 Formatting your SD card is a great way to give it a fresh start, whether you want to clean out existing data or just format a new card for your GoPro. But formatting your card in GoPro cameras requires more than a few clicks, which can be puzzling, especially for beginners.
In this guide, we’ll walk you through the process of formatting an SD card camera and why you might want to format your SD card for GoPro.
Why Do You Need to Format an SD Card for GoPro?
Formatting allows you to reconfigure the file system of storage devices like an SD card, along with other specifications like size allocation. Oftentimes, formatting an SD card resets it to a functional state and solves almost all GoPro SD card errors. However, this process will erase all of the existing data on your card.
Most of the time, formatting your card is considered a last resort. But there are various situations where formatting or reformatting the SD card for GoPro makes sense:
- 📷 Use old SD card on a new GoPro camera: If you’ve purchased a new GoPro camera and want to use your old SD card, you’ll need to format the SD card to a filesystem that GoPro can read. The best filesystem to choose when you format an SD card for GoPro is FAT32 (for cards 32GB or smaller) or exFAT (for cards larger than 32GB).
- 🧹 Clear the space: If you’ve got a lot of data on your SD card, you’ll need to make more space by erasing some of that data. If none of the data on the SD card is important to you or if you’ve already backed it up, you can go ahead and format the card to empty the entire storage space.
- ⚠️ Resolve the errors: Storage devices often run into logical errors like filesystem corruption or end up malfunctioning because of virus or malware. Formatting ensures that your SD card reverts back to its original, functional condition.
How to Avoid Losing Footage Due to Formatting
Your SD card can suffer from data loss if you accidentally format your card or encounter errors that prevent backing up GoPro footage before formatting your SD card. Luckily, you can recover deleted GoPro files with an intelligent data recovery tool like Disk Drill. Here’s how:
- Download Disk Drill and install it on your PC. Note that with the Windows version, the free trial already allows you to recover up to 500MB of data.
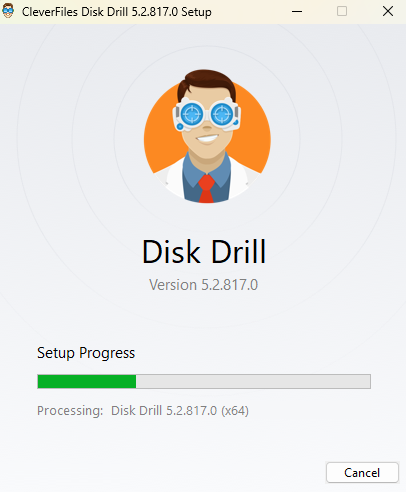
- Next, launch Disk Drill once it’s installed and make sure the SD card is connected to your computer.
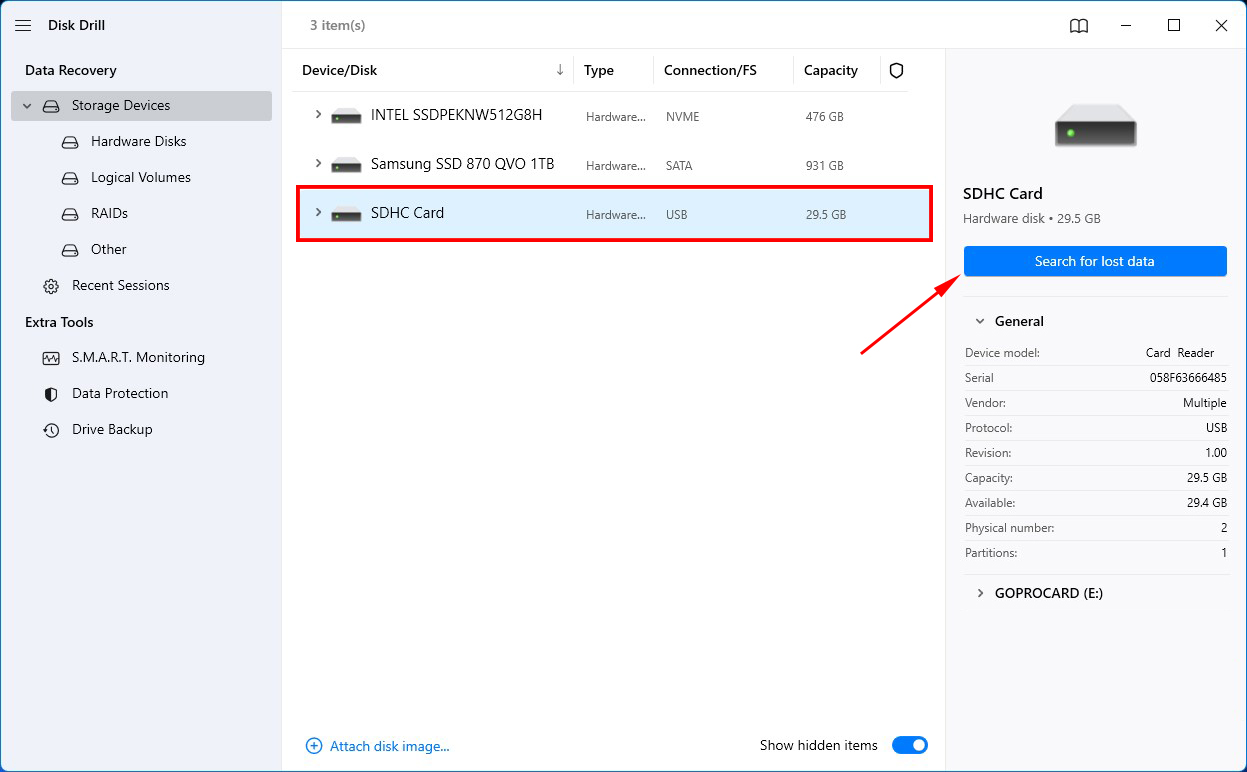
- Then, select the SD from the list of devices available. Next, and click on the Search for lost data button on the app to start the scan.
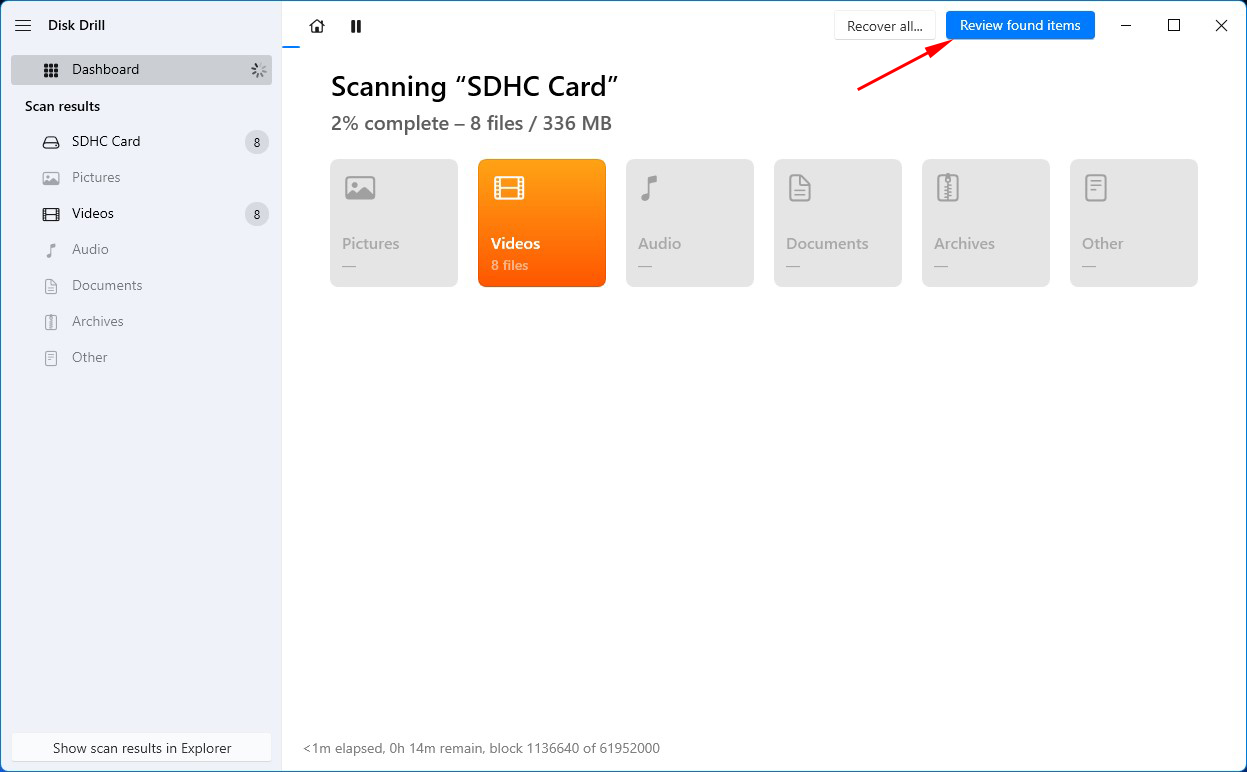
- Once the scan is complete, click Review found items to see a list of files that Disk Drill found on the SD card.
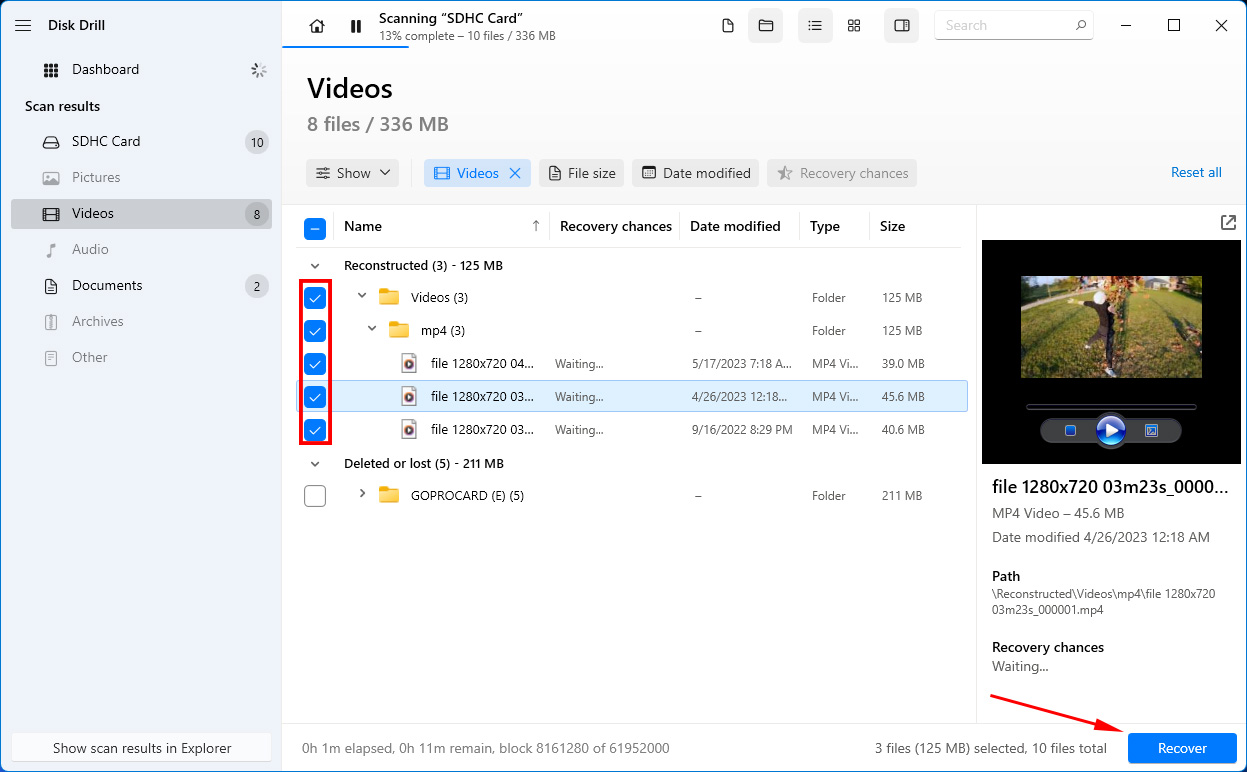
- Select the files you want to recover by checking the boxes next to them. Since you’re likely trying to recover photos and videos, select the relevant file category from the left sidebar. Doing this filters the files and shows only the selected category of files such as pictures. Then, click on the Recover button.
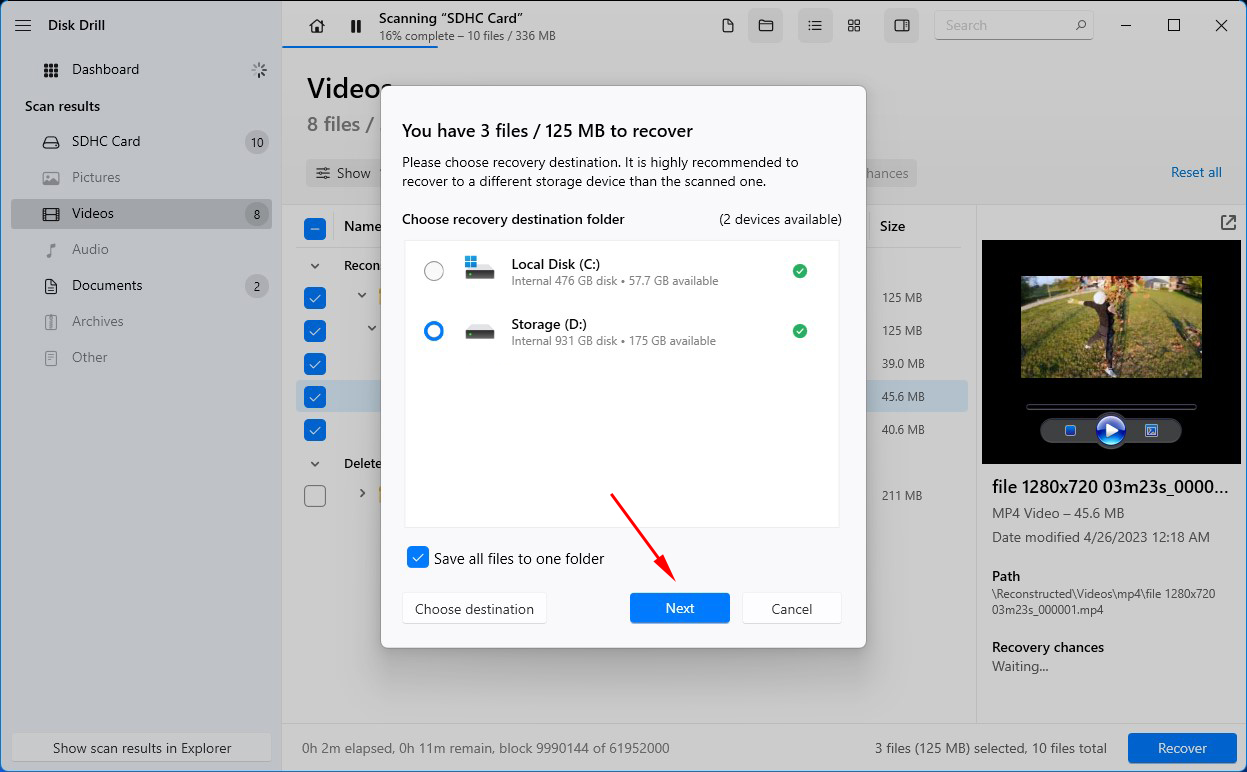
- You’ll need to select a recovery location. Choose a location that’s different from the storage device you’re recovering from (the SD card in this case) to ensure you don’t overwrite any recoverable data. Once you’ve selected a location, click Next to recover the files.
How to Format SD Card for GoPro?
There are several ways of formatting a microSD card for GoPro cameras. You can use various devices as well as operating systems and software, and we’ve listed the process for each one below.
Method 1: Format SD Card in GoPro Camera
The process of formatting an SD card in a GoPro camera differs among models. There’s no way to format SD cards using HERO Session, HERO4 Session, and HERO5 Session models. The process for other models is listed below.
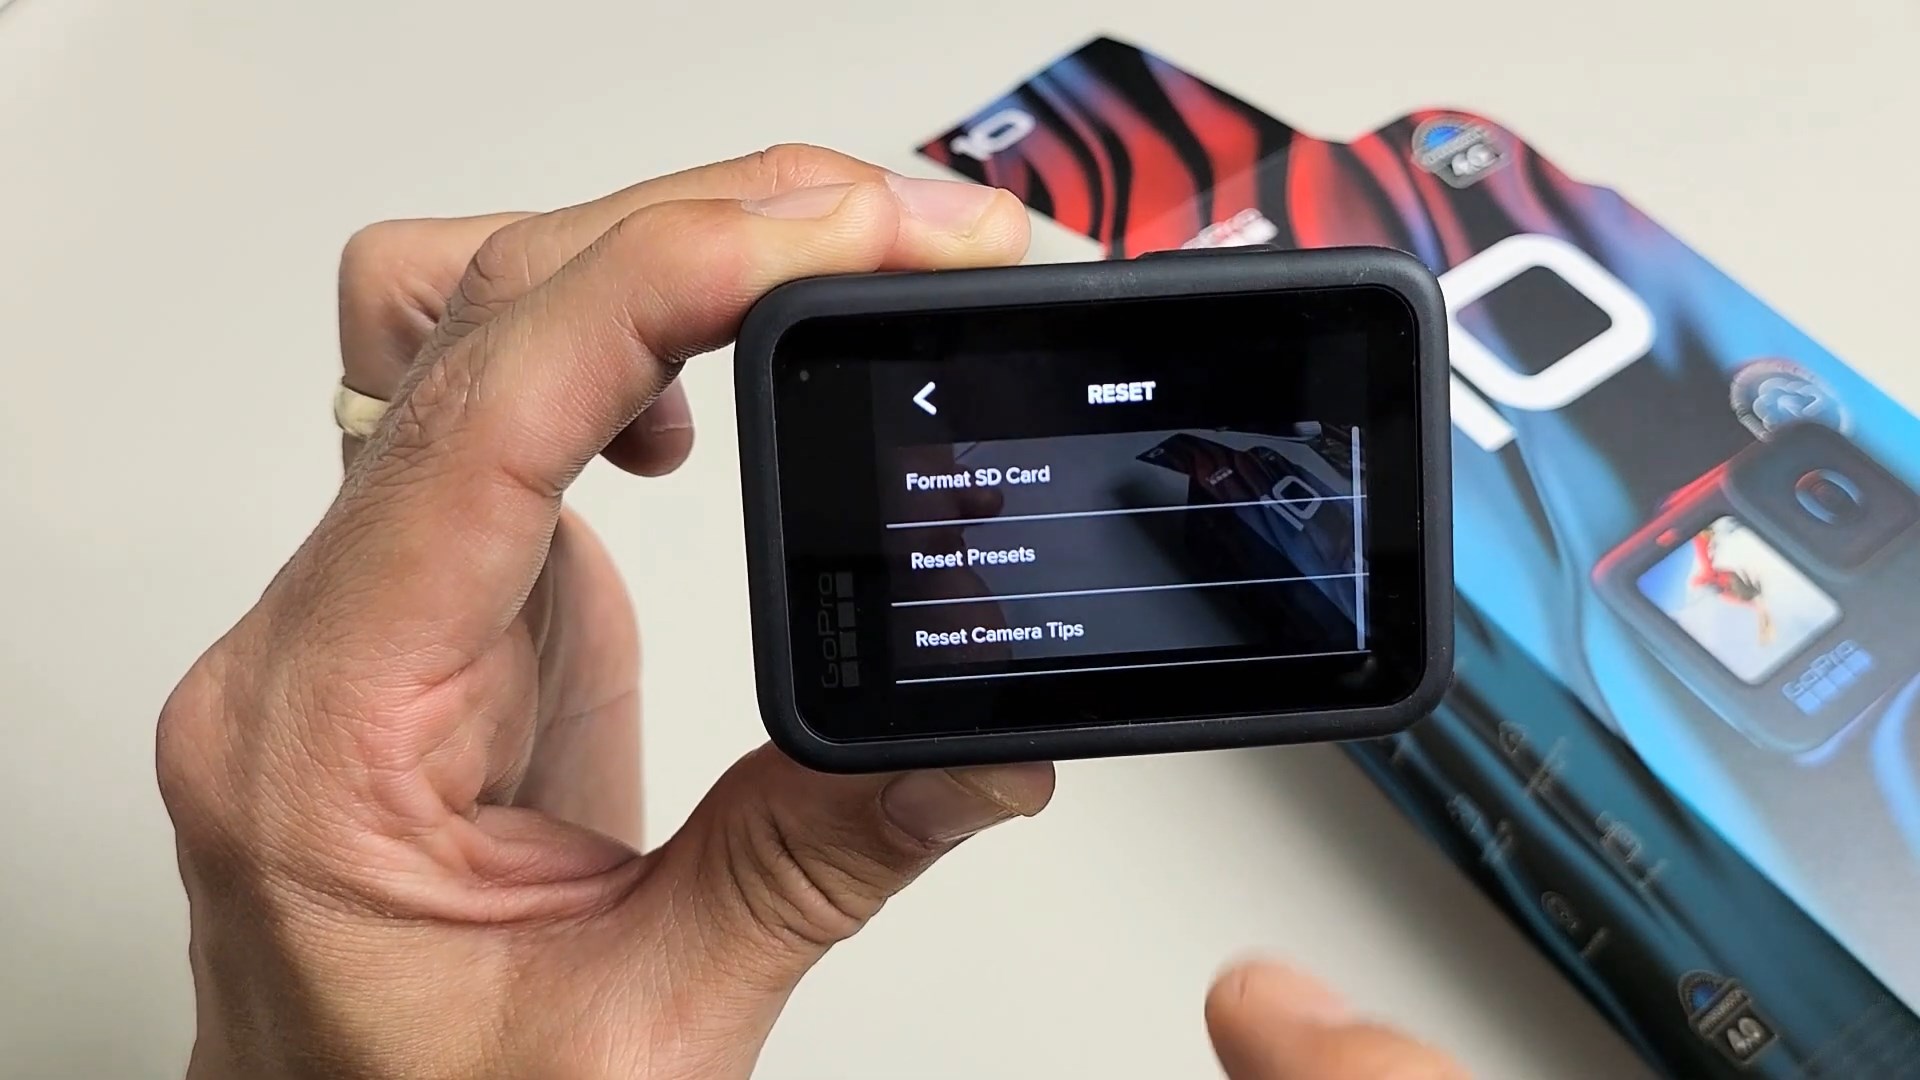
Formatting SD Card in GoPro HERO 10, HERO9, and HERO8 Black
- Turn on the GoPro camera with the SD card inserted.
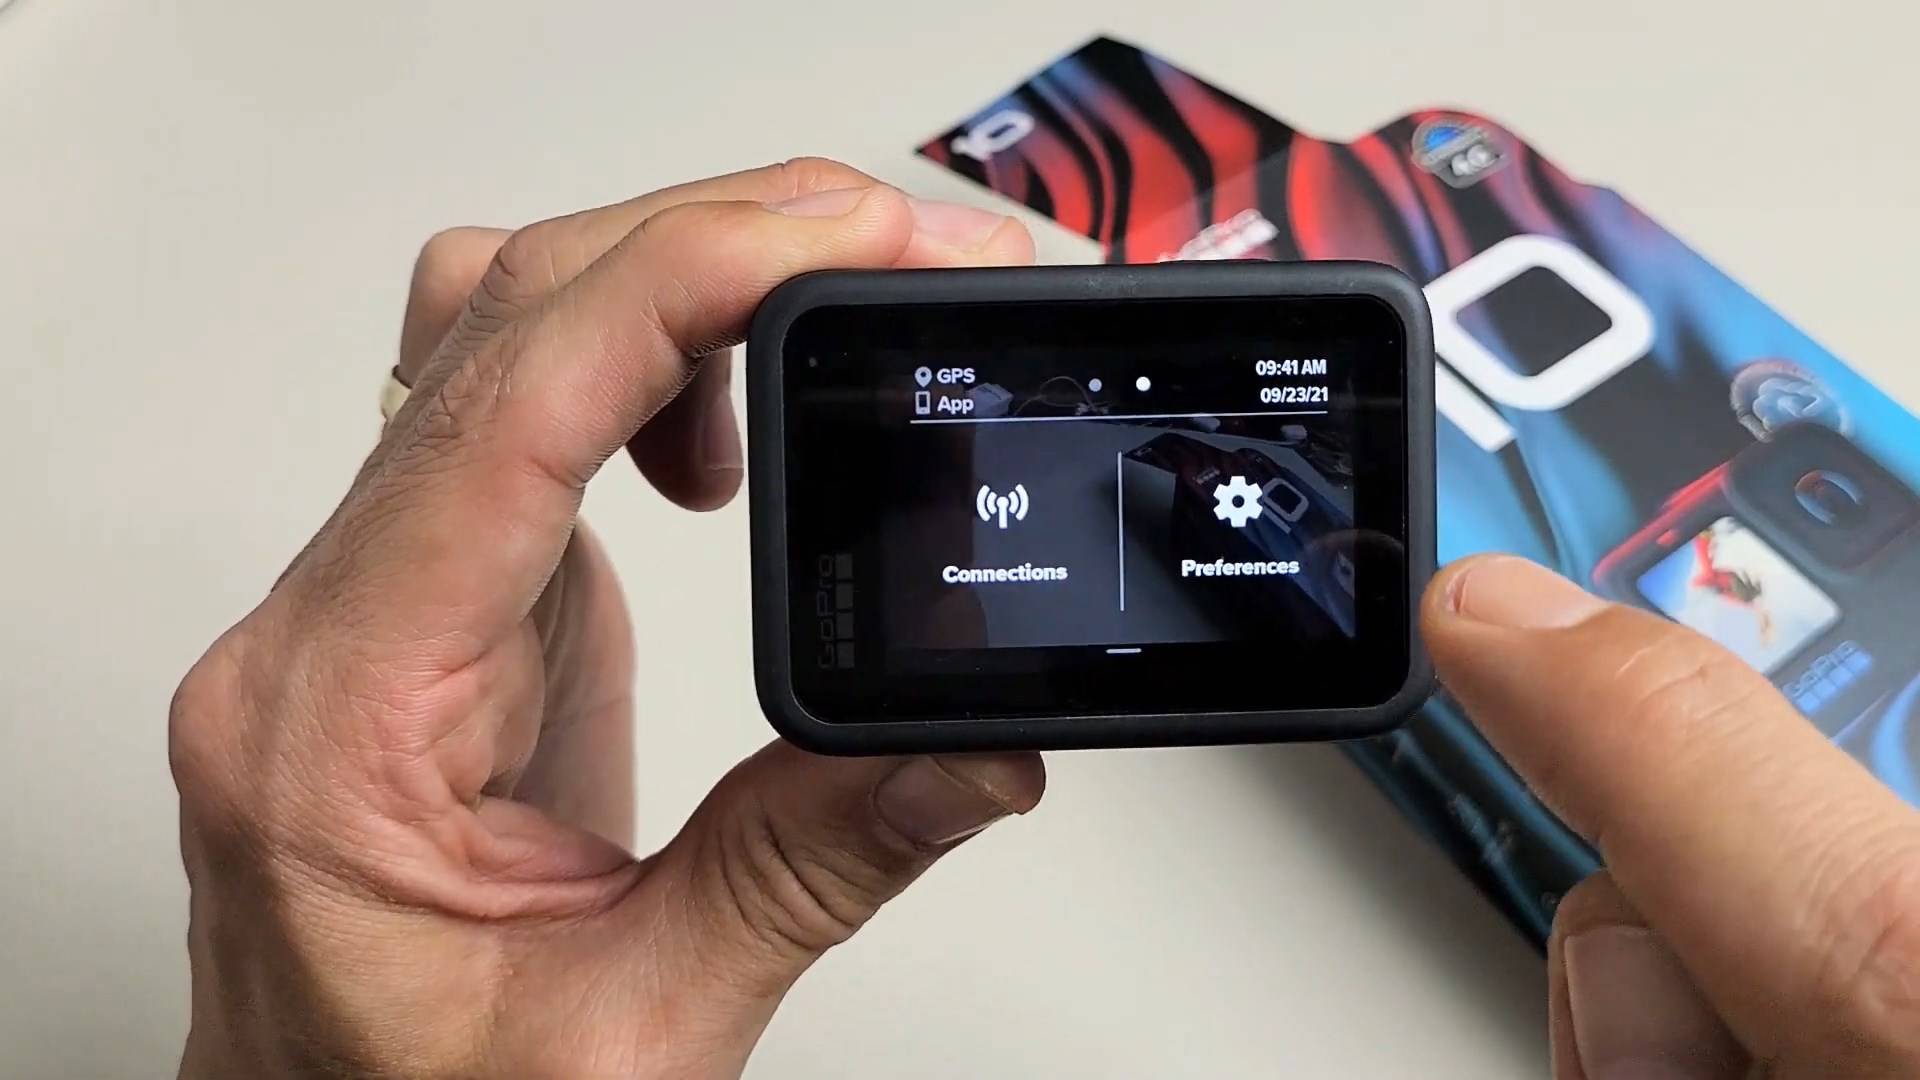
- Swipe down to open the menu and go to Preferences.
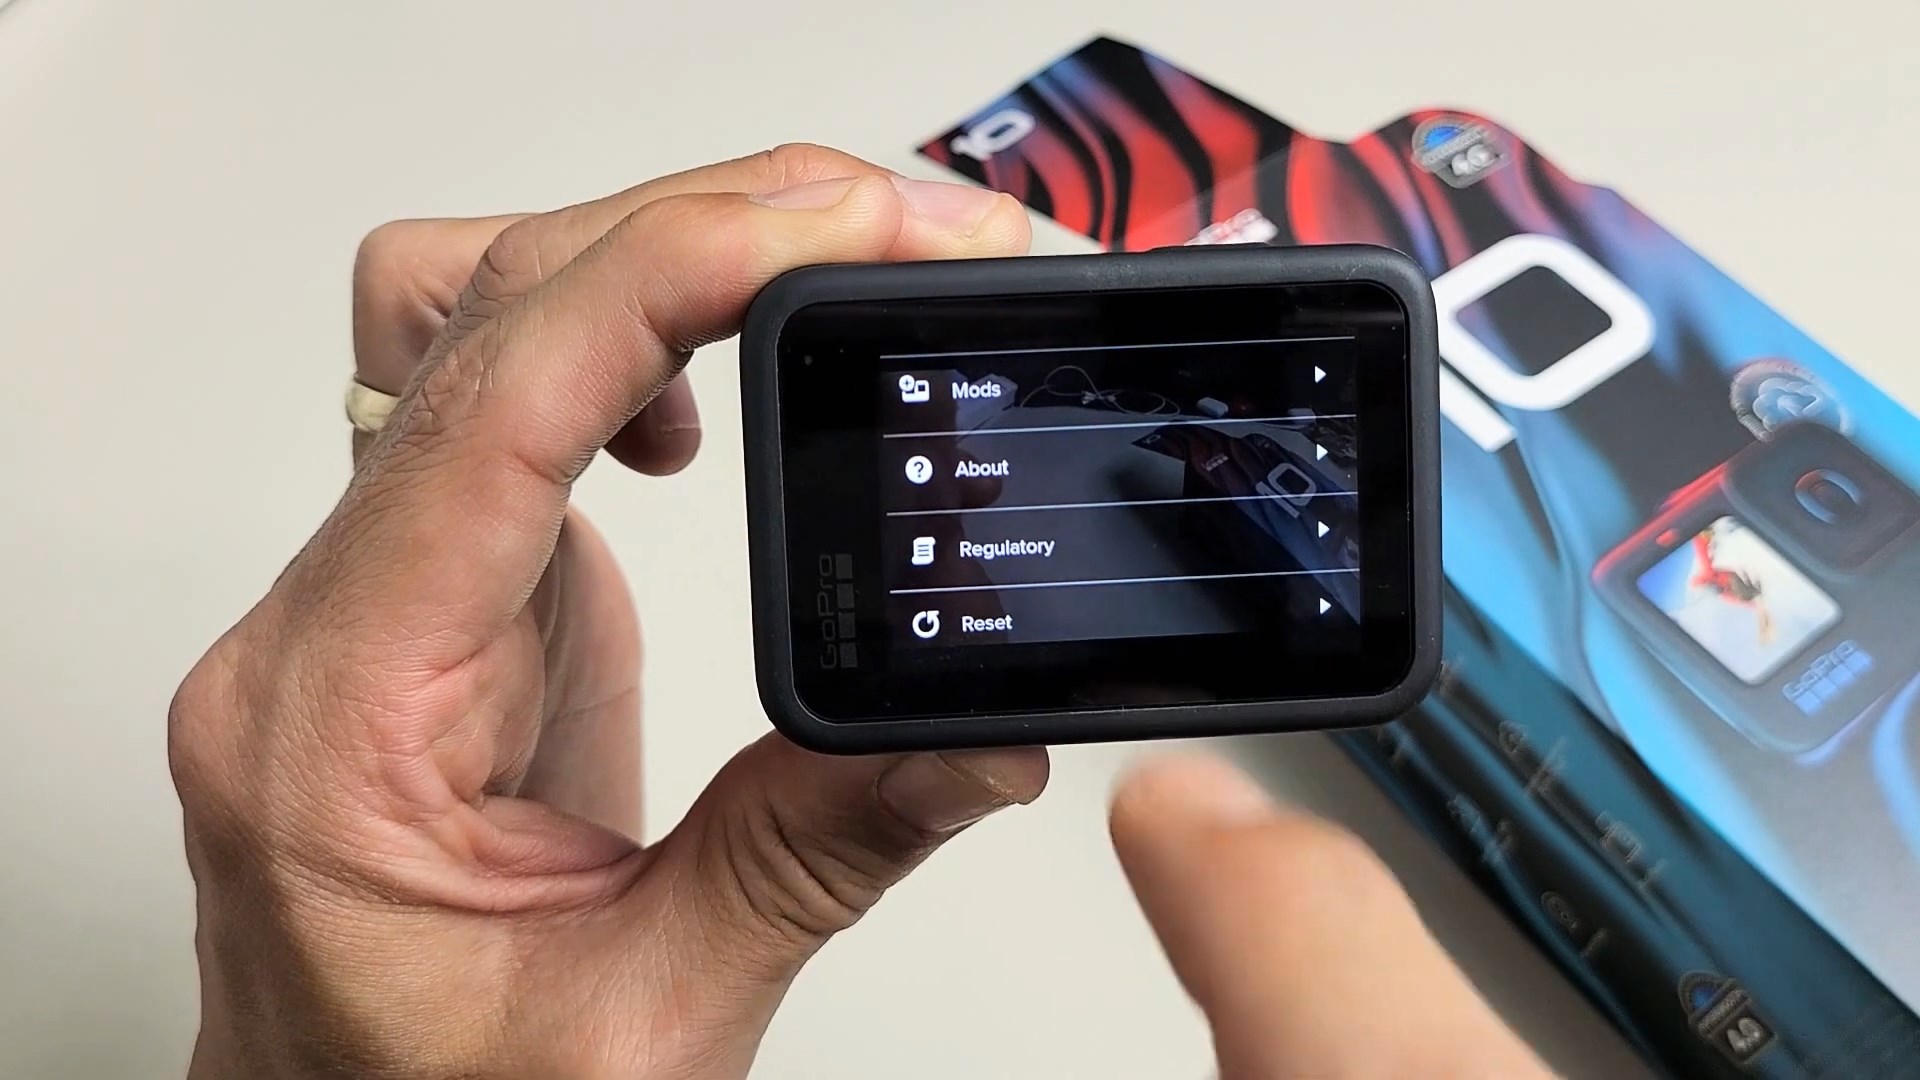
- Scroll down and select Reset.
- Select Format SD Card.
Formatting SD Card in GoPro HERO7 White, Black, and Silver
- Turn on the GoPro camera with the SD card inserted.
- Press the side button to open the menu and go to Preferences.
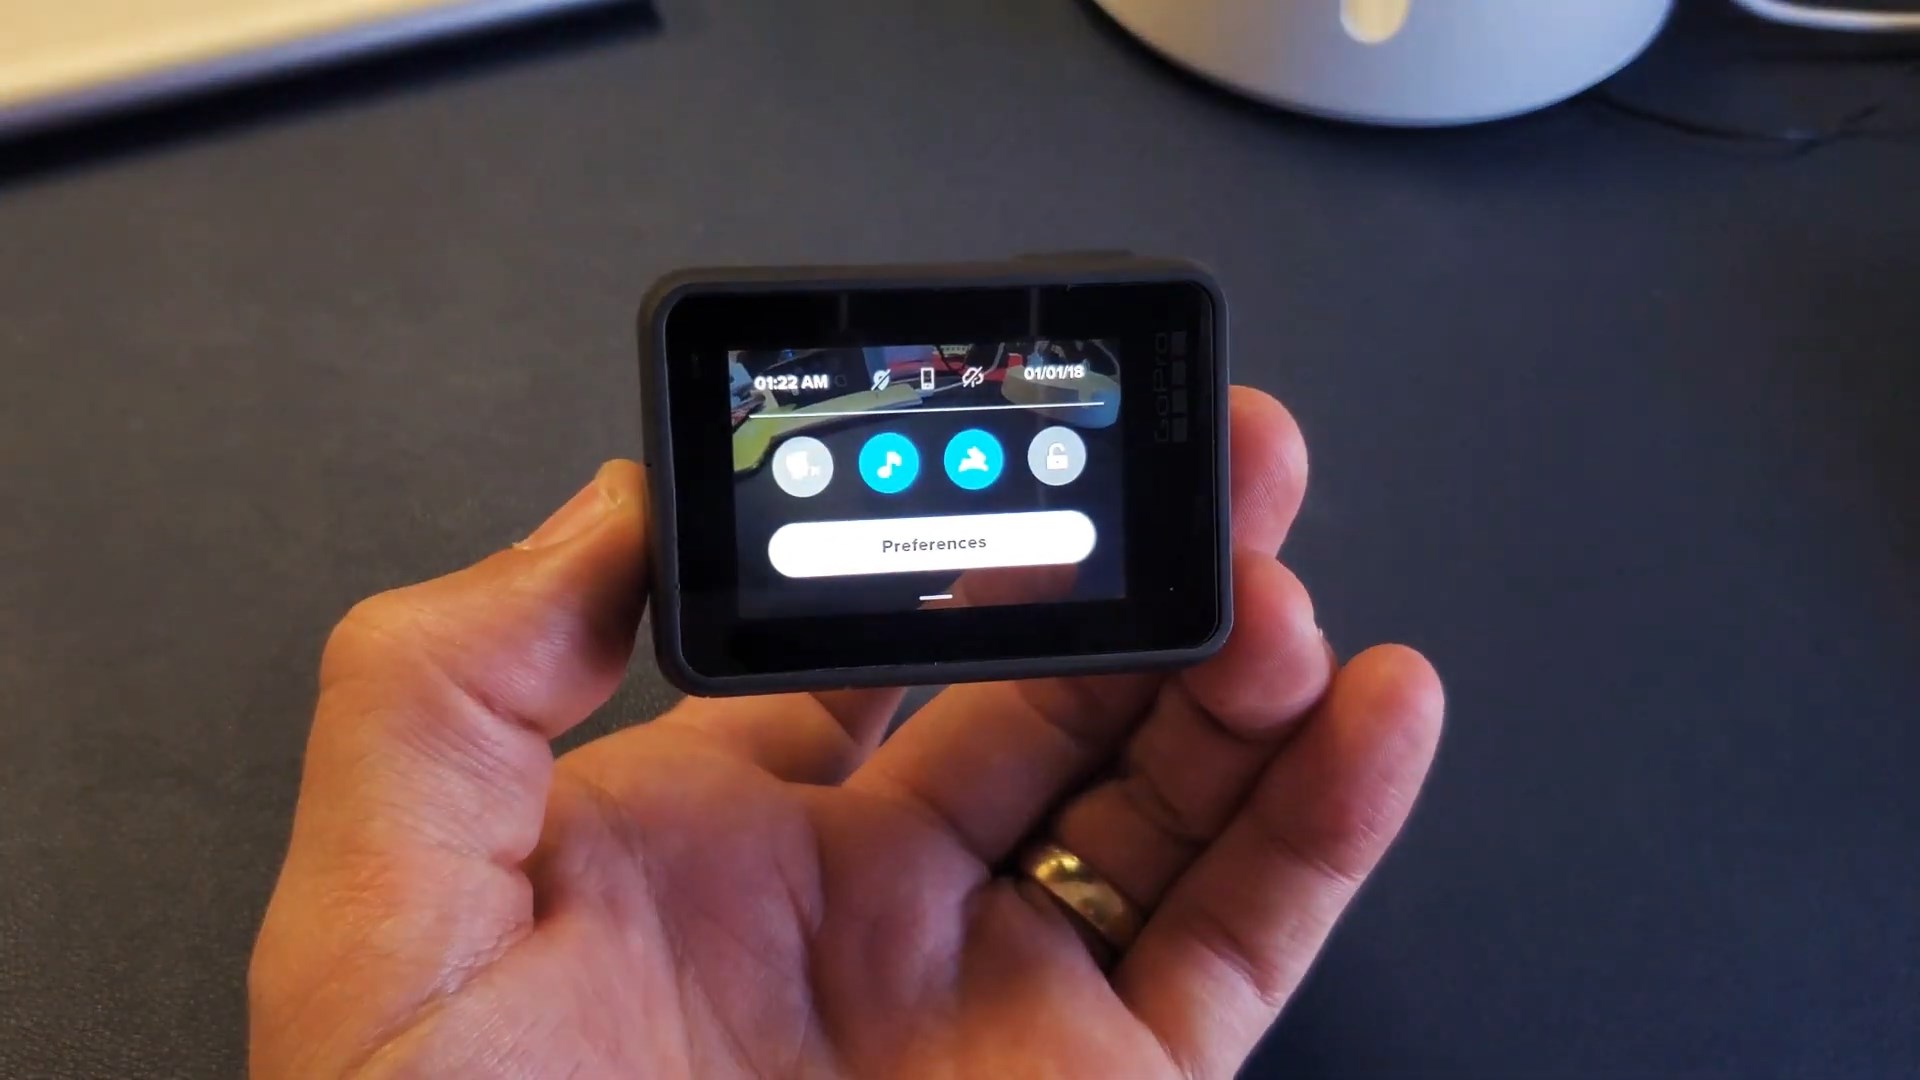
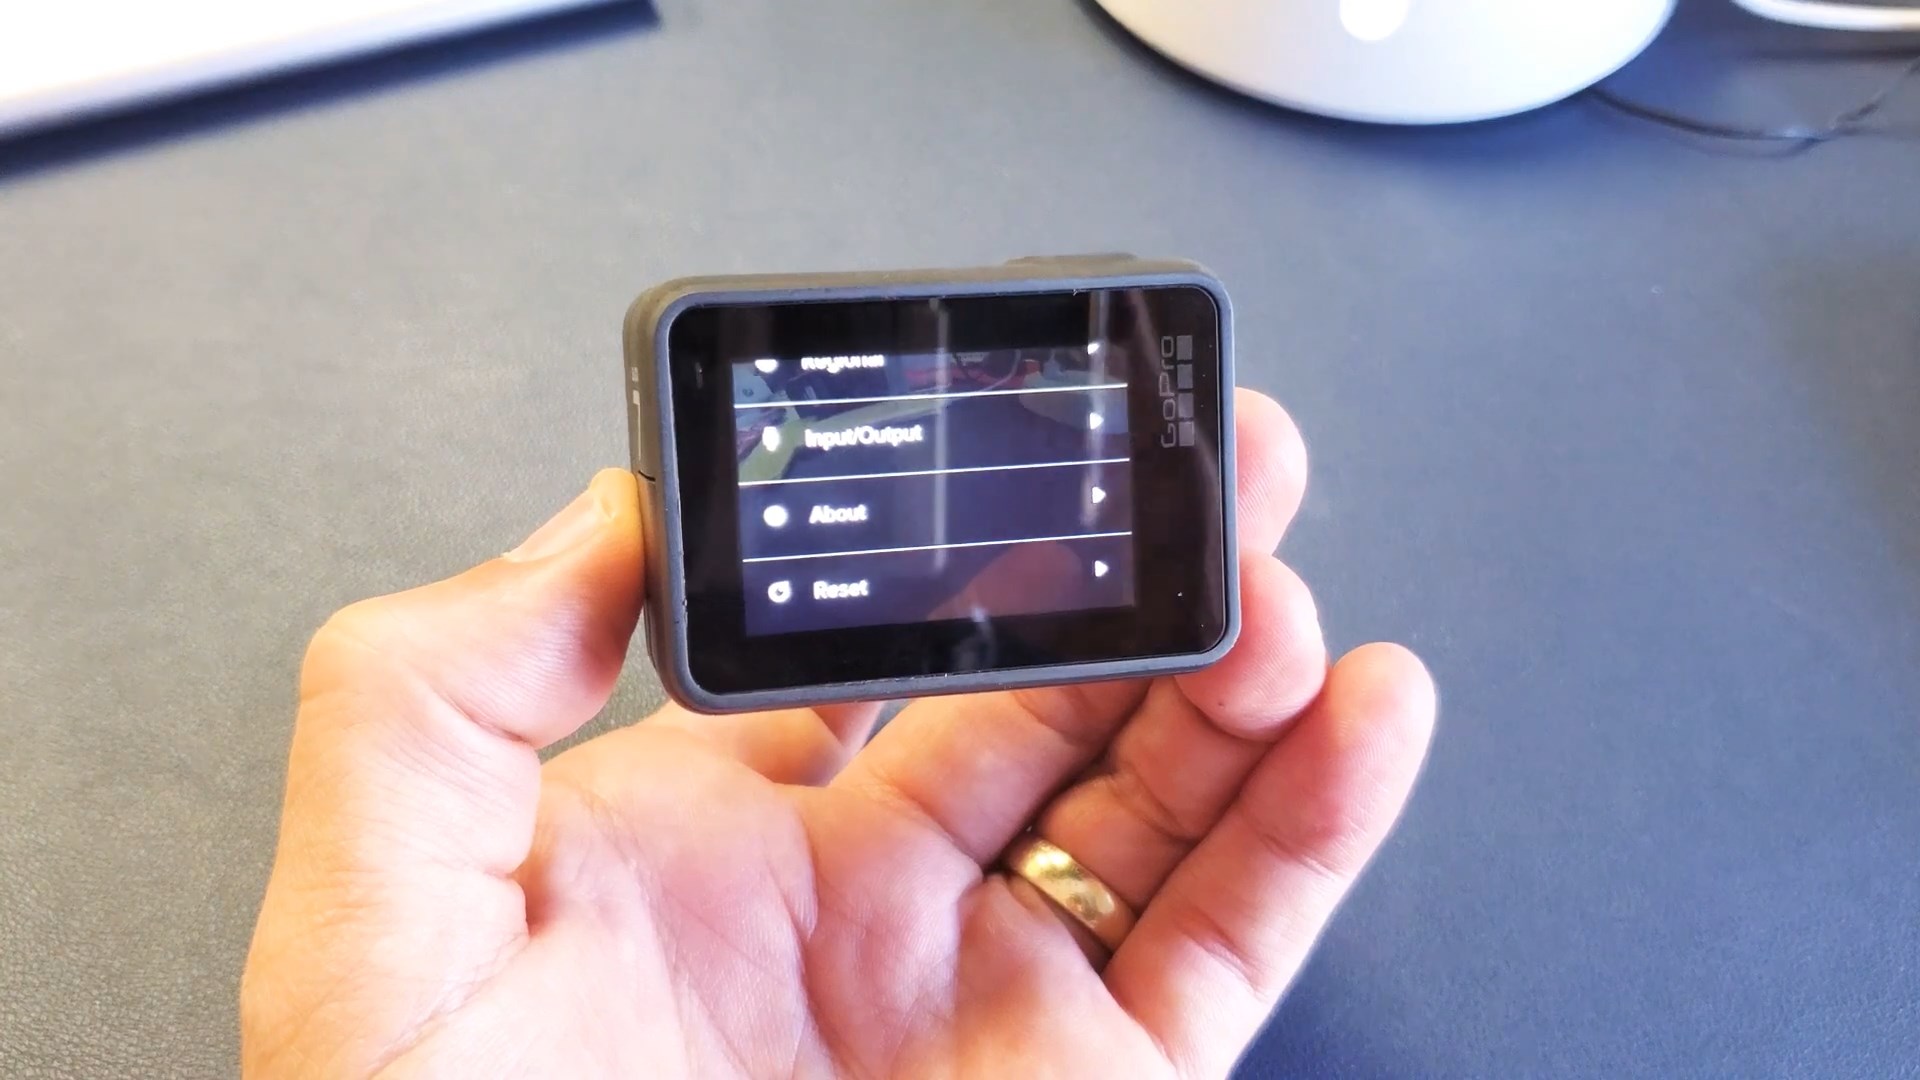
- Scroll down and select Reset.
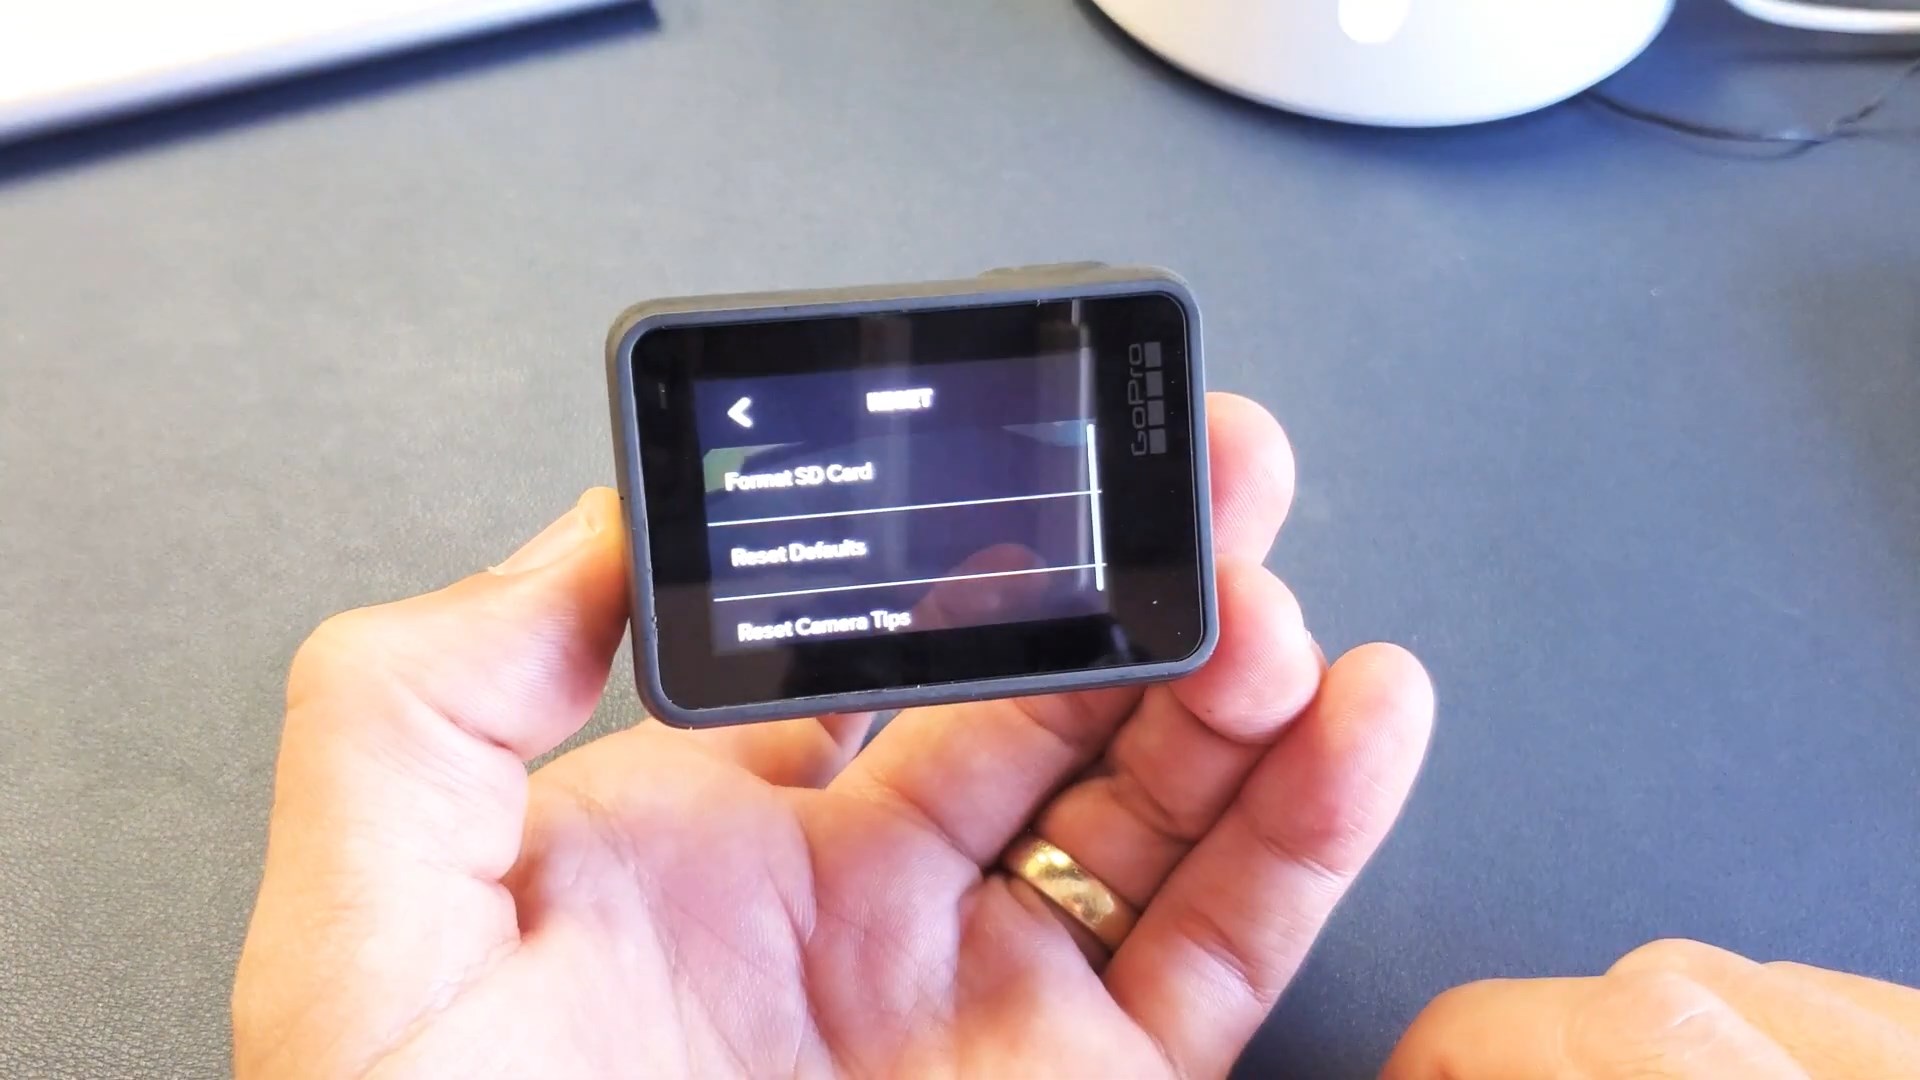
- Select Format SD Card.
Formatting SD Card in GoPro HERO5 and HERO6 Black
- Turn on the GoPro camera with the SD card inserted.
- Press the side button to open the menu and go to Preferences.
- Scroll down and select Format SD Card.
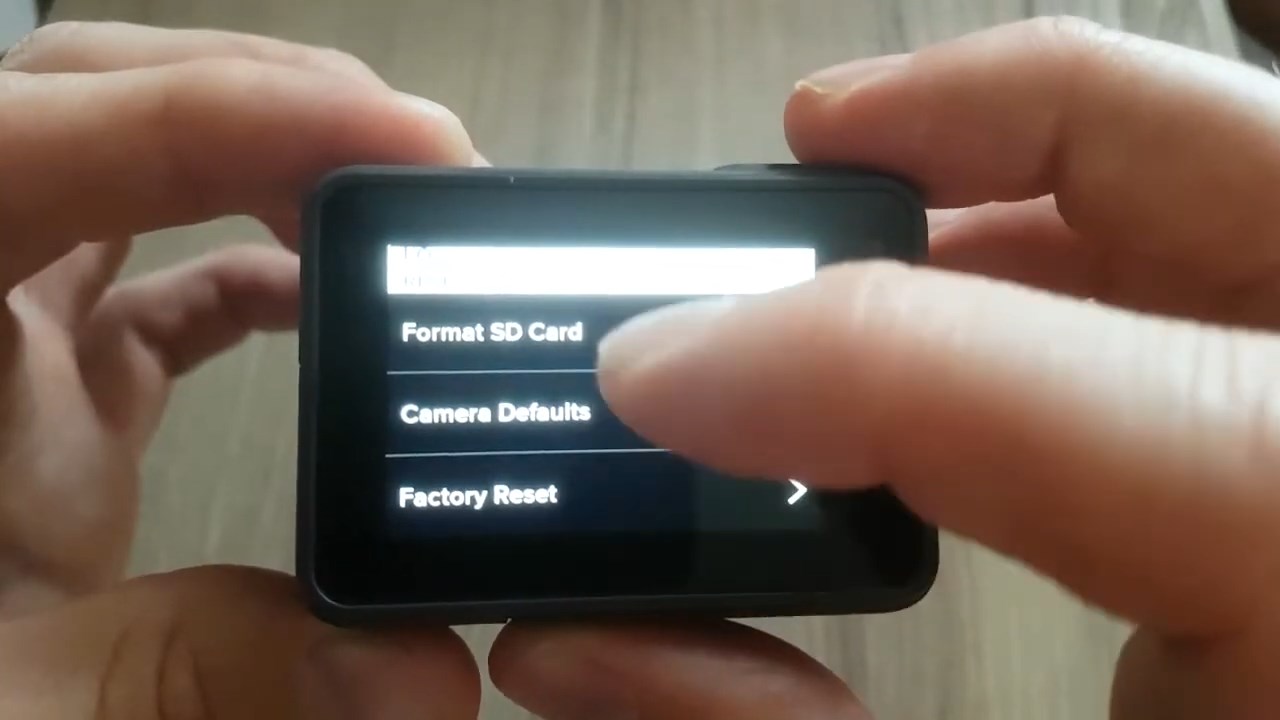
- Select Delete.
Formatting SD Cards in GoPro HERO4 Black or Silver
- Start by going to Settings and scroll down to the Delete option (might also appear as a trash icon).
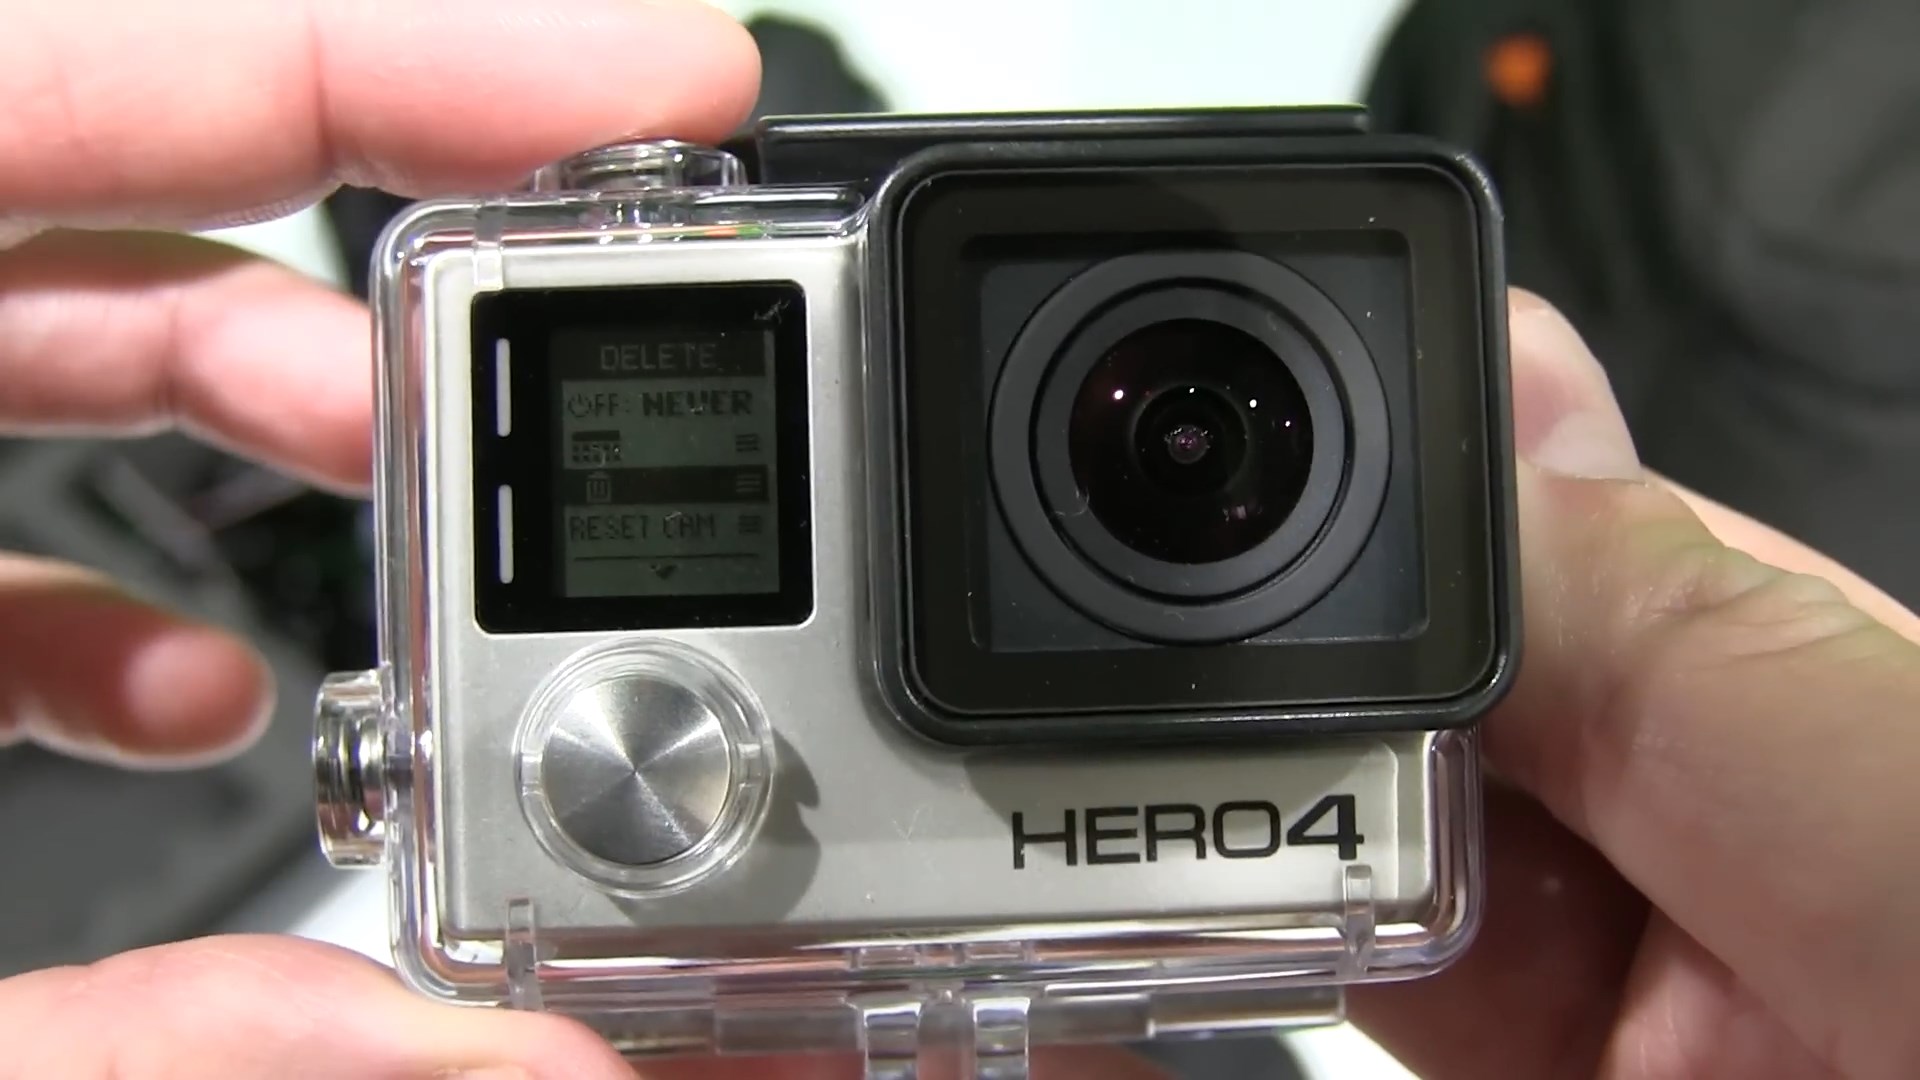
- Select All/Format.
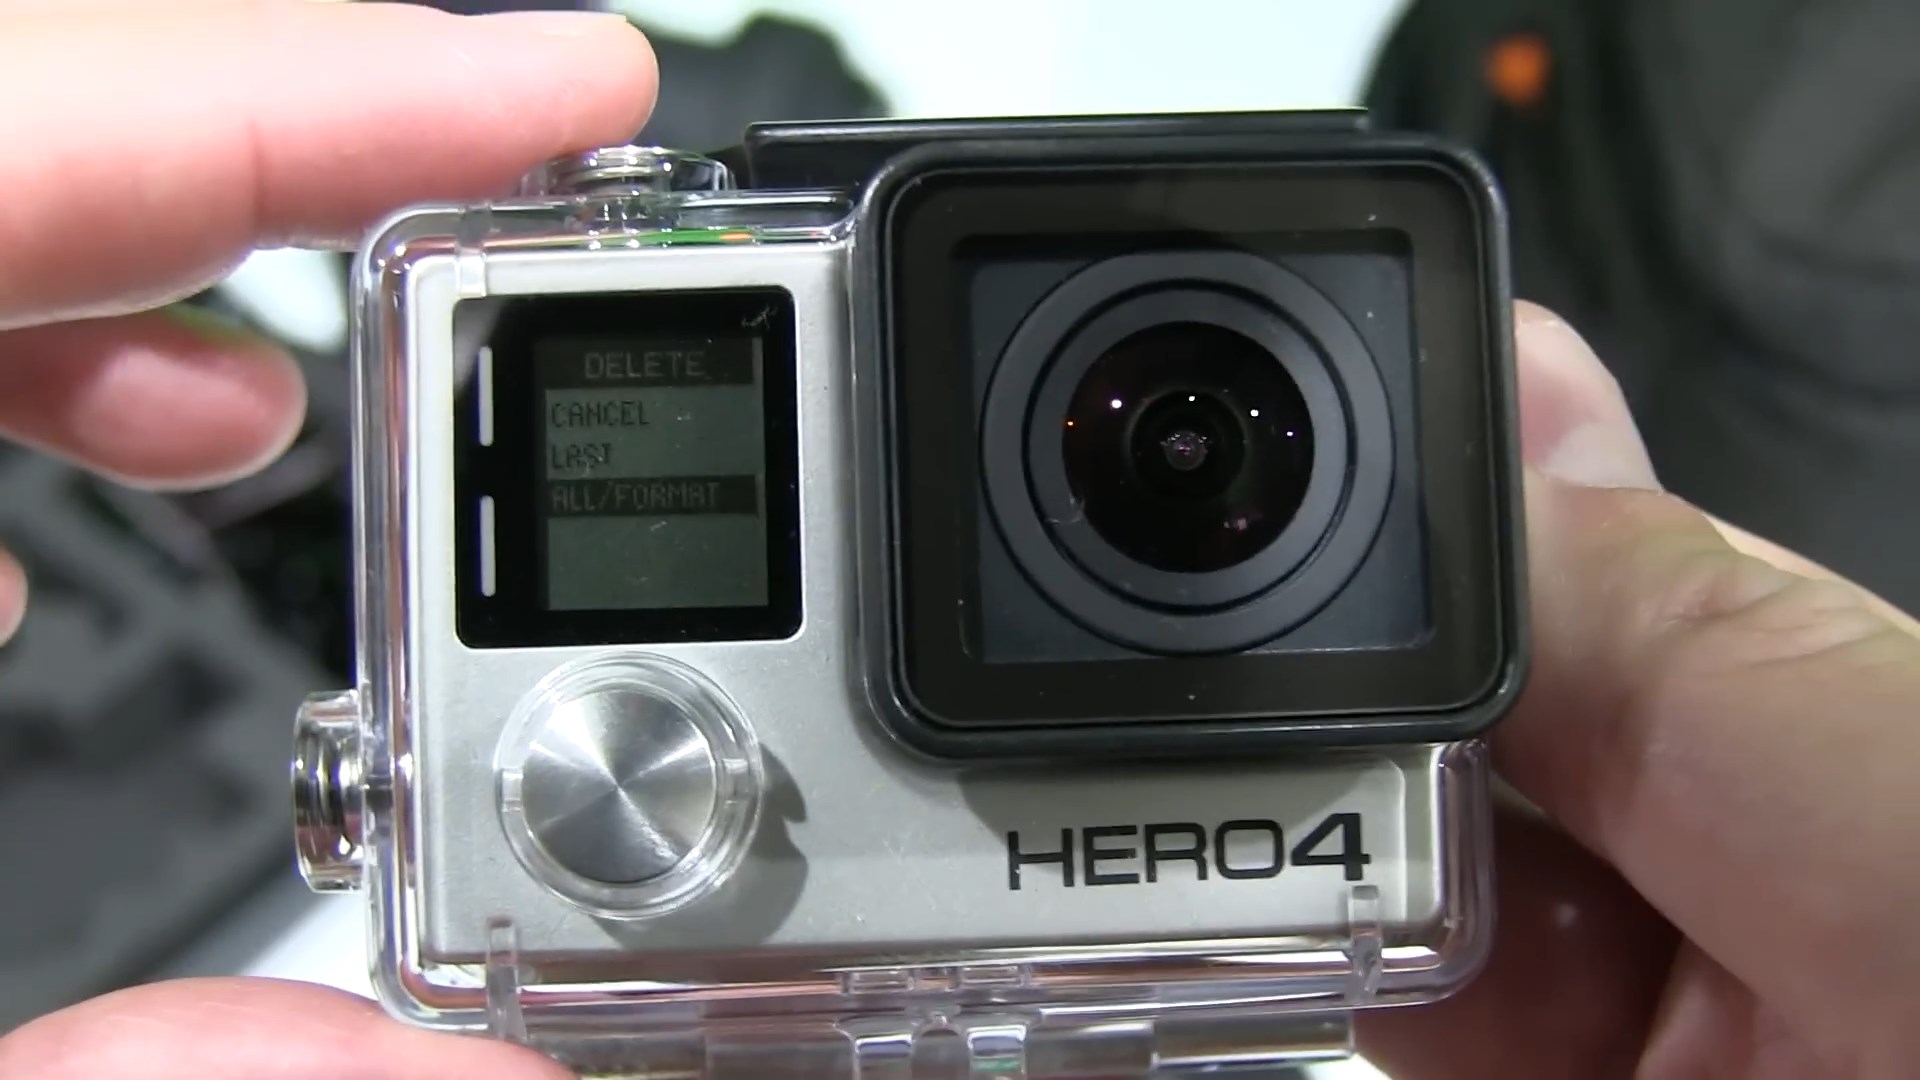
- Select Delete.
Method 2: Format SD Card Using a Windows Computer
Formatting an SD card on Windows works the same way as for any other device:
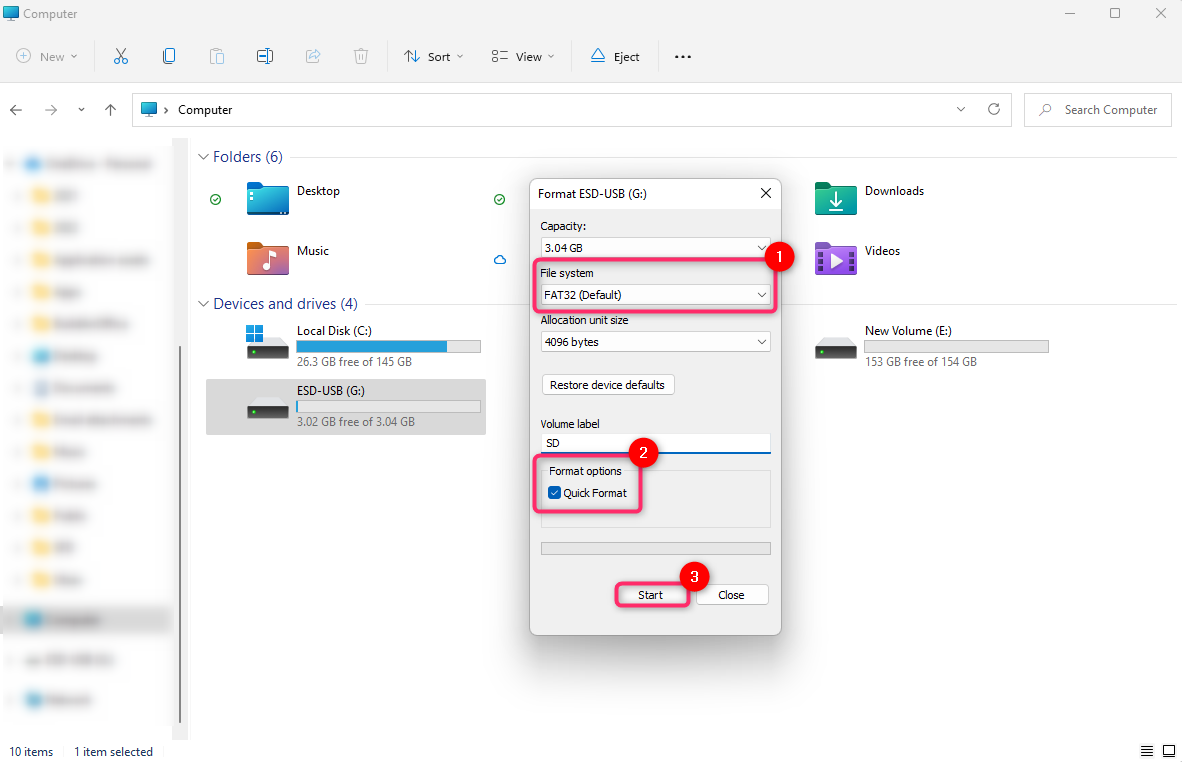
- Connect the SD card to your PC and launch File Explorer.
- Right-click on the SD card and select Format.
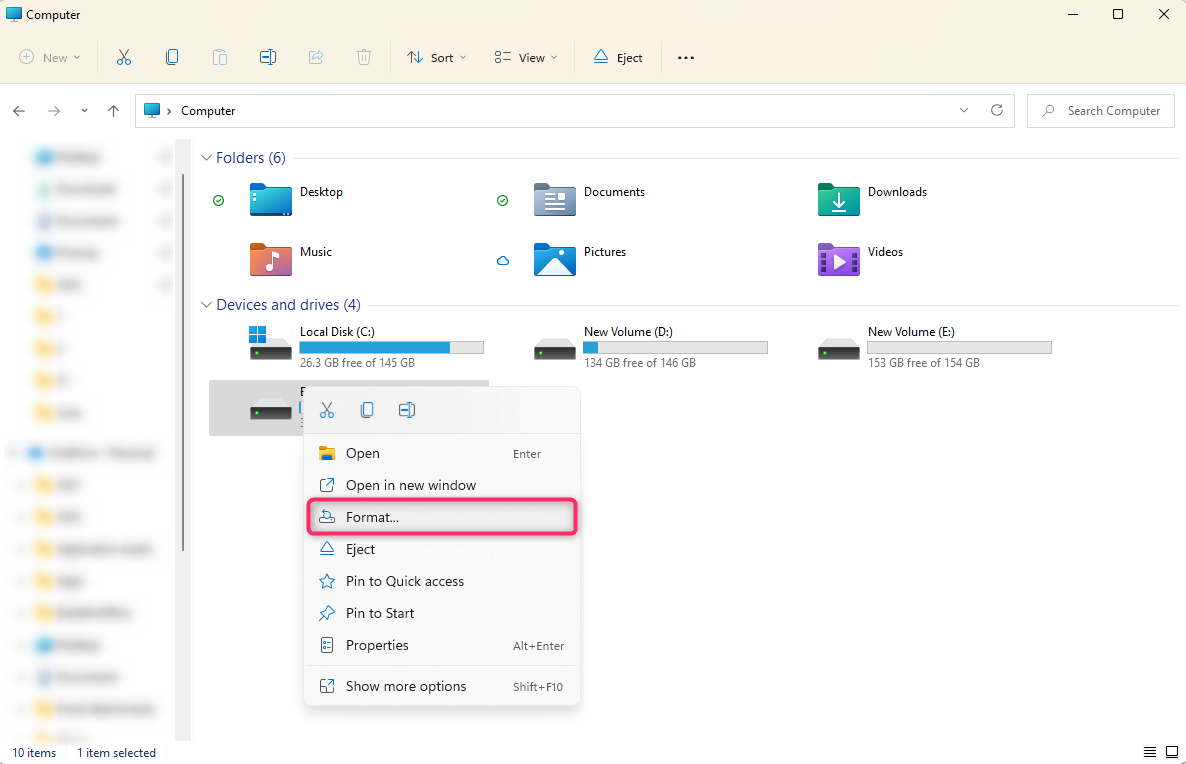
- Choose a filesystem (ideally, FAT32 or exFAT), check the box next to Quick Format and click the Start button.
Method 3: Format SD Card Using a Mac
If you’re on a Mac, here’s how to format SD cards:
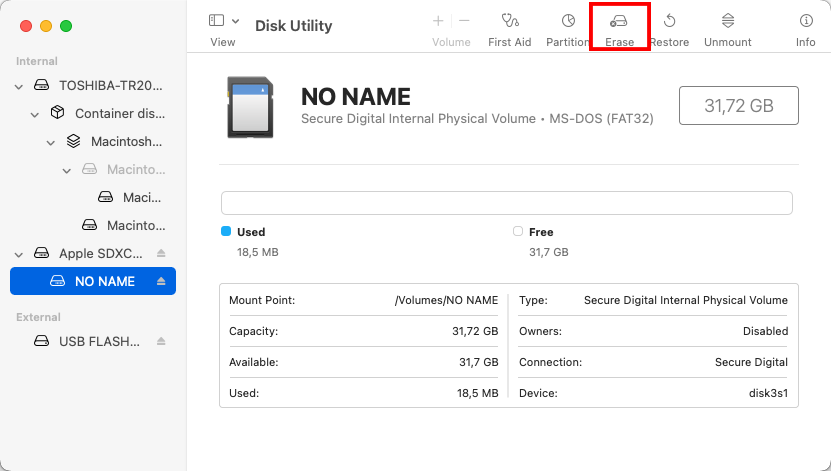
- Launch Disk Utility.
- Select your SD card from the left sidebar.
- Select a filesystem (FAT32 if SD card is 32GB or smaller, exFAT otherwise) and click on Erase to start formatting.
Conclusion
Formatting an SD card for your GoPro camera is essential to ensure your card will work best with your device. You can also do it to clean up your device or if you want to use an existing card for your GoPro.
With the tools and methods we mentioned in this guide, you can safely format your card without the risk of data loss. And if you suffered data loss due to accidentally formatting your card or needing to format your card because of errors, reliable data recovery software like Disk Drill can come to your rescue.
After safekeeping your important data, you can format your SD card by connecting it to your GoPro camera, Windows or Mac computer, or the GoPro Quik app. After this process, your SD card should be empty, properly configured, and ready to be used by your specific GoPro camera.
