 LG has been out of the phone game for the past couple of years now, but it did manage to release its fair share of notable mobile devices back in its heyday. The brand had a pretty expansive catalog ranging from entry-level to some fairly high-end devices.
But while LG phones were generally met with solid reviews, they’re just as prone to lost data as any other Android phone in the market.
If you still own an LG cell phone and have accidentally deleted some important photos, there are a number of ways you could get them back. In this guide, we’ll tackle the different ways you can perform LG phone photo recovery with or without a PC or laptop.
How to Recover Deleted Photos From LG Phone with a Computer
There are a couple of methods you can try if you want to recover deleted pictures from LG phones using a PC or laptop.
You can either use a proprietary LG program designed for the brand’s mobile devices or leverage an excellent data recovery program to restore the photos from your phone memory card.
Method 1: Restore Photos from LG Phone with LG BRIDGE
LG Bridge is a program developed by LG specifically for their line of phones and tablets, which allows you to update device software and back up or restore data. That being said, this LG data recovery tool only works if you happened to create a backup before the data loss occurred.
Here’s how to recover deleted phone pictures using the LG Bridge app:
- Download and install the LG Bridge app from the official LG website to get started.
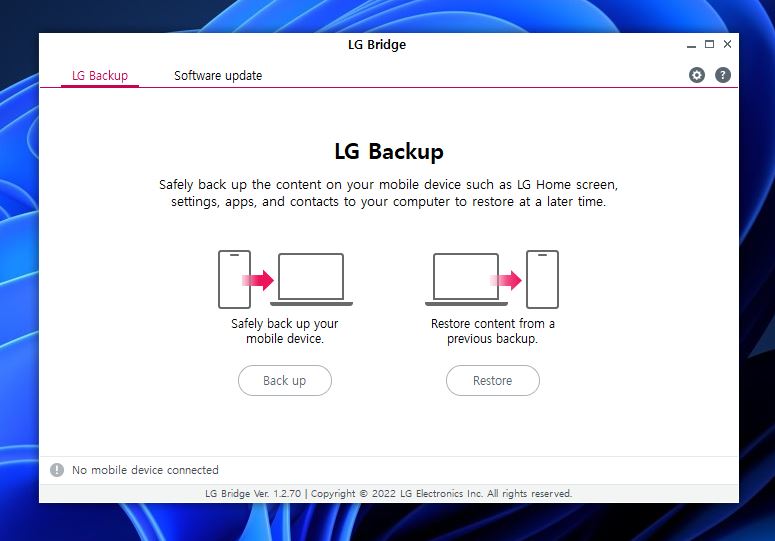
- Next, launch the app and select the “Restore” option from the home screen.
- After that, choose which backup contains the photos you want to retrieve.
- Restore the deleted pictures.
Method 2: Recover Deleted Photos from LG Phone SD Card
If you weren’t fortunate enough to have created a backup before erasing photos that were saved in the phone’s SD card, then the best way to restore them is through a top-tier data recovery program.
Disk Drill is one of the best Android SD card data recovery apps in the business, especially when it comes to retrieving missing photos. It’s capable of swift scans, sports a sky-high recovery rate, and has a user interface that’s designed with both newbies and advanced users in mind.
Here are a few of its other notable features:
- Compatibility with a wide range of SD cards, such as MicroSD, microSDHC, SDHC, SDXC, and more.
- Support for almost any file type, which is inclusive of whatever format your LG phone utilizes.
- Capable of scanning and recovering from corrupted/inaccessible SD cards. Keep in mind that it’s best to do so from a byte-to-byte backup to prevent further data loss, which can be created using Disk Drill.
If you’re not convinced about investing in a Disk Drill purchase, you can try the program’s trial version. It comes with all the bells and whistles of the paid variant but with a recovery cap of 500 MB.
Follow the steps below to recover deleted photos from LG phone SD cards using Disk Drill for Windows:
- First, download Disk Drill from the official Cleverfiles website.
- Then, open the downloaded setup file and follow the instructions until it’s installed on your computer.

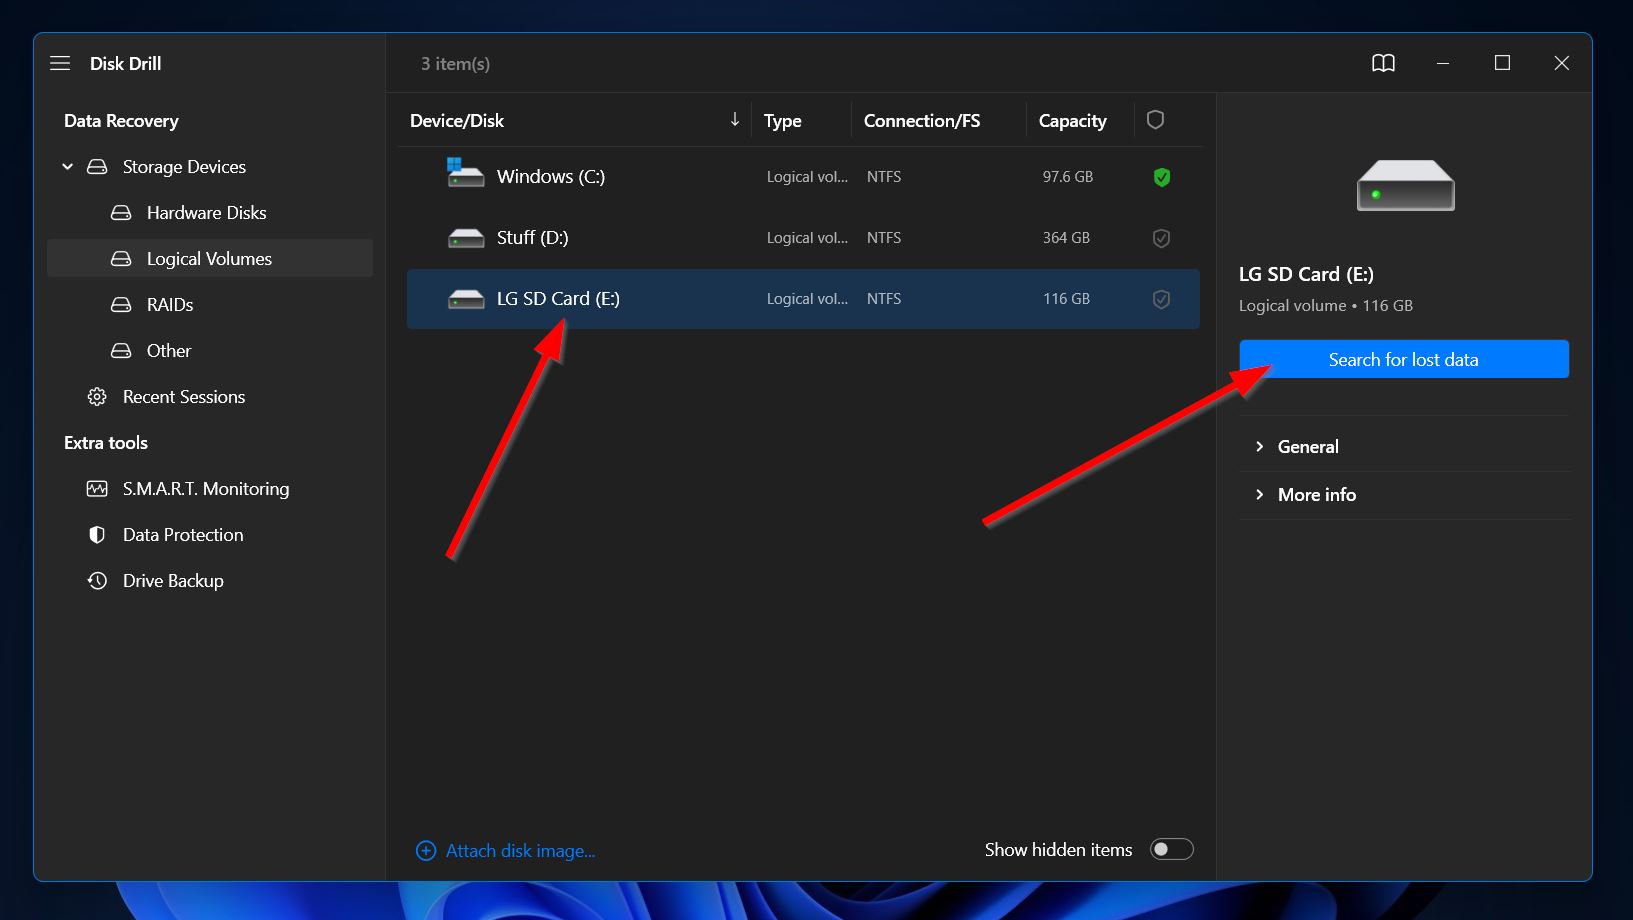
- Make sure your LG cell phone SD card is connected to your computer via a memory card reader, then launch Disk Drill. From there, select the SD card from the list of available storage devices and click the “Search for lost data” button.
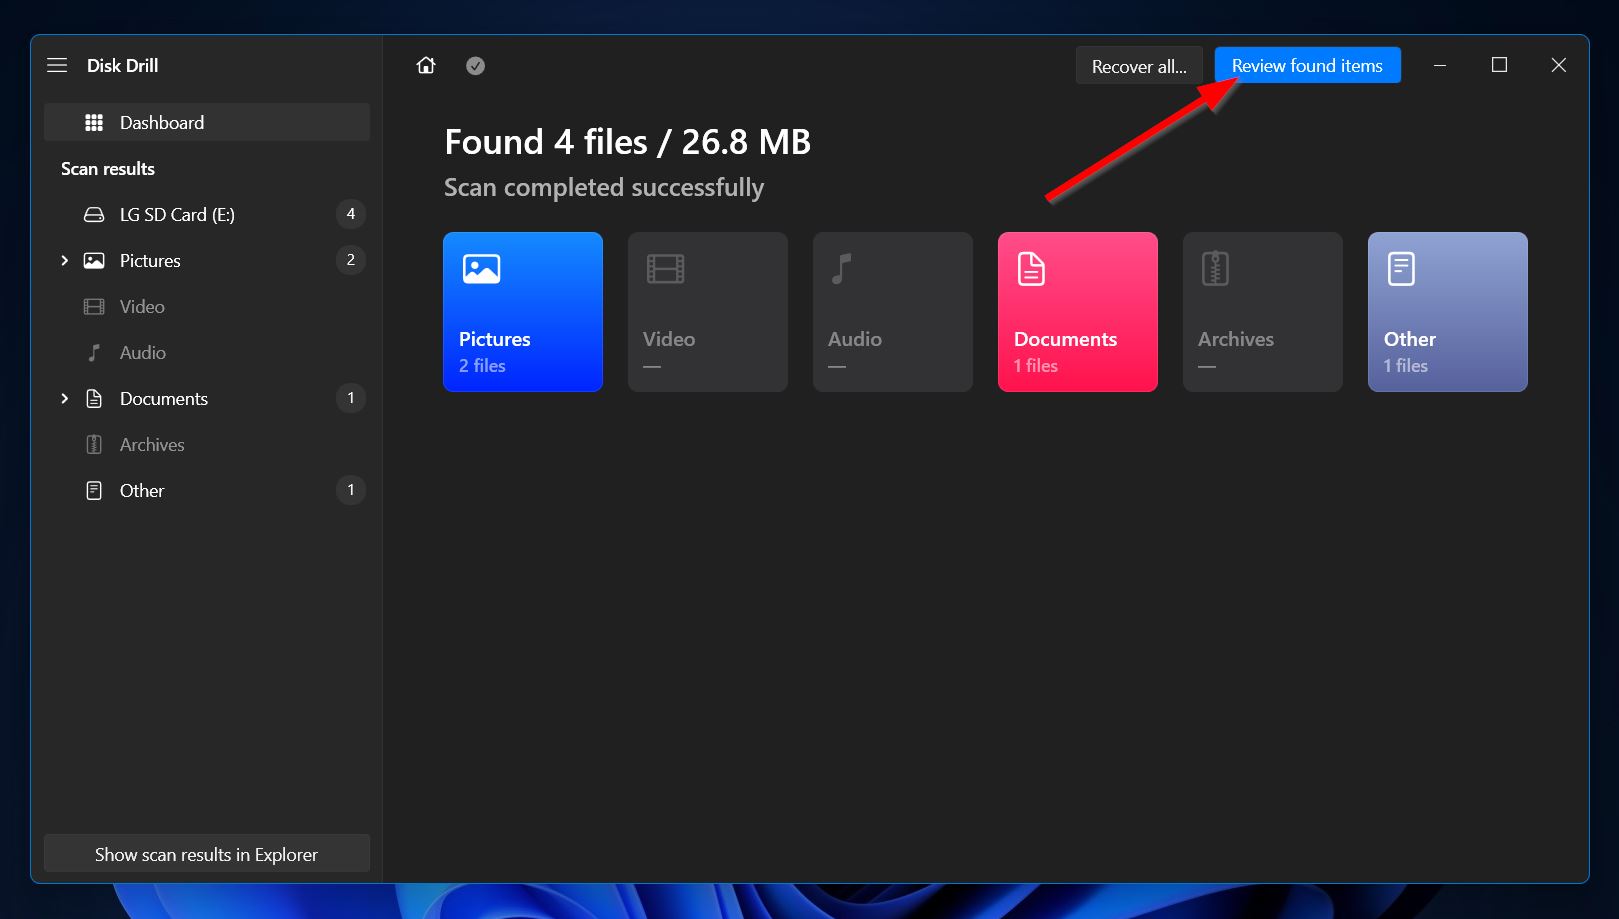
- After that, Disk Drill will begin the scan for any recoverable data. This could take a while, depending on the capacity of your SD card. As the scan progresses, you can click the “Review found files” at the top-right corner to view any files that have been uncovered so far. On the other hand, you can just wait for the scan to complete and click the same button to move to the results section.
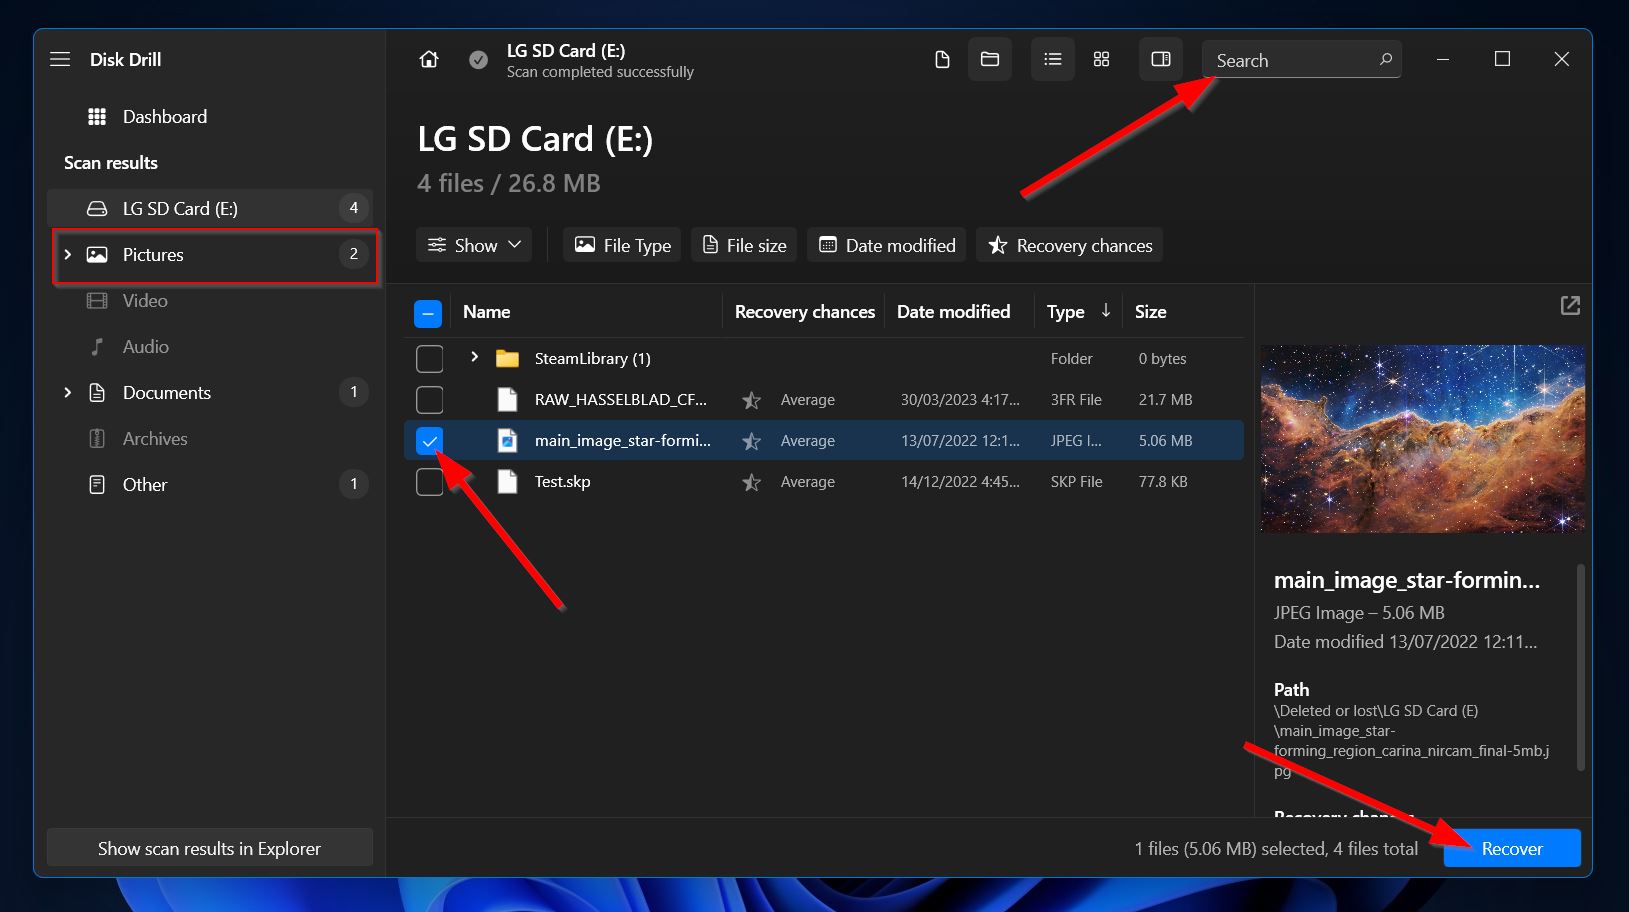
- On the results page, you can filter out the items to show just photos using the options on the left-side panel. Alternatively, you can use the search bar in the top-right corner to look for specific file names or file extensions. Once you’ve found the photos you’re looking to recover, mark them by ticking the checkboxes right best the file names. When you’re good to go, click “Recover.”
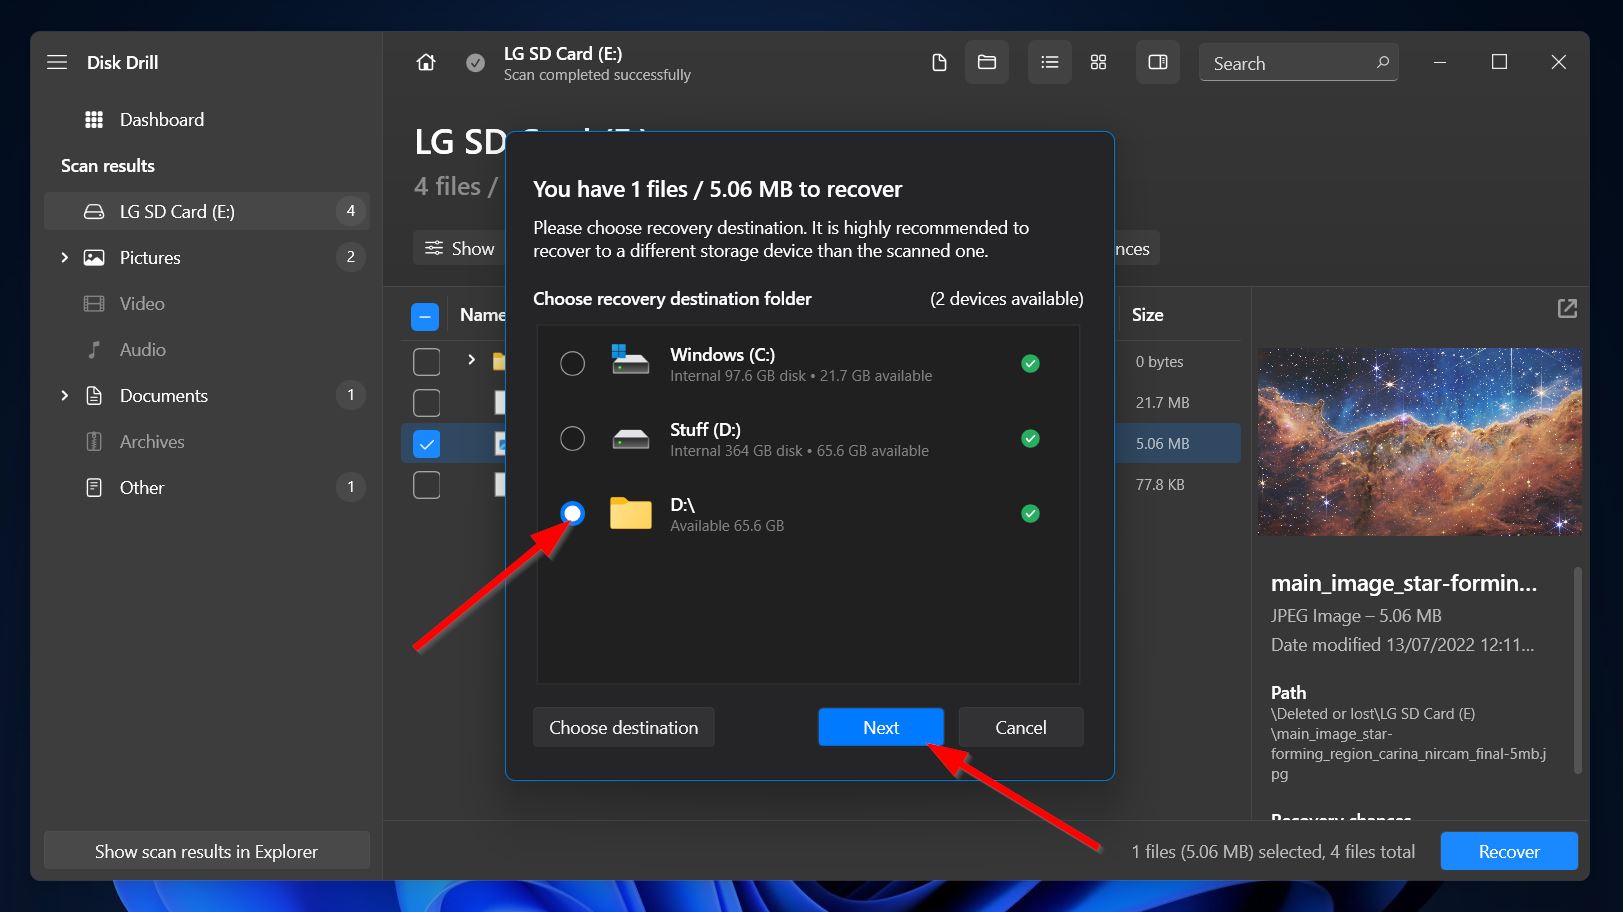
- Next, a smaller window should appear where you’ll need to decide on the recovery location of your deleted photos. This has to be on a different storage medium than the SD card you’re recovering from. Once you’ve decided, hit “Next.”
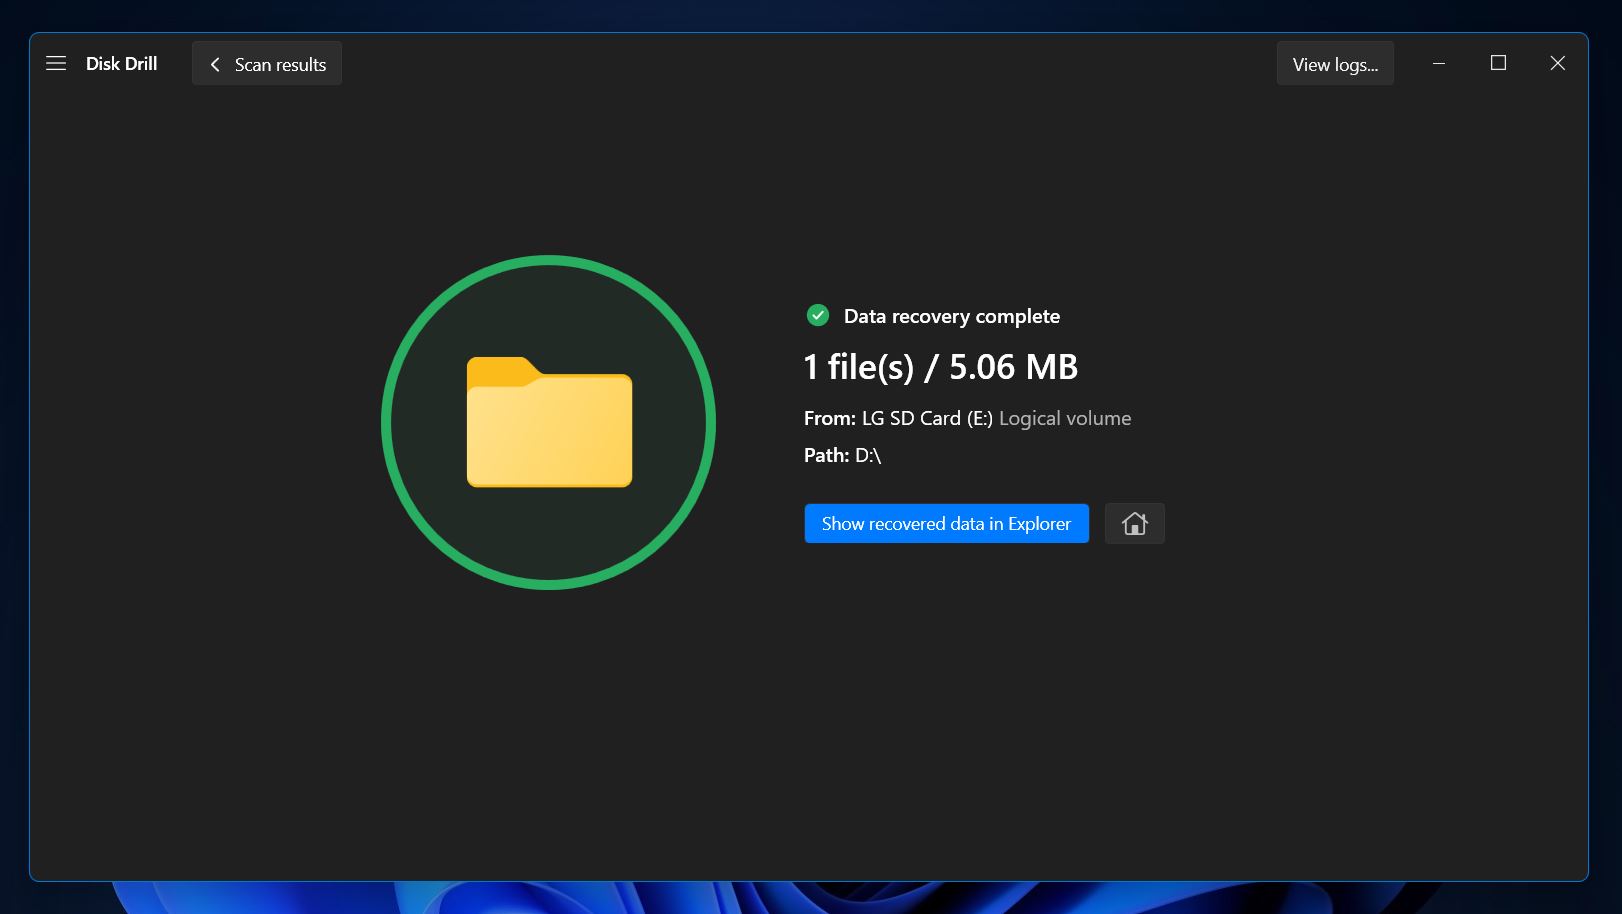
- Upon clicking, Disk Drill will then rescue your selected photos. Once the process is finished, you’ll see a completion message and a button labeled “Show recovered data in Explorer.” Clicking it will open the folder where the restored photos are saved.
How to Recover Deleted Photos from LG Phone without Computer
Using a computer to retrieve deleted pics from LG phones is often easier, more convenient, and offers a greater chance of recovery. But if you don’t have a PC or prefer to restore the photos directly through your phone, there are several techniques you can try ranging from specific LG phone features to third-party apps.
Method 1: Recover Deleted Photos from the Trash on LG Phone
LG phones come with a Trash feature in place that gives users the chance to reverse a deletion made by accident. You can use this feature to find deleted pictures on LG phones as long as they haven’t been erased more than 7 days ago.
To use the Trash feature to recover deleted photos from an LG phone without a computer, simply follow the steps below:
- To get started, launch the Gallery app on your LG phone.
- Next, tap the Drawer icon at the top-left corner of the screen and choose the “Trash” option.
- After that, select the photos or album you want to recover and tap the “Restore” button.
Method 2: Restore Deleted Pictures from LG Cell Phones from Google Photos
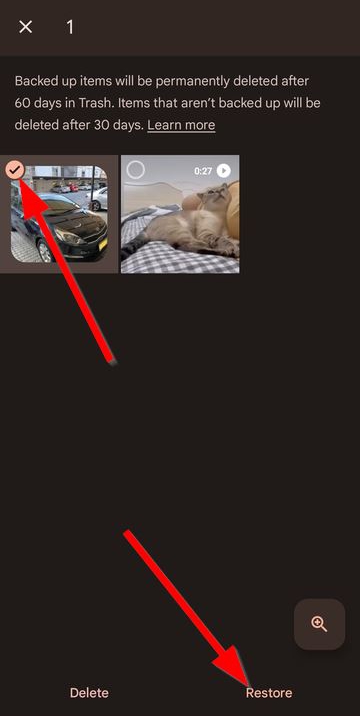
Android smartphones include the Google Photos app, which allows you to manage your pictures and videos. Deleting a photo using the app simply moves it to the Trash section, where it can be retrieved for up to 30 days. The exact steps may vary from one phone model to another, but they generally follow a similar process.
Here’s how to recover photos from your LG phone through the Google Photos app:
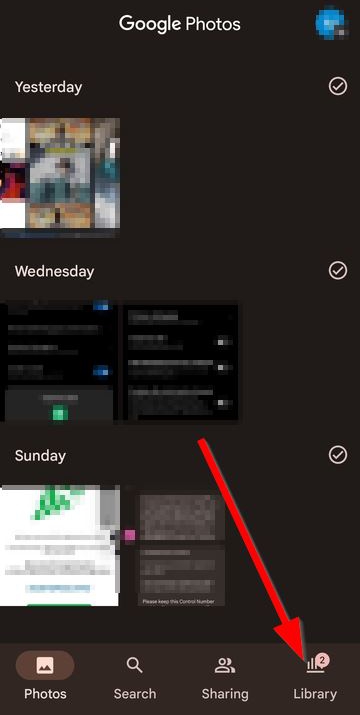
- First, launch the Google Photos app on your LG phone and navigate to the “Library” section.
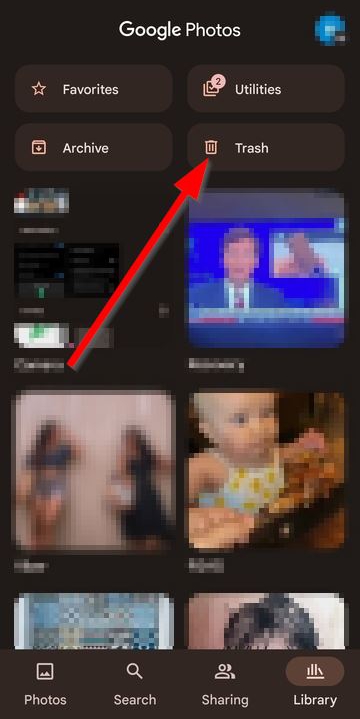
- Head to the “Trash” section.
- Next, highlight the photos you want to recover and tap the “Restore” button.
Method 3: Recover Deleted Photos with LG Backup
Similar to other brands like Samsung and Huawei, LG mobile devices have their own backup feature called LG Backup. This can be used to recover deleted phone pictures as long as a backup was created before the deletion took place.
Here’s how to use LG Backup to restore data:
- Head to “Settings” > “General” > “Backup & Reset” > “Backup & Restore”
- Select a backup from the list that contains your deleted photos.
- Mark the photos you want to retrieve and tap “NEXT” to restore them.
Method 4: Recover Deleted Photos With DiskDigger Photo Recovery App
Just like computers, mobile devices also have Android data recovery programs that can help rescue lost files. DiskDigger is one that specializes in photo recovery and is free to download in Google Play. However, it’s worth noting that the app is only capable of performing basic scans on unrooted devices. For full scans, you’ll need to root your LG phone.
To recover deleted photos using the DiskDigger app, simply follow the steps outlined below:
- To get started, install the DiskDigger app from Google Play.
- Launch the app and tap the “SEARCH FOR LOST PHOTOS” button.
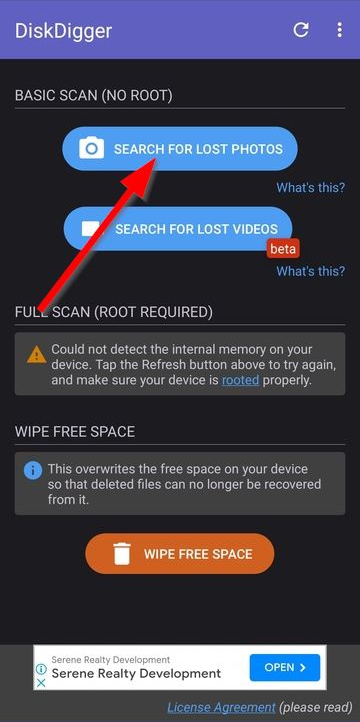
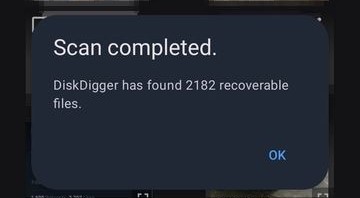
- Upon tapping, the app will start scanning your LG phone for any recoverable photos. For basic scans, this process will likely take less than a minute. It’ll be a lot longer for full scans. Once the scan is complete, you’ll get a pop-up message that tells you exactly how many recoverable files were found.
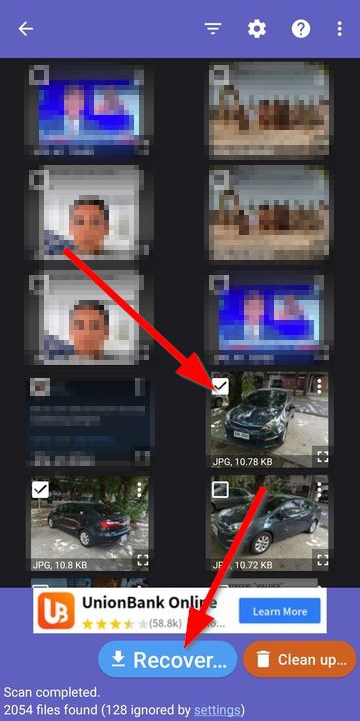
- Next, tap the files you want to restore to mark them, then tap the “Recover” button near the bottom of the screen.
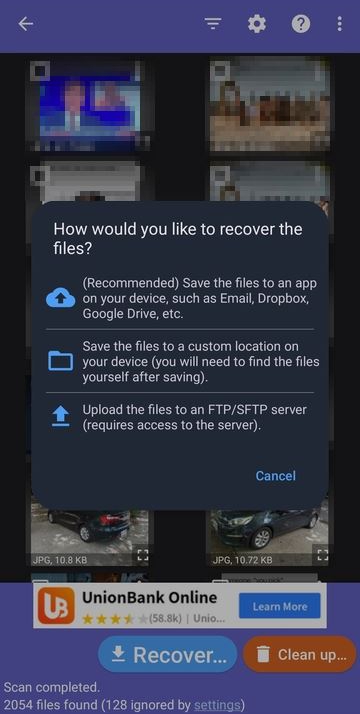
- You’ll be given three options to choose from when it comes to the recovery location. You can either save the photos to a specific app, save the pictures to a custom location on your device, or upload the files to an FTP/SFTP server. Tap whichever suits you best. For the purpose of this guide, we’ve chosen a custom location on the device.
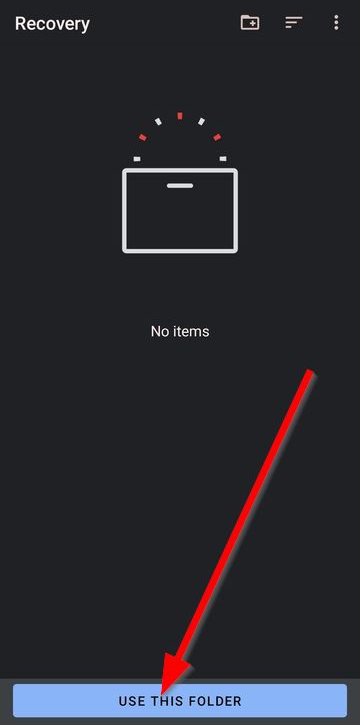
- After that, you’ll be taken to a file manager of sorts, where you need to choose a folder to save the recovered files. Select a folder and tap the “USE THIS FOLDER” button at the bottom of the screen. A pop-up will appear, asking you to give permission to access the folder. Tap “ALLOW” when requested.
- The photos will then be saved in the specified folder. You can now access them through either the gallery or a file manager.
