SD cards serve a variety of useful functions. One such use is expanded storage for your mobile device. An SD card can hold all sorts of files, but they’re especially useful for holding photos taken from your phone.
Nonetheless, they are still vulnerable to corruption. If your SD card has become corrupted, it may no longer be immediately readable to your Android device, or any device for that matter. This article will show you how to fix a corrupted SD card on Android.
Signs of Android SD Card Corruption
When your phone’s SD card becomes corrupted, it typically means the memory card is no longer accessible due to some form of logical damage. You can identify corruption by looking for a handful of common symptoms.
| Symptom | Description |
| 🐌 Slow performance | Corruption can increase the amount of time it takes for your phone’s operating system to locate and access data from the SD card. |
| 👻 Disappearing files | You may notice that some of your files are no longer appearing where they should be. While they may still physically reside on the SD card, corruption can stop your phone from locating and accessing your files. |
| ✍️ Read/write errors | If you try to open a file from your SD card, you may be prompted with a warning that states the file is either inaccessible or damaged. Moreover, you may encounter this message when trying to save new data to the memory card. |
Knowing what corruption looks like is the first step in understanding how to repair SD cards in Android.
How to Recover Data From a Corrupted Android SD Card
Immediately trying to fix your corrupted SD card can very well result in data loss. Therefore, before you try any fixes, you should back up all the data on it. If you can’t, you should use data recovery software to get the data back instead.
We recommend the data recovery tool Disk Drill if you need to perform corrupted SD card recovery. It supports most SD card manufacturers and over 350 file types, providing good odds at restoring even uncommon file formats. Disk Drill can recover files lost due to SD card corruption, as long as the SD card is intact.
Before you start, take your SD card out of your Android device and connect it to your computer using a card reader.
- Download, install, and launch Disk Drill.
- Select your corrupted memory card. The name may vary depending on the actual SD card you use. Click Search for lost data.
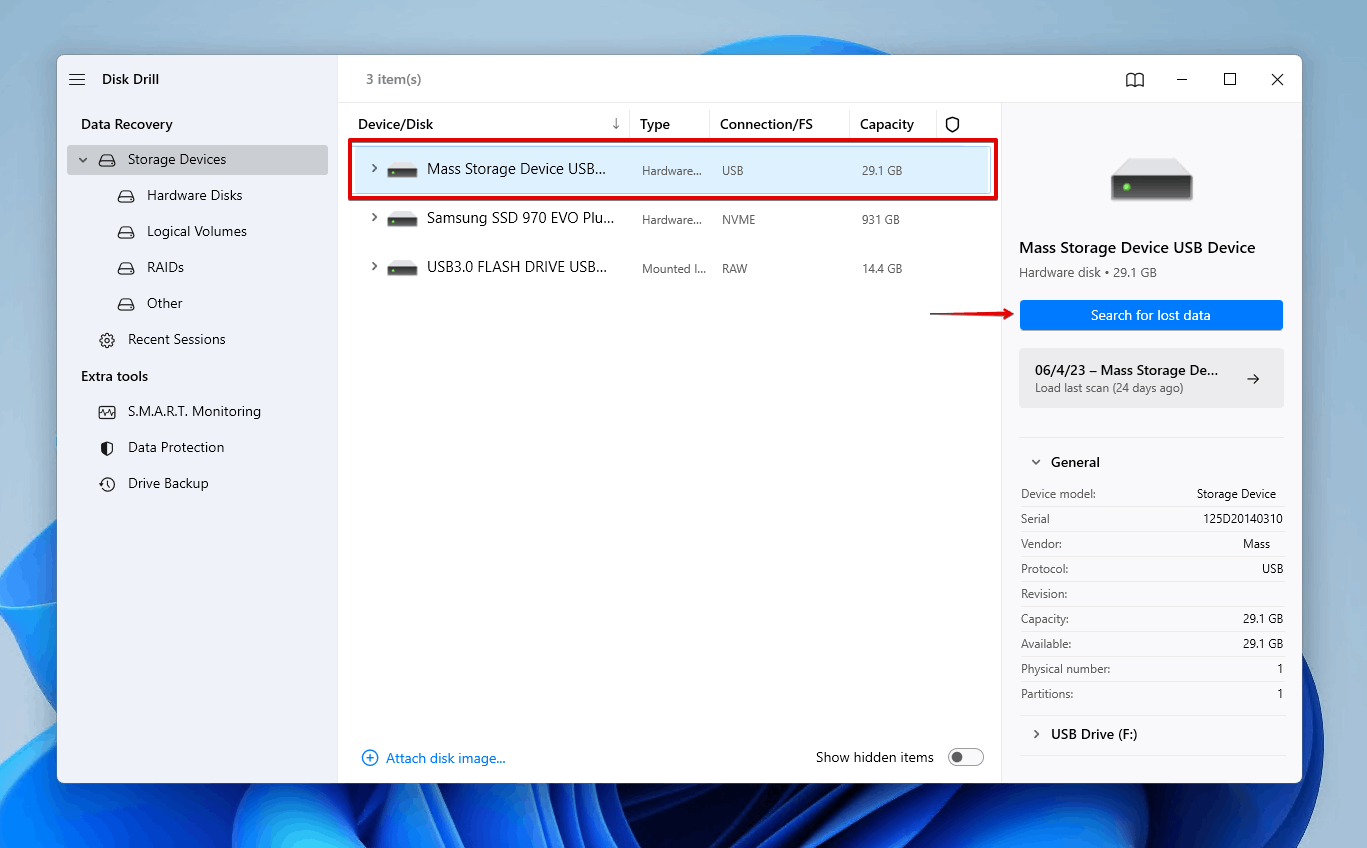
- Click Review found items when the scan has finished.
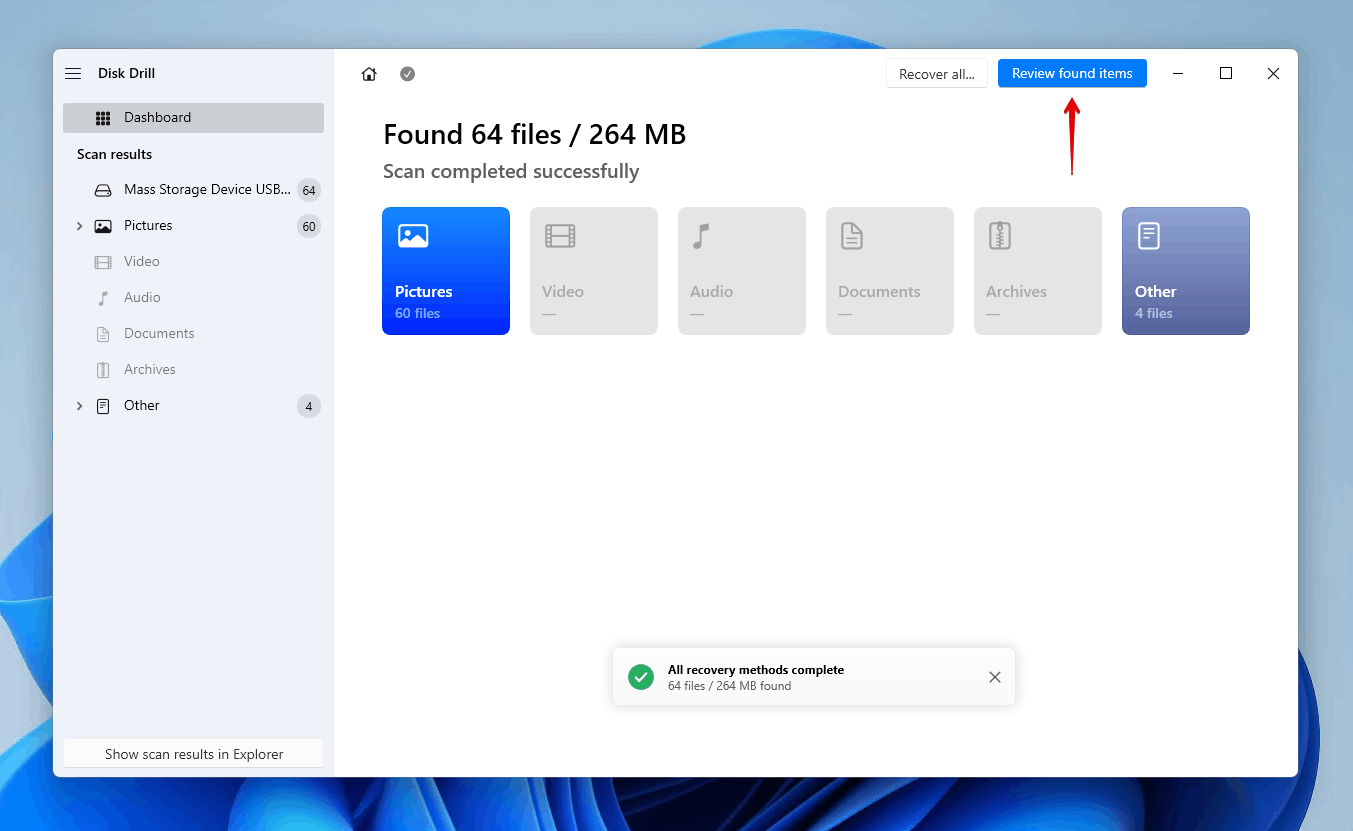
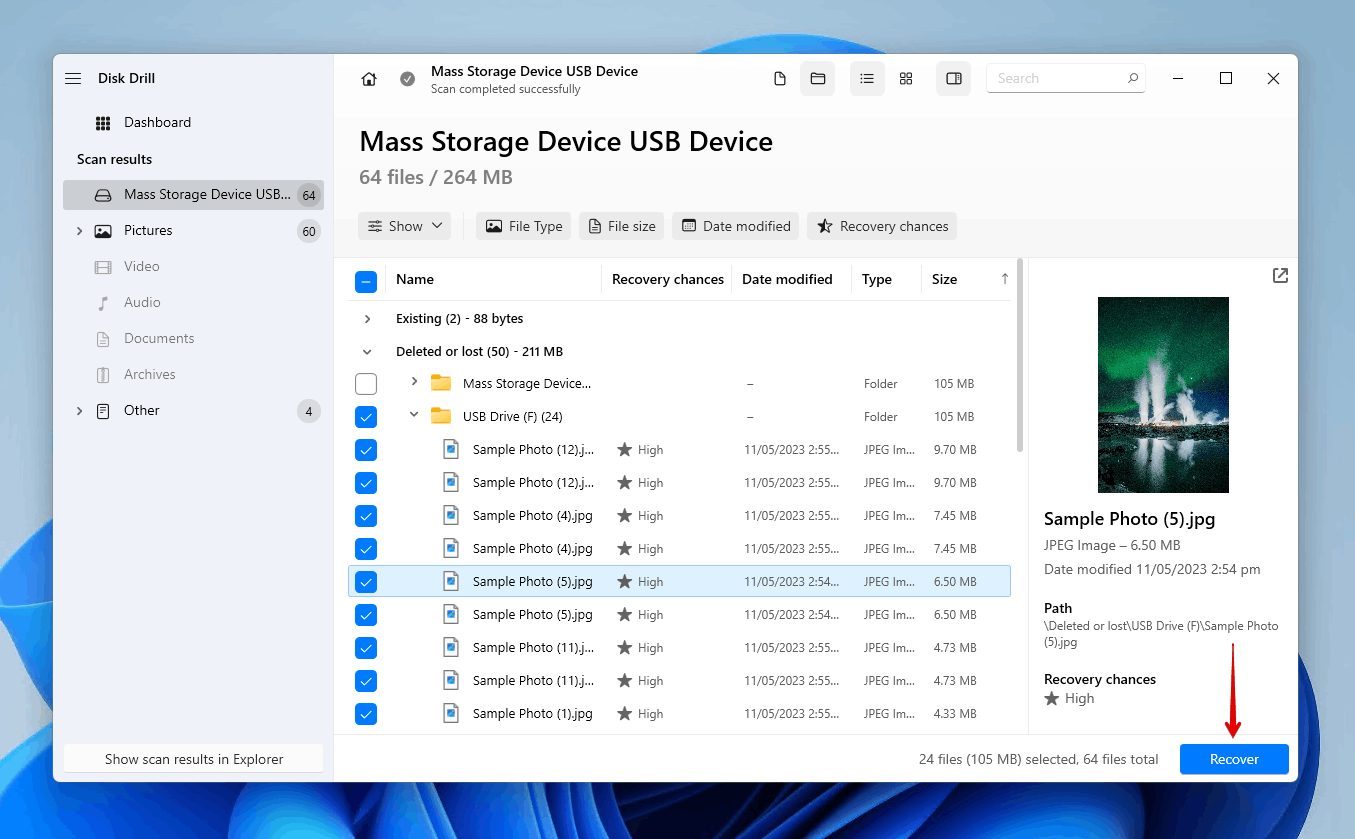
- Select all of the files you want to recover. The Recovery chances column indicates your chances of success when recovering that file. Click Recover when ready.
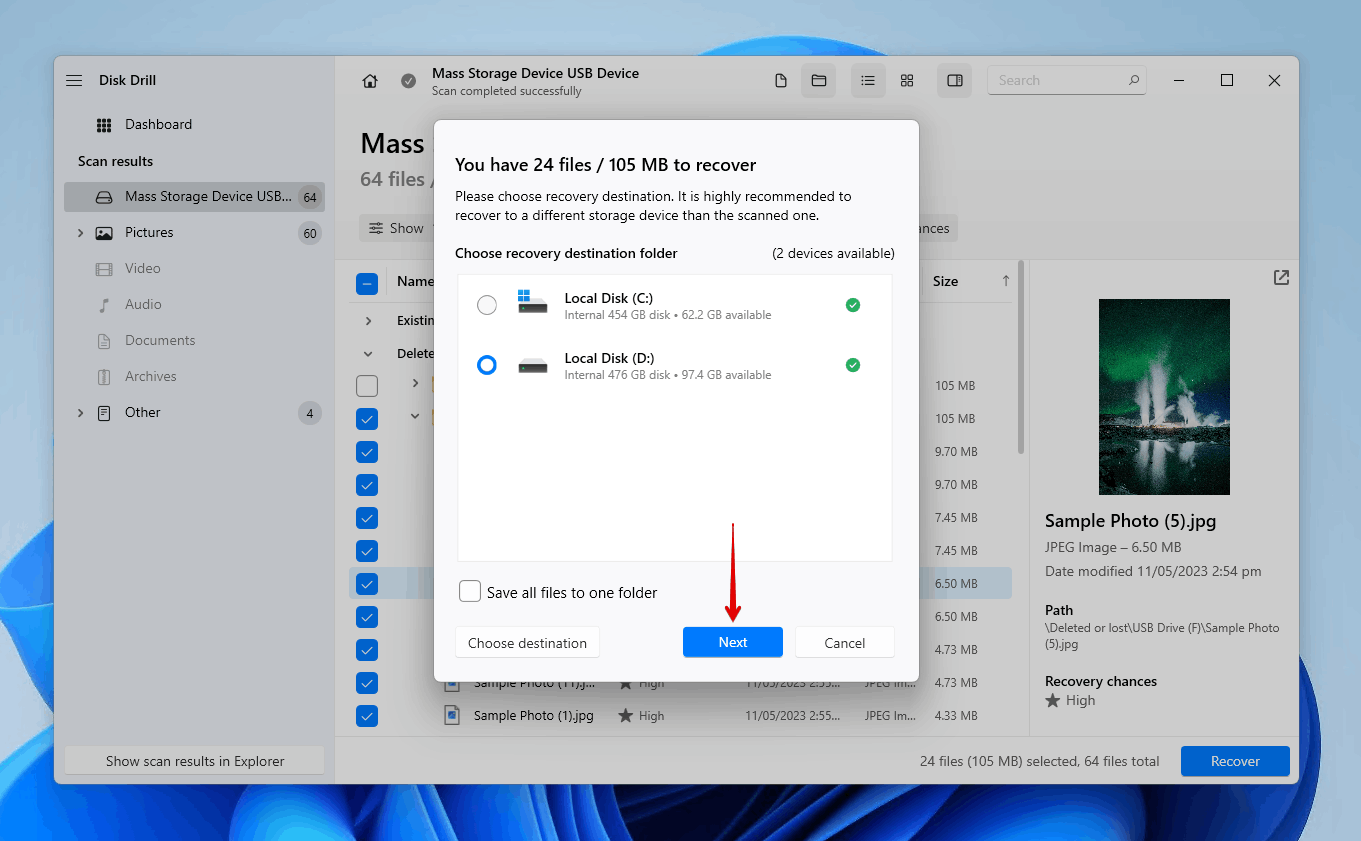
- Select the output location and click Next.
How to Fix a Corrupted Android SD Card
Before you try any of these fixes, ensure the SD card is intact. If there are any signs that the card is bent or the contact plates are damaged, these fixes are unlikely to work. Additionally, make sure the SD card slot of your card reader is clear of obstruction.
Method 1:Scan SD Card for Viruses
Viruses can infect your SD card and cause corruption to its data or file system. We’re going to show you two ways you can scan your SD card for viruses.
On Windows
Windows comes included with Microsoft Defender Antivirus, a full-fledged antimalware software tool. Here’s how you can utilize it to remove any viruses on your SD card:
- Connect the SD card to your Windows PC.
- Open File Explorer.
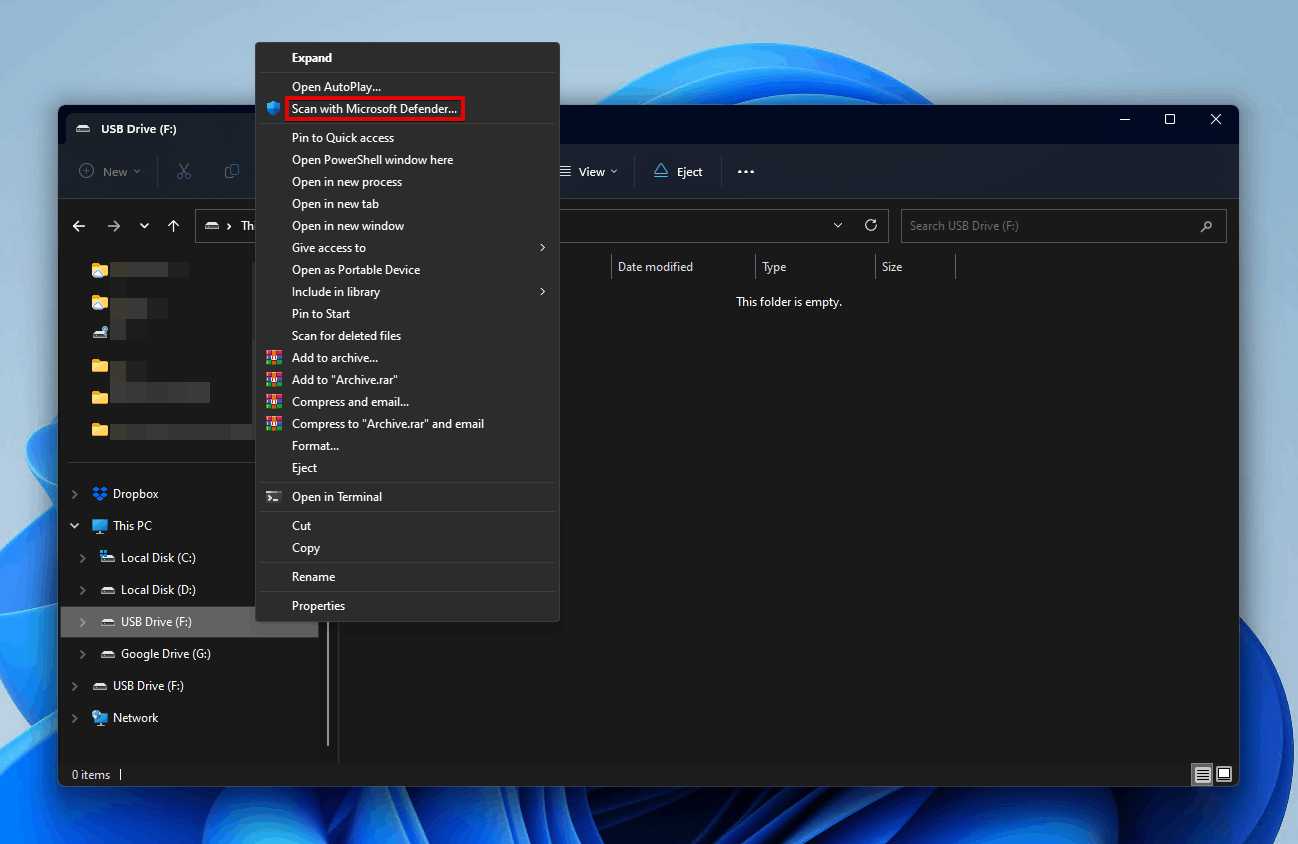
- Shift right-click the SD card and click Scan with Microsoft Defender. If you want to perform a more comprehensive scan, go to the next step.
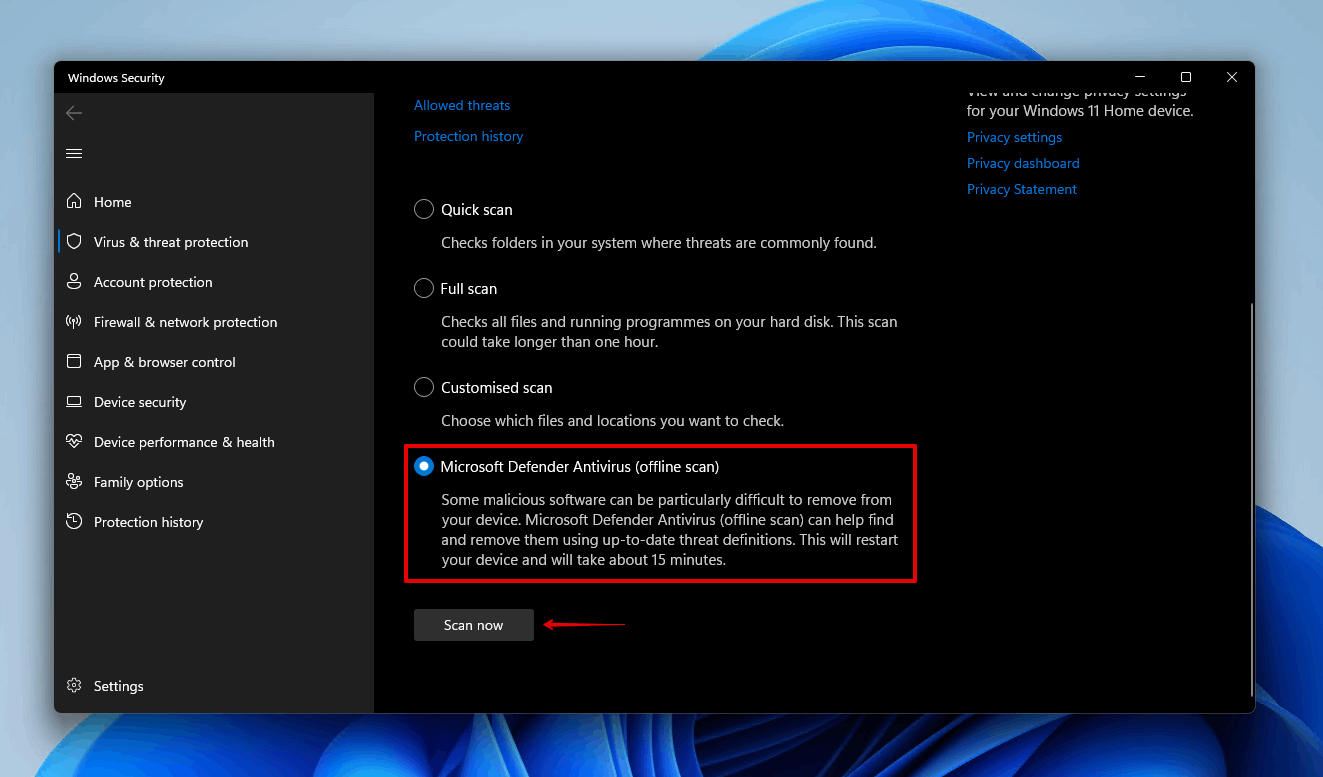
- Select Microsoft Defender Antivirus (offline scan) and click Scan now.
On Android
If you don’t have a Windows computer available, you can use Avast Mobile Security instead. There is a paid version, but the free version is enough to get the job done (as long as you’re ok with some ads).
- Download Avast Antivirus & Security and follow the on-screen instructions to set up the app.
- Tap Start Scan.
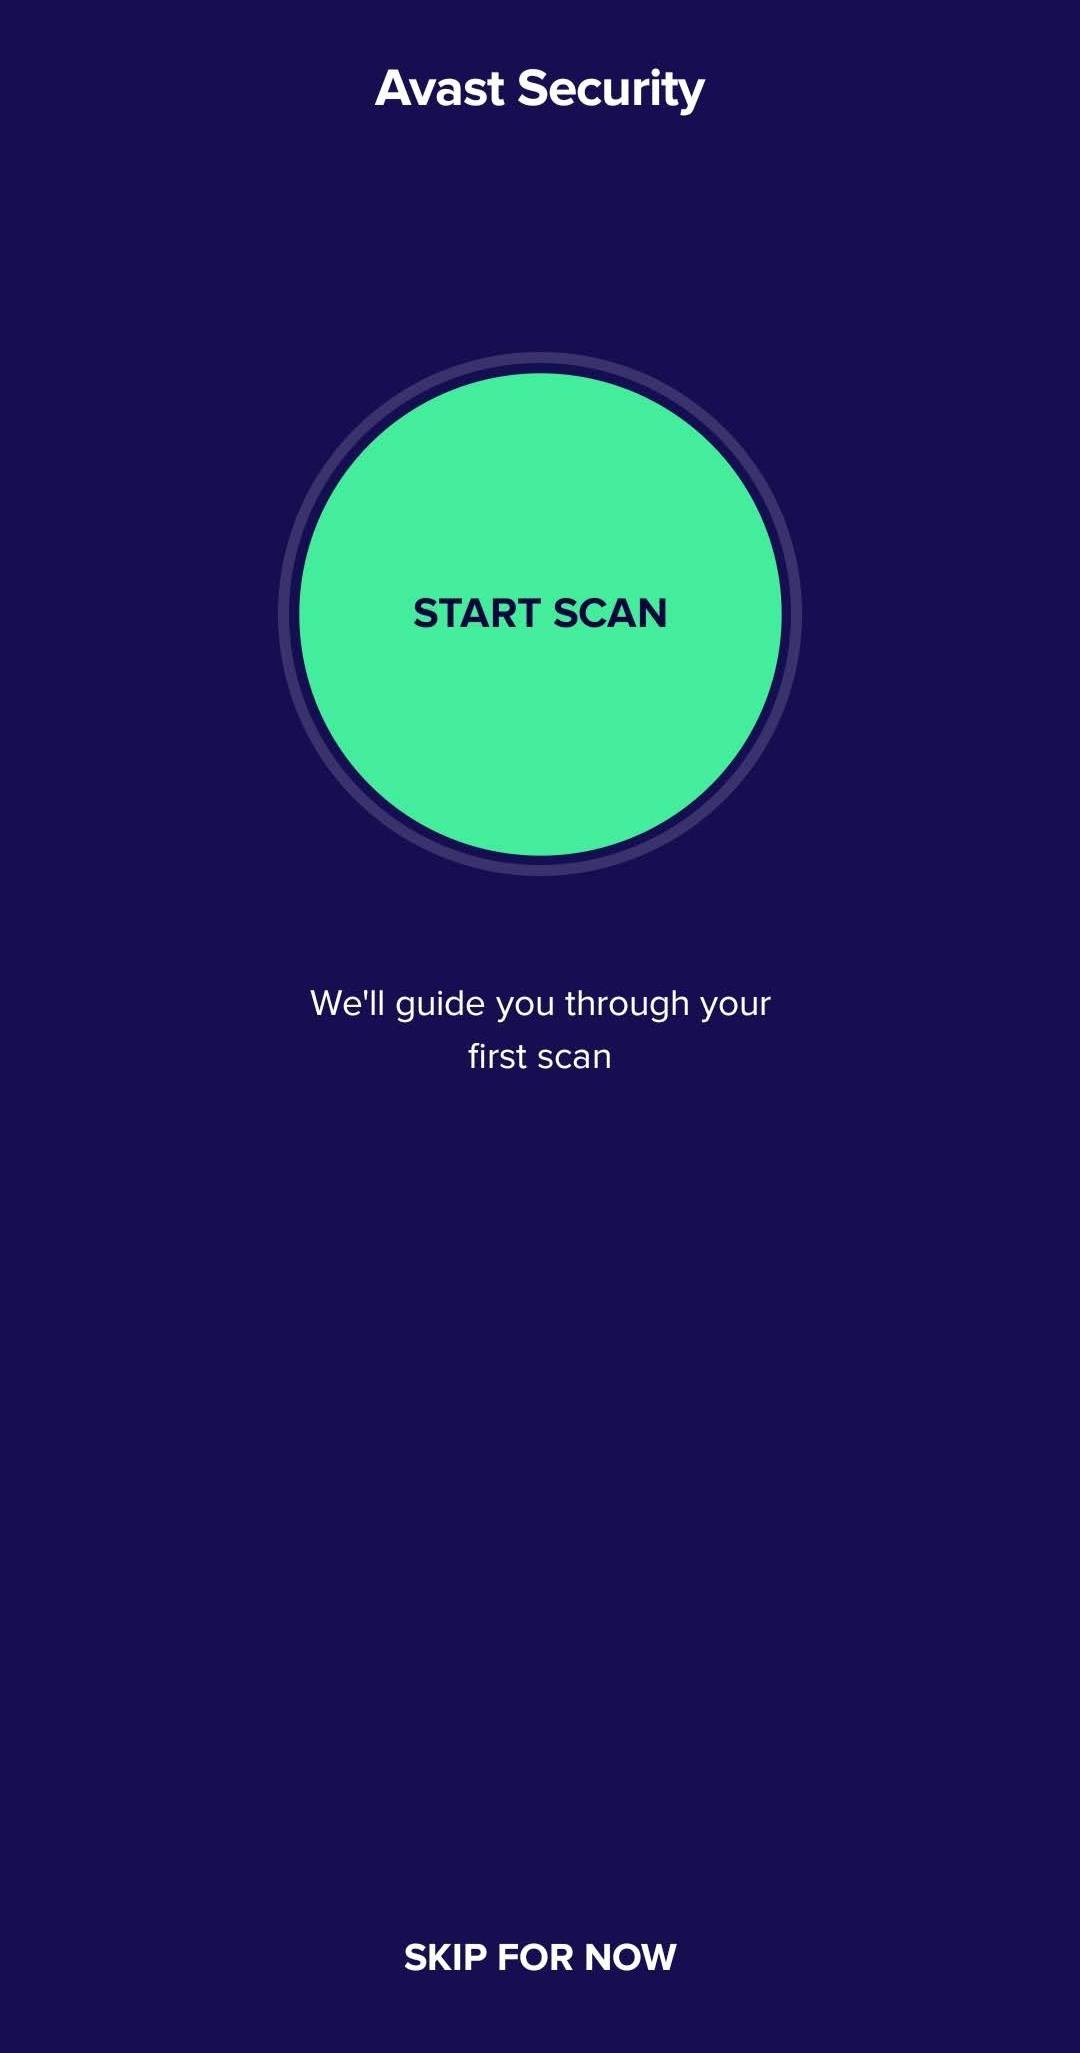
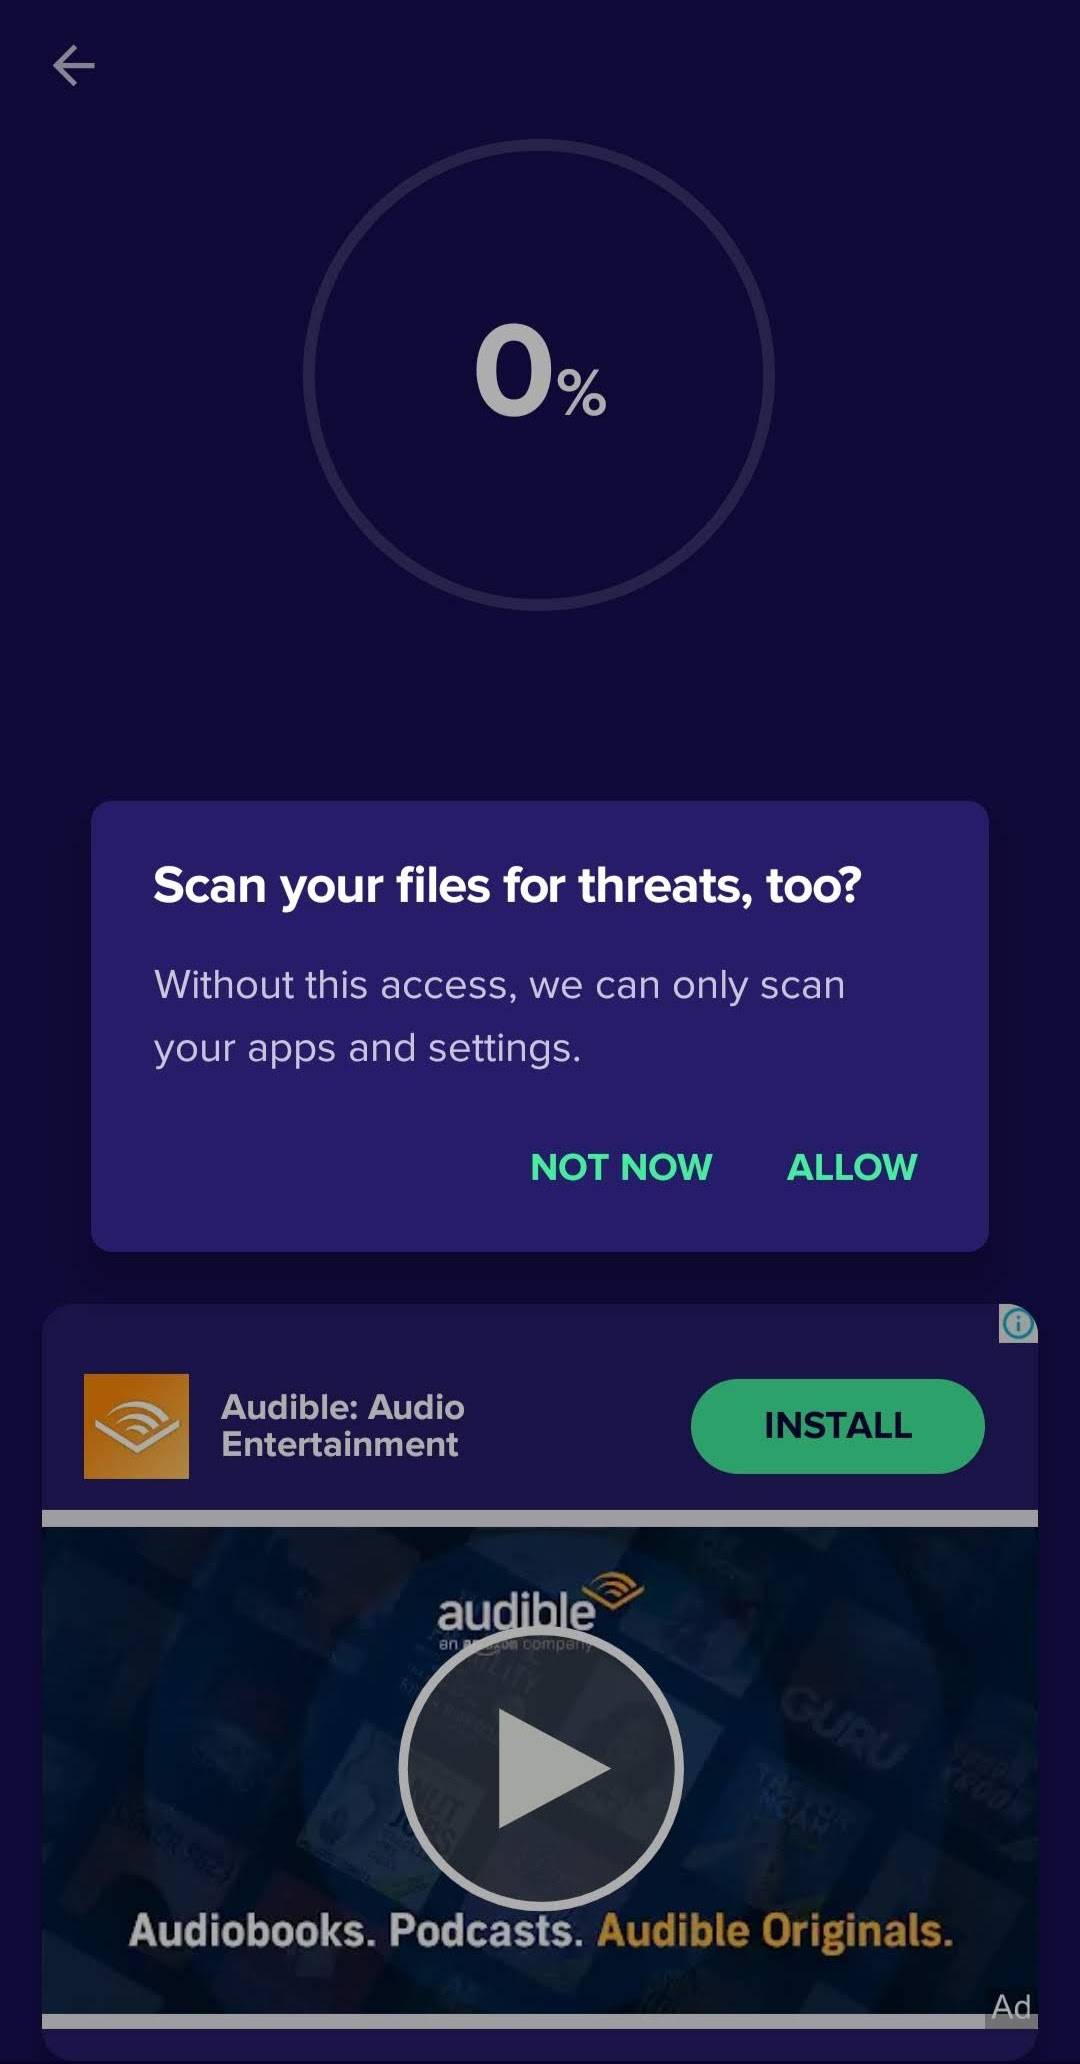
- Tap Allow to scan your apps and settings.
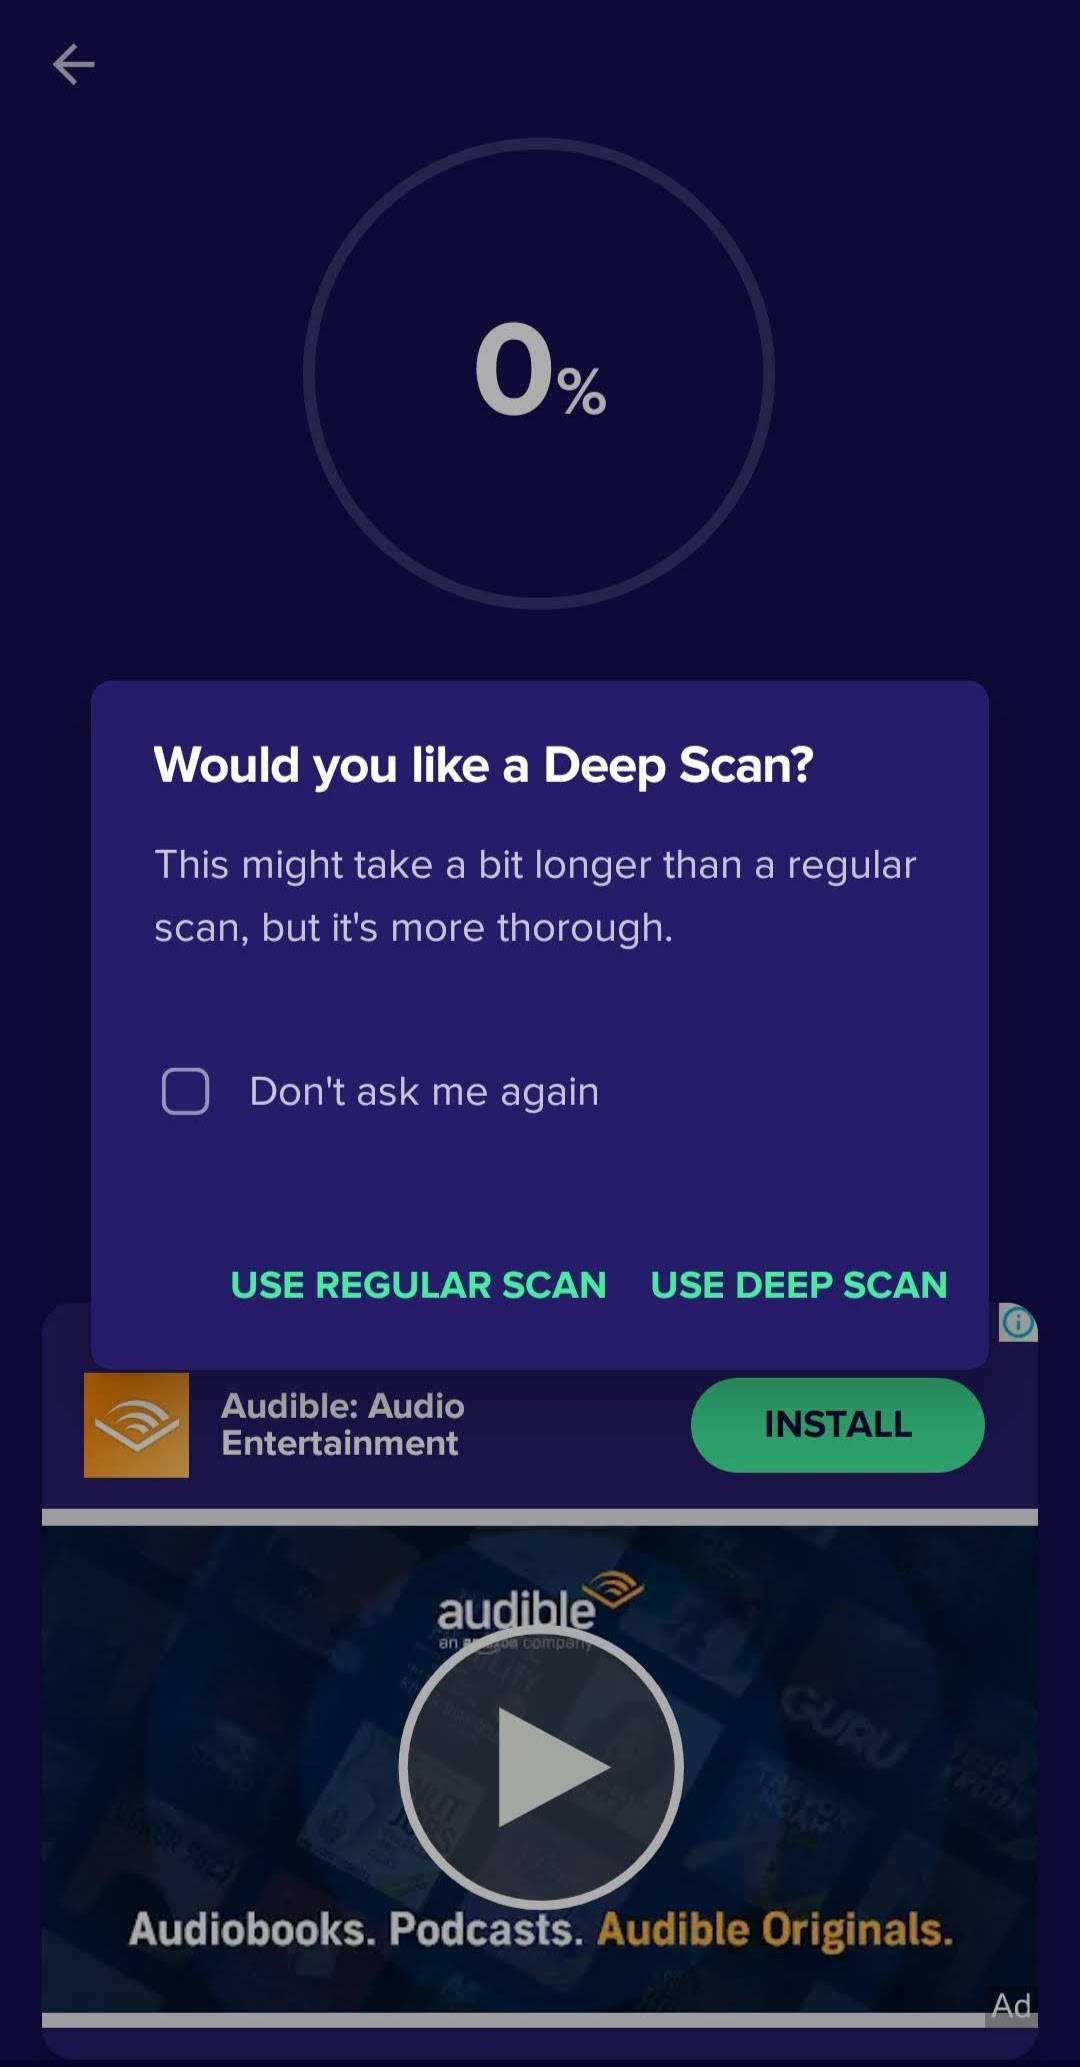
- Choose whether you want to perform a Regular Scan or Deep Scan.
Address any risks that the app finds.
Method 2:Repair with CheckDisk (CHKDSK)
CHKDSK is a command included with Windows that can scan your SD card for logical and physical errors. When used with additional parameters, it can also attempt to fix the discovered errors, depending on their severity.
You can use CHKDSK for Android by connecting your corrupted SD card and pointing the command towards it. The below instructions will show you how to repair an SD card in Android using CHKDSK.
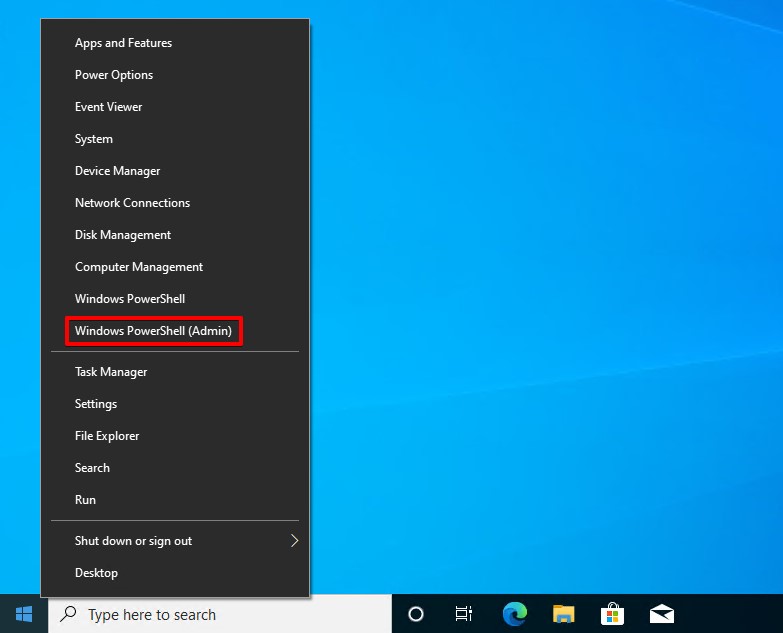
- Right-click Start and click PowerShell (Admin). If prompted by UAC for confirmation, click Yes.
- Type
chkdsk D: /f. Replace D: with the drive letter associated with your corrupted SD card. Press Enter.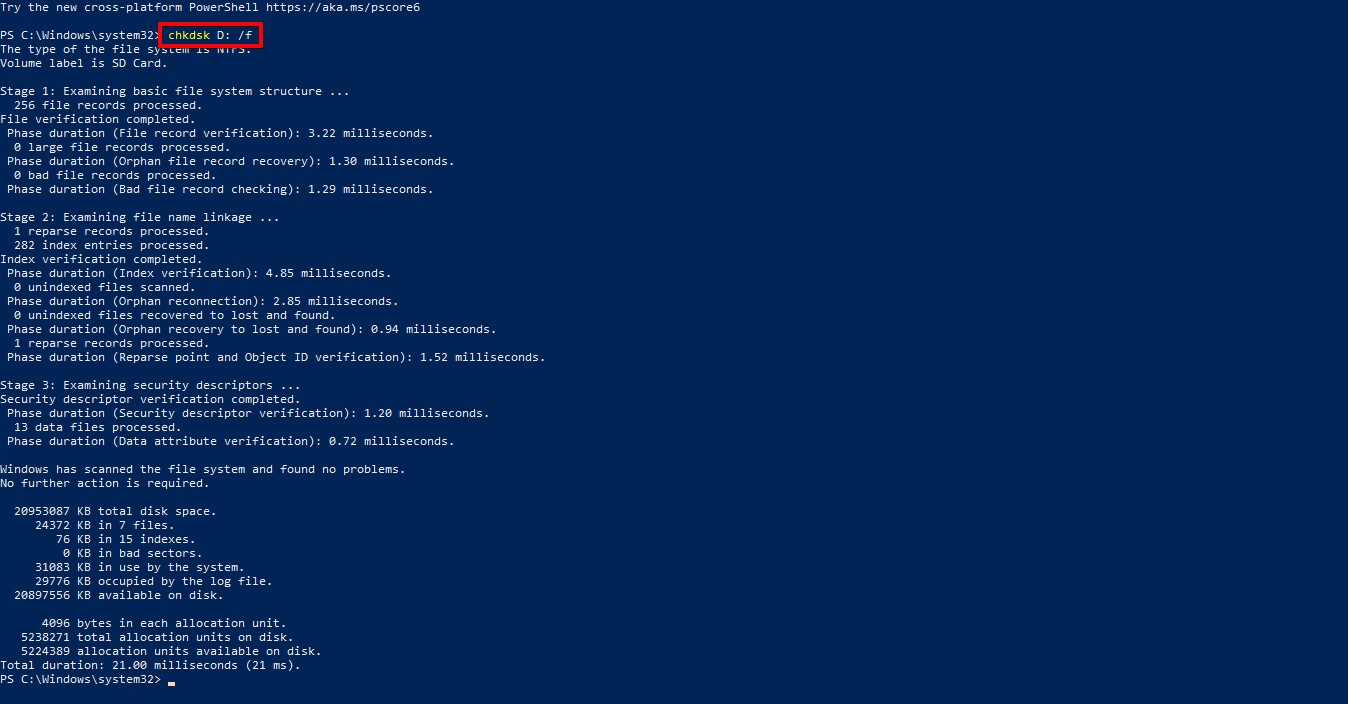
The /f parameter locates and fixes any errors found on the corrupted SD card. Removing this parameter will still perform the scan, though no errors will be fixed. Once the command has finished running, check your SD card to see if the corruption has been removed.
Method 3:Format on PC
Reformatting your memory card is useful if your phone says the SD card is corrupted as it can effectively remove any corruption that’s present. When you format an SD card, you’re deleting all of the data that’s on it and refreshing the file system.
We’re going to be performing a Quick Format instead of a Full Format. A Quick Format is significantly faster than a Full Format, but a Full Format does a more thorough job at removing the data (resulting in it often becoming unrecoverable). Use the below instructions to repair Micro SD card on Android by formatting it.
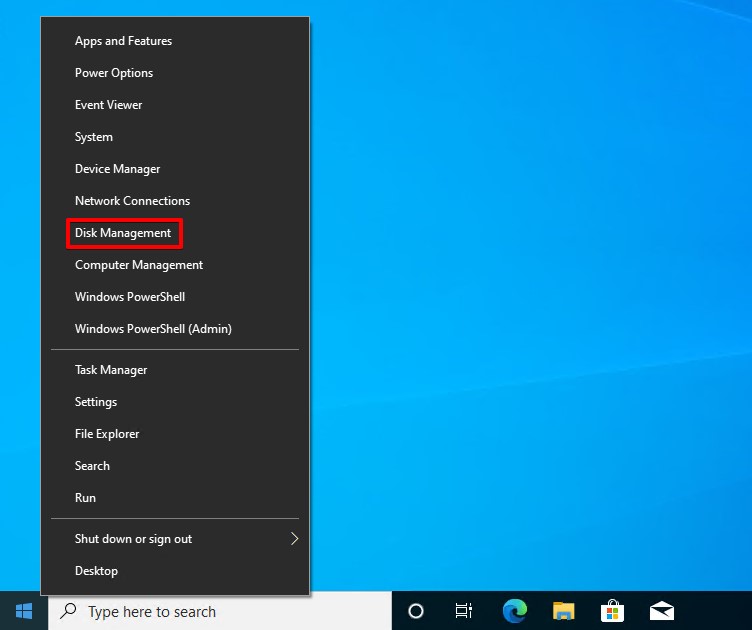
- Right-click Start and click Disk Management.
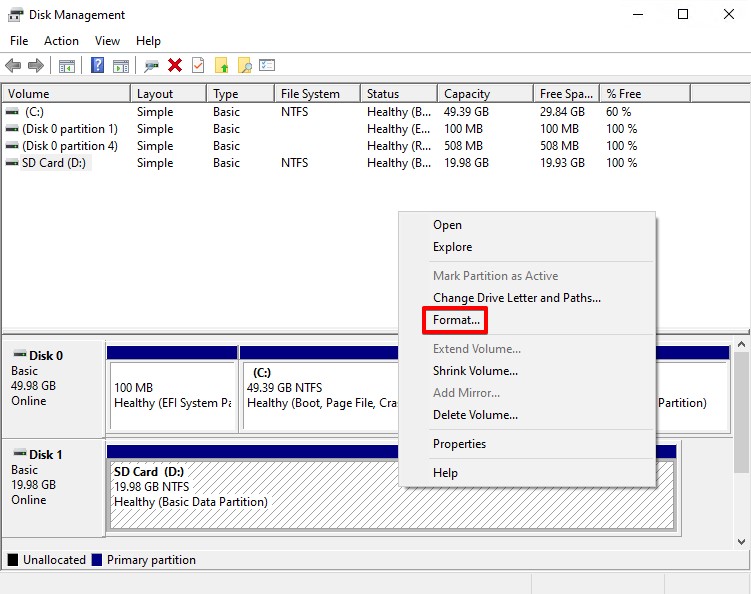
- Right-click the volume on your corrupted SD card and click Format.
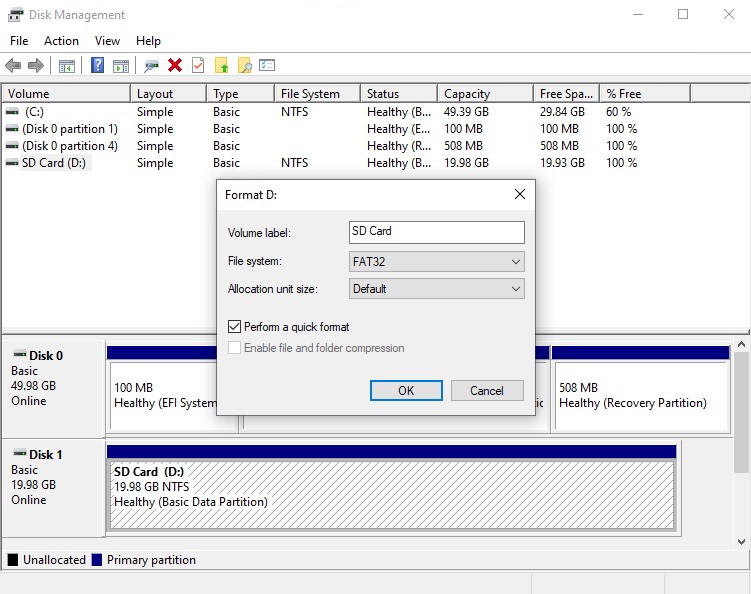
- Give the SD card a name and change the File system to FAT32. Ensure Perform a quick format is ticked and press OK.
Method 4:Format on Android
If you don’t have a computer handy, or if you’d just prefer to work on your phone directly, you can fix your corrupted SD card Android without a PC. To do this, you will be formatting the SD card directly from your Android device.
This process may look slightly different depending on your device and Android version. Remember that the process of formatting your SD card will delete all of the data on it. Follow the below instructions to repair the corrupted SD card on Android 11.
- Open Settings.
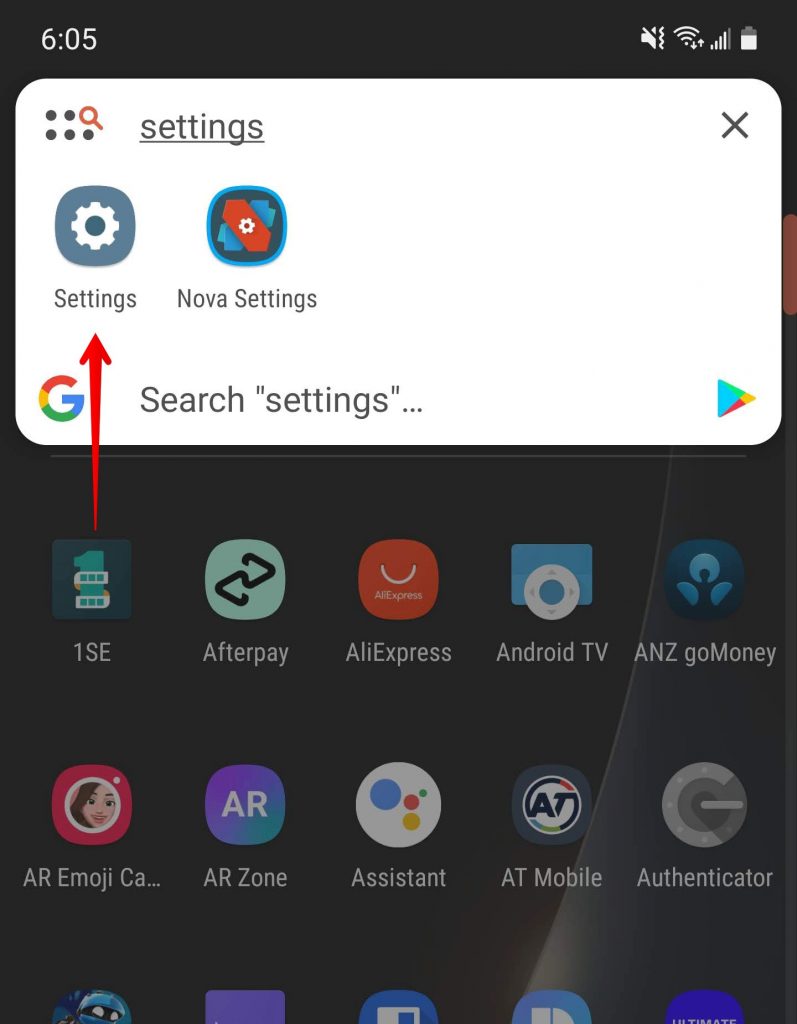
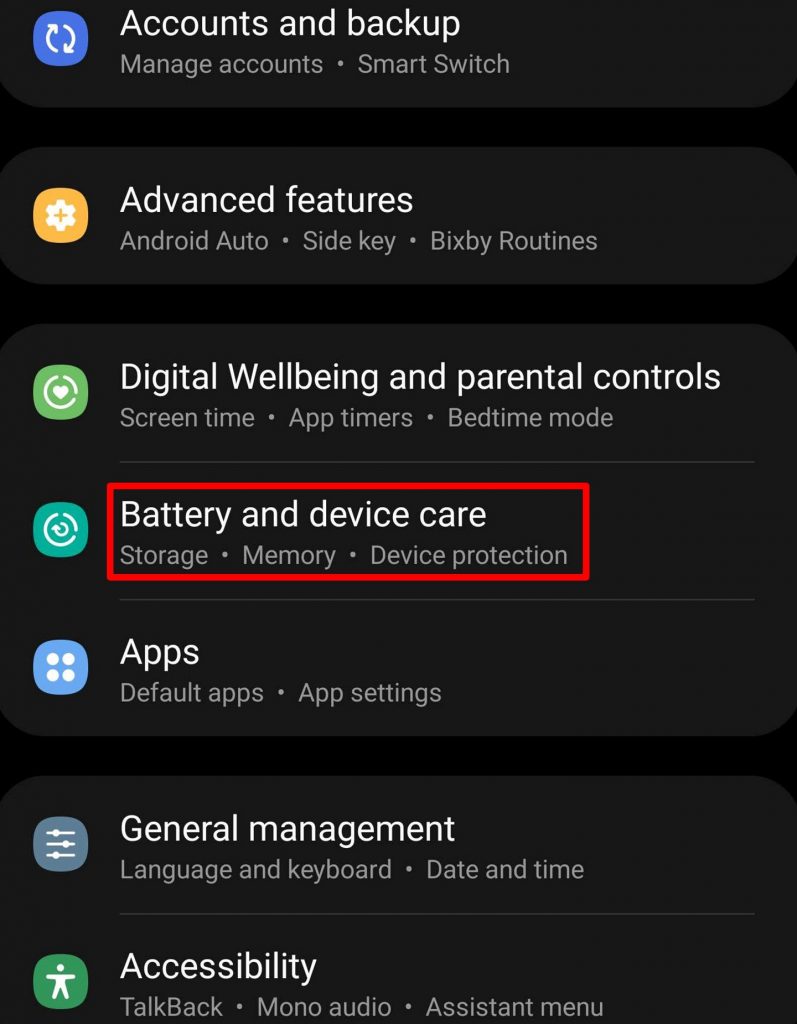
- Tap Battery and device care.
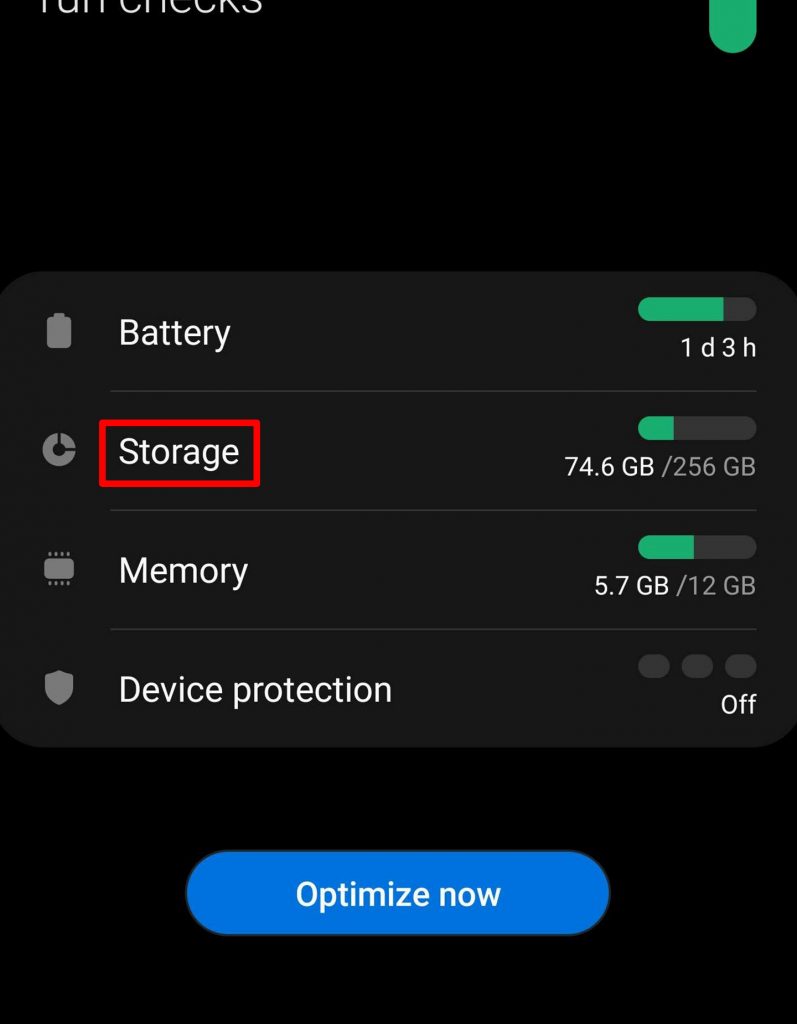
- Tap Storage.
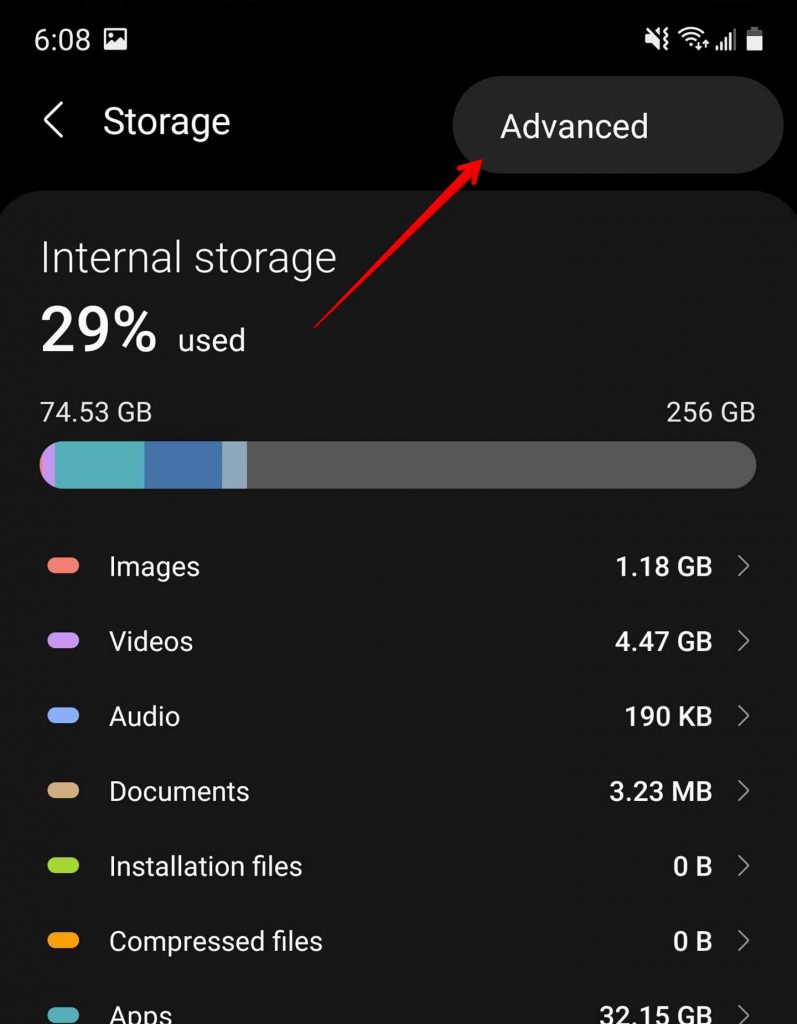
- Tap the three dots at the top right, then tap Advanced.
- Tap on your SD card.
- Finally, tap Format.
Protect Your SD Card From Corruption
Your SD card can become corrupted at any point. Because of this, you should take care of your data and protect it so it’s safeguarded from any data loss situations that arise.
- Make backups– Making backups of your data is the most effective way you can protect it. In the event of data loss, you can simply restore a copy of the working file and proceed as normal.
- Remove safely– When removing the SD card from your Android device, make sure there are no active write processes in progress. Ideally, power down your mobile device before removing the SD card to avoid incomplete data.
- Replace bad cards– If problems repeatedly appear on your SD card, even after being repaired, it may be time to replace it. Back up your data and replace your memory cards as soon as problems arise to reduce the risk of data loss as they will worsen over time.
Taking care of your SD card reduces the risk of you encountering an SD card-related problem.
Conclusion
Going forward, if your SD card becomes corrupted on Android, you’re equipped with the knowledge to recover the data on it yourself. Additionally, using the methods outlined in this article, you can fix SD card errors on Android without much trouble.
FAQ
- Open Settings app.
- Tap Device maintenance.
- Tap Storage.
- Tap the More options icon (vertical ellipses).
- Tap Storage settings.
- Tap your SD card.
- Choose Format.
- Download DiskDigger for Android.
- Select Start Basic Photo Scan.
- Select the photos you wish to recover, then tap Recover.
- Choose where you want to store the recovered photos.

