 You connect an SD card to your Windows computer but discover that one of the important SD card partitions is not showing. It is very frustrating if you have some important data stored in the lost partition.
Don’t worry; it’s not the end of the world. There is still a possibility of fixing the partition and recovering the lost data. This article will explain ways to recover SD card partition on Windows.
Does an SD Card Need a Partition?
Partition is a logical division on an SD card with its own parameters and functions. It allows an operating system to know where to start reading data. SD cards typically have one partition marked as Primary Partition.
You can make the storage unallocated and add more partitions. However, there is one major con associated with it. If you add more partitions, some devices may be unable to read your SD card.
At the same time, if your SD card doesn’t have a partition, then the operating system won’t be able to understand where to start reading the card. The stored files are still on the SD card, but your device can’t find them.
It is Master Boot Record’s role to store partitioning information on an SD card. MBR indicates the operating system, the beginning of a partition, and where to start reading.
Common Reasons for Partition Removal from SD Card
As you are facing issues with the SD card partition, you may be thinking about the reasons for it. Below are some common reasons for partition removal from an SD card.
| Reason | Description |
| 👆 Manual deletion | Accidentally deleting a partition while creating or modifying another partition. |
| 🦠 Virus or malware | A virus or malware infects the partition tables of an SD card leading to partition removal. |
| 🔨 SD card corruption | SD card corruption could occur due to: removing an SD card without safely ejecting it, power loss, extensive use of a card, or physical damage. |
| 🔠 Drive letter removal | When you insert an SD card into your computer, the system automatically assigns a drive letter. It allows the system to access the stored files. However, If the drive letter is removed for some reason, it may not appear in the File Explorer. |
| 💿 Bad sectors where system files had been present | If the sector in which system files of an SD card are present becomes bad, it may cause a partition loss. |
How to Recover Data from a Missing Partition
Although you cannot see the partition, your files are still on the SD card. It is possible that the partition table is heavily corrupted, which is why your device cannot read it.
At this point, an attempt to fix the partition may cause permanent data loss. So, you should first take care of your data and then only think about fixing the lost partition. An SD card partition recovery software is the best way to recover data from a lost or corrupted SD card partition.
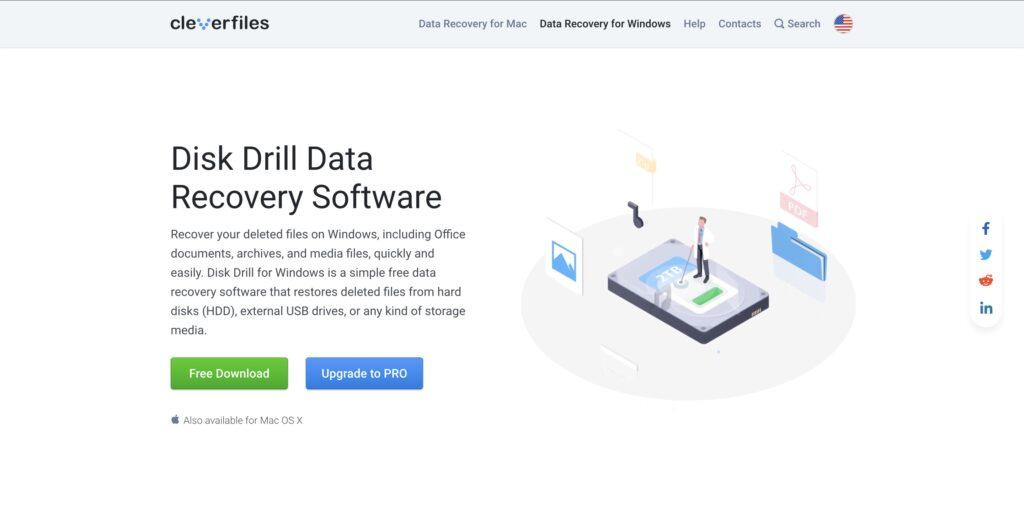
Our recommendation is Disk Drill for Windows. It can recover most file types from your SD card across the majority of your devices. Most importantly, Disk Drill offers free data recovery of up to 500 MB.
Follow the below steps to use DiskDrill and recover data from the missing SD card partition.
- Download and install Disk Drill for Windows on your PC.
- Connect the SD card to your computer.
- Now, open Disk Drill and select the SD card from the list of drives.
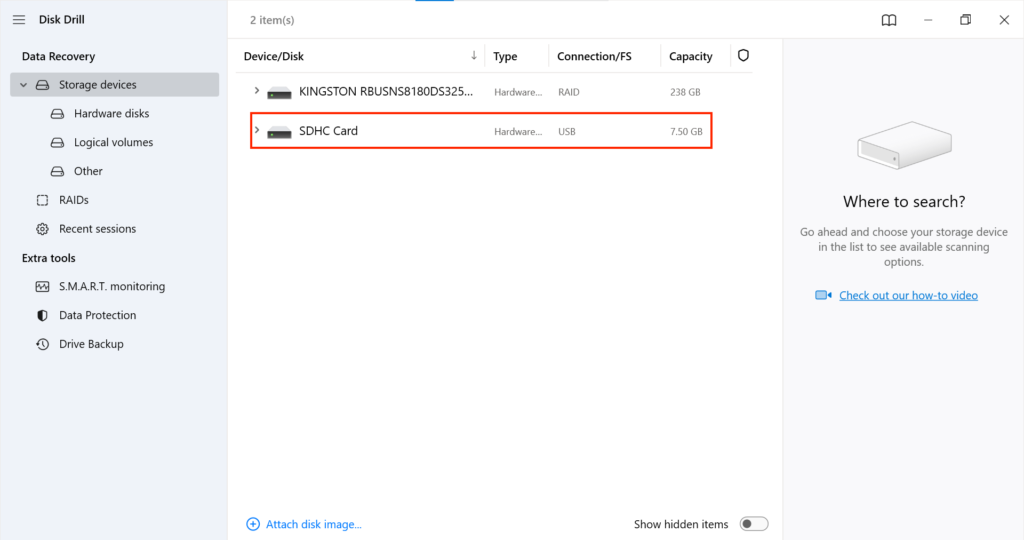
- Next, tap on Search for lost data button.
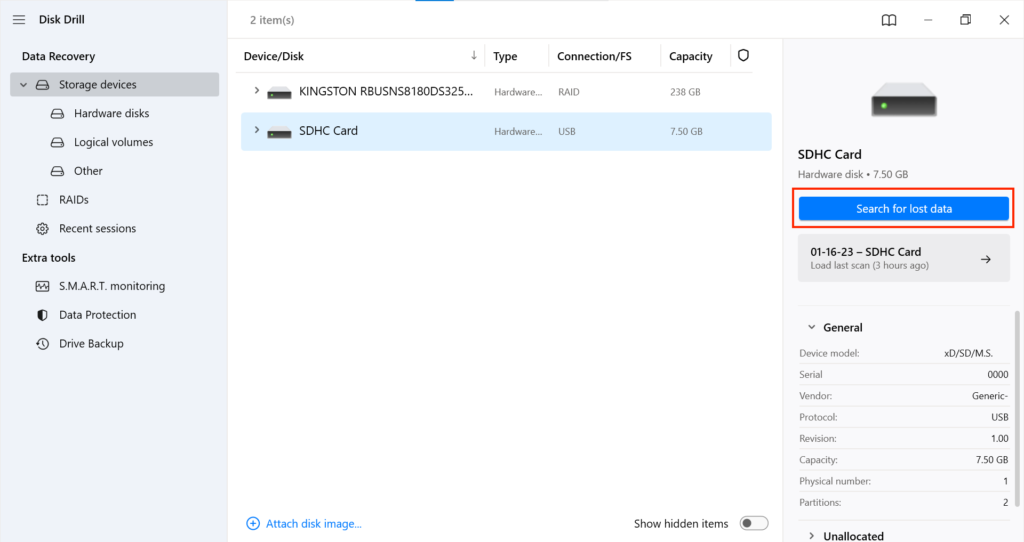
- DiskDrill will start scanning and searching for lost or deleted SD card partitions. Once the scan is complete, it will show a list of all the recoverable partitions on your SD card.
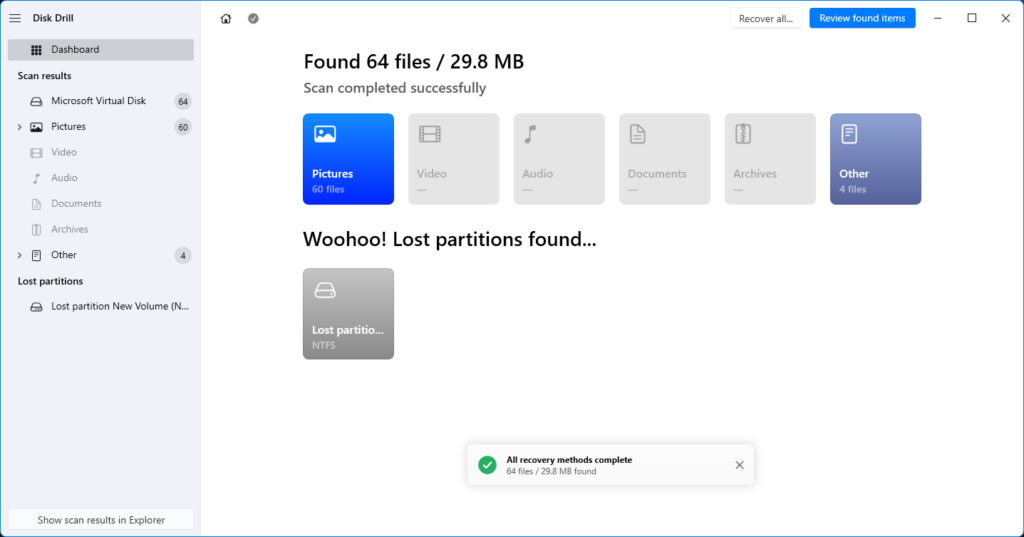
- Select the partition you want to recover and tap on the Recover button.
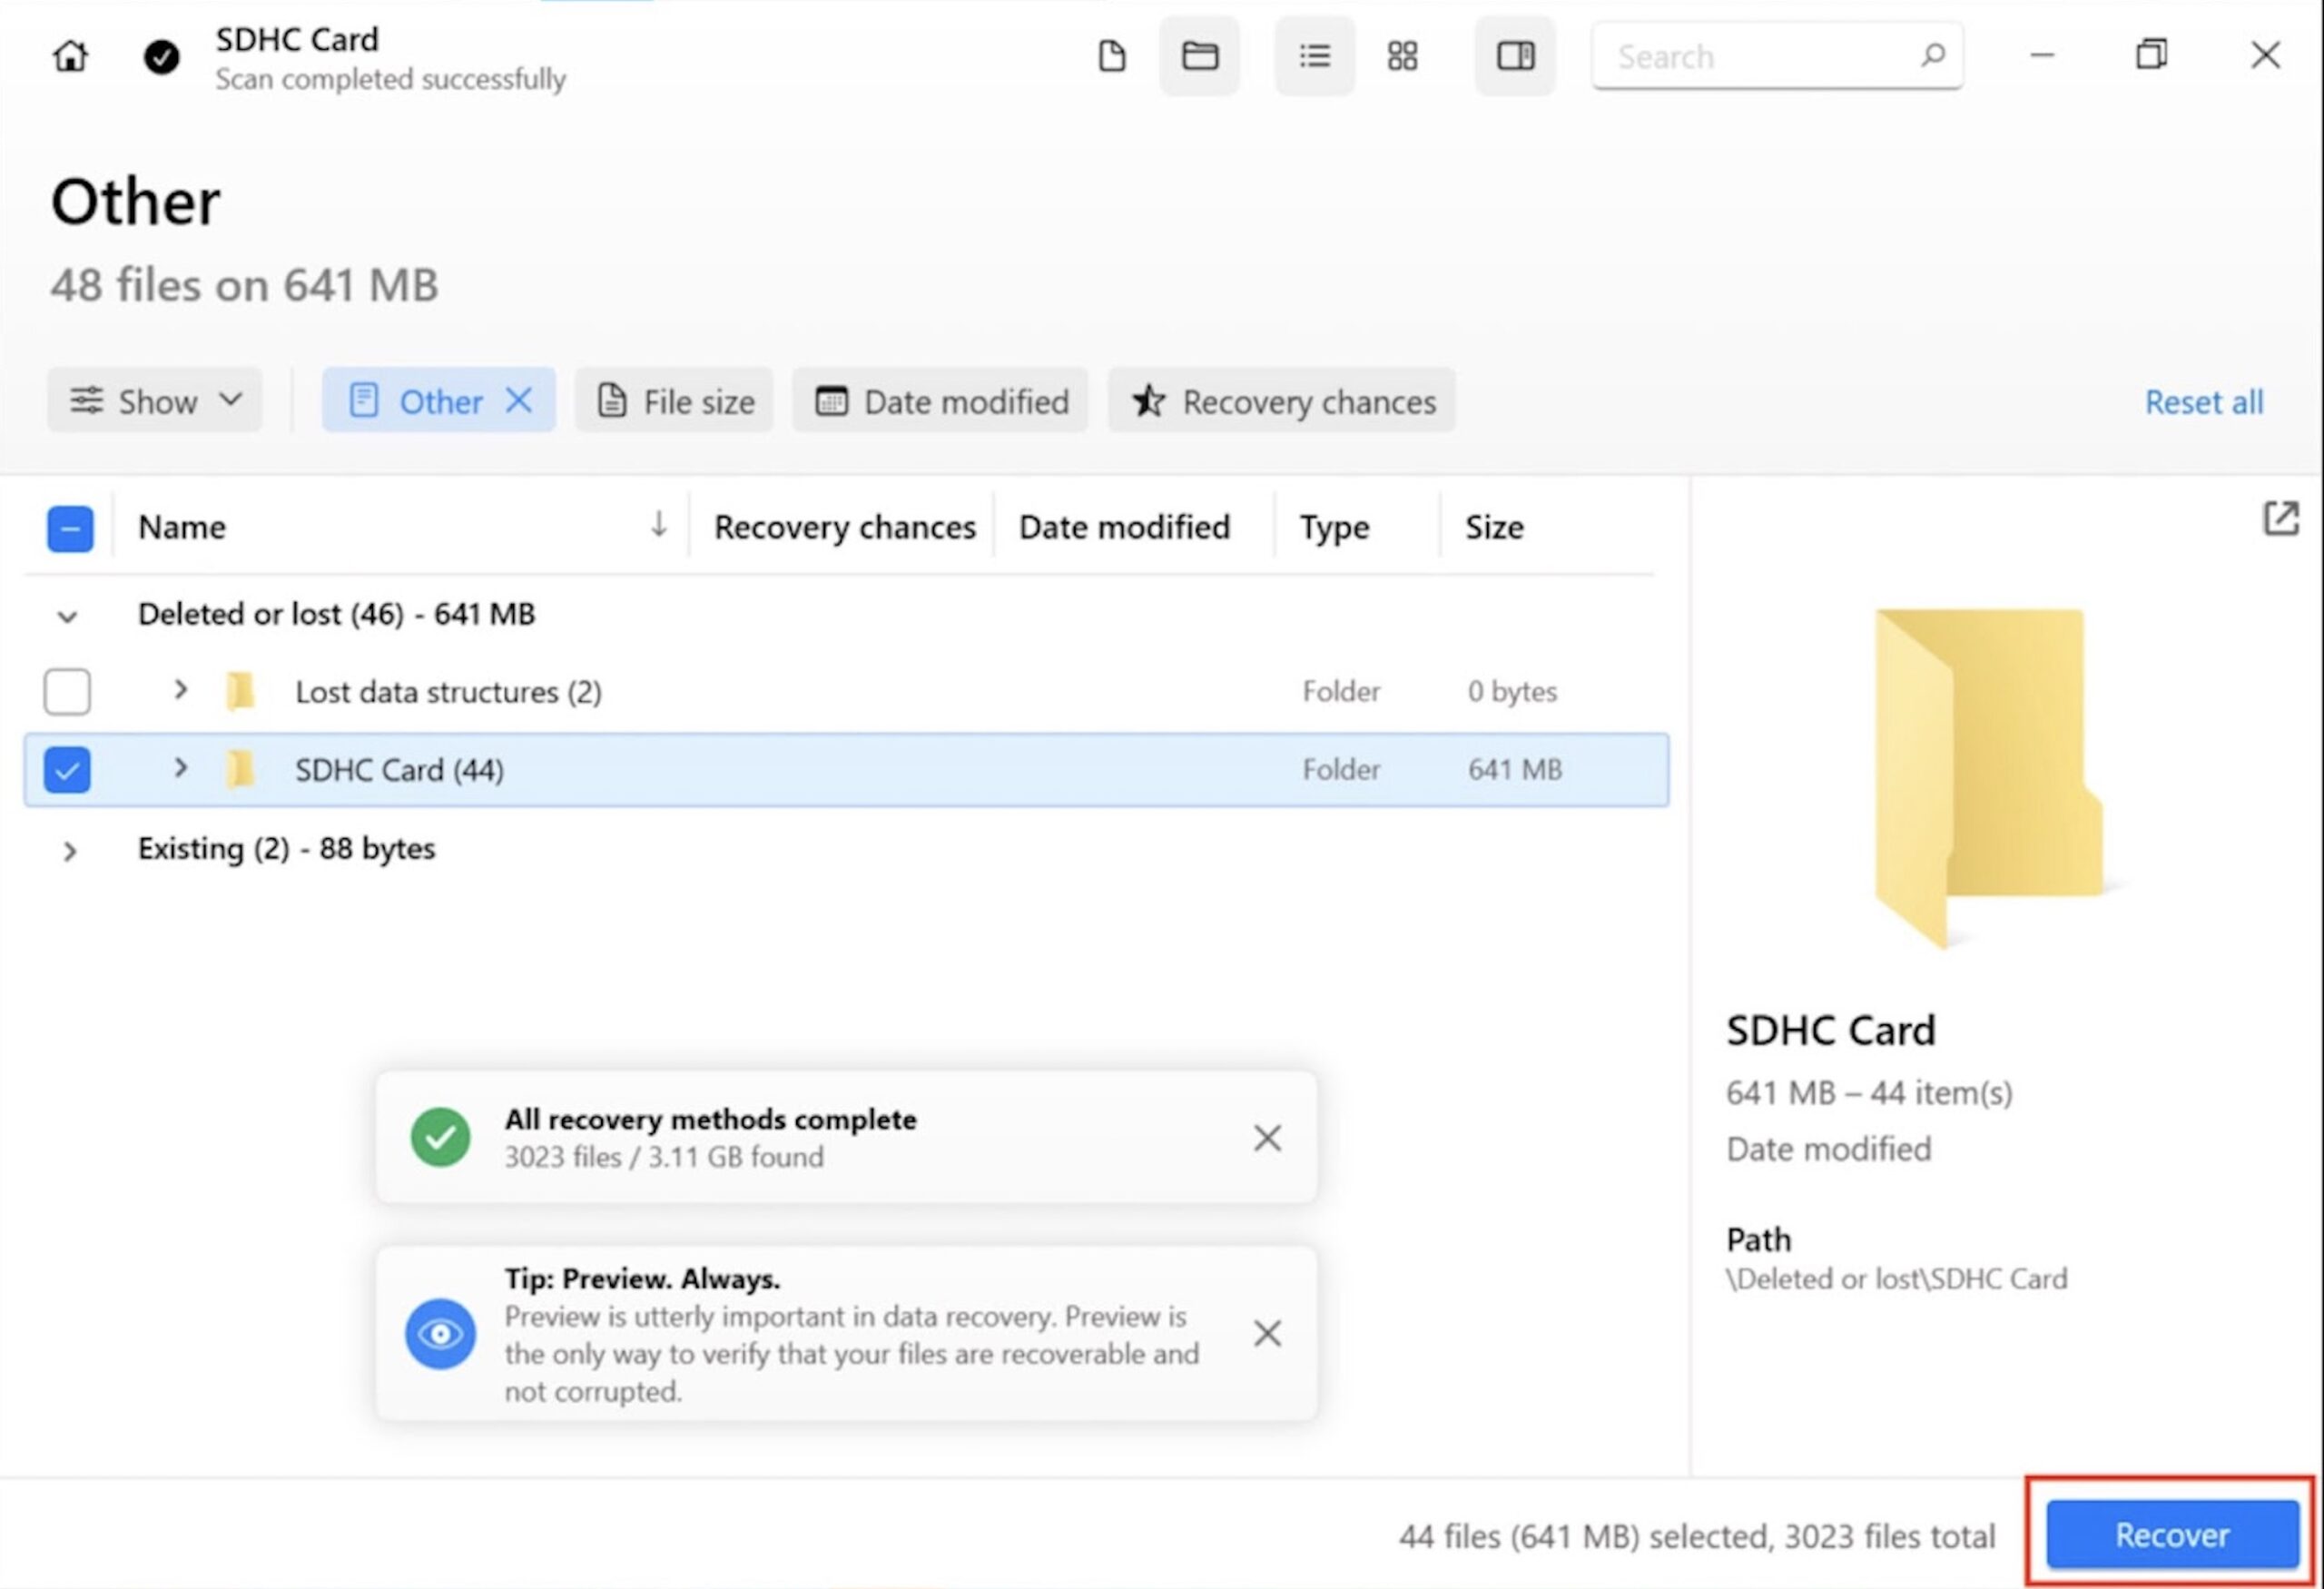
- Now select a location on your PC to save the files. Make sure not to save the file on the SD card; instead, save it on any other drive.
Disk Drill will initiate the final recovery process and save the files to your computer. That’s it; It’s that easy to recover data from an SD card partition that is not showing with the help of Disk Drill.
How to Fix Lost Partition on SD Card
Now that you have recovered your data from the missing partition, you are safe to try fixing the lost partition on your SD card. You could do several things to fix the lost partition: Run chkdsk and antivirus scan, check the disk letter, and add a new partition.
You can also use partition recovery software like TestDisk. We have created a step-by-step guide for each fix so you can easily follow and get back the lost partition on your SD card.
Method 1: Antivirus Scan
Often time viruses or malware are the root cause of partition corruption. You will need to run an antivirus scan to prevent further partition corruption. You can use the built-in Windows security tool to scan your PC. Follow the below steps:
- Connect your SD card to the computer.
- Open Settings.
- Under Settings, tap Privacy & security under the left sidebar and Windows Security under the right pane.
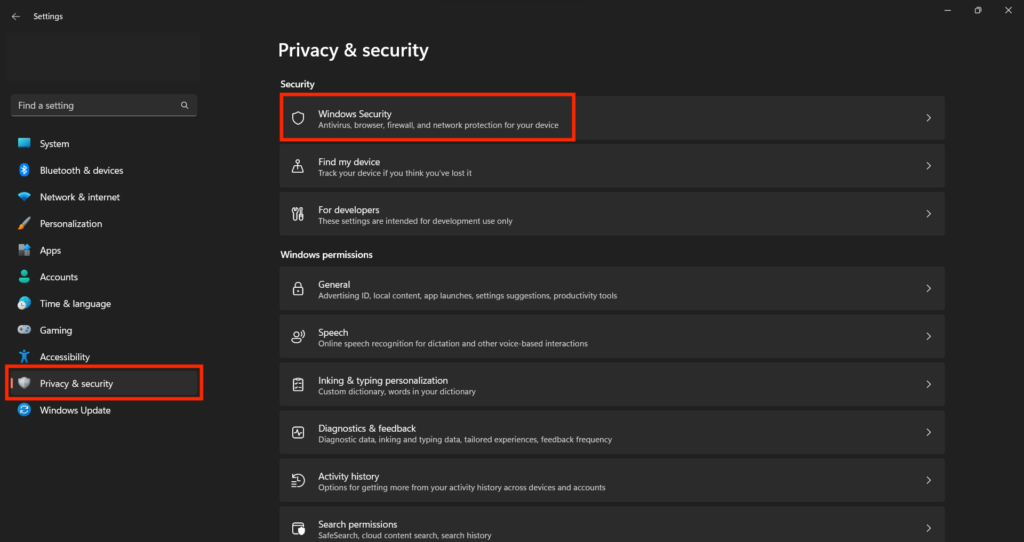
- Click on Virus & threat protection.
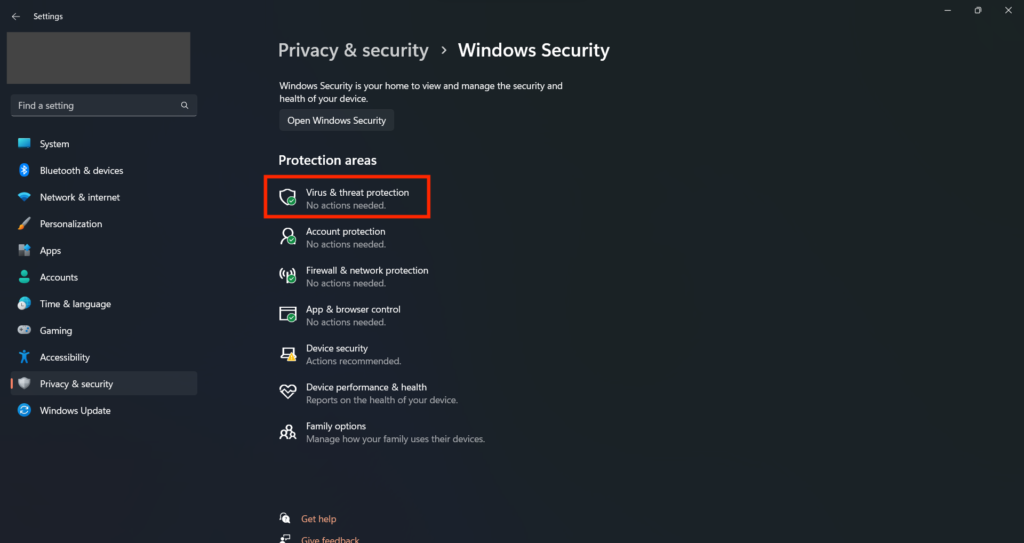
- Under Current threats, click Scan options.
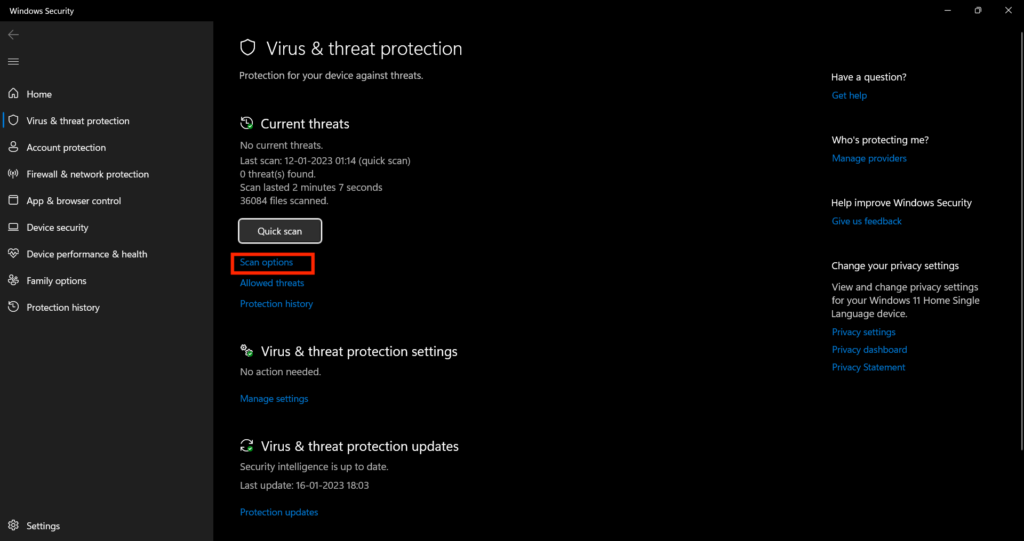
- Next, select Full Scan.
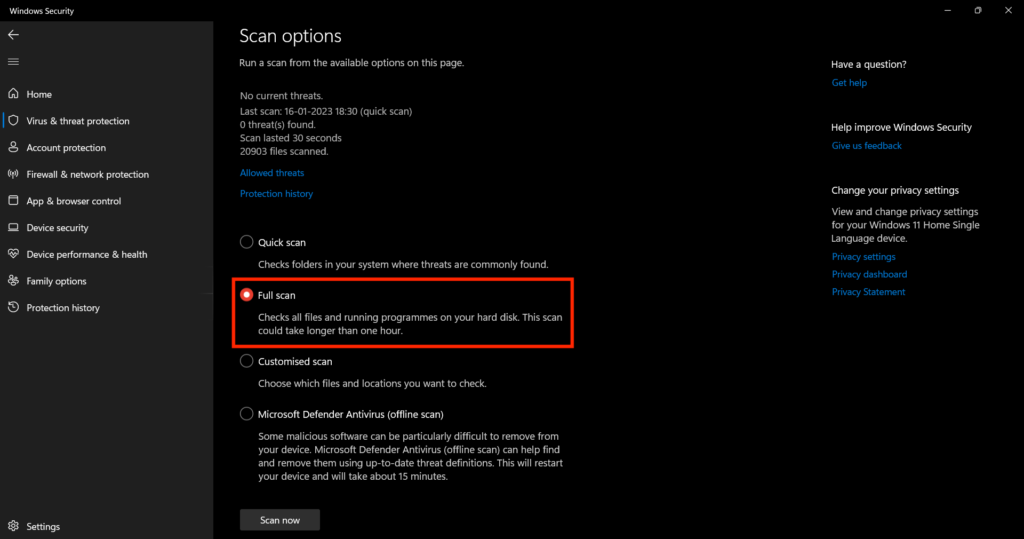
Now Windows Security will run a full scan on your PC. If it finds any virus or malware on your SD card, it will prompt you to remove them.
Method 2: Run chkdsk Scan
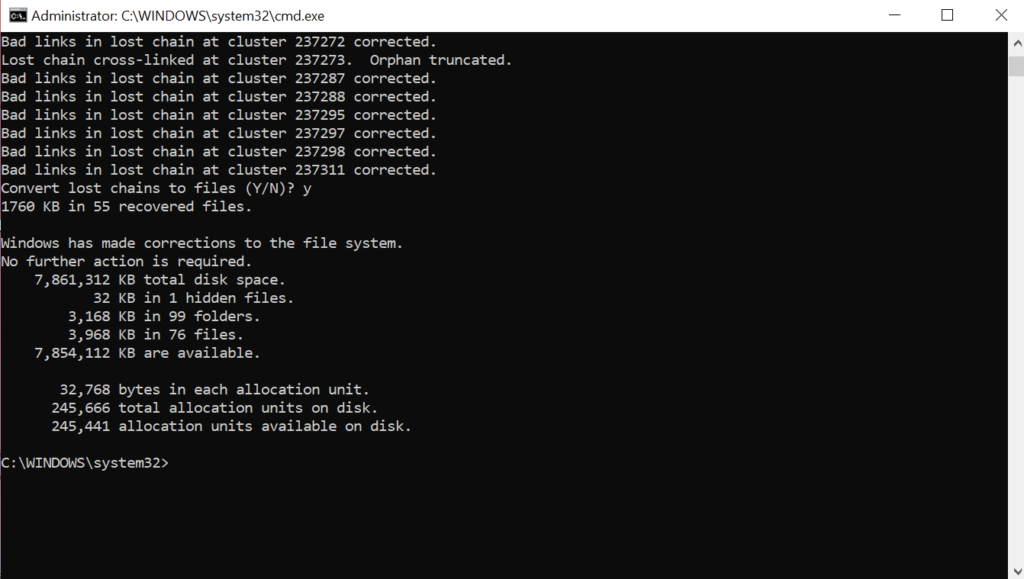
The Check Disk command, popularly known as chkdsk, is a useful utility in Windows. You can use it to check and fix partitions on an SD card. Below are the steps to run a chkdsk scan on your SD card.
- Connect your SD card to the system.
- Press the Windows + R key to launch the Run box.
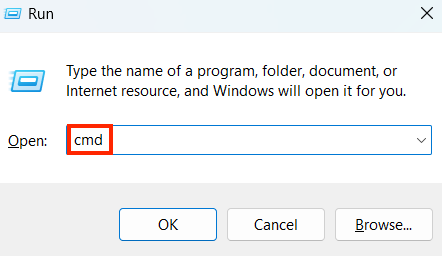
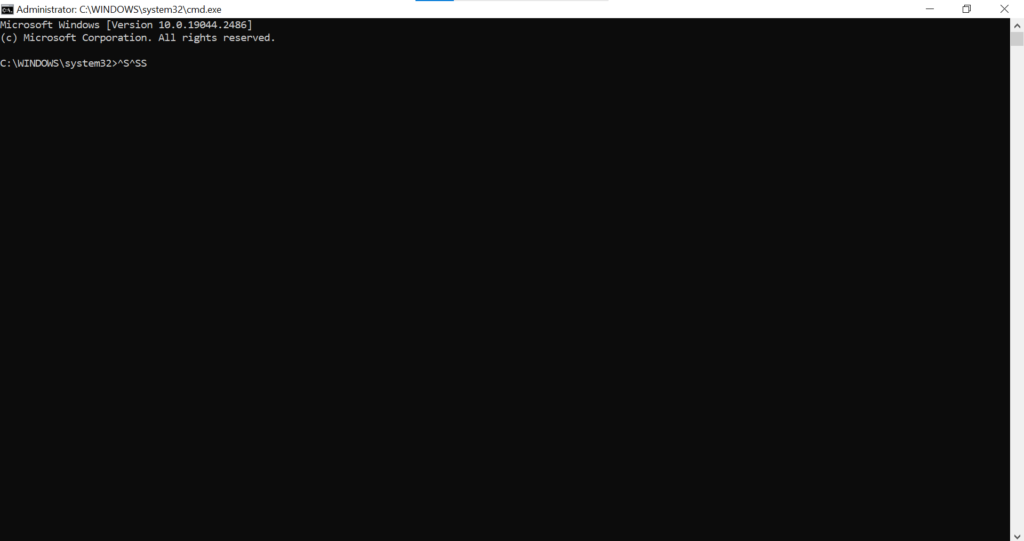
- Type cmd and press CTRL + Shift+ Enter to open Command Prompt with admin rights.
- Type chkdsk <drive letter>: /f and hit Enter.
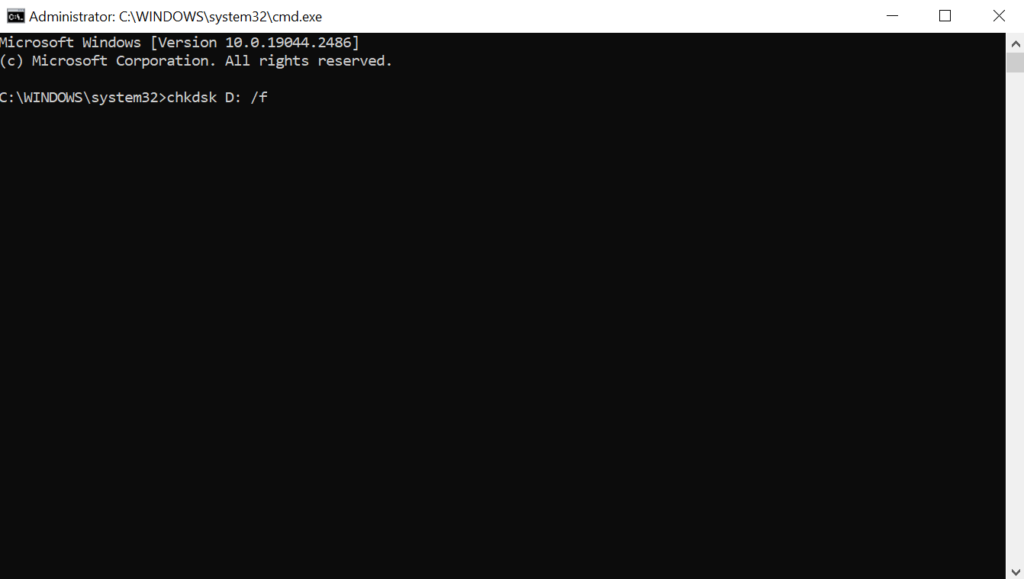
Note: Replace the <drive letter> with your SD card drive letter.
- Enter Y to give Command Prompt the required confirmation.
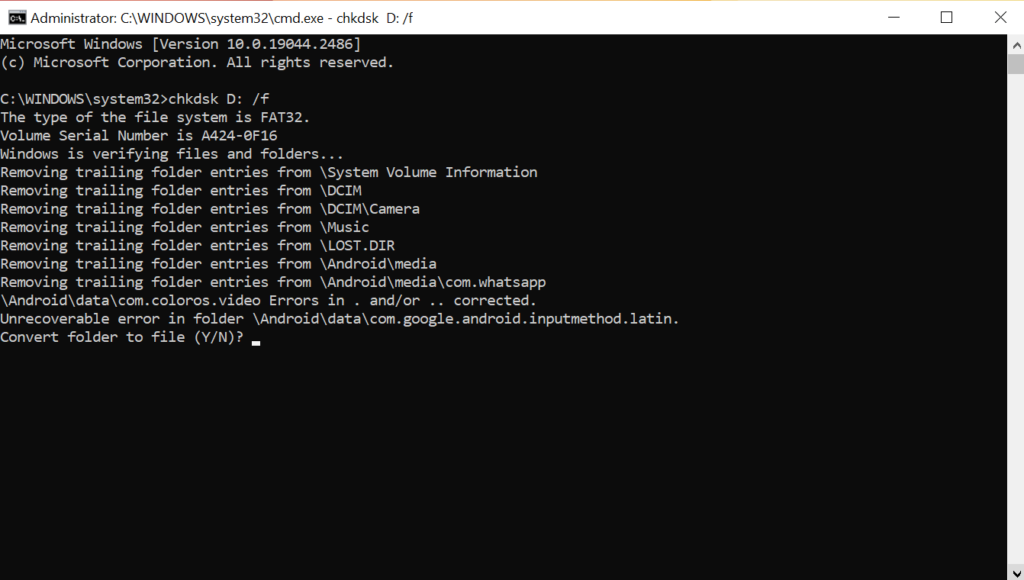
- After it, check if the Check Disk command has fixed the lost partition on your SD card.
Method 3: Check the Letter in diskmgmt.msc
If you can’t access a partition on your SD card, then one of the reasons behind it may be a missing drive letter. The missing partition is still there but is not appearing because it doesn’t have an assigned letter.
However, you can quickly check whether the drive letter is assigned or not using Disk Management. If you see that the drive letter is missing, you can create it. The below steps will help you check and assign a new drive letter in Disk Management.
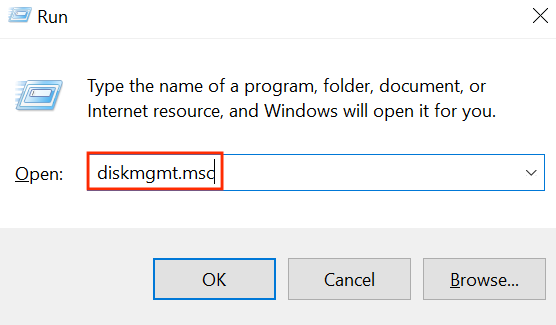
- Open the Run dialog box.
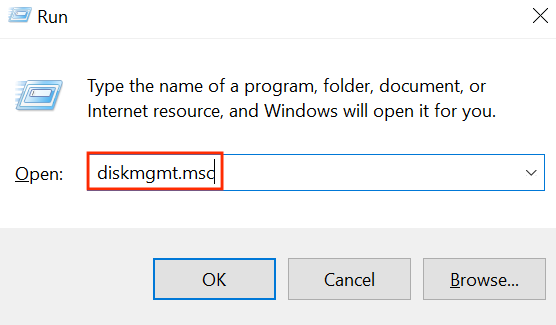
- Type “diskmgmt.msc” and press OK to open Disk Management.
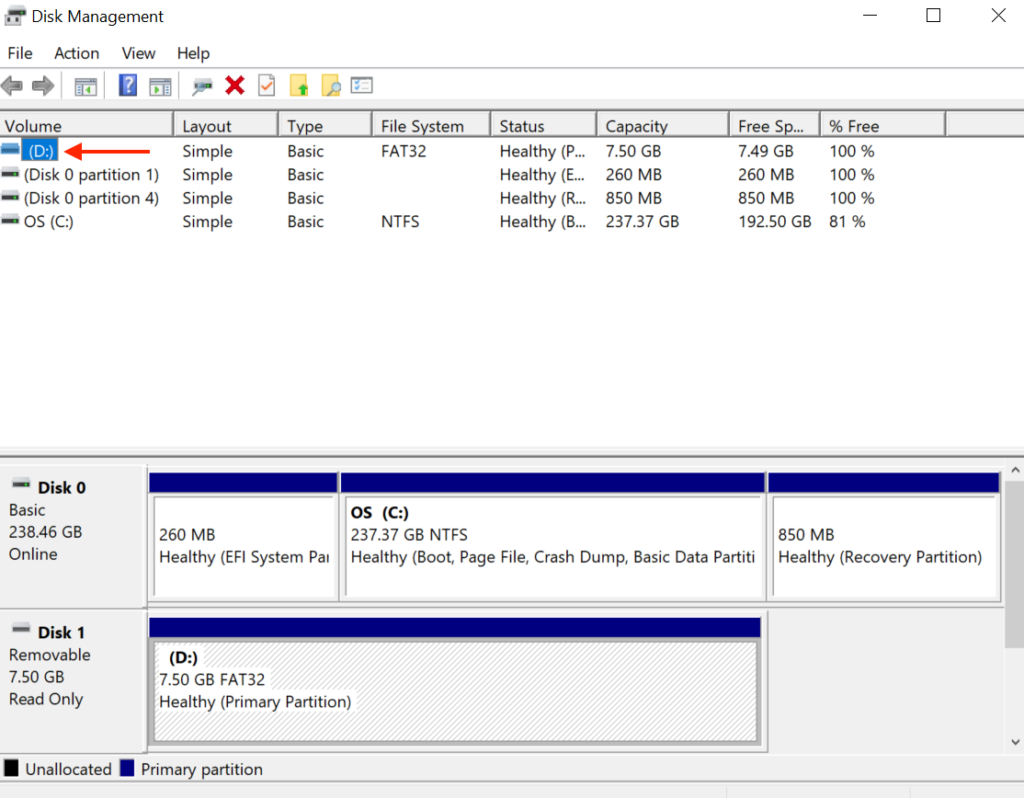
- From the list of all the drives connected to your computer find your SD card. it should be listed as “Removable Disk.”
- After locating the SD card, look if there is a letter assigned to it in the Volume column. If there is no letter in the volume section, it means the drive letter is missing, and you will need to add it.
- To do so, right-click on the SD card partition and select Change Drive Letter and Paths option from the context menu.
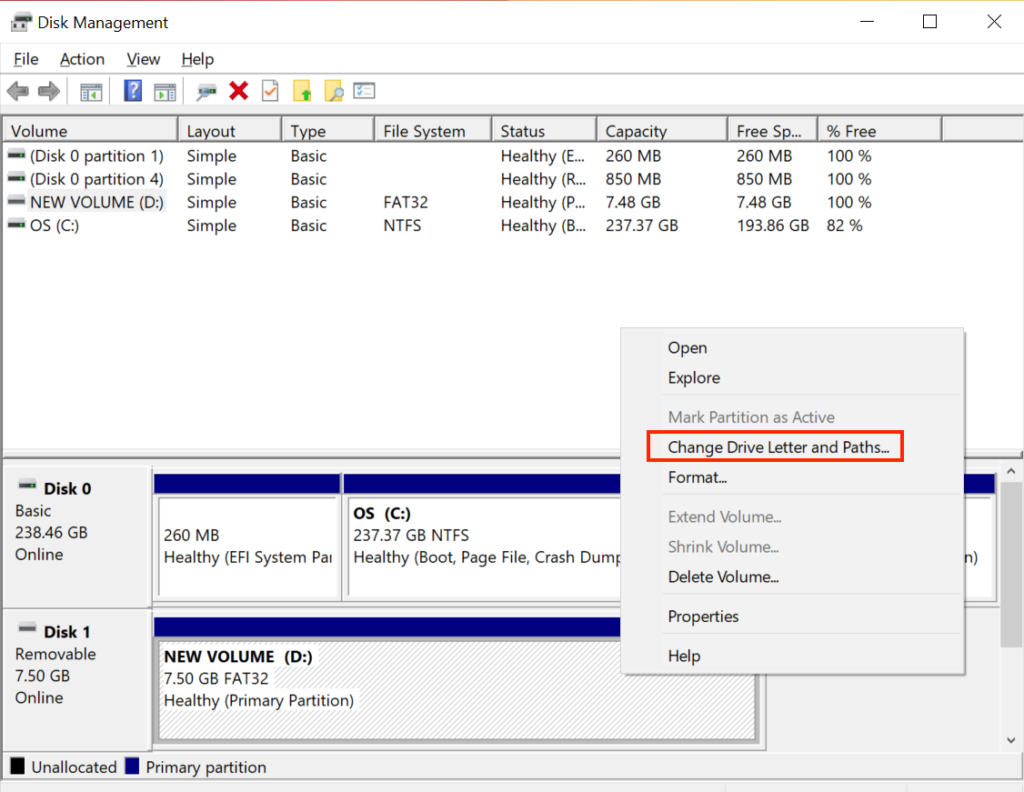
- On the next screen, select Add.

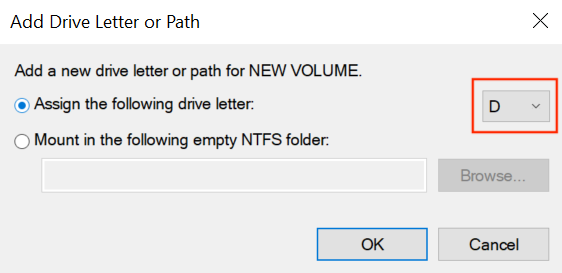
- Select the drive letter and click OK.
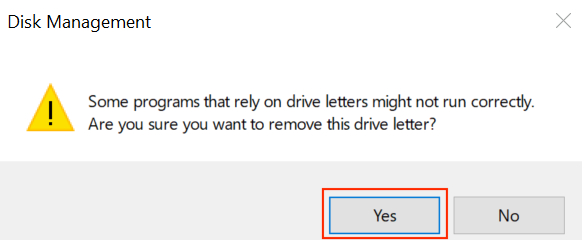
- A prompt will appear on the screen; select Yes to confirm.
Method 4: Add New Partition on SD Card
If the old partition table is damaged, adding a new partition will create a new table. Doing so will make the space with files usable again. Here is how you can create a new partition on your SD card.
- Launch the Run box.
- Type “diskmgmt.msc” and hit Enter.
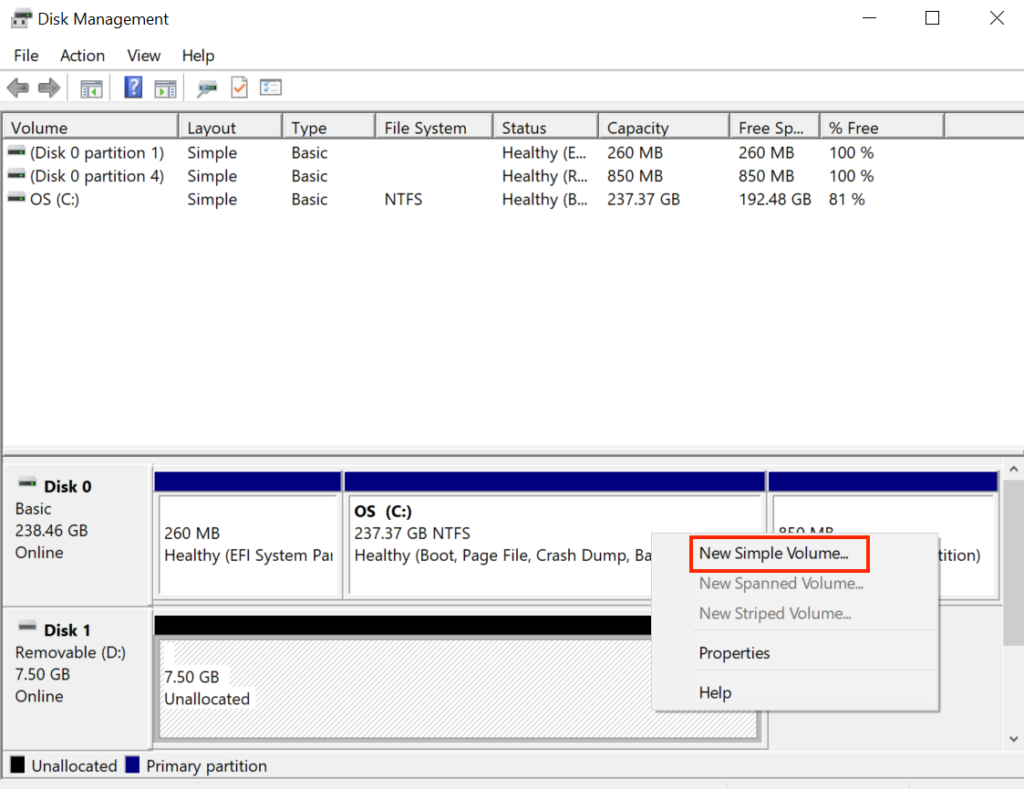
- Find your SD card, right-click on any unallocated space it shows, and then select the “New Simple Volume” option.
- A new Wizard will appear on the screen. Enter the size you want to keep for the new partition, the file system you want to use, and the drive letter.

Method 5: TestDisk
TestDisk is a free, open-source SD card partition repair tool. You can use it to fix lost partitions, rebuild partition table. It can also help you rewrite the master boot record of the corrupted partition. Follow the below steps to use TestDisk to fix lost SD card partition.
- Connect the SD card to your PC.
- Download TestDisk.
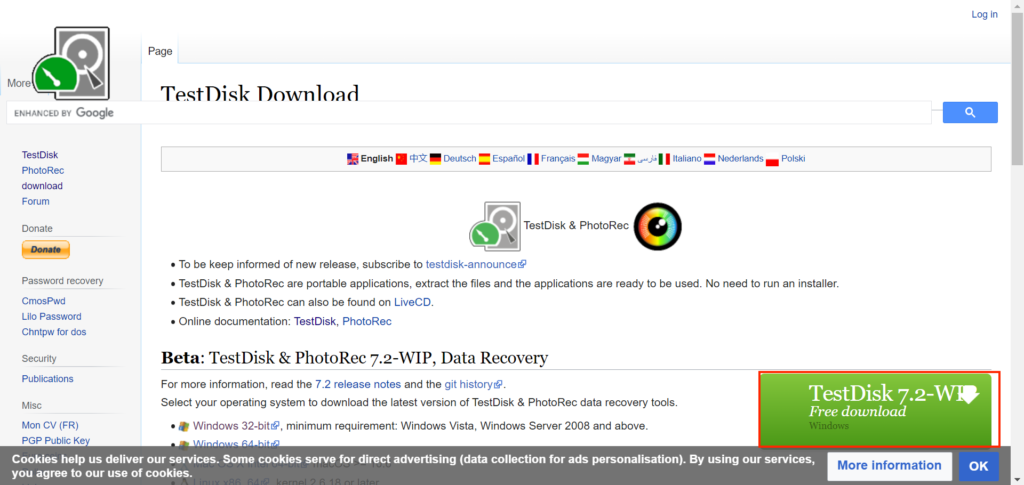
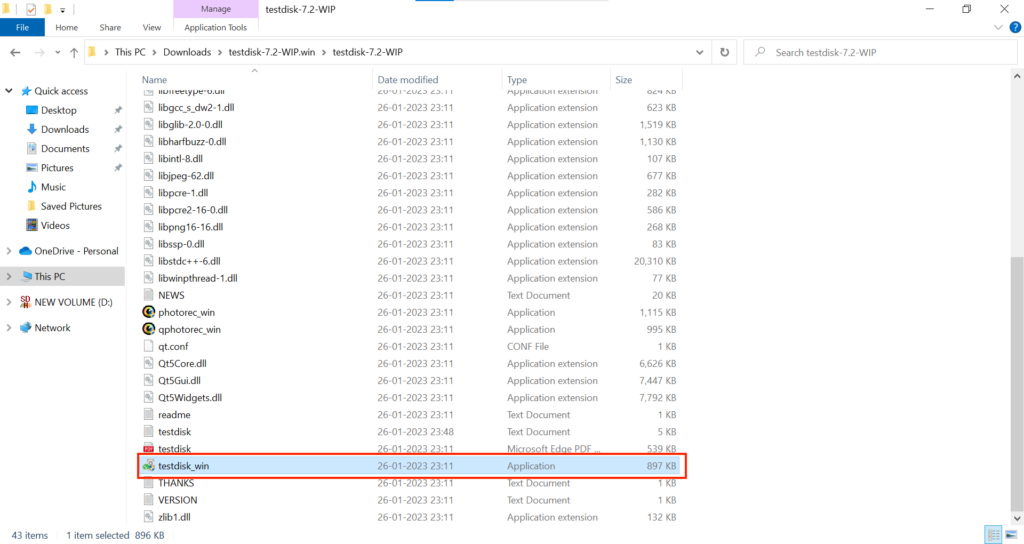
- Open the download file and extract it.
- In the extracted folder, scroll down and run the testdisk_win file.
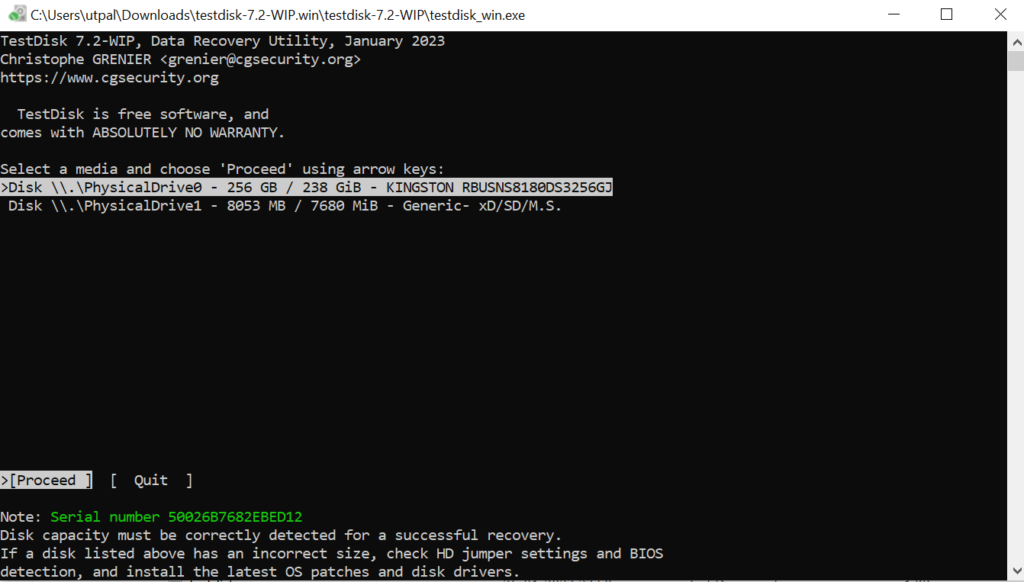
- TestDisk will open in a Command Line interface. From there, select “Create” and press Enter.

- Now, TestDisk will scan and list all the drives connected to your PC. Select your SD card and Proceed.
- On the next screen, you will be asked to select the partition table. Select Intel and press Enter.
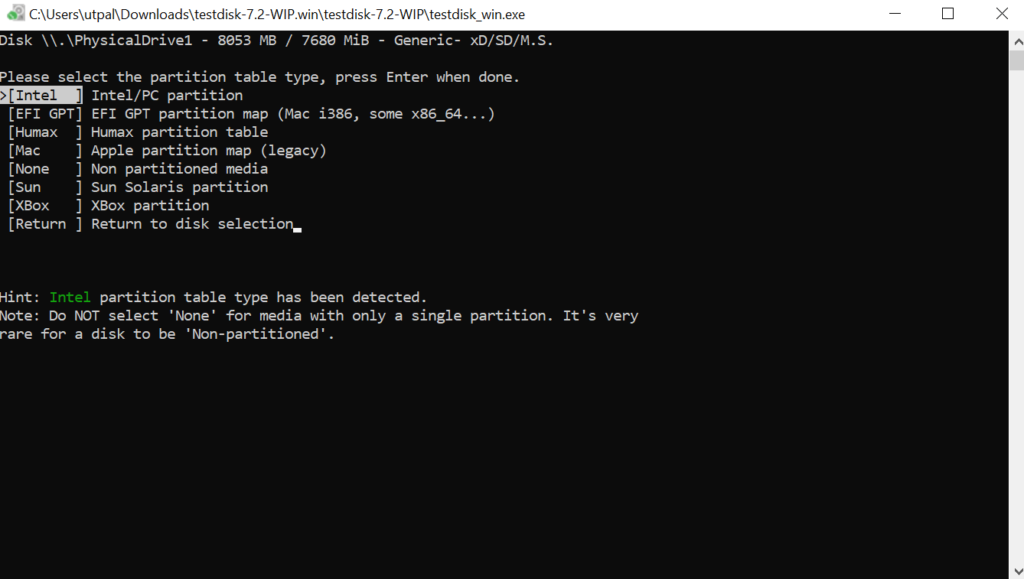
Note: We selected Intel as the partition table because we are doing it on a Windows PC. As TestDisk also supports other operating systems, select a partition table based on your device.
- Now, TestDisk will show different options, select Analyze and hit Enter.
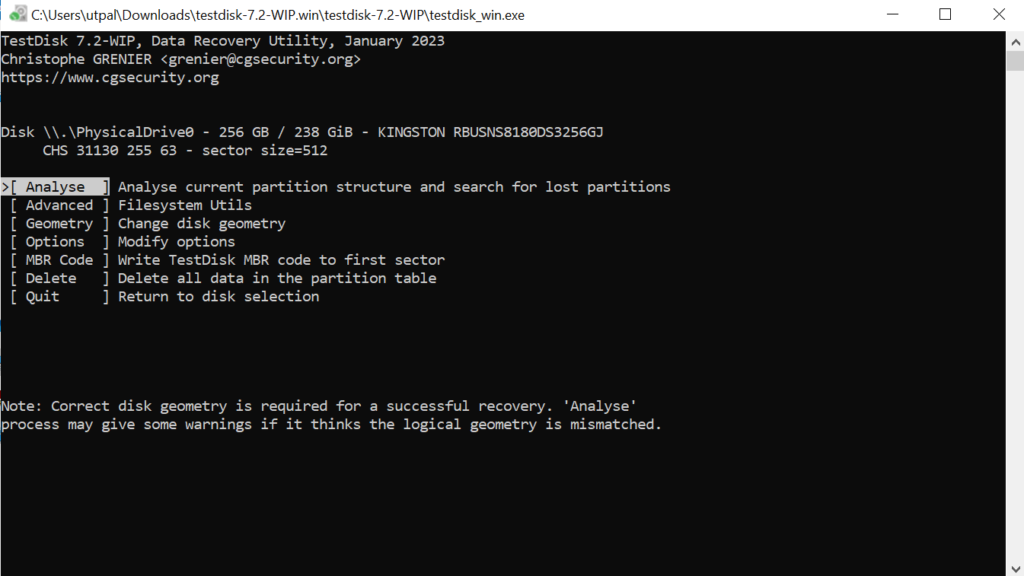
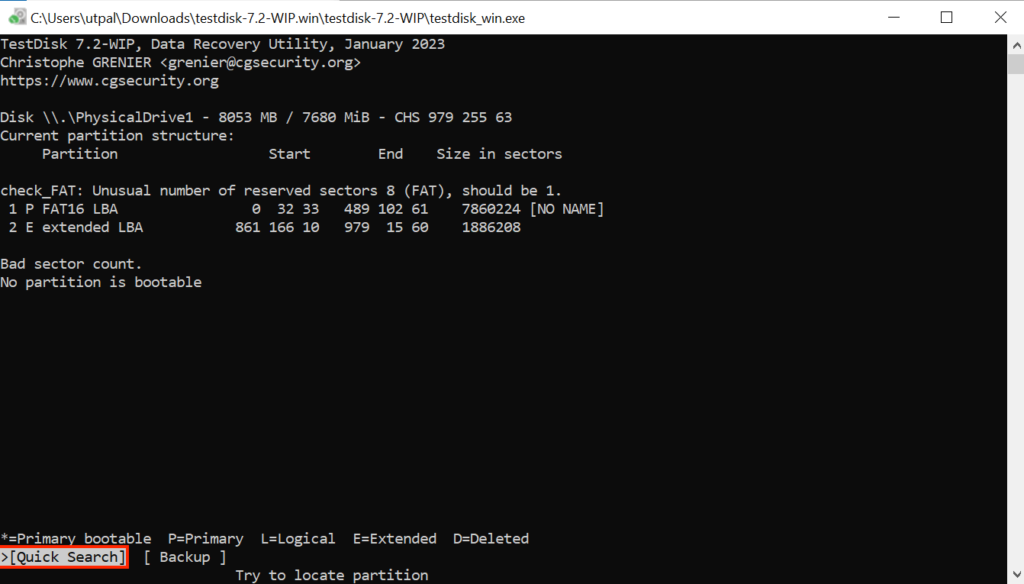
- After it, TestDisk will display the partitions currently present on your SD card. Select the Quick Search option at the bottom and press Enter.
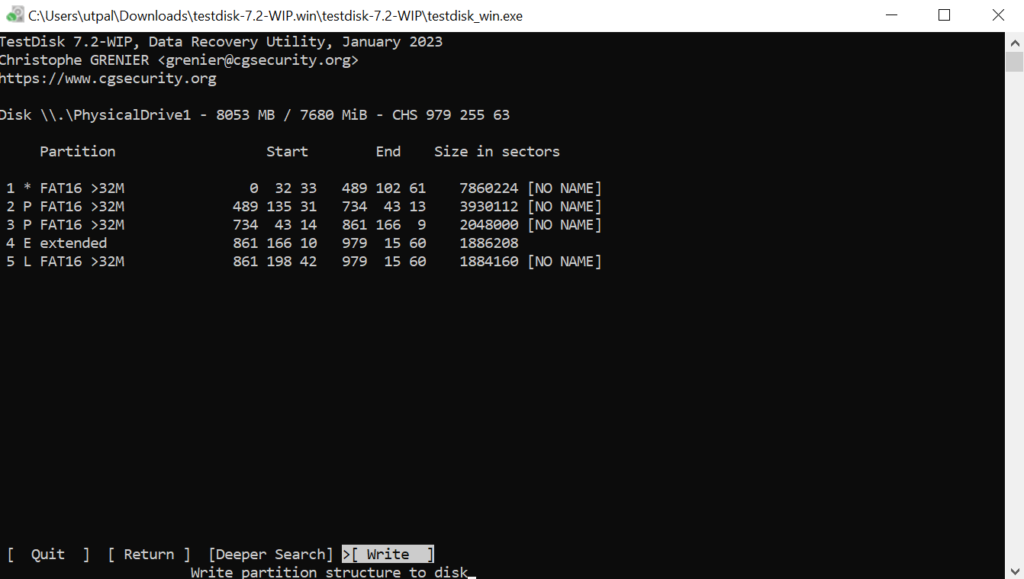
- TestDisk will look for deleted partitions and list them. To write the partition table on the SD card, select Write and press Enter.
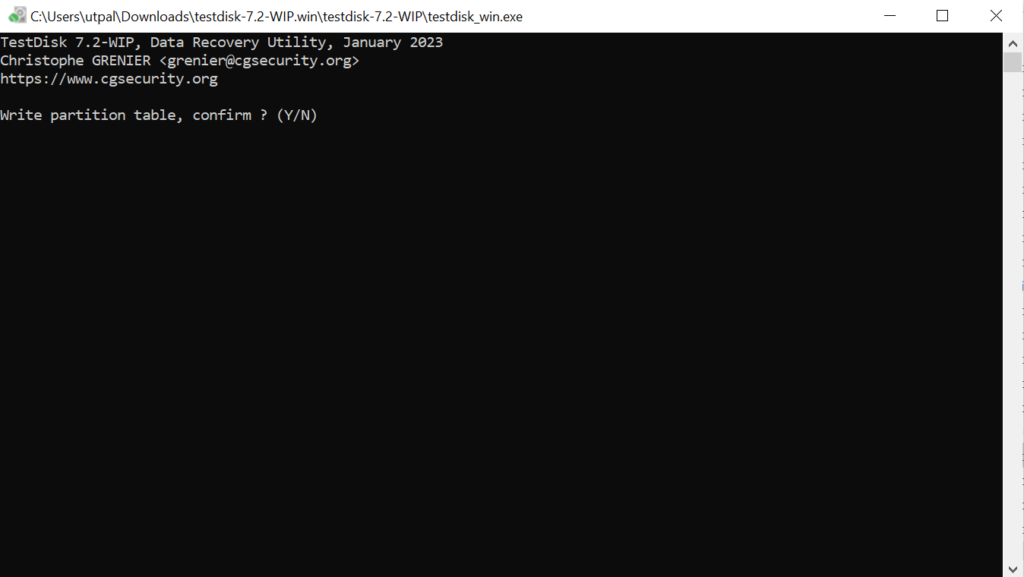
- On the next screen, confirm by pressing Y.
- TestDisk will ask you to restart your computer for the changes to take effect. Quit the program and reboot your computer.
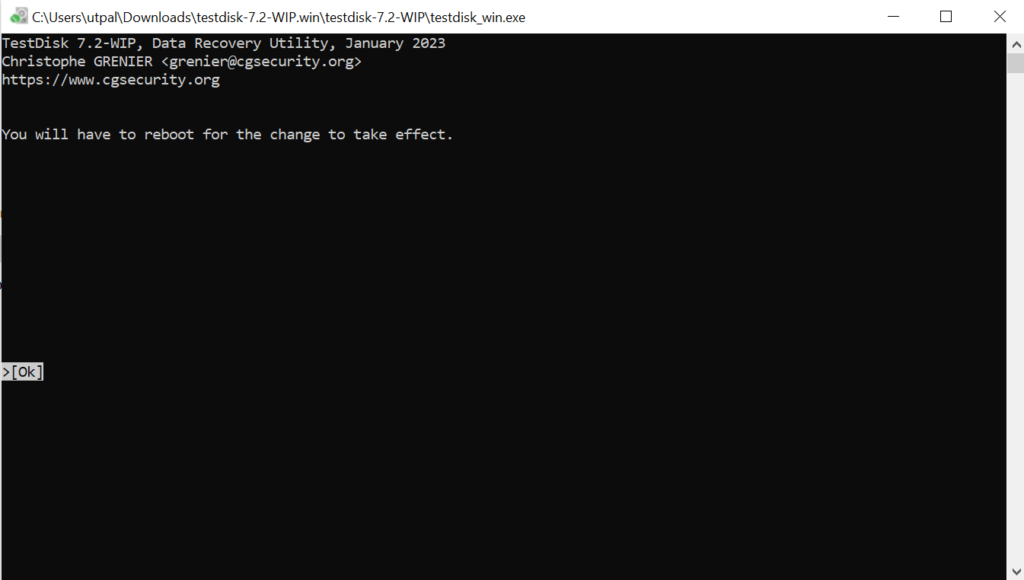
Once done, check the lost partition in the File Explorer, which should be recovered.
Conclusion
Recovering a lost SD card partition may seem daunting at first. But, it is possible and you can also get back the lost data. First, you can scan and recover your data using Disk Drill. Once you have your data back, you can fix the corrupted partition.
