 The Mac Terminal is often neglected by users due to its complexity. However, it is a powerful tool that can perform tasks the standard macOS GUI can’t. It offers much greater flexibility as well.
When it comes to data recovery, Terminal can help you find and recover your deleted files. This is useful when macOS refuses to boot into its standard GUI due to system errors, and instead, boots into safe mode with limited functionality. The sections below contain step-by-step instructions on how to recover deleted files and folders using the Mac Terminal.
Ways to Recover Deleted Files Using Mac Terminal
By itself, Terminal offers two main recovery methods—restoring files from the Trash, and recovering files using a Time Machine backup. While both Trash, and Time Machine have GUI counterparts, accessing them is cumbersome (or straight-up impossible) when your Mac boots into Single User mode (Intel Macs), Recovery Mode (Apple Silicon), or Safe Mode.
In addition to native commands, there are open-source tools like TestDisk that let you recover permanently deleted files using the Terminal interface.
It’s strictly optional, but you may want to boot your Mac in Recovery Mode when using Terminal to recover your files. This has two key advantages:
- Recovery Mode lets you execute tasks and Terminal commands that aren’t possible in the regular environment. It also lets you perform data recovery in case your GUI keeps freezing, or macOS has trouble booting.
- It offers you several avenues for troubleshooting and repairing your Mac, which can then help you regain access to your files.
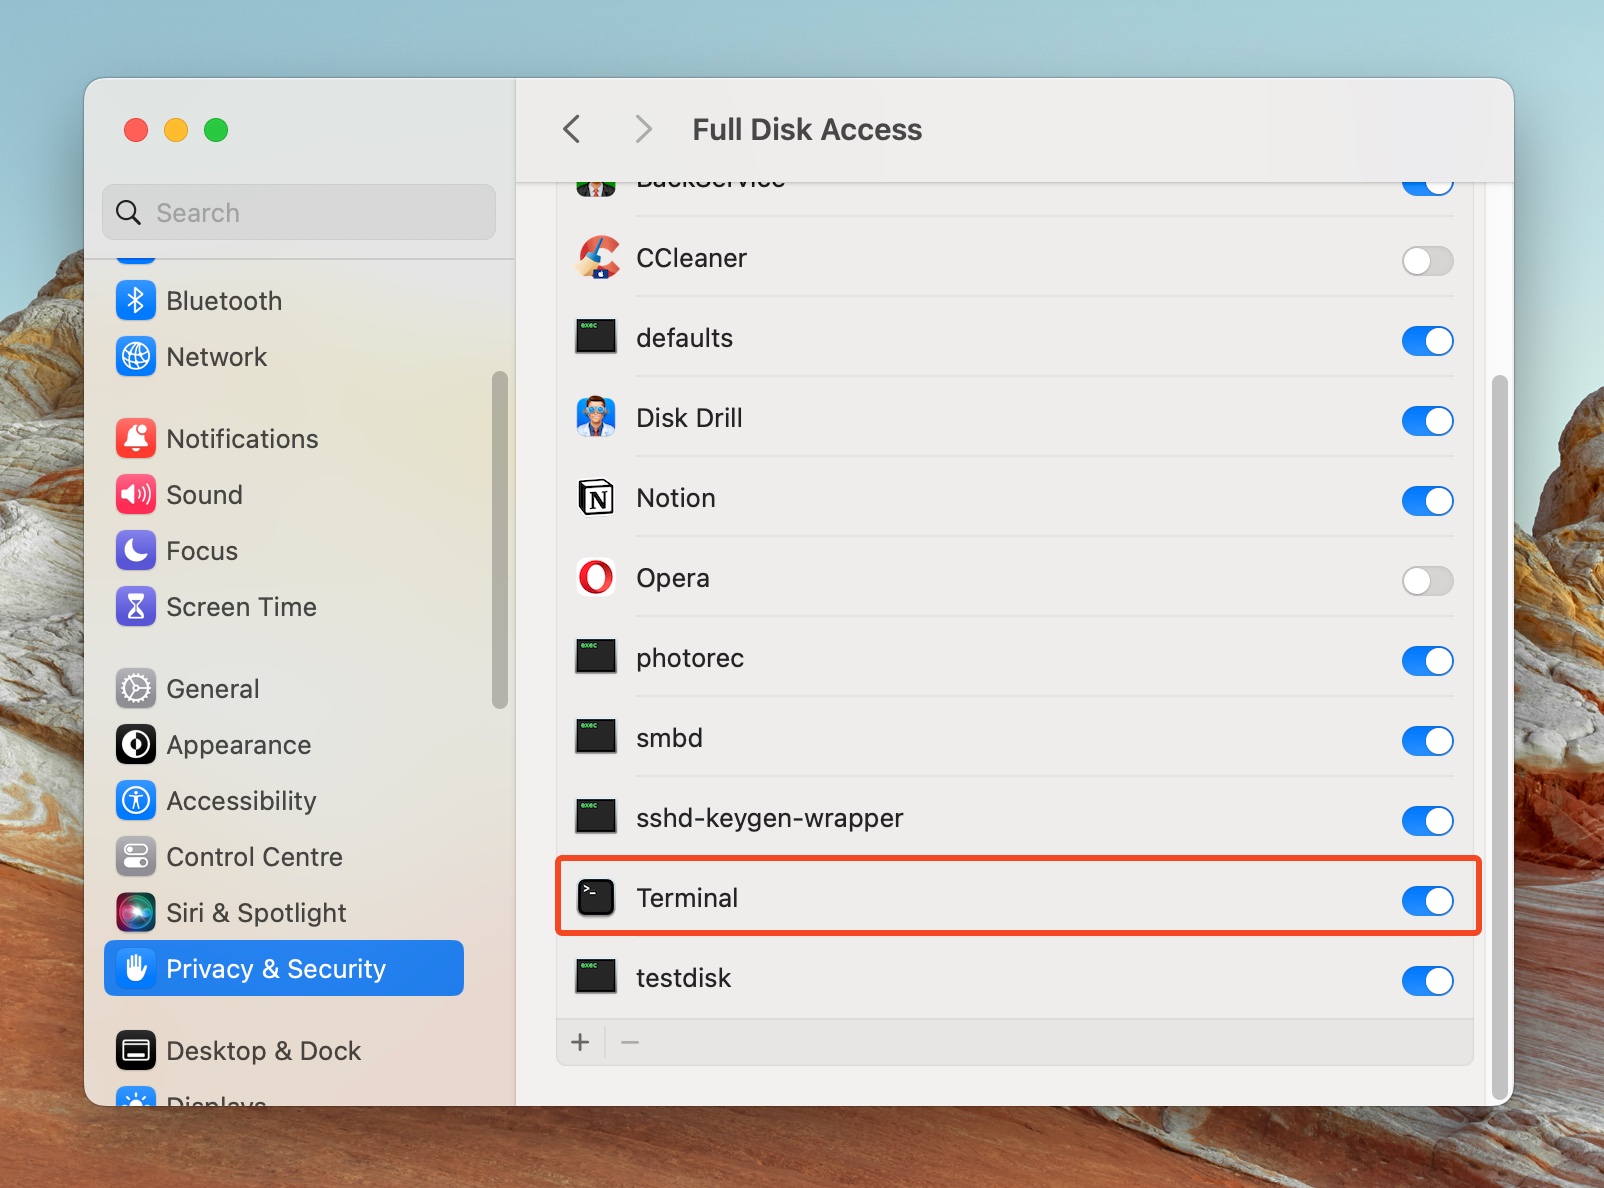
Before moving forward with data recovery using Terminal, ensure that it has Full Disk Access on your Mac. Without this, you’ll face permission issues when trying to access, or modify files within Terminal. Additionally, if you run into permission issues when executing commands on the Terminal, add sudo before the command.
Here’s how to give Terminal Full Disk Access on macOS:
- Click on the Apple logo in the top-left corner and choose System Settings.
- Click on Privacy & Security on the left navigation bar.
- Click on Full Disk Access.
- Ensure the slider for Terminal is set to the ON position.
Now, let’s take a look at how to recover deleted files and folders using Mac Terminal:
Method 1: Use Terminal to Recover Files from the Trash
When you delete a file in macOS, it’s not permanently deleted from your disk. Instead, it is moved to the Trash/Bin folder on your Mac, where it remains until you restore it, or empty the Trash. If enabled, the Trash may automatically empty itself at regular intervals as well.
You can use Terminal to access the contents of the Trash, and recover your deleted files from it.
Here’s how:
Option A: Recover Deleted Files from an Internal Storage Drive Using Terminal
- Open Terminal. It can be found in the Go > Utilities section in Finder. Alternatively, just press Command + Space to open Spotlight Search, then type Terminal, and click on it from the search results.
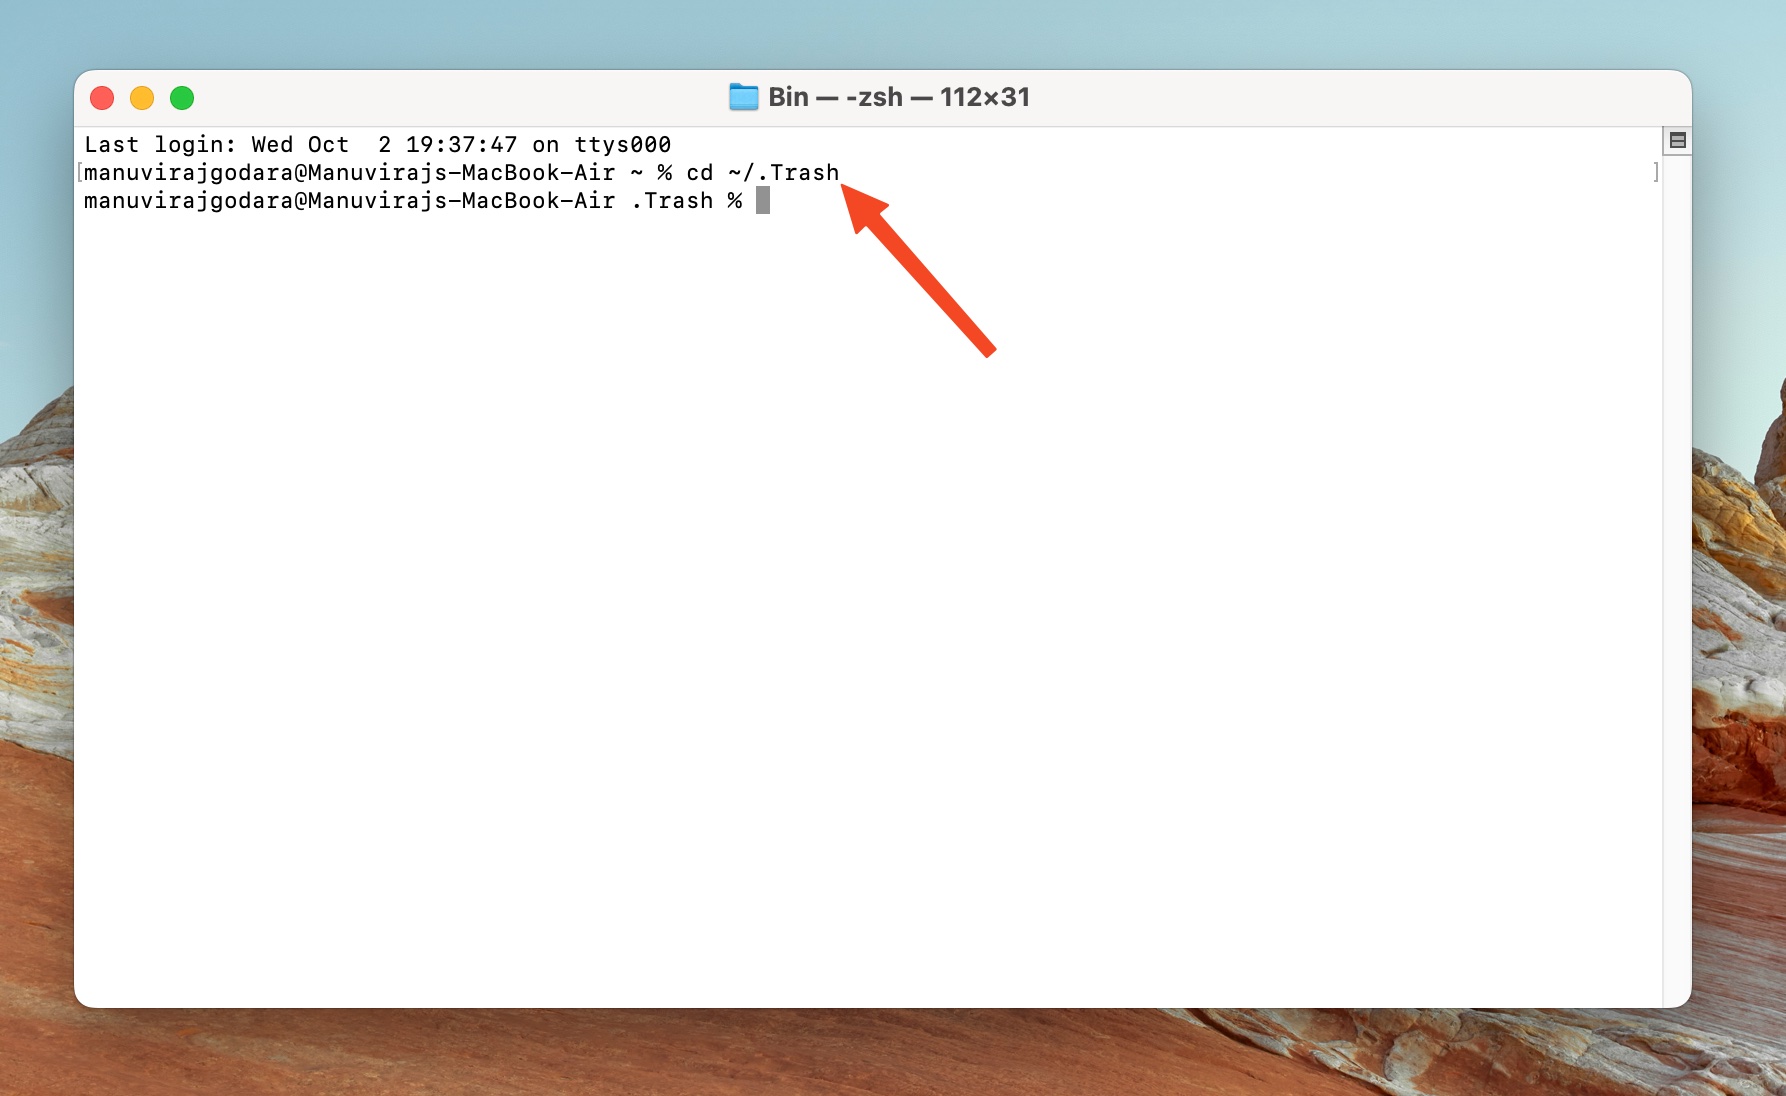
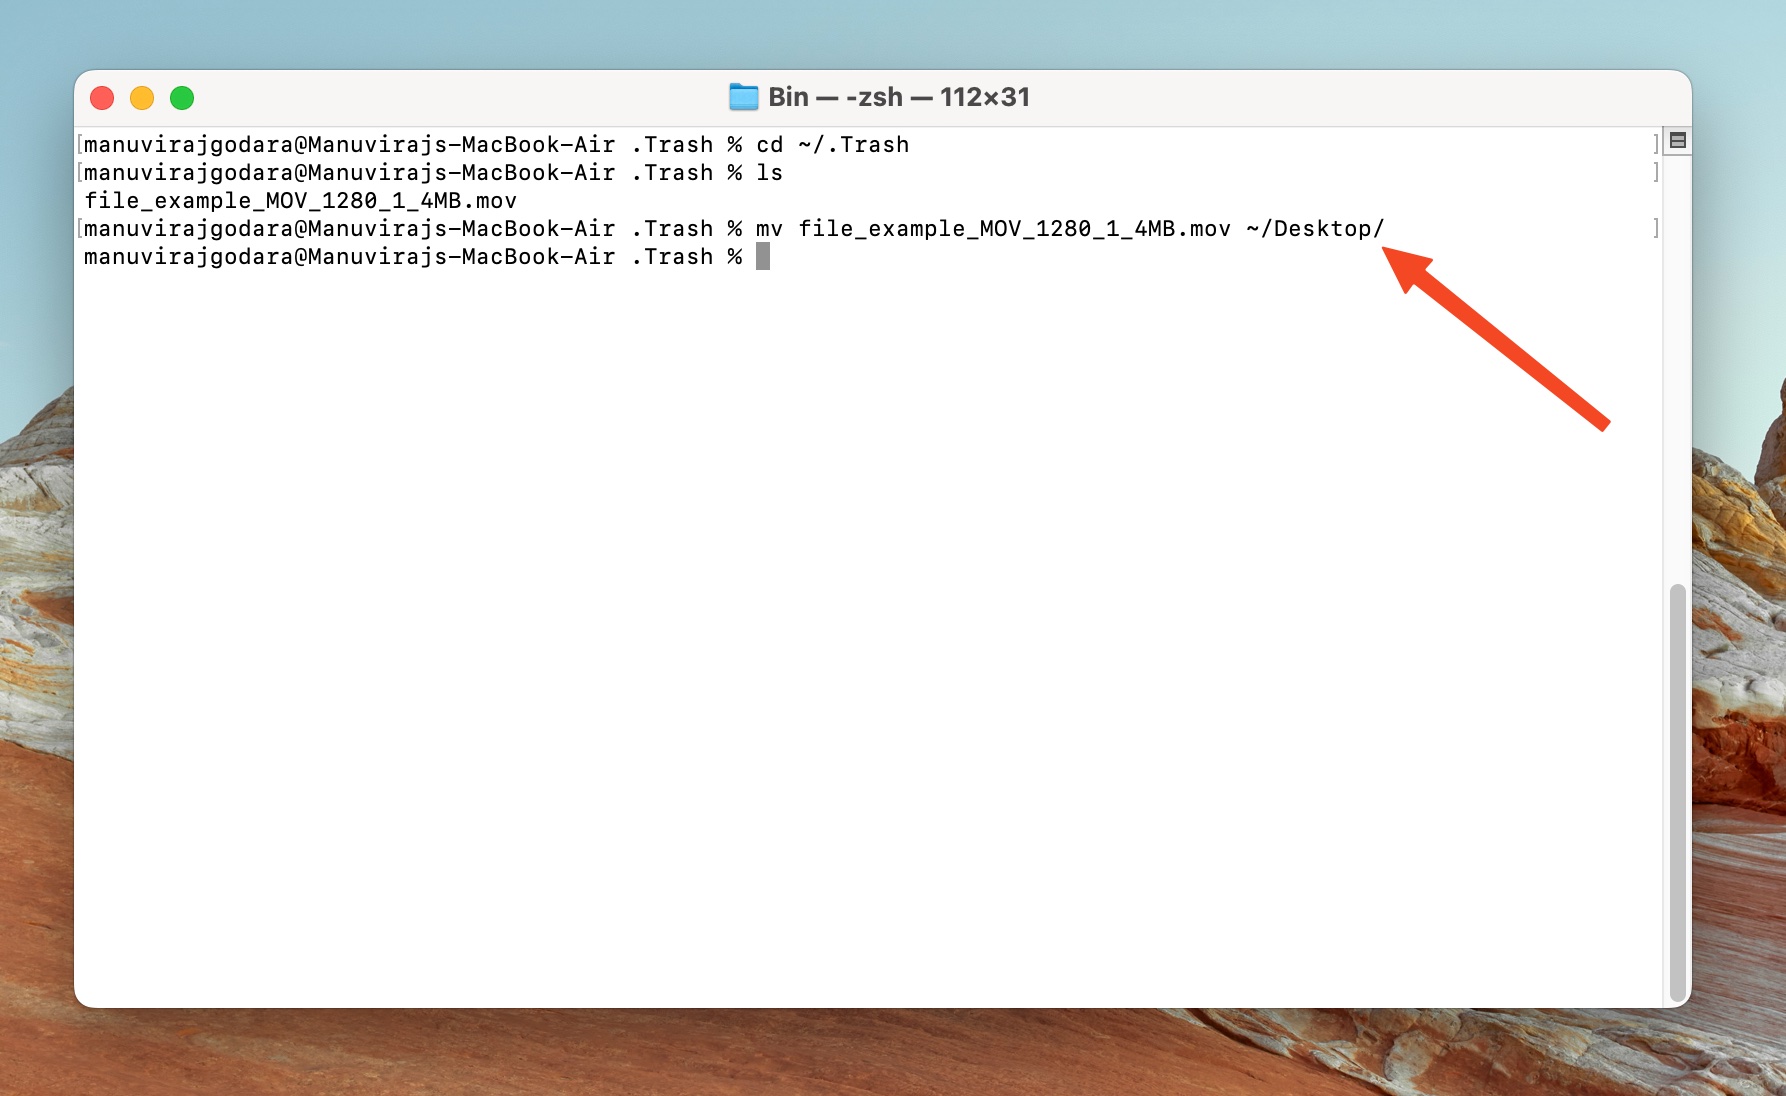
- Type cd ~/.Trash and press Enter. The cd command is used to change directories within Terminal.
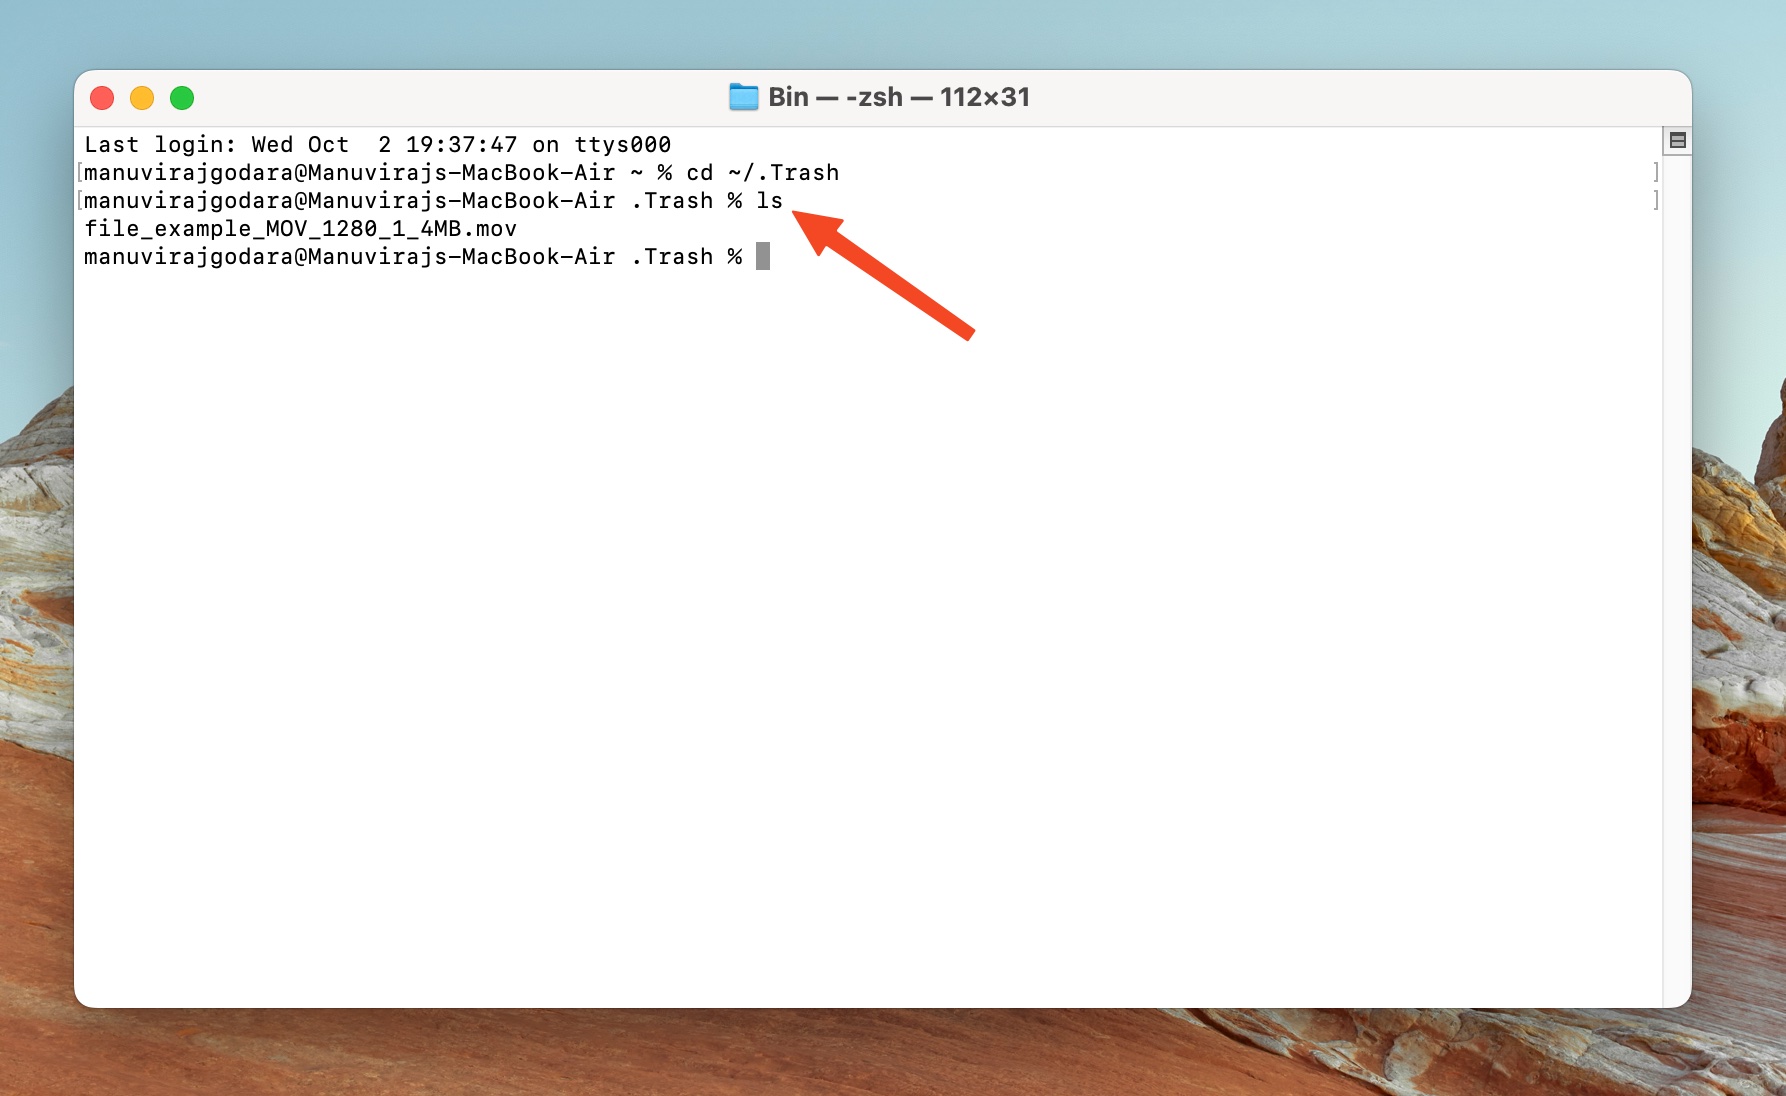
- Type ls and press Enter to list all the files and folders in the Trash. Note down the files, and folders you wish to recover. The ls command lists the files and folders in the current Terminal directory.
- Type mv filename ~/Destination/Folder and press Enter. Replace filename and /Destination/Folder with the real filename (or folder name), and destination respectively. In my case, I restored a file called file_example_MOV_1280_1_4MB.mov to the Desktop (~/Desktop/). Do this for all the files/folders you wish to recover.
Option B: Recover Deleted Files from an External Storage Drive Using Terminal
The steps above only work for the internal Trash folder on your Mac. In case you’re using an external drive, the process will differ slightly:
- Connect the external drive to your Mac, and open Terminal.
- Type id -u and press Enter to display your user ID (UID). Note down the output, because you’ll need it later.
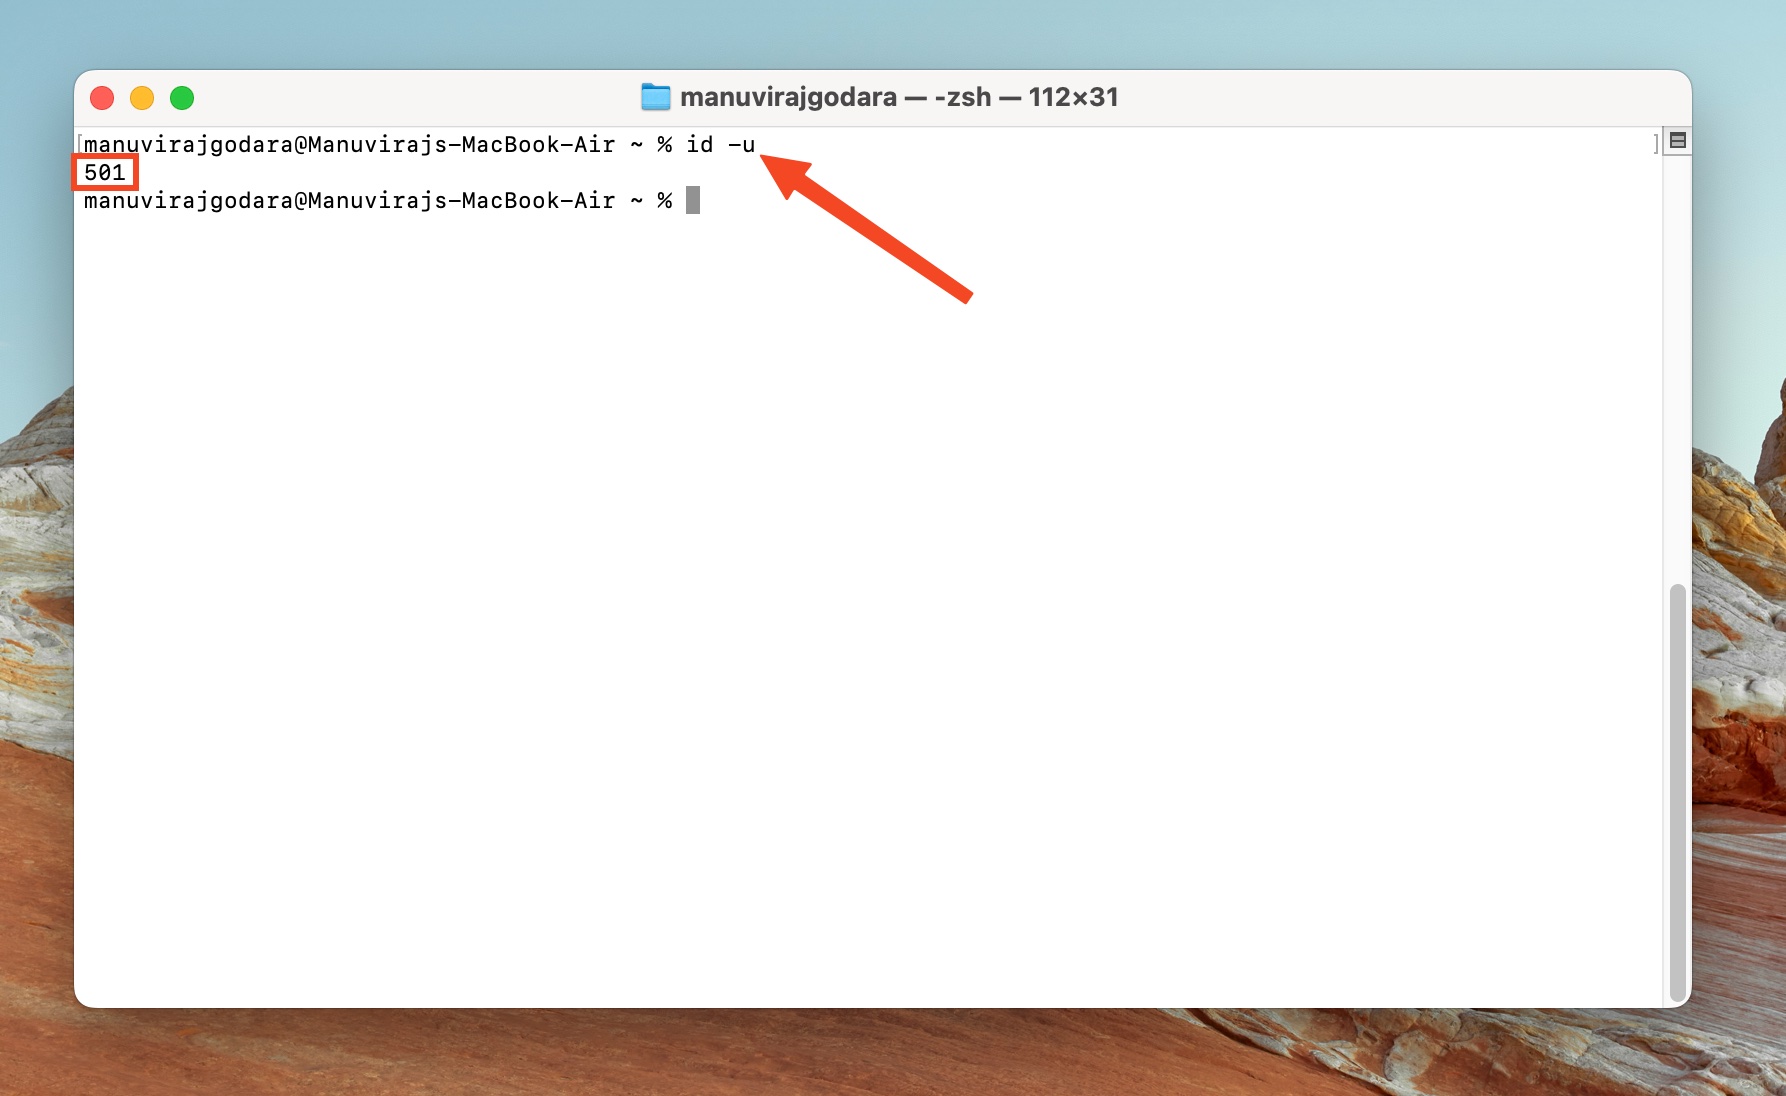
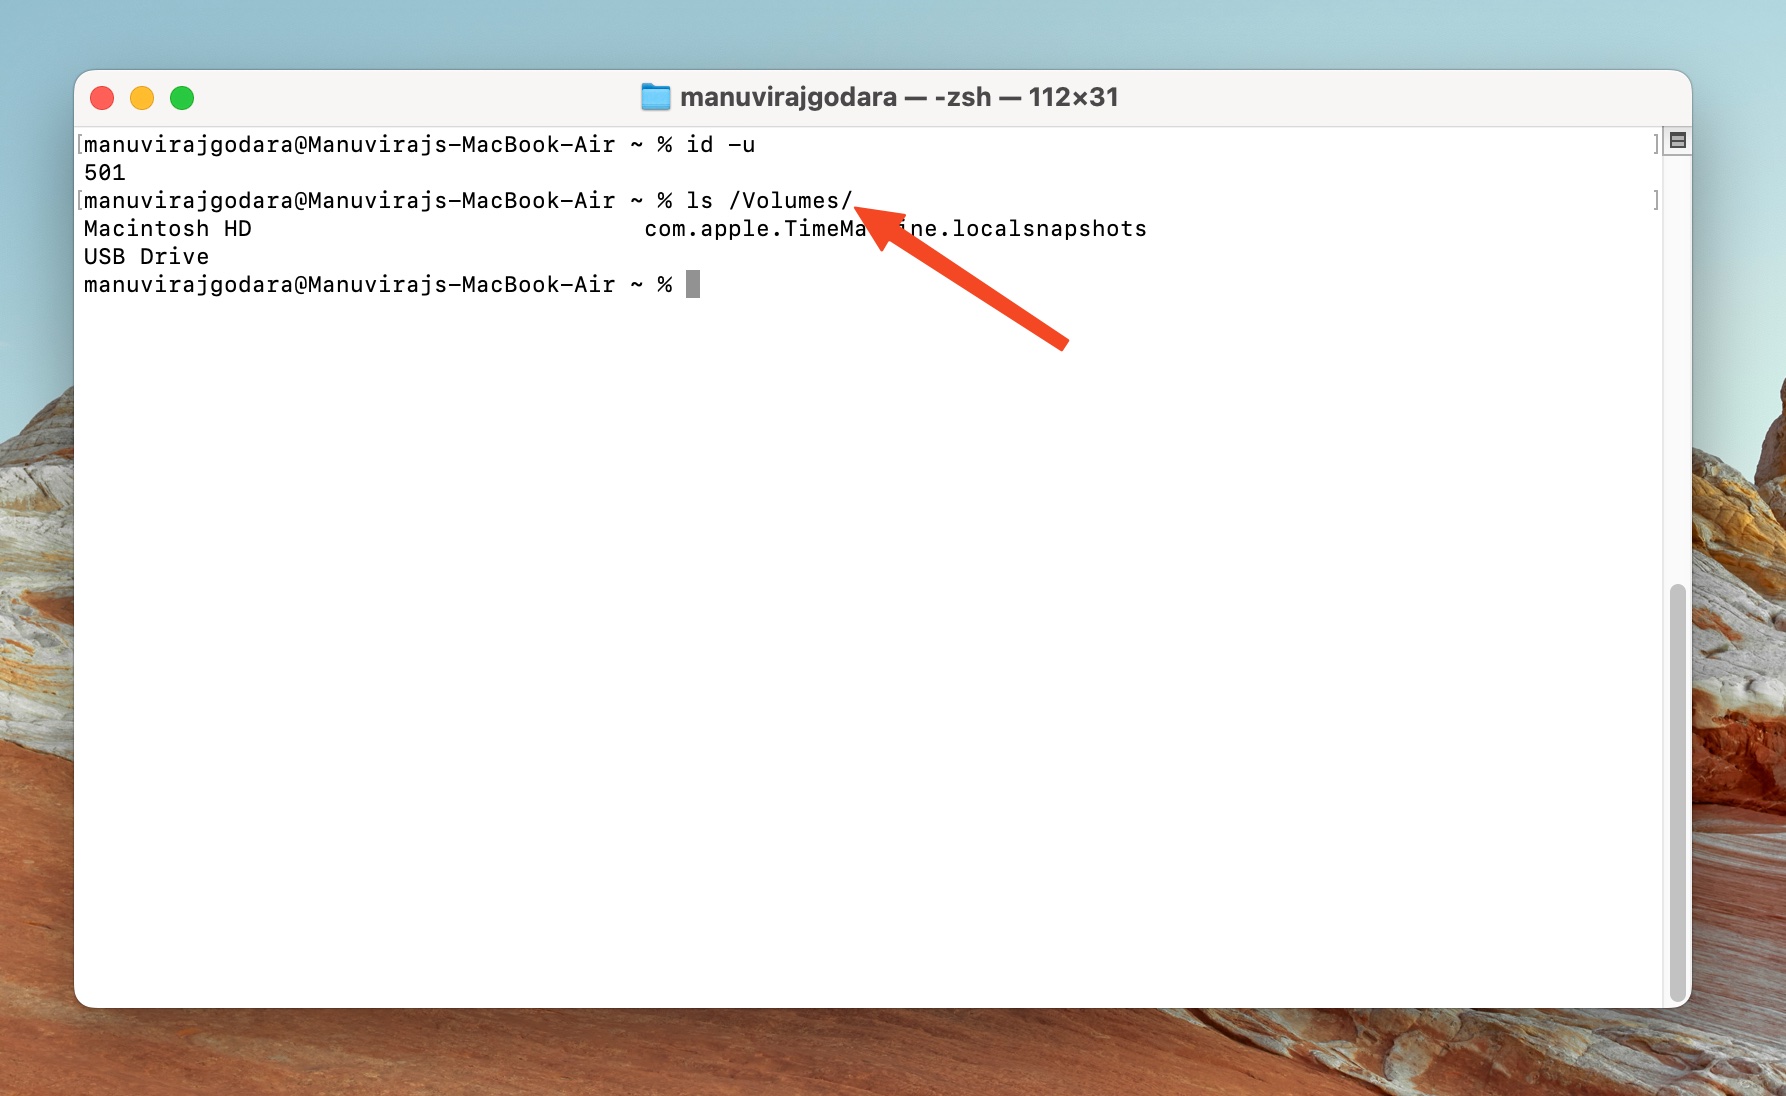
- Type ls /Volumes/ and press Enter to list all the drives connected to your Mac.
- Type cd “/Volumes/ExternalDrive/.Trashes/UID” and press Enter. Replace ExternalDrive with the name of your external storage drive listed in Step 3, and UID with the output you got in Step 2.
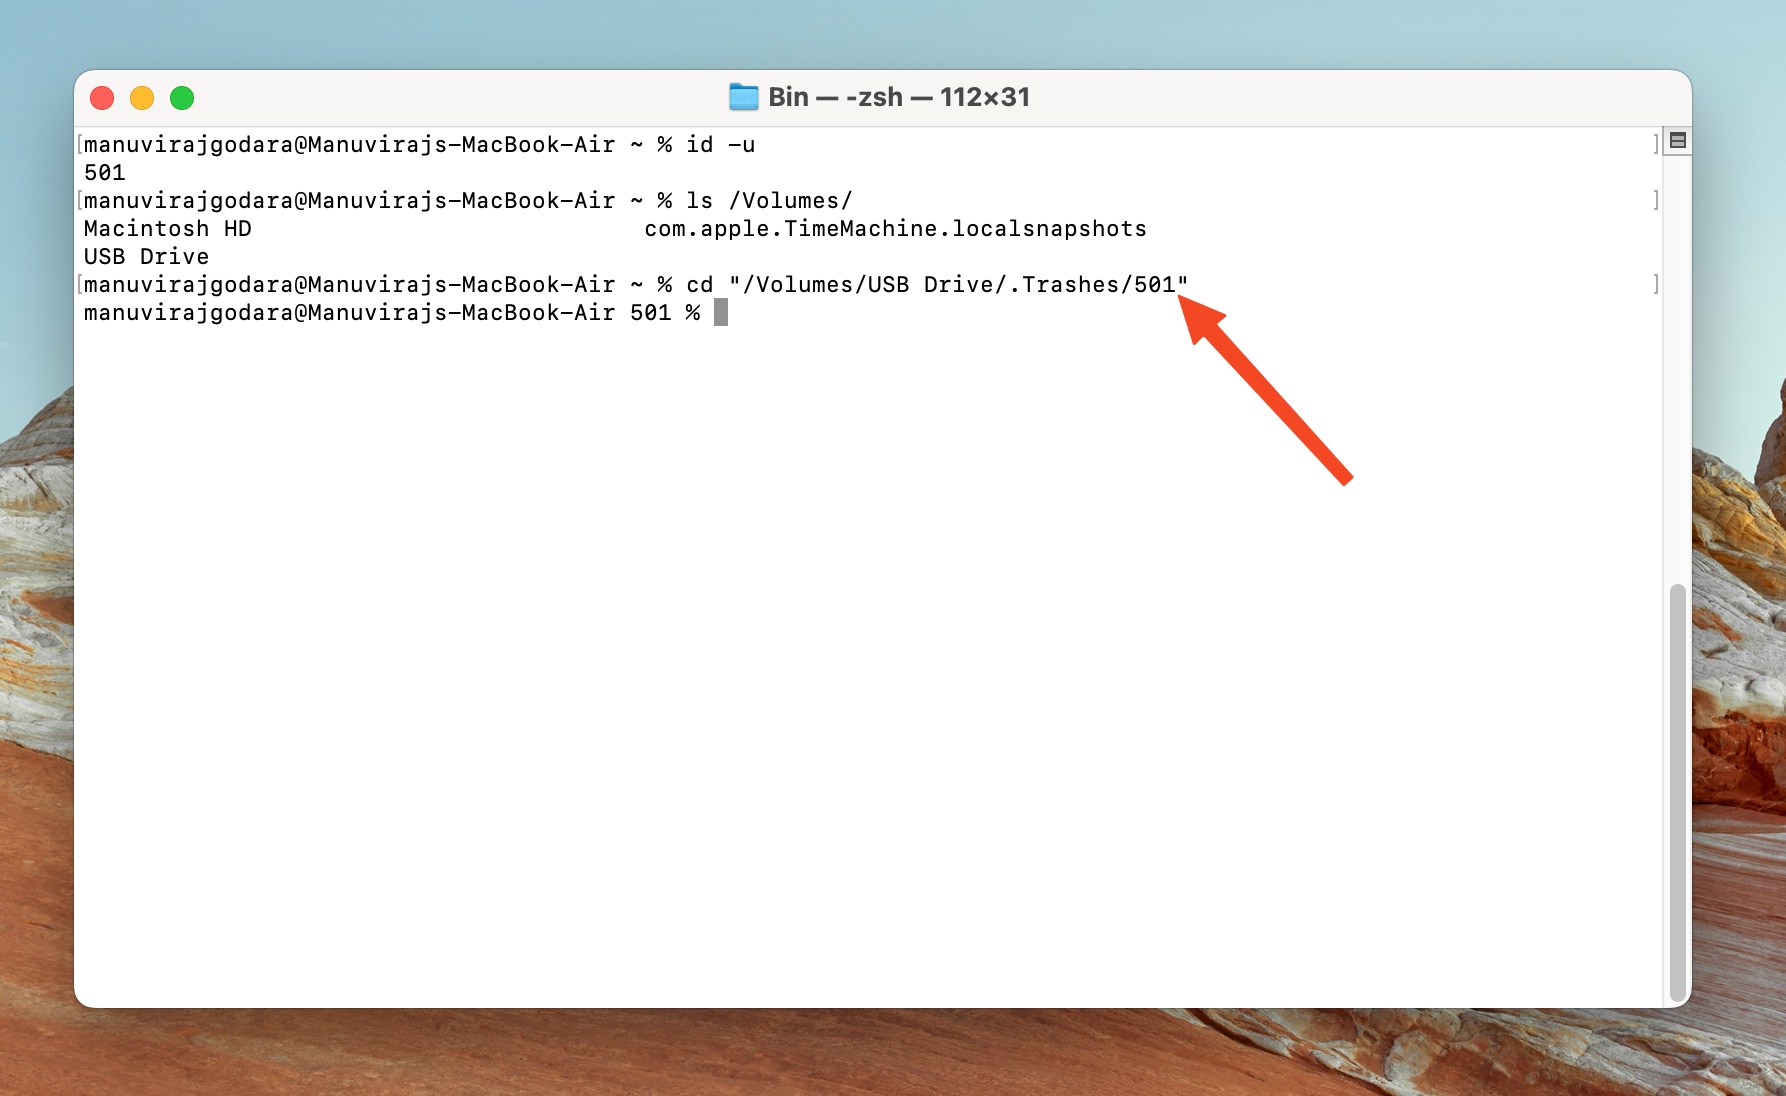
- Type ls and press Enter to see the files in the external storage drive’s Trash.
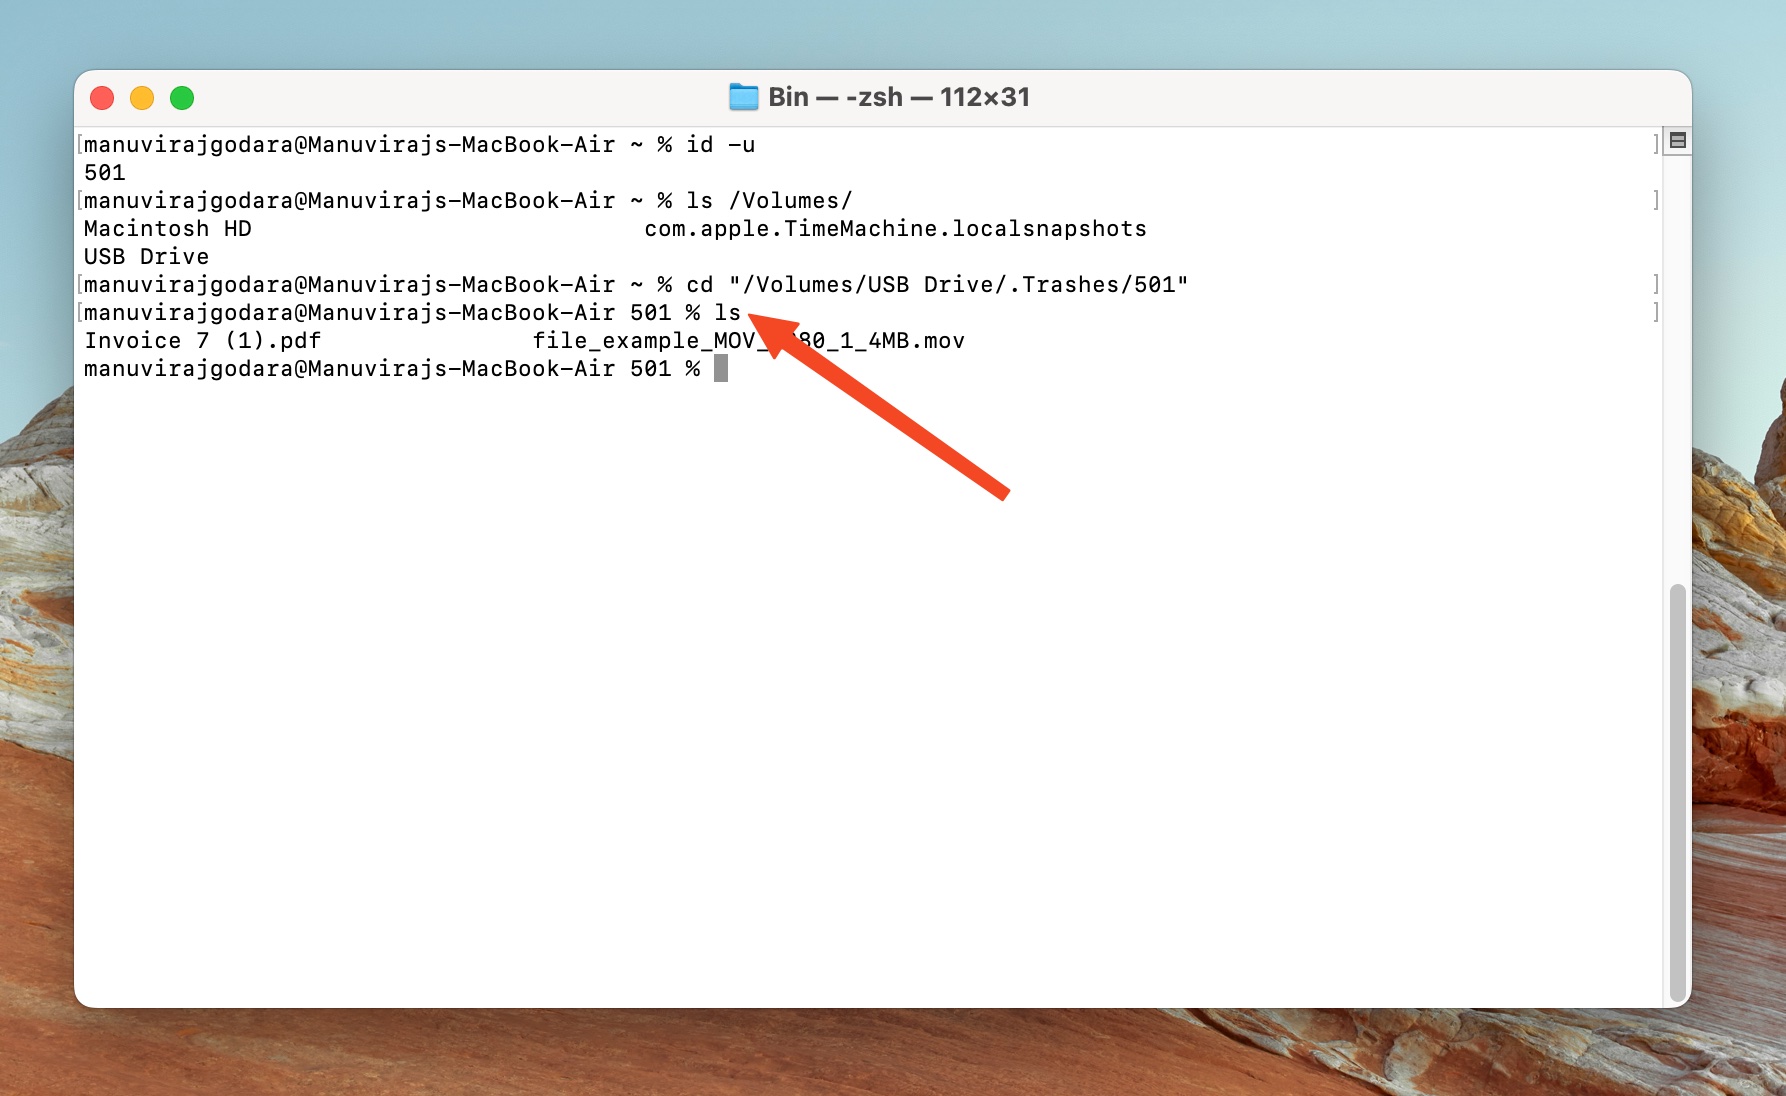
- Type mv “filename” ~/Destination/Folder and press Enter. Replace filename and /Destination/Folder with the real filename (or folder name), and destination respectively.
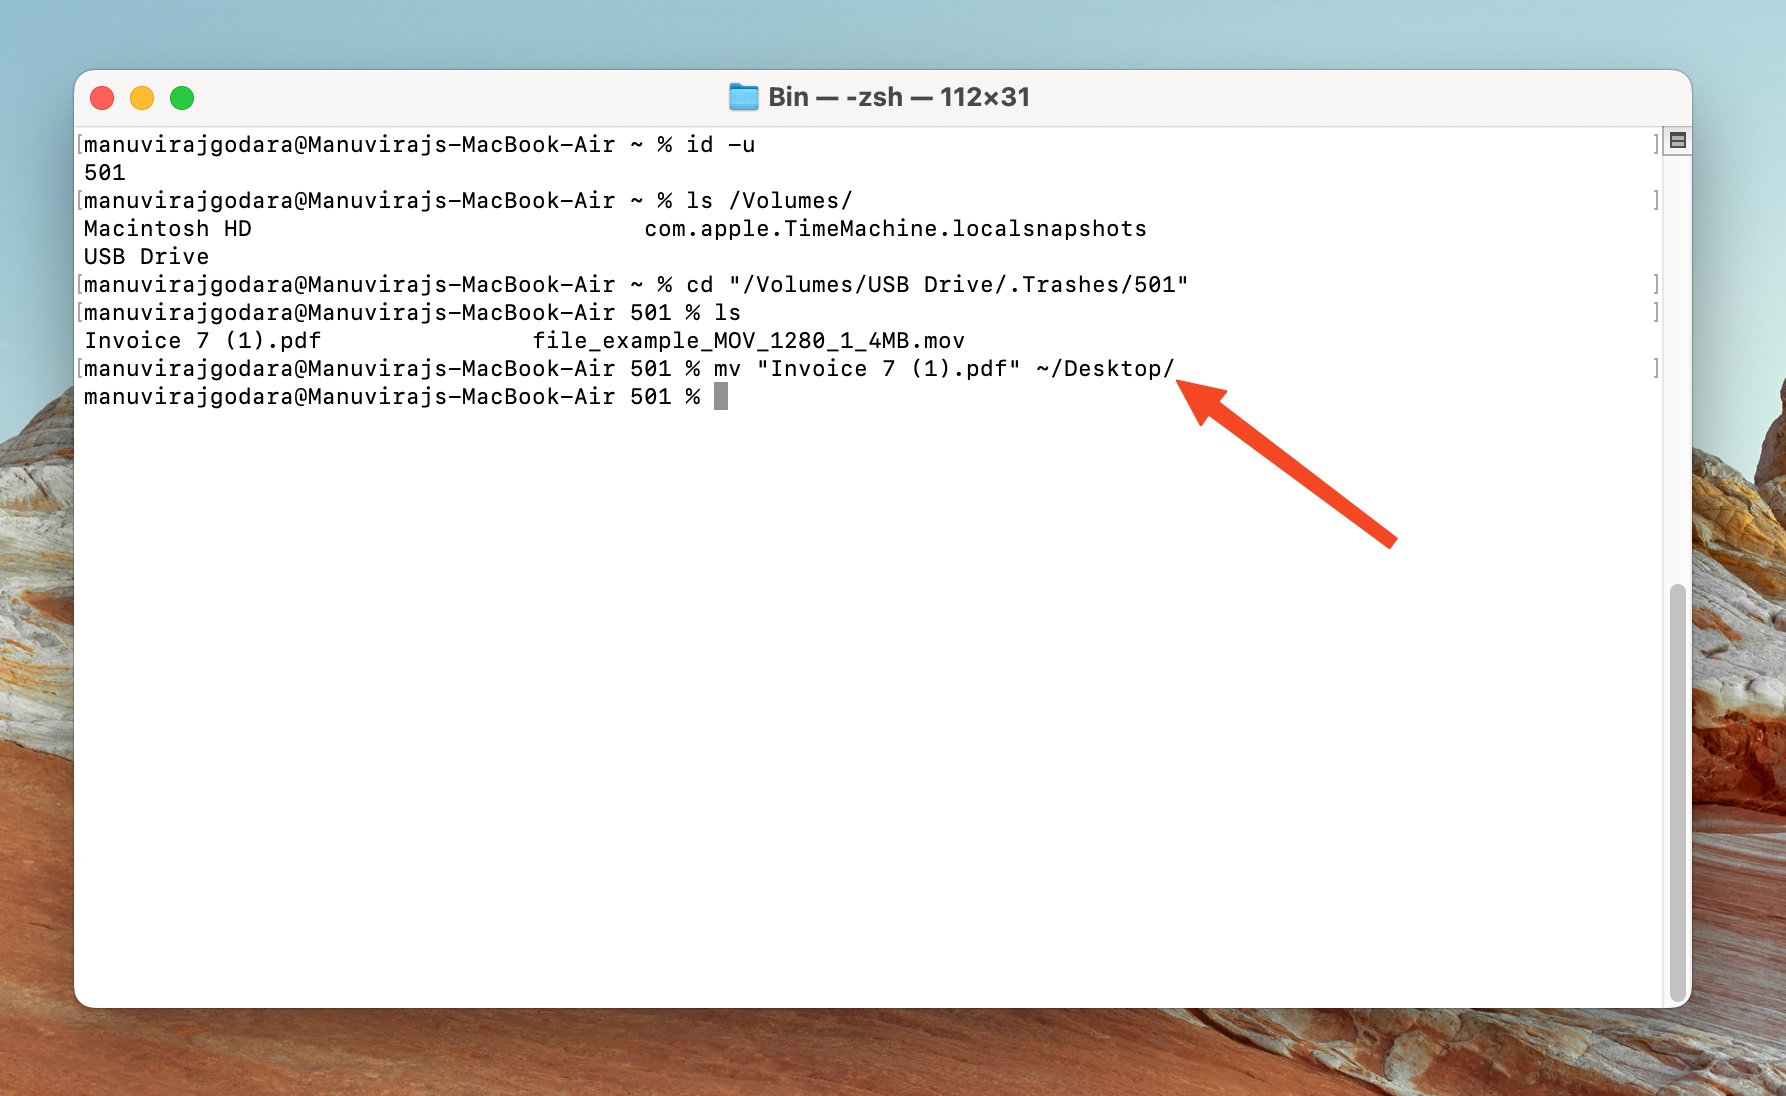
Bonus: Wish to recover the entire contents of the Trash folder on your internal/external storage drive? Simply replace “filename” with *. The command will look like mv * ~/Destination/Folder.
Method 2: Use Terminal to Recover Files Using Time Machine
The Time Machine feature lets you restore deleted files provided you enabled it beforehand, and the Time Machine backups contain the required files. In case you have access to the macOS GUI, it’s best to use that version of Time Machine because it’s much simpler.
If you don’t have access to the macOS GUI, or are simply curious to know how Time Machine works within Terminal, follow the guide below:
- Connect the Time Machine backup drive to your Mac, and open Terminal.
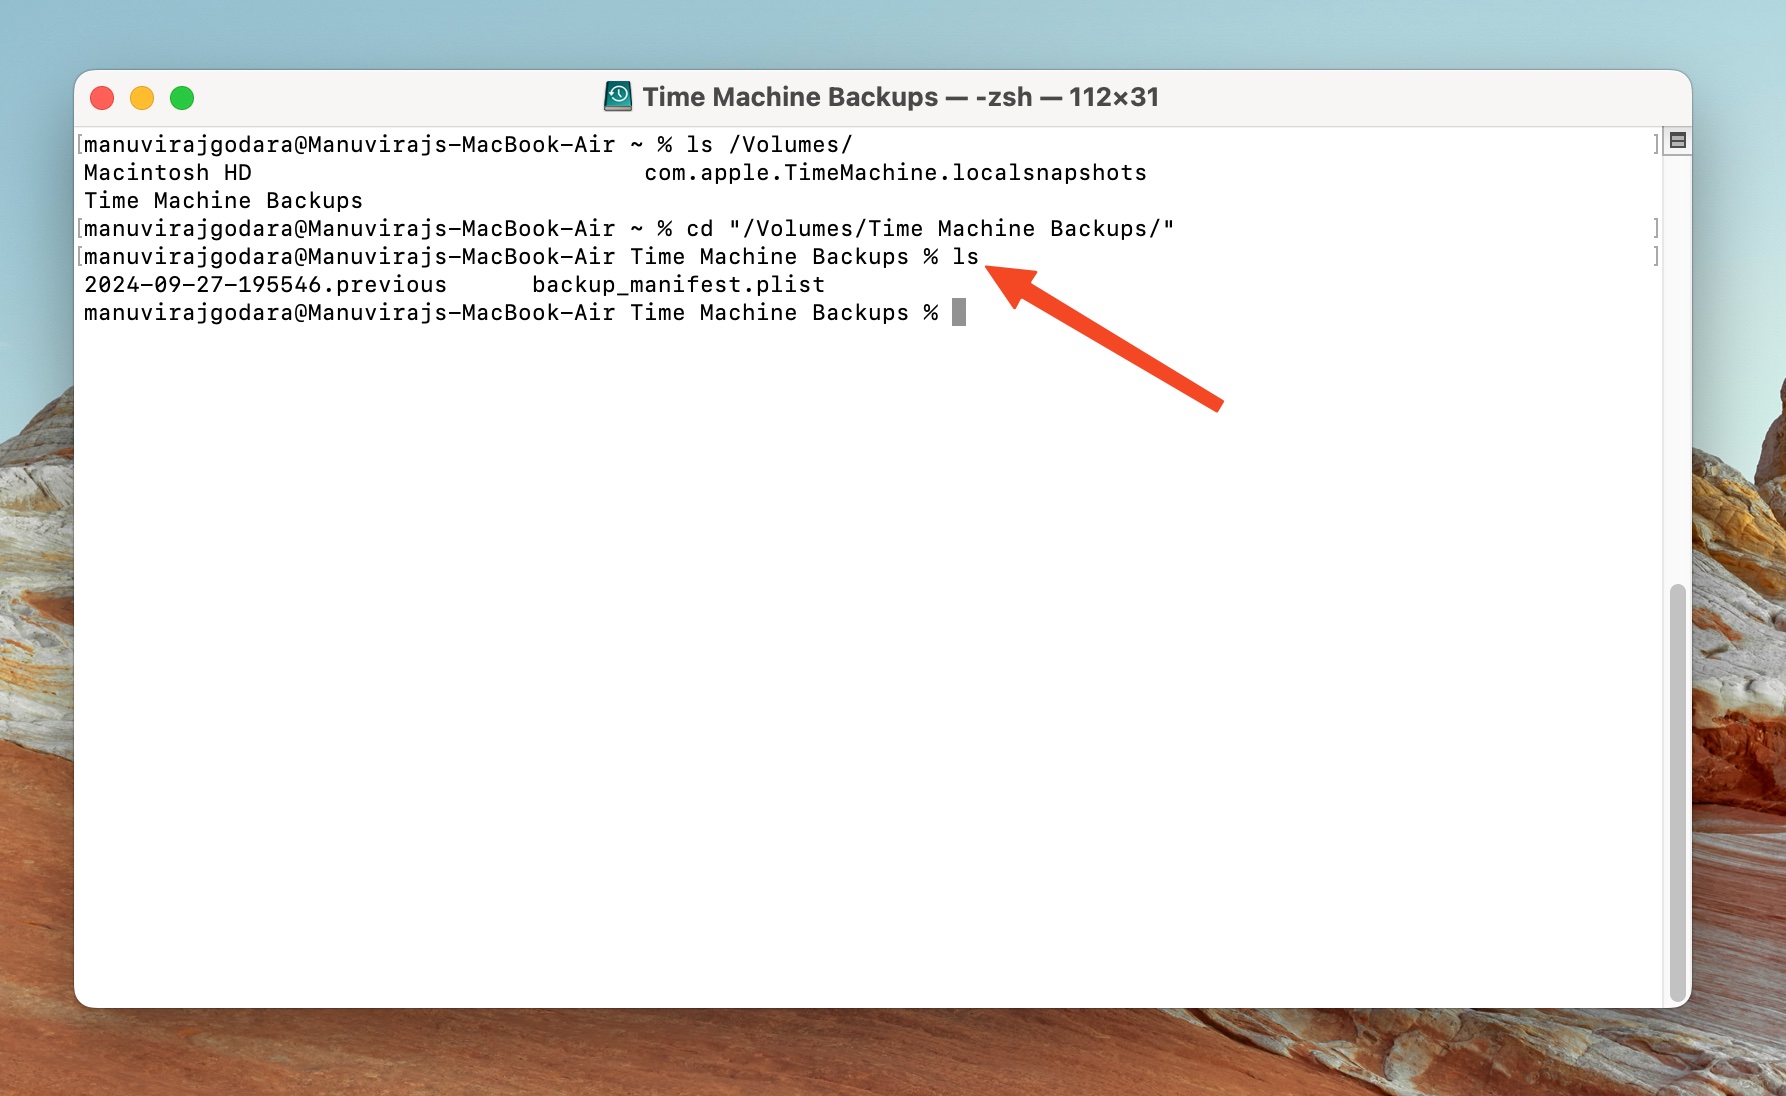
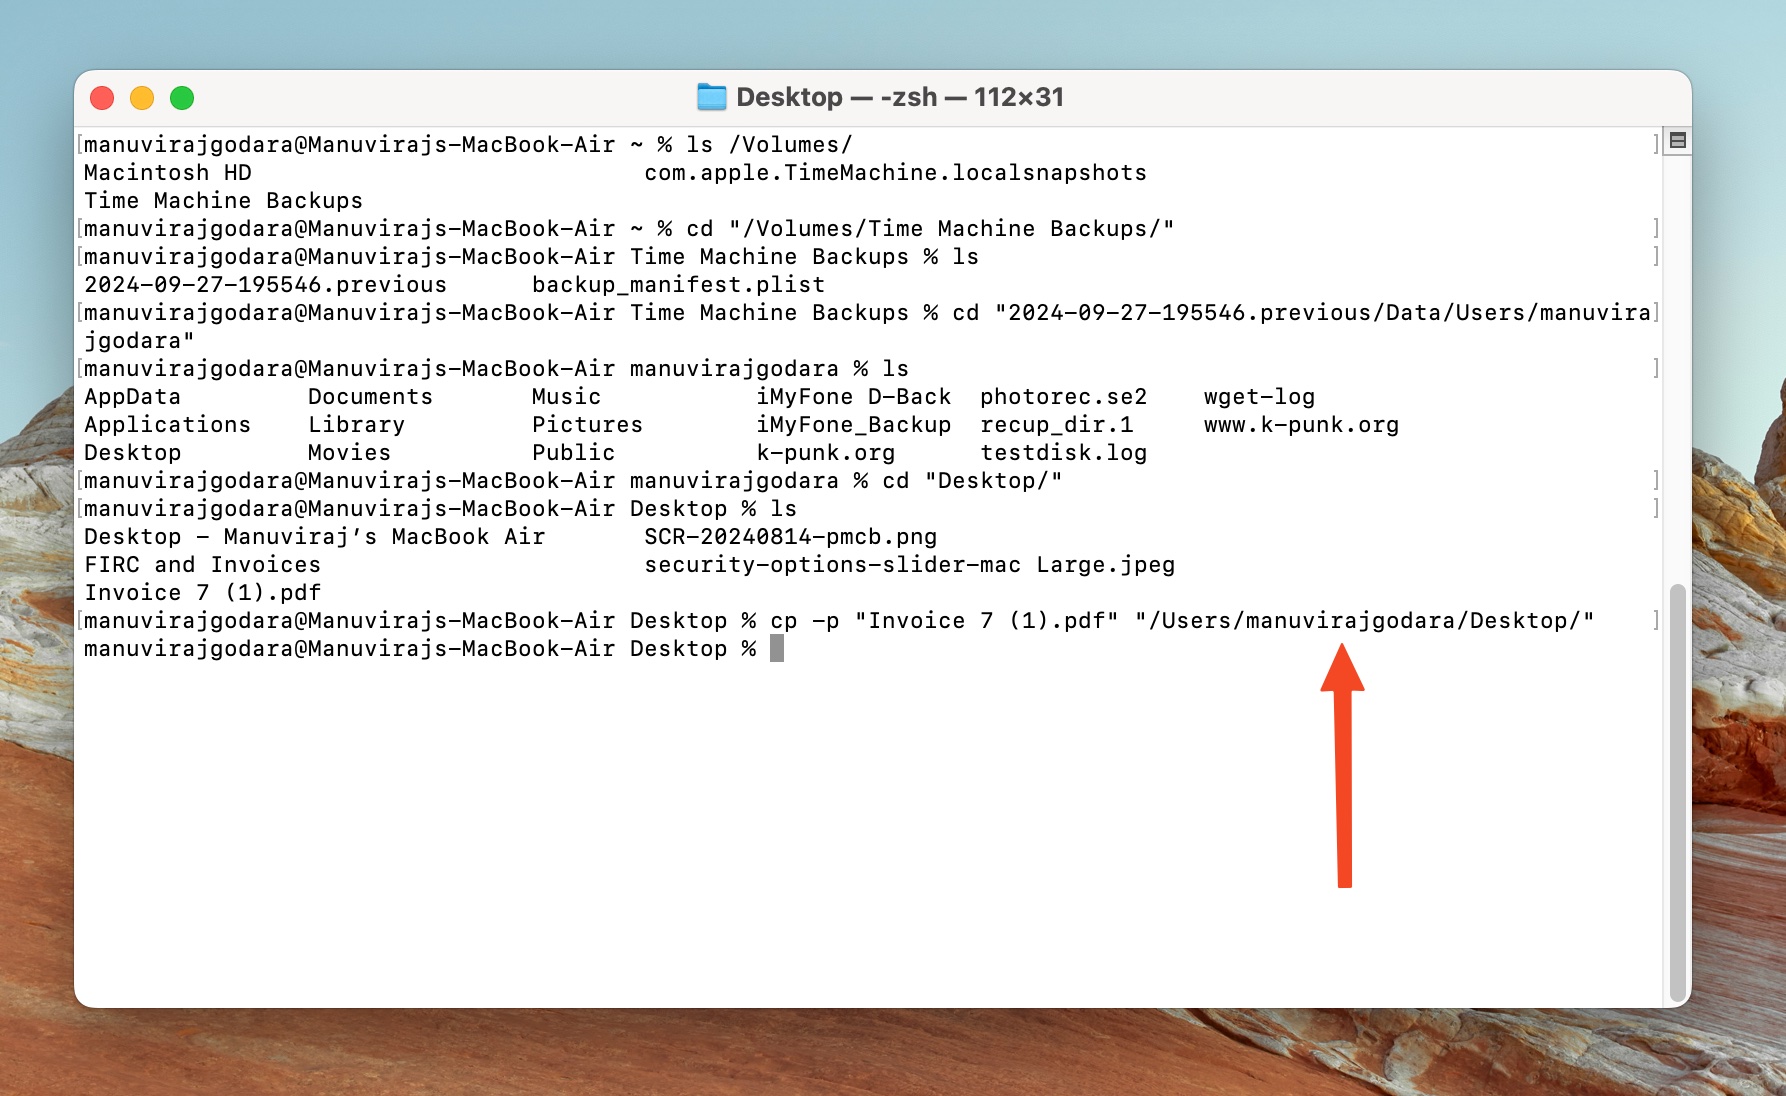
- Type ls /Volumes/ and press Enter. This command displays all the drives connected to your Mac—take note of the Time Machine drive. In my case, it’s named Time Machine Backups.
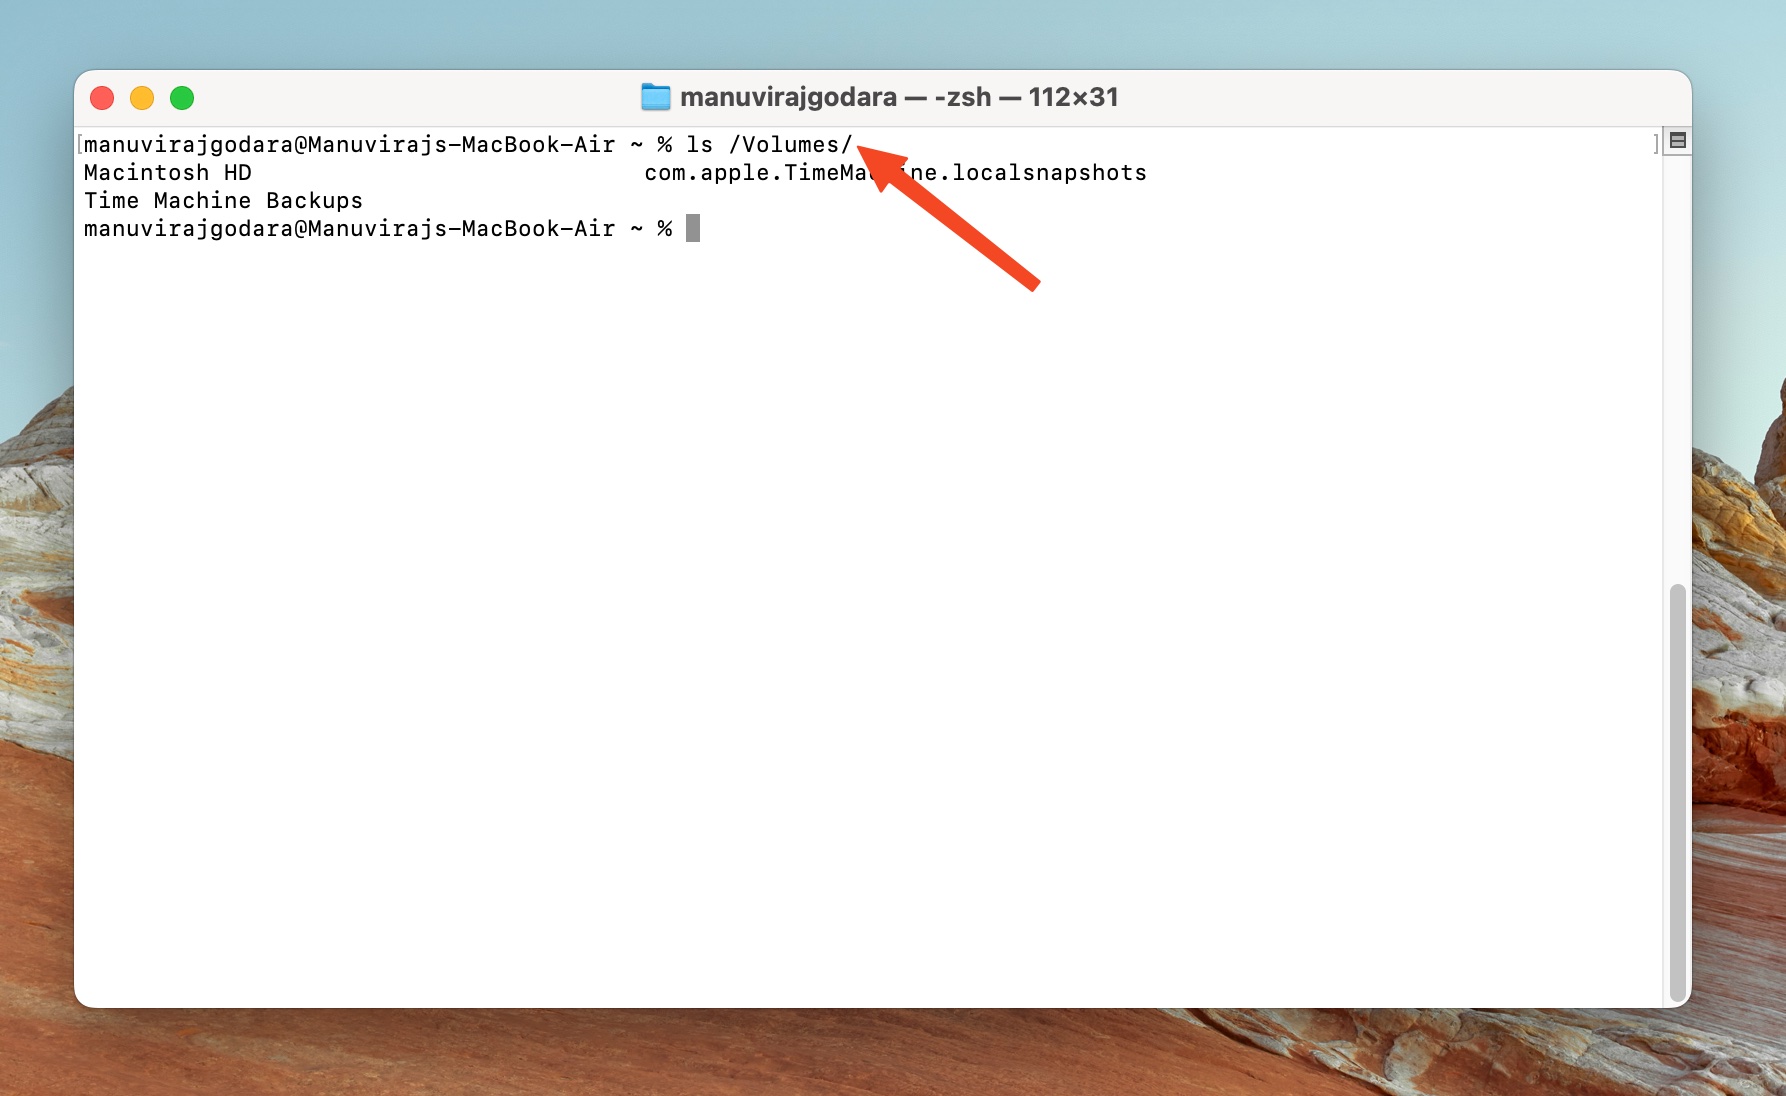
- Type cd “/Volumes/YourBackupDrive/”, and press Enter, replacing YourBackupDrive with the Time Machine backup drive’s name—Time Machine Backups, in my case.
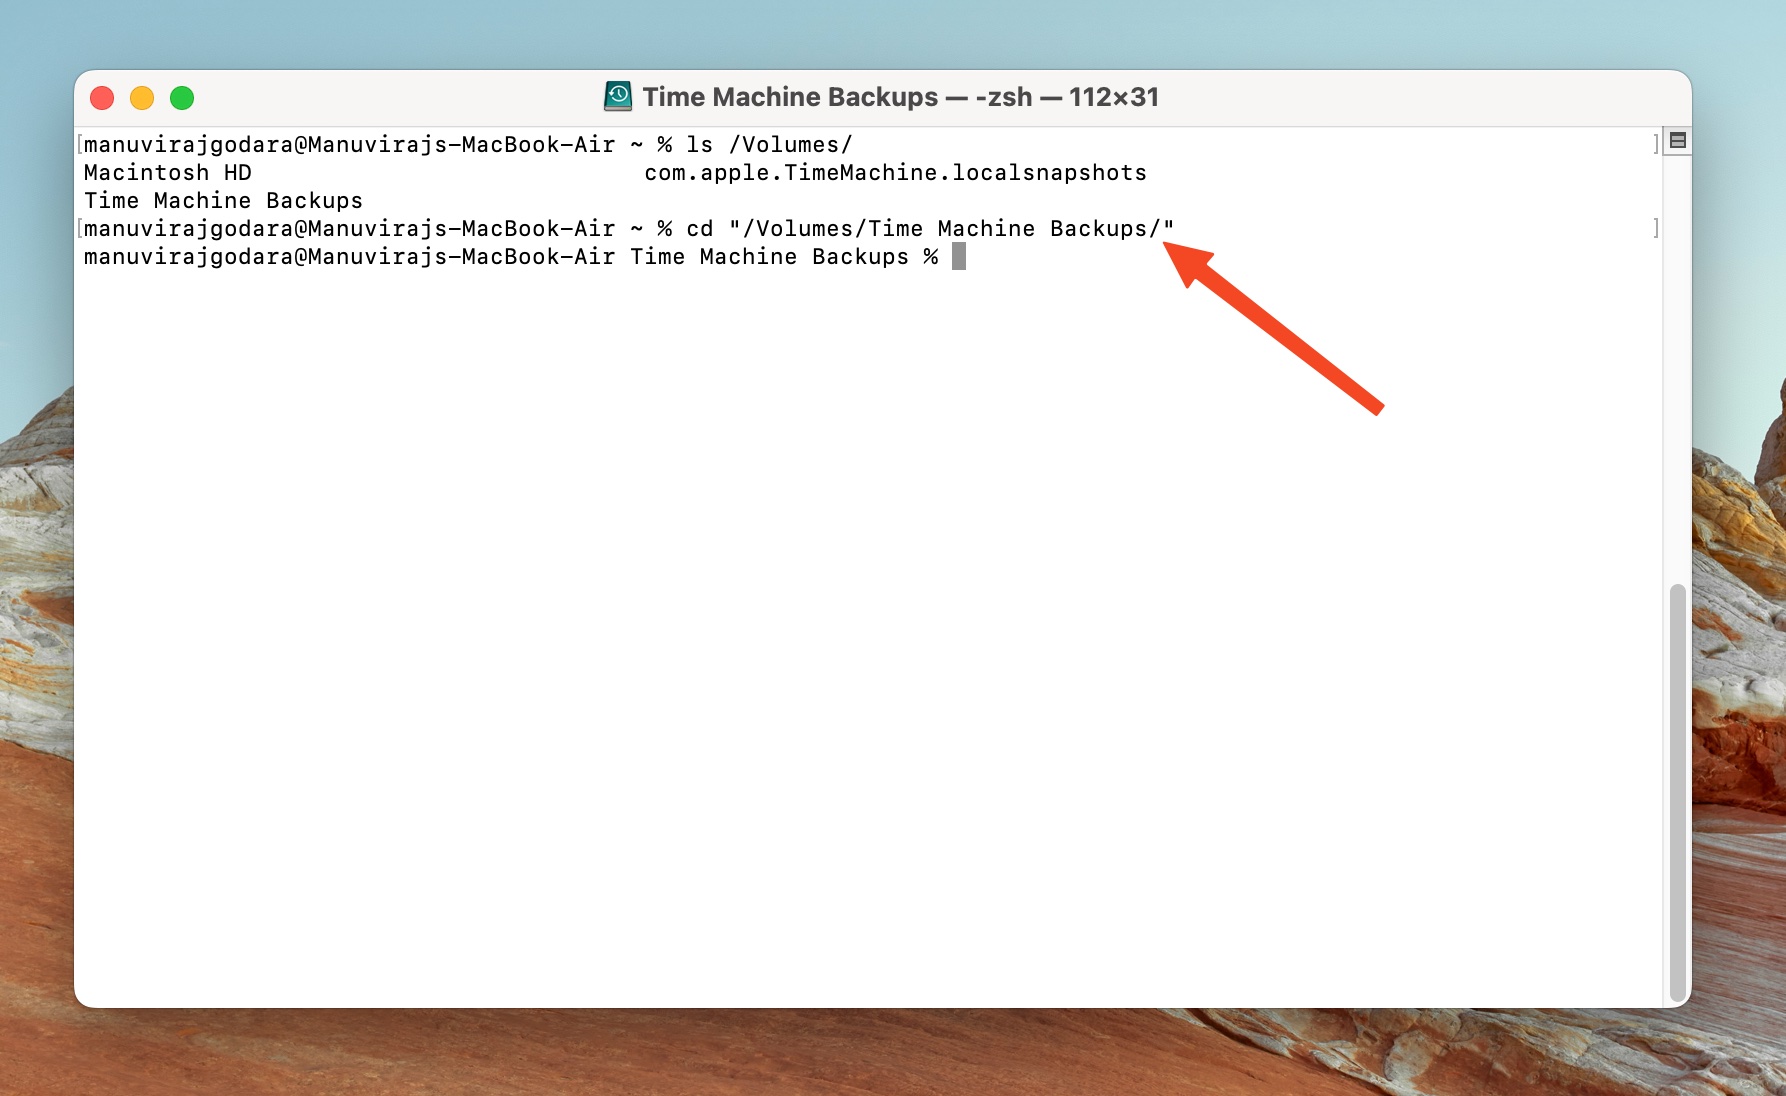
- Type ls and press Enter. This will list all the files and folders in the Time Machine drive. Ideally, the drive should only contain your Time Machine backups and other relevant files. Time Machine backups follow a similar filename pattern: 2024-09-27-195546.previous. The first part of the filename represents the backup’s date. In my case, it’s 2024-09-27 (27th September, 2024).
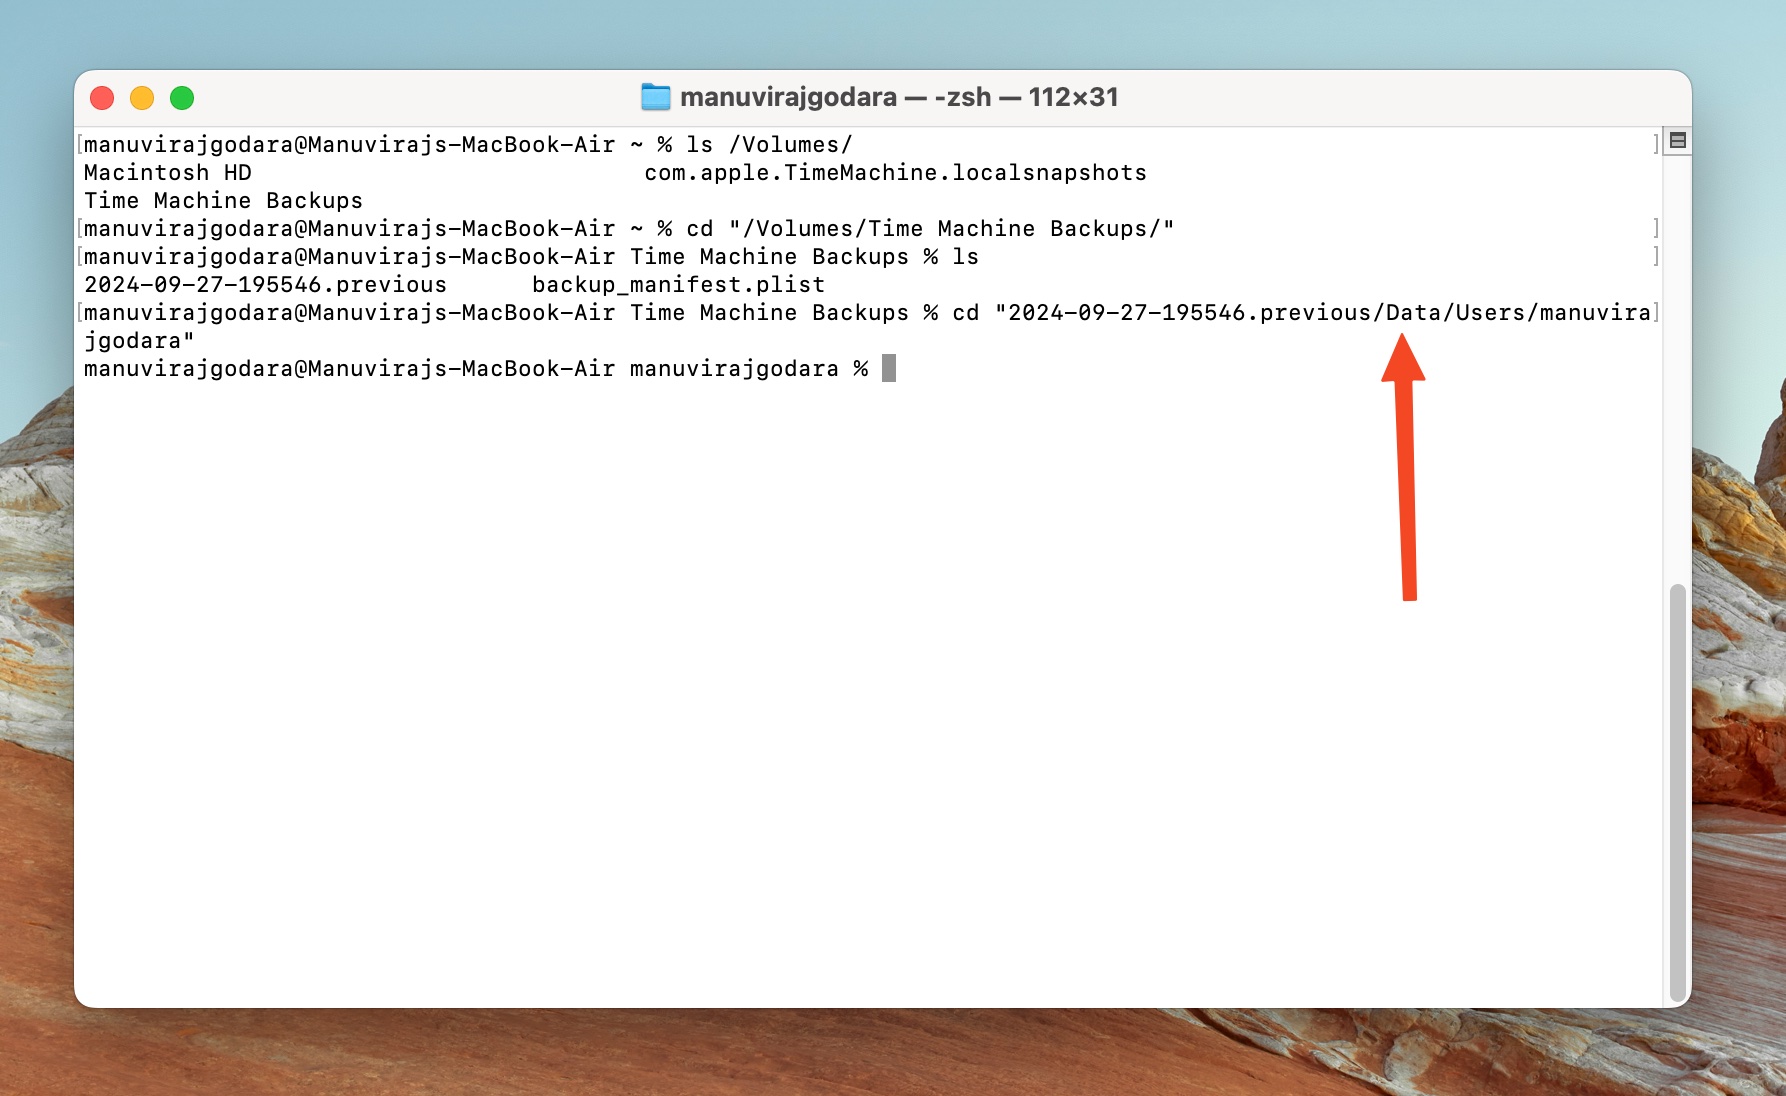
- Type cd “BackupName/Data/Users/YourUsername” and press Enter. Replace BackupName with the Time Machine backup that contains the file you wish to recover, and YourUsername with your Mac username. In my case, I typed cd “2024-09-27-195546.previous/Data/Users/manuvirajgodara/”.
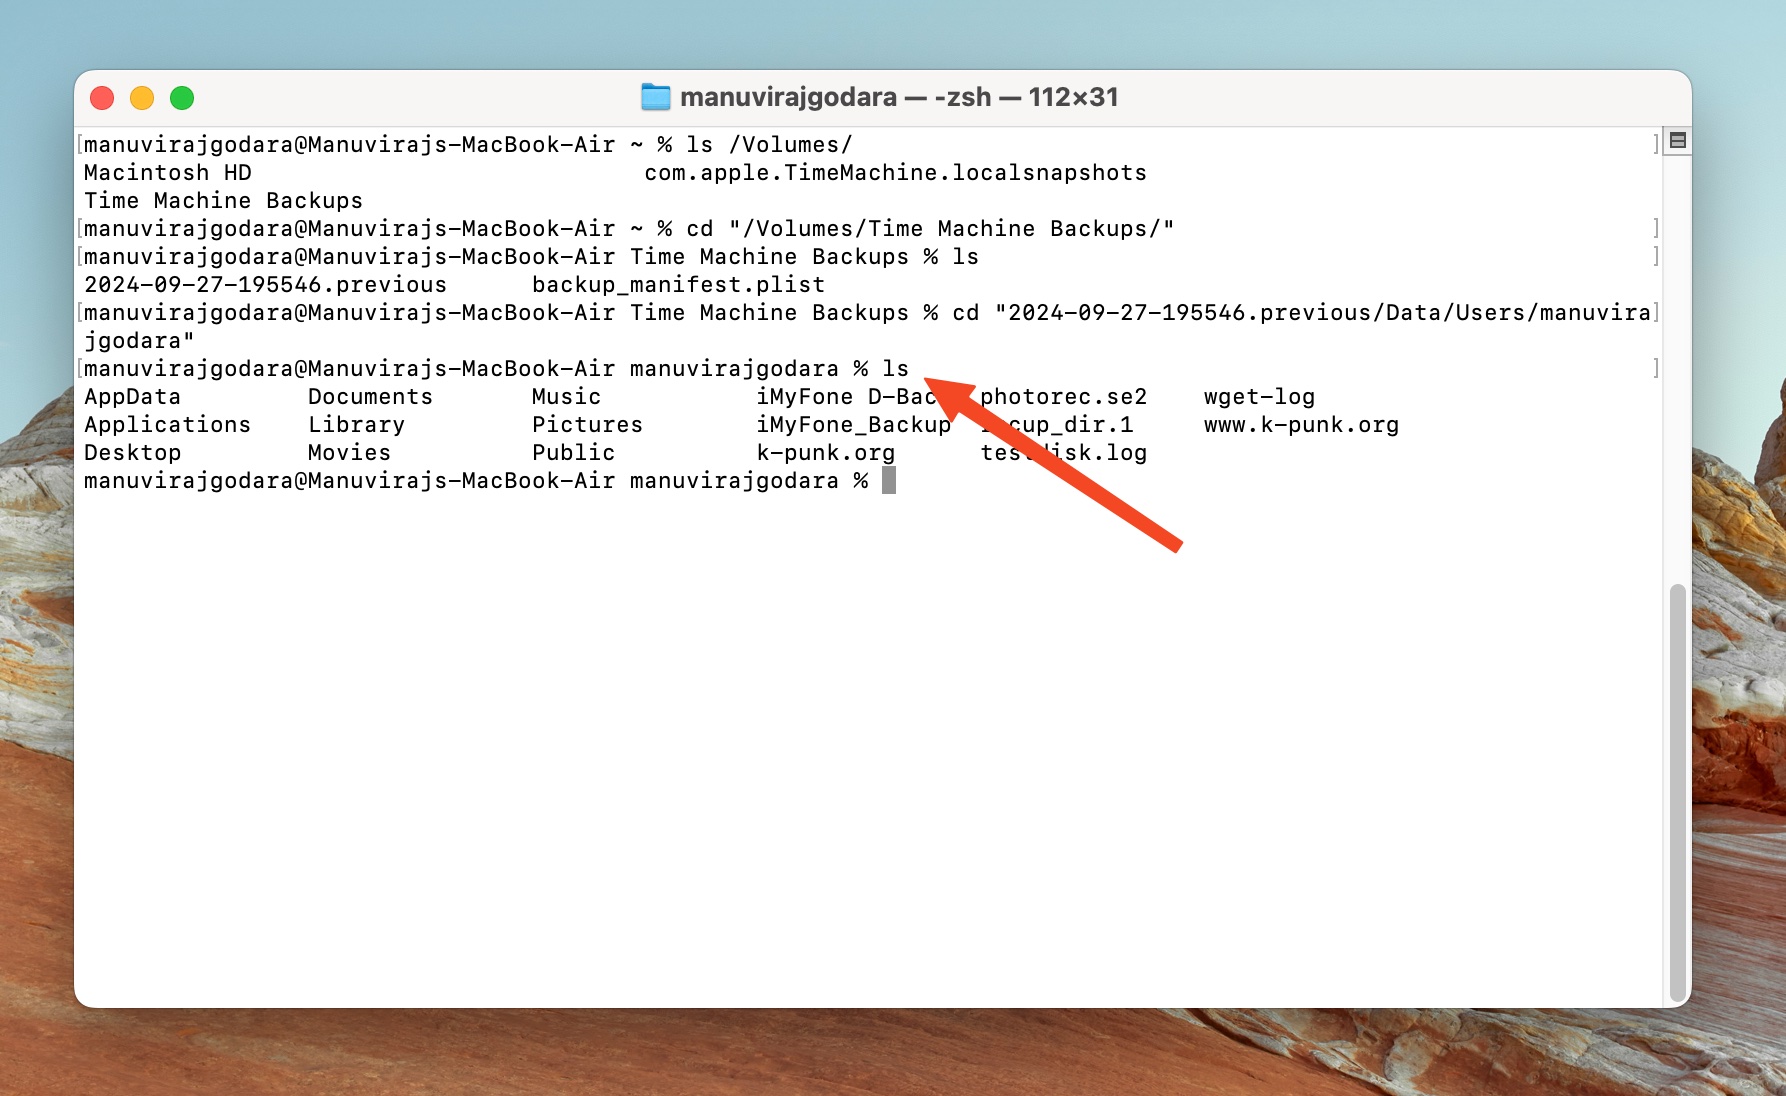
- Type ls and press Enter. This lists all the folders, and files associated with your username that Time Machine backed up. Take note of the folder that contains your files.
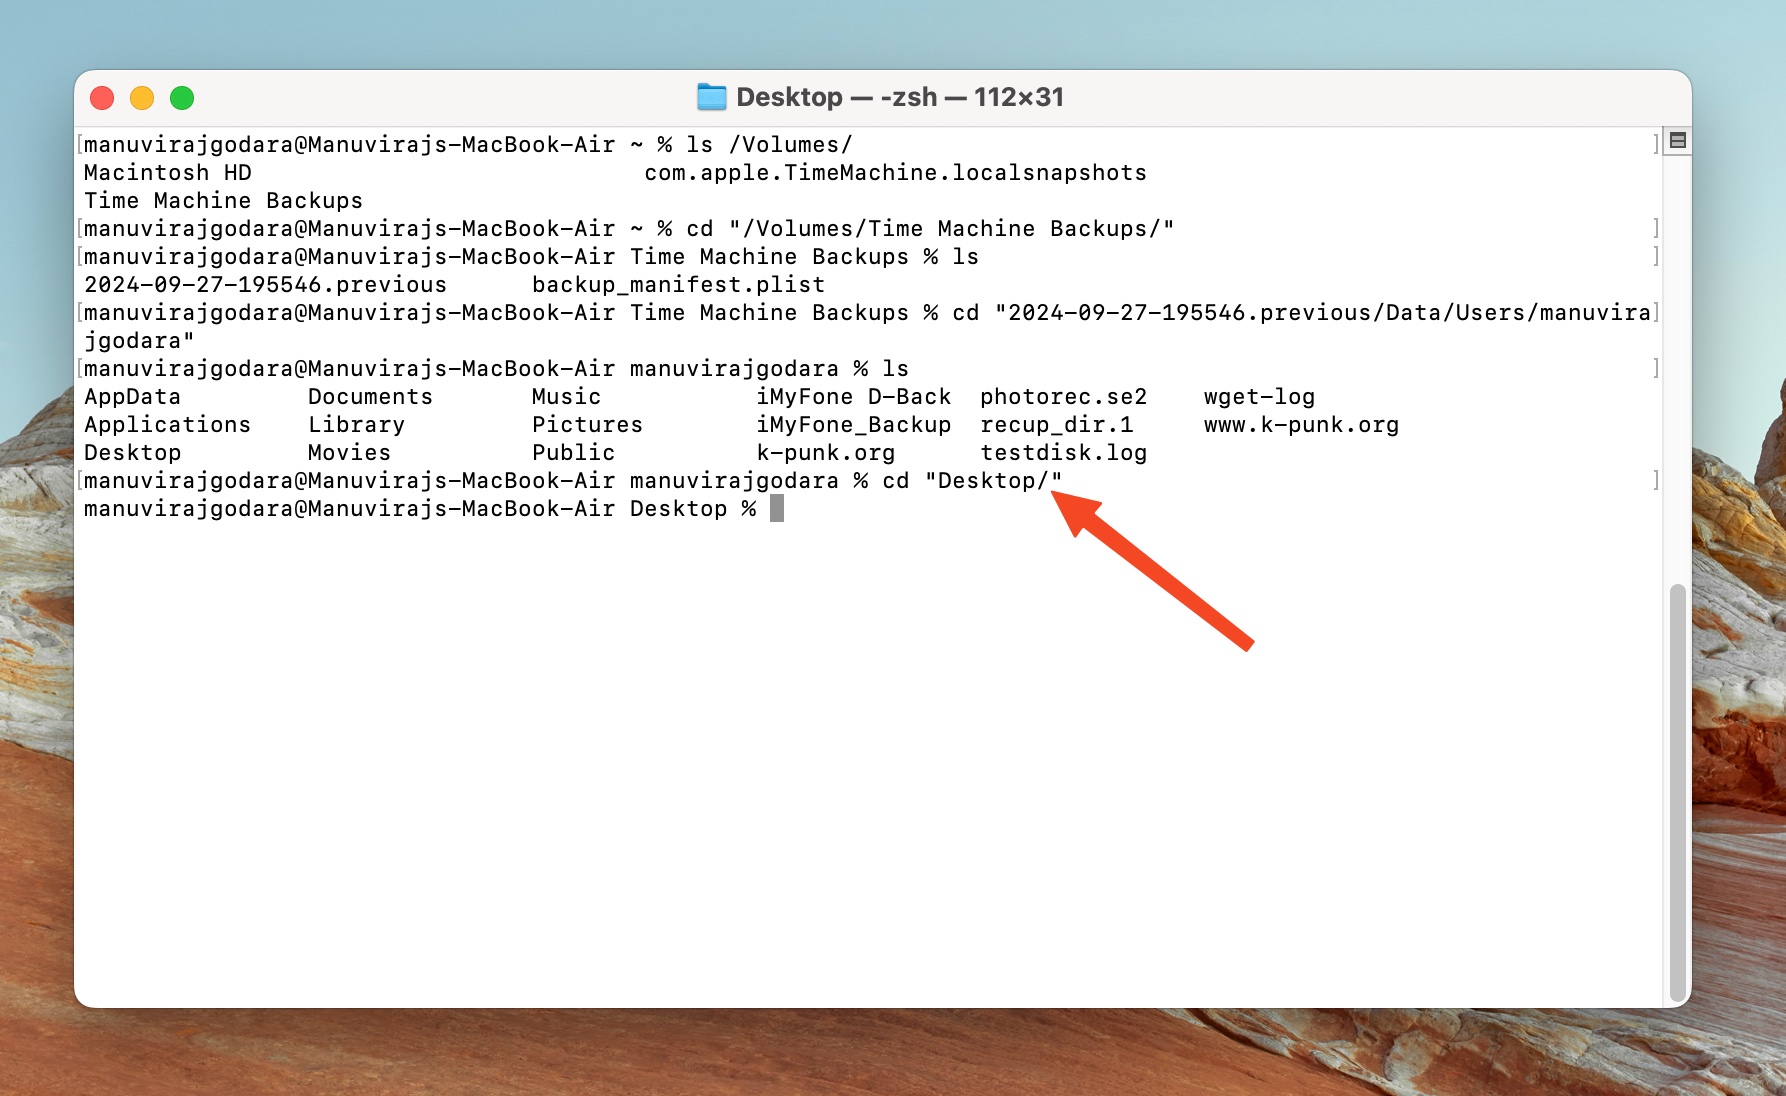
- Type cd “FolderName/” and press Enter, replacing FolderName with the one containing your files. Now, if you wish to navigate further into the subfolders, type ls, note down the folder name, then type cd “FolderName/”, till you reach the folder containing your files. Also, type ls and confirm that the file you require is there in the folder.
- Type cp -p “Filename.extension” “/Path/to/Folder”, and press Enter. Replace Filename.extension with the filename and extension, and Path/to/Folder with the recovery destination path. I wanted to copy a file named Invoice 7 (1).pdf to my Mac’s desktop, so the command looked like this: cp -p “Invoice 7 (1).pdf” “/Users/manuvirajgodara/Desktop/”.
Method 3: Use TestDisk to Restore Your Files
TestDisk is a data recovery tool that works within Terminal to restore deleted files, repair corrupt partitions, and more. Thanks to it being open-source, free to use, and effective, many users swear by it. However, its steep learning curve, patchy support for APFS drives may deter some users from using it.
While you can download and install TestDisk using the official DMG file, I suggest using Homebrew instead. It makes the process easier, and you’re less likely to run into permission-related issues:
- Open Terminal.
- Type the following command and press Enter to install Homebrew: /bin/bash -c “$(curl -fsSL https://raw.githubusercontent.com/Homebrew/install/HEAD/install.sh)”.
- After Homebrew finishes installing, type brew install testdisk and press Enter. This command will automatically download, and install TestDisk for you.
Once TestDisk is installed, here’s how you recover your deleted files:
- Open Terminal, and type sudo testdisk and press Enter.
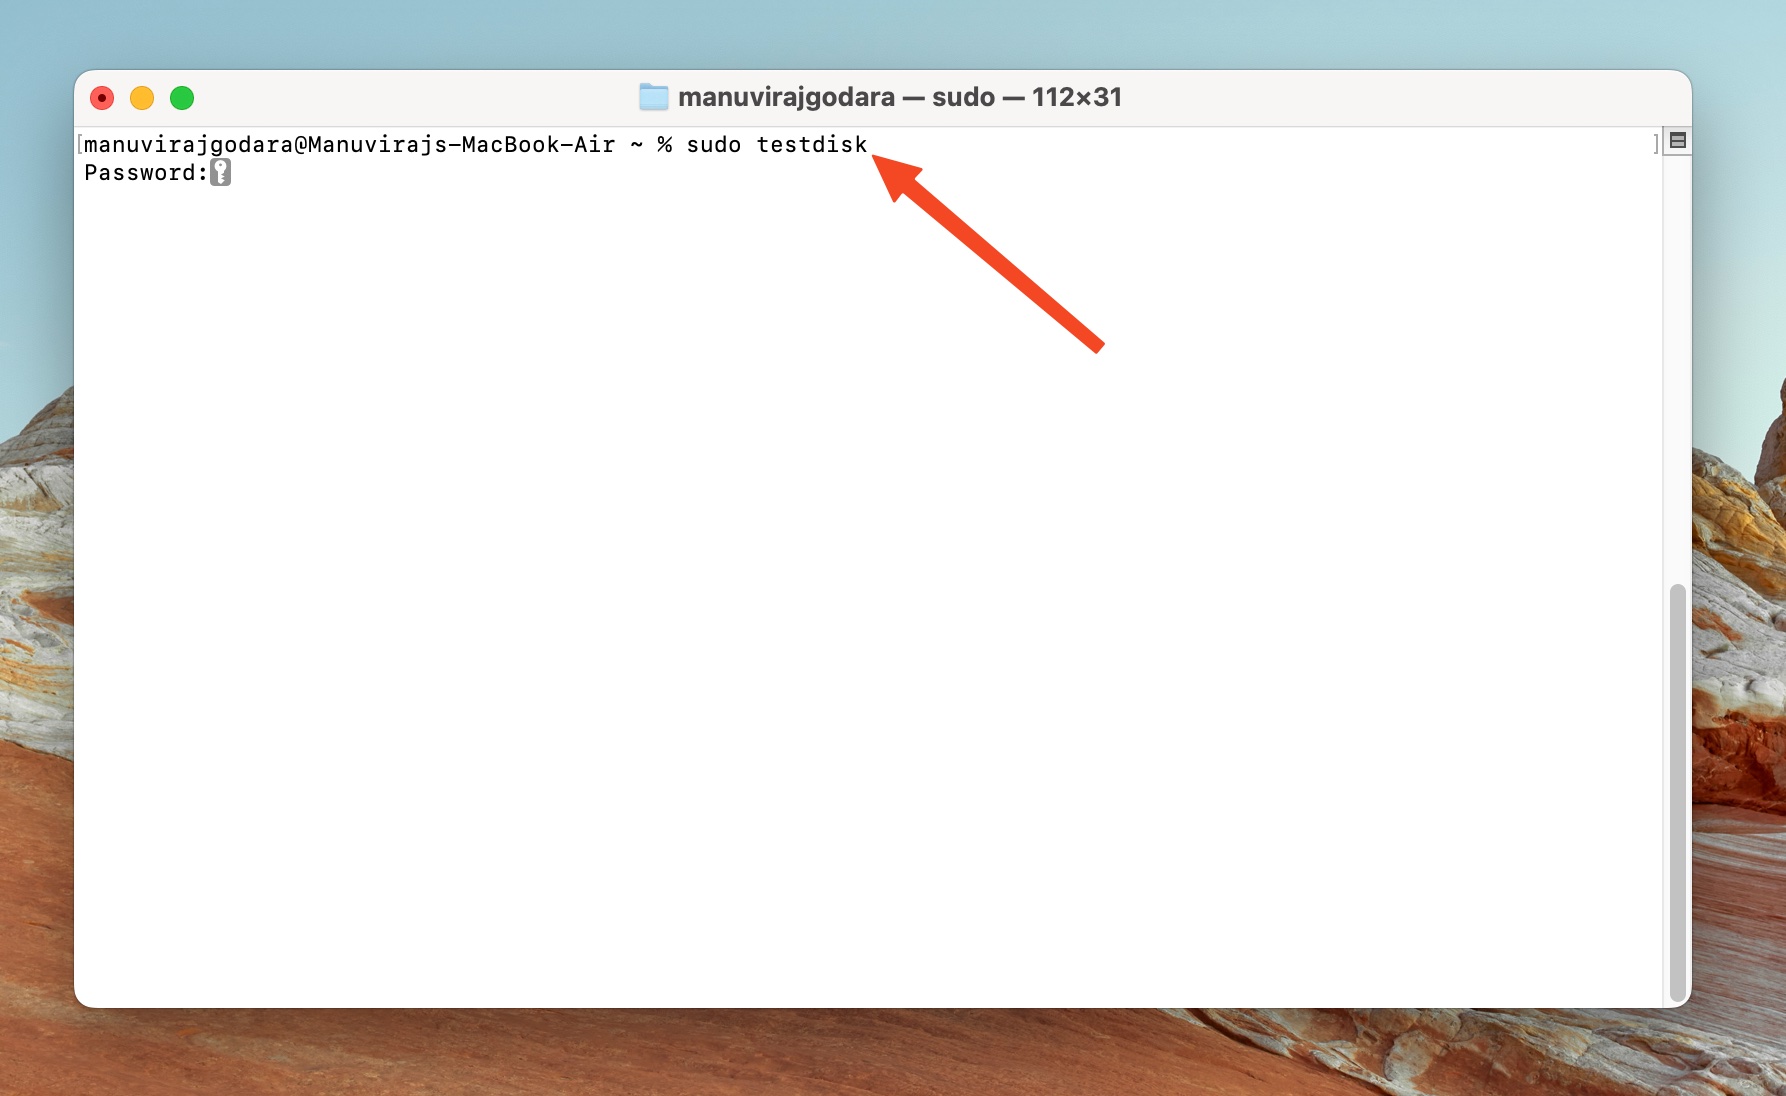
- Type in your password and press Enter to open TestDisk. To navigate in TestDisk, use the arrow keys to highlight an option, and press Enter to select it.
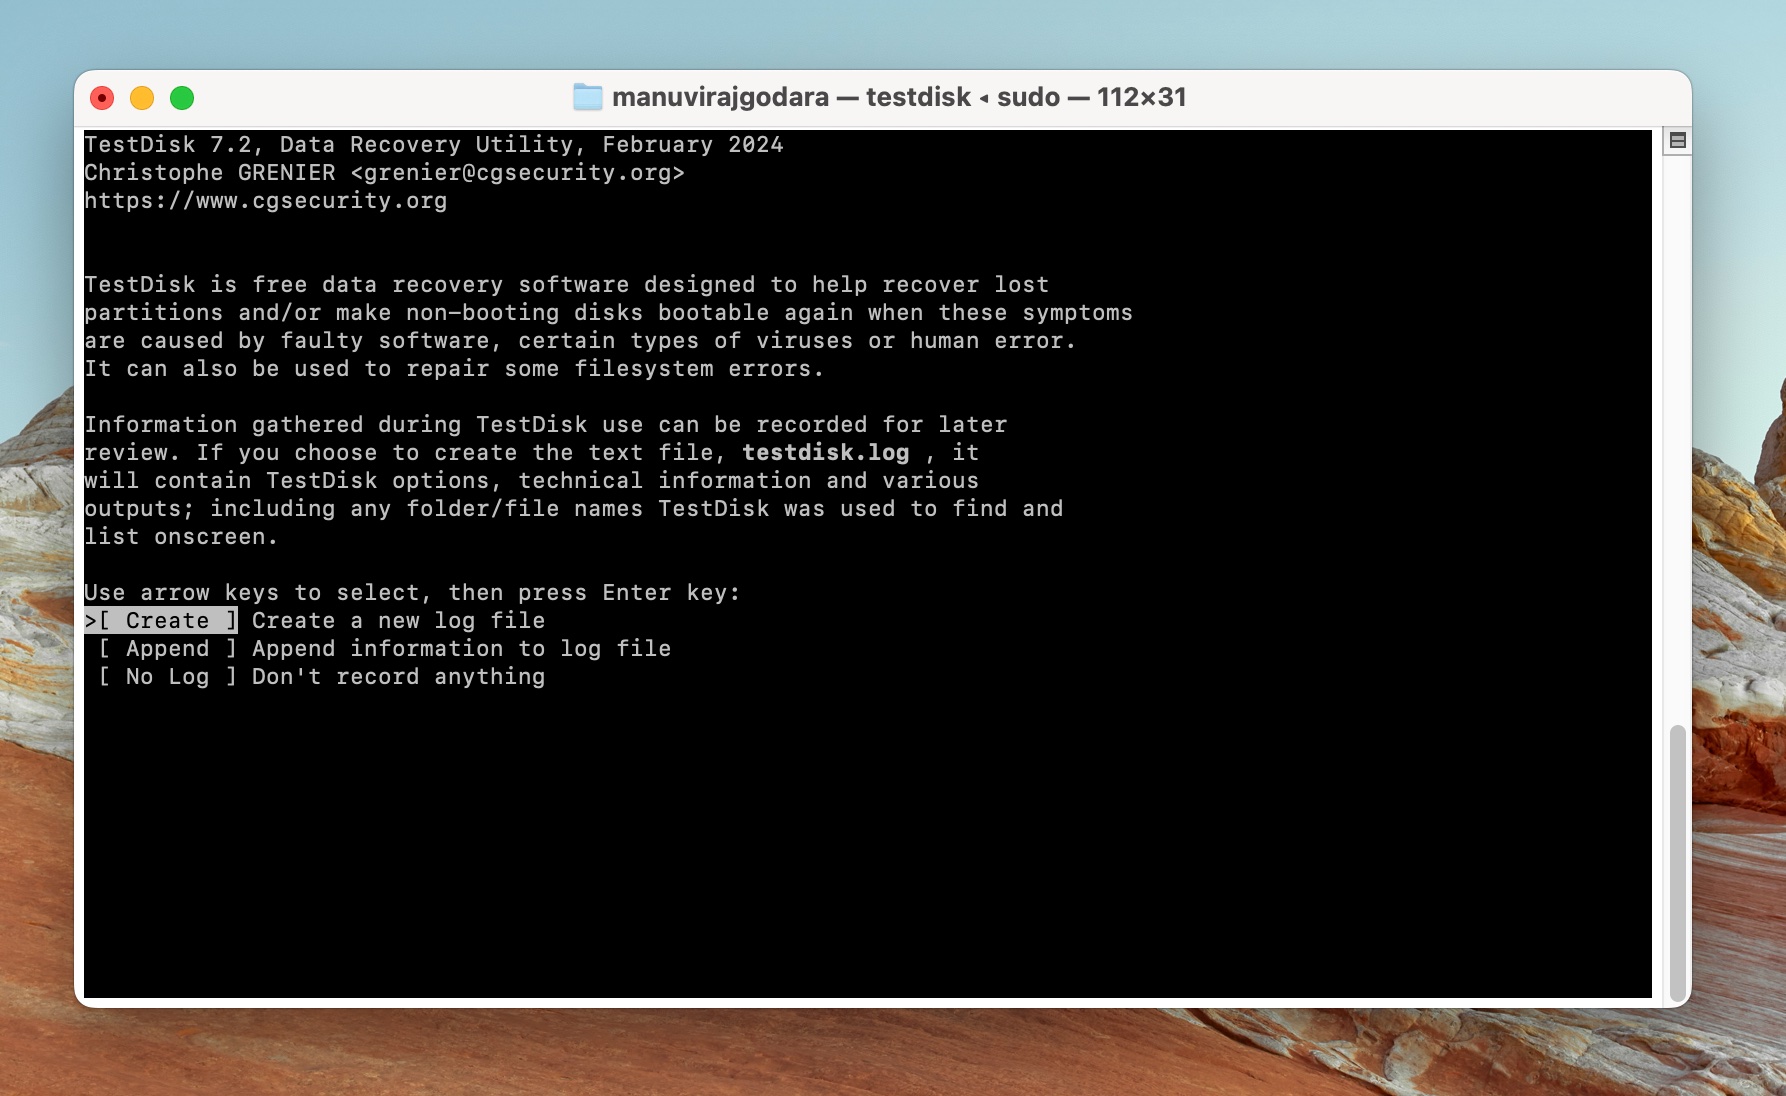
- Choose whether you want to create a log file or not. This doesn’t impact the data recovery process in any way.
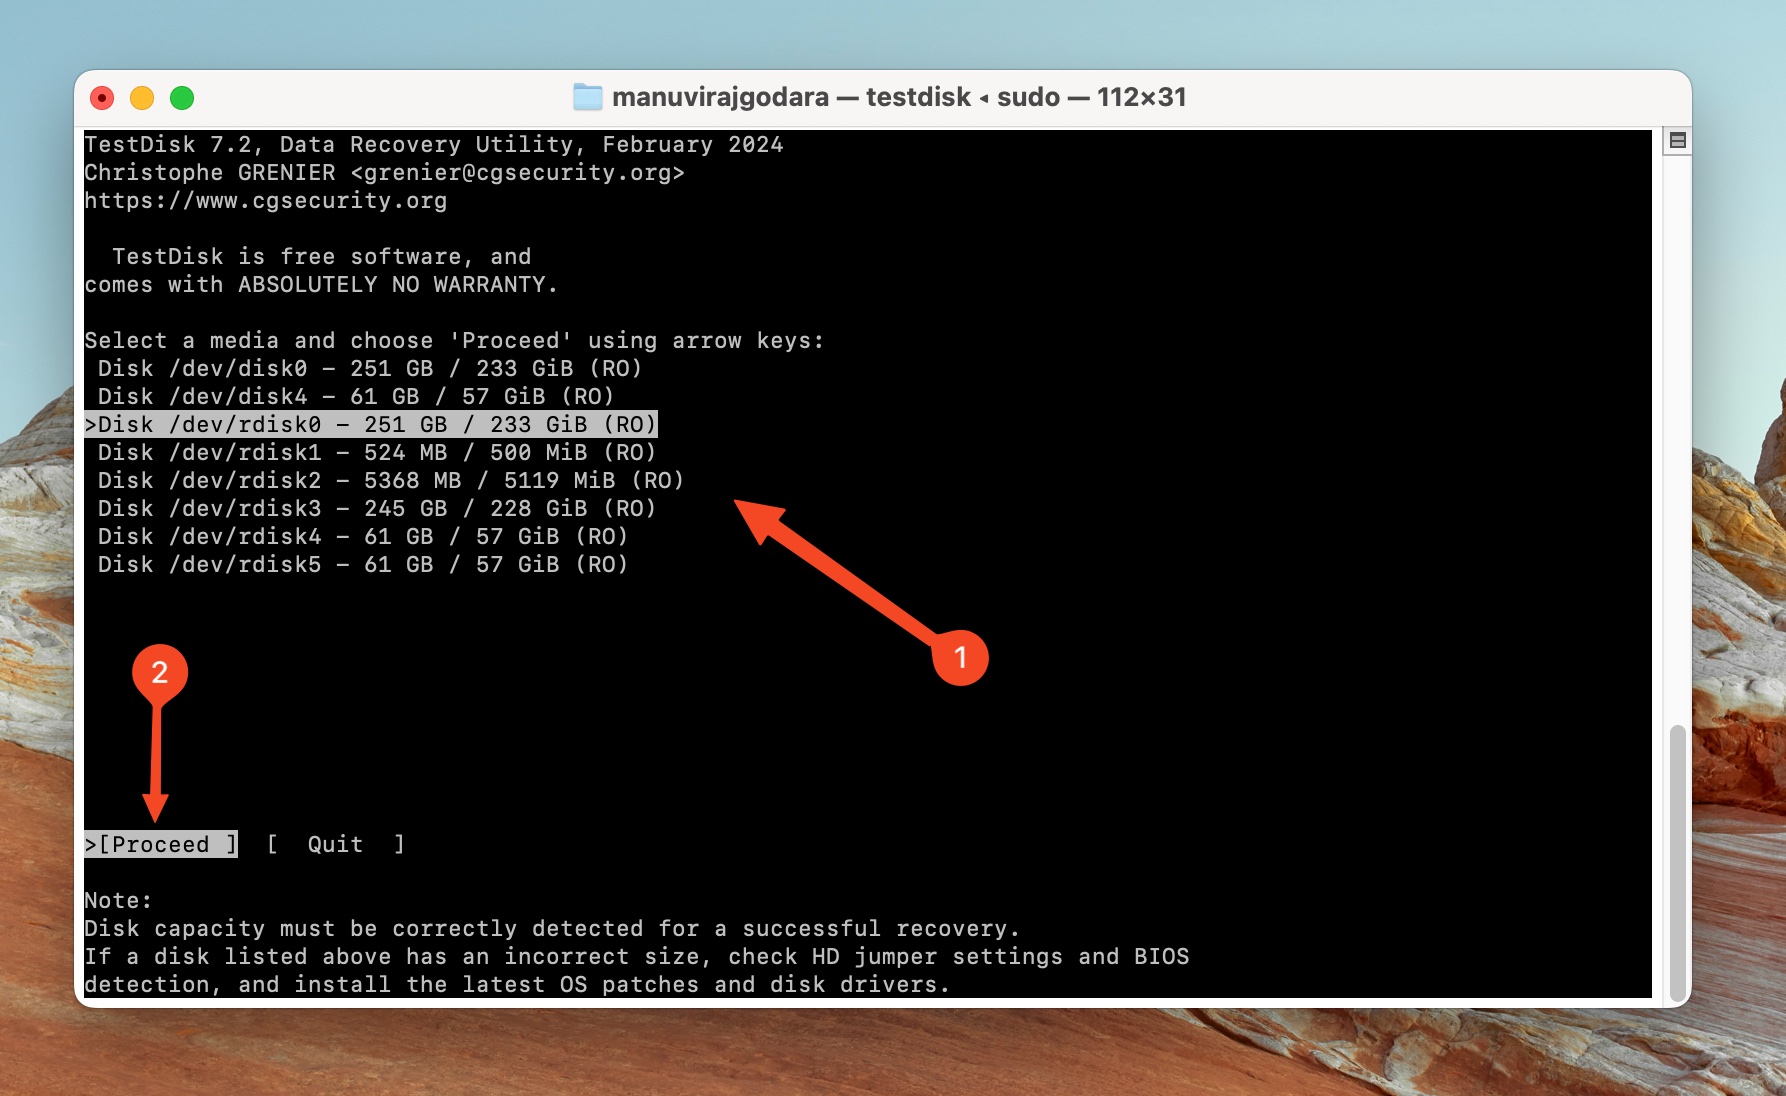
- Pick the drive you want to recover data from, and press Enter.
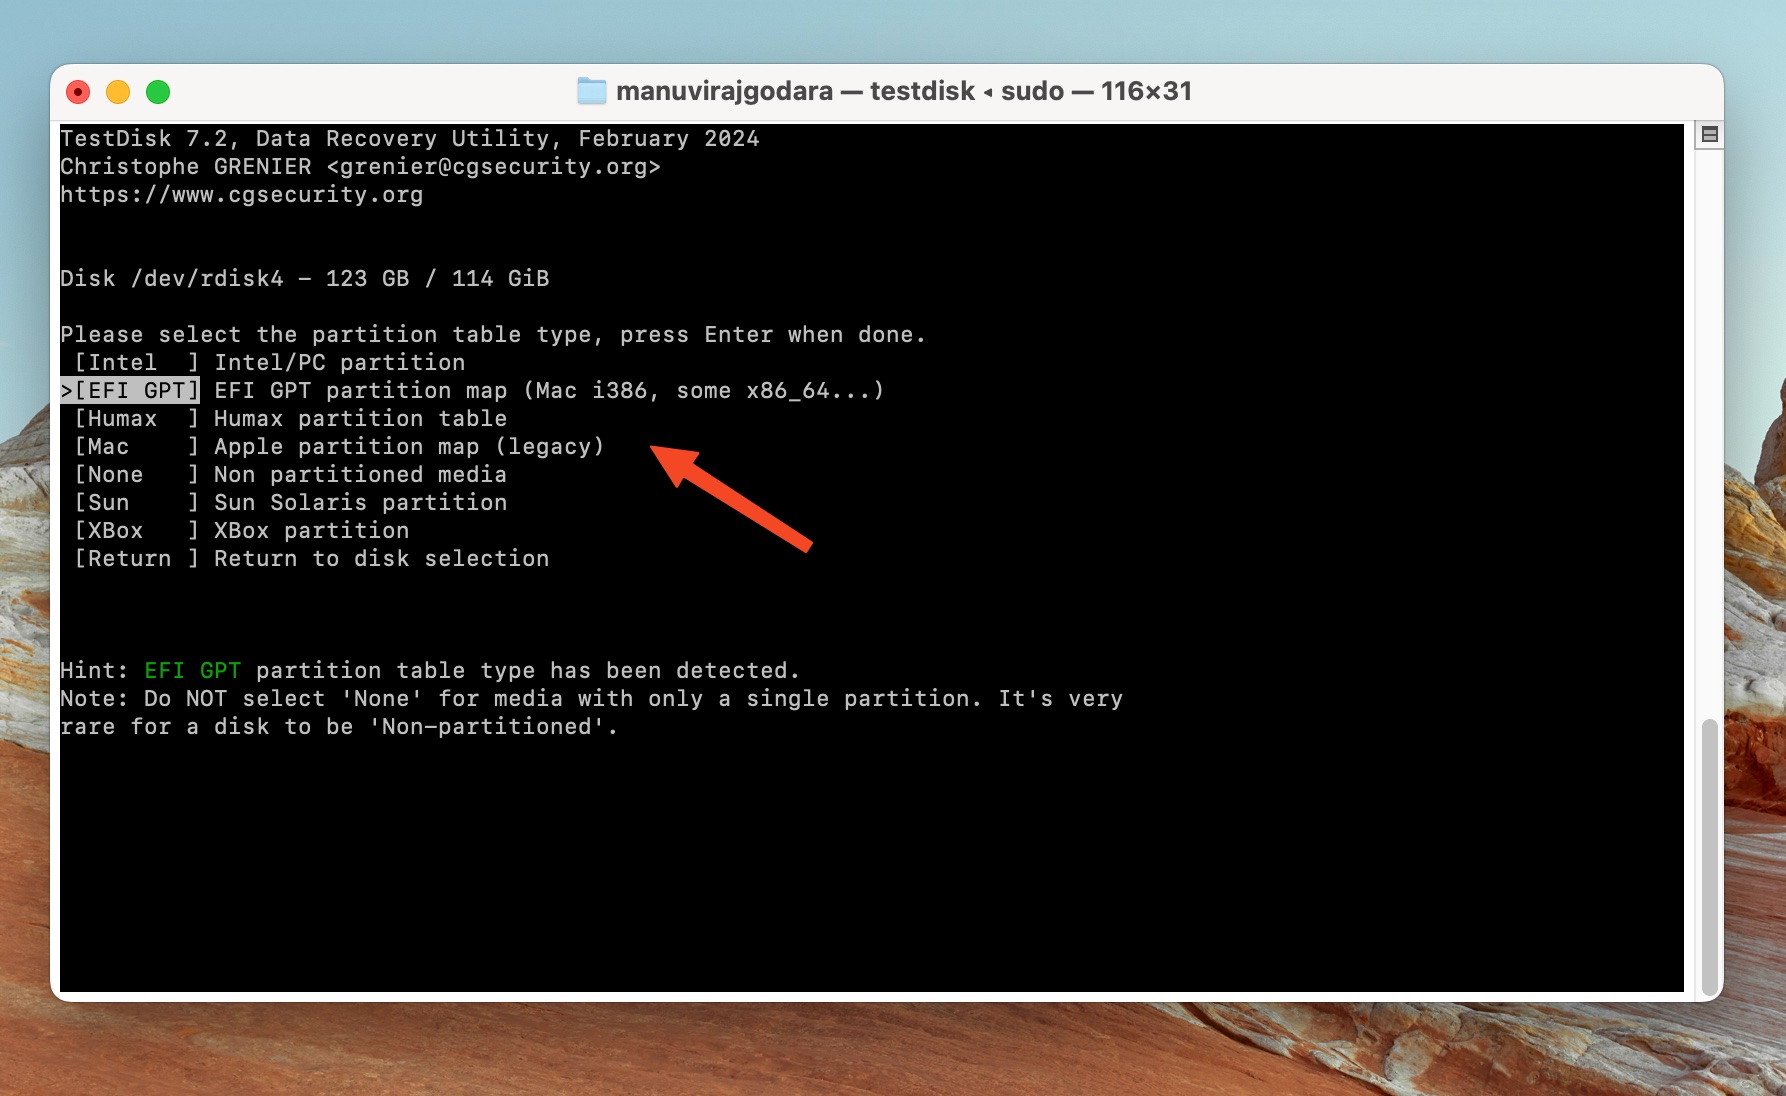
- Select the partition table type, and press Enter. TestDisk auto-detects the partition table, so it’s best to simply press Enter on this screen, unless you’re sure the drive uses some other partition table.
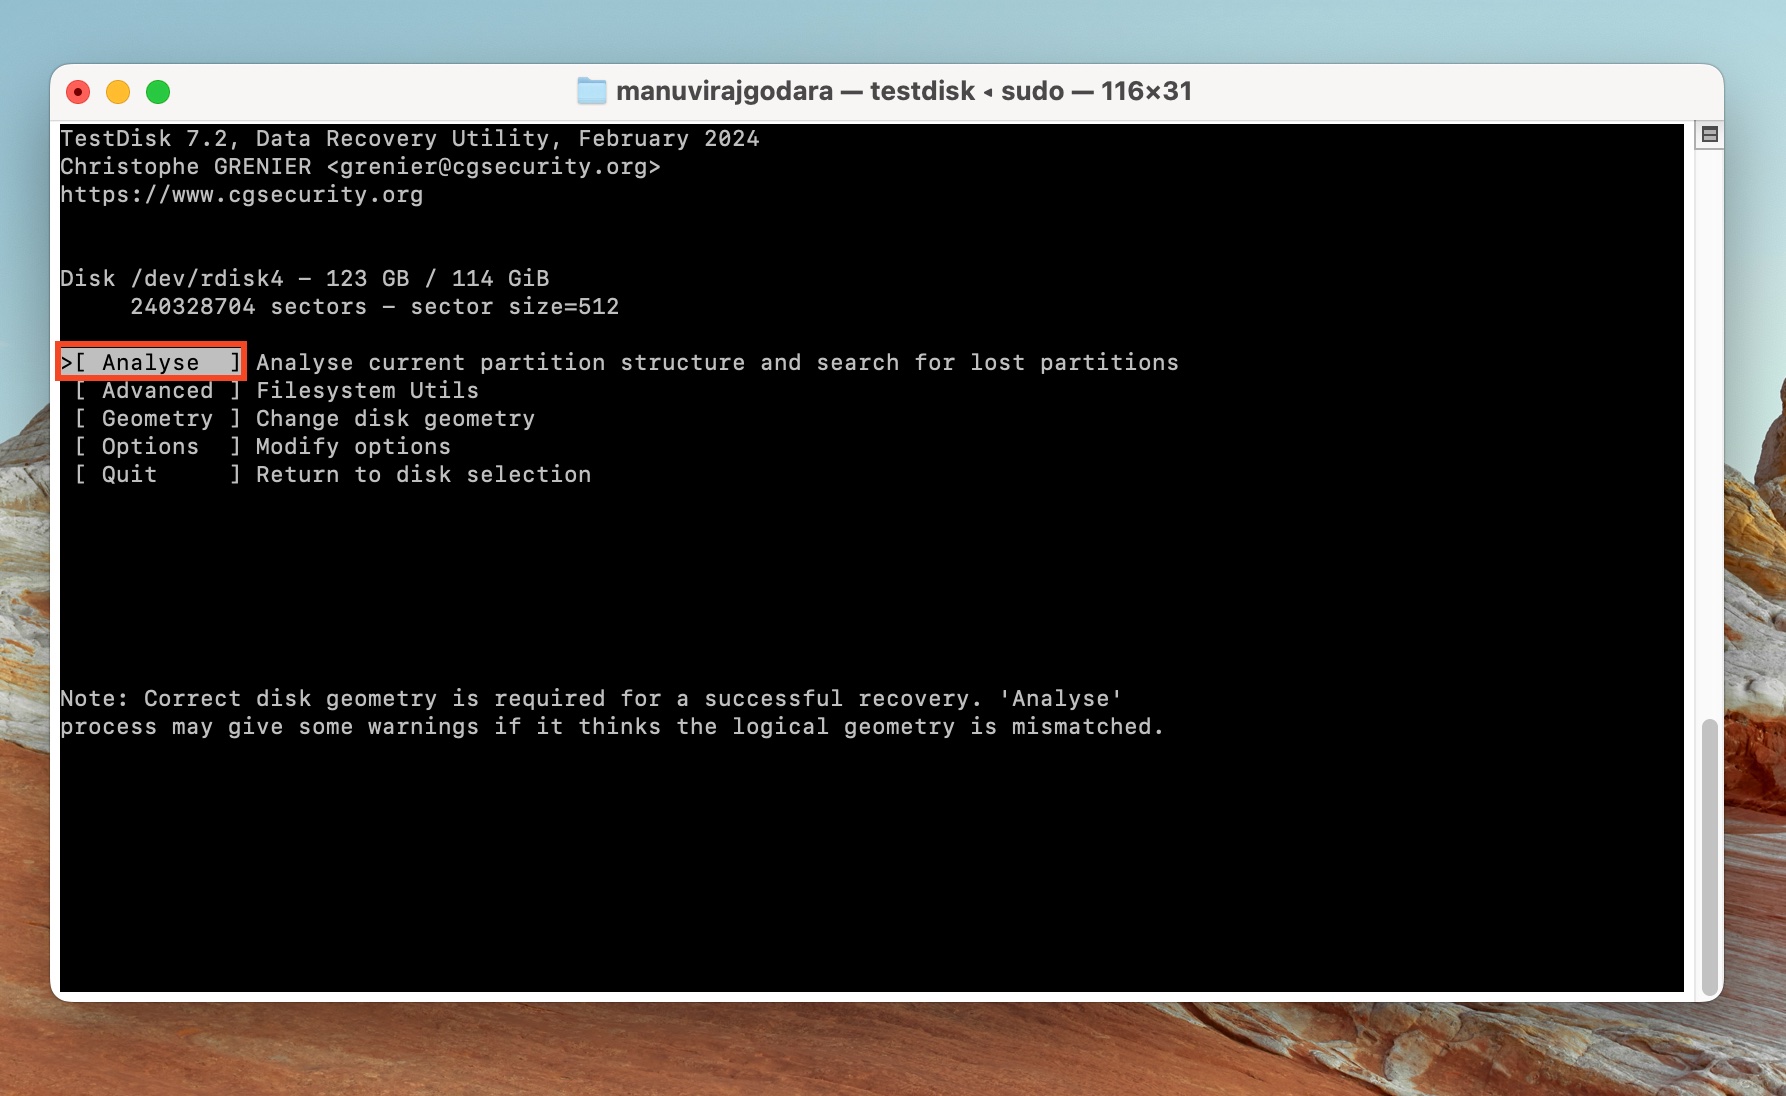
- Select Analyse, and press Enter.
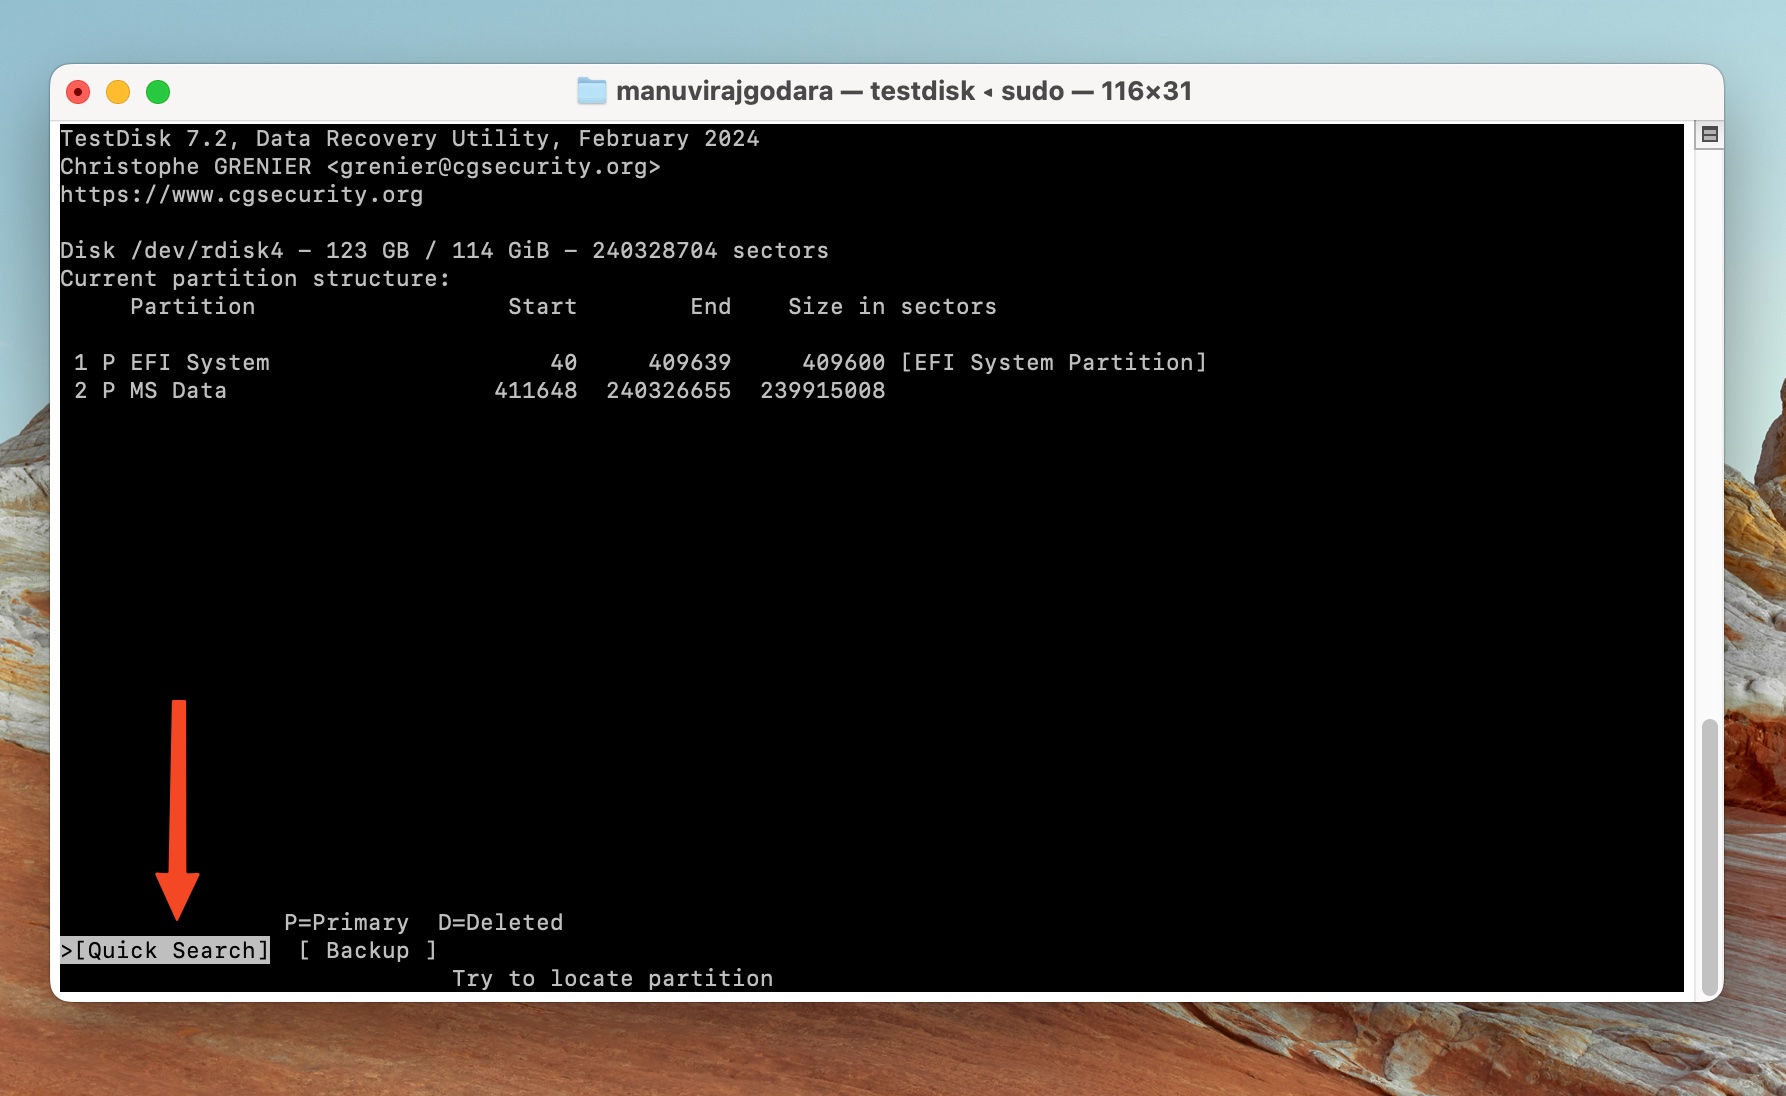
- Select Quick Search, and press Enter.
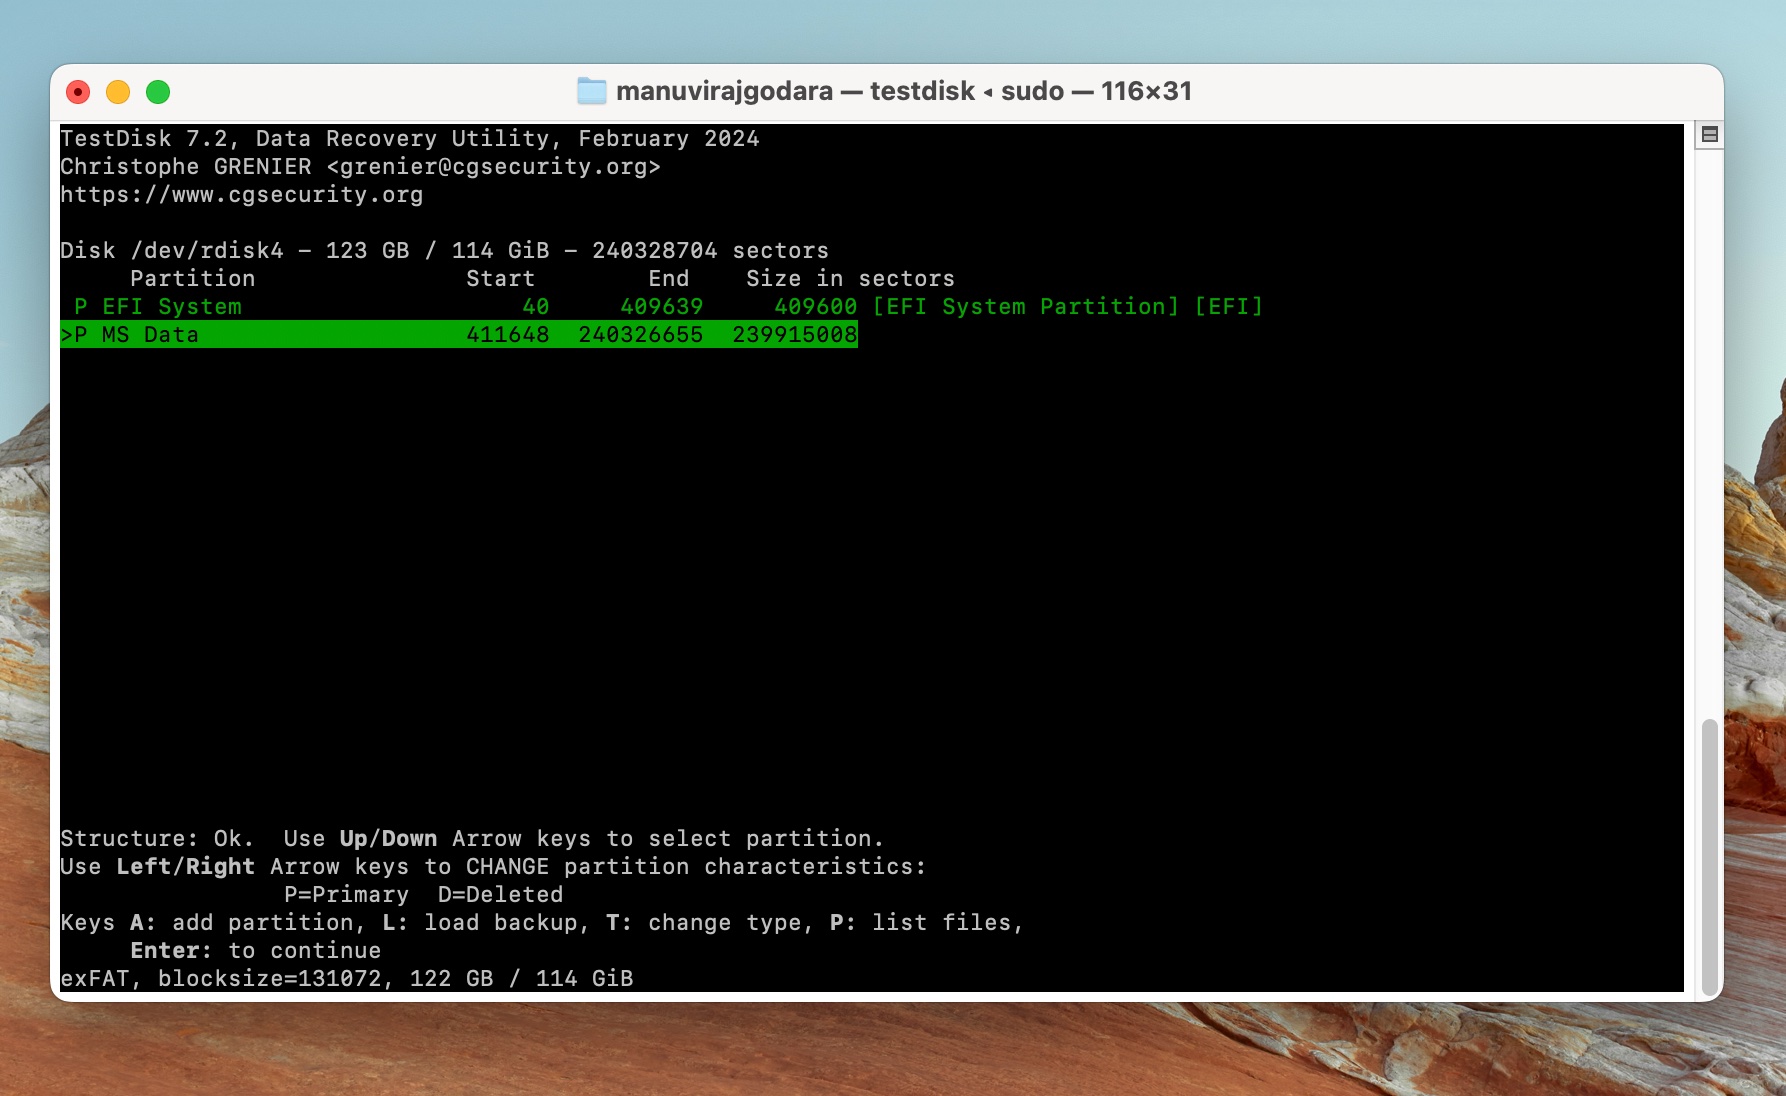
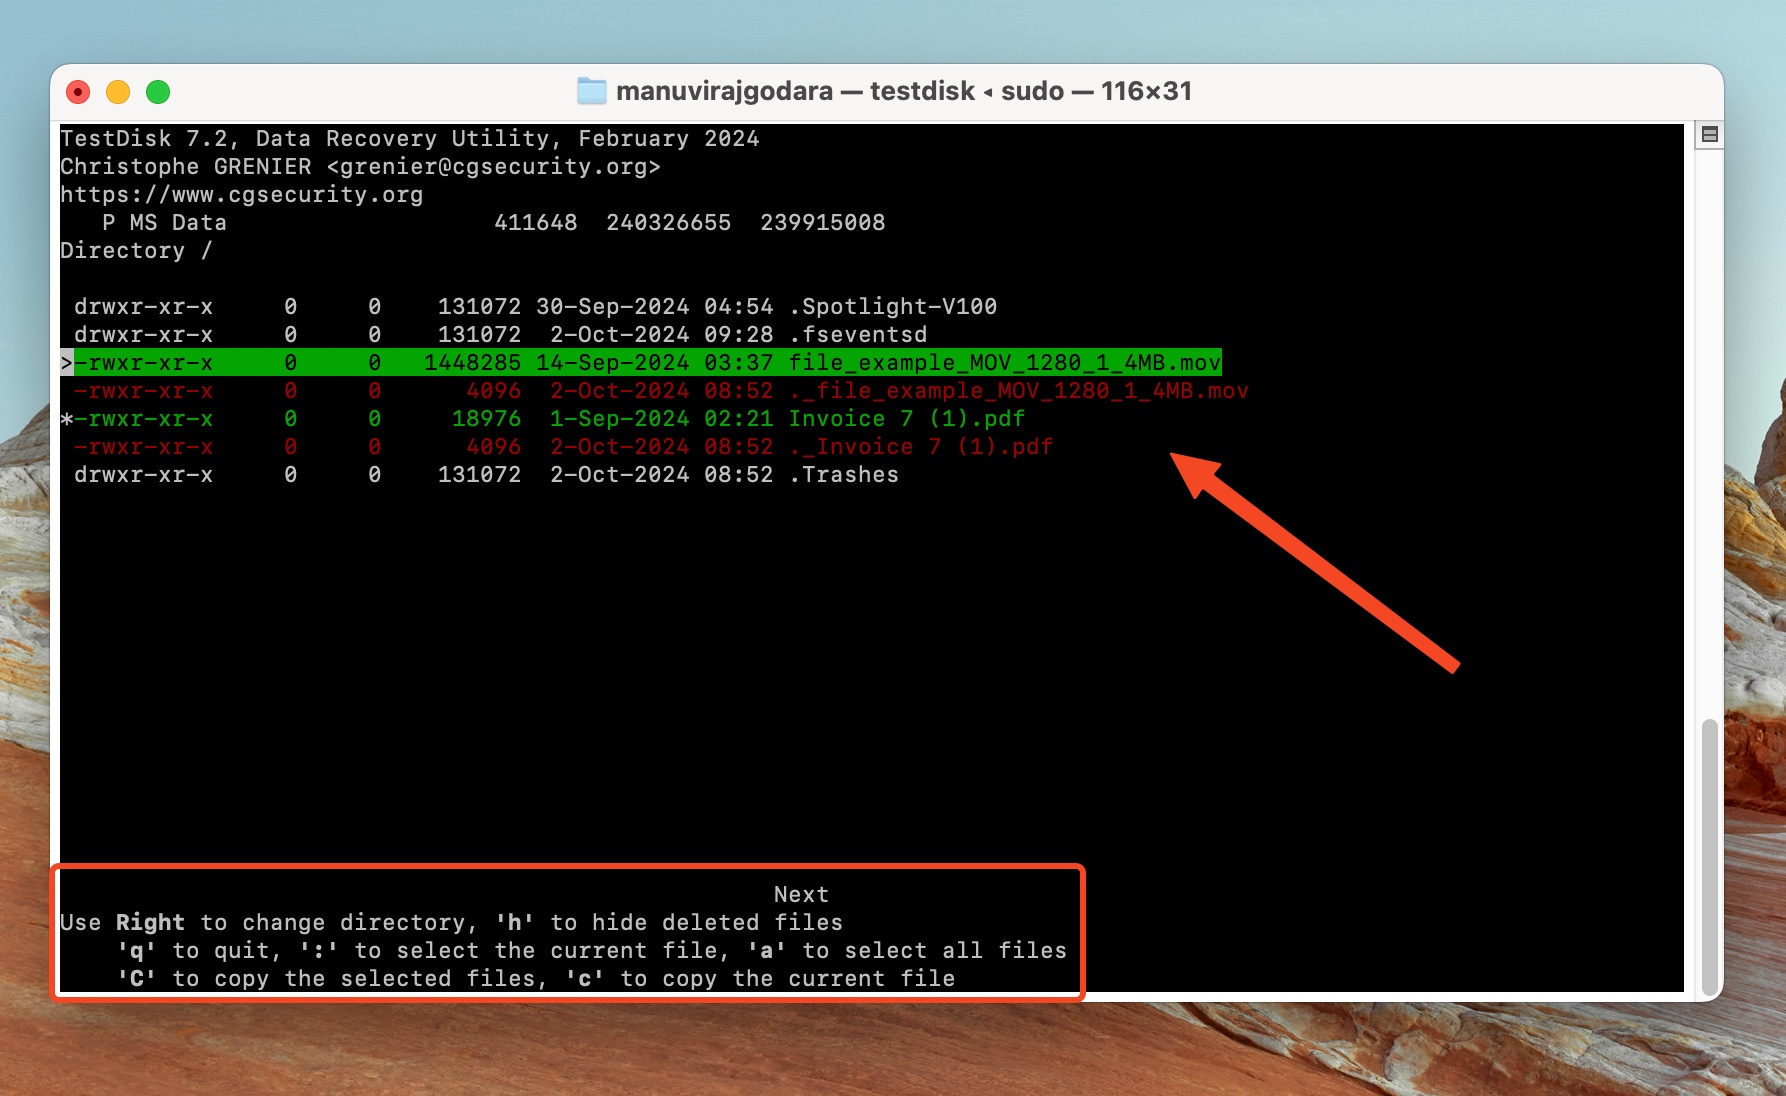
- TestDisk will list the partitions it discovers on the drive. Highlight the partition you want to recover data from, and press P on your keyboard—this lists the files on the partition, including deleted ones.
- Navigate through the directories by using the arrow keys, and pressing Enter. You can go and forth between directories by pressing the left and right arrow keys. Select the files you wish to recover by navigating to each of them and pressing : (colon). Once you’ve selected the files, press C (uppercase), then navigate to the recovery destination, and press C (uppercase) again to copy the files. Once copied, press Q to go back.
- Close TestDisk.
Note: If a drive is encrypted with FileVault encryption,TestDisk won’t work until you turn off FileVault first.
What If Terminal Didn’t Recover Your Deleted Files?
In case none of the methods above recovered your deleted files, your only option is to use a capable third-party GUI-based data recovery tool, or contact a professional data recovery service.
There are innumerable data recovery programs on the web, all claiming to be the “best”. My advice—choose an option from our curated list of the best data recovery apps. These programs have proven their reliability and effectiveness.
For this tutorial, I’ll use Disk Drill. Thanks to its ease of use, combined with a reliable data recovery algorithm, the program fits the bill for novice, and expert users alike. Disk Drill offers several ways of sorting, previewing, and filtering your files, making data recovery that much easier. Unlike many other data recovery apps, Disk Drill works in macOS’ Recovery Mode too—you will still temporarily require an internet connection to download the app.
Here’s how to use Disk Drill to recover deleted files on your Mac:
- Download Disk Drill, and install it. Give the program the necessary permissions.
- If you’re in macOS’ Recovery Mode, click on Utilities > Terminal and paste the following command: sh <(curl http://www.cleverfiles.com/bootmode/boot.xml). Press Enter, and Disk Drill will automatically download, and open.
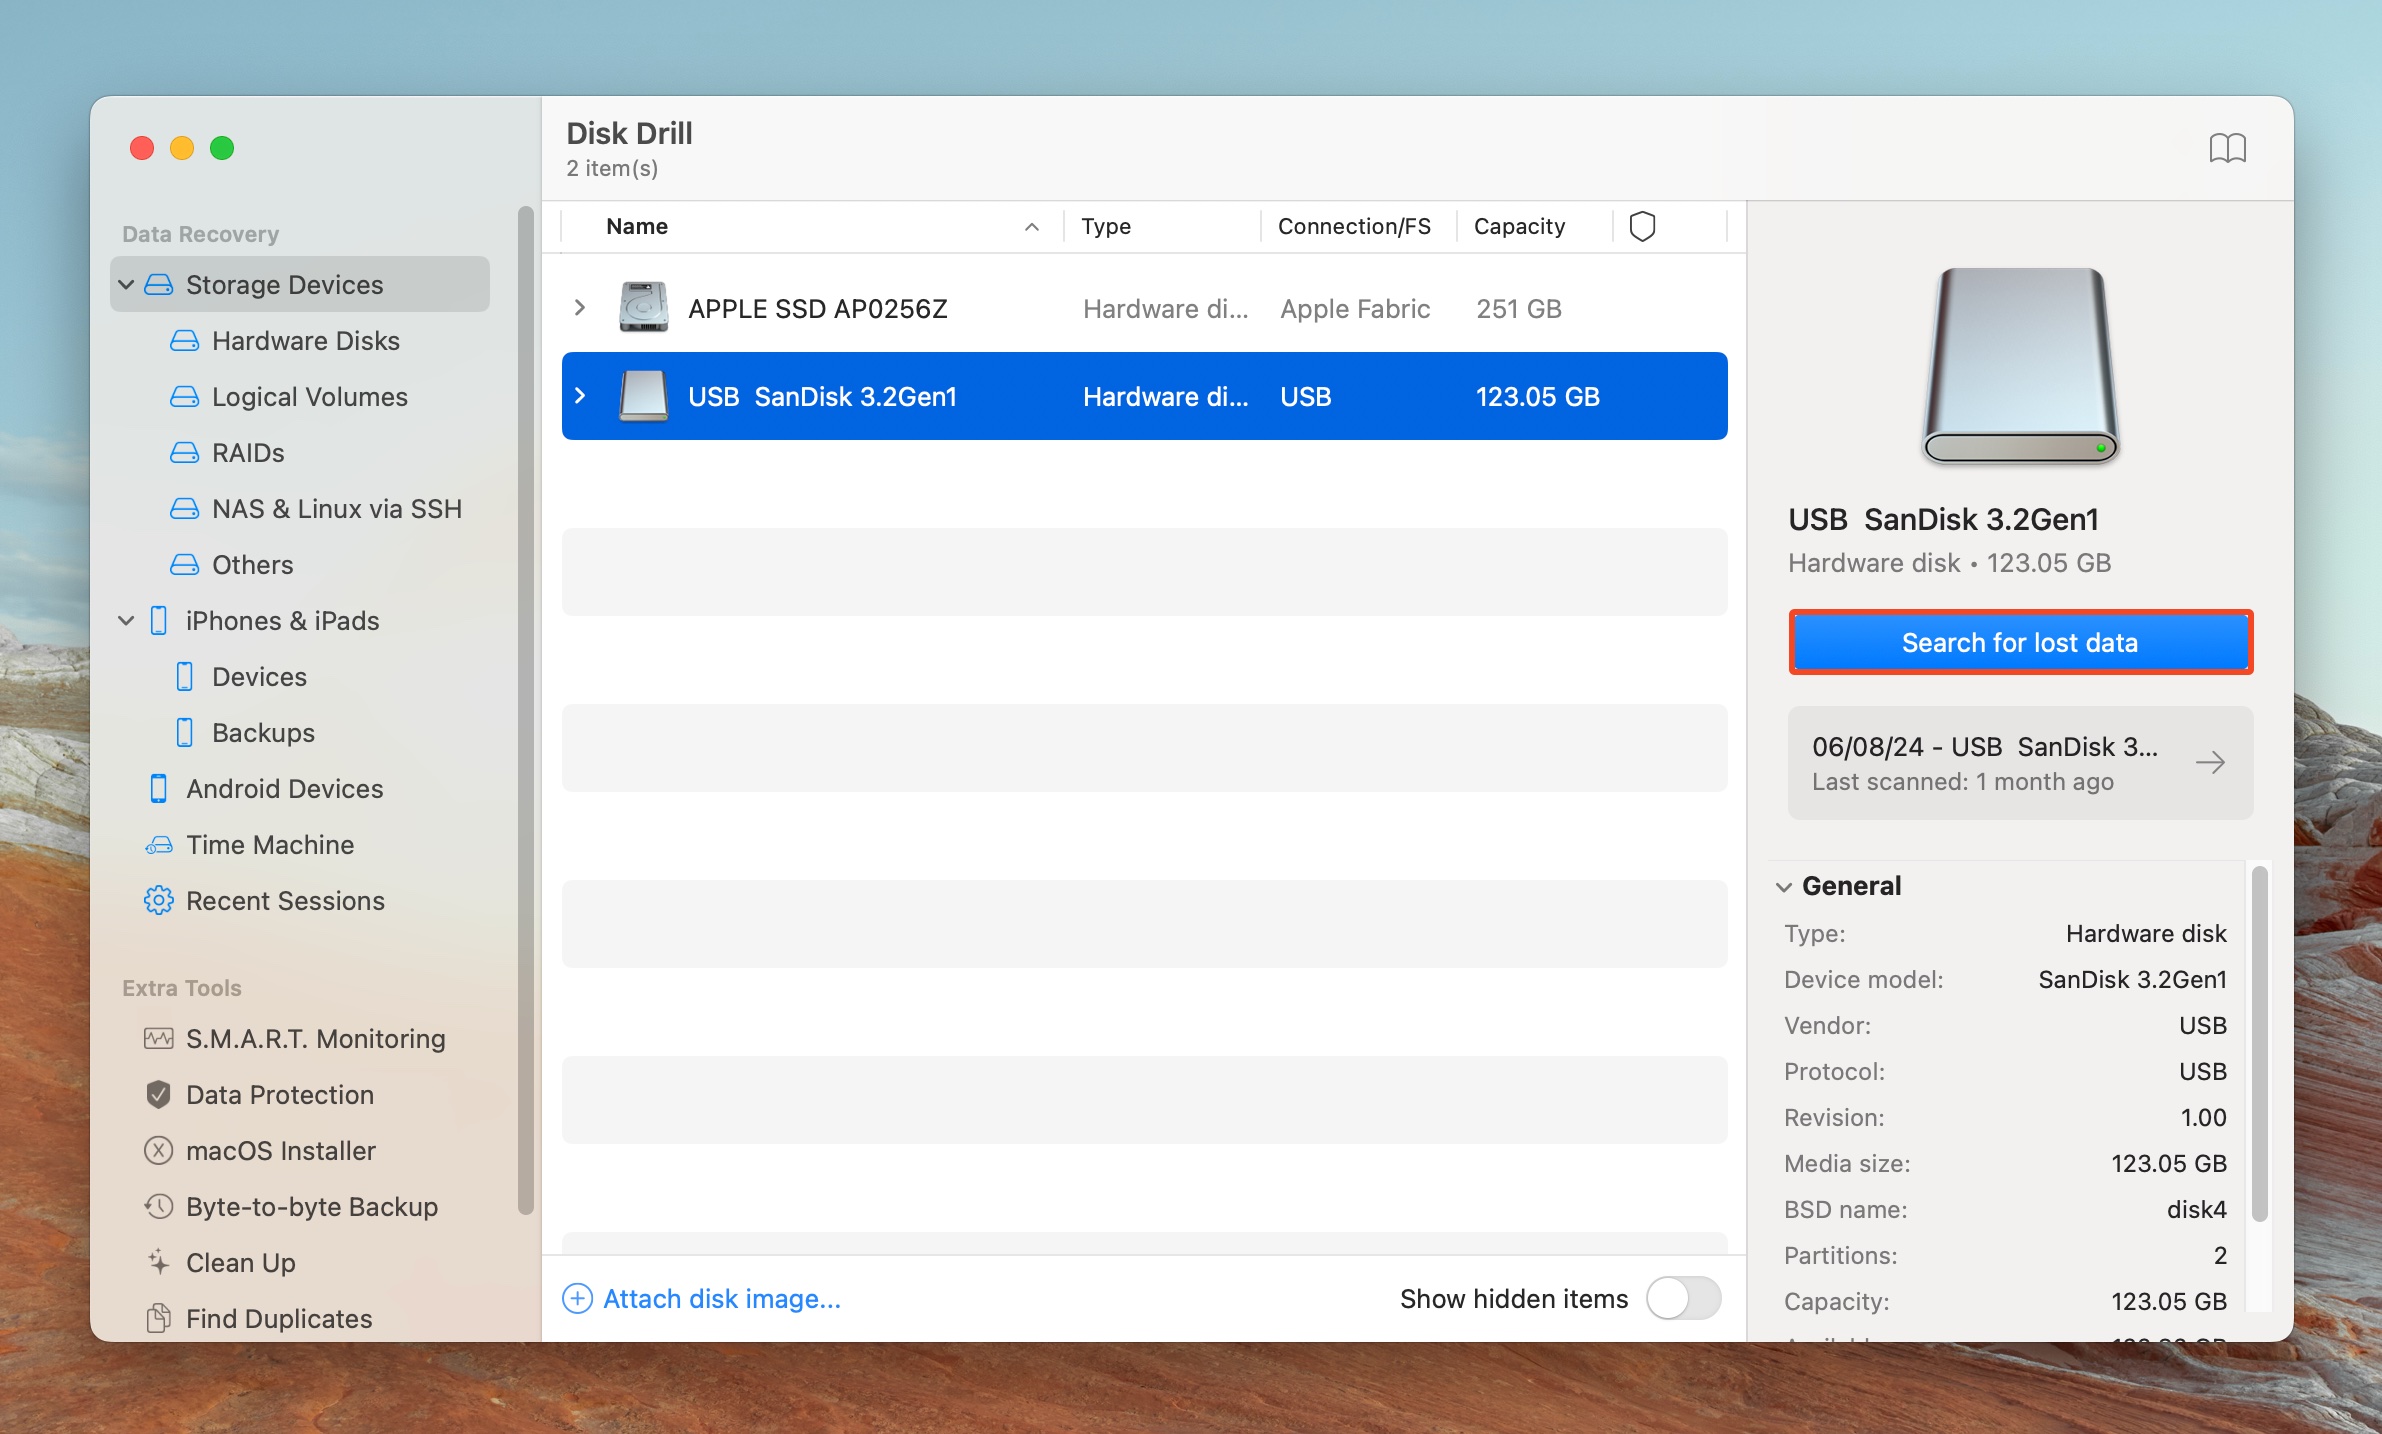
- Select the drive you wish to recover data from, and click Search for lost data.
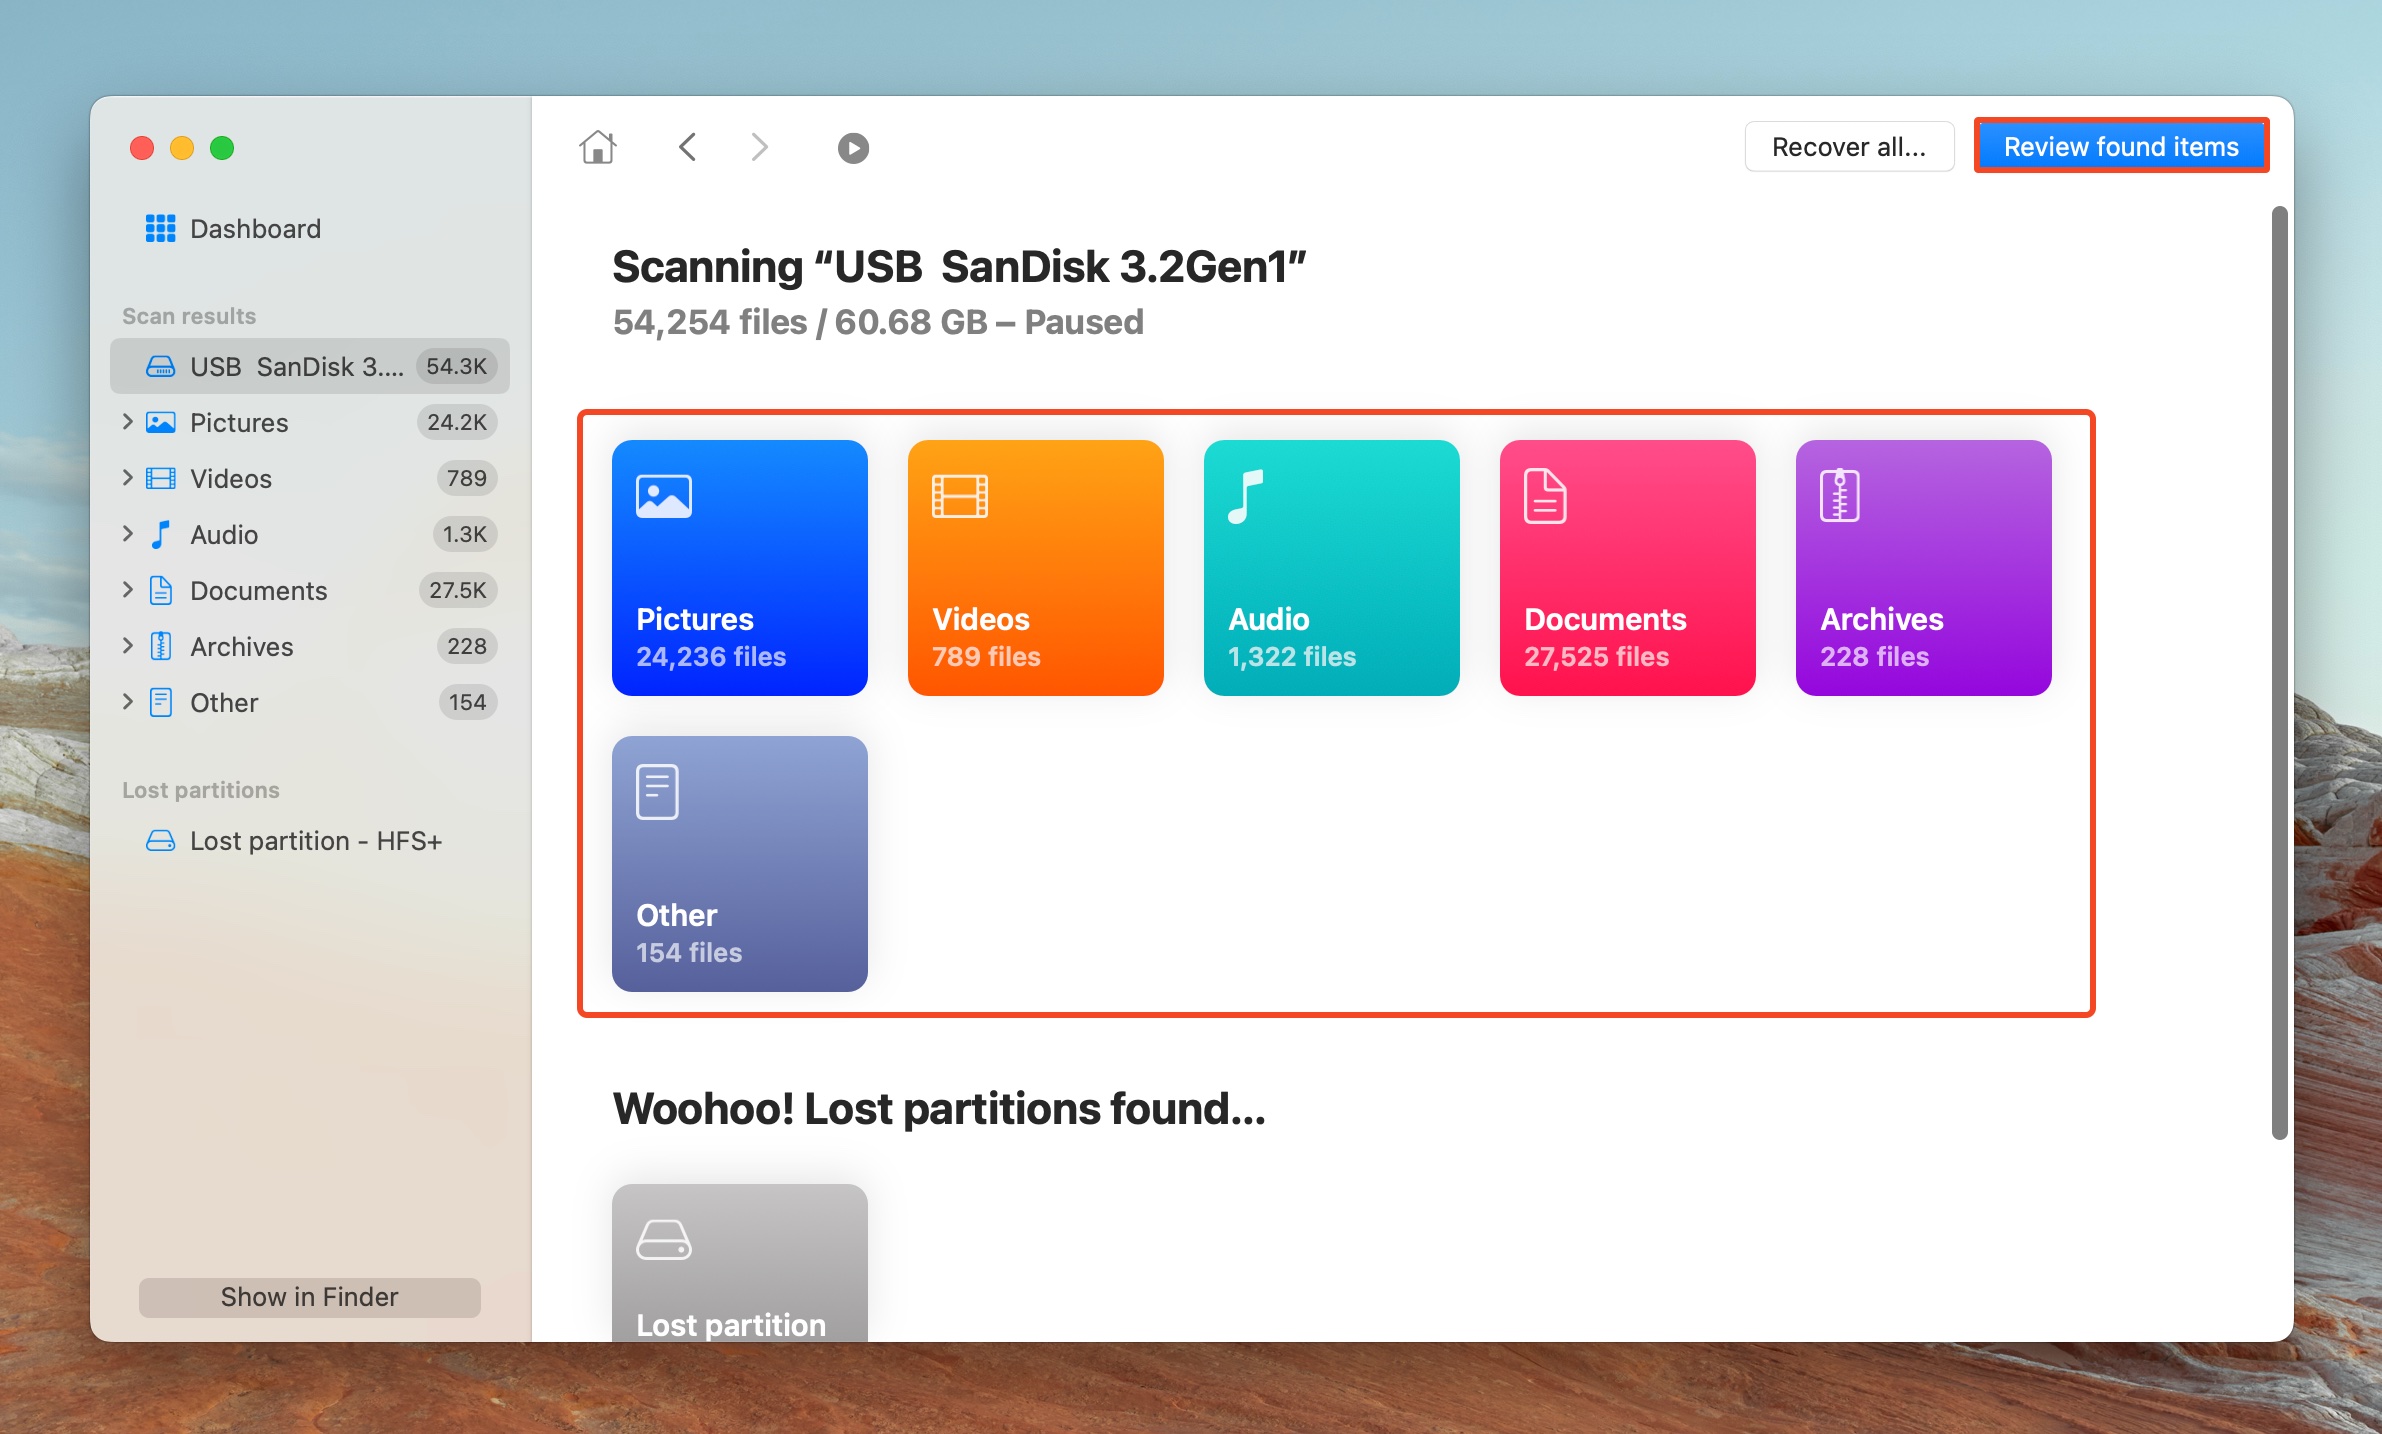
- Click on Review found items once Disk Drill has finished scanning your drive. To only view certain file types, click on the relevant file type tile instead (Pictures, Videos, Audio, Documents, Archives, and Other).
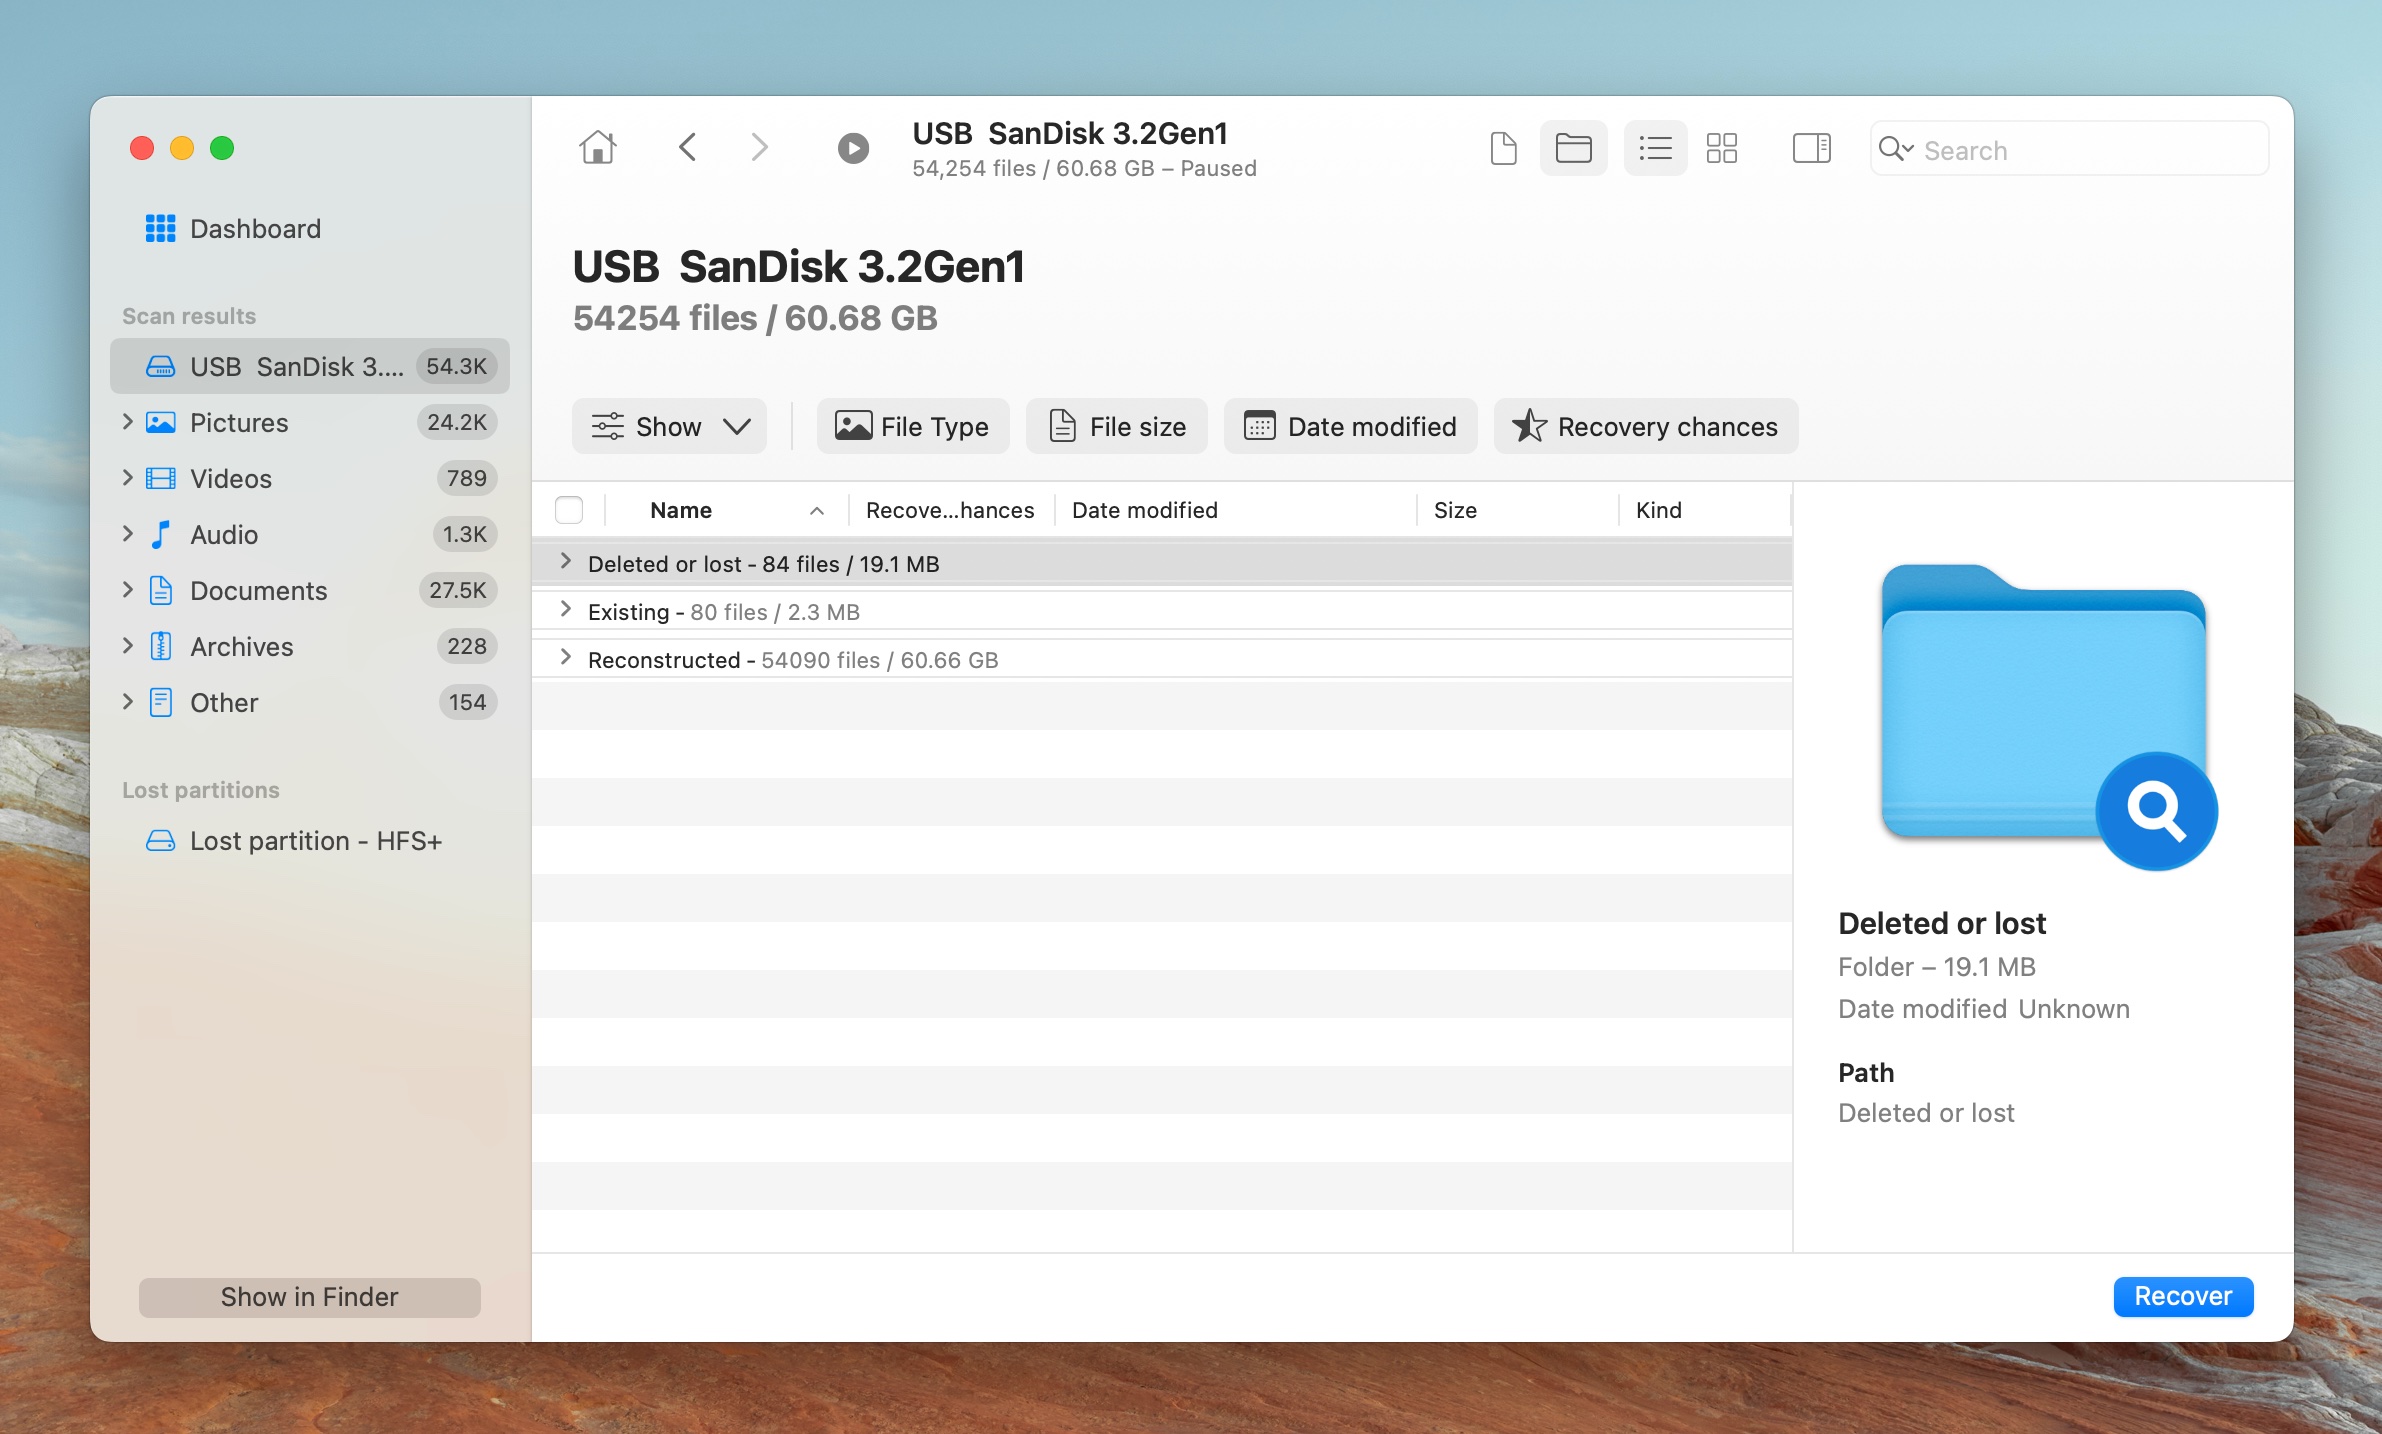
- Expand the Deleted or lost, and Reconstructed sections.
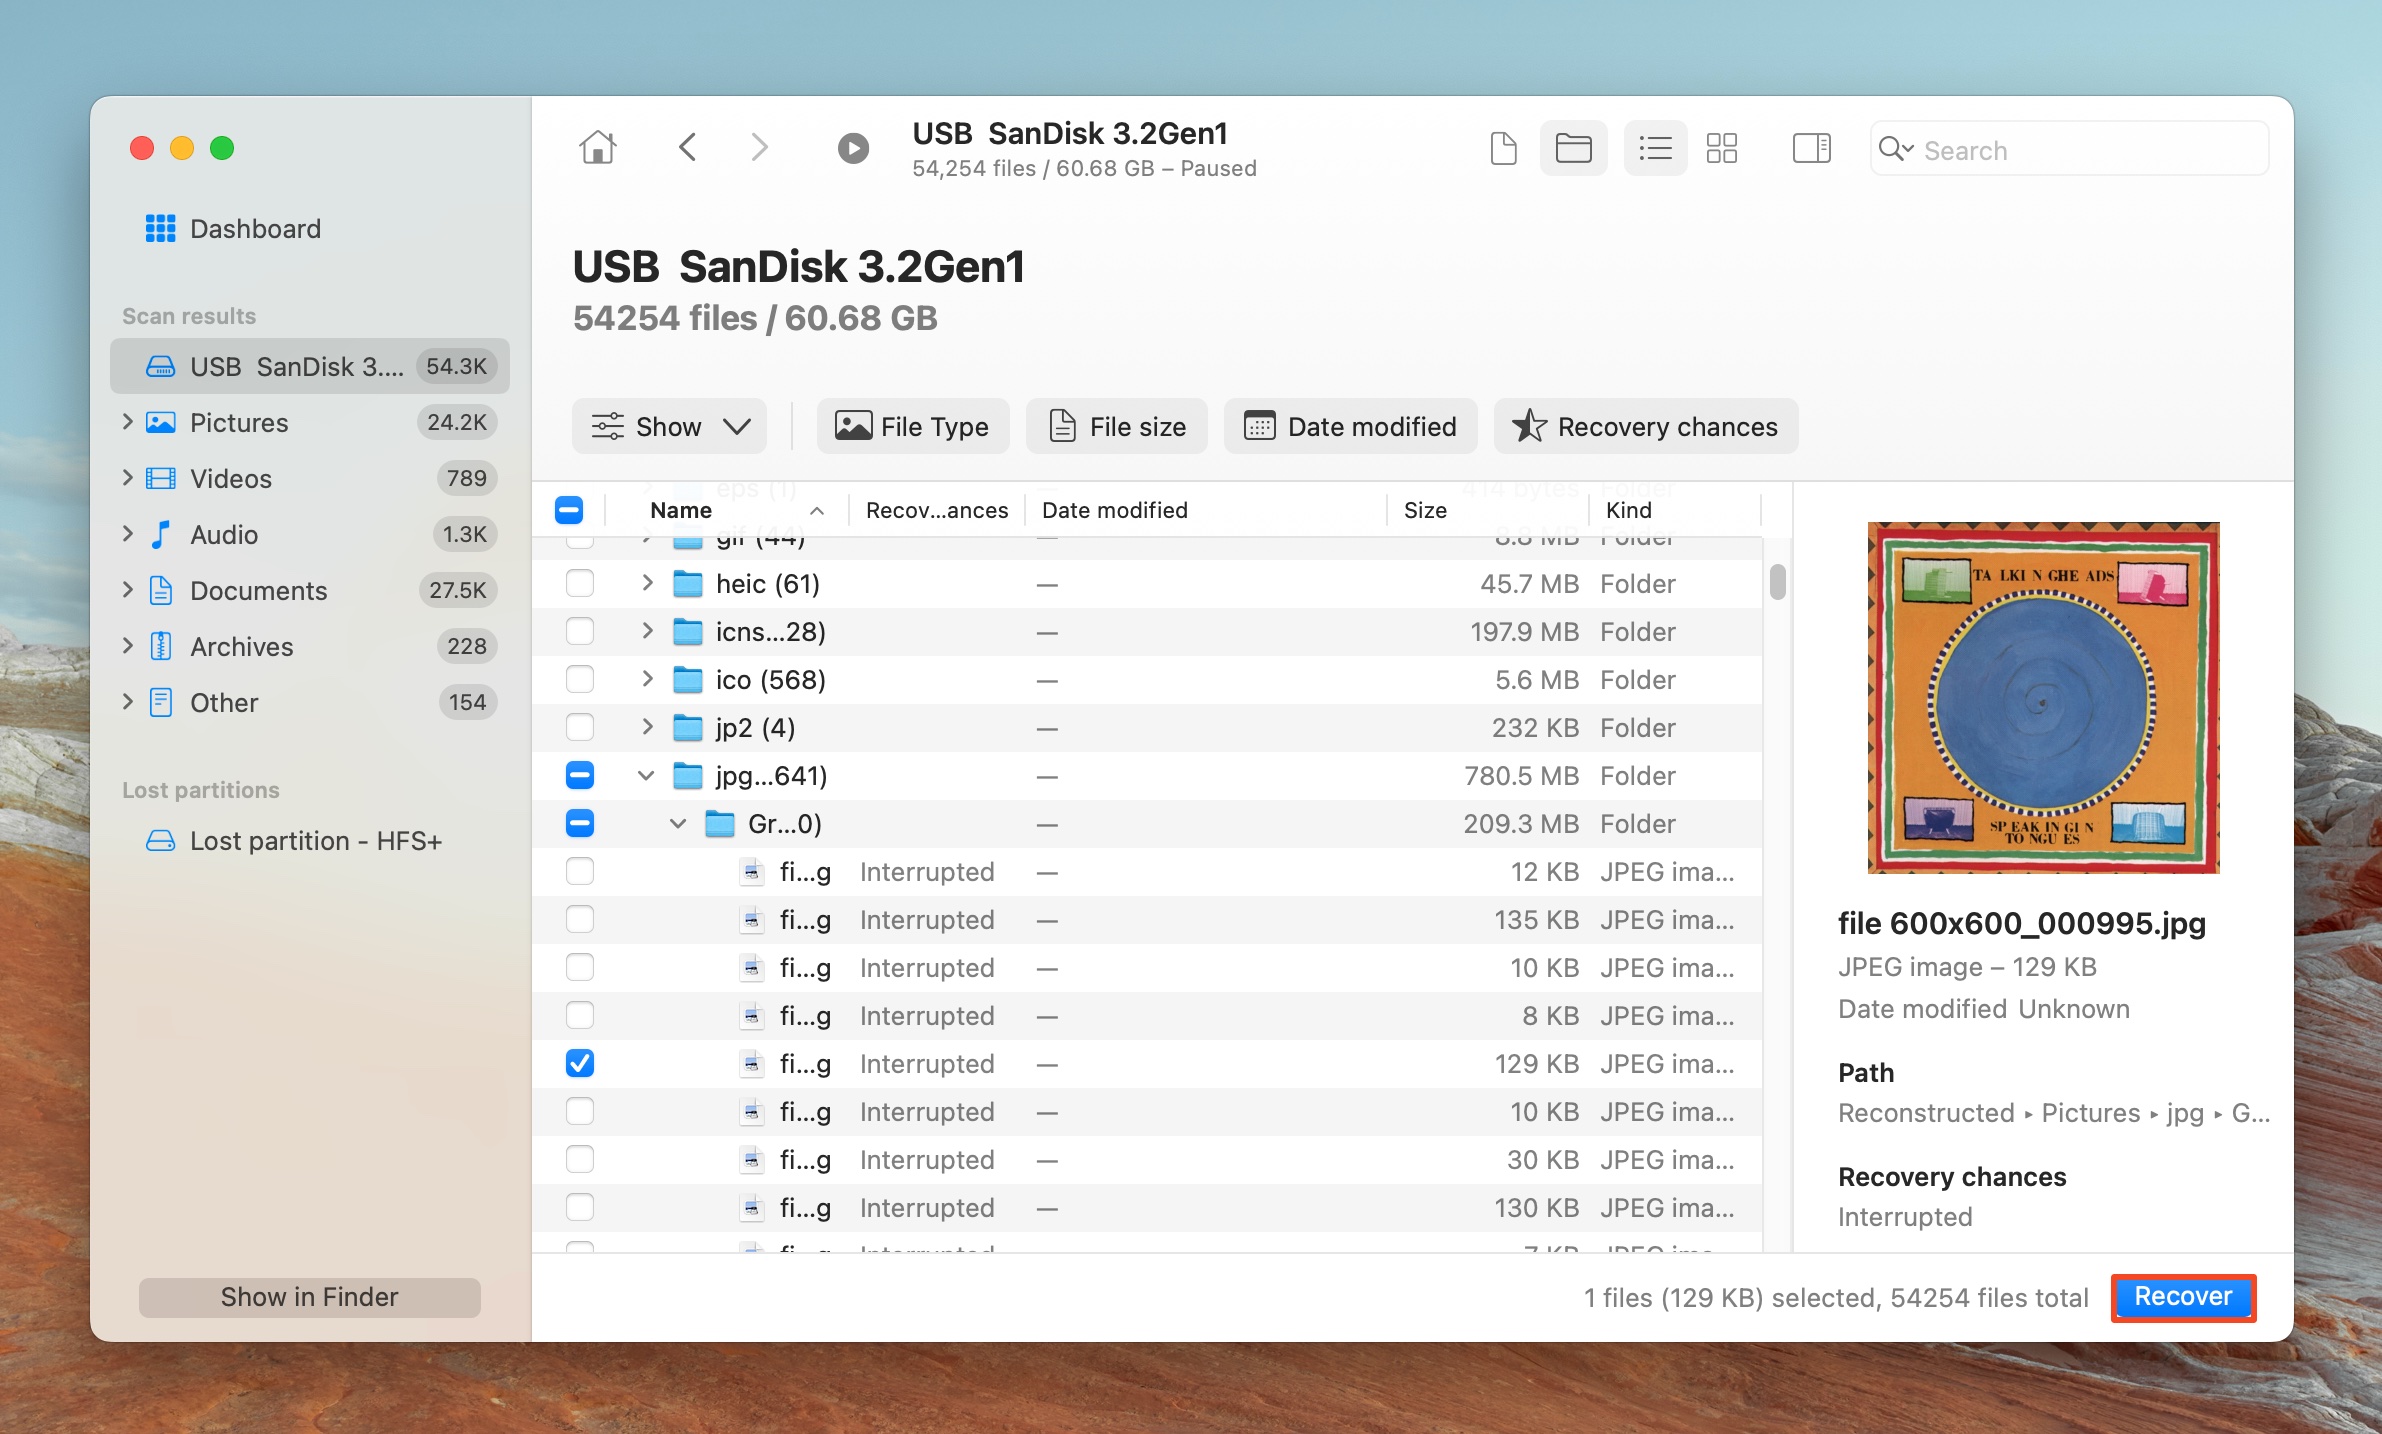
- Select the files you wish to recover. Disk Drill automatically displays a preview of the currently selected file, but you can manually preview any file by clicking the eye icon next to its filename. Once you’ve selected the required files, click on Recover.
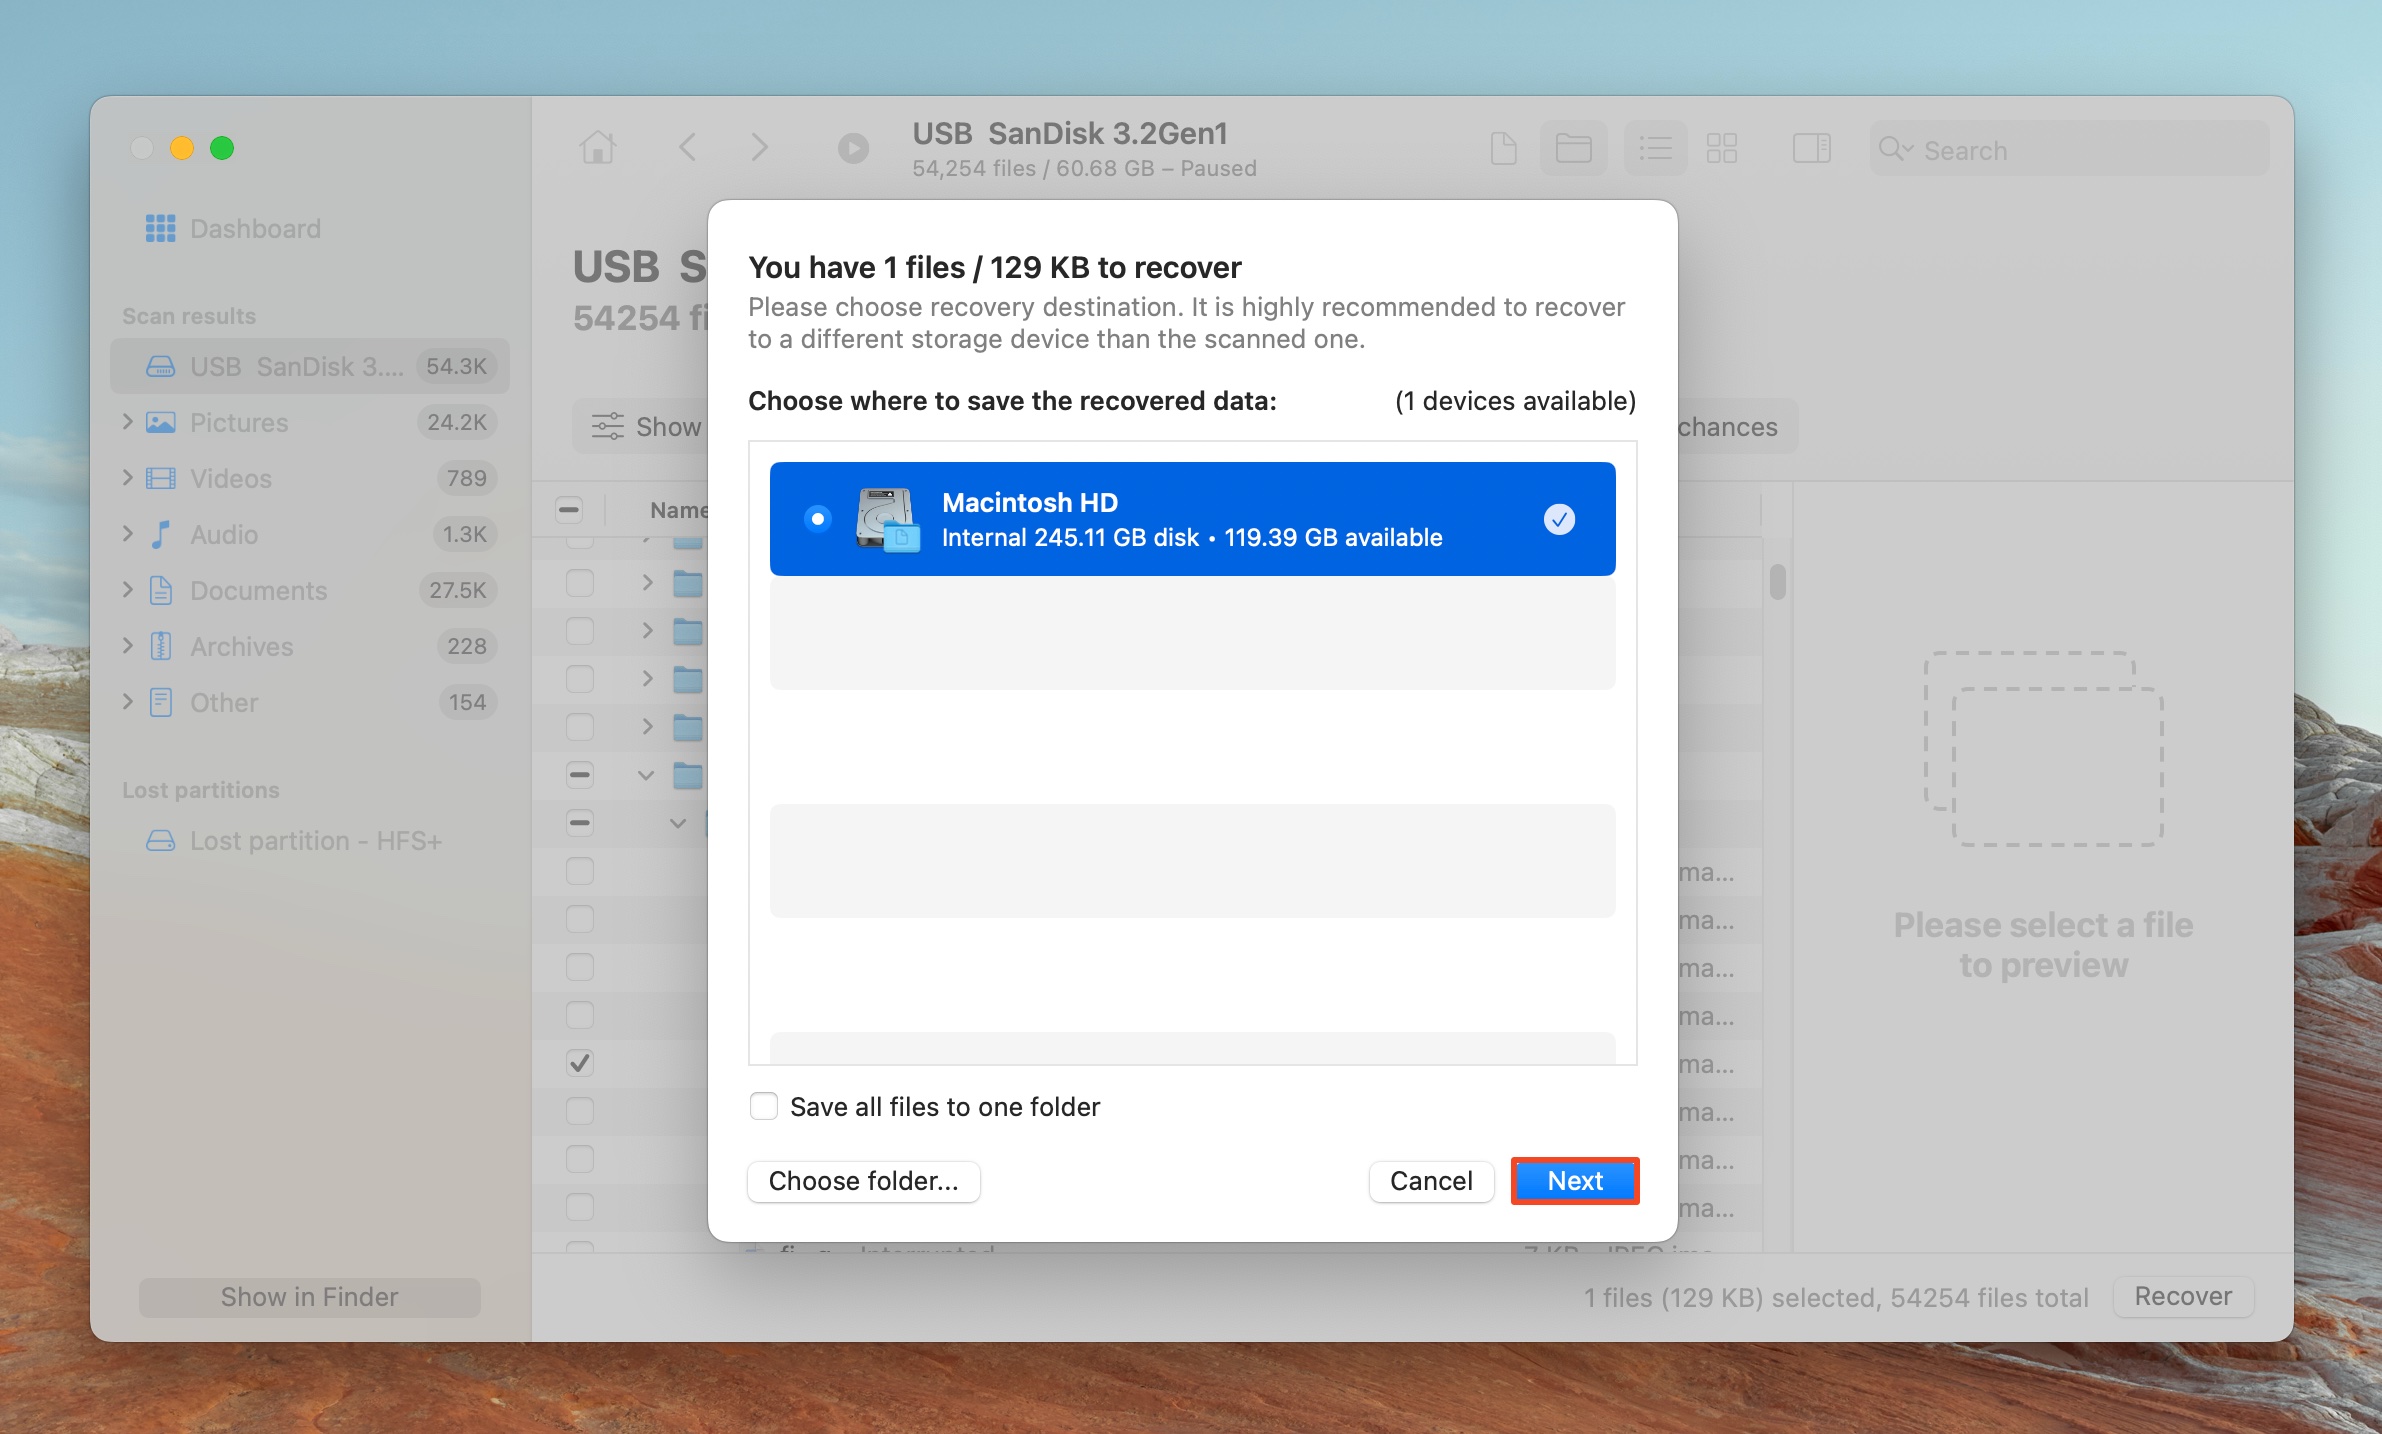
- Choose a recovery destination, and click Next. It’s good practice to choose some other drive, instead of the one you’re recovering data from.
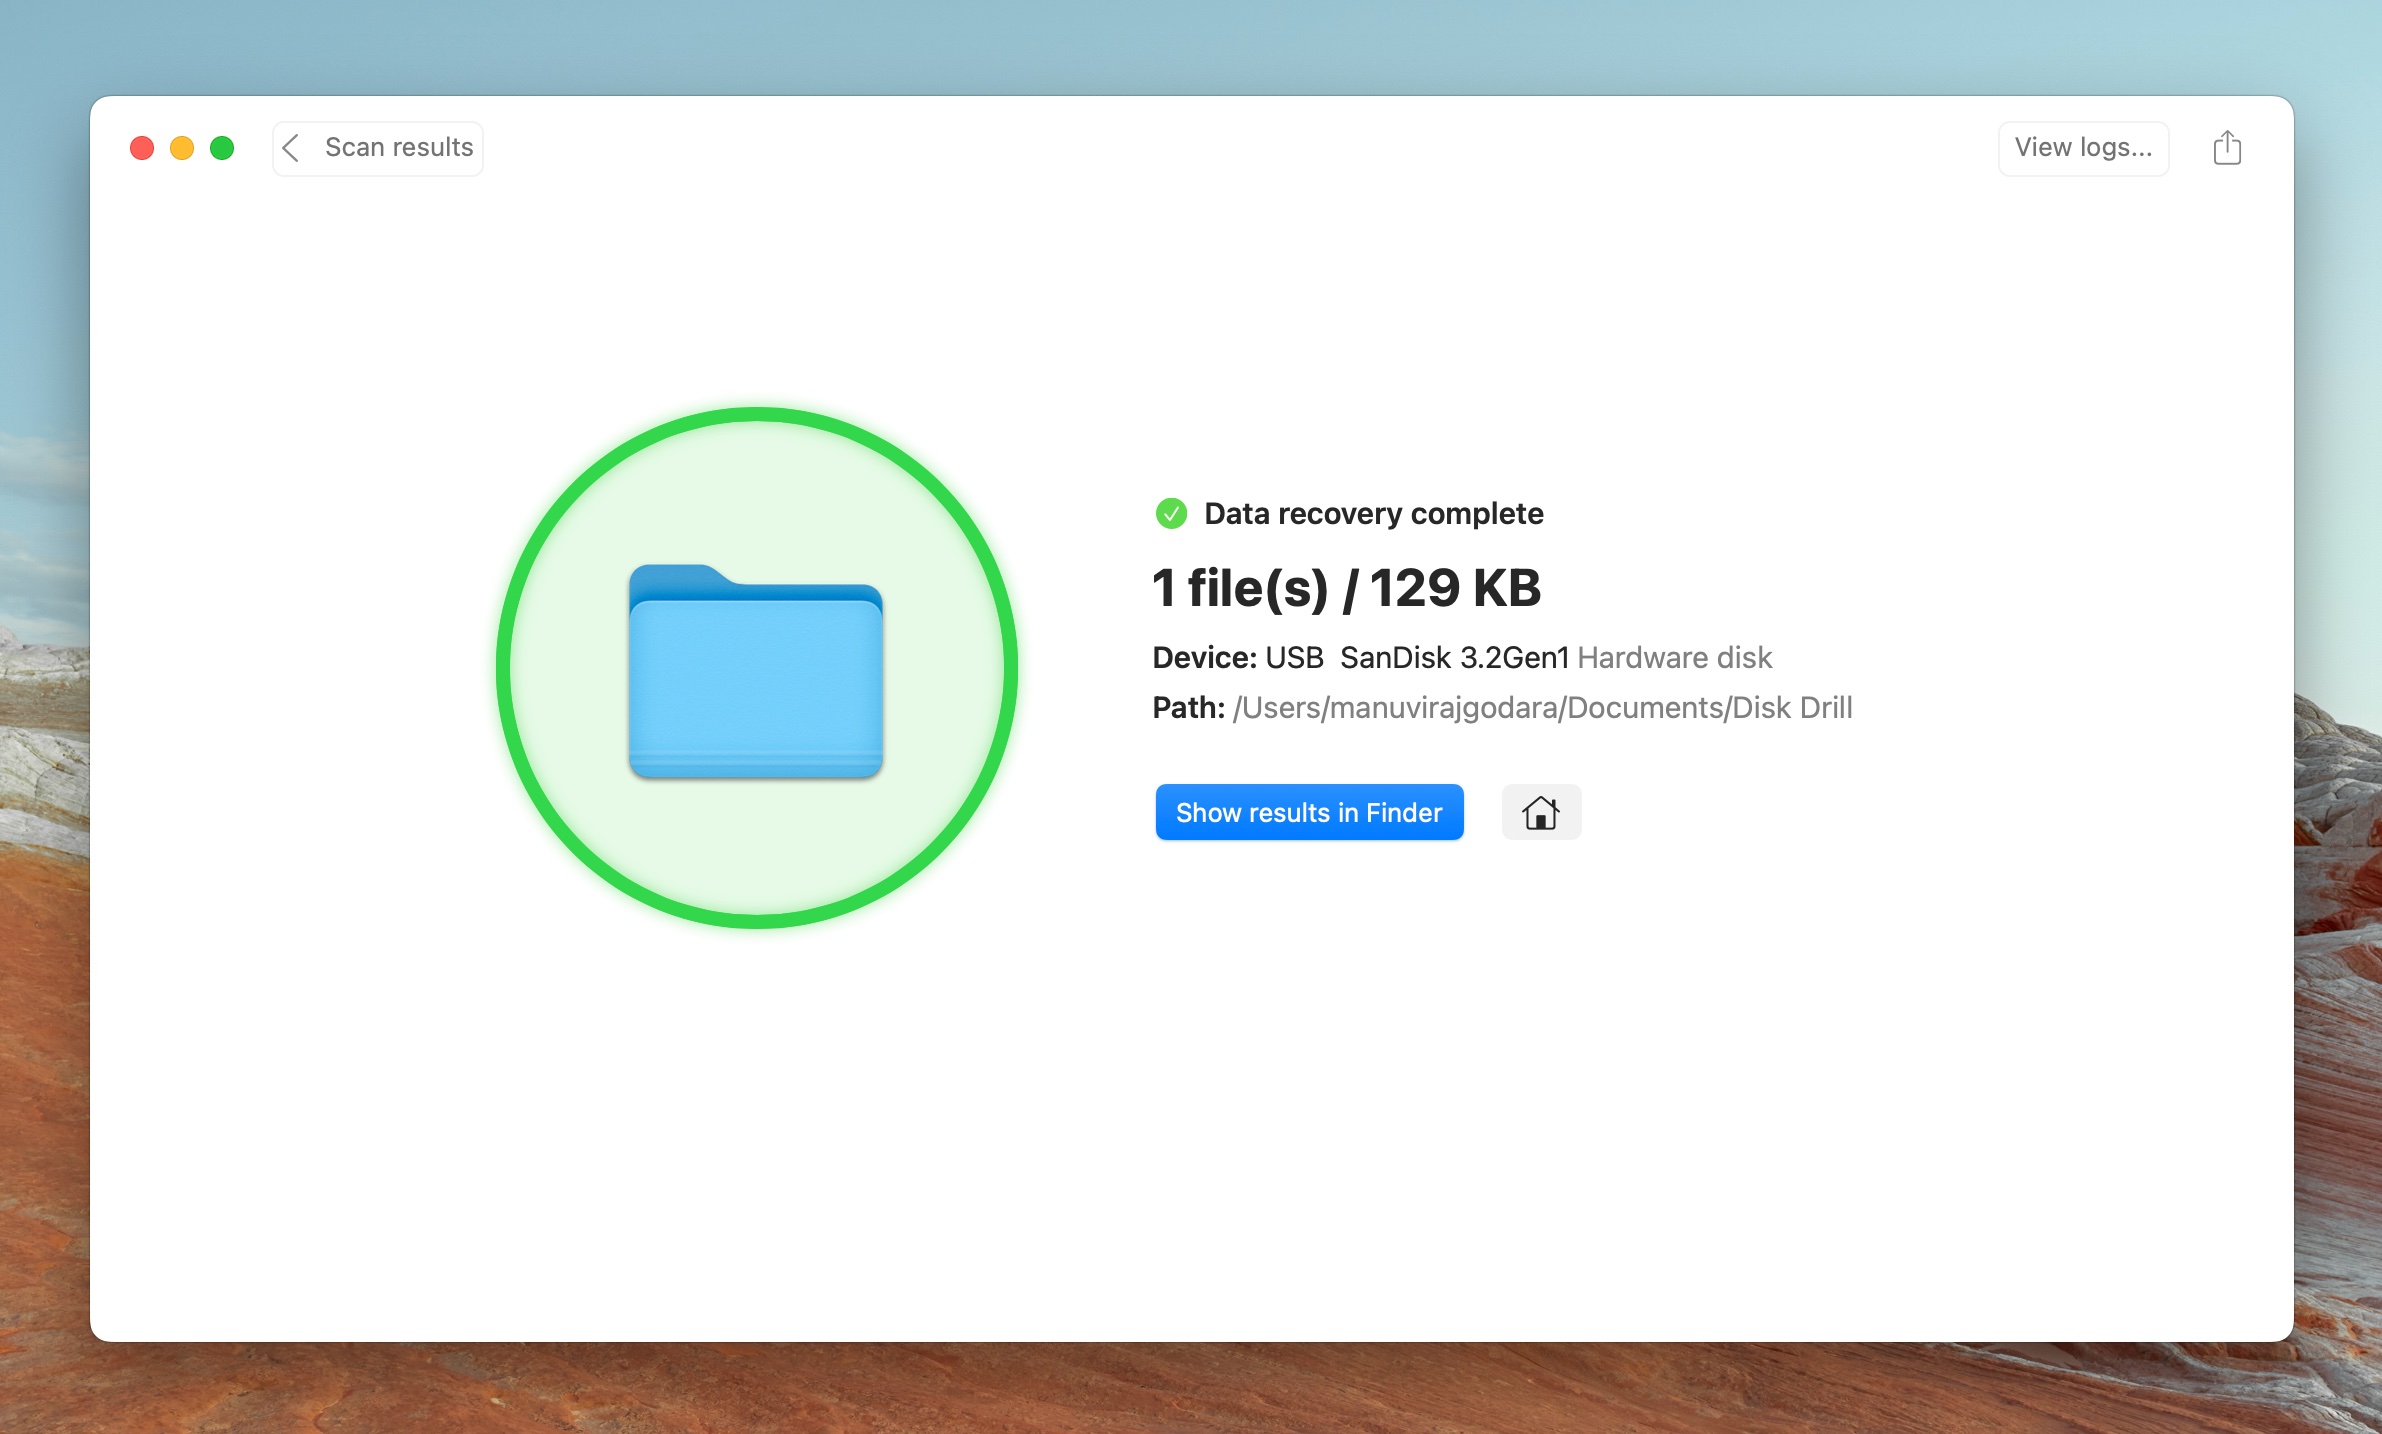
- Disk Drill will recover the selected files.
Disk Drill for macOS requires a paid, one-time license fee, for data recovery. The Windows version has a free trial that lets you recover up to 500 MB of data for free.
Note: While Disk Drill works in macOS’ Recovery Mode, its functionality is somewhat limited—you can’t preview files before recovery, nor use the Hyperlink, and Show in Finder features.
Conclusion
The Mac Terminal can be a valuable alternative for data recovery, when traditional GUI based recovery methods are unavailable. Whether it’s accessing the Trash, restoring a Time Machine backup, or performing full-fledged data recovery using a third-party app—all of it can be done using Terminal. However, it’s hard to justify using it when you have access to the Mac GUI, and third-party GUI-based data recovery programs.


