Booted up your PC and found that one of your drives isn’t appearing in File Explorer? Further inspection reveals that your partition has turned into unallocated space. Maybe this happened after the drive was disconnected improperly, or as a result of partition table corruption. Either way, the disk is unallocated, and you need to get your data back and fix the unallocated hard drive.
Thankfully, this problem is well-documented. We’ve encountered it many times and have helped many of our readers recover from this exact problem already. But while fixing the hard drive is usually very easy, recovering the data itself depends on how fast you are and the actions you take next. We’ll show you the correct steps to take in order to recover your data and restore the drive to working condition.
What Is an Unallocated Hard Drive
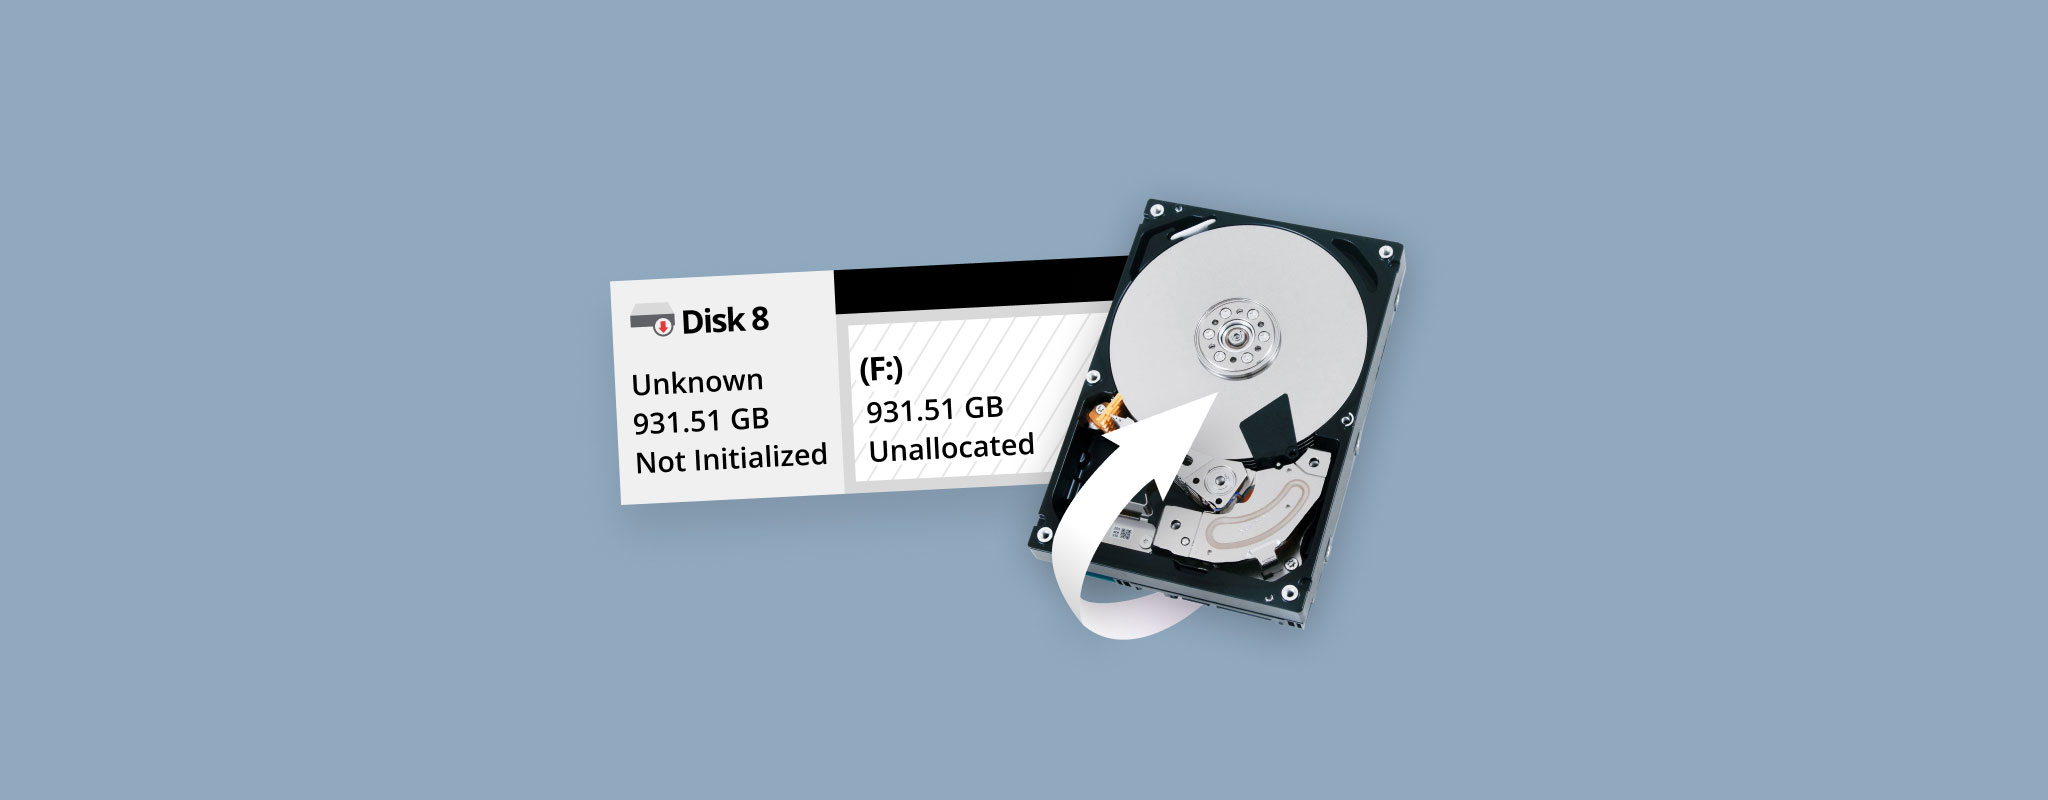
An unallocated hard drive is a storage device that Windows reads as having no partitions in which to store data. Even if you know there was a working partition there before, it may now show as an unallocated disk, locking you out from accessing your data.
When a partition reads as unallocated space, it means there’s no working file system. Without a working file system, your data is inaccessible through traditional means like File Explorer. Let’s first try and figure out what happened. Here are some of the most common causes of a drive becoming unallocated are:
- User error. The partition that once occupied the disk’s unallocated space was deleted due to the incorrect use of disk partitioning tools by careless and/or uninformed users.
- Partition table corruption. The partition’s entry in the partition table became lost or damaged, so Windows is unable to identify it.
- Malware. Certain types of malware, such as Petya, specifically target a drive’s partition table or Master Boot Record (MBR). When they manage to cause damage, Windows often loses its ability to recognize the drive’s structure.
The good news is that usually this error isn’t indicative of any data loss, as it really only affects the drive’s organizational structure rather than the actual data. Therefore, you can (and should) recover most or all of your data before attempting to fix the drive itself.
Note that storage devices can also appear as unallocated when they’re brand new. For example, many USB flash drives come unallocated from the factory. In these cases, where you know there’s no data to recover, you can simply create a new partition and format it with a file system to make the drive usable. Follow our guide on how to format a drive if you haven’t done it before or need a refresher.
How to Recover Data From an Unallocated Space
In its current state, you won’t be able to access the data on the drive with apps like File Explorer. To reach your data, you’ll need to use data recovery software, which is capable of scanning the disk and accessing the underlying data. This should be your first priority if the disk contains important data that you need to get back.
There are many software tools for Windows that can help you recover data from unallocated space on a hard drive, but our go-to is Disk Drill for a few reasons. Despite being one of the easiest-to-use solutions, Disk Drill is compatible with all Windows file systems (FAT16/32, exFAT, NTFS, and others)—even when the hard drive is showing unallocated. When file system information isn’t available, Disk Drill can also recover data based on file signatures, supporting over 390 different file types.
One of the most important reasons why we recommend Disk Drill is its ability to create byte-to-byte backups of unallocated storage devices, turning them into complete image files that contain all data. You can then mount the image directly in Disk Drill and safely recover data from it.
Creating a byte-to-byte backup before attempting recovery is an important best practice, especially if the unallocation was caused by corruption or malware. If anything goes wrong during the recovery process, you’ll have an exact copy of your drive’s data to fall back on.
Step 1: Back Up the Drive
Let’s start with backing up the drive. Keep in mind that this step isn’t mandatory, but is recommended for keeping your data safe throughout the recovery process.
To create a byte-to-byte backup using Disk Drill:
- Download and install Disk Drill.
- Launch Disk Drill and select Drive Backup from the left menu.
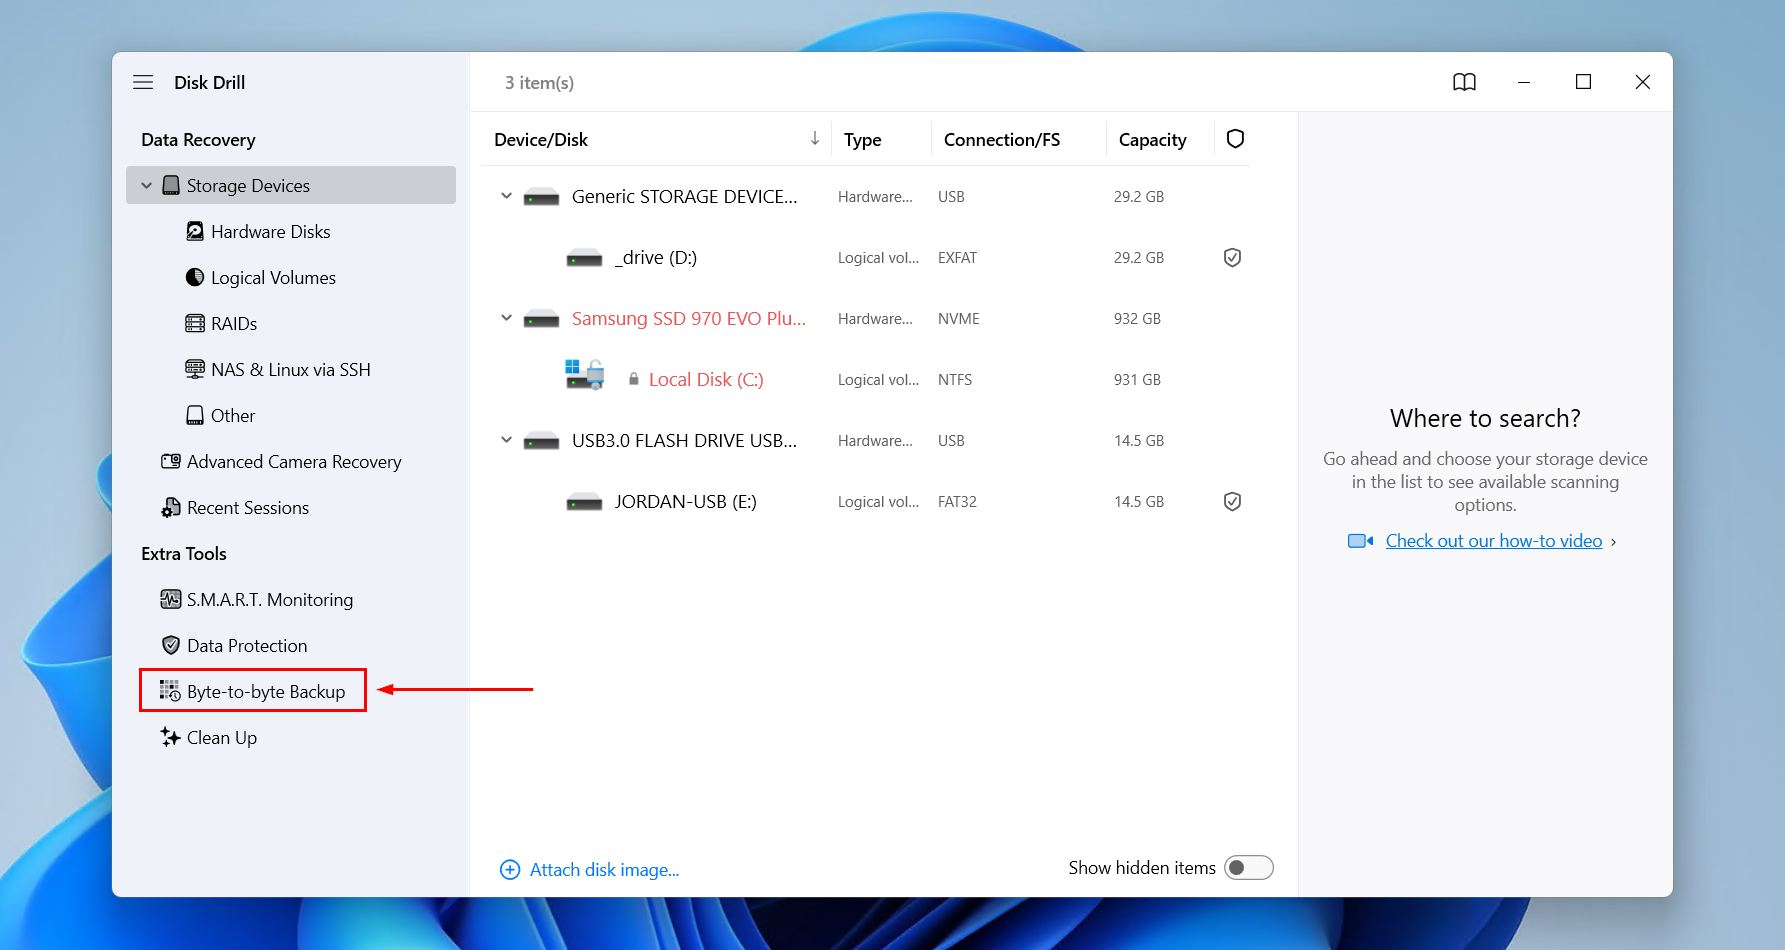
- Select your unallocated HDD from the list. Click Create Backup.

- Choose a destination for the backup file (must be on a different drive) and give it a name. Click OK.
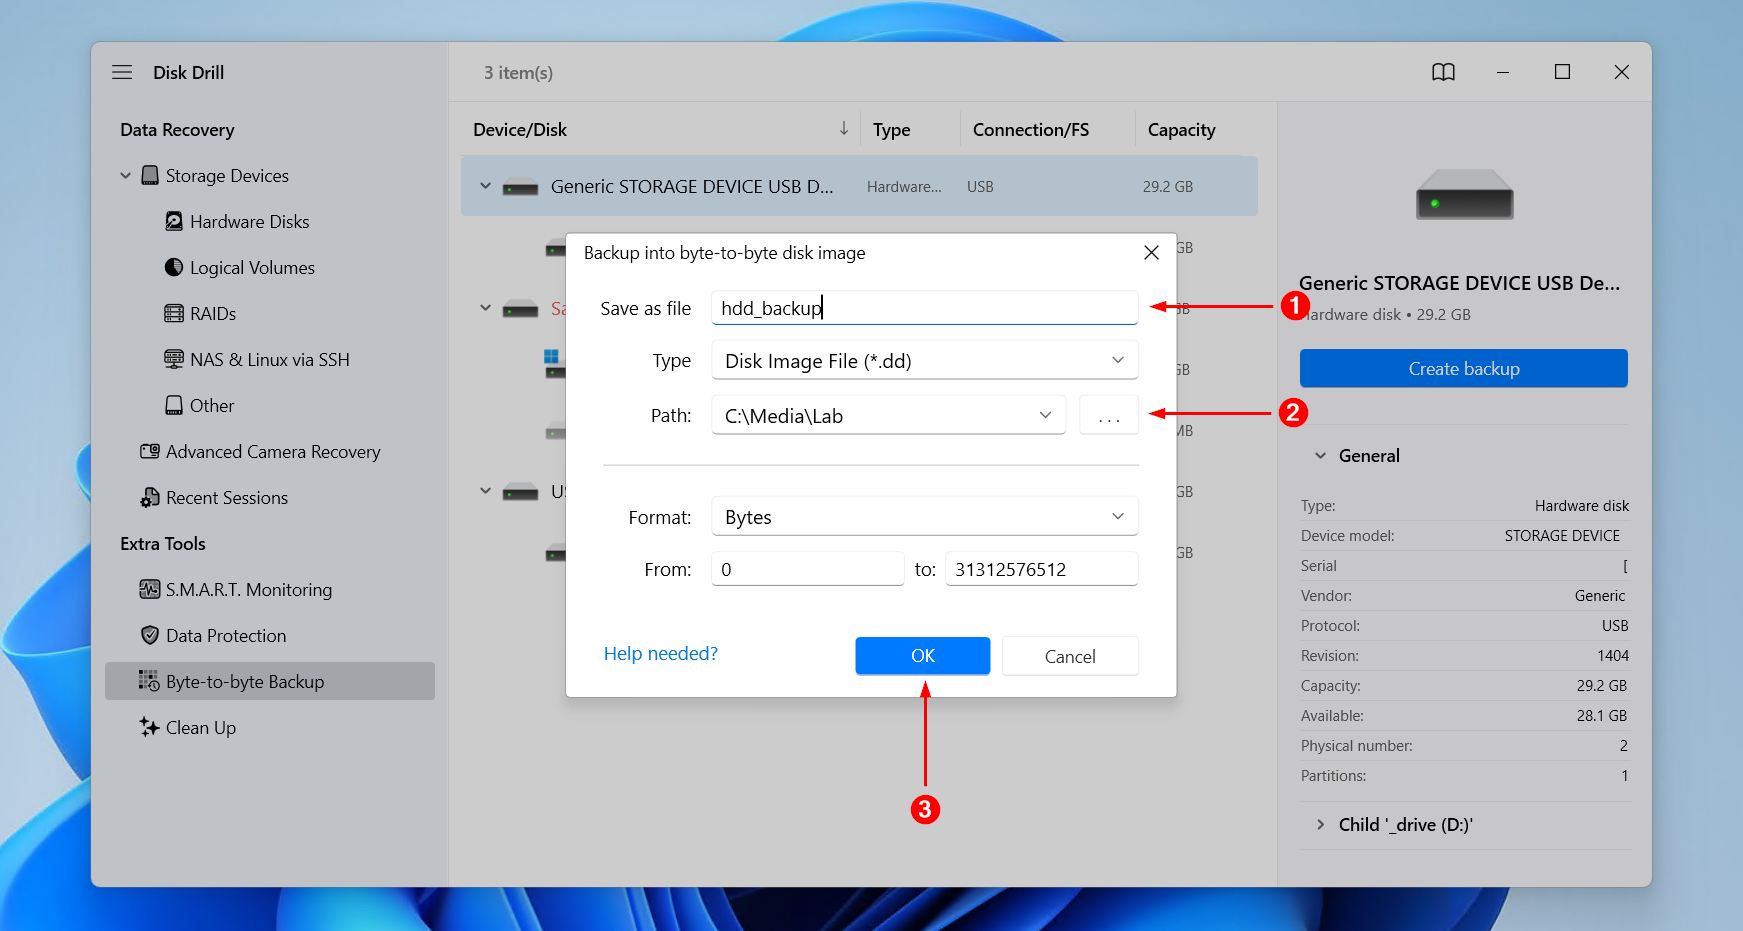
- Wait for the backup process to complete.
Step 2: Recover the Data
If you backed up the drive using the previous steps, you can choose to recover the data now, or recover it once you learn how to fix unallocated hard drive below. However, if you’re recovering the data from the drive directly, follow the steps below.
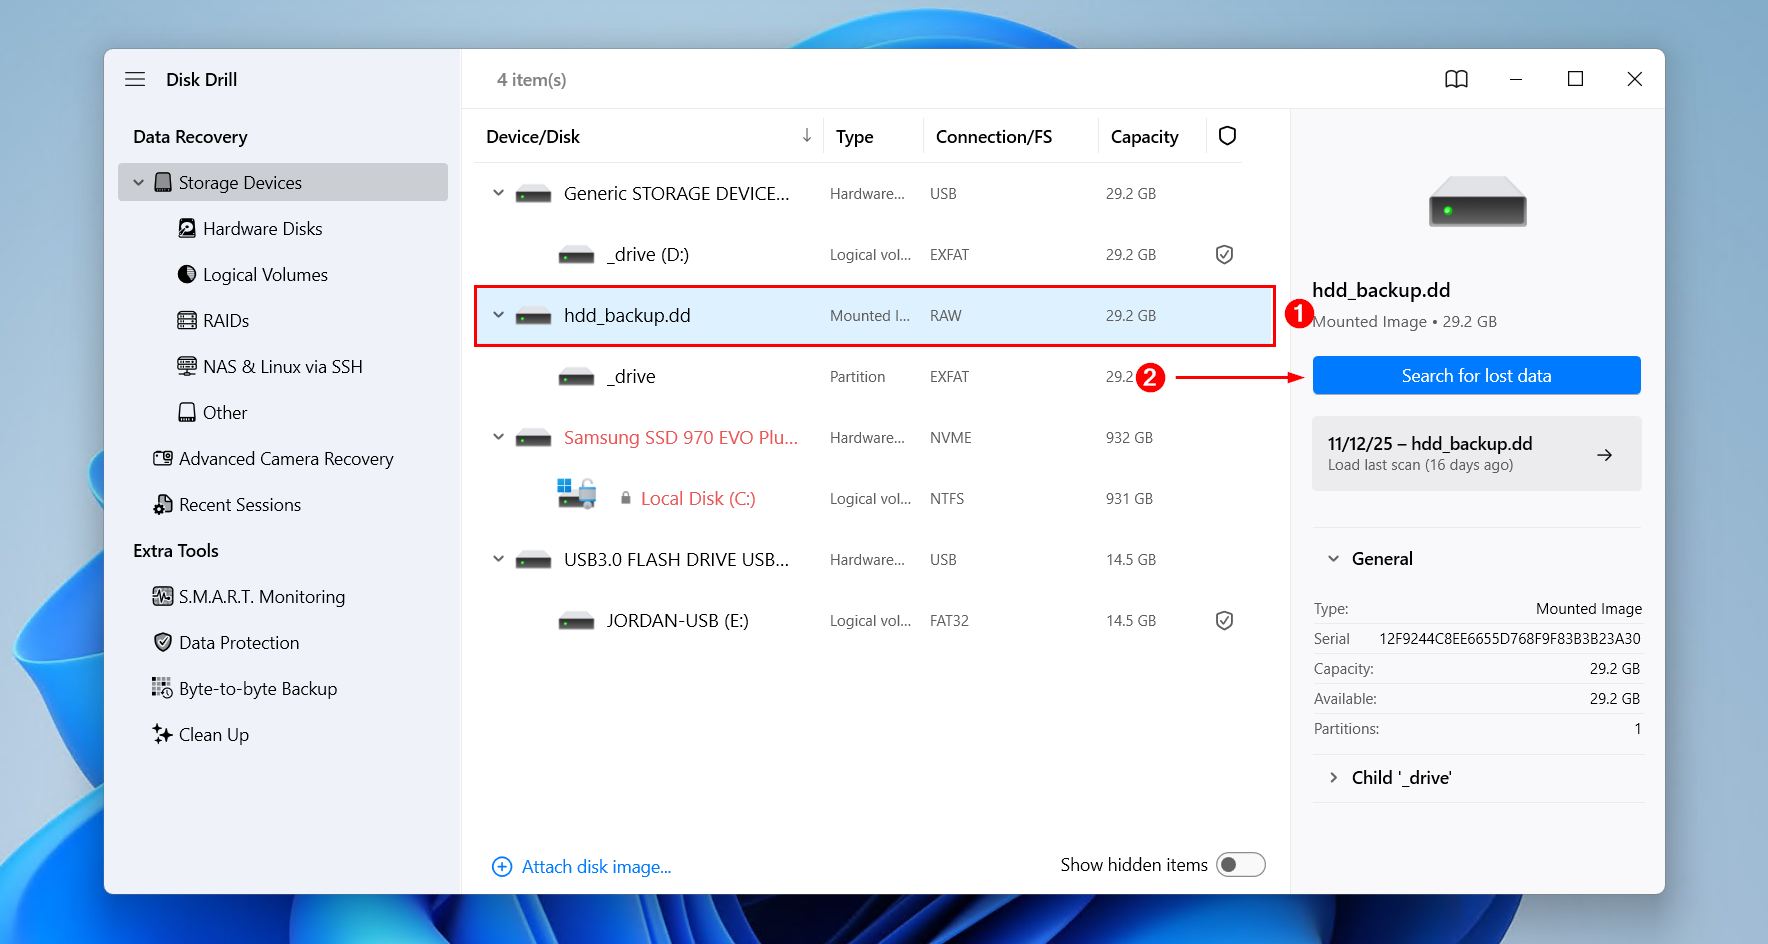
- Launch Disk Drill if it’s not running already, and make sure you’re in the Storage Devices section.
- Click the Attach disk image option below the list of available storage devices and select your backup image file.
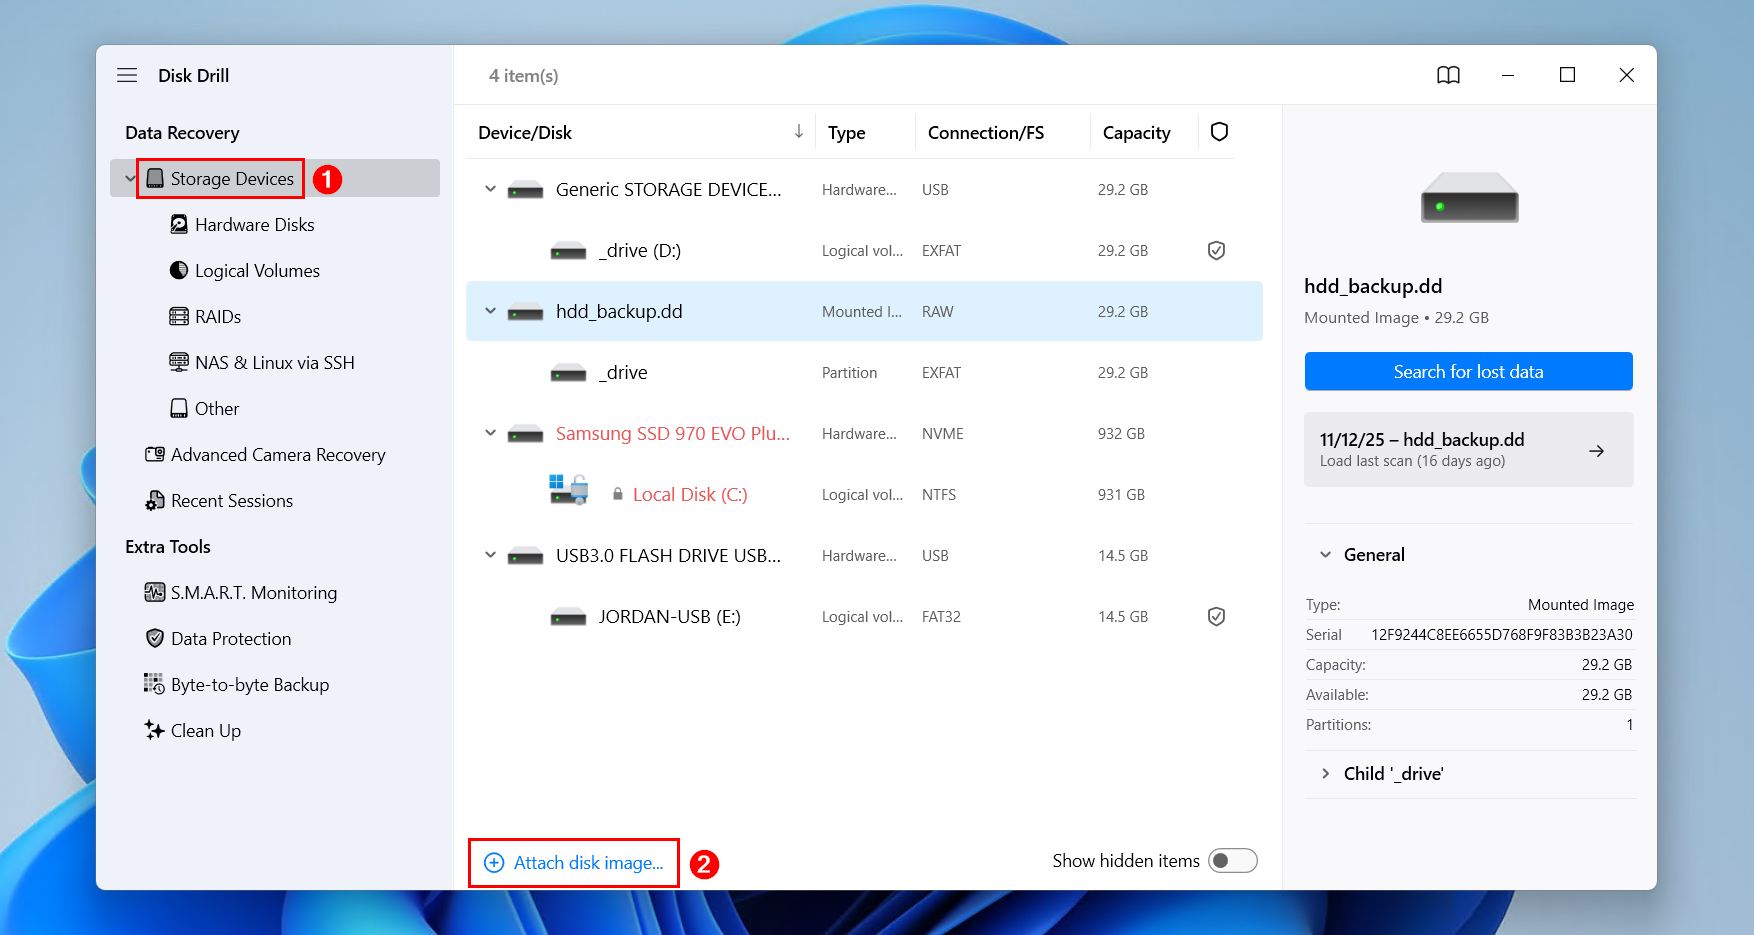
- Select the mounted backup image file from the list and click Search for lost data.
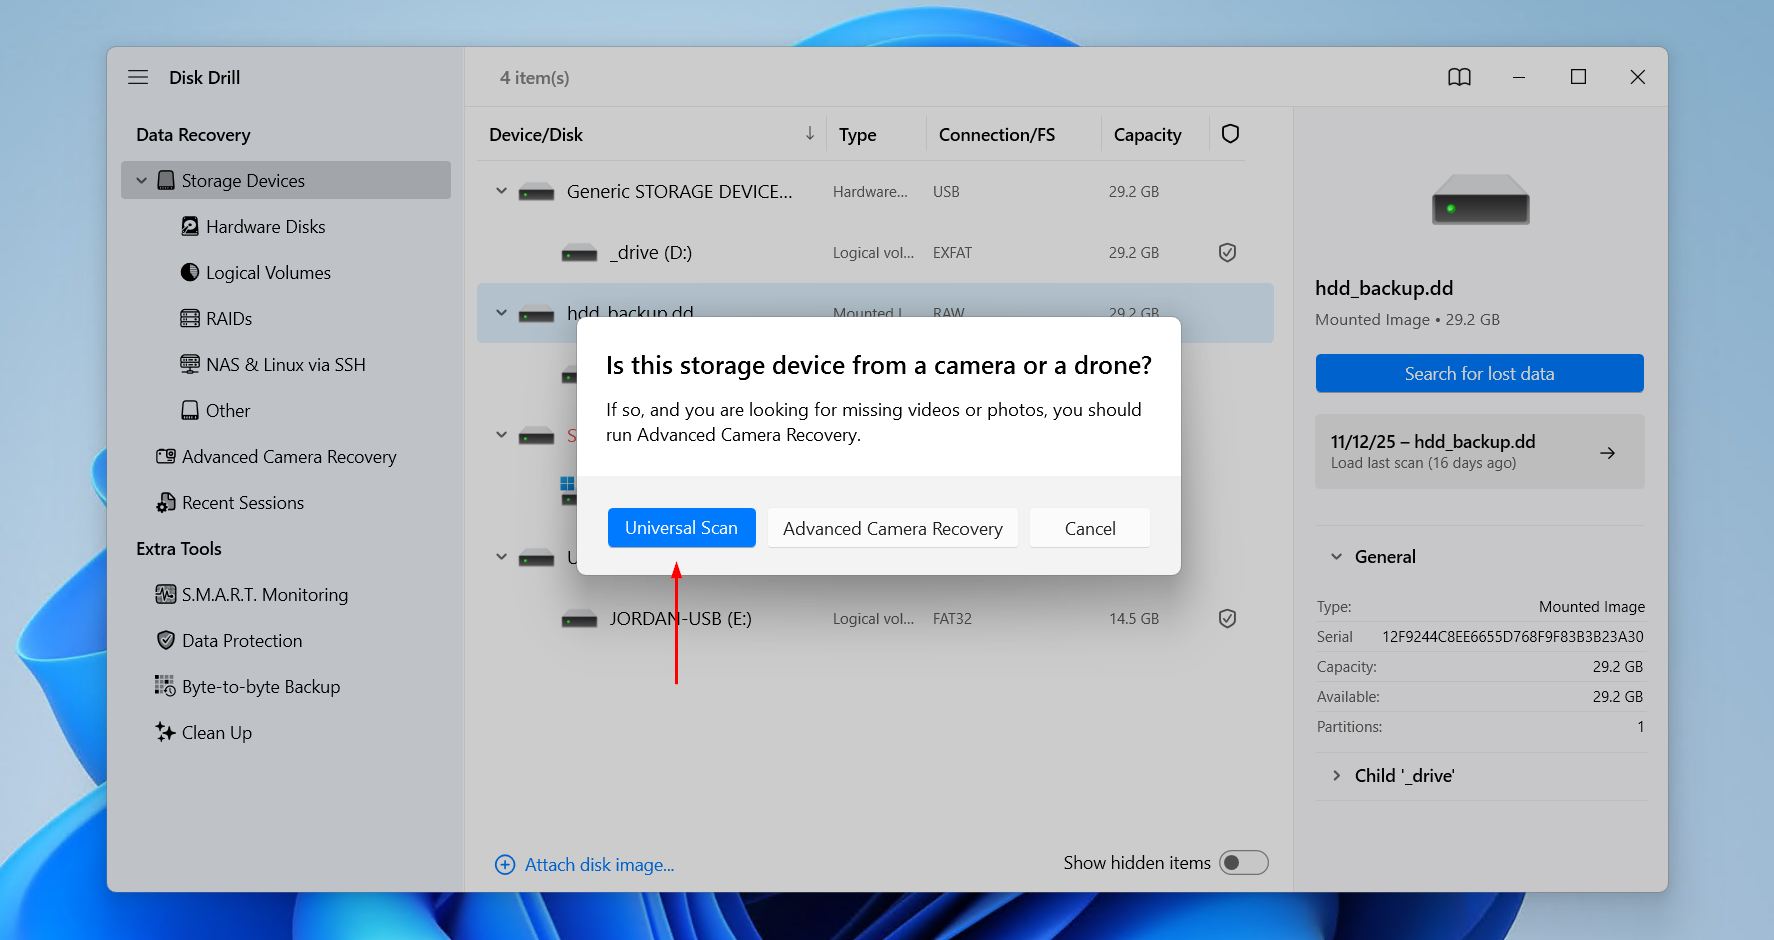
- Click Universal Scan for Disk Drill to find every possible file it can. Advanced Camera Recovery is ideal for recovering fragmented videos from storage used in cameras and drones.
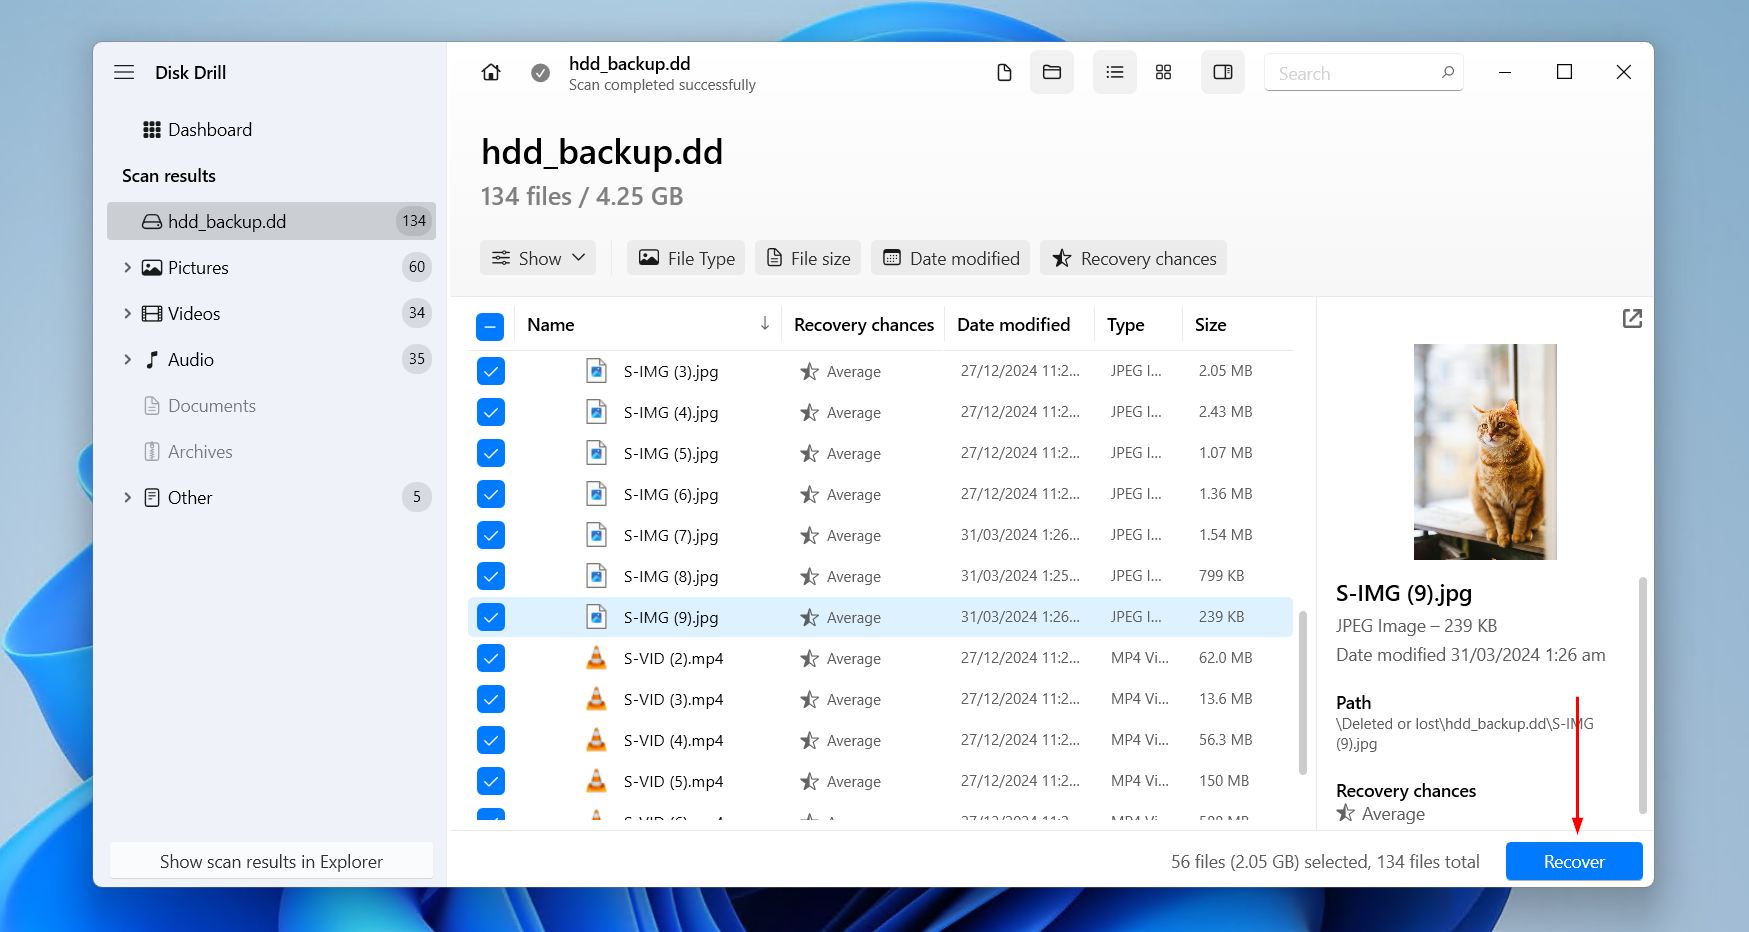
- Click Review found items once Disk Drill’s scan has finished. If you’re only searching for specific file types, click one of the colored file type icons instead. Or, recover everything by clicking Recover all.

- Select the files you want to recover from the unallocated hard drive. The recovery chances column and preview panel give you a good indication of what data can and cannot be recovered. If a lot of data was found, make use of the filter buttons to narrow the search results. When you’re ready, click Recover.
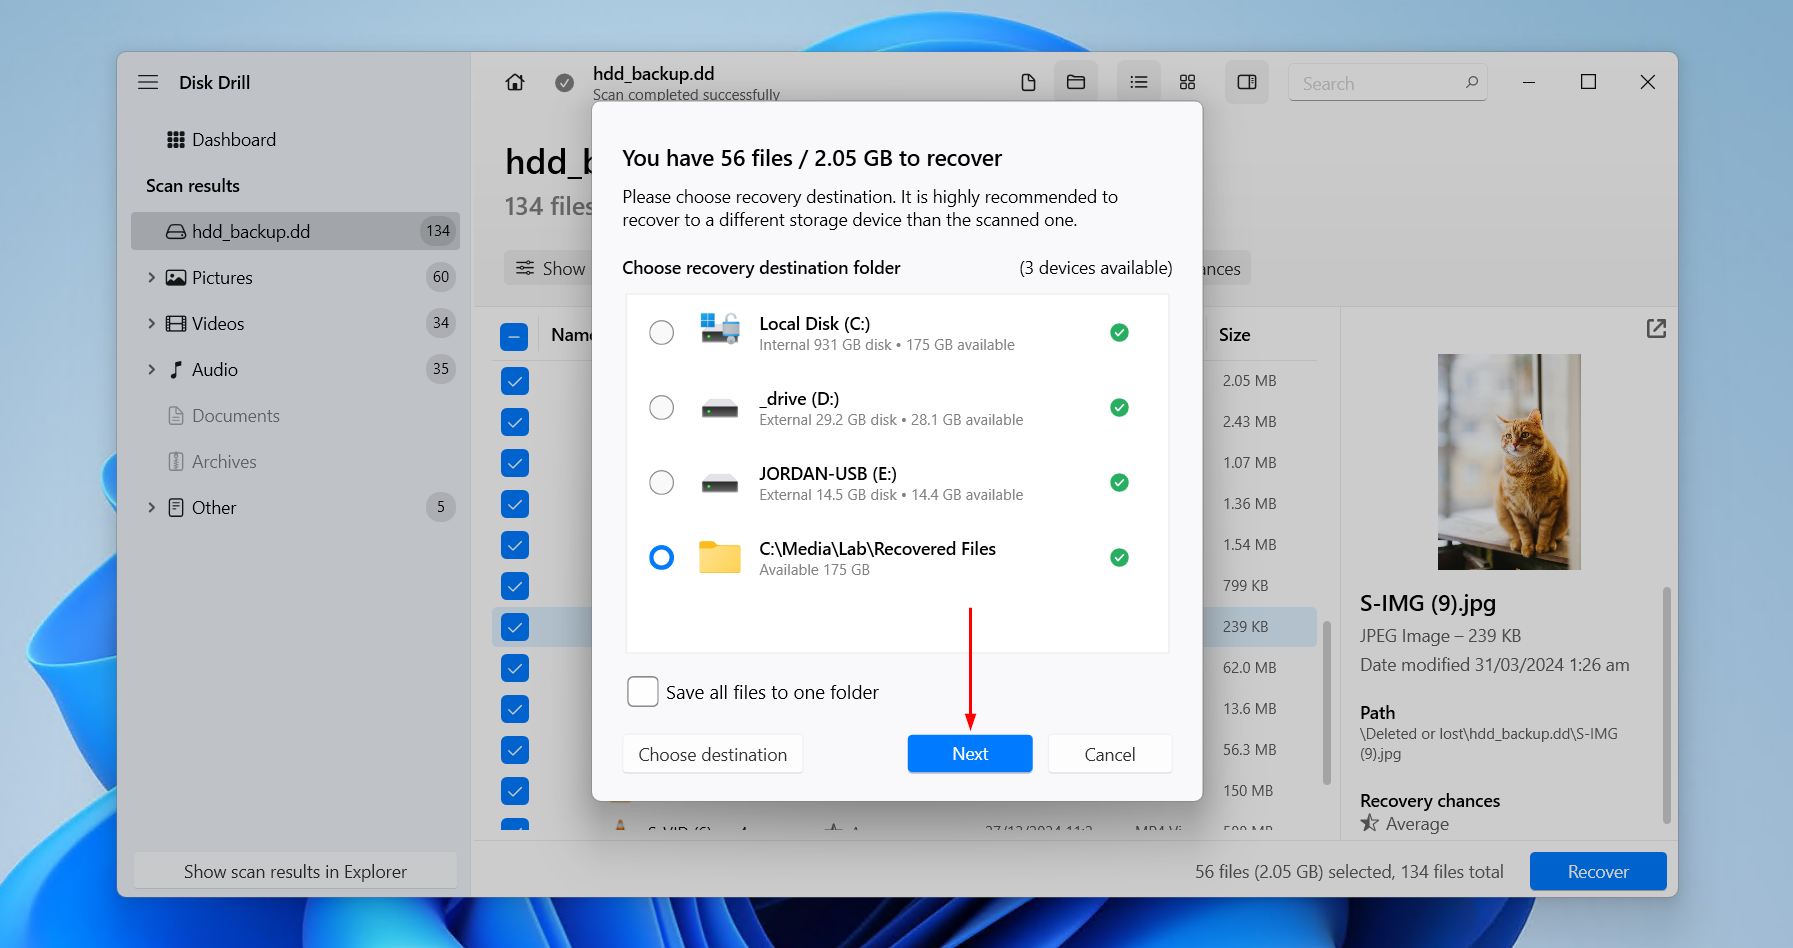
- Select a recovery location. Make sure you’re not restoring the data to the same drive you’re recovering it from to avoid data corruption. Click Next to complete recovery.
The free version of Disk Drill limits recovery to 100 MB of data, which is usually enough to recover essential files or just try the software. For larger recoveries, you’ll need to upgrade to the Pro version. However, you can use the free version to scan your drive and verify that your files are recoverable before purchasing by previewing them and looking at the recovery chance estimates displayed by Disk Drill.
You don’t need to use Disk Drill to create a byte-to-byte backup. The data is still recoverable if the backup was made using other tools.
How to Fix an Unallocated Hard Drive
Let’s look at fixes for this. If you haven’t recovered or backed up your data yet, do so before proceeding with any fixes. These fixes pose a risk to any deleted or lost data located in the unallocated space, and going ahead with them can greatly hinder your chances of recovery. Furthermore, these will work for unallocated hard drives on Windows 10 and 11.
Method 1:Use TestDisk
TestDisk is an open-source tool specifically designed to recover lost partitions and fix various logical drive issues, with notable support for Windows file systems like FAT32, exFAT, ReFS, and NTFS. Because its focus is on repairing the underlying hard disk unallocated problem that resulted in the partition disappearing (and unallocated space appearing in its place), TestDisk is capable of restoring the original partition with all of its data.
The one caveat of TestDisk is that it can be a little complicated, which is exacerbated by the fact that it uses a terminal interface. Choosing the wrong options can cause the data to become unrecoverable, and so a backup is highly recommended i you haven’t recovered the files yet.
Here’s how to fix an unallocated hard drive using CMD:
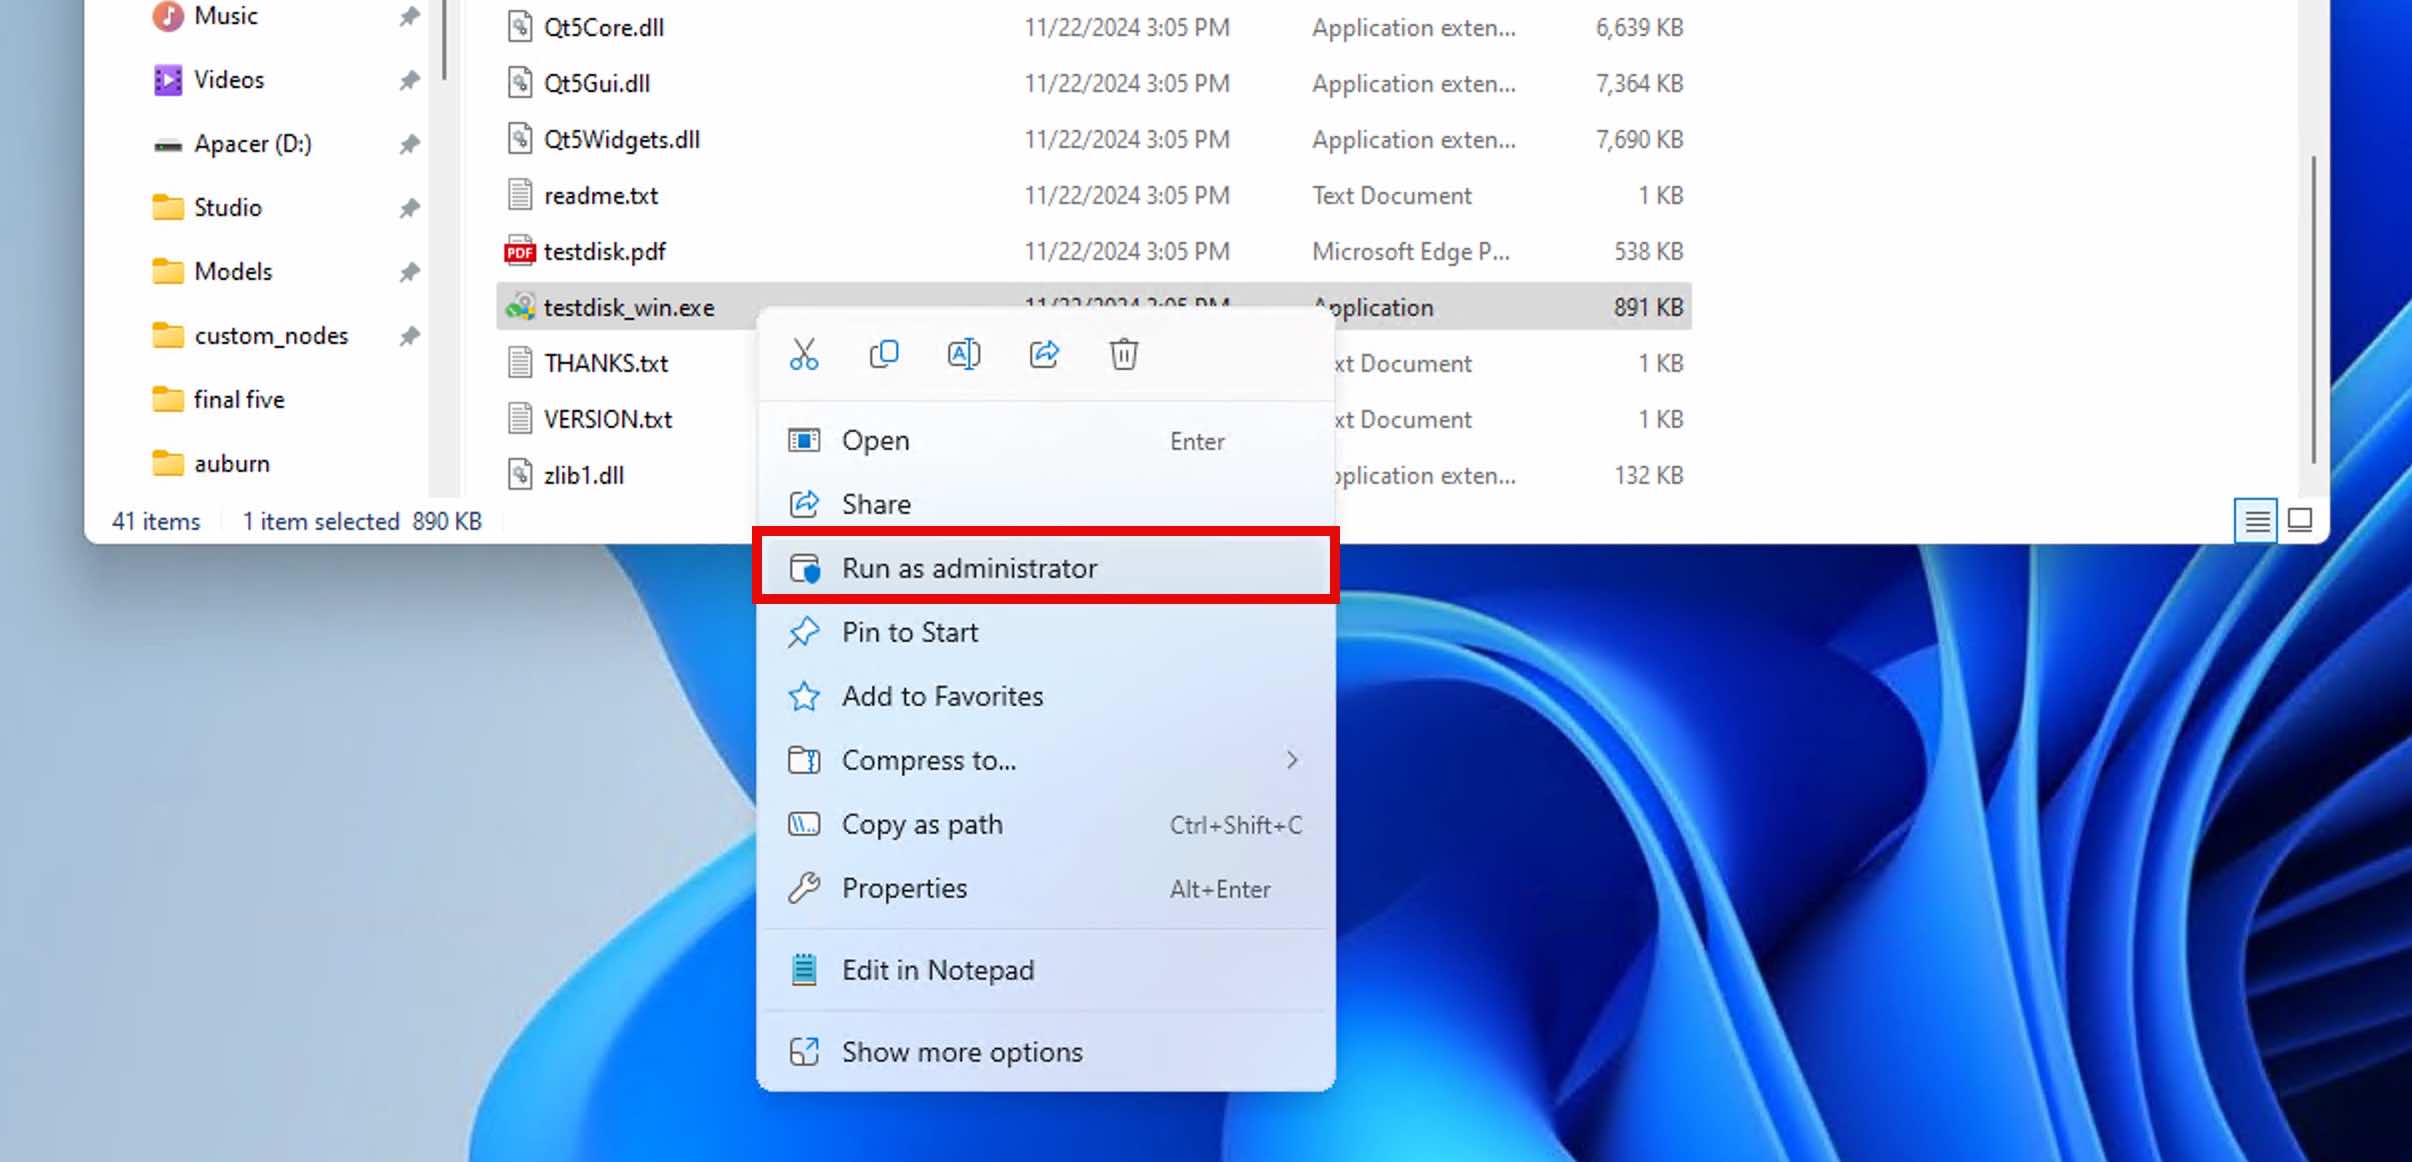
- Download TestDisk and extract it to a folder on your computer.
- Run testdisk_win.exe as administrator.
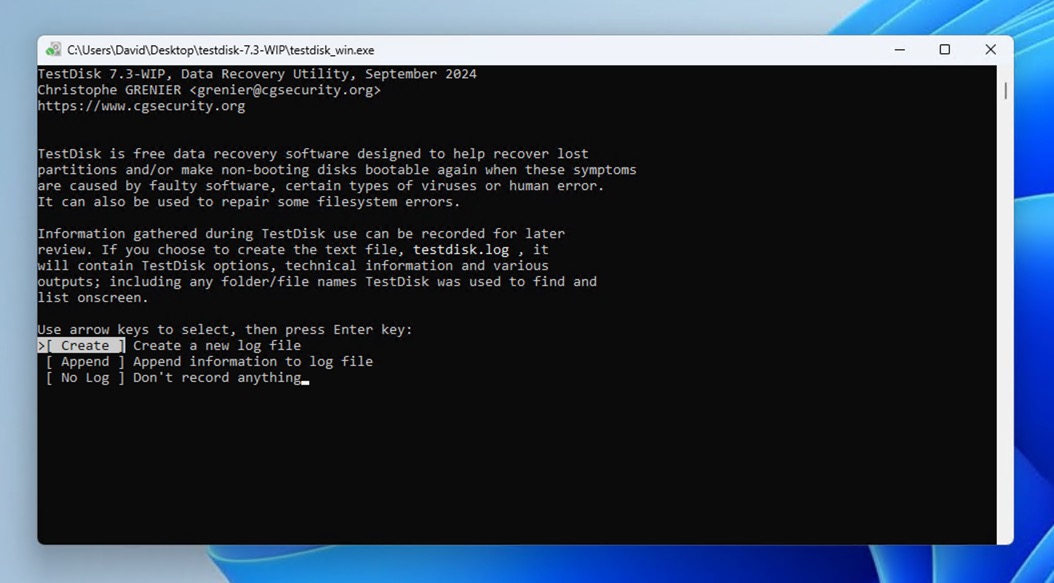
- Choose Create to start a new log file and then select your unallocated drive from the list. You will be asked to specify the original partition table type (TestDisk usually detects this automatically).
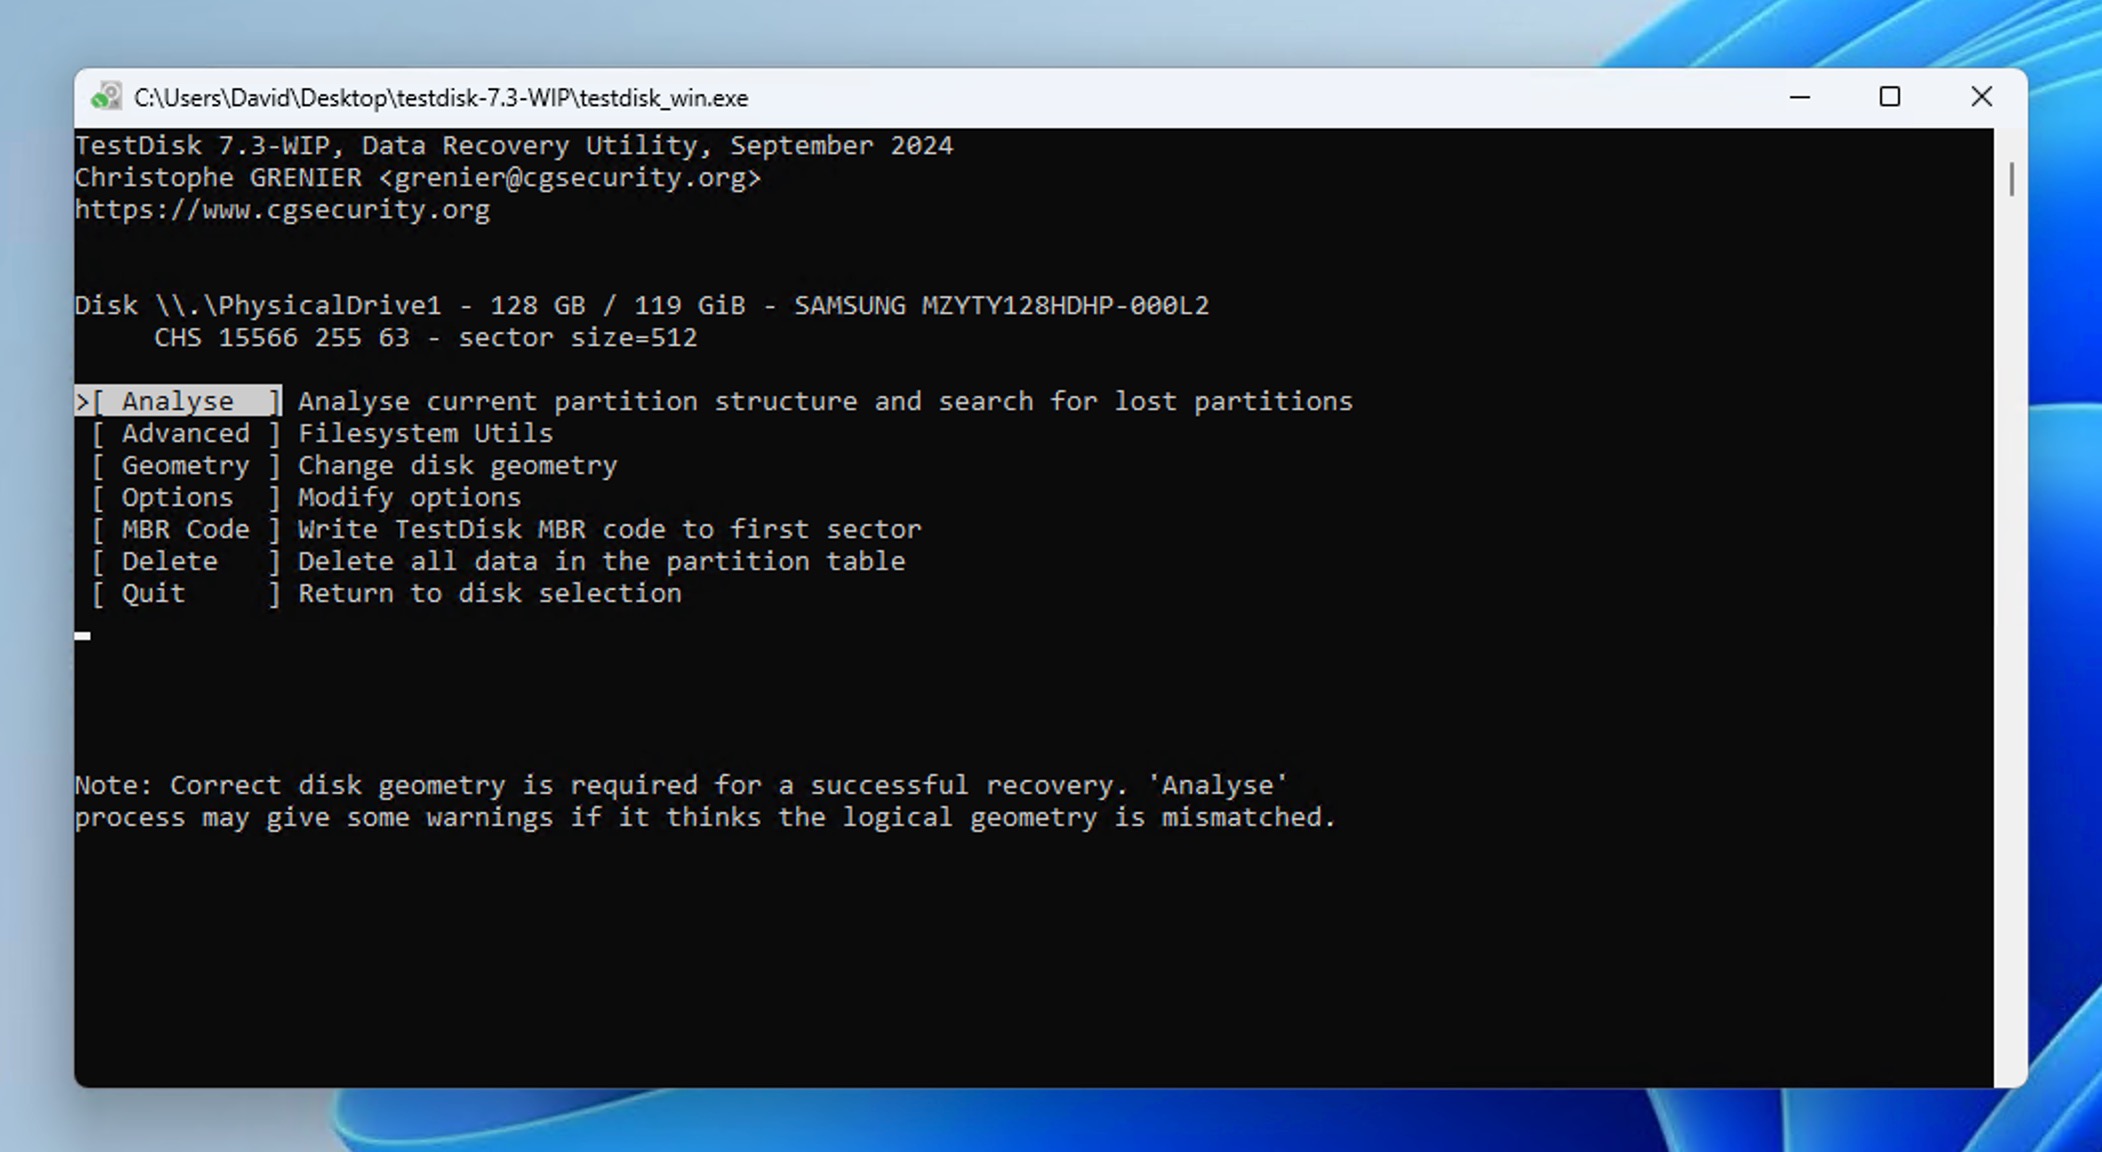
- Select Analyse and press Enter to examine your current partition structure.
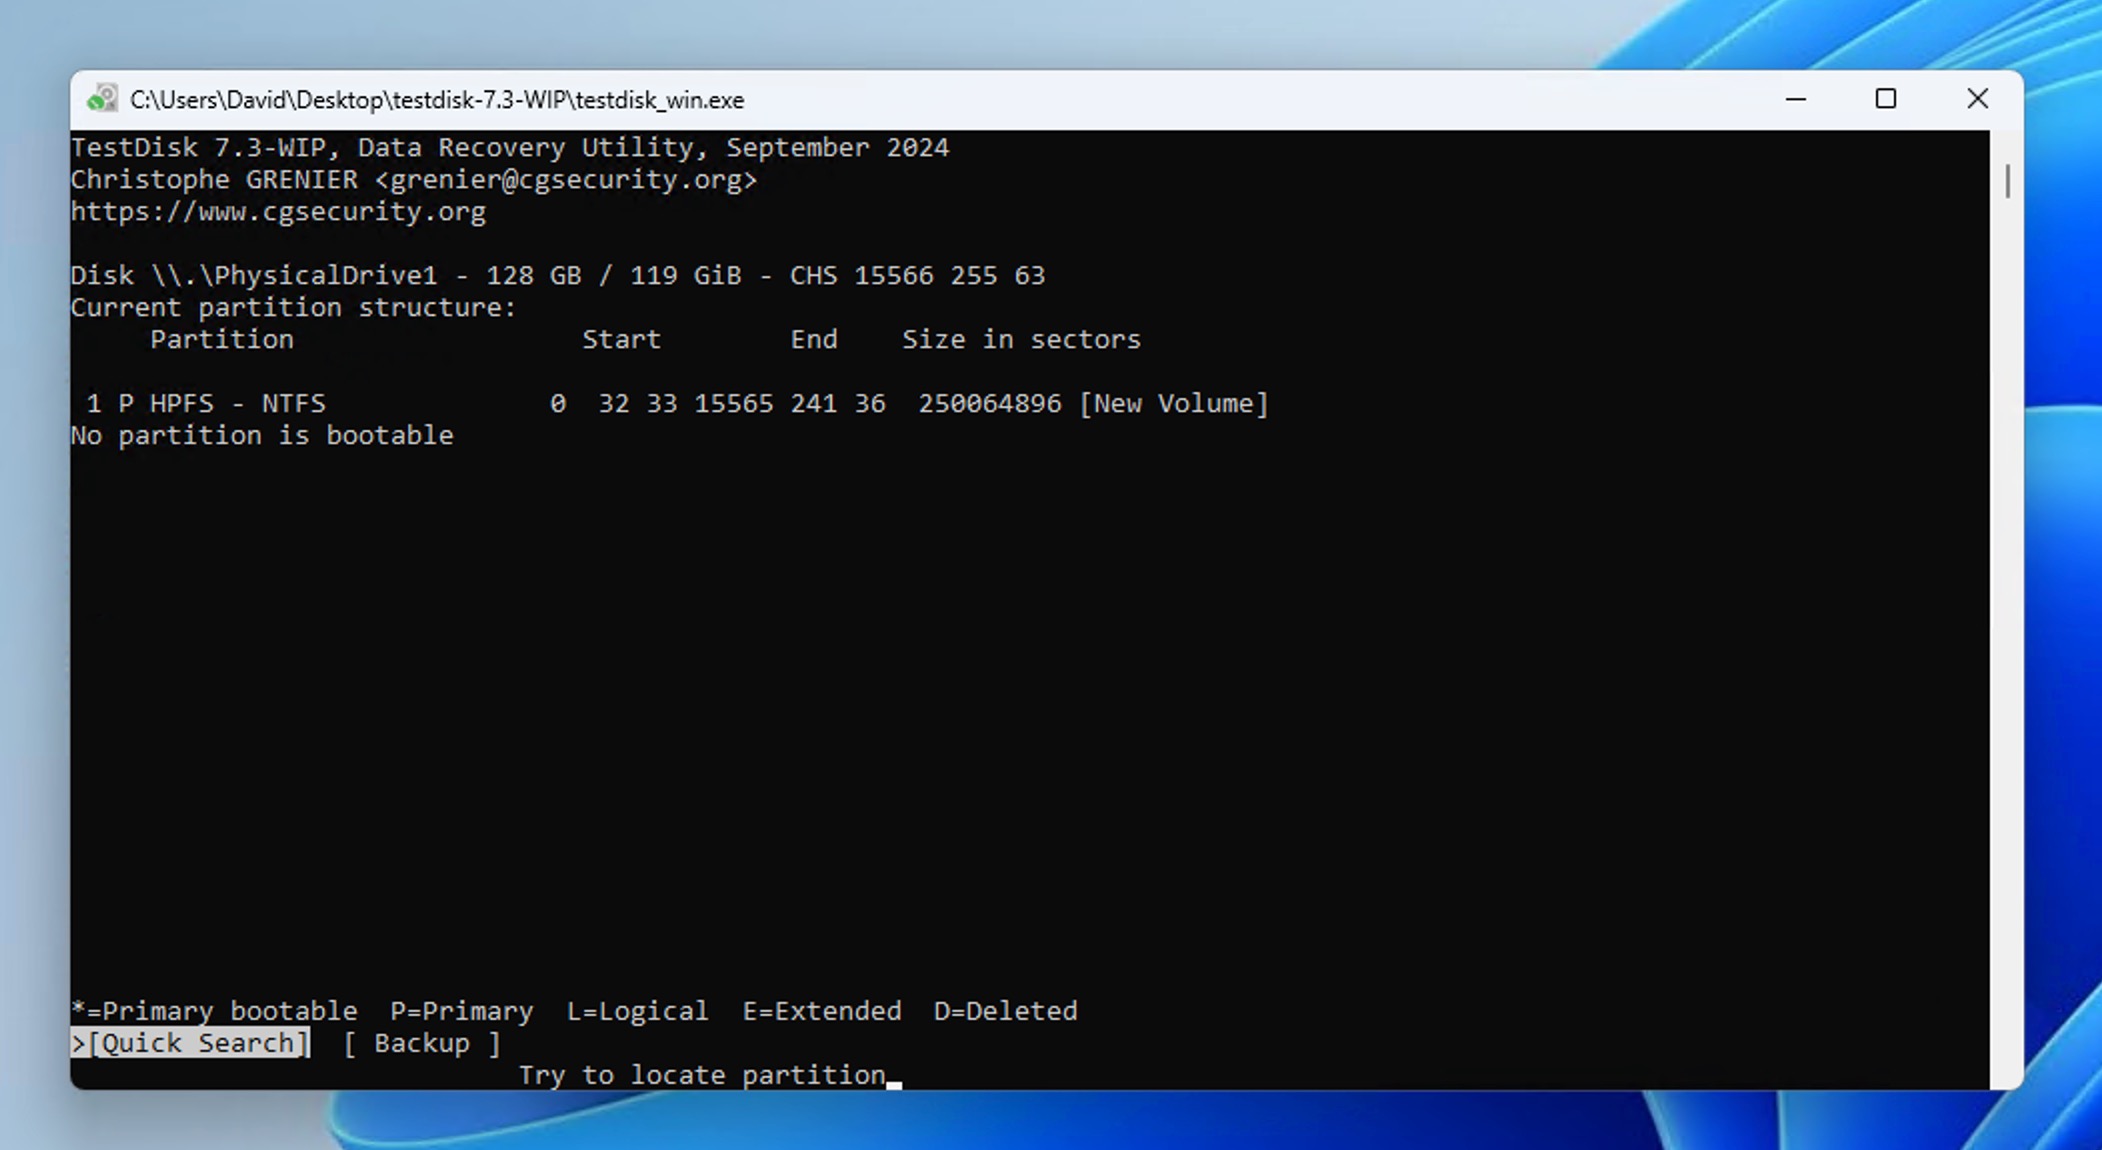
- Choose Quick Search and wait while TestDisk scans your drive. The tool will display results in real time, showing any partitions it finds. Once the scan completes, you’ll see a list of found partitions.
- Use the arrow keys to highlight the partition you want to recover. You can preview its contents by pressing P on your keyboard.

- After selecting the partition for recovery, you can press Enter to continue and then select Write. Confirm the action and wait a short while.
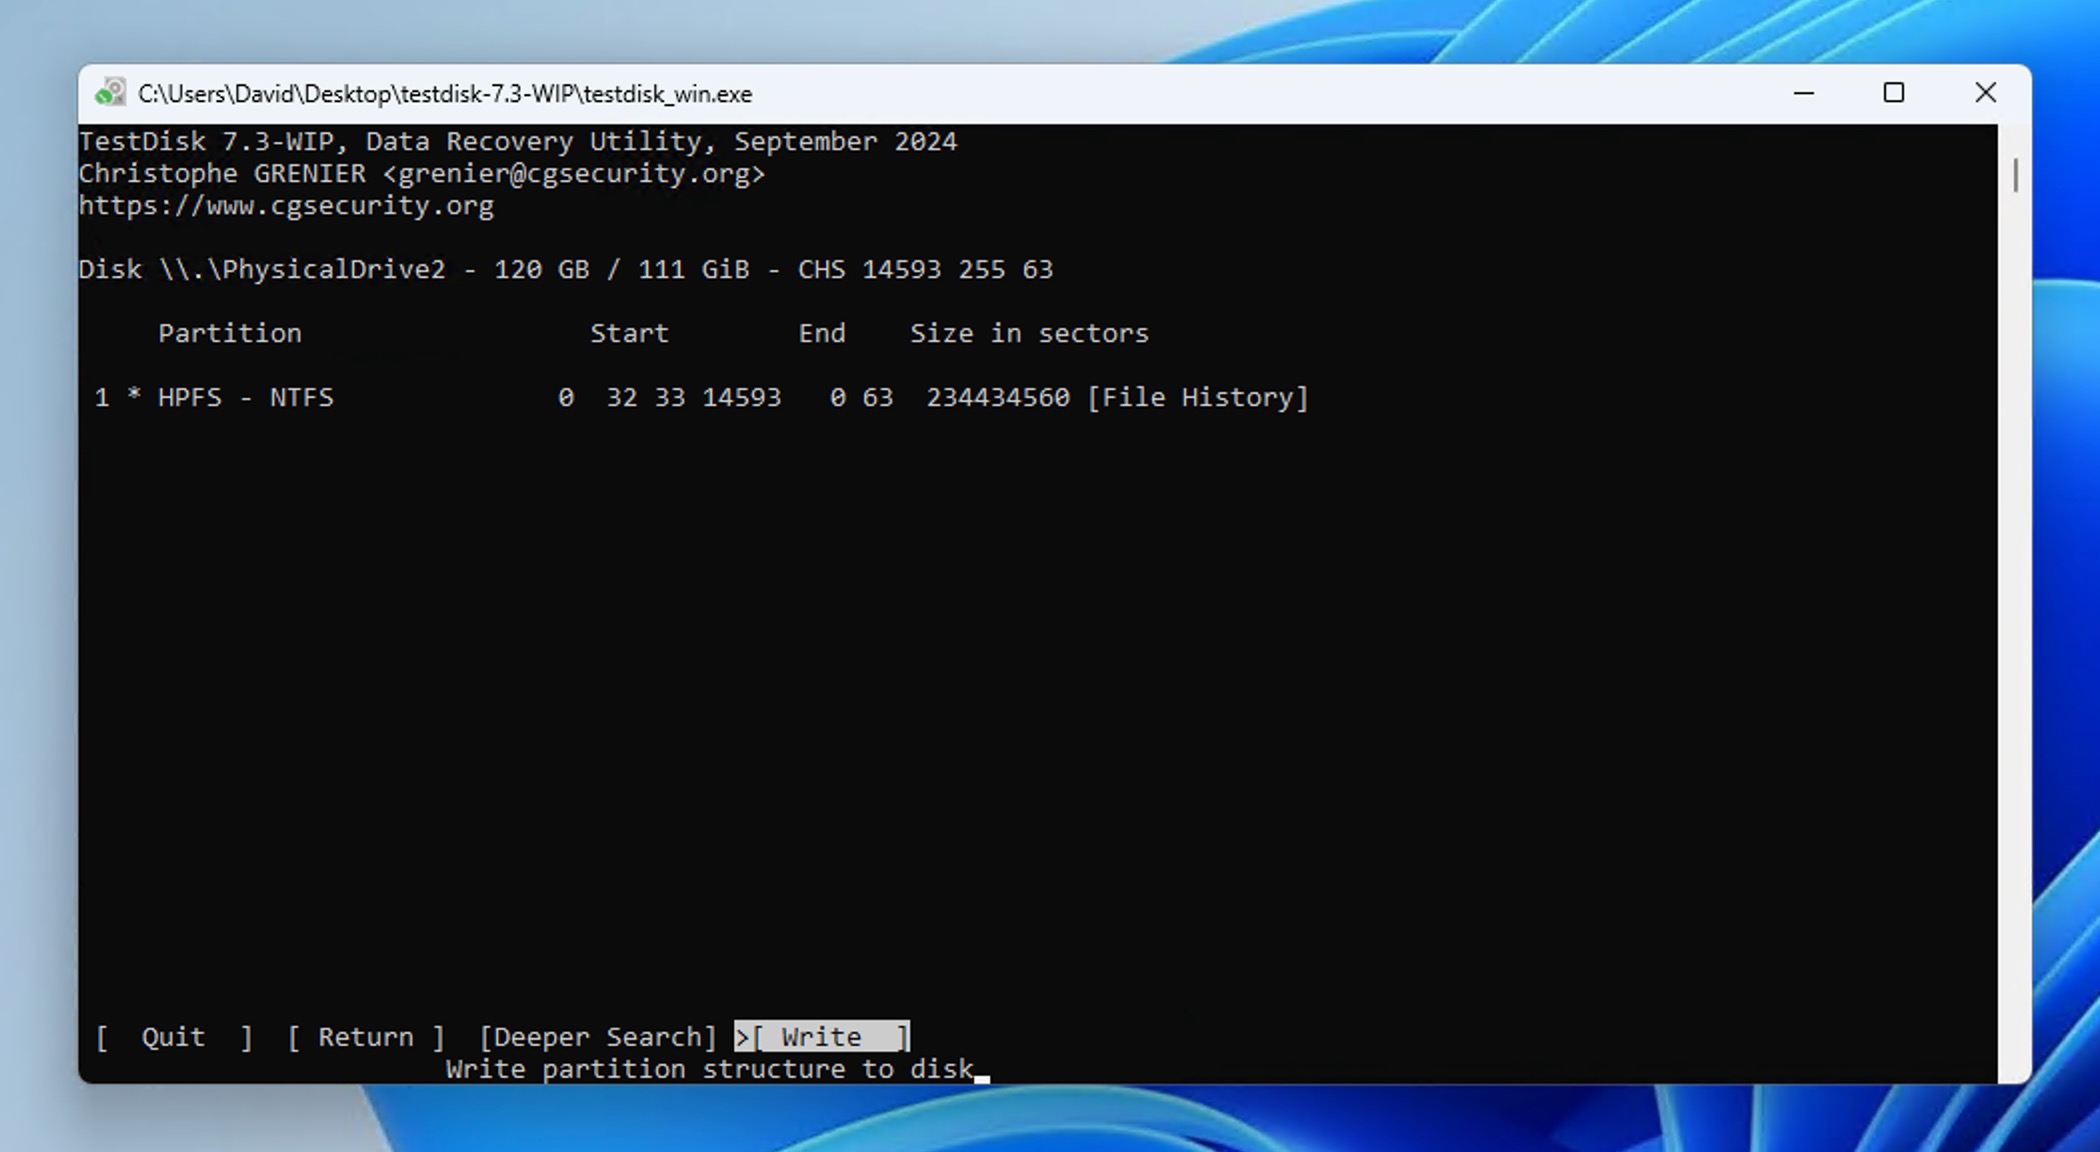
If Quick Search didn’t recover your unallocated partition, don’t panic. The Deeper Search option (available after Quick Search completes) can often find partitions that Quick Search misses, though it takes longer to complete.
If TestDisk successfully recovers your partition structure, your drive should no longer show as unallocated in Windows Disk Management after you restart your computer. All your files should be accessible normally through File Explorer.
Method 2:Add Space to an Existing Partition
If your drive contained multiple partitions and your intention was to delete the others in order to create one large partition, extending the existing partition is the way to go. This feature is only supported by NTFS and ReFS file systems. If your partition uses exFAT, see our guide on how to convert exFAT to NTFS.
Still want to have multiple partitions on the drive? Move to the next method which will guide you through formatting the unallocated space.
If you have an unallocated disk, here’s how to fixit by extending the partition using Windows Disk Management:
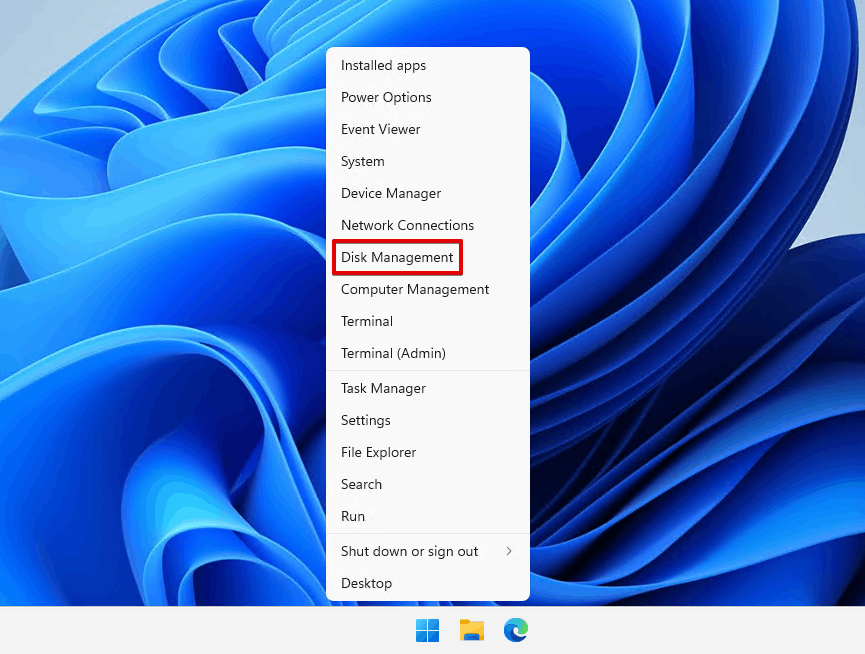
- Right-click Start and click Disk Management.
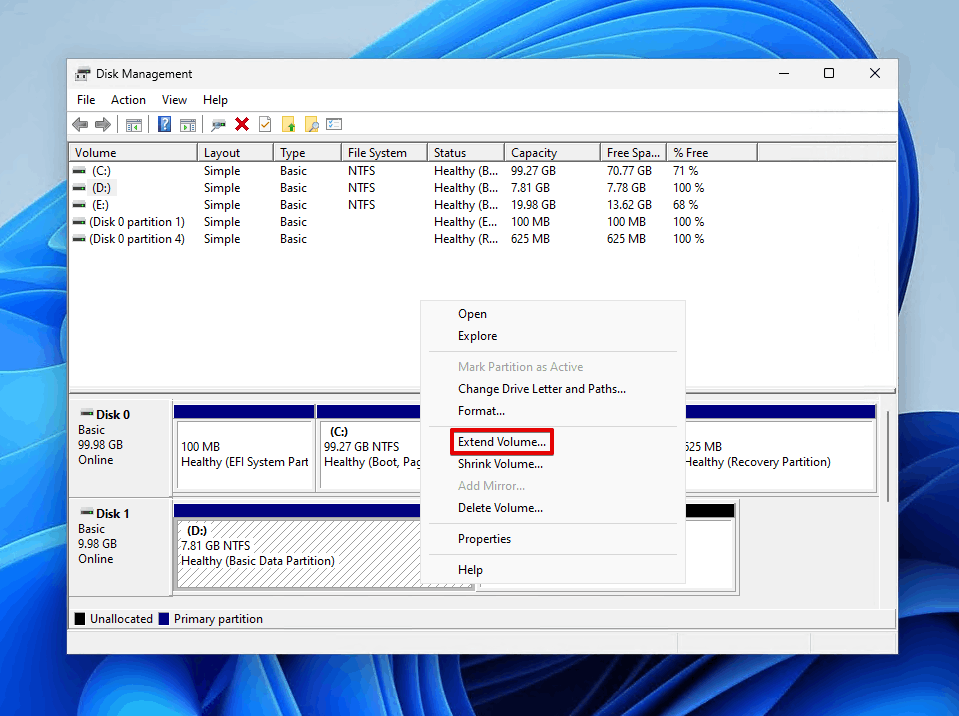
- Right-click the existing partition you want and click Extend Volume.
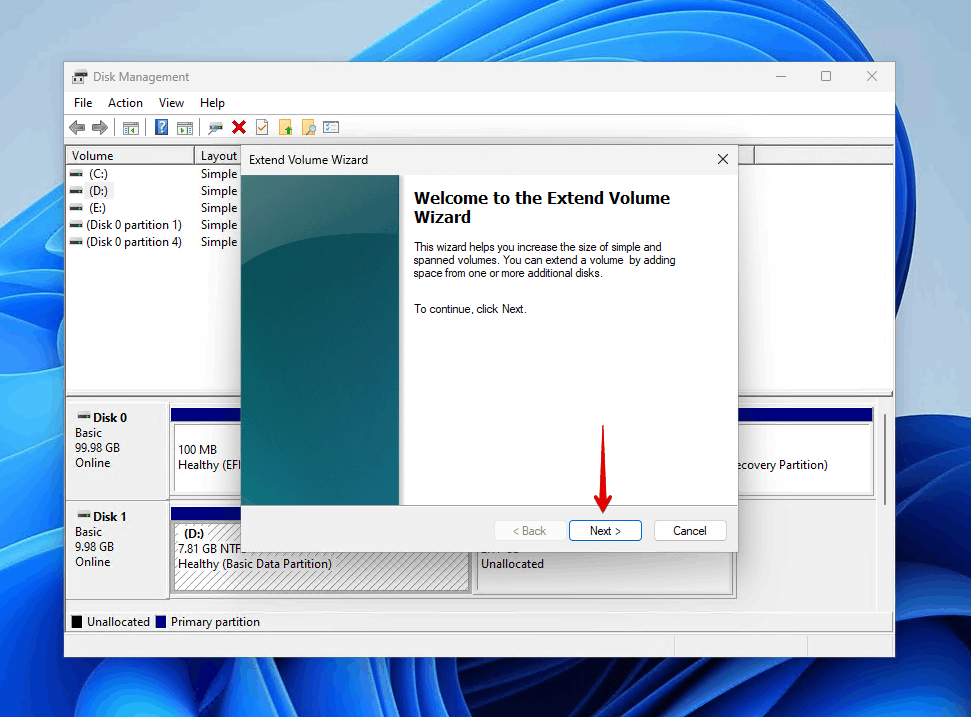
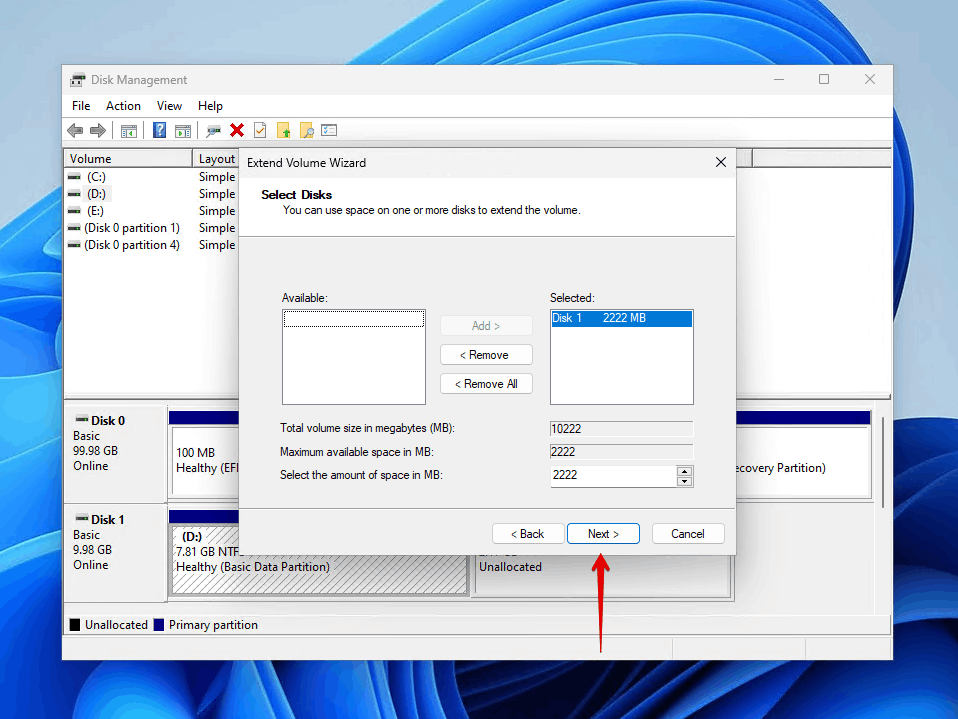
- When the Extend Volume Wizard appears, click Next.
- On the Select Disks screen, the unallocated space should already be selected, so you can simply click Next. The Selected field shows how much space will be added.
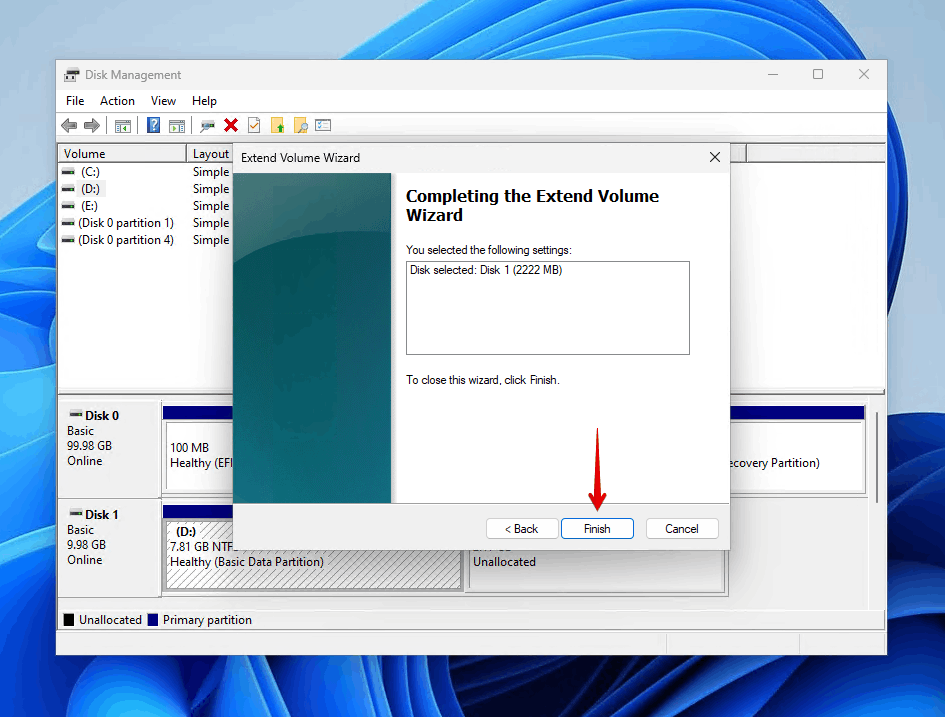
- Click Finish to complete the process.
Important: You can only extend a volume to unallocated space that’s directly adjacent to it on the same disk. If there’s another partition between your target volume and the unallocated space, the Extend Volume option will be grayed out.
Method 3: Create a New Partition Using the Unallocated Space
If you’ve already recovered your important data (or there wasn’t any to recover), then you can create a fresh partition using the unallocated space. There are two format options to choose from: Quick format, which only prepares the space for use by creating a new file system structure, without overwriting the actual data sectors, and Full format, which overwrites every sector with zeros, rendering data unrecoverable.
Internal SSDs (solid-state drives), and even some external ones, use TRIM technology to reduce long-term wear on the drive. Back up or recover the data before formatting, as formatting automatically issues a TRIM command, which eliminates any chances of recovering the data.
Since the Quick format option is almost always perfectly sufficient, that’s what the following instructions will use. This is how to fix an unallocated disk by formatting:
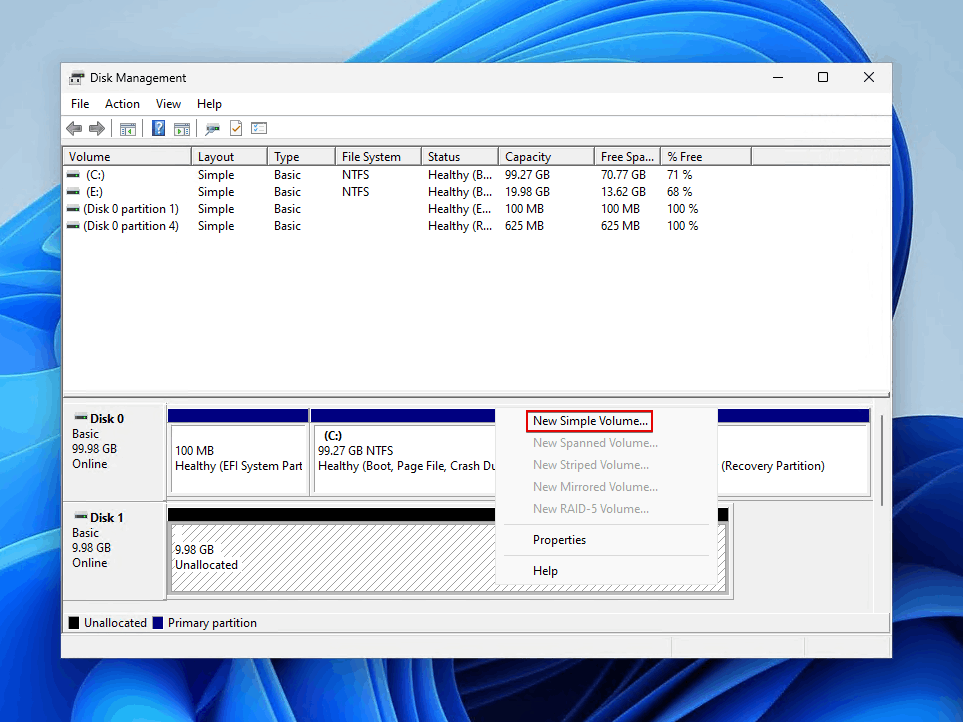
- Right-click Start and click Disk Management.
- Right-click the unallocated space and click New Simple Volume.
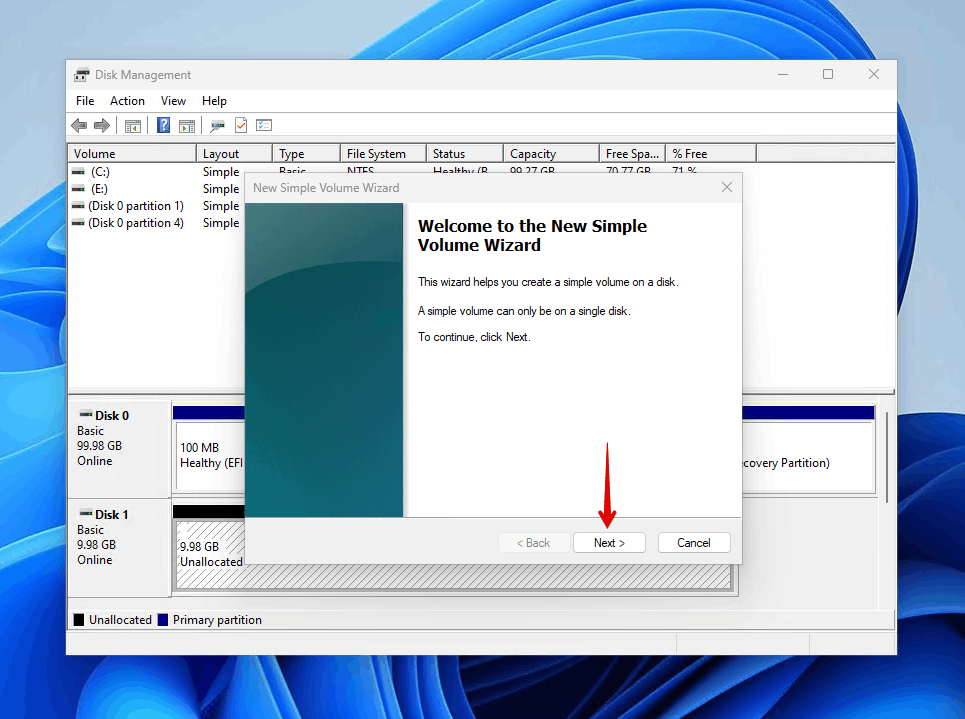
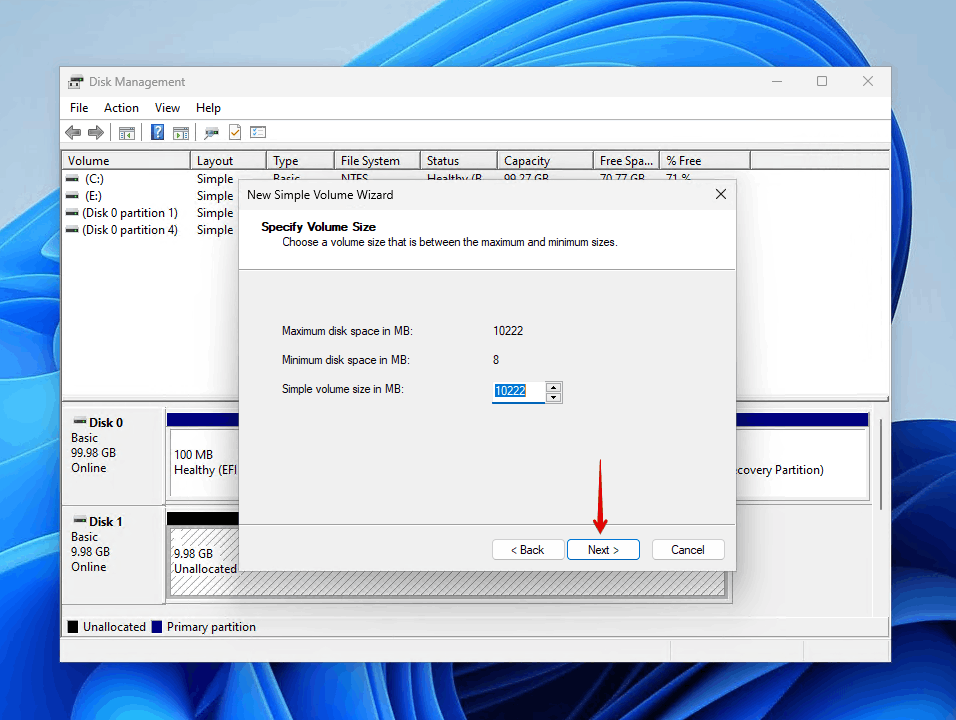
- Click Next when the New Simple Volume Wizard appears.
- Specify the volume size (by default, it will use all available unallocated space) and click Next.
- Choose a drive letter that isn’t already in use and click Next. Windows will use this letter to identify the drive in File Explorer.

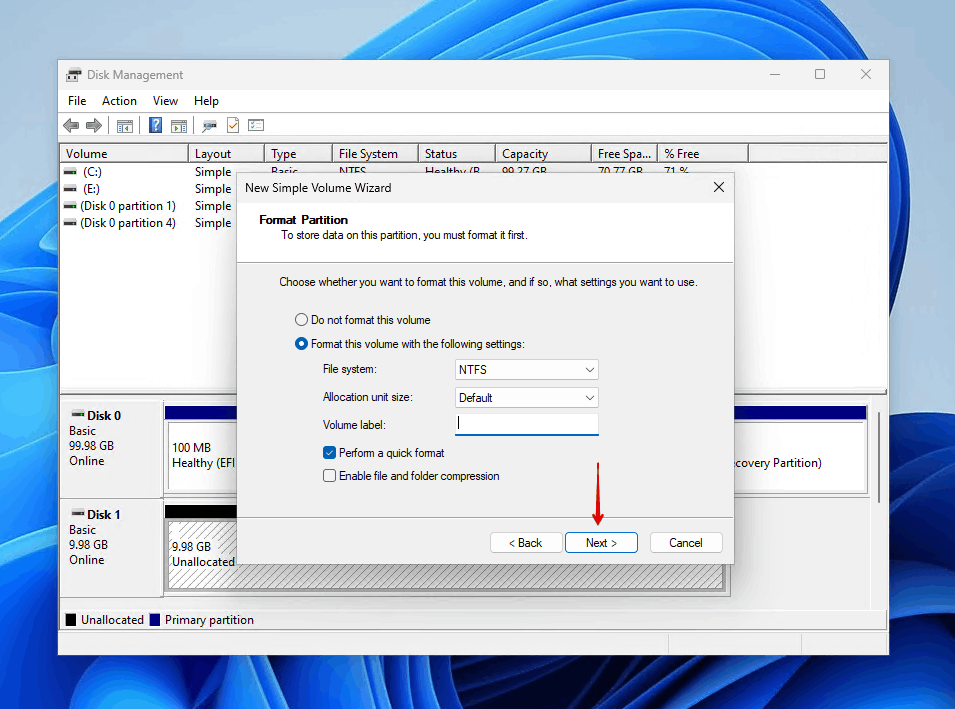
- Keep Perform a quick format selected or select it if it isn’t already and choose NTFS as the file system for best compatibility with Windows. If you want to access the partition from a different operating system, then FAT32 or exFAT is. a better choice.
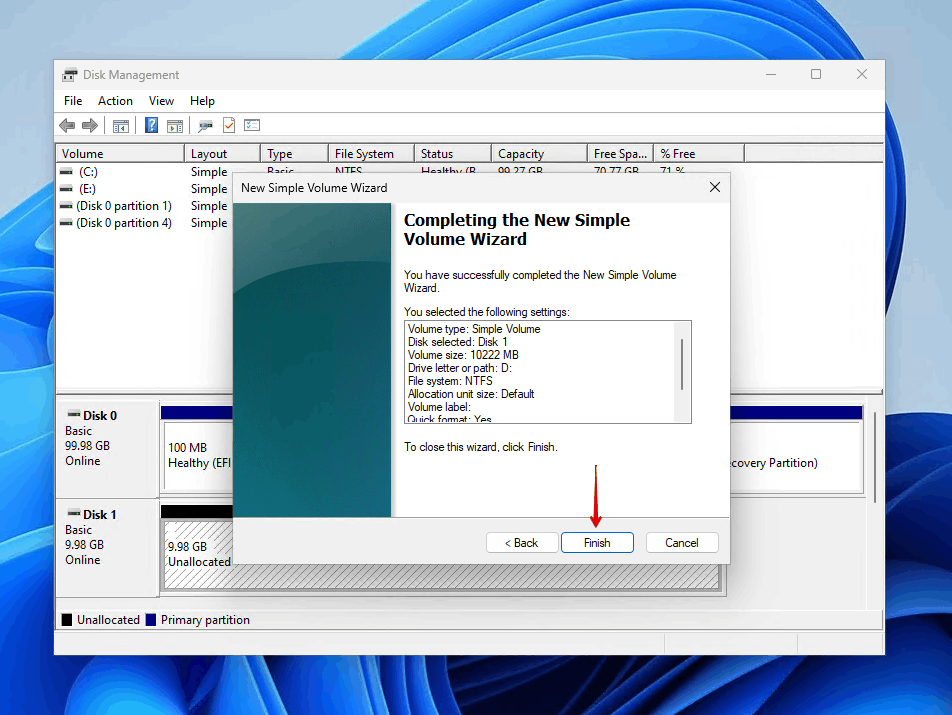
- Review your settings and click Finish.
If you’re creating a partition on an SSD, consider leaving about 10% of the drive’s total capacity as unallocated space. This unallocated space acts as “overprovisioning” that helps maintain the SSD’s performance and longevity. By not making it accessible, you never have to worry about it.
Conclusion
Using the methods outlined above, you’ll know how to get your data back, as well as how to recover an unallocated hard drive to working order in no time. Going forward, the best way to bounce back from a situation like this is to maintain a regular backup of critical data. That way, you can jump straight to formatting the drive and copying the data back over.
Any questions about what we mentioned in this guide? Ran into an issue at some point that was tough to get past? Let us know in the comments below. We’d love to hear from you.
FAQ
- Recover the original partition structure using TestDisk.
- Add the space to an adjacent existing partition.
- Create a new partition in the unallocated space.


