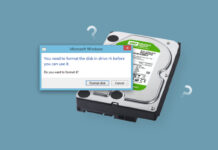
 SCSI hard drives exist with an aura of obscurity. Advancements in the hard drive storage industry steadily reduced the demand for SCSI hard drives. Their unpopularity and a scarcity of relevant data recovery guides can make SCSI data recovery challenging.
If you are dealing with data loss on a SCSI hard drive, don’t panic. This article covers three actionable methods for SCSI data recovery. Click here to skip straight to the data recovery tutorial.
SCSI Hard Drive VS SATA/ATA Hard Drives
The SCSI hard drive is a rare breed in the memory storage kingdom. Back in the 1980s, the SCSI hard drive was quite popular thanks to its high-performance storage applications. As a result, these hard drives were massively popular for businesses with huge server clusters.
However, cheaper alternatives like SATA and SAS displaced SCSI in many computing environments. SATA drives promised affordability and higher capacities. Consequently, the market gradually turned against the SCSI technology.
| Factors | SCSI | SATA/ATA |
| 🔰Target Audience | Corporations with Medium to high-end servers. | People with personal computers. |
| 🗼Signal Technology | Parallel signals for data transfer with an integrated processor. | Series signaling approach – relying on the system processor to execute commands. |
| 💯Performance | High | Low data transfer rates |
| 🔌Cable Length | Up to several meters. | Limited and usually <1 meter. |
| 💻Clients | Supports multiple devices in a daisy chain. | Fields a one-to-one connection. |
Pros
- Faster data transfer speeds
- Multi-drive setup support
- Streamlined connection through a single cable
- Controller for independent troubleshooting
- Expensive
- Limited consumer market
- Complex interface setup
The data recovery process for SCSI hard disks is identical to other storage devices. The only exception is that you will have to connect the SCSI drive to the PC using special adapters.
How to Establish a Successful SCSI to USB Connection
While attempting to connect your SCSI hard drive to a PC, here are some helpful tips:
- 🔌Choose an appropriate SCSI connector by considering these parameters:
SCSI generation (like SCSI-1, SCSI-2, Ultra SCSI, etc.)
Connector cable type (like CN50, MD50, U68, etc.)Combining the two parameters, you might require a 25/50/68 pin ultra SCSI adapter. To connect a SCSI hard drive to your PC, look out for a SCSI to USB converter.
- 🔋Check the power requirements for booting your SCSI hard drive. Ensure that you have the necessary power cables. Typically, external SCSI hard drives come with power adapters – which you would need to plug into a power source.
- 💿 Install suitable drivers to access the SCSI hard drive on your PC. Visit the SCSI hard drive manufacturer’s website to download the latest drivers.
How to Recover Data From a SCSI Hard Drive
Once you have established a successful connection with your PC, it’s time to head into the data recovery tutorial.
❗ For data recovery software to work, your Disk Manager must detect the SCSI drive with its correct size.
Method 1: Use Professional Data Recovery Software
Data recovery software can help you effortlessly retrieve deleted data. Amongst the several top tools, our editorial team recommends Disk Drill.
Disk Drill is compatible with popular Windows file systems, like FAT32, NTFS, exFAT, etc. The tool is quite versatile, with comprehensive support for all file types, including audio, video, images, and special file types like RAR and ZIP. Lastly, Disk Drill offers free data recovery for up to 500 MB.
Here’s how you can recover data from a SCSI drive using Disk Drill:
- Download, install, and launch Disk Drill on your computer.
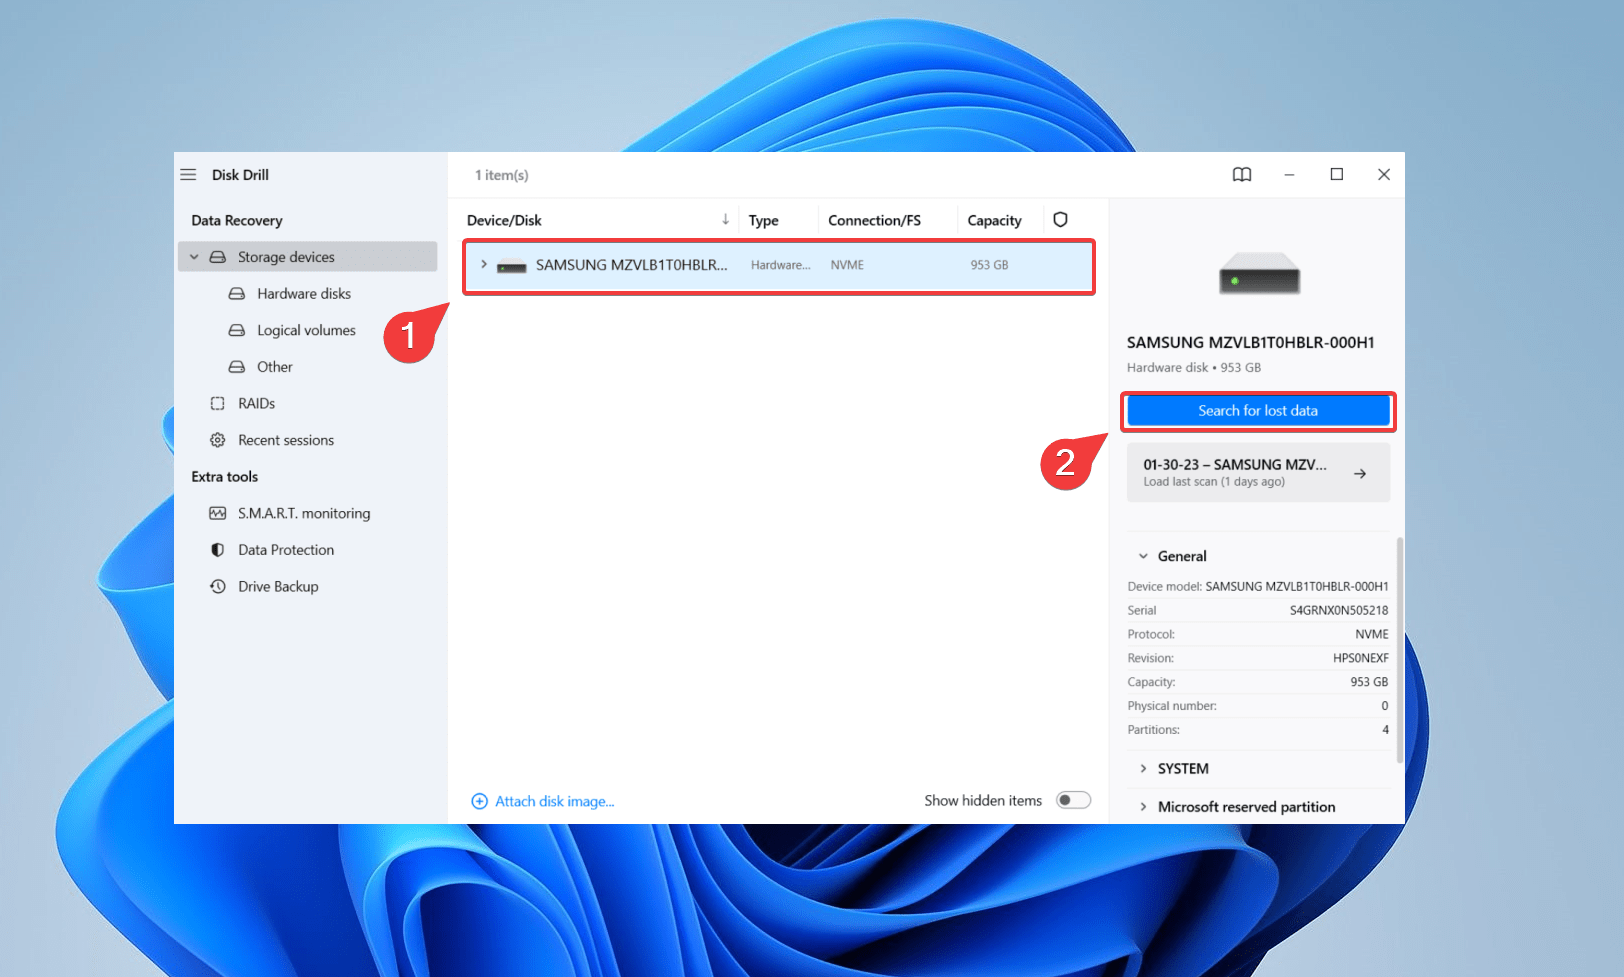
- Click on the SCSI hard disk, and select search for lost data.
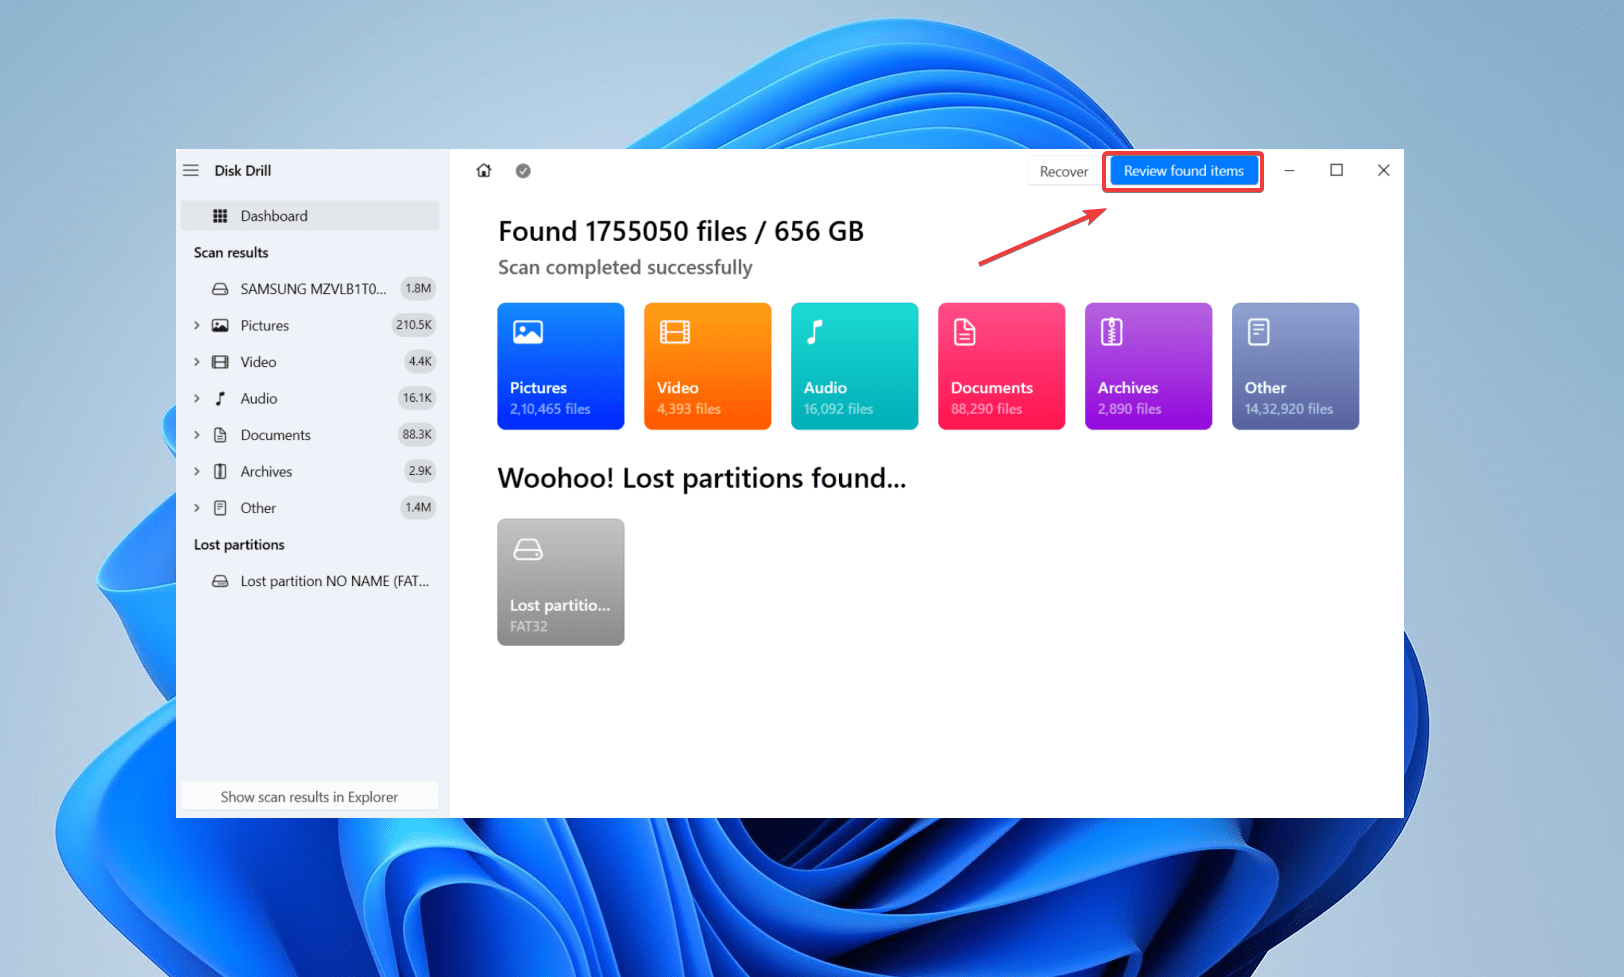
- Click on Review found items. Alternatively, you could directly click on a file type from the left navigation pane.
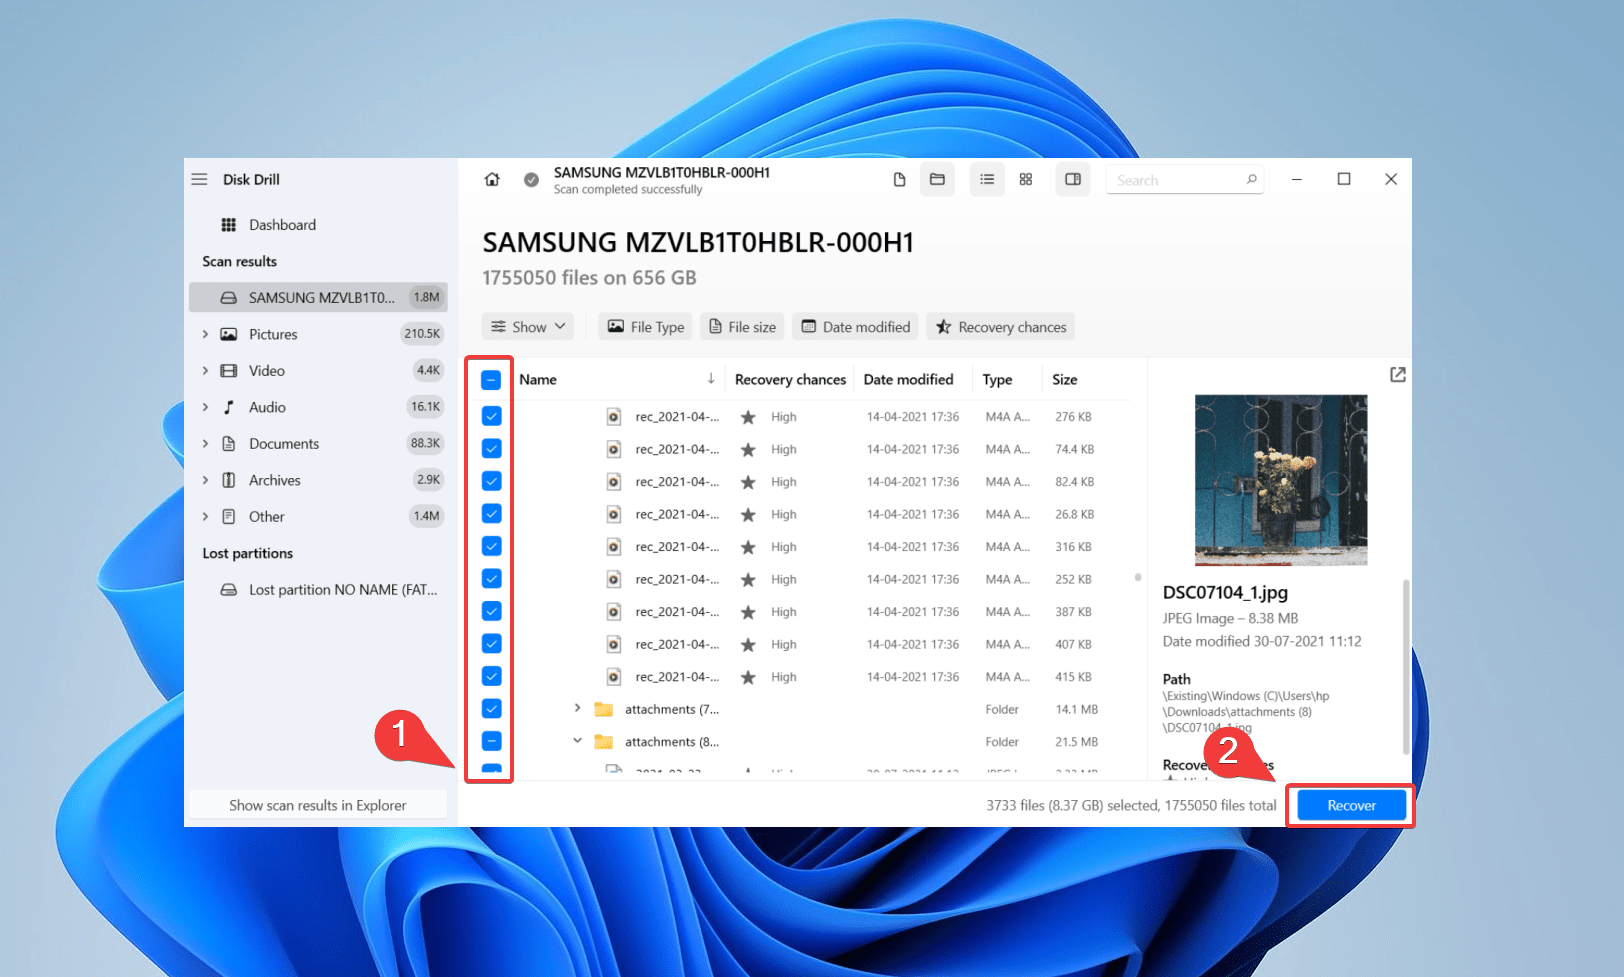
- Preview your desired file by clicking the eye icon (after hovering on a file). Additionally, leverage the filter feature to refine search results. For instance, if you are hunting for a jpg file, enter the file format in the top right-hand corner, and hit Enter. Disk Drill will shortlist your target jpg files. Select the files you would like to retrieve and click Recover.
- Select a destination for saving your recovered data and click Next. Don’t choose the same affected SCSI disk. Disk Drill will issue a warning if you try to do so.
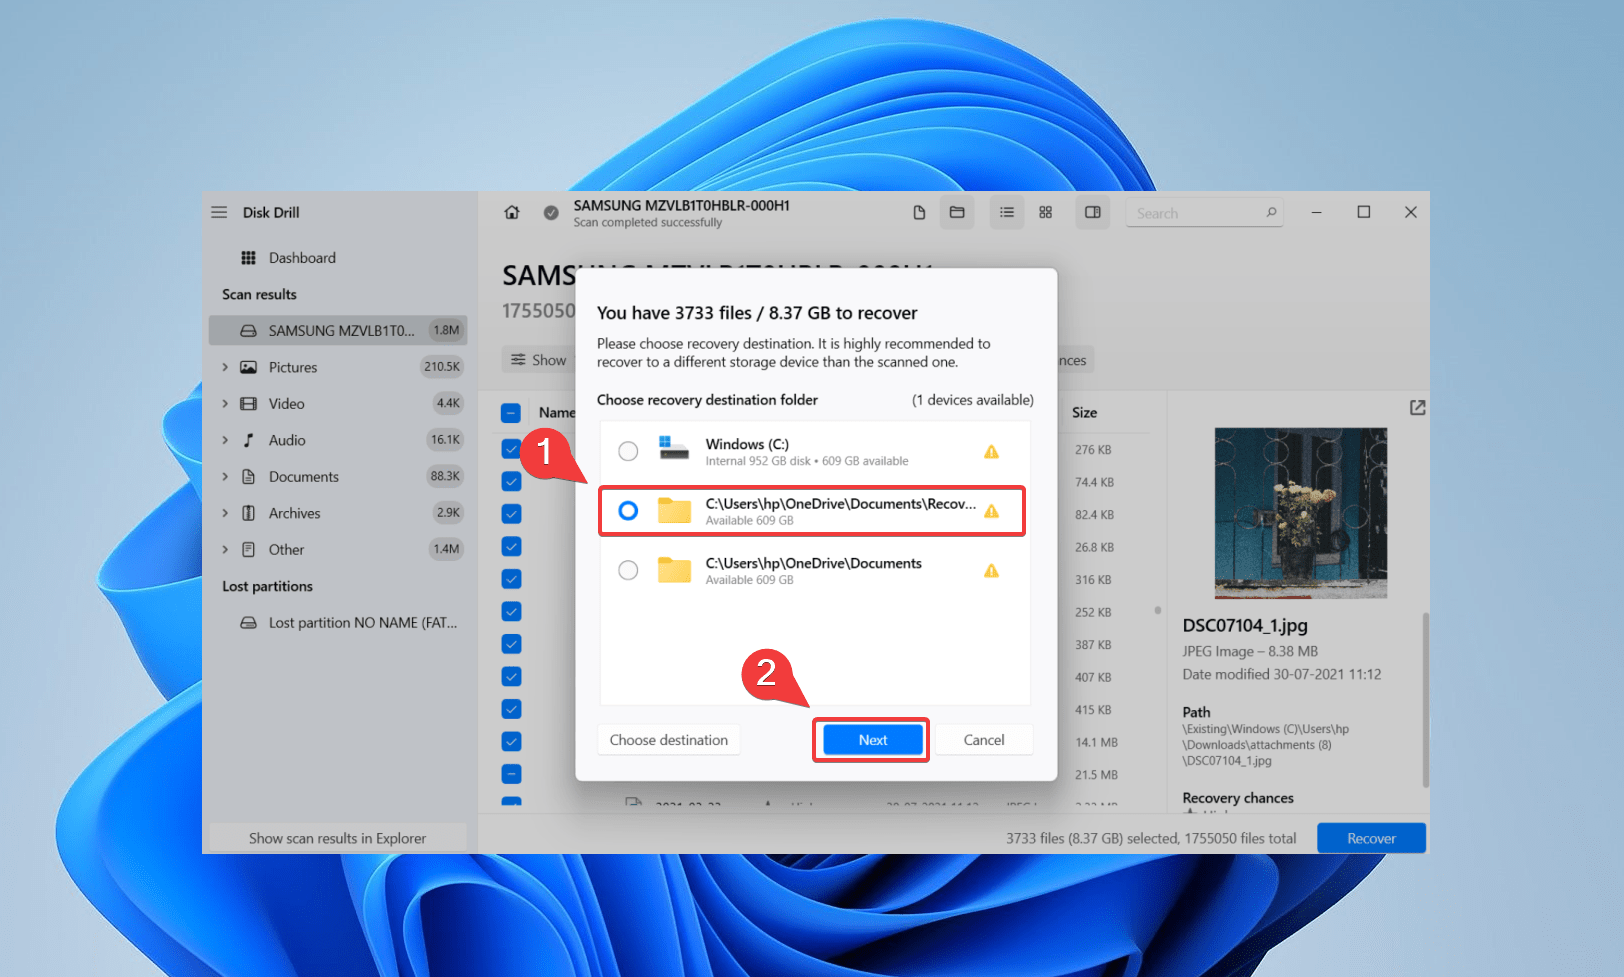
- Finally, click Show in Explorer to navigate to your recovered files.
Method 2: Use Freeware SCSI Data Recovery Software
You can use freeware data recovery software for your SCSI hard drive. However, free tools pose certain limitations, like limited deep scan capabilities and improper technical support. Moreover, freeware tools are unreliable and may not help you with successful data recovery. For instance, most freeware tools cannot list recoverable file types. Additionally, such tools also have a confusing UI.
📁 Nevertheless, if you are on a tight budget, you can consider using freeware SCSI data recovery. Recuva is one such cost-effective option, allowing you to retrieve unlimited files for free. Recuva features a standard scan and a deep scan for a more extensive hard drive search. Additionally, Recuva also allows you to partially restore file structure and filenames.
Here’s how to perform SCSI data recovery via USB on Windows using Recuva:
- Download, install and launch Recuva.
- Select the SCSI hard drive from the list of devices.
- Navigate to Options from the upper right corner.
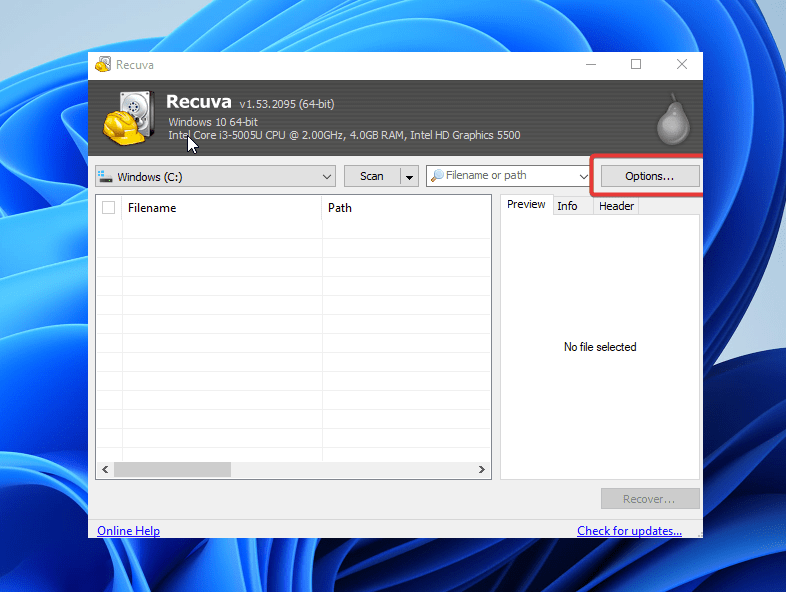
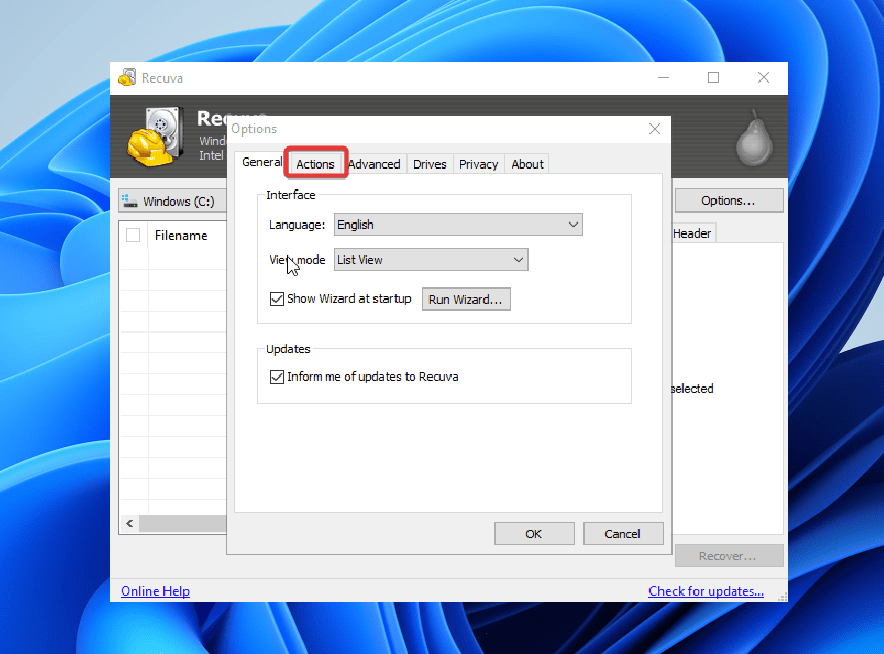
- In the options dialogue box, select the second tab that says Actions.
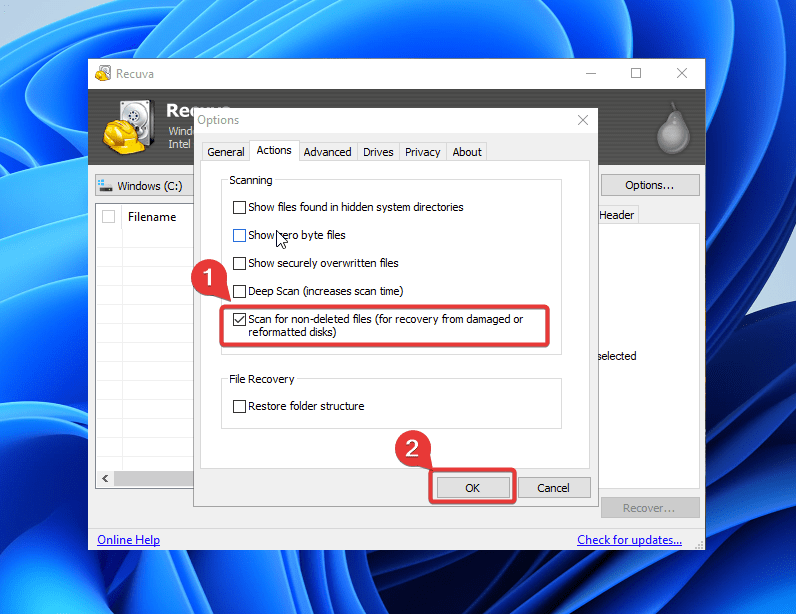
- Select the last option from the list – Scan for non-deleted files and hit OK. Recuva will execute the scan and highlight recoverable files with a green double-circle icon.
Method 3: Send Disk to a Data Recovery Service
Consider consulting a data recovery service if you encounter the following:
- The SCSI disk doesn’t boot up despite being properly connected. A general indicator is when the LED lights don’t blink even after powering up the hard drive.
- Unusual clicking noises from the SCSI disk.
- Significant physical damage or mechanical failure.
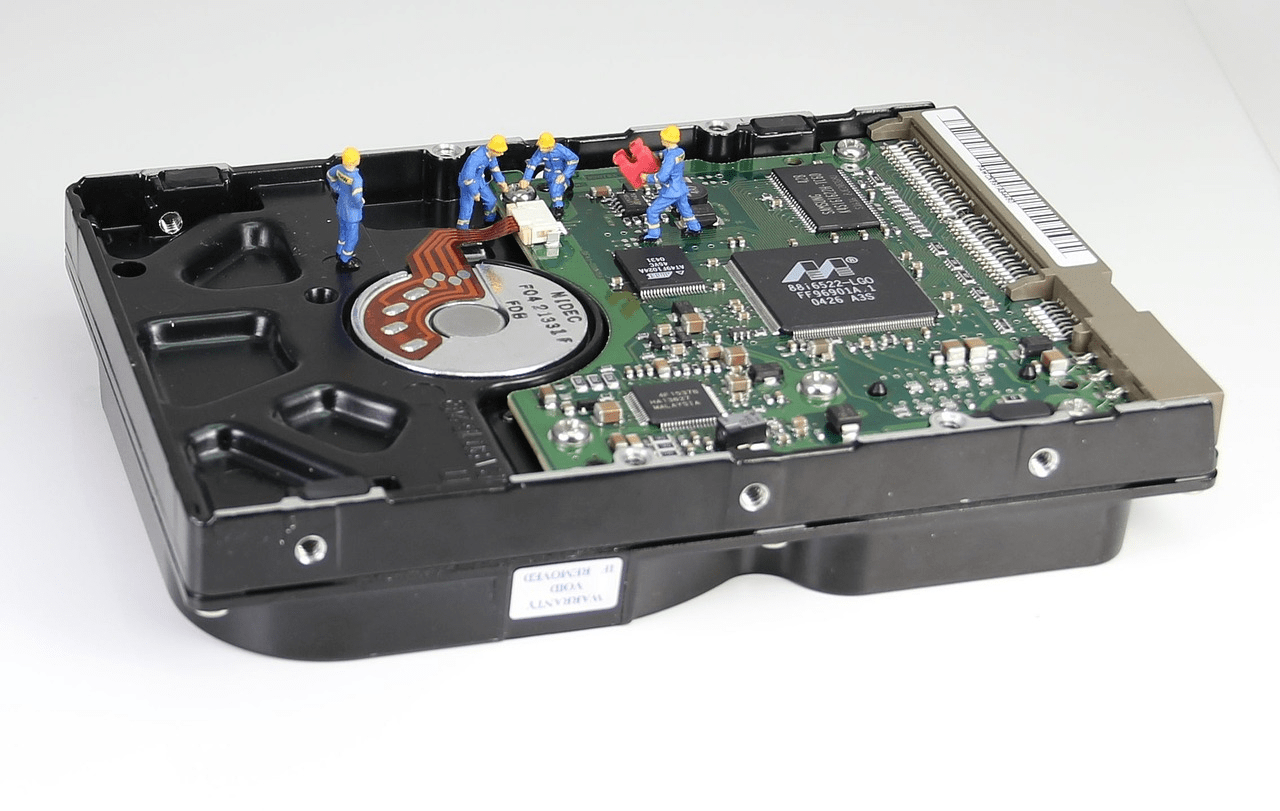
🔧 Since SCSI ships legacy hardware, you shouldn’t attempt any DIY fixes. Moreover, trying to fix a corrupted and damaged SCSI hardware will only lead to further damage, and affect your data recovery probability. Consult a reputable data recovery service to maximize your chances.
Data recovery services have cleanroom facilities to meticulously perform data recovery procedures on your SCSI hard drive. Moreover, the professionals working at reputable data recovery centers possess vast expertise in data recovery.
Here’s a checklist for shortlisting the right data recovery service center:
- 📃Certifications: Look for data recovery centers with industry accreditations, like the ISO 9001 or SOC 2 Type II.
- ✍️Customer Reviews: Look for positive testimonies and case studies. Find out if a data recovery service center has a proven track record.
- 💰Pricing: Consider the pricing models of every data recovery center. Analyze the refund policies, and other T&Cs.
Conclusion
Data retrieval from a SCSI hard drive is very much possible with the right tools. Once you manage to access the SCSI hard drive, use reputable data recovery tools to attempt a data recovery. If you can’t access the SCSI hard drive, consult a data recovery service center.
FAQs
- SATA uses a system processor, while SCSI has a built-in processor.
- SATA is cheaper than SCSI.
- SATA focuses on storage capacity, whereas SCSI prioritizes speed.
- SATA uses serial signals, while SCSI uses parallel signals.
