 Your Desktop folder acts as a shortcut hub to your files, folders, and applications. You put shortcuts to everything you need on the Desktop because it’s the first thing you see when you log in. However, if some of your files or folders have disappeared, its convenience quickly comes into question.
The data that once resided on your Desktop could have become lost for many reasons. No matter the cause, we’ll show you various proven methods you can use to recover files from the Desktop.
Where Are Desktop Files Stored?
By default, your Desktop is tied to your user account. Each account has its own unique desktop. If your account name is Name, for instance, the path will look something like C:\Users\Name\Desktop. When you save a file to your Desktop, you will be able to find it in this folder.
The location where your Desktop files are actually stored can be changed manually. To do this just right click on your Desktop folder and in the tab Location you can change where you want to store your Desktop. If the path is changed, the Desktop will still look the same but all files will be in a separate location.
4 Ways to Recover Deleted Desktop Files in Windows 10
If you’ve found yourself in a situation where your files or folders are missing, try using the below methods to recover deleted files from the Desktop.
Method 1: Recover Using Data Recovery Software
If you don’t have a backup of your data, data recovery software is the best option for recovering the data yourself. Data recovery software works by scanning your drive for data that has been lost or deleted and gives you the option of recovering it. The chances of recovery will vary based on how long ago the data was lost and what changes have been made to the drive since then.
Disk Drill is the data recovery tool we’ll be using for its streamlined interface and proficiency to recover files from the Desktop. If a file or folder has disappeared from your Desktop, use the below steps to recover it:
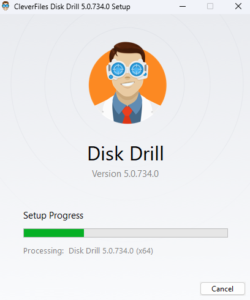
- Download and install Disk Drill. Once installed, open it.
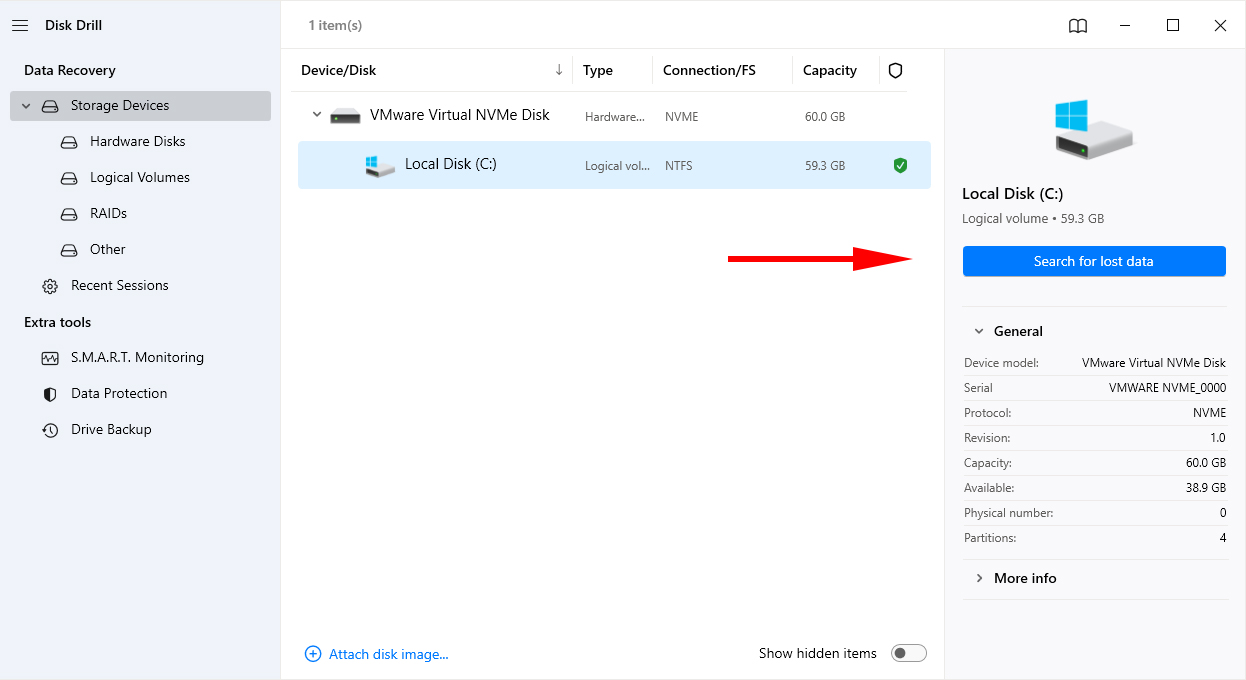
- Select the disk that contains your Desktop. Click Search for lost data.
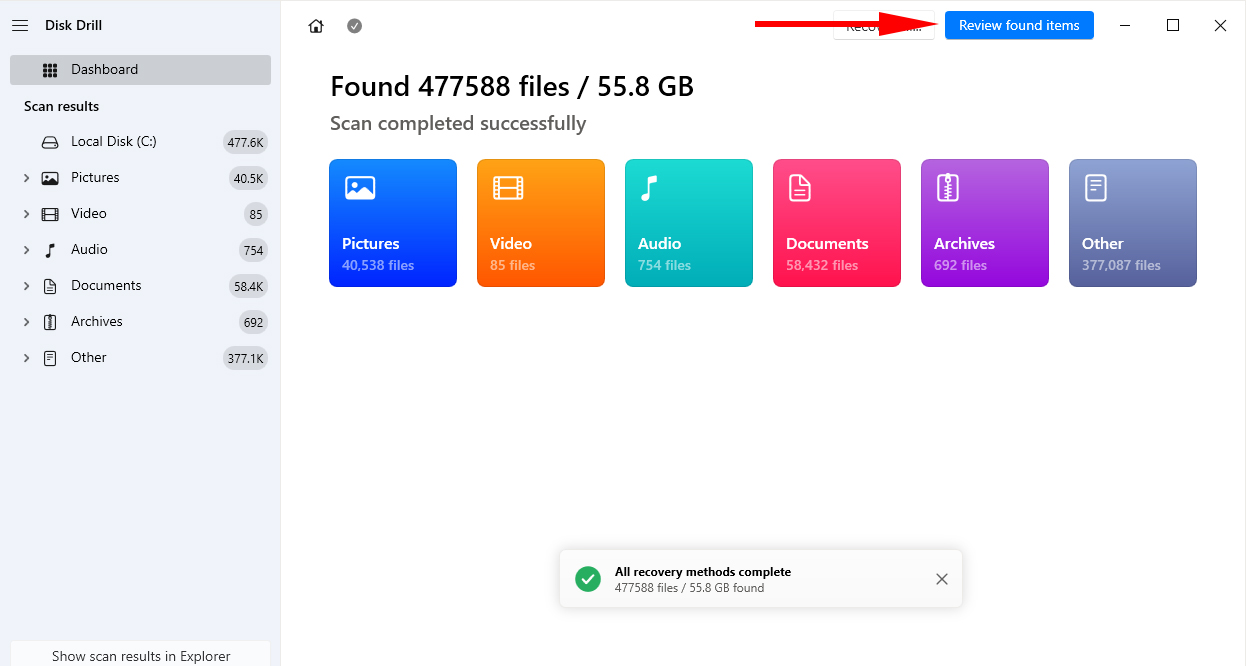
- Click Review found items when the scan has finished to see what Disk Drill discovered.
- Use the dropdown menus to locate and mark your files for recovery. Use the Recovery chances column and Preview panel to get an overall view at your chances at recovering that file. When ready, click Recover.
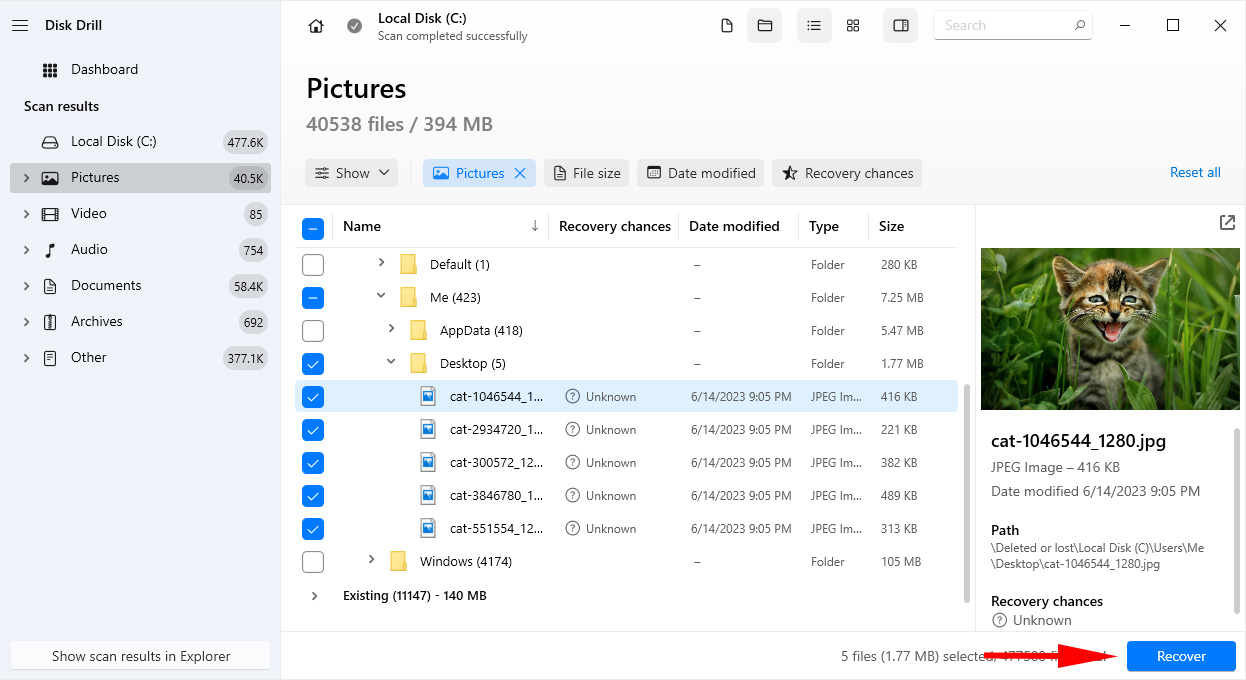
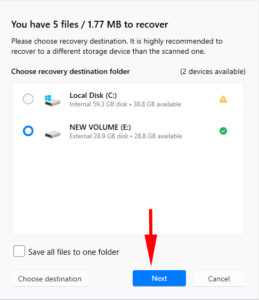
- Specify a location that’s not on the same physical partition you’re recovering from. Press Next to finalize recovery.
Disk Drill is frequently updated with new features and even supports recovery on Windows 11. In addition to the ability to recover individual files and folders, it can recover the entire deleted Desktop folder in Windows 10 if it were to become lost, making it the perfect solution if your Desktop folder disappeared.
Method 2: Restore From Recycle Bin
The second method is the classic Recycle Bin. It will also work if you need to recover deleted folders from the Desktop. When you delete a file or folder, it’s automatically sent to the Recycle Bin instead of being permanently deleted. The only time it’s not is if you shift deleted the file, or if the file was too big. If you find that some of your desktop files are missing, check the Recycle Bin.
Follow these steps:
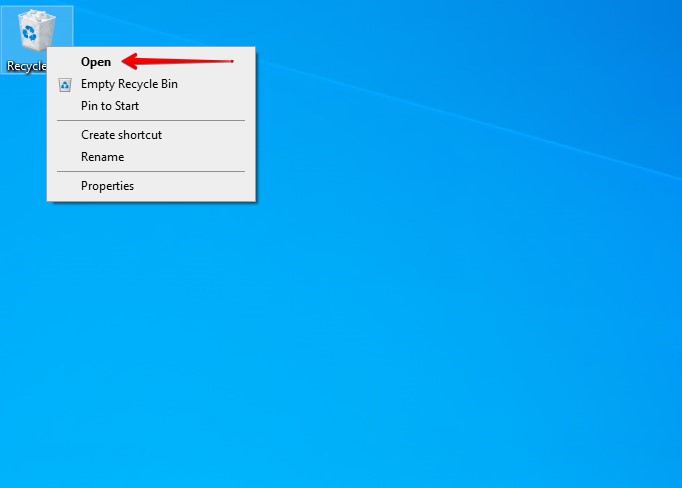
- On your Desktop, open the Recycle Bin.
- Select the files you want to recover. In the Recycle Bin Tools tab, click Restore the selected items.
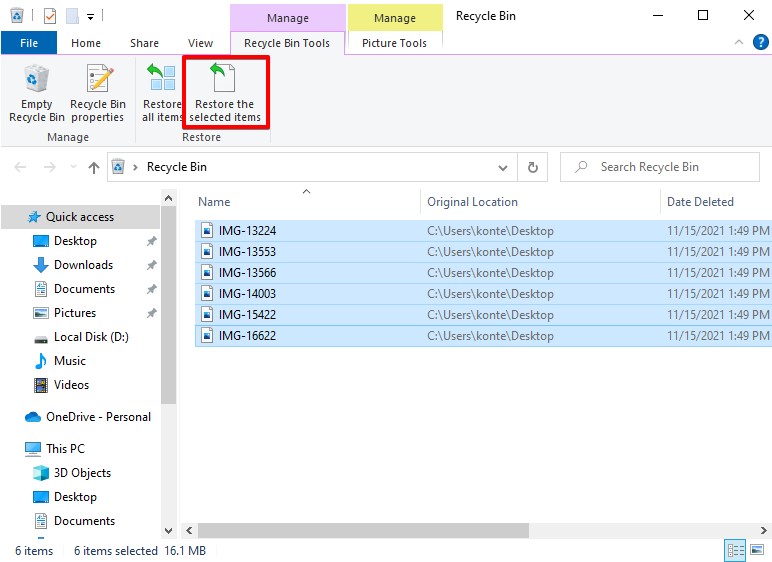
This method will restore the files back to their original location on the Desktop.
Method 3: Restore from Windows Backup and Restore
Backup and Restore is the backup solution introduced with Windows 7. It has remained a part of Windows through multiple releases as it is still a fully functional and reliable backup solution that also allows you to create a copy of the necessary files to boot Windows in case they’re corrupted.
If you configured Backup and Restore to regularly back up your Desktop folder, read the below instruction to understand how to recover Desktop files in Windows 10.
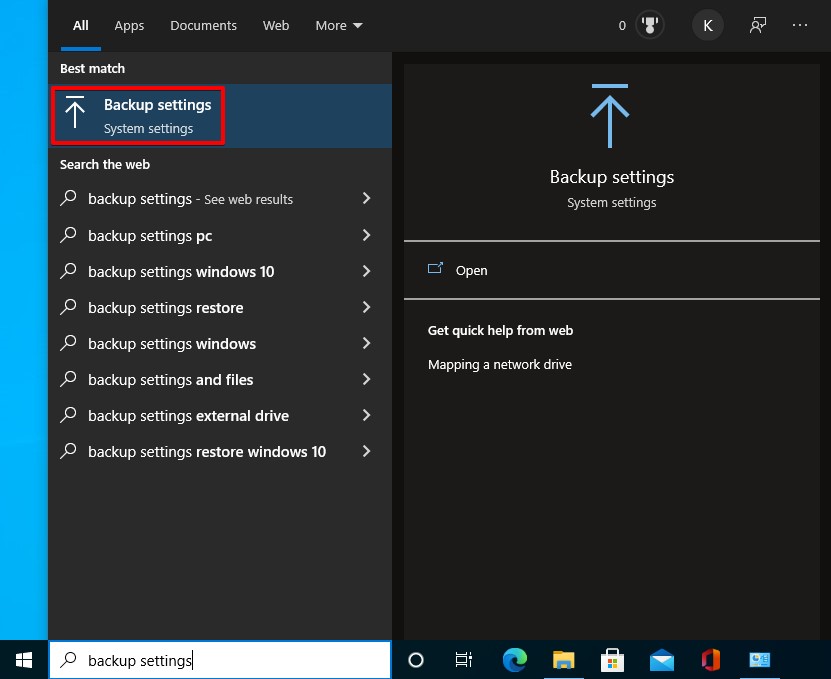
- Press CTRL + S and search Backup settings. Open the first result.
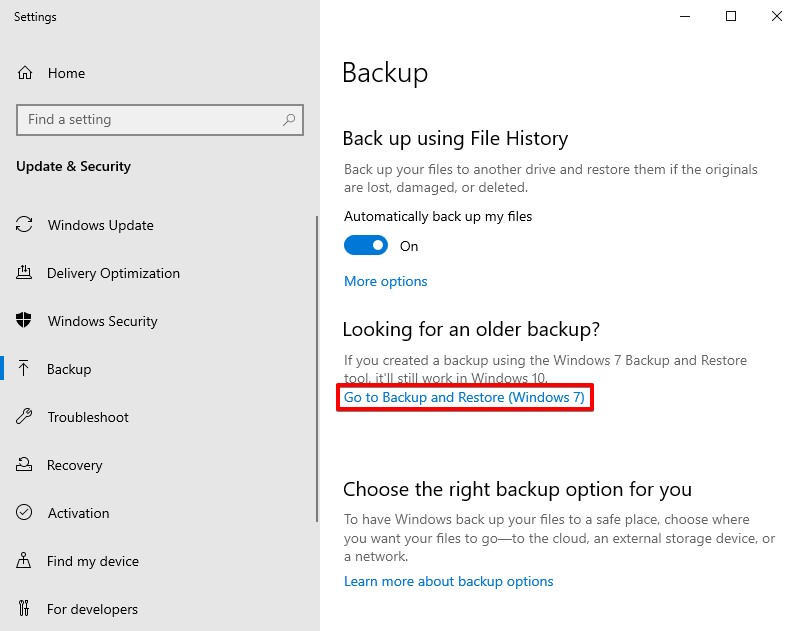
- Click Go to Backup and Restore (Windows 7).
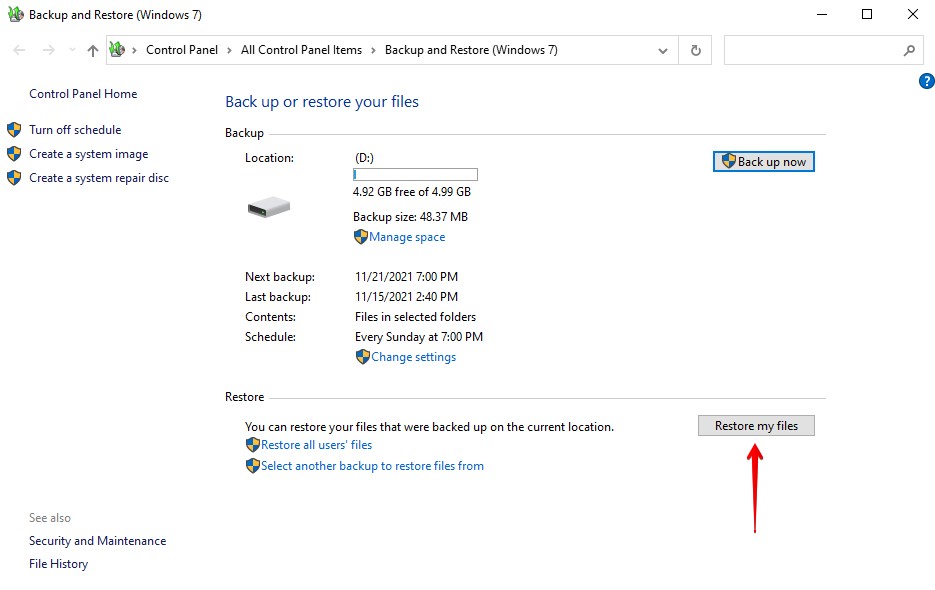
- Click Restore my files.
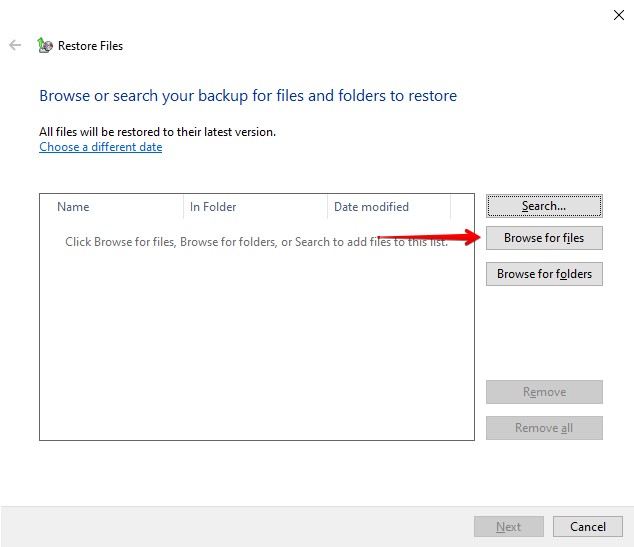
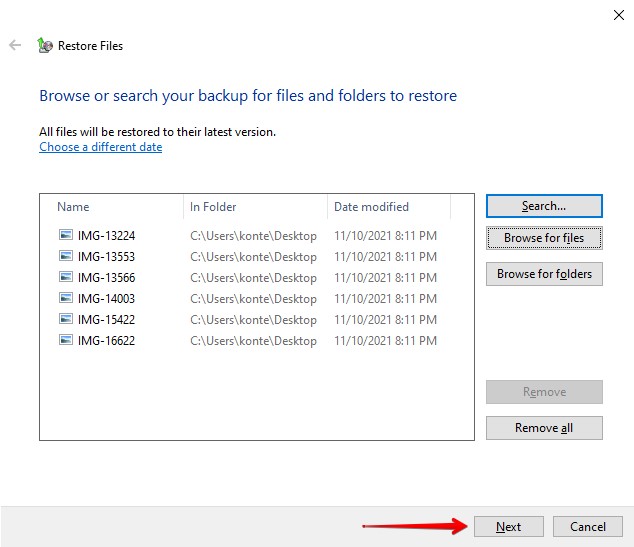
- In the new window, click Browse for files. Select the files you want to restore.
- Click Next.
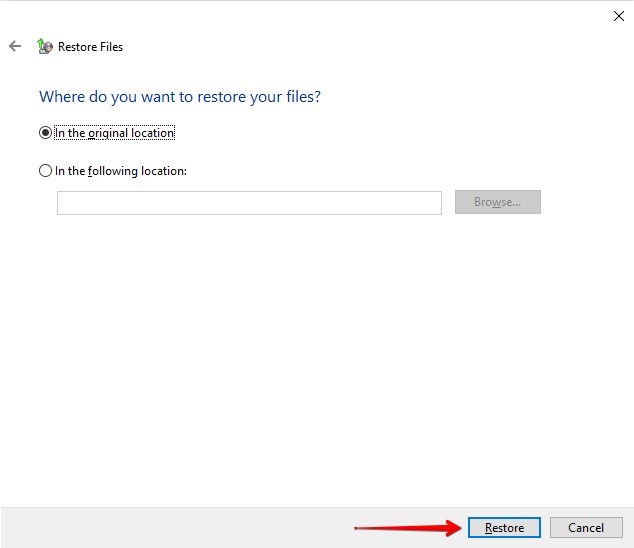
- Choose whether you want to restore the files to their original location or a new one. When ready, click Restore.
Method 4: Restore a Previous Version
If you had the foresight to set up File History, recovery will be a lot easier for you as there’s likely a copy of your file or folder ready to restore. File History is the successor of Backup and Restore and acts as another solution for backing up your data. It works by taking snapshots of your folder and allows you to restore the entire folder to a previous version.
If some of your desktop files disappeared or you accidently deleted the Desktop folder after you set up File History, follow these steps to restore them:
- Open File Explorer.
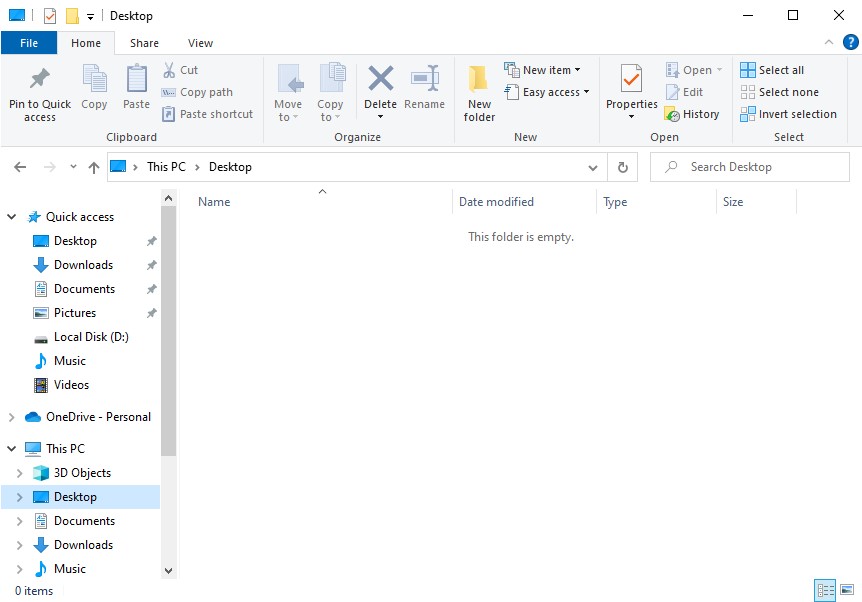
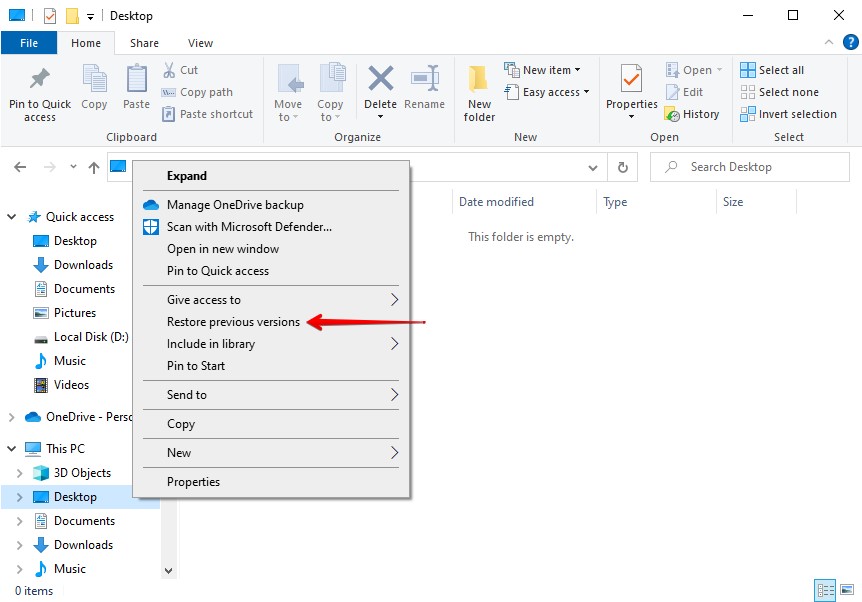
- Right-click Desktop and click Restore previous versions.
- Choose a date and time when the data was present and click Restore.
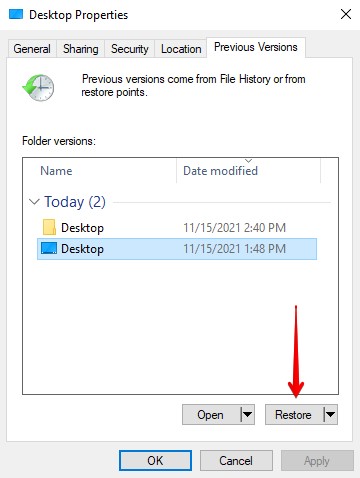
When you click Restore, the files will be returned to their original location by default. If you want to restore to a new location, right-click the button instead and click Restore to.
FAQ
- Right-click on your Desktop screen and click Personalize.
- Click Themes.
- Click Desktop icon settings.
- Untick the icons you want to remove and click Apply.
- Open File Explorer.
- Right-click Desktop and click Properties.
- Click the Location tab and make note of the folder path.
- Right-click your Desktop and click Personalize.
- Click Themes.
- Click Desktop icon settings.
- Untick the Recycle Bin icon and click Apply.
- Open File Explorer.
- Right-click Desktop and click Restore previous versions.
- Select a version you want to restore to, then click Restore.
- Backup - if you have a habit of copying important data to a reserve storage, or automated process through variety of existing tools then just recover your files from this backup.
- Data Recovery Software - more often than not the first scenario is not the case, then your best bet is reliable data recovery software; our team considers Disk Drill is the best tool in most cases of data loss.
