 Have you mistakenly deleted a message or an entire conversation from the Messages app on your Mac? Don’t worry just yet; we’ve all been there. The good news is that there are a few effective data recovery methods that can help you recover deleted iMessages on Mac.
Read on to learn about how to manually find the messages database on your computer and get a step closer to restoring the needed messages.
Go to data recovery ⤵
Mac’s Messages App Explained
Messages is a built-in app that comes with every Mac. To use it, all you need to do is sign in with your Apple ID. This allows you to access the history of all your iMessages and keep track of them in real time from any connected Apple device.
When synced, you’ll be able to open and send new messages from your Mac and they’ll automatically come up on your iPhone or iPad.
Important: If you use Messages in iCloud and delete a message or a whole conversation on either of the connected devices, it’ll also get automatically deleted from everywhere else.
Where Are iMessages Stored on Mac?
So where should you look for your messages on Mac? The first place that you should check is, of course, the Messages app. You can find it by going to Launchpad and typing in Messages in the search bar at the top.

How to Find Deleted iMessages on a Mac
Just to be clear — no, you can’t access the deleted iMessages from the Trash folder on your Mac. That would be nice if it was possible, but unfortunately it doesn’t work that way with messages.
If you noticed that some or all of the messages disappeared from the Messages app, you can use finder to get the deleted iMessages.
Follow these steps to access the iMessage archive on your Mac and check whether they are still physically present on the drive:
- Open Finder and click Go from the menu at the top.
- Choose Go to Folder from the drop-down menu.
- In the search field, type in ~/Library and click Go.
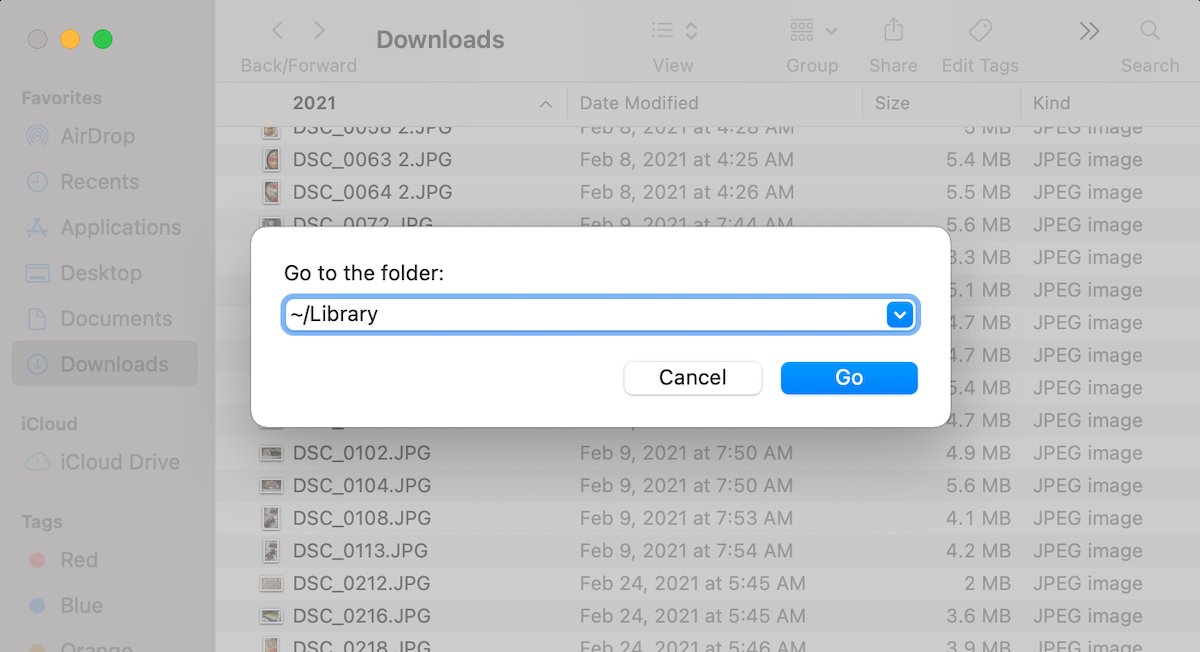
- Click the Messages folder to open it.
- To view your iMessage history, open the chat.db file (it’s best to use the TextEdit app).
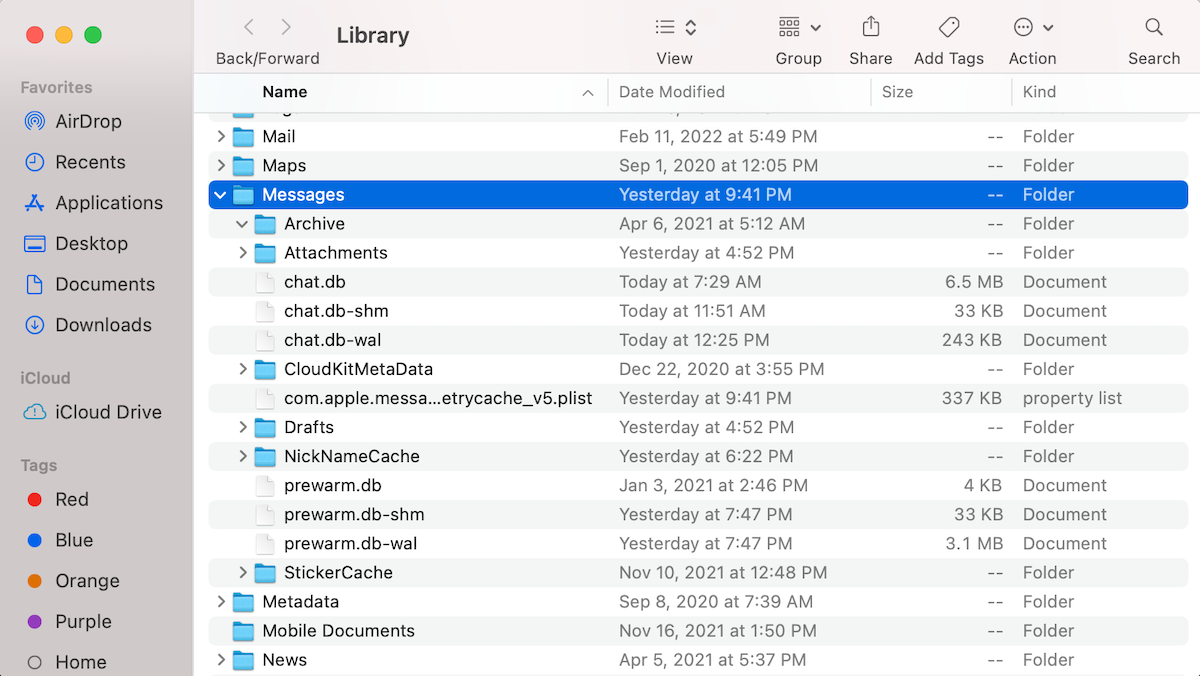
- To view the pictures and videos that have been sent using Messages, open the Attachments folder.
Note: It’s almost impossible to read the messages from the chat.db file since it’s meant specifically for the use of the Messages app.
How to Check Message Settings
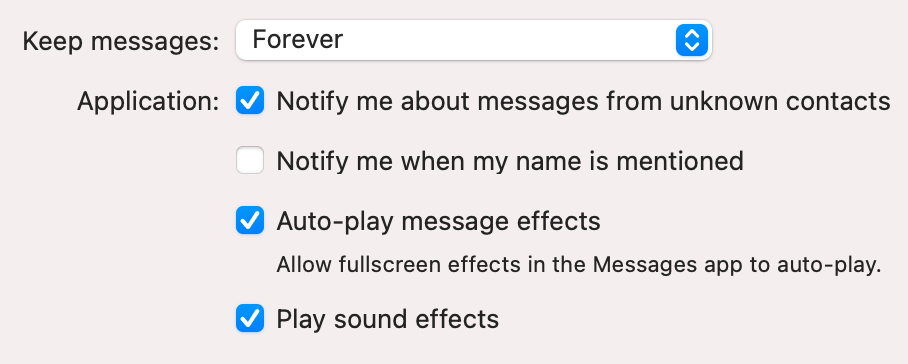
If you’ve noticed that your older messages started to disappear, it’s best to check your Message settings. It’s possible that you chose to keep your messages only for 30 days (if that’s the case, then they will automatically get removed after that time has passed).
To check your message settings, open the Messages app and click Messages > Preferences from the top menu. You’ll see the selected option near Keep messages. To change it, click the arrows for a drop-down menu to appear and click Forever.
4 Methods to Recover Deleted iMessages on a Mac
No luck finding the deleted messages on your Mac? Don’t lose hope just yet. There are a few data recovery methods that may help you restore the accidentally deleted iMessage conversation.
Method 1:Use Data Recovery Software
Using data recovery software is the quickest and easiest way to restore iMessages on Mac. For this job, we’ve tested the Disk Drill app and it has performed the task successfully.
We prefer this data recovery tool since it can be used with almost any Mac: Disk Drill is compatible with all of the recent macOS versions (macOS Monterey, macOS Ventura, macOS Sonoma) and runs on M1/M2/T2 and other Macs. Moreover, it supports a wide range of file types, including iMessages, photos, videos, documents, etc., so you’ll be able to recover both the missing messages and the attachments.
Important: Stop using your Mac as soon as you realize that you’ve mistakenly deleted an important message. This will ensure that it doesn’t get overwritten with other data and increases your chances of recovery.
Follow these steps to retrieve deleted iMessages from your Mac using Disk Drill:
- Download Disk Drill and follow the onscreen instructions to install the app.
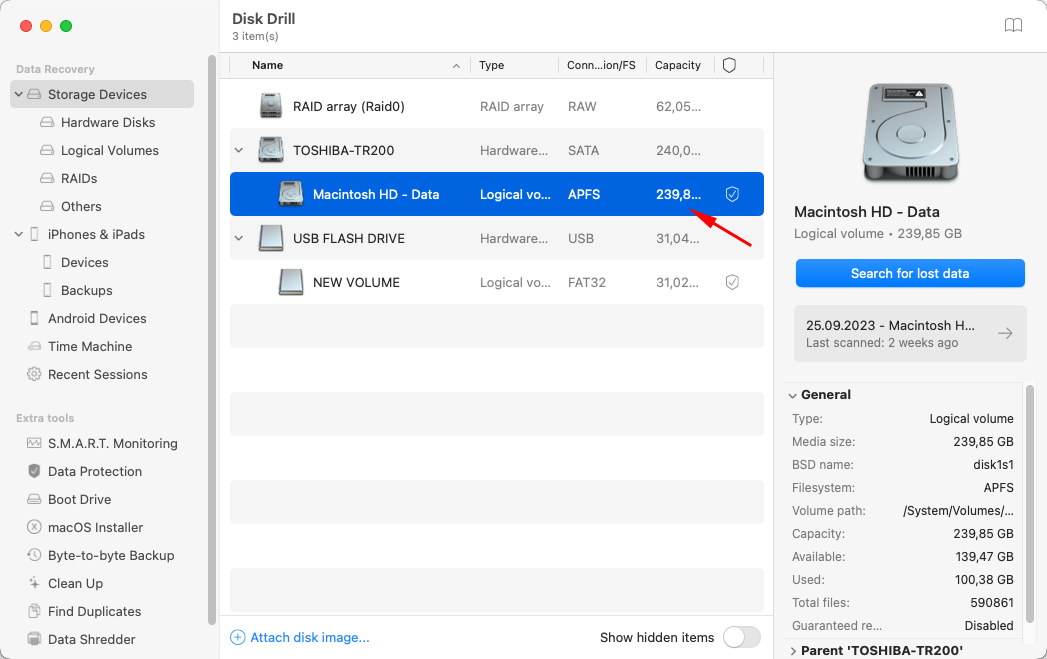
- Choose your drive from the list of available storage devices.
- Click the Search for lost data button.
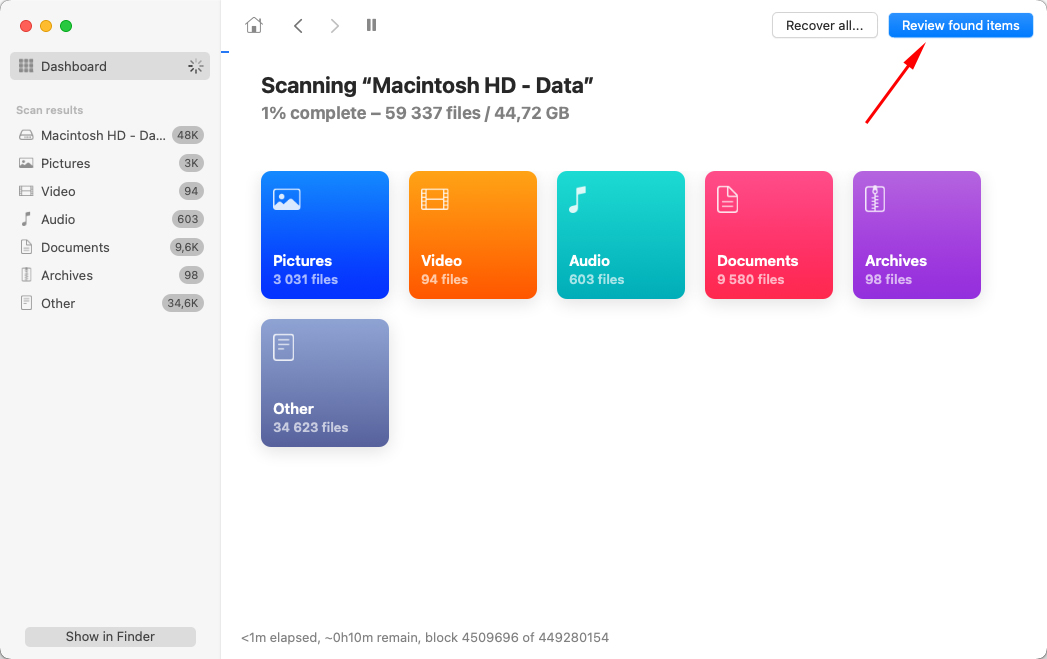
- Click Review found items to preview the files while the app is still performing the scan or wait for it to finish.
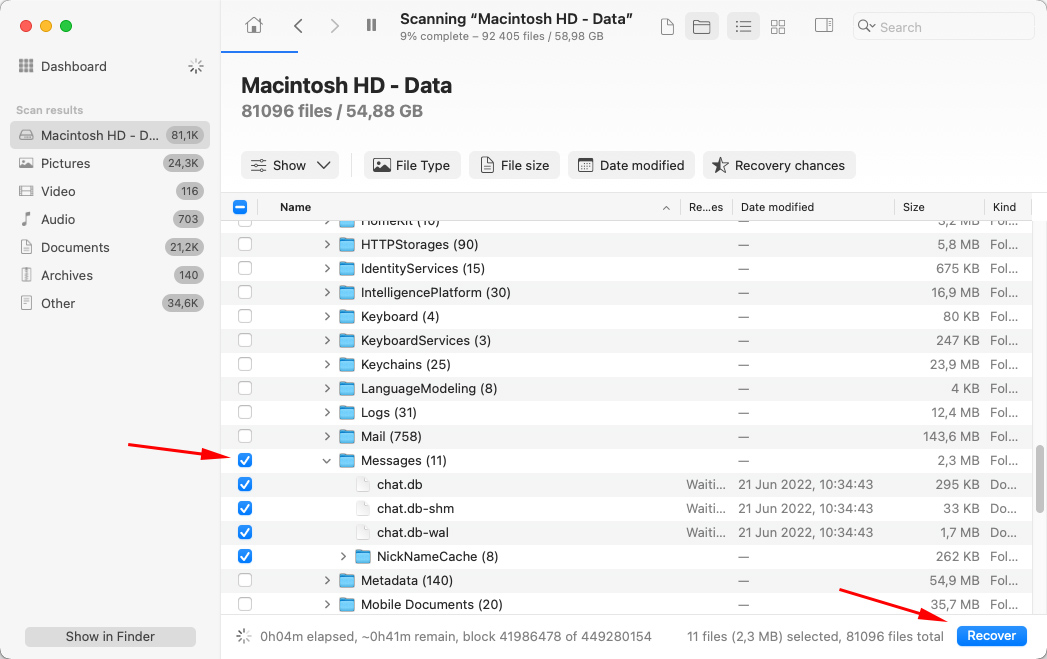
- Navigate the app to find the Messages folder (go to Existing files > Macintosh HD > Users > Library > Messages).
- Click the box near the Messages folder to select it, and then click Recover.
- Choose a destination for the recovered messages and click Next.
Method 2:Check Your Other iOS Devices
If you’ve recently deleted an important message from the Messages app on your computer, it’s possible that the other devices that use your Apple ID and are synced haven’t noticed this change just yet, and you’ll be able to still find it there.
Important: As soon as you realize that you’ve deleted a message on your Mac by mistake, immediately turn off WiFi and mobile data on your iPhone or iPad.
Since time is of the essence in such a situation, the best option for you would be to locate the needed message on your device and simply copy and paste it into Notes (or any other word app), send it to someone, or take a screenshot.
If your iPhone or iPad is running iOS 16 (iPadOS 16.1) and the deleted messages were also present on those devices, it’s worth checking the Recently Deleted folder since those messages might still be there. To do that, open the Messages app, tap Edit, and choose Show Recently Deleted.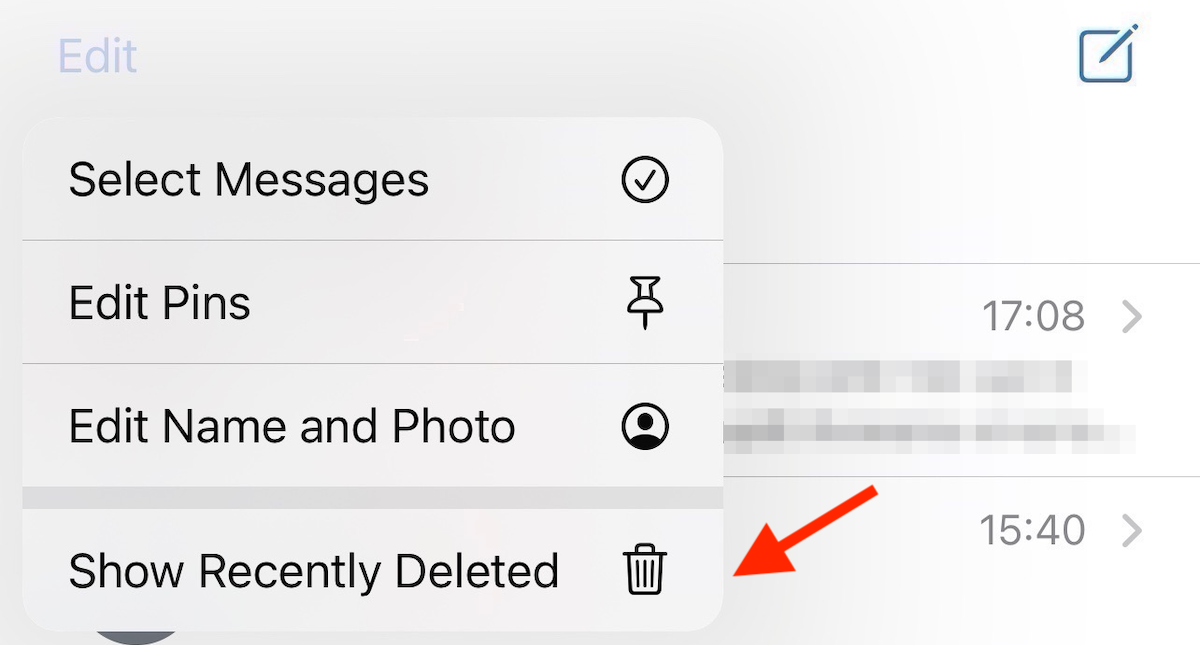
Method 3:Use a Time Machine Backup
Time Machine is a built-in app that comes with every Mac and was designed specifically for backing up data. If you’ve been using it and have configured this tool to make regular backups of your Mac, you should be able to quickly find the needed backup version and restore deleted iMessages on your Mac.
This data recovery method is especially effective in case you wish to recover old iMessages on a MacBook.
Note: Time Machine is not able to restore separate messages or conversations. With this tool, you can recover only the entire database of your messages from a specific backup version. Also, to avoid overwriting your current messages, it is best to back them up before moving forward.
Follow these steps to recover deleted text messages on Mac via Time Machine:
- Connect the drive containing your backup to your Mac.
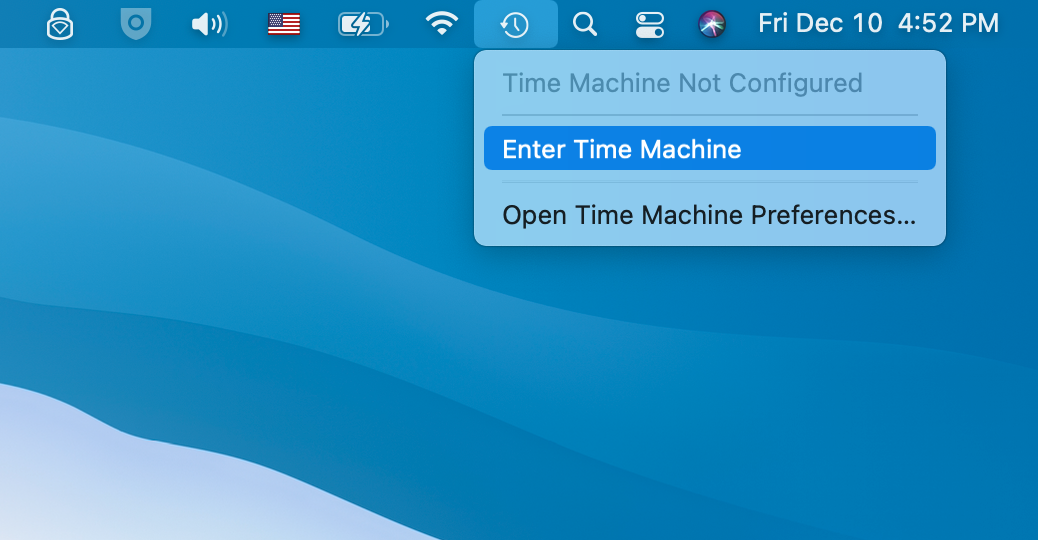
- Click the Time Machine icon at the menu on the top of the screen and then click Enter Time Machine.
- Use the timeline on the right to choose the needed backup version.
- Go to Library > Messages.
- Click the chat.db file to select it and click the Restore button.
Method 4:Recover From iCloud
Another way to restore the deleted iMessages from your Mac is to use iCloud. But here’s the thing: this data recovery method will work only if you’ve enabled Messages in iCloud and the iCloud Backup feature before the messages got removed from your iPhone or Mac.
You can access all of your backed-up iMessages directly from your iCloud account. You’ll be able to copy-paste them if you wish to save them somewhere separately.
Follow these steps to recover deleted iMessages from your iCloud account:
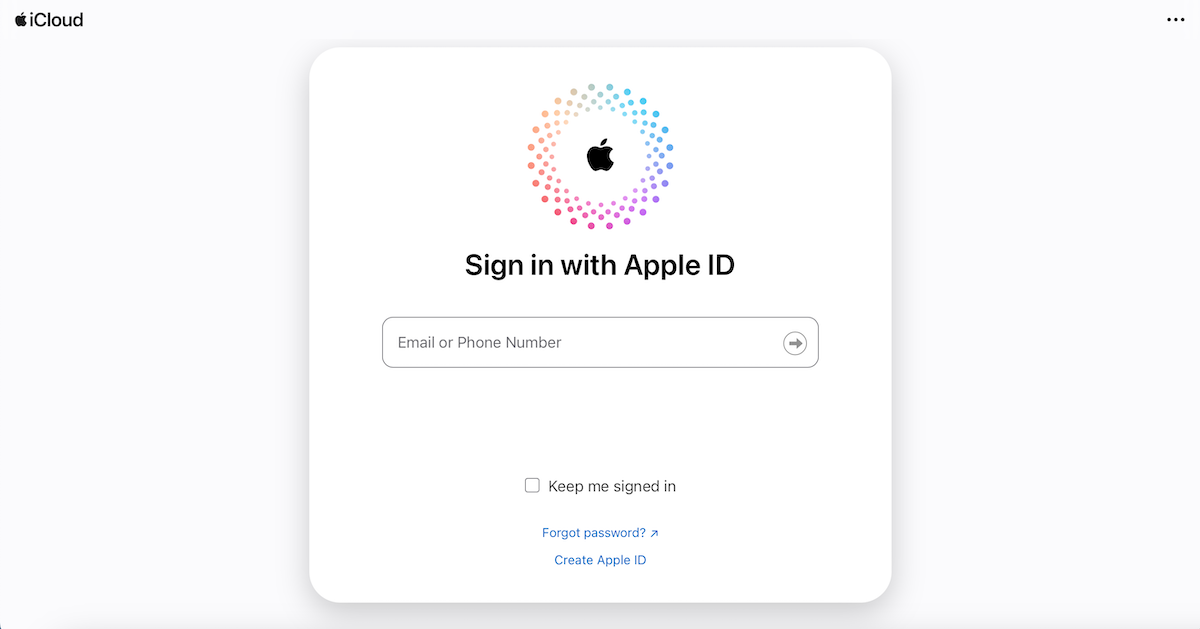
- Go to iCloud.com and sign into your account with your Apple ID details.
- Click Messages.
- Look through your iMessage history to locate the conversation or separate messages that you want to retrieve.
- Click Export on a conversation to download it as a PDF file or simply copy-paste the needed messages.
Bottom Line
When trying to recover the deleted iMessages on your Mac, for optimal results it’s best to choose a data recovery method that best suits your scenario and preferences. And keep in mind, whether you’re looking for the missing messages in the iMessages archive, checking other synchronized devices, recovering them from a backup, or using specialized data recovery software, the key is to act as fast as possible to increase your chances of achieving the goal.
FAQ
- On your iPhone, head to Settings > General.
- Scroll down and tap Reset.
- Choose Erase All Content and Settings.
- Follow the on-screen instructions to set up your phone. When you see the Apps & Data screen, tap Restore from iCloud Backup.
- Log into your iCloud account and choose the backup containing your missing messages.


