 In today’s guide, we will cover how to recover data from a LaCie external hard drive – it doesn’t matter what exact model you have, could be a Rugged, d2, 5big, or a Porsche Design. We’ll walk you through what you can do at home with the right tools and also talk about other options if the situation calls for expert help.
LaCie Drive Data Recovery in a Nutshell
LaCie drive data recovery doesn’t have to be complicated. Whether you accidentally deleted a few important files or your LaCie drive doesn’t show up in File Explorer at all, as long as your computer detects it, you’ve got a path forward.
The first thing to check is whether Windows can actually see the drive – not in File Explorer, but in Disk Management. You’d be surprised how many times the drive is there, just invisible because it lost its file system or got unplugged mid-transfer.
Here’s how to check:
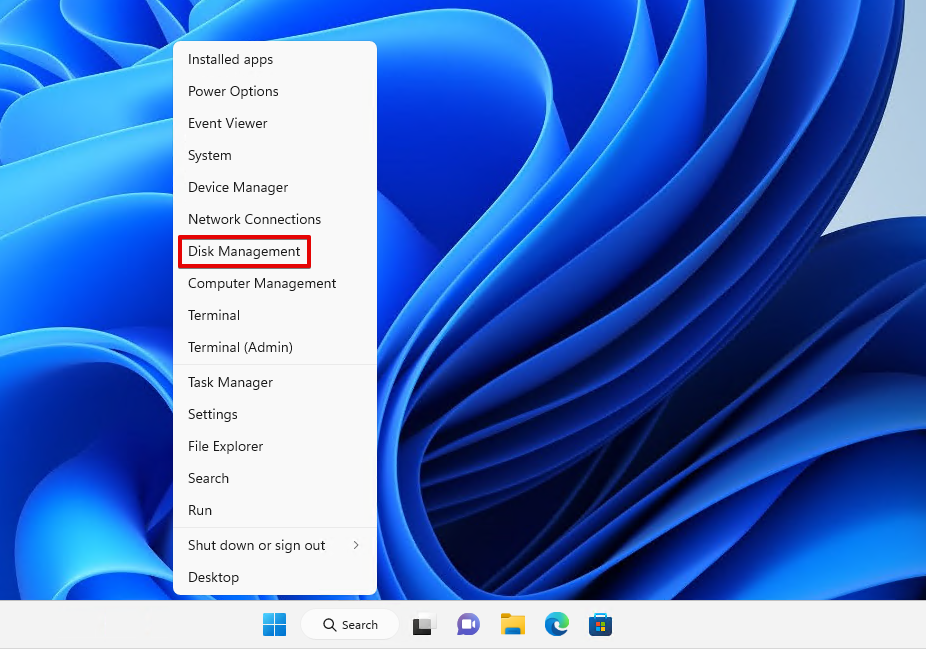
- Right-click the Start button and hit Disk Management. Give it a moment.
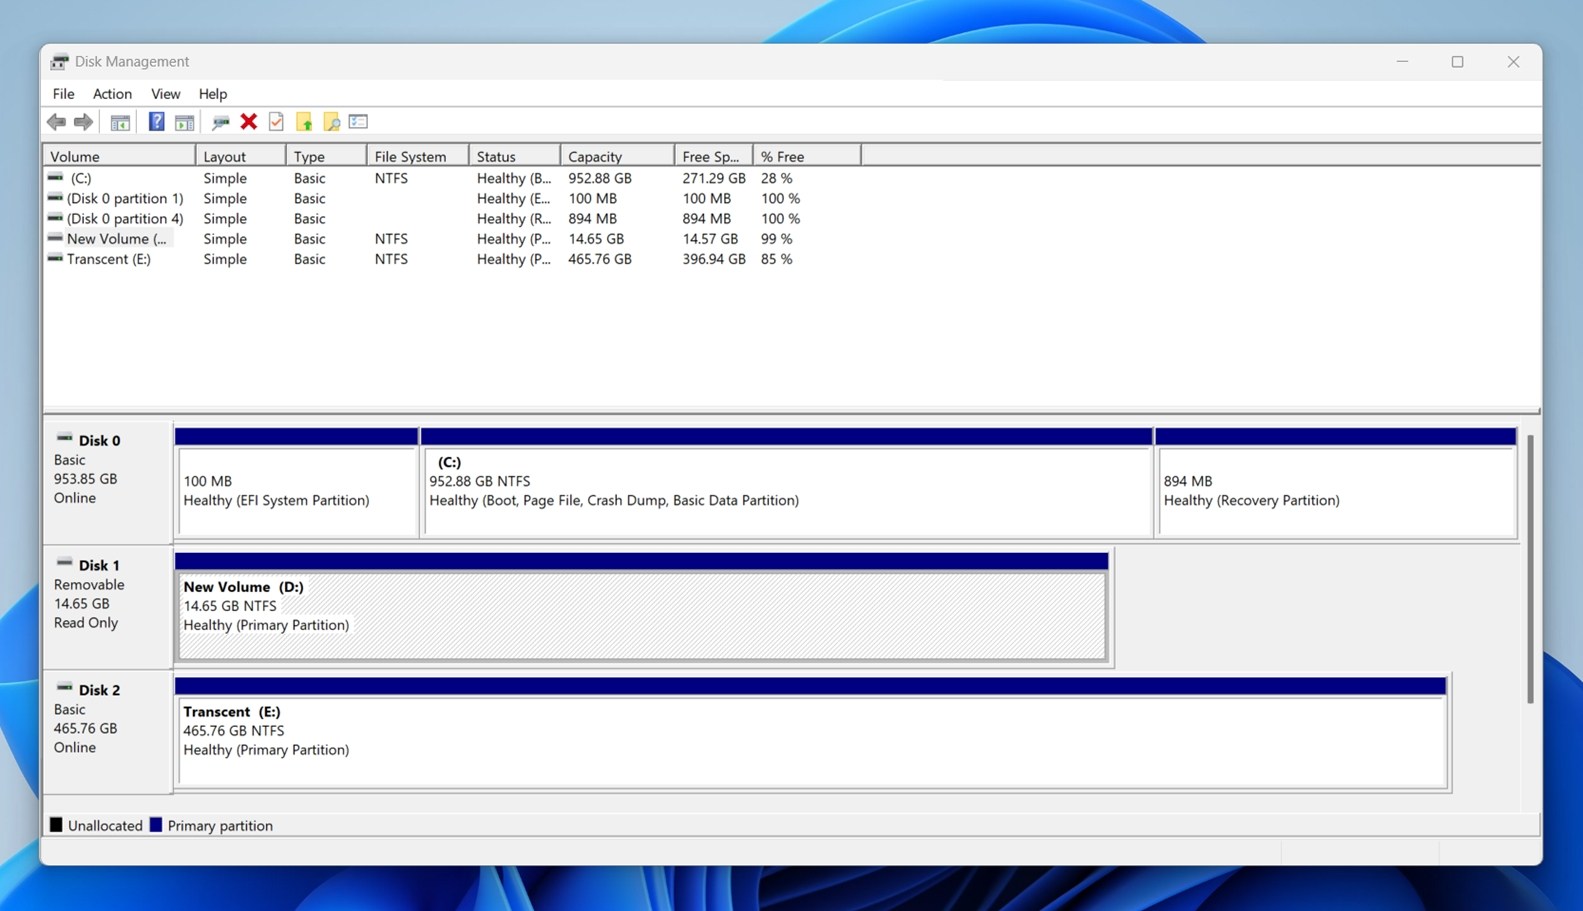
- You’ll get a list of all storage devices attached to your machine. If your LaCie drive is working at the hardware level, you’ll see a new disk pop up there (probably something like Disk 2 or Disk 3).
- What you want to check here is the size. Say your Rugged drive is 4TB – you should see something close to that, even if the space is marked as Unallocated or RAW. That’s still a win. It means the system recognizes the disk, and software recovery is still an option.
If nothing shows up at all, that’s when things get harder, but not necessarily game over. There are a few things you can try, but let’s not jump ahead of ourselves.
How to Recover Data From a LaCie Hard Drive
Let’s get into the practical part – how to actually retrieve data from a LaCie hard drive. We’ll walk you through three proven methods.
Method 1:Data Recovery Software
We’ll start with a do-it-yourself approach to conduct data recovery on a LaCie hard drive. Like we already said, as long as the drive is detected in Disk Management, you can try scanning it with data recovery software.
To show you what that looks like in practice, we’ll walk through the process using Disk Drill, a tool we’ve used across dozens of tests, and it’s consistently proven itself reliable, especially with external drives like LaCie.
| Advantages of This Method |
| Can scan drives even if the file system is missing (marked as RAW or unallocated) |
| Simple layout with file previews and filters |
| Supports byte-to-byte backups (lets you create a disk image to scan instead of stressing a failing drive) |
| Handles many LaCie recovery scenarios – deleted files, formatted drives, lost partitions |
| Useful for NTFS, exFAT, HFS+, and more – great if your LaCie drive was used across both macOS and Windows |
| Lets you filter by file type, sort by recovery chances, or search by name |
| Proven track record |
Follow these steps to recover data from your LaCie hard drive using Disk Drill:
- Download and install Disk Drill to a different drive.
- Launch the app and select your LaCie hard drive.
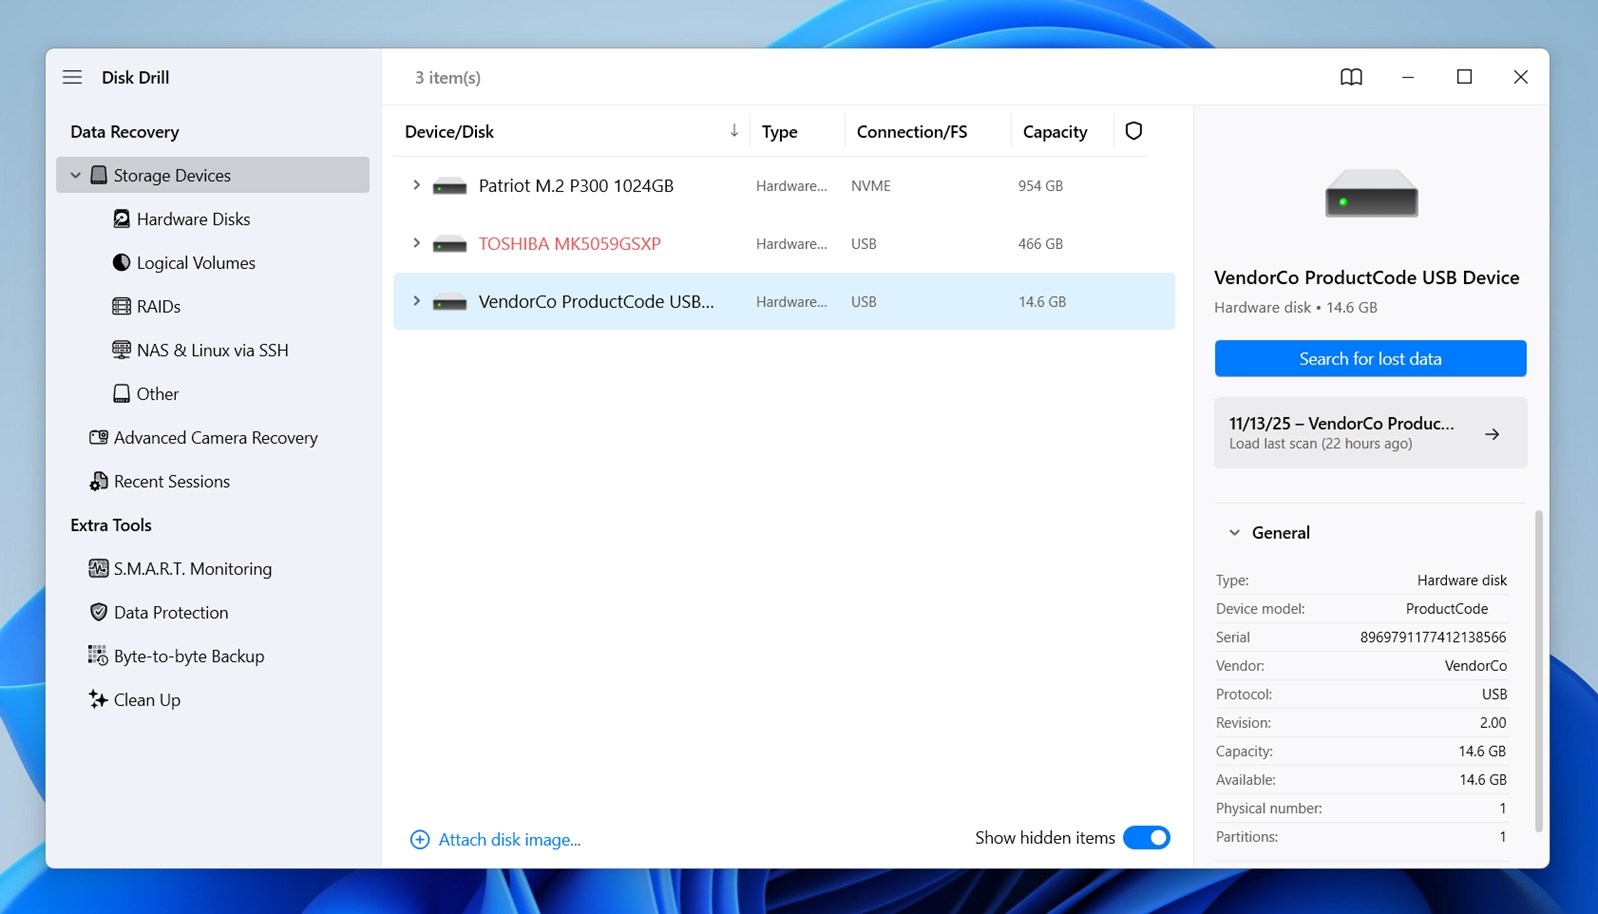
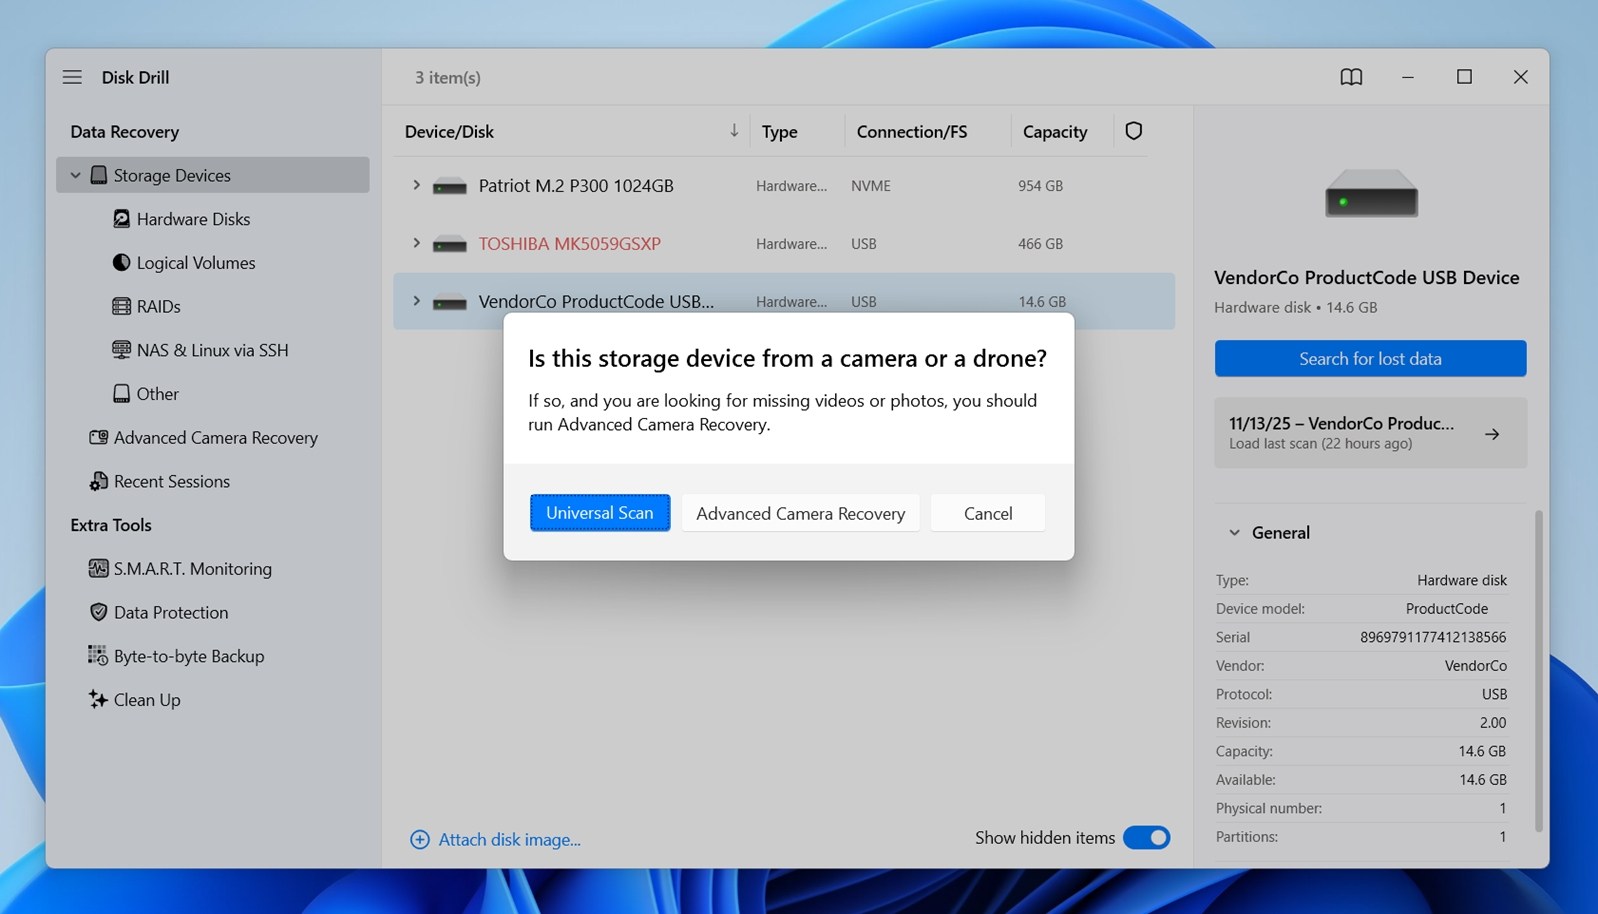
- Click Search for lost data. If it asks which scan mode to use, choose Universal Scan – this option runs all available scan types in a single pass.
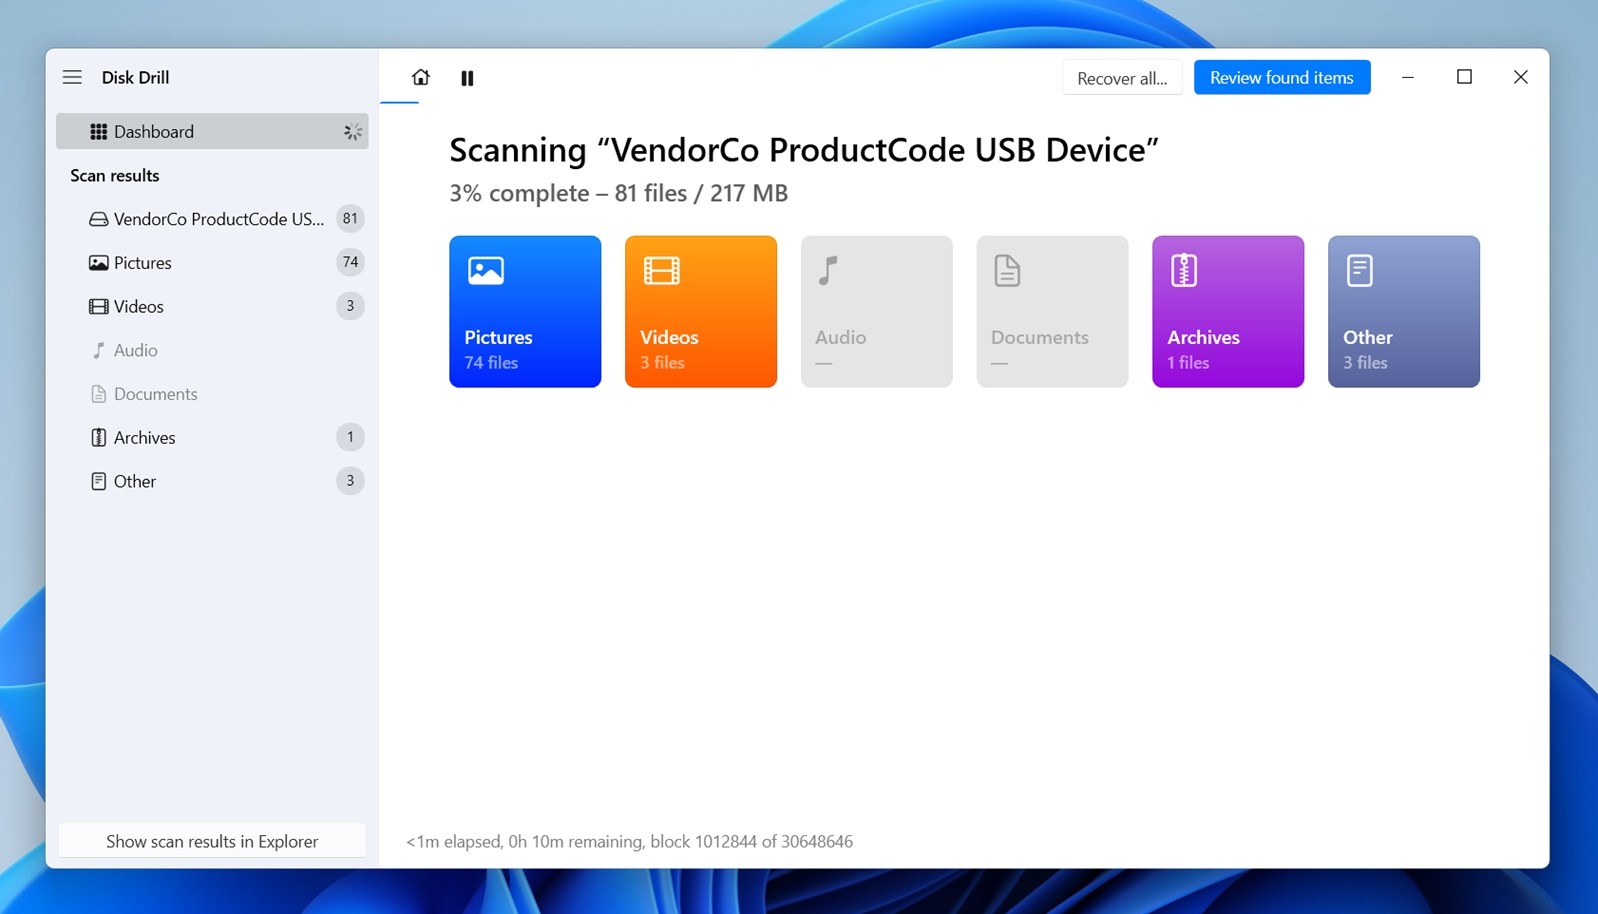
- Click Review found items once Disk Drill is finished scanning your LaCie hard drive. Alternatively, click Recover all to recover everything immediately.
- It’ll organize the results into a few sections: Deleted or Lost, Existing, and Reconstructed.
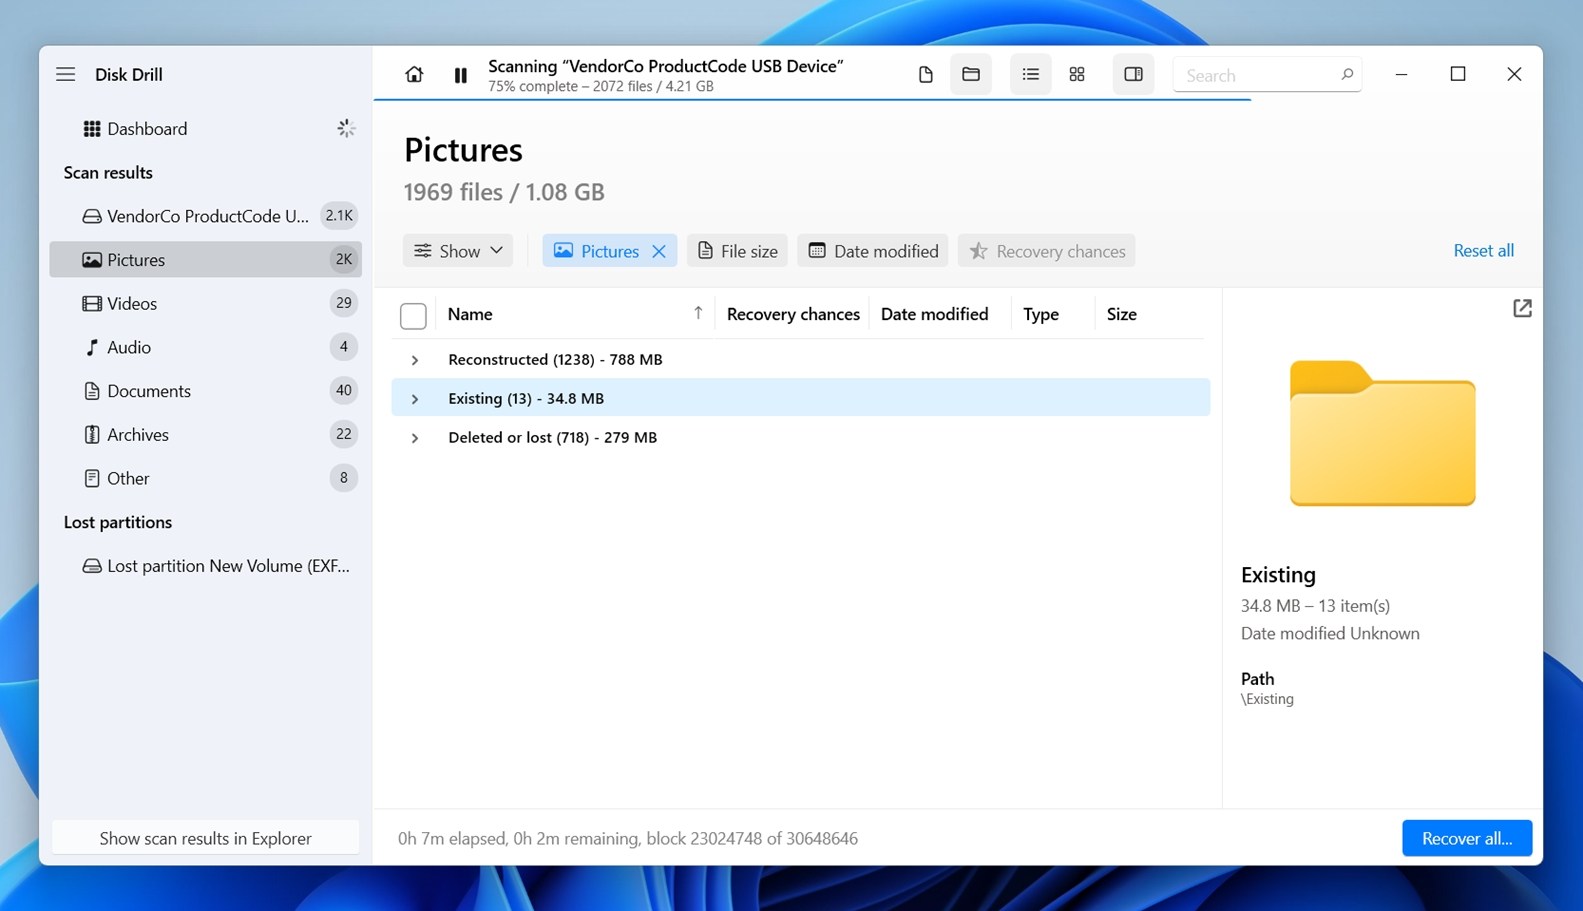
“Deleted or Lost” includes files that were removed or lost due to formatting (these often still have names and folder structure).
“Existing” shows files that technically still live on the drive but might not be accessible normally.
“Reconstructed” contains files Disk Drill found by signature alone (it identified them based on internal patterns specific to each file type. Every format has a unique binary signature). - Click on any file to preview it – Disk Drill will show you a thumbnail for images, let you play videos, and even open documents.
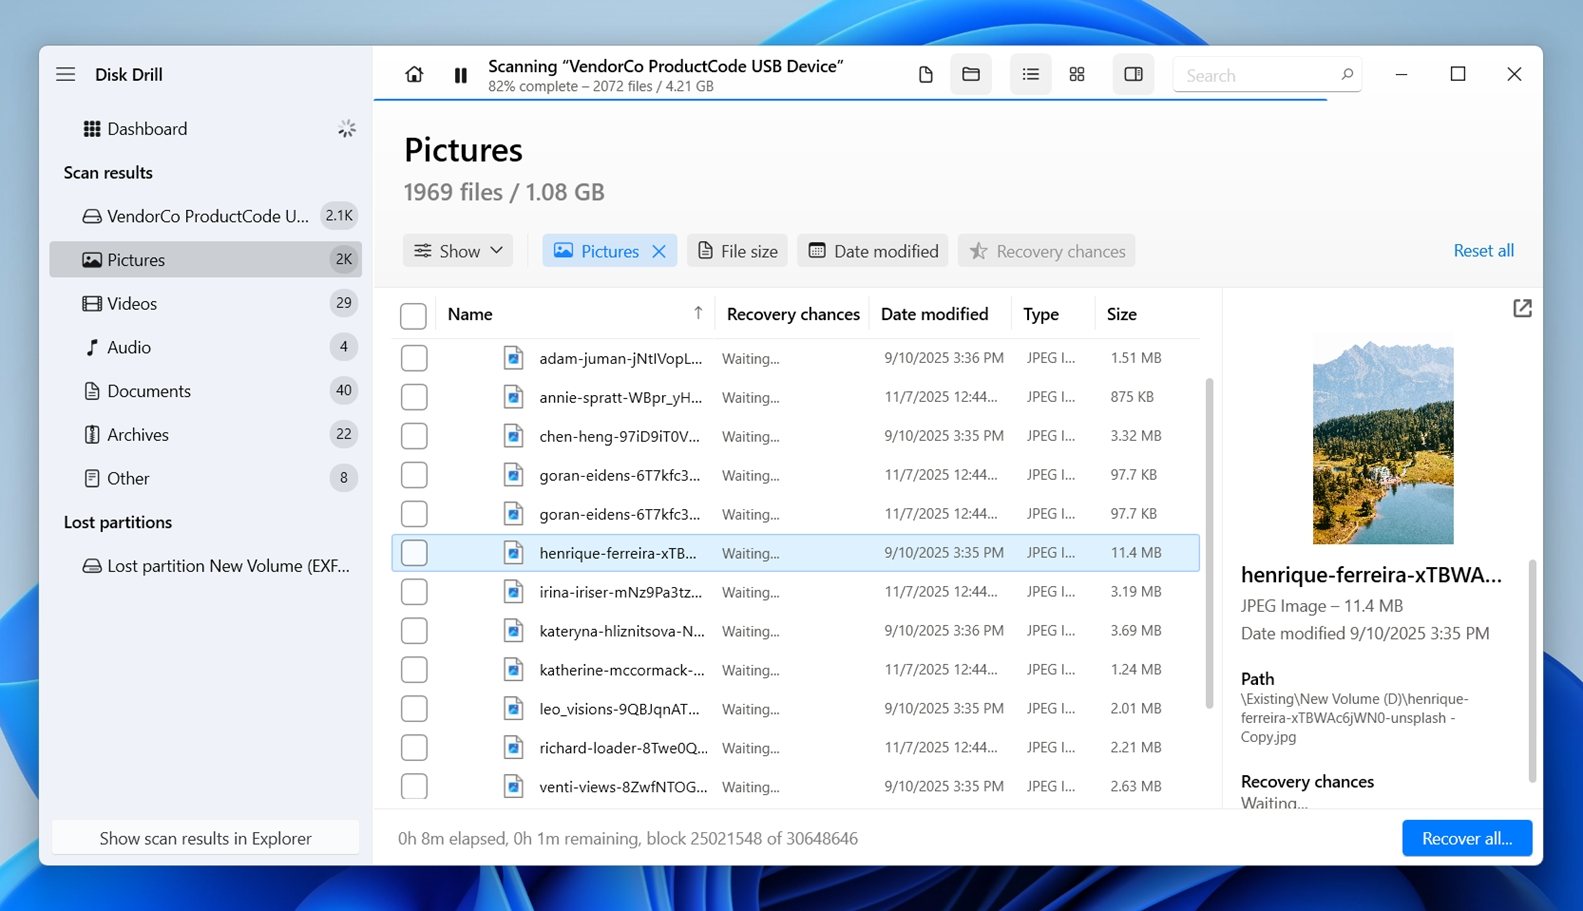 This helps confirm that the file is intact before you hit recover. If a video plays smoothly or a document loads without error in preview, that’s a sure sign the file is 100% readable and will restore without issues.
 - Mark what files you’d like to recover from the LaCie drive. Click Recover when you’re ready.
- As a final step, you’ll be asked to choose where you want to save the recovered files.
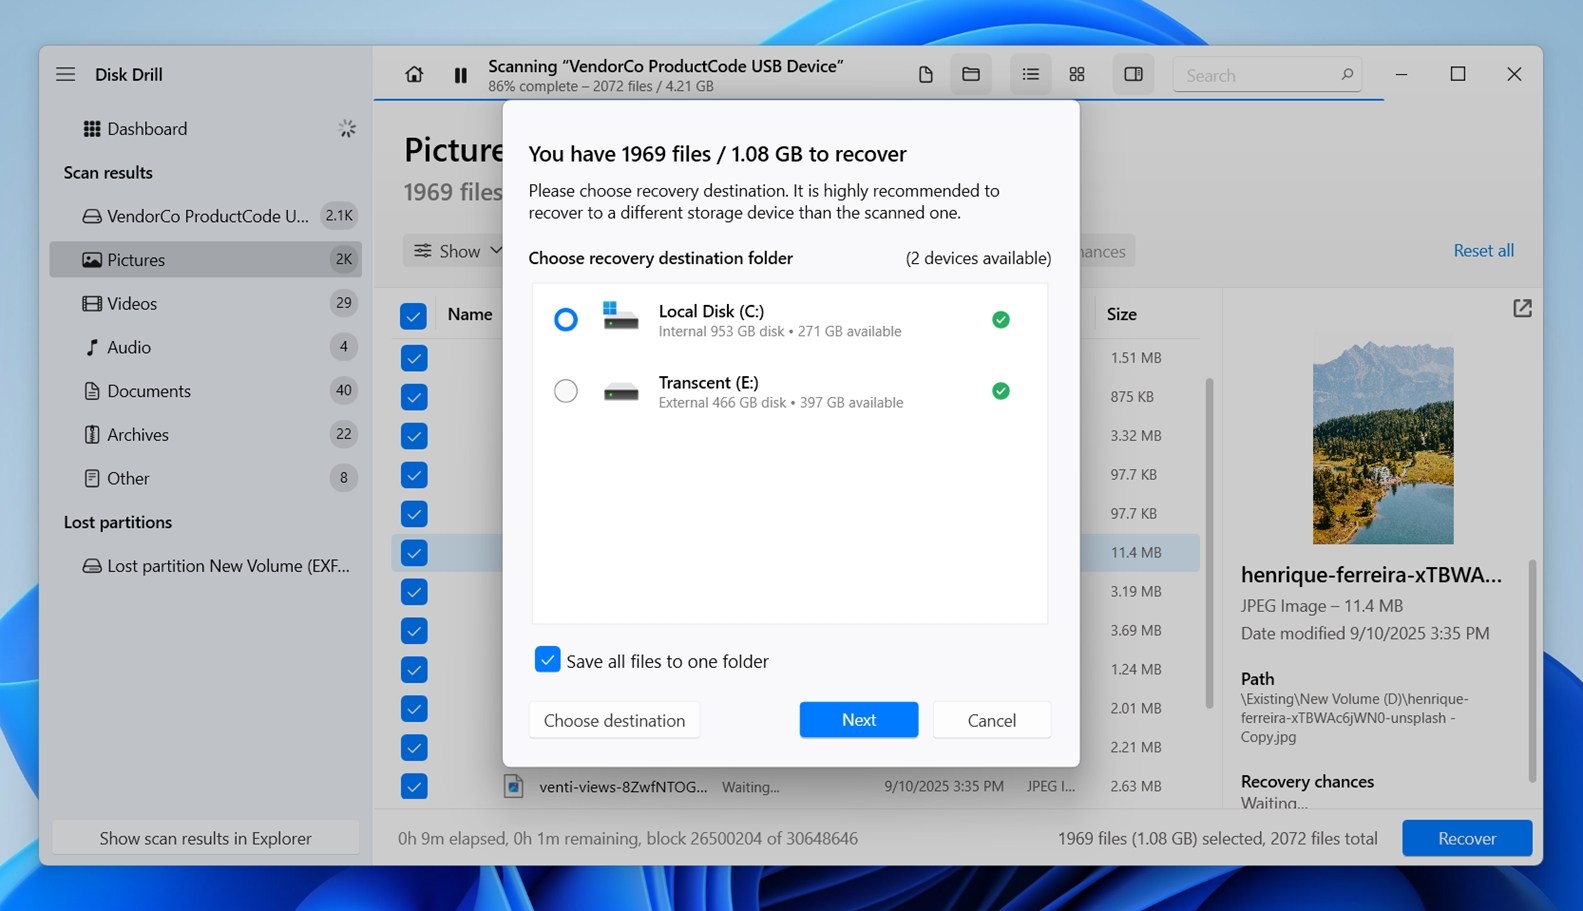 Pick a different location than your LaCie drive – use your internal disk or another external one. Disk Drill will actually warn you if you try to save to the same drive. Click Next and let the recovery process run.
Disk Drill also includes extra features that can be incredibly helpful during LaCie hard drive data recovery. One standout tool is Byte-to-Byte Backup, which lets you create a full disk image of the LaCie drive sector by sector. This is super useful if your drive starts disconnecting randomly, becomes very slow to respond, or you suspect it might be failing. Instead of continuing to scan a fragile drive directly, you can scan the backup image safely without adding more wear. Another built-in feature worth enabling is S.M.A.R.T. Monitoring. It taps into the drive’s internal health indicators to alert you if things are headed in the wrong direction. It won’t fix anything, but it gives you a heads-up before failure, which can make all the difference in some cases.
Method 2:Data Recovery Service With Warranty
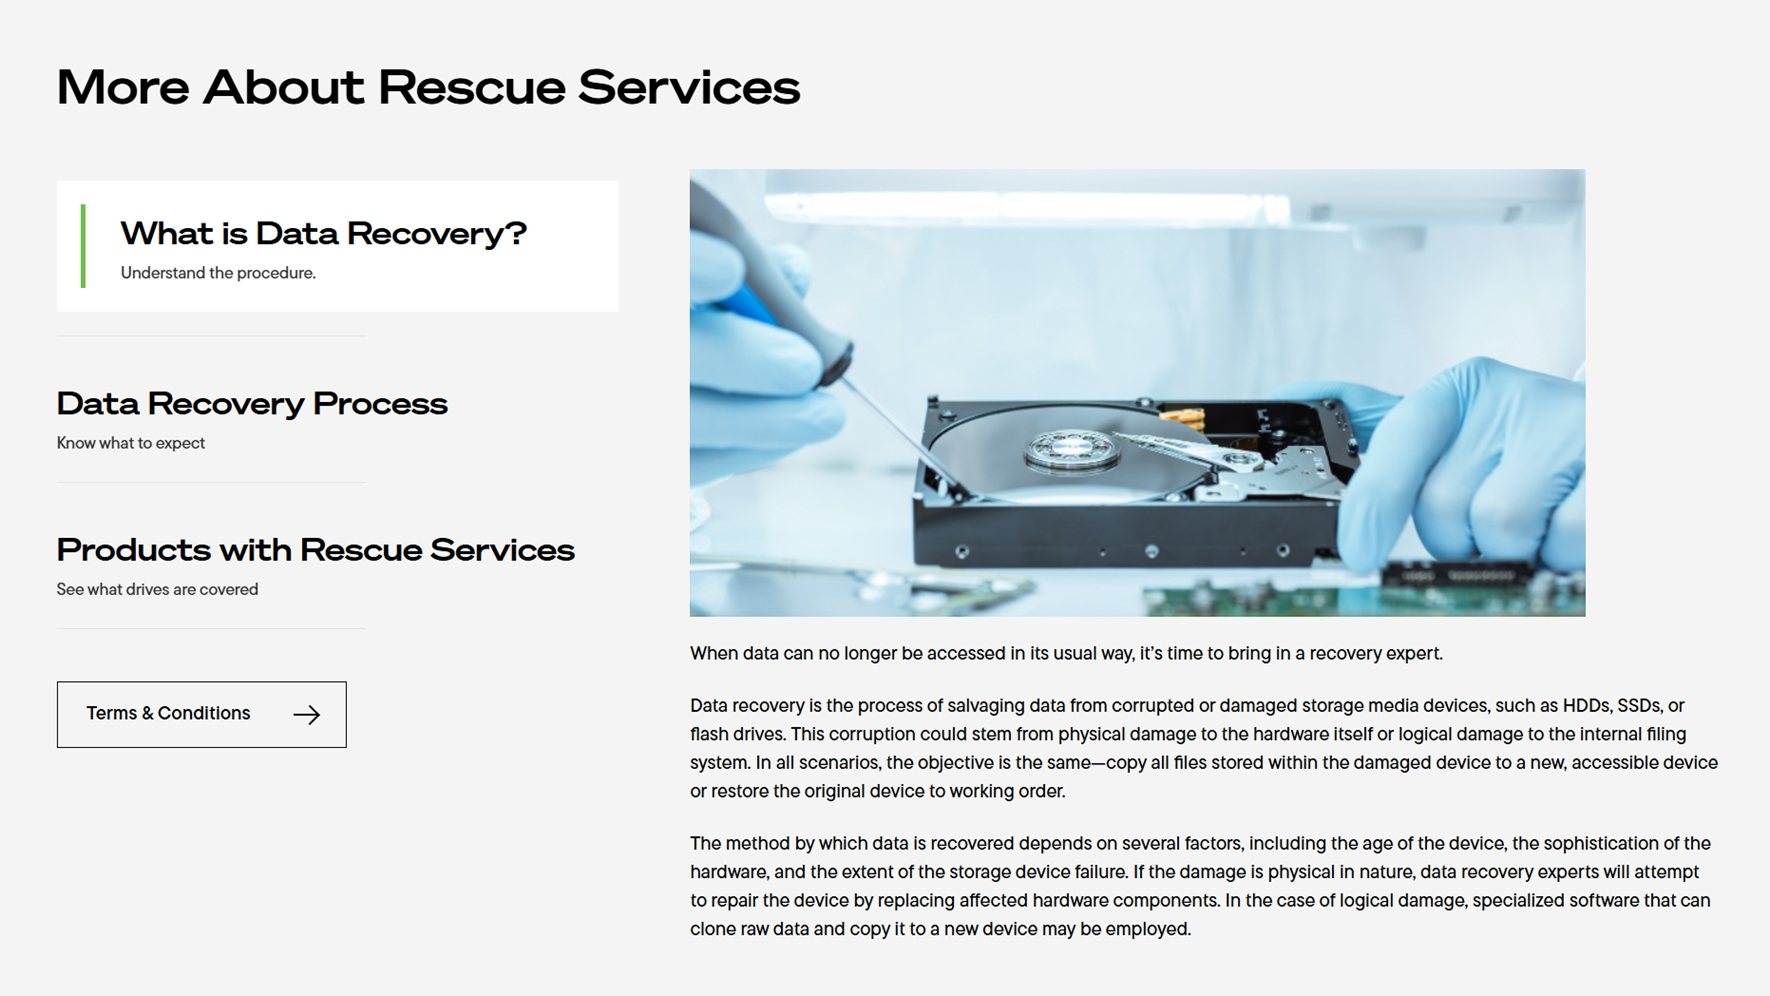
If your LaCie drive isn’t showing up at all, or worse, it’s clicking, overheating, or completely dead, this is where the DIY route usually ends. When the drive is physically damaged or the onboard controller fails, software won’t help. But if your LaCie drive is still under warranty, you might not have to pay out of pocket. This is where Rescue Data Recovery Services LaCie comes in.
| Advantages of This Method |
| Ideal for drives that don’t show up at all, have mechanical issues, or suffered physical damage |
| Rescue Data Recovery Services often come bundled with new LaCie drives, so you may already be covered at no extra cost |
| Recovery labs can bypass failed controllers, read damaged platters, and access areas software tools can’t reach |
| If the recovery works, your files come back on a new encrypted external drive |
| Professional tools and equipment can recover data beyond what consumer software can do |
LaCie, as a Seagate brand, includes optional or bundled data recovery coverage with many of their drives. You’ll often find this printed right on the box (something like “Includes 3-Year Rescue Plan.”) If your drive qualifies, you can file a recovery request through Seagate’s official portal, send in the device, and let their in-house specialists handle the rest. The service includes diagnostics, full recovery attempts, and, if successful, your data is returned on a secure external drive.
Even better, if you’re covered under the Rescue plan, there’s no extra cost for the recovery itself. You don’t pay for success or failure; the recovery attempt is included in the protection plan. People who’ve gone through this have reported high success rates, even in cases where the drive was unresponsive or totally unreadable at home.
Not sure if you’re still under warranty? Check now on the Seagate website.
To make a claim on your warranty, reach out to the Seagate Warranty & Technical Support team to begin the process.
Method 3:Data Recovery Service Without Warranty
If your warranty has lapsed, nothing stops you from still getting help, especially if the files are too important to lose. Plenty of users recover data from LaCie drives successfully using third-party data recovery LaCie services, even without an active Rescue Plan. For example, Data Recovery Center. This data recovery service covers all major hard drive brands and manufacturers, including Seagate data recovery.
| Advantages of This Method |
| You can recover data from LaCie drives long after the original Rescue plan expires |
| Ideal for dead drives, clicking noises, damaged enclosures, or failed USB/Thunderbolt controllers |
| Rugged, d2, Porsche Design, 2big, 5big, and NAS setups – all covered by specialists familiar with LaCie/Seagate hardware |
| Useful when dealing with RAID arrays, encrypted drives, or multiple failed disks from a single setup |
| Many labs provide a free evaluation and a clear quote before you commit |
Here’s a quick overview of what this process would look like:
- Click Start Recovery.
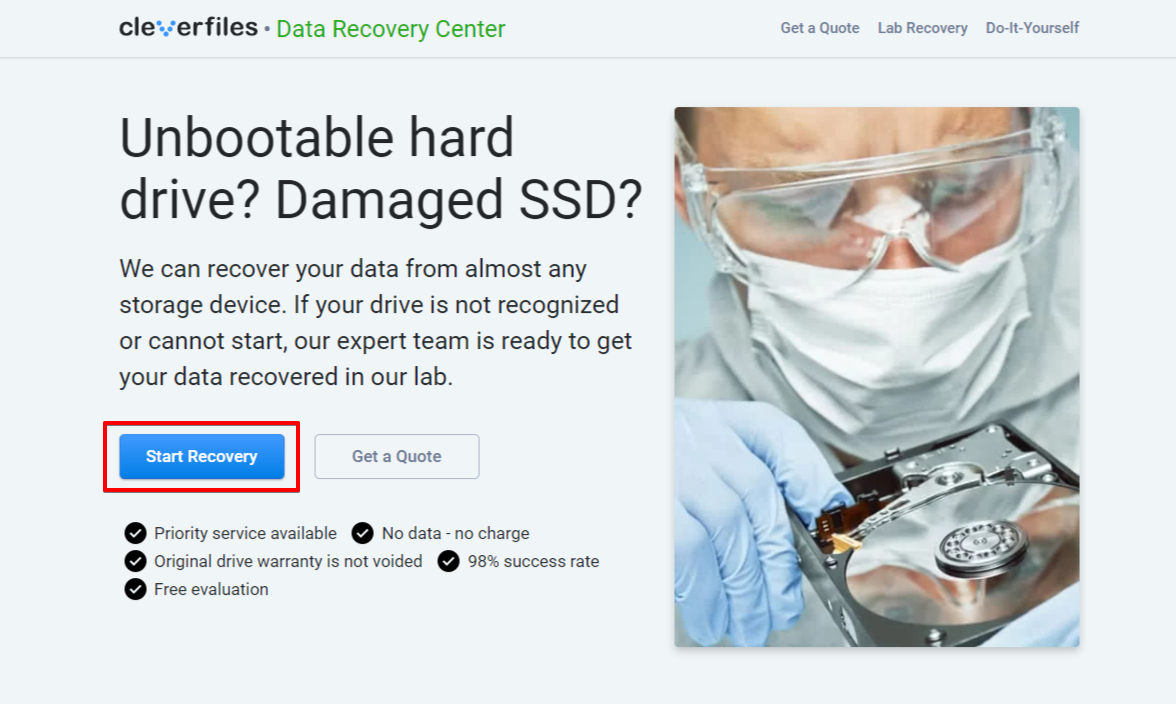
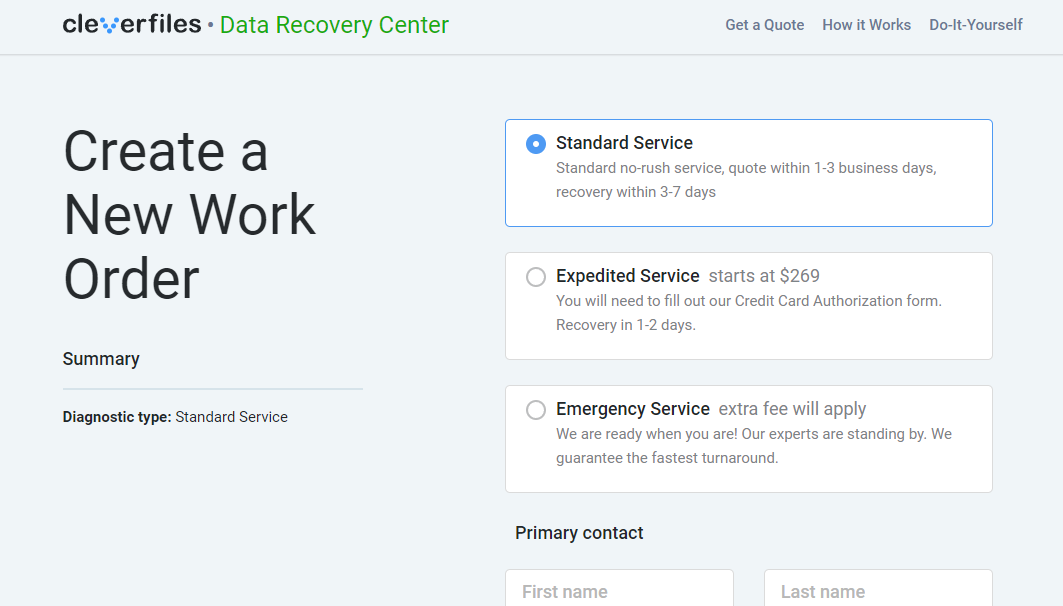
- Fill out the work order with all of your information.
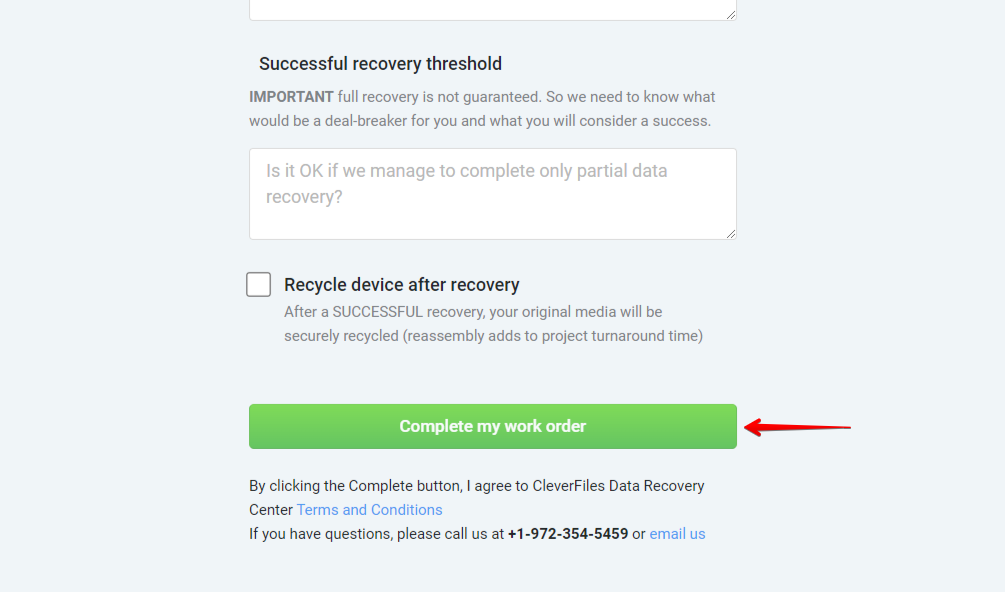
- Submit the work order and send your drive away.
Once recovery is complete, your data will be returned to you on a healthy storage device, ready to be restored.
Useful LaCie Recovery Software & Utilities (Built-in + Official)
Before we wrap up, we also want to mention a few other tools that might come in handy. Not tools for recovering files from your LaCie drive directly, but ones that can help bring the drive back to working order or rule out hardware issues before you assume the worst.
These include some built-in Windows utilities and official tools from Seagate, LaCie’s parent company.
Method 1:CheckDisk
One many people are already familiar with is CheckDisk, which can be a surprisingly useful tool in the early stages of LaCie hard drive repair. It’s built into Windows and is designed to check the file system and fix errors that might prevent the drive from behaving properly.
We always recommend running CHKDSK (or any similar repair tool) after you’ve completed your data recovery, not before. The reason is simple: tools like CHKDSK are designed to fix file system problems, but the way they do it can sometimes make things worse for data recovery. So unless your data’s already safe, hold off on running it.
Follow these steps to run CheckDisk on your LaCie hard drive:
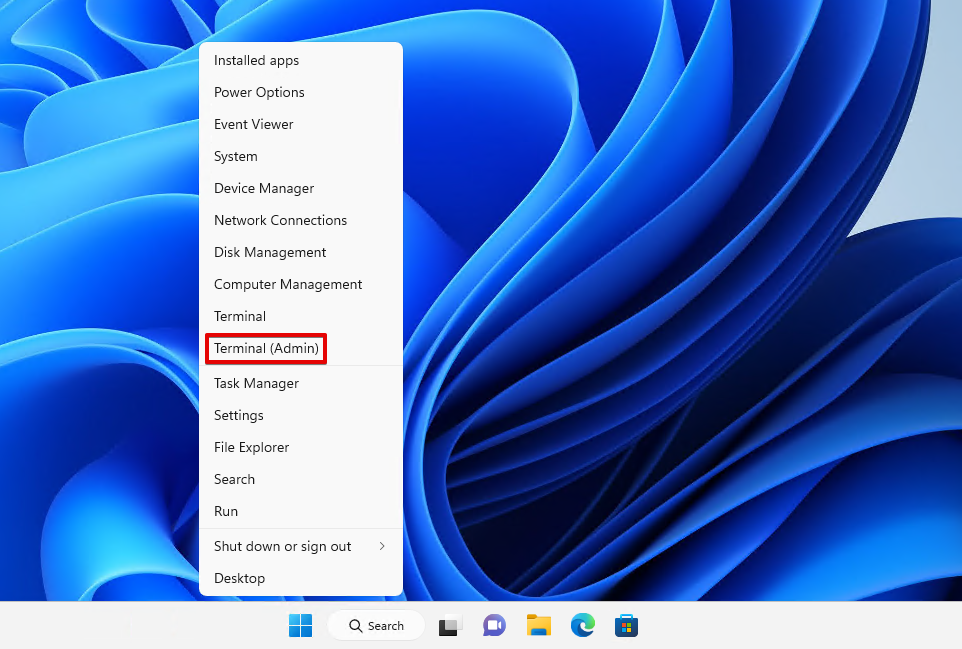
- Right-click Start and click Terminal (Admin). If you’re using Windows 10, click Windows PowerShell (Admin) instead.
- Type
chkdsk *: /r. Replace * with your LaCie drive letter. Press Enter.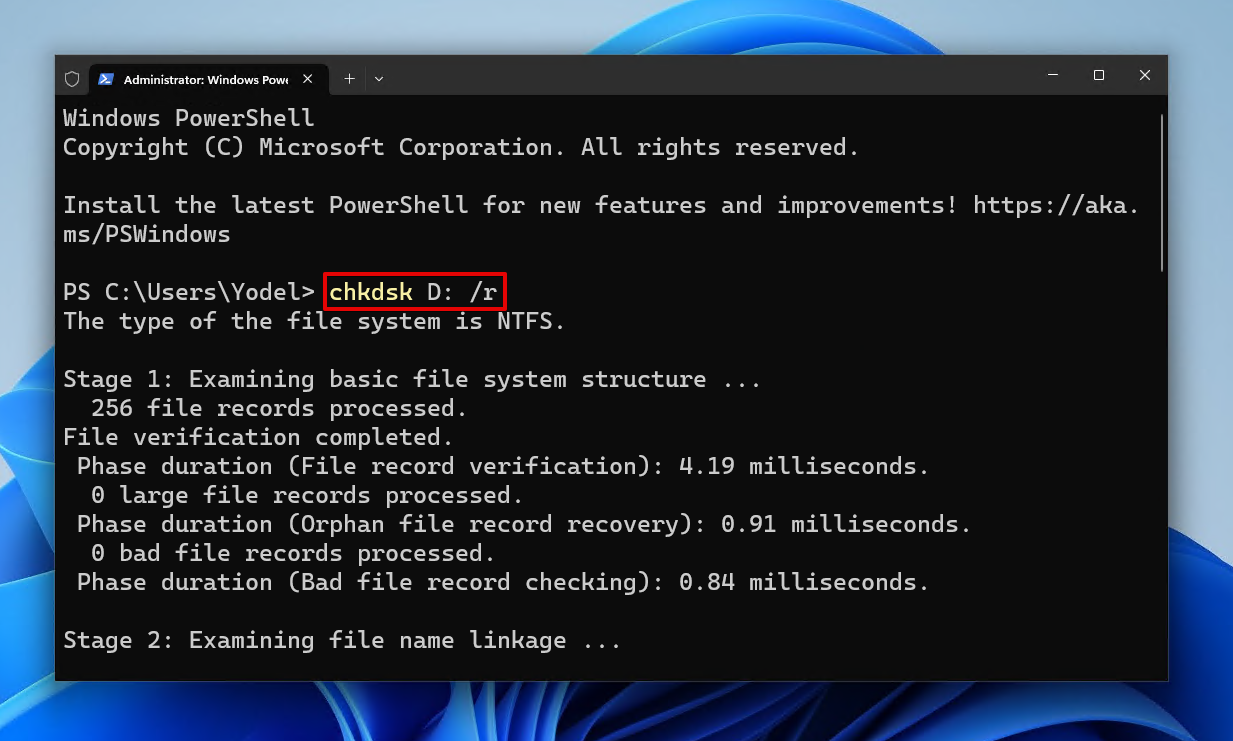
Method 2:SeaTools for Windows
SeaTools for Windows is an official diagnostic tool developed by Seagate, and it works with LaCie drives too (since LaCie is a Seagate brand). It’s not a recovery tool, but it’s extremely helpful when you’re trying to figure out whether the issue is with the drive’s hardware.
Here’s how you can use it:
- Download SeaTools directly from Seagate’s official website.
- After you install and open the program, it’ll show a list of all drives connected to your computer.
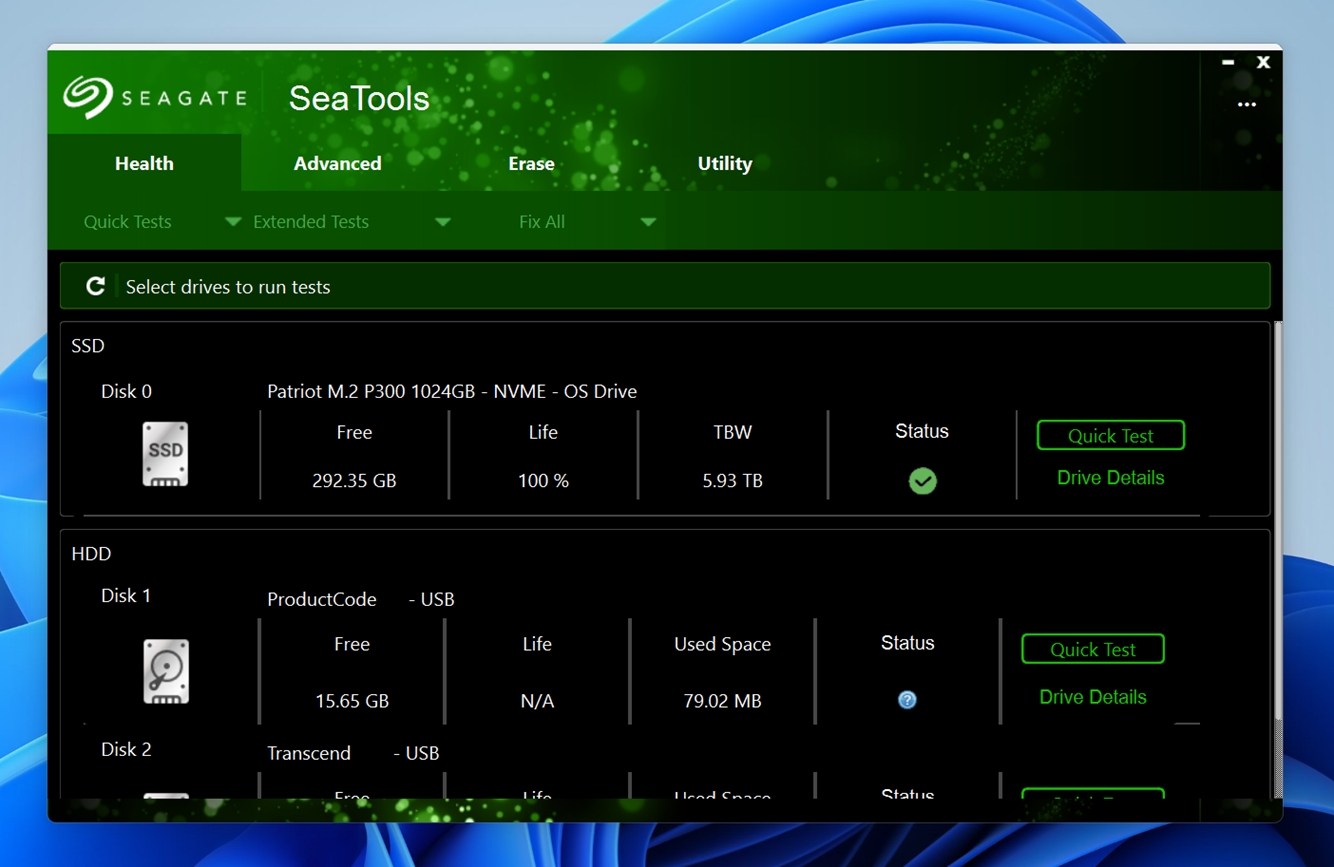
- You’ll recognize your LaCie by its size, model number, or device path. If SeaTools shows a green checkmark next to the drive, that’s a good sign: the tool can communicate with the hardware.
- To run a test, select your LaCie drive from the list. Then go to the Tests menu and choose between a few different diagnostics:
Long Generic Test. This is the deep scan. It checks the drive’s surface sector by sector for read problems and instability. It takes time, especially on larger drives, but it’s your best shot at spotting serious wear or failing areas.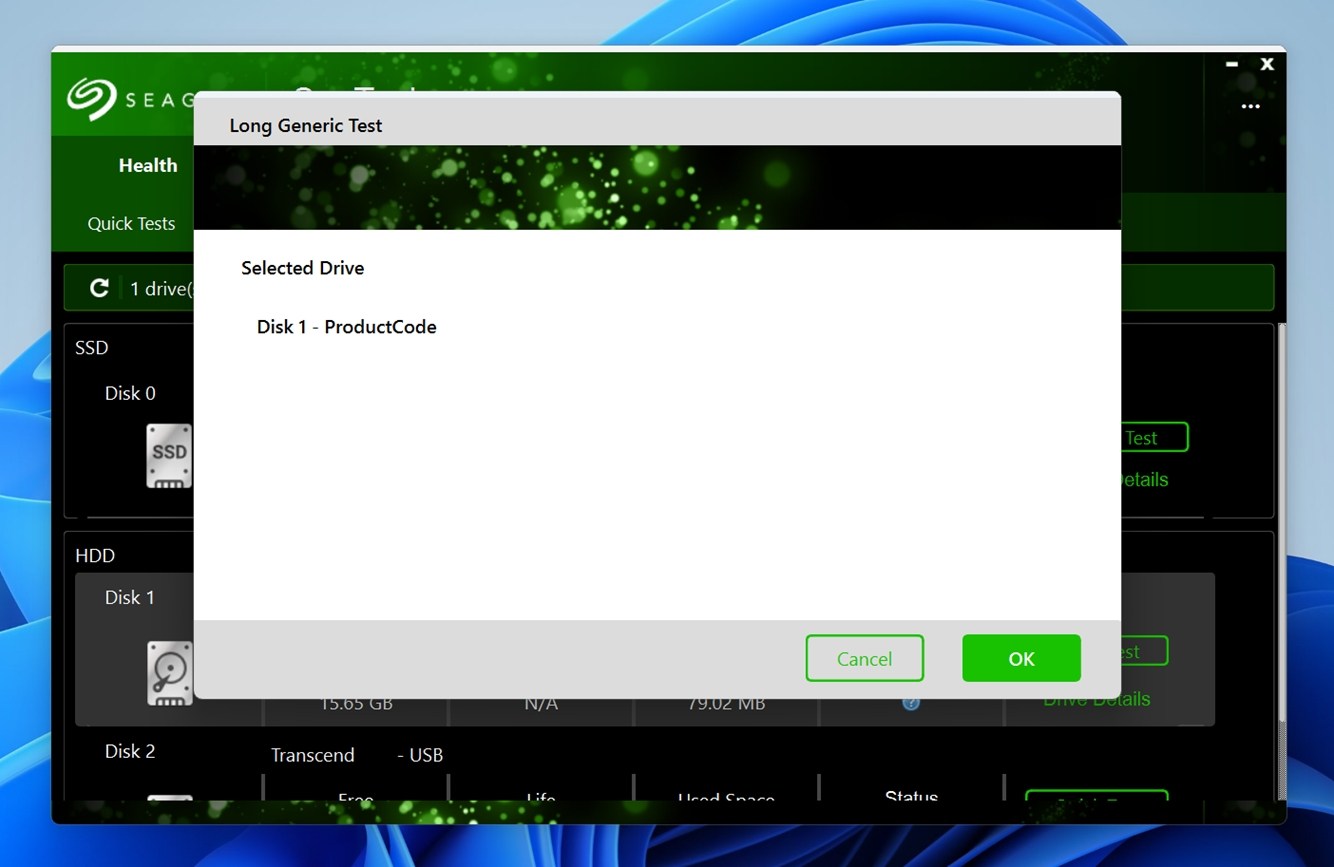
Short Generic Test (2-minute). A much faster option that gives you a basic pass/fail read test. It’s not as thorough but works well when you want a quick check.
If the test completes and gives you a PASS, then your drive is likely in good shape at the hardware level. If it fails or freezes during the test, that’s usually a red flag – bad sectors, unstable heads, or firmware issues might be involved. In that case, stop using the drive immediately and consider imaging it with a byte-to-byte tool or contacting a recovery lab.
You can also explore extra options like Drive Information to check the S.M.A.R.T. attributes, number of power-on hours, and firmware version. These stats help diagnose silent failures and wear patterns, especially with aging LaCie drives.
Method 3:Victoria SSD/HDD
Another tool worth knowing about is Victoria. It is often useful when your LaCie drive shows signs of bad sectors, those small sections of the disk that become unreadable over time due to wear, power loss, or physical impact. These sectors are one of the most common early warnings that a drive is degrading, and Victoria gives you a detailed view of how bad things really are under the surface.
Here’s how to use Victoria to recover a LaCie external hard drive:
- Download and launch Victoria.
- On startup, make sure your LaCie drive is selected in the device list. You’ll see its model name, capacity, firmware version, and current status.
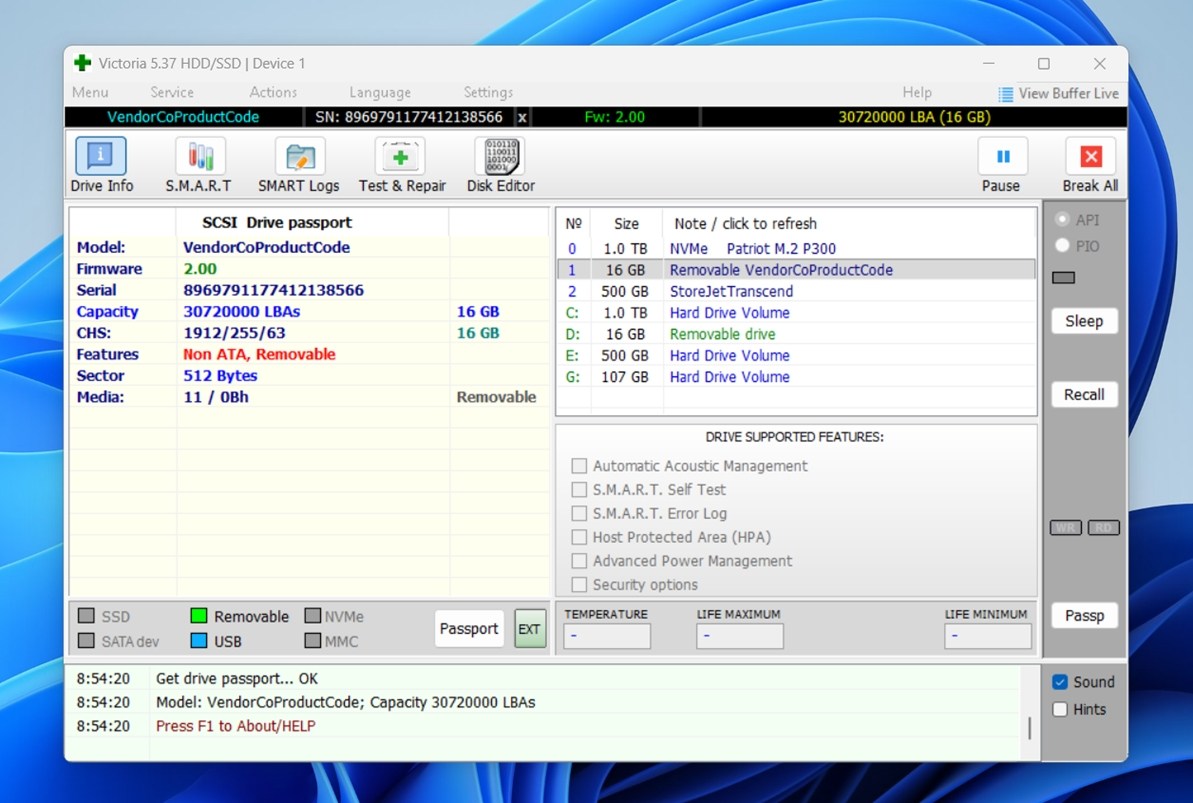
- Click on the Test & Repair tab at the top. This is where all the surface-level diagnostics and repair tools live.
- Hit the Scan button to begin a surface scan.
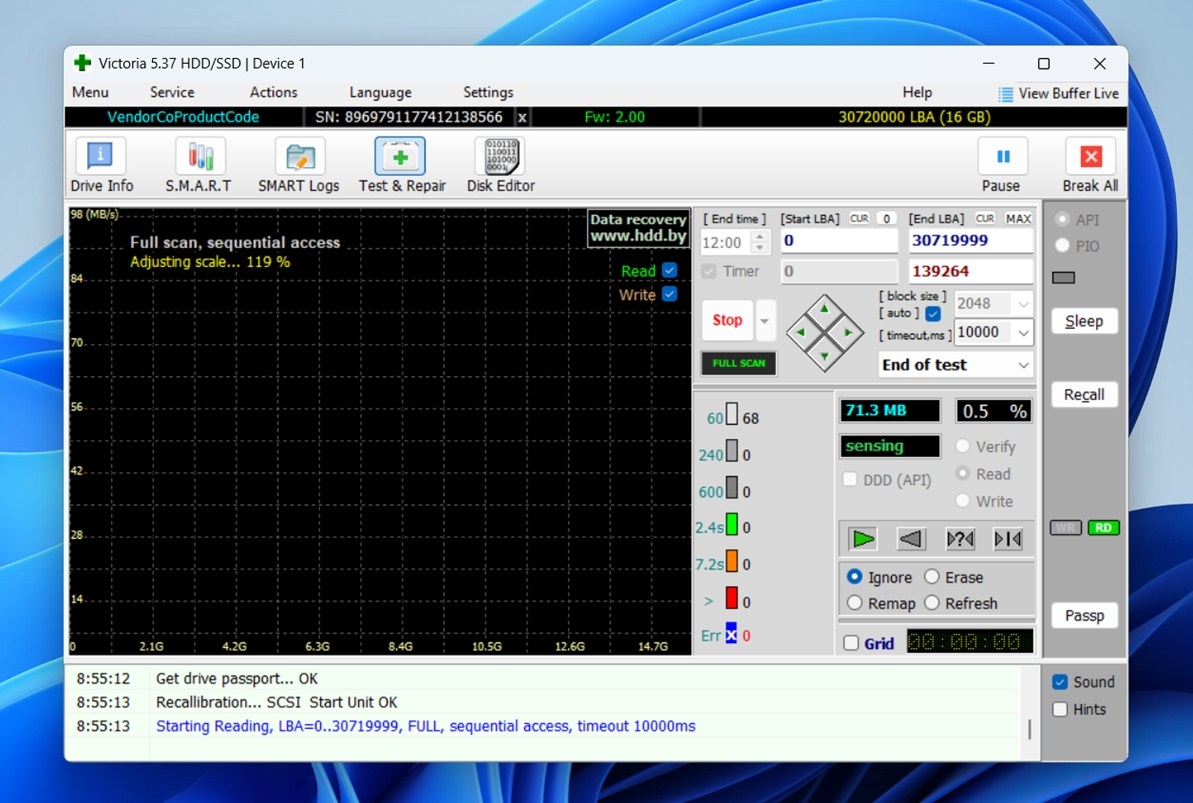 The program will immediately start checking sector-by-sector and display results in a live grid. Green blocks = healthy sectors (normal read times). Yellow or orange = slow sectors (weak or unstable). Red blocks = unreadable (bad sectors that have failed completely).
Once the scan finishes:
- If you see mostly green with a few scattered yellows, the drive is still usable, but you should keep an eye on it. That level of degradation suggests aging, and it’s better off as a secondary backup than active storage.
- If red blocks start showing up in clusters, though, that’s a much bigger issue. You’re likely dealing with physical failure. In that case, avoid writing anything more to the drive, and consider imaging it immediately or sending it in for professional recovery.
Method 4:Format the Drive
And of course, there’s always the formatting method. Once you’ve successfully recovered your data, formatting is often the fastest way to bring a LaCie drive back to full working order.
What this does is erase the existing file system and set up a new, clean structure that your OS can read and write to without errors. It doesn’t repair physical damage, but it clears up issues like corruption, RAW file systems, and partitions that don’t mount properly.
Since this will delete your data, be sure to recover as much data as you can beforehand. If you’re forced to format first, you can still sometimes perform data recovery after the format.
Follow these steps to format your LaCie hard drive:
- Right-click Start and click Disk Management.
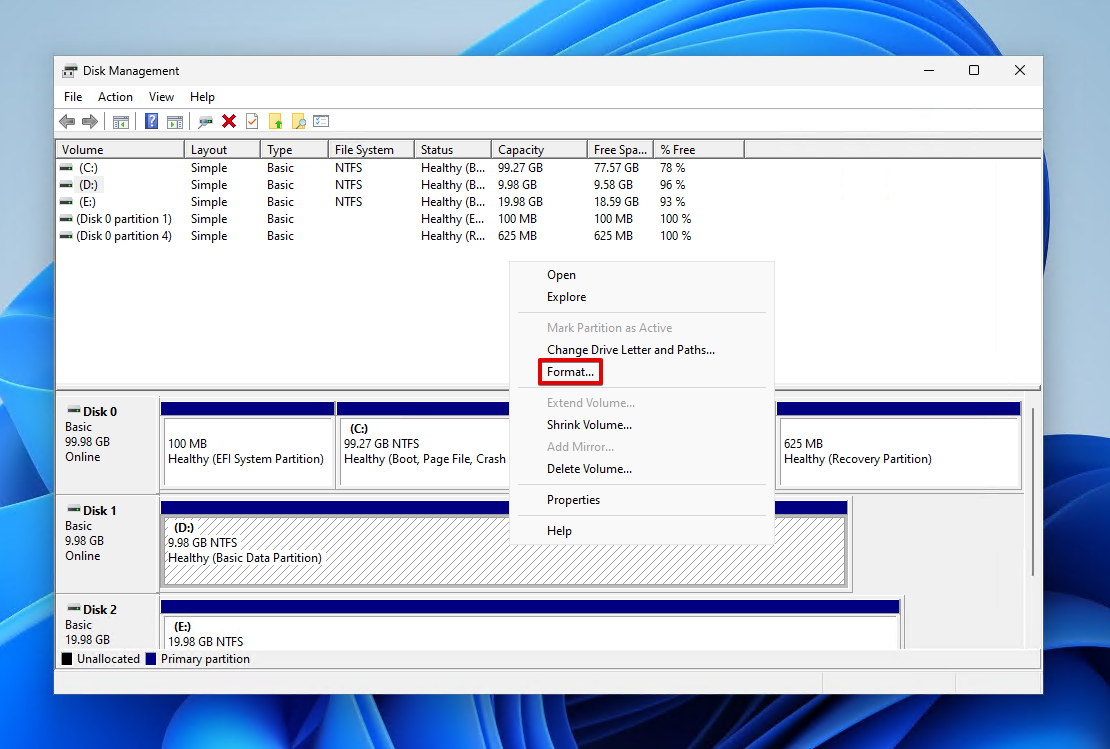
- Right-click the volume of your LaCie hard drive and click Format.
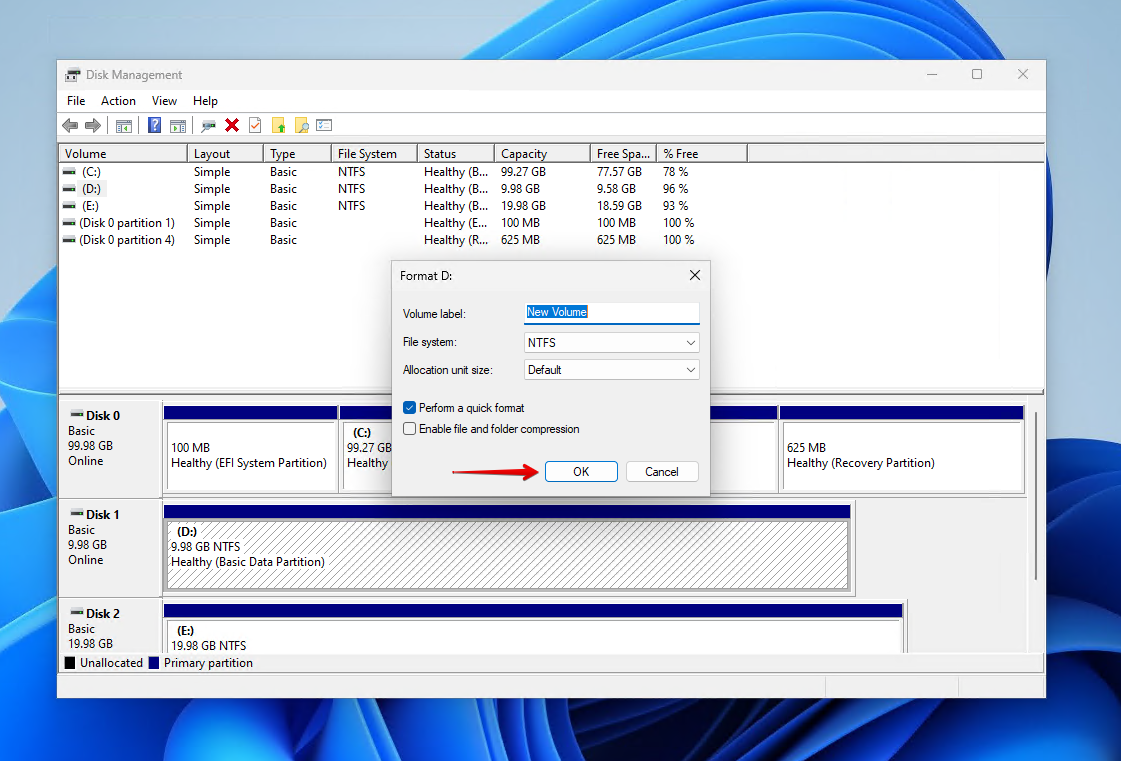
- Ensure Perform a quick format is ticked and click OK.
- Click OK again.
Still have questions? Be sure to check the FAQ section below. And if you’re dealing with something unusual or your situation isn’t addressed, feel free to leave us a comment. We’d love to hear from you and help however we can.
FAQ
- If it’s a logical issue, like accidental file deletion, a corrupted partition, a RAW file system, or even a mistakenly formatted volume, you’re in luck. In those cases, the drive is still physically functional, and data recovery software (like Disk Drill or R-Studio) can scan the disk and bring back lost files. You might not even need to repair anything beyond the file system.
- But if the problem is hardware-related. like the drive not spinning up, disconnecting randomly, or making clicking or grinding sounds, then recovery gets a lot more complicated. That’s when you’re dealing with possible read/write head failures, PCB damage, or failing platters. You won’t be able to “repair” that at home, and even professional recovery labs can’t promise full recovery.
- If your LaCie drive came with the Rescue plan or the warranty includes it. Many Seagate/LaCie external drives include one in‑lab recovery attempt at no additional cost. If the damage is covered by the plan, which often includes mechanical failure, accidental damage (depending on region/terms), or other unexpected data loss scenarios.
- If the failure is within the service territory (region/country) and you followed the manufacturer’s instructions (stopped using the drive immediately). The plan may have exclusions (like misuse, unauthorized opening, or natural disaster) so make sure your case qualifies.
