 A NAS device is a great way to increase your storage capacity without having an abundance of hard drives and cables taking up space on your desk. Even so, your NAS is not impervious to data loss that could strike at any moment.
If your NAS device has suffered from an issue that has resulted in data loss, read on to learn about proven methods of performing NAS data recovery to get your files back.
Peculiarities of NAS Data Recovery
A Network Attached Storage (NAS) device is a storage device that includes one or more hard drives where data can be written over the network. While operating systems like Windows can be used on a NAS, it’s not common, as they typically come with their own open-source or proprietary software that is specially designed to be resource-optimized and compatible with cross-platform file sharing.
Many (but not all) NAS devices make use of a form of RAID (Redundant Array of Inexpensive Disks), a technology that writes data to all of the drives with the intention of improving performance or redundancy (or both).
The causes behind data loss are the same as you’d expect with a normal hard drive. Here are some of the most common reasons NAS devices encounter data loss:
| Reason | Description |
| 💥 Mechanical failure | A dying hard drive may start showing its symptoms in the form of degraded performance, random crashes, or clicking sounds. |
| ❗ Disk corruption | When a drive becomes corrupted, the data on it will no longer be accessible. As a result, you may find that some of your data has gone missing and any attempt to access the specific drive is denied. |
| 🙅♂️ User error | Working with a NAS device is more complicated than a typical hard drive. If a mistake is made when modifying or configuring your NAS, it can result in data loss. |
| 🔌 Sudden power failure | A sudden loss of power can interrupt delicate read/write processes being performed on the hard drive. When such processes are interrupted, the file system on the drive can become unusable. |
Because a NAS uses unique software, it’s impossible to install data recovery software straight to it. Furthermore, the data recovery software you use must support NAS devices. Next, we’ll guide you through our preferred choice of NAS data recovery software to get your data back.
How to Easily Recover Data from NAS
To recover lost data from a NAS device, we recommend using Disk Drill, an advanced data recovery tool that can easily scan and recover data from network-connected drives.
Disk Drill supports a wide range of file systems and recovery cases. It uses an all-in-one scanner that utilizes multiple scanning modes to find as much of your data as possible. The program also supports most RAID configurations, including RAID 0, RAID 1, RAID 5, RAID 6, RAID 10/1E, and JBOD, so it’s a great choice even for advanced recovery.
SSH must be enabled on the NAS device before recovery can be done. Refer to the documentation of your NAS device for specific instructions on how to do this.
Follow these instructions to recover data from your NAS device using Disk Drill:
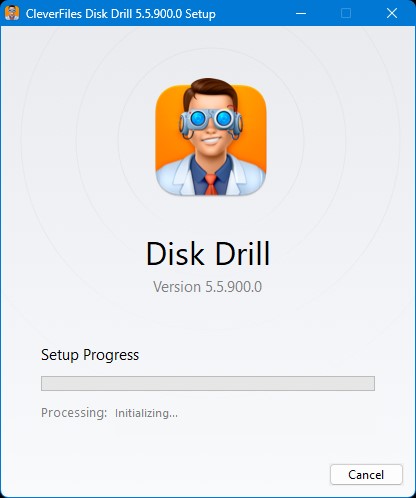
- Download and install Disk Drill.
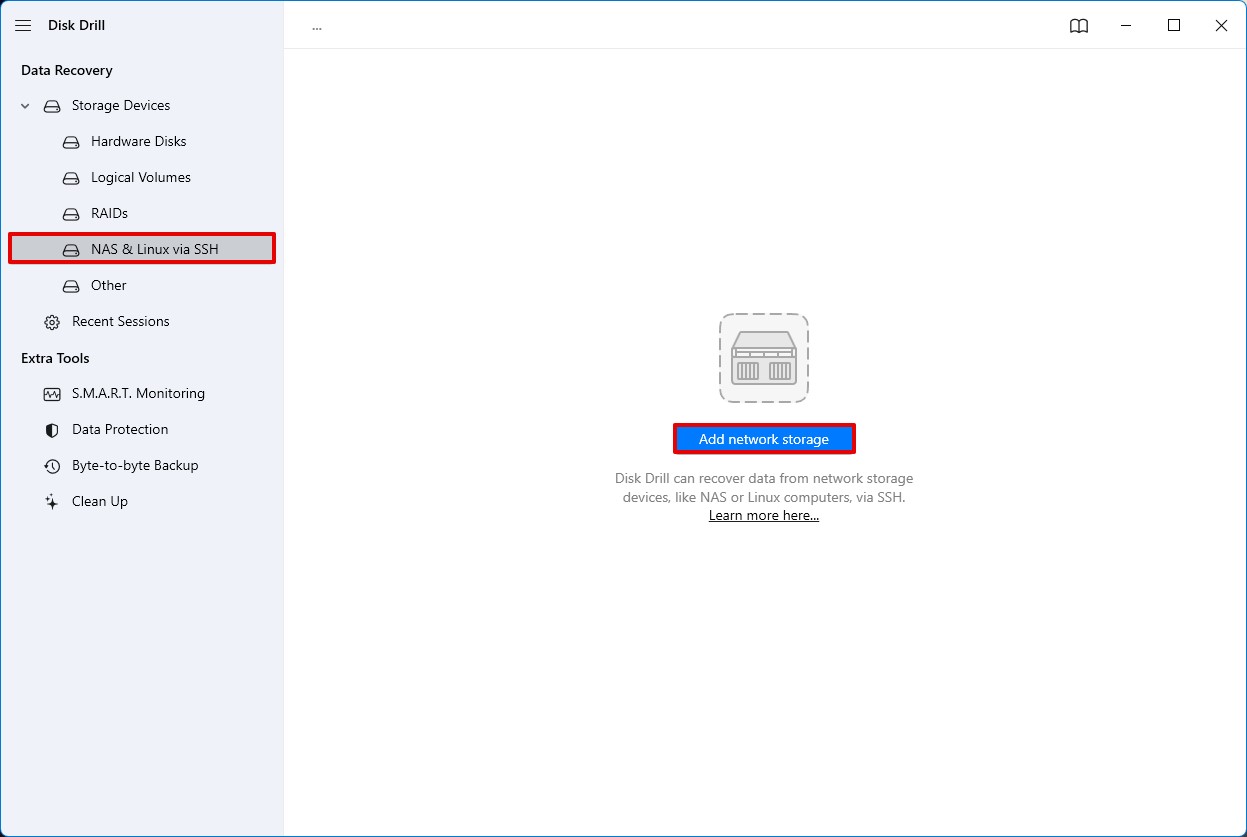
- Select NAS & Linux via SSH option on the sidebar. There click on Add network storage and input the IP address of your NAS, along with the administrator credentials and what port is being used. Click Connect. The NAS device should now appear in the device list.
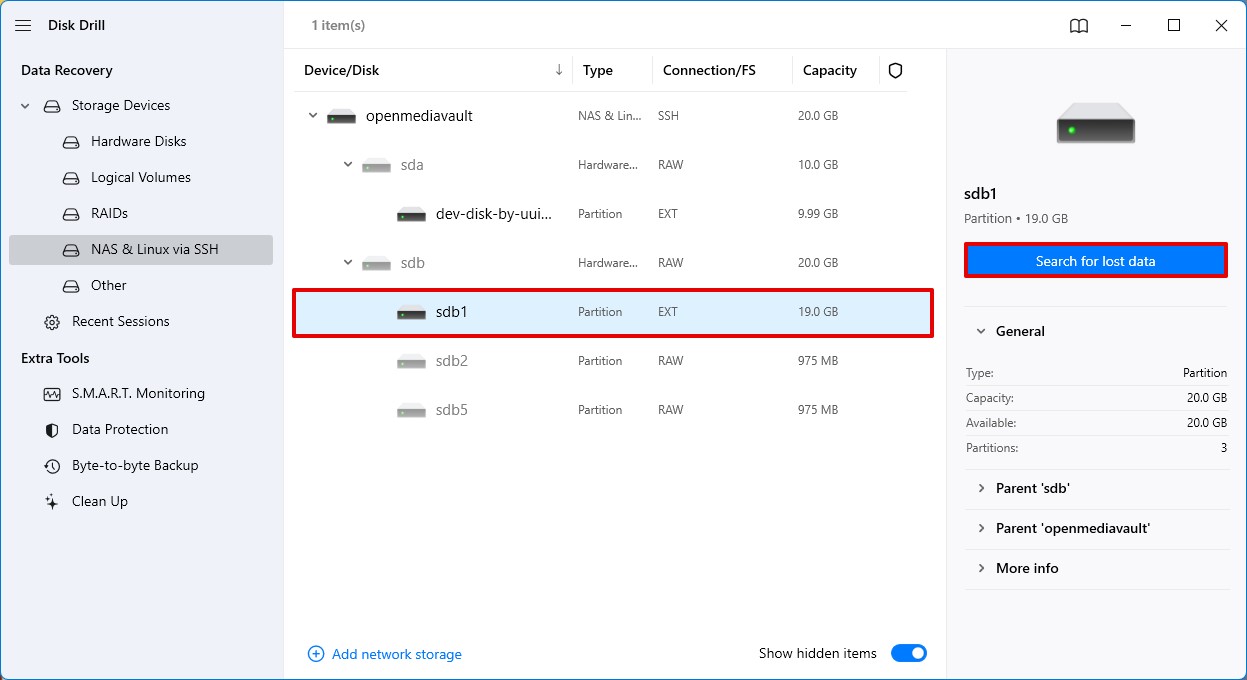
- Select the hard drive of the NAS that you want to scan, then click Search for lost data.
- Click Review found items or one of the colored file type icons to only view that data. Alternatively, click Recover all… to restore all recoverable data.
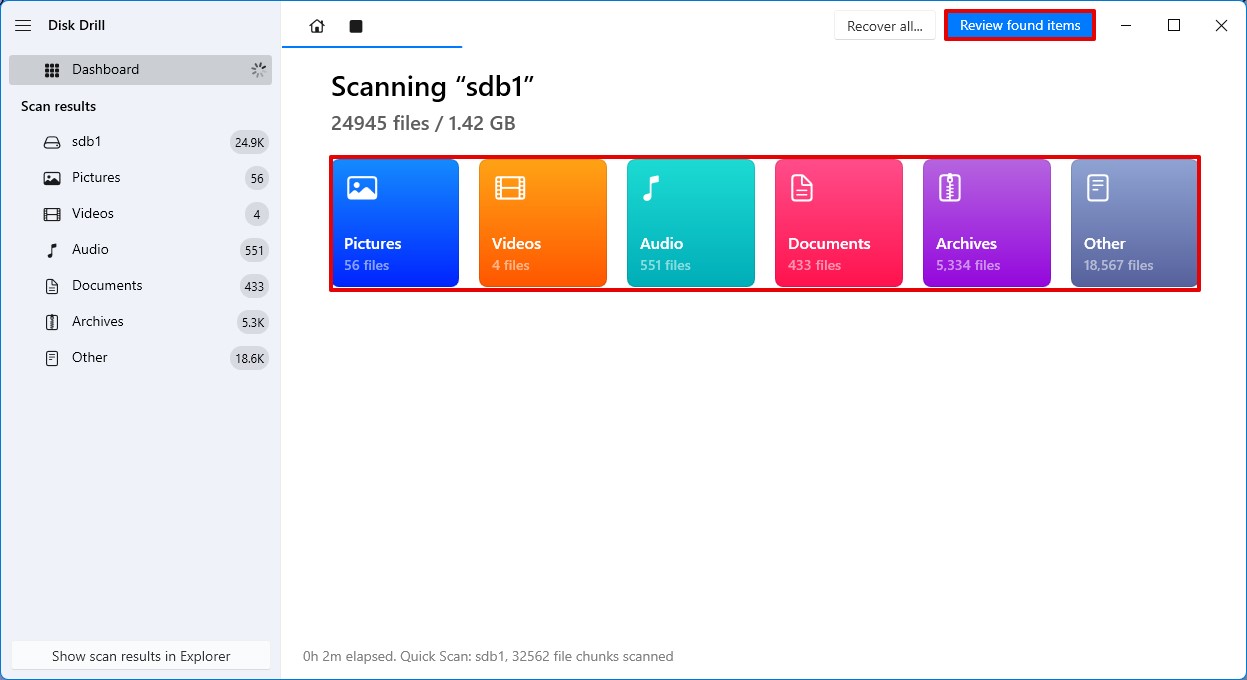
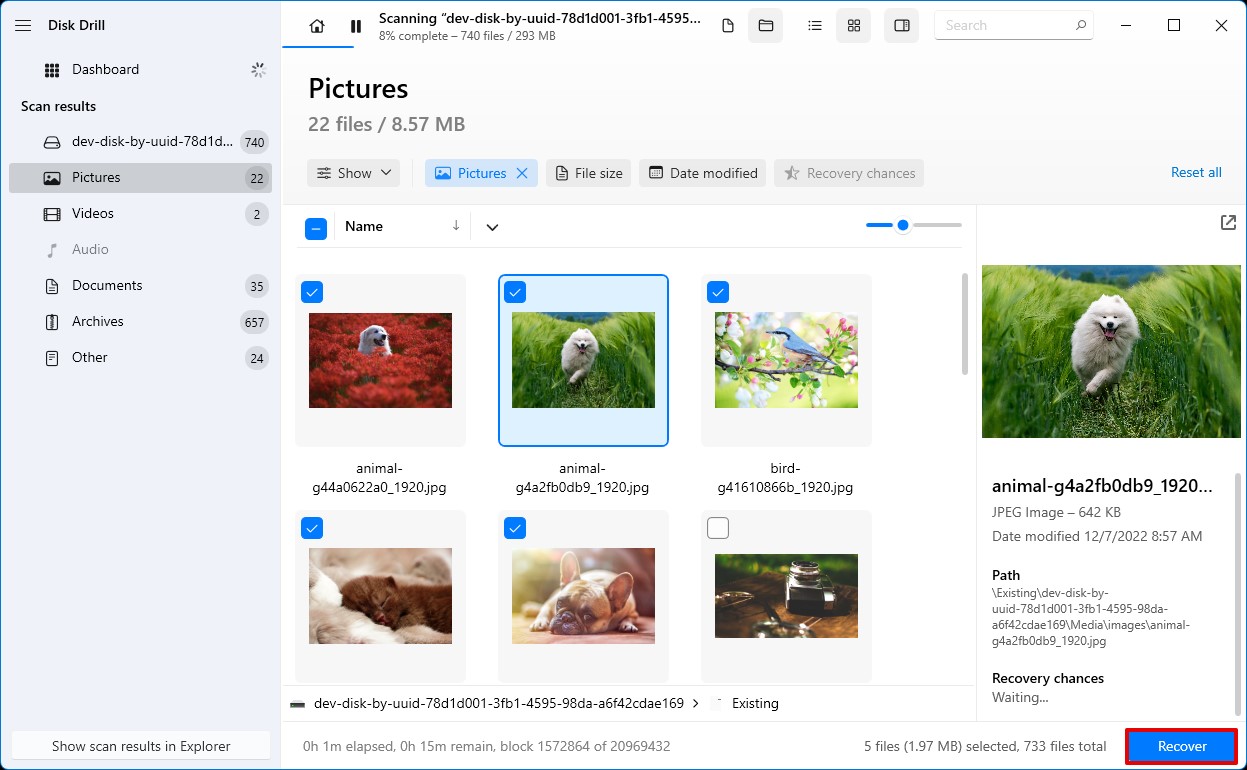
- Select the data you wish to recover from the NAS hard drive. Pay attention to the recovery chances column for an indication of what files can be recovered. When you’re ready, click Recover.
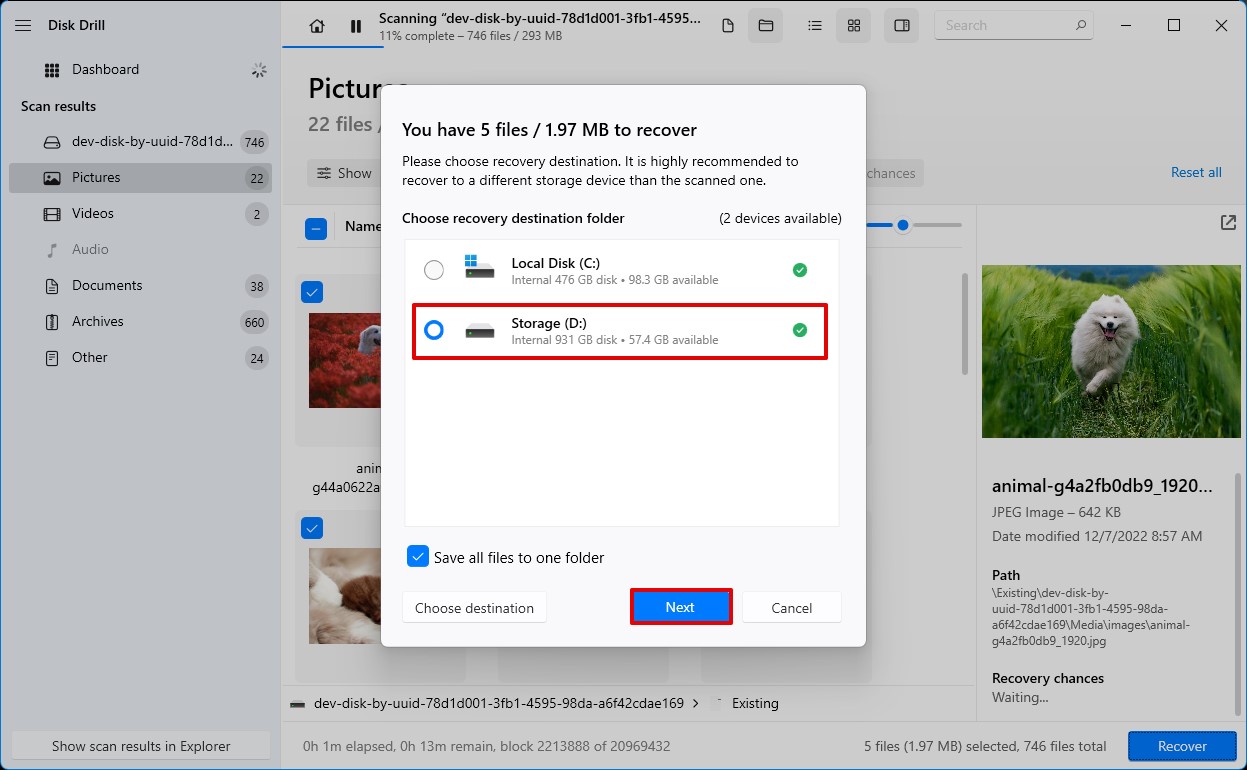
- Specify a safe location on a separate storage device where the data can be recovered. To complete NAS recovery, click Next.
Other NAS Data Recovery Software We Considered
In cases where Disk Drill isn’t a good fit for you, we’ve included some additional NAS recovery solutions below for you to explore. However, notice that all these solutions require you to connect your NAS drives directly to your PC.
Home NAS Recovery
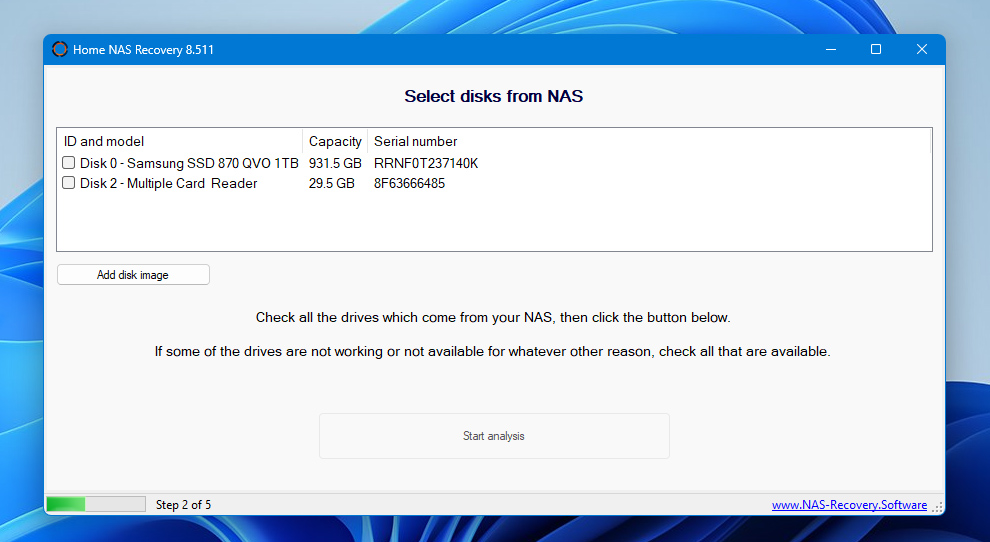 Home NAS Recovery is a reliable NAS recovery solution that’s compatible with a wide range of NAS devices, including QNAP, NETGEAR, Buffalo, Seagate, Synology, and more. It has a user-friendly interface and offers 24/7 technical customer support if you run into any issues. Unfortunately, it’s only available on Windows and its scan times are quite slow.
Pros
- Intuitive user interface.
- Home NAS Recovery offers 24/7 technical support.
- Available on Windows.
- Free.
- Only available on Windows.
- Scan times are very long.
- You need to manually connect and scan each disk separately.
ReclaiMe Free File Recovery
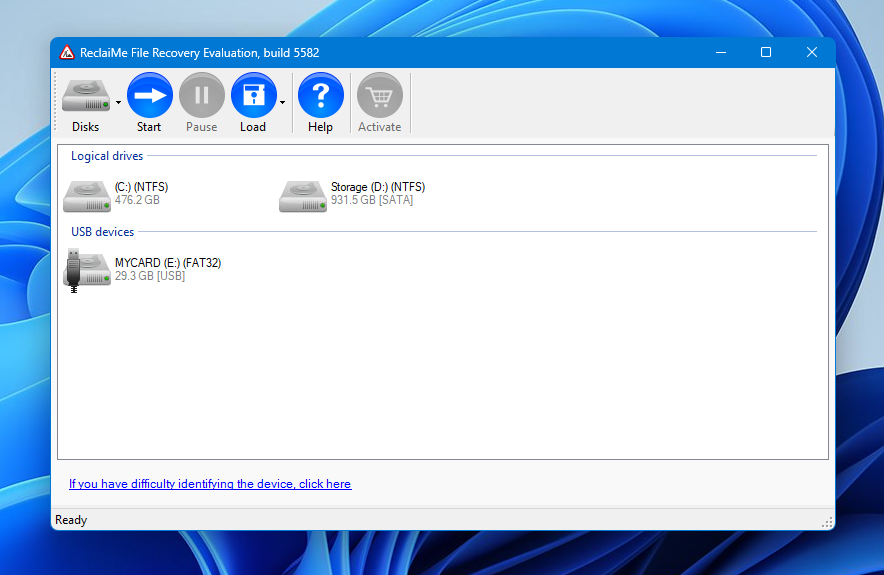 If you’re on the hunt for a NAS RAID data recovery tool that’s free, check out ReclaiMe Free File Recovery. It is compatible with a large number of RAID configurations and also supports NAS devices from varying manufacturers. However, we found that the program is vulnerable to memory leaks. Furthermore, an entire second array is required before you can recover the first one, which many users may not have access to.
Pros
- Easy to use.
- Free.
- Wide support for RAID types and NAS devices.
- Can recover only the whole array at once, requiring you to prepare the second array for recovery.
- No macOS support.
- Prone to memory leaks.
Ontrack NAS Data Recovery
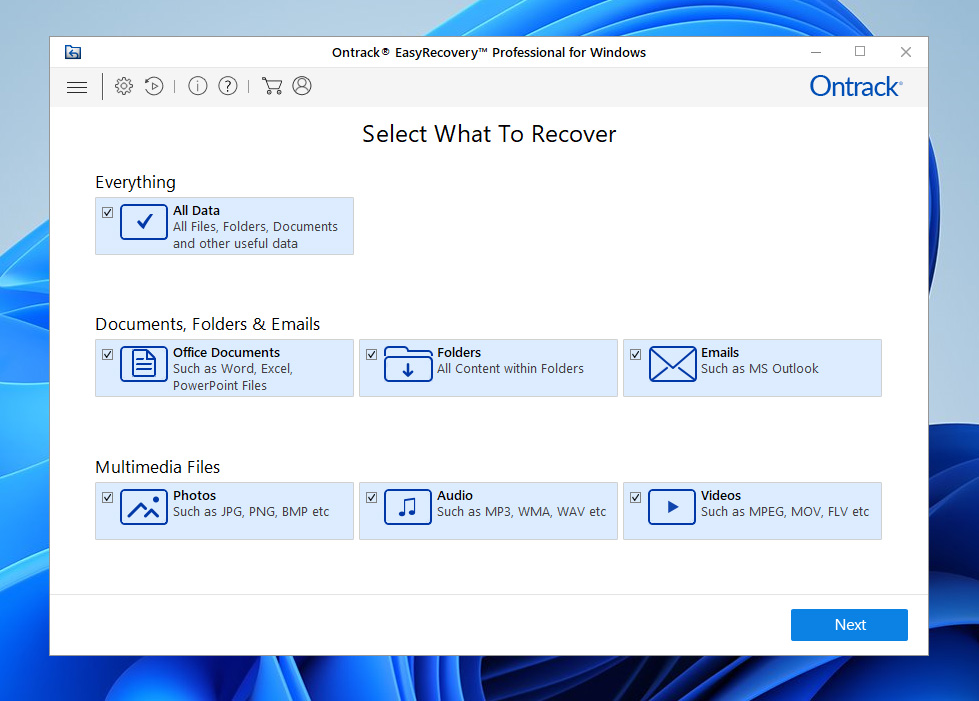 Ontrack EasyRecovery is a NAS file recovery software solution that gives you a full toolkit to recover the lost data from your NAS on your own. It features efficient, high-speed data recovery and a lot of advanced tools that give you more control over recovery. One drawback is that it’s fairly expensive compared to other solutions. Additionally, at the time of writing this article, it’s still incompatible with the latest version of Windows (Windows 11) and macOS (macOS 12 and 13).
Pros
- High-speed data recovery processing.
- 24-hour customer support.
- Provides a lot of technically advanced options.
- Expensive.
- Free trial requires personal information.
- Incompatible with the latest Windows 11, macOS 12 Monterey, and macOS 13 Ventura.
How to Protect Your NAS Data from Loss
While it’s impossible to predict when data loss will occur, there are steps you can take to protect your data from becoming permanently lost as a result of an unexpected issue.
- 🔒 Make security a priority – People with malicious intentions are always trying to get access to your data. Protect yourself by investing in a NAS device that includes system and file-level security features, like data-access monitoring and file encryption, to prevent unwanted access.
- ⚡ Protect against power outages – Power outages are a very real threat to your data. To give your system a chance to shut down safely in the event of a power outage, you can get an Uninterruptible Power Supply (UPS) which gives you some reserve power, buying you a little extra time.
- ✅ Set up RAID – If your NAS supports it and you have enough hard drives, consider setting up RAID. Because RAID 0 (which simply stripes your data to improve performance) isn’t ideal for keeping your data safe, we recommend RAID 1 at a minimum as it mirrors all of your data to another drive in real time.
- 💾 Follow the 3-2-1 backup rule – The age-old 3-2-1 rule is a backup strategy that’s widely considered the best. It involves making three separate backups of your data. Two of these backups should be stored on different storage mediums, and one must reside offsite.
Conclusion
You can recover lost data from a NAS before it’s lost for good using a NAS data recovery tool. In terms of software, we recommend Disk Drill, as it can handle recovery cases of all difficulty, whether you’re recovering data from an external hard drive or a complex RAID array. Other potential recovery options include Home NAS Recovery, ReclaiMe Free RAID Recovery, and Ontrack NAS Data Recovery.
Going forward, you can safeguard your data against data loss by incorporating some beneficial practices. This includes using a NAS with useful security features, connecting your NAS to a UPS, configuring RAID for redundancy, and following the 3-2-1 backup rule.
FAQ
- Open File Explorer.
- Right-click This PC and click Map network drive.
- Select a drive letter and input the IP address or hostname of your NAS. If it requires special credentials, make sure Connect using different credentials is ticked.
- Click Finish.
