If an NTFS drive stops showing files, you still have options. One of the simplest starting points is to use an NTFS partition recovery tool, which can scan the volume and identify items that are no longer listed in the file system. In the sections that follow, we look at simple ways to bring back deleted data from an NTFS partition, and then move on to situations that call for repairing the partition itself—the purpose is to help you decide what to try first and understand what tools might actually yield results.
How to Recover Files from an NTFS Partition
There are several practical ways to restore files from an NTFS volume, and it makes sense to start with the options that require the least setup. In many cases, the data is still on the drive and can be recovered with tools that are already available in Windows. The methods below show three common approaches. Each method is useful in different situations, so it’s good to know how they work and what they’re good for.
Method 1. Restore Files from Recycle Bin
This method is effective when the NTFS hard drive is intact physically and files have just been deleted. NTFS allows a Recycle Bin, so Windows usually stores files that have been deleted there for some time. It works the same with external hard drives and SSD drives formatted as NTFS: recently deleted items may well show up in the Recycle Bin, just like files from the internal drive.
If the data was stored on an external NTFS device, plug it in first and wait for Windows to recognize it.
- Open the Recycle Bin by double-clicking the icon on the desktop.
- Scroll through the contents and look for the files you want back. You can sort by the date deleted or use the search box if you remember part of the file name.
- When you find what you need, right-click the file and choose “Restore.” Windows will place it back where it came from, which can be useful if you want everything in its original folder.
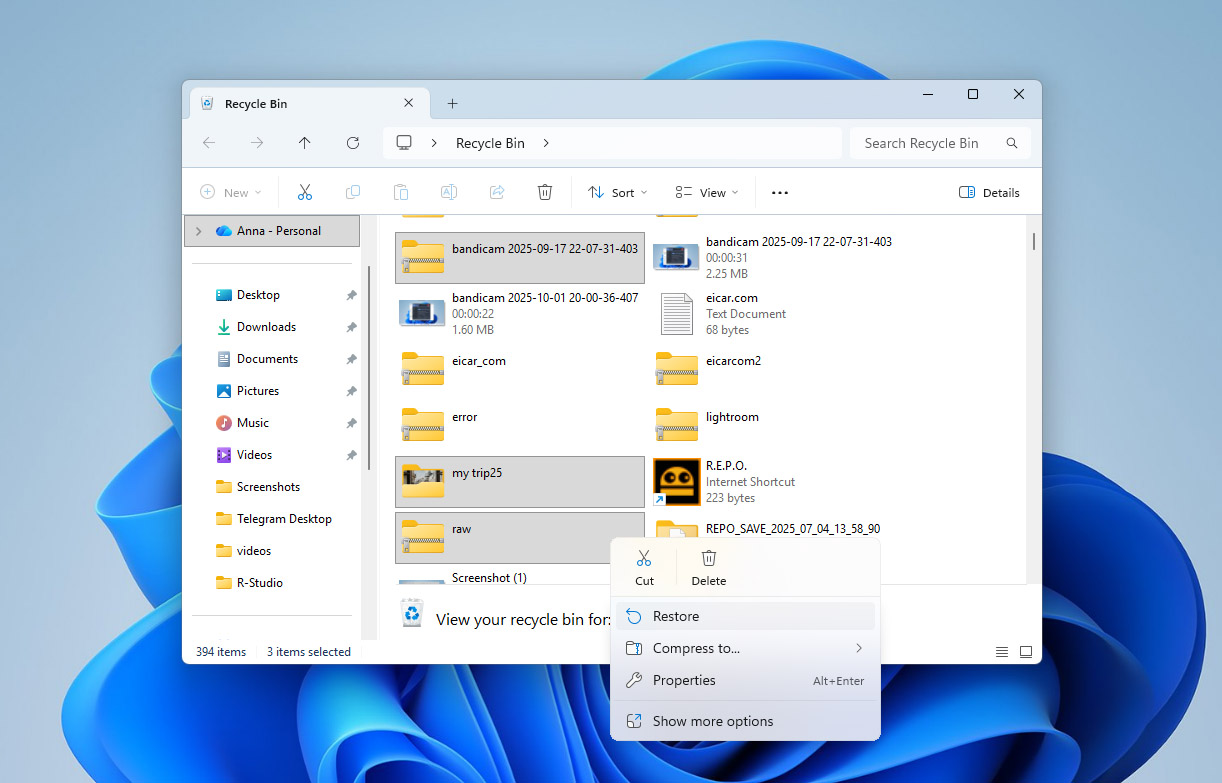
If you’d rather put the file somewhere else, just drag it from the Recycle Bin window to another folder. This is often the better choice if you want to keep things separate or avoid overwriting something.
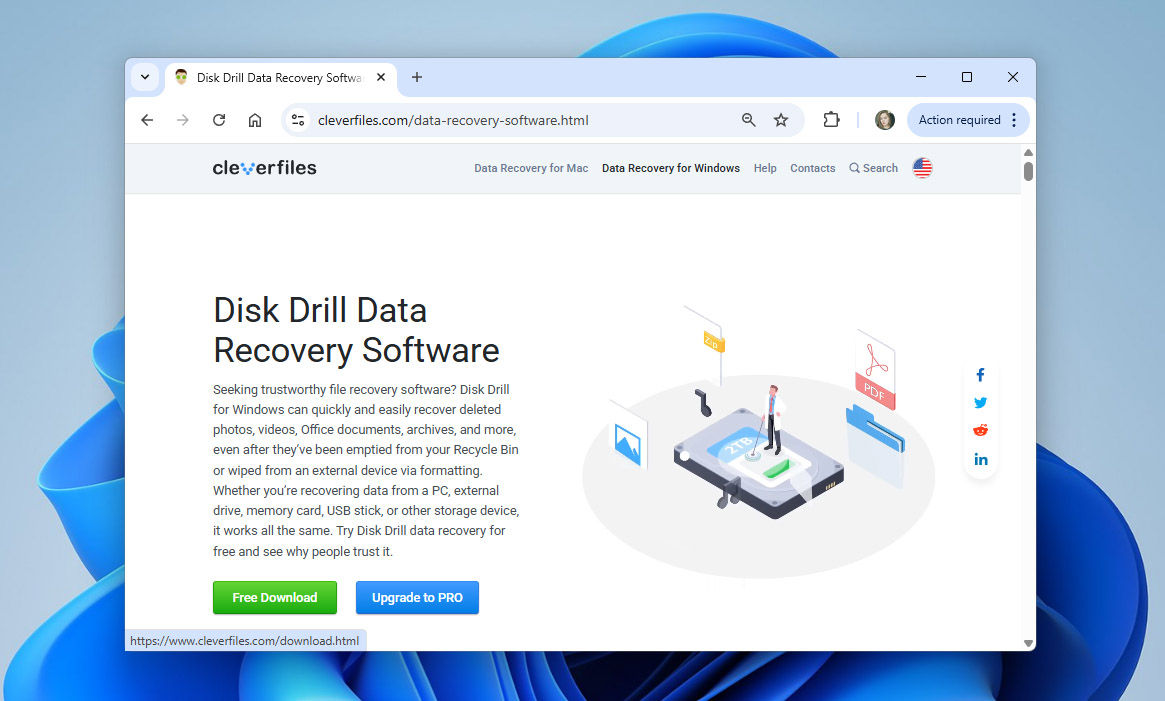
Method 2. Recover Files with Disk Drill
If deleted files are not in the Recycle Bin, or if they disappeared without a clear reason, a recovery utility is usually the next option. Disk Drill is designed to scan NTFS volumes and read the information the file system keeps about stored data. This can help in situations where files were removed permanently, and it can also be used when the NTFS partition itself has been damaged or even deleted from the drive. The software analyzes metadata left behind by the file system and recovers items that no longer appear in Windows.
Step 1. Download and Install Disk Drill
Download Disk Drill and run the installation wizard. Be sure to install Disk Drill in a different partition than the one you want to recover files from to avoid overwriting of data. You can recover up to 100 MB of data with the free version of Disk Drill for Windows, which is often enough to recover important documents, photos, or even short videos.
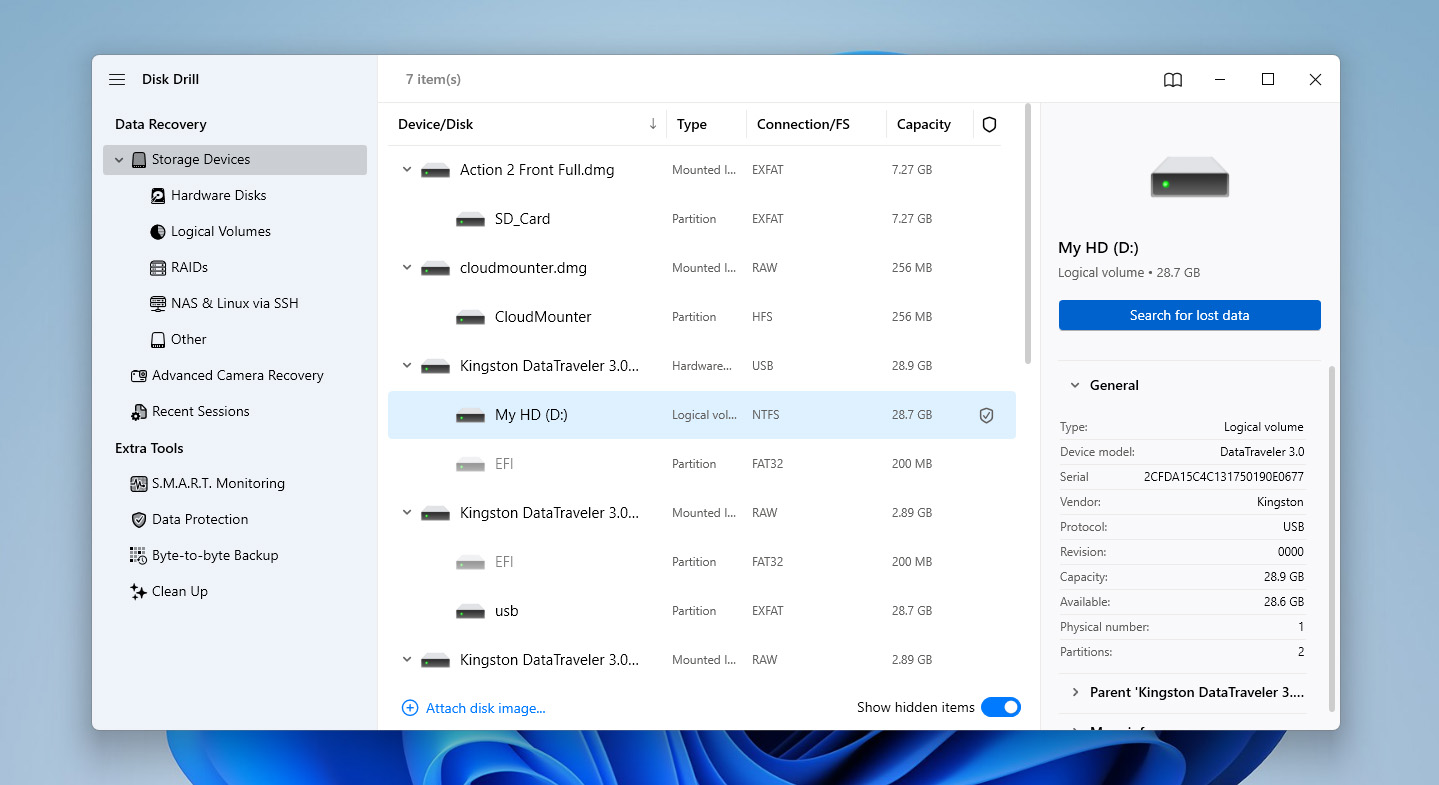
Step 2. Select NTFS Partition
Once you’ve launched Disk Drill after installation, you’ll need to select the NTFS partition you want to scan for potentially recoverable files. Click the “Search for lost data” button, then select the scan type. In your case, Universal scan will be more effective. At this stage, Disk Drill will start scanning your NTFS partition.
Step 3. Start Recovering Files
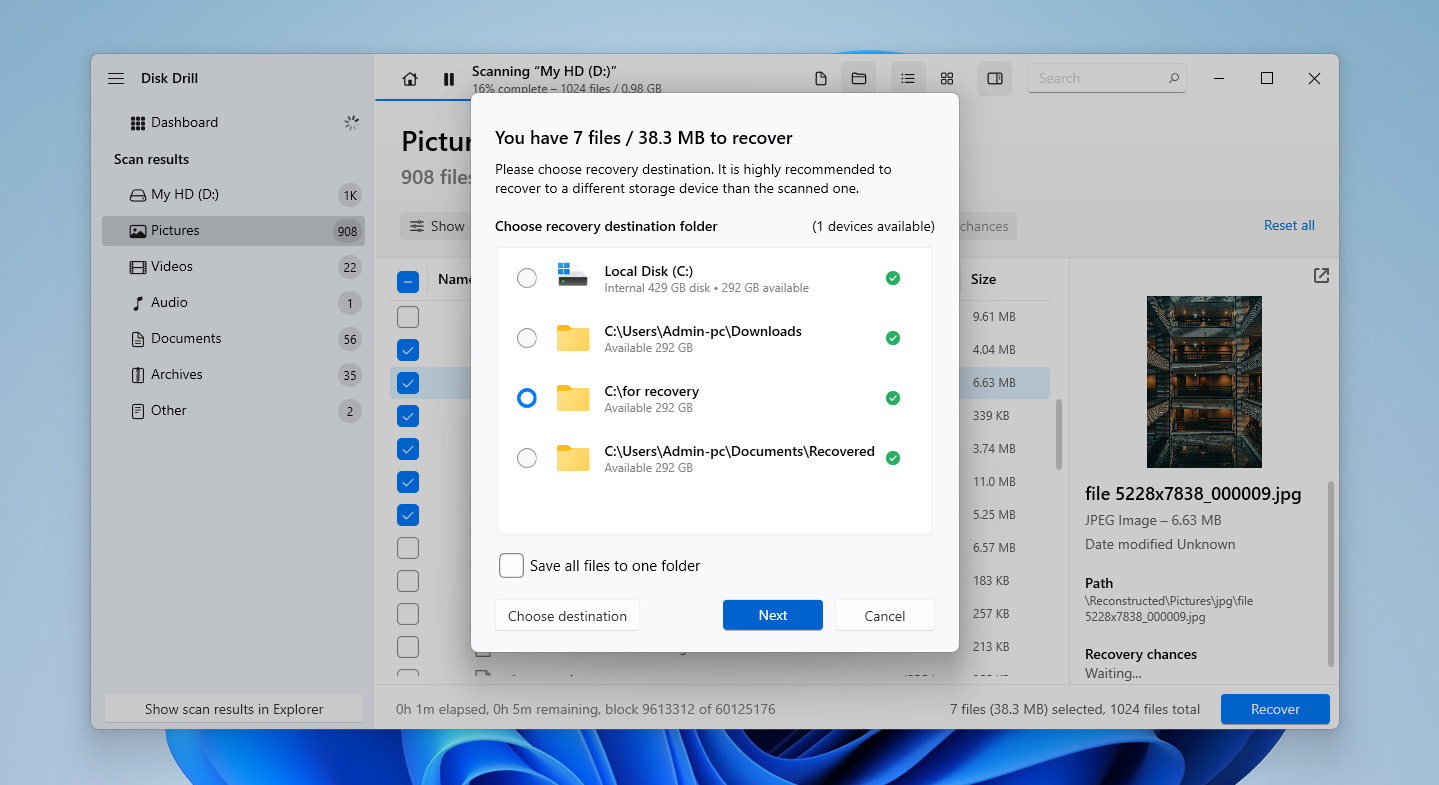
You don’t need to wait for the scan to complete, you can preview the files by clicking the Review found items button. Once you see the list of recoverable files, select the ones you want to recover by checking the box to the file’s left and clicking on the Recover button.

Step 4. Select Recovery Location
When you click the Recover button, you’ll be asked for the location where you want to save the files. Select a location different from the source drive to avoid overwriting data. Once you’ve selected a location, click Next.
Method 3. Restore Data from File History Backup
This method is listed third because many systems never had File History configured in the first place. If it was enabled, though, it is usually the most straightforward and reliable way to bring files back. As long as the drive that stores the backups is available, File History can restore previous versions of files even when the original NTFS partition is damaged, deleted, or otherwise not usable.
By default, File History is aimed at the standard libraries on the system drive (Documents, Pictures, Music, and so on), the Desktop, and a few other locations. However, a lot of users create their own libraries that point to folders on different drives. Those custom libraries are also included in File History, which makes this method worth checking even if the missing data was stored on a non-system NTFS volume.
- If your File History backup is stored on an external drive or network location, connect the drive or make sure the network share is accessible.
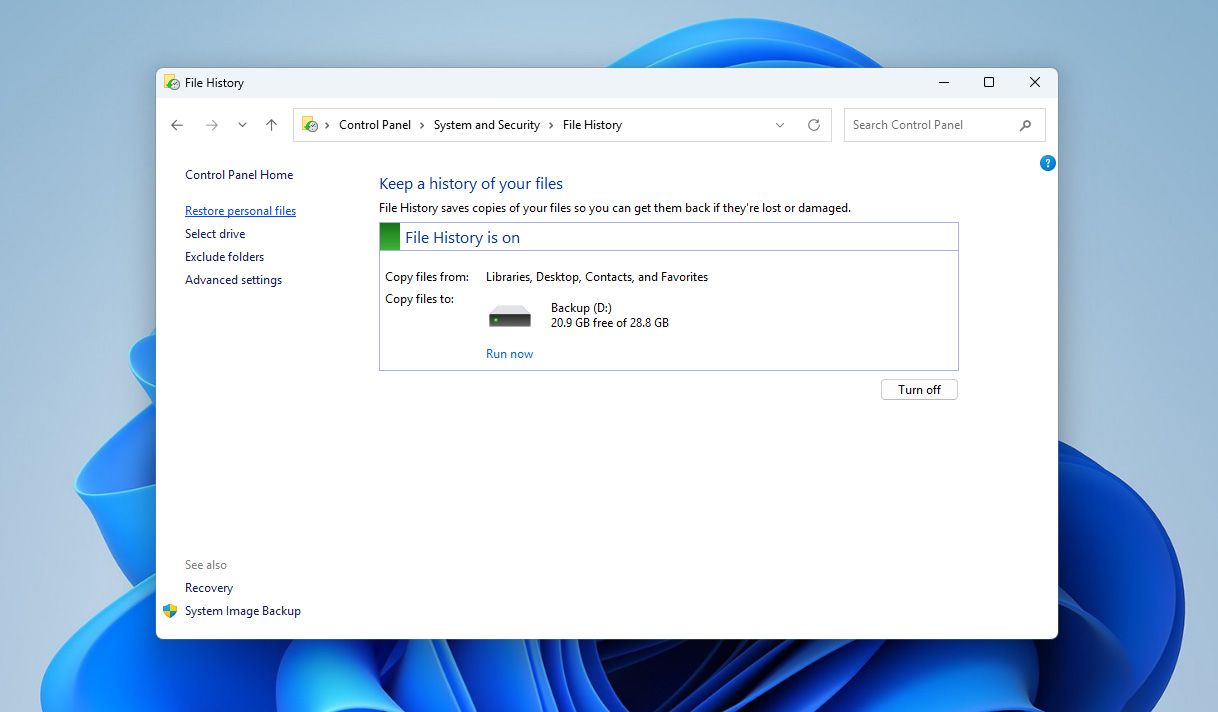
- Open the Start menu, type Control Panel, and press Enter. In the Control Panel window, click on “System and Security,” and then select “File History.”

- In the File History window, look in the left pane and click “Restore personal files.” This opens a separate window that shows the backed-up libraries and folders.
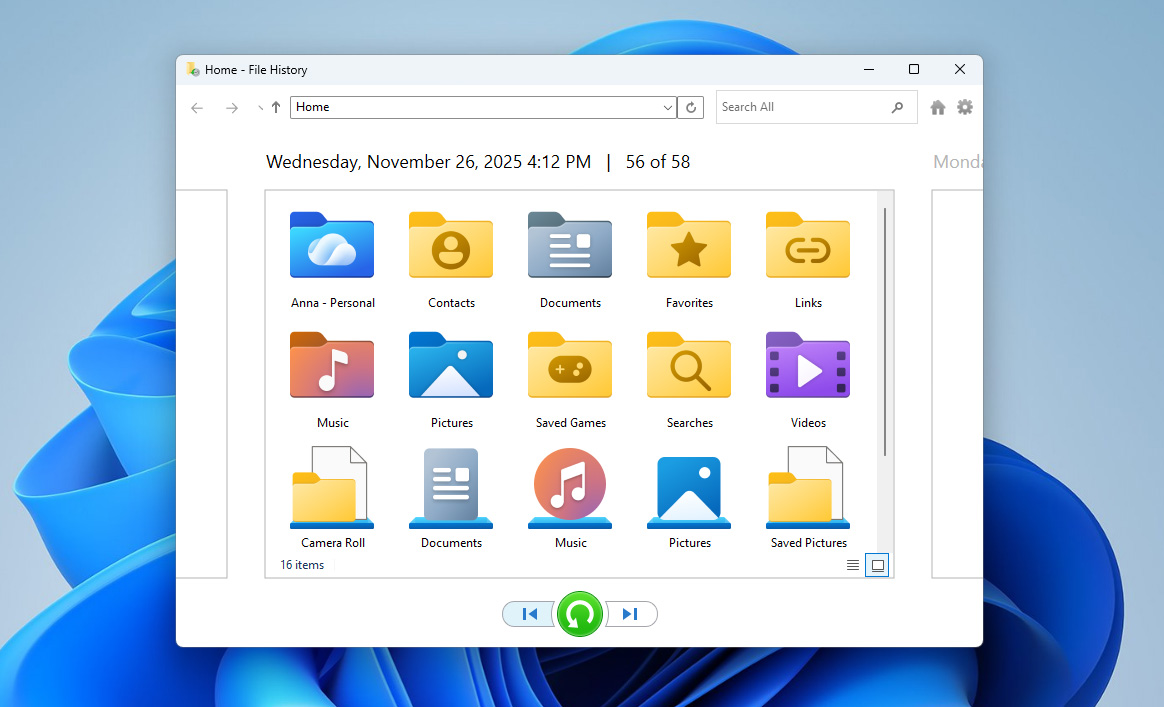
- Browse through the folders or use the search box in the upper-right corner to find the files or folders you want to restore. If needed, use the arrow buttons at the bottom to move between different backup dates until you see the version you need.
- Select the file or folder you want to bring back and click the green “Restore” button.
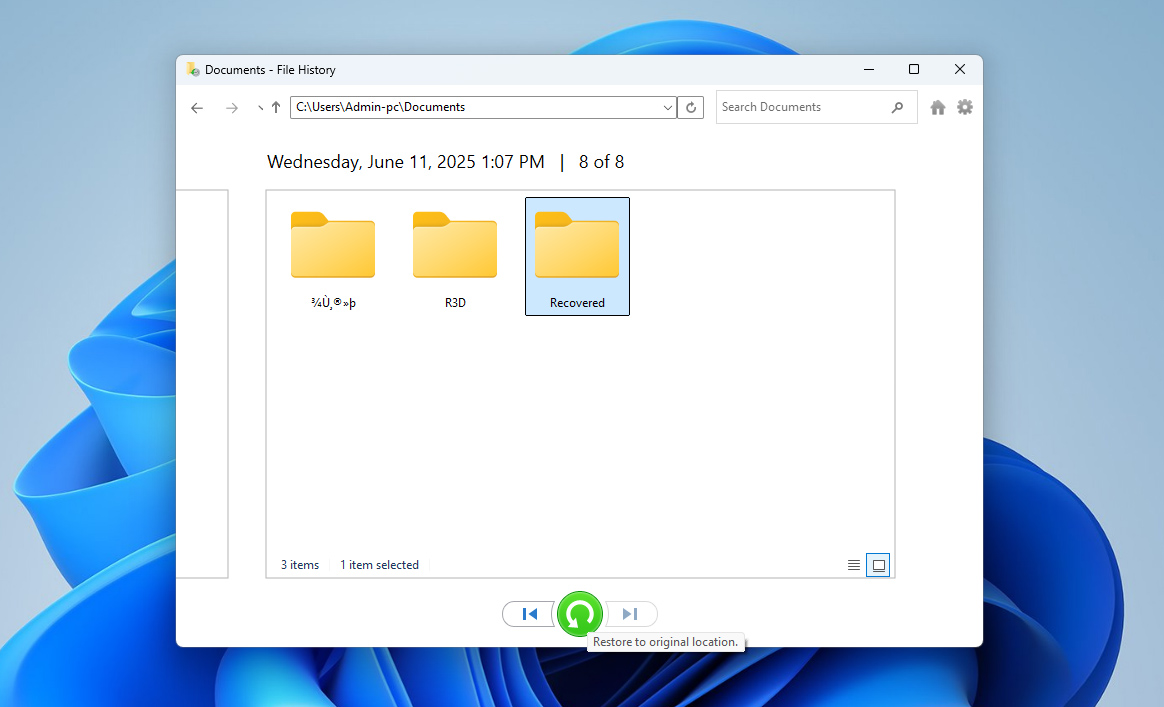
If you want to send the restored data to another place (for example, a different drive or a temporary folder), right-click the green Restore button instead and choose “Restore to…”, then select the destination.
Now that you’ve recovered the files, you can fix your NTFS partition table if that’s what had caused the data loss in the first place and recover the entire partition.
How to Fix the NTFS Partition Table and Recover the Partition
In some cases, the issue is not individual missing files but the partition itself. When the NTFS table contains errors, Windows may show the drive as RAW and prompt you to format it. There are a couple of tools that can help.
Method 1. Repair NTFS Partition with CHKDSK tool
Improper removal of a drive or a sudden power loss can leave the NTFS boot sector in a bad state. When that happens, Windows may show the partition as RAW and refuse to read the file system at all. In this situation, you can try the built-in CHKDSK utility. It can compare the damaged boot sector with its backup copy and, if the backup is still intact, rebuild the boot sector and bring the NTFS volume back to a readable condition.
It is important to keep in mind that CHKDSK is designed to repair the file system, not to “save” your files. During the repair process, it may modify or discard some structures, and that can make later recovery attempts more difficult. Therefore, we recommend that you first recover your files using the previous section, and then try to repair the file system using chkdsk or TestDisk, which is described in the next method.
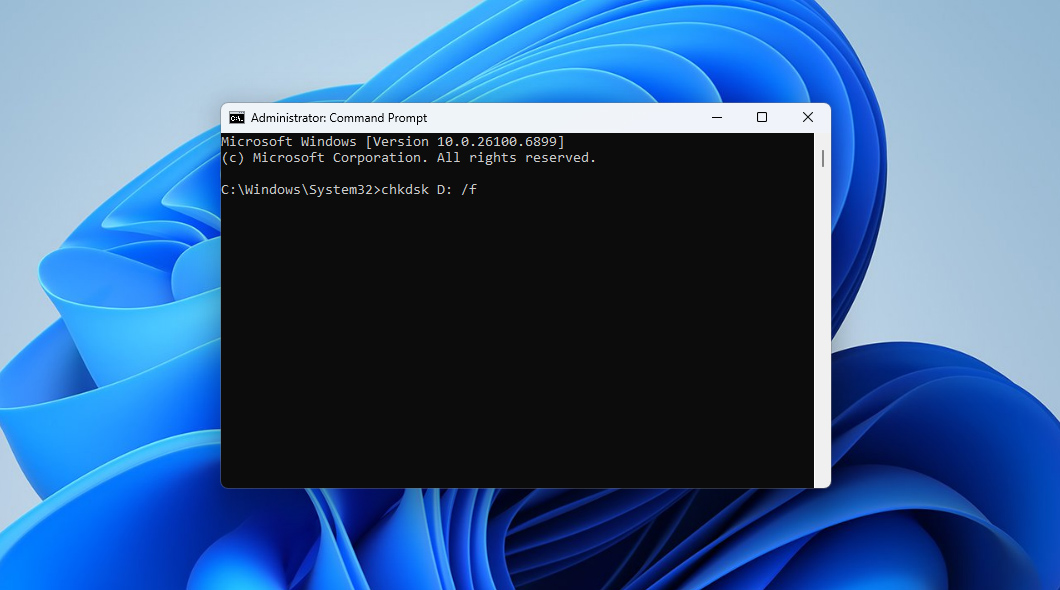
- Open the Start menu, type cmd, then right-click “Command Prompt” and choose “Run as administrator.” Confirm the UAC prompt if one appears.
- In the Command Prompt window, type the CHKDSK command (chkdsk E: /f) and press Enter. Replace E: with the correct drive letter for your volume.
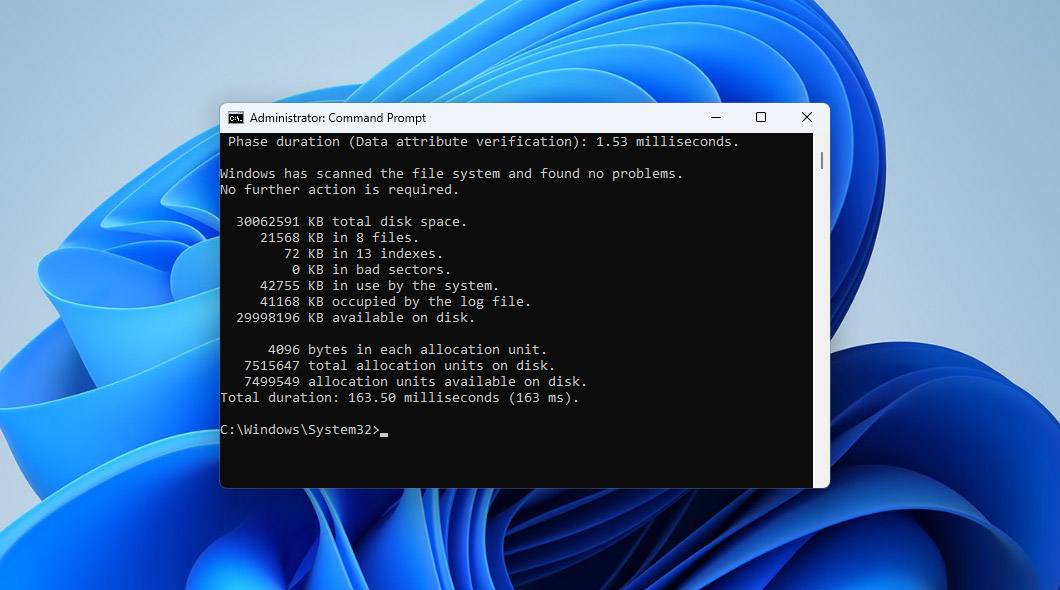
- Allow CHKDSK to complete its stages. The screen will show progress messages while it checks files, indexes, and other NTFS structures, and applies fixes as needed. This can take some time, depending on the size of the drive and its condition.
- When the scan finishes, read the summary at the end. If you see a message that corrections were made to the file system, close the Command Prompt and check in File Explorer to see whether the partition is now accessible.
Method 2. Restore NTFS Partition using TestDisk
TestDisk is a more advanced option for repairing NTFS partitions, especially when the damage goes beyond file system inconsistencies that CHKDSK can correct. It is a third-party tool that works directly with partition structure information on the disk, and it is often effective in cases where the NTFS partition has been deleted, marked as unallocated, or has a damaged table that prevents Windows from recognizing it.
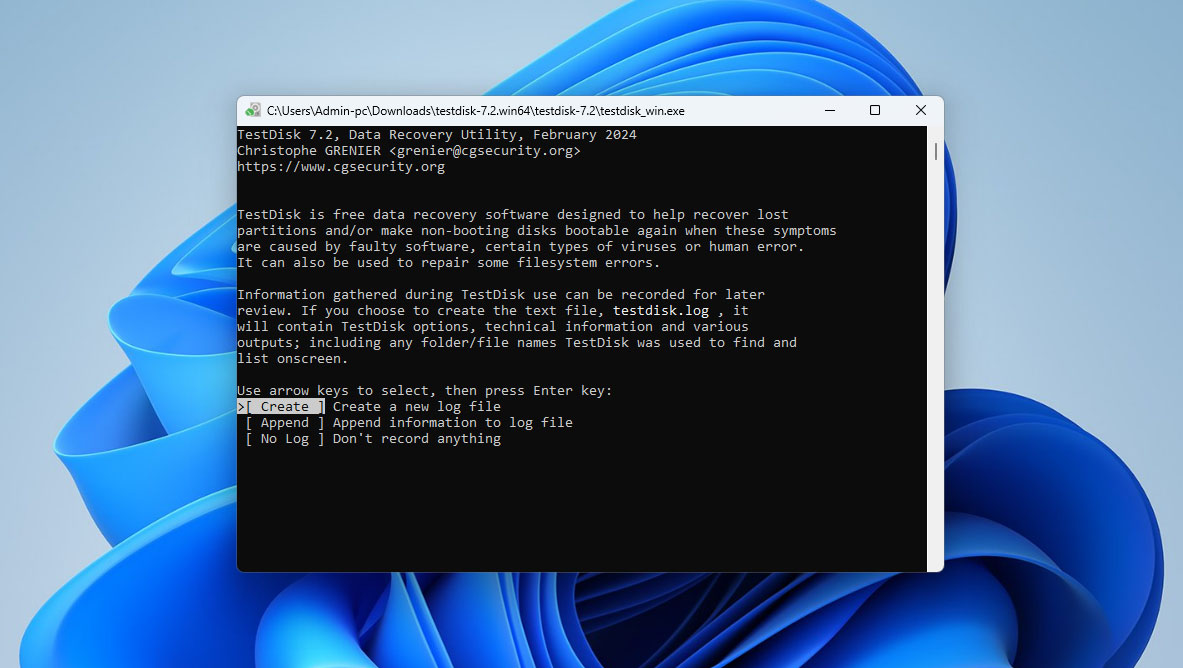
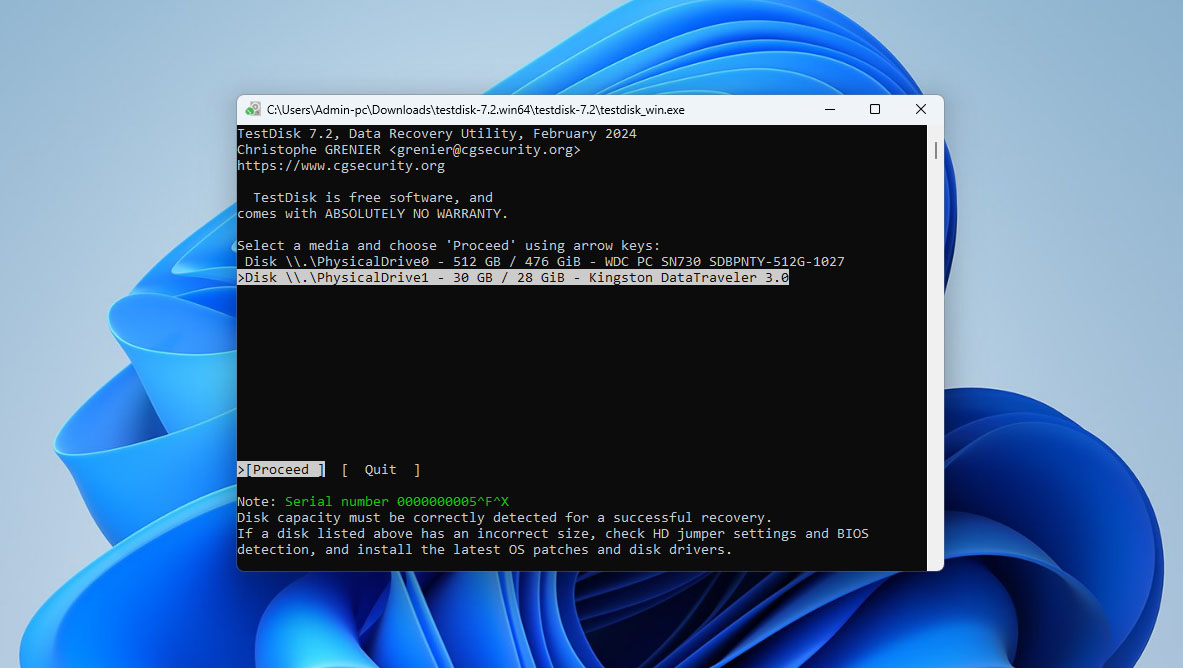
- Download TestDisk, extract the files into a folder, and run TestDisk. It’s a portable program and doesn’t require an installation.
- Select the [Create] option and press Enter. If prompted, enter your admin password.
- Select the disk drive you want to repair and press Enter.
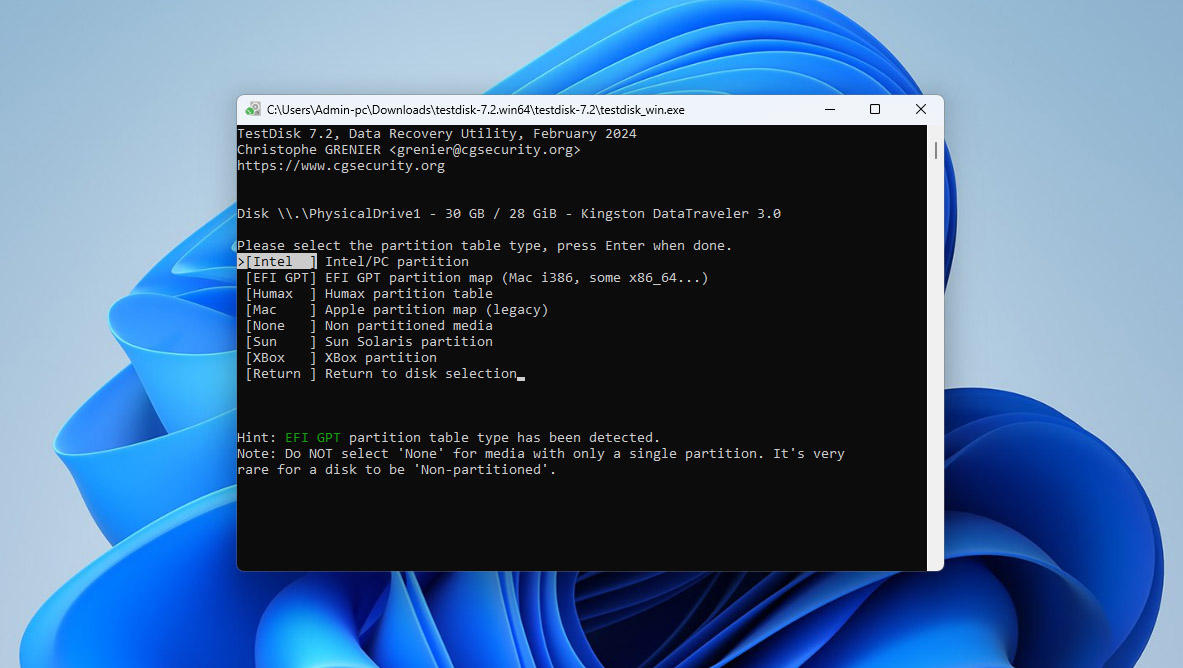
- Select [Intel] (Intel/PC partition), since we’re trying to repair an NTFS partition.
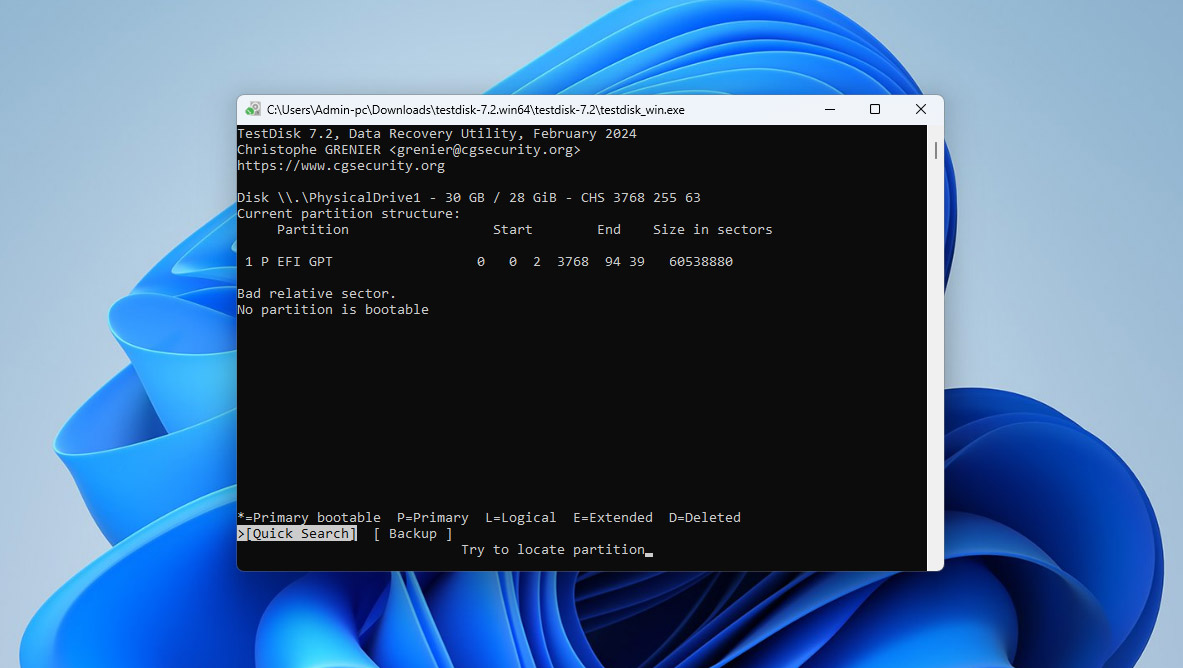
- Select [Analyze].

- Select [Quick search].
- Select the partition you want to repair and press Enter.
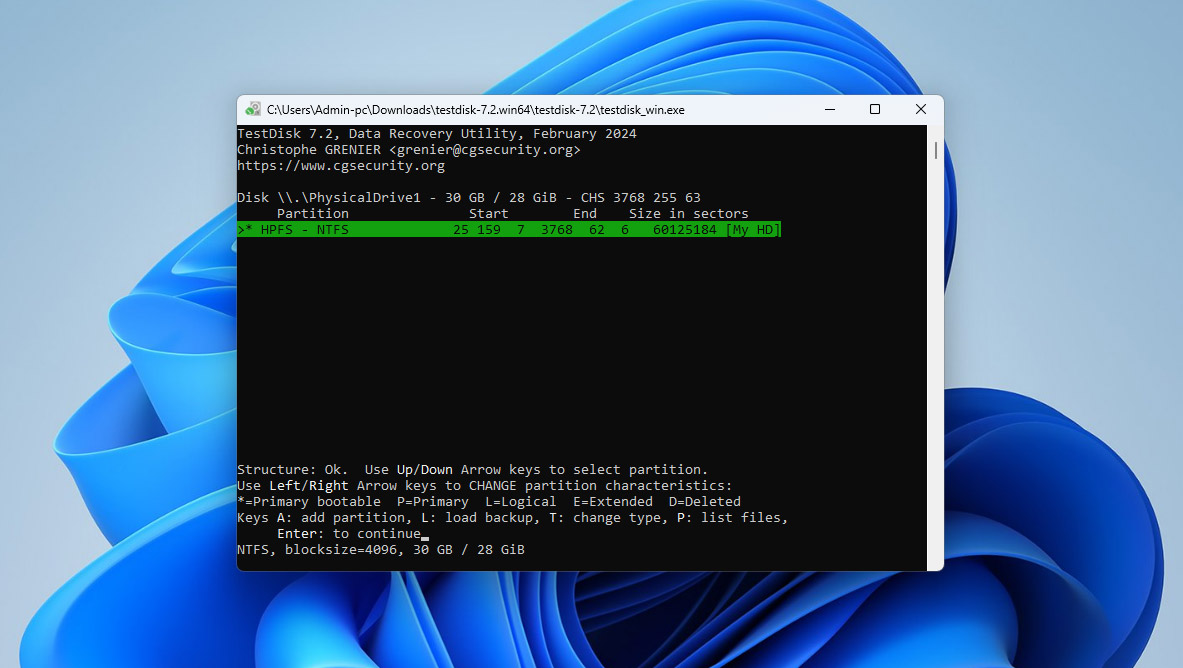
- Select [Write] at the bottom and press Enter. Doing this will write the partition table to the partition, or alternatively, you can press A to recover a broken partition and fix any existing inconsistencies.
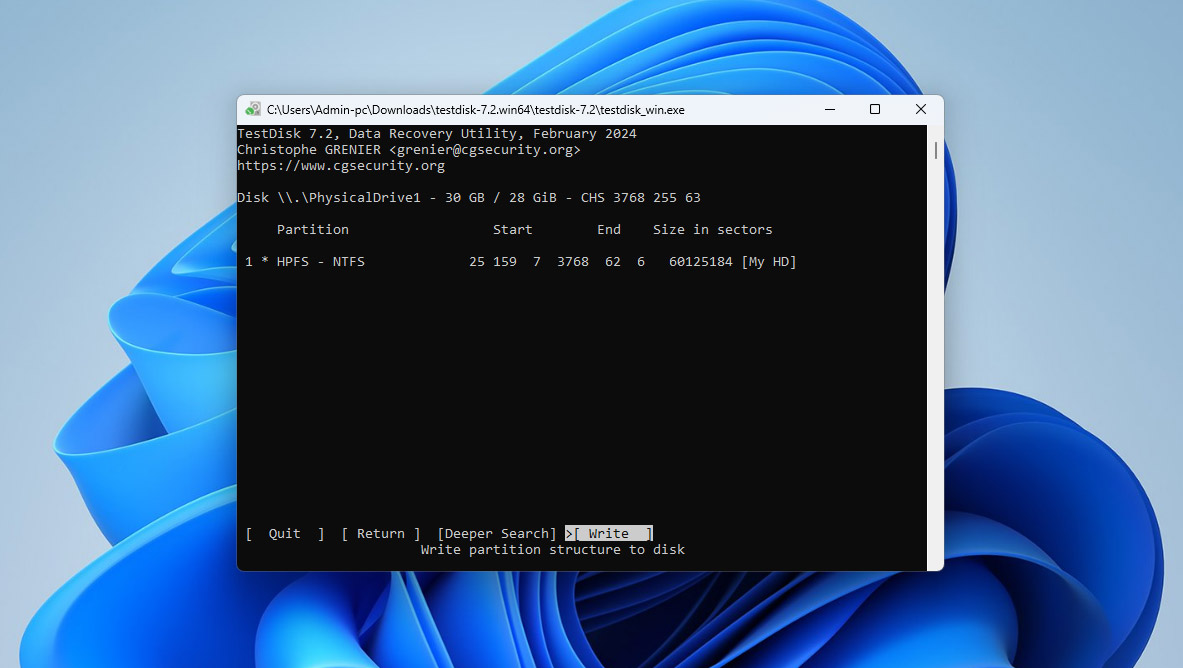
Note: If the [Quick Search] option doesn’t find the partition, you’ll also see an option to run a [Deeper Search].
Conclusion
Accidental loss of data on an NTFS drive can happen for many reasons, but it usually helps to start with the simplest options and work toward the more involved ones. Using the Recycle Bin or a recovery tool can often bring files back quickly, and repairing the partition structure may restore access when the file system itself has been affected. Looking ahead, it is worth enabling backups if you have not already done so. File History, external drives, and even a basic cloud storage routine can prevent future problems from turning into permanent loss. A second point to keep in mind is how you handle removable drives: using the “Safely Remove” option before unplugging a device, and shutting down the system properly, reduces the chances of file system damage.
If this article helped you, or if you have questions or want to share your experience, we would be glad to see your feedback below.


Thanks a lot. TestDisk repaired damaged partition on my NTFS hard drive.