 Storing videos on your PC is never a smart move. A hundred things can go wrong with your PC, resulting in those video files getting deleted. However, if you’re only just realizing this after you’ve lost videos to accidental deletion or another reason, we’re going to explain the deleted video recovery process.
Common Causes of Video Loss
There is a good chance that at least some of the videos that you have taken and stored on your computer are important to you in some way. They may capture a moment that can never be repeated, such as your child’s first steps or a sibling’s wedding. While it is impossible to put a monetary value on these videos, their personal and emotional significance may be considerable. You certainly don’t want to lose them. Unfortunately, there are many reasons that you might need to use data recovery software to restore lost or deleted videos.
Some of them are:
| Reason | Description |
| 🧍♂️ Human error | The majority of data loss events contain an element of human error that contributed to the problem. This can be as simple as emptying a Recycle Bin after accidentally deleting some files or formatting the wrong SD card. As long as humans are involved, the potential of making a mistake is always present. |
| 🖥️ Hardware failure | A hardware issue with the disk or the device that contained it can lead to lost videos. |
| 💥 Extreme conditions | Exposing your computer or mobile device to very hot, cold or humid conditions can result in a damaged disk and possible data loss. |
You can probably think of a number of additional scenarios that will lead to your videos disappearing. The common denominator in all of these situations is that you are left scrambling to recover the files in a timely manner.
How to Find Deleted Videos on a Windows PC
Before attempting video recovery, try looking for the videos on your PC. It’s possible the videos weren’t deleted, but moved elsewhere to another folder, or the Recycle Bin.
Here’s how you can confirm the videos were actually deleted, and not just stored elsewhere on your PC:
Method 1: Search using Start Menu
In some cases, the video files might just be in a different location and not deleted from your computer altogether. You can search your entire storage space using the search functions on Windows. The first search option is placed in the Start Menu. Click on the Start Menu and enter the name of the video file in the search bar. Select More > Videos to filter results so you only see the video files. 
Method 2: Search using the File Explorer
Another way to search video files when they haven’t actually been deleted is from the File Explorer. Launch the File Explorer by pressing Win + E, select Computer from the left sidebar, and enter the name of the video file in the search bar at the top. 
Method 3: Search in Recycle Bin
If you didn’t permanently delete the file by emptying the Recycle Bin or using the Shift + Del shortcut when deleting the file, you might see the deleted videos in the Recycle Bin. Just go to the Recycle Bin, and if you find the video files, right-click on them and select Restore. 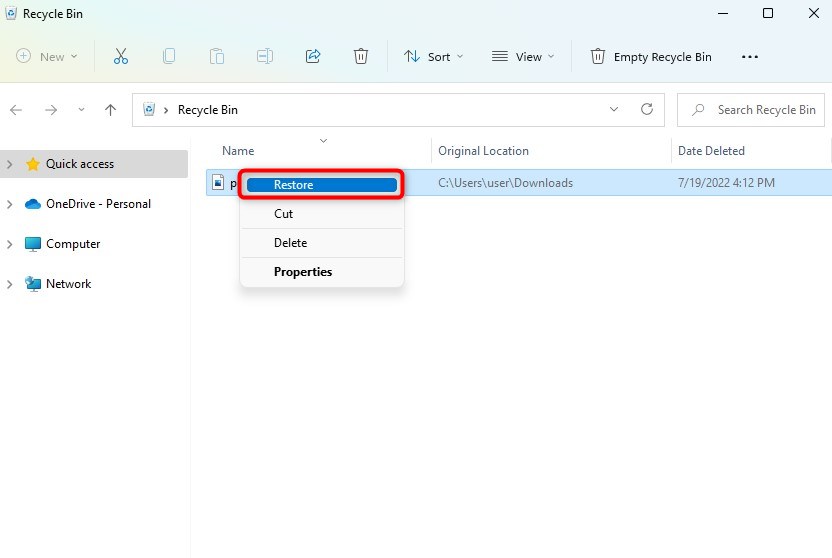
How to Recover Permanently Deleted Videos
You can try multiple methods to recover permanently deleted videos on a Windows computer. We’ve listed the most effective ones below.
You should stop using the disk or device that contained the deleted videos as soon as you realize they are gone. This will minimize the chance of overwriting the files you want to recover.
Method 1: Try a Video Recovery Software
Data recovery apps are the most convenient way to recover deleted videos. If you act fast, a good data recovery app can almost always recover your videos in a few clicks.
For this tutorial, we decided to use Disk Drill—thanks to its reliable data recovery algorithm, user-friendly GUI, and wide compatibility with file types. In addition to popular video formats like MP4, MOV, FLV, AVI, etc., Disk Drill can also recover RAW videos. It is cross-platform (Windows, and macOS), and has a free trial that lets you recover up to 500 MB of data without paying a penny.
Here’s how to recover permanently deleted videos from your PC, using Disk Drill:
- Download Disk Drill, and install it on a drive other than the one from which your videos disappeared.
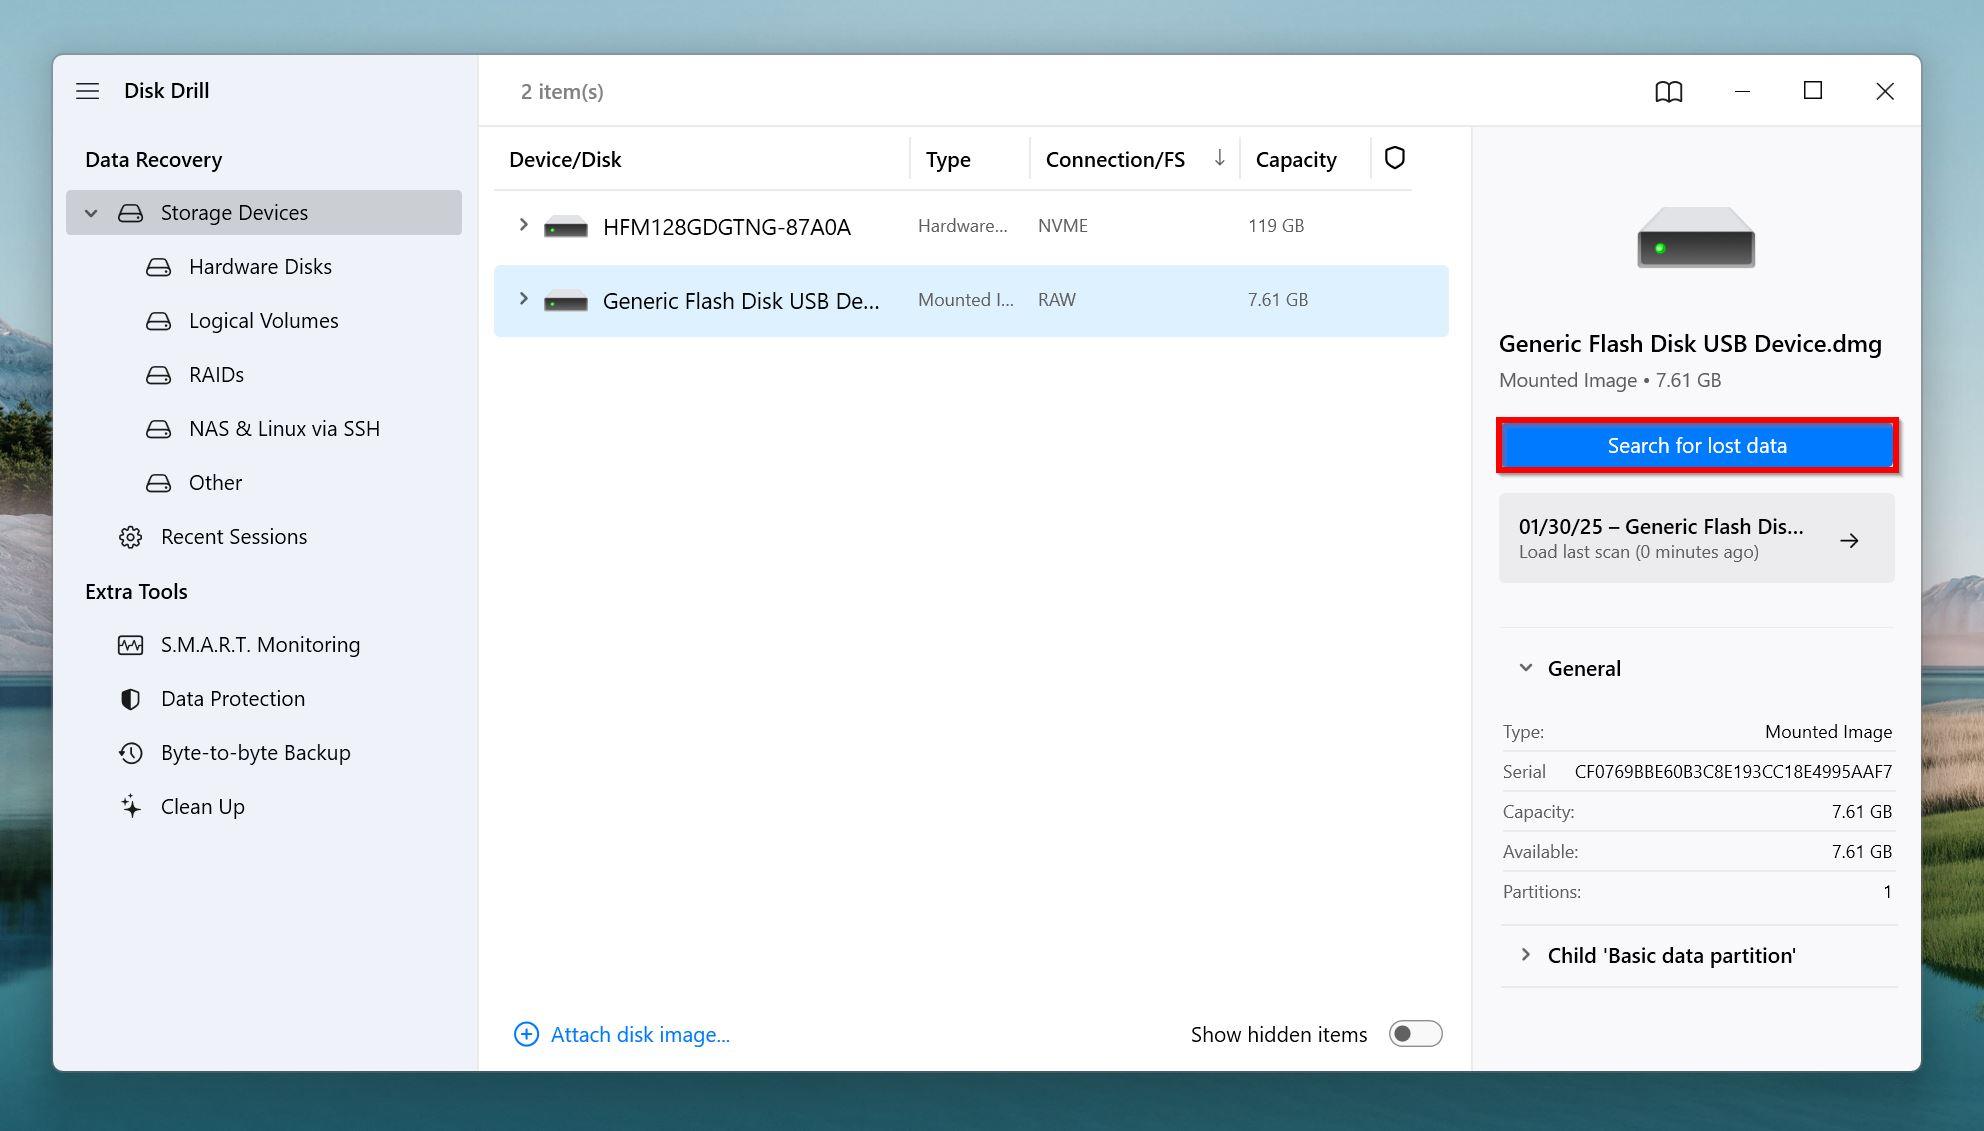
- Open Disk Drill, select the drive that contained the permanently deleted videos, and click on Search for lost data.
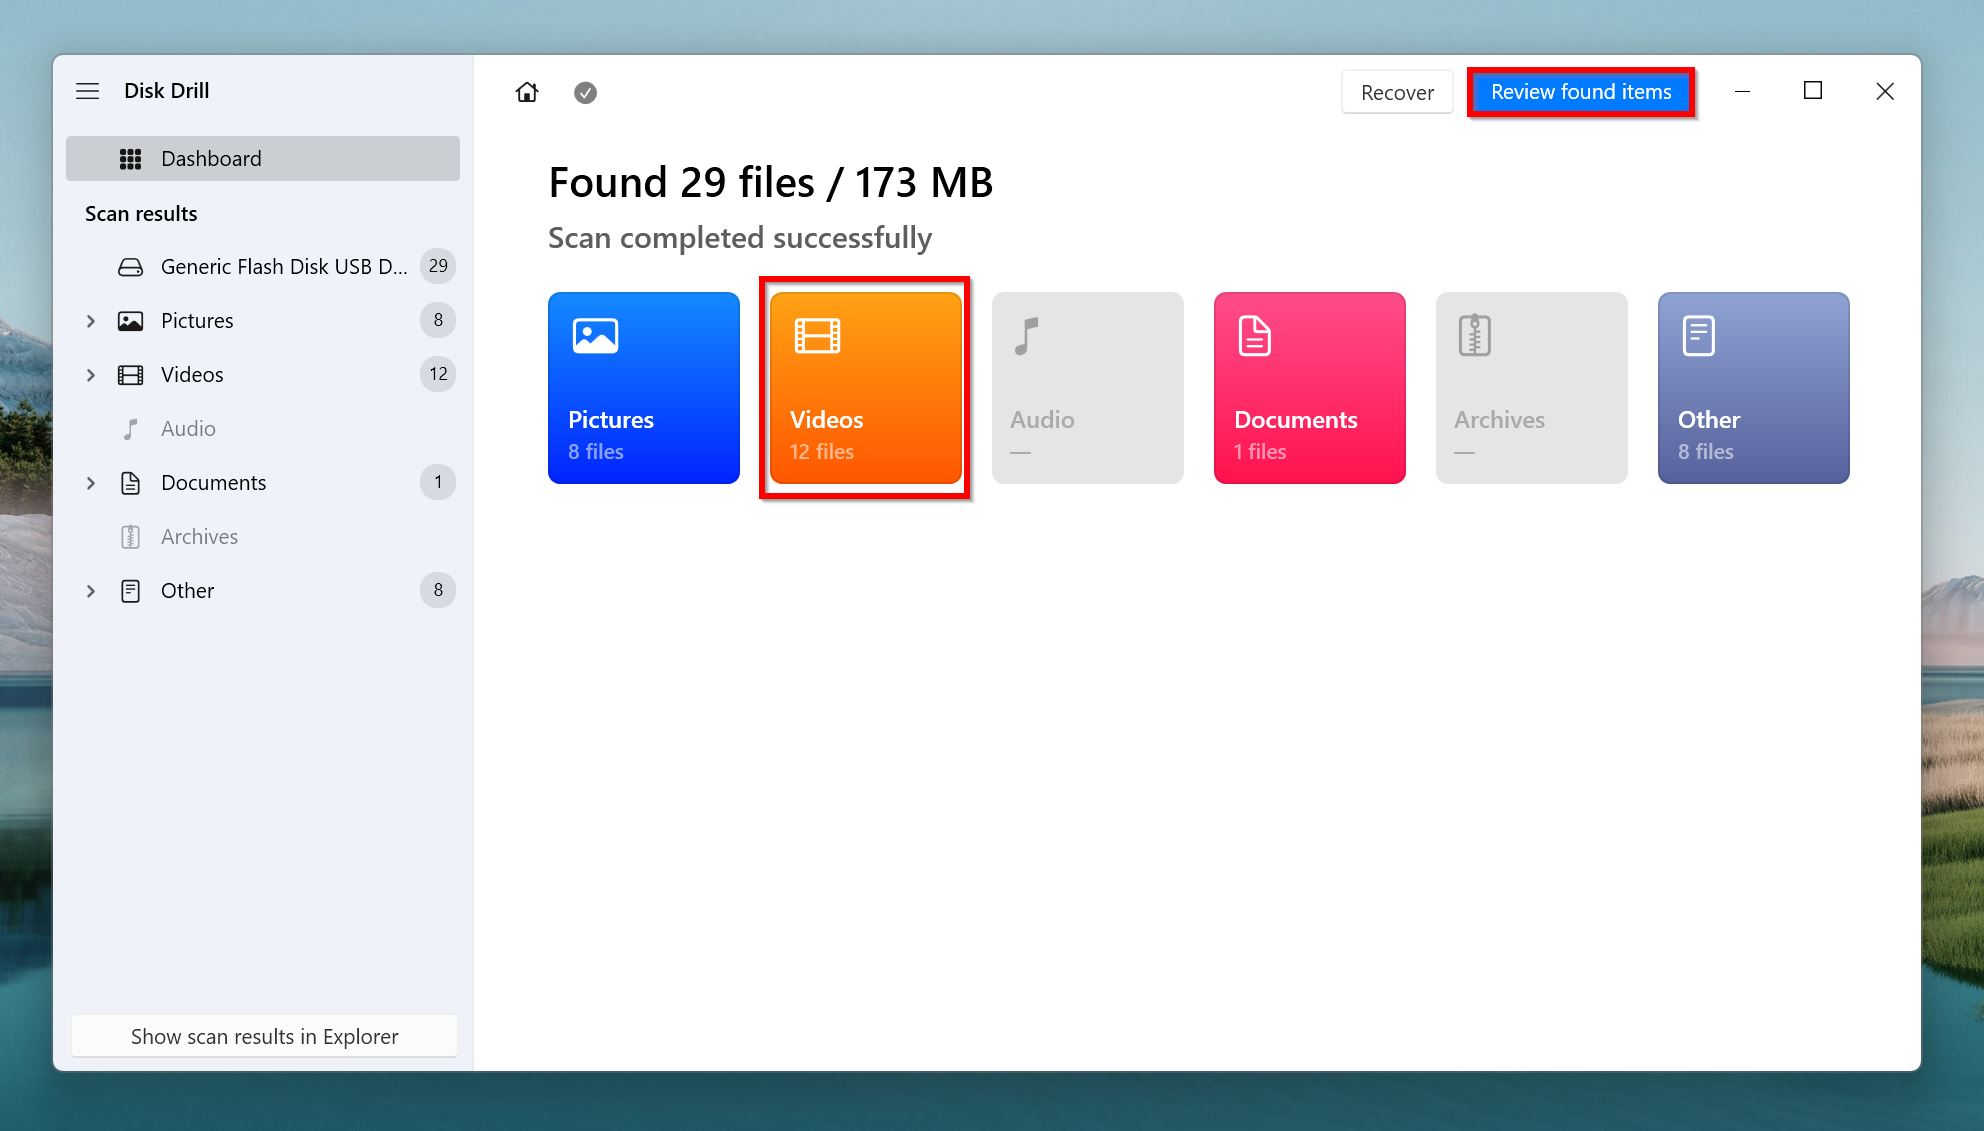
- Once the scan completes, click on the Videos tile to filter out the results to display only videos. If you wish to see all file types (useful when recovering RAW videos), click on the Review found items button.
- Select the videos you wish to recover. Disk Drill automatically displays a preview of the currently selected video, but you can manually preview any video by clicking the eye icon that appears when you hover the cursor next to its filename. Click Recover once you’ve selected all the videos you wish to recover.
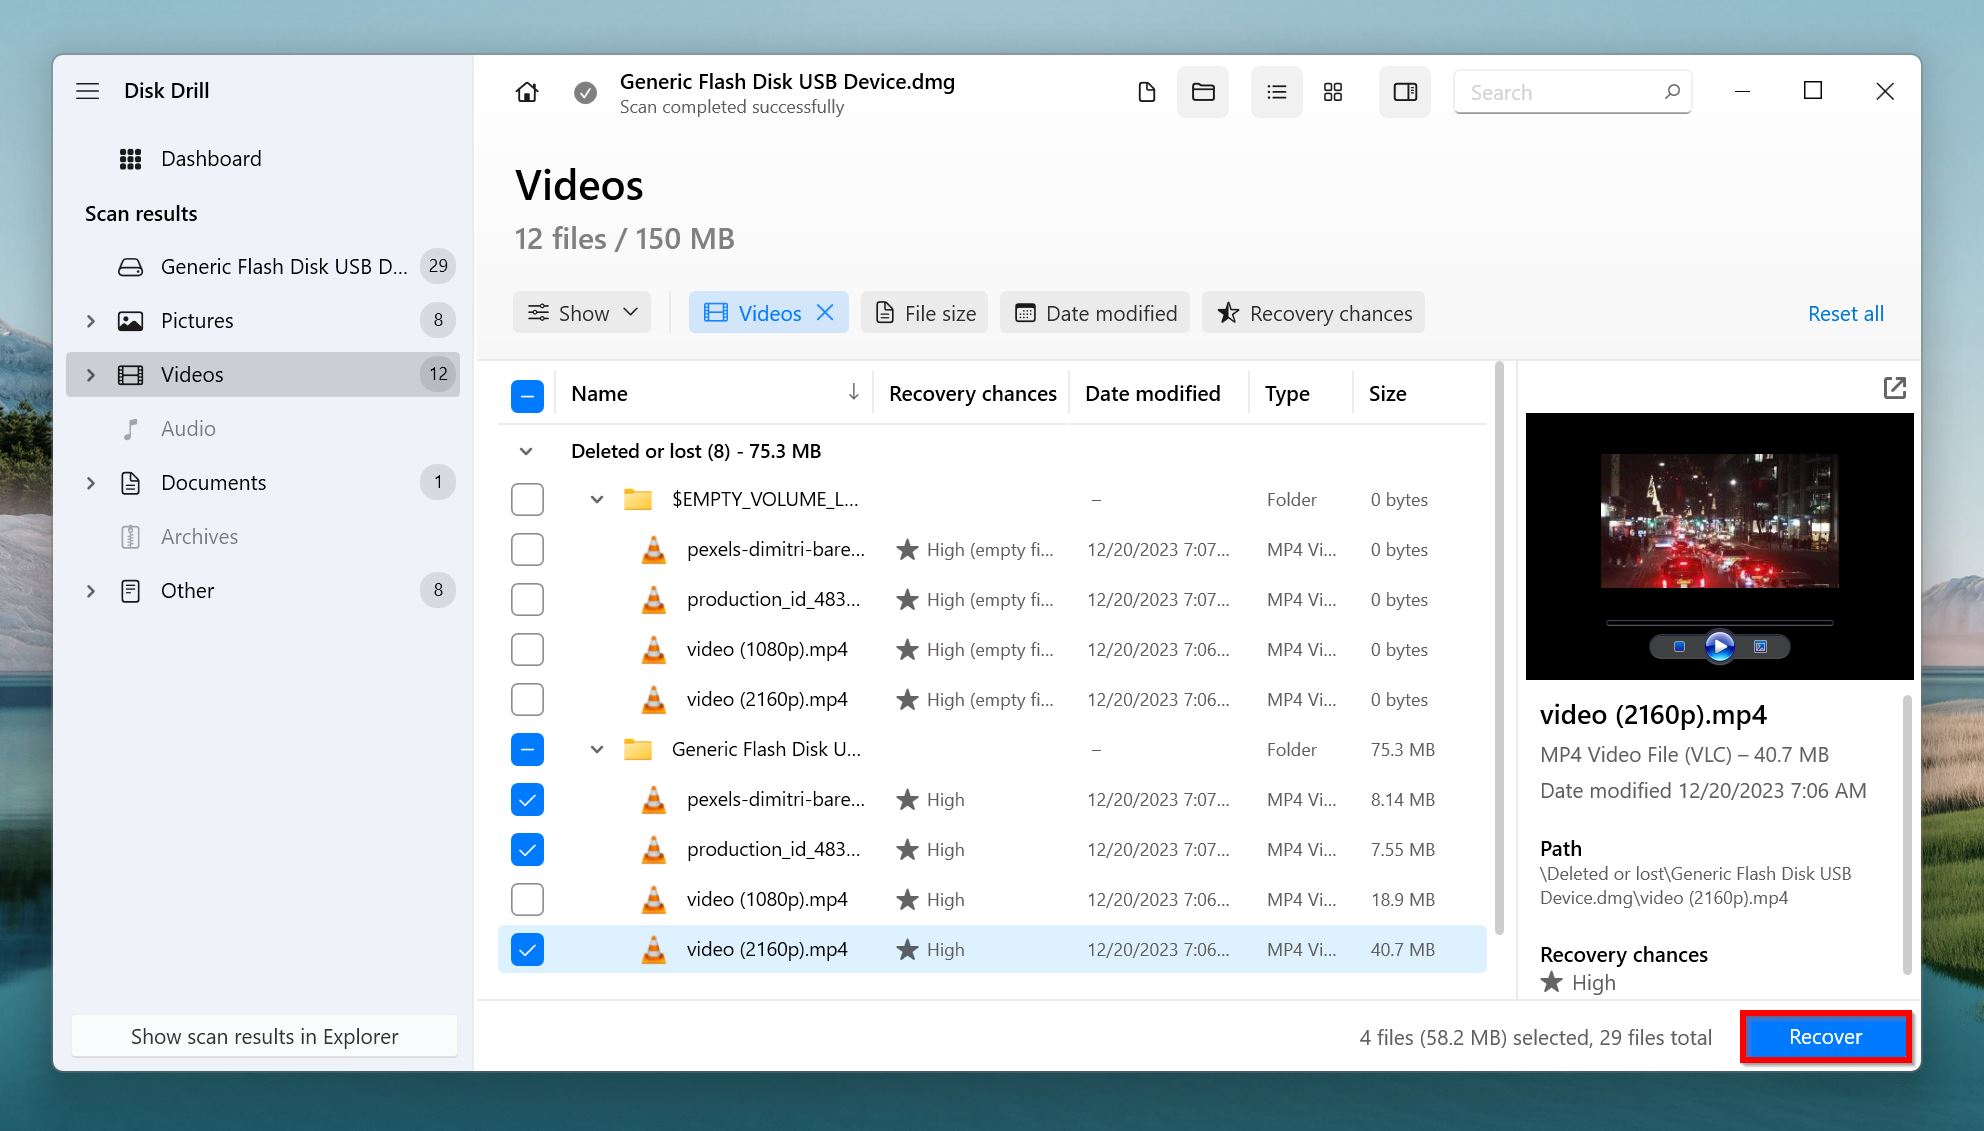
- Choose a recovery destination for the videos. We suggest saving these videos to a storage drive except the one that contained the videos originally. This prevents overwriting of deleted videos that you may wish to recover later. Click Next.
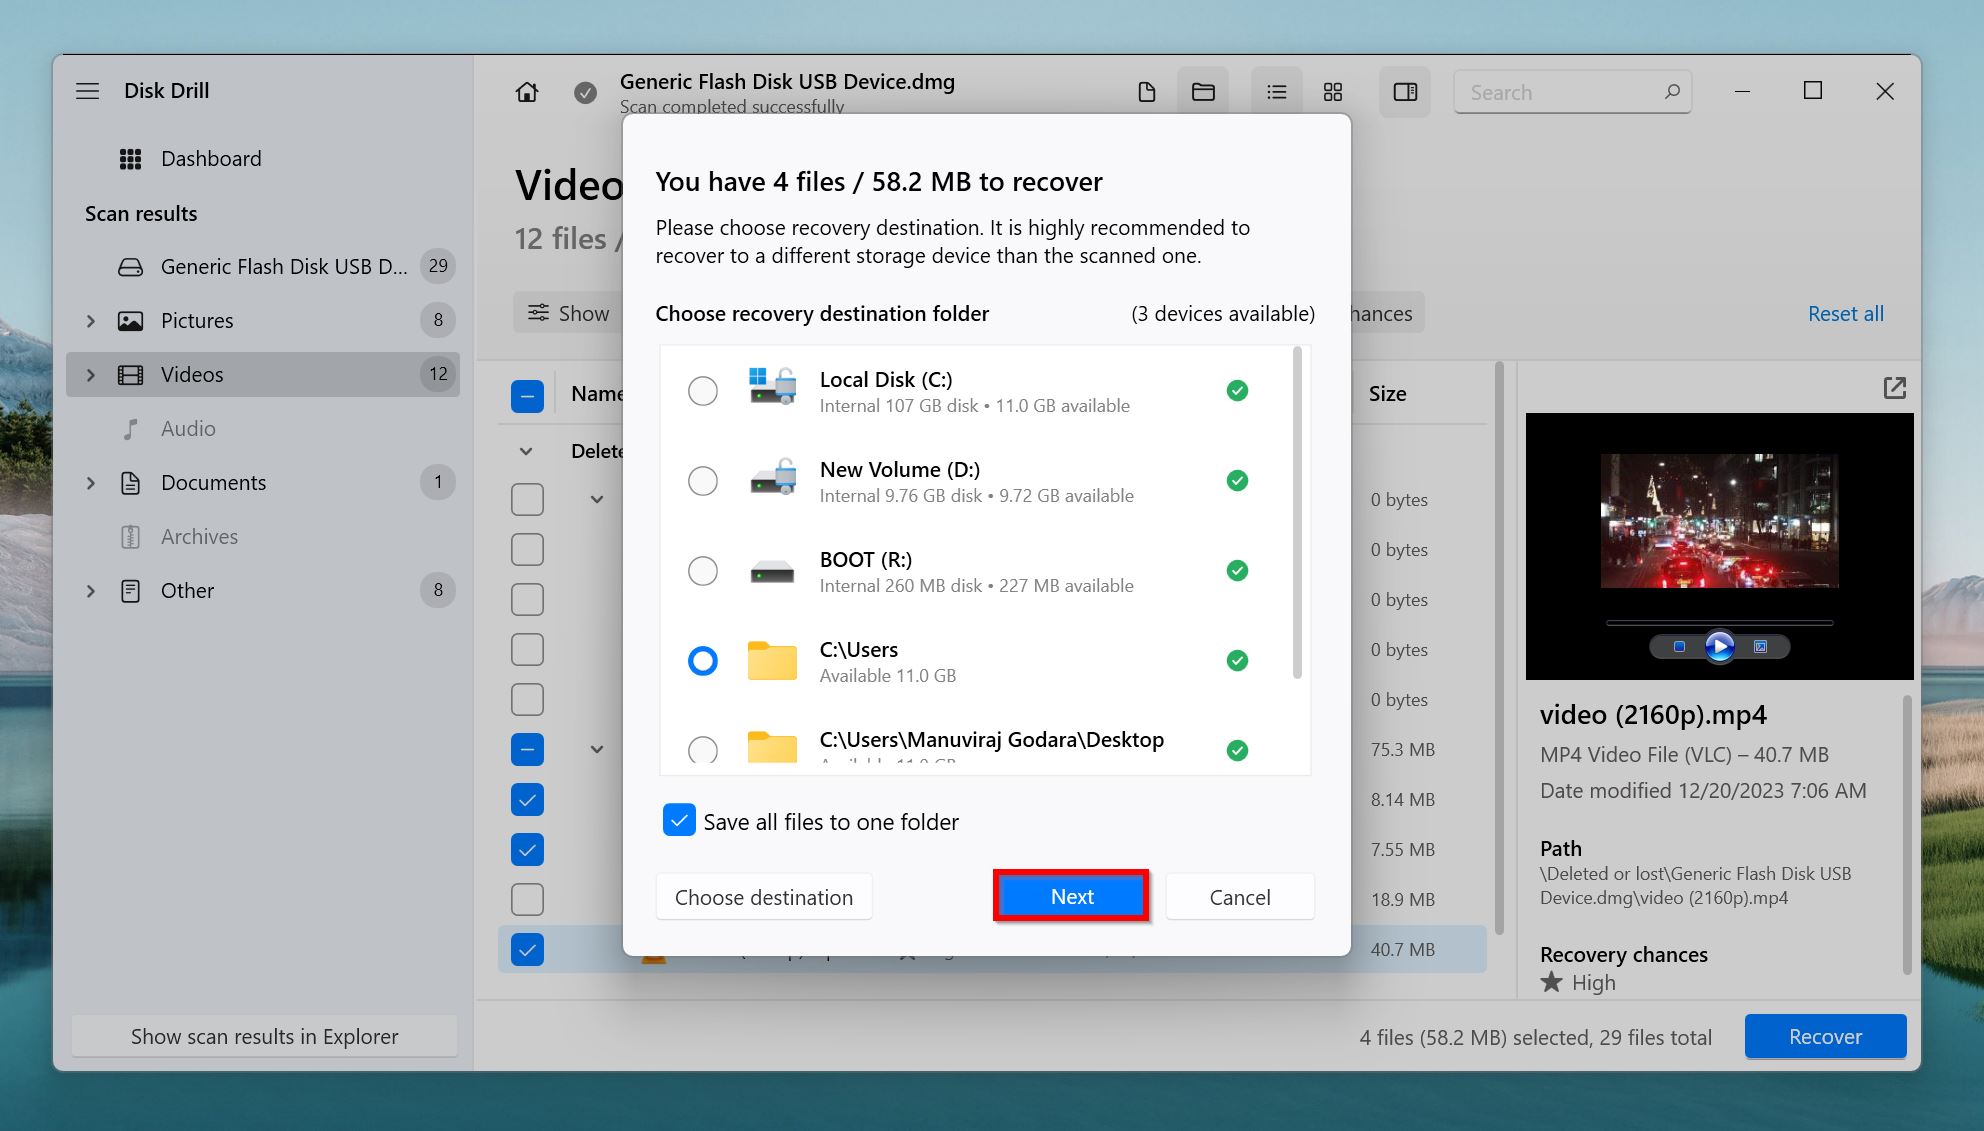
- Disk Drill will recover the selected videos.
Method 2: Restore from File History Backup
Windows has a feature called File History that automatically backs up versions of a file. However, for this method to work, the File History backup option should already be set up on your PC. Assuming that it is, here is the deleted video recovery process using File History:
- Search for File History in the Start Menu and select the Best match.
- Click on Restore personal files from the options at the left.
- You’ll see a list of folders that are being backed up. Navigate to the file location you want to recover the video file from.
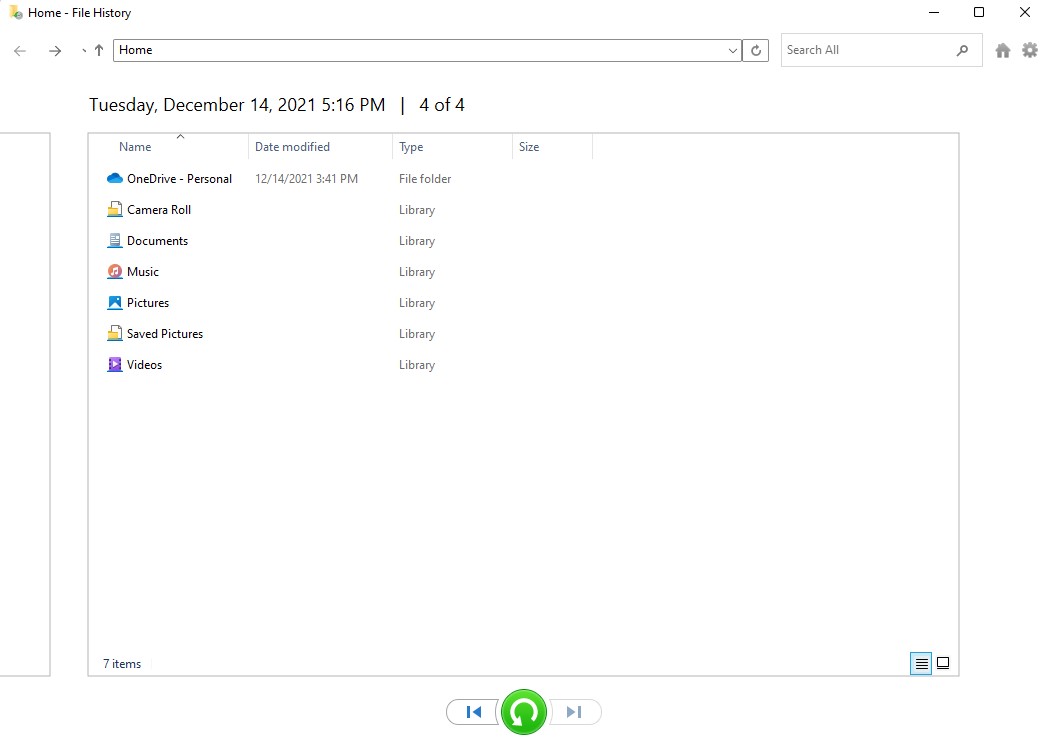
- Select the video file (or the entire folder) you want to recover and click the green recover button at the bottom.
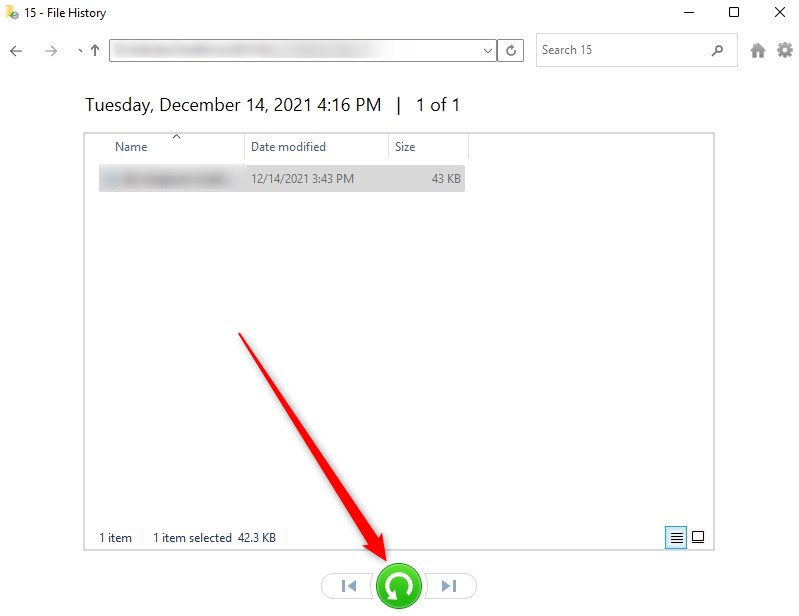
The video files will be recovered in their original location. Remember that the recovered video file may not be the latest version so if you performed any edits recently, those might be lost.
Method 3: Restore Video Files from Backup
If you periodically back up your files, you might be able to retrieve deleted videos just by copying and pasting them back into your computer. For example, if you’ve backed up your files on an external hard disk, just plug it in and copy the video files back into your PC. Alternatively, if you backup your data on a cloud storage service like Google Drive, you can download the files into your PC by right-clicking on the file and selecting Download.
Note: If you use OneDrive, you should know that OneDrive does not backup your data. It simply syncs your data to the cloud so it’s available across devices. If you delete a video from your PC, it will also be deleted from your OneDrive account and won’t be recoverable.
Top 4 Video Recovery Apps
There are numerous data recovery apps on the web, all claiming to be excellent at video recovery. Most of them aren’t worth your time and money. In fact, using an untrustworthy app can do more harm than good. To avoid this, here are the top 4 video recovery apps you can pick from, depending on your needs :
1. Disk Drill (Windows, and macOS)
Disk Drill perfectly balances cutting-edge functionality and ease of use. It supports 44 video formats including popular ones like MP4, MKV, AVI, MOV, and FLV, making it ideal for almost all video loss scenarios. The program can recover data from file systems like NTFS, APFS, FAT 16/32, exFAT, and more. It can even recover data from drives with a damaged, or missing file system, i.e., RAW drives.
The file preview feature in Disk Drill makes your life much easier when selecting which videos you want to recover. Additional features include S.M.A.R.T. disk monitoring, a Recovery Vault for protection against data loss, and disk imaging and scanning.
Disk Drill is an excellent choice for novice, and advanced users looking to recover videos without fuss.
Price: The free trial lets you recover up to 500 MB of data. Beyond that, you need a paid license that costs $89 for lifetime validity.
2. R-Studio (Windows, macOS, and Linux)
If you’re an expert user, you can do no better than R-Studio when it comes to video recovery. It supports more than 40 video formats ranging from common ones like AVI, MP4, MKV, and FLV, to proprietary RAW formats used in Sony cameras.
Thanks to its file-carving feature, you can recover fragmented parts of videos from your storage drive. This can be a lifesaver when dealing with large 4K or 8K videos. Other features include a hex editor, disk imaging, and data recovery over a network.
R-Studio is filled to the brim with features, but most can only be used by advanced users who know what they’re doing.
Price: $79.99.
3. Stellar Data Recovery (Windows, and macOS)
Stellar Data Recovery’s primary strength is its in-built video repair feature, which can prove useful when your recovered videos have choppy playback and other related issues. It supports 25 unique video formats, much less than its competition. However, popular formats like MP4, MOV, AVI, and 3GP are covered. Notably, support for FLV files is absent. In addition to drives with recognized file systems, Stellar Data Recovery also supports data recovery from RAW drives.
The smooth, user-friendly UI is a high point. You can filter out the results by size, type, date created, and more. It can also monitor your drives and notify you if they’re at risk for data loss.
Stellar Data Recovery is a good option for novice users who prefer its cleaner UI, and 24/7 customer support, over its competitors.
Price: A free trial that lets you recover up to 1 GB of data. Further data recovery requires a paid plan, starting at $59.99 for a 1-year license.
4. Windows File Recovery (Windows)
For users looking for a completely free option for basic video recovery, Windows File Recovery is a good choice. It does lack a GUI, and support for non-Windows file systems. However, it can recover popular video formats like MP4, AVI, and MOV in a few steps. There is a learning curve to the tool, so it’s best to consult its support page before diving in.
We suggest using Windows File Recovery if you’re looking for a free, lightweight, command-line-based, bare-bones video recovery tool.
Price: Free.
Protecting Against Video Loss on Your Computer
If you consider your videos to be important you will want to take measures to protect them. As described above, there are many ways that you can accidentally lose your videos. Here are some tips to help guard against their permanent loss.
- Keep multiple copies – It makes sense to have more than one copy of videos that are exceptionally important to you. Don’t keep all of your valuable memories on a single SD card or hard drive. Compared to the emotional cost of losing the videos, the price of some additional storage is negligible.
- Backup your videos – You might not think of backing up videos that are on SD cards or that reside on a mobile device. Think again. Take advantage of cloud storage or external storage devices and back them up. Think of it as insurance for those important videos.
- Protect your devices – Keep the devices that contain your videos and other important data away from conditions that may cause damage and data loss. Stay away from water and high temperatures. Avoid leaving computers and devices in parked cars or in direct sunlight.
")


