
Some users may see the word formatting as an intimidating technical term. In reality, formatting is simply a method of preparing a storage device, in our case an SD card, for use with a digital camera, mobile device, or computer. It’s a necessary step in making a storage device available for storing data.
Can a Formatted SD Card be Recovered?
So, you’ve accidentally formatted your SD card and are now panicking, wondering if any data can be recovered from the tiny but critically important storage device. Fortunately for you, the answer is often yes—you can recover data from a formatted SD card.
When you format an SD card, what you’re essentially doing is wiping the table of contents—the file system that keeps track of where each file is stored. The data itself is still there; your computer or device just doesn’t know how to find it anymore. In fact, your computer or device thinks the storage space is now empty and available for new data.
This is where the risk of overwriting comes into play. When you add new files to the card, the device sees the sectors where your old data is still physically located as “free space,” and could write the new data right over the old. Once that happens, recovery becomes much more difficult, if not impossible.
To increase your chance of success when recovering files from an SD card, you should:
- ⛔ Stop using the SD card as soon as it is formatted if you intend to attempt data recovery. If you have accidentally formatted an SD card, there is a very good chance that you can get all or most of the data back if you act quickly.
- 📥 Remove the card from its device until you are ready to perform the data recovery.
Let’s look at some methods that you can use to recover data from a formatted SD card.
3 Methods to Recover Files from a Formatted SD Card
So, you’ve grasped the urgency of the situation and pulled that SD card out of your device—be it a mobile phone that carries your life in photos, or a camera packed with memories of that once-in-a-lifetime trip. Now what? It’s time to roll up your sleeves and start the actual recovery process. In the following section, we’ll guide you through three proven methods to salvage your precious data from a formatted SD card.
Method 1:Recover a Formatted SD Card Using Data Recovery Software
Data recovery software is the most reliable method of recovering data from a formatted SD card because it can repair the logical links that were removed during formatting. As a result, it can make lost data accessible to the operating system and other applications again.
Our SD card recovery software of choice is Disk Drill because of its ease of use and impressive recovery capabilities. Disk Drill is available for both Windows and macOS, and it looks and works the same on both platforms, with only a few minor differences:
- Windows users get a free trial that allows them to recover up to 500MB of data.
- macOS users enjoy the convenience of scanning their SD card without even removing it from their phone.
Let’s now show you how to put the tool to good use by guiding you through its step-by-step recovery process on Windows and macOS.
How to Recover Files on a Windows Computer
Follow the steps below to recover files on Windows computers using Disk Drill data recovery software. Remember, the Windows version of Disk Drill can recover up to 500 MB of data for free, so use this opportunity to test out its capabilities and recover crucial files without spending a single dollar.
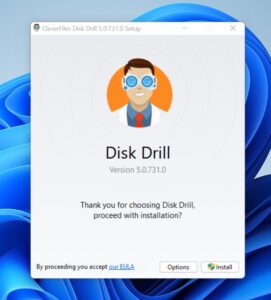
- Download and install Disk Drill for Windows on your machine. Since you are recovering data from an SD card, you can use your computer’s main hard drive for the download and installation.
- Connect the SD card to the machine through an internal or external card reader.
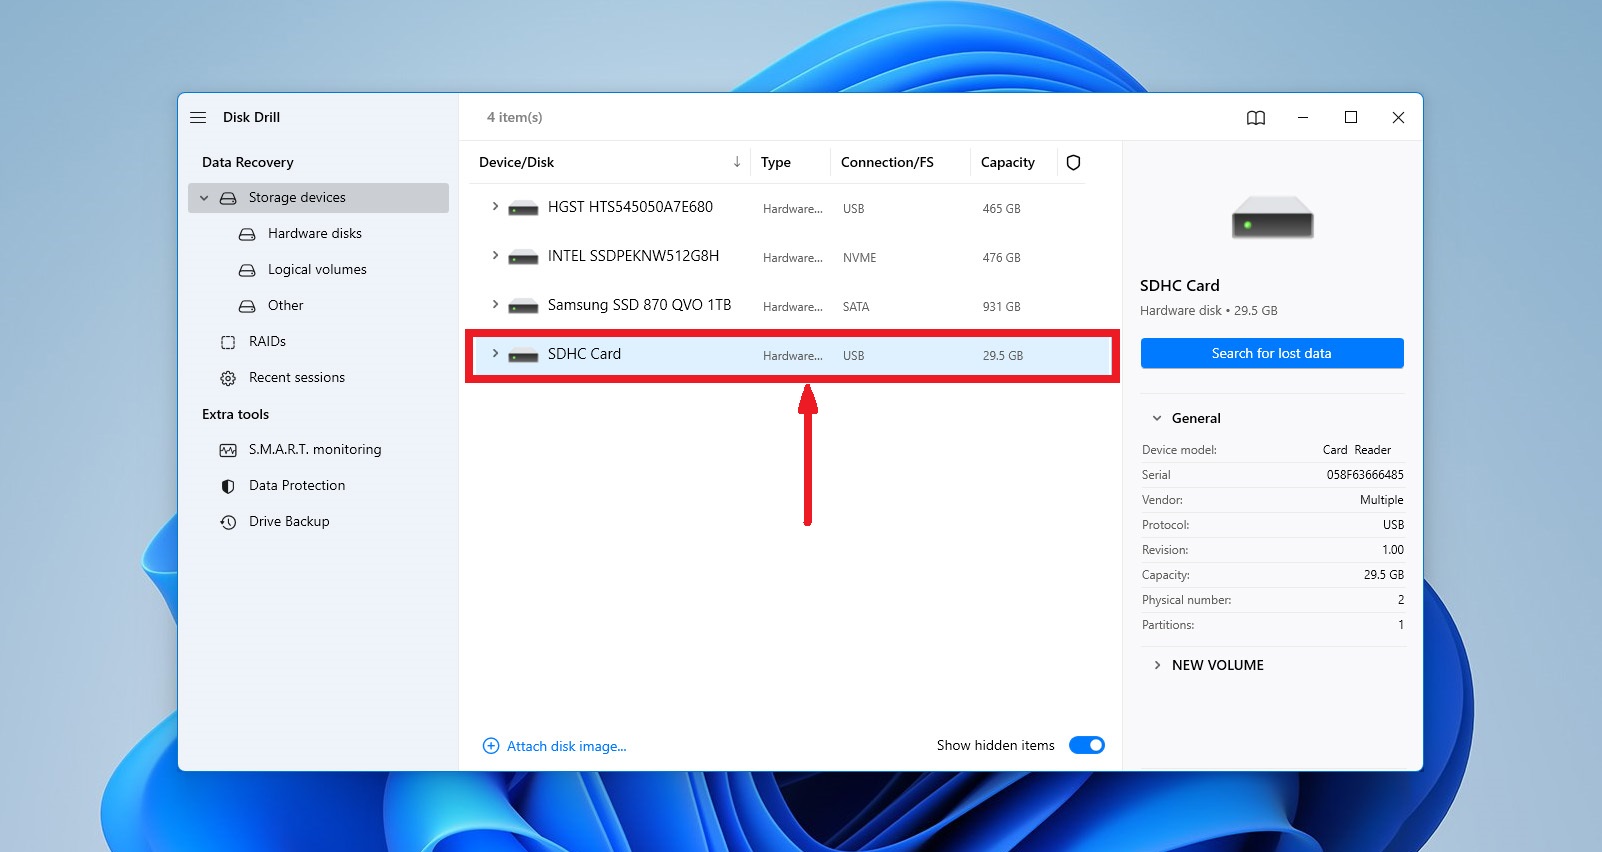
- Launch Disk Drill and choose the SD card from the app’s disk list.
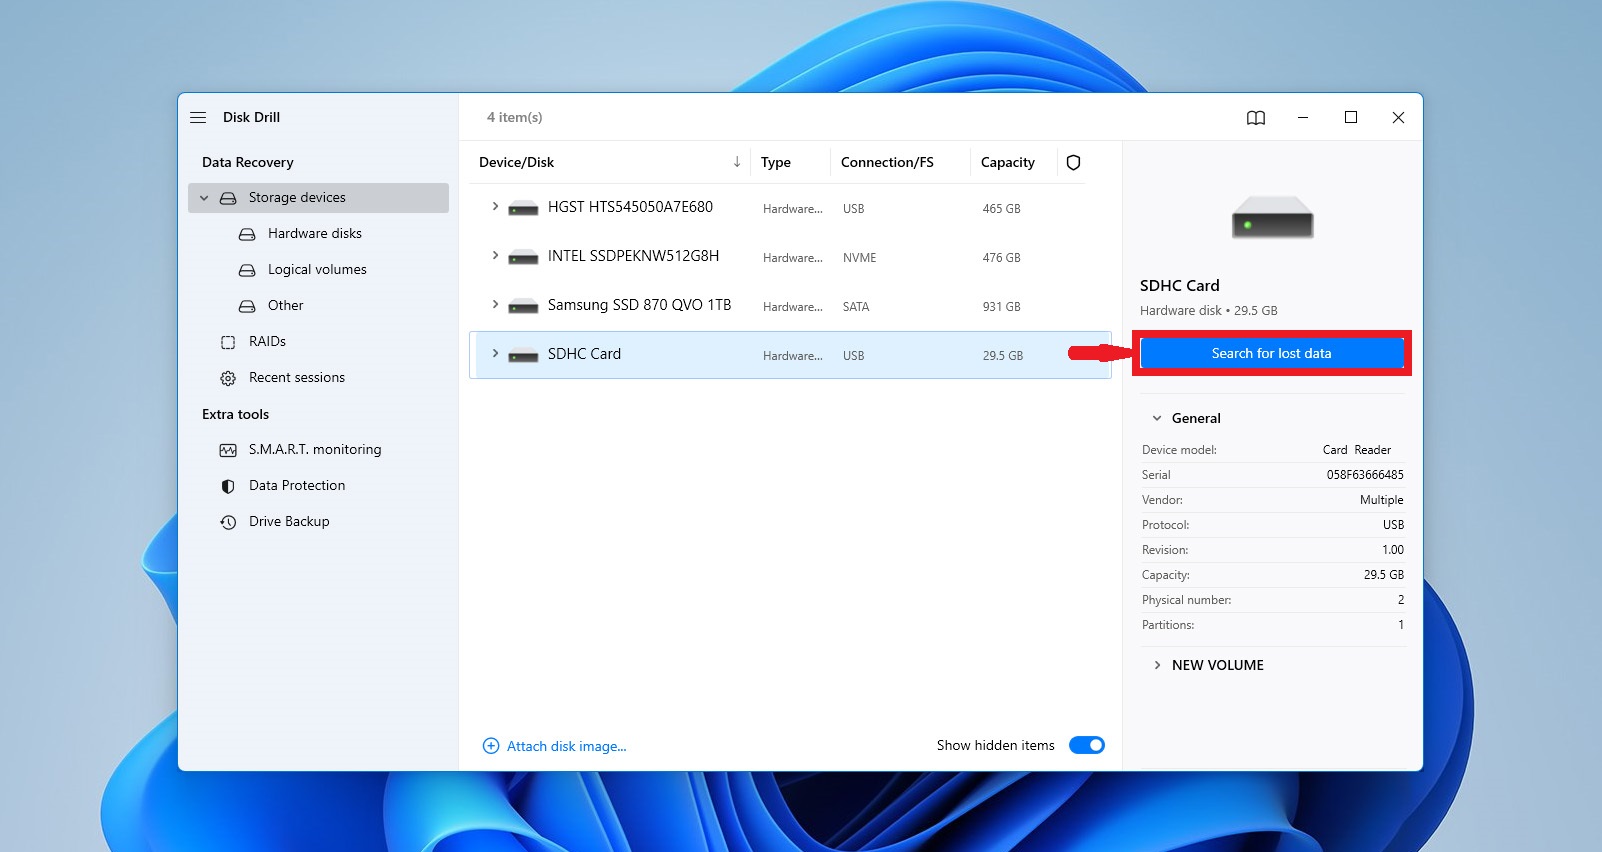
- Click the Search for lost data button to initiate the scan.
- Preview the recovered files by clicking on the icon representing the type of file you are recovering. Found files are categorized as Pictures, Video, Audio, Documents, Archives, and Other files so you can quickly navigate to the type of file in which you are interested.
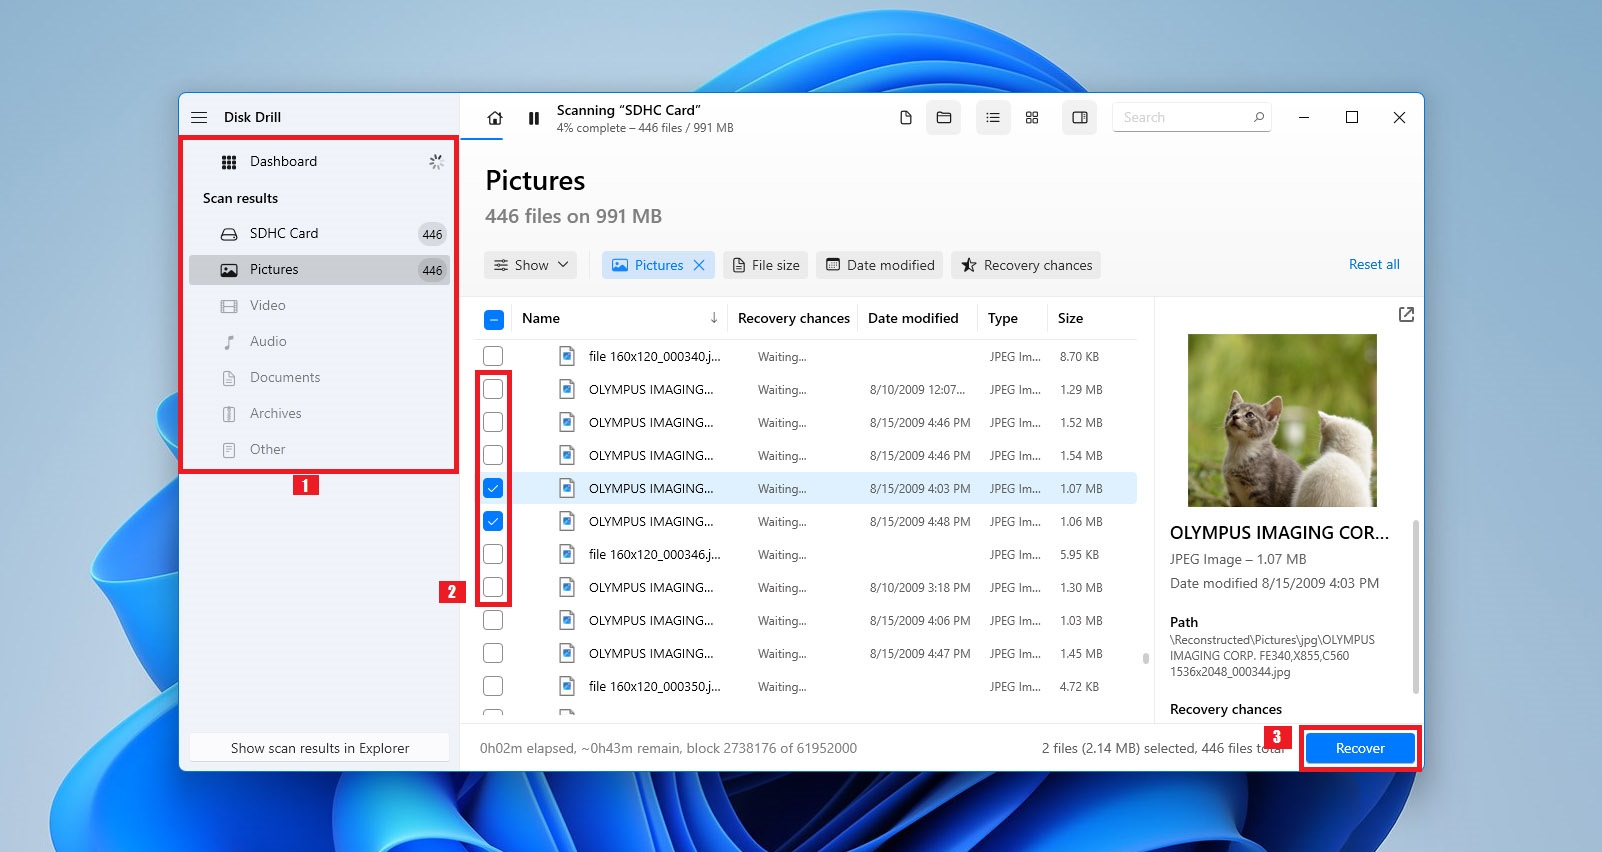
- Select the files you want to recover and choose a safe location at which to store the recovered data that is not on the affected SD card. This prevents data corruption or overwriting during the recovery process.
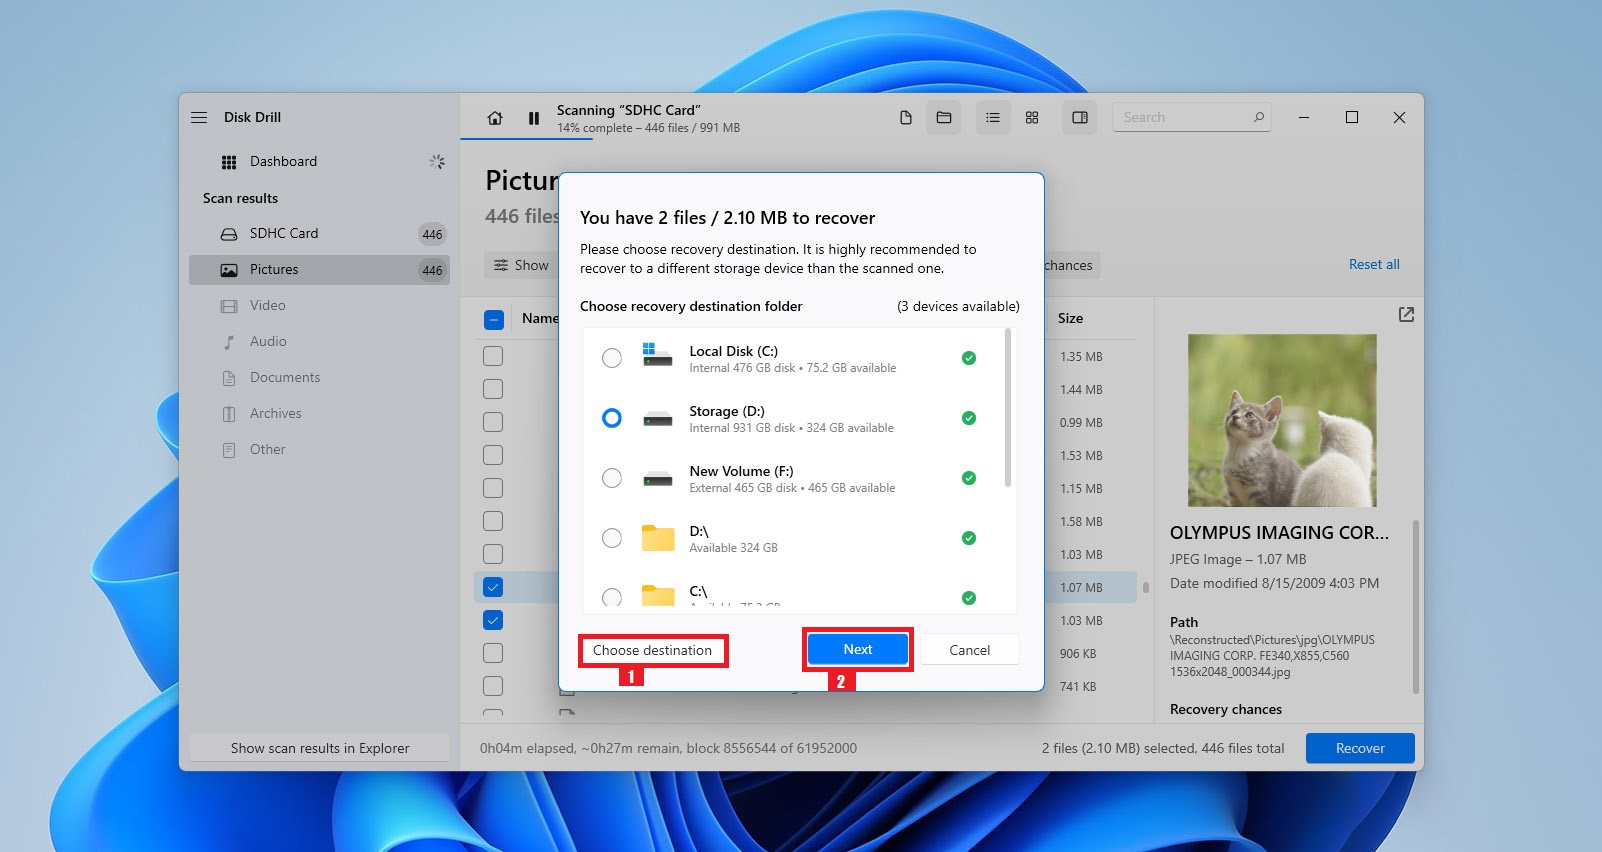
- Click the Recover button and let the software retrieve your files to the designated storage location.
How to Recover Files on a Mac Computer
One excellent feature of the Mac version of Disk Drill is its ability to scan and recover data directly from your smartphone’s SD card—no need to remove it. Here’s how to go about it with Disk Drill data recovery software on a Mac.
- Download and install Disk Drill for Mac. It’s safe to perform the download and installation on your Mac’s main disk since you are recovering data from an external storage device.
- Connect the smartphone with the SD card that has lost data to your Mac using a suitable USB cable.
- Launch Disk Drill and navigate to the Android Devices section.
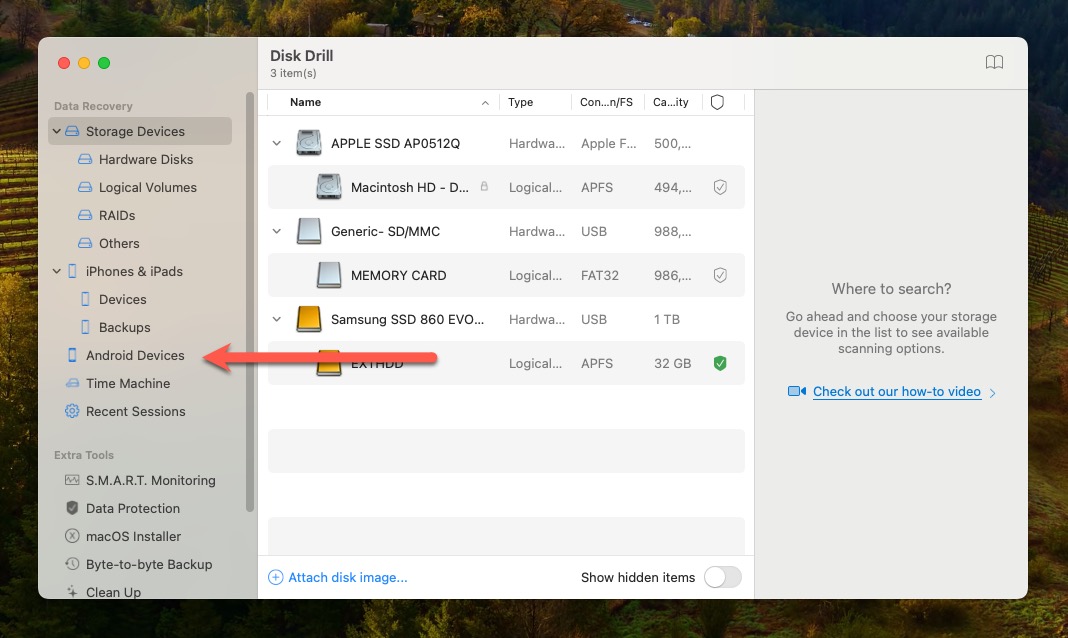
- Make sure to enable USB debugging on your Android device and allow your Mac to access it. You may be asked to root your device. This is necessary for Disk Drill to access its contents.
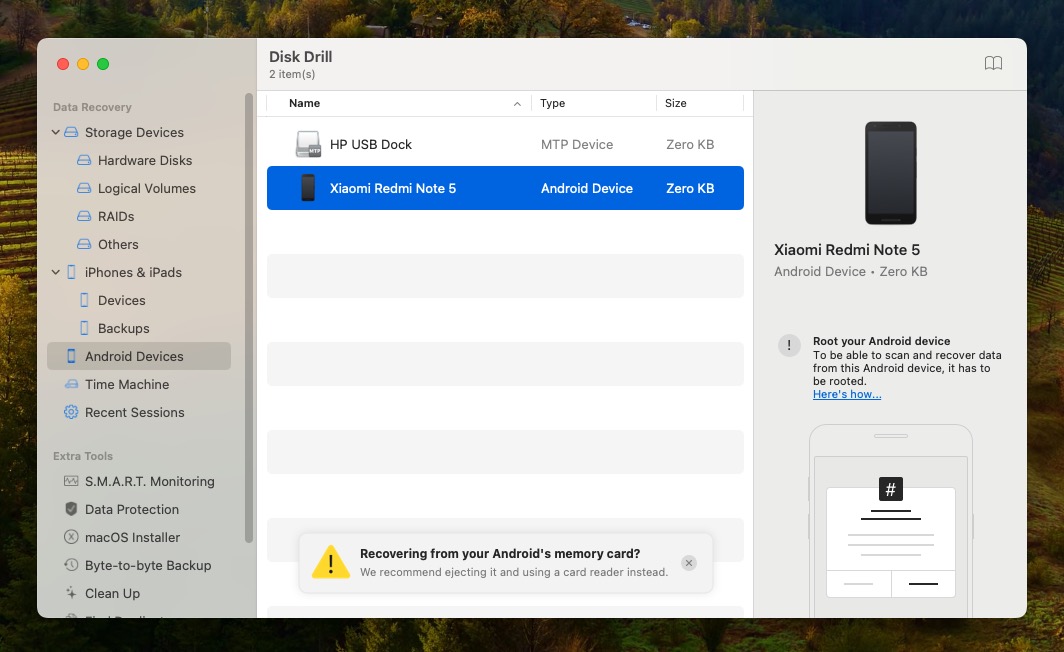
- Once your device is rooted, you can scan it just like you would a regular storage device. Then, you just need to select your lost files and recover them to a safe destination.
Method 2:Recover Data from a Formatted SD Card with the Command Line on Windows
Windows users can try to recover an SD card after a format through the command line. Use the following steps to try this method of recovering your data.
To repair an SD card using CMD you need to:
- Open a command prompt by typing cmd in the Windows search box.
- Select Run as administrator.
- Type this command:
chkdsk F: /r /x. Replace G with the drive letter of the formatted SD card.
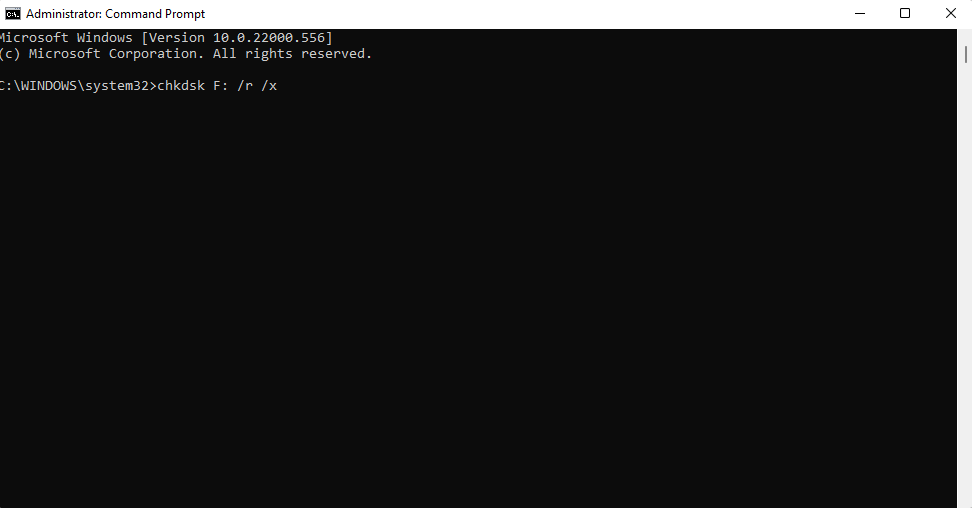
- Hit Enter and let the process complete.
Method 3:Recover Data from a Formatted SD Card Using the Terminal App on Mac
- Open the Terminal application which is located in your Mac’s Utilities folder.
- Navigate to the SD card using the
cdcommand in Terminal. - Enter this command
mv filename ../replacing filename with the name of the file you wish to recover. Then hit Return.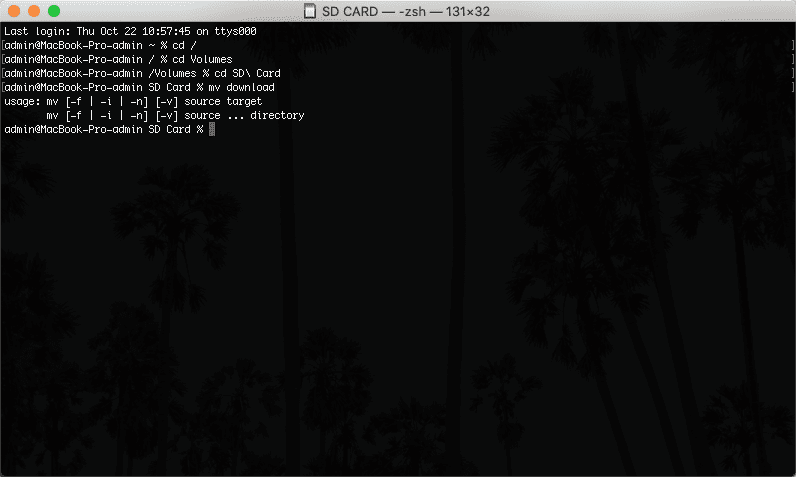
- Type
Quitto exit Terminal. - Go to the previous folder and see if your file has been restored.
To recover data from a formatted SD card on Android, we recommend a free app called DiskDigger for Android. It’ll help you to recover your data without PC.
- Download DiskDigger from the Google Play Store.
- Launch DiskDigger and choose any of the available scan options.
- Select files for recovery.
- Choose how you would like to recover the selected files.
What Happens During SD Card Formatting?
When you format an SD card, you overwrite the current file structure with a new one. The files and folders that were previously visible on the card are no longer accessible after the card is reformatted. Most operating systems and devices offer the option to perform a Quick or Full format. The one you choose will impact your ability to recover files if you have inadvertently formatted the card before saving its contents to a safe location.
- A Quick format just overlays a new filesystem on top of the data previously stored on the SD card. It does not physically erase the data but makes it available to be recovered with one of the methods we will discuss shortly. The logical links to the files and folders are removed, making the data inaccessible to the operating system, but the underlying data remains physically intact.
- A Full format takes longer to perform and does attempt to remove all data from the SD card. Depending on the operating system, this may be done by overwriting the card to obscure the data that was stored on the device. It will be harder, if not impossible, to recover lost data from an SD card that has undergone a Full format.
Conclusion
Many people assume that learning how to recover files from a formatted SD card is just as difficult as deciphering the Enigma machine. In reality, SD card file recovery has been made simple thanks to modern data recovery software solutions like Disk Drill, which presents a very accessible one-click approach to data recovery. By following the step-by-step instructions provided in this article, you should be able to get back all accidentally deleted files in no time, but you must act quickly and begin recovery before the files become overwritten.



Sd card formet ho gya h
Nice