 Having a hard time finding an important note on your Mac? Well, it’s possible that you’re either looking at the wrong place or the note is actually missing. The latter can be caused by various reasons: hardware failure, malware, power outage, or even accidental deletion. But luckily, regardless of your situation, there are a few methods that can help recover deleted notes on your Mac.
Read on to learn how to find lost notes on your Mac and ways to recover deleted ones.
Where Are Notes Usually Stored on a Mac?
Knowing where notes are stored may be incredibly helpful in case you want to manually back up the data or when you’re having trouble locating a note within the Notes application and think that the notes might’ve disappeared from your Mac.
There are two places where you can find the database of all your notes and the files used in them:
- 🖥️ Mac’s hard drive: By default, all the data from the Notes app is being saved automatically in a separate folder on the hard drive.
- ☁️ iCloud account: If you’ve synced your notes with iCloud, then you should be able to access them online through iCloud.
Try to Find Notes on a Mac
Aside from opening your notes with the Notes app on your Mac, you can also find them directly on your computer’s hard drive via Finder or through your iCloud account.
Option 1: Finder
It’s quite easy to find the notes location on your Mac. But the tricky part is reading it since it contains not just the text from your notes but also lots of other data used by the Notes application.
Here’s how to find a database file with all the notes on your Mac:
- Open Finder.
- Using the menu bar, click Go > Go to Folder.
- Copy-paste the following folder path and click Go:
~/Library/Containers/com.apple.Notes/Data/Library/Notes/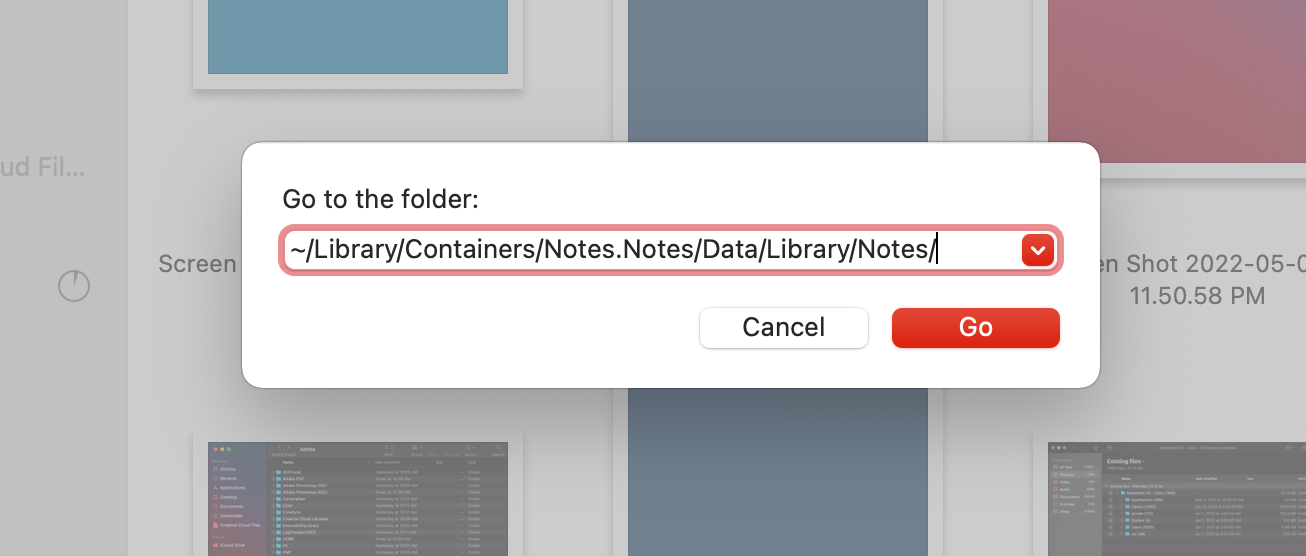
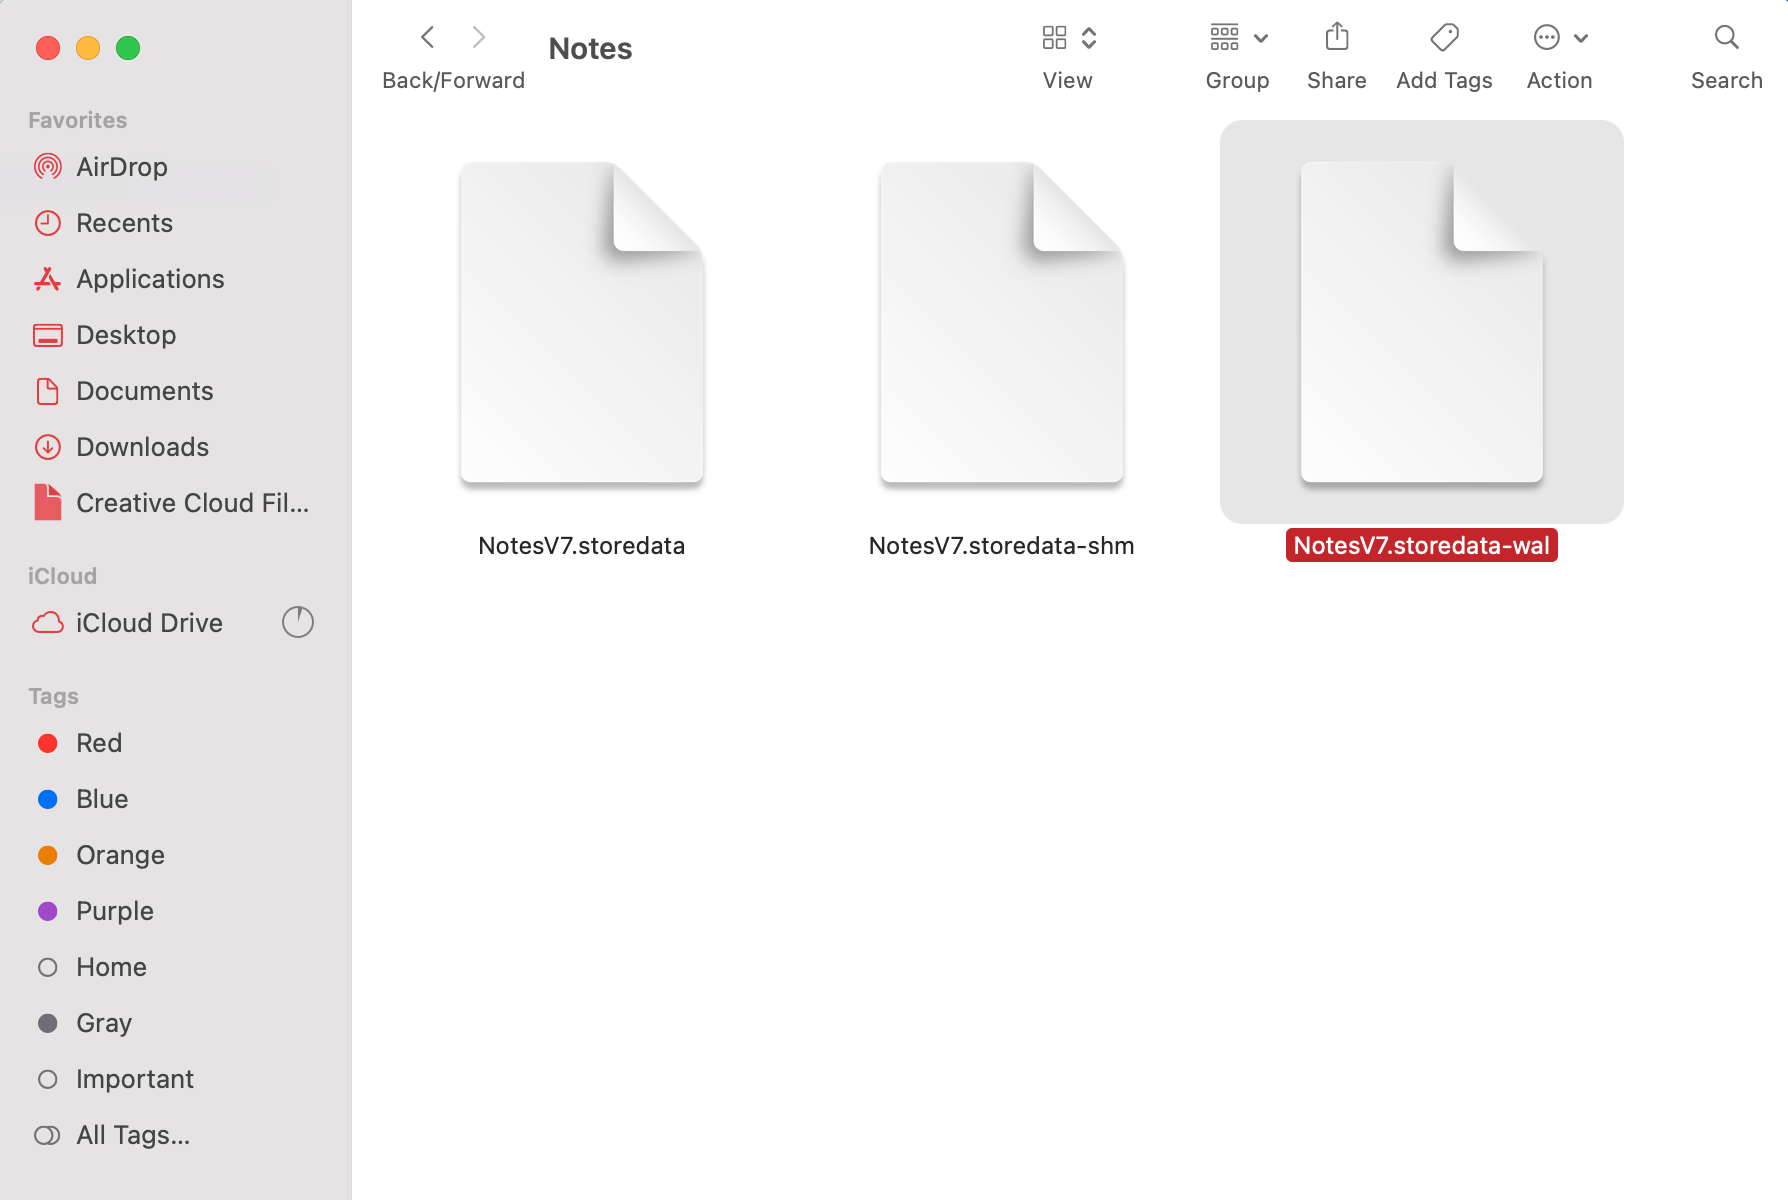
- Open the NotesV7.storedata-wal file (right-click it and choose to open with TextEdit).
Option 2:iCloud
Here’s how to access your notes via iCloud:
- Go to icloud.com and log into your account.
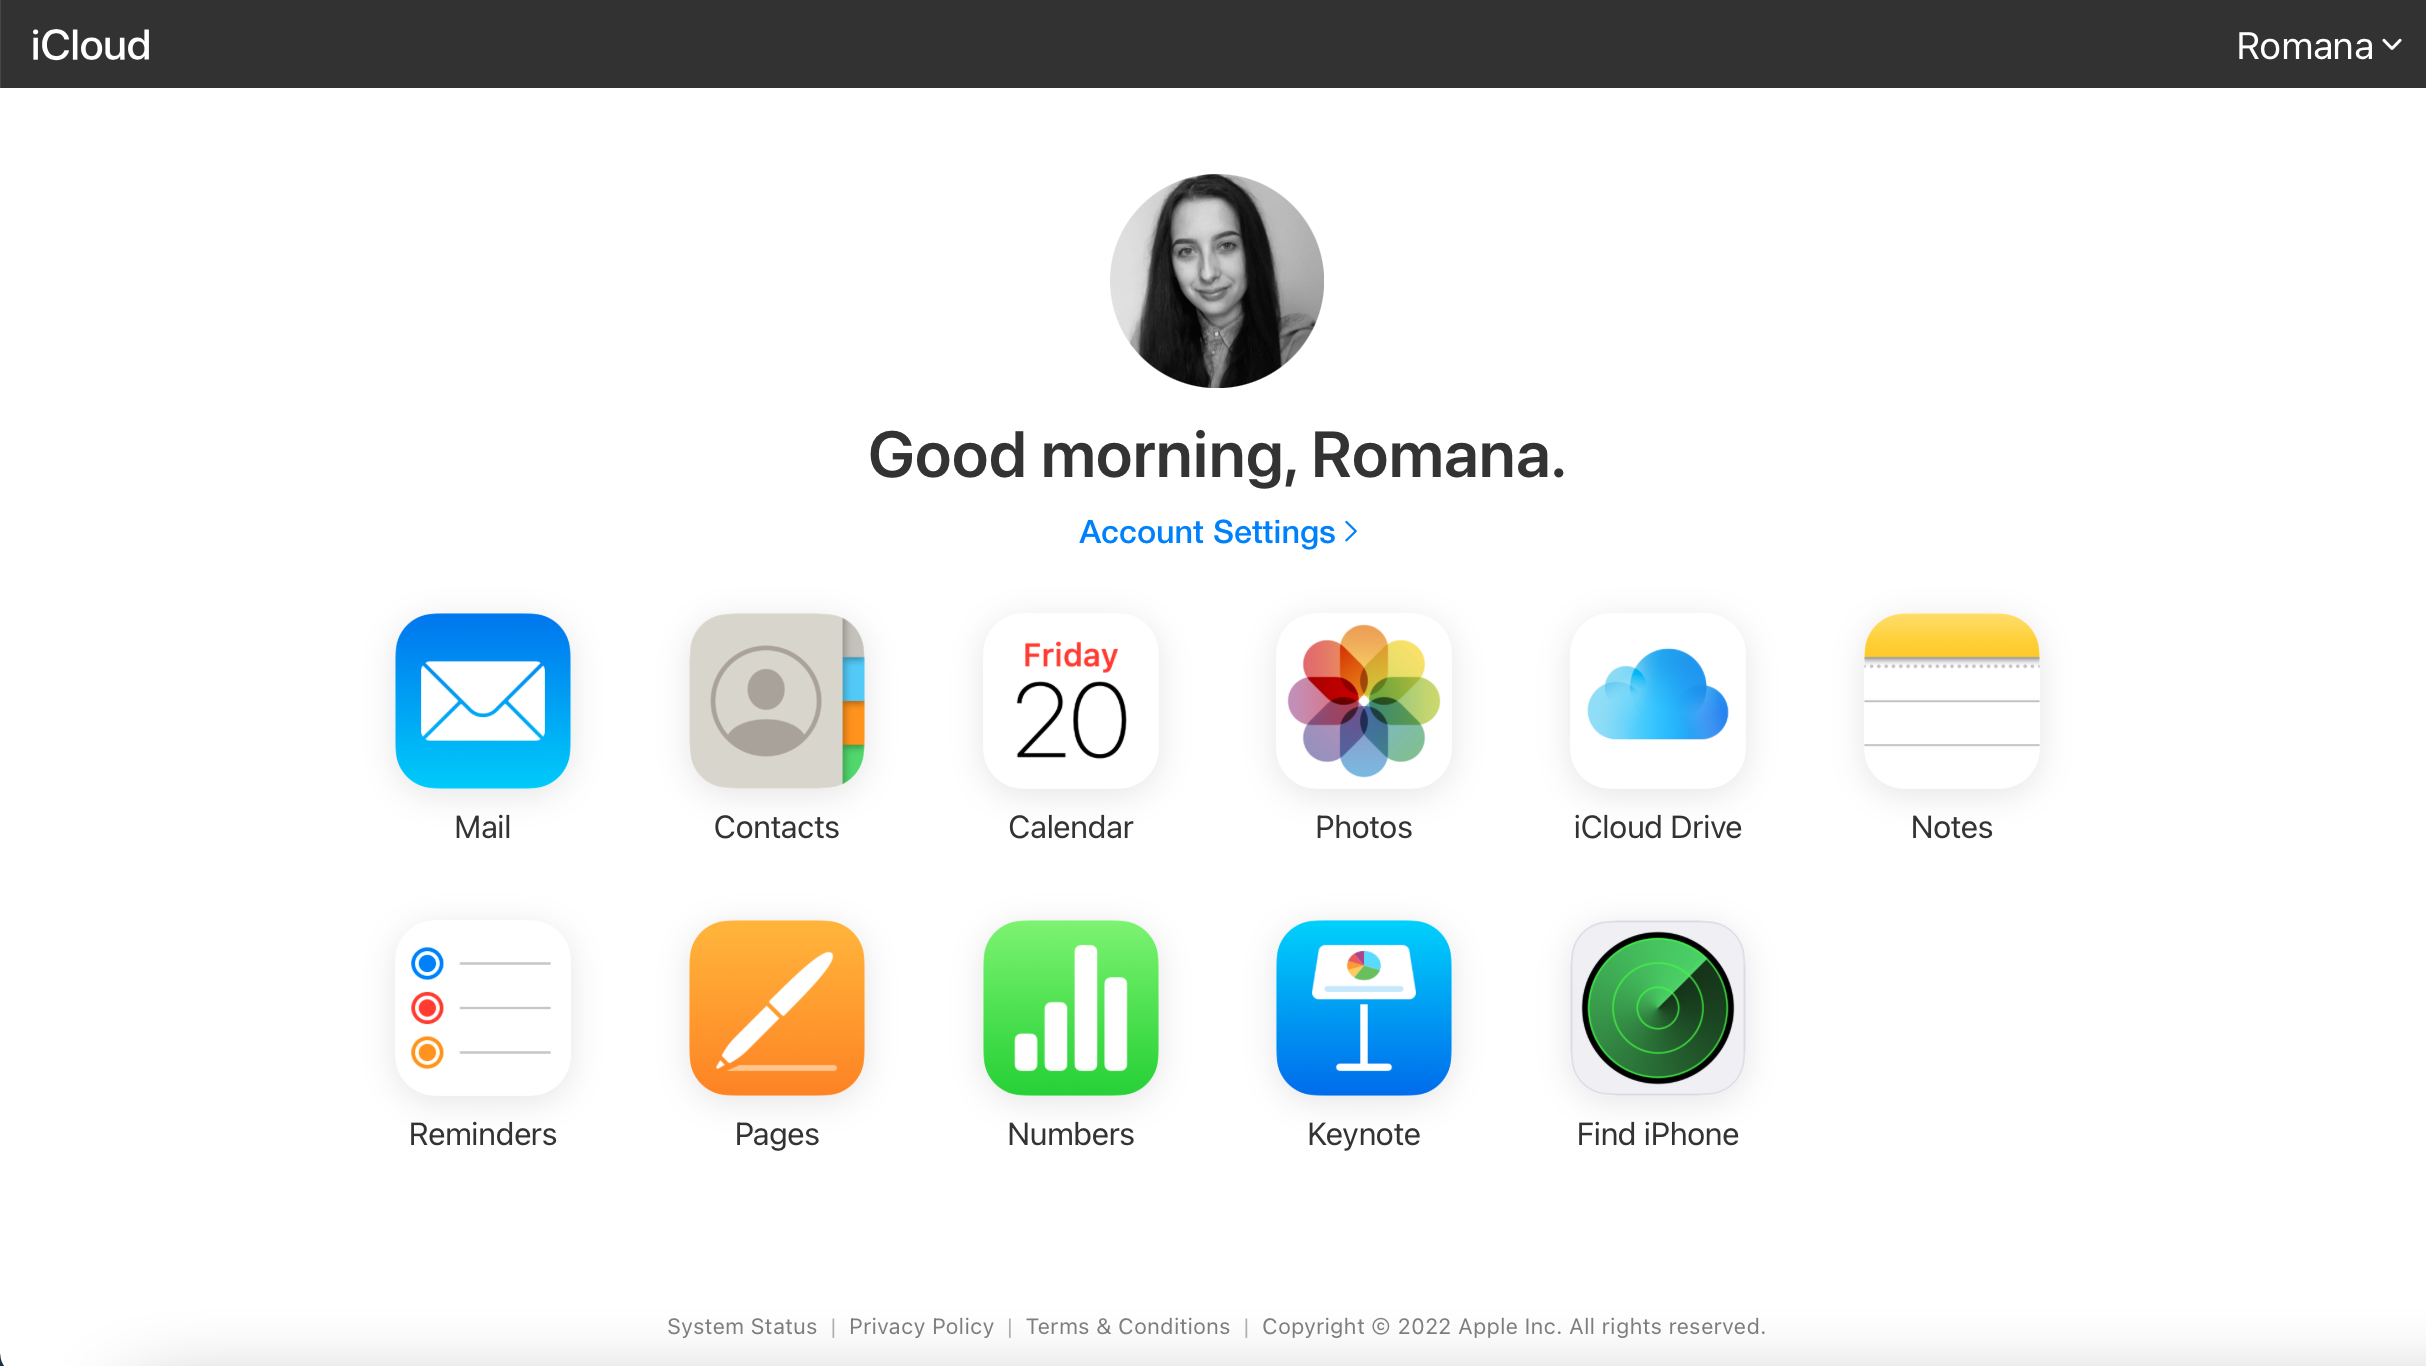
- Click Notes.
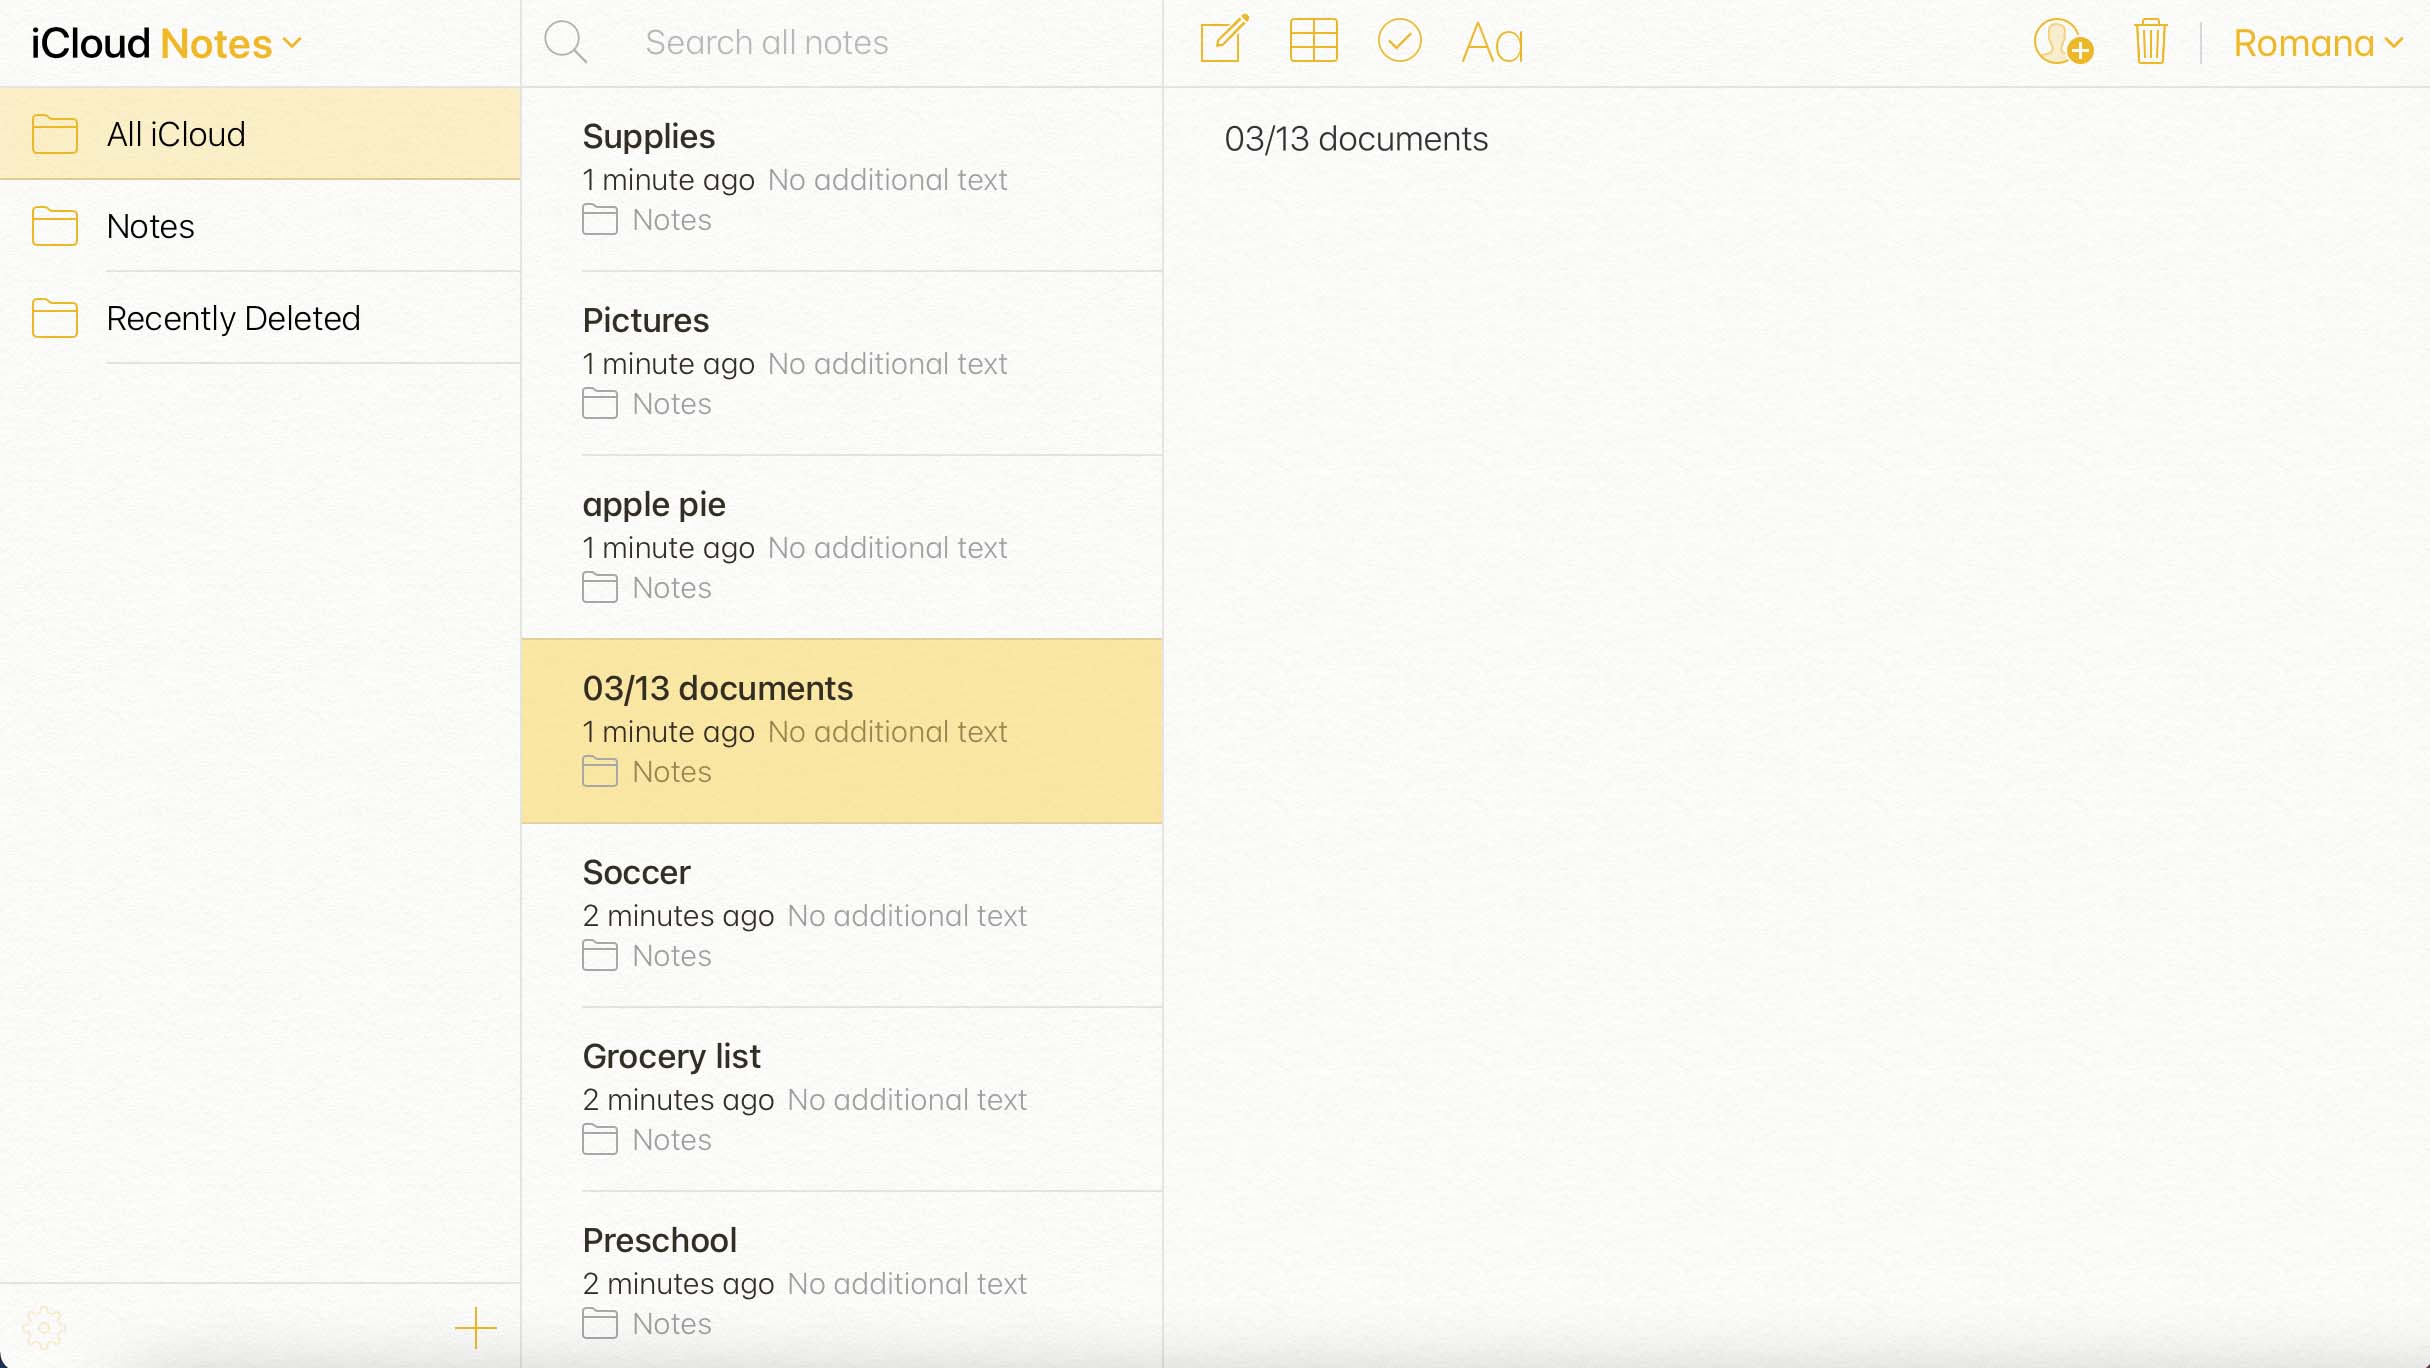
- Use the search field to find a specific note.
How to Recover Deleted Notes on a Mac
If you are certain that you’ve actually deleted a Note file and now want to restore it, these data recovery methods should help you. Simply choose a method that’s suitable for you and follow the step-by-step instructions.
Method 1:Check the Recently Deleted Folder
When you delete a note from the Notes application on your Mac, it gets instantly transferred to the Recently Deleted folder within the app. The deleted notes will stay there for 30 to 40 days. So if you’ve realized that you wish to restore a Notes file and not much time has passed since its deletion, the first thing that you should do is check this folder.
Note: If you’ve checked the Recently Deleted folder in the Notes app and the needed note wasn’t there, it means that the application has already permanently deleted the file. In this case, try to restore it using any other data recovery method described in this article.
Here’s how to find deleted notes on a Mac and recover them:
- Launch the Notes application.
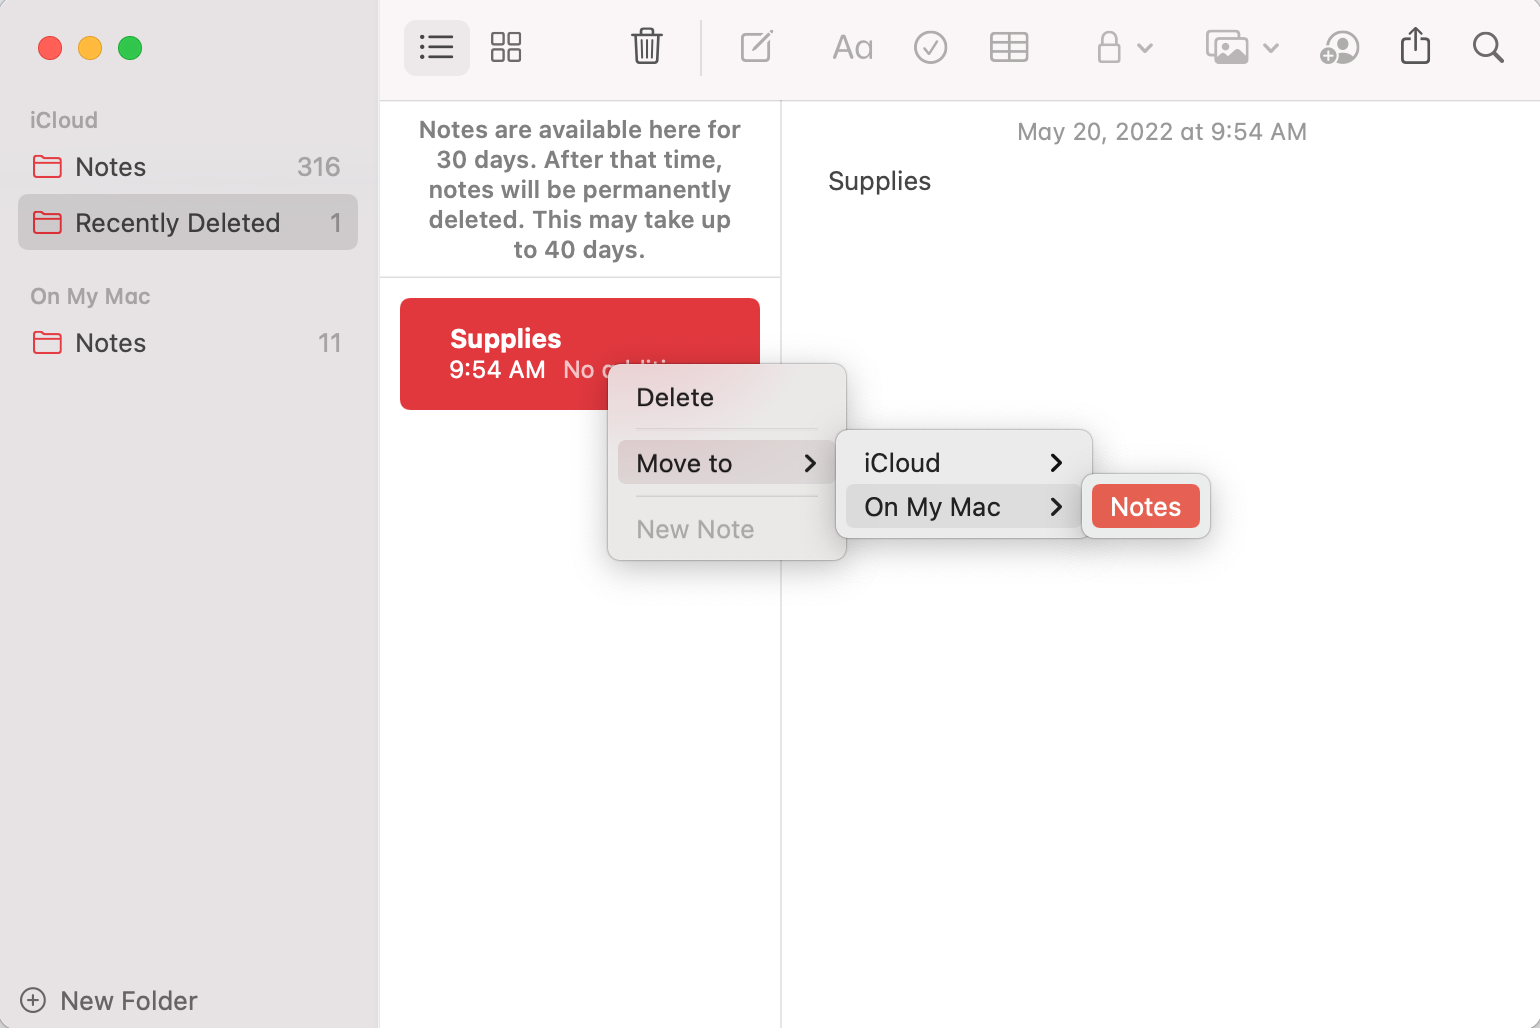
- Click the Recently Deleted tab from the sidebar on the left.
- Look through the deleted notes and click the one that you want to restore.
- Click Edit on the menu at the top of the screen and choose Undo Trash Note (or alternatively, right-click the note, choose Move to and select the desired folder).
Method 2: Use Data Recovery Software
The next solution that you can try for restoring a deleted note is to use a specialized data recovery tool. Disk Drill is a great example of such software since it’s quick, effective, and is incredibly easy to navigate. Also, this tool has a free trial version which allows you to test it out before purchasing a license.
Important: Stop using your Mac as soon as you’ve noticed that a Notes file is missing. This will prevent the computer from overwriting the deleted note with new data and increase your chances of recovering the file.
Moreover, Disk Drill is a versatile tool and can be used to recover all kinds of files: images, videos, Pages documents, Excel spreadsheets, emails, etc. And it can even help you to prevent potential data loss.
Here’s how to recover notes on a Mac using Disk Drill:
- Download Disk Drill and follow the onscreen instructions to install it on your computer.
- Launch the application.
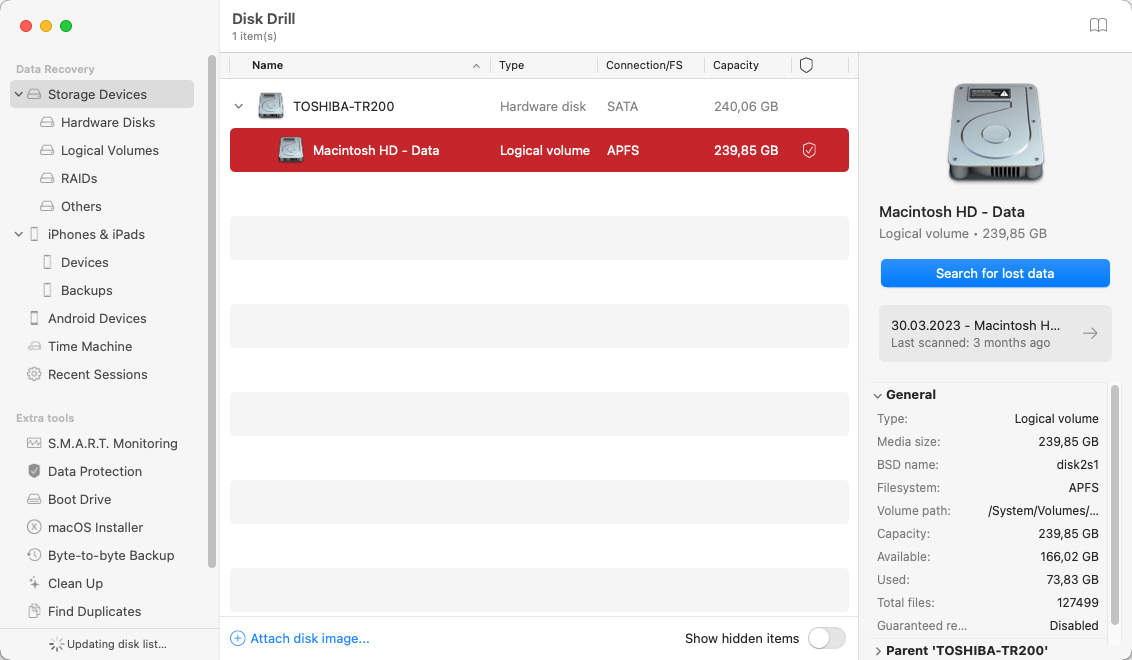
- Choose the drive where the deleted note used to be located and click the Search for lost data button.
- Once the scan is finished, click the Review found items button.
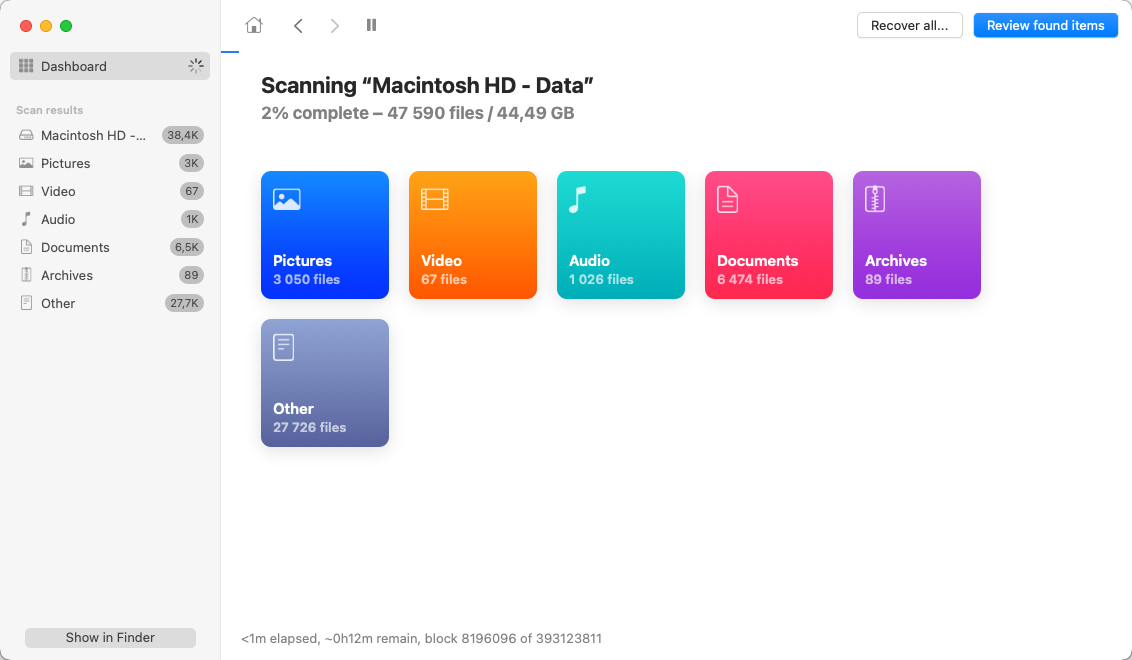
- Look through the files and click the eye icon near a file to preview it.
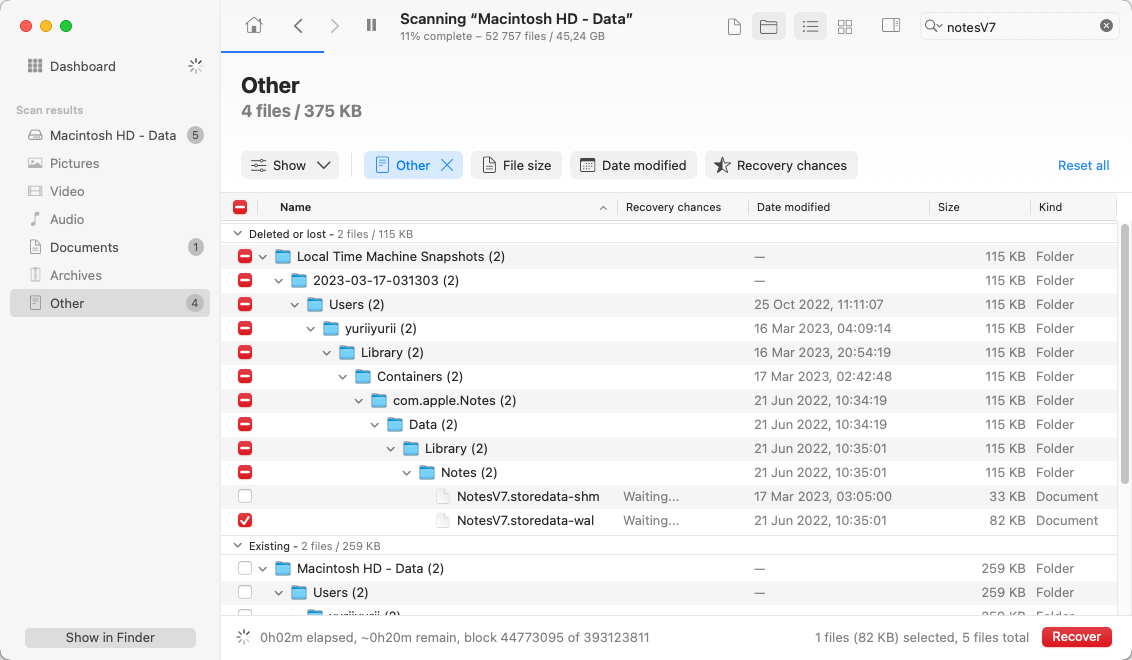
- To find the whole database with your notes, type NotesV7 in the search field at the top-right of the screen.
- Click the box near a file to select it. Then when ready, click Recover.
- Choose a preferred location for the recovered file and click Next (it’s recommended to select a folder from a different drive to avoid accidental data overwriting).
Method 3: Look Through the Temporary Files
If you don’t remember deleting a note from the Notes app on your Mac and it seems like the file simply disappeared by itself, try to search for it in the Temporary Files folder on your Mac. Since the folder is hidden on Macs, the best way to access it is through the Terminal app.
Here’s how to open the Temporary Files folder and search for a Notes file:
- Launch the Terminal app (go to Launchpad and type Terminal in the search field at the top of the screen).
- Type in the command
echo $TMPDIRand hit Return. - Then type in command
open $TMPDIRand hit Return.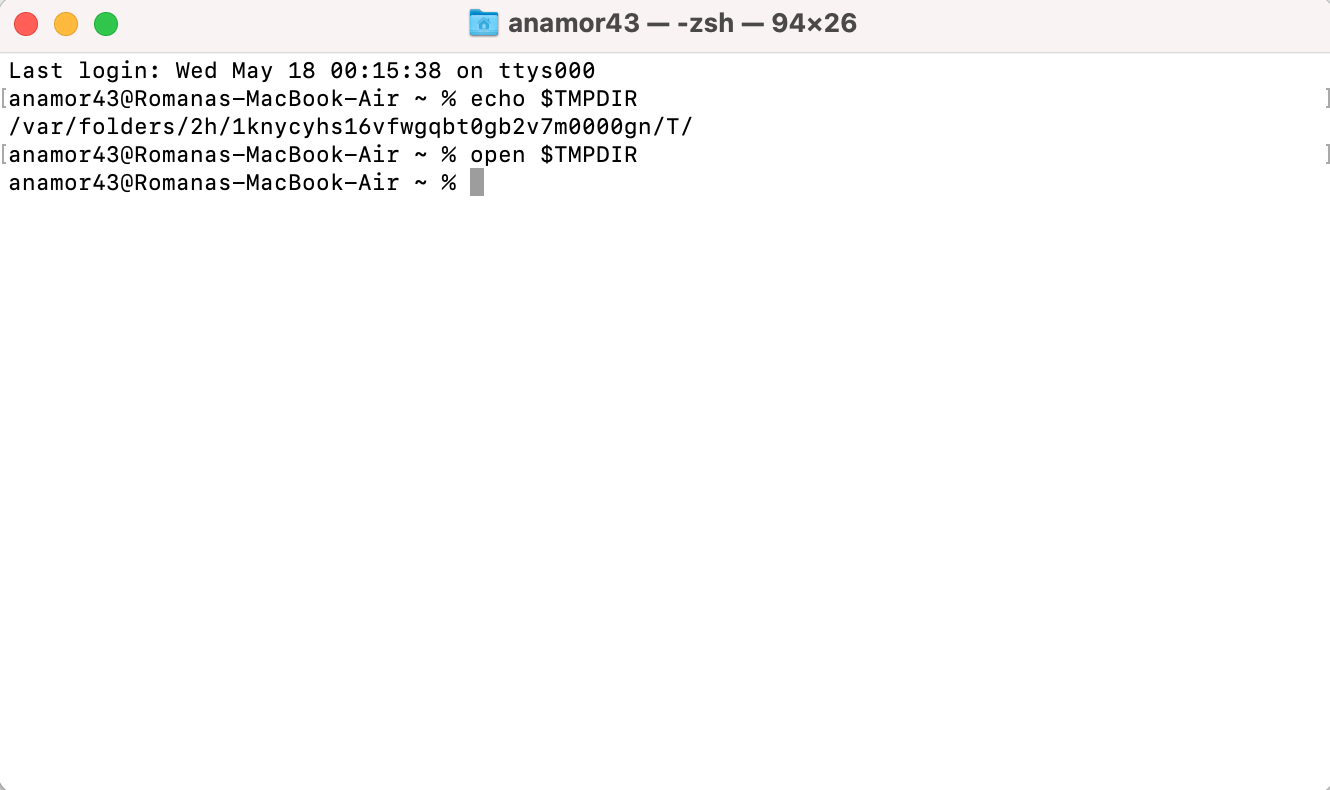
- Look for the folder containing Notes files (it should be named something similar to com.apple.Notes). Open the folder and search for the file.
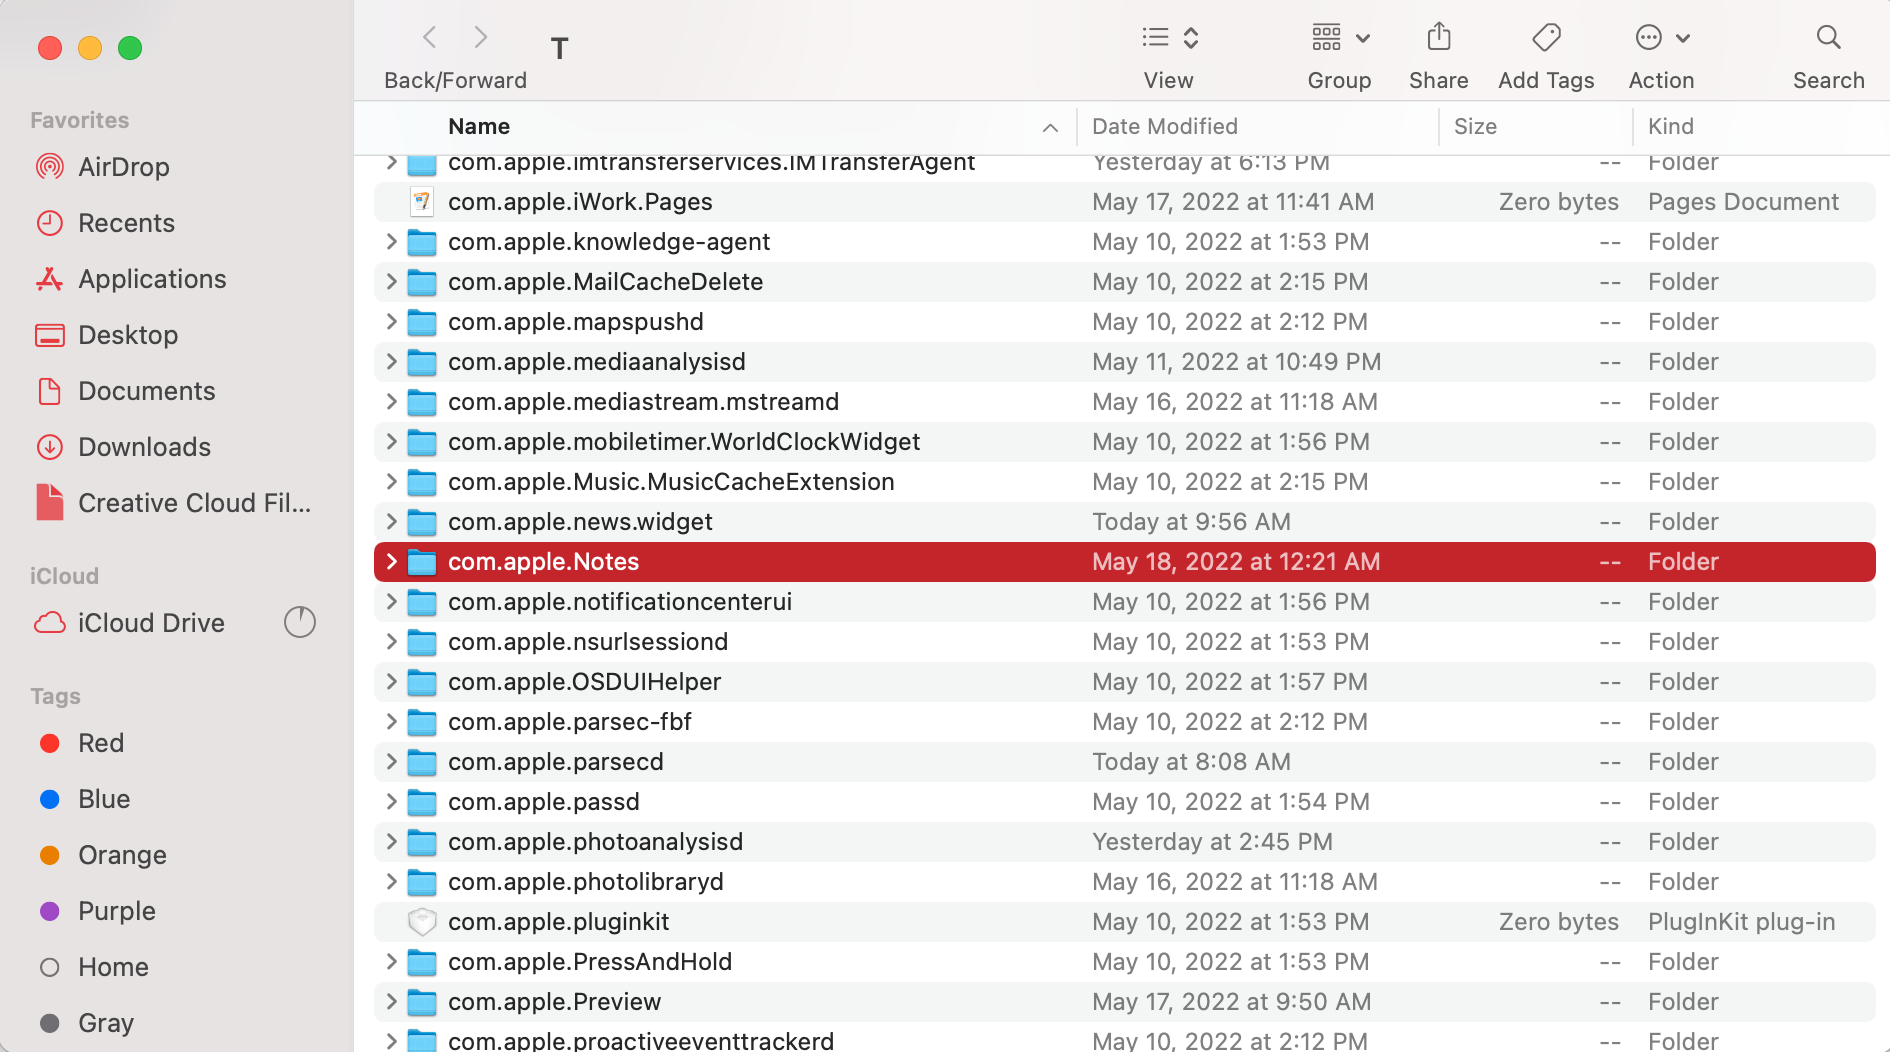
- Alternatively, check the TemporaryItems folder as well.
Method 4:Restore From iCloud
If you’ve been using iCloud to synchronize your notes across your devices, then you should be able to restore a deleted Notes file with the help of this method.
To check whether you’ve been using iCloud with the Notes app, open System Preferences on your Mac, click Apple ID, and log into your account. Then click iCloud on the sidebar, and if there’s a checkmark near Notes, it means that your notes are synced with iCloud.
Note: The deleted notes will be stored in your iCloud account for 30 to 40 days. After that, they will get permanently deleted, and you won’t be able to recover them using this method.
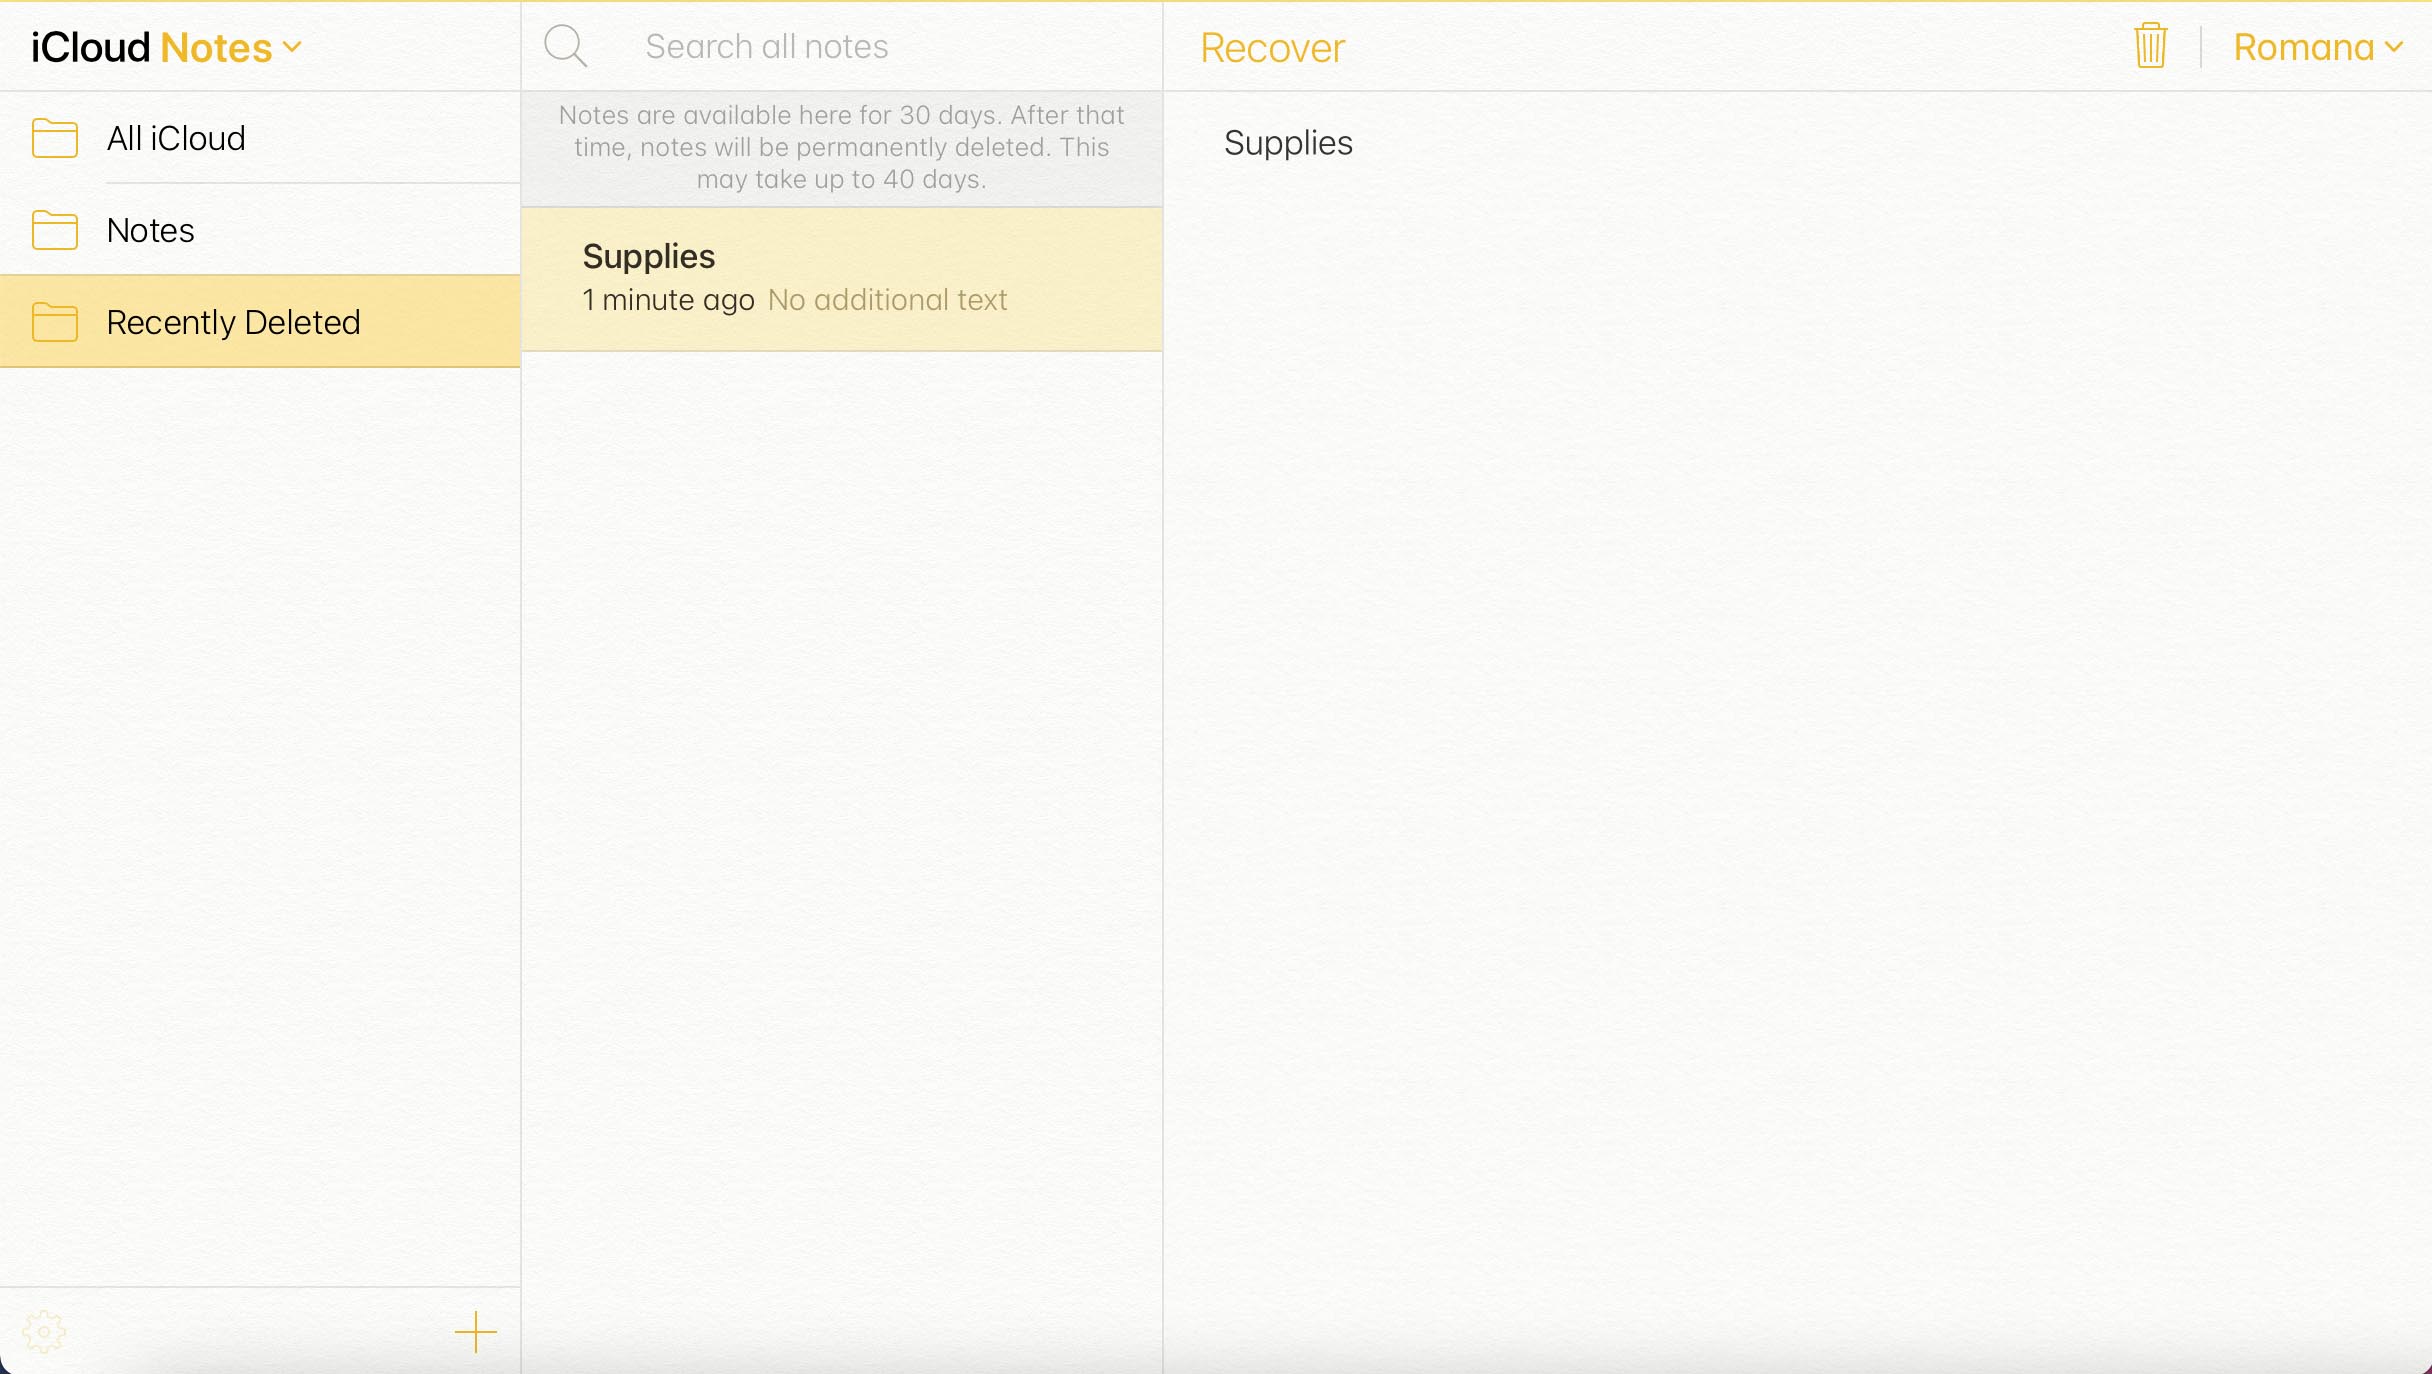
Here’s how to recover notes from iCloud on your Mac:
- Go to icloud.com and log into your account.
- Click Notes.
- Click the Recently Deleted folder at the sidebar on the left.
- Look through the deleted notes. Once you find the needed one, click it, and then click Recover at the top.
Method 5: Recover From a Time Machine Backup
If you’ve been using Time Machine to back up the data on your computer, then you can use your recent backup version to restore notes on a Mac. But this method will work only if you’ve created a Time Machine backup before deleting that file.
Important: It’s necessary to back up the current Notes files before restoring the older ones to prevent them from being overwritten.
Here’s how to restore notes from Time Machine:
- Connect the drive with your Time Machine backups to your Mac. If you used an internal drive for the backups, skip this step.
- Open Finder, and using the menu bar, click Go > Go to Folder.
- Copy-paste the following folder path and click Go:
~/Library/Containers/com.apple.Notes/Data/Library/Notes/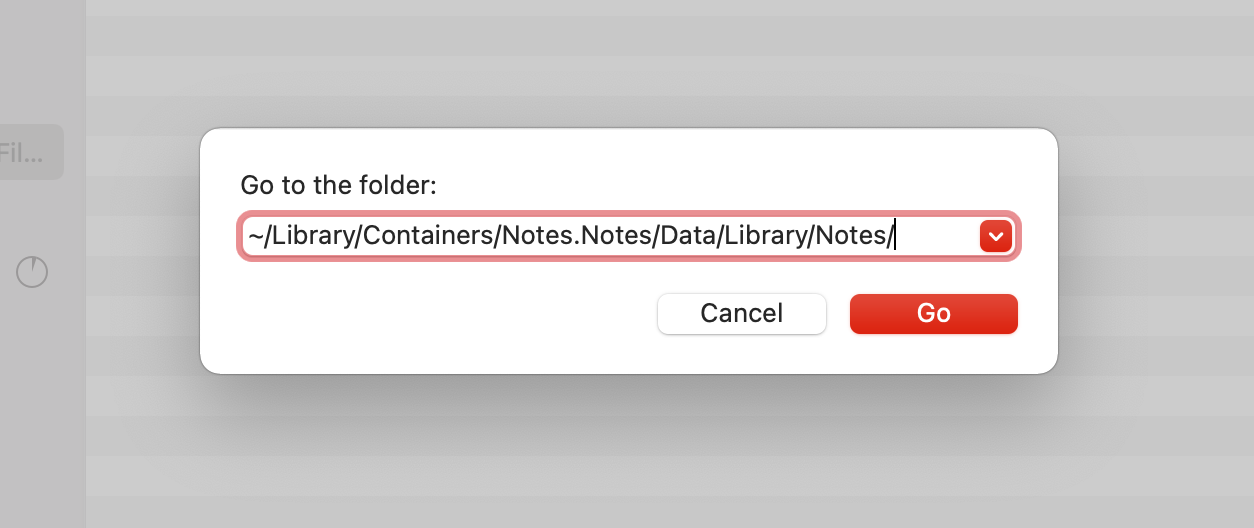
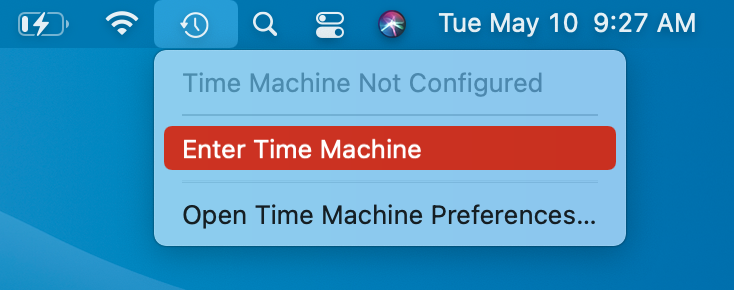
- Click the Time Machine icon on the menu bar and choose Enter Time Machine.
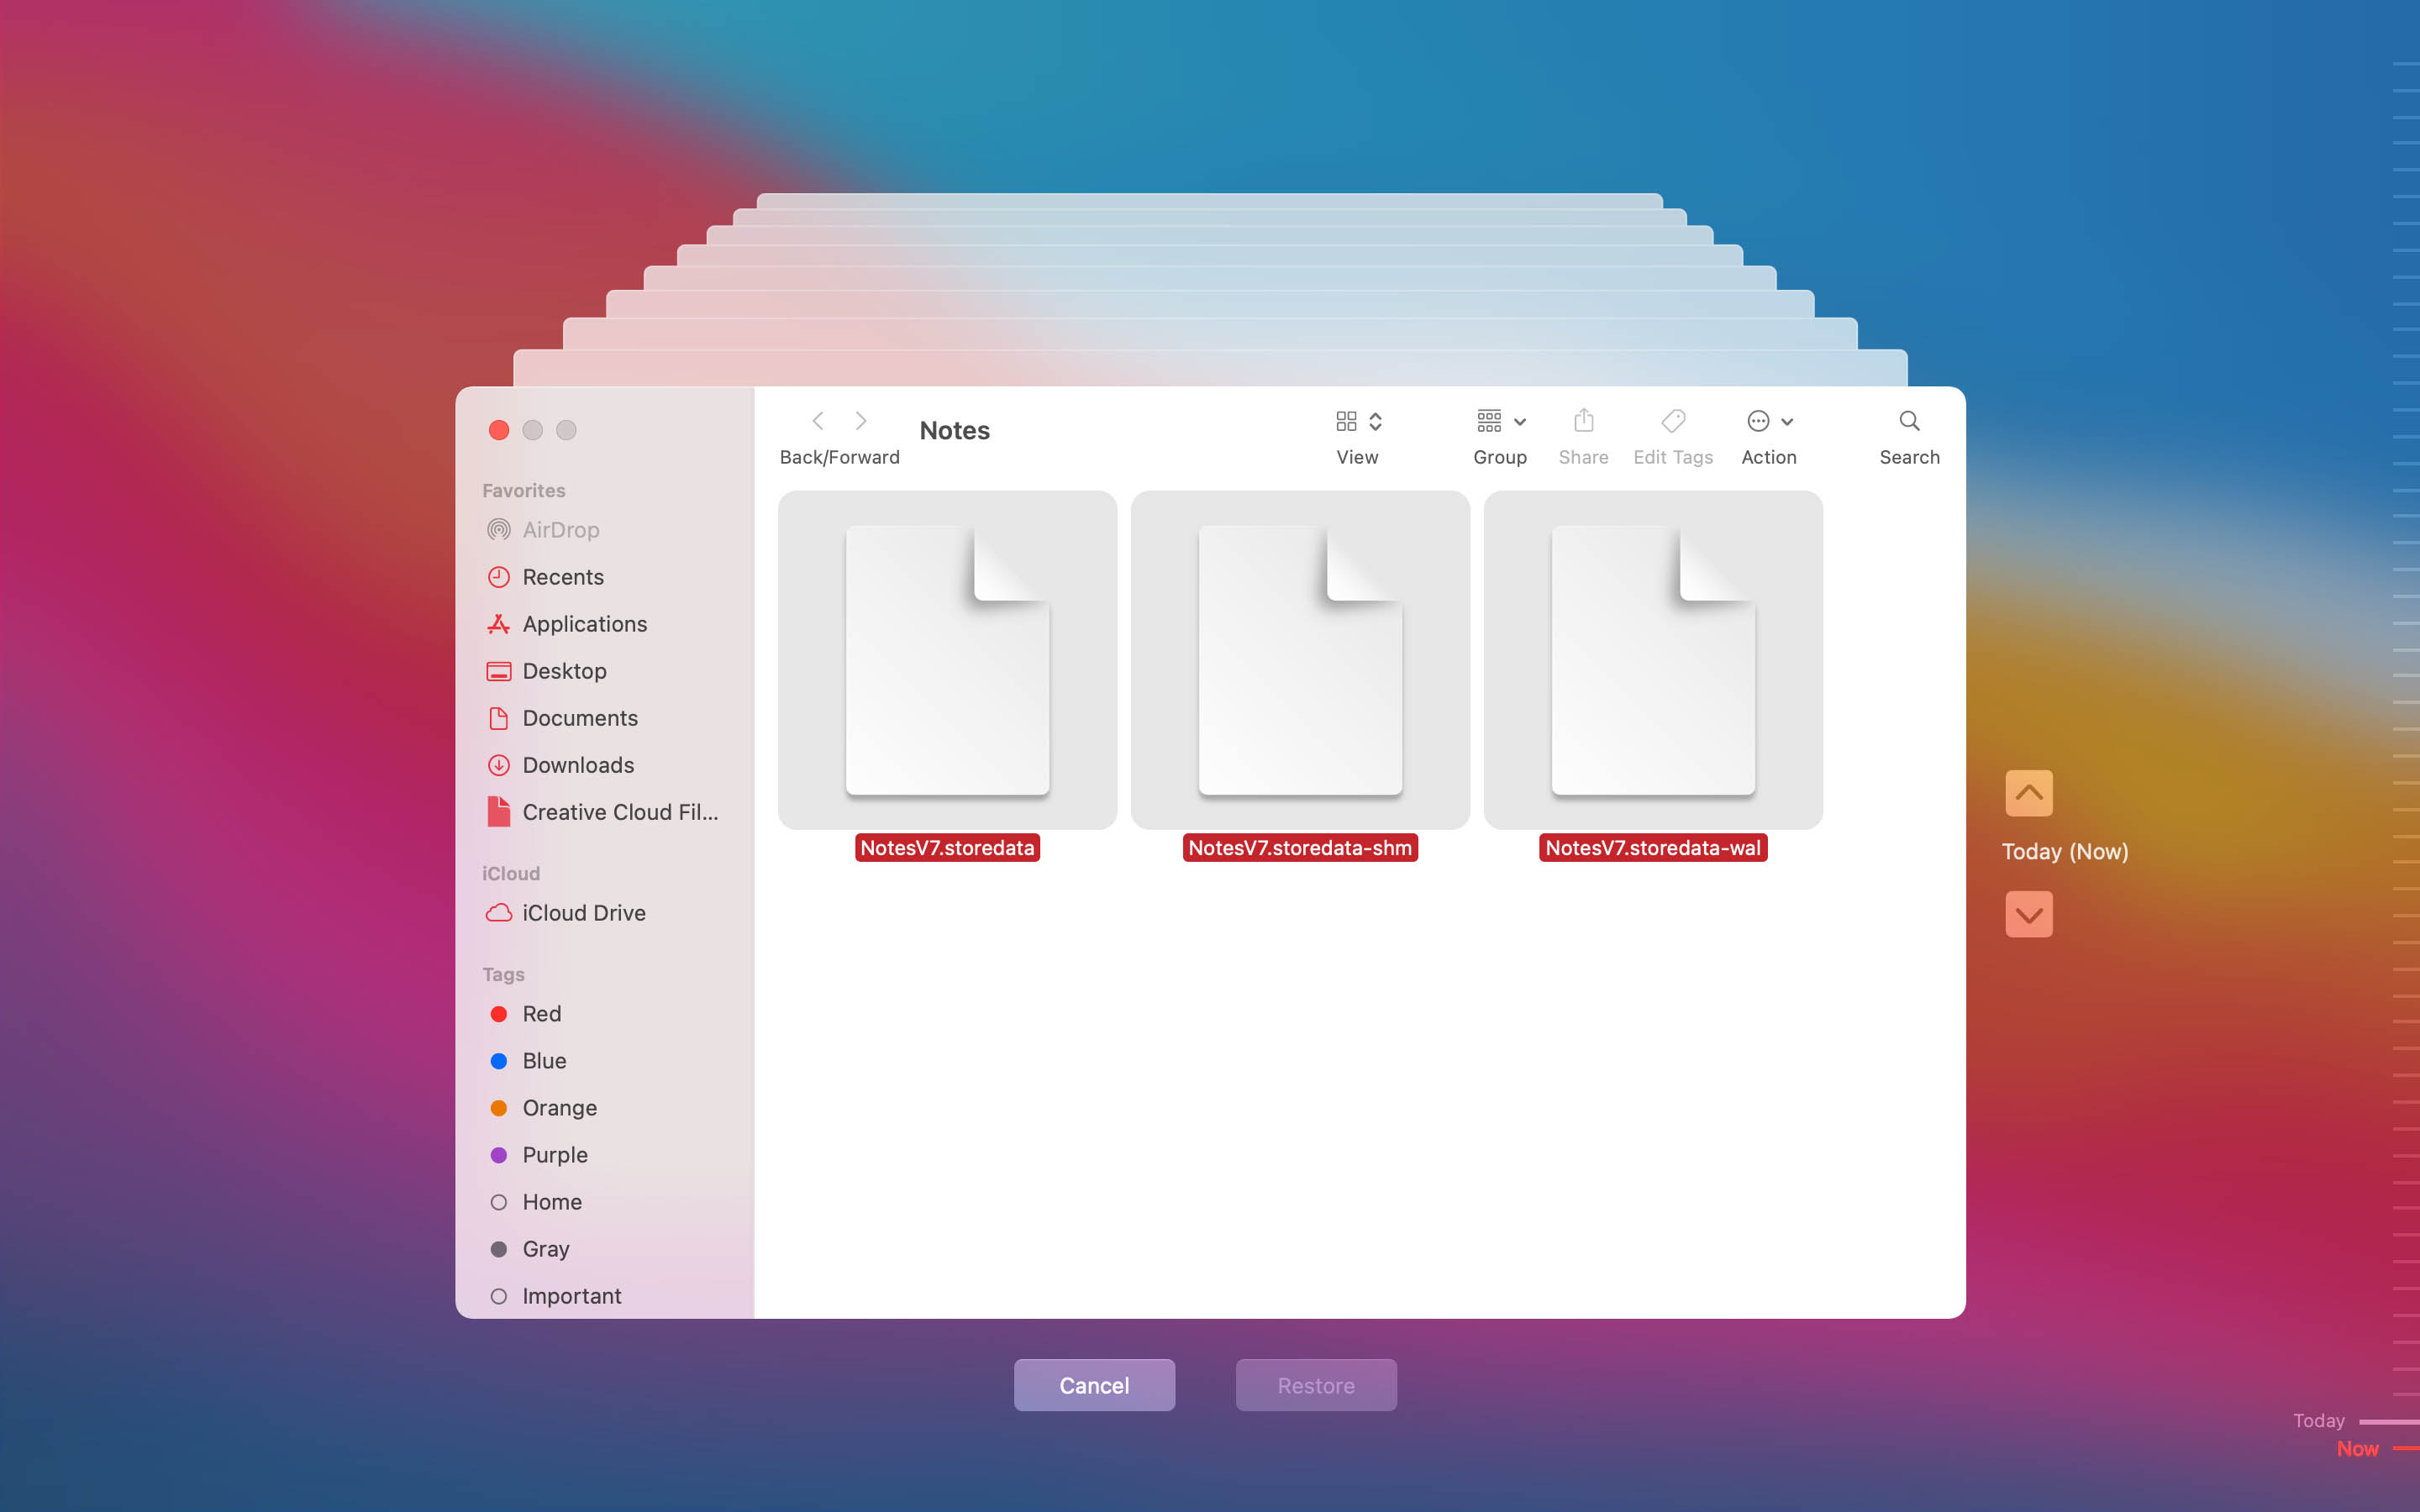
- Use the timeline on the right to choose a backup version.
- Select the files located in that folder and then click the Restore button.
FAQ:
- Open the Notes app.
- Tap the arrow on the top left of the screen to open the Folders menu.
- Tap Recently Deleted.
- Tap Edit on the top-right.
- Choose the note that you want to restore. When ready, tap Move.
- Tap the folder where you wish to place the chosen note.


