
It takes just one user error to accidentally overwrite a file or even an entire folder in Windows 10/11. The consequences of such an error can be painful because overwritten files and folders can’t be simply recovered from the Recycle Bin like deleted files. Fortunately, that doesn’t mean they’re gone for good. I’ll show you several proven methods to recover overwritten files—from specialized recovery tools to Windows’ built-in features.
Is It Possible to Recover Overwritten Files?
The recovery of files and folders that have been replaced by other files and folders with the same names is often possible, but it depends on whether the data itself has or hasn’t been physically overwritten.
What I mean by that is there are two different scenarios when you “overwrite” a file:
- Logical overwriting: When you save a new file using the same name as an existing one, Windows destroys the logical link leading to the old file, but it doesn’t destroy the data itself because the new file is typically saved in a different physical location on the storage device. Since physical overwriting doesn’t happen and the storage space occupied by the original data is only marked as available, recovery is possible.
- Physical data overwriting: It may take a few seconds or a few years, but eventually, Windows will reuse the storage space marked as available for new files. Once this happens, the original data is physically overwritten and becomes impossible to recover. This process happens much faster on SSDs than on traditional hard drives due to how SSDs handle data storage optimization with their TRIM command.
To increase your chances of successfully recovering overwritten files and folders, you always want to minimize the use of the affected drive until you’ve completed the recovery. Every write operation, such as saving new files, installing programs, or even normal system operations, could potentially overwrite your data permanently.
How to Recover Overwritten Data
You have two basic options for recovering overwritten files and folders: you can either use specialized data recovery software capable of finding logically overwritten files that are still physically present on your storage device, or you can recover them from your backups.
In this section, I’ll walk you through both approaches, starting with data recovery software since it works even if you don’t have a backup.
Method 1:Use Software to Recover Overwritten Files
Data recovery software is designed specifically to find all files that are physically present on a storage device—be it existing files, deleted files, or logically overwritten files.
My favorite data recovery software is Disk Drill because it manages to make the process so simple that even my grandmother has completed it while delivering industry-leading results thanks to its support for hundreds of file formats, including:
- Documents (DOC/DOCX, PDF, XLS/XLSX, PPT/PPTX)
- Media (JPG/JPEG, PNG, MP3, MP4, MOV)
- Archives (ZIP, RAR, 7Z)
- And many other formats
The free version lets you recover up to 500 MB at no cost, which should be enough to recover at least a few overwritten files (unless we’re talking about large videos, of course). Best of all, you can preview an unlimited number of overwritten files to verify their recoverability, so you don’t have to worry about spending money on a license and then finding out that there’s nothing to recover—that doesn’t happen with Disk Drill.
Here’s how the actual recovery process looks like:
- Download and install Disk Drill on your computer.
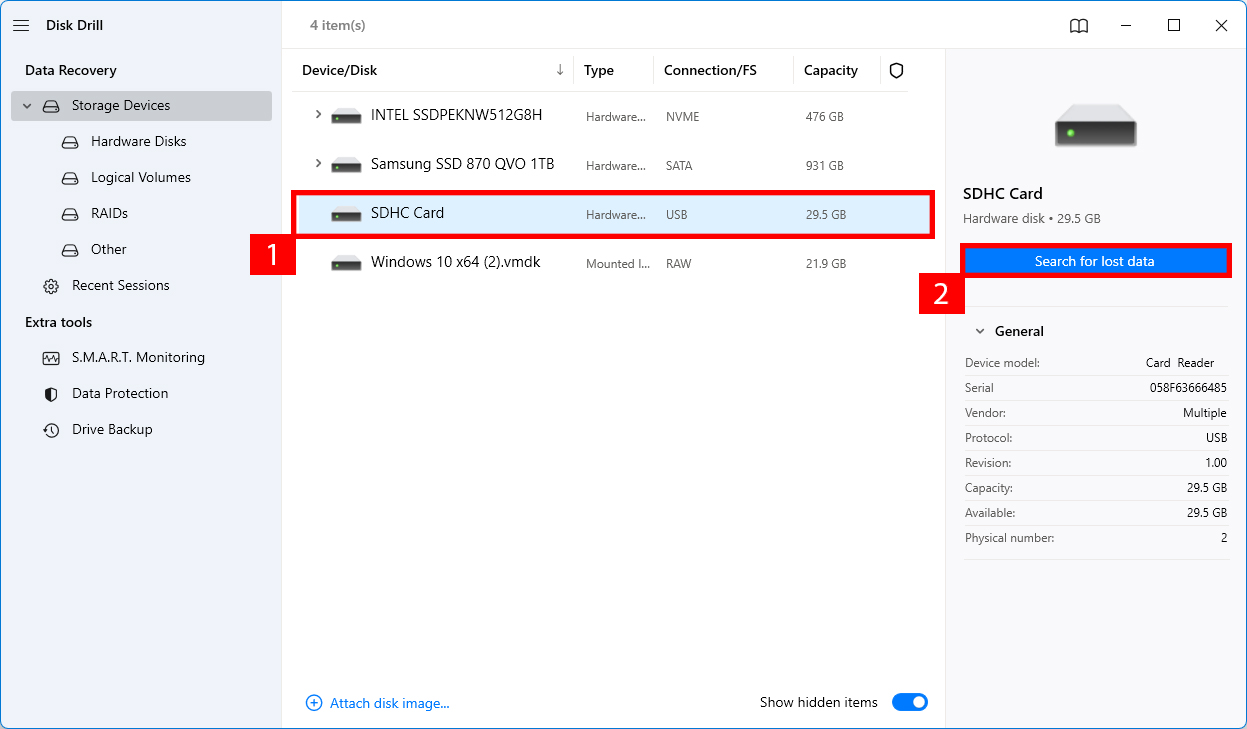
- Select the drive where your overwritten files were stored and click Search for lost data.
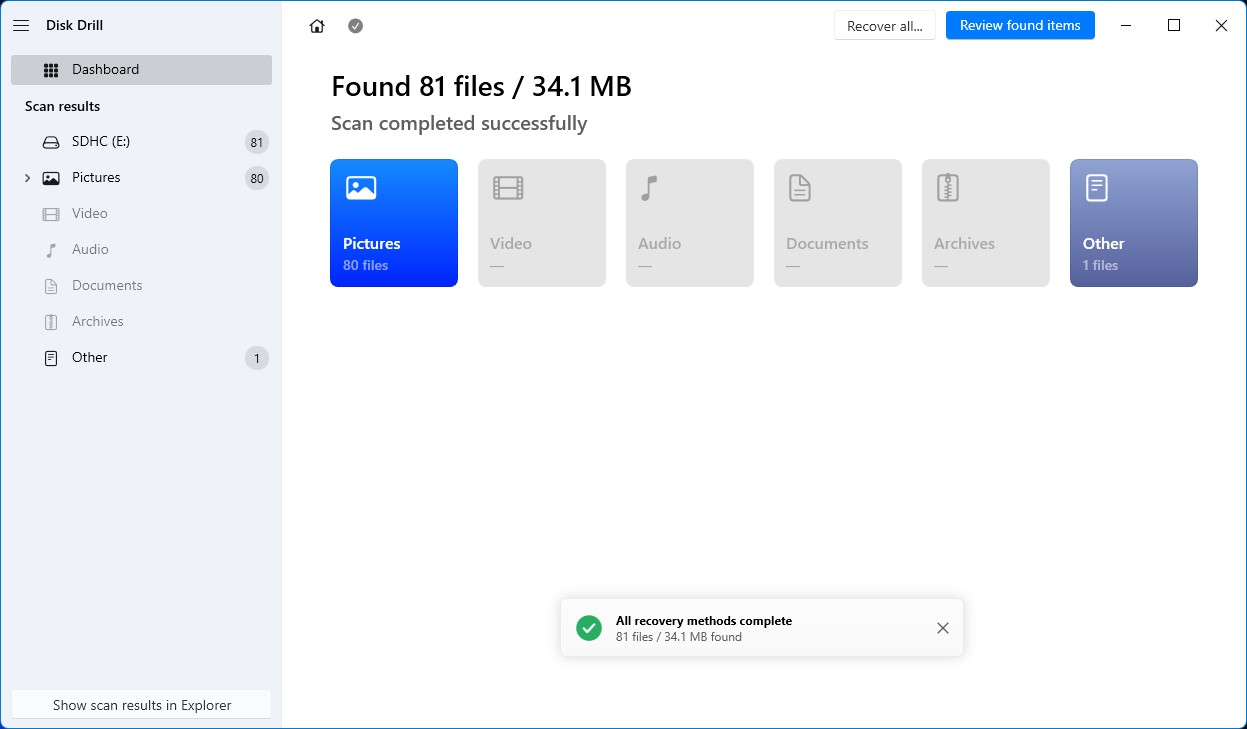
- Wait for Disk Drill to complete the scan. This may take a while depending on your storage device’s size. Alternatively, you can click Review Found Items to see recoverable files right away (Disk Drill will continue scanning in the background).
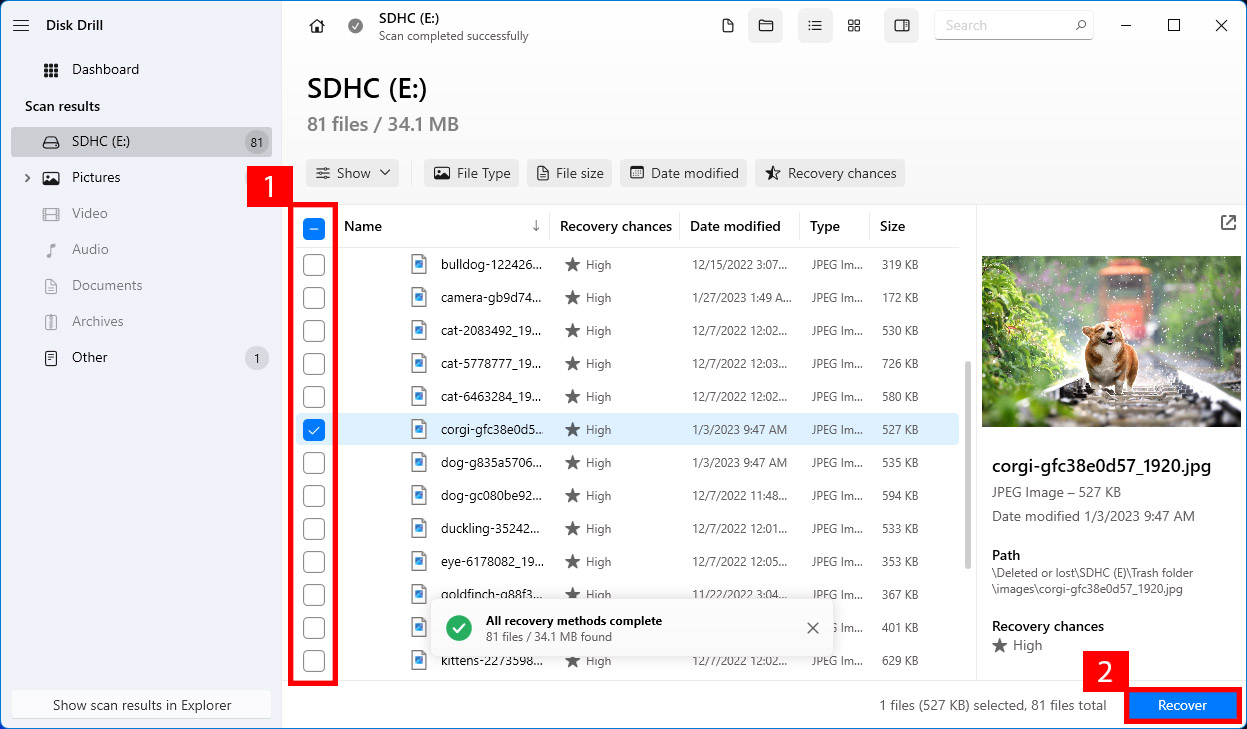
- Review the scan results and select the files you want to recover. You can also filter by file type to find specific files faster. Once you’re done, click Recover.
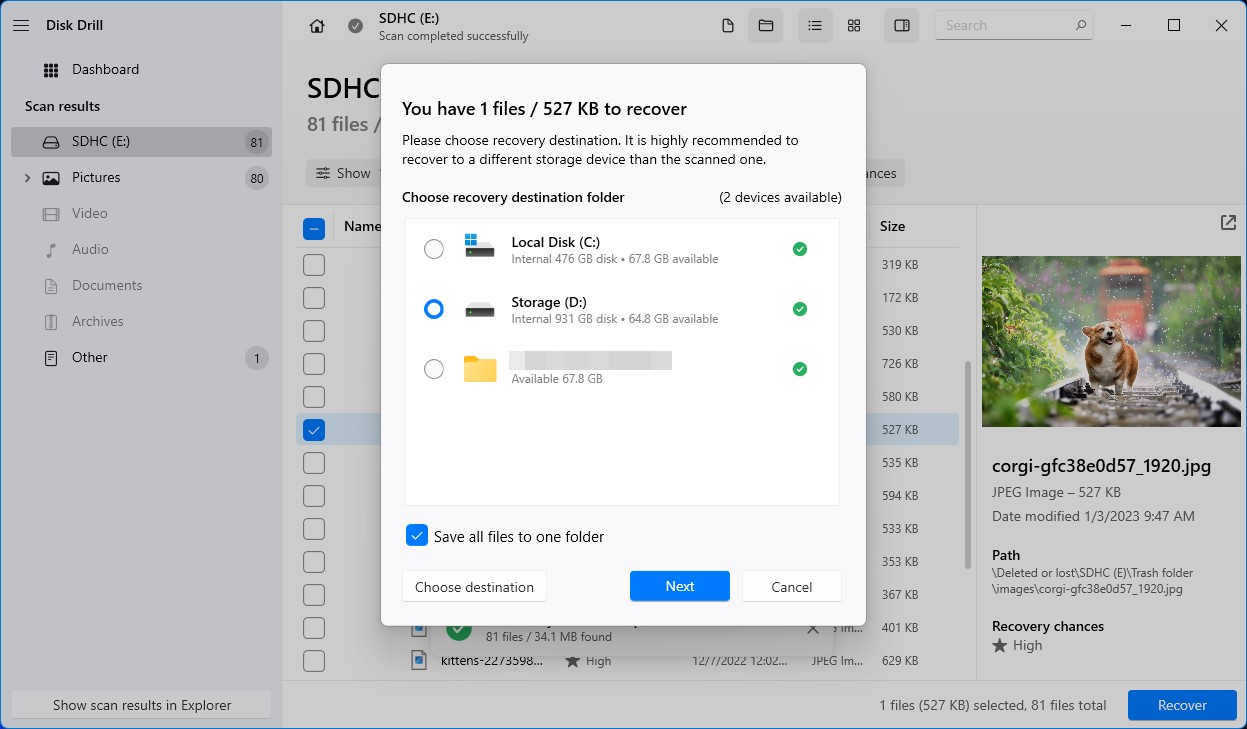
- Choose where you want to save the recovered files. Make sure to select a different storage device than the one you’re recovering from. Click Next to continue.
- Once the recovery finishes, Disk Drill will show a completion message.
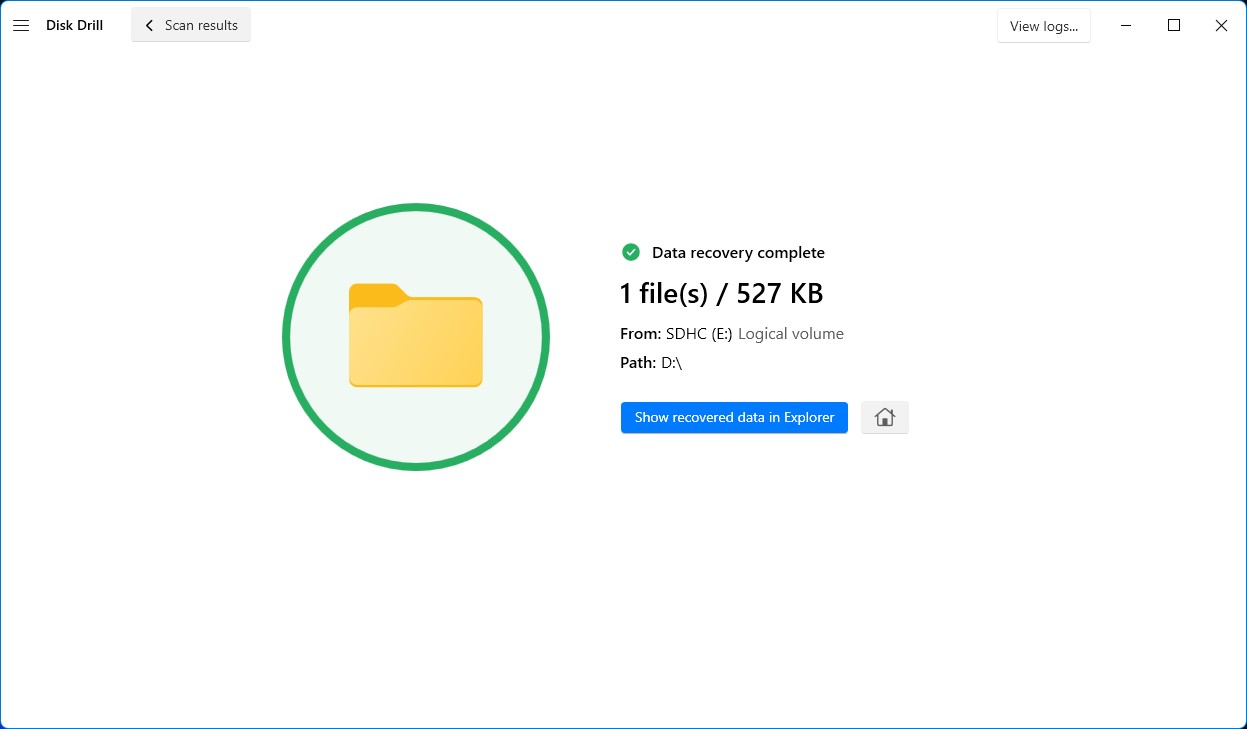
I’ve used cute image files in this example, but the steps are the same for all file types.
Method 2:Recover Overwritten Files Using Previous Versions
Windows has a built-in feature called Previous Versions that I find incredibly useful for recovering overwritten files. It automatically creates copies of your files either when Windows makes a restore point or at regular intervals when File History is enabled.
If there’s a recent Windows restore point or if you’ve enabled File History in the past, then you can follow these steps to recover your overwritten files:
- Locate your overwritten file or folder in Windows Explorer.
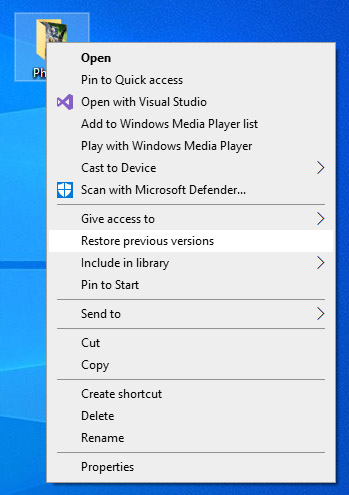
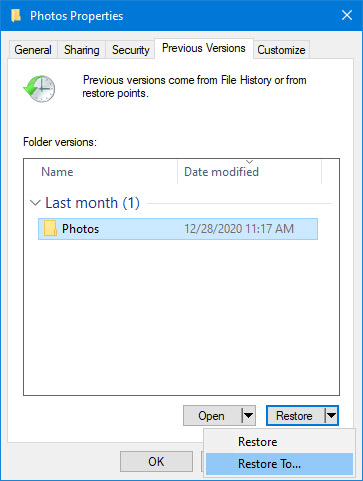
- Right-click it and select Restore previous versions.
- A window will appear showing available previous versions. I always click Open first to preview the version and make sure it’s the one I need.
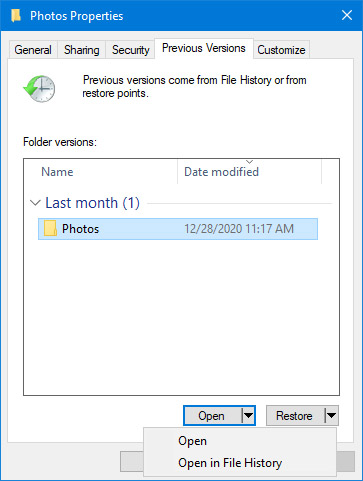
- Once you’ve found the right version, click Restore To.
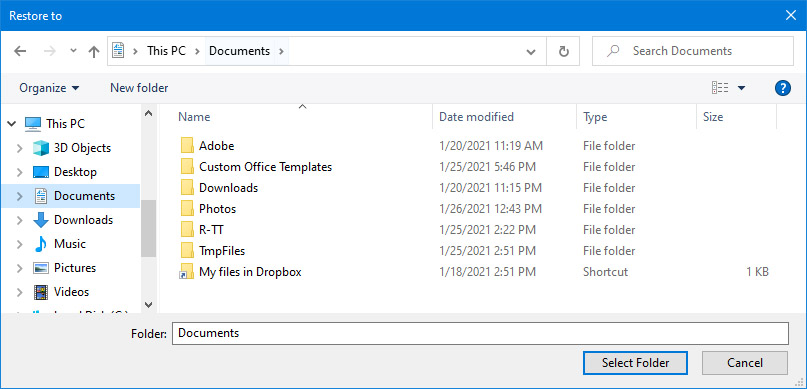
- Finally, choose a new location to save the restored file.
Again, this method works only if File History is enabled on your Windows PC. You can check if it is by going to Settings > Update & Security > Backup.
Method 3:Recover Overwritten Files from a Cloud Backup
Recent versions of Windows come with Microsoft’s cloud backup service, OneDrive, included by default, so it’s no wonder that increasingly many users are discovering the benefits of automatically backing up files to the cloud.
One such benefit is the ability to easily recover overwritten files thanks to OneDrive’s versioning capabilities, which keep track of all changes made to your files.
To recover overwritten files from OneDrive, you need to do the following:
- Go to OneDrive.com and sign in with your Microsoft account
- Find the overwritten file.
- Right-click the file and select Version history.
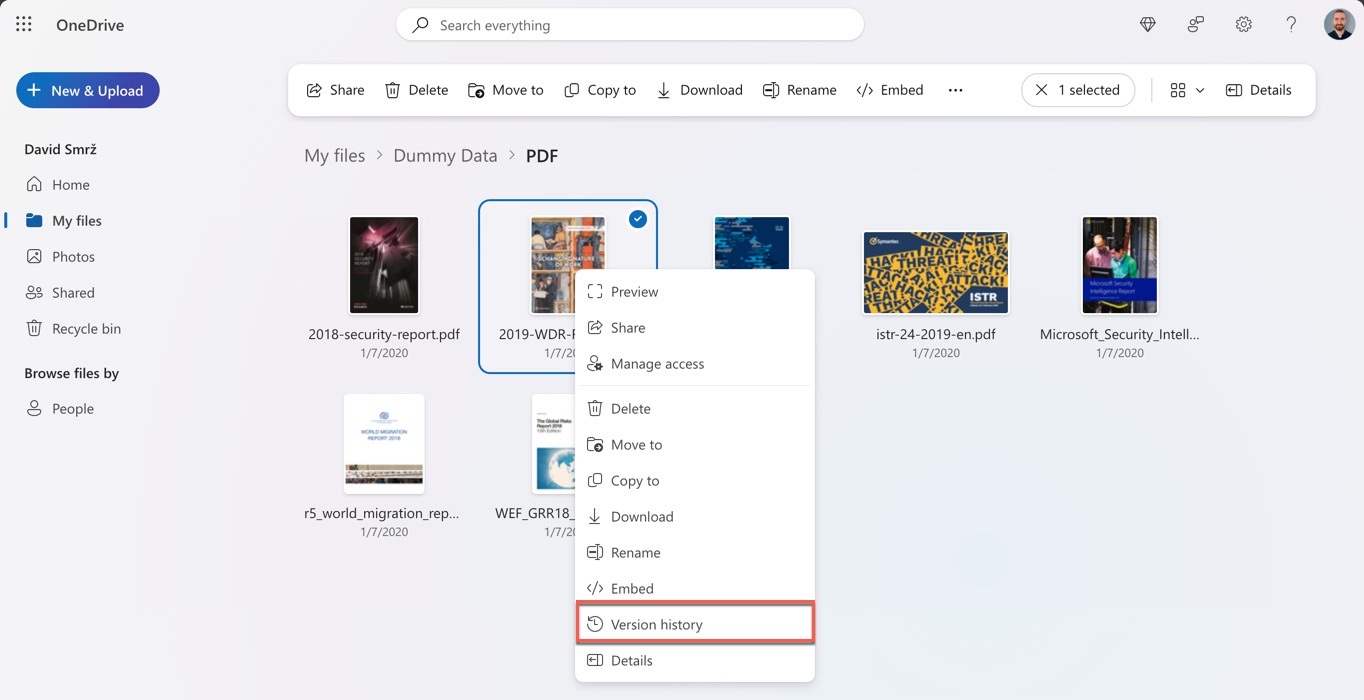
- Choose the version you want to recover from the list of previous versions.
Method 4: Use Built-In Backup Features In Your Applications
Most modern applications like Microsoft Office, Adobe Creative Suite, and AutoCAD include automatic backup features that create automatic backups of your work at regular intervals, so they can often be used to recover overwritten files in the same way as the Previous Versions feature and OneDrive can.
While most apps enable their auto-save features by default, I always recommend checking the settings to make sure they’re active and configured to your needs.
Let me show you how to recover files using Microsoft Word as an example, since it’s one of the most commonly used applications with a built-in backup feature:
- Open Microsoft Word.
- Click File > Options > Save.
- Here you’ll find the AutoRecover settings. I keep mine set to save every 10 minutes (the default setting), but you can adjust this based on your needs. You’ll also see the AutoRecover file location.
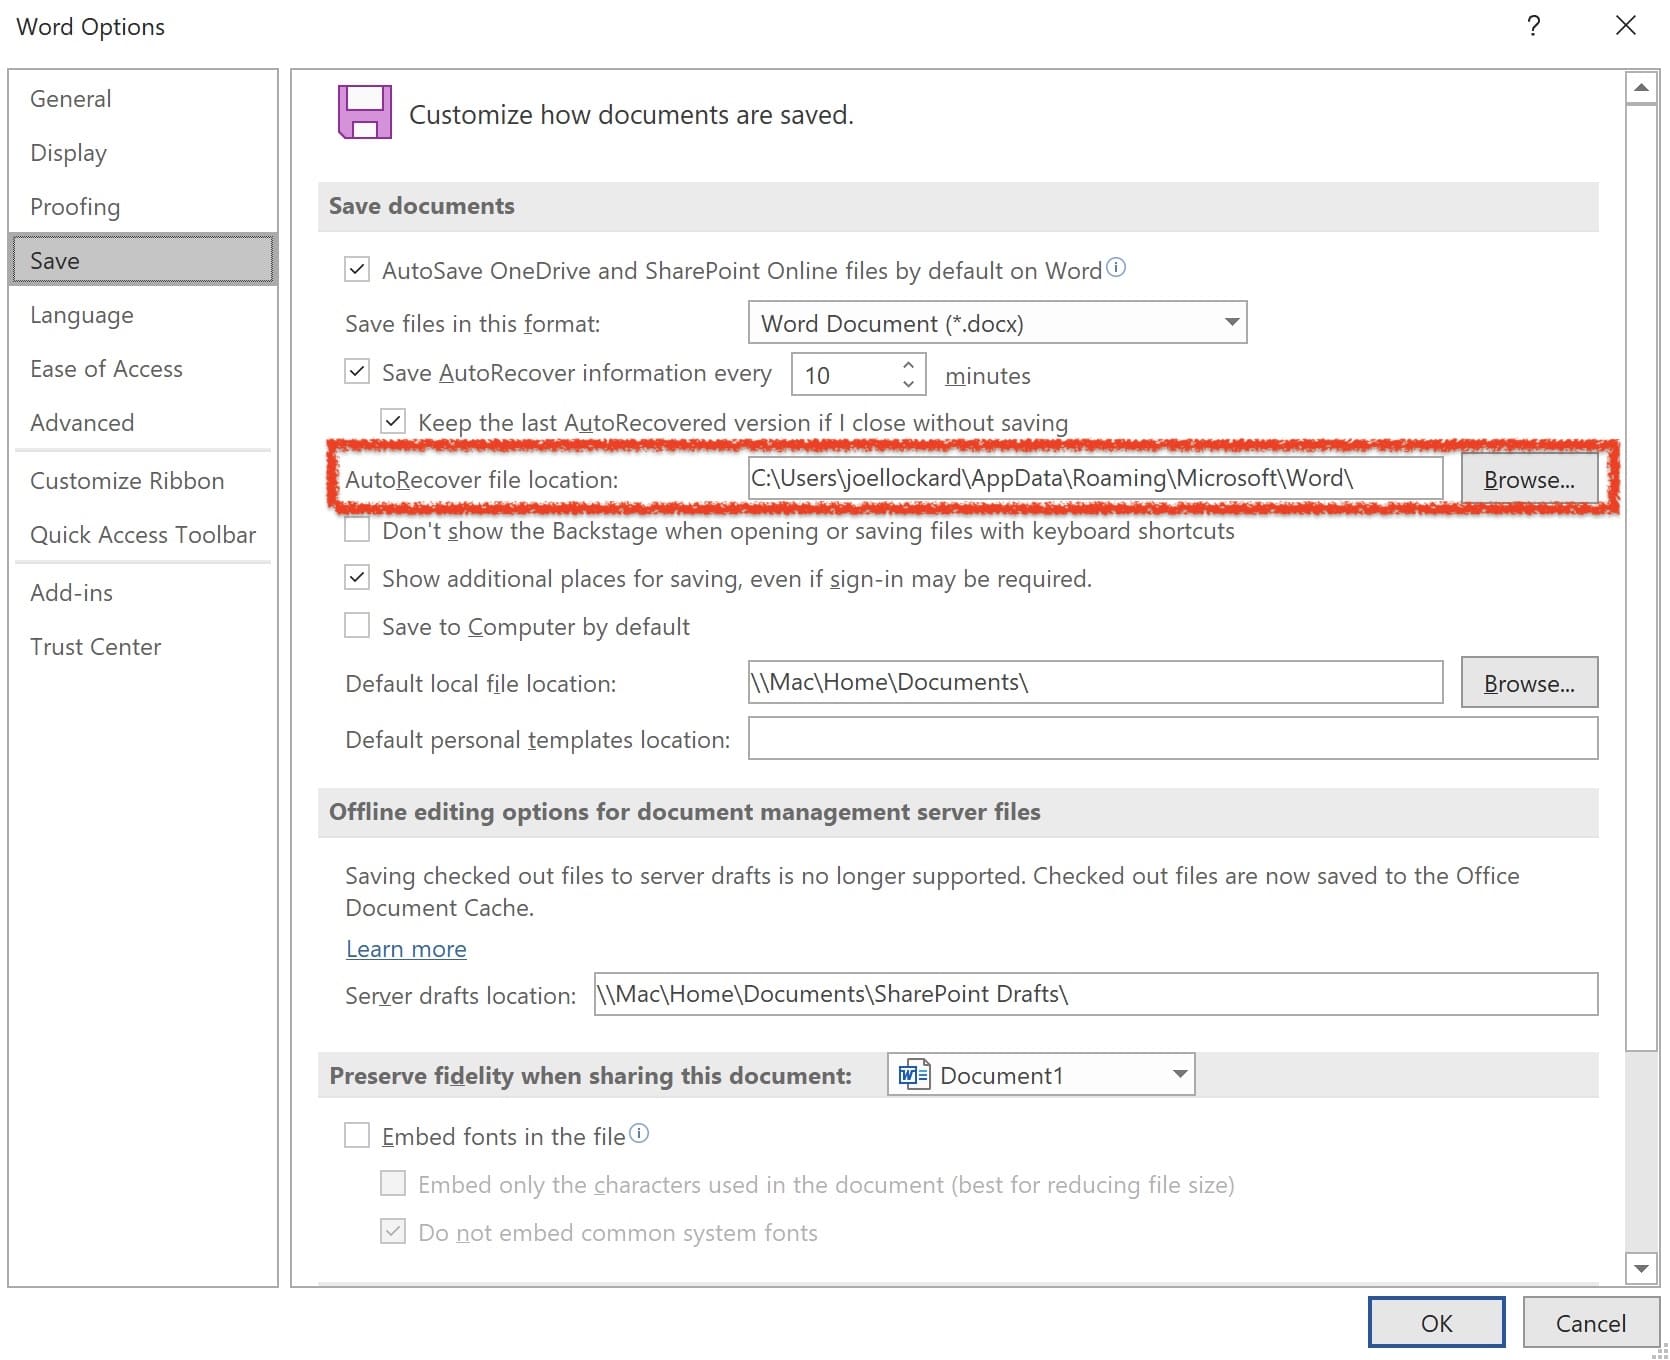
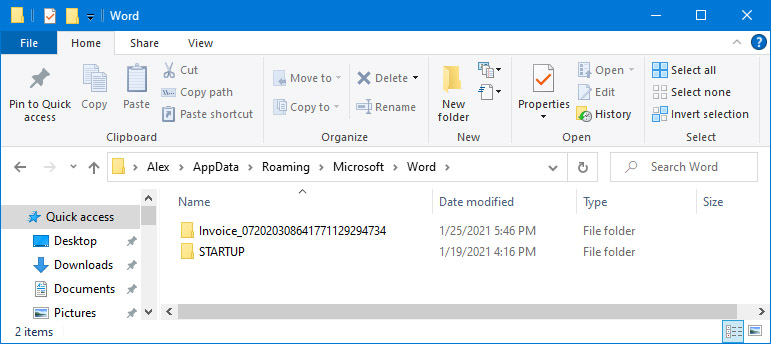
- To find your recoverable files, click Browse next to the AutoRecover file location. Navigate through the folders to find your file, select it, and click OK to recover it.
Pro tip: If you’re using Microsoft 365, I highly recommend enabling AutoSave, which continuously saves your work to OneDrive.
Conclusion
When recovering overwritten files and folders in Windows, your success largely depends on how quickly you act, which data recovery software you choose, and what backup features you have enabled. Of course, it also depends on how well you follow the recovery steps since even the best tools won’t help if you accidentally save recovered files back to the same drive or keep writing new data to it during recovery, for example. But with this guide by your side, your recovery chances will be as high as they can be.
