
This guide will walk you through four effective methods to recover overwritten files on macOS. Whether you’ve replaced a business document, family photo, or hours of video footage, the step-by-step instructions below will show you exactly how to recover replaced files on Mac.
Where Do Replaced Files Go on Mac?
When you replace a file on Mac, the original file is marked as deleted in the file system while the new version is saved to the disk. What happens then depends on the type of storage device you’re using, with SSDs and HDDs handling replaced files differently:
- On SSDs (Solid State Drives): Due to wear leveling technology, the replacement file is typically written to a different physical location than the original. The original file remains physically present on the drive but becomes “invisible” to the operating system. This characteristic of SSDs significantly increases your chances of recovering the original file.
- On HDDs (Hard Disk Drives): The new file may overwrite the exact same sectors as the original file, making recovery more challenging but still possible in many cases if you act quickly.
However, to maximize recovery chances, you should stop using the affected drive immediately after noticing an accidental replacement and begin the recovery process as soon as possible. The longer you wait, the higher the risk that the operating system will reuse that space for other files.
Note: Unlike manually deleted files, replaced files don’t end up in the Trash folder, which is why you can’t simply restore the original file from there. Your only option is to use the below-described data recovery methods.
4 Methods to Recover Replaced Files on Mac
To give you the highest chance of success, we describe four methods below – we recommend you start with the first one and continue from there – then you’re most likely to recover your replaced files.
Method 1: Retrieve with Data Recovery Software
Specialized data recovery software can see even overwritten files that macOS can’t anymore, and Disk Drill is the best choice for Mac users.
Disk Drill is so competent when it comes to the recovery of overwritten files because it can scan all commonly used Mac file systems for information about overwritten files, and it can also recover them based on their unique signatures. Despite its technical capabilities, the software is so well designed that even less tech-savvy users can achieve great results without any special knowledge.
Important: As soon as you notice that a file has been mistakenly replaced, stop using the disk on which the file is located. Also, make sure to install data recovery software on a different storage device.
- Download and install Disk Drill from the official website, then launch the application.
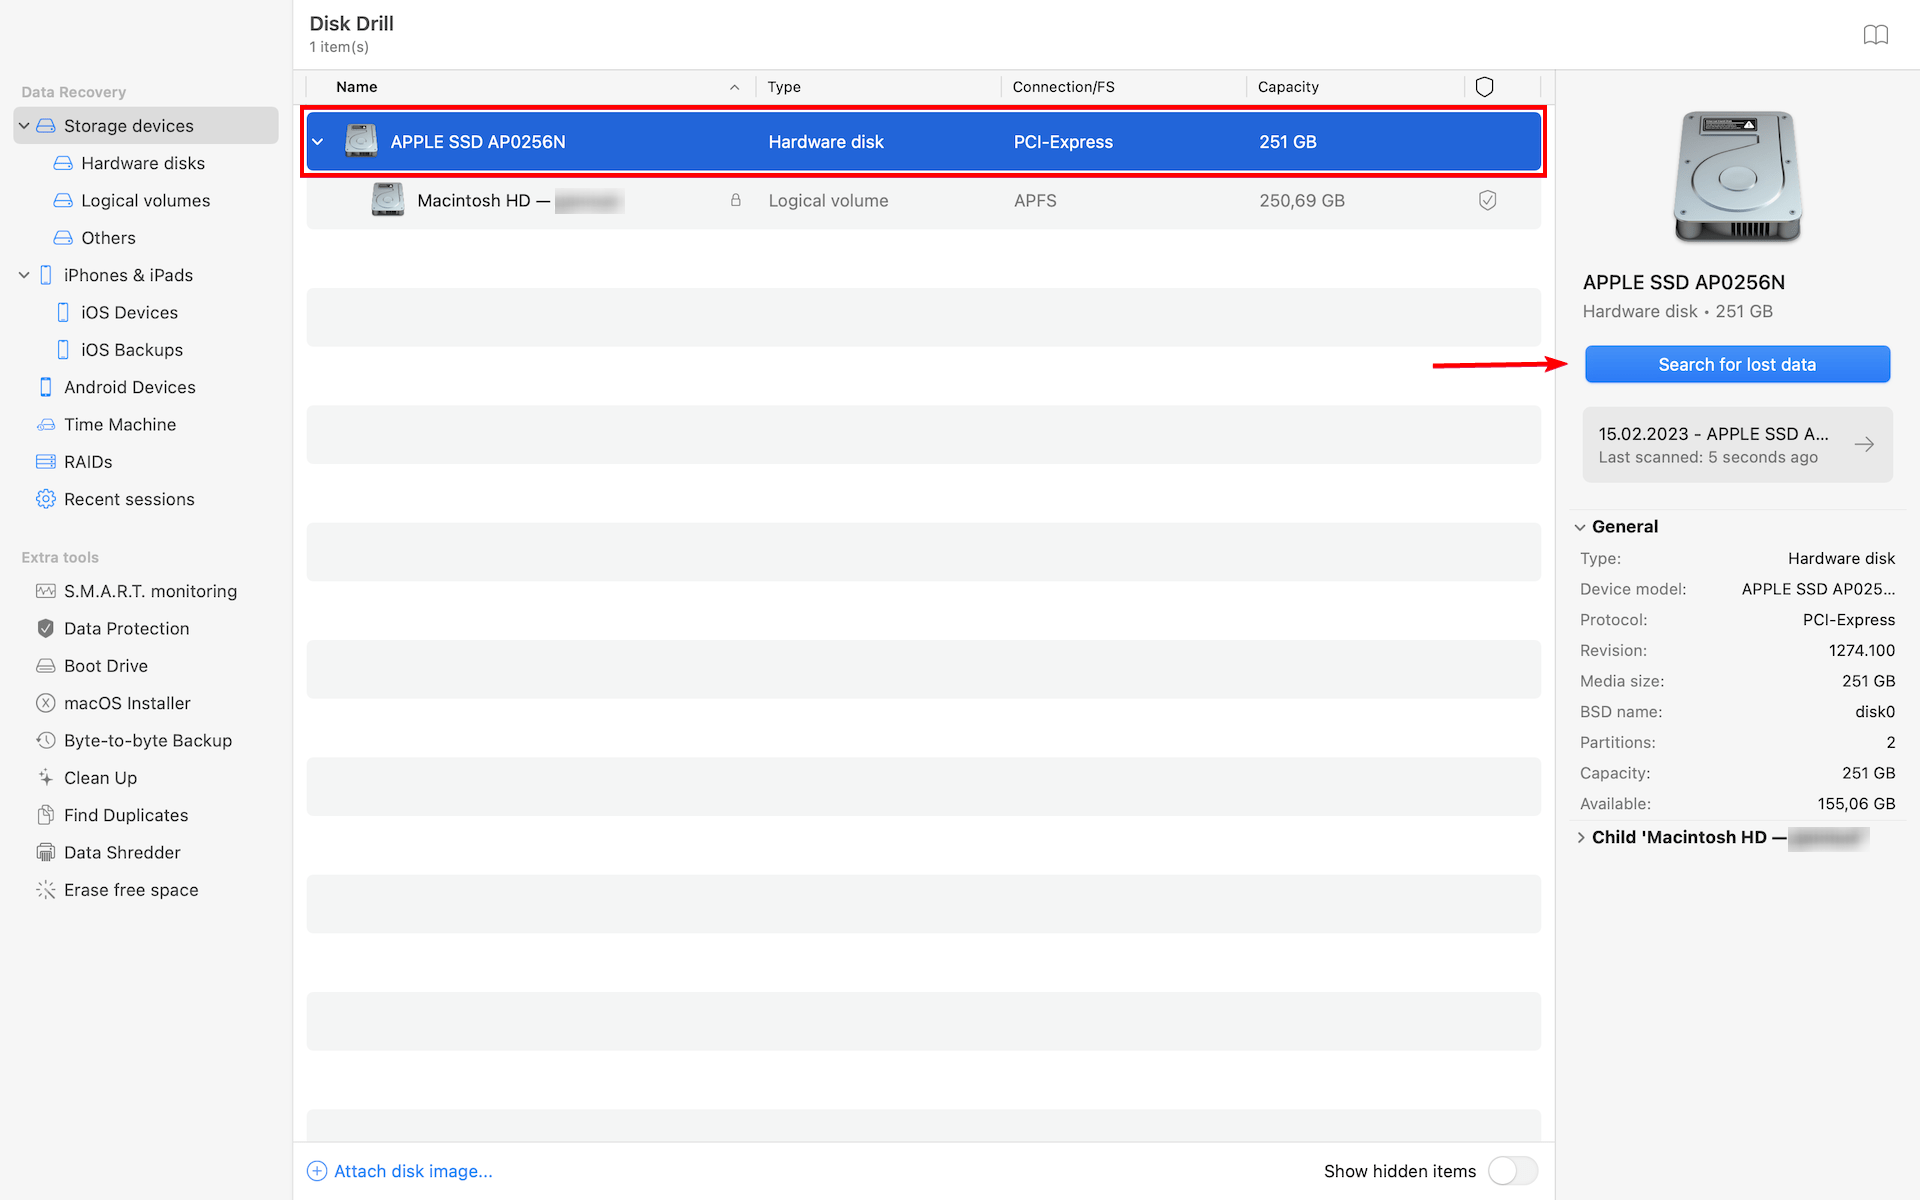
- Find and select the drive containing your overwritten file, then click the Search for lost data button to begin scanning.
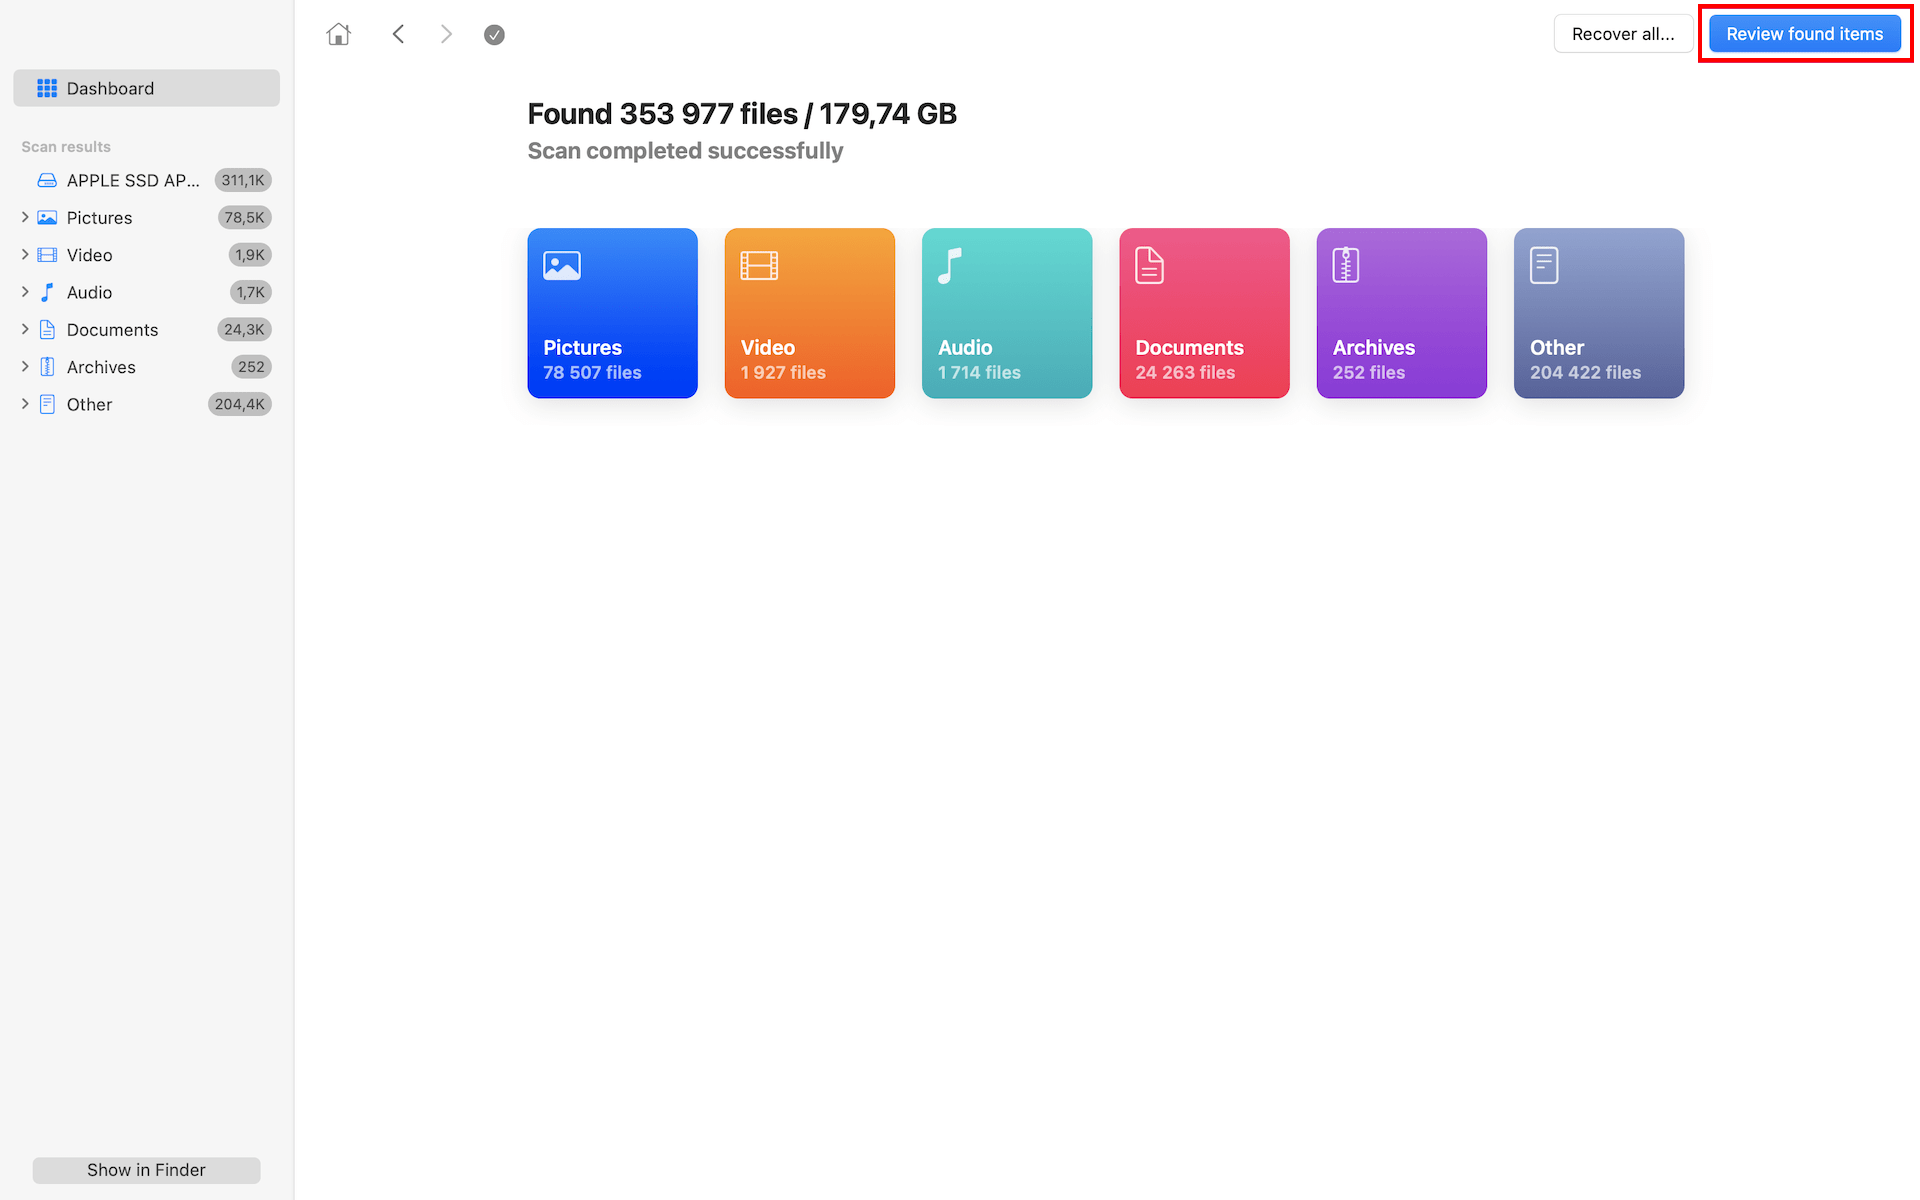
- While Disk Drill scans, it categorizes recoverable files by type. You can click the Review found items button at any time to see what has been found so far.
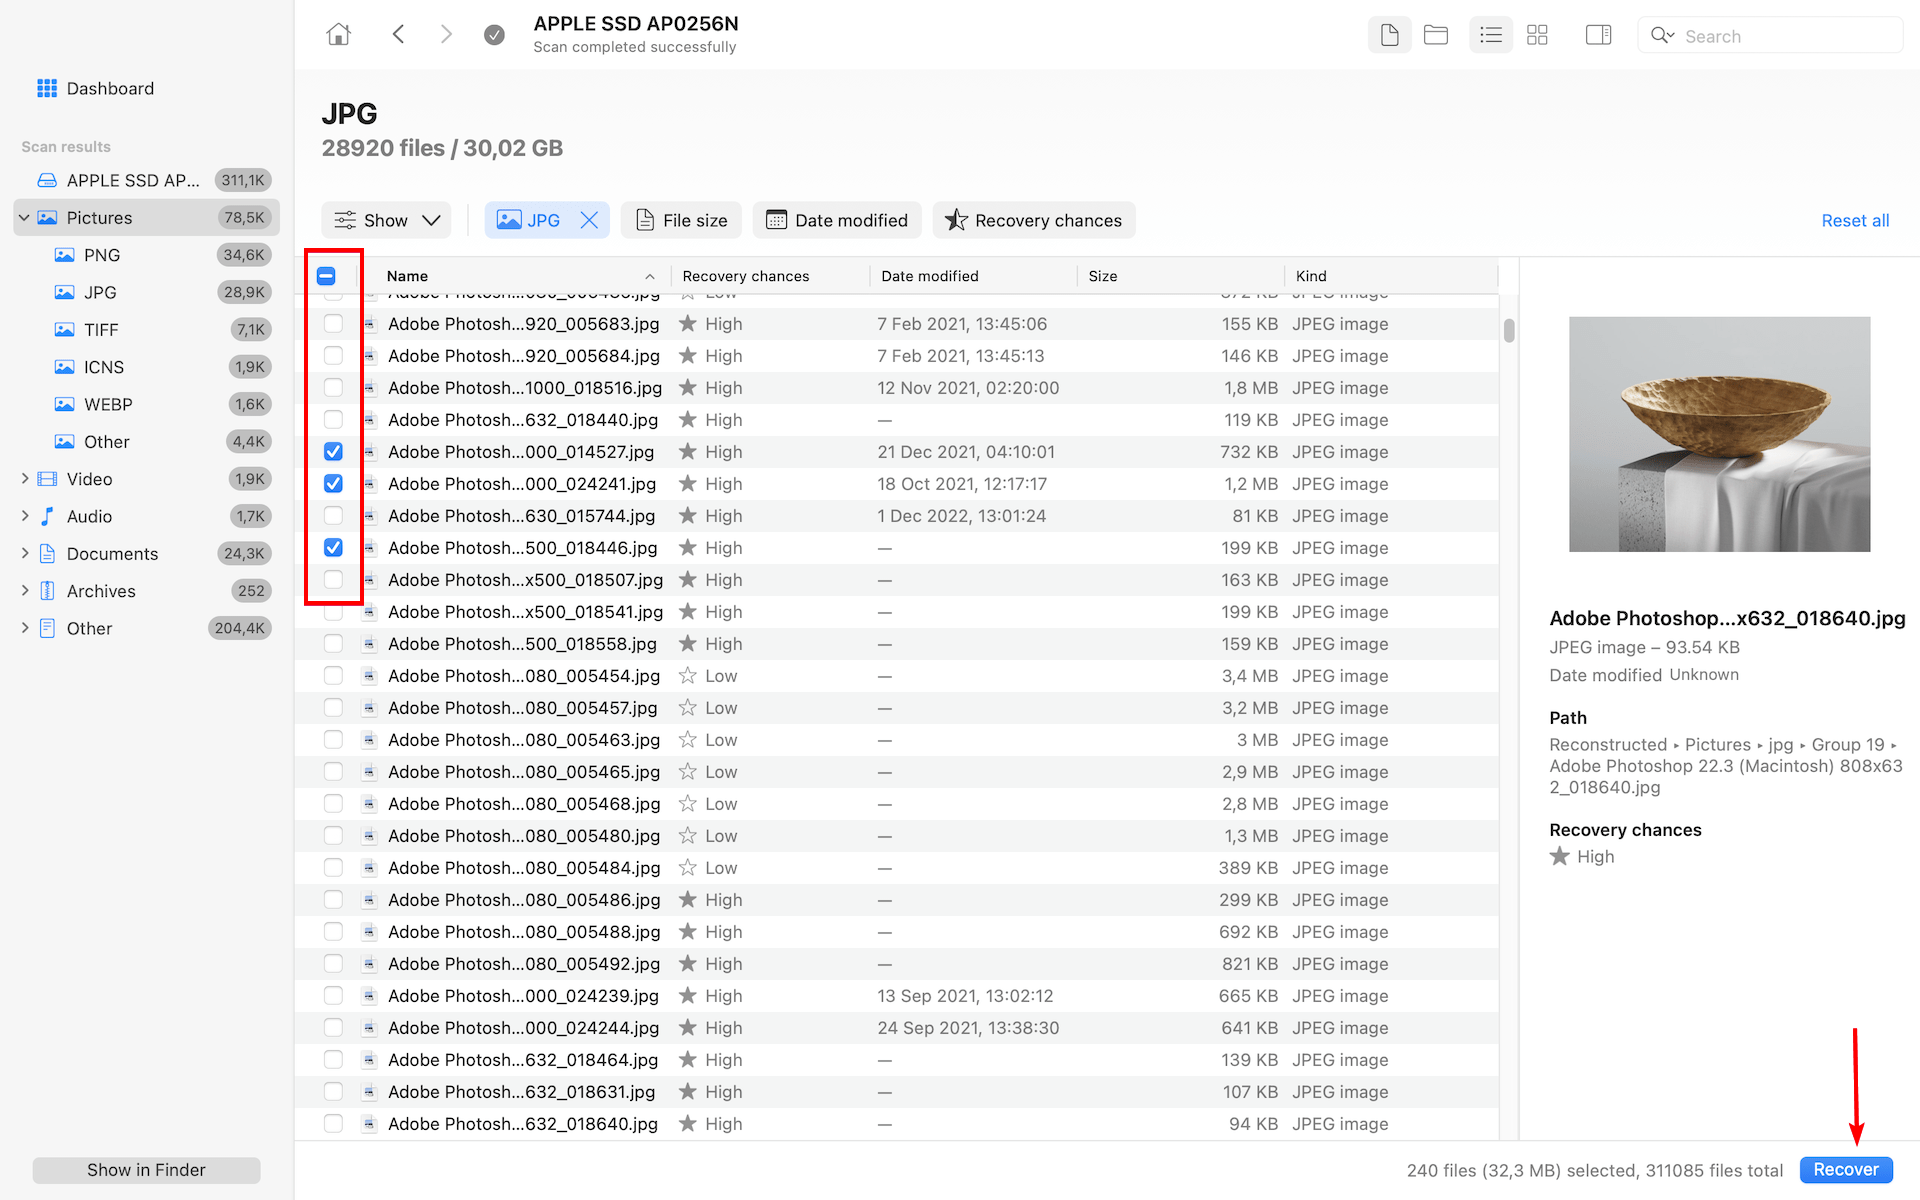
- Browse through the discovered files or use the search function to locate your specific overwritten file. You can also make the search for your overwritten file easier by taking advantage of Disk Drill’s file filters and sorting options.
- Once you find your overwritten file, select it by placing a checkmark next to it, then click the Recover button.
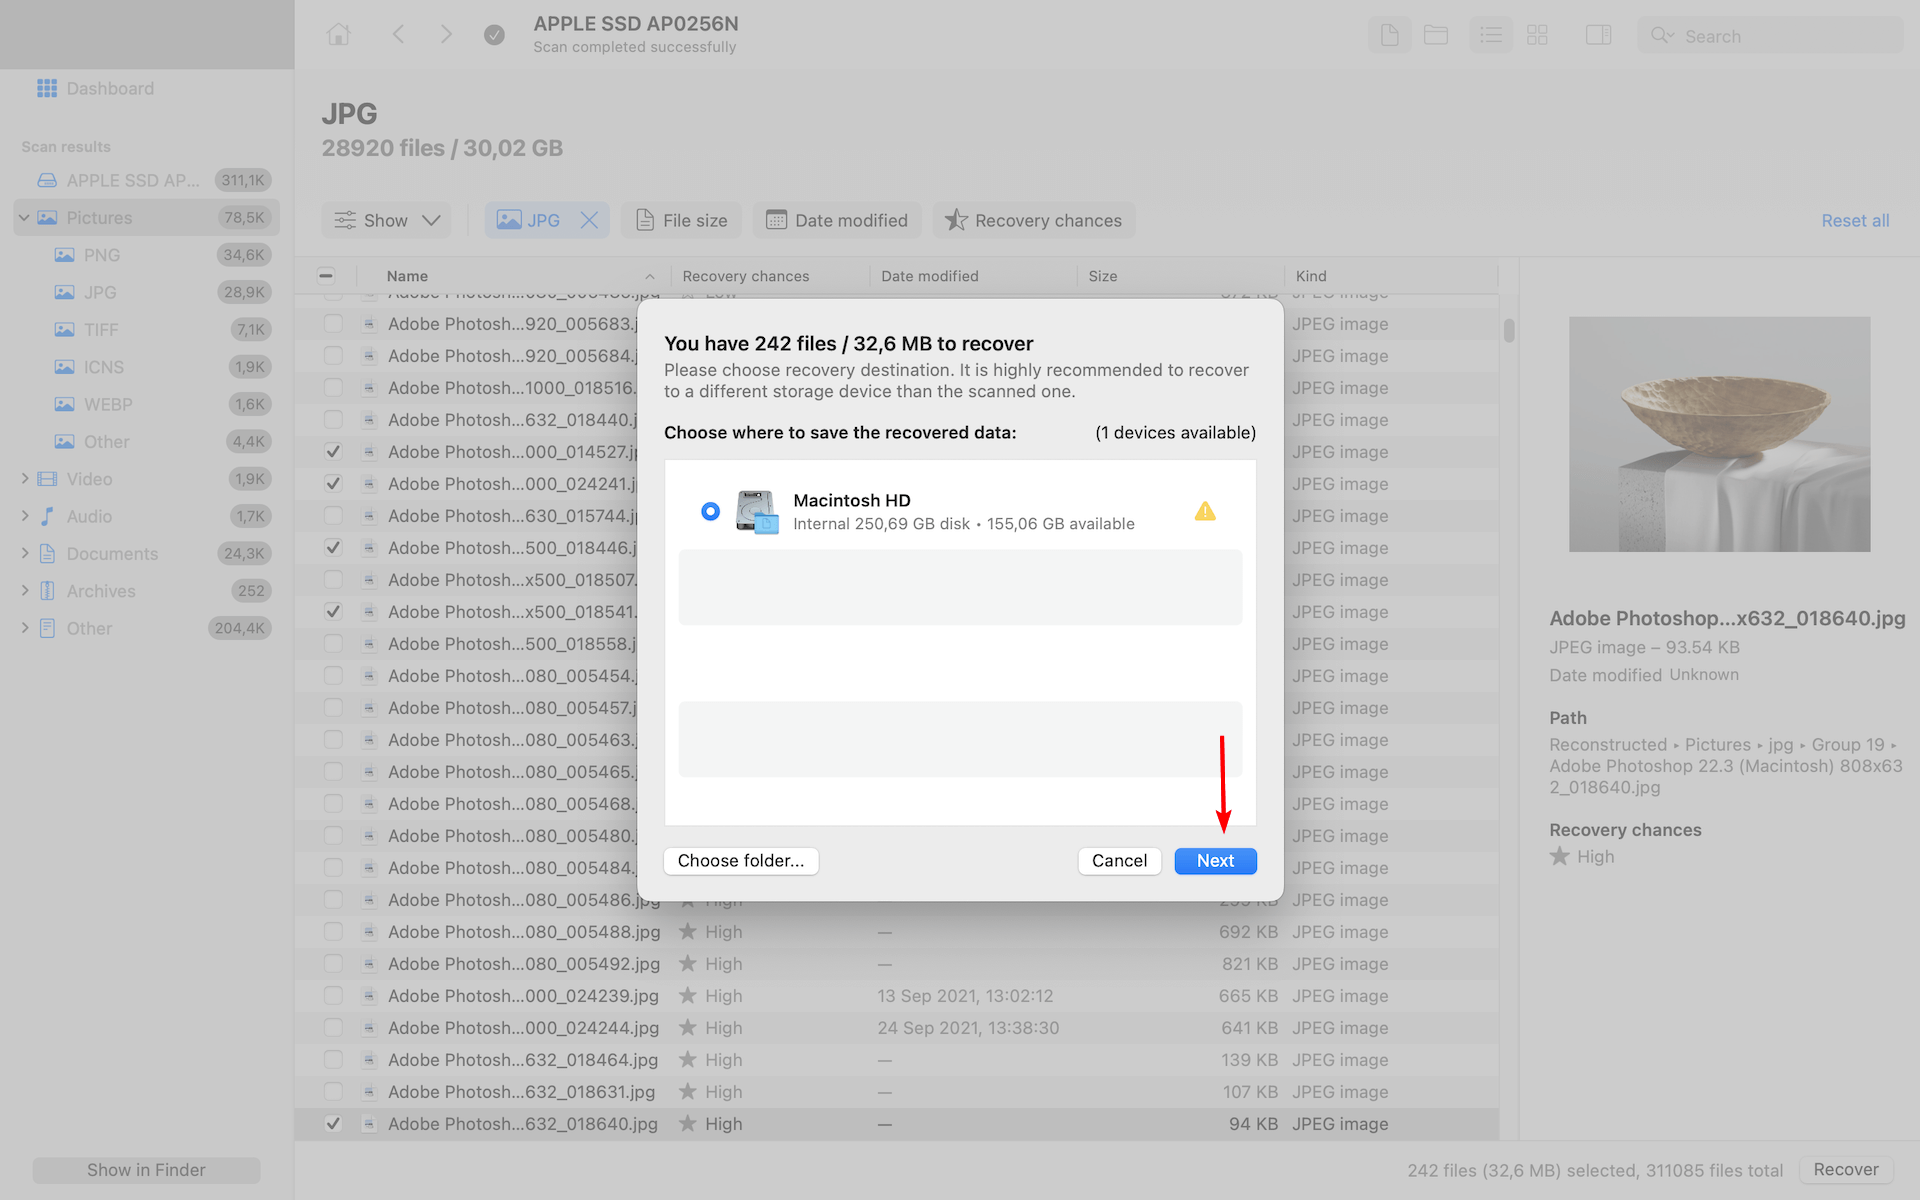
- Choose a recovery destination different from the original location (to prevent potential further overwriting), then click Next to complete the recovery.
Disk Drill’s free version allows you to scan and preview all recoverable files, so you can confirm your file can be recovered before purchasing. A license is only required to actually recover the files to your system.
The success of this method depends on how quickly you act and how much you’ve used your Mac since the overwriting occurred.
Method 2: Restore from Time Machine Backups
Time Machine is a built-in macOS tool that can be used for various purposes, including for recovering accidentally replaced files on Mac. However, there is one major drawback of this software: if your backup doesn’t contain the original file, you won’t be able to restore it.
Here’s what you should do to recover a file that was replaced via Time Machine:
- Connect the external drive containing your Time Machine backup to your Mac.
- Launch Finder (press Command + Shift) and open the folder that contains the overwritten file.
- From the Menu Bar, click the Time Machine icon.
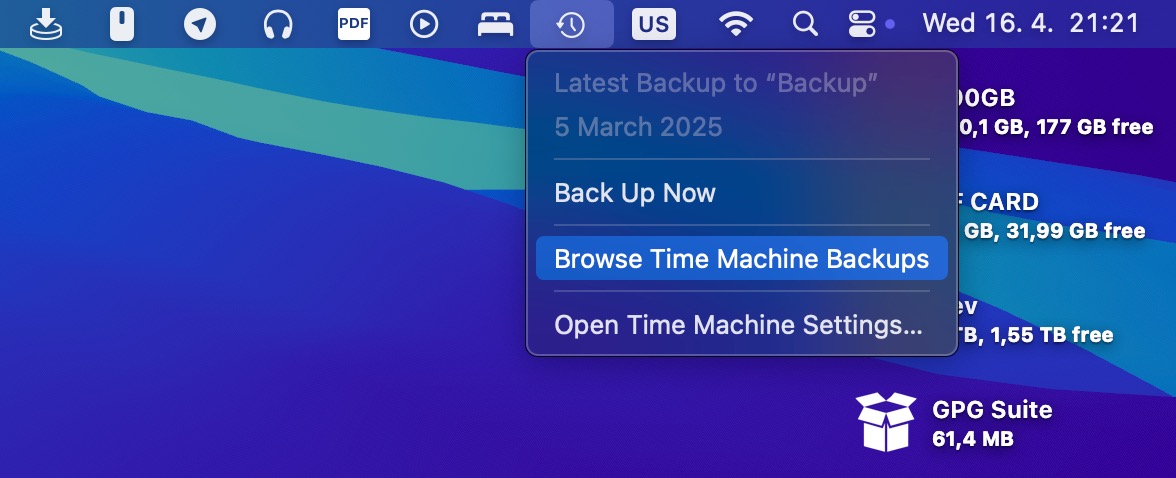
- Click Browse Time Machine Backups.
- Use the arrows next to the screen to navigate through your backups. Once you’ve found the needed file version, hit Space Bar to preview it, or click it to select the file. Then click Restore on the bottom of the screen.
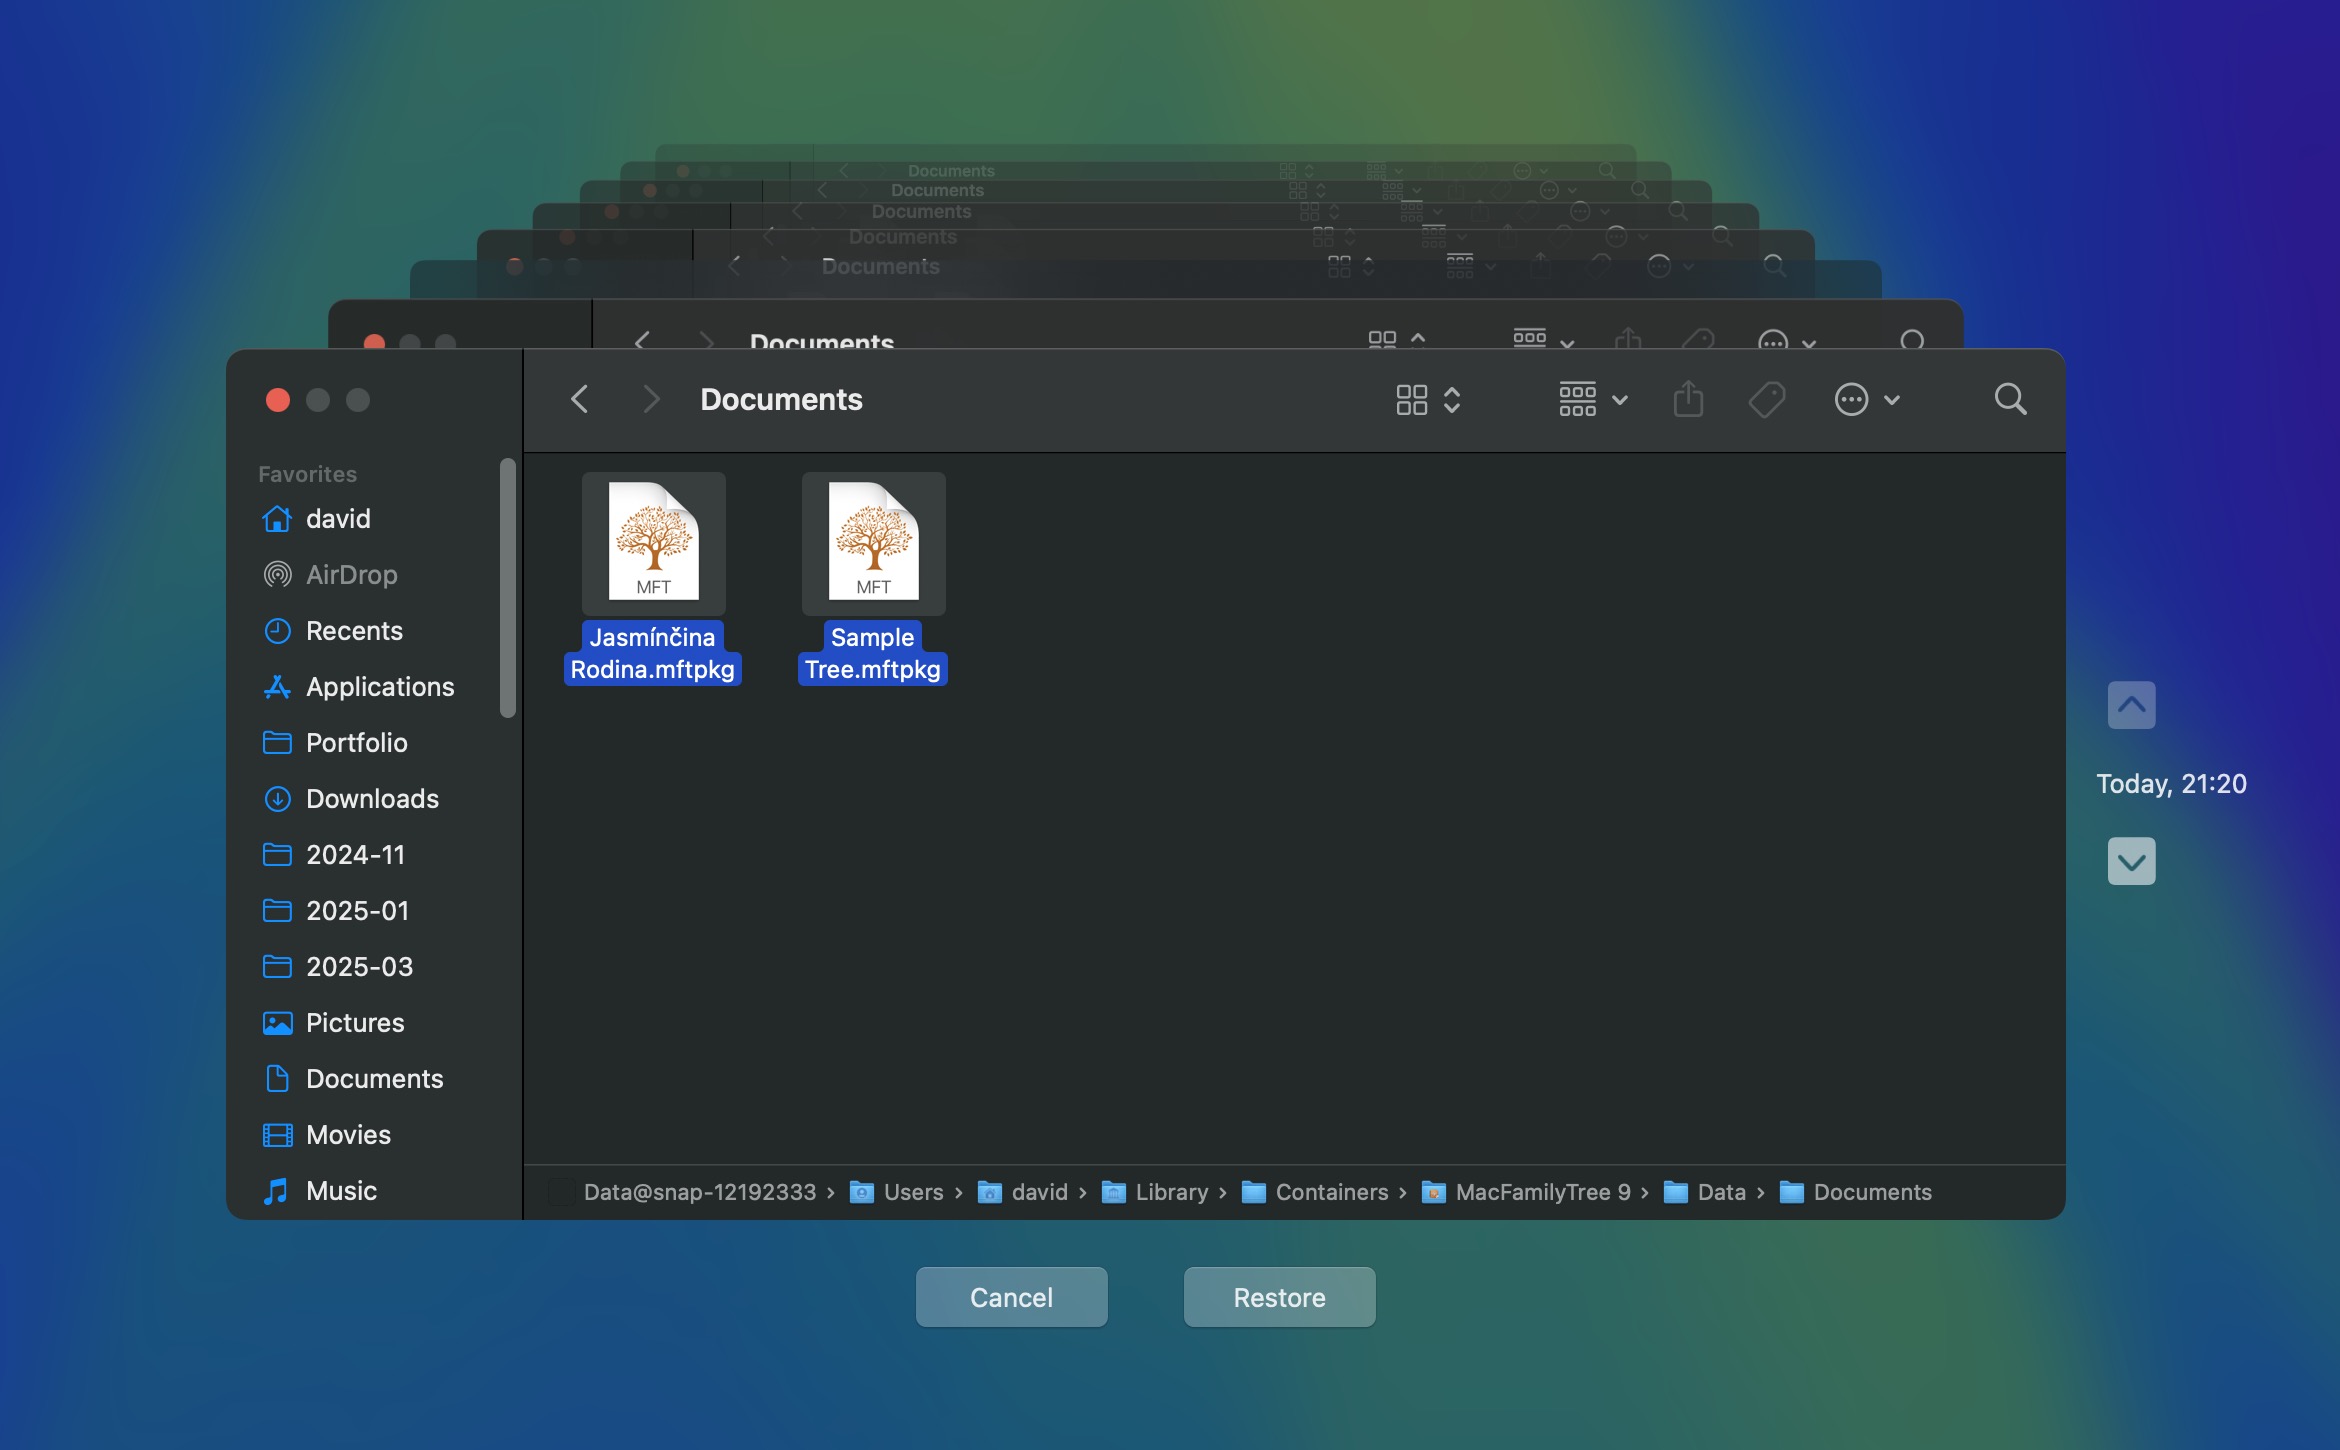
That’s it! After doing this, the original file should reappear on your Mac.
Method 3: Access Previous Versions in Cloud Storage
If instead of backing up your Mac via Time Machine, you use a cloud backup service, it’s possible to use that service to restore replaced files. Whether you’re using iCloud or any other online backup service (Dropbox, Google Drive, or OneDrive), the process of recovering overwritten files should be pain-free and quick.
Note: if you’re using iCloud as your backup service, it will store your deleted files for 30 days before erasing them permanently. This is a good thing since you’ll have some time to retrieve the needed files.
Here’s how to recover replaced files on Mac via iCloud:
- Head to iCloud.com and log into your account.
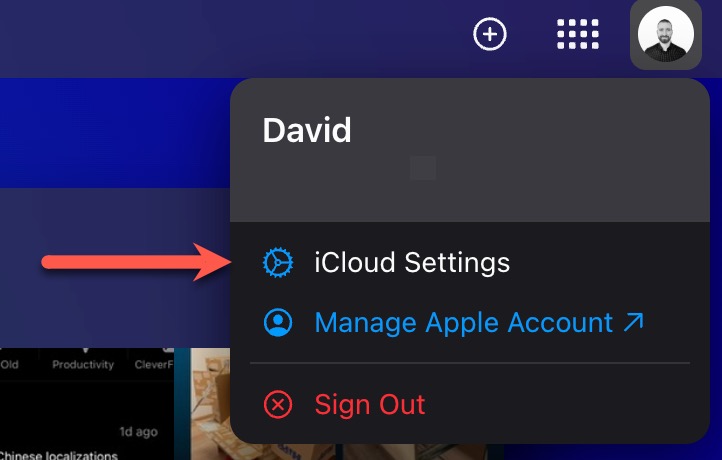
- Click on your profile icon and then go to iCloud Settings.
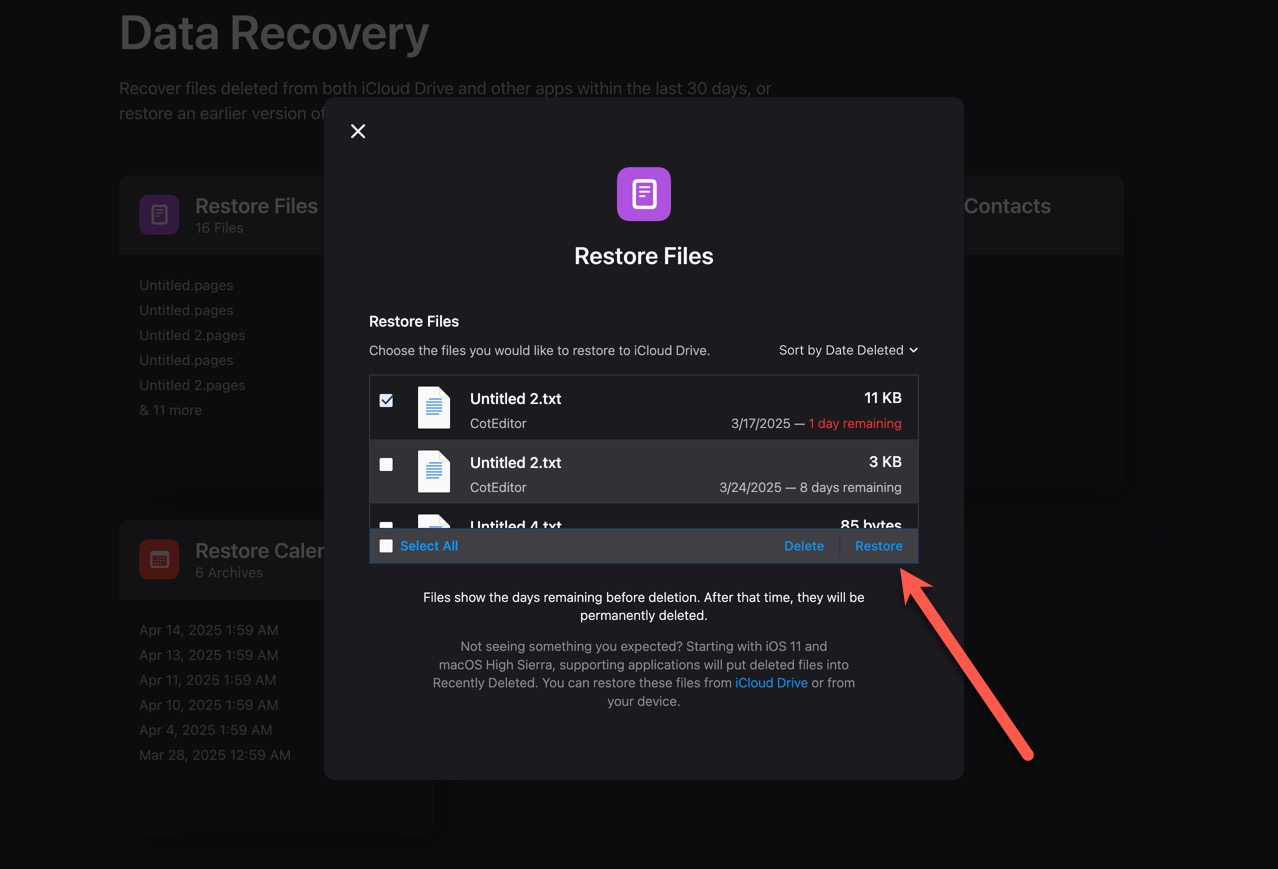
- Navigate to the Data Recovery tab.
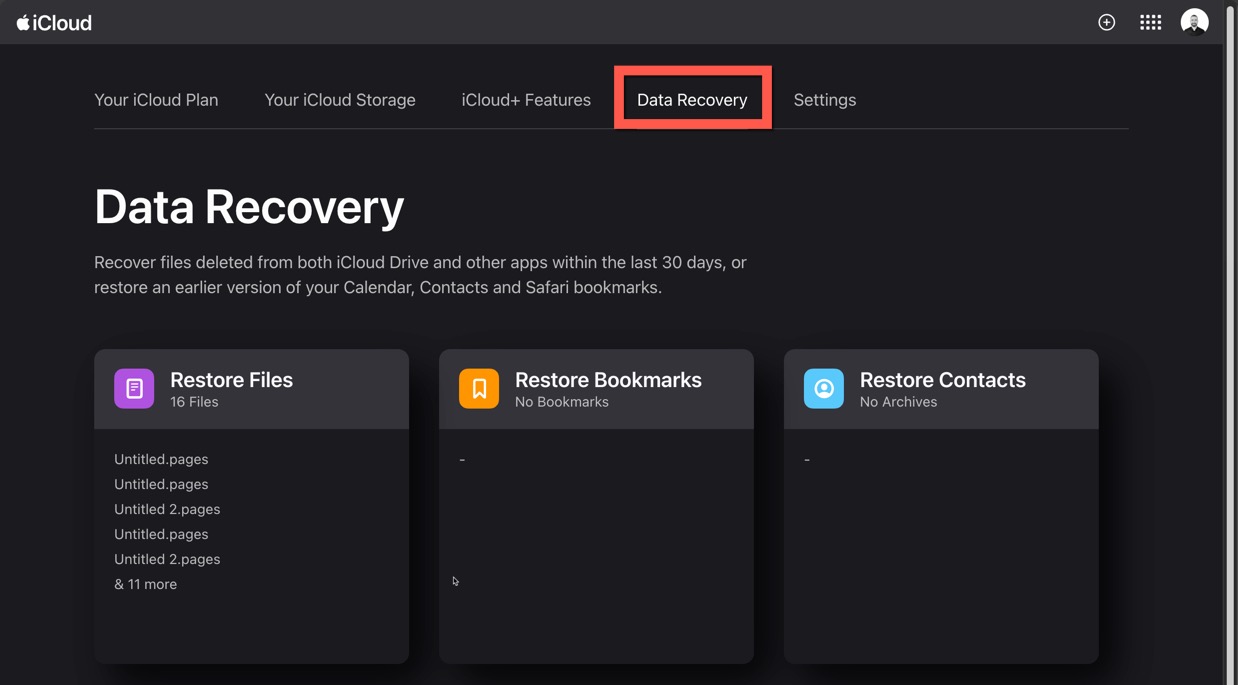
- Find your overwritten file in the Restore Files section. Select it and click Restore.
If you’re using a different online backup service, you should be able to get back a file you replaced as long as that service keeps a history of changes made to your files and as long as you’ve completed a backup at the right time.
Method 4: Revert to Earlier Document Versions
macOS includes a built-in versioning system that automatically saves snapshots of your documents as you work. Many Mac-compatible applications, including Apple’s native apps (Pages, Numbers, Keynote) and Microsoft Office programs (Word, Excel, PowerPoint), integrate with this version history feature. This system stores previous iterations of your files independently of manual saves to create a detailed timeline of all changes made to your document.
If you’ve accidentally overwritten a file while working in a compatible application, here’s how to recover your original content using the built-in versioning system:
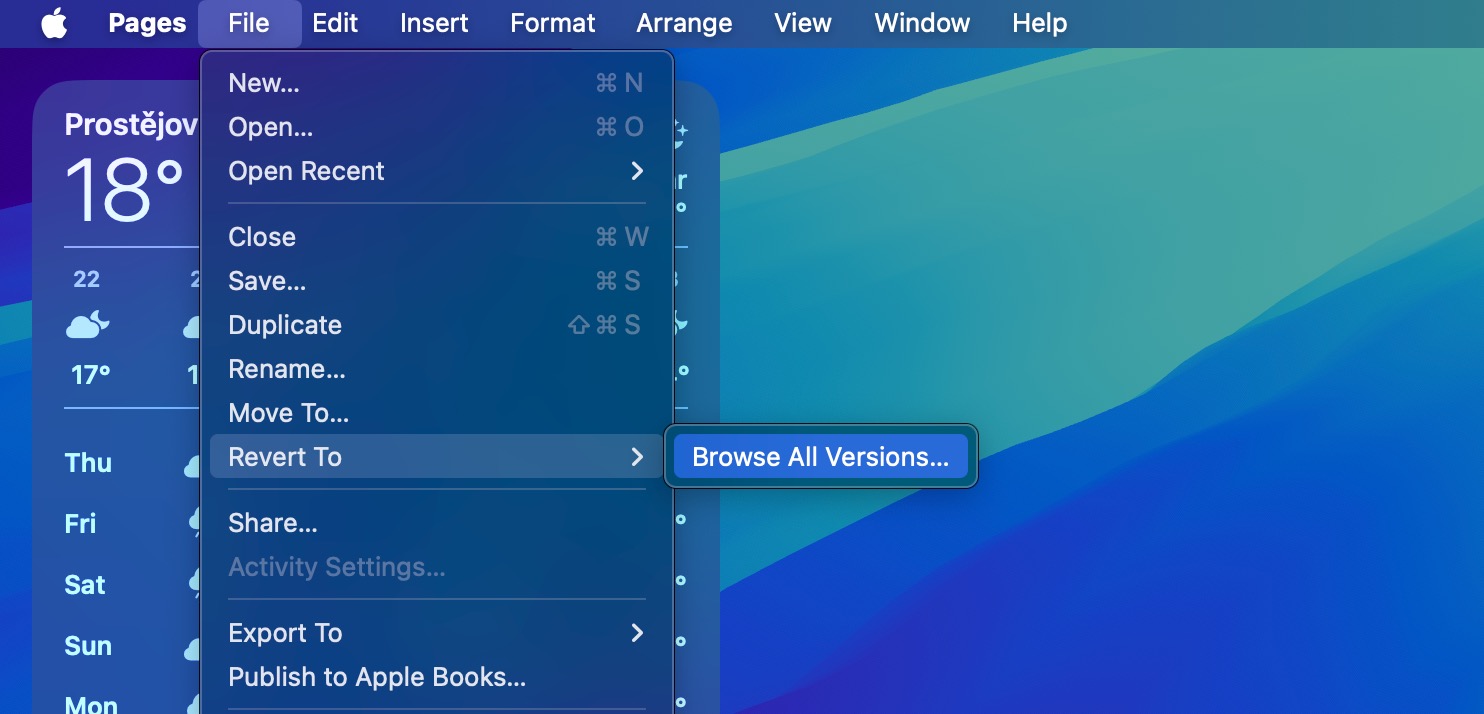
- Find the file that you wish to restore and open it. Then from the top screen menu, click File > Revert To and then click Browse All Versions.
- Scroll through all of the available file versions using the arrows on the right of the screen.
- Once you’ve found the needed version, click the Restore button to recover the file (or if you want to save both the overwritten file and the other version, press and hold the Option key and click Restore a Copy).
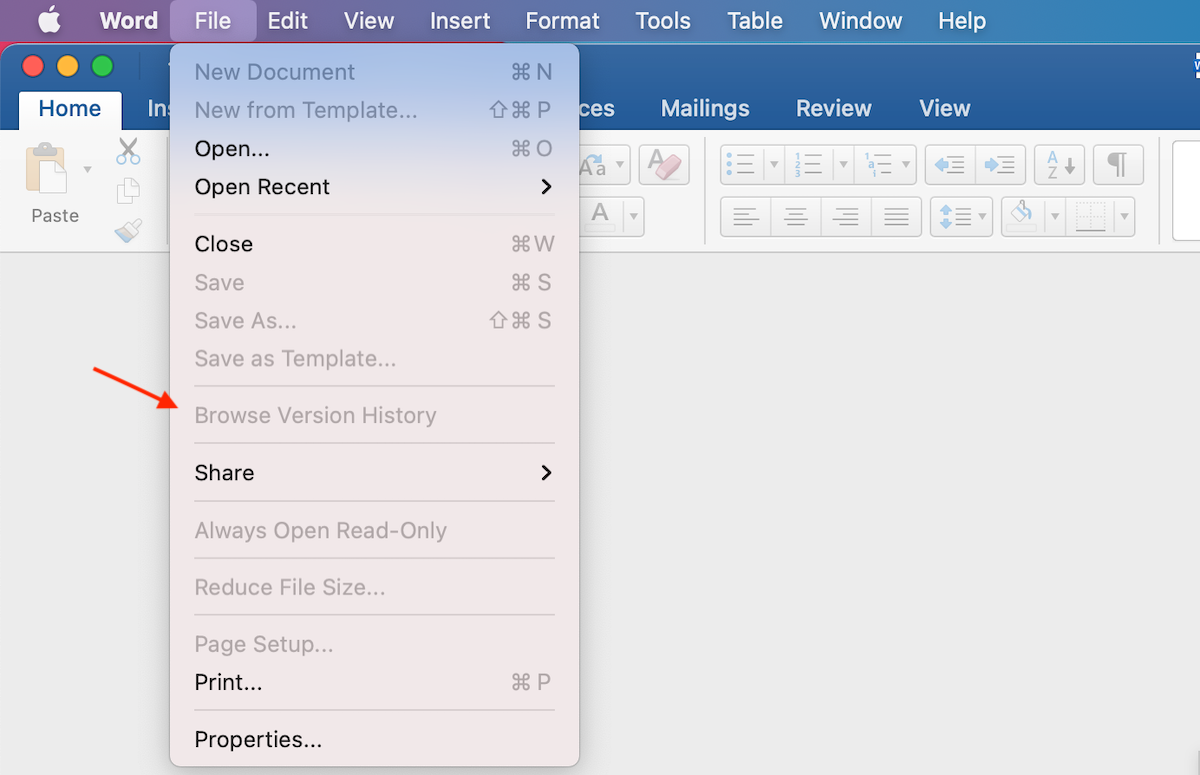
If you need to restore a file through non-native macOS apps (Microsoft Word, for instance), do the following:
- Double-click the needed file to open it.
- From the top menu, click File > Browse Version History (or if you’re using Microsoft 365 for Mac, use the app’s title bar to choose the needed document and then click Browse Version History).
- Click the needed file version.
- Once the chosen file version opens, click File > Save to save the recovered file on your Mac.
Depending on the application you’re using, the process of recovering overwritten files may slightly differ.
Final Thoughts
While the four methods we’ve covered have helped many recover overwritten files, good user habits are your best line of defense against issues with data loss caused by overwriting. At the least, consider implementing:
- Automated local backups through Time Machine.
- Keeping important documents in cloud services with versioning capabilities.
- Implementing a file naming convention that includes dates or version numbers.
- Keeping your work and personal life separate through multiple accounts or macOS installations.
- Installing a reliable data recovery tool before you need it.


