 Unable to play an important video recorded on your Sony camera? You’re likely dealing with video corruption. This usually happens when you switch off your camera mid-recording, or its battery dies out—preventing the recorded video file from being saved properly. Other factors behind video corruption include improper ejection of the SD card, faulty SD cards, interrupted video transfers, or logical and physical issues with the SD card.
The good news is that there are several free ways to perform Sony video file repair—online, or using local software. Here’s a detailed look at them.
Which Sony Camera Video Formats Can Be Repaired?
Sony cameras use several video formats depending on your recording settings and camera model. However, not all of them can be repaired using widely available video repair tools. Some formats are proprietary and can only be repaired using specialized tools with the help of experts.
Here are the video formats used by Sony cameras and their repair chances:
| Format | Repair Chances | Suggested Repair Methods |
| MP4 (H.264, and H.265) | High repair chances as MP4 is a widely used format, supported by almost all video repair tools. | If you have another working MP4 file from the same camera, use an online video repair program, or a third-party video repair tool. Else, use a video transcoder to re-encode the file. |
| MTS/MT2S (AVCHD) | Moderate repair chances. Very few repair tools support MTS/MT2S files natively. The only way out is to convert or re-encode the file. | Encode/convert the MTS/MT2S file to MP4 using HandBrake, or Shutter Encoder. This should fix any header corruption, indexing, and playback errors. |
| MXF (XAVC-I/XAVC-L) | Moderate repair chances because, again, few repair tools support MXF repair. | Convert the MXF file to another format using a video transcoder. |
| RAW | Low repair chances as Sony’s RAW videos use proprietary encoding. Video repair tools and transcoders are unlikely to help. | Contact a professional. |
In addition to the video format, the type of corruption plays a role too.
Compression issues, missing metadata, freezing, stuttering, and corrupt index files can be easily fixed by most video repair tools, and video transcoders.
However, corrupted codec data, lost decryption keys, and a significant amount of missing data can’t be fixed using regular video repair tools. These issues require expert assistance.
How to Repair Corrupted Videos From a Sony Camera for Free
When repairing your Sony camera’s corrupt files, you have three options—use an online video repair service, download a third-party video repair tool, or re-encode the corrupt video using free tools.
Regardless of which method you use, the corrupt video should not be 0 KB in size. It’s unlikely you’ll be able to repair such videos using video repair tools because it doesn’t contain any data for the tools to work with. It may be worth looking into Sony SD card data recovery to find a copy of the video that contains data, and can potentially be repaired.
For Method 1 and Method 2 to work, you’ll need a healthy video recorded on the same camera. This video will be used as a reference file to repair the corrupt video.
Let’s get started:
Method 1: Use a Free Online Video Repair Service
The convenience of online video repair services is unmatched—upload the corrupt video, upload a healthy reference video, and click repair. That’s all. The repair process itself is usually quick, thanks to the wonders of cloud computing.
But there aren’t many free video repair services that can reliably repair corrupt videos. To be safe, pick an option from our list of the best free video repair tools.
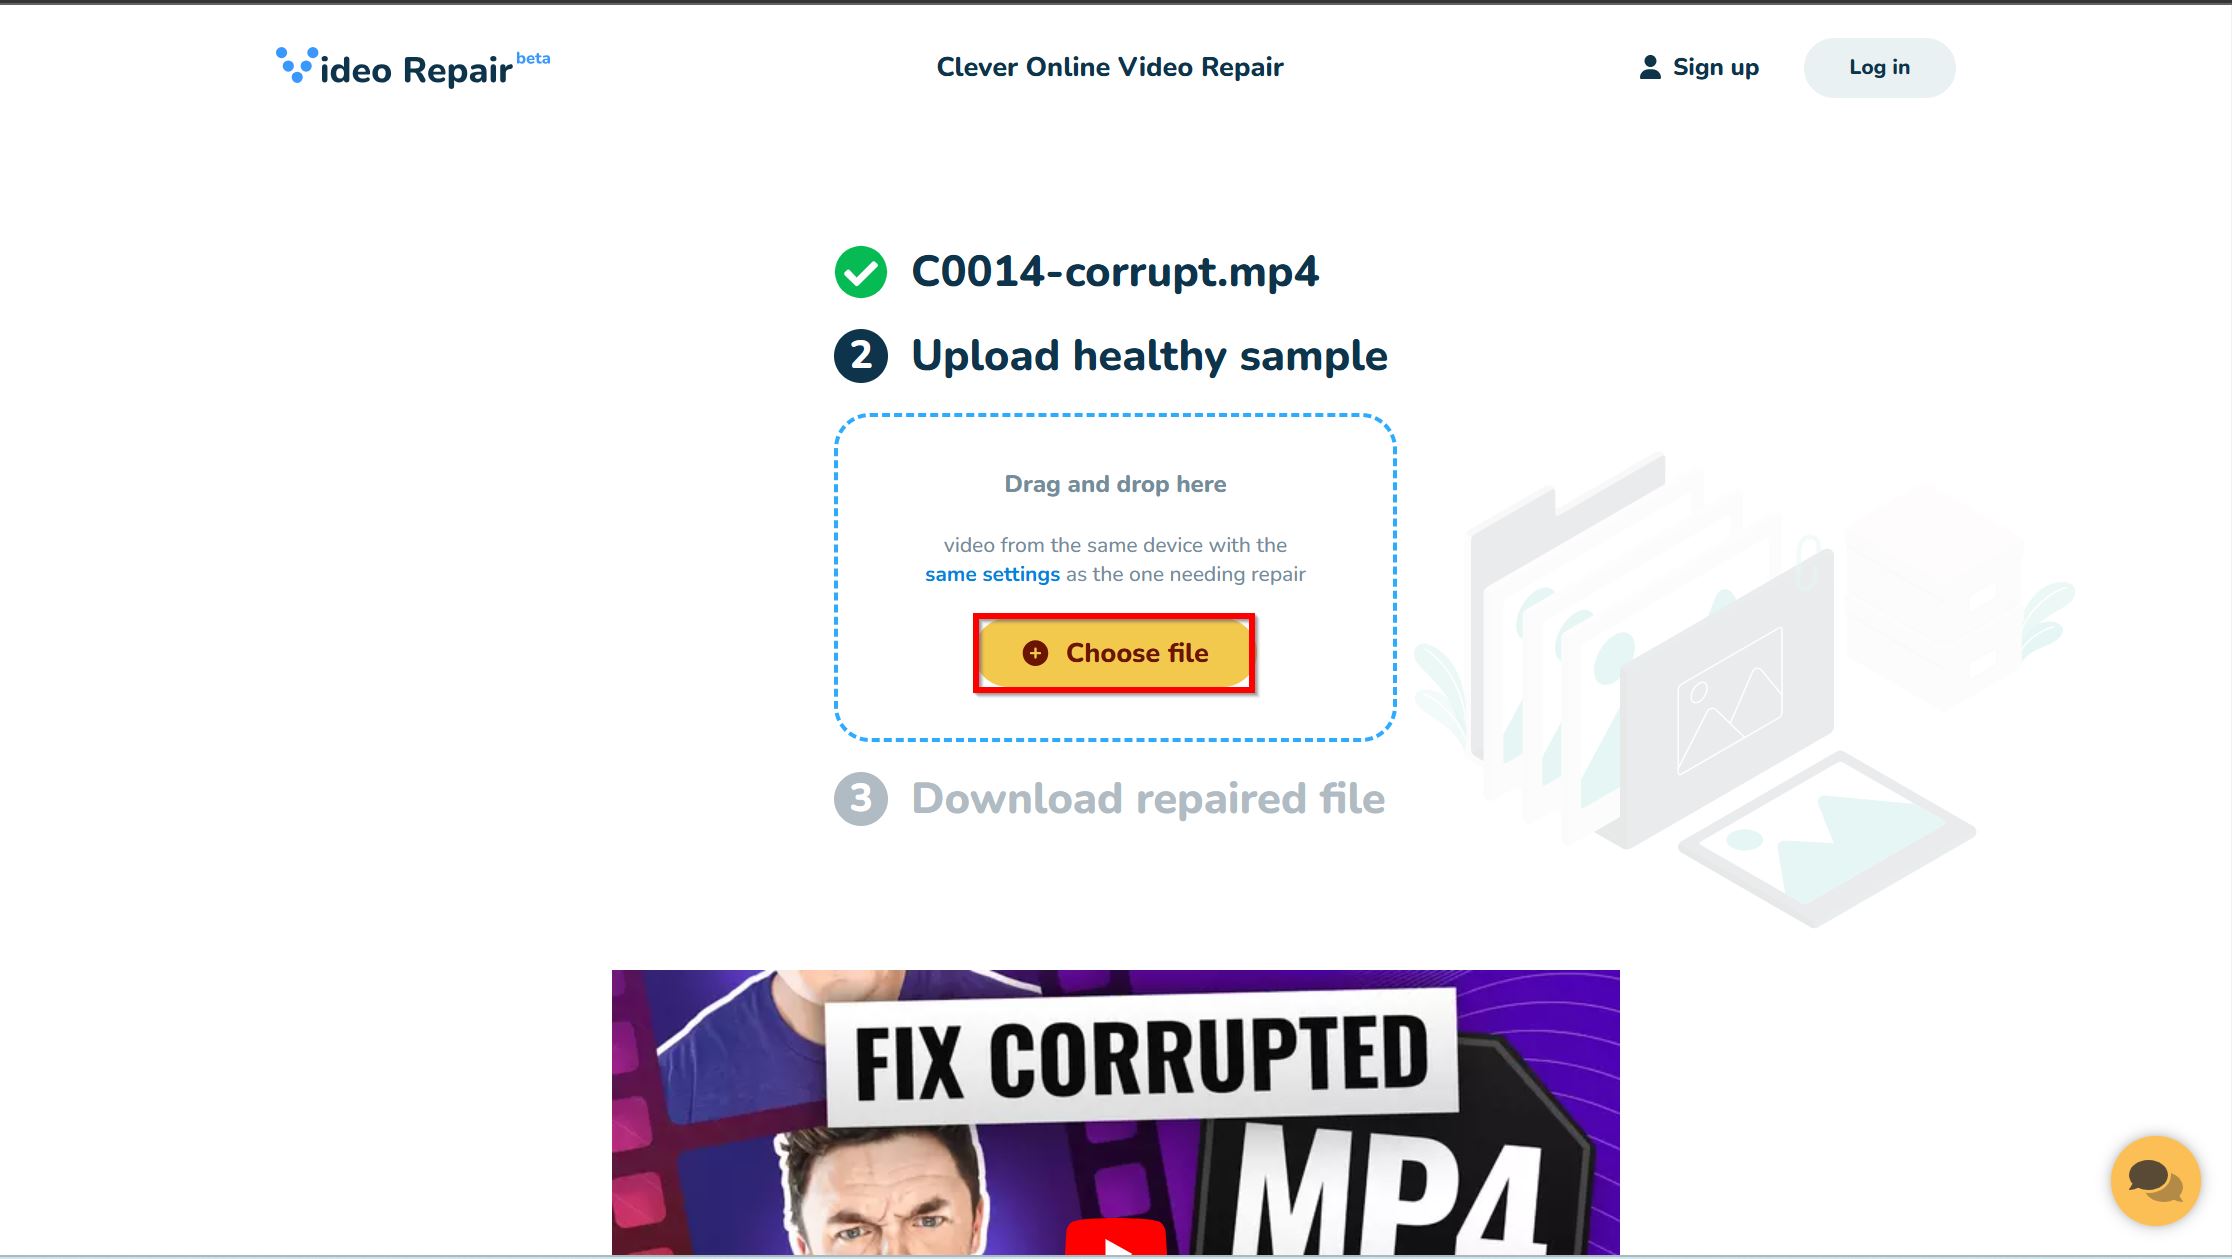
For this specific case, Clever Online Video Repair fits the bill perfectly. It’s free to use, supports MP4 files, and repairs video files in a few seconds. The service is safe and takes privacy seriously—it uses the HTTPS protocol, has a clearly explained privacy policy, and your video is deleted within 24 hours, should you change your mind after uploading it. Additionally, it supports video files up to 5 GB in size, which is much more than its competitors.
Here’s how to perform Sony video file repair online using Clever Online Video Repair:
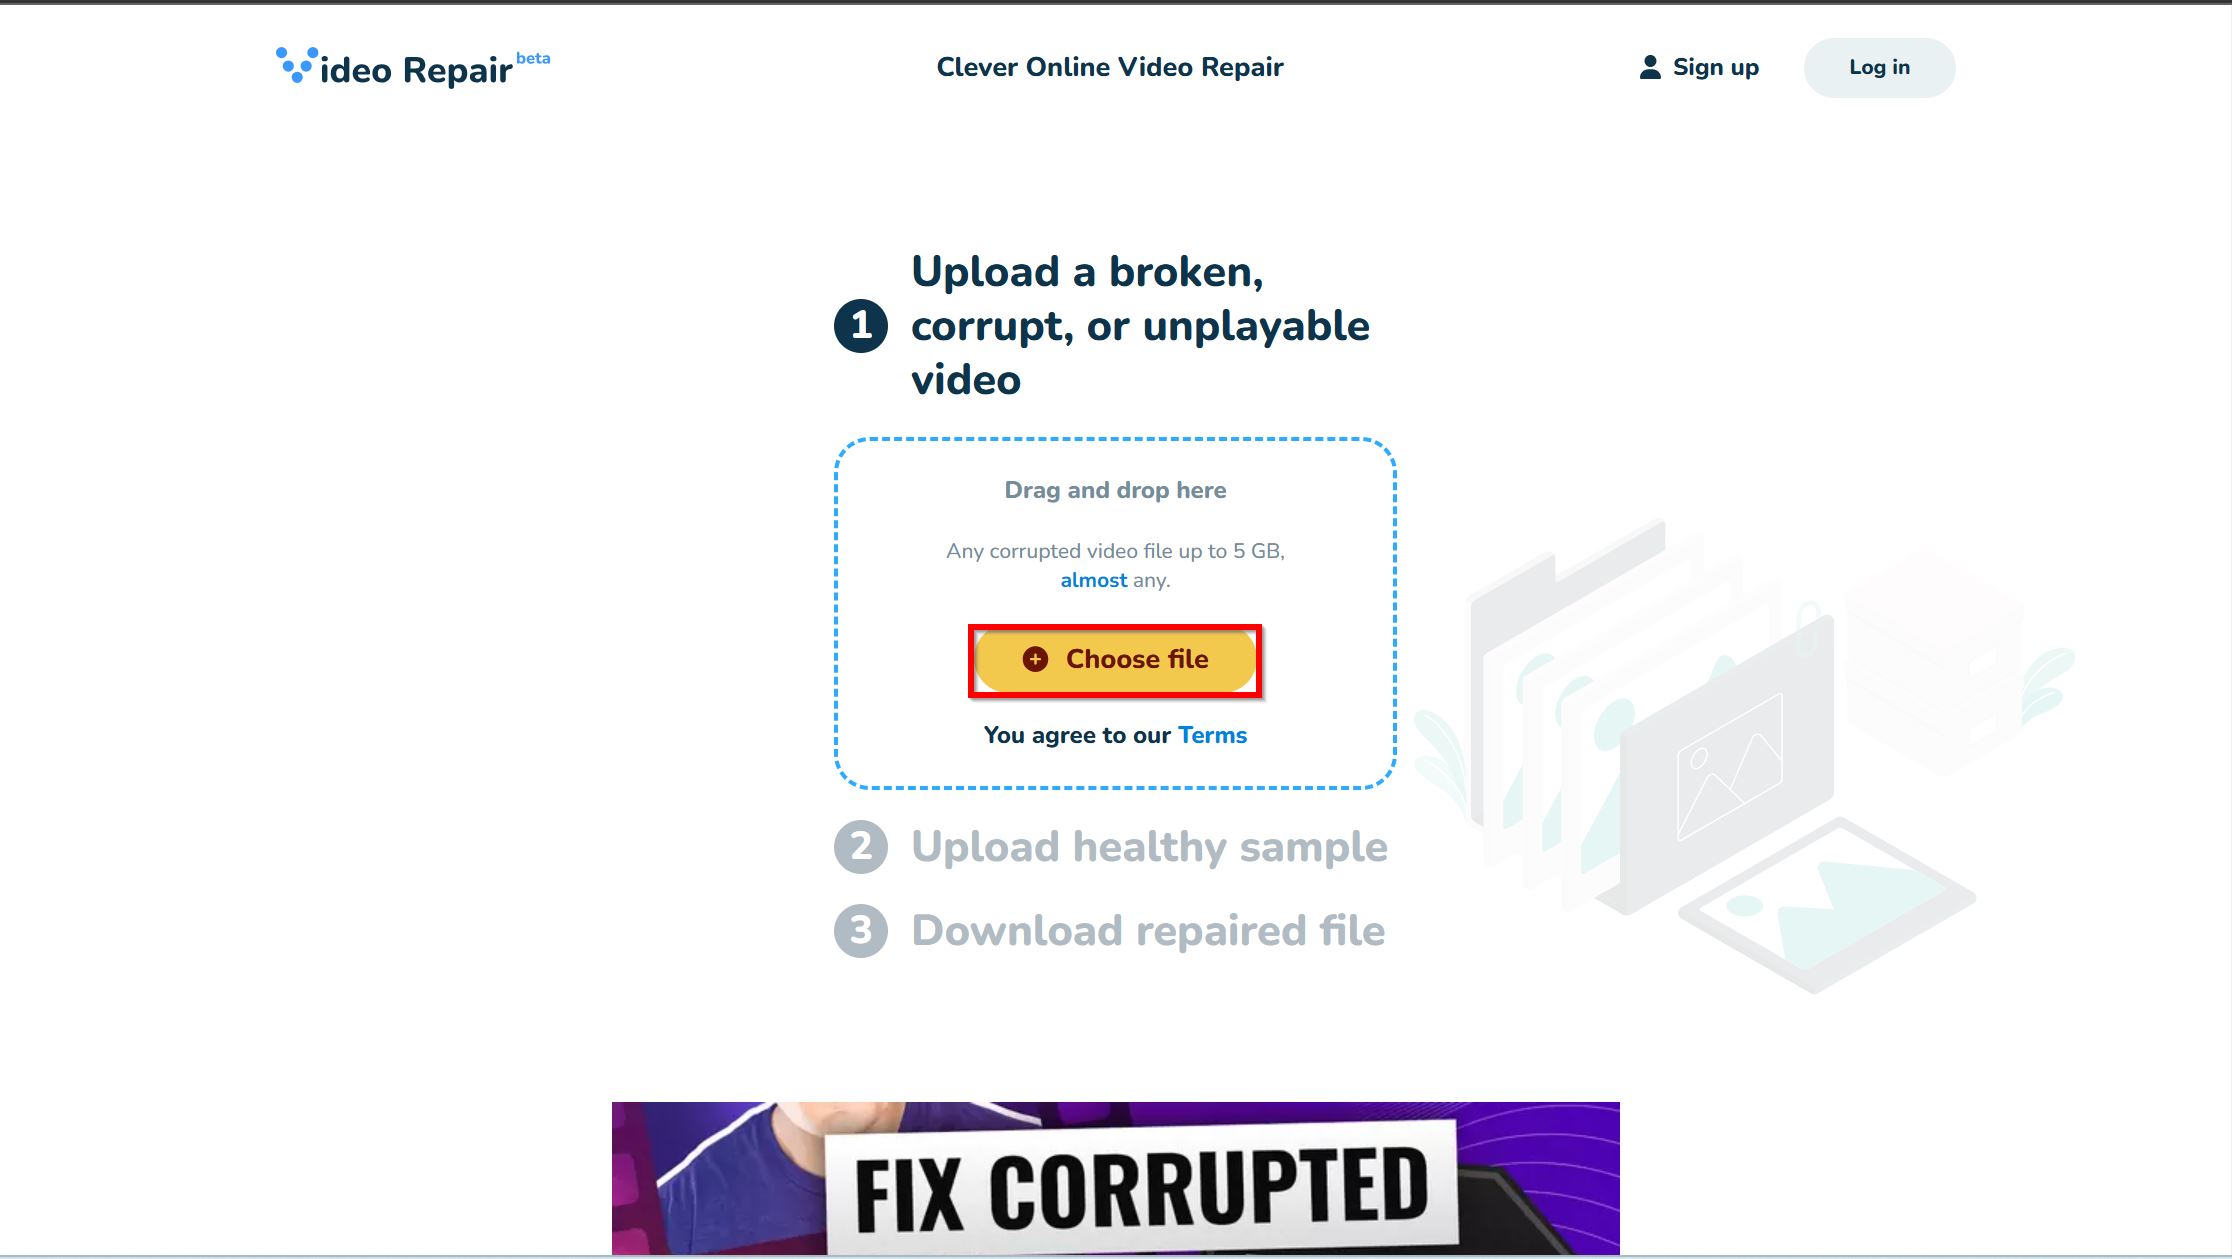
- Visit the Clever Online Video Repair website.
- Click on Choose file, browse for the corrupt Sony camera video, select it, and click Open.
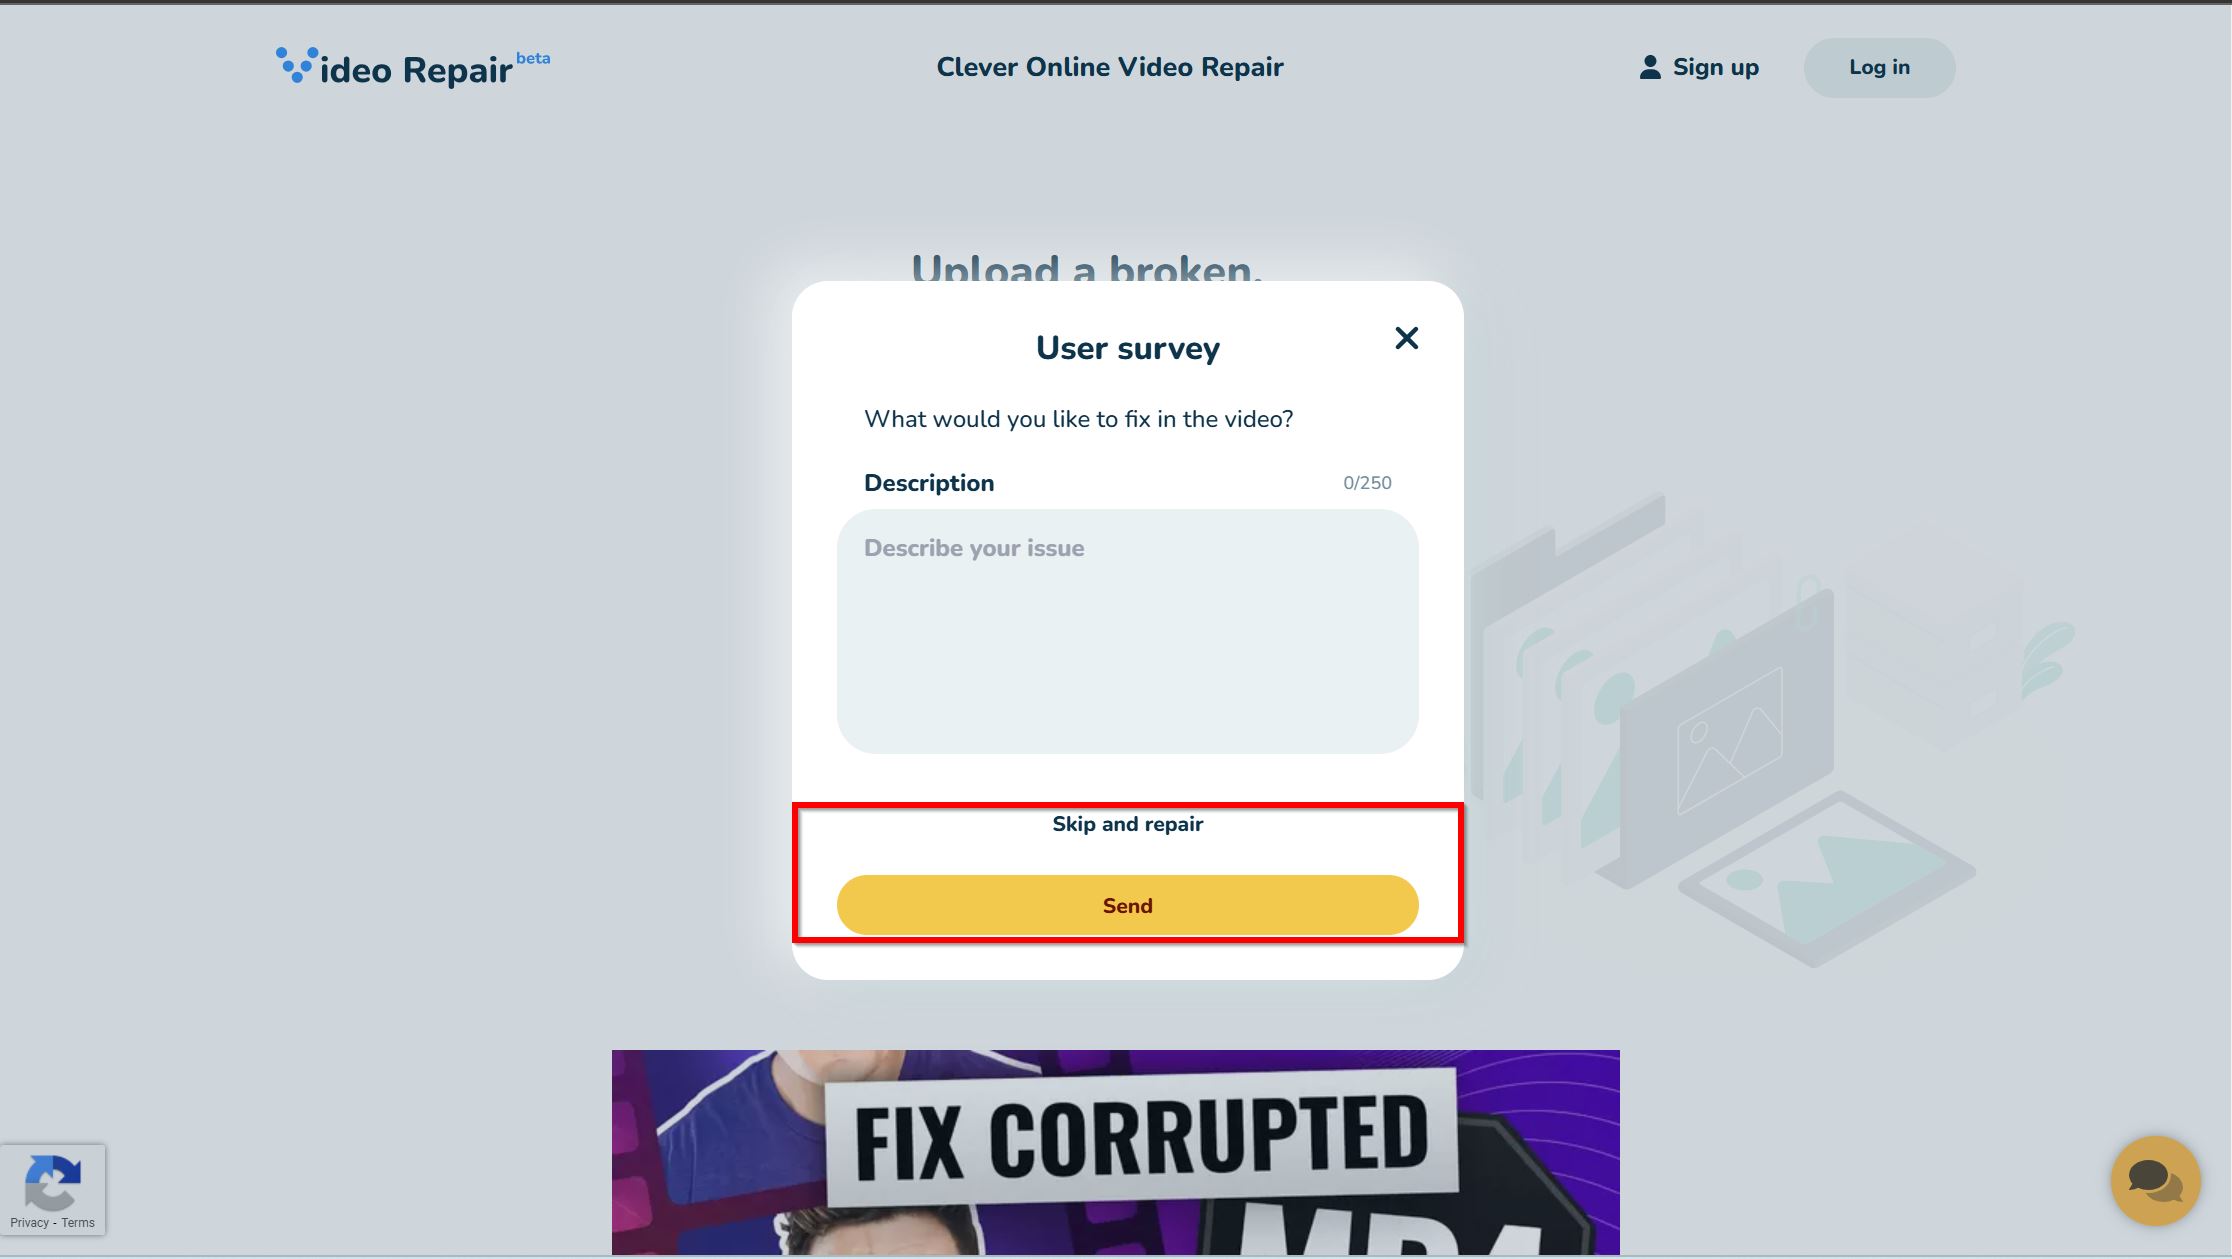
- (Optional) Describe the issue you’re facing with the video—stuttering, unplayability, frozen frames, etc. Click Send. Else, click on Skip and repair.
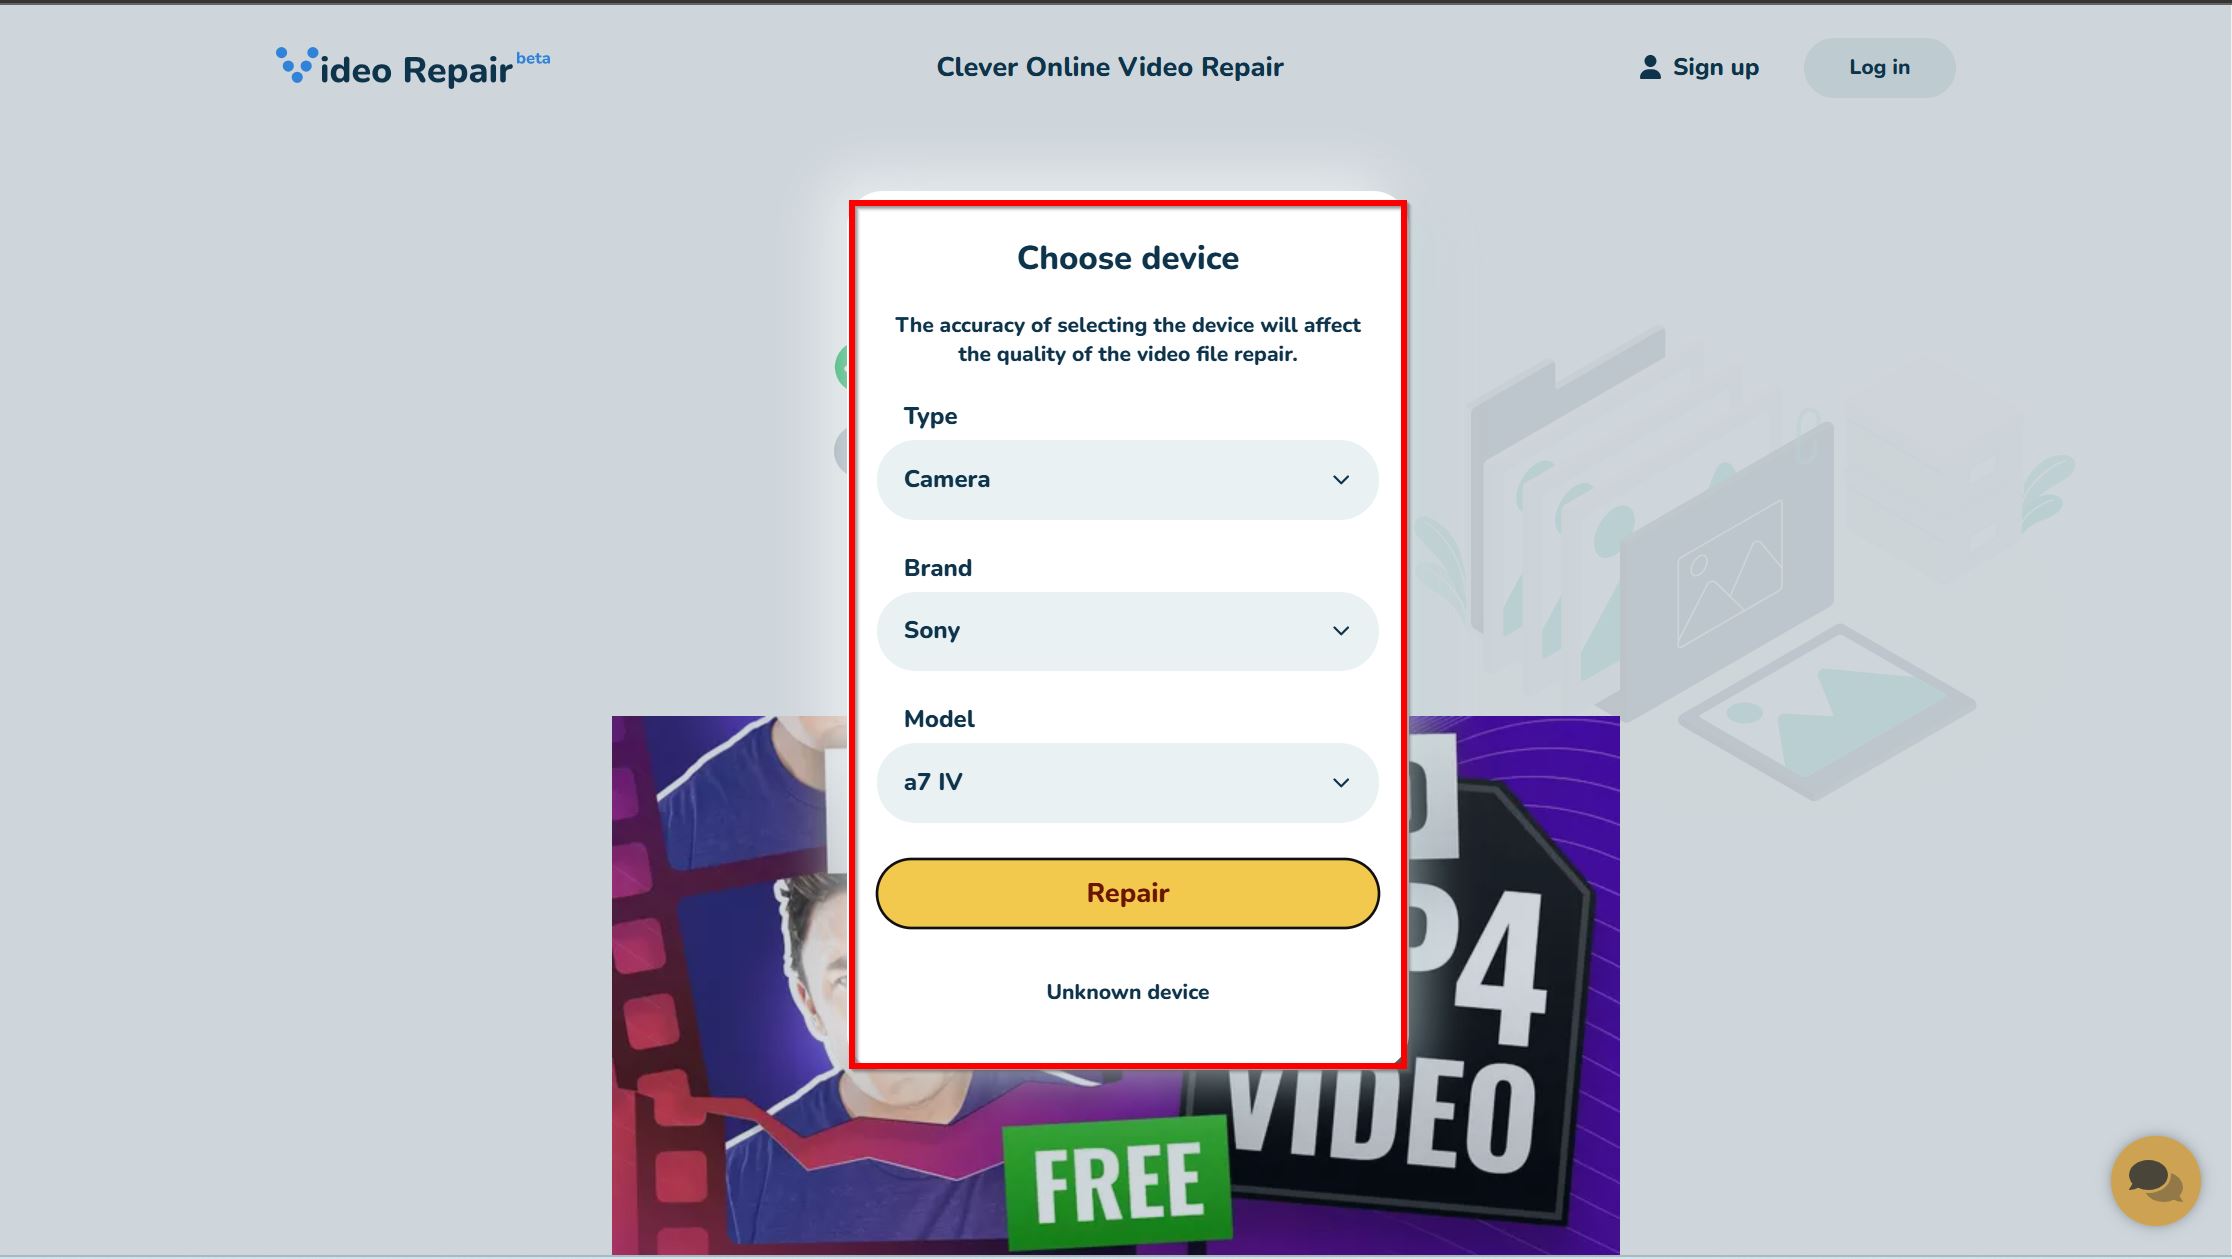
- From the drop-down menus, select the model of your Sony camera, and click Repair. If the model isn’t listed, click on Unknown device.
- Click on Choose file, select a healthy video recorded on your Sony camera, and click Open.
- Register on the website to begin repairing the video. If you choose not to, your uploaded video will be deleted from Clever Online Video Repair’s servers within 24 hours.
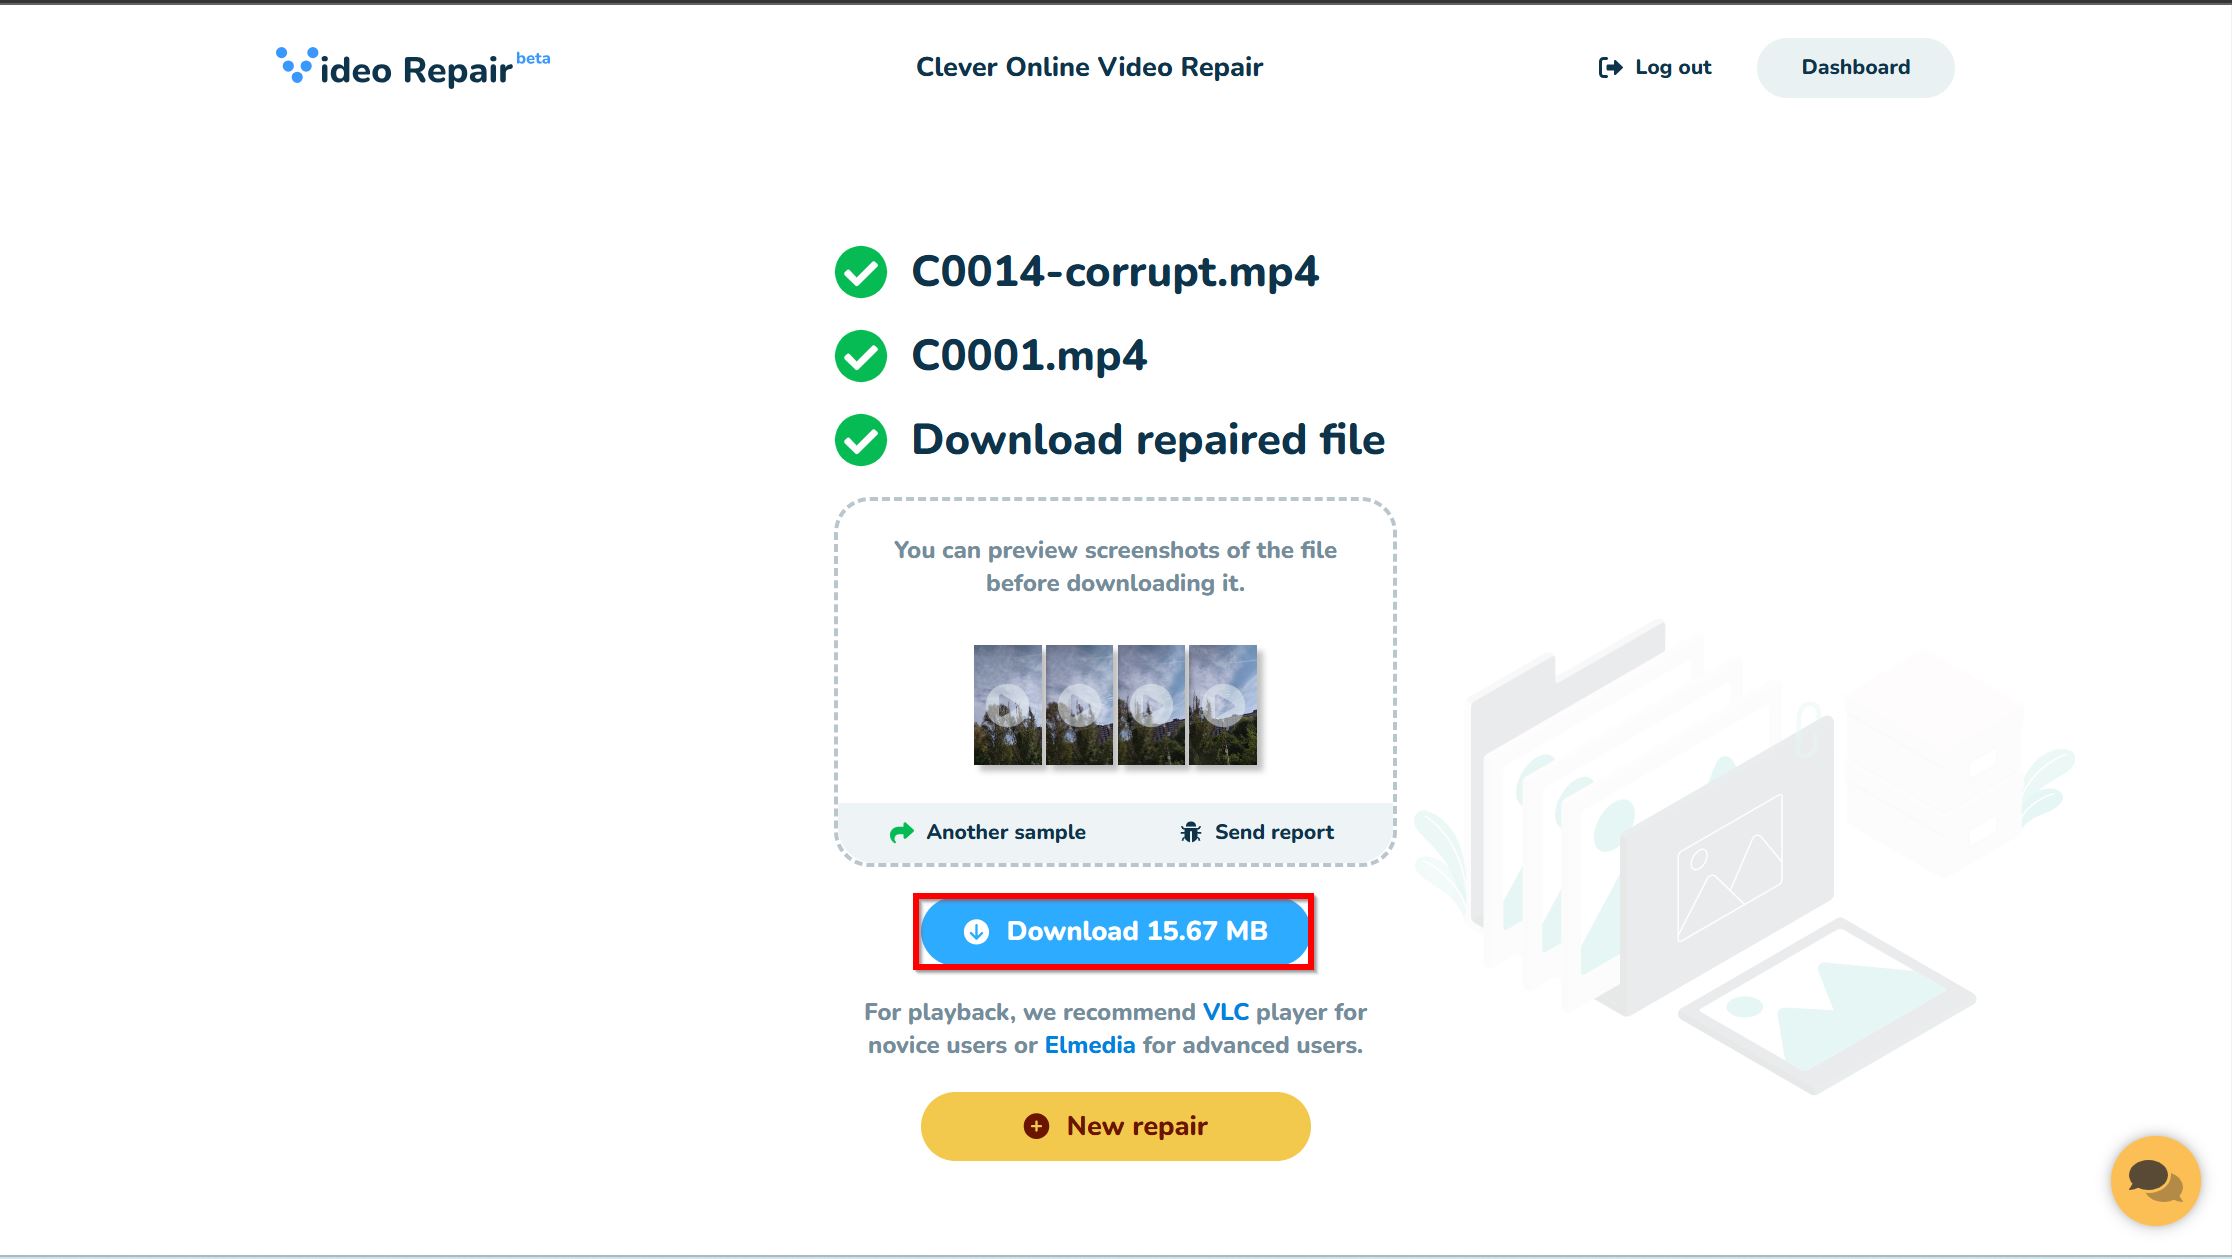
- Preview the screenshots of the repaired video to check its quality.
- Click on Download.
Method 2: Use Free Local Video Repair Software
For sensitive videos, using a local video repair program can provide added peace of mind. You don’t have to upload your videos anywhere—the repair process takes place locally. Additionally, local video repairs aren’t restricted by the corrupt video’s file size.
However, the repair process may take a while since these programs rely on your PC’s processing power, and not the cloud.
Untrunc GUI is an excellent Sony video file repair software. It’s open-source, easy-to-use, and trusted by novice and expert users alike. As long as your Sony camera’s corrupt video uses the MP4 format, Untrunc GUI should be able to repair it.
Here’s how to use Untrunc GUI to repair your corrupt Sony camera video:
- Visit Untrunc’s GitHub page, and expand the Assets menu. Depending on your PC’s system architecture (32-bit, or 64-bit), click on untrunc_x32.zip, or untrunc_x64.zip, respectively to begin downloading the tool.
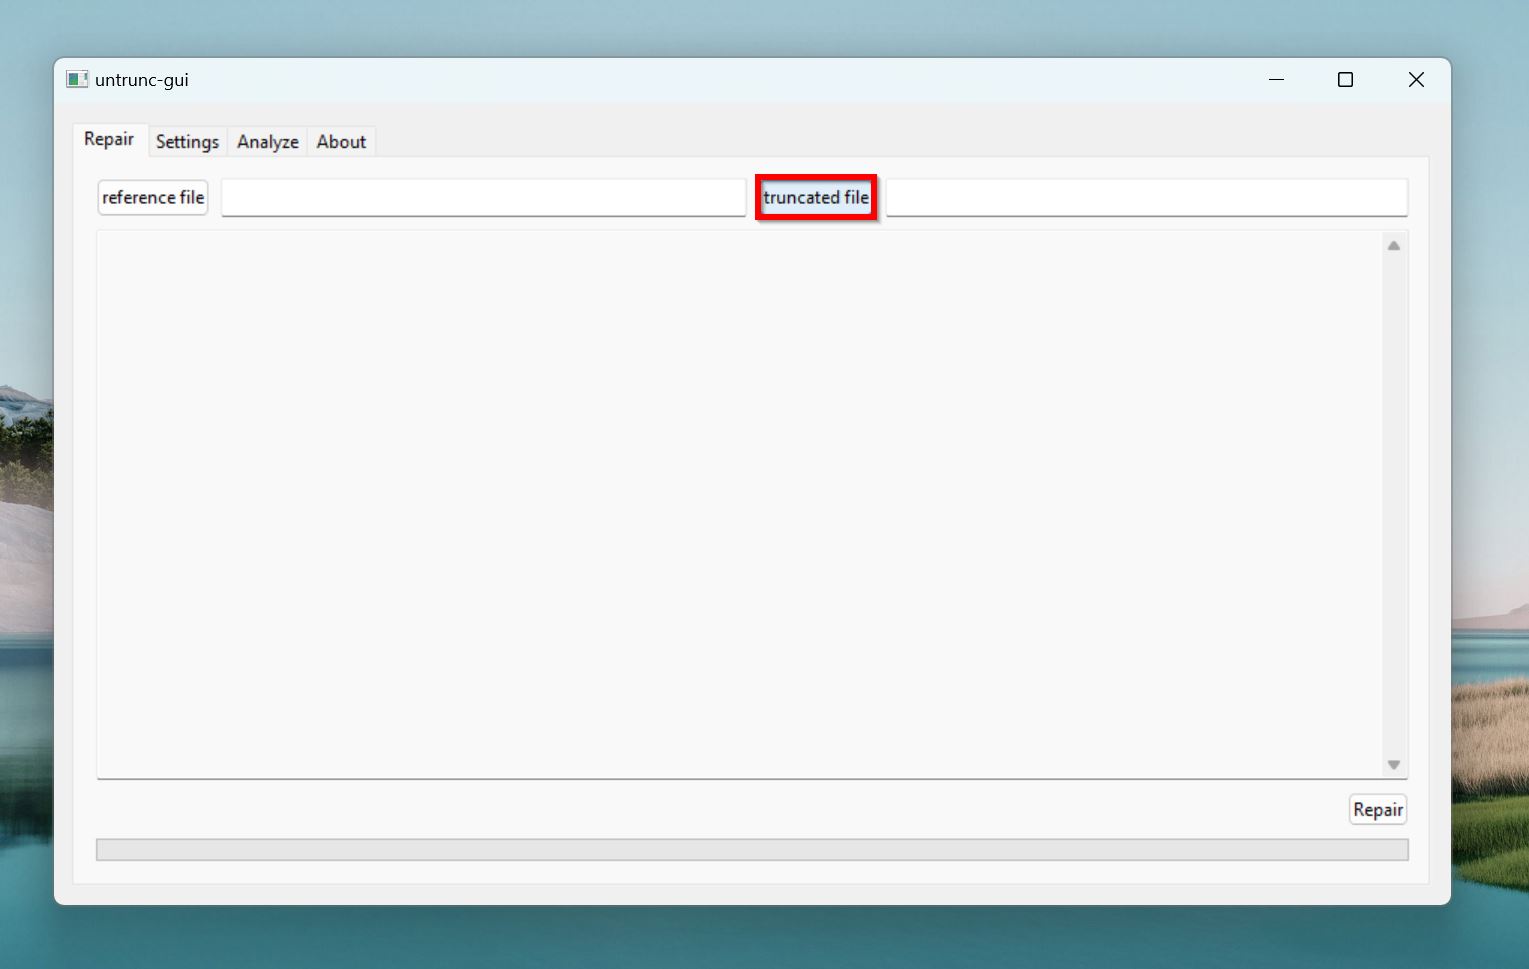
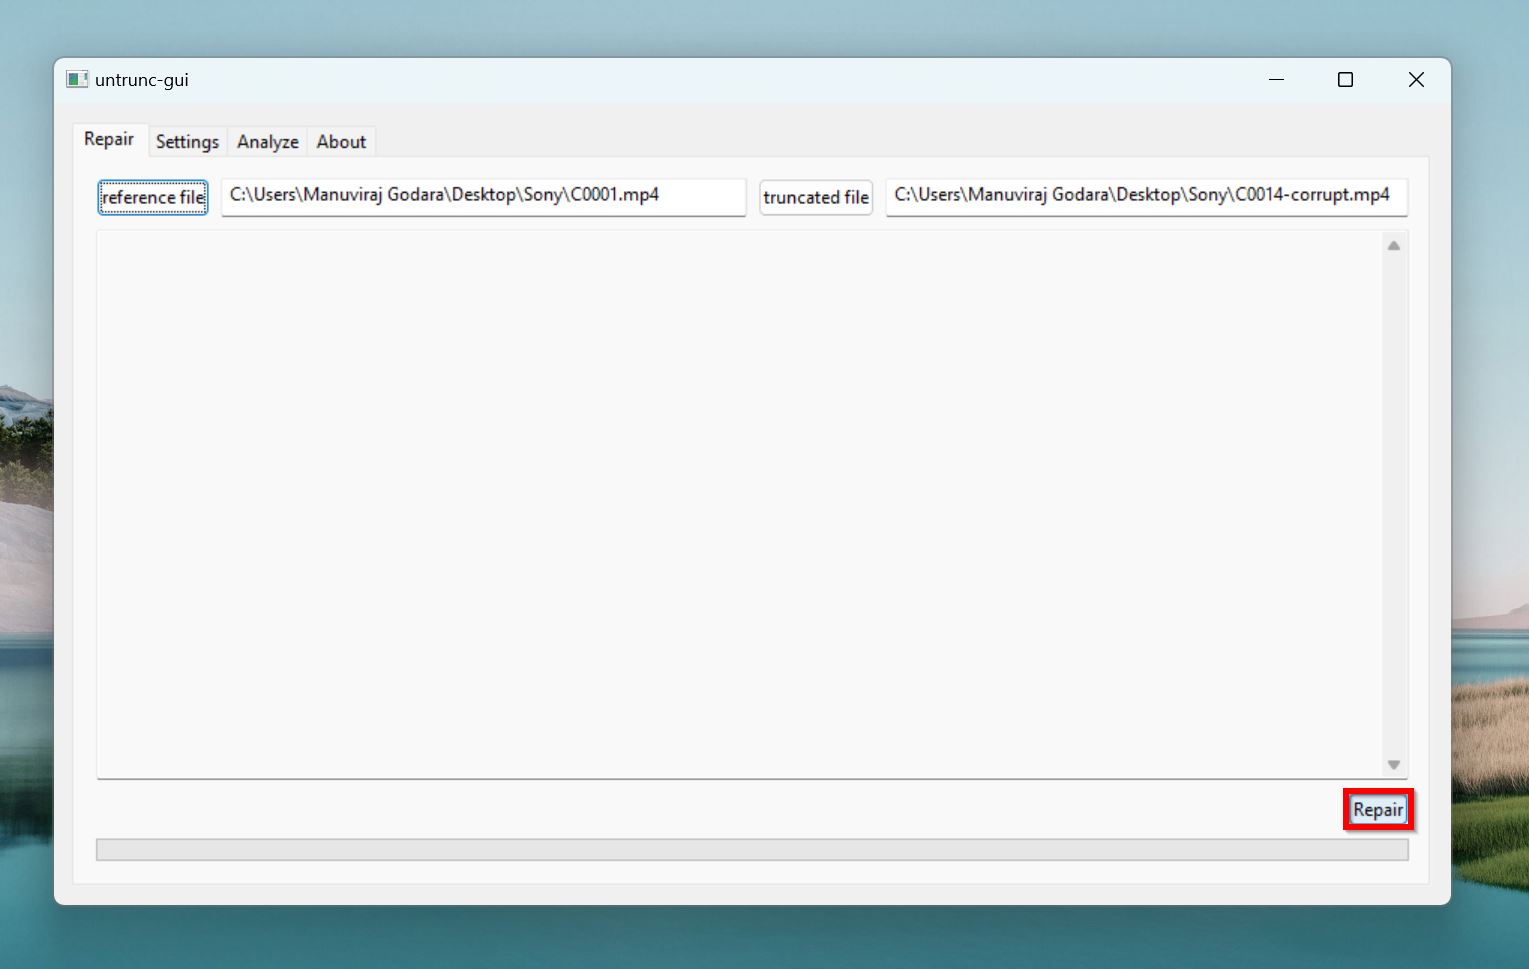
- Extract the ZIP file you downloaded. Run untrunc-gui.exe from the extracted folder.
- Click on truncated file, browse for the corrupt recording, and double-click it.
- Click the reference file button, look for the healthy recording from the Sony camera, and double-click it.
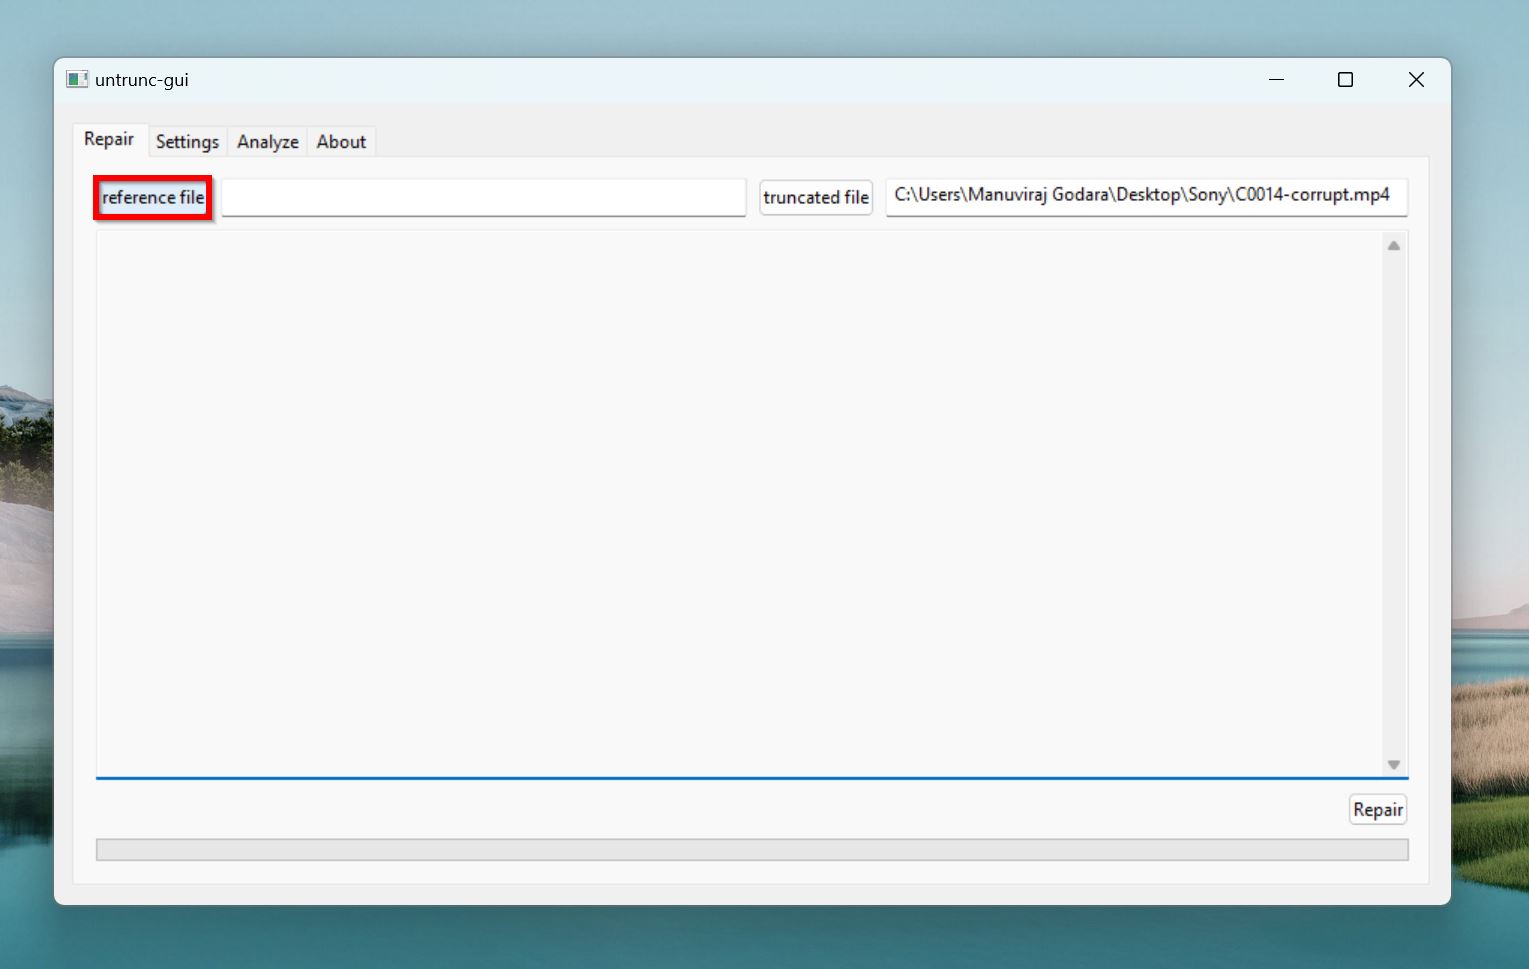
- Click on repair in the bottom-right corner.
- Untrunc GUI will repair the corrupt video and save a copy in the original folder.
Method 3: Use Free Video Transcoders
Re-encoding a video can fix video corruption related to indexing, the header, audio-video synchronization, stuttering, codec compatibility, and compression. Re-encoding essentially reconstructs a video. Think of it like rebuilding a wobbly house using the same materials to make it more stable.
There are several video transcoders available, but you can’t go wrong with HandBrake, and Shutter Encoder.
Tool 1: HandBrake
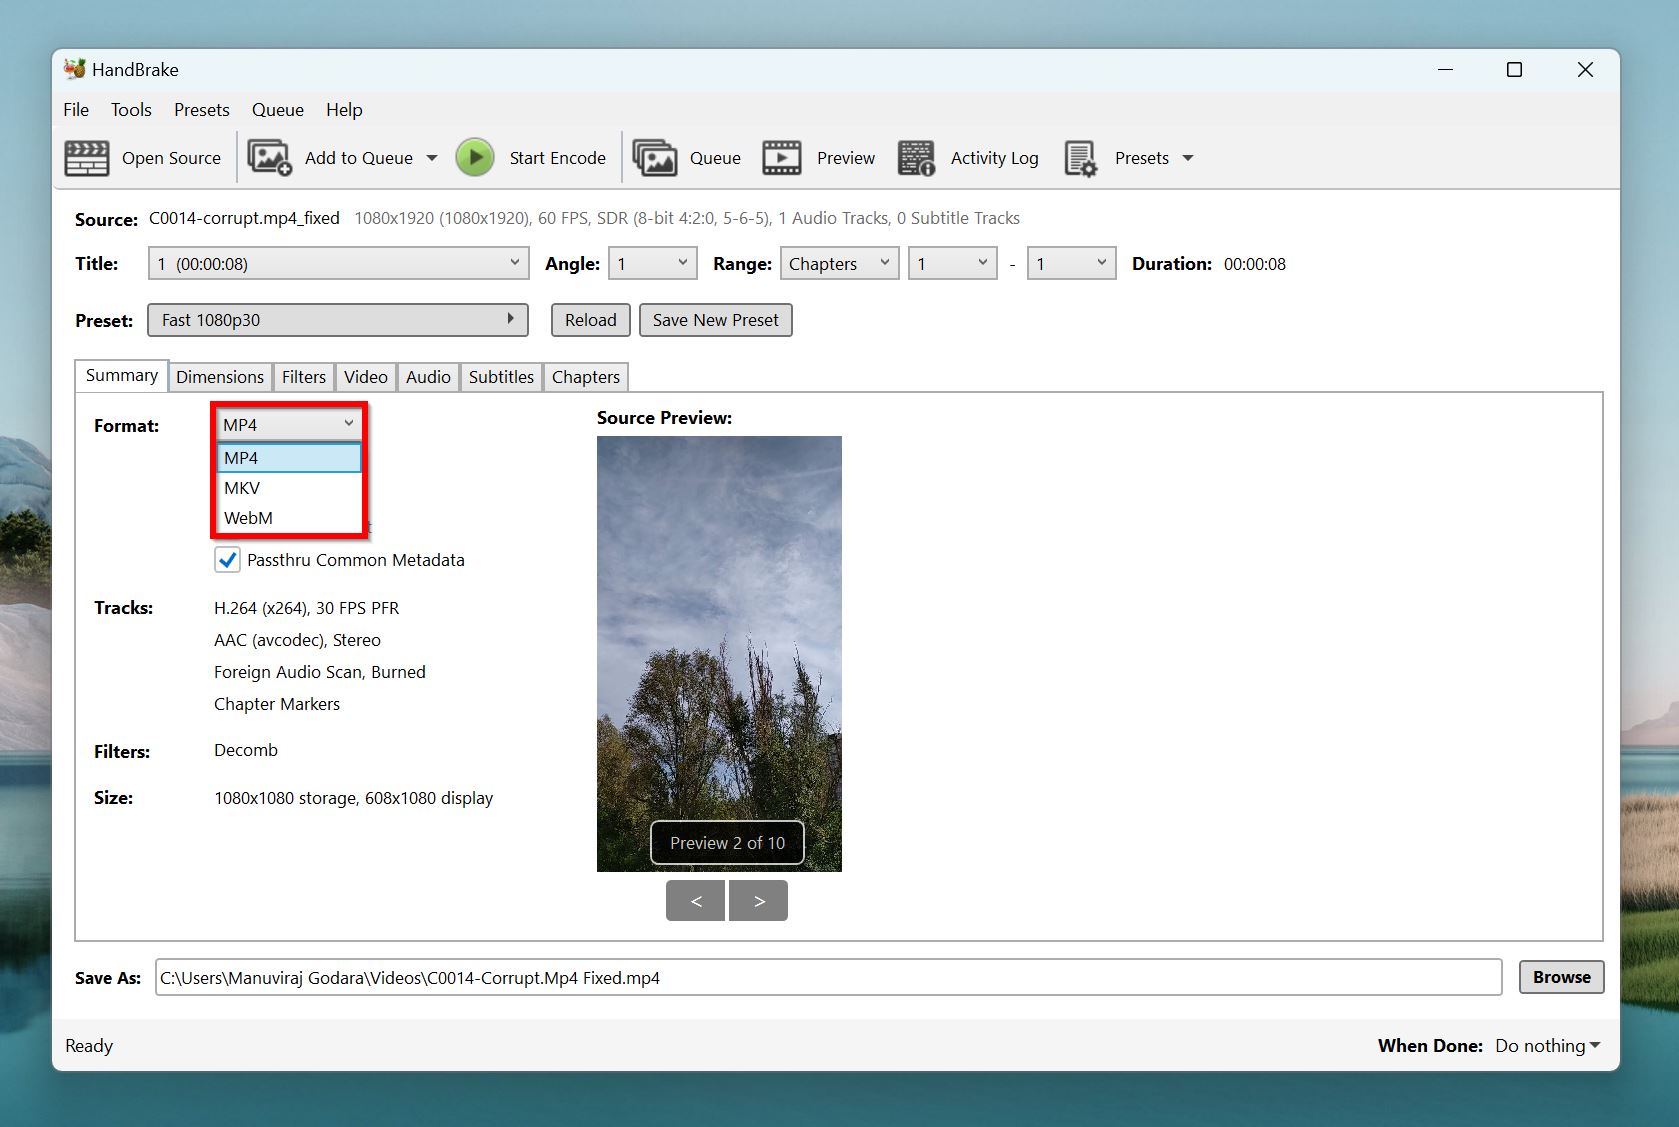
HandBrake is an open-source, free, and easy-to-use video transcoder. It can open almost any video format under the sun—including formats like MP4, MTS/M2TS, and MXF, used by Sony cameras. However, it only converts the video to MP4, MKV, and WebM formats. Keep this in mind when re-encoding corrupt MTS/M2TS, and MXF videos.
Here’s how to re-encode your Sony camera’s corrupt video, and potentially fix it, using HandBrake:
- Download HandBrake, and install it.
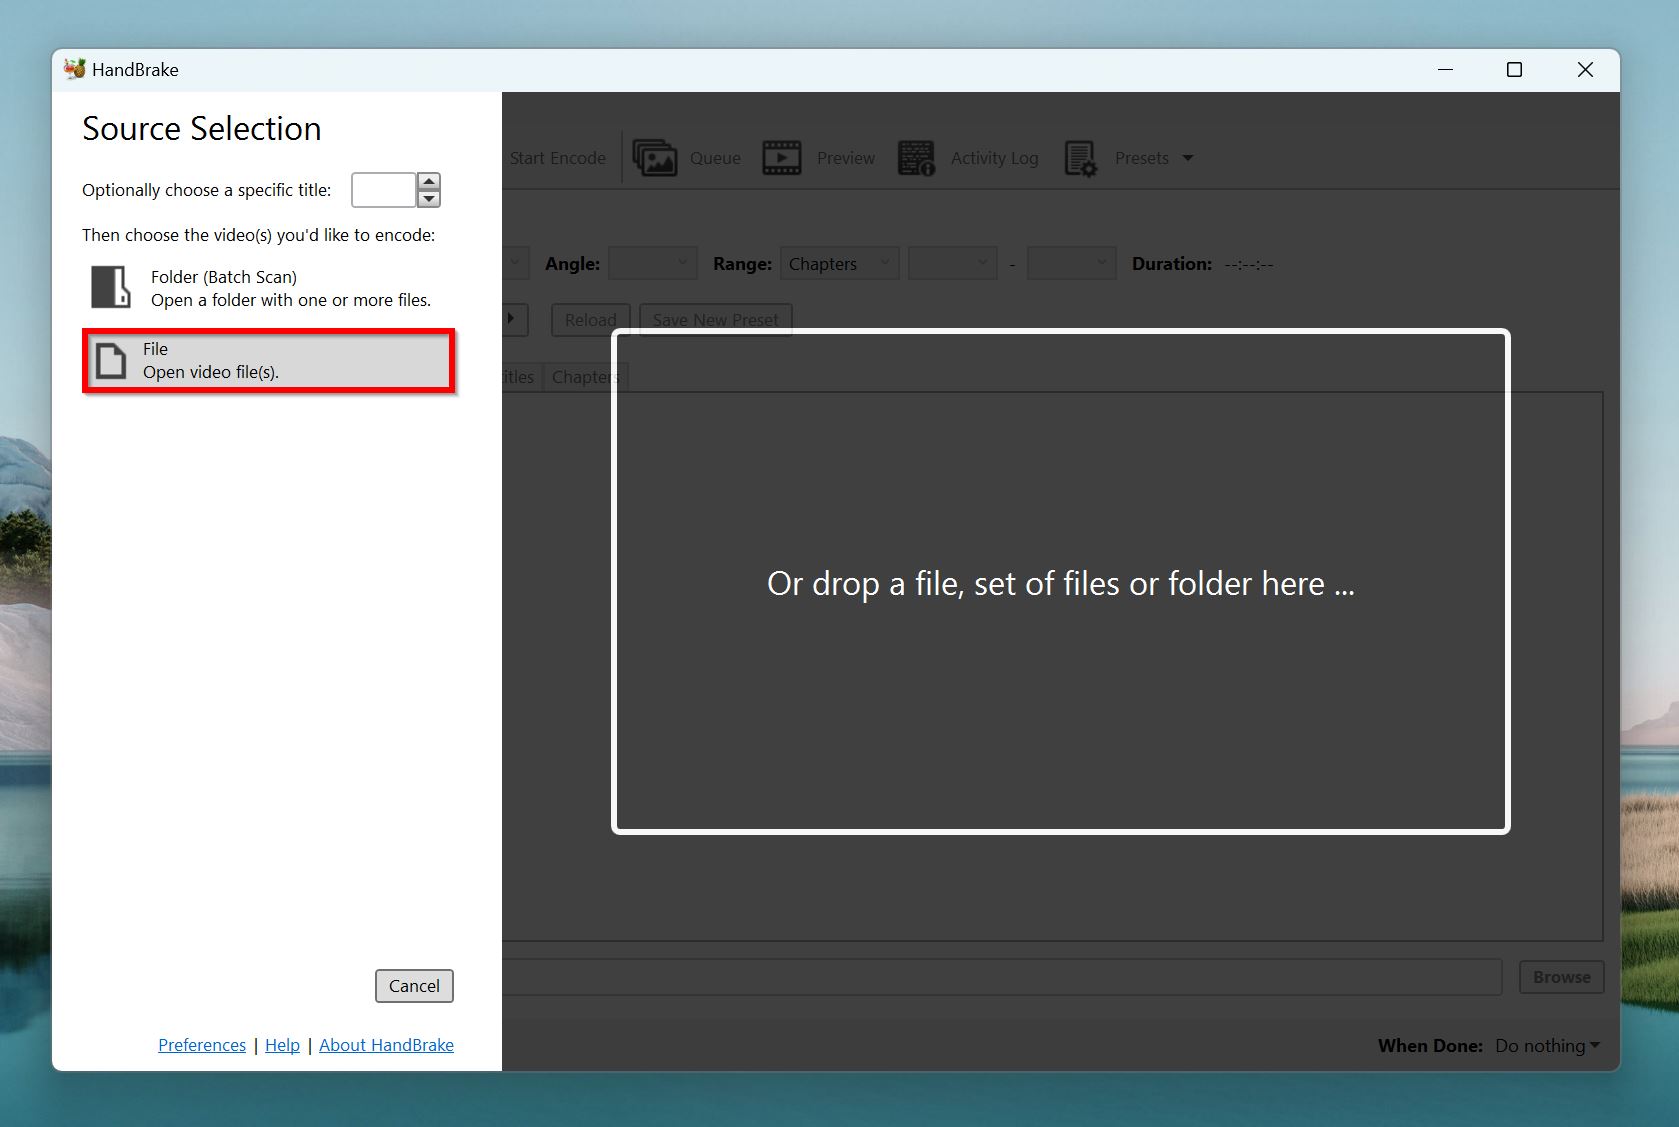
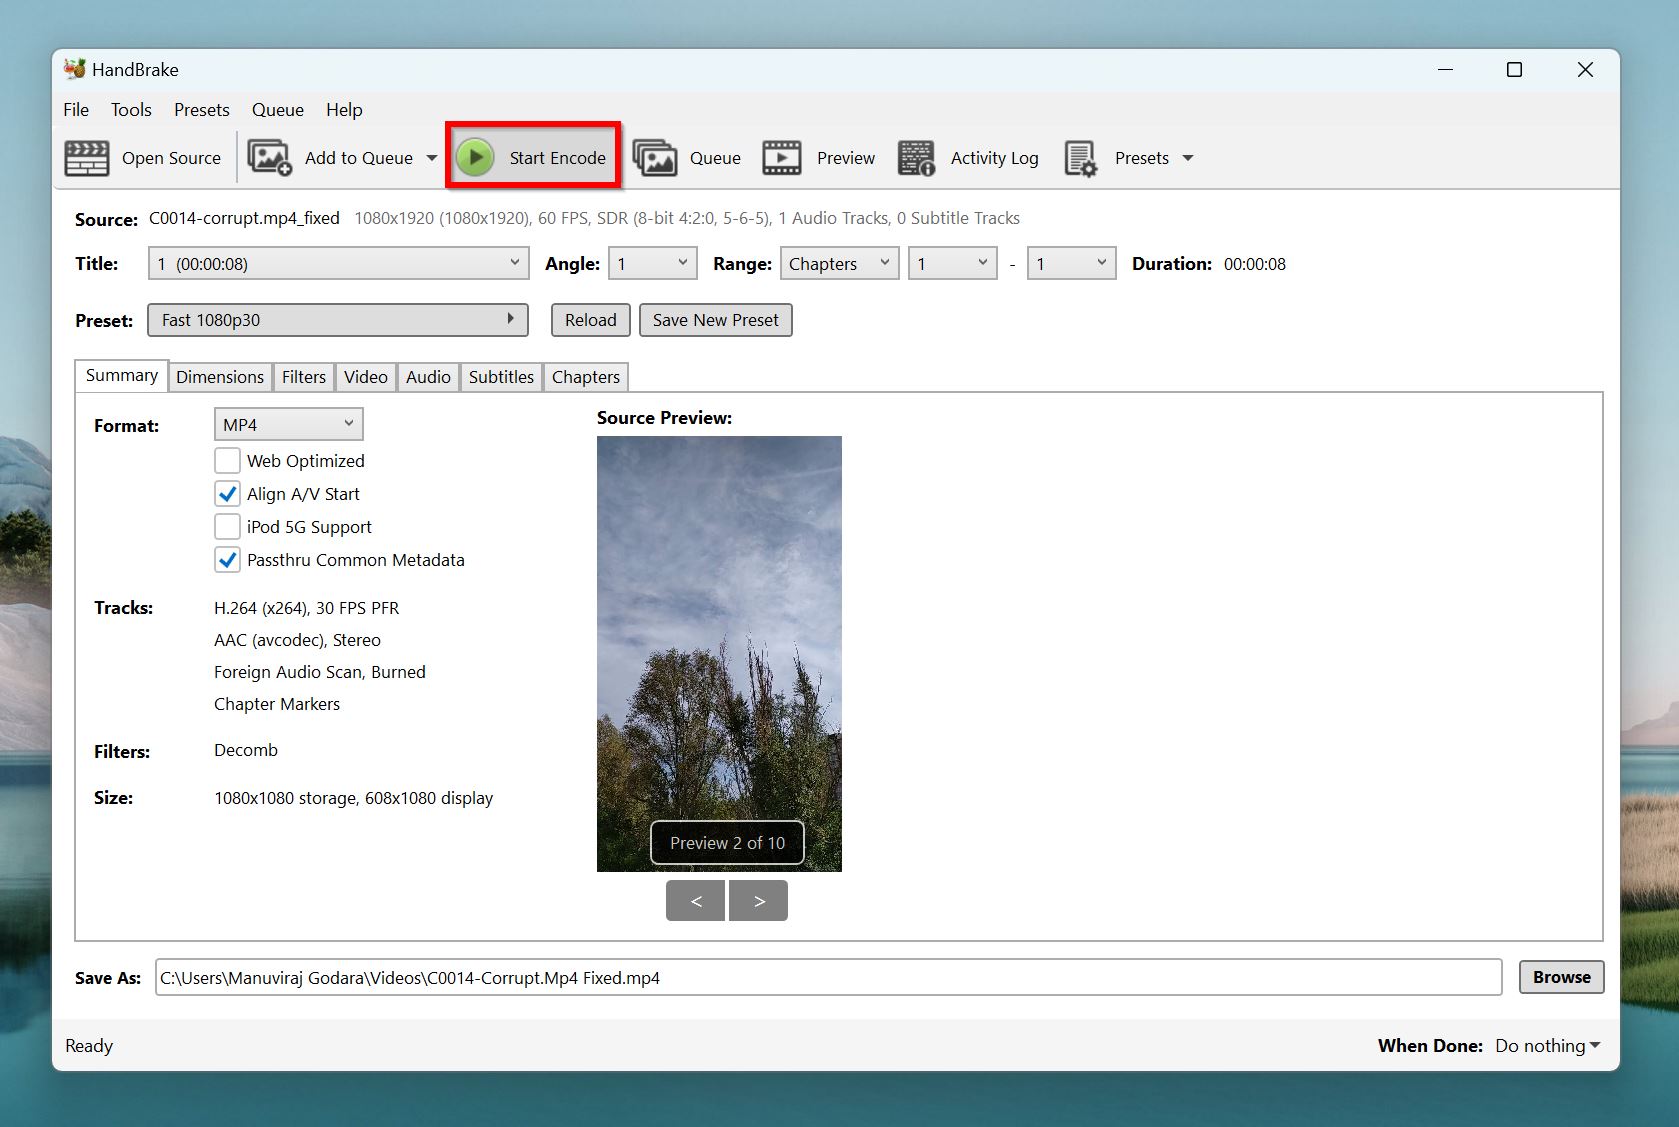
- Open HandBrake, and click File. If you don’t see the option directly, click on Open Source > File. Navigate to the corrupt Sony camera video, and double-click it.
- Choose a video format from the Format drop-down menu in the Summary tab. You can make other changes by going through the remaining tabs.
- Click on Browse in the bottom-right corner. Choose a save location for the re-encoded video.
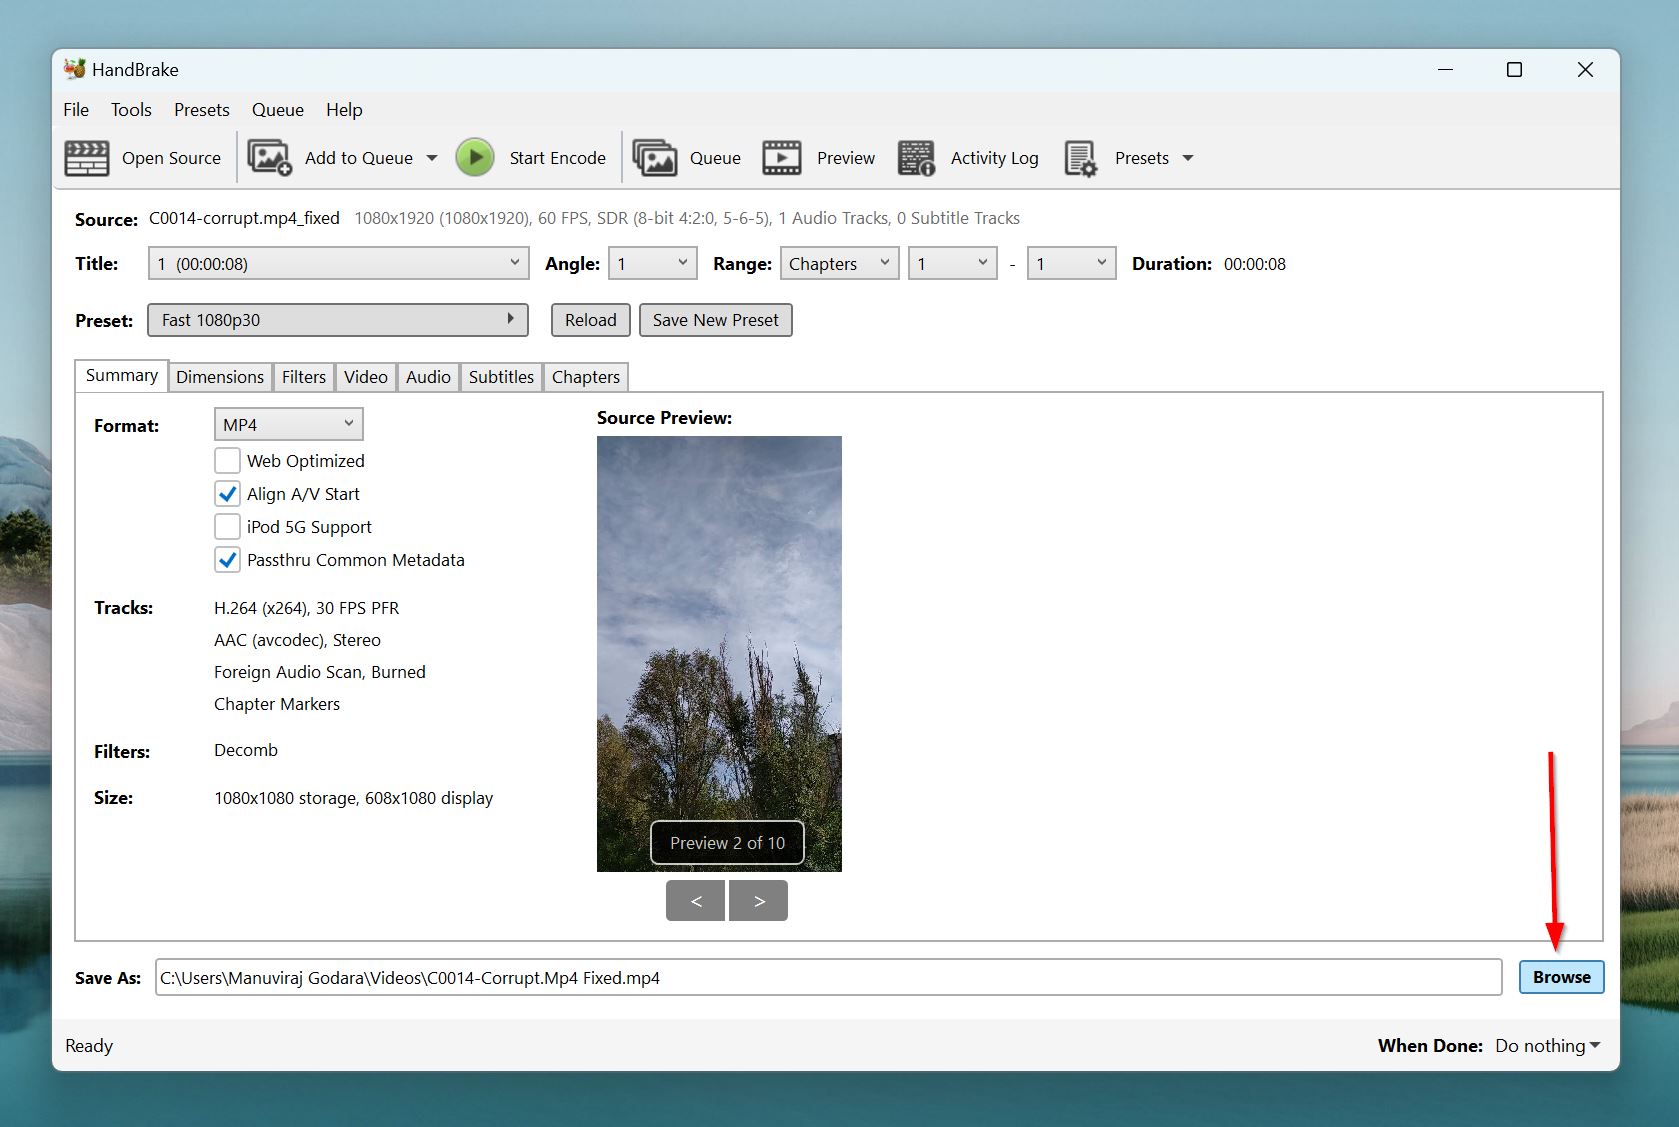
- Click on Start Encode.
Tool 2: Shutter Encoder
Shutter Encoder is another excellent video transcoder, and converter. Like HandBrake, it’s free, and open-source. While it may not be as smooth as HandBrake, it’s still quite easy to use. Shutter Encoder is feature-packed, letting you quickly rewrap the video to fix container issues. To fix deeper corruption, you can re-encode the video using a codec of your choice.
A Reddit user claimed that Shutter Encoder was the only tool that fixed their corrupt MTS file that was more than 30 GB in size, so it’s worth looking into if you’re in a similar situation.
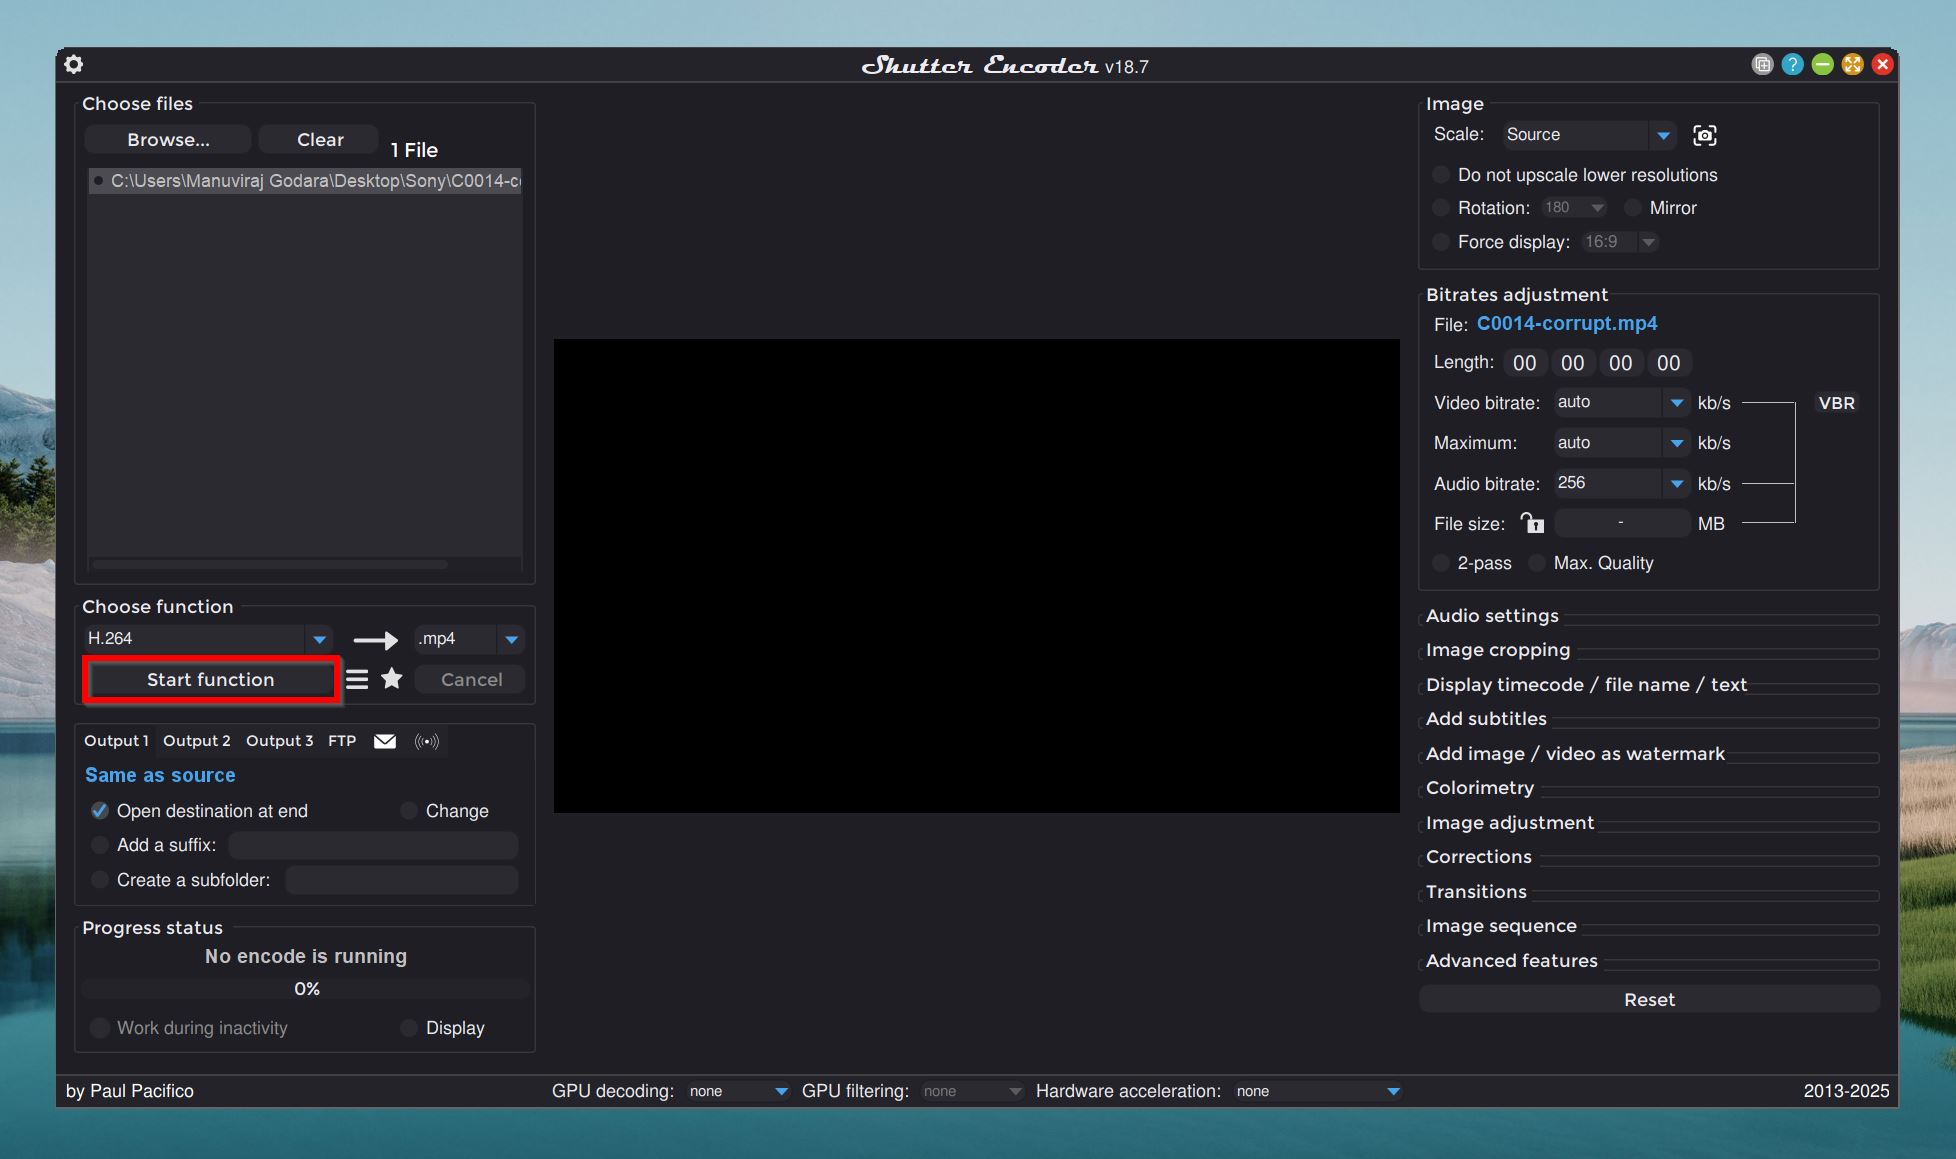
Here’s how to fix your Sony camera’s corrupt video using Shutter Encoder:
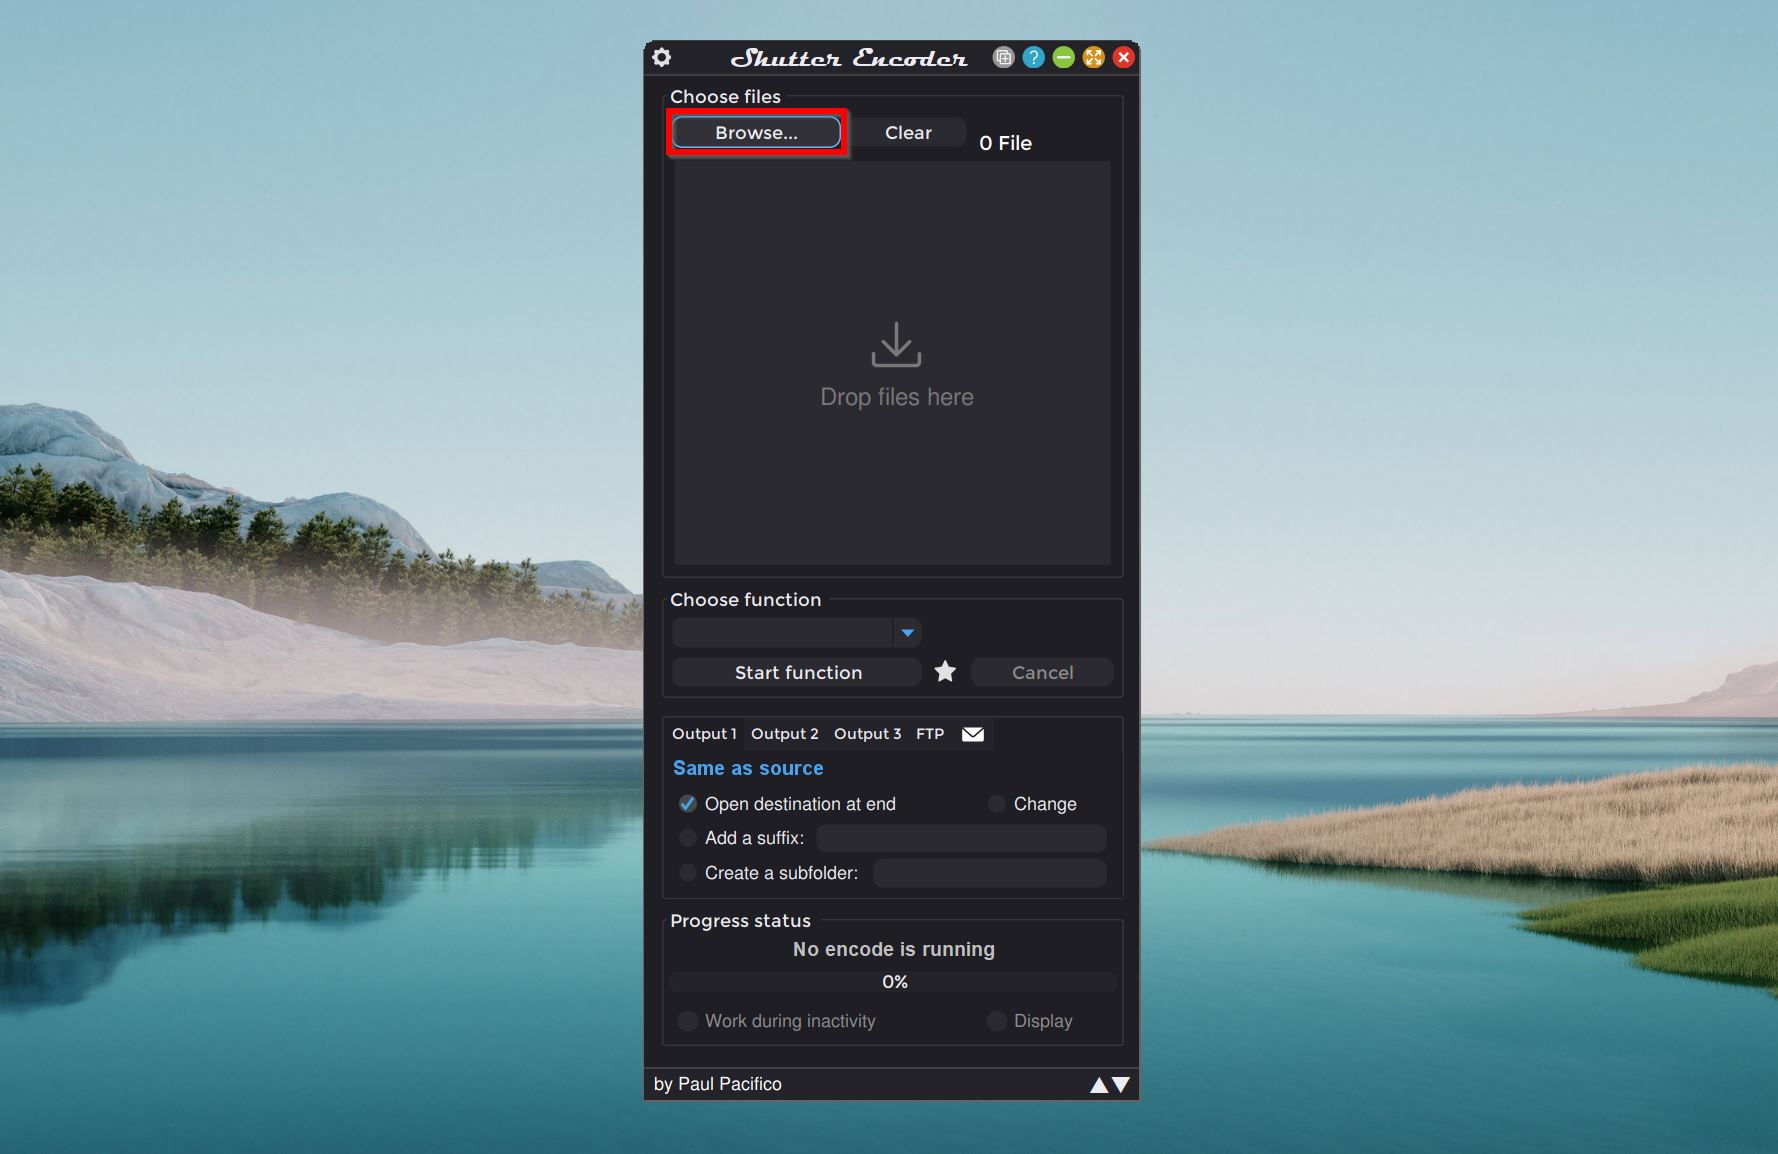
- Download Shutter Encoder, and install it.
- Open Shutter Encoder, and click Browse. Find the corrupt video file, select it, and click Open. You can add multiple files as well.
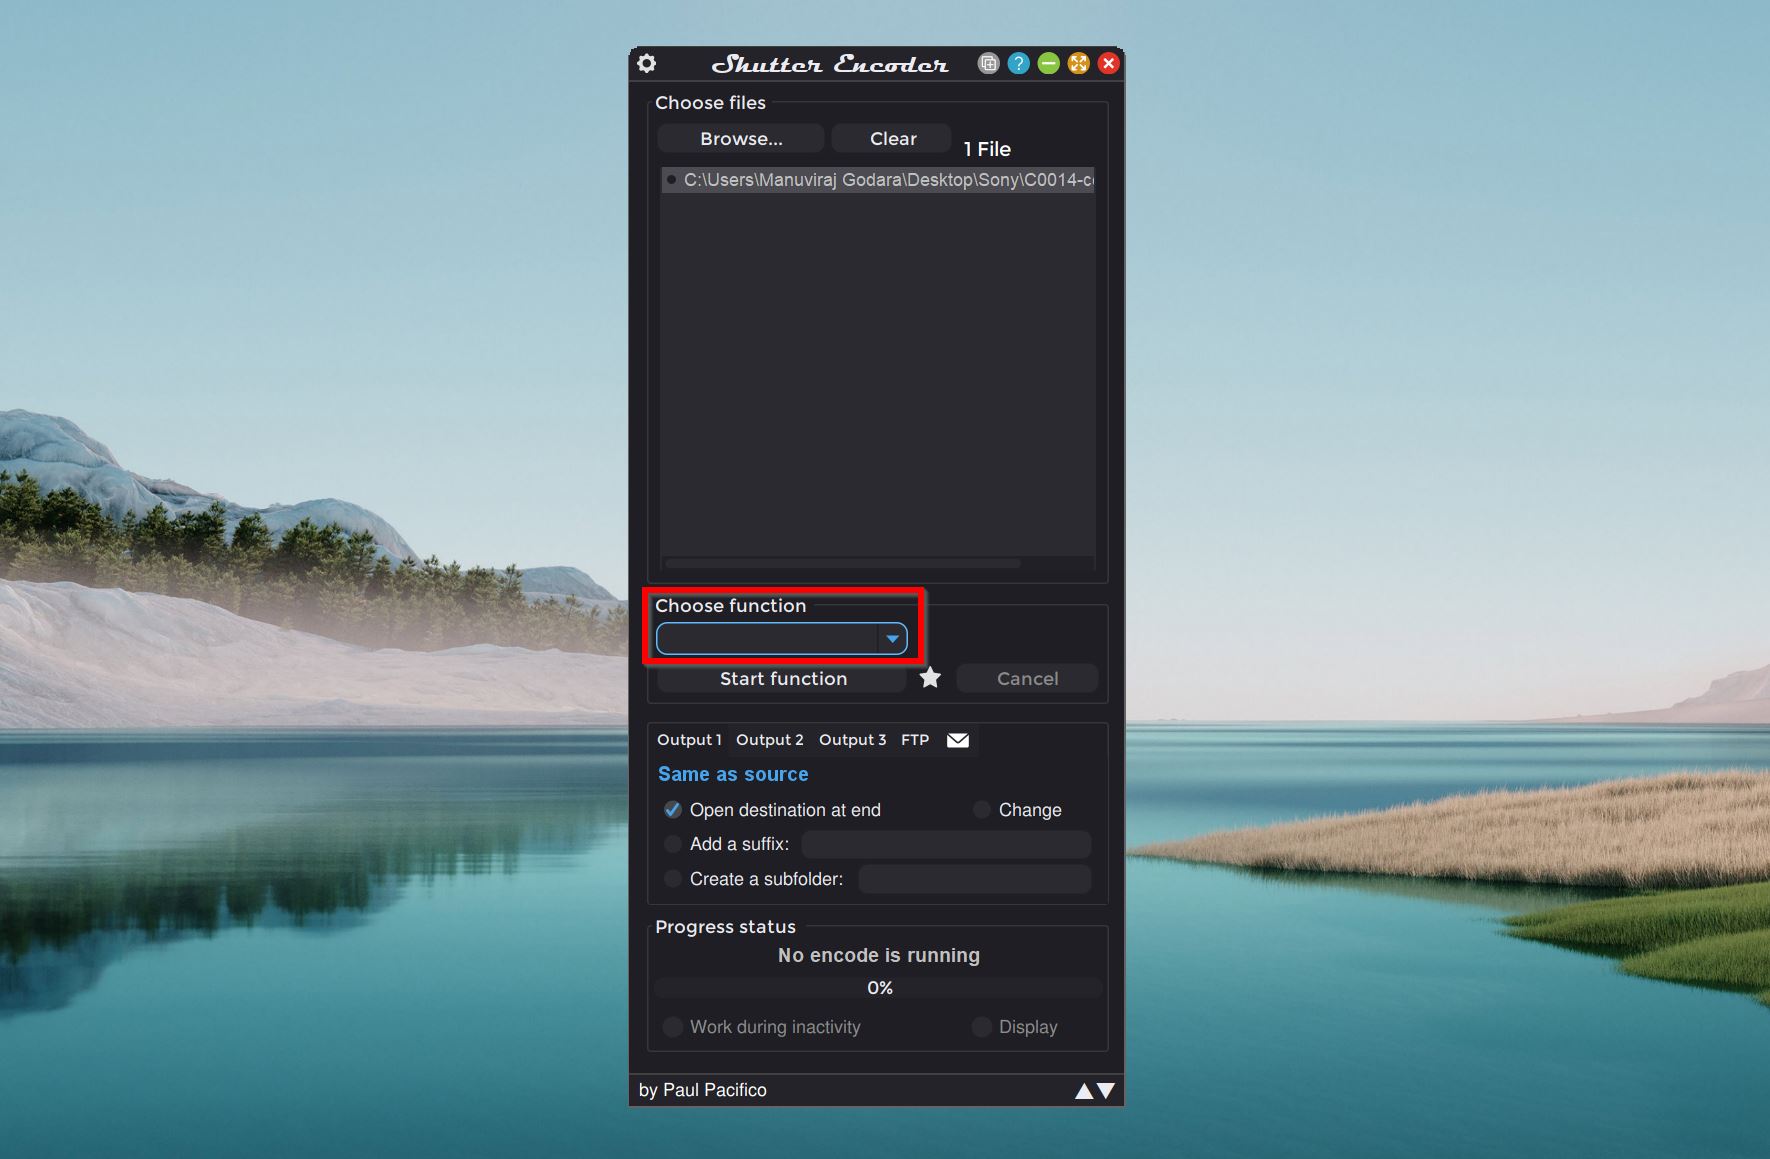
- Select H.264 from the Choose function drop-down menu. You can also pick the video format using the drop-down menu next to the arrow.
- By default, the re-encoded video will be saved to the same destination as the corrupt one. To change this, click on Change, and select the folder where you wish to save the re-encoded video.
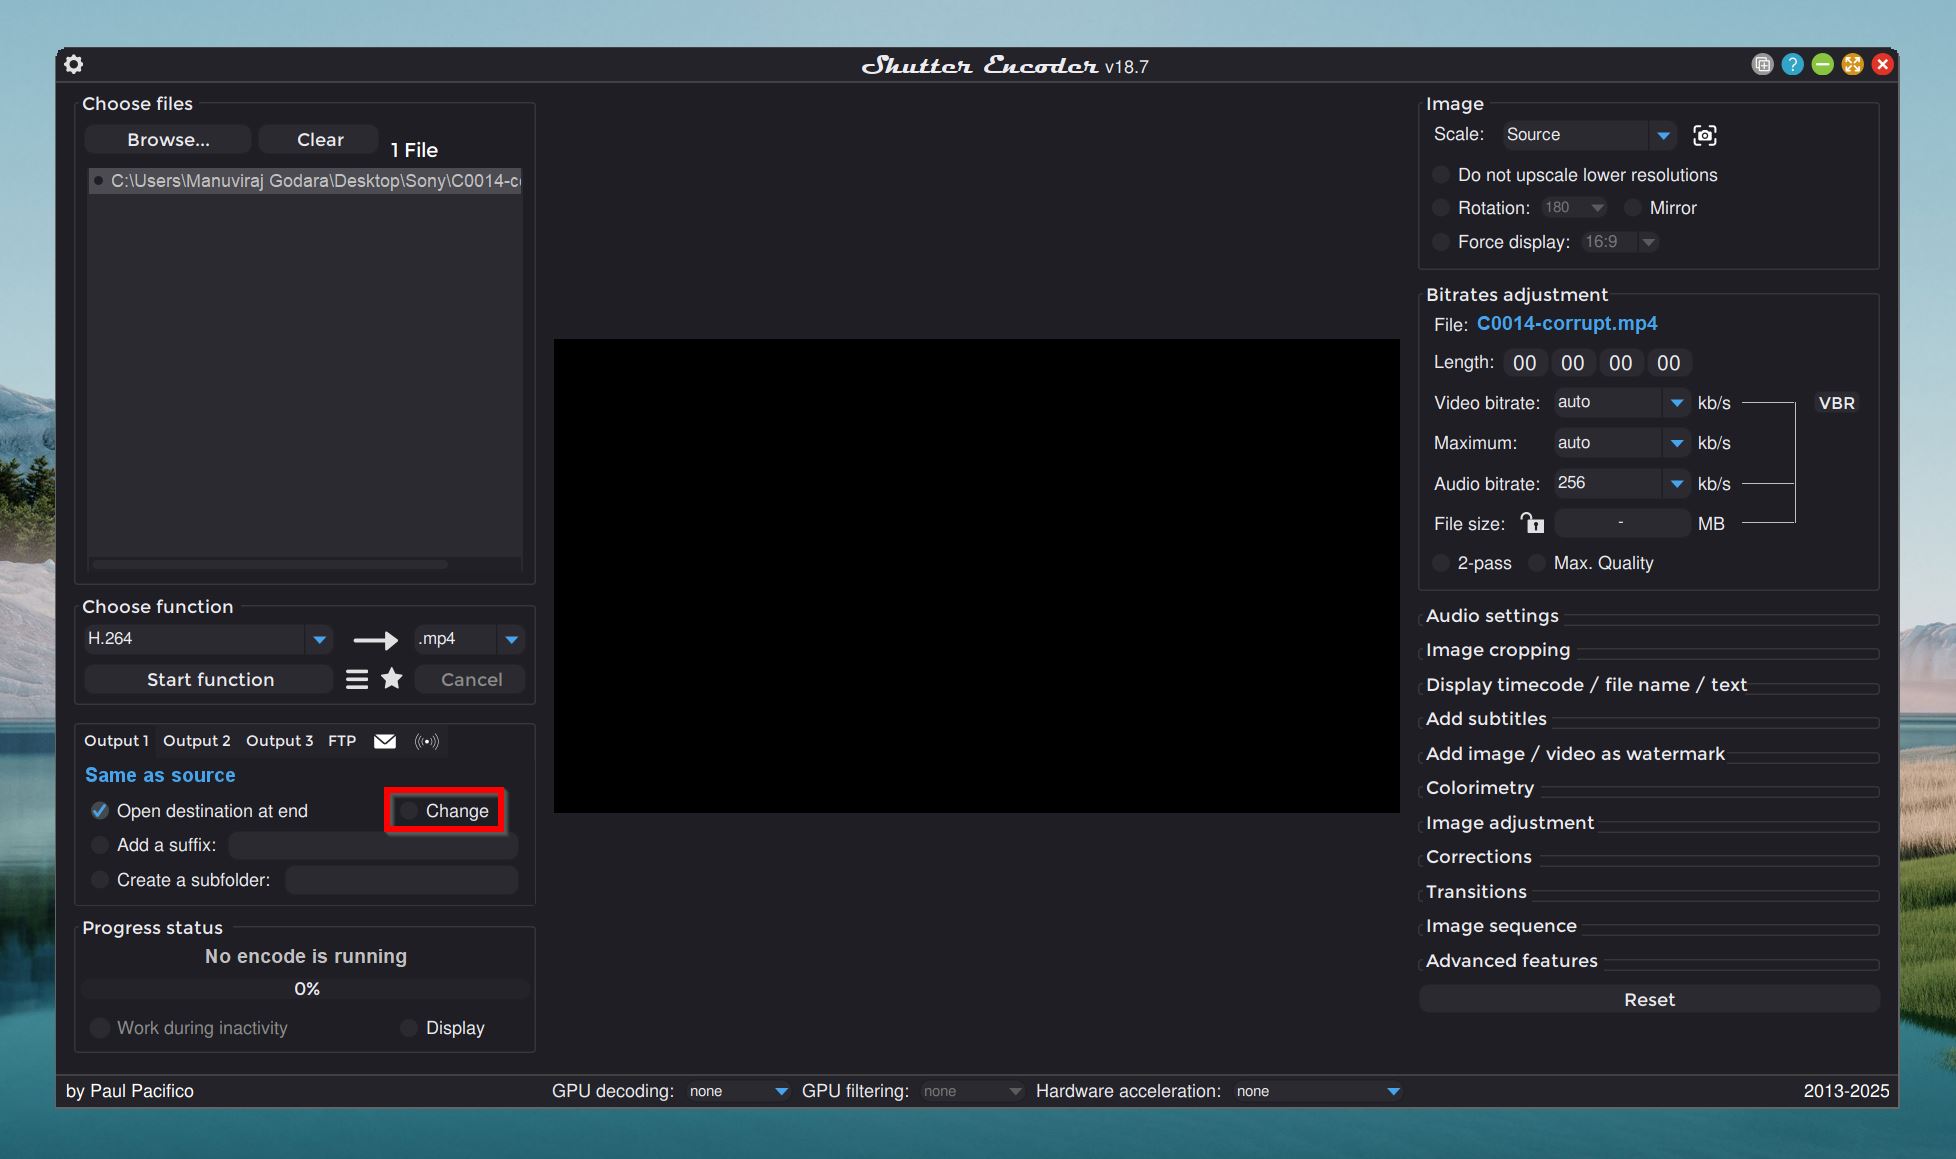
- Click on Start function to begin encoding.
Conclusion
While fixing corrupt videos is easier than ever (and free) — thanks to sophisticated video repair websites, tools, and video transcoders — they may be unable to fix severe corruption. That’s why it’s important to regularly back up your videos, especially if corruption occurred due to a faulty storage drive, or mishaps during file transfer. If you don’t have any backups, contact a professional repair service.
")


