
Do you suddenly need to recover data from a dead SD card, but you’re not even sure if it’s possible at all? Or maybe nothing happened yet and you’re just checking what your options are before something goes wrong?. In any case, the situation isn’t as hopeless as it looks at first glance.
SD cards fail more often than people assume, and not always for a noticeable reason. Sometimes they just stop responding, and you suddenly face an unreadable card with photos or files you still need. They’re a lot more delicate than external drives or USB sticks, so when something goes wrong, it tends to happen quietly and without warning. And because of the way SD cards store data, recovery can get messy, especially if the card looks completely dead.
What we’ll do here is walk you through the situations where recovery from a dead SD card is possible, the methods that actually help in real cases, and the moments when the card is too bad and replacing it is the only sensible option.
Is Your Card Really Dead?
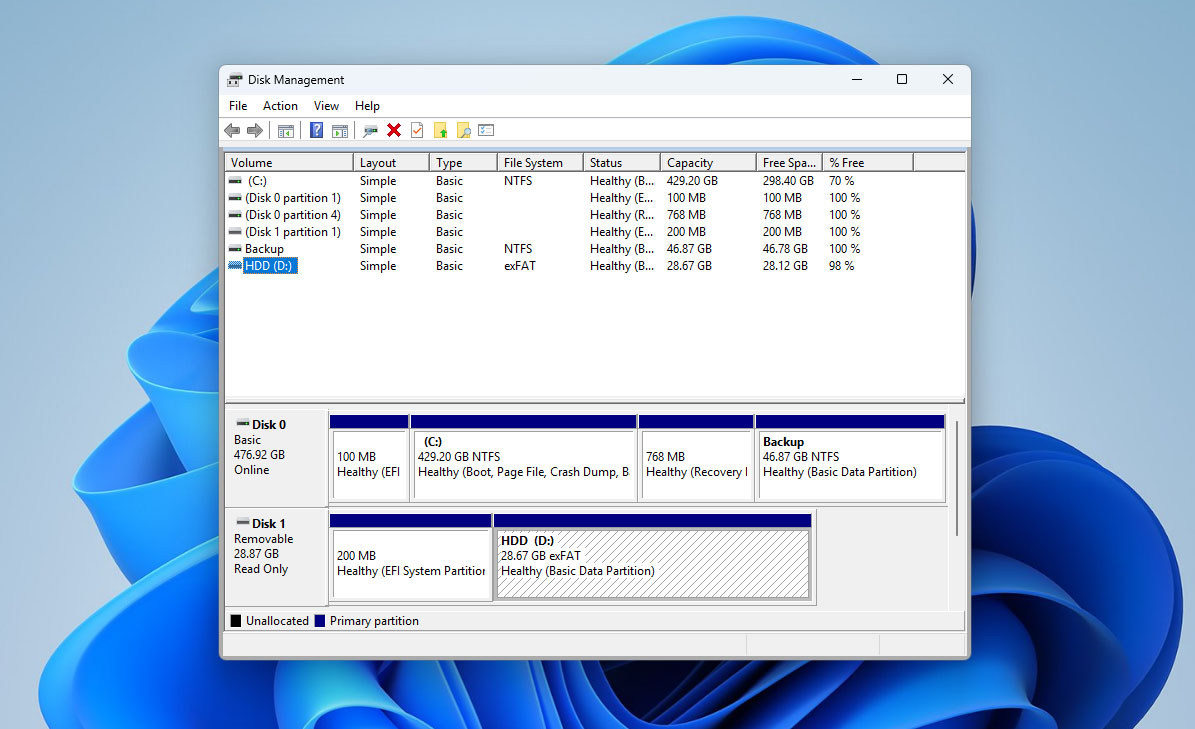
Your “dead” SD card may not be truly dead. The easiest way to understand what’s going on is to look at how your computer sees the card.
- If your SD card appears in Disk Management on Windows or Disk Utility on macOS with the correct storage size, that’s a good sign. It means the system still communicates with the card at a basic level, and you still have a chance to recover data from it. The fact that the card doesn’t show up in File Explorer or Finder, or keeps throwing random errors, is a separate issue, one we don’t focus on in this article.
If your SD card isn’t fully dead but shows signs of corruption, we have a separate guide that covers different ways to fix a corrupted SD card. Some of the methods are simple checks, while others involve full formatting. Before you try any of those steps, we recommend finishing this article first and recovering whatever data you can from the “dead” card. Once your files are safe, you can switch to the corruption-repair guide without risking further loss.
- If the SD card shows up in Disk Management or Disk Utility with an incorrect capacity, doesn’t appear at all no matter how many times you reconnect it across different readers and devices, then the situation is far worse. In most cases, this means the card is permanently dead. You can still reach out to a professional data recovery service, but they will likely confirm that the memory chip failed and the data cannot be restored.
- Visible damage is another sign you shouldn’t ignore. If the SD card has a cracked shell, bent or worn contacts, or a warped body, do not plug it into your computer and do not attempt DIY recovery. This type of damage requires specialized equipment, and trying to read the card at home may make recovery impossible. If this is your case, skip the software methods and contact a professional recovery lab right away.
How to Recover Files from a Dead SD Card
Earlier in this guide, we outlined the situations where recovery from a dead SD card is still possible. Now it’s time to move from theory to the actual methods. In practice, you have two real options: try data recovery software on your own, or reach out to a professional data recovery service. Both approaches work, but only if your SD card meets the conditions we described above.
Before we get into the step-by-step process of recovering files from a dead SD card, think maybe you already have a backup of the files you’re trying to restore? Many users forget they once copied photos to a computer, uploaded them to a cloud account, or shared them with someone. If you have even a partial backup somewhere, recovering those files will be faster and completely risk-free compared to working with a failing SD card.
Method 1: Use Data Recovery Software
Data recovery tools often act as lifesavers in situations where a failing SD card becomes unreadable. During a scan, this type of software works directly with the underlying structure of the card and often bypasses the same logical issues that prevent your system from showing files normally. For most storage devices, recovery comes down to selecting the drive and running a standard scan, but a dead SD card is a different story.
When an SD card starts failing, its behavior can be unpredictable. It may disconnect mid-scan, freeze the system, or return inconsistent data. Because of this, it’s strongly recommended to create a byte-to-byte clone before you attempt any recovery. Working from a clone protects the original SD card from additional stress and reduces the risk of losing any remaining data.
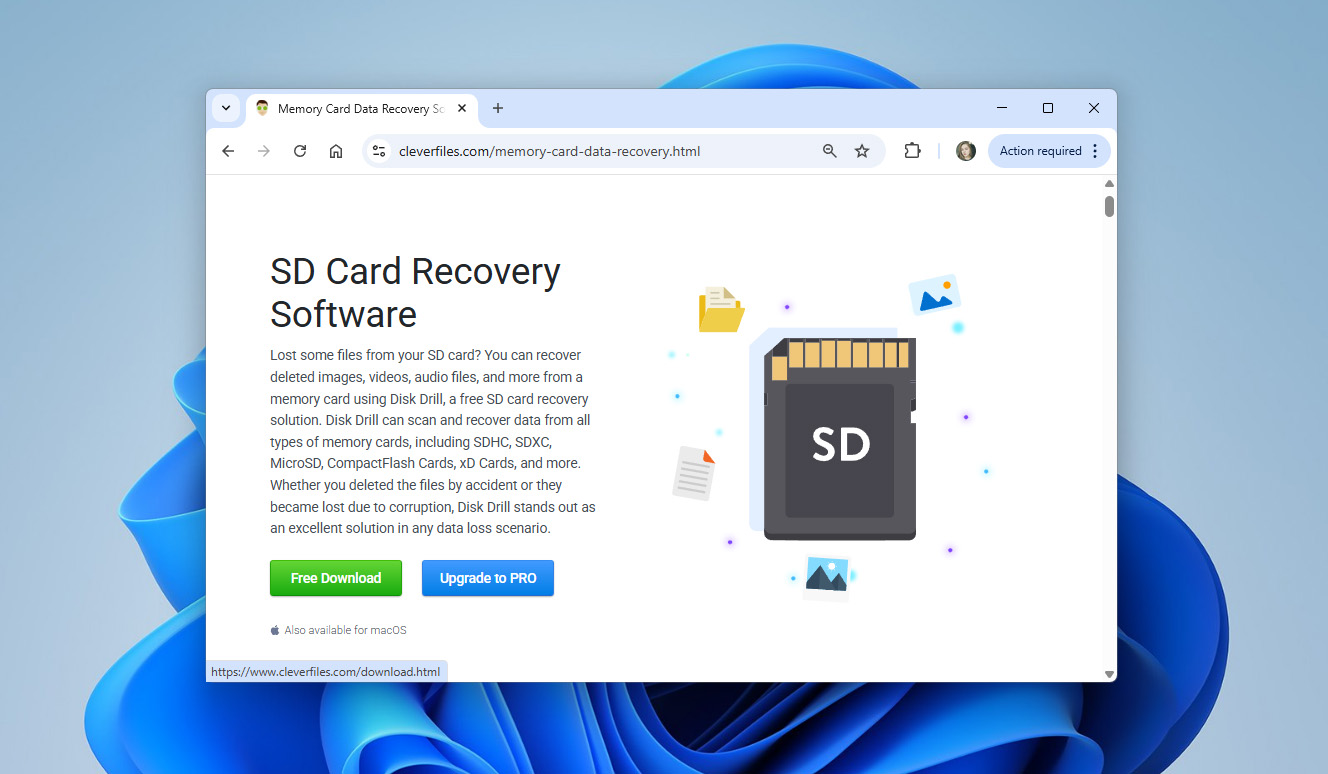
To make the process easier, it’s best to use a tool that combines both functions (image creation and data recovery) rather than juggling multiple programs and hoping they’re compatible. For us, Disk Drill has been the most reliable option for years. It runs on both macOS and Windows, and as long as your SD card appears in the system (as described earlier), it can scan it and recover any file type that was originally stored on the card.
Here’s where to start:
- Download Disk Drill from the official website and install it on your system( not on the SD card itself).
- Connect your SD card using a reliable card reader, and check the card mounts in Windows or macOS, even if it doesn’t show up in Explorer/Finder.
- Open Disk Drill and in the sidebar, look for the Byte-to-Byte Backup section.
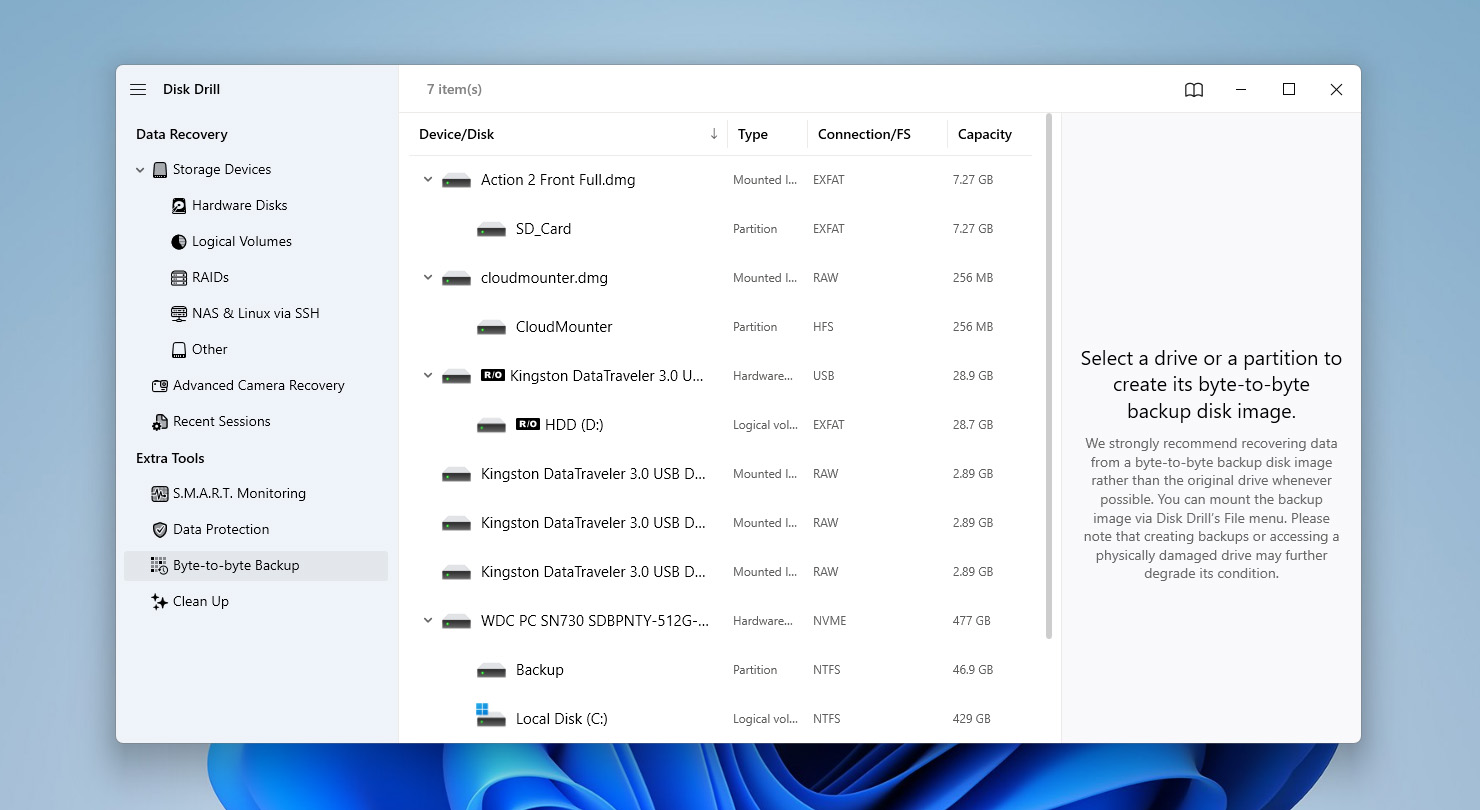
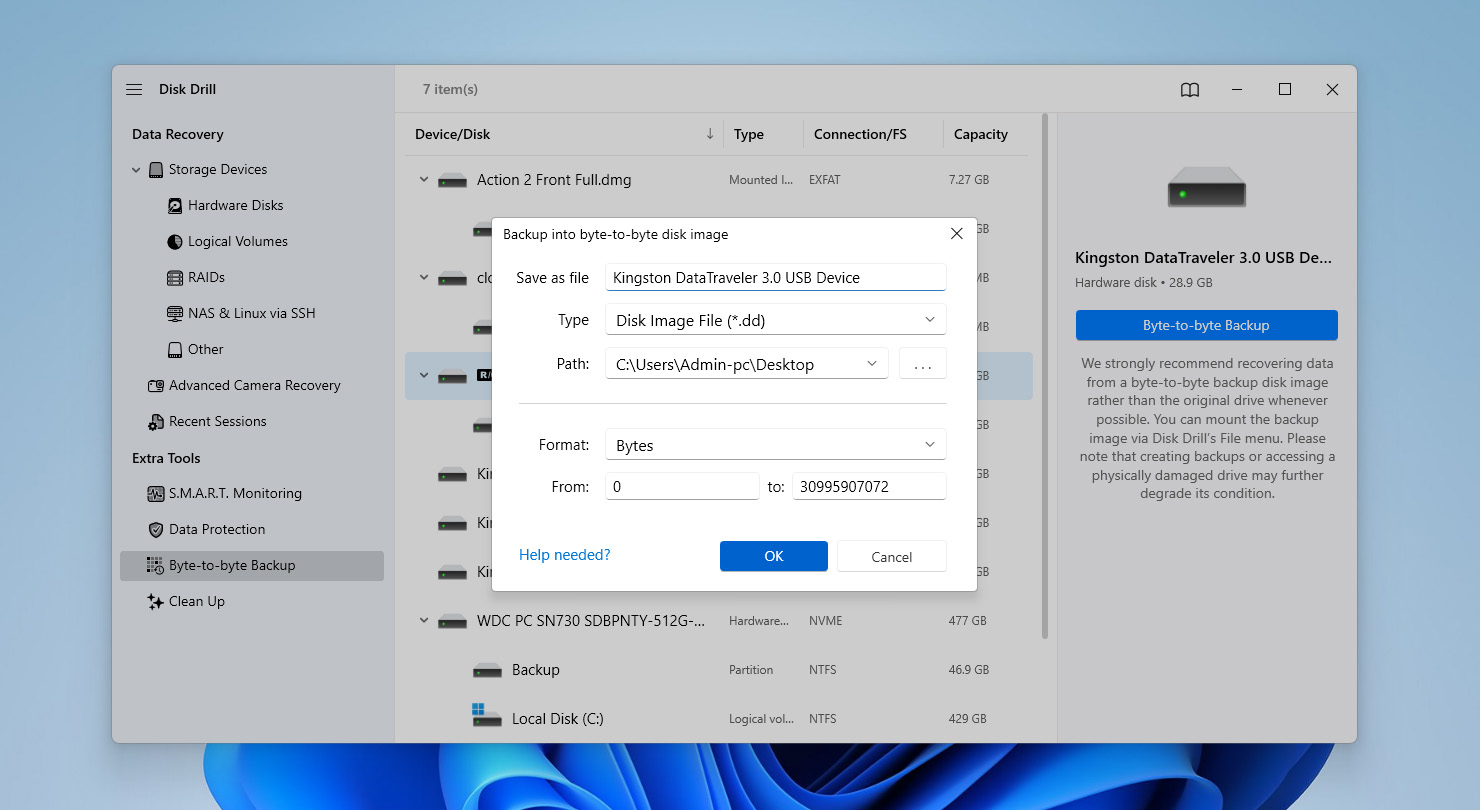
- Select your SD card from the device list and click the Byte-to-Byte Backup button to create a backup image and choose where you want the file saved. Allow the cloning process to finish. Don’t disconnect the card or the reader until the image is fully created. Once the clone is ready, you can safely scan it instead of stressing the original SD card.
- Switch to the Storage Devices section. The cloned image won’t appear automatically, so look for the option to Attach disk image at the bottom of the device list.
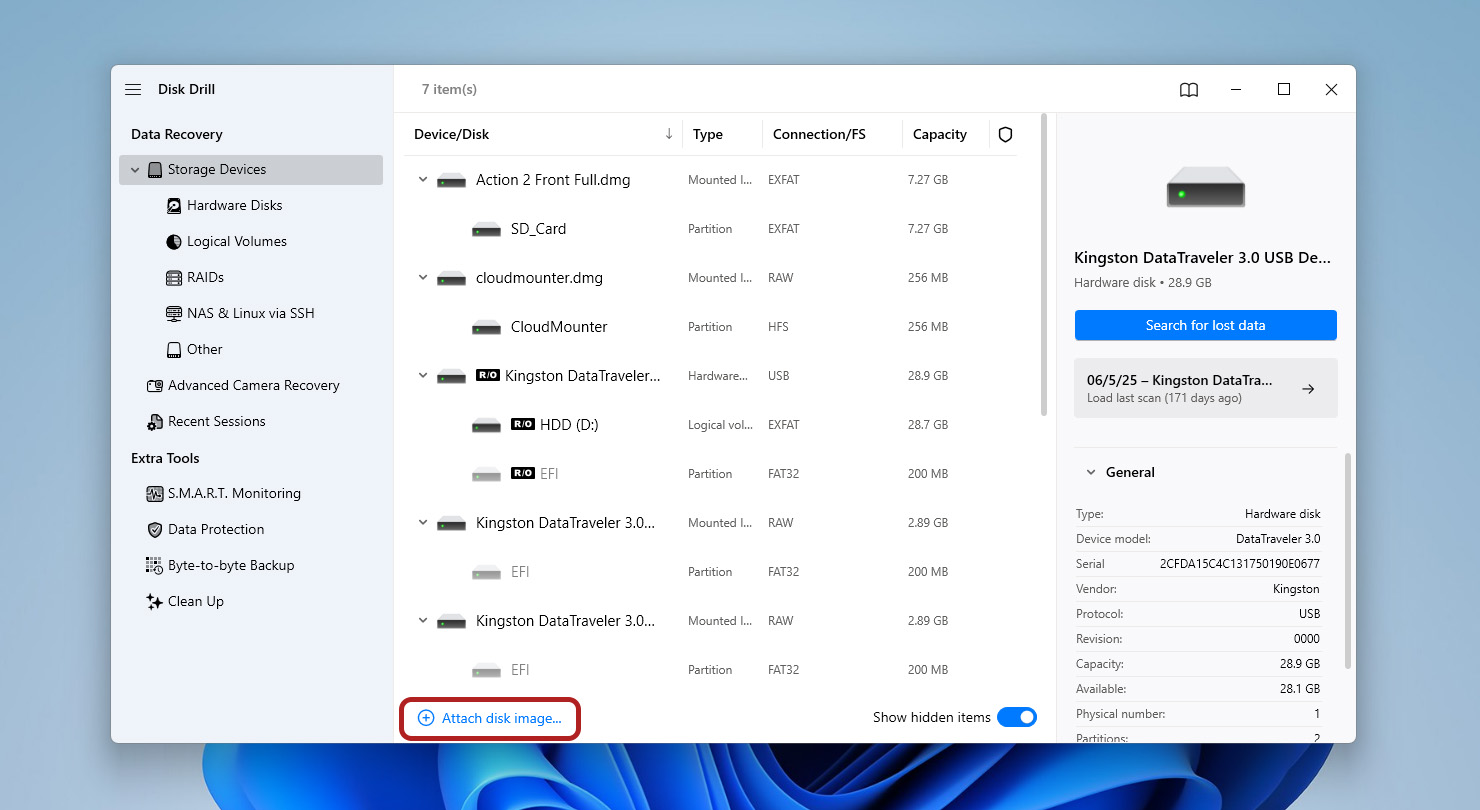
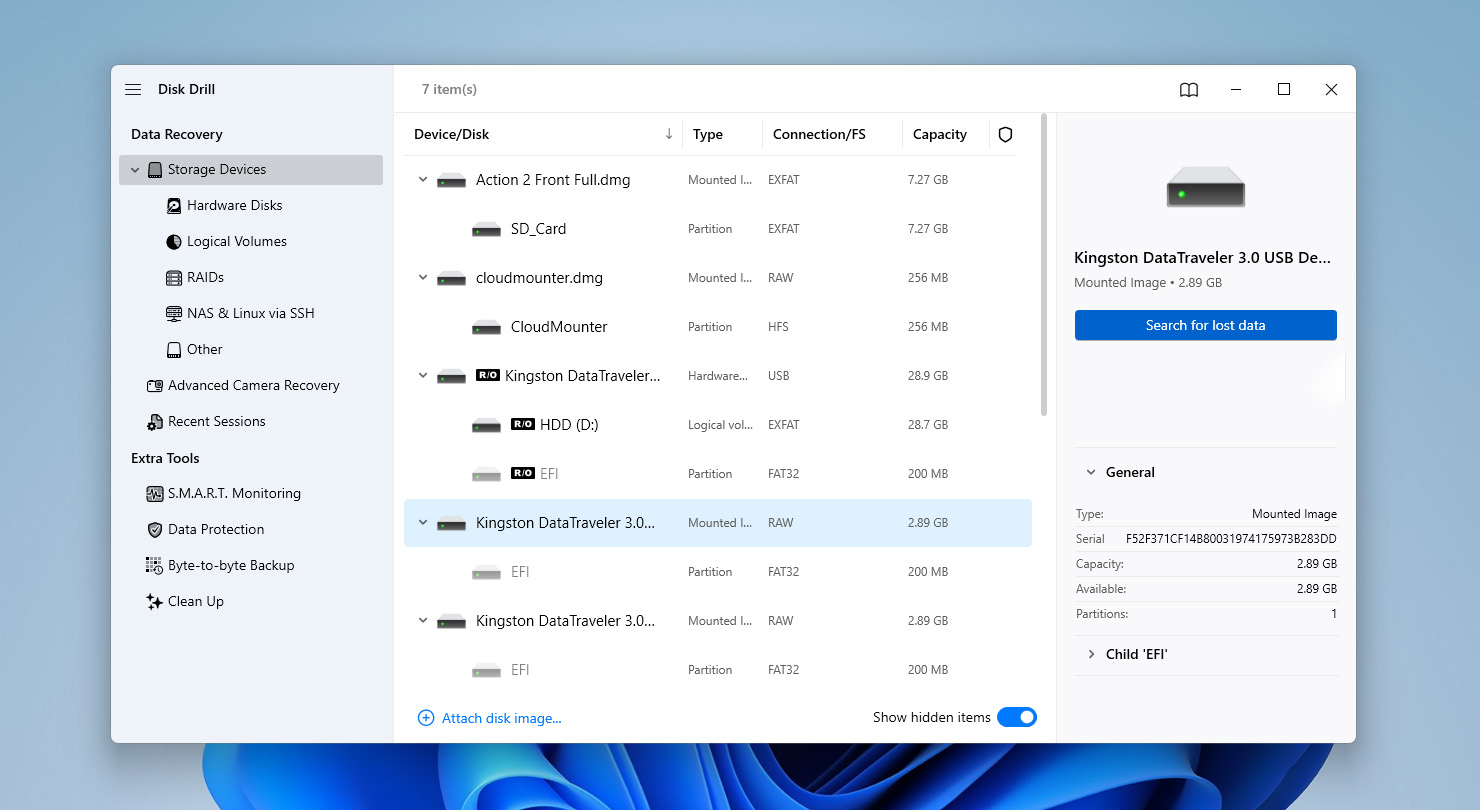
- Select the byte-to-byte clone you created earlier. Once attached, Disk Drill will treat it like a real drive (it will show up in the main device list with its full capacity). Choose the image and click Search for lost data.
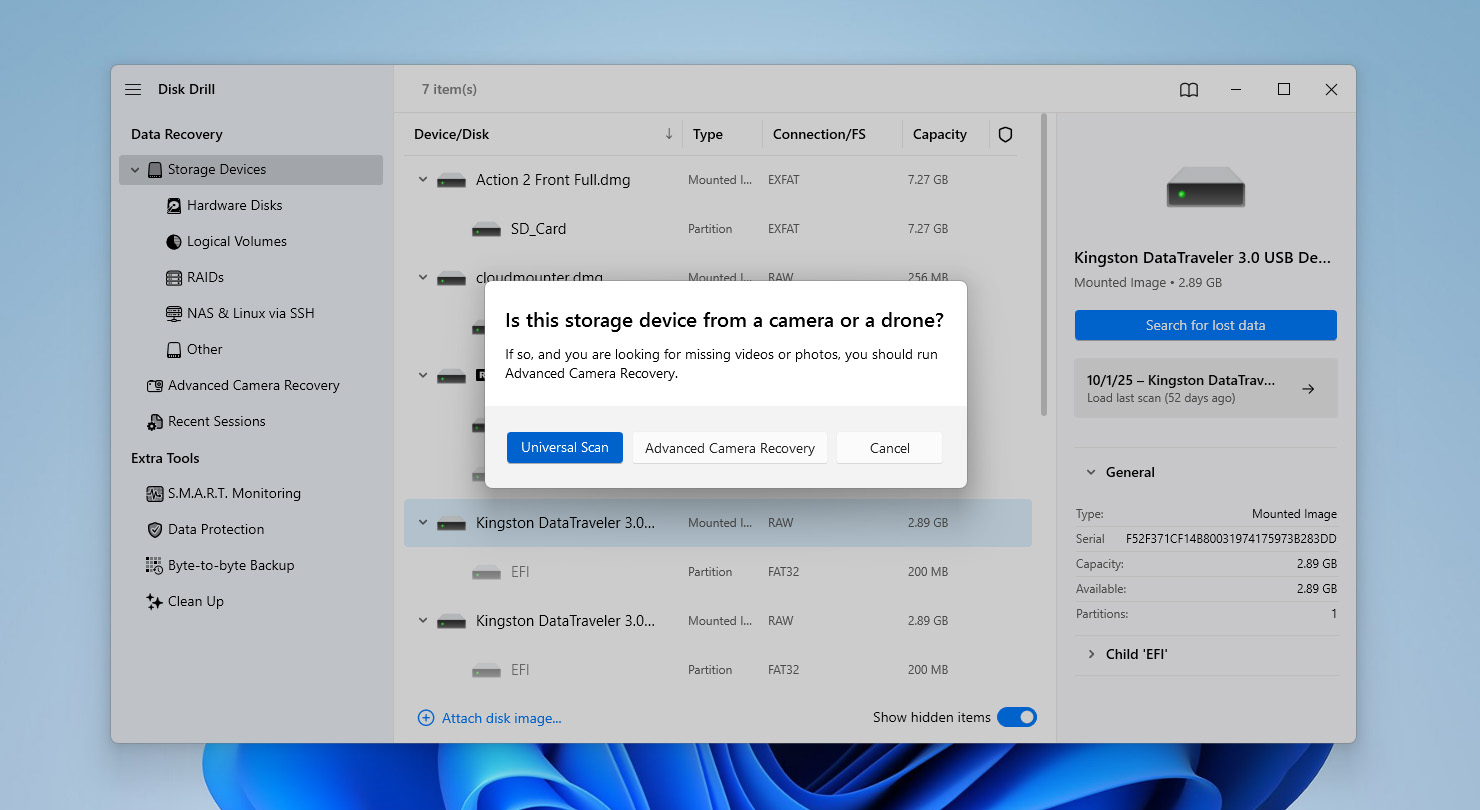
- Disk Drill will ask which method you want to run: Universal (the default choice and the best starting point) or Advanced Camera Recovery (designed for fragmented video files). Begin with Universal. If your recovered videos show glitches or visual artifacts afterward, you can run Advanced Camera Recovery as a second pass.
- Wait for the scan to finish. You can open the results panel early, but it’s usually better to let Disk Drill complete the scan. At the end, the program will show recovery chances for each file: High, Average, or Low.
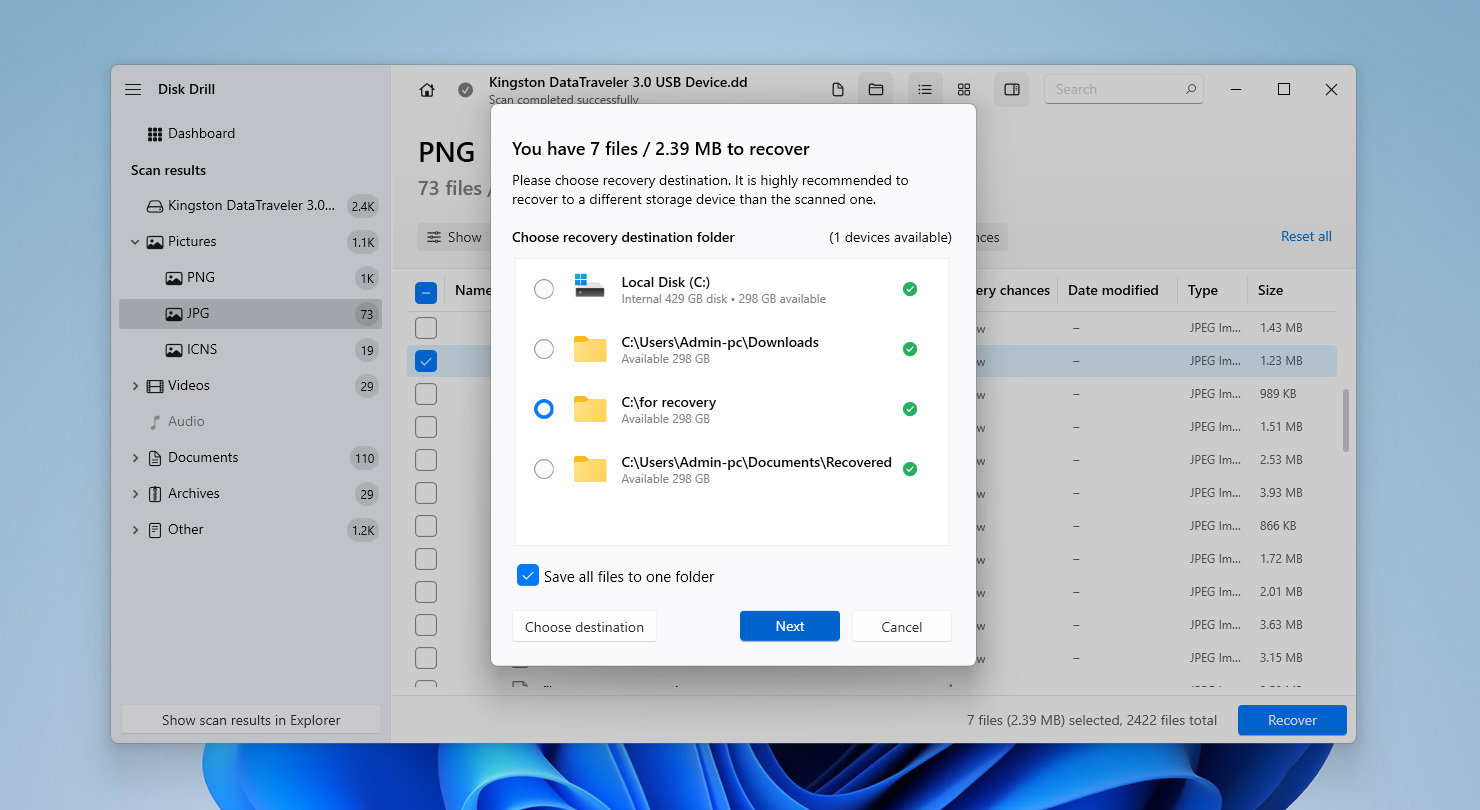
- Browse through the results, preview items whenever possible, and choose the files you actually need. When you’re ready, click the blue Recover button in the bottom-right corner.
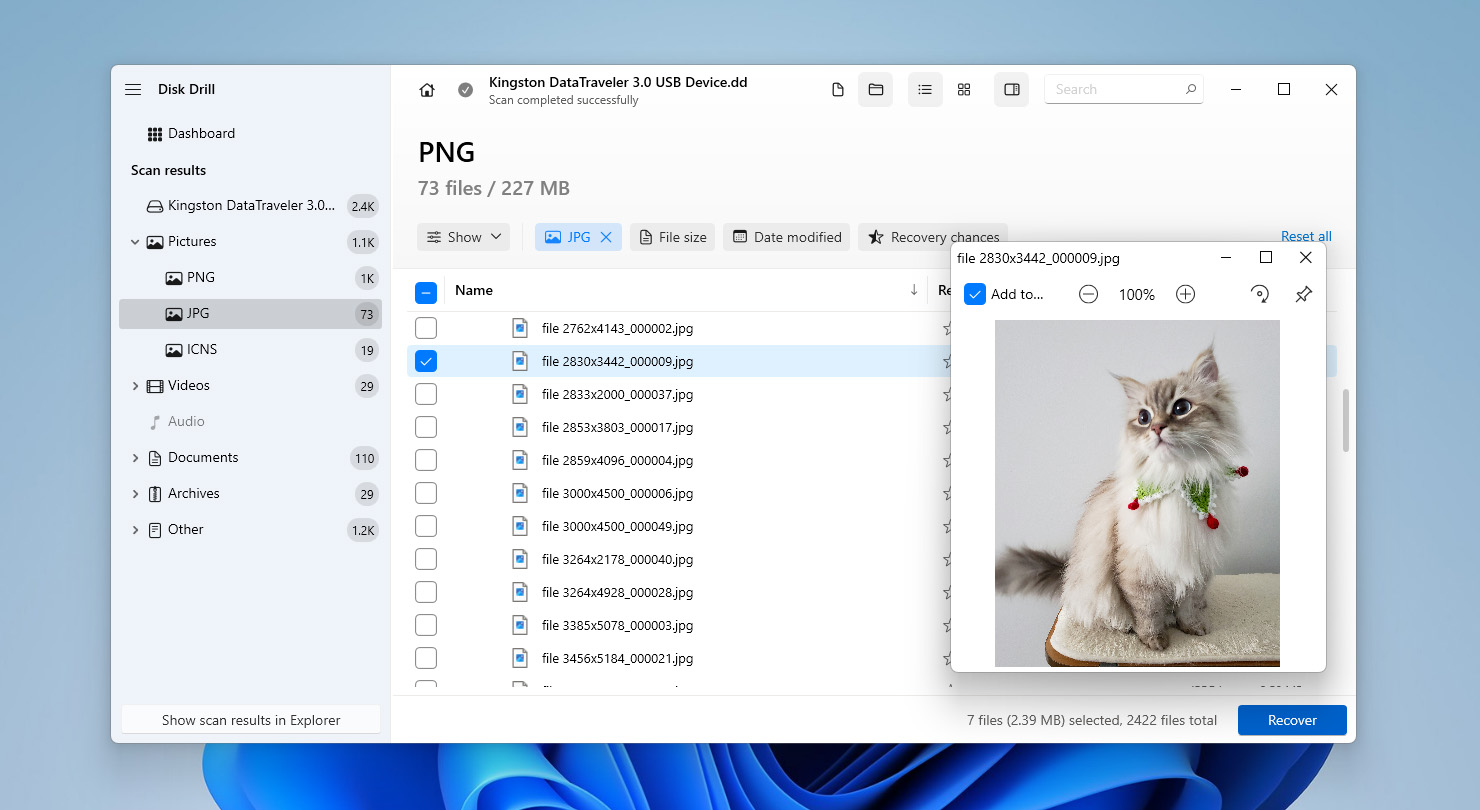
- Pick a location on your computer or another external drive and click Next.
If you’re doing this on a Mac instead of Windows, the workflow stays nearly identical. Some buttons and menu names differ slightly, but the overall process (attaching the disk image, scanning it, reviewing files, and recovering them) works the same way.
You can download Disk Drill, create a full byte-to-byte backup, and scan that backup for recoverable data completely free, both on macOS and Windows. However, to actually recover files from your dead SD card to another device, you’ll need the PRO version. Windows users do get a small exception: the first 100 MB of recovered data can be saved for free.
Once your files are recovered, you can finally decide what to do with the SD card itself. If you want to try bringing it back to a working state, open the corrupted-SD-card guide we mentioned earlier and follow the steps there. If you have no interest in troubleshooting the card any further, the easiest option is to discard it and replace it with a new one.
Method 2: Seek Help from Data Recovery Experts
If your dead SD card is in such bad shape that recovery software isn’t an option, or you simply don’t want to risk trying it yourself, the last remaining chance to get your files back is to contact a professional data recovery service.

A data recovery lab has tools and equipment that aren’t available to regular users. Instead of attempting to “fix” the SD card, specialists extract whatever data is still physically readable and transfer it to a healthy drive. This method often gives the best results, but it also comes with the highest price tag.
Since every recovery center has its own workflow, we can’t provide exact step-by-step instructions. Instead, here’s what the general process usually looks like when dealing with a dead SD card:
- Choose a reputable recovery center. Take your time to read reviews, check their success rates, and see how long they’ve been in business. Good labs usually offer several ways to contact them: an online request form, a phone consultation, or even a dedicated app.
- Explain what happened to the card, whether it shows up on your computer, and whether it has any visible damage. The more details you provide, the easier it is for the technicians to evaluate your case.
- The recovery team will review your case and decide whether they can take it on. If recovery looks possible, they’ll give you a price estimate. If not, they’ll let you know upfront instead of wasting your time.
- Send or deliver the SD card according to their instructions. Professional labs usually give clear guidelines on how to package and ship the card safely. Follow their recommendations carefully, as physical damage during transport can make recovery harder.
- Once the lab receives your SD card, they’ll attempt to extract whatever data is still readable. The recovered files are usually delivered either through a secure cloud link or on a new storage device, depending on the service you choose.
Professional recovery isn’t cheap. Prices often start in the low hundreds and can go into the thousands, depending on the damage and the amount of manual work required. Before committing, decide whether the files on your dead SD card are worth that investment.
Conclusion
Recovering data from a dead SD card is possible, as long as the card meets the right conditions and the damage isn’t beyond repair. We hope this guide helped you get your files back — and we also hope this is the first and the last time you ever need it.
To keep yourself out of this situation in the future, follow these few habits:
- Use multiple SD cards. A single high-capacity card sounds convenient, but if it fails, everything on it disappears at once. Several smaller cards spread out the risk.
- Budget SD cards often fail sooner, and the cost of recovery (or the pain of losing files) is much higher than the few dollars saved upfront, so choose quality over the cheapest option.
- Back up your files regularly. It takes only a minute to copy photos or videos from an SD card to your computer or cloud storage. Do it before you forget, and you’ll thank yourself later.
Thank you for reading to the end, and good luck with your recovery process! We’d love to hear how things turned out for you. Did you try recovering your dead SD card with Disk Drill, or did you decide to hand it over to professionals? And if you still have questions about SD card recovery, feel free to ask, we’re here to help
FAQ
- Check if your computer detects the card at the hardware level. Open Disk Management (Windows) or Disk Utility (macOS). If the card shows up with its correct capacity, your computer can still read it at a base level. If it appears as 0 MB, RAW, uninitialized, or with the wrong size, the controller is damaged. If it doesn’t appear anywhere, your computer cannot read it at all.
- Sometimes the “dead” part is the reader, not the SD card. A different adapter or USB port can instantly make the card appear.
- If your computer doesn’t detect the card anywhere, then it cannot be read at home. The only way to read it is through a professional data recovery lab, where specialists extract data directly from the memory chip using dedicated equipment.


