 If you need to recover deleted hidden files on your Windows PC – whether it’s Windows 10 or Windows 11 – this guide has all the answers. We’ll show you exactly how to recover your files or folders and cover several different ways to deal with hidden files on modern Windows systems.
Let’s not waste any time and jump right in.
Go to data recovery solution ⤵
How to Show Hidden Files on Your Computer
Before we get into how to restore deleted hidden files, let’s first cover the basics. Few people realize that Windows hides certain files and folders by default. These are usually system-related files, kept hidden to prevent accidental changes or deletion. However, files and folders can also be manually marked as hidden by the user.
Regardless of the reason, it’s fairly simple to make them visible again using File Explorer. The exact steps, however, differ slightly depending on which version of Windows you’re using. We’ll cover two methods: one for Windows 10 and another for Windows 11.
Even though Windows 11 has recently overtaken Windows 10 as the most widely used desktop OS, many users still prefer Windows 10’s familiar interface. That’s why we’ll show you how to reveal hidden files on both systems.
Here’s how to find hidden files on a computer running Windows 10:
- Open File Explorer.
- Click on the View tab, then click Options.
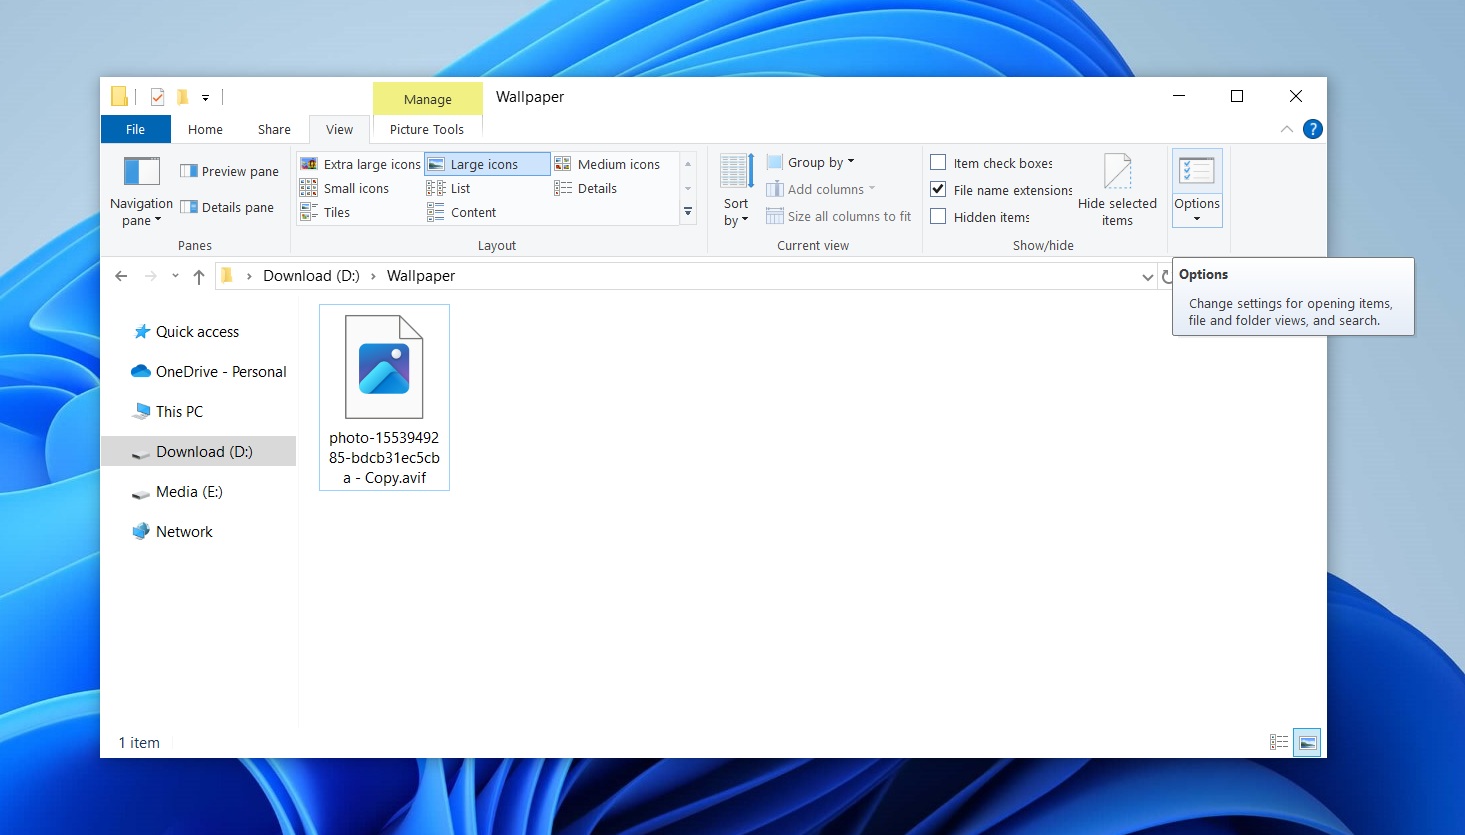
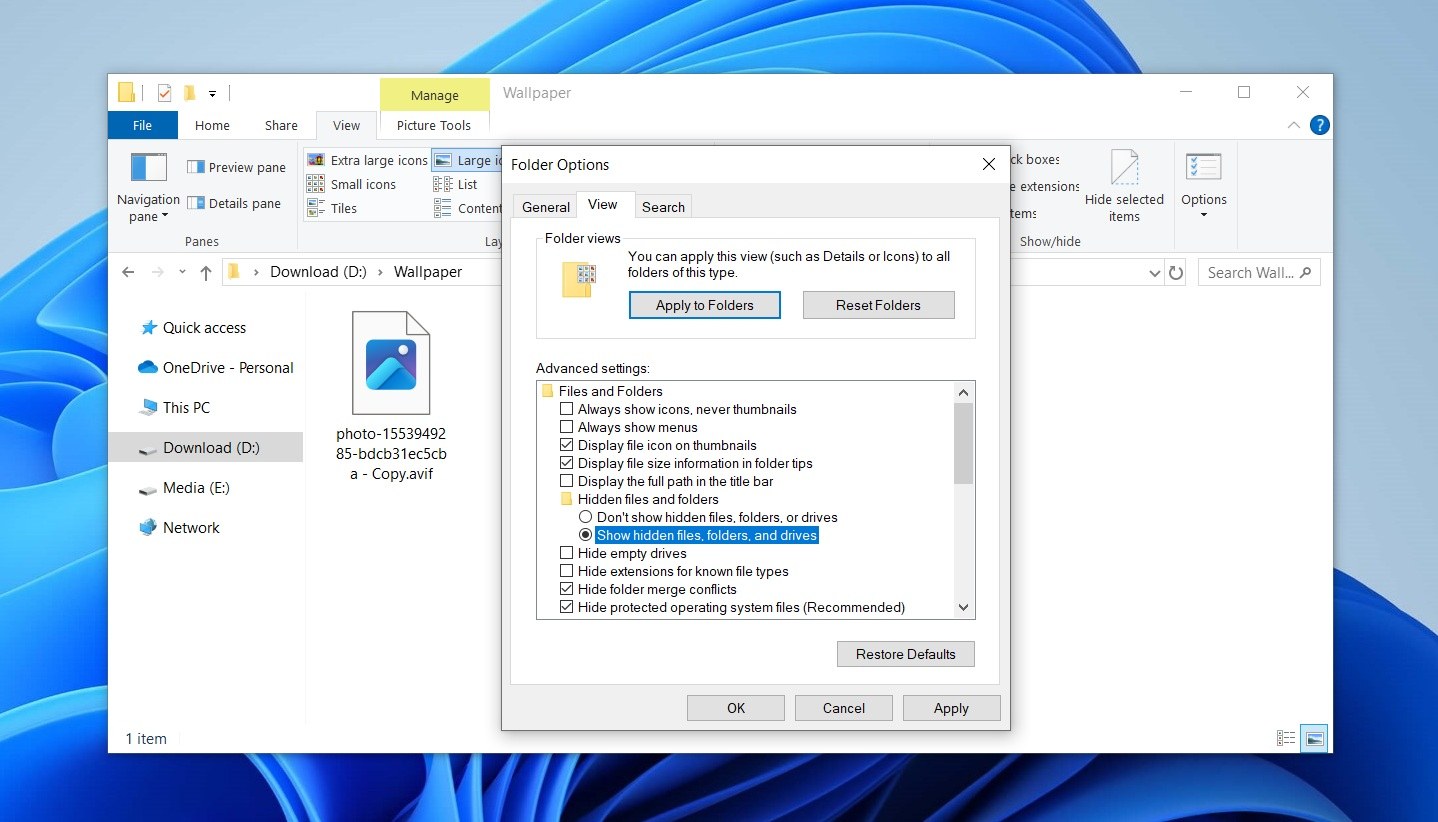
- Click to the View tab, then under Hidden files and folders, make sure the radio button for Show hidden files, folders, and drives is enabled. Click Apply then OK to finish.
Tip: Alternatively, you can quickly toggle hidden files on or off by checking or unchecking the Hidden items box under the View tab in File Explorer. Once enabled, any hidden files or folders in the current directory will immediately become visible.
Here’s how to show hidden files on a computer running Windows 11:
- Open File Explorer.
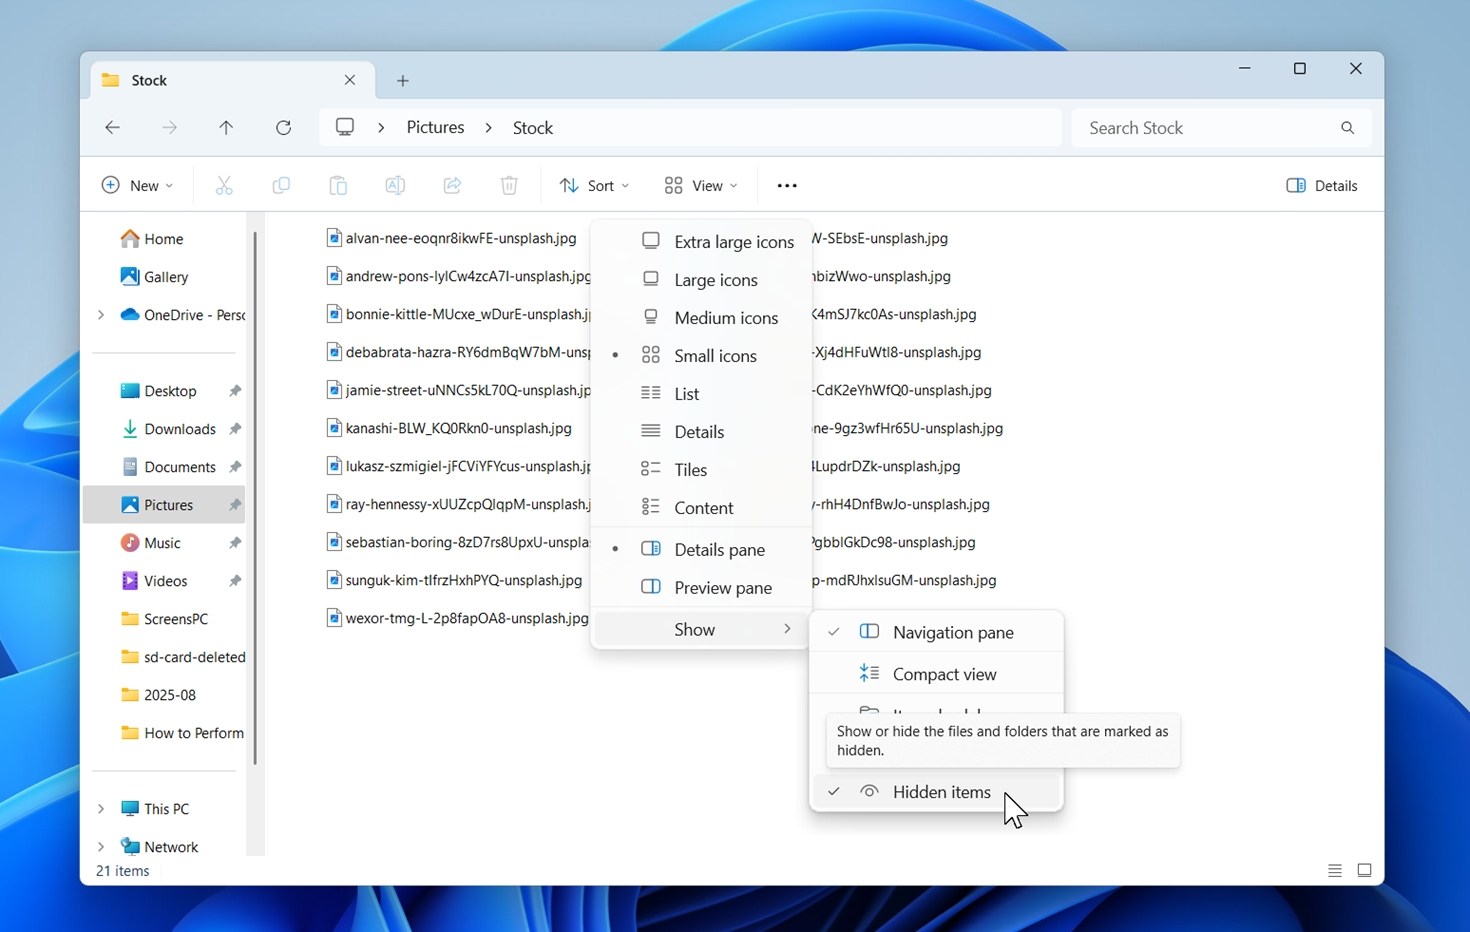
- At the top, click View.
- Hover over Show, and select Hidden items.
Note: A little later in this guide, we’ll show you how to unhide these files or folders permanently, so they act just like any other “normal” files on your computer. That said, be careful, many files are hidden by Windows for a reason, usually to protect important data. Only unhide/modify these files if you’re sure you know what you’re doing.
How to Recover Deleted Hidden Files on Windows
If you weren’t careful and deleted some of your hidden files or folders, you might be glad to know that recovery is still possible. In most cases, deleted hidden files behave just like any other files – the only difference is the Hidden attribute, not the actual data.
So, just like with regular files, when hidden files are deleted, the data often still resides on the disk until it’s overwritten by new information. This means you can use data recovery tools to retrieve them. Whether it’s documents, photos, or entire folders, you have a solid chance of restoring them if you act quickly.
Tip: To improve your recovery chances, stop using the affected drive immediately. Any new writes can permanently overwrite the deleted hidden data. Also, your chances of hidden deleted files recovery also depend on the type of drive.
On system SSDs, recovery success rates are much lower due to automatic TRIM operations, but don’t let that discourage you. Try running a data recovery tool – you won’t know for sure what’s recoverable until you scan the drive.
To demonstrate the recovery process in detail, we’ll use Disk Drill – a tool we’ve extensively tested in all kinds of scenarios. It has consistently earned high marks from our recovery experts for both reliability and ease of use. The interface is simple, and recovering files usually takes just a couple of clicks. The steps are exactly the same for both Windows 10 and Windows 11, as this software works equally well on either system.
Here’s how you can recover deleted hidden files with Disk Drill:
- Download Disk Drill. Once downloaded, install and open it.
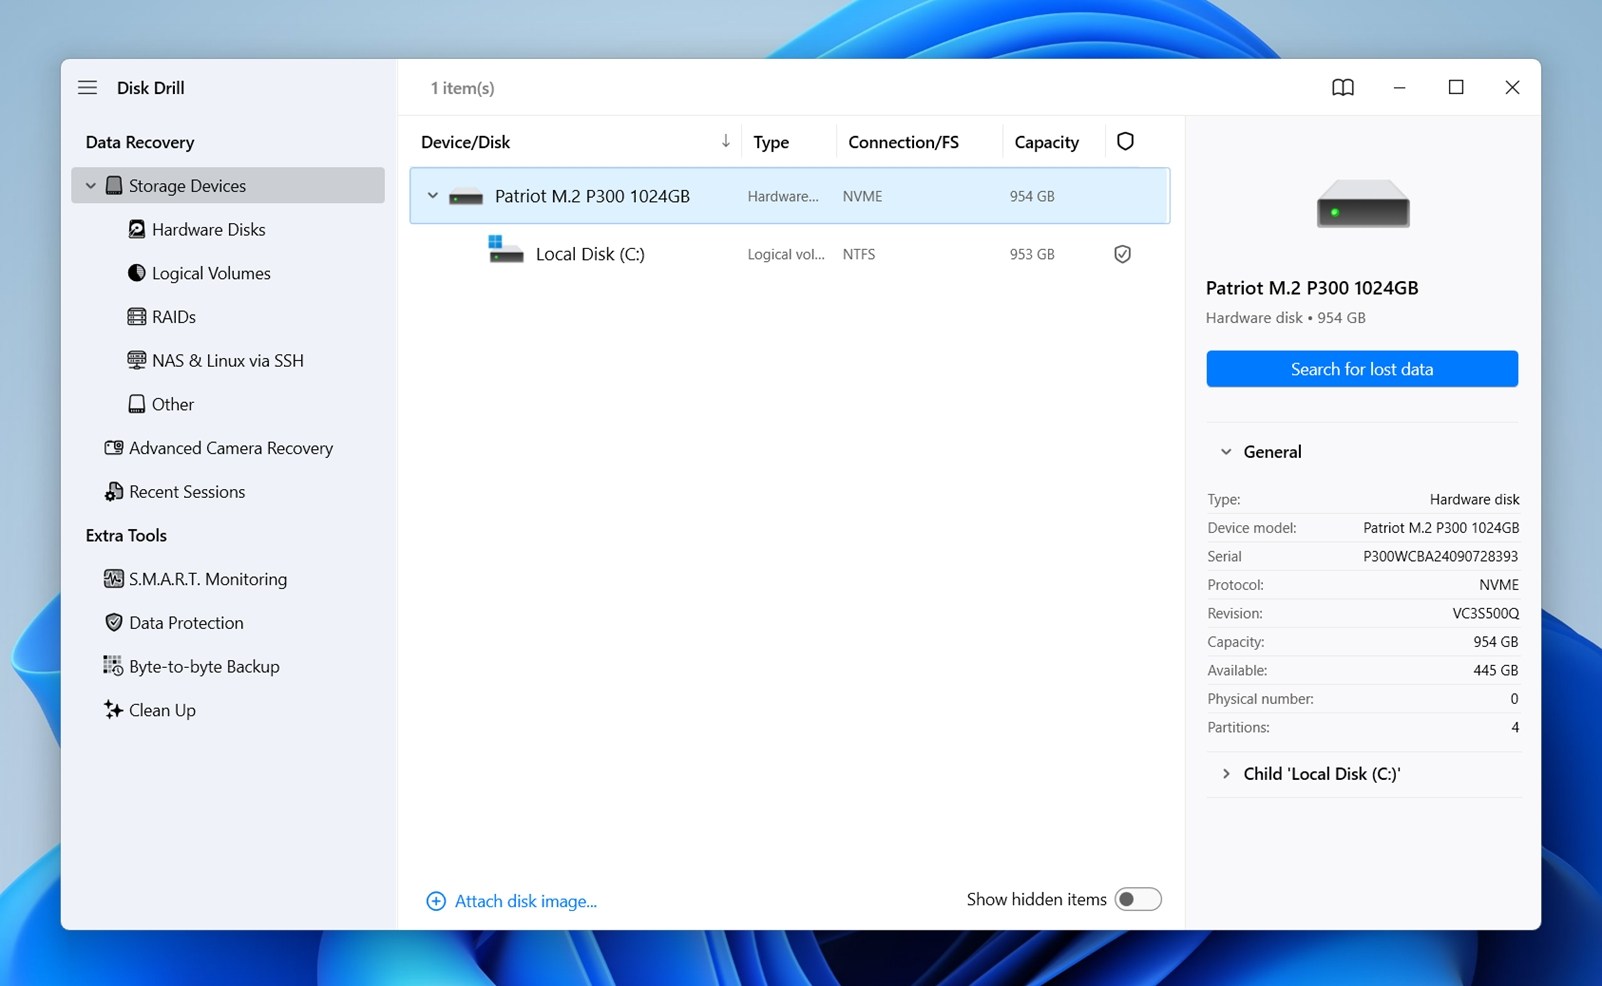
- Select the drive that contains the hidden files or folders that you want to recover. Click Search for lost data.
 If you’re scanning an external drive, Disk Drill may ask you to choose a scan mode. Go with the Universal option. This will locate any hidden files that have been deleted.
 - When the scan has finished, click Review found items. If you already know what type of files you’re looking for, like photos, videos, documents, and so on, you can select the category right from this screen. But if you’re unsure, stick with Review found items. It will display all recoverable files in one place.
- If the files you deleted were hidden system files, make sure the Show hidden system files option is enabled in Disk Drill’s Show panel. Without this, those files may not appear in your scan results.
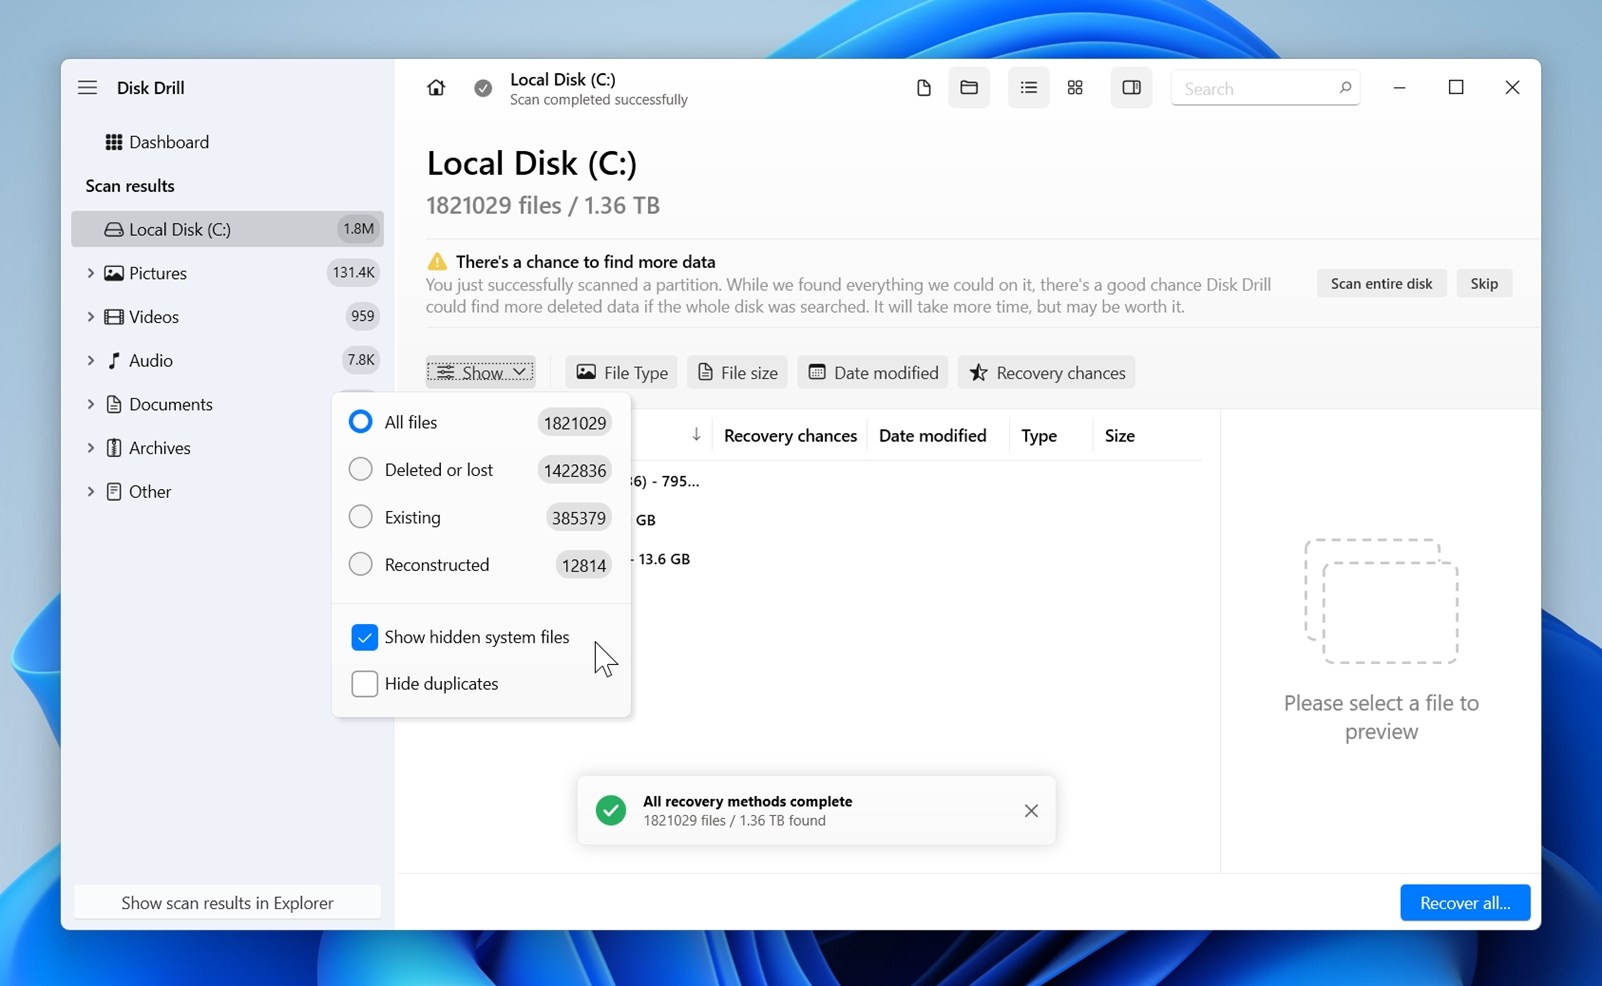
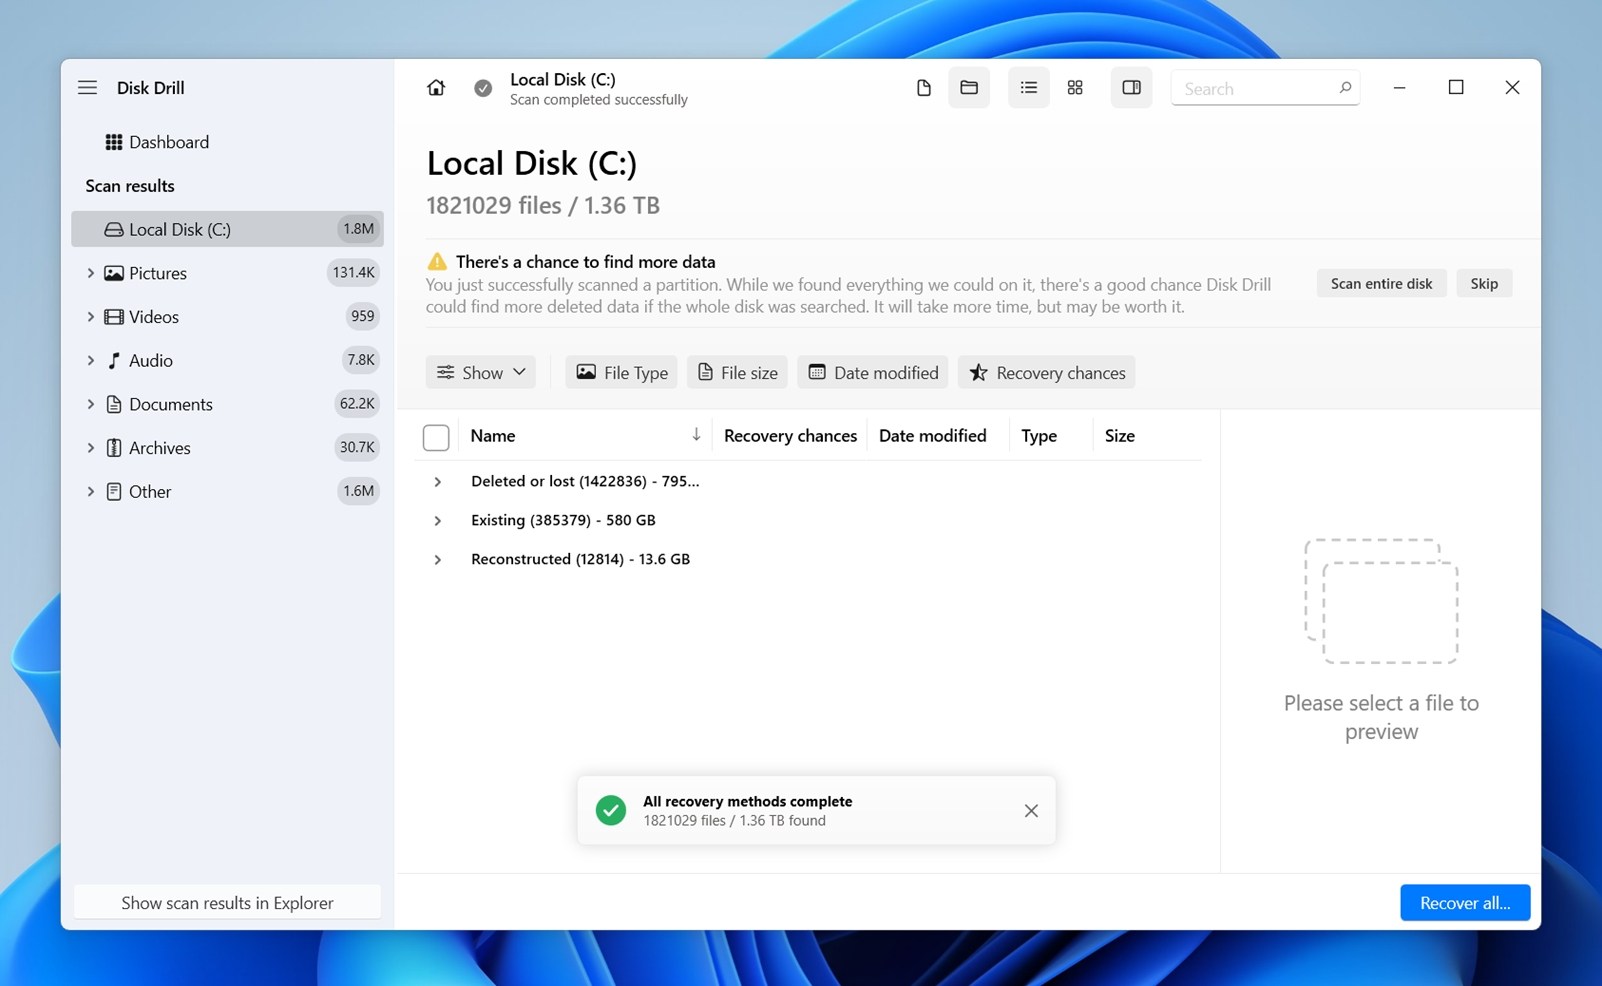
- In the scan results, you’ll notice subcategories like Deleted or lost (files that were removed), Existing (lists files currently “visible” on the drive), and Reconstructed (contains files recovered without their original names or folder structure). If you know for sure the files were deleted, start with Deleted or lost to save time.
- As you click on individual files in the results, a small preview panel will appear on the right side. This is especially helpful when you’re recovering hidden files or deleted hidden photos and want to confirm you’ve selected the right ones.
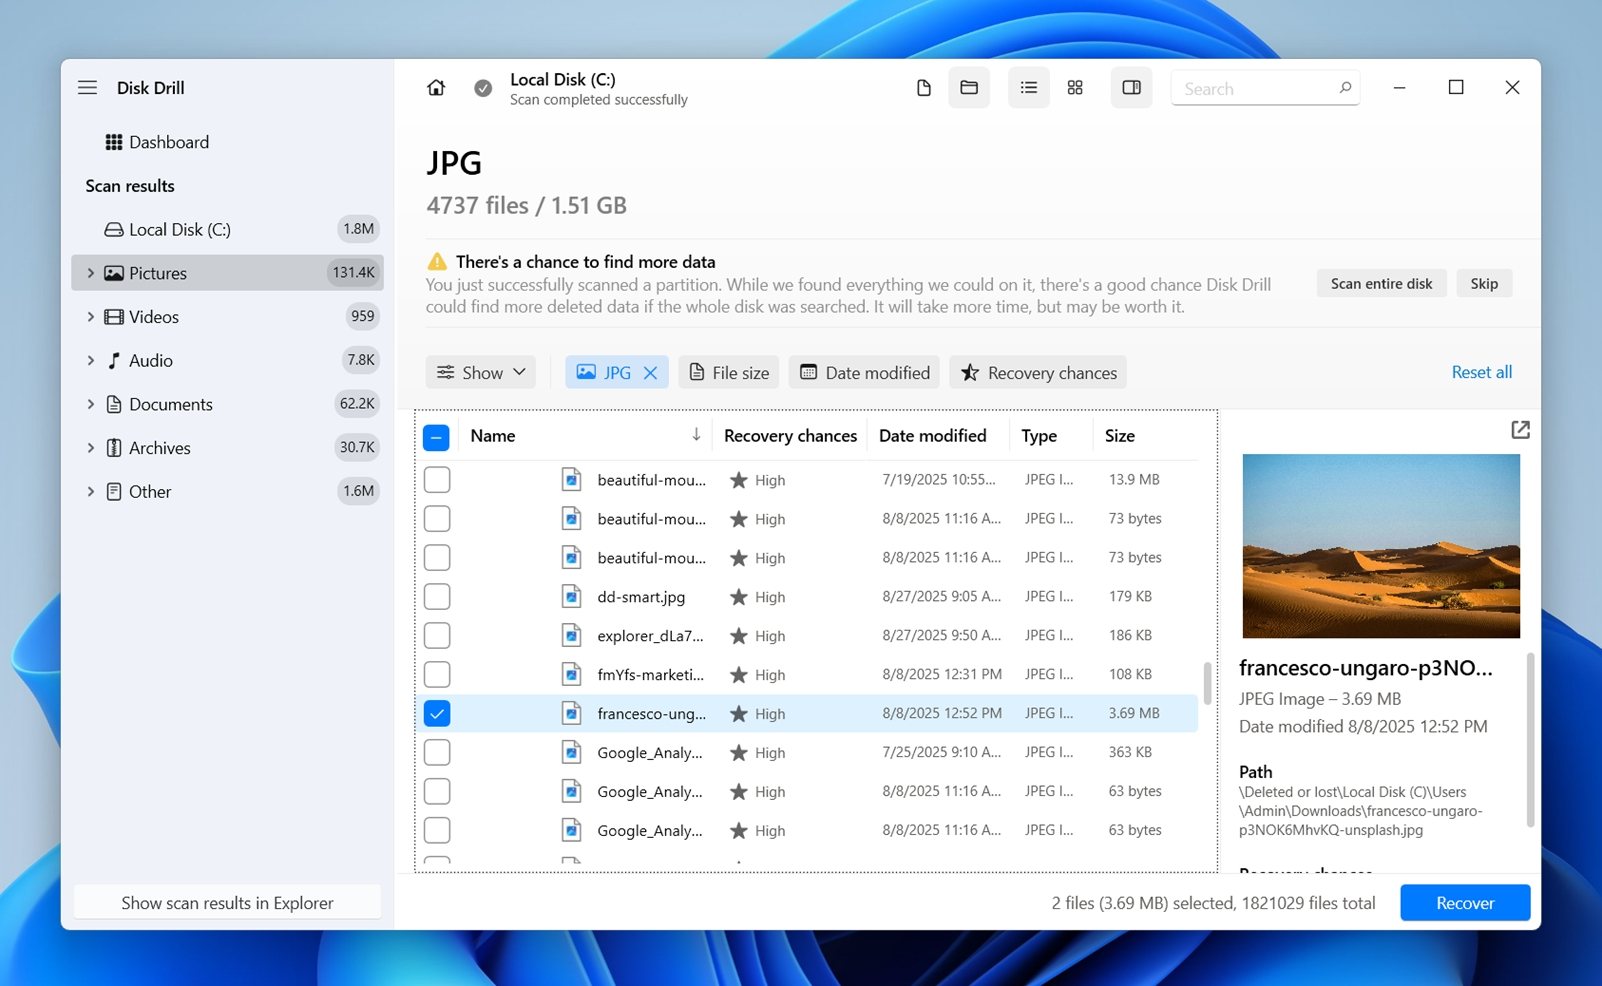 Disk Drill can preview almost all common file types, either using your operating system’s native capabilities or through any compatible third-party apps already installed on your PC.
 - If you’ve found the files you were looking for, all that’s left to do is select them and click Recover at the bottom-right corner of the window.
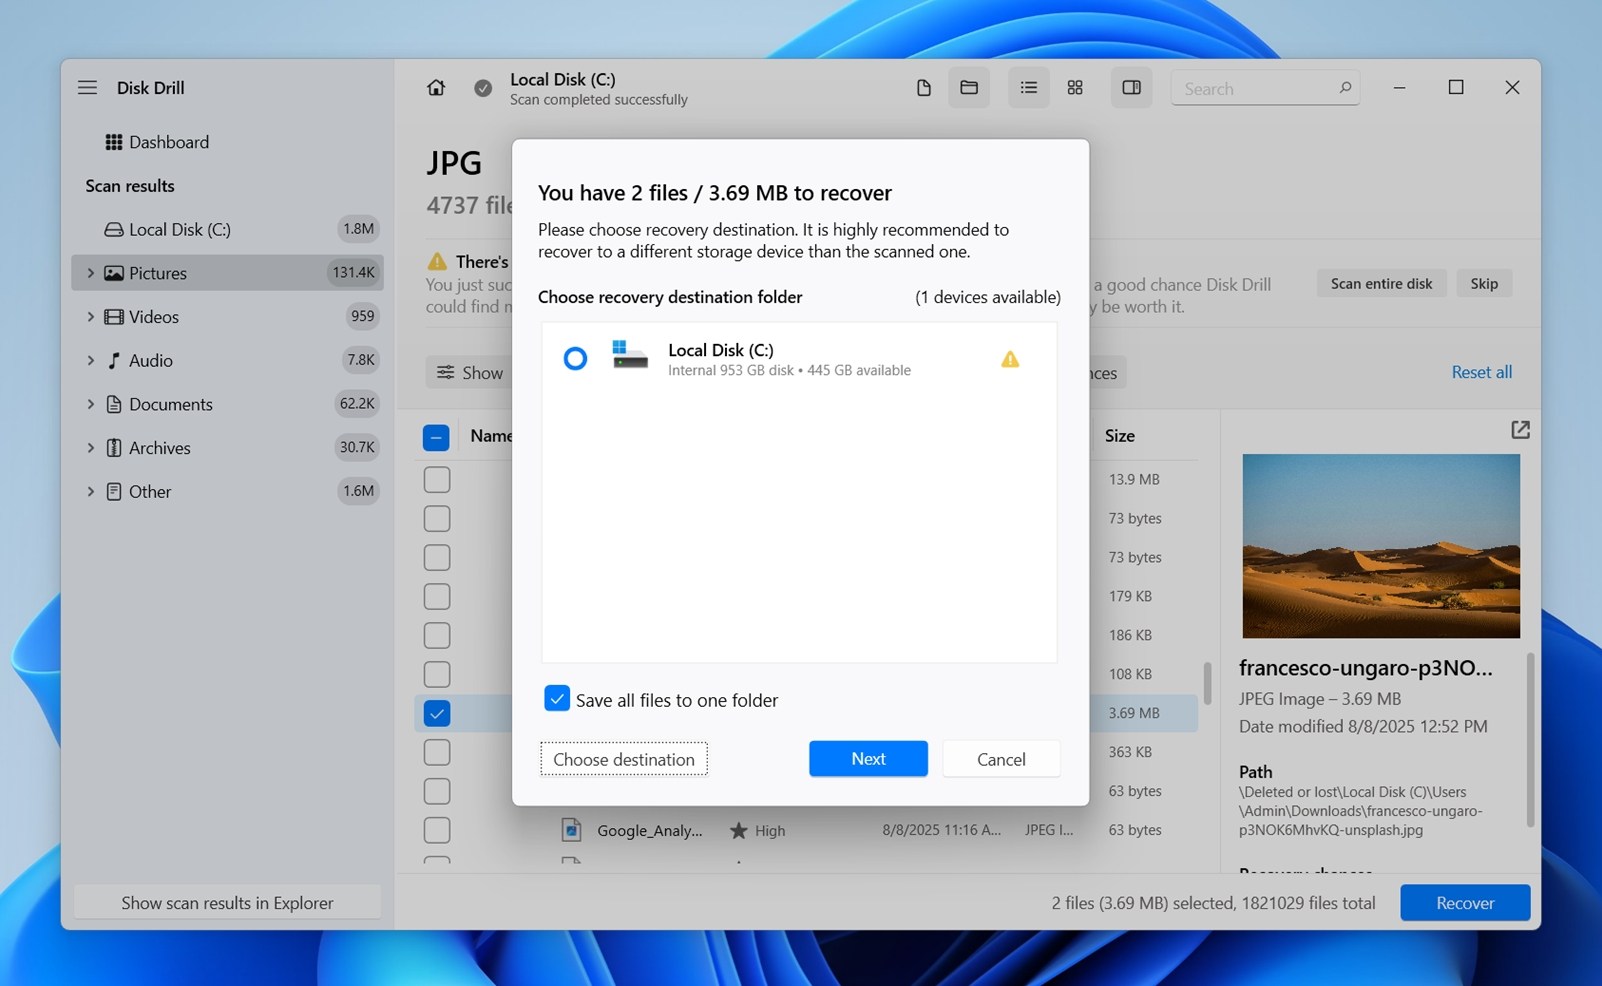
- Specify the location where you want the recovered files to be saved.
Best practice: Always choose a different drive/partition from the one where the files were originally lost. Saving them back to the same drive can overwrite deleted data and reduce the chances of successful recovery.
Hidden files on your PC that have been restored can be found in the specified recovery location. Disk Drill can be used to recover data in any situation, like recovering files after a Windows update, and it contains features that can protect your data against future data loss situations.
How to Unhide Hidden Files or Folders
Now, as promised, let’s talk about how to unhide these files for good.
Hidden files and folders are invisible due to a specific attribute that has been applied to them. When this attribute is active, the files won’t appear unless you’ve specifically set your system to show them using the methods we covered at the very beginning. Once this attribute is removed, the files and folders will show up like normal.
You’ve got two ways to do that: either through File Explorer or through Command Prompt (CMD). We’ll cover both.
Method 1:Unhide files or folders with File Explorer
Just like showing hidden files, folders, and drives, making files visible is super easy using Windows Explorer.
- Open File Explorer and navigate to the folder that contains the files you want to unhide.
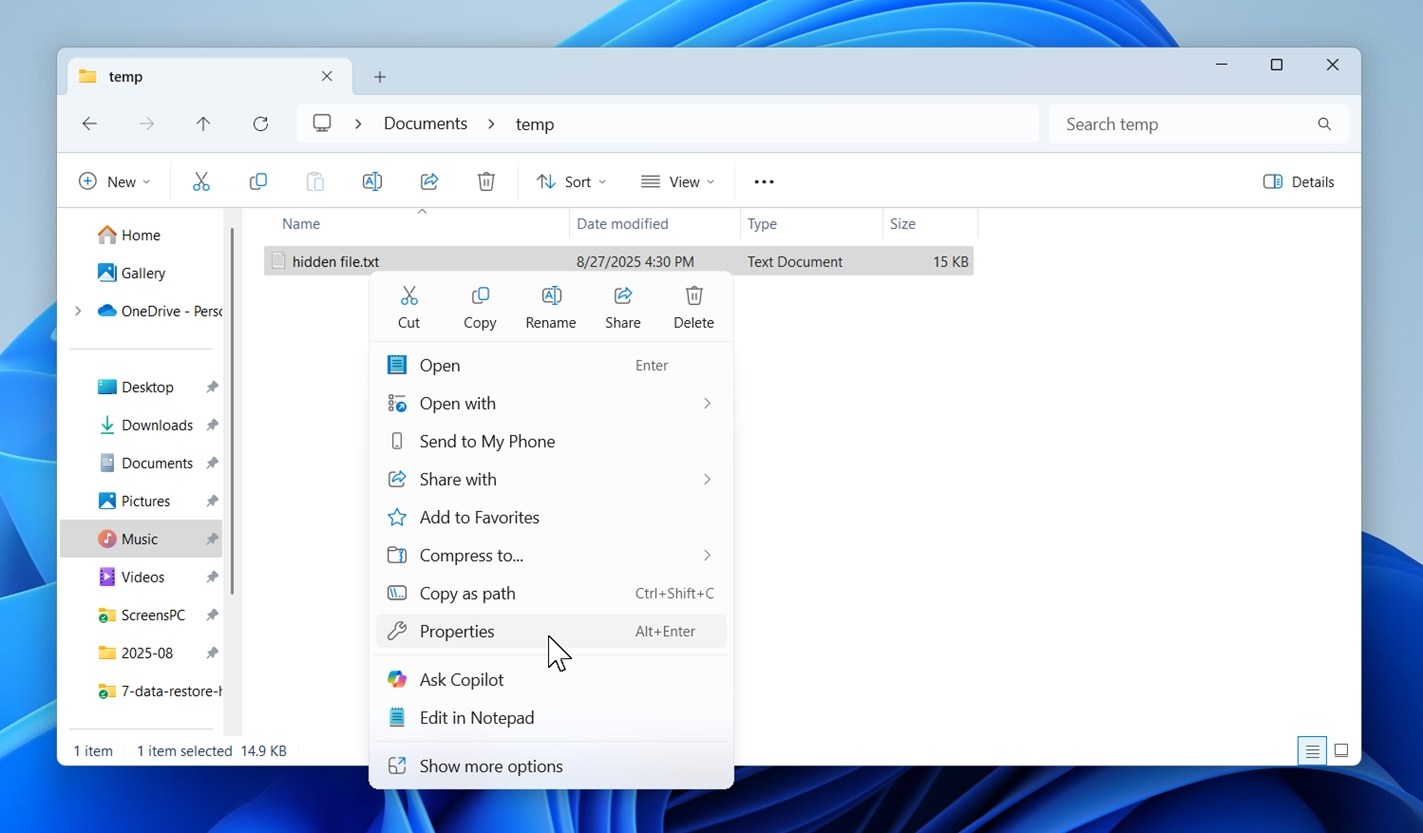
- Right-click on the file or folder you want to unhide and click Properties.
- Deselect the Hidden attribute, click Apply then OK. The file or folder will be visible again.
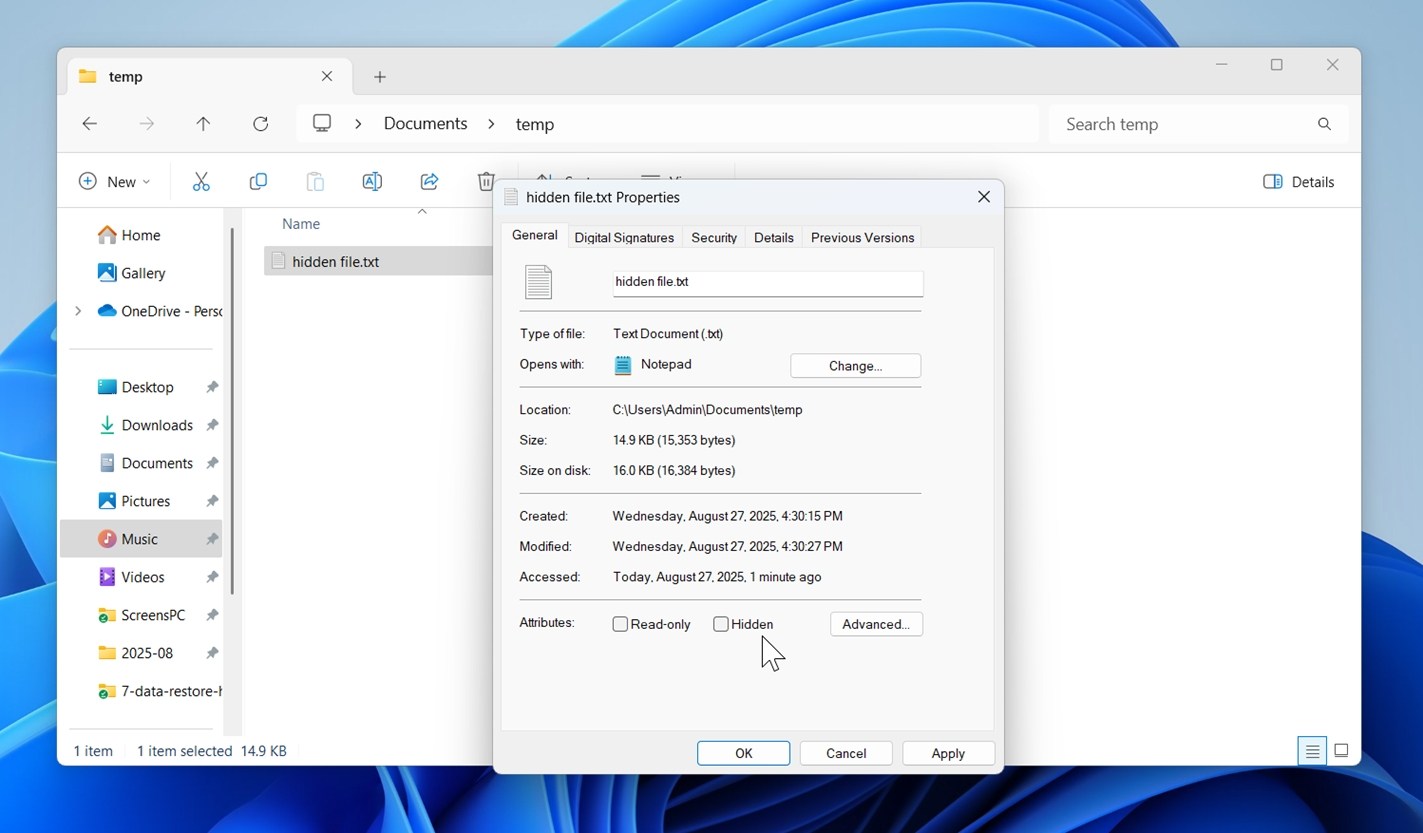
Heads-up: If you’re dealing with a folder, Windows will ask whether you want to apply the change just to that folder or to all subfolders and files inside it. Choose carefully.
Method 2:Unhide files or folders with Command Prompt
If you prefer using a command-line interface, you can unhide files by removing the hidden attribute. This can be performed at a folder level, or to individual files.
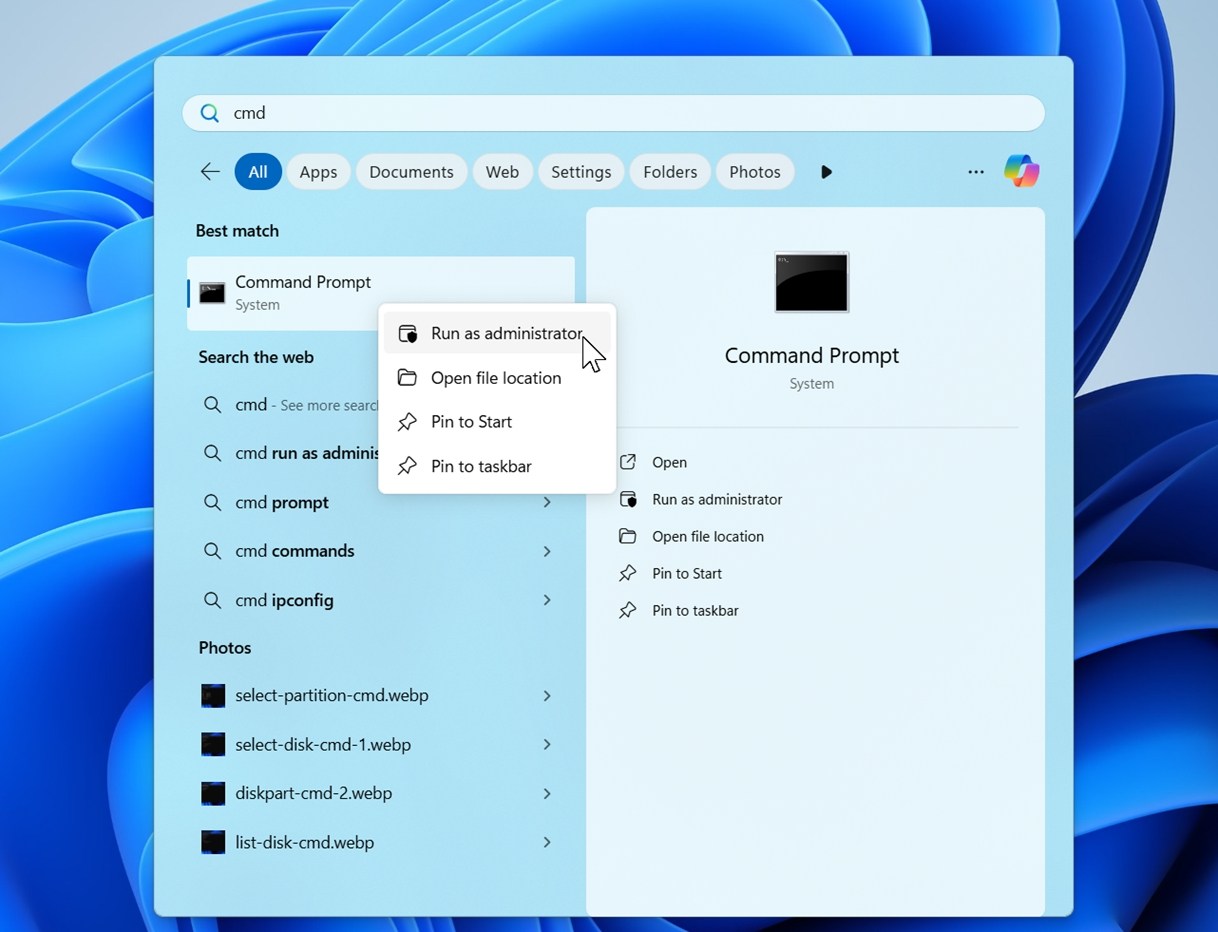
- Press Windows + S and search Command Prompt. Right-click it and select Run as administrator. This isn’t always required, but it’s a good idea because certain commands may need elevated permissions to work properly.
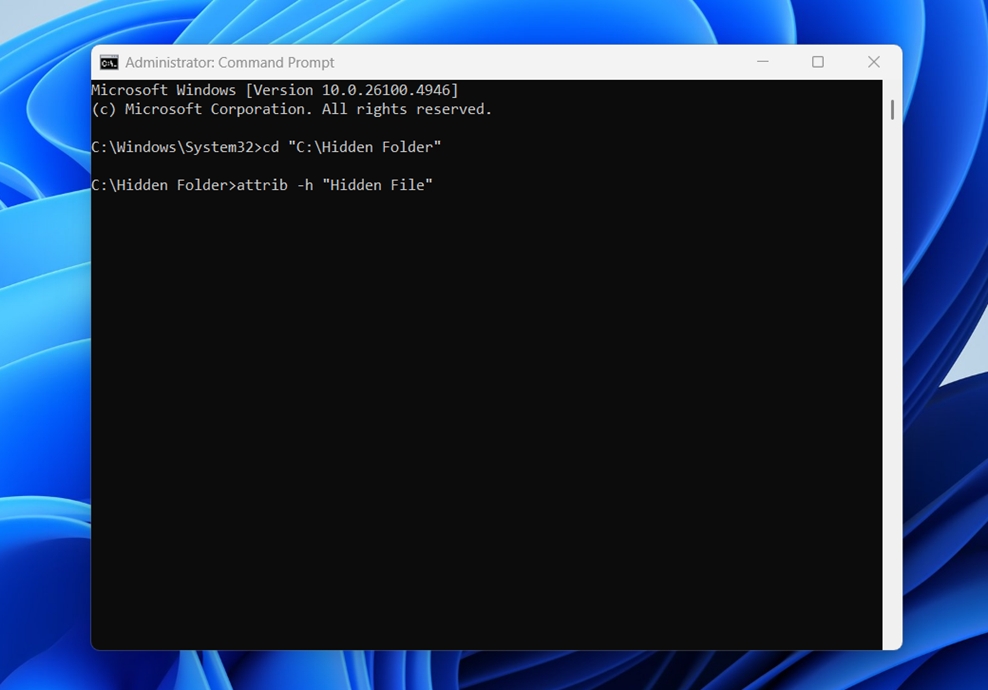
- Type
cd “C:\Hidden Folder”. Replace the quoted text with the location of your files/folders. If there is a space in the directory location, be sure to include it within quotation marks. Press Enter.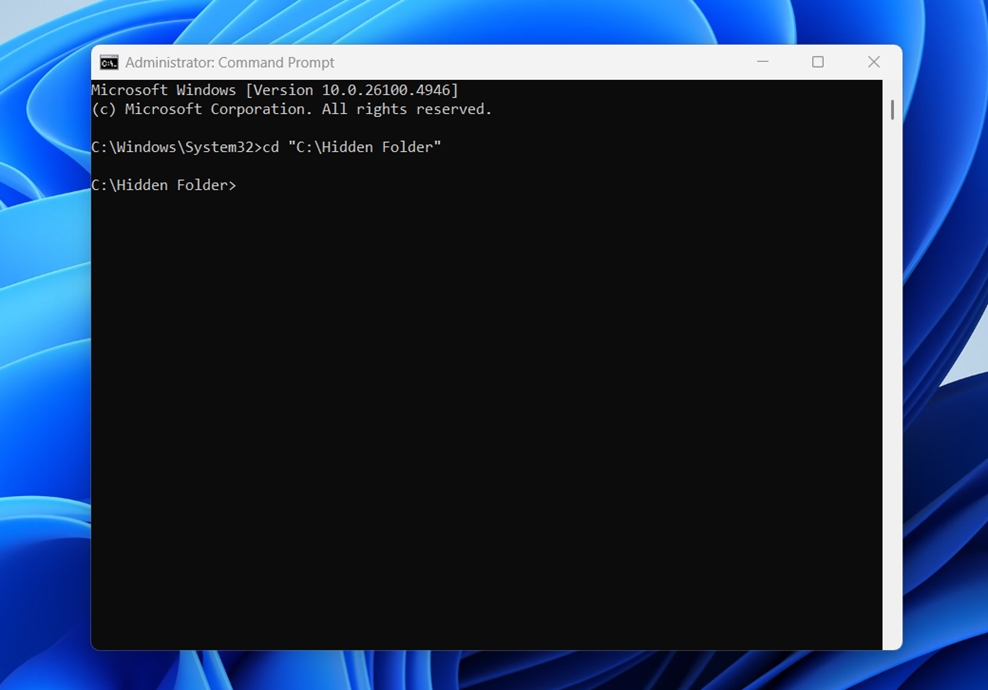
- Type
attrib -h “Hidden File”. Replace the quoted text with the name of the file you want to unhide. If it states that the file cannot be found, try adding the file extension to the end of the filename.If you want to remove the hidden attribute from all files and subfolders in the selected folder, use the command attrib -h /s /d instead.
You can hide the files again by replacing the -h command with +h, which will add the attribute back.
Final Words
By the way, if you’re absolutely sure you didn’t make a file hidden yourself and it wasn’t hidden before (or if you’re certain you didn’t delete it) there’s a good chance something else is going on. Viruses and malware are known to cause exactly these problems, often marking files as hidden or deleting them altogether.
To stay safe, scan your system and any connected external drives using an antivirus tool. Even the built-in Microsoft Defender on Windows does a solid job here, but you can use any reputable free antivirus if you prefer. A quick scan now can save you a lot of recovery work later.
If you still have questions, check our FAQ section first, we’ve covered many common issues there. If you don’t find your answer, leave us a comment below. We read them all and respond to every one.
FAQ
- Open File Explorer and navigate to the folder that contains the hidden files.
- Click the View tab and make sure that the Hidden items checkbox is ticked.
- Right-click the files you want to delete and click Delete.
- Open File Explorer and navigate to the parent folder that contains the hidden folder.
- Click the View tab at the top and make sure the Hidden items checkbox is ticked.
- Right-click the hidden folder and click Properties.
- Deselect the Hidden attribute, click Apply then OK.
- Click Start, then open the Control Panel. Go to Appearance and Personalization.
- Click Folder Options, then click on the View tab.
- In the Advanced settings sections, click Show hidden files, folders, and drives. Click OK.
- The first factor is the type of storage drive. On traditional HDDs, deleted data often stays untouched until something overwrites it, giving you a better shot at getting your files back. On SSDs, though, things get trickier because of TRIM, which automatically clears deleted data. But there’s an important detail here: external and internal SSDs don’t behave the same way. External SSDs connected via USB Type-A or Type-C hubs often don’t receive TRIM commands, which means your deleted files might still be recoverable. Internal SSDs, on the other hand, almost always run TRIM automatically (especially on system drives), so recovery success rates are much lower.
- Next on the list, timing plays a huge role. The sooner you try to recover your files, the better your chances. As you’ve already realized, the more you use the drive after deletion, the higher the risk that new data will overwrite your lost photos. If you want the best results, stop using the affected drive right away.
- The third factor is where your files were stored. Here’s something many people overlook: recovery odds differ based on location. Files on a system drive are more likely to get overwritten quickly because Windows is constantly writing updates, caches, and temporary files. On the other hand, external drives and SD cards often have better recovery chances.
- As you may have guessed, if the folder was accidentally deleted, it won’t reappear just by enabling hidden items. In this case, you’ll need to try deleted hidden files recovery using a data recovery tool like Disk Drill.
- Another reason could be that the folder is marked as a protected system folder. These remain invisible even when the hidden items toggle is on. To make them visible, open File Explorer Options, go to the View tab, and uncheck Hide protected operating system files (Recommended). Confirm the warning and click OK.
- Enable the Show hidden items option in File Explorer. If you still don’t see them, go into File Explorer Options, open the View tab, and uncheck Hide protected operating system files. This makes system-hidden files visible as well.
- If the files are stored on a USB drive or external disk and suddenly disappeared, malware might have set them as hidden. In that case, open Command Prompt and run “attrib -h -s /s /d X:\*.*”. Replace X: with the drive letter. This removes the hidden and system attributes from all files and folders on that drive, making them visible again.
- Another option is to check the Recycle Bin. If the files were deleted but not permanently erased, you can restore them directly from there without any extra tools.
- The most frequent reason is malware. Some viruses automatically change file attributes to Hidden or System so you can’t see them in File Explorer. If this keeps happening, run a full antivirus scan using Microsoft Defender or any trusted antivirus tool. Also, scan any connected external drives - they can spread the issue.
- Another possibility is syncing or backup software. Cloud services like OneDrive or Google Drive sometimes hide placeholder files or restore them as hidden after a sync. Check your cloud storage settings to make sure nothing is automatically managing attributes.
- It can also happen if Group Policy settings or scripts are in place on work or school PCs. In that case, check with your administrator or review startup tasks to see if anything’s enforcing these changes.


