
Nothing is more frustrating than pouring your time and effort into a Notepad document, only for your computer to crash before you get a chance to save it. The same is true when you accidentally delete a Notepad document that you had forgotten to back up.
Thankfully, when you delete a file, it’s not always gone for good. Data that has been deleted has a small window of opportunity where it’s still recoverable. Read on to learn more about how you can recover Notepad files.
Does Notepad Autosave?
Notepad, as useful as it is, does not have an autosave feature. This means if you accidentally closed Notepad without saving, there’s no automatic backup you can use to restore what you had written. Considering Microsoft puts a priority on Microsoft 365 apps like Word, it’s unlikely that any additional features are going to be added to Notepad.
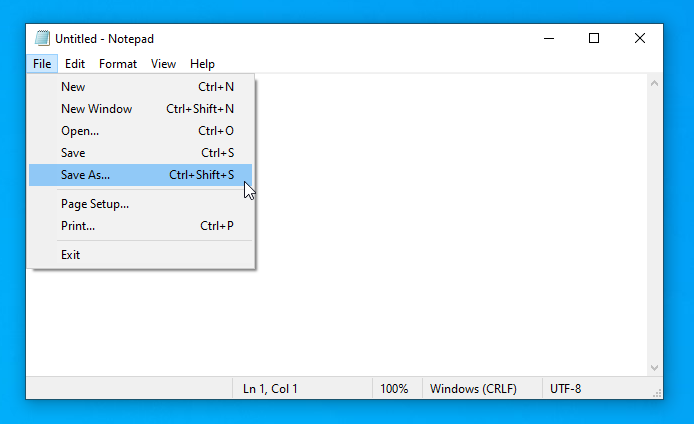
Here is a list of Notepad alternatives that include an autosave feature: Notepad++, Notes, Google Docs, OneNote, ThoughtPad, Sublime.
It’s important to note that you cannot recover an unsaved Notepad file. For instance, if you wanted to recover a Notepad file after a crash, this would only be possible if the file had been saved at least one previously. The same is true if in any situation where you want to recover an unsaved Notepad document. Since nothing has been saved, there is no way to recover unsaved Notepad data.
Cloud-based alternatives like Google Docs are often the preferred choice. Not only do they automatically save your progress as you go, but you also have the option of collaborating with others and accessing the file from anywhere with an internet connection.
How to Recover a Deleted Notepad File
While there may be no methods on how to recover an unsaved notepad file, there are various methods you can use to recover a deleted Notepad file. If you’ve lost or deleted an important Notepad file, let’s take a look at a few different ways of recovering it.
Method 1:Use the Ctrl + Z Command
If you just accidentally deleted a Notepad file, you can try to recover it by using the Ctrl + Z keyboard shortcut for Windows. This command will undo the last action you performed, so this will only work if deleting your Notepad file was one of the recent actions you took using your computer.
You can also do the same thing by right-clicking on the desktop or a folder and selecting undo delete.
Method 2:Restore from Recycle Bin
Usually, a deleted file is sent to the Recycle Bin if you didn’t press Shift + Delete (permanently delete) to delete your Notepad file. So you can try to recover a Notepad file by checking the Recycle Bin and searching to see if your file is still there.
Restore your file by doing the following:
- Open the Recycle Bin.
- Scroll down until you see your file, or use the search bar if there are a lot of files in the Recycle Bin.
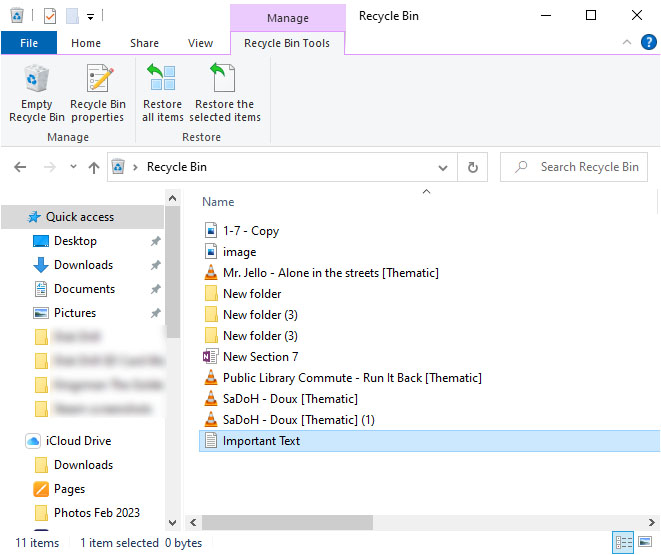
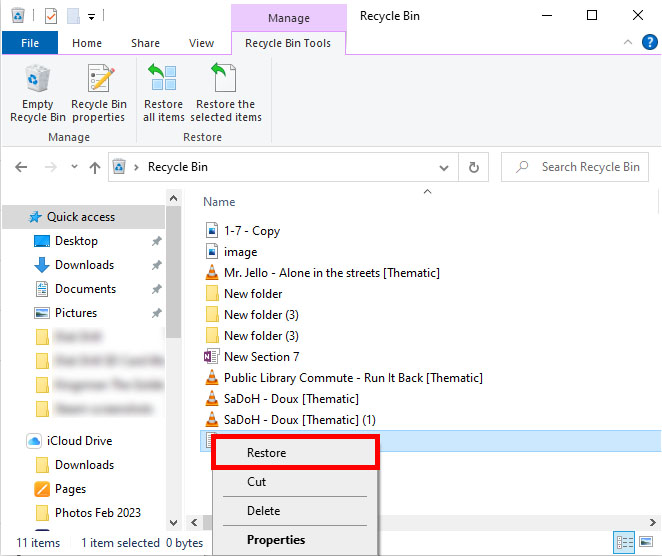
- Once you locate your file, right-click on it and choose “Restore.” This will return the file to its original location.
Method 3:Check for Temp Files
While Notepad does not have any Autosave feature in its latest version, Windows actually creates temporary data for different files on your system. While it’s not guaranteed, your Notepad file can also have temporary files available. To check if your Notepad file has a temporary file, do the following:
- Access the temp folder by pressing the Windows key + R. This opens the Run dialog box.
- Type %AppData% and click OK. This opens the temp folder where your Notepad temporary file might exist.
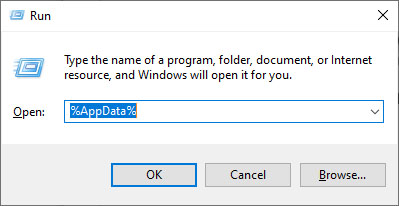
- Check if a folder named Notepad exists. Otherwise, navigate to the Microsoft folder.
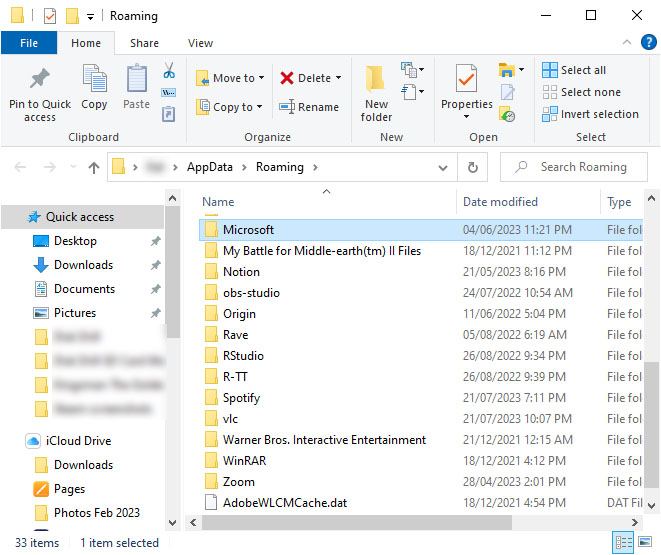
- Check for any .tmp files with a similar name to your Notepad file and copy them to another location.
- Rename your file to .txt to open it as a Notepad file.
Method 4:Restore From a Backup
Windows gives you the option of creating backups using the Backup and Restore (Windows 7) feature. By default, these backups include a copy of the necessary files used by Windows to boot in the event that your essential system files are lost, deleted, or corrupted. If you’ve created a backup of the file previously, you can restore the file directly from the backup.
If there was no backup made of the file prior to deletion, this method will not work for you. Instead, move onto the next section for restoring the file using File History.
- Press Windows Key + S on your keyboard and search Backup settings. Click on the top option.
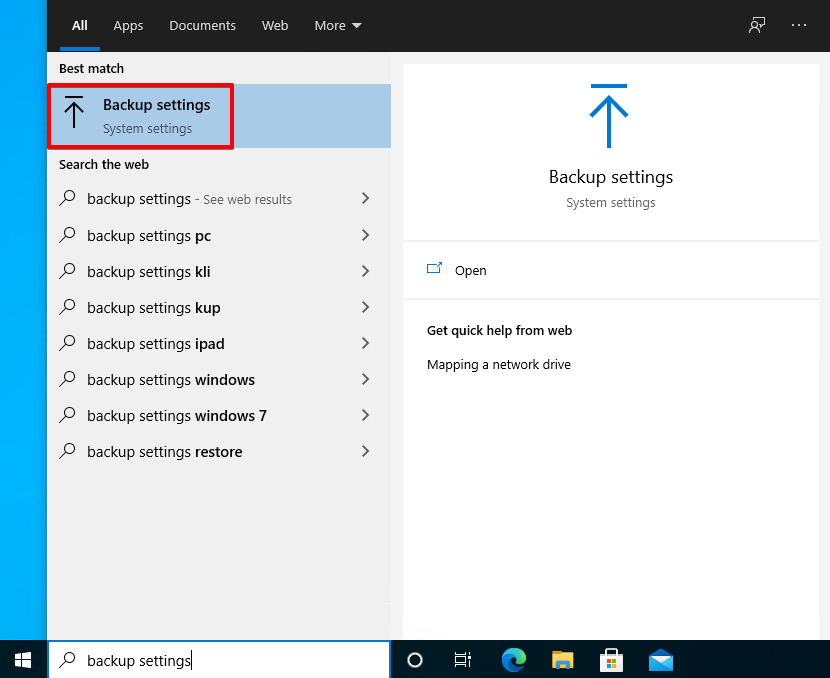
- Click Go to Backup and Restore (Windows 7).
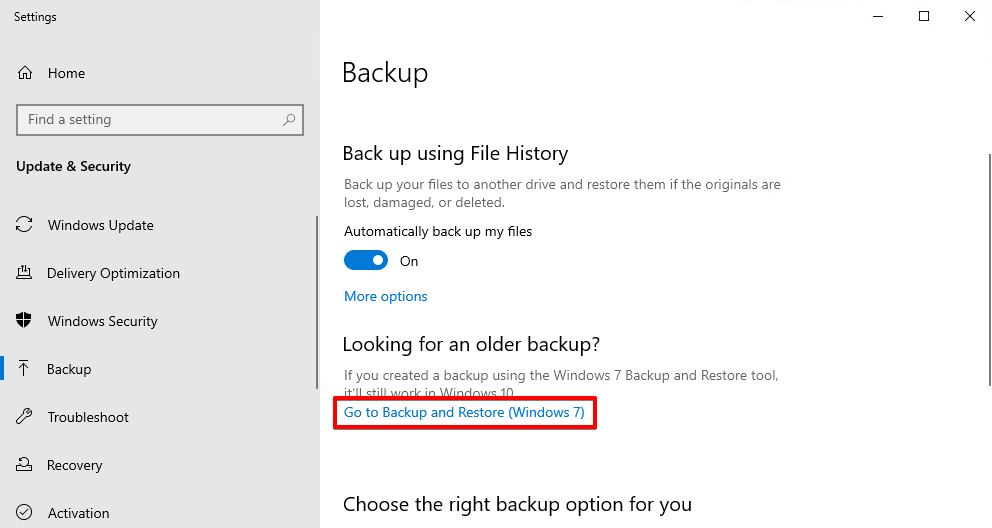
- Click Restore my files.
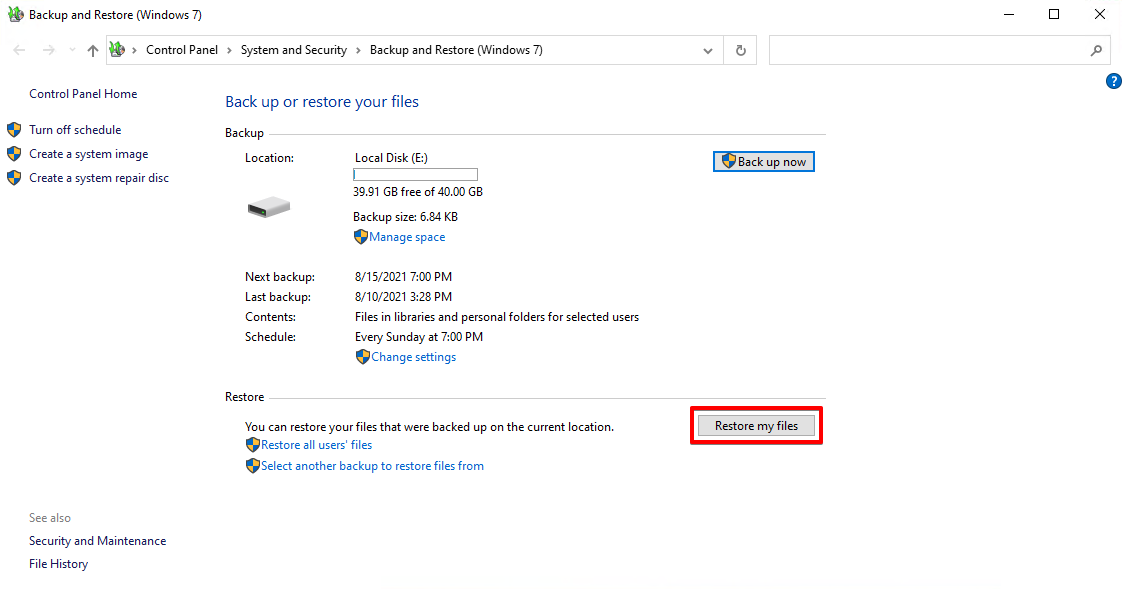
- Click Browse for files.
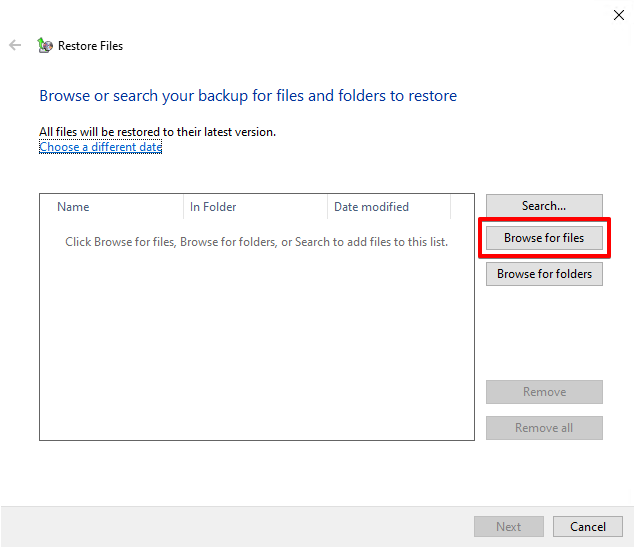
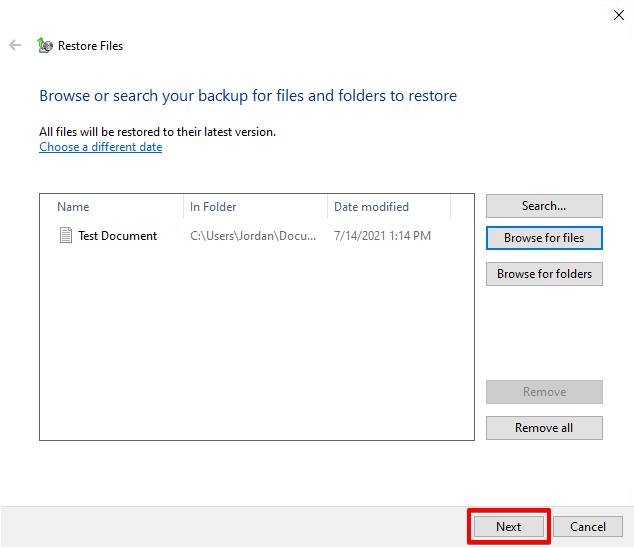
- Navigate to the file, select it, then click Add files.

- Click Next.
- Click Restore. If you want to restore it to a different location, specify the location in the In the following location: field.
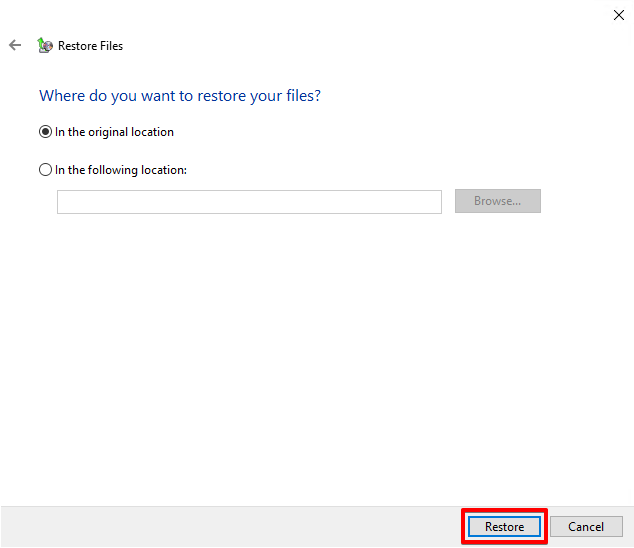
When restored, you will find the file either in the original location or the specified location, depending on which option you chose.
Method 5:Restore Using File History
File History is the updated way of creating backups compared to the Backup and Restore feature. With File History, you can create backups that include different versions of the file, depending on how far back you want to restore from.
File History had to have been enabled and configured prior to the loss of your file. If you didn’t make a backup of the file, move onto the next section.
- Navigate to the folder where the Notepad file was stored before it was lost or deleted.
- Select the Home tab and click History.
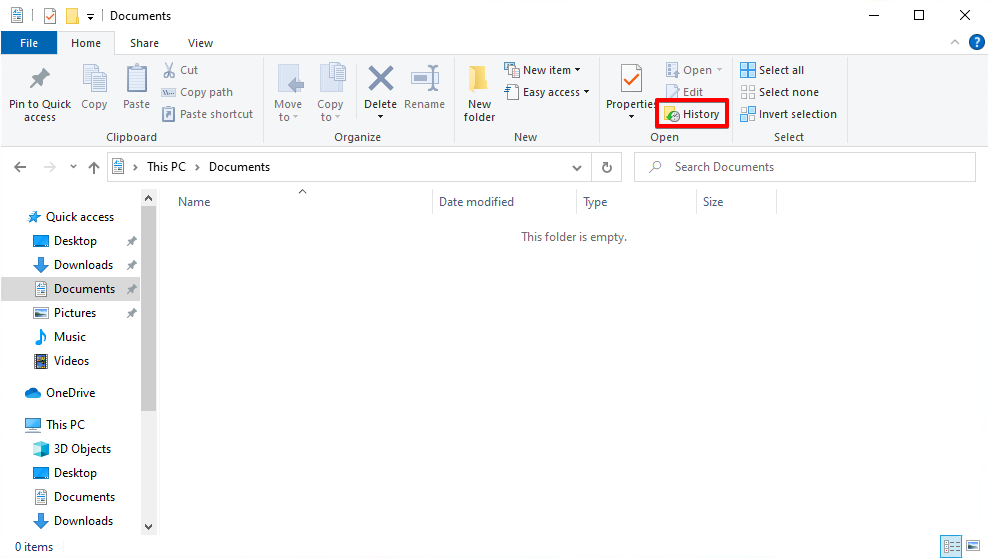
- Use the left and right navigation buttons to locate a version of the file you want to restore. When ready, click the file to select it, then click the green recover button with an encircling arrow.
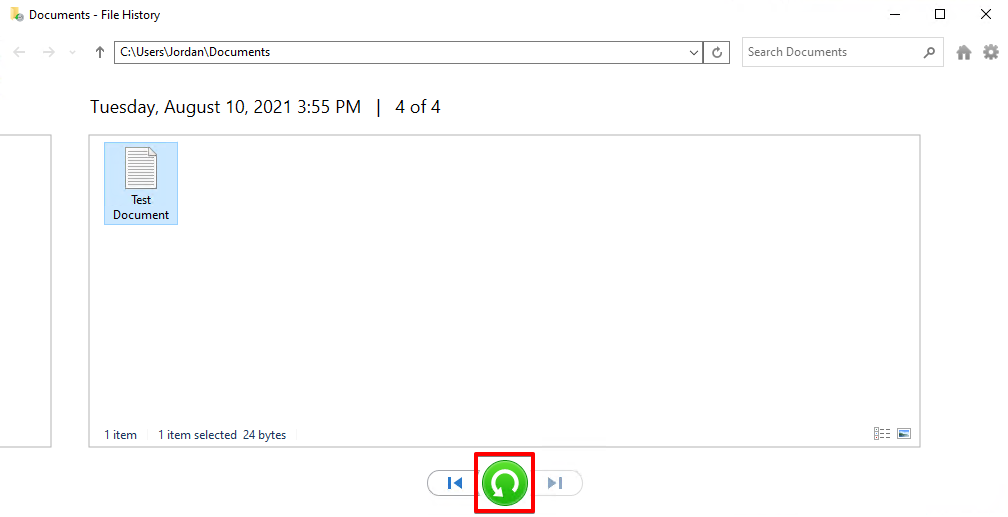
When recovered, the file will appear in its original directory.
Method 6:Recover Using Data Recovery Software
Even after deletion, you do have the ability to recover a lost Notepad file. Upon deletion, the data used by the operating system to locate this file is deleted. This means the data still remains on the disk for a time, at least until it’s overwritten by new data. Data recovery software is designed to scan and recover files like these.
Recovering lost Notepad documents is made easy through the likes of Disk Drill, a data recovery solution that can scan and recover lost, deleted, or corrupted files from your computer. It also includes features that allow you to actively take care of your data so that data recovery is much easier going forward.
Follow the below instructions on how to recover Notepad files using Disk Drill:
- Download Disk Drill. Install it, then open it.
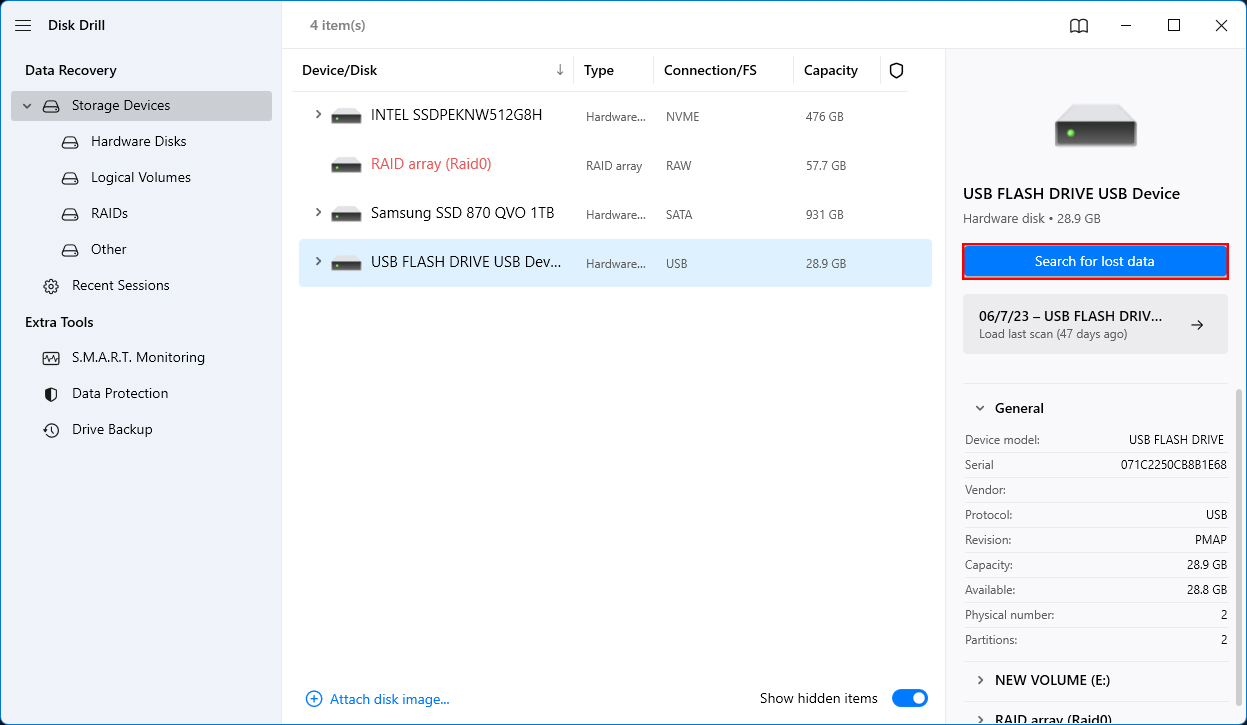
- Select the drive that contained the Notepad file before it was deleted. Click Search for lost data. This will begin the scan for any recoverable data that’s still in your system.
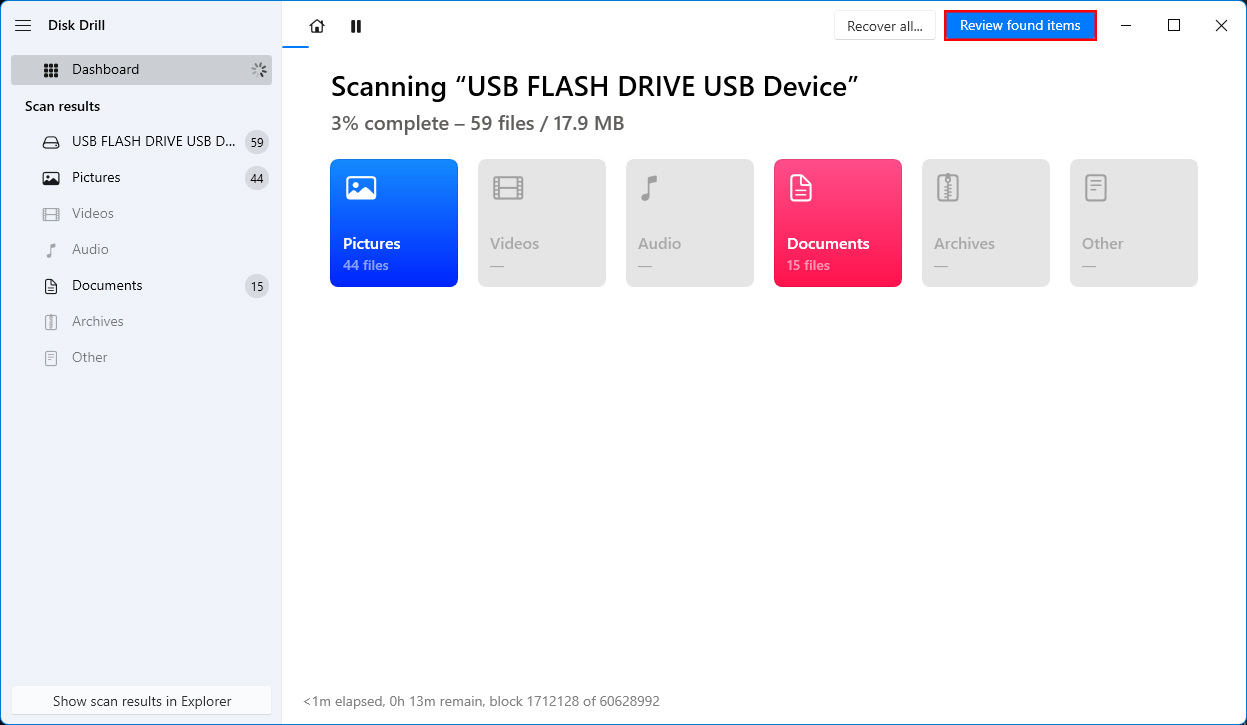
- When the scan has finished, click Review found items.
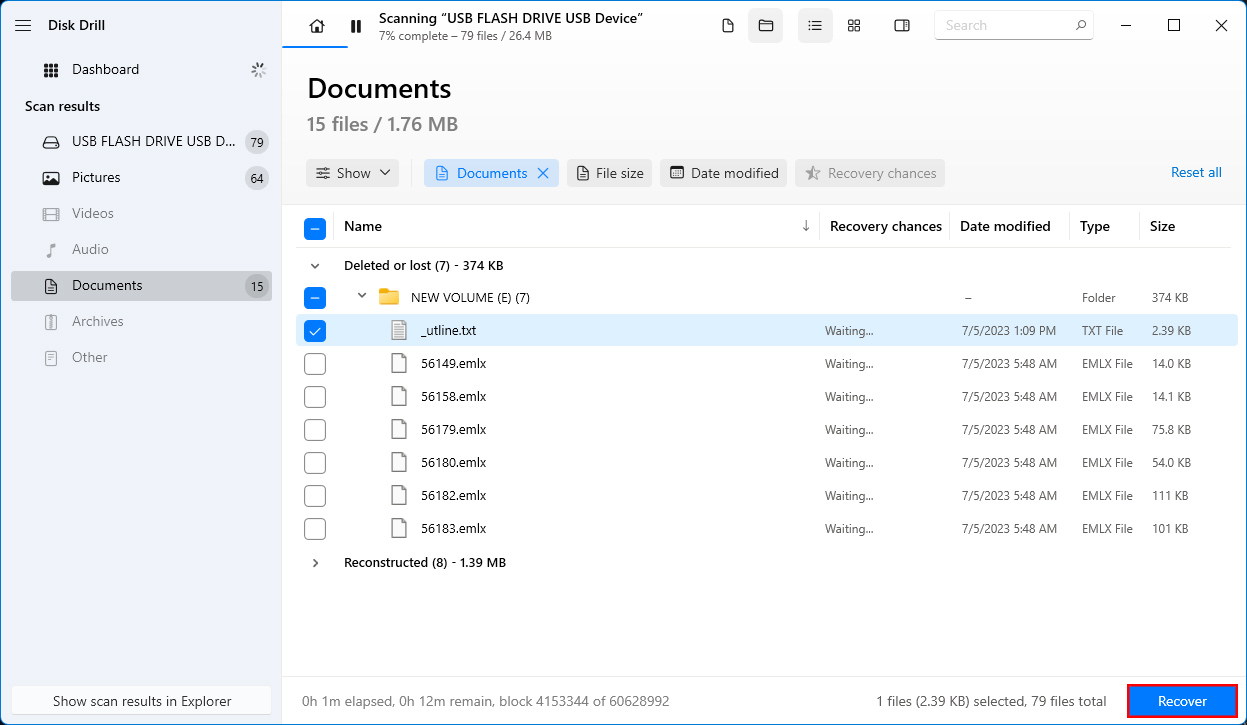
- Here you will find all of the files that Disk Drill found in the scan. Select the Notepad files you want to recover by checking their tickbox. When ready, click Recover.
You can use the built-in search function to look for your specific file by name. You can also use the preview function to see what the document contains before recovery.
- Specify where you want the recovered files to go. Click Next. It’s recommended that you restore the files to a different drive than where they’re being recovered from.
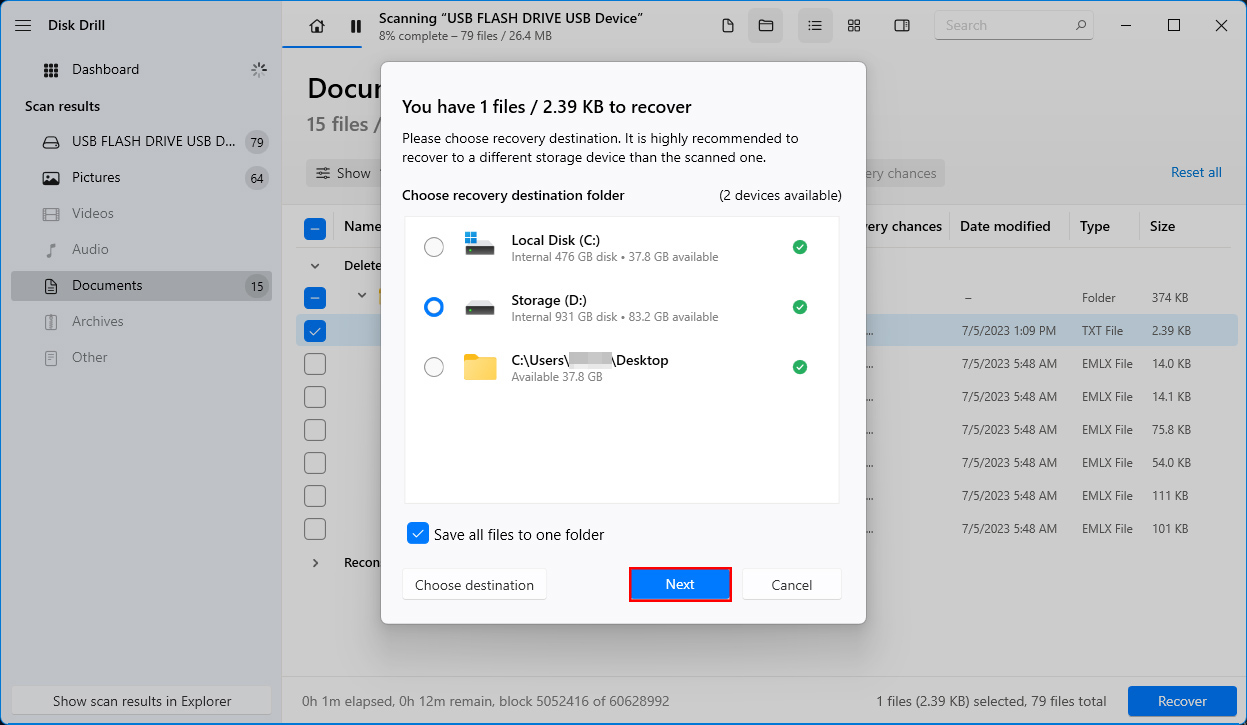
When Notepad recovery is complete, the files can be found in the location you specified. This same process can be repeated for recovering any type of file, even recovering entire hard drives.
Conclusion
Losing an important Notepad file can be devastating. Thankfully, using the methods outlined in this article, you can recover a Notepad file on Windows 10 without much effort. Unfortunately, there’s no way to recover an unsaved Notepad file on Windows 10, nor is there a way to restore an unsaved Notepad autosave since it doesn’t support this feature.
To avoid this going forward, regularly scheduled backups are recommended. Having a backup of your file always on hand ensures you can immediately restore your files in the event of data loss. Additionally, consider switching to a Notepad alternative that includes an autosave feature in case your application crashes before you get a chance to save.
FAQs
- Go to the Start menu. Alternatively, you can press the Windows key + S to open the search bar.
- Search for “*.txt” to search for all the text files available on your system. Adjust the search filters as you see fit to increase the chances of finding all the Notepad files on Windows 10.


