 No matter how you prefer your steak, nobody enjoys seeing their flash drive go RAW for no apparent reason, with Windows refusing to recognize it and you being unable to access the data stored on it. This guide explains why USB flash drives sometimes become RAW, and, most importantly, it provides easy-to-follow instructions on how to recover your files and fix the underlying issue.
What Is a RAW Flash Drive
A RAW flash drive is a storage device that Windows labels as having an undefined or unrecognizable file system.
In other words, “RAW” isn’t an actual file system but a designation used when none of the installed file system drivers (like FAT, FAT32, or NTFS) can identify the disk’s structure.
According to the Microsoft Wiki, common causes that can leave your flash drive in a RAW state include:
- Formatting fails. Yanking the USB out mid-format or a power glitch can interrupt the process in such an unfortunate moment that there’s nothing usable for Windows to recognize.
- Malware infection. There are strains of malware that are capable of damaging the file system structure and causing a USB flash drive to become RAW. For example, the infamous Petya ransomware encrypts the Master File Table (MFT) to make the entire file system inaccessible.
- Partitioning mistakes. Extending a partition improperly—like with FSExtend—can confuse Disk Management into labeling it RAW, even if chkdsk still sees NTFS.
- Incompatible formats. Plugging an APFS-formatted drive (macOS’s darling) into Windows can make it appear RAW since Windows doesn’t speak that language.
- File system corruption. Logical errors in the file allocation tables or directory structure can also cause your USB flash drive to appear RAW.
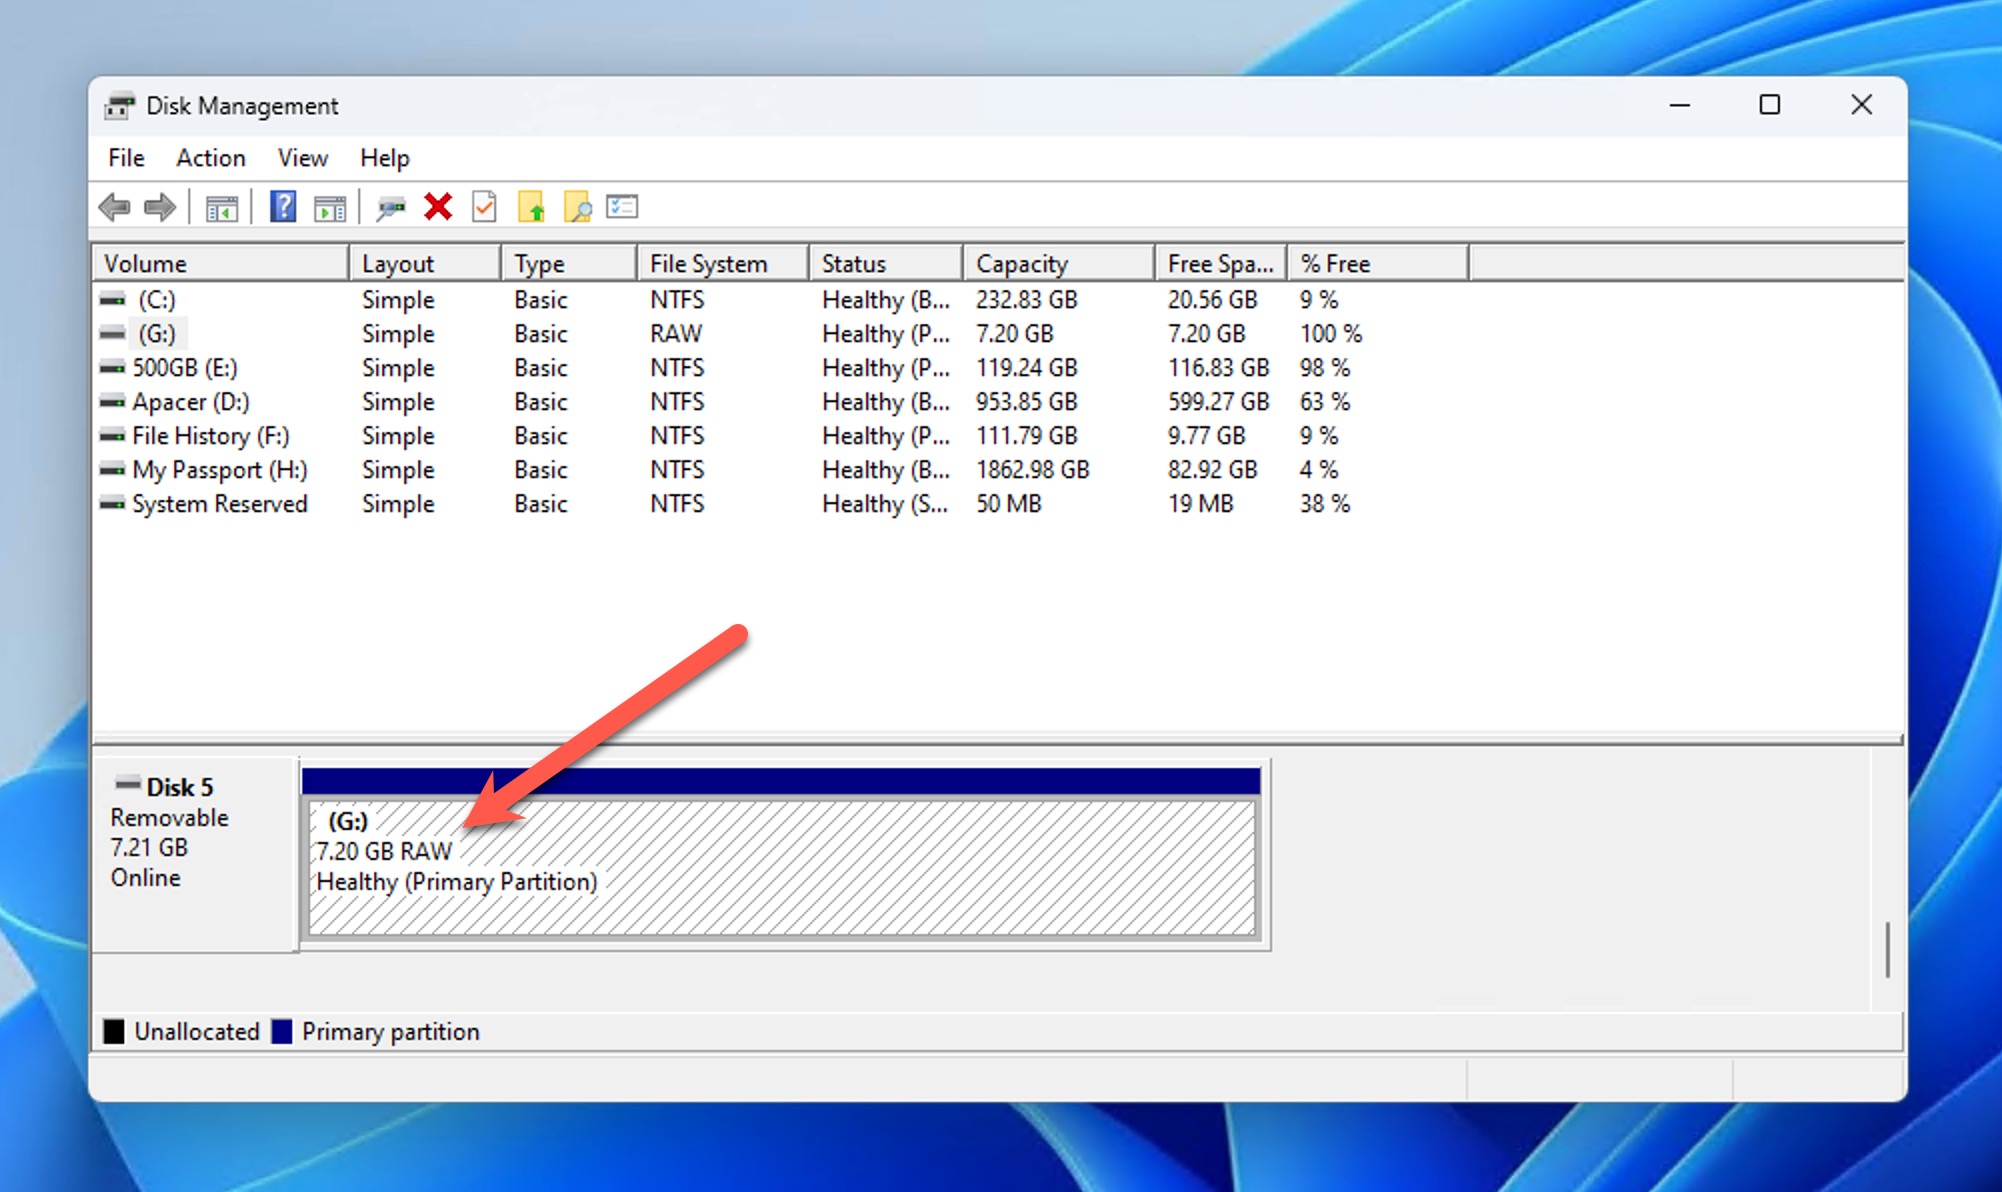
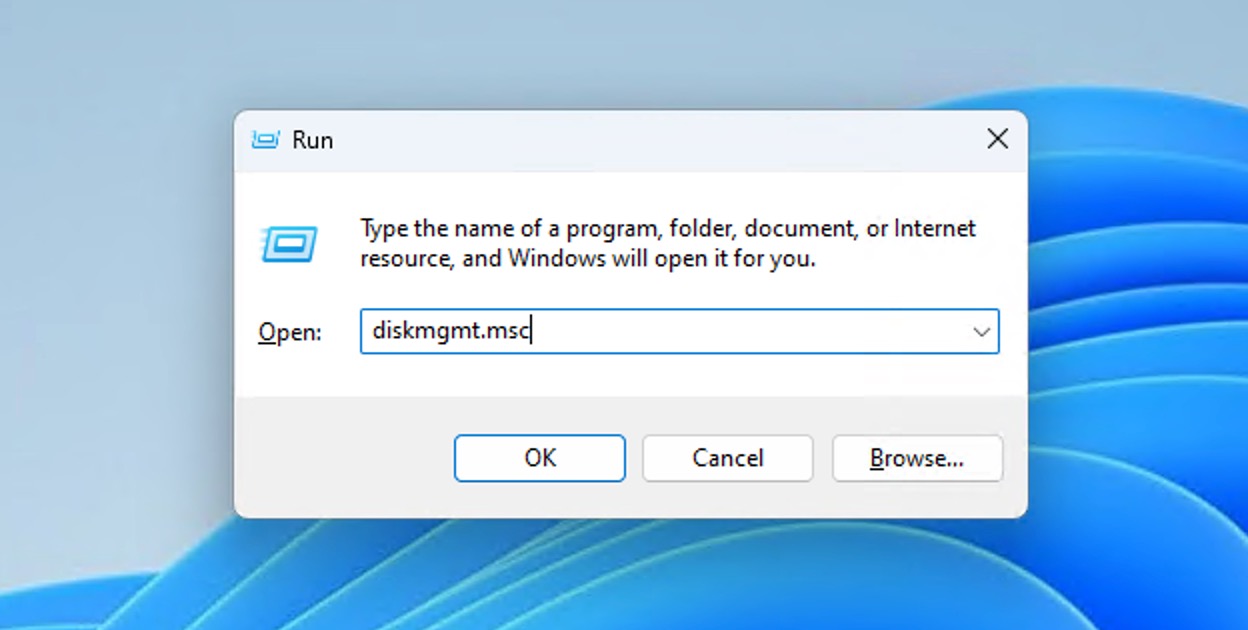
To confirm if your drive is in a RAW state, you can use the Windows Disk Management tool:
- Press Win + R to open the Run dialog and type diskmgmt.msc.
- Locate your USB drive in the lower section of the window.
- If it shows “RAW” instead of FAT32, NTFS, or another recognized file system, you’re dealing with a RAW drive.
Despite the alarming nature of the problem, your files are still very likely physically present on the RAW drive, and you can recover them using specialized data recovery software before addressing the underlying issue to make your drive usable again.
How to Recover Files from a RAW USB
Even though a RAW drive’s contents are invisible to Windows File Explorer—thanks to its missing or mangled file system—data recovery software can still dig them out by bypassing the file system mess and scanning the drive’s raw data directly.
For recovering a RAW USB flash drive on Windows, Disk Drill is objectively among the best solutions available (if not the best). Why? It’s dead simple to use, even for beginners, and it’s packed with power under the hood. Disk Drill can recover data by leveraging leftover file system info or by recognizing over 400 file signatures—think photos, documents, videos, and more. Plus, the free version lets you preview all recoverable files and restore up to 500 MB of data, no strings attached.
To recover files from your RAW USB flash drive using Disk Drill:
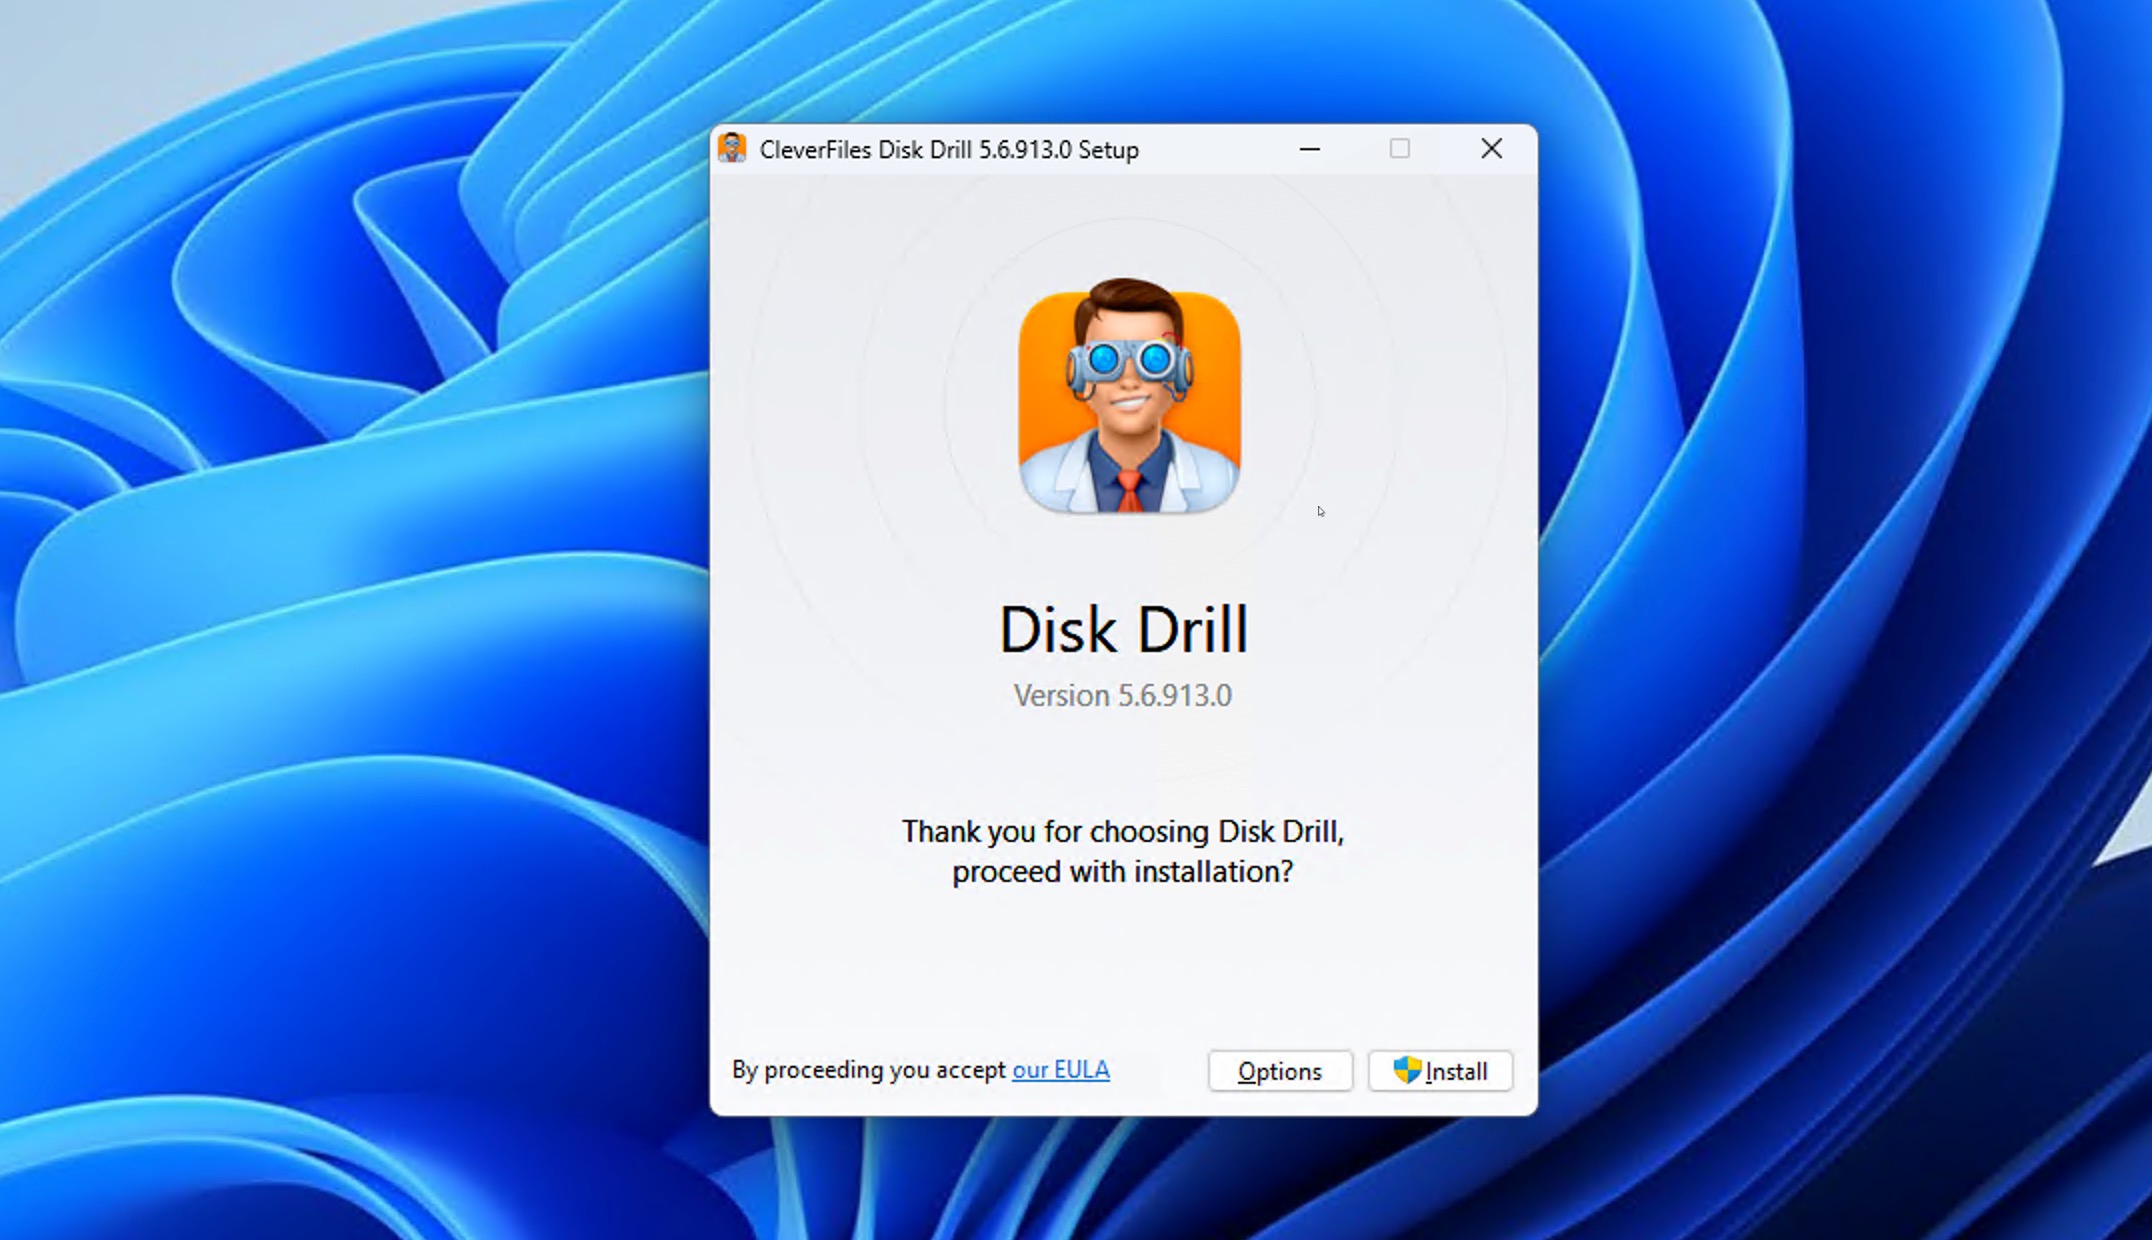
- Visit the official Disk Drill website and download the latest version. Run the installation file and follow the on-screen instructions to complete the setup process. The installation is straightforward and requires minimal user input.
- Plug your RAW USB flash drive into an available USB port on your computer. Windows may display messages about the drive needing to be formatted—ignore these warnings and do NOT format the drive.
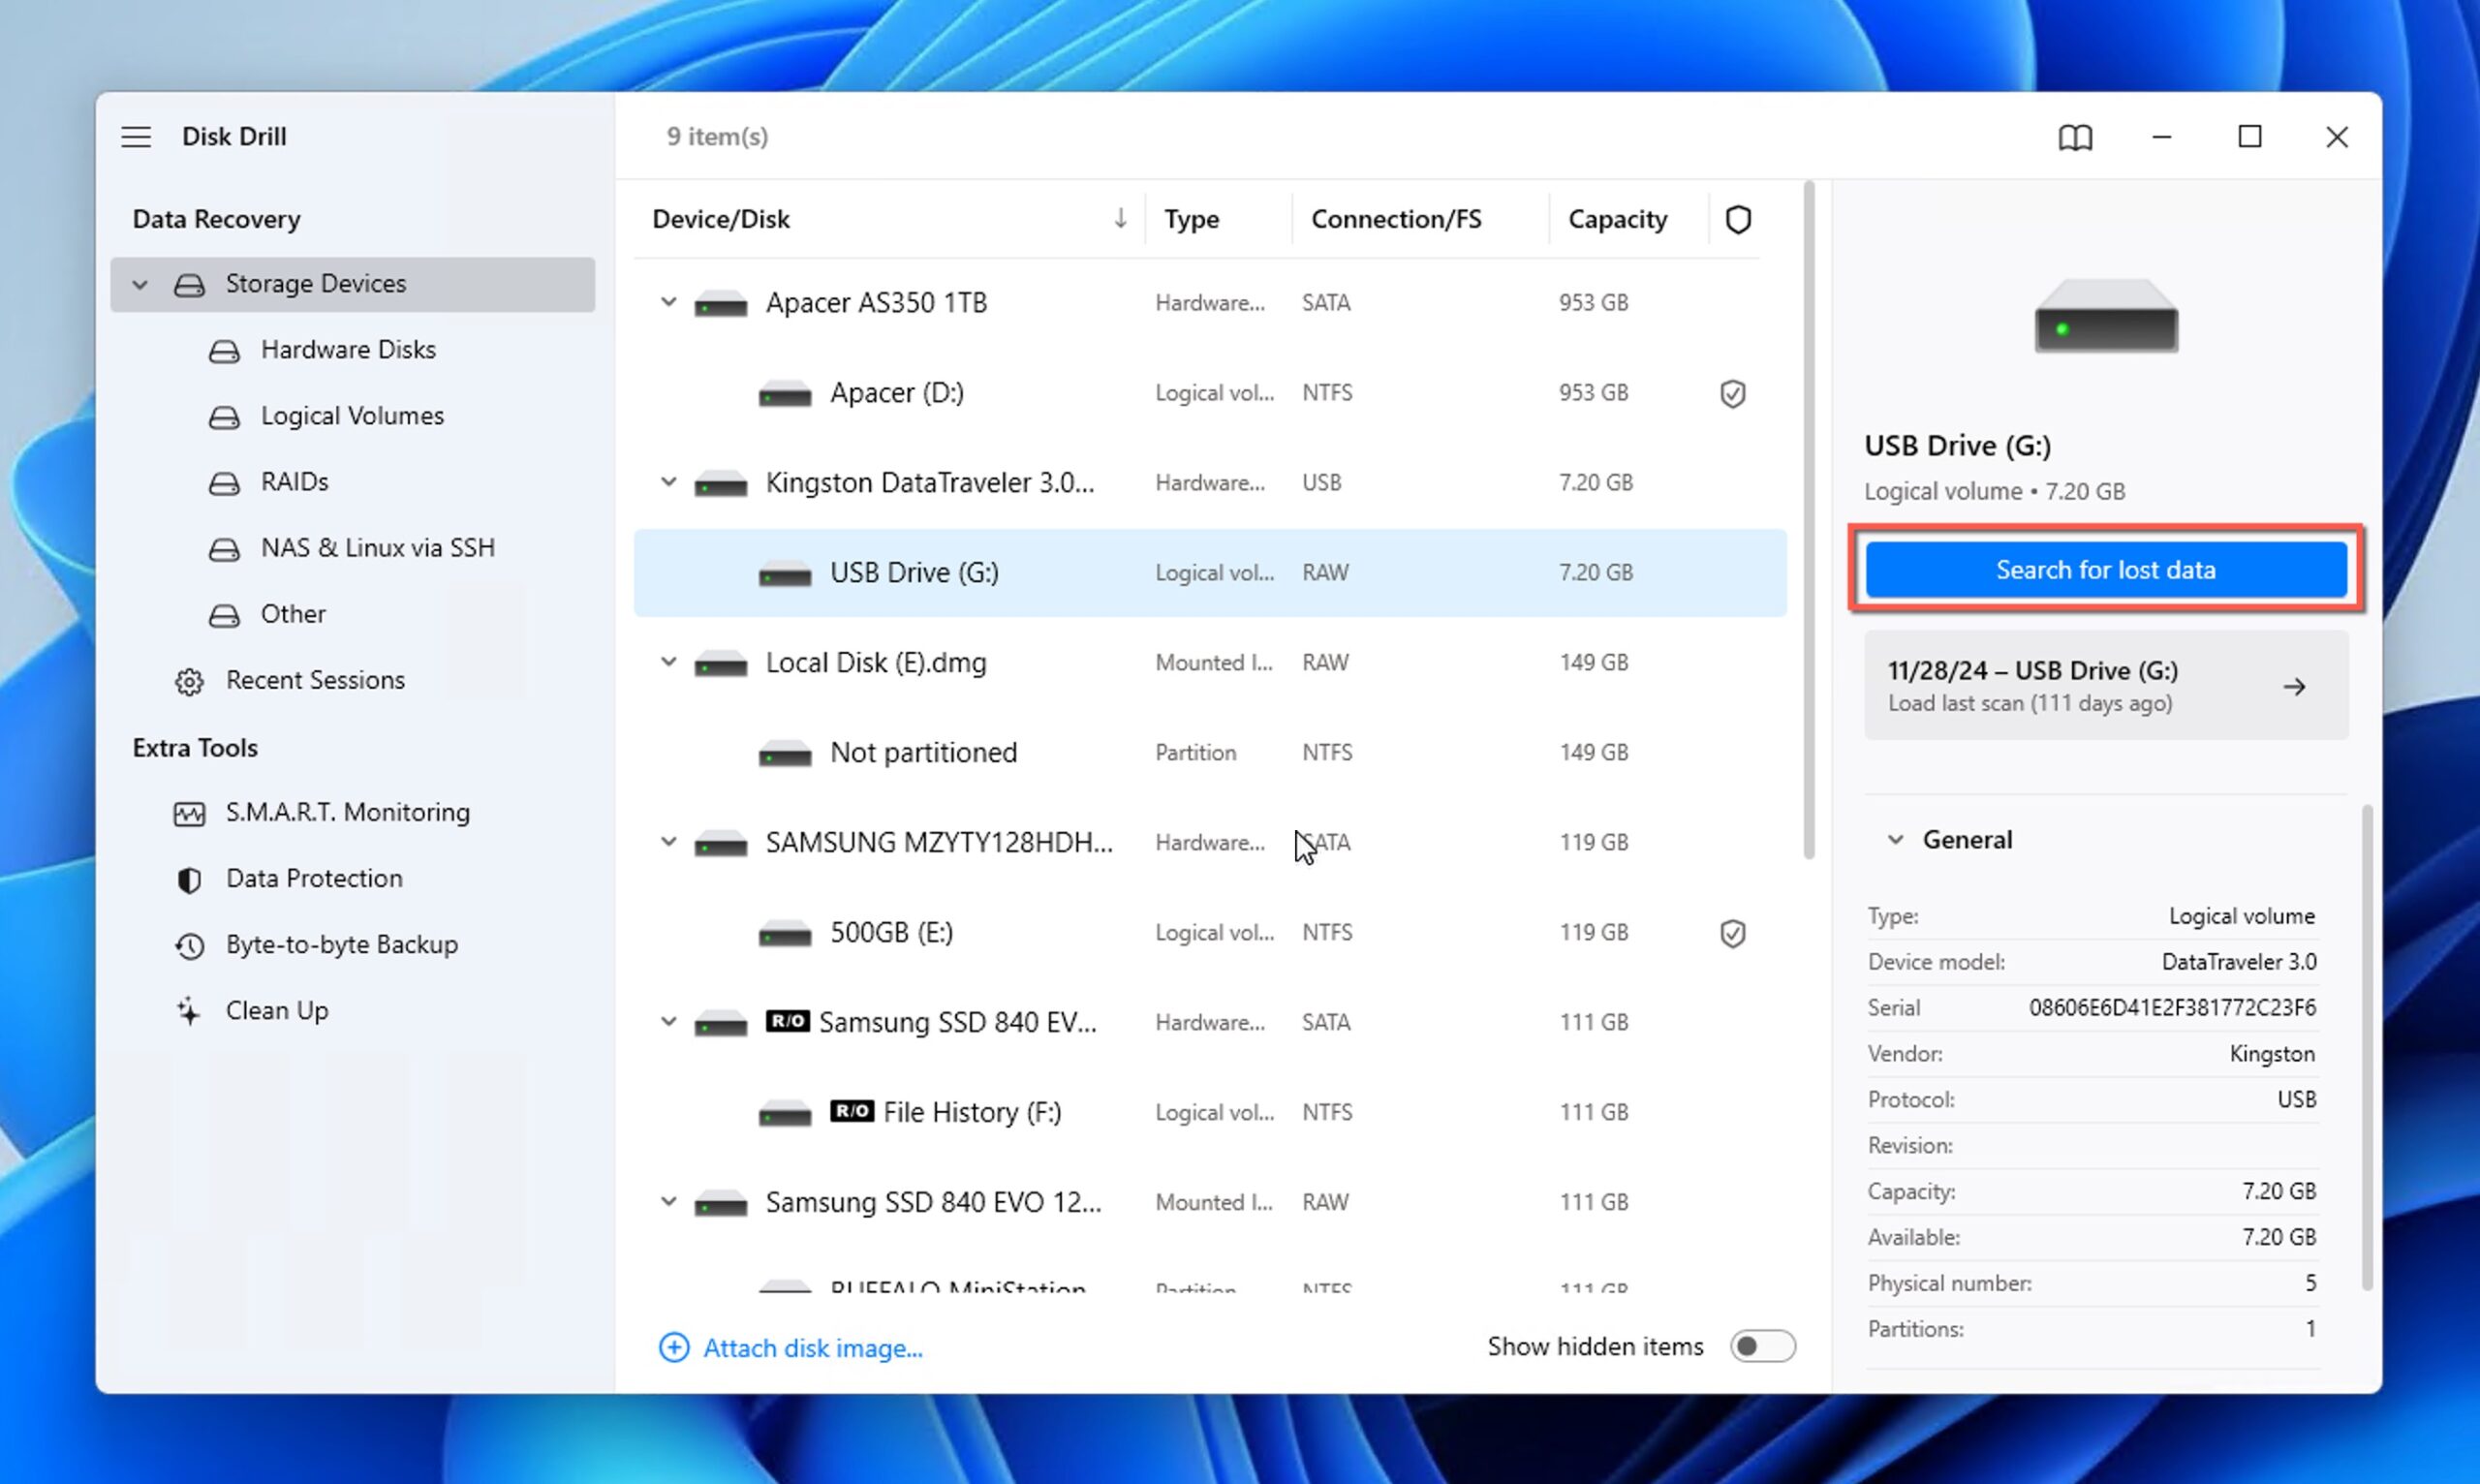
- Open Disk Drill from your desktop or Start menu. The program will automatically detect all connected storage devices. From the list, locate and select your RAW USB drive (usually identifiable by its size or model number). Click the Search for lost data button.
- You can wait for scanning to finish completely or click the Review found items button to see what files Disk Drill has found.
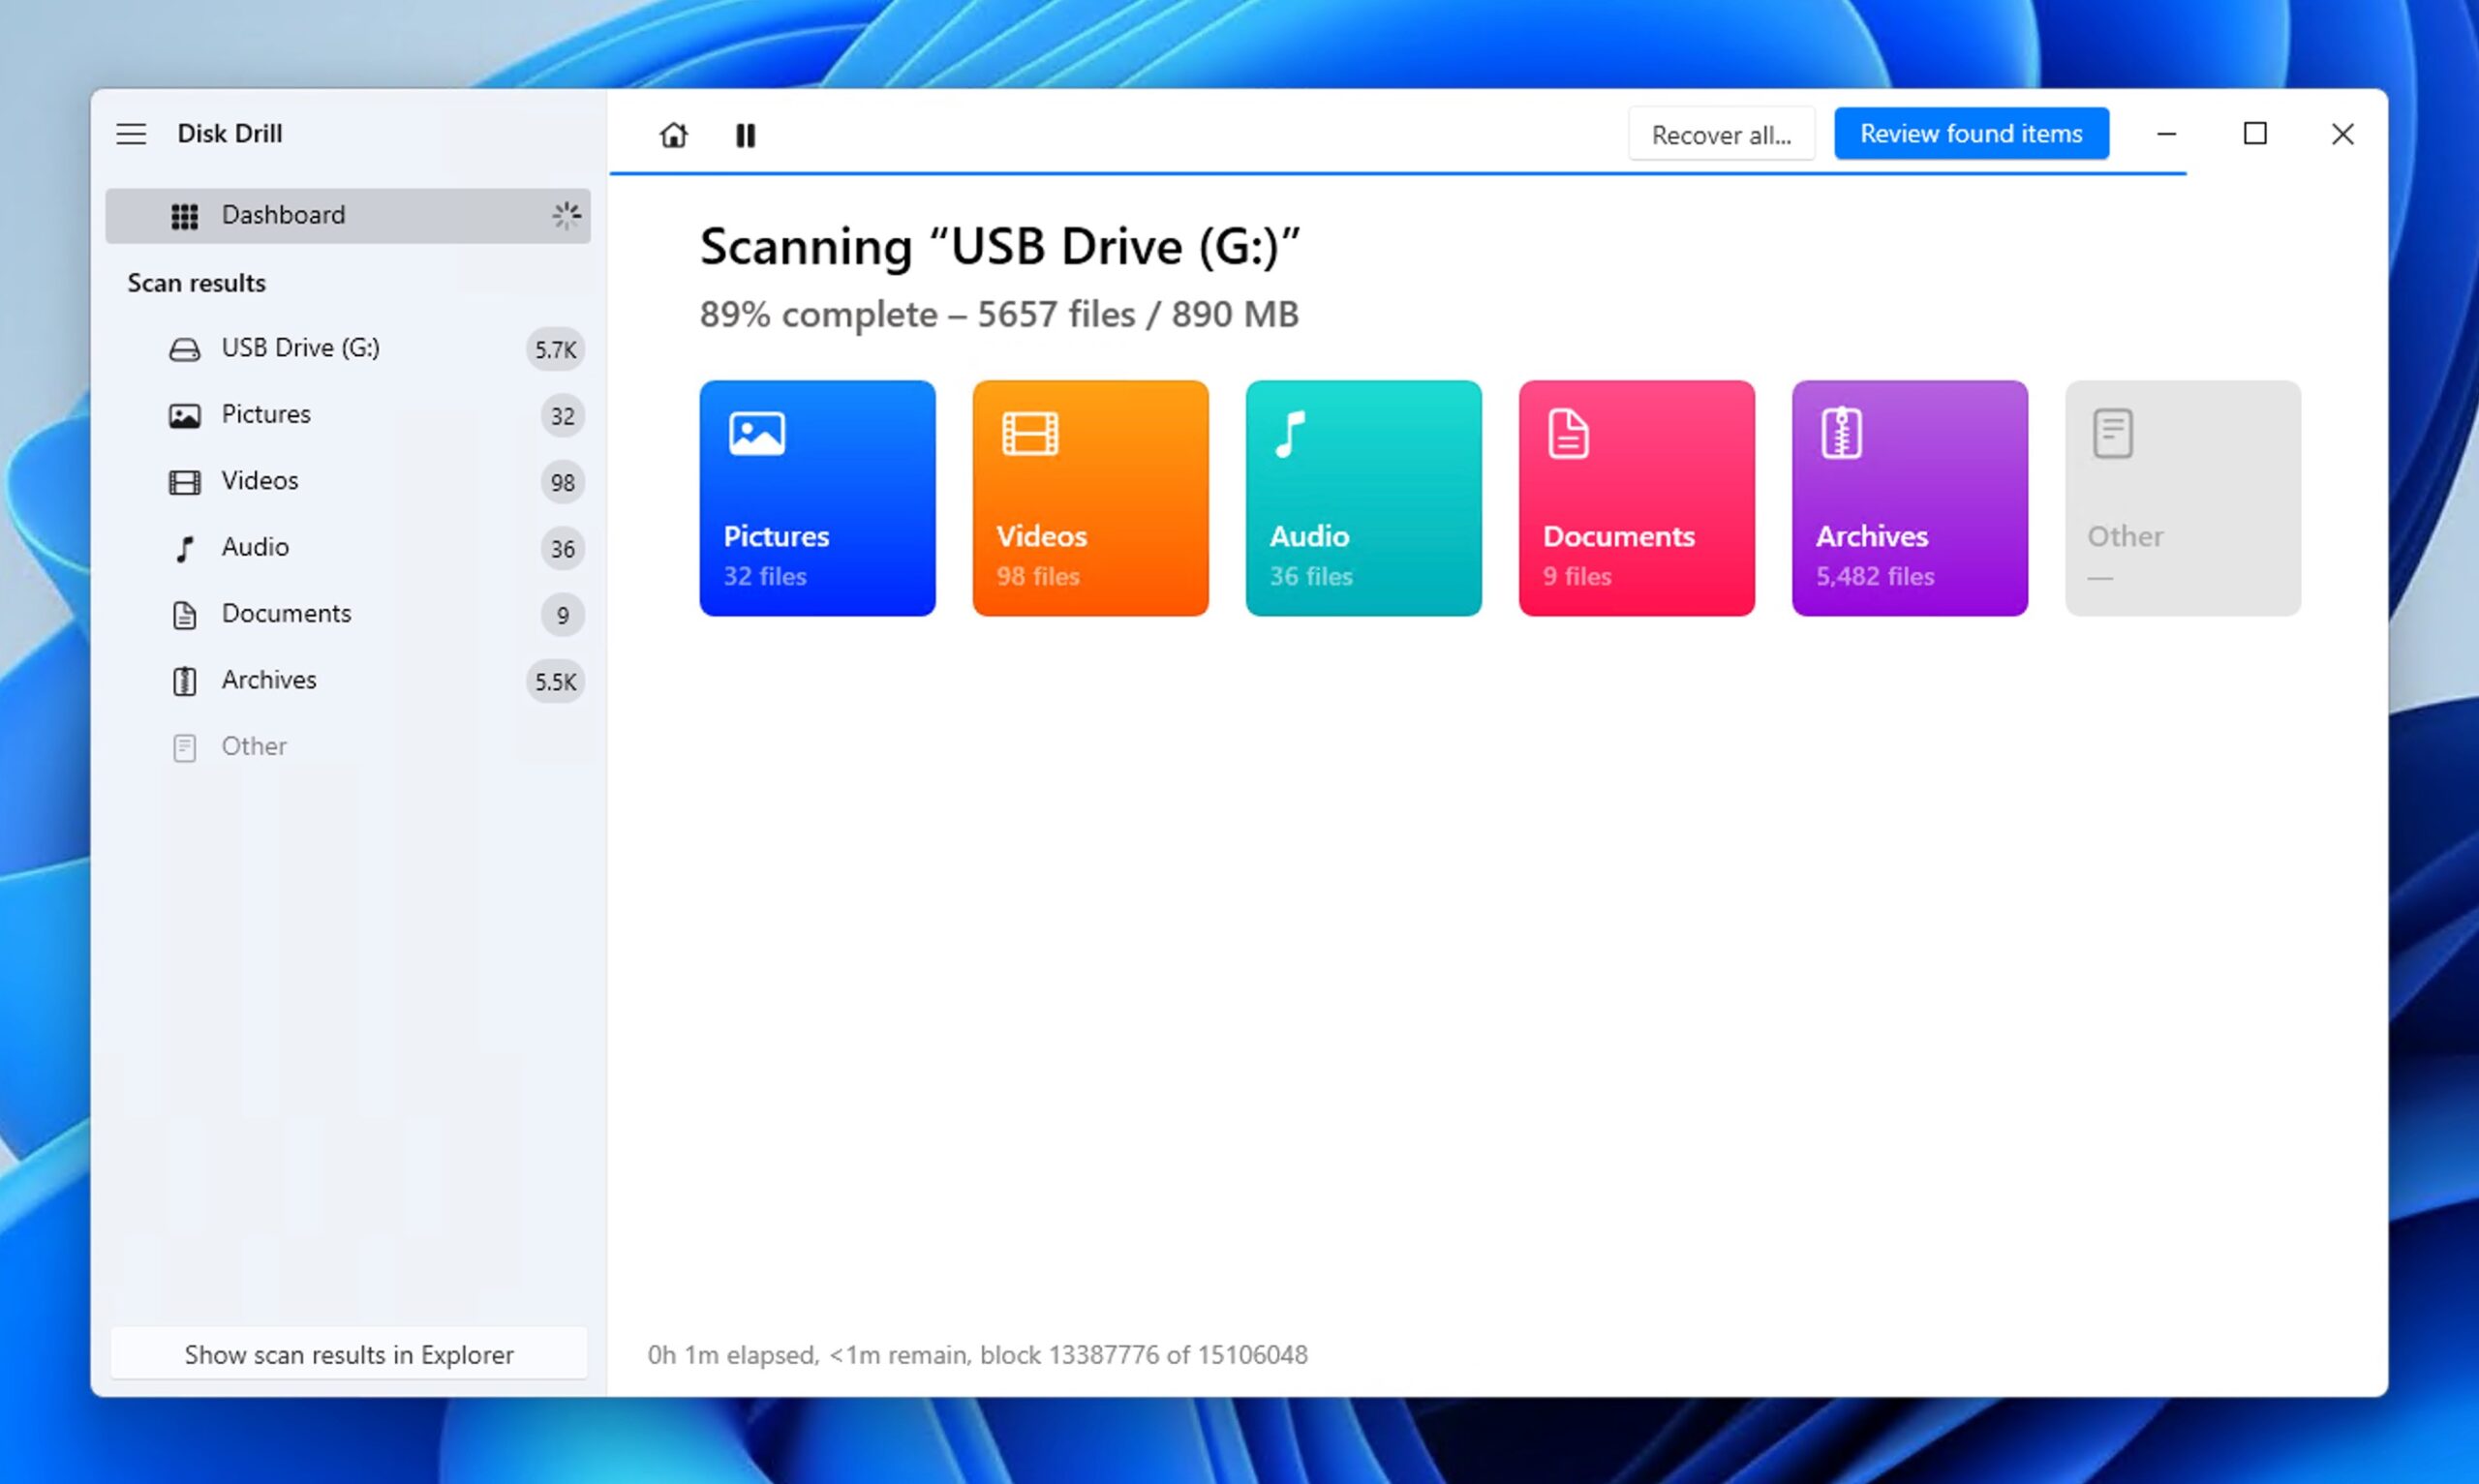
- Now it’s time to review the scan results and select the files you want to recover from your RAW USB flash drive by checking the boxes next to them. You can narrow results by file type using the left sidebar or the filters above the results. You can preview many file types directly in Disk Drill.
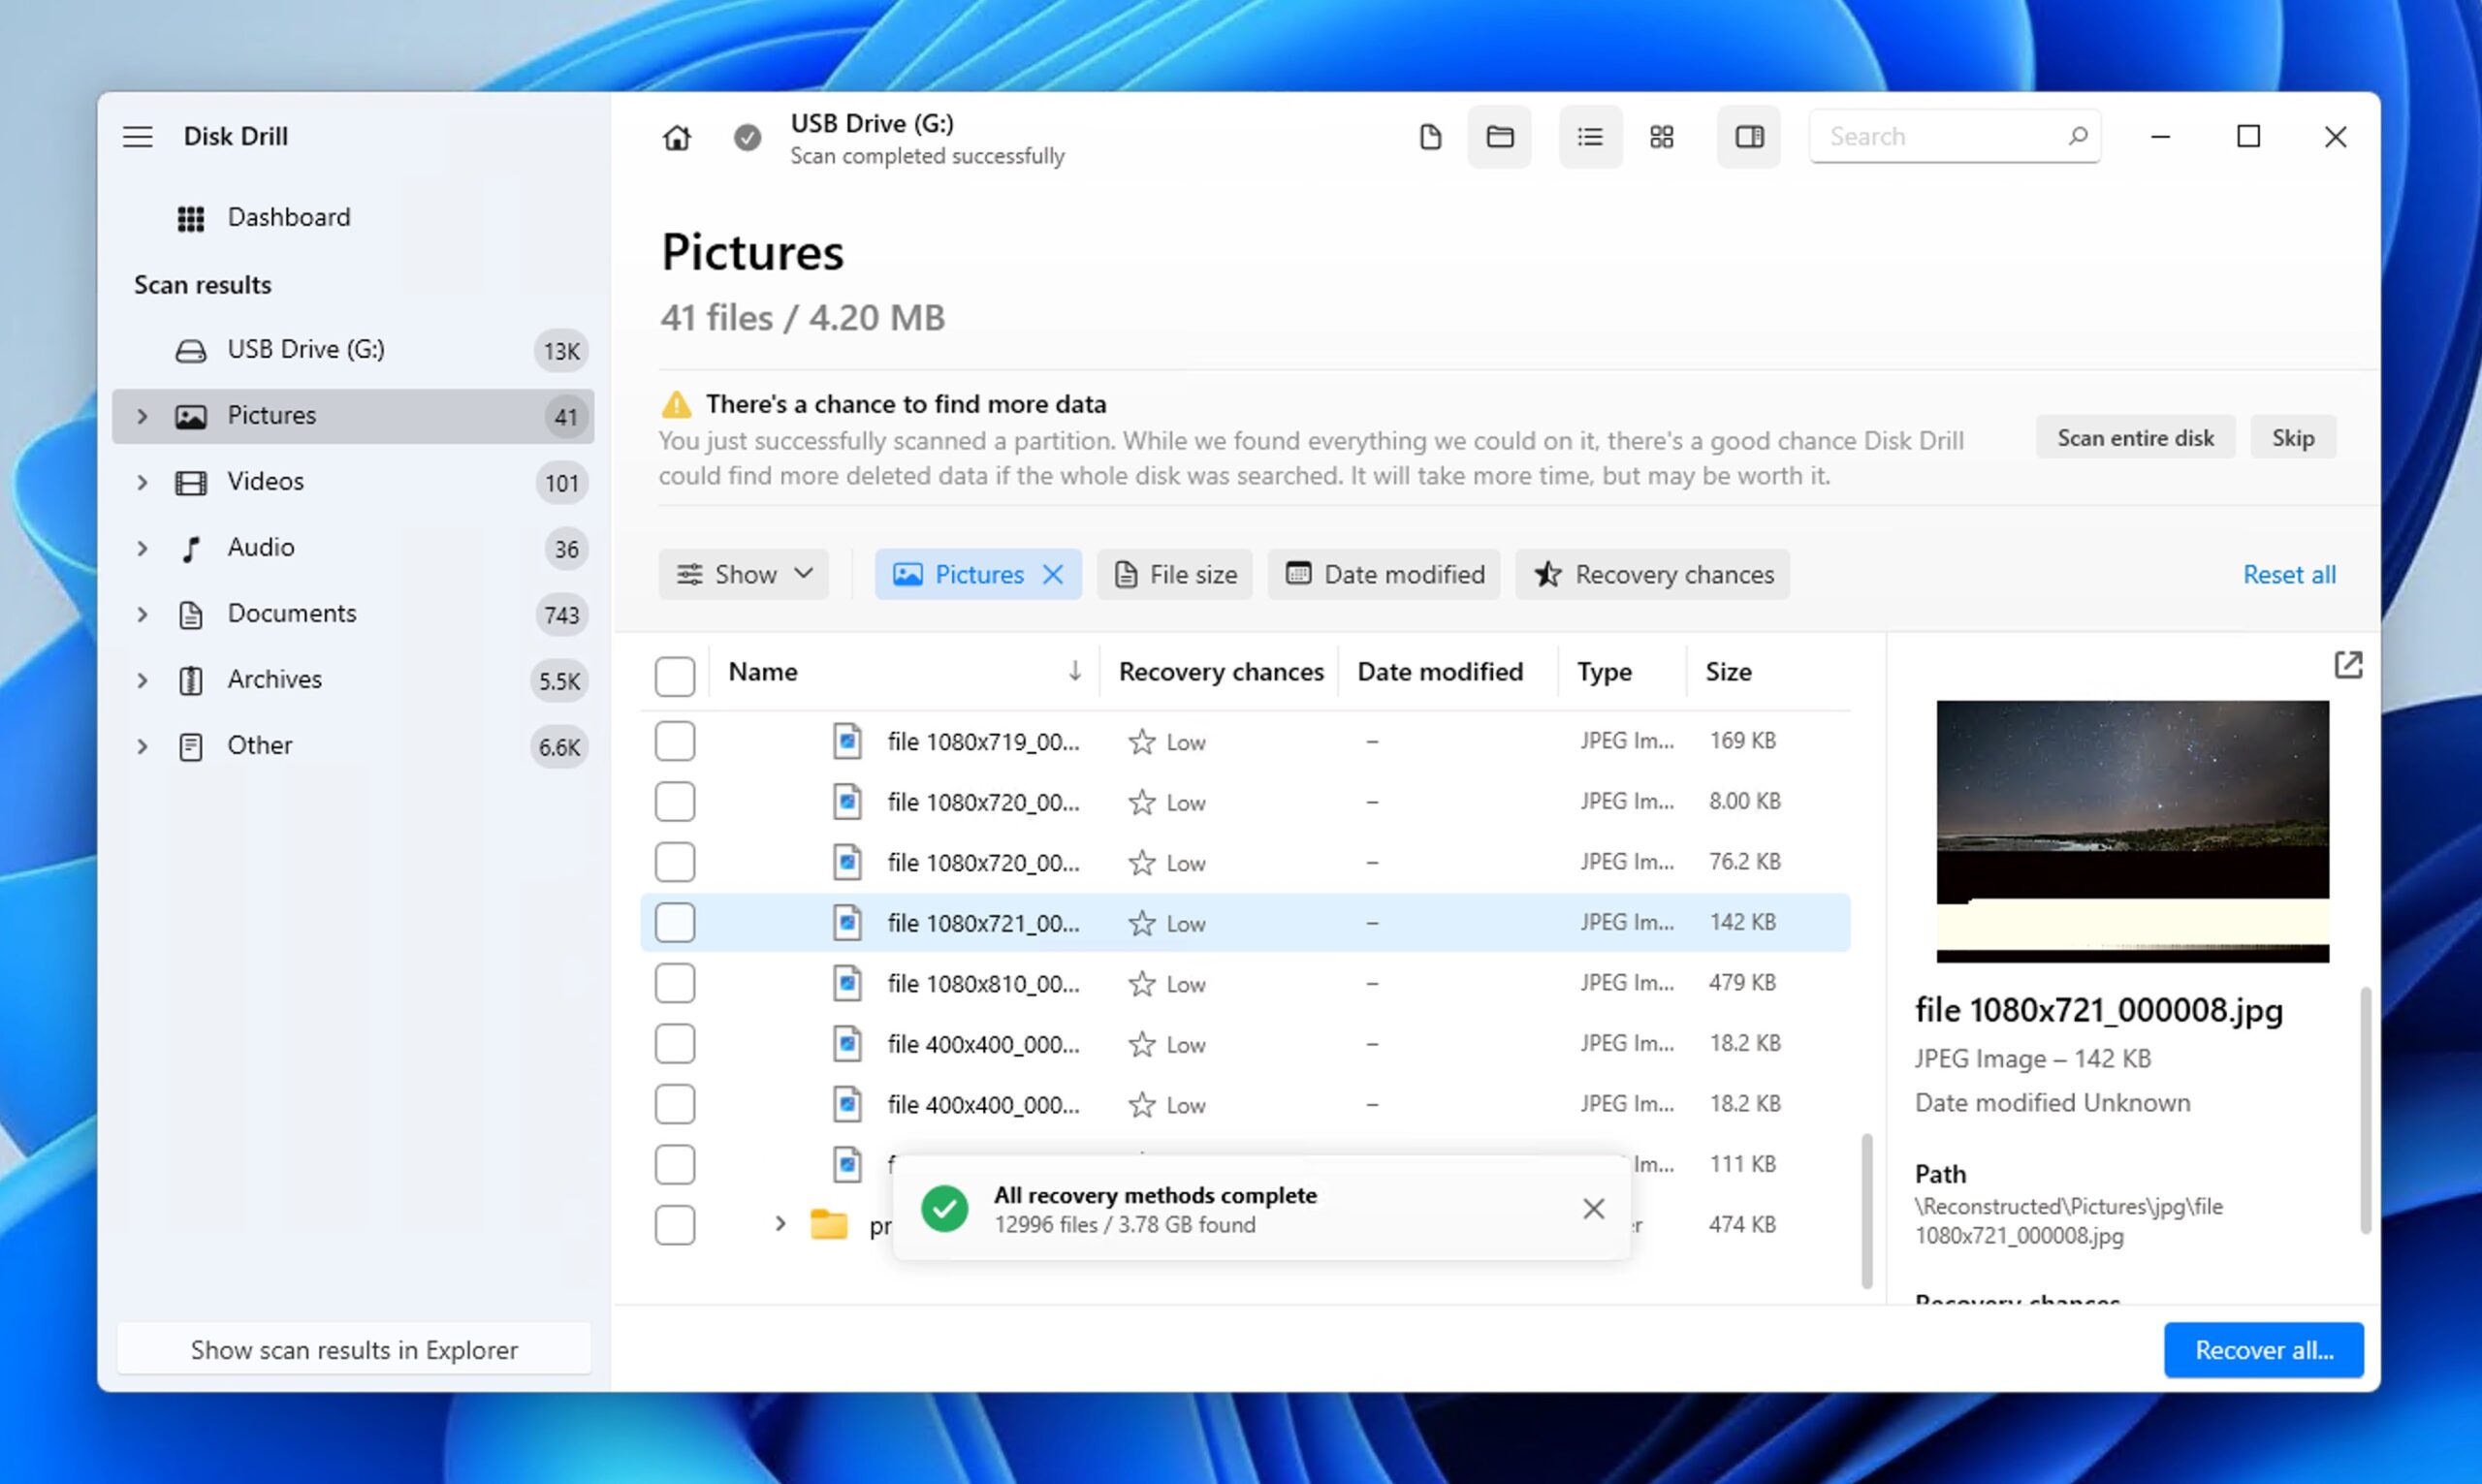
- Click the Recover button at the bottom of the screen. When prompted, select a destination location for your recovered files. Always choose a location on a different drive than your RAW USB drive to prevent potential data overwriting that could permanently damage your chances of recovery.
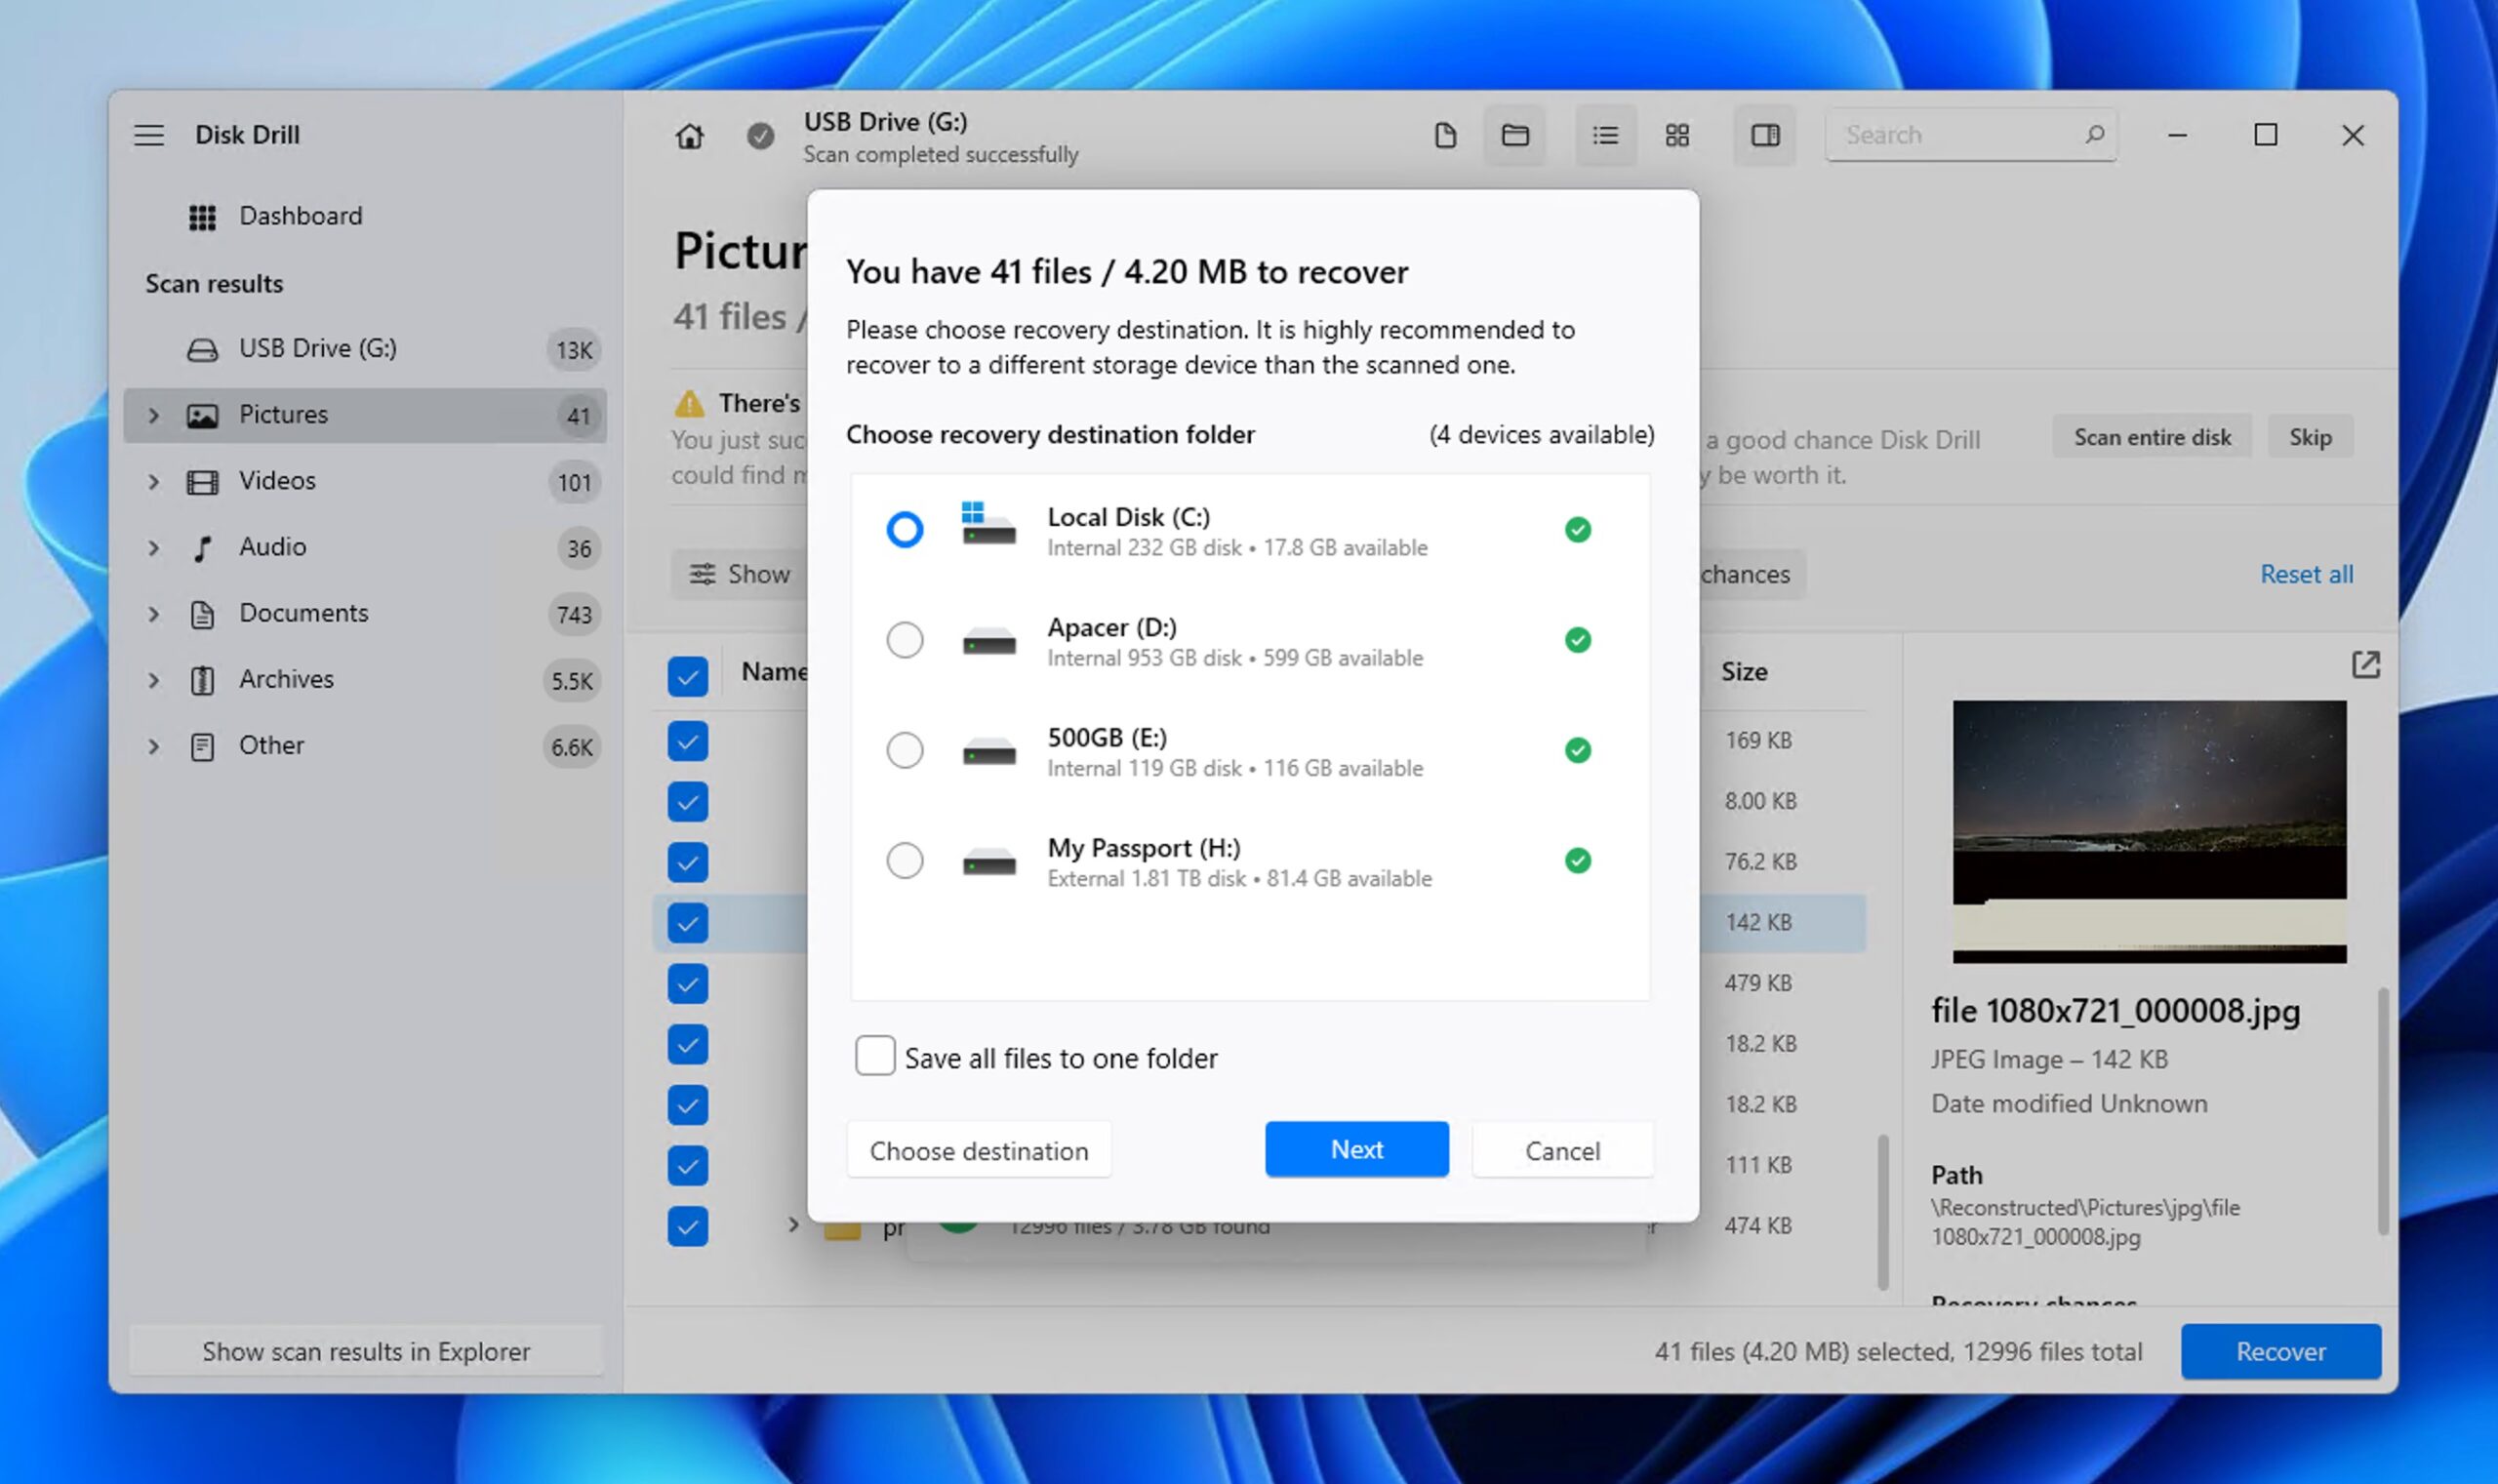
- Click Next to begin the file recovery process. Disk Drill will extract the selected files and save them to your specified destination. Once complete, you can navigate to the recovery location to access your rescued files.
With your valuable data now safely recovered, you can proceed to fix your RAW USB flash drive to make it usable again.
How to Fix a RAW Flash Drive with Formatting
With your files safely recovered, you’re ready to restore your RAW USB flash drive to working order. The best—and often only—fix for a RAW drive is to format it, which wipes out the corrupted or missing file system and replaces it with a fresh one.
The only problem is that RAW drives typically don’t show up in File Explorer, so you can’t just right-click and hit “Format” like you might with a healthy drive. Instead, you’ll need to rely on the Disk Management utility or the diskpart command-line tool.
Method 1:Disk Management
The Disk Management tool is a built-in Windows utility that gives you a clear view of all connected drives. It’s relatively intuitive thanks to its graphical interface, so following the necessary steps shouldn’t be a problem:
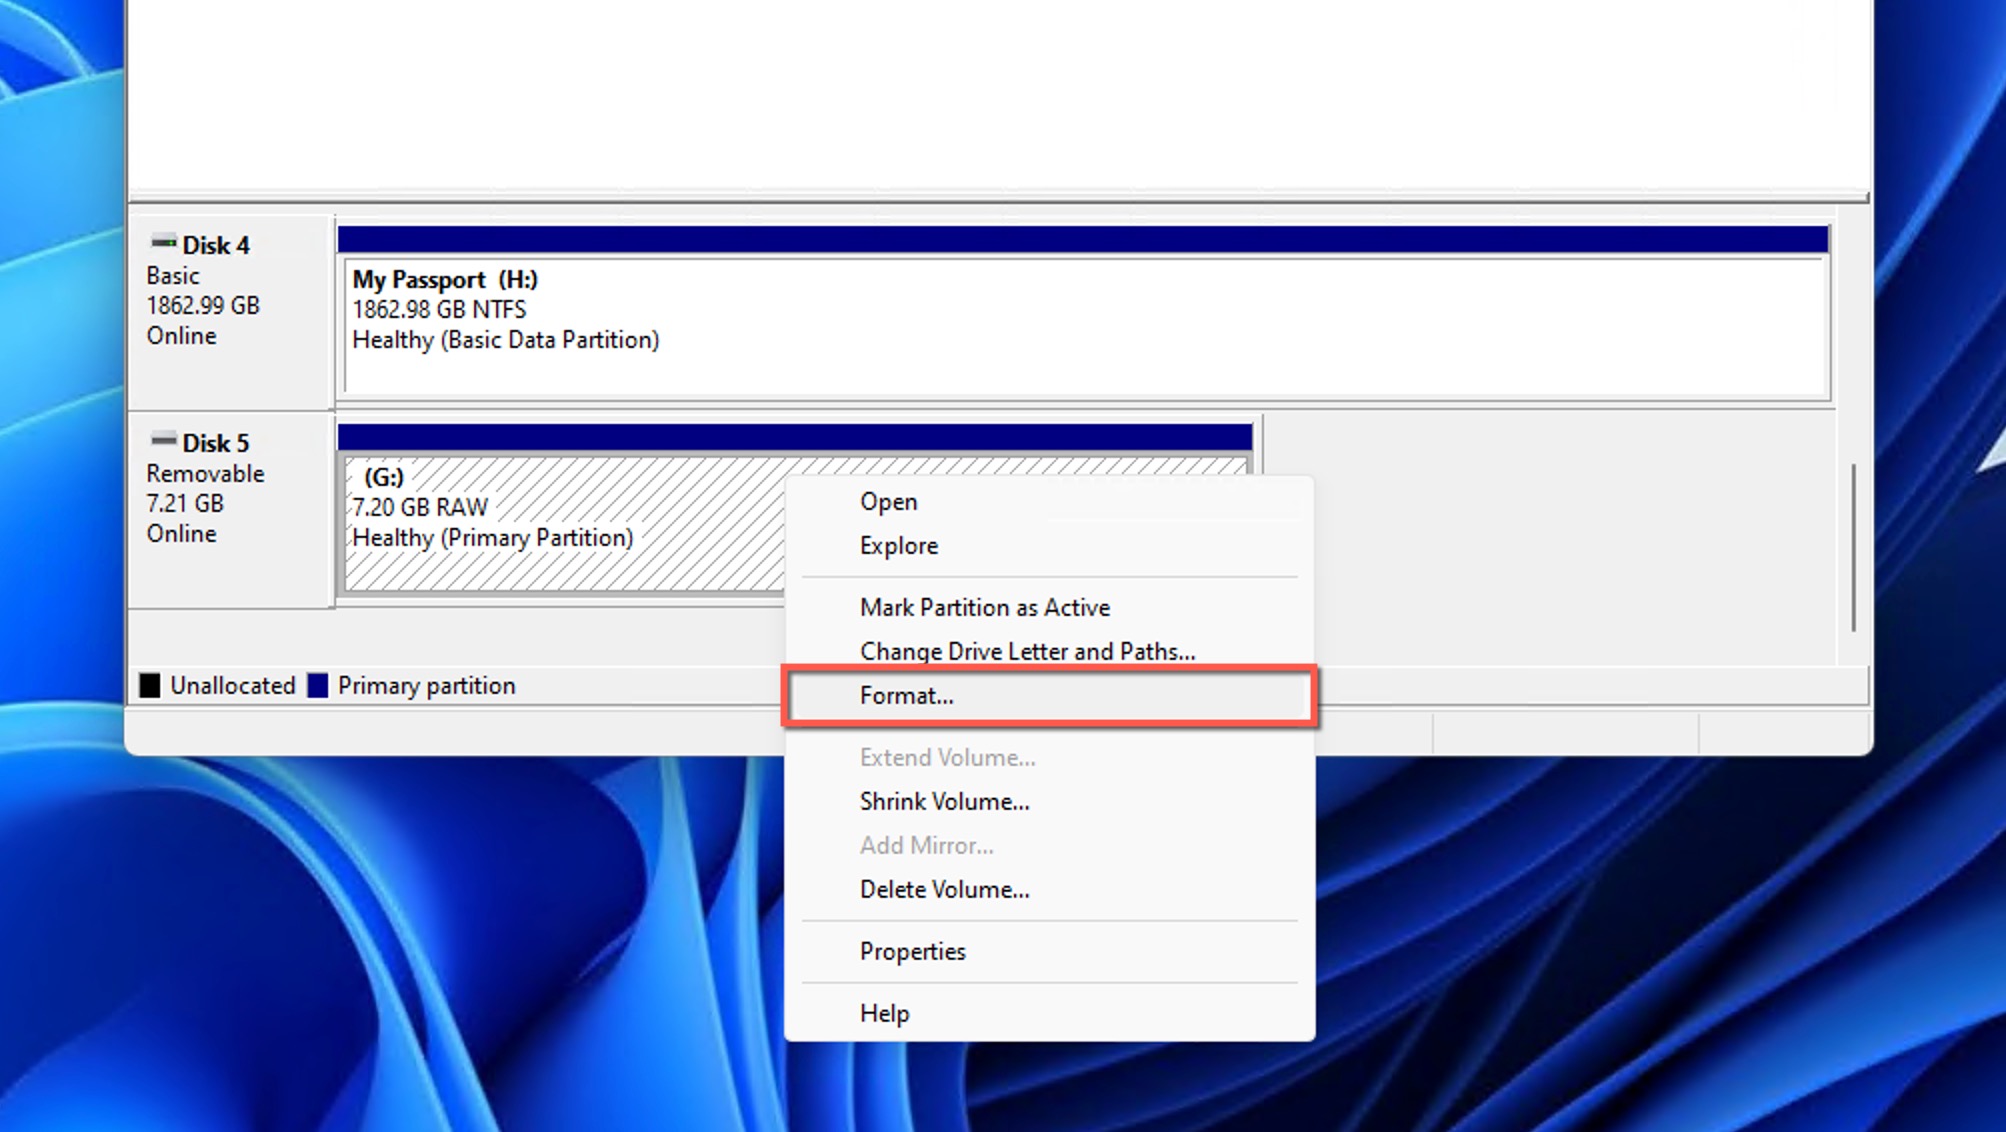
- With your RAW USB flash drive connected to your computer, press Win + R, type diskmgmt.msc, and press Enter to launch Disk Management.
- Find your USB drive—it’ll list “RAW” under File System and may not have a drive letter. Double-check the size so that it’s the right one. Right-click the RAW drive and select Format from the menu.
- Pick a file system: FAT32 for smaller drives (under 32GB) or exFAT for larger ones or big files (over 4GB). Leave the allocation unit size as default unless you have a specific need. To save some time, you can enable the “Perform a quick format” option.

- Click OK and confirm the warning prompt.
- Wait a moment for the formatting to complete.
Once finished, Windows assigns a drive letter, and your USB should appear in File Explorer, ready for use.
Method 2:Diskpart
Alternatively, you can use the diskpart tool. Unlike Disk Management, diskpart doesn’t have a graphical user interface and can be accessed only from the Terminal app (or its older and simpler sibling, the Command Prompt). Here’s how to format your RAW USB with diskpart:
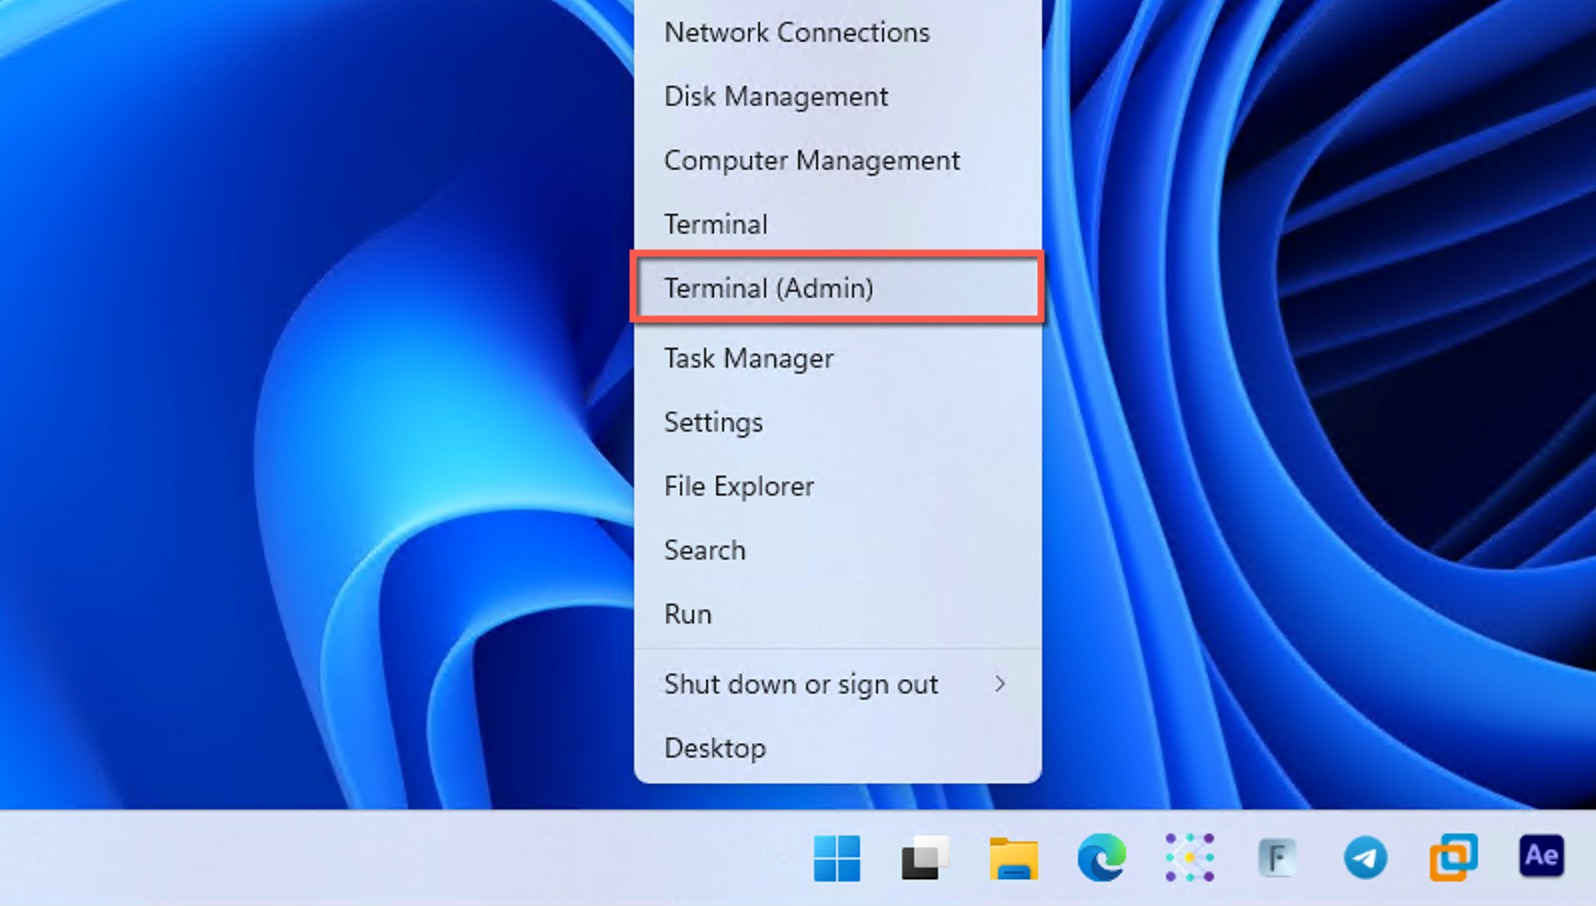
- Connect your RAW USB flash drive to your computer, press Win + X, and launch Terminal or Command Prompt as administrator.
- Type diskpart and press Enter to start the tool.
- Type list disk and hit Enter to see all drives. Spot your RAW USB by its size (e.g., Disk 1), then type select disk 1 (replace “1” with your disk number) and press Enter.

- Run these commands one at a time, pressing Enter after each:
- clean (erases all data and partitions)
- create partition primary (sets up a new partition)
- format fs=fat32 quick (or format fs=exfat quick for larger drives/files)
- assign (gives the drive a letter)
- Type exit and press Enter to close diskpart.
Your USB now has a new file system and a drive letter, which means you can access it using File Explorer.
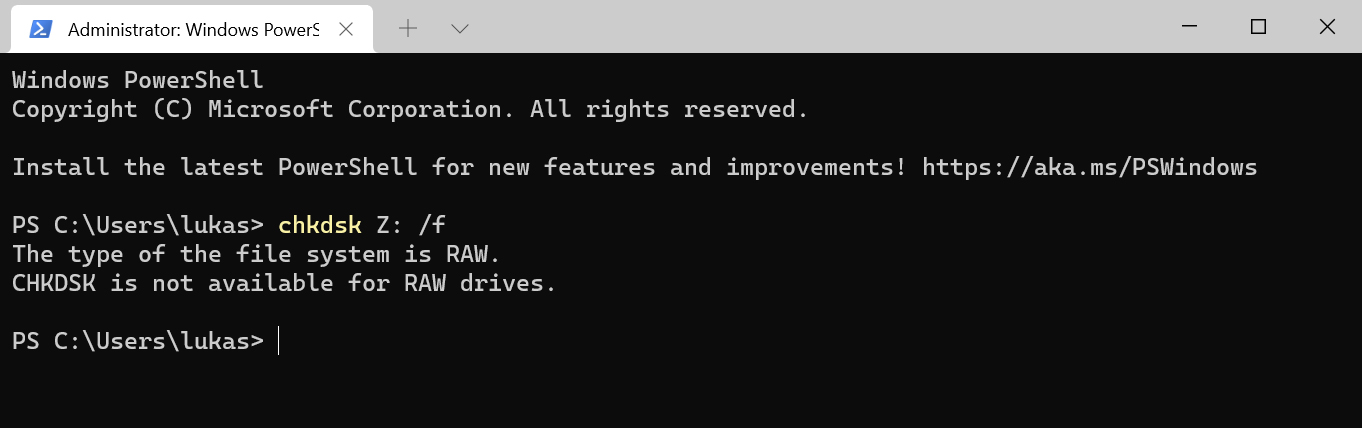
Is It Possible to Fix a RAW Flash Drive Using the Chkdsk Command?
Chkdsk (Check Disk) is a command-line utility that checks a drive for file system integrity and automatically fixes any violations that it finds. There are two ways to use the Chkdsk utility on Windows: from the Command Prompt and file explorer. However, neither of these methods will work for a RAW drive.
If you try the Command Prompt method, you’ll get this message:
If you attempt the file explorer method, you’ll encounter an error with a message that reads “The disk check could not be performed because the disk is not formatted. Would you like to format the disk?”
Therefore, the only solution for fixing a RAW USB drive is to format it as described in the previous section.
Summary
When your USB flash drive goes RAW, there are just three steps you need to take to fix the problem:
- Understand what a RAW USB flash drive is and why it happens.
- Recover your important data first using specialized recovery software before attempting any fixes.
- Use Disk Management or DiskPart to format the drive and restore its usability.
With your data safe and your USB flash drive formatted, you’ll have everything back to well-done perfection.


