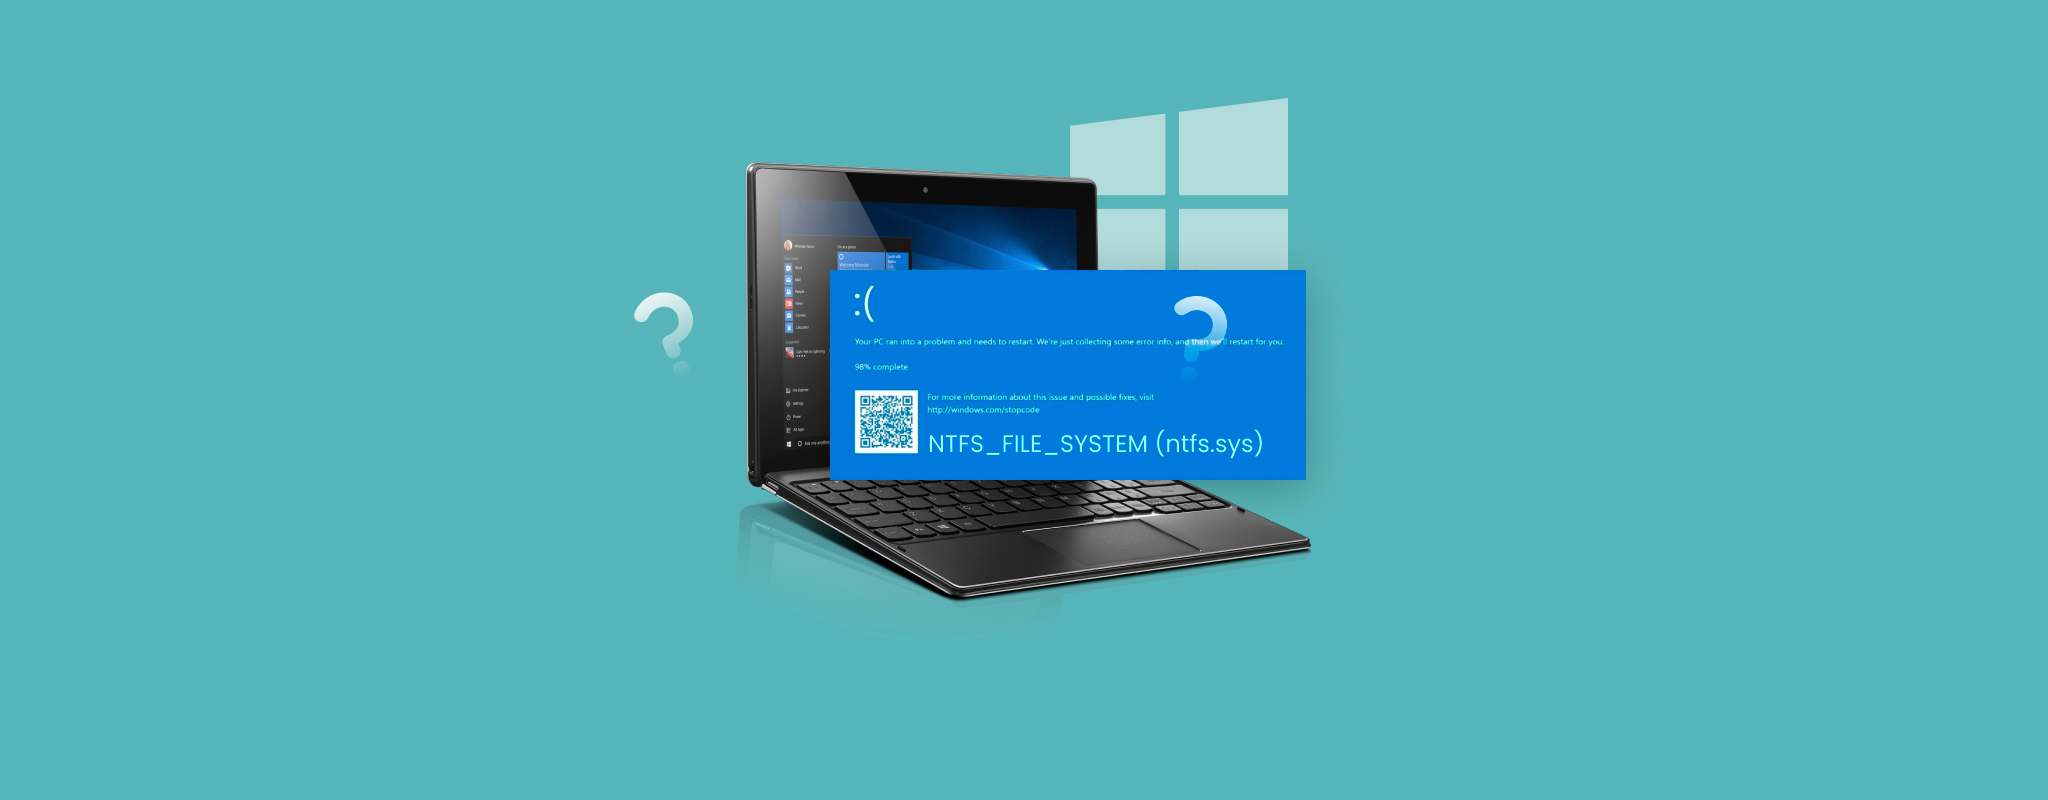
 In the process of booting your Windows PC, were you met with a Blue Screen of Death (BSoD) and the error code NTFS_FILE_SYSTEM? This means that something has gone wrong with your drive, and you won’t be able to boot properly until it’s resolved.
This is a fairly generic error message that could point toward a range of issues. We’re going to explain what sort of problems cause this error, how to fix it, and how to recover data that was lost after experiencing the NTFS_FILE_SYSTEM error.
What Causes NTFS_FILE_SYSTEM Error
The NTFS_FILE_SYSTEM error, sometimes displayed as 0x00000024, causes a blue screen loop every time you try to access your computer. It’s possible for this issue to appear on all versions of Windows, from Windows 7 to Windows 10 (and even the new Windows 11). There are many reasons why you may encounter the NTFS_FILE_SYSTEM error on boot, and we’ve compiled a brief list of some of the most common ones:
| Reason | Description |
| 🗃️ Corrupted system drive file system | Without a working file system on the drive that contains Windows, your computer will not know how to boot the operating system, resulting in this error message appearing. |
| ⚙️ Outdated or corrupted hard drive drivers | Drivers handle the communication between your hardware and operating system. If they’re no longer functional or updated, it could cause this message to appear. |
| ❌ Corrupted hard drive | Hard drives are prone to physical issues, like mechanical failures and read/write head issues. If your hard drive becomes physically damaged, this message can appear. |
| 🗑️ Insufficient disk space on system drive | Once your system drive becomes full of data, it can manifest itself in the form of this message. A key indicator of this is sluggish performance leading up to this error message. |
| 📄 Damaged or corrupted system files | Some essential system files may have become unusable over time. In this case, this generic message may appear to alert you to some missing or damaged files that are needed for the continued use of your OS. |
How to Fix NTFS_File_System Error
There is more than one NTFS_FILE_SYSTEM error fix. We’ve included some of the best ones below. Be aware that some of the methods may only be possible by booting into safe mode, so if you’re not familiar with this process already, you may want to check it out.
Where possible, it’s always recommended to recover data from the drive before you attempt to fix it. You can do so by removing the drive and connecting it to a healthy computer as an external device for troubleshooting.
Method 1: Free Up Storage on System Disk
To fix an NTFS_FILE_SYSTEM error blue screen that’s appearing as a result of insufficient disk space, you can easily rectify this by deleting some data that you no longer need.
To do this, you will need to boot into safe mode. Once you have access to Windows, you can begin deleting files that are no longer wanted or needed. After deleting enough to fix the error, you can use Disk Cleanup to clear away any more temporary files that are no longer needed.
Method 2: Update System Drive’s Drivers
Updating or reinstalling your system drive’s drivers is easy. Once again, you will need to enter safe mode for this method.
- Right-click Start and click Device Manager.

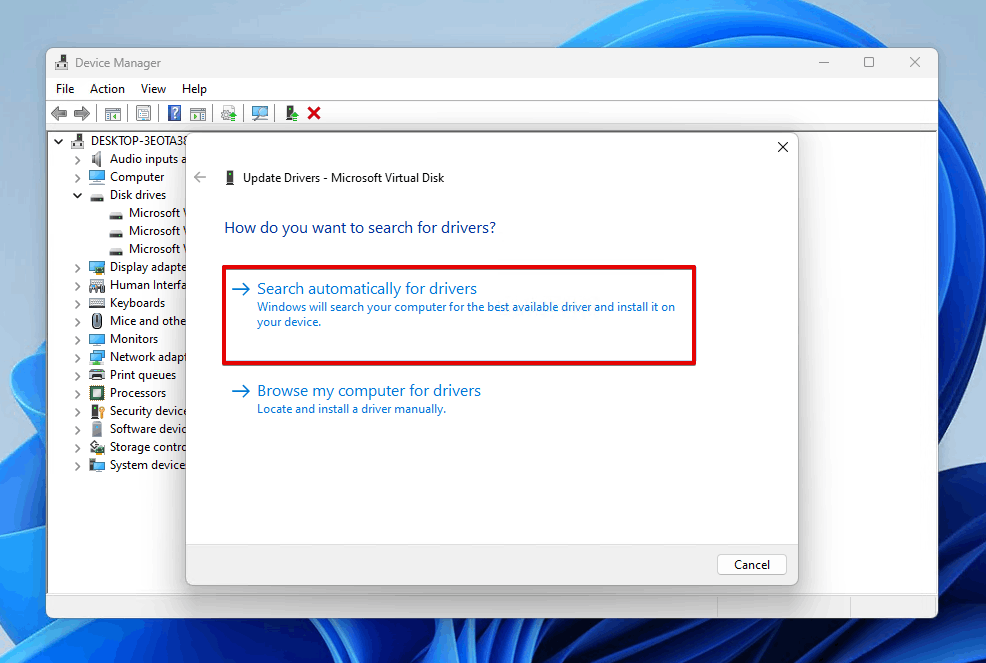
- Expand the Disk drives dropdown. Right-click your system drive and click Update driver.

- Click Search automatically for drivers. If no updated drivers were found, proceed to the next step.
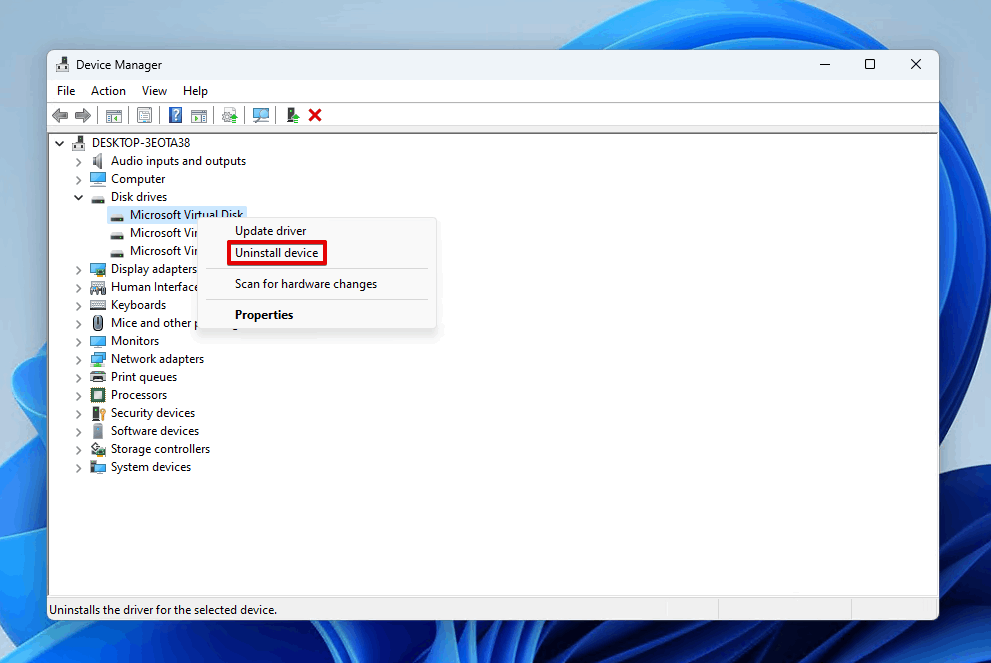
- Right-click your system drive and click Uninstall device.
- Click Uninstall.
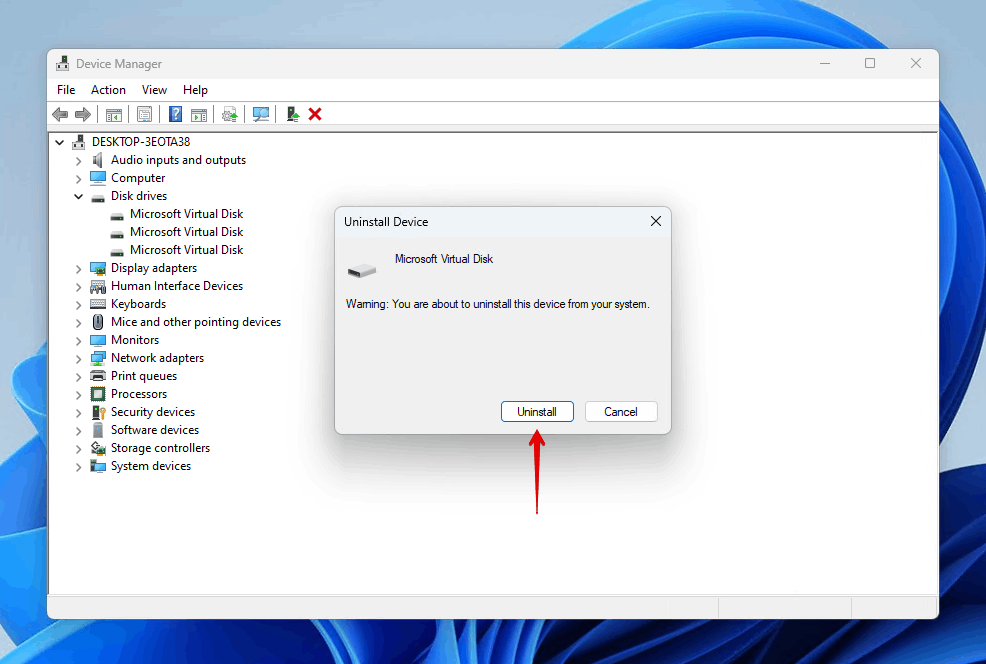
After uninstalling the driver, simply restart your computer for the driver to be reinstalled.
Method 3: Attempt Running Windows Startup Repair
Windows Startup Repair lets Windows try and diagnose the problem and get your system back to working condition.
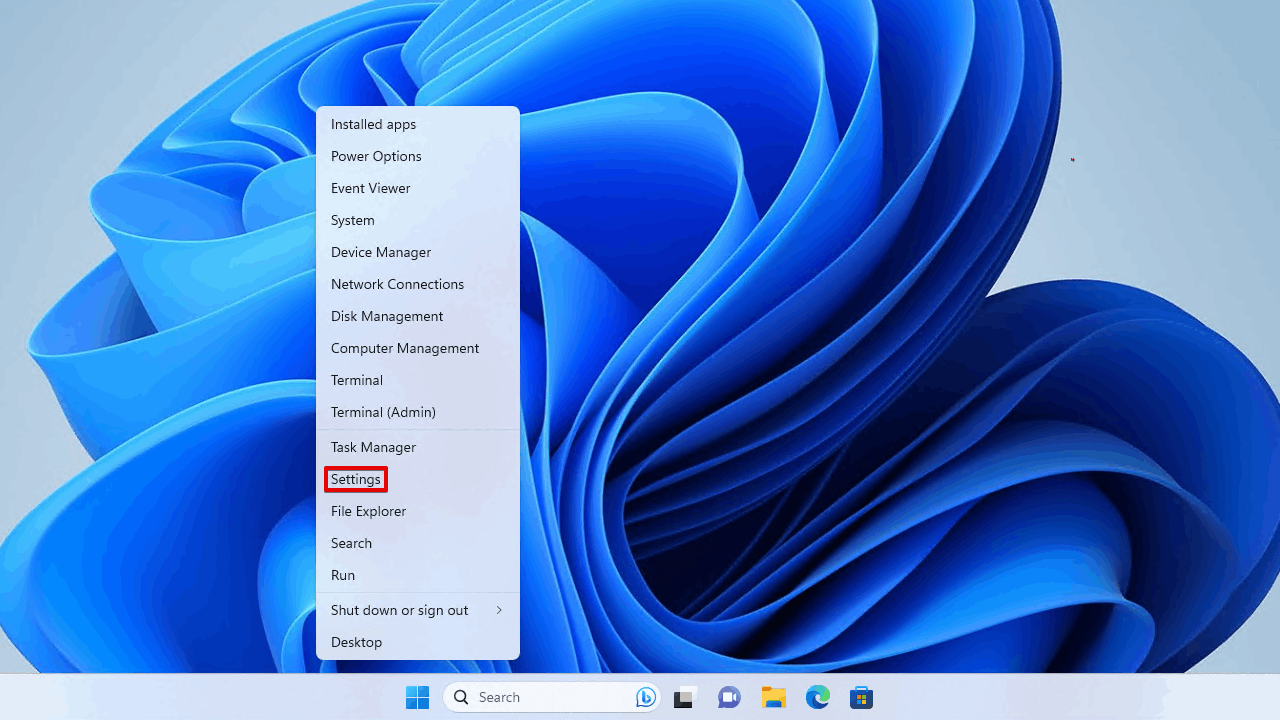
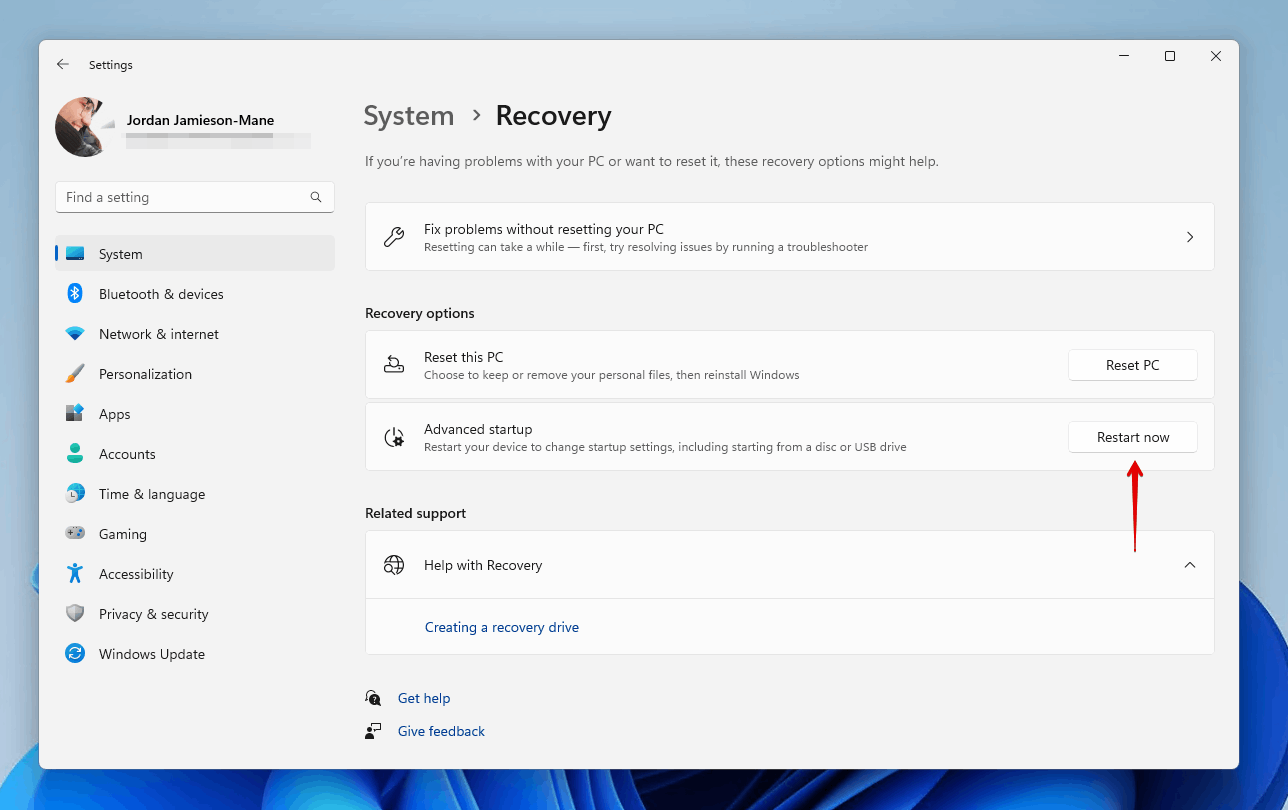
- Right-click Start and click Settings.
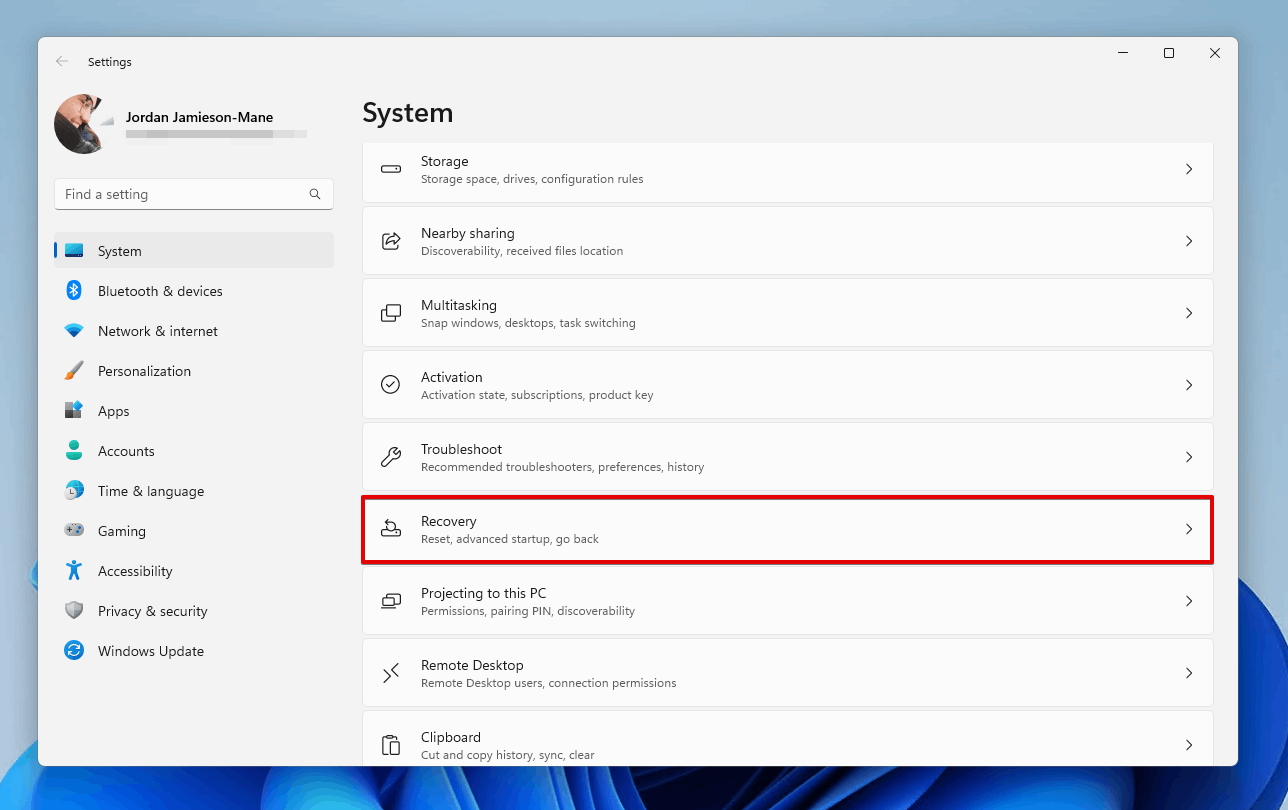
- Click Recovery.
- Click Restart now.
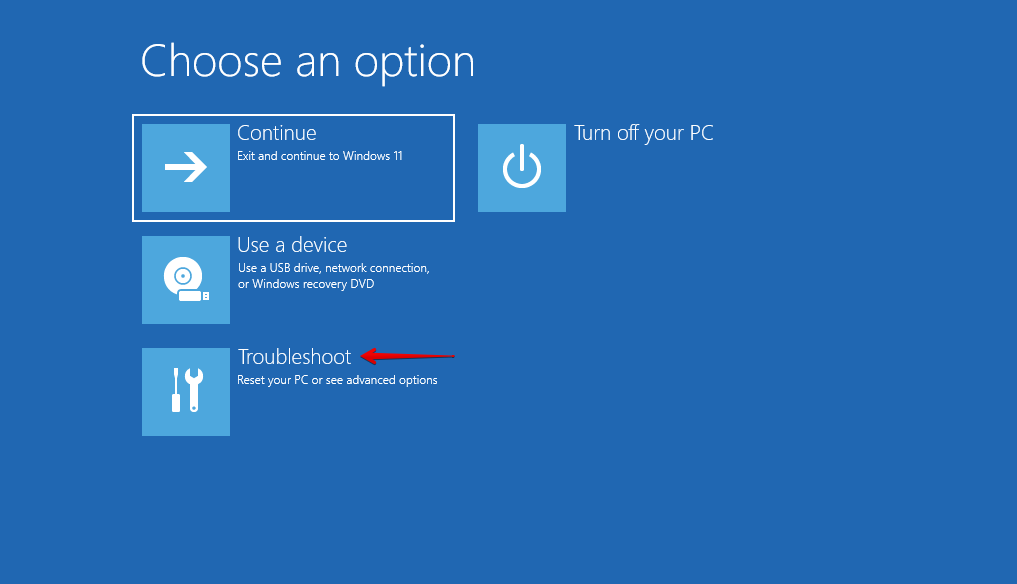
- Click Troubleshoot.
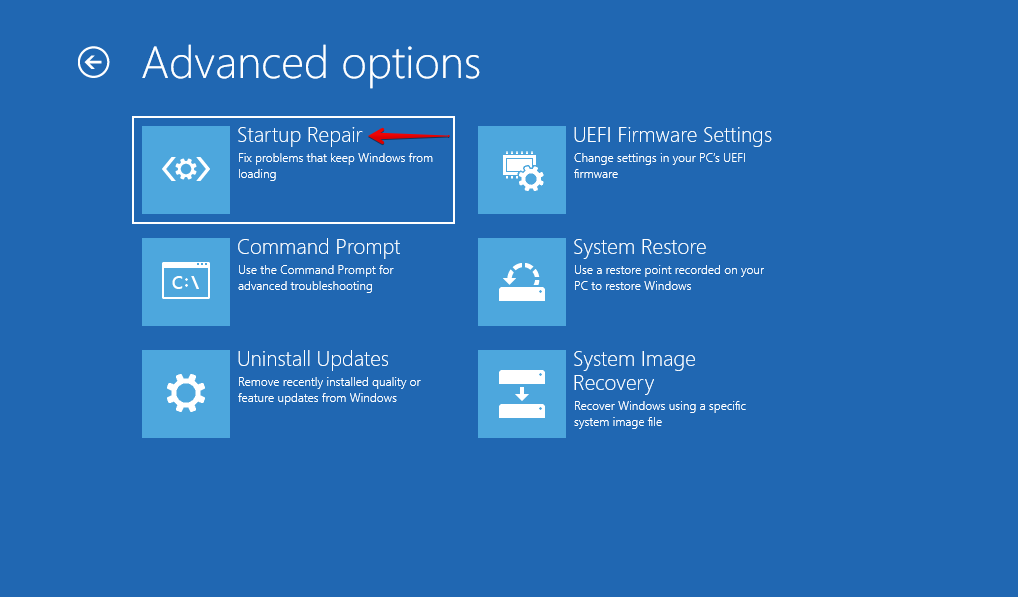
- Click Startup Repair. If you don’t have this option, you may need to boot into WinRE using your installation media instead.
- Choose your OS.

Method 4: Check System Drive for Errors
CHKDSK is a great tool for troubleshooting issues with your computer. It has a wide range of uses, making it a very diverse solution for fixing a number of issues, such as when no bootable device is found on your computer.
Here’s how you run CHKDSK to fix errors on your hard drive:
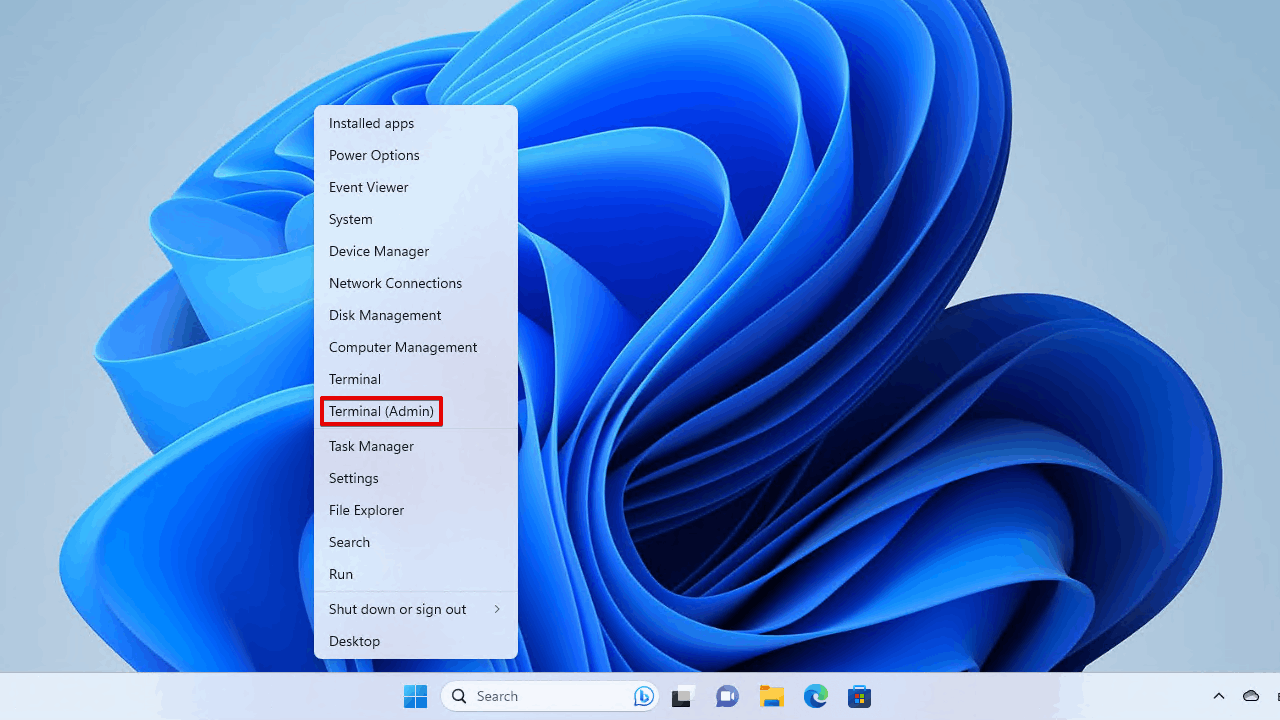
- Right-click Start and click Terminal (Admin).
- Type
chkdsk *: /r. Replace * with the drive letter of the disk that’s experiencing issues. Press Enter to run the command.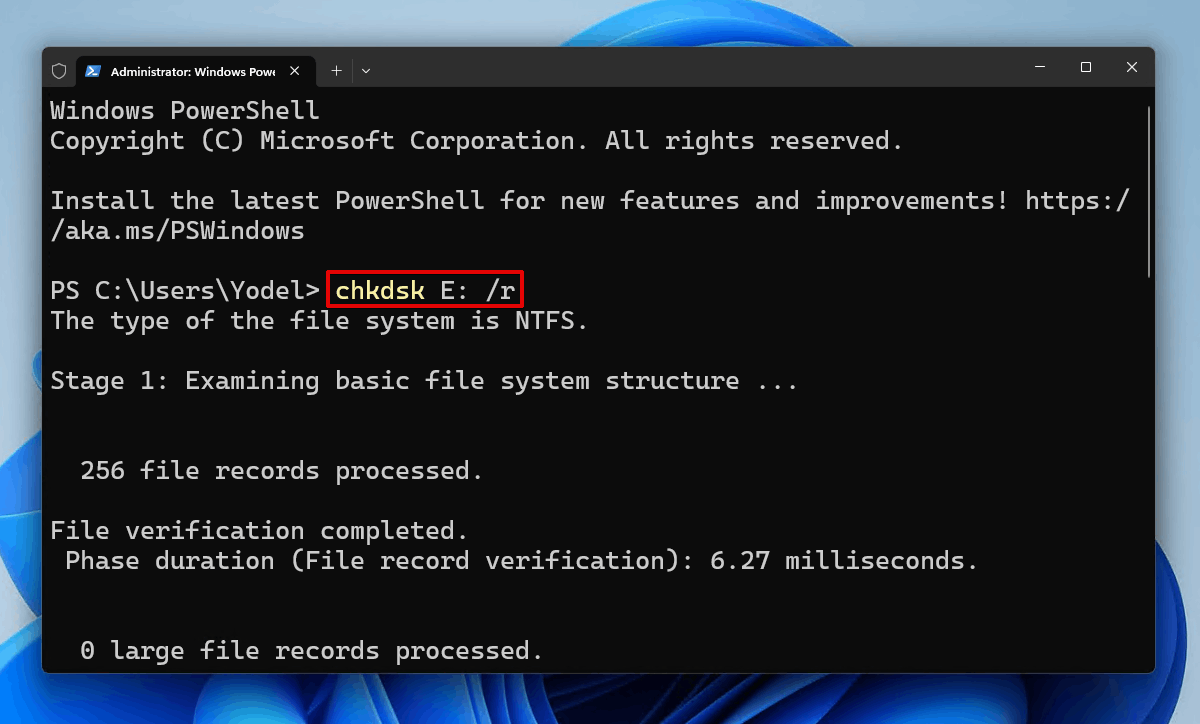
Method 5: Check System for Errors
In cases where some essential system files are missing, damaged, or corrupted, you can replace them with a working version using System File Checker (SFC) and Deployment Image Servicing and Management (DISM). SFC attempts to replace the file with a locally stored backup. If that doesn’t work, DISM can be used to download the necessary files by utilizing Windows Update.
- Right-click Start and click Terminal (Admin).

- Type
sfc /scannowand press Enter.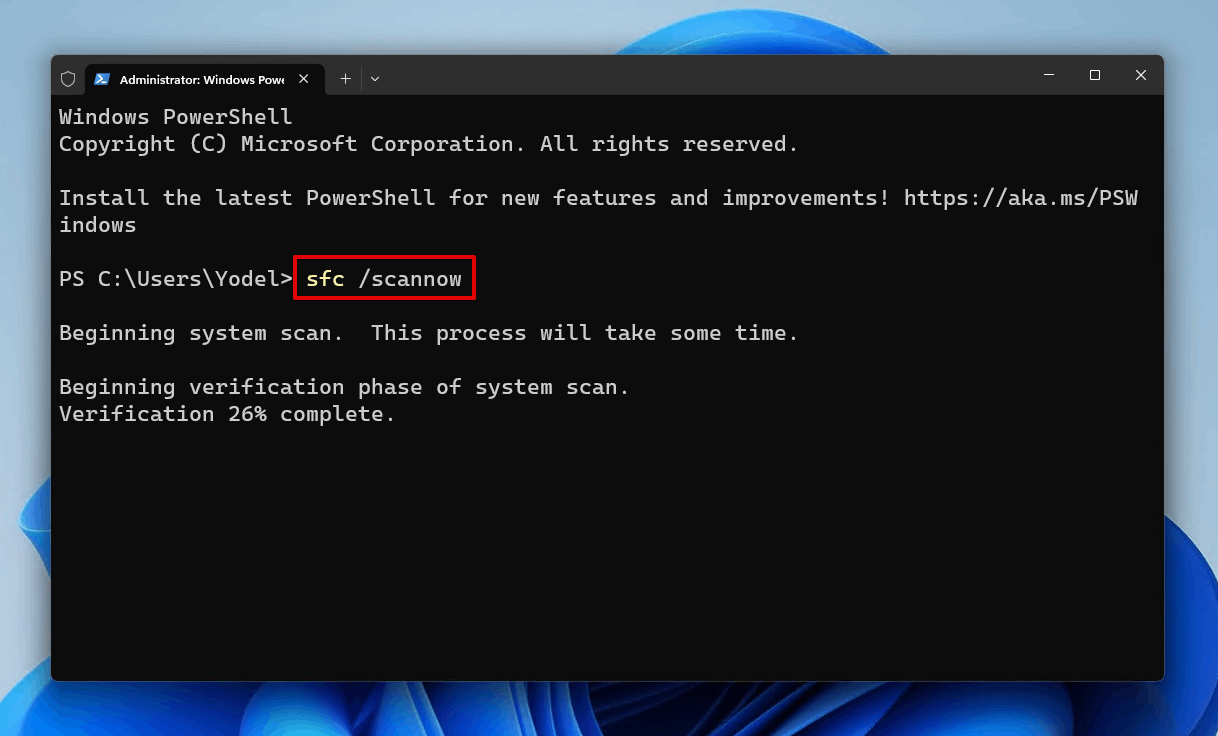
- Type
dism.exe /online /cleanup-image /restorehealthand press Enter. Bear in mind that this step will require an internet connection.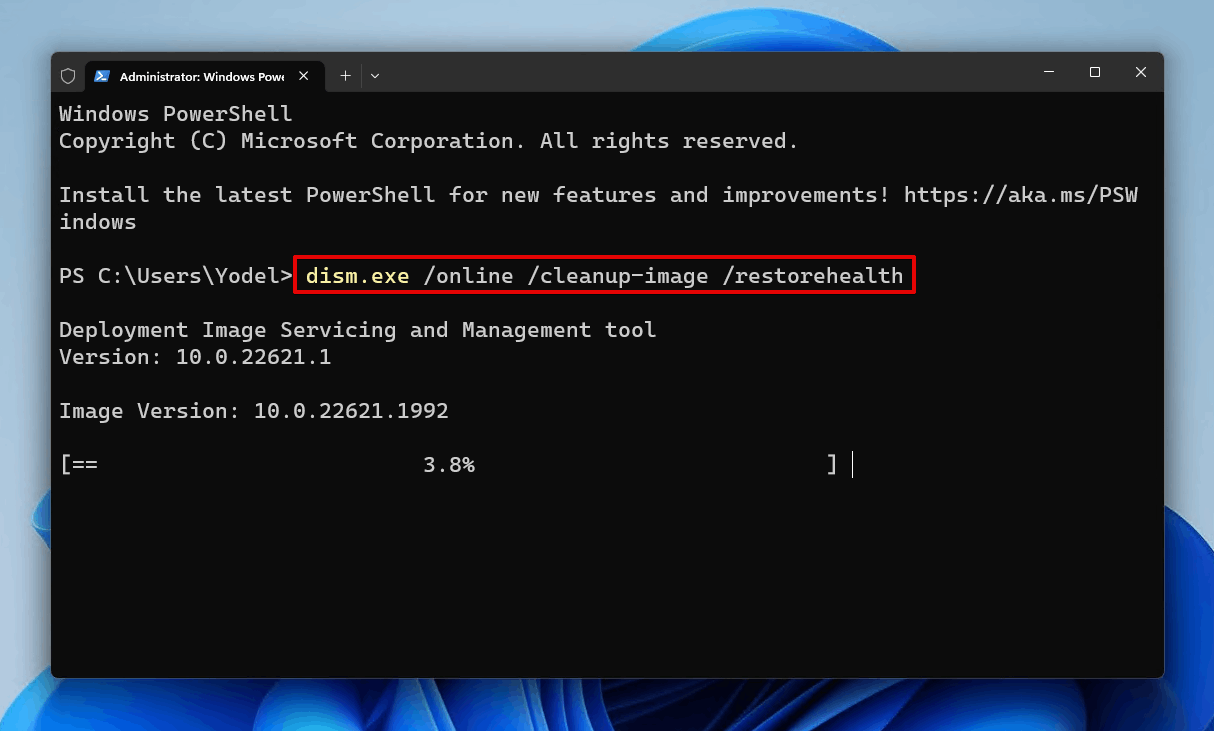
Method 6: Reset Your Windows Installation
A more drastic but effective solution is resetting Windows. Resetting Windows is a surefire way to clean away unnecessary files.
Backing up your data is highly recommended for this method, as it protects your data in case something interrupts the reset. If you ended up here because you’ve already factory reset Windows and suffered from data loss, see our guide on how to recover files after you factory reset Windows.
Follow these steps to reset Windows through WinRE:
- Boot into WinRE and click Troubleshoot.

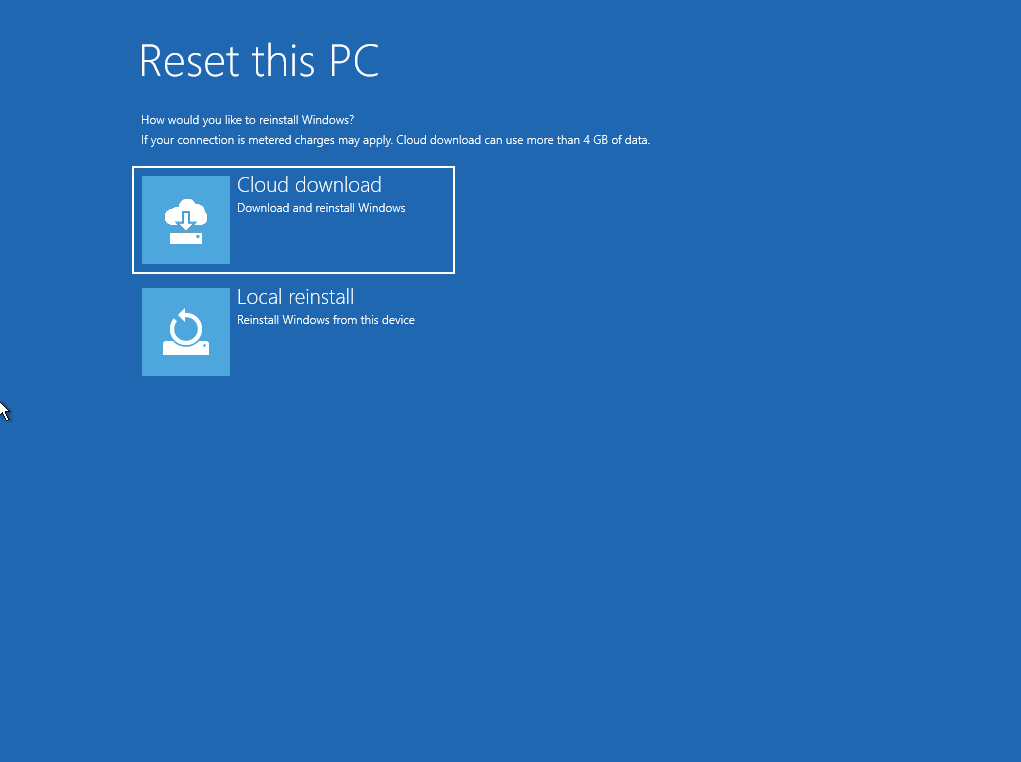
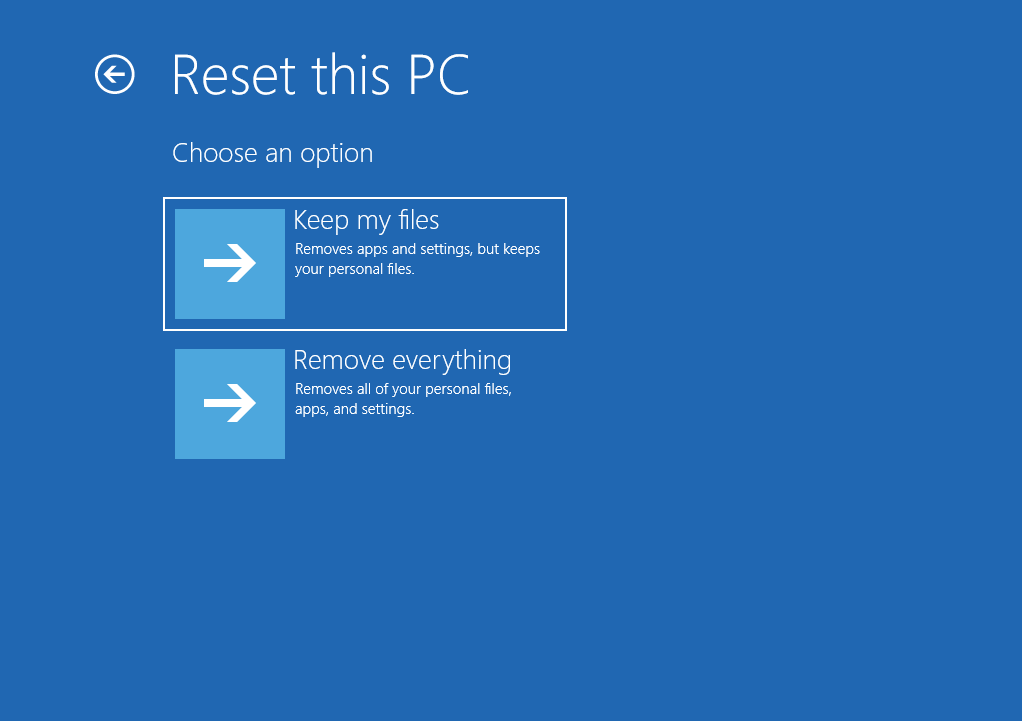
- Click Reset this PC.
- Click Keep my files.
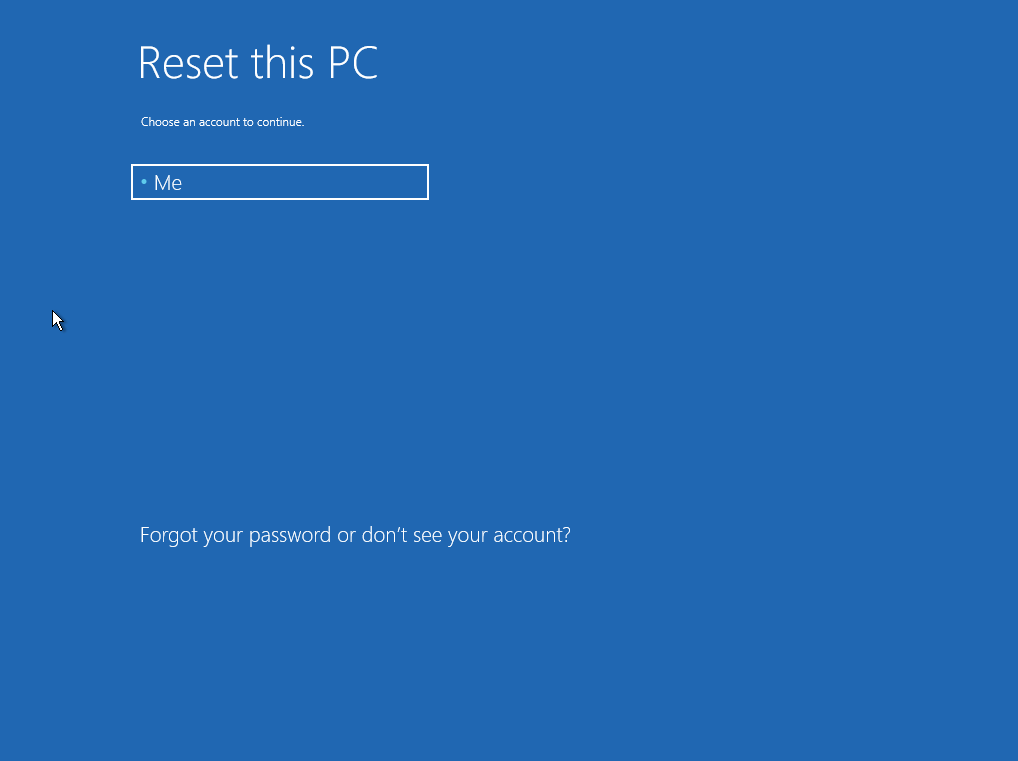
- Choose your account (and enter the password on the next screen if necessary.
- Choose whether you want to download Windows with Cloud download or use the Local reinstall option.

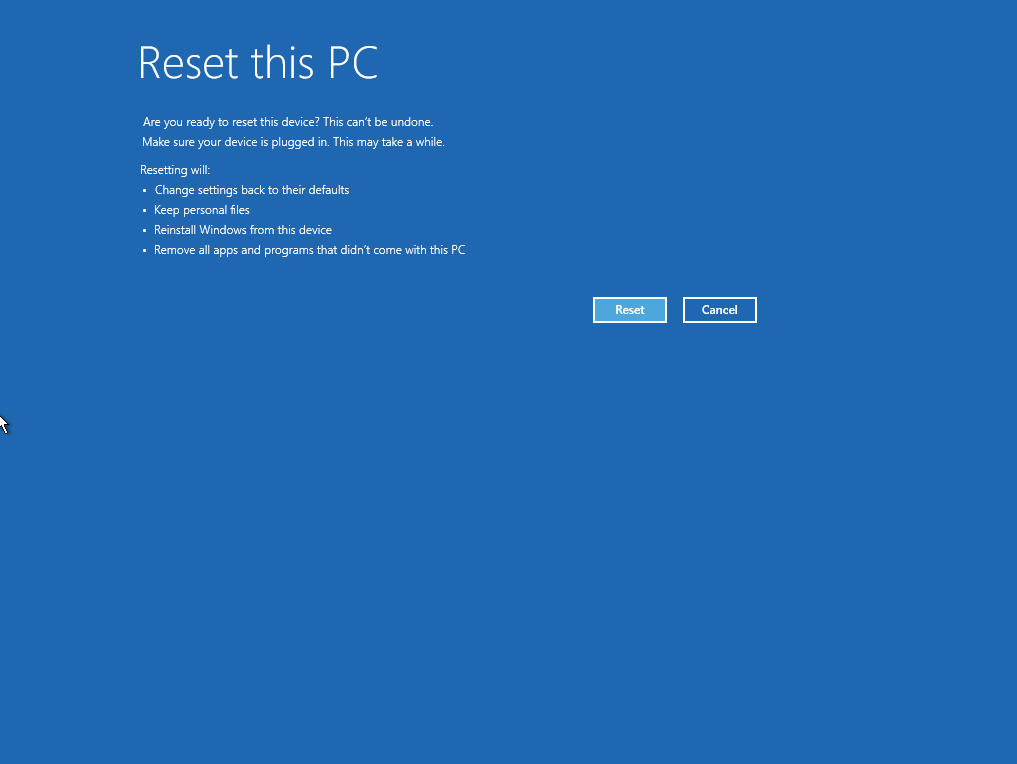
- Click Reset.
Method 7: Manually Reinstall Windows
Resetting Windows may not be possible using the previous method if your recovery partition has been damaged. In this case, you will need to manually reinstall Windows. For this method, you will need your Windows installation media, like a bootable USB. This will delete all data on the drive, so be sure to back it up beforehand or see our guide on how to reinstall Windows without losing files.
- Connect your Windows installation media and start your PC. Be sure to update your boot order in your BIOS beforehand.
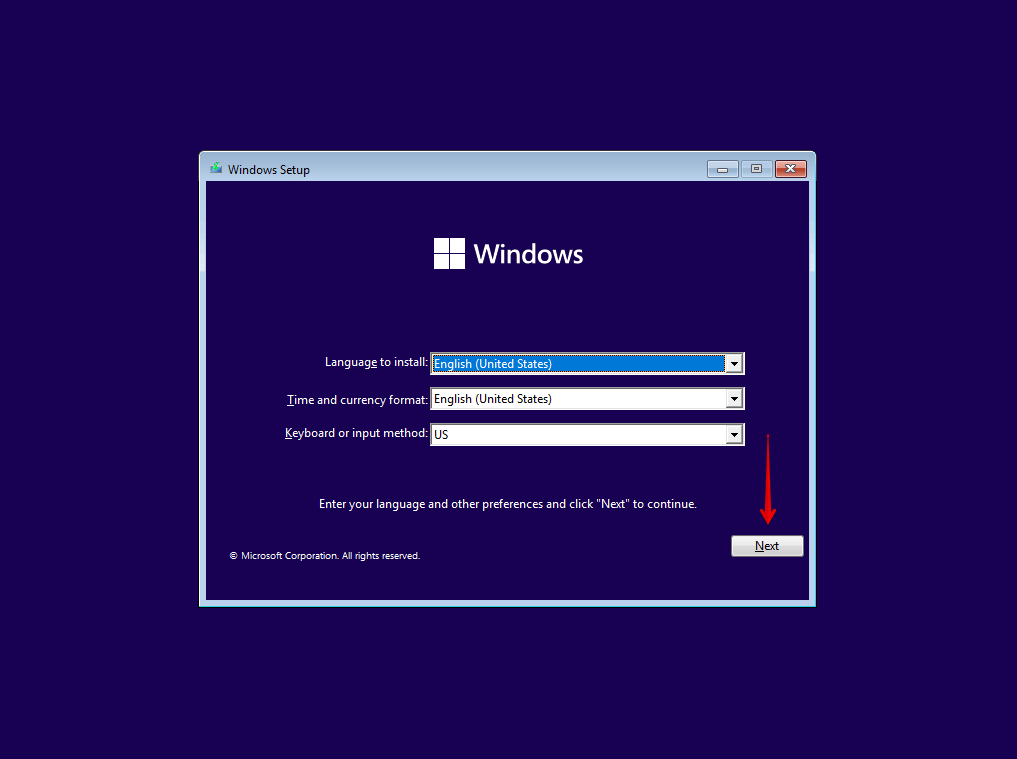
- Choose your preferences and click Next.
- Click Install now.
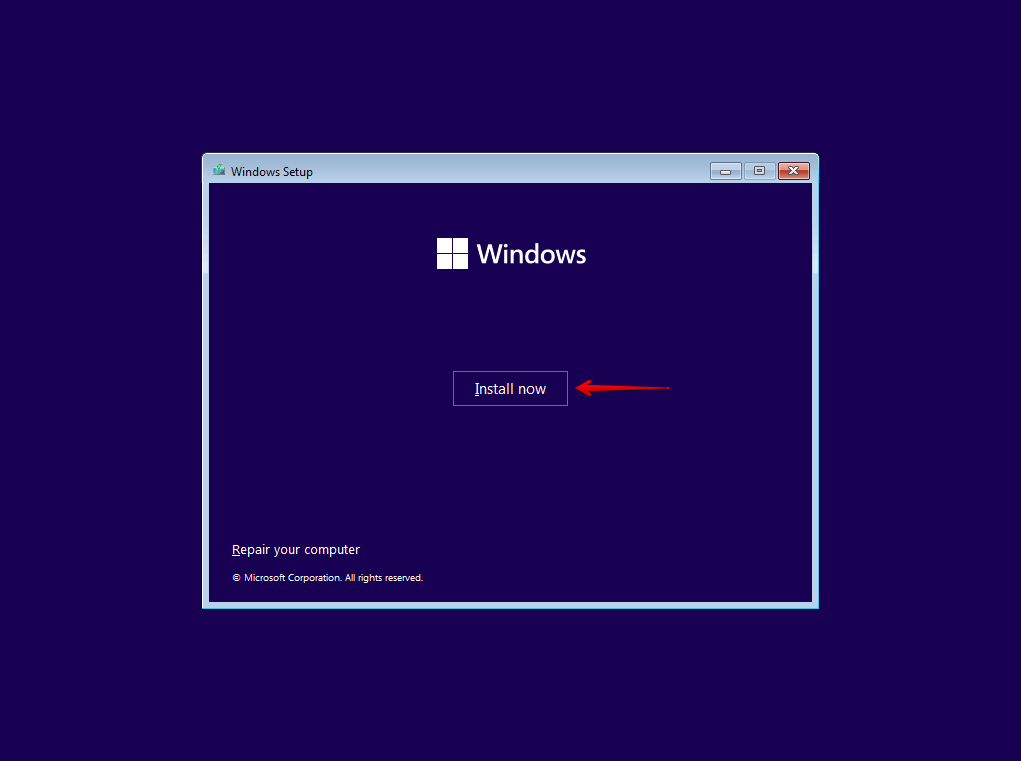
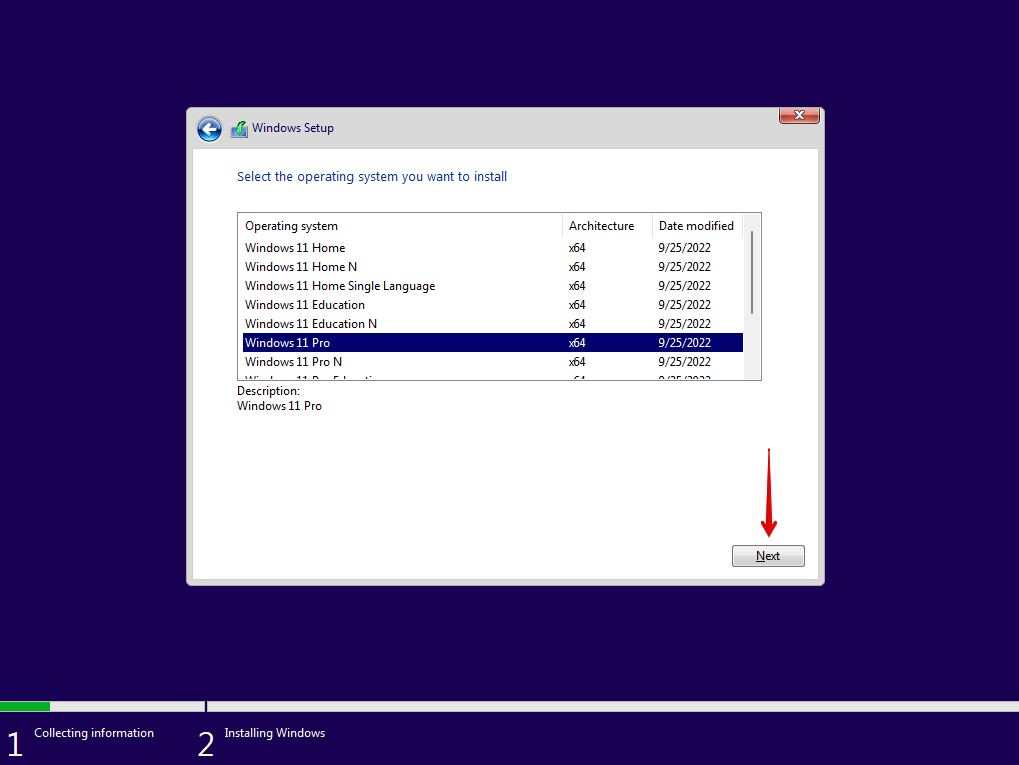
- Enter your product key or click I don’t have a product key and choose your Windows version. Click Next.
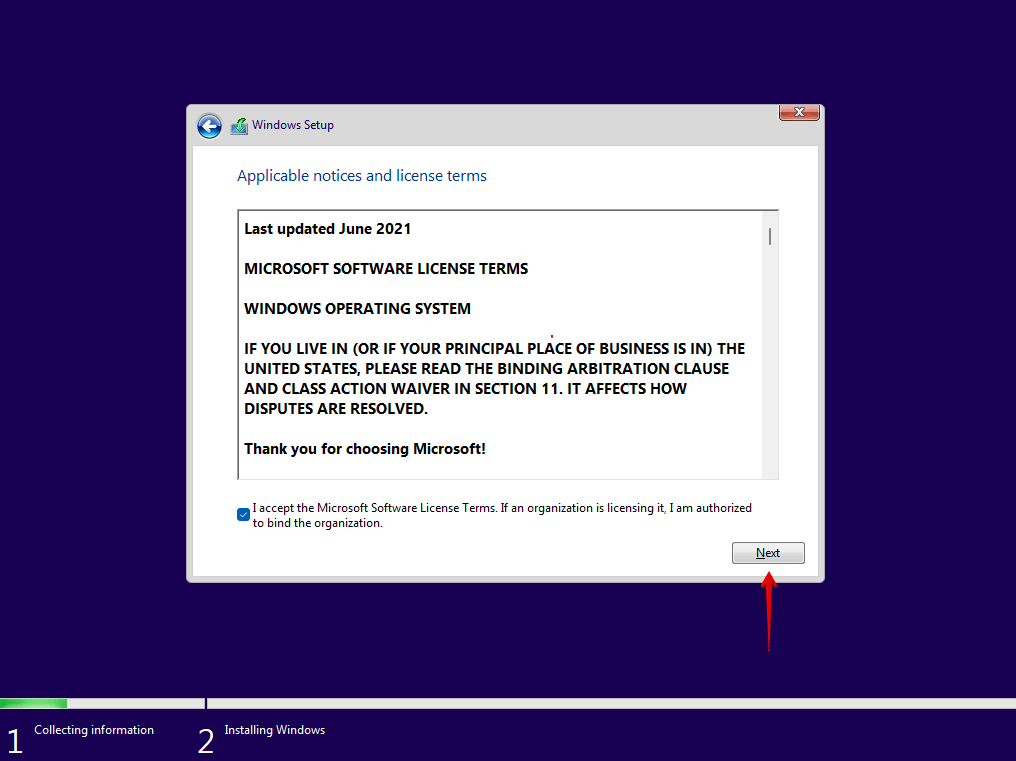
- Agree to the license terms and click Next.
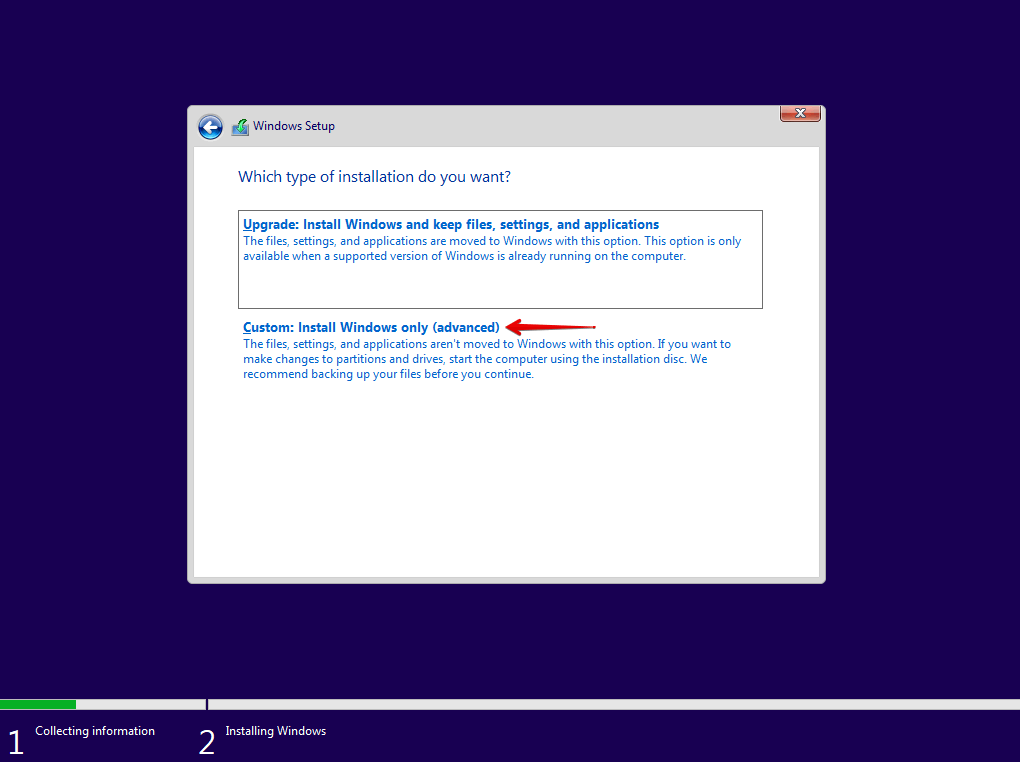
- Click Custom: Install Windows only (advanced).
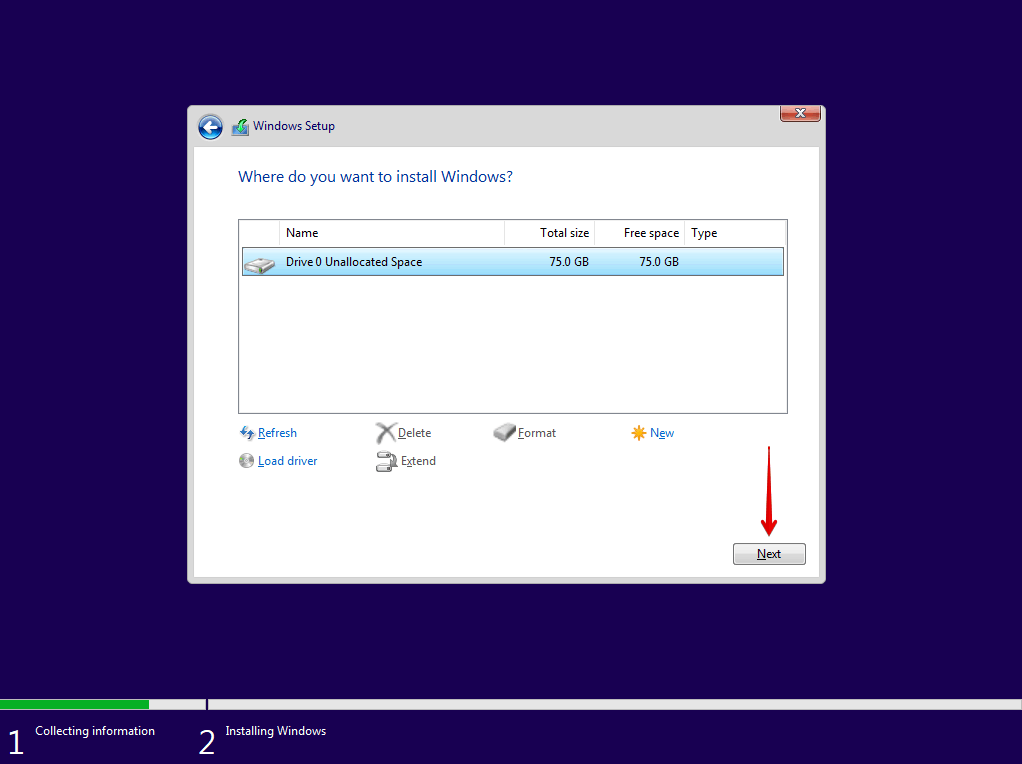
- Delete all of your existing volumes and partitions and create new ones according to how you want to partition the drive. Select the partition you want to install Windows on, then click Next.
How to Recover Data After Fixing NTFS_FILE_SYSTEM Error
After fixing the issue, you may notice that some of your data has disappeared. If this is the case, you should recover it as soon as possible, because it will eventually be overwritten (and in turn, unrecoverable).
To recover your lost data, we recommend Disk Drill. You can use Disk Drill to recover data that has become lost or deleted, either because of the NTFS_FILE_SYSTEM error directly, or as a result of the fix that was implemented. It uses a comprehensive, all-in-one scanner and allows you to recover data from the drive to a safe location.
Follow these steps to recover data that was lost due to the NTFS_FILE_SYSTEM error using Disk Drill:
- Download and install Disk Drill to a separate drive. Installing Disk Drill on the drive you’re recovering data from may cause some of it to become corrupted.
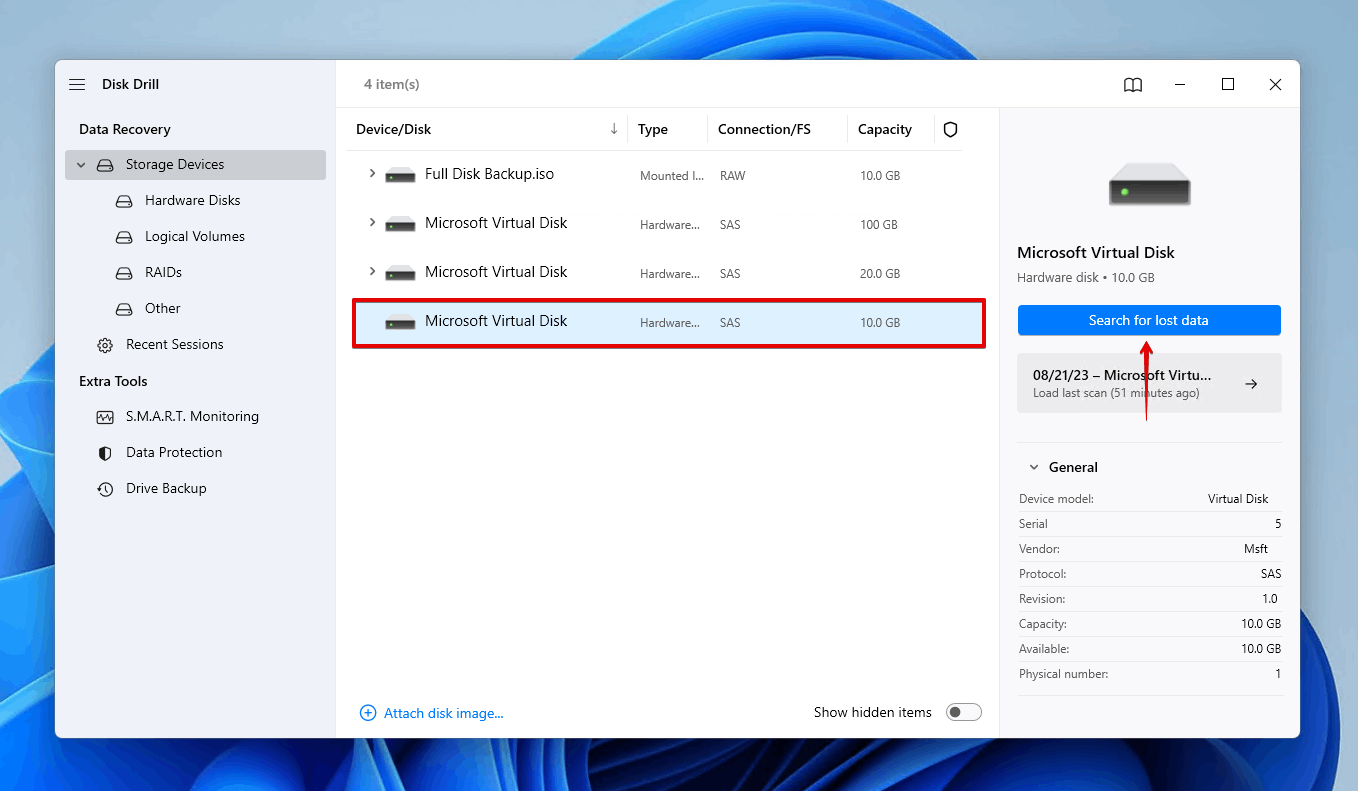
- Select the drive that suffered from the NTFS_FILE_SYSTEM error, then click Search for lost data.
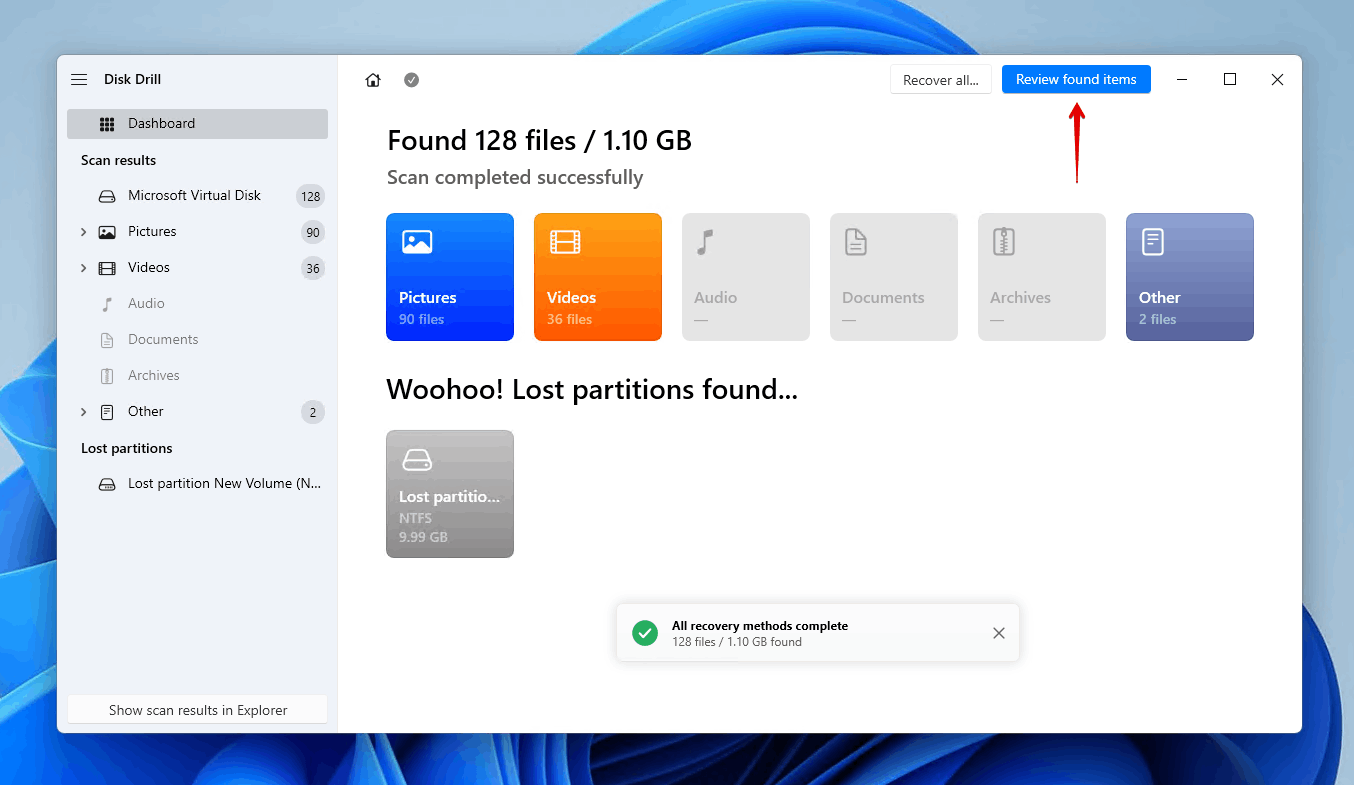
- Click Review found items to choose what files you want to recover. If you want to recover everything instead, click Recover all.
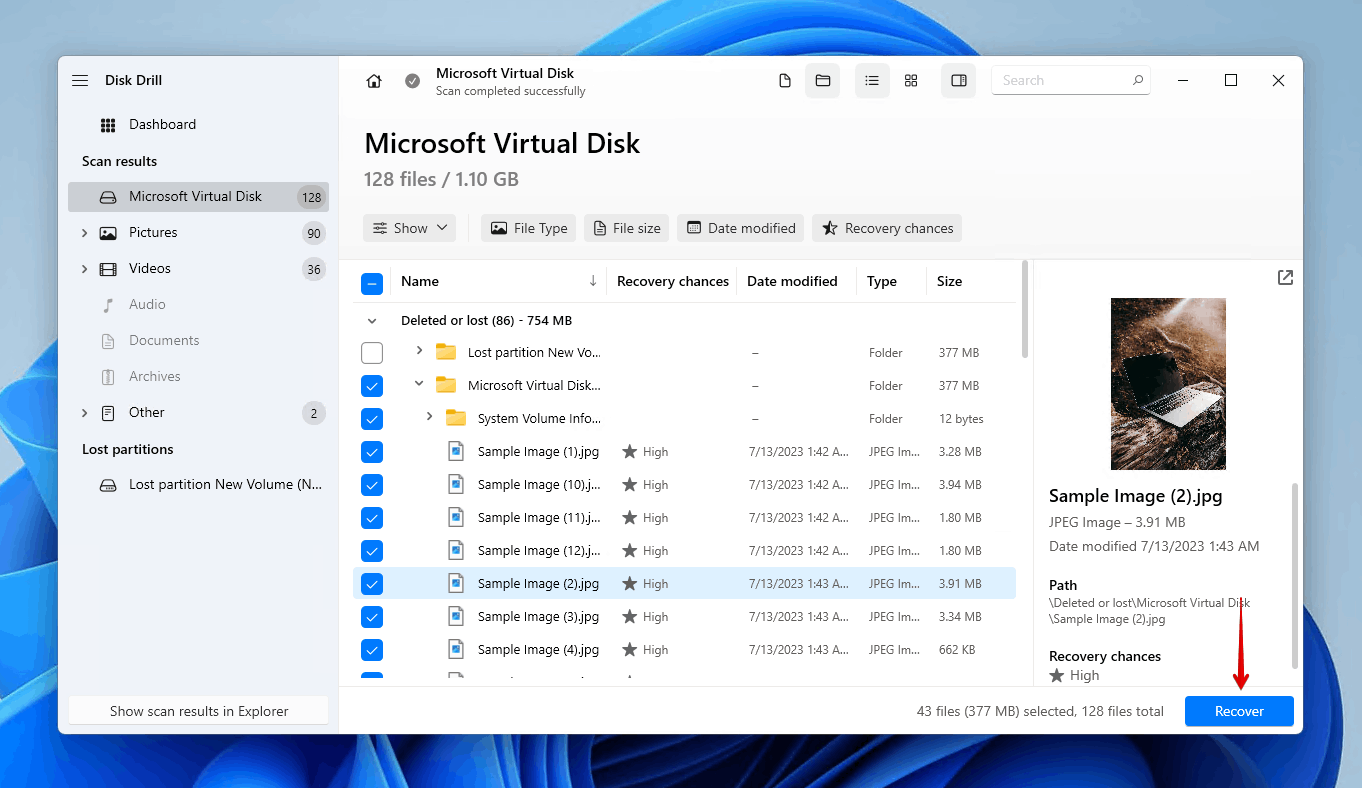
- Select the files you want to restore. Your data may be split between the Deleted or lost, Existing, and Reconstructed dropdowns, depending on each file’s state. When you’re ready, click Recover.
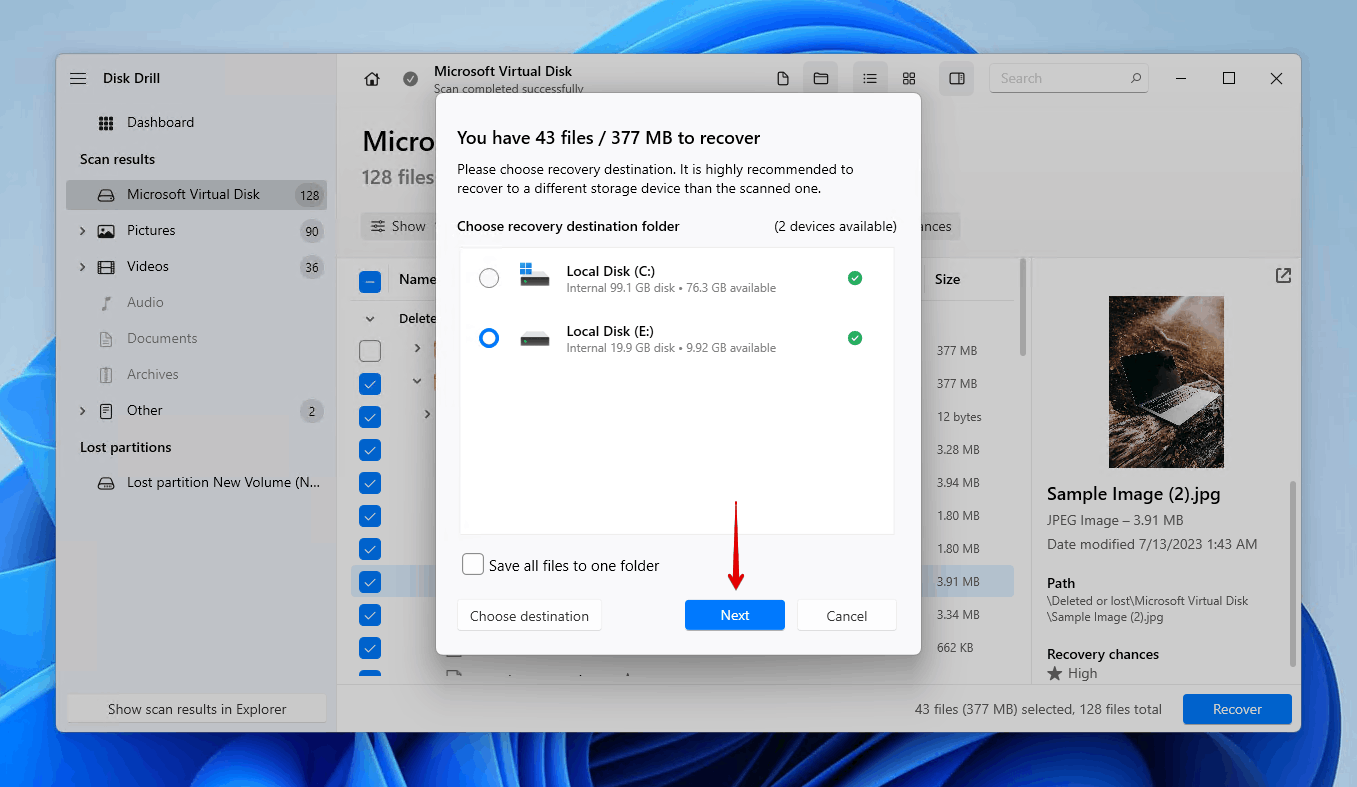
- Choose a safe recovery location to complete recovery. Again, this should not be a location on the same drive you’re recovering the data from. Click Next.
Conclusion
Dell, Lenovo, HP, ASUS, and all other computer brands are susceptible to the NTFS_FILE_SYSTEM error in Windows. Once you encounter it, Windows will block you with a constant BSoD.
You can fix the NTFS_FILE_SYSTEM error by freeing up some space on your system drive using Safe Mode. If that doesn’t work, try updating your drivers, running Windows Startup Repair and CHKDSK, and verifying file integrity with SFC and DISM. If all of those fail, resetting Windows will do the trick. Following the successful repair, you can repair any lost data using a data recovery tool.
