 Has your hard drive suddenly become unreadable and marked as RAW? This common problem has many potential causes (bad sectors, virus attacks, formatting errors, etc.), but it also has many possible solutions. In this article, we describe free and paid methods that you can use to recover data from a RAW drive, and we even help you decide which method is right for you. Go to data recovery ⤵
What Is a RAW Drive?
Think of your hard drive as a filing cabinet. The drawers represent partitions, and the labeled folders inside them represent your file system. When you save files on your computer, the file system (like NTFS, FAT, exFAT, APFS, or ext4) organizes them systematically—just as you would organize important documents in labeled folders, telling your operating system:
- Where each file is physically stored
- How to access it when needed
- What permissions apply to it
- Other essential metadata
When a drive becomes RAW, it’s as if someone removed all the labels from your filing cabinet and scattered the contents. Your files are still physically present on the drive, but the organizing system that tells your computer where to find them is damaged or missing.
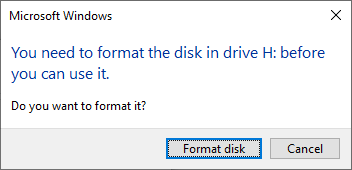
This is why you see messages like “You need to format the disk before you can use it” when trying to access a RAW drive. Fortunately, recovering files from a RAW drive is entirely possible—you just need to use the right approach to maximize your chances of successful recovery.
Is It Possible to Perform RAW Drive Recovery Without Data Loss?
Yes, it’s possible to perform RAW data recovery without any data loss, but you need to keep in mind that certain actions can make a RAW hard drive unrecoverable, so it’s paramount to approach the recovery the right way. Here are a few RAW drive recovery dos and don’ts to follow:
| Dos and Don’ts | Description |
| 🧹 Don’t format your hard drive | While formatting a RAW hard drive makes it usable again, it doesn’t solve anything as far as data recovery goes. Instead, it makes RAW file recovery more difficult or even impossible by performing write operations that can overwrite the same data you’re trying to recover. |
| ✒️ Don’t write new data to the RAW hard drive | Similarly, any attempt to write new data to a RAW hard drive may result in a permanent loss of important files as the new data might be written over areas that contain your valuable files, effectively erasing them permanently. |
| 💻 Don’t use random RAW drive recovery software | There are many capable software applications that you can use to effortlessly recover files from a RAW drive, but there are also shady applications that can do more harm than good. |
| ⌛ Do start RAW disk recovery as soon as possible | The sooner you begin the recovery process, the more likely you are to get your files back. That’s because every operation performed on the RAW drive increases the risk of overwriting your original data. Additionally, the longer you wait, the greater the chance of physical damage occurring to the storage media itself. |
| 📜 Do follow our instructions | If you’ve never recovered a RAW drive before, you don’t want to experiment with solutions that may or may not work. By following the instructions in the next chapter of this article, you are guaranteed to successfully recover as many files from a RAW hard drive as possible. |
How to Recover Data from a RAW Drive?
We’ve organized the recovery methods below to help you achieve the best results for the least amount of effort, money, and time. In most cases, you should be able to recover data from your RAW drive with just the first method, so let’s get to it.
Method 1: Recover Files With Disk Drill’s Smart Algorithms
Disk Drill is my personal favorite software solution for RAW drive recovery because it combines power with usability. Unlike many other recovery tools, Disk Drill includes features specifically designed for RAW recovery scenarios:
- Multiple recovery methods that work even when standard recovery fails because they can recover lost data based on both file system information and file signatures.
- Byte-level backup creation to protect your RAW drive from further damage during recovery attempts.
- File preview capabilities that let you verify recoverable files before restoration.
- Free recovery of up to 500MB of data, which is enough for many smaller data recovery jobs.
Even without any previous experience with data recovery tools, any Windows user can use Disk Drill to recover lost data from a RAW hard disk in just a few simple steps:
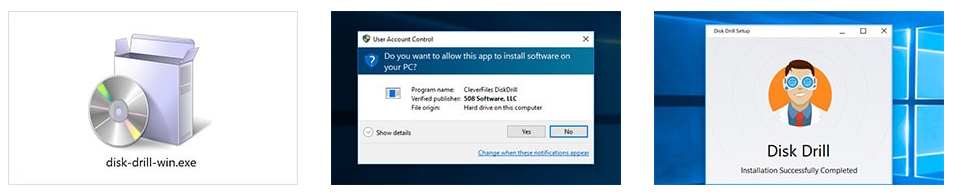
- Download and install Disk Drill. Launch the application with administrator privileges so that it has full access to your drive.
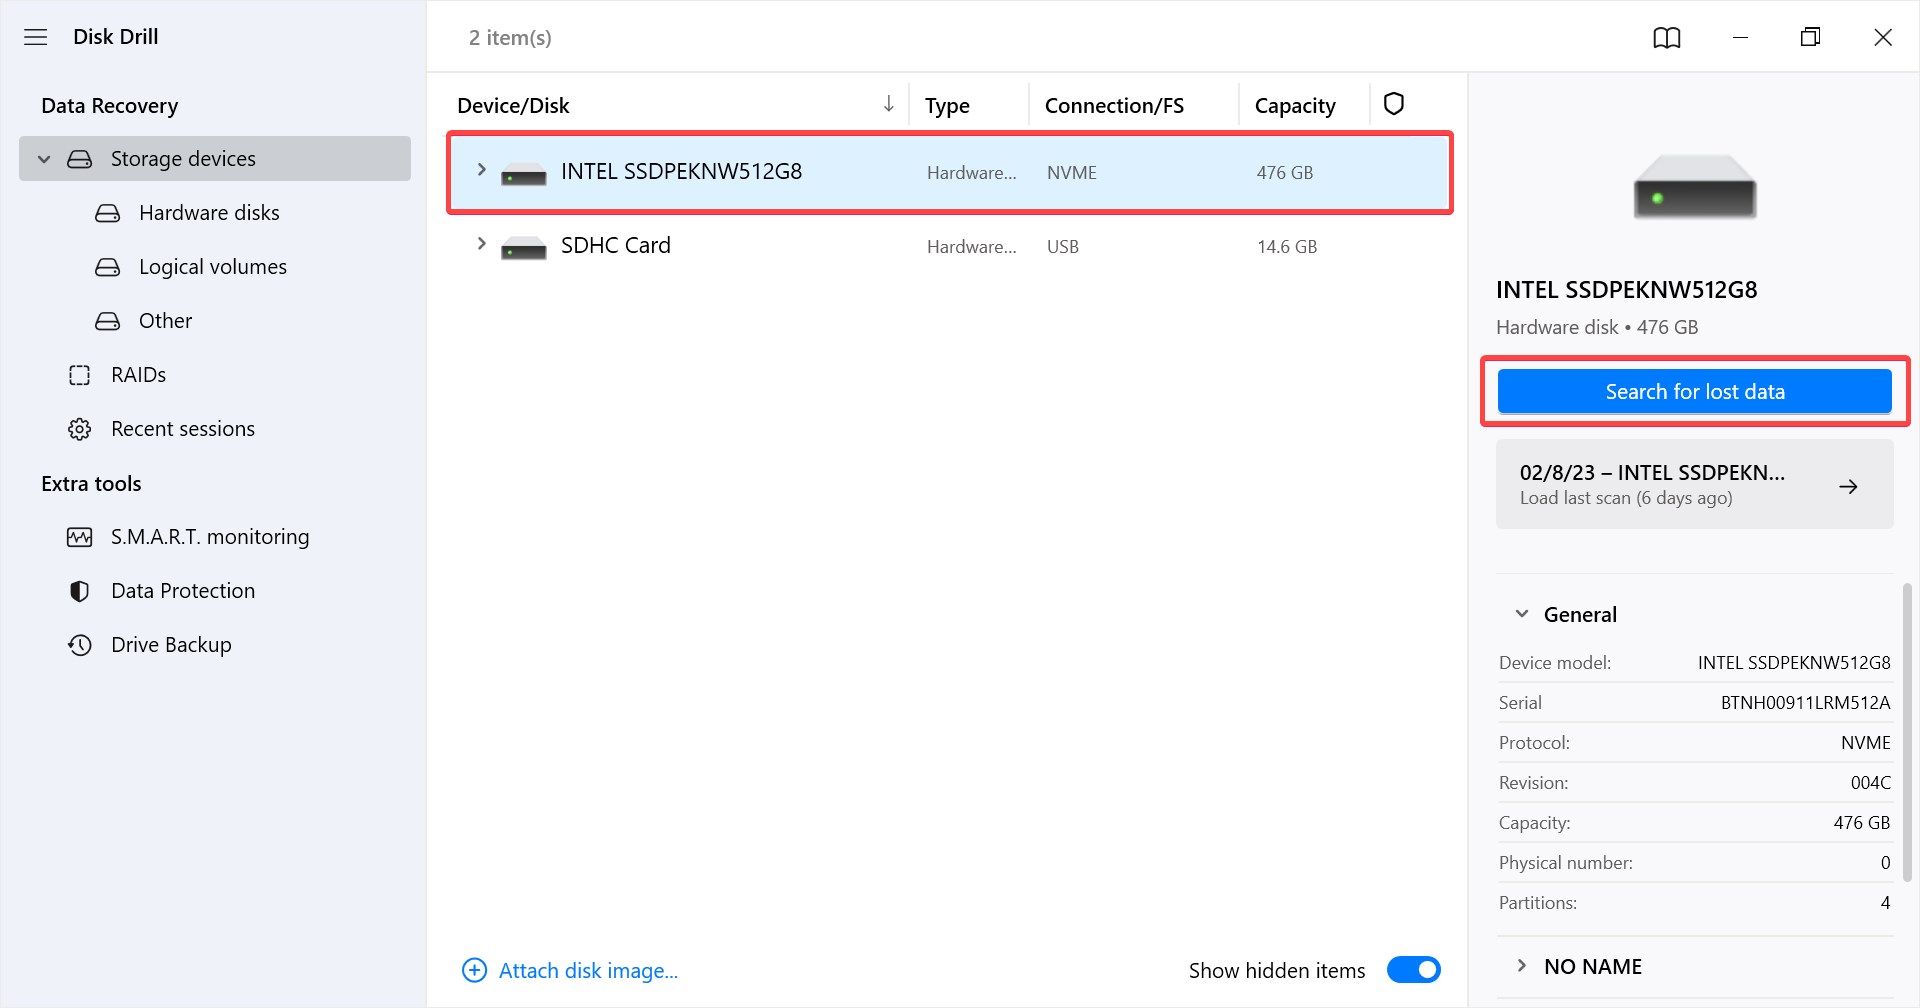
- Locate and select your RAW drive or partition from the main interface (it’s usually better to scan the entire drive instead of just a single partition). You’ll see it listed with all detected storage devices. Click the Search for lost data button to begin the scanning process.
- While Disk Drill scans your RAW drive, you can monitor the progress in real time. The scan will detect recoverable files as it progresses, so you don’t need to wait for it to complete before reviewing the results. That said, this isn’t the right time to rush, so I recommend you watch a YouTube video and wait until it’s done.
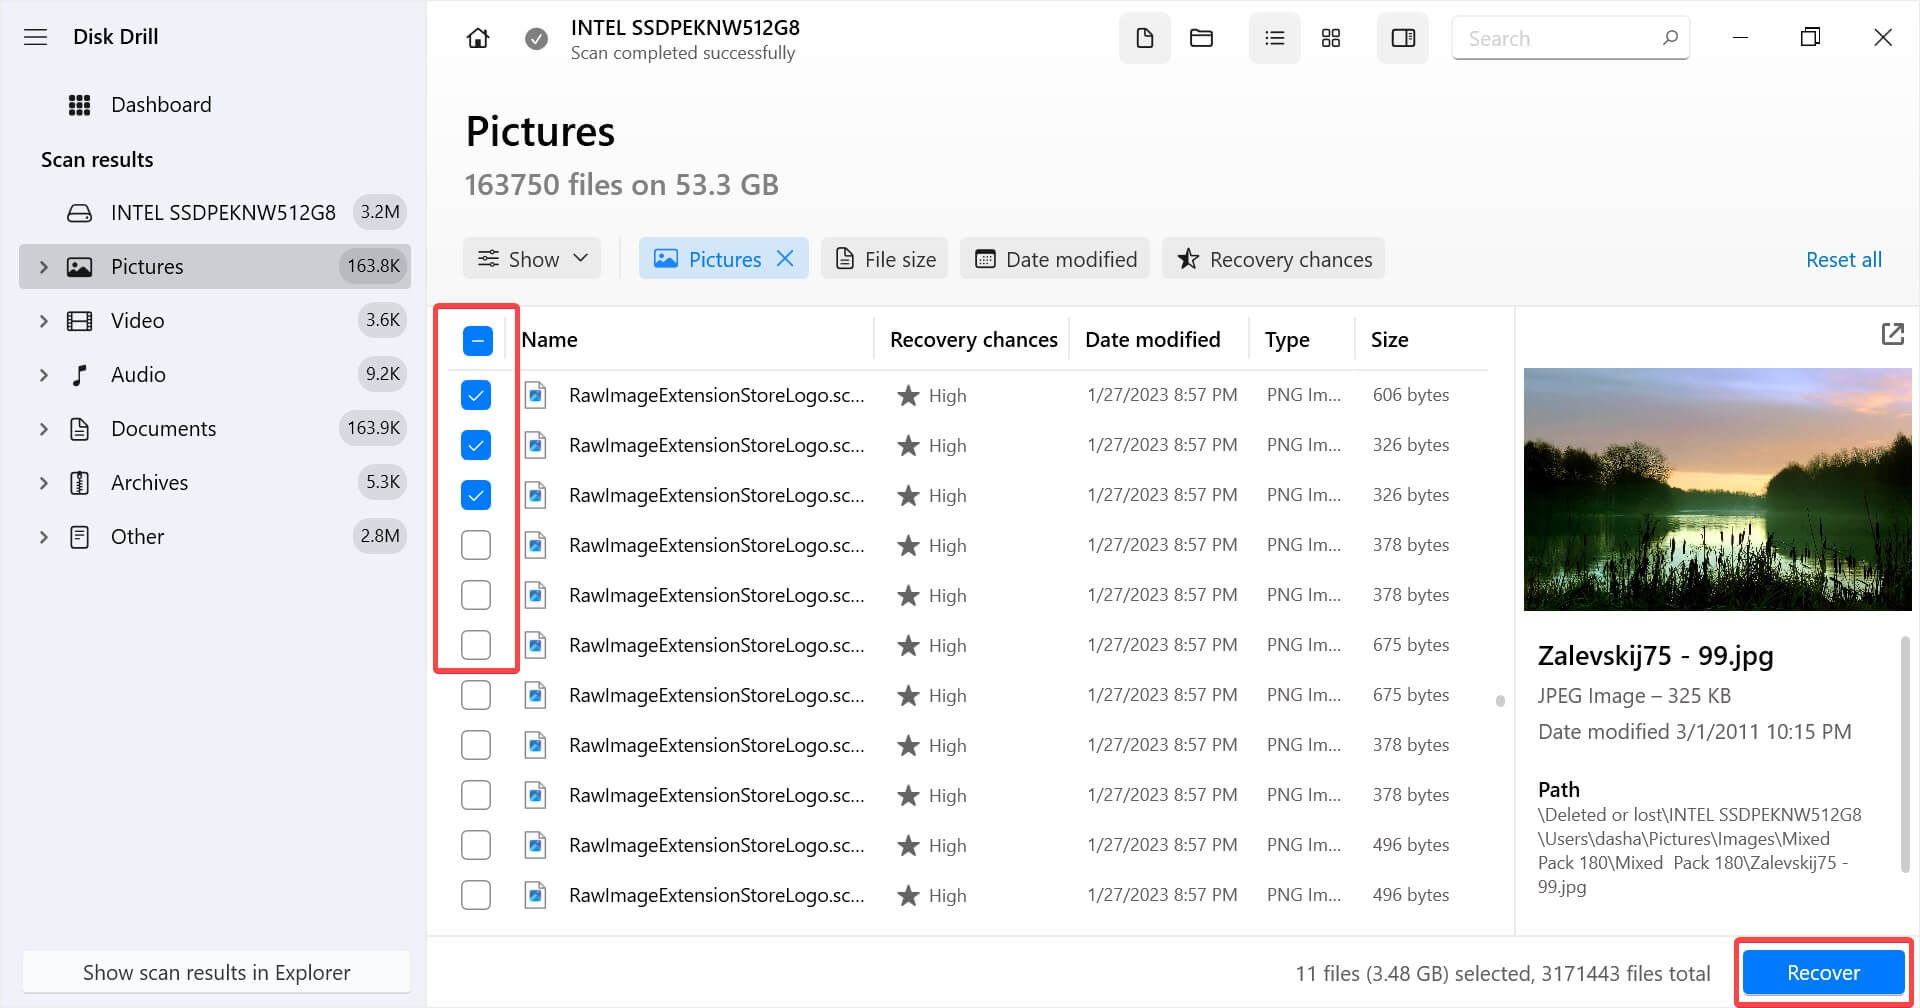
- After scanning, use the filtering options on the left panel to narrow down results by file type, size, or date. You can also use the search bar to find specific files by name. It’s a good practice to preview files before selecting them by clicking the checkboxes next to them. Once you’ve made your selection, click the blue Recover button.
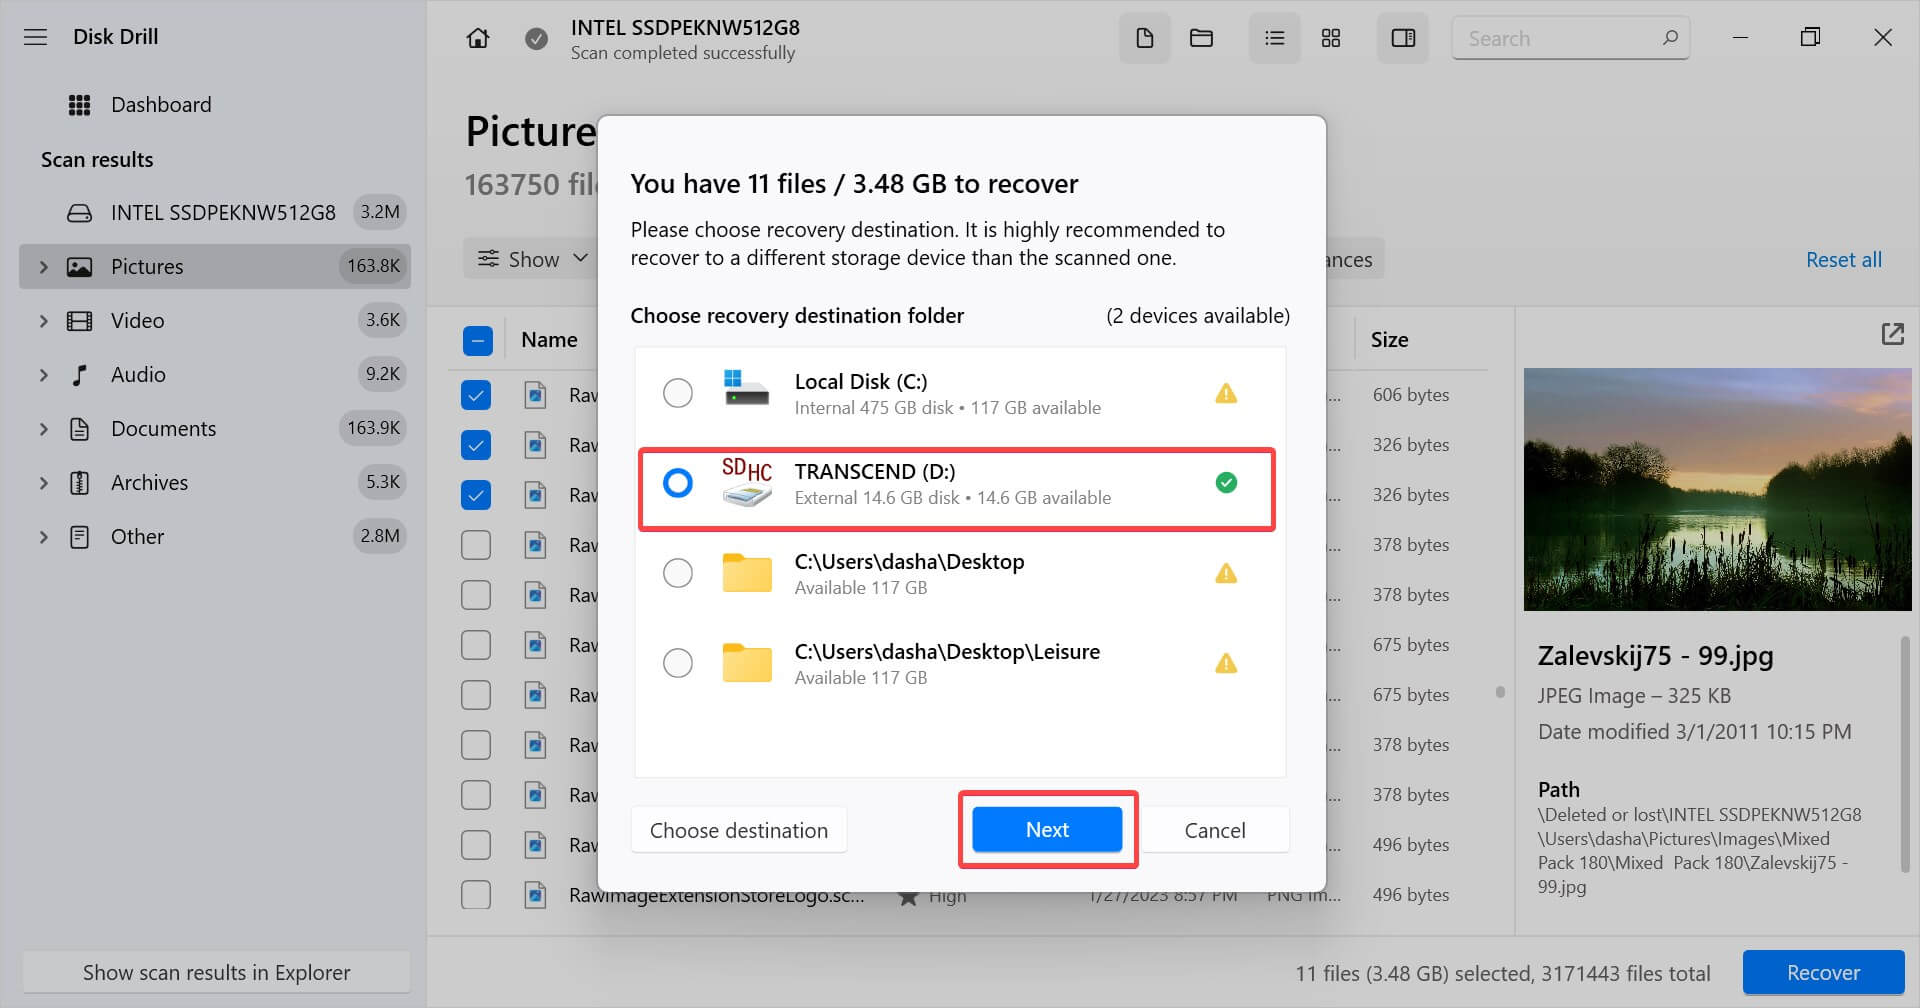
- Choose a recovery destination on a different drive (never the same RAW drive you’re recovering from) and click Next to complete the process.
RAW partition recovery or RAW hard drive recovery in general with Disk Drill is so straightforward that even complete beginners can perform it with confidence. That said, Disk Drill certainly isn’t the only data recovery software that’s worth trying when faced with data loss involving RAW data.
Method 2: Use PhotoRec to Recover Files Based on Their Signatures
Despite its name, PhotoRec can recover much more than just photos—it supports over 480 file extensions including documents, archives, videos, and more.
The free and open-source application is especially useful in situations where there are no file system data on the storage device to recover and signature-based recovery is the only possible path forward. Other benefits include:
- No size limitations on the amount of data you can recover
- Cross-platform compatibility with Windows, macOS, and Linux
- Community support from dedicated volunteers from around the globe
PhotoRec itself is designed to be controlled from the command line, but there’s also a graphical user interface, called QPhotoRec, which works just fine for the purposes of RAW partition data recovery, so that’s what I’ll be demonstrating:
- Download PhotoRec and extract the ZIP file. Inside the folder, you’ll find qphotorec_win.exe for Windows. Double-click the file to launch the application.
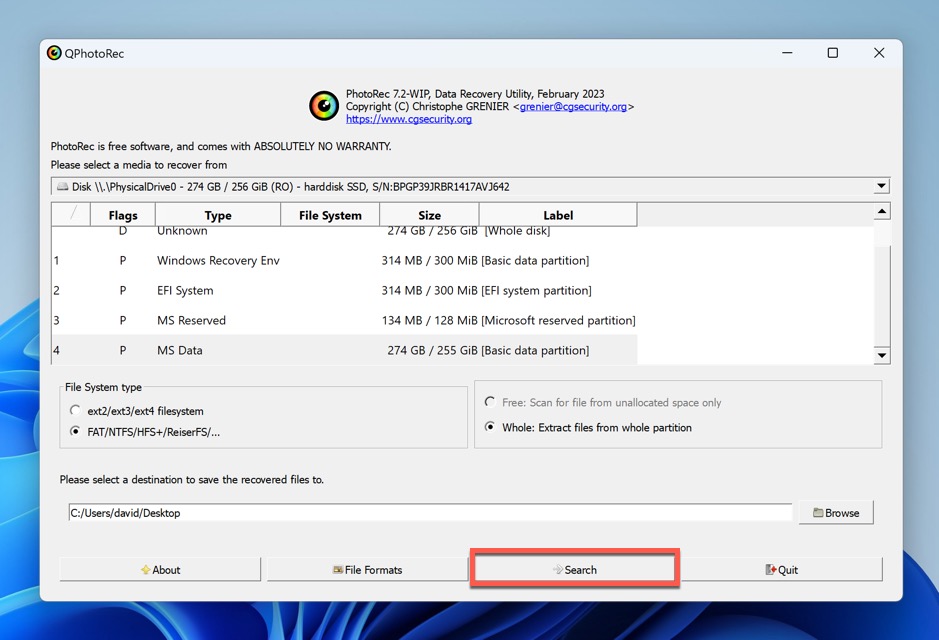
- Select the partition you want to recover, specify which file system the partition used before it became RAW, and select a destination to save the recovered files to. Notice that QPhotoRec doesn’t give you an option to choose the files you want to recover. You can only select file formats to include in the search. As such, it’s necessary to have enough free storage space on the target device.
- Click the Search button to start the data recovery process.
The recovered files won’t have their original names, and they will be all placed on a single pile, so it might take you a while to go through them, but it’s always better to have your data back in any form than to lose it permanently.
Method 3: Enlist Professional Help From Data Recovery Services
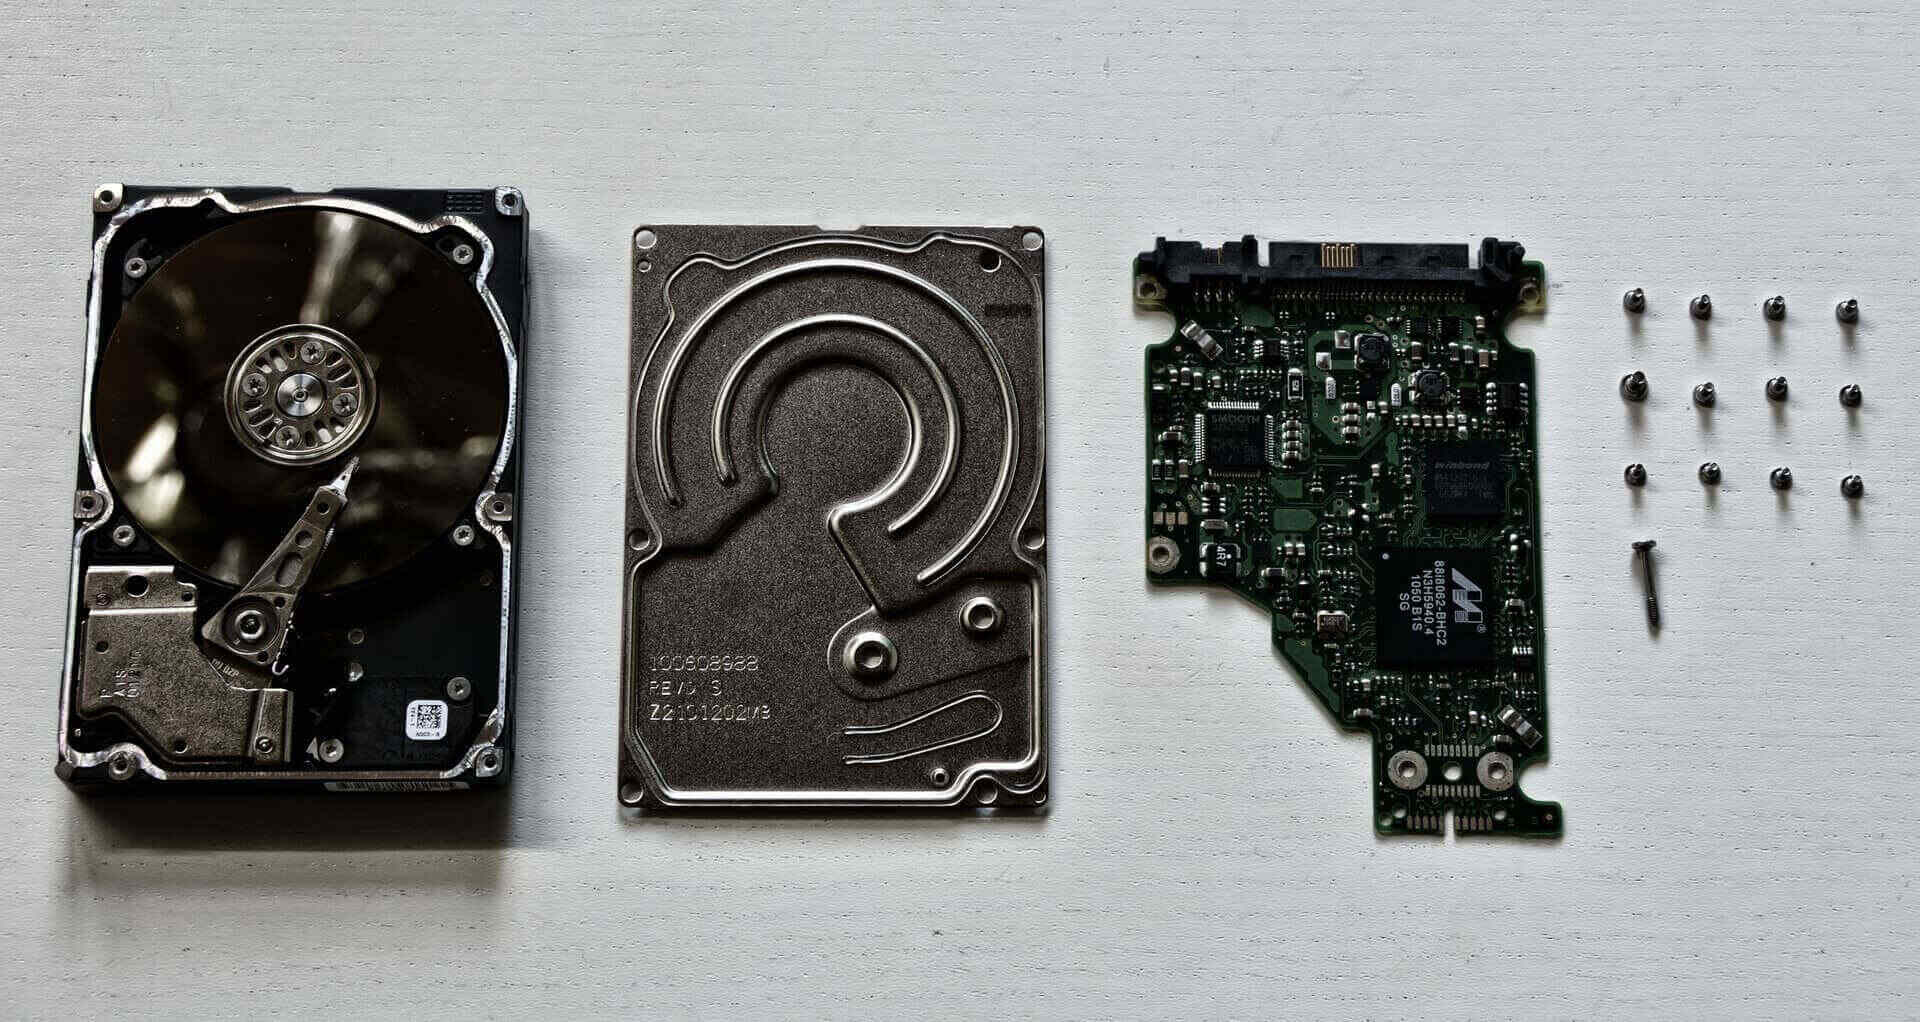 If the files on the RAW hard drive mean a lot to you, then you should consider paying professionals to recover them for you. That way, you won’t risk making a beginner mistake and making it impossible to get your files back. Most data recovery centers offer a free evaluation, and they charge only for the data they actually manage to recover, so you don’t need to worry about having to pay hundreds of dollars for nothing. To get started, you simply need to pack your RAW hard drive and ship it to a data recovery center of your choice.
How to Fix RAW Partition
Data recovery solves only half the problem—you still need to address the underlying issue that caused the RAW state in the first place. The methods below will help you restore your storage device to proper working condition so you can return to normal use. Again, start with the first method and continue from there unless you have a good reason to tackle them in a different order (maybe you’ve already tried some).
Fix 1:Attempt to Rewrite Partition Table Using TestDisk
If you’ve tried the second data recovery method (PhotoRec), then you already have TestDisk downloaded on your computer because the two are distributed in the same archive, and you can use it to restore the partition table on the RAW disk.
Just like PhotoRec, TestDisk doesn’t feature a graphical user interface, but the process is straightforward, so you don’t have anything to worry about as long as you follow these steps:
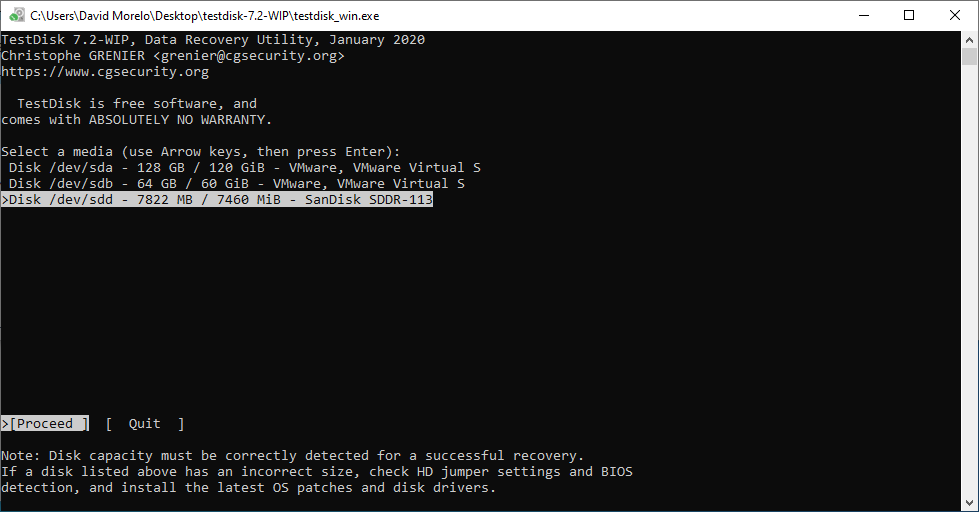
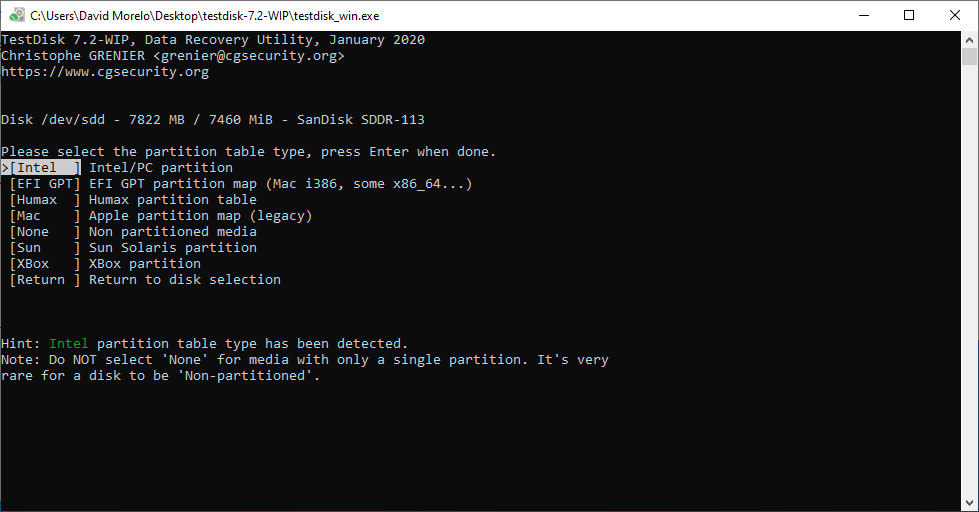
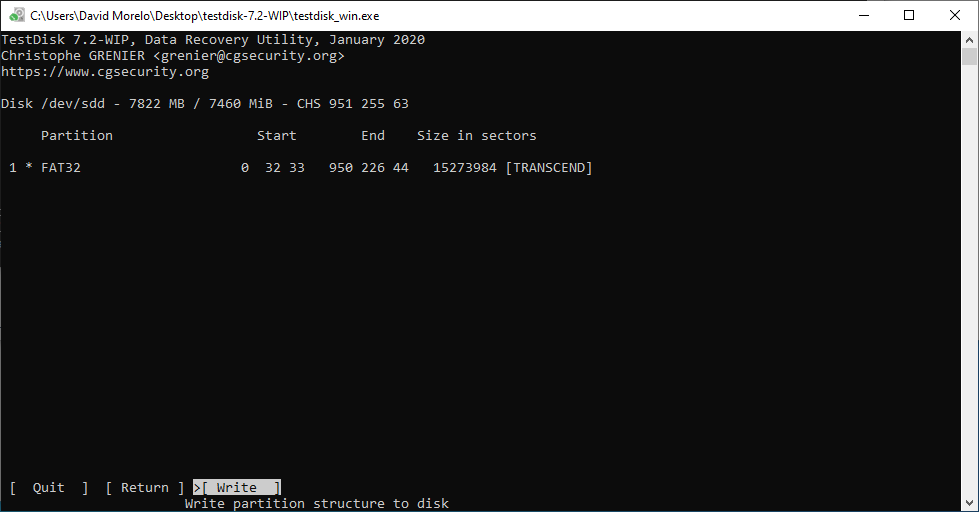
- Download TestDisk directly from its official website and launch the testdisk_win.exe file.
- Select Create to create a new log file.

- Select the storage device with the deleted partition.
- Select the partition table type.
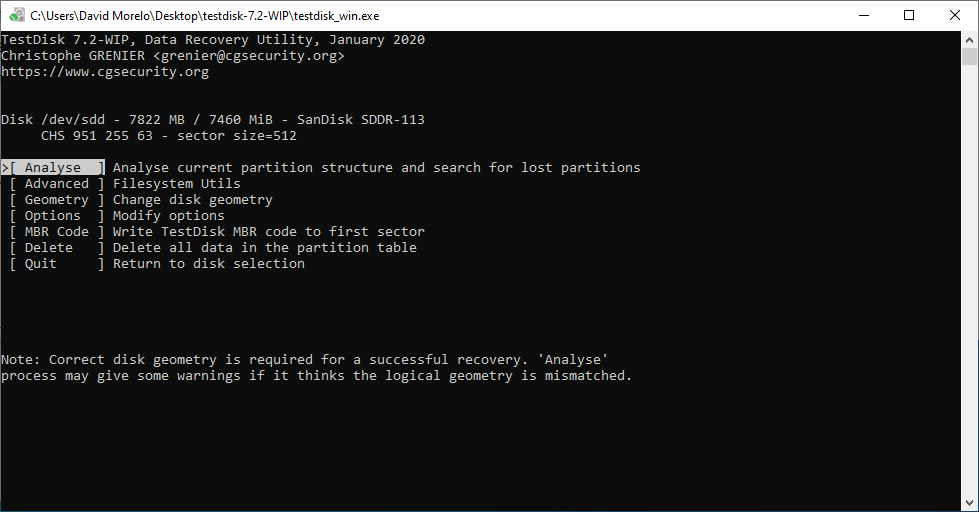
- Press Enter to analyze the current partition structure and search for lost partitions.
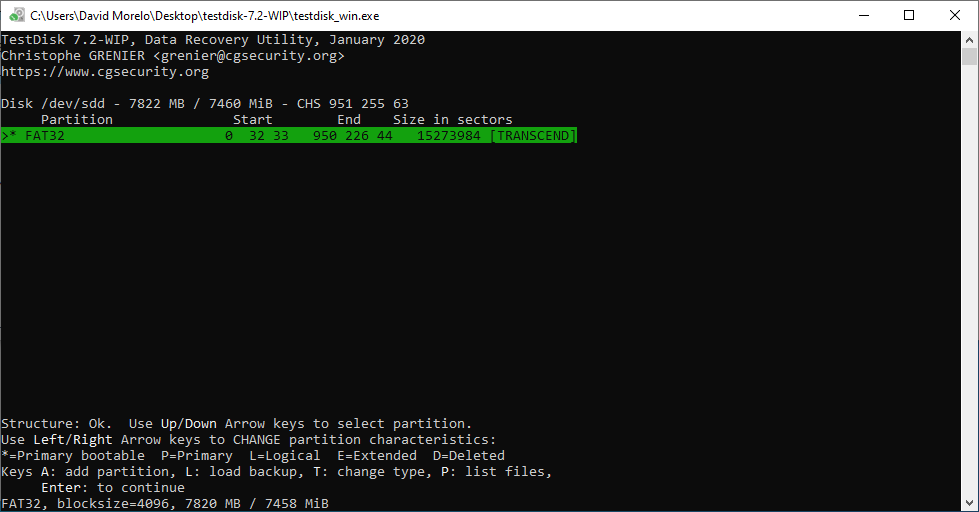
- Perform a Quick Search for the deleted partition.
- (Optional) Perform a Deeper Search to find deleted partitions that Quick Search wasn’t able to recover.
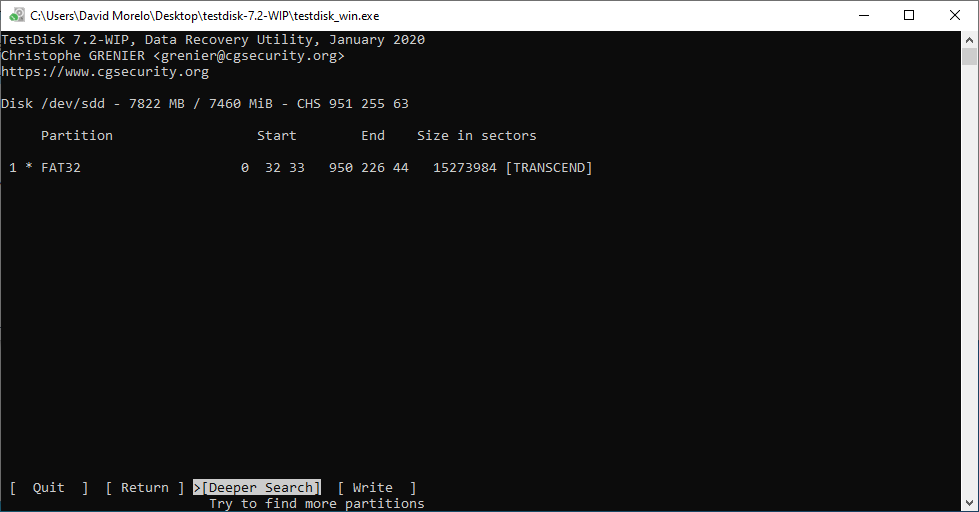
- Write the new partition structure.
TestDisk is compatible with Windows, macOS, and Linux, and the application is completely free with no limits or hidden costs.
Fix 2: Format Partition
Formatting to fix a RAW partition is a straightforward method that’s most suitable for users who:
- Don’t have important data on the partition
- Have a backup copy of the inaccessible data
- Managed to recover the data using a software application like Disk Drill
You can format a storage device on Windows using several different methods, but your best option when dealing with a RAW hard drive is the built-in disk management tool, which, unlike File Explorer, lists RAW storage devices:
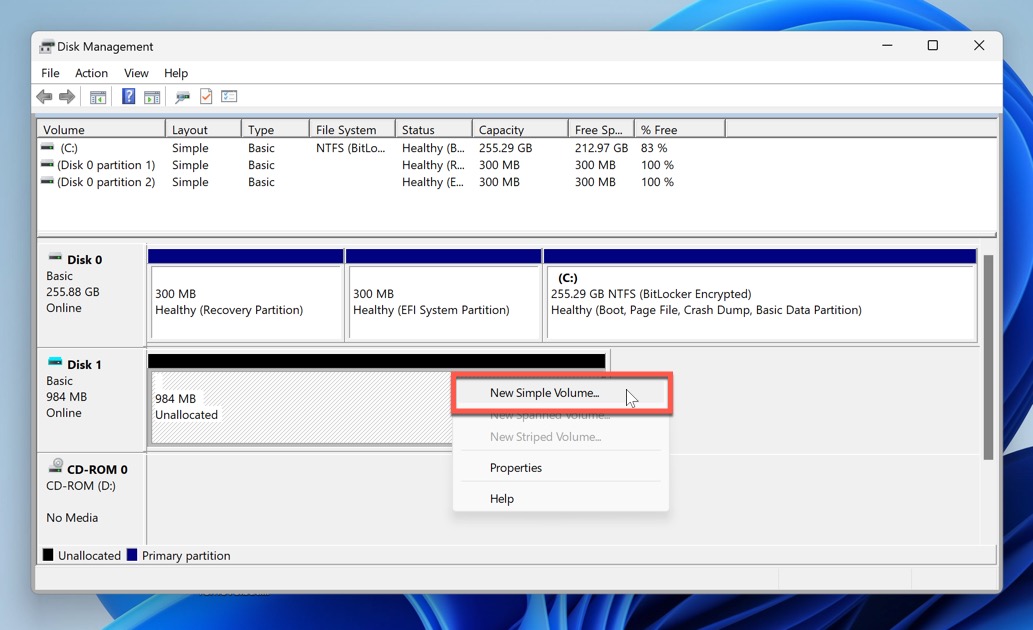
- Press Win + X on your keyboard and select the Disk Management tool.
- Locate the RAW partition you wish to format.
- Right-click on the RAW partition and choose the New Simple Volume option.

- Go through the new volume creation wizard and select a suitable file system for the partition (NTFS in most cases).
- Click the Finish button to close the wizard. Your RAW partition should be accessible again.
Fix 3: Force Format Partition in Diskpart
Windows also includes a command-line tool called Diskpart that can often succeed where other formatting options fail. The Diskpart utility lets you force a format operation on RAW partitions, but it takes a few text commands to do so:
⚠️ Warning: Diskpart executes commands exactly as entered with no safeguards. A simple typo or selecting the wrong disk number can result in permanently wiping the wrong drive and all its data.
- Press Win + X on your keyboard and select Command Prompt (Admin) or Windows Terminal (Admin).
- Type
diskpartand press Enter to launch the Diskpart utility. - Type the
list diskcommand to see all connected disks. Remember the number next to the disk on which your RAW partition is located. - Select the disk with your RAW partition using the
select disk Xcommand (replace X with the actual number assigned to your disk).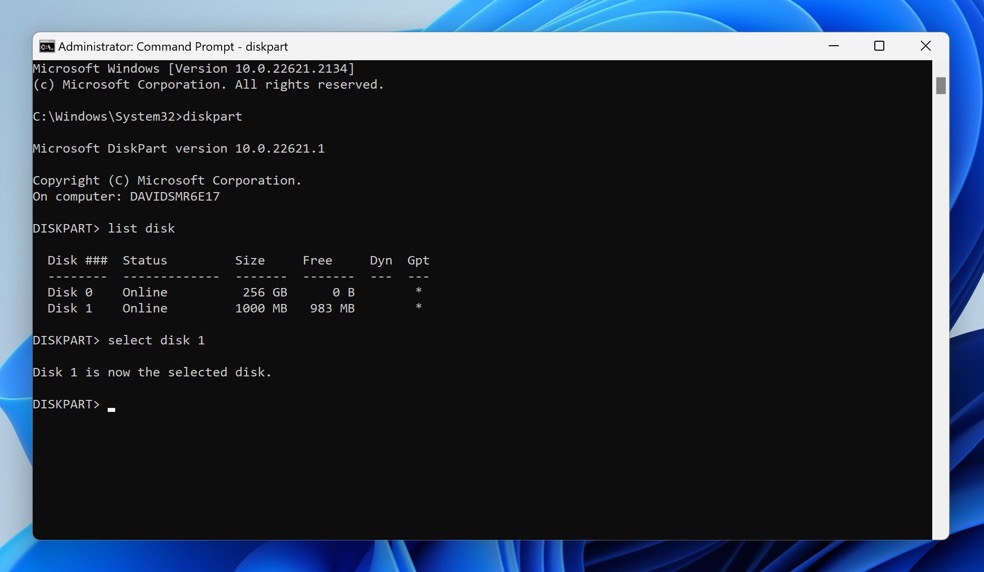
- Type
list partitionand press Enter to display the partitions on the selected disk. Identify your RAW partition and remember its number. If diskpart displays the “There are no partitions on this disk to show” message, then your disk doesn’t contain any because you’re essentially dealing with an uninitialized or corrupted disk. In such cases, you first need to initialize the disk or create a new partition before you can format it. Please check the note below for instructions on how to do so. - Type
select partition Y(where Y is the partition number) and press Enter. - Type
format fs=NTFS quick(for NTFS) orformat fs=exFAT quick(for exFAT) and press Enter to force format the RAW partition.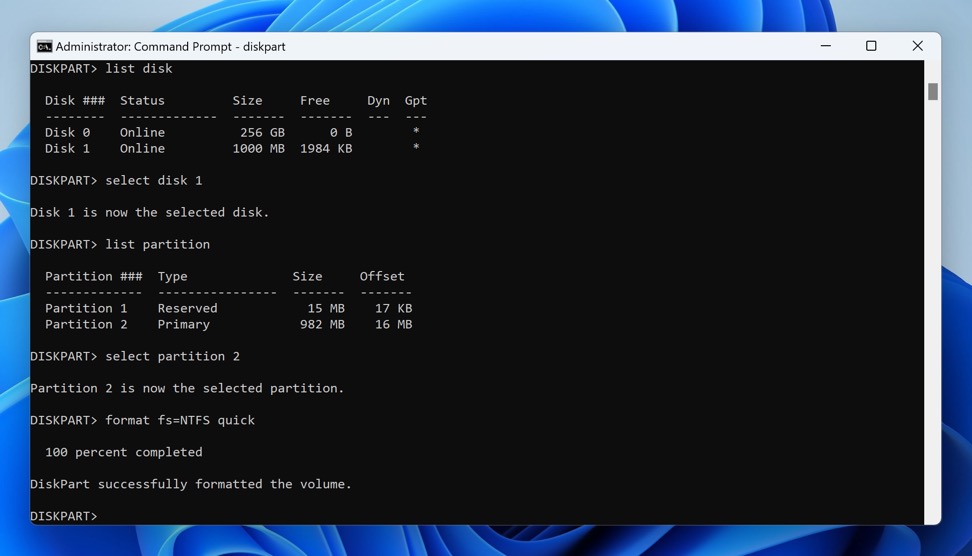
- Type
exitand press Enter to close the Diskpart utility once the process is complete.
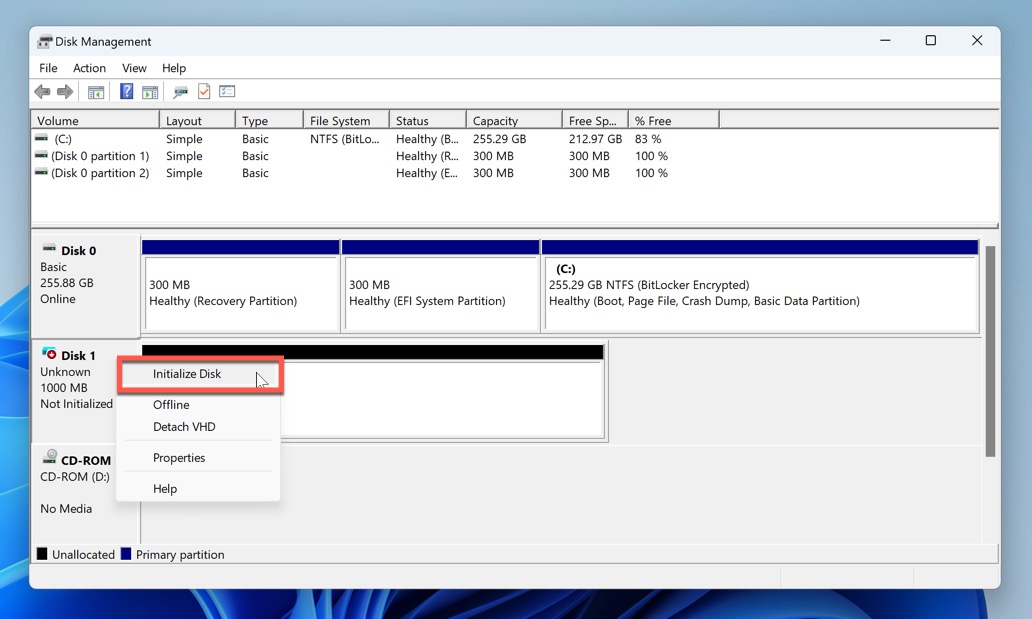
To initialize a disk that has no partitions on it, you need to:
- Press Win + X on your keyboard and select the Disk Management tool.
- Locate the disk that’s not initialized and right-click on its name in the bottom section.
- Select the Initialize Disk option, choose a partition table style (GPT is a good choice), and click OK.
Conclusion
As demonstrated in this article, it’s possible to recover data even from a RAW hard drive, but you need to equip yourself with the right knowledge and tools, namely:
- User-friendly recovery software like Disk Drill for straightforward recovery with minimal technical expertise.
- Patience and a methodical approach, as rushing the process often leads to permanent data loss.
- Remember that RAW drive recovery is a race against time—the sooner you act, the better your chances of successful recovery.
- Once your data is safely recovered, take the time to properly fix or replace the affected drive to prevent recurring issues.
You can also rest assured that professional data recovery services remain a viable option if your own recovery attempts don’t succeed.


