 Have you attempted to open a file that was perfectly fine just yesterday, only for an error message to display instead? Or maybe you can’t even find the file anywhere on your storage device because it has seemingly disappeared? I’ve been there, and after years of helping people recover corrupt files across every version of Windows, I know that corrupted file recovery isn’t as impossible as it first appears, and I’ll show you nine proven methods to restore corrupted files using both Windows’ built-in tools and specialized recovery software that actually works.
What Is a Corrupted File?
In short, a corrupted file is one that has been damaged. All of the data on your computer has a structure to it, and when this structure is damaged or interrupted, it can cause a file to become corrupt.  This can cause the file to no longer open, and your operating system may not know how to handle the file anymore. If you do try to open it, the app may crash as there is missing data that causes the program you’re using to not understand what to do with it. Understanding this damage is the first step in learning about corrupted file recovery methods that actually work.
How Do Files Get Corrupted?
Files most often become corrupted for the following reasons:
- 🔌 Power issues: Sudden outages or surges interrupt file-writing processes mid-operation, leaving files partially written and unreadable.
- 💥 Software crashes: When apps crash while saving, they leave files in an inconsistent state with some parts updated, others damaged or missing.
- 🖥️ System failures: Operating system crashes halt all processes instantly and potentially corrupt any files being accessed or modified at that moment.
- ⚠️ Bad transfers: Moving files between incompatible systems or using faulty cables can scramble data during transfer.
- 💾 Storage problems: Failing hard drives develop bad sectors where data physically can’t be written or read correctly.
- 🦠 Malware: Viruses intentionally modify file structures to damage your data.
In practice, it’s not necessary to know the exact cause of corruption because most corrupted files can be recovered the same way.
9 Best Methods to Recover Corrupted Files on Windows 10/11
I’ve arranged these nine recovery methods so that they start with the quickest, simplest solutions and progress to more advanced techniques. Through years of data recovery work, I’ve found this sequence saves the most time while maximizing your chances of success. The first few methods take just minutes and often solve the problem immediately, while the latter ones handle more complex corruption issues.
Method 1: Copy the File from Original Source
The simplest way to fix corrupted files is to copy them from the original source. Most files on your PC that aren’t system files (i.e., files that Windows adds when installed) are usually obtained from an external source and can be reobtained.
For instance, if the corrupt file you’re trying to use is a setup file for a tool you want to install, go to the tool’s website and download the setup file again. If you received the file, for instance, a movie as an mp4 file that has become corrupt, you can ask your friend for the file again.
💡 Pro tip: Verify the checksum after downloading
When re-downloading files (especially installers, archives, or large media files), I always verify the checksum to ensure the new copy isn’t corrupted. A checksum is like a digital fingerprint for files, a unique code that changes if even a single bit of data is different.
Here’s how to verify it:
- Look for MD5, SHA-1, or SHA-256 values on the download page.
- Open Command Prompt and navigate to your download folder.
- Type certutil -hashfile filename.exe SHA256 (replace filename.exe with your file).
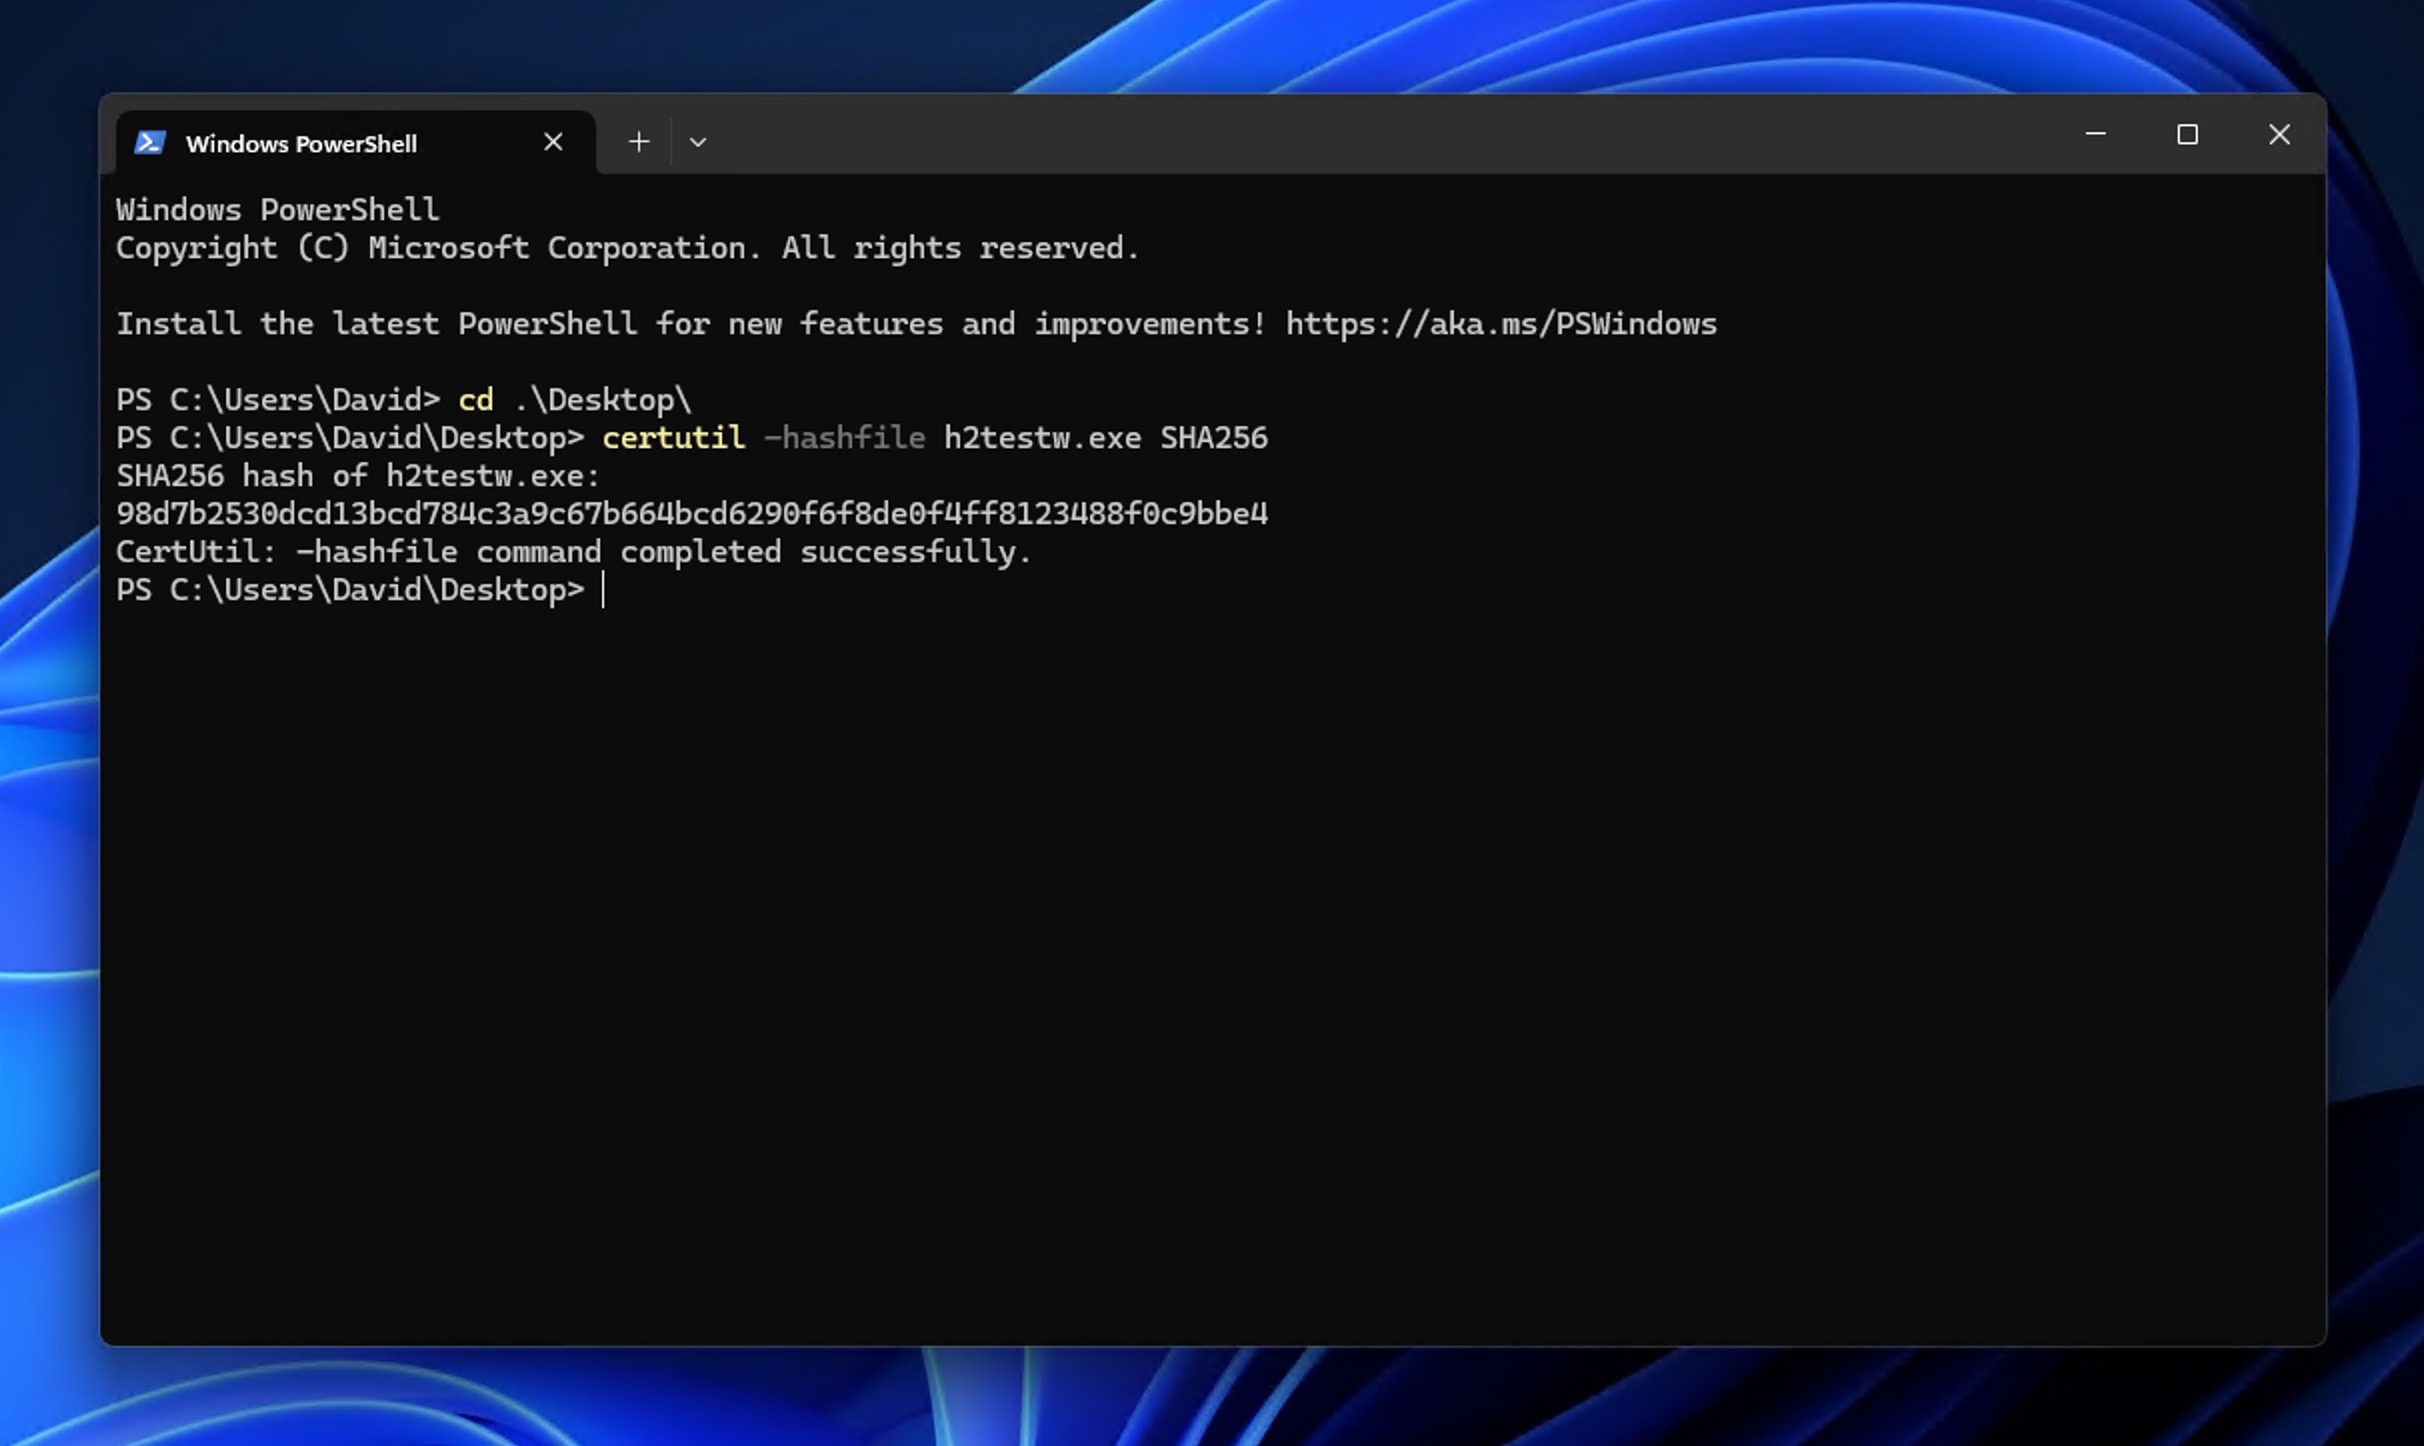
- Compare the output with the checksum on the website. They should match exactly.
If the checksums don’t match, the file is corrupted or modified, and you should download it again from a different mirror or source.
Method 2: Change the File Format
Sometimes, fixing a corrupt file is as simple as changing the file format. For instance, if you’re unable to open a Word document, converting it to a PDF can help. If your corrupt file is an image in PNG format, converting it to JPG might help recover the file.
⚠️ Important: Converting a file doesn’t actually repair the corruption. Instead, it forces the converter or application to read whatever data it can still interpret and create a new file from the readable parts.
There are several ways to change the file format. Usually, searching online for “convert (file format) to (a different file format)” will give you a list of web-based tools that can convert the file format online.
You can also convert some file formats using the tools you already have on your PC, provided you’re at least able to open the file. For instance, when a Word document becomes corrupt, some of its content may not appear, but the file will still open. You can go to File > Save as and save the file as a PDF document. 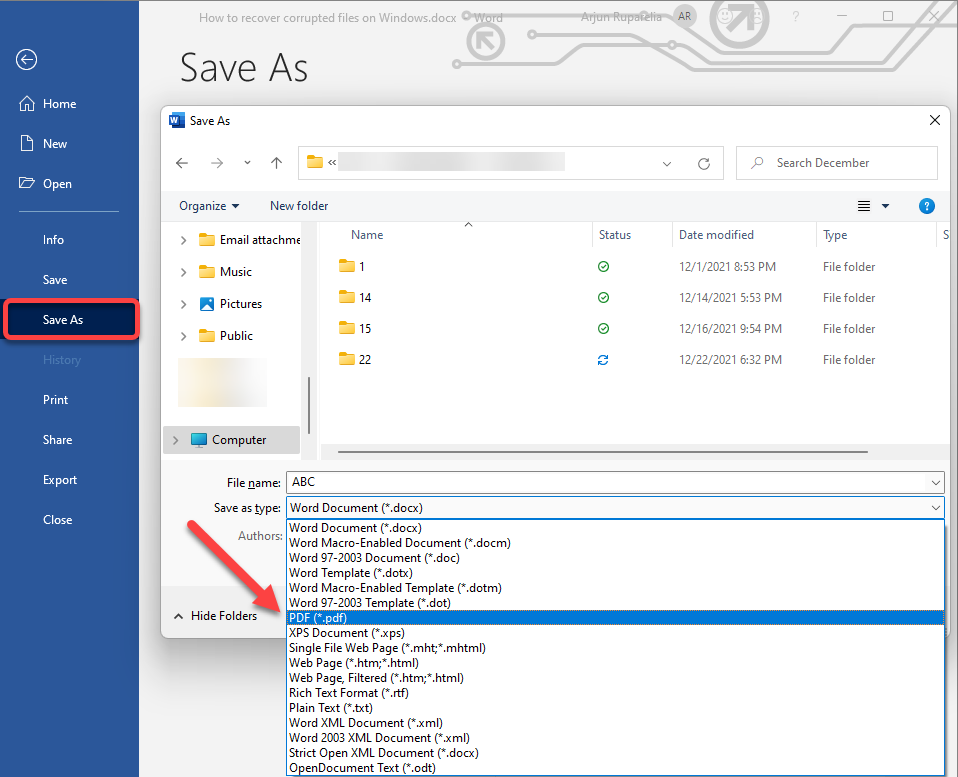
Method 3: Use AutoRecover Built-in App Solutions
Many apps these days offer built-in data protection against things such as app and computer crashes. Microsoft Office is a prime example of a software service that offers amazing protection for your data.
Since most of us use Microsoft Office, we can take a look at how to recover a corrupted file using Word. If you’re using something such as Microsoft OneDrive or Google Docs, then this most likely wouldn’t be something that you would need to consider as your data is constantly being saved via the cloud.
However, due to privacy concerns and depending on what you’re working on, you may not be able to save your data to the cloud or you may have other reasons for not doing so. In the steps below, I will go through how to recover a file from Microsoft Word but these steps will apply to most of the Microsoft Office apps and the steps shouldn’t change by much.
- Launch Word or any Office product as the steps should be nearly the same.
- Go to the navbar and choose File > Options > Save.
- Within this window, you can find the AutoRecover location for where your files are being saved to. You can also see how often AutoRecover is saving your work for you. You can note on mine, that it is saving every 10 minutes and that this is the default setting.
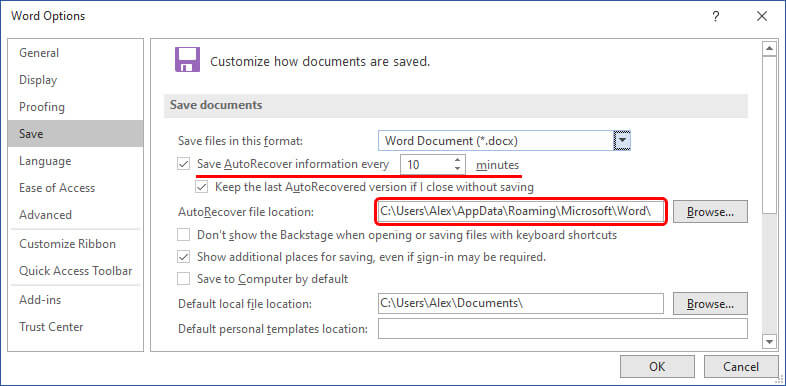
- Navigate to the AutoRecover file location shown (usually C:\Users\[YourName]\AppData\Roaming\Microsoft\Word\).
- Look for files with the .asd extension. These are your AutoRecover files that can be opened to recover your work.
📝 Note: Many applications include built-in recovery options. For example, ZIP/RAR archivers like WinRAR and 7-Zip offer repair archive functions for damaged compressed files, Adobe Creative Suite apps maintain autosave folders for crash recovery, and video editors like DaVinci Resolve create automatic project backups to protect against data loss.
Method 4: Recover Corrupted Files Using Previous Versions
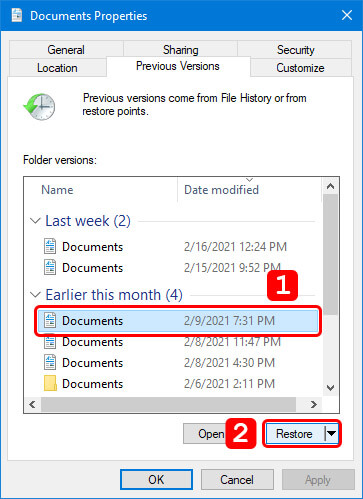
Previous versions are copies of files that Windows creates as part of a backup or restore point. Previous versions are sometimes also referred to as shadow copies, and they can help you restore corrupted file to an earlier, working state.
⚠️ Important: Previous Versions aren’t enabled by default. This feature only works if you have File History, Windows Backup, or System Protection (Shadow Copies) turned on, or if a restore point was created before the corruption occurred. Without these features enabled, there won’t be any previous versions available.
Here’s how to check for and recover previous versions:
- Find the folder or file that you want to restore to a previous version.
- Right-click on the file or folder and select Restore previous versions.
- If versions are available, you’ll see a list with dates. Select the version you want.
- Click Open first to inspect the file and make sure it’s the right version.
- If it looks good, click Copy to save it to a new location (this is safer than clicking Restore which overwrites your current file).
If the Previous Versions tab is empty, it means:
- System Protection/File History wasn’t enabled before the corruption occurred.
- The file is stored in a location not included in backups (like external drives or certain system folders).
- No restore points were created recently.
- The feature was disabled to save disk space.
To enable this feature for future protection, go to Control Panel > System > System Protection and turn on protection for your drives so that you can recover any file corrupted by crashes or malware or anything else with ease.
Method 5: Recover Corrupted Files From a Windows Backup
After years of being in the computer industry, I can attest that backing up your computer is one of the best things that you can do for your data. As a Windows user, you already have a solid backup solution installed on your computer, and it’s called simply Windows Backup.
⚠️ Important: Windows Backup only works if you had backups enabled and running BEFORE the corruption occurred. If you haven’t been backing up your files, this method won’t help, and you can skip to Method 6.
Here’s how to check for and restore from Windows backups to fix a corrupt file:
- Open Settings (Windows key + I).
- Navigate to Update & Security > Backup (Windows 10) or System > Storage > Advanced storage settings > Backup options (Windows 11).

- If you see Back up using File History with an ON status, you have backups available.
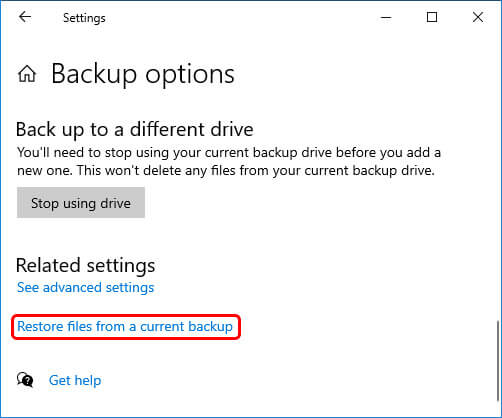
- Click More options and then Restore files from a current backup.
- Use the arrows to navigate to the date before your files became corrupted.
- Select the files you want to restore and click the green restore button.
- Choose whether to replace the existing files or save to a new location (I recommend saving to a new location first to verify the files work).
Method 6: Restore Corrupted Files From Cloud Backups
Cloud storage services like OneDrive and Google Drive automatically save version history of your files, so they’re excellent for recovering corrupted data. Of course, they are a possible answer to the question of how to recover corrupted files only if the files were already synced or saved in the cloud before the corruption occurred.
Even if you’re not sure whether you can perform corrupt file recovery from the cloud, it’s worth trying since it takes just a few minutes to check.
For OneDrive:
- Open OneDrive in your web browser and sign in.
- Navigate to the corrupted file (don’t open it).
- Right-click the file and select Version history.
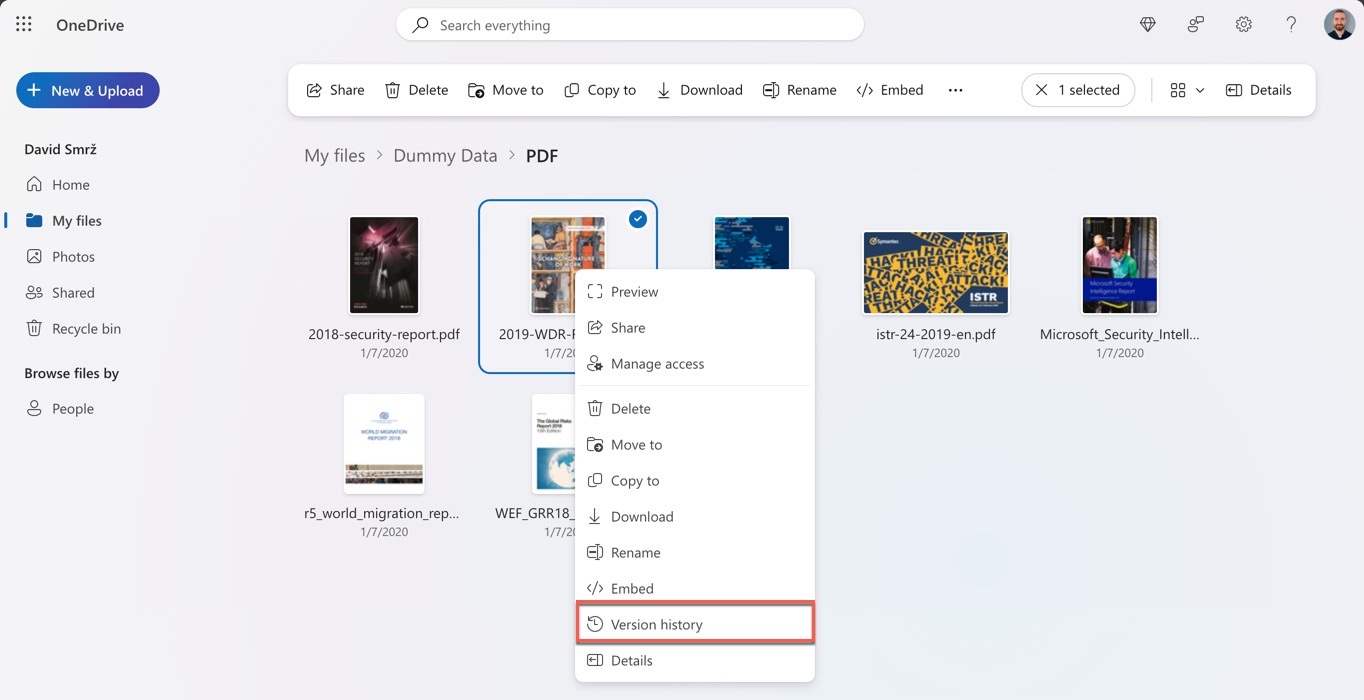
- Review the list of previous versions with timestamps.
- Click the three dots next to an older version and select Restore or Download to save it separately.
- The file will be restored to its previous, working state.
For Google Drive/Docs:
- Open Google Drive and locate your corrupted file.
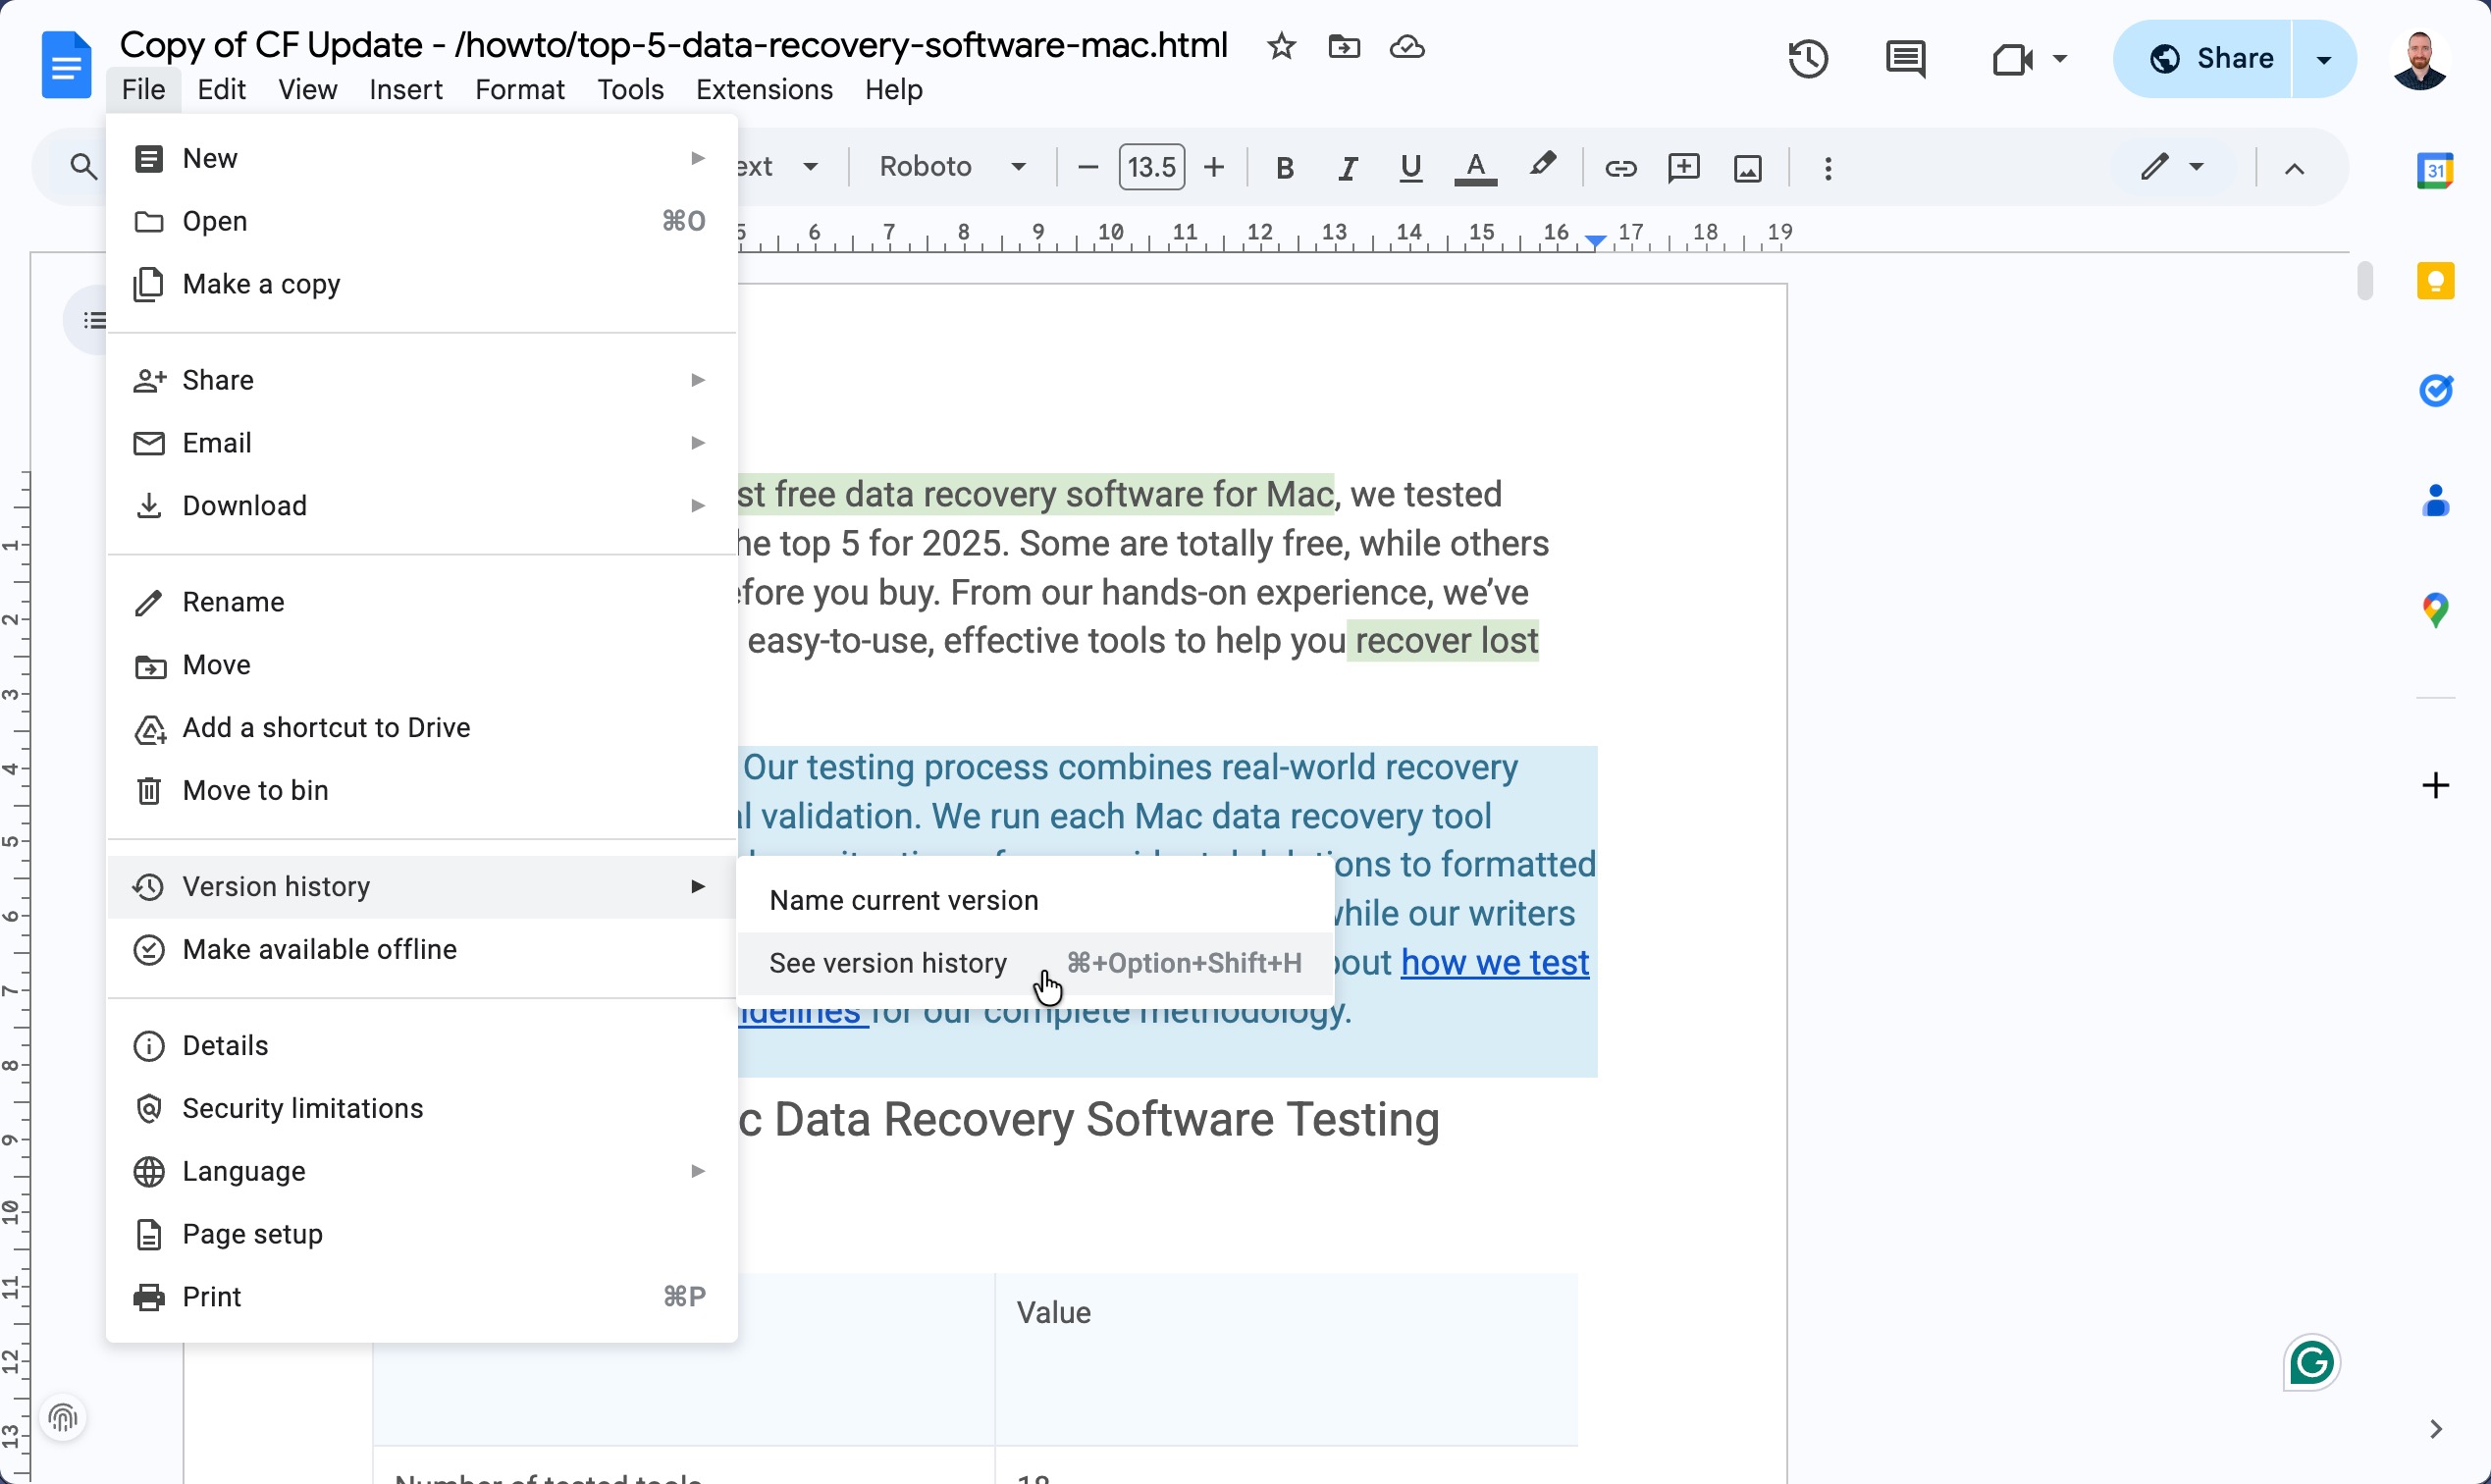
- Right-click the file and select Manage versions (for uploaded files) or open the document and go to File > Version history > See version history (for Google Docs/Sheets/Slides).
- Browse through the available versions on the right sidebar.
- Click on a version from before the corruption occurred to preview it.
- Click Restore this version or use the three-dot menu to Make a copy.
Both services typically keep versions for 30 days (longer for Google Workspace users). The more frequently you save or the file auto-saves, the more restore points you’ll have available.
Method 7: Use File Repair Software
There’s no single “universal” repair tool that can fix every type of corrupted file. The right repair solution depends entirely on what kind of file you’re dealing with. For example, documents need different treatment than videos, images require different algorithms than archives, and so on.
For media files specifically, I recommend trying Clever Online Video Repair first. It’s completely free, works directly in your browser without any installation, and handles the most common video corruption issues remarkably well. I’ve tested it with everything from damaged GoPro footage to corrupted wedding videos, and the success rate genuinely surprised me.
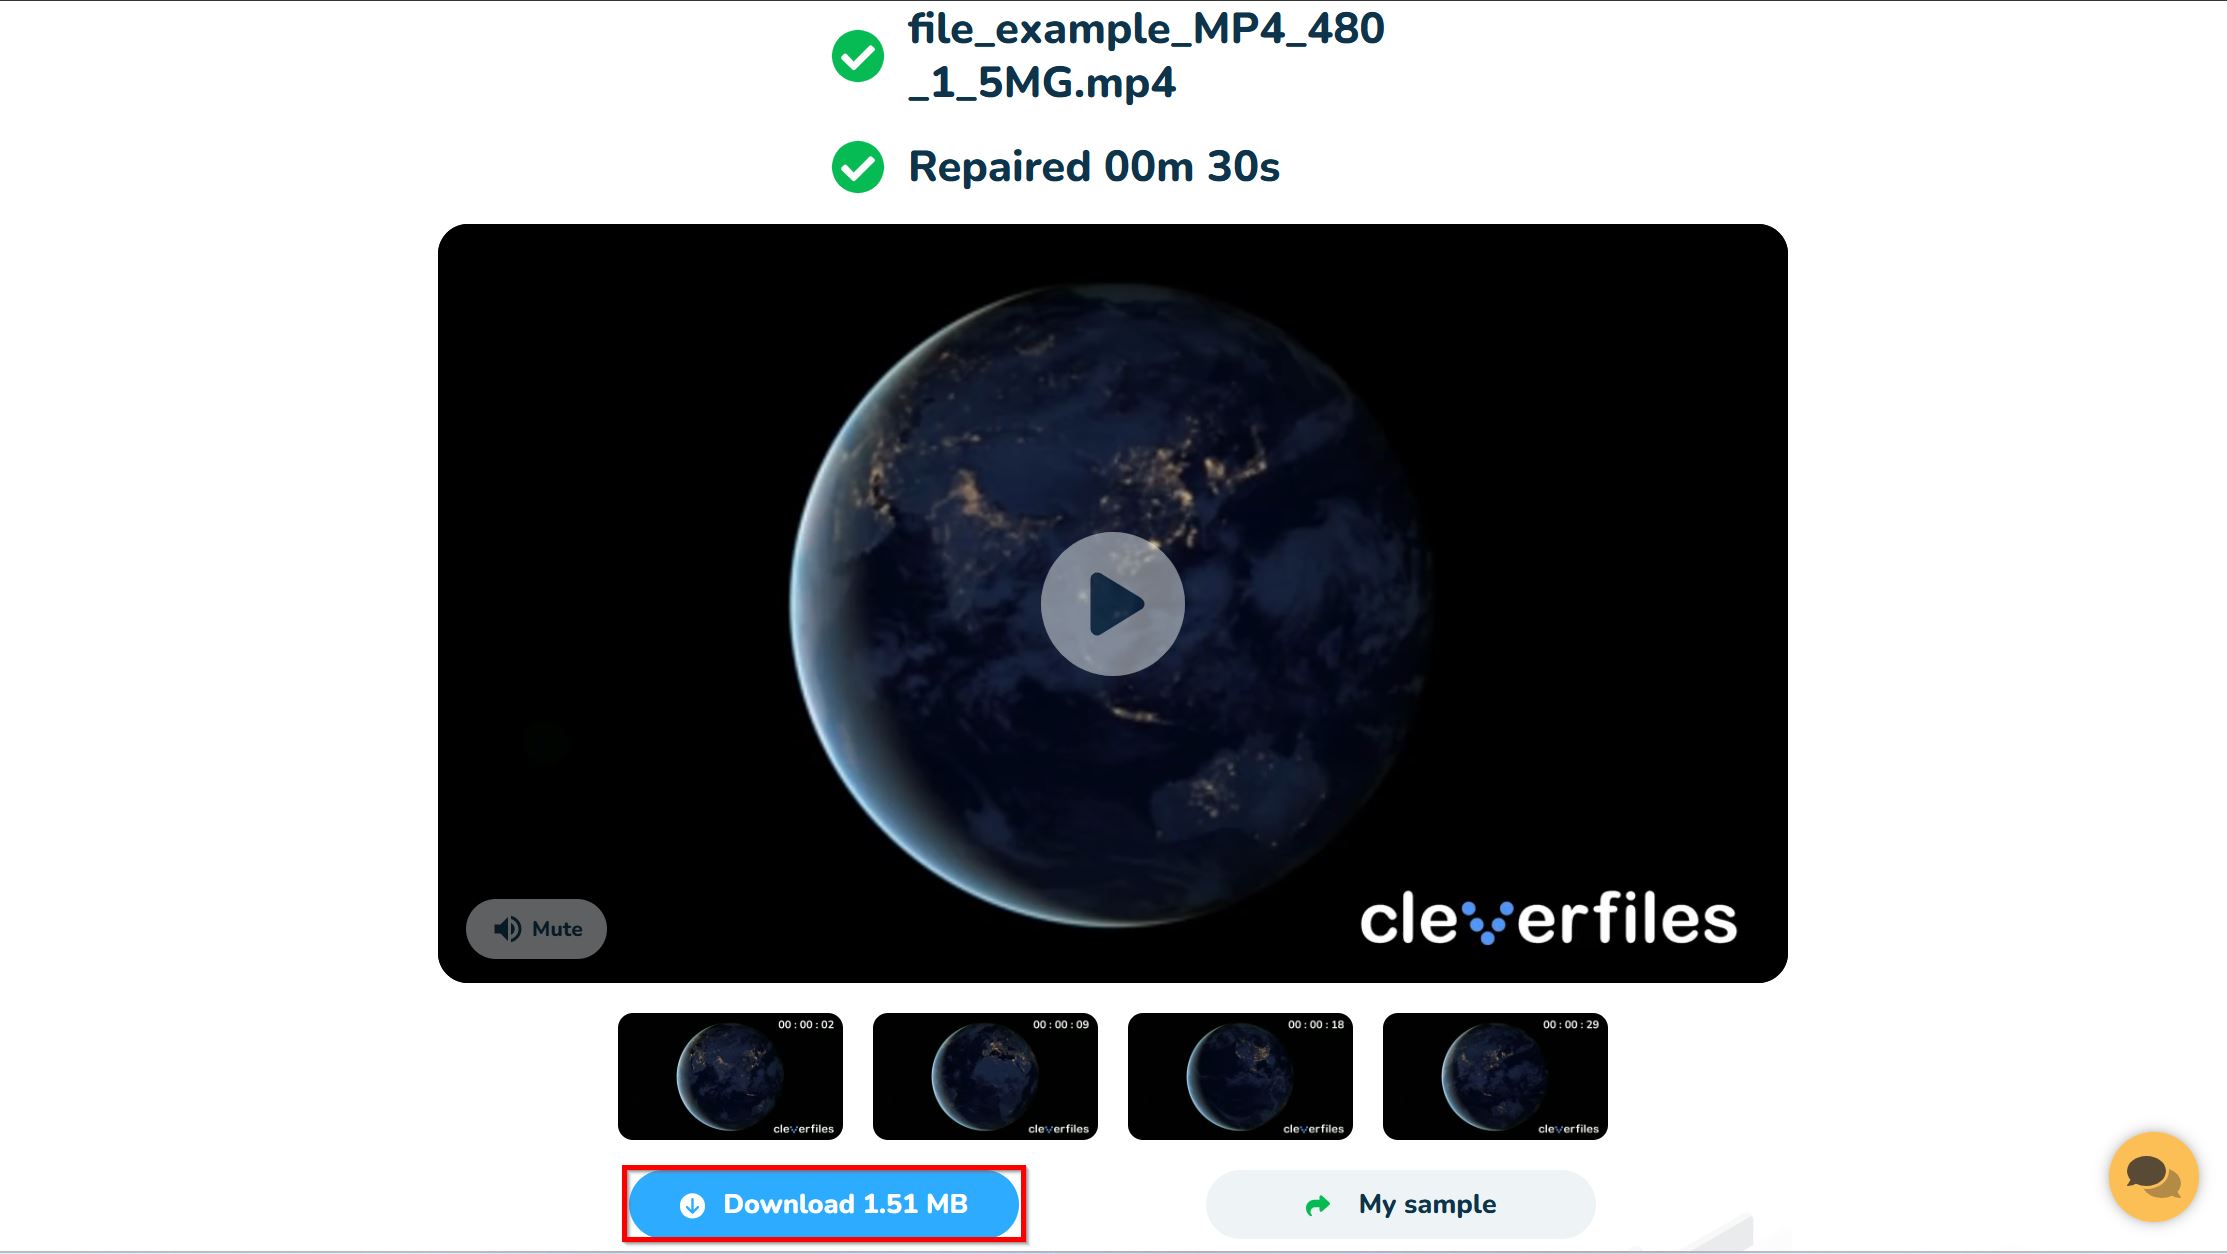
Here’s how to use Clever Online Video Repair to repair corrupted video files:
- Visit the Clever Online Video Repair website using any modern browser.
- Drag and drop the file you want to repair onto the designated area or click Choose file to open the Windows file picker.
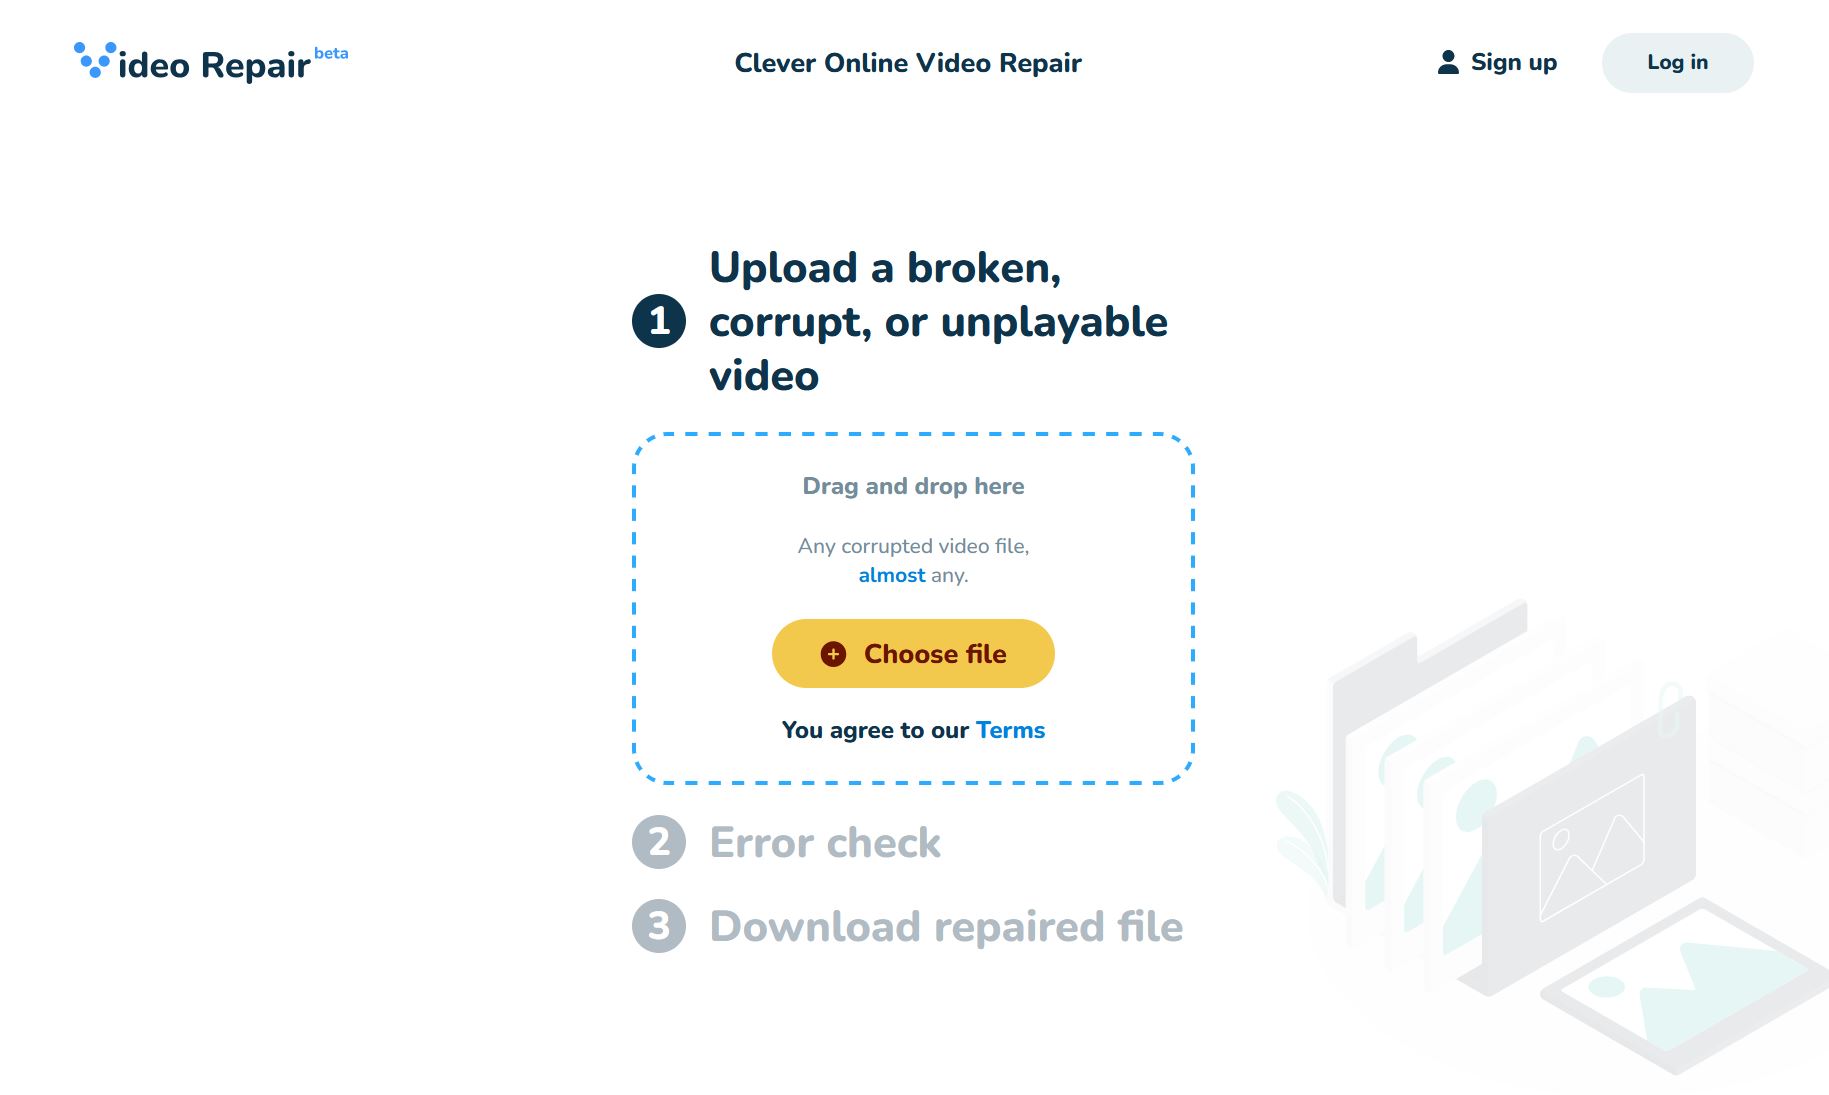
- Wait until your video file is uploaded and analyzed.
- If successfully repaired, download the repaired version of the video otherwise, you can provide a sample file recorded by the same camera on the same settings. The sample file will help the tool repair your video.
Success depends heavily on the extent of corruption and what data is actually missing. If large chunks of data are overwritten, even the best repair tools won’t perform miracles (it would be like trying to complete a jigsaw puzzle while missing half the pieces).
Method 8: Recover Corrupted Files Using Data Recovery Software
Data recovery software can absolutely help with corrupted files, but it needs to be sophisticated enough to handle the corruption properly. If the recovery tool uses basic algorithms, it might retrieve your file exactly as it is now: corrupted, broken, and impossible to open.
This happens because recovering corrupted files is actually incredibly complex for the following reasons:
- Fragmentation: Your files are scattered across multiple locations on the disk, and some recovery tools can’t properly reassemble all the pieces in the right order.
- Missing metadata: File headers (the part that tells programs how to read the file) get damaged or lost, leaving the data unreadable even if it’s technically there.
- Basic recovery algorithms: Many tools use simple “undelete” functions that grab whatever data they find first, missing crucial pieces stored elsewhere.
So, unless you use a data recovery software tool that can handle corrupted files, your recovery chances are slim. My recommendation is Disk Drill because of its Advanced Camera Recovery (ACR) module.
The ACR module is specifically engineered to recover a corrupted file from cameras like GoPro, DJI, Canon, Sony, and over 150 other models by properly putting together countless tiny video fragments. ACR actually understands how modern cameras write data and intelligently reconstructs the fragmented video, audio, and metadata streams into smooth, fully playable files.
Here’s how to use Disk Drill when other recovery attempts have failed:
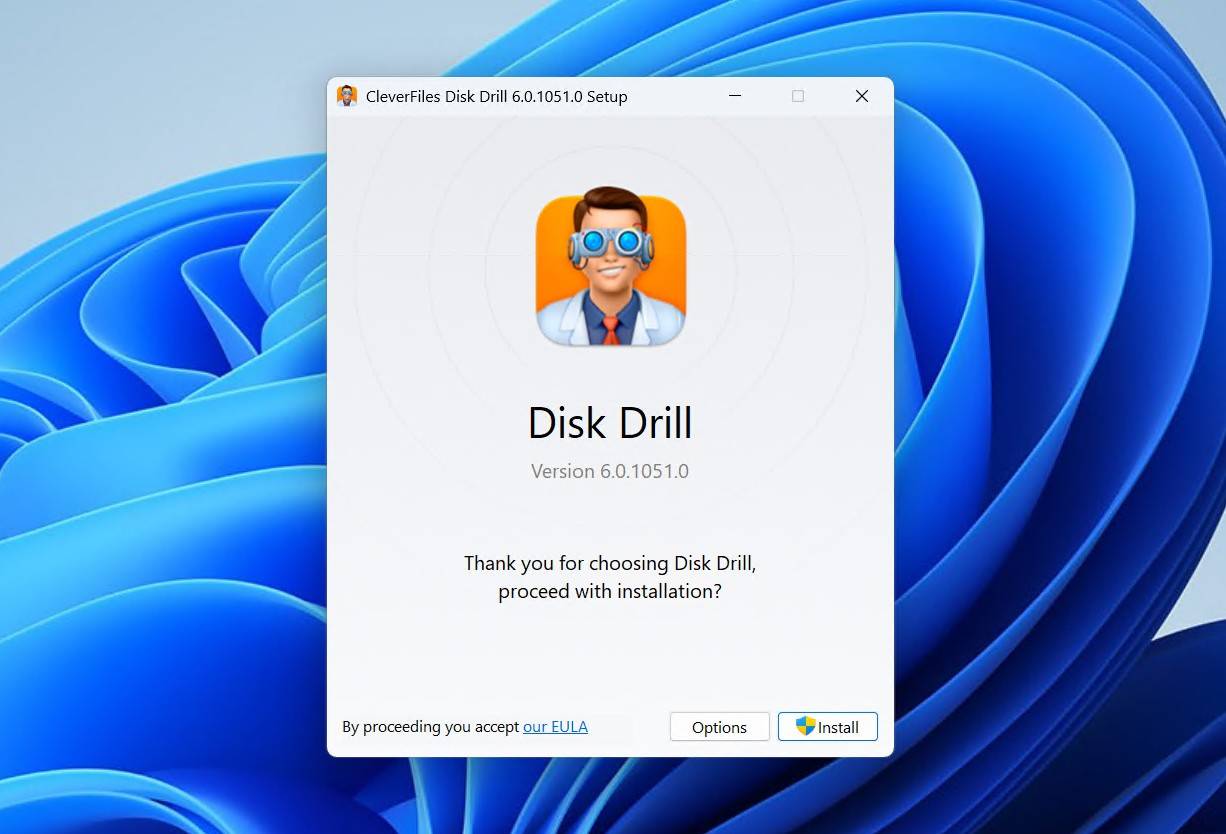
- Download and install Disk Drill for Windows. The free version lets you scan and preview files before committing to recovery.
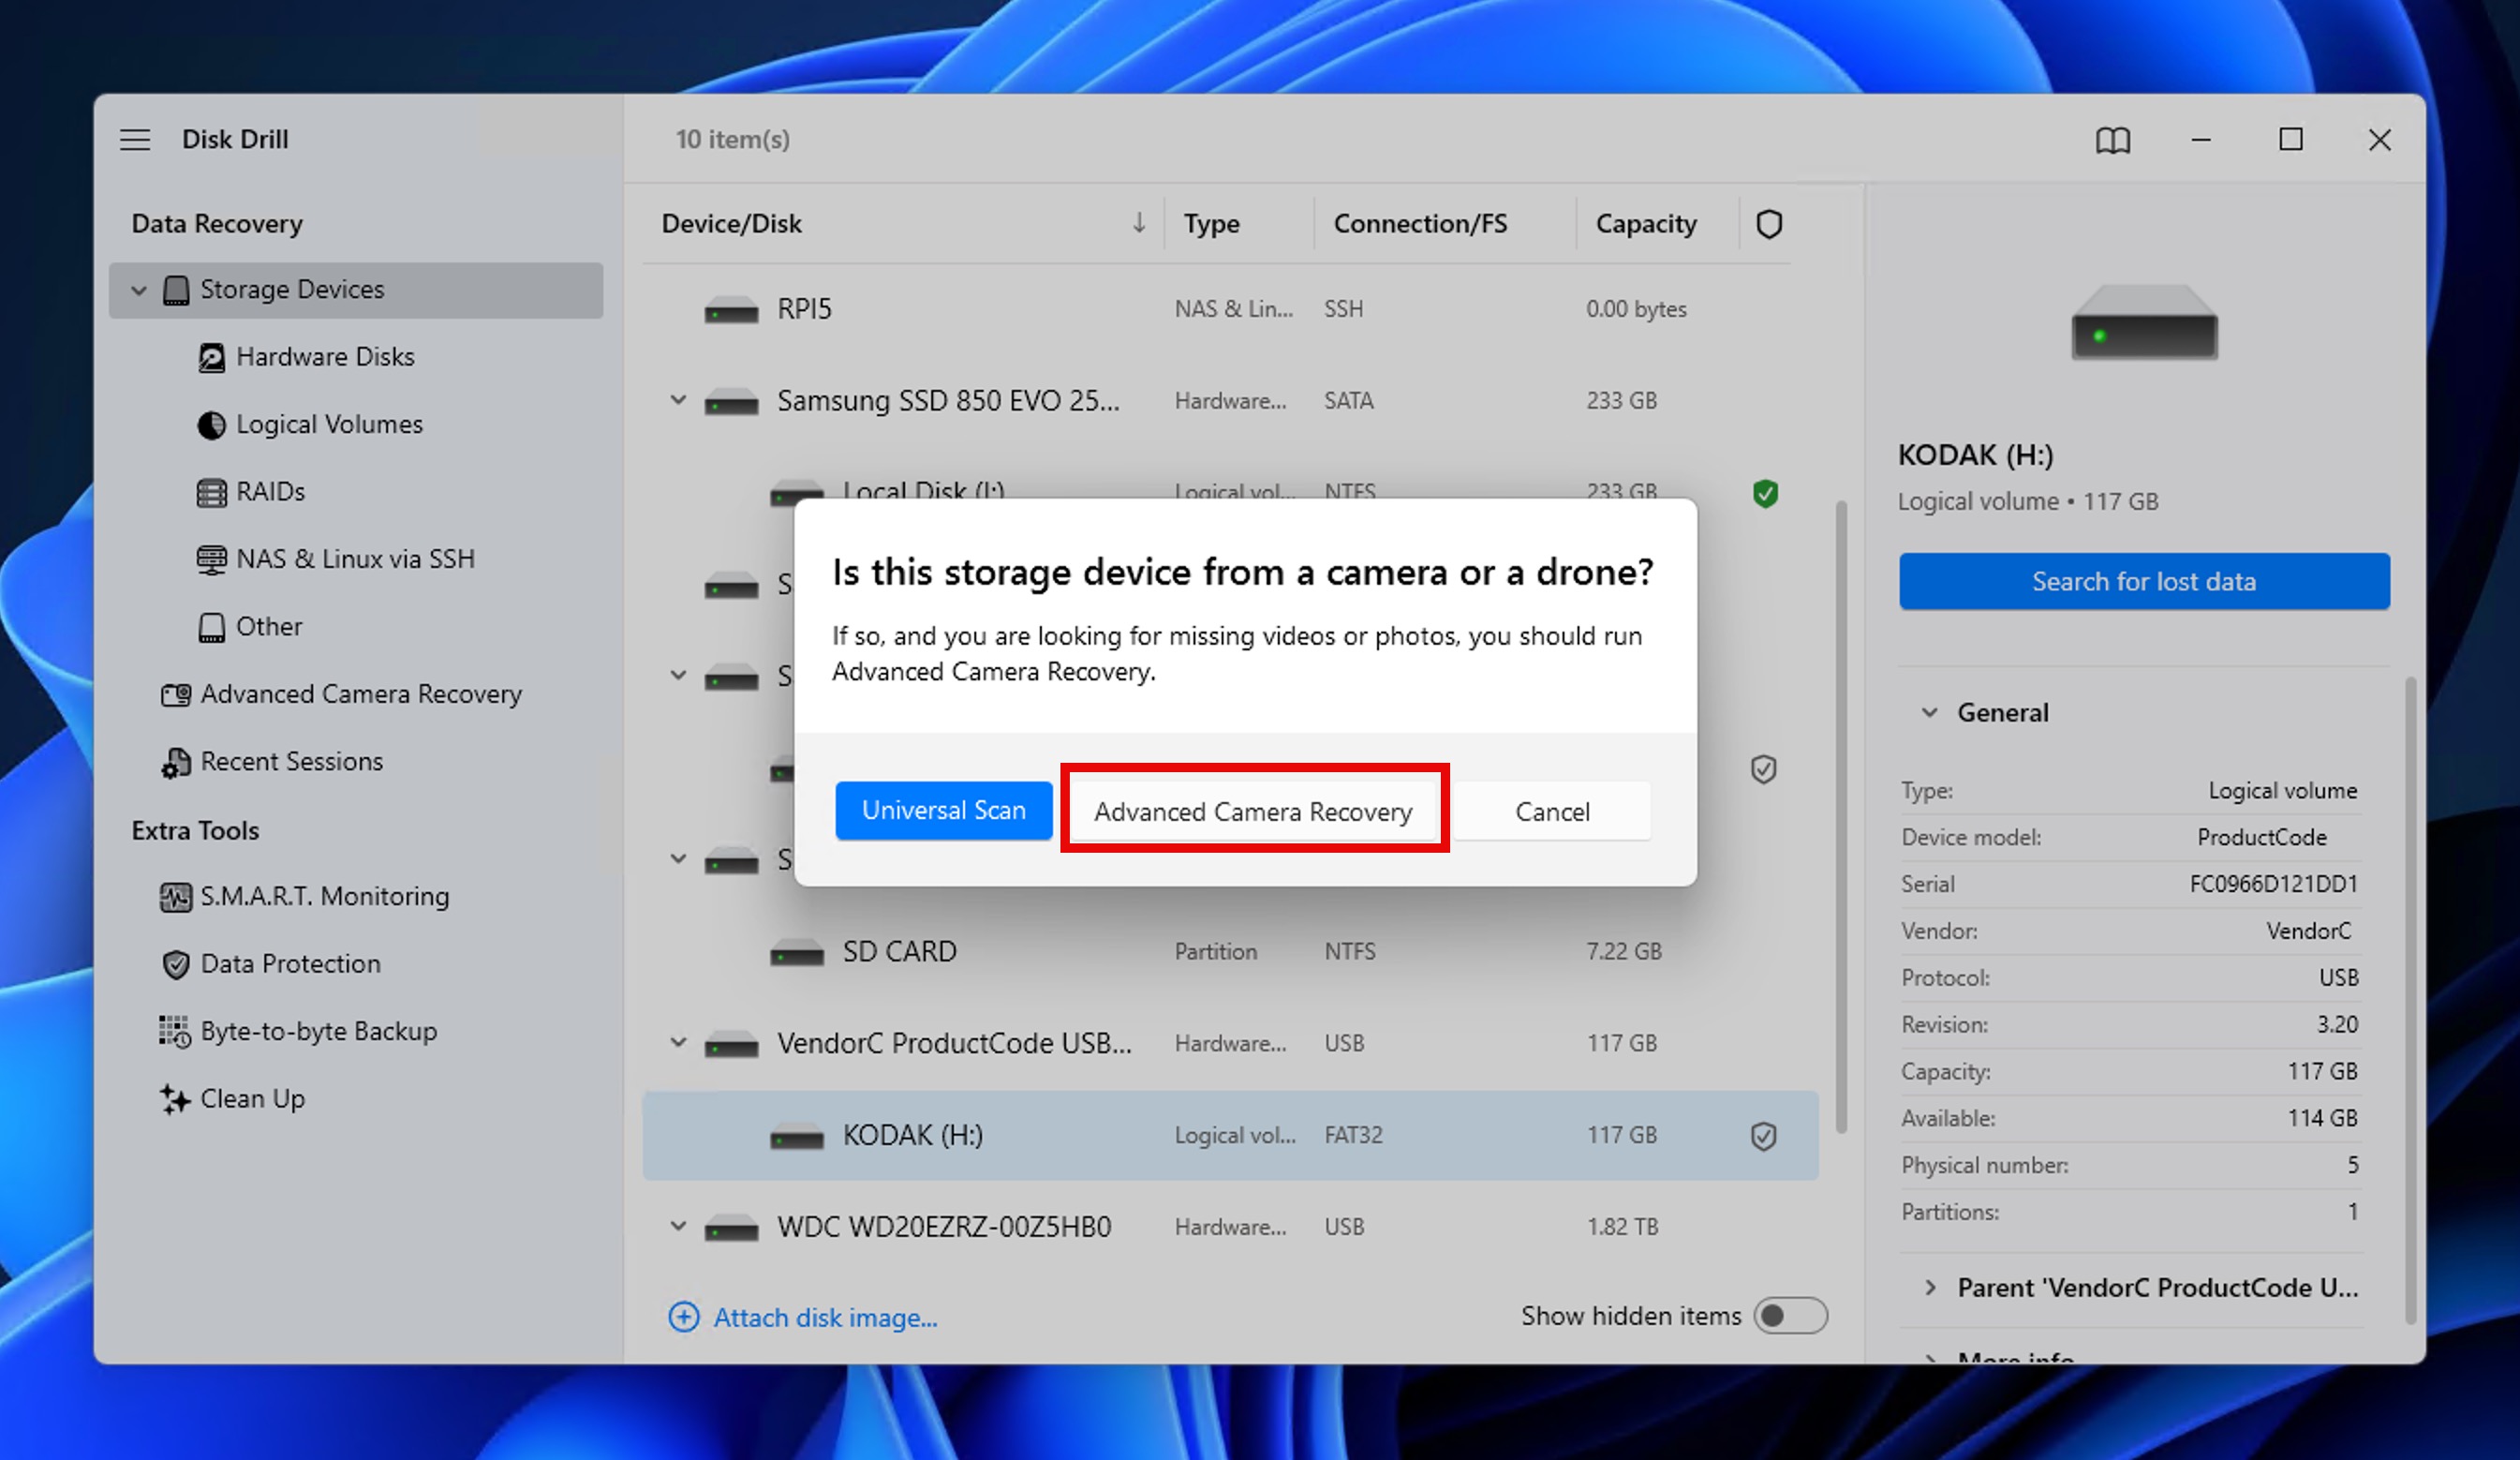
- Select your drive from the main interface. If you’re recovering camera footage, connect the SD card directly to your computer (not through the camera).

- Click the Search for lost data button and choose your scan method. For corrupted camera videos, select Advanced Camera Recovery. For other file types, the Universal method works great.
- Let the scan complete. This might take a while depending on your drive size. Disk Drill will dig deeper than basic recovery tools, searching for file fragments that others miss.
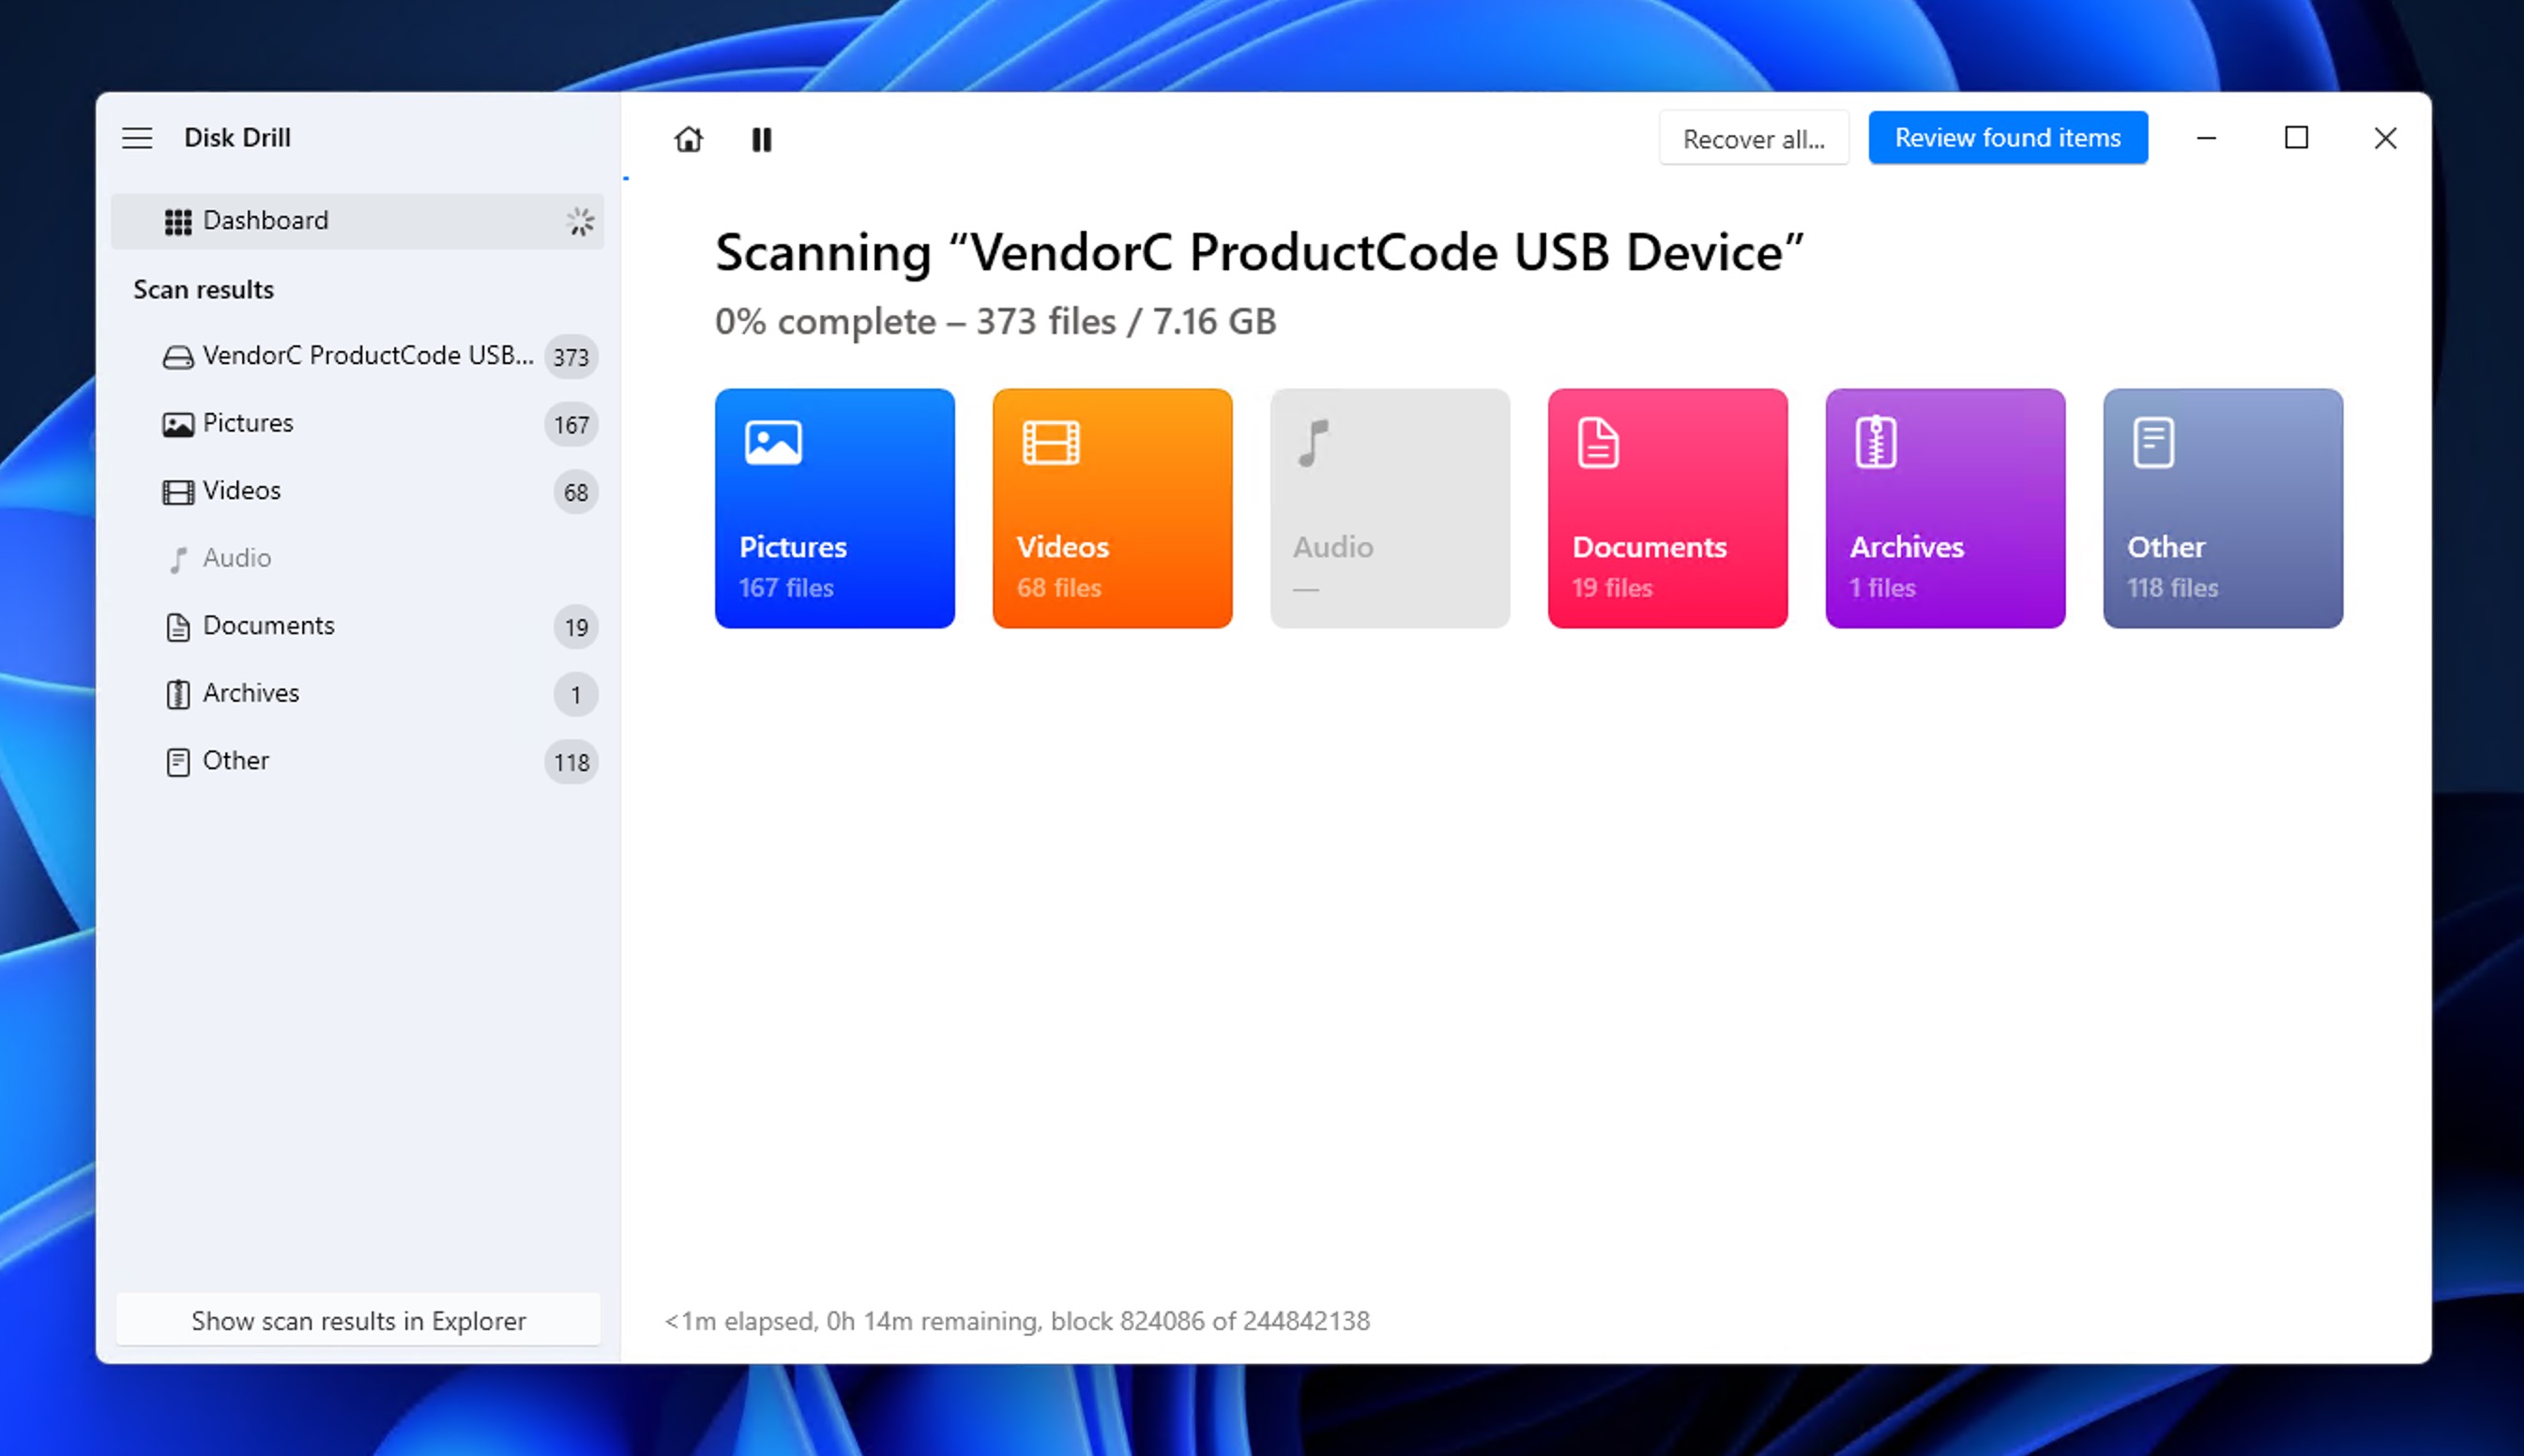
- Preview your files before recovery. If you can preview the file properly in Disk Drill, it means the software has successfully reconstructed it. To quickly locate the most important files, you can use the file type and other filters.
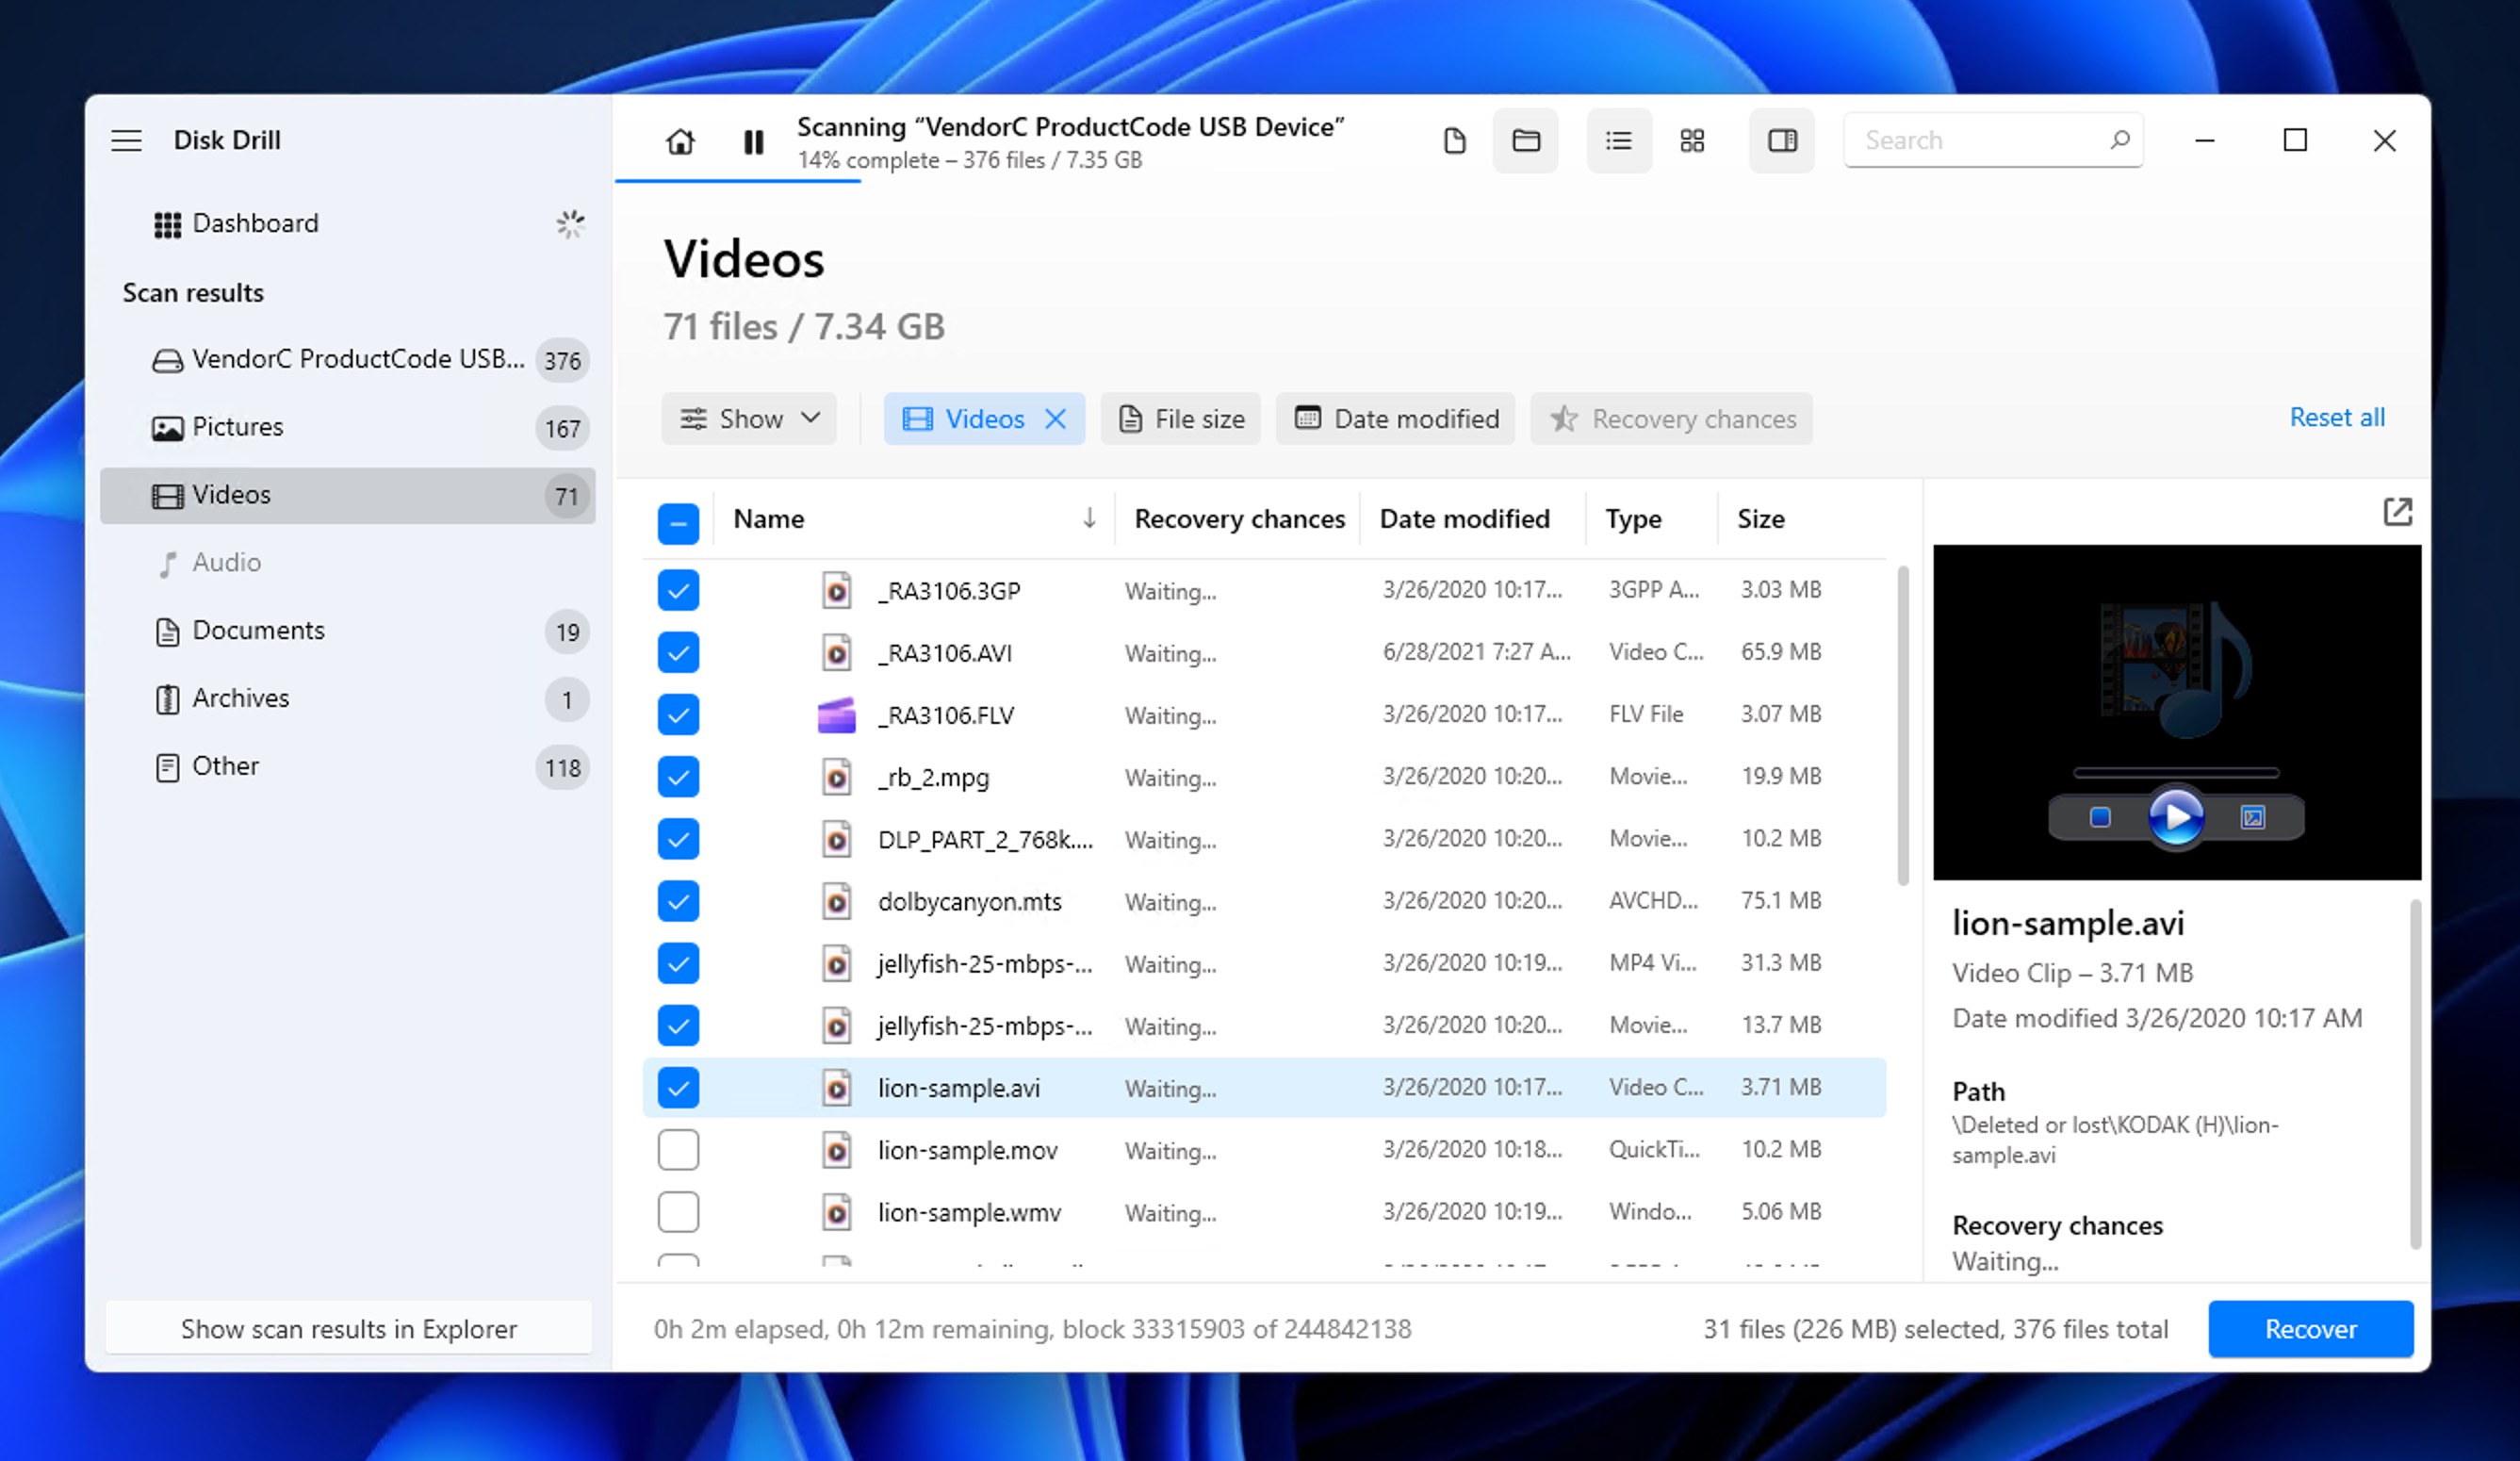
- Select files to recover by checking the boxes next to them. Then, you can click Recover and choose a suitable recovery destination.

After recovery, you can open the destination folder and check the integrity of the recovered files by opening them as you would normally. So, even if you’ve been wondering how to uncorrupt a file that other tools couldn’t fix, Disk Drill’s advanced algorithms often succeed where simpler recovery software fails.
Method 9: Use the System File Check (SFC) Utility
System File Check (SFC) is a built-in utility that scans for corrupt system files and fixes them. Windows saves a cached copy of all your system files in the System32/dllcache folder. When you run the SFC utility, it scans all protected system files to see if any have become corrupt. If it finds corrupt files, it replaces them with a cached copy of the file.
⚠️ Important: SFC only repairs Windows system files (things like DLL files, system executables, and Windows components). It won’t fix your personal files like Word documents, photos, videos, or any other user data. If the corruption affects your personal files, skip this method and use one of the previous methods instead.
Here’s how to use SFC if you’re experiencing system-related corruption:
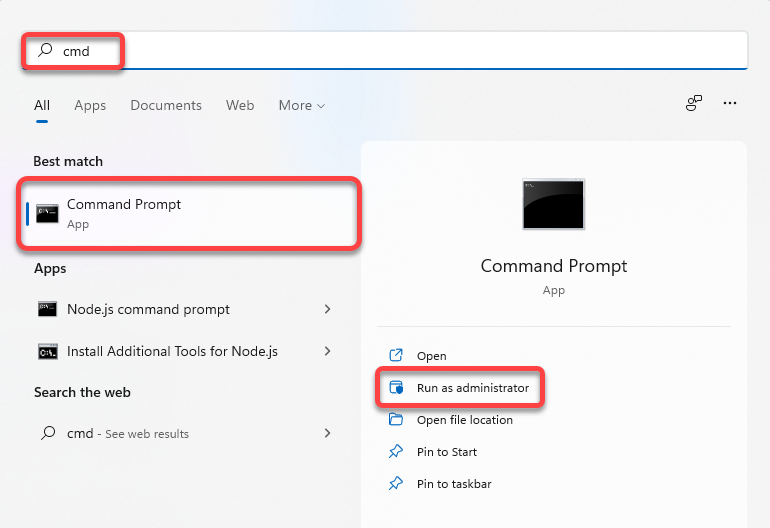
- Search for cmd in the Start Menu. Select Command Prompt from the left pane and click on Run as administrator from the right pane to launch the Command Prompt as an administrator.
- Run the following command:
sfc /scannow
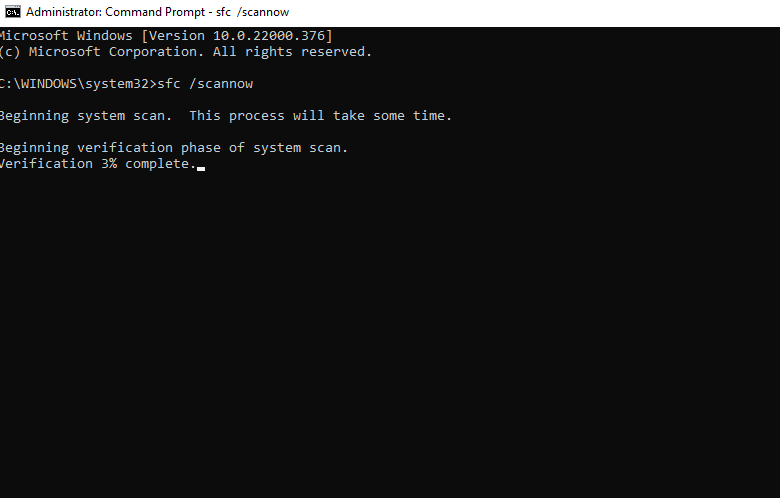
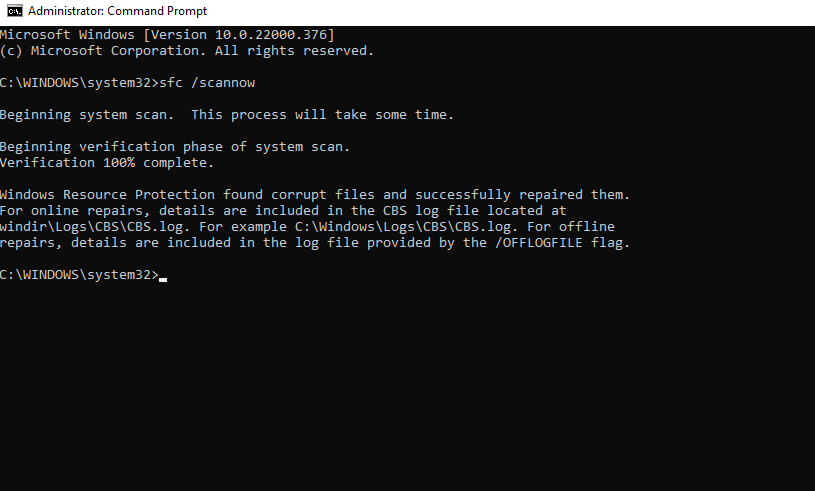
- Let the scan complete. Once it does, you’ll see a message that tells you whether the scan found any corrupt files and if they were fixed. If the message says the corrupt files were successfully repaired, you’ll have fixed the corrupt system files.
Quick Recap
So can corrupted files be recovered? Absolutely, but it’s important that you approach their recovery correctly because corrupted files repair success depends on choosing the right method for your specific situation. For example, system files need SFC, personal files can be recovered using various backup tools, and media files often benefit from specialized repair software.
That said, the following three simple steps can most cases of corruption-related data loss you can realistically solve:
- Start simple: Try re-downloading from the original source or converting the file format first – these quick fixes work more often than you’d expect.
- Check your backups: Windows Previous Versions, File History, and cloud services like OneDrive/Google Drive often have older, working versions of your files ready to restore.
- Use specialized tools when needed: For stubborn corruption, free tools like Clever Online Video Repair handle media files well, while Disk Drill’s Advanced Camera Recovery can reconstruct even severely fragmented video files that other software can’t handle.
For future protection, enable Windows File History or use cloud storage. Having automatic backups means you’ll never have to wonder how to fix corrupted files again.
FAQ
- File History: Automatic backups of your personal files (must be enabled first).
- Windows Backup: Full system and file backup solution.
- System File Checker (SFC): Repairs corrupted Windows system files only.
- AutoRecover: Built into Microsoft Office apps for document recovery.
- OneDrive: Automatic version history for synced files.
- chkdsk X: /f fixes file system errors and bad sectors on your drive (but doesn't repair individual corrupted files).
- ATTRIB -H -R -S /S /D X:*.* makes hidden files visible, which is useful for finding files you thought were lost (but not for fixing corruption).
- sfc /scannow repairs Windows system files (but not your personal documents or media).


