We download files from the internet all of the time. This can range from email attachments, pictures, music, documents, and many other types of files. With so many files being downloaded onto computer, it can become easy to get overwhelmed with all of them. You may go to clean out your downloads folder and delete a file thinking you’re done with it and then realize that you need to reference it at a later date.
No worries though! Even if you deleted a download and then realize that you need it, there are ways to recover deleted downloads on Windows.
How to Recover Deleted Downloads
If you have deleted a file and then realize that you need it back, there are several ways to recover a deleted download. Most of the time, files aren’t erased right away but are either moved to another location, or are stored on your computer but just aren’t visible to you.
Option 1: Check Your Recycle Bin
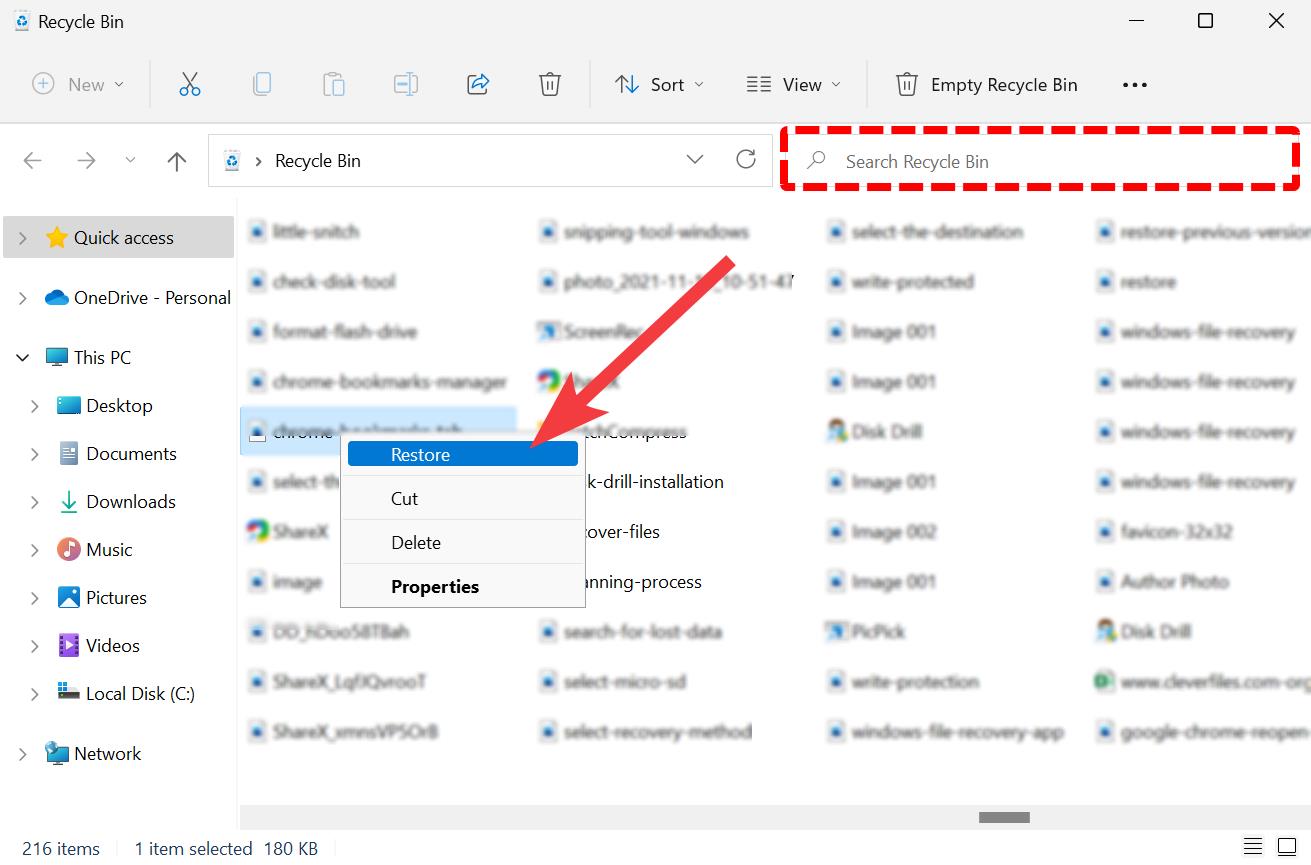
If you accidentally delete a download, it most likely will be in the recycling bin unless you have emptied it recently or have it set to empty on its own. The recycling bin is put into place to add an extra step when deleting files to make sure that you have to confirm twice before something is removed from your hard drive. Think of it as a safety net that always has your back.
To restore deleted downloads from Recycle bin follow these steps:
- Open the recycle bin.
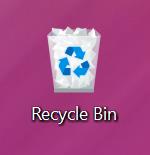
- Look for the file from within the recycling bin window. You can also search for it by typing in the name of it if you have a lot of files to search through which will make it much easier to find.
- Click Restore on the deleted download to put it back onto your computer.
Option 2: Re-download the File from Web Browser
When you download a file from your web browser, most will save the download path so that you can download it again at a later date if needed. This feature works even if you have deleted the download from your computer or it is lost. It’s a handy feature and allows you to re-download the file again. I will be using Google Chrome for this example, but most web browsers follow the same steps seen below:
- Open your web browser of choice.
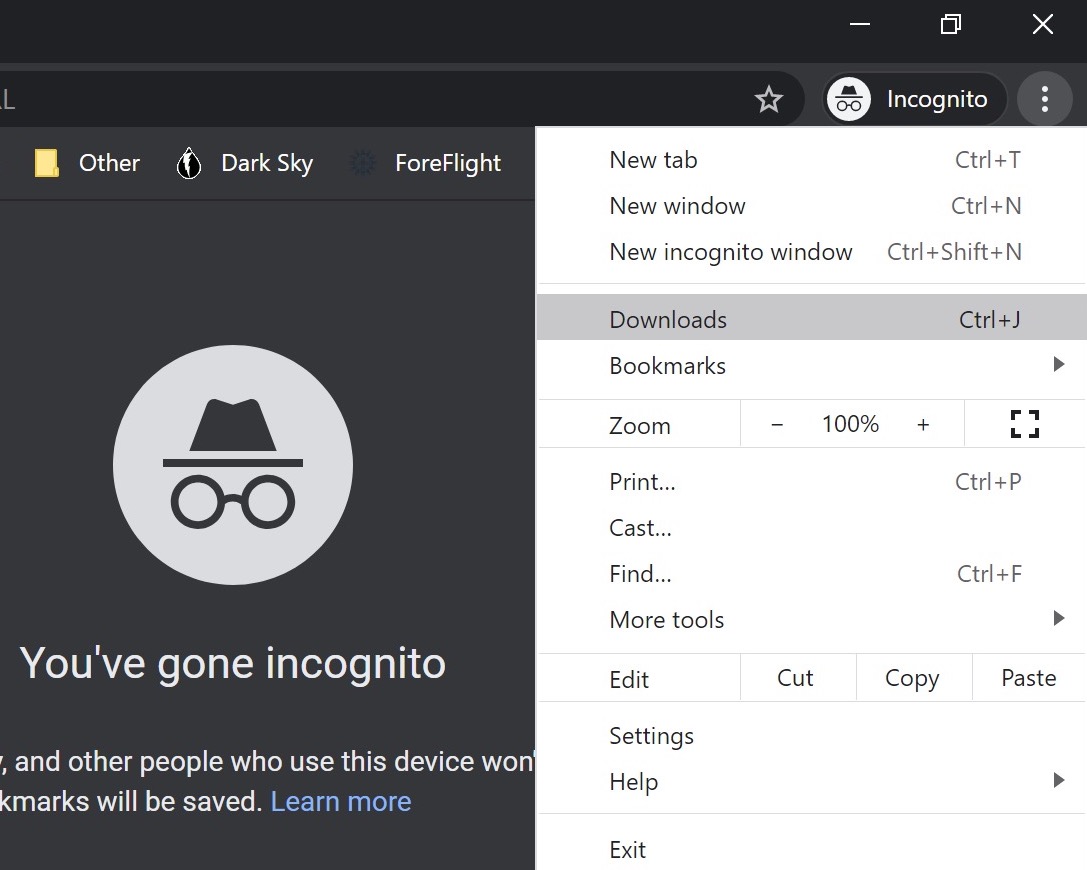
- Go to settings or click on the three cascading dots in the upper right-hand corner.
- Click the “Downloads” option from within the drop-down menu. You can jump to this section by clicking CTRL + J once Google Chrome is open as well!
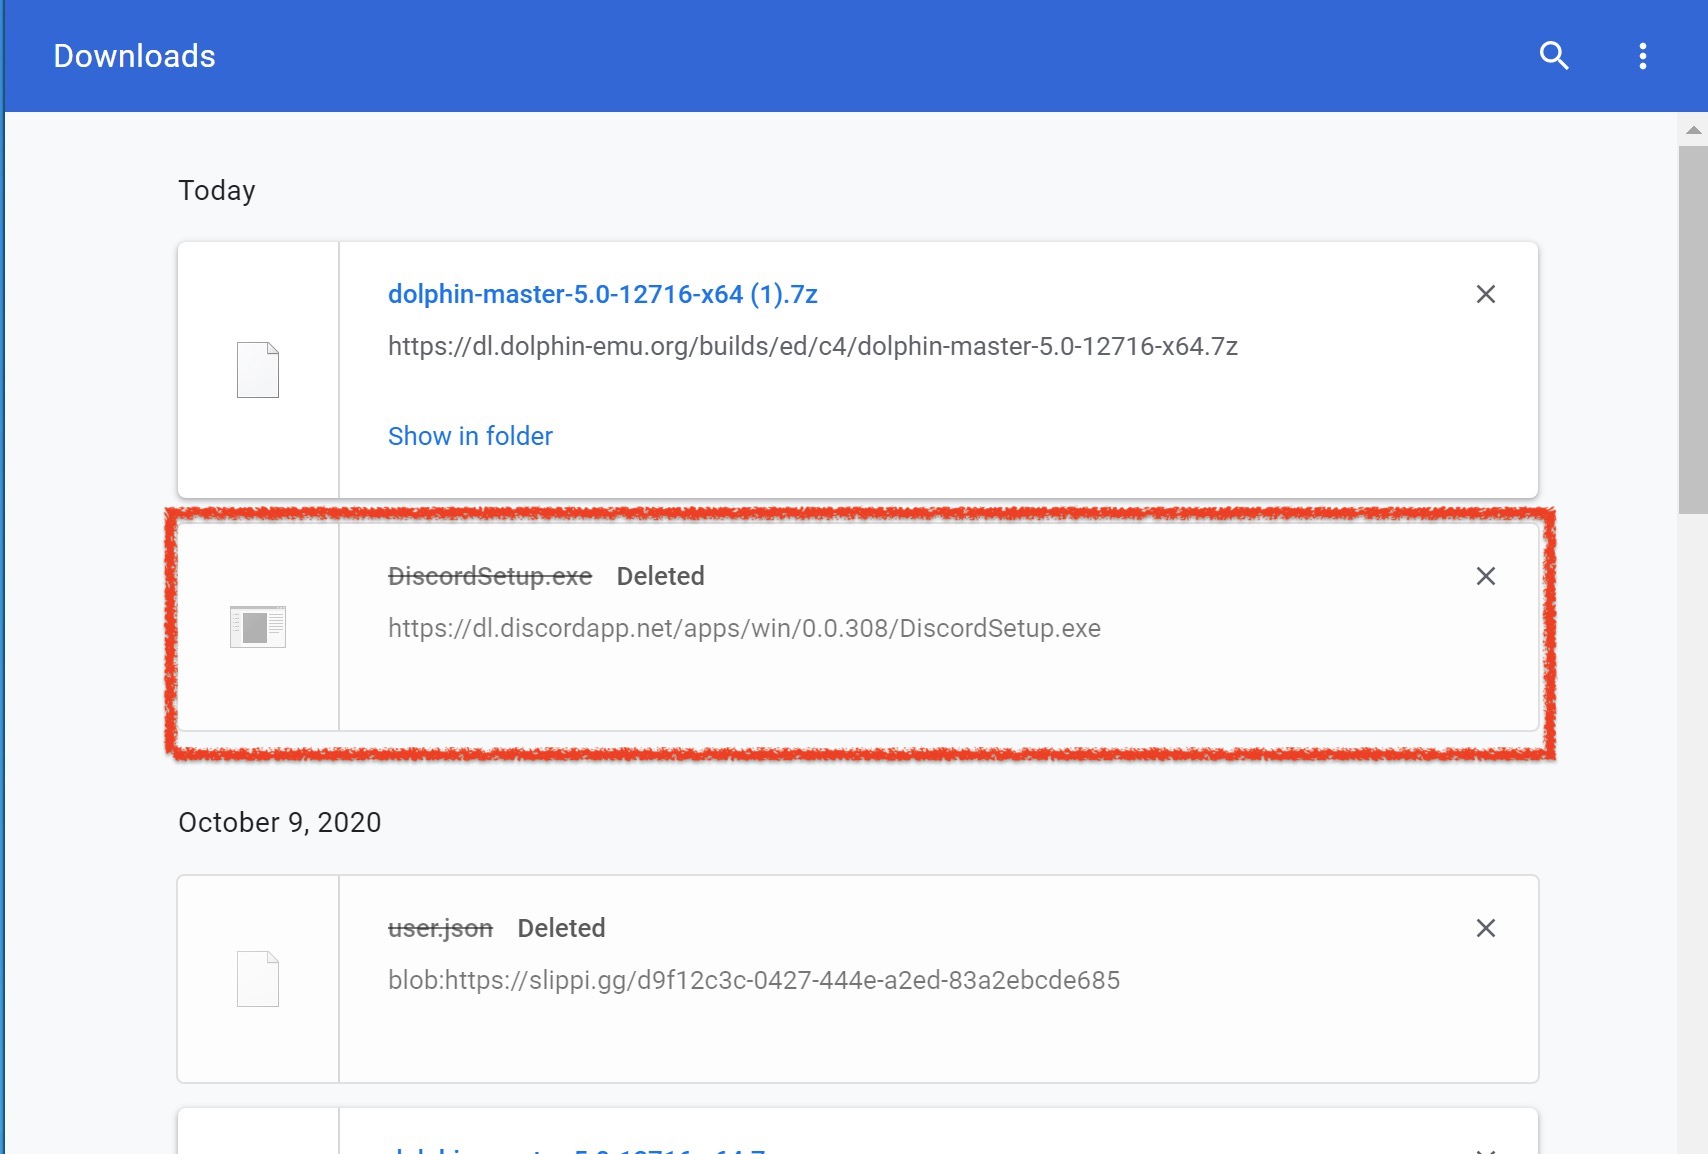
- Click the “Show in folder” option and it would open a new file explorer tab with the file in there. Super useful if the download is on your computer but lost. If the download has been deleted, the download URL path for it can be found still as shown from within the red box. Copy the path that starts with “https” and then paste it into the search window from within your web browser and you can re-download the deleted file.
Option 3: Find Downloads in Temporary Files Folder
The temporary files folder is created by the Windows operating system on your computer. It allows for files to be stored and searchable on your computer even if they have been deleted for a short time.
Steps to recover deleted downloaded files from temporary folder:
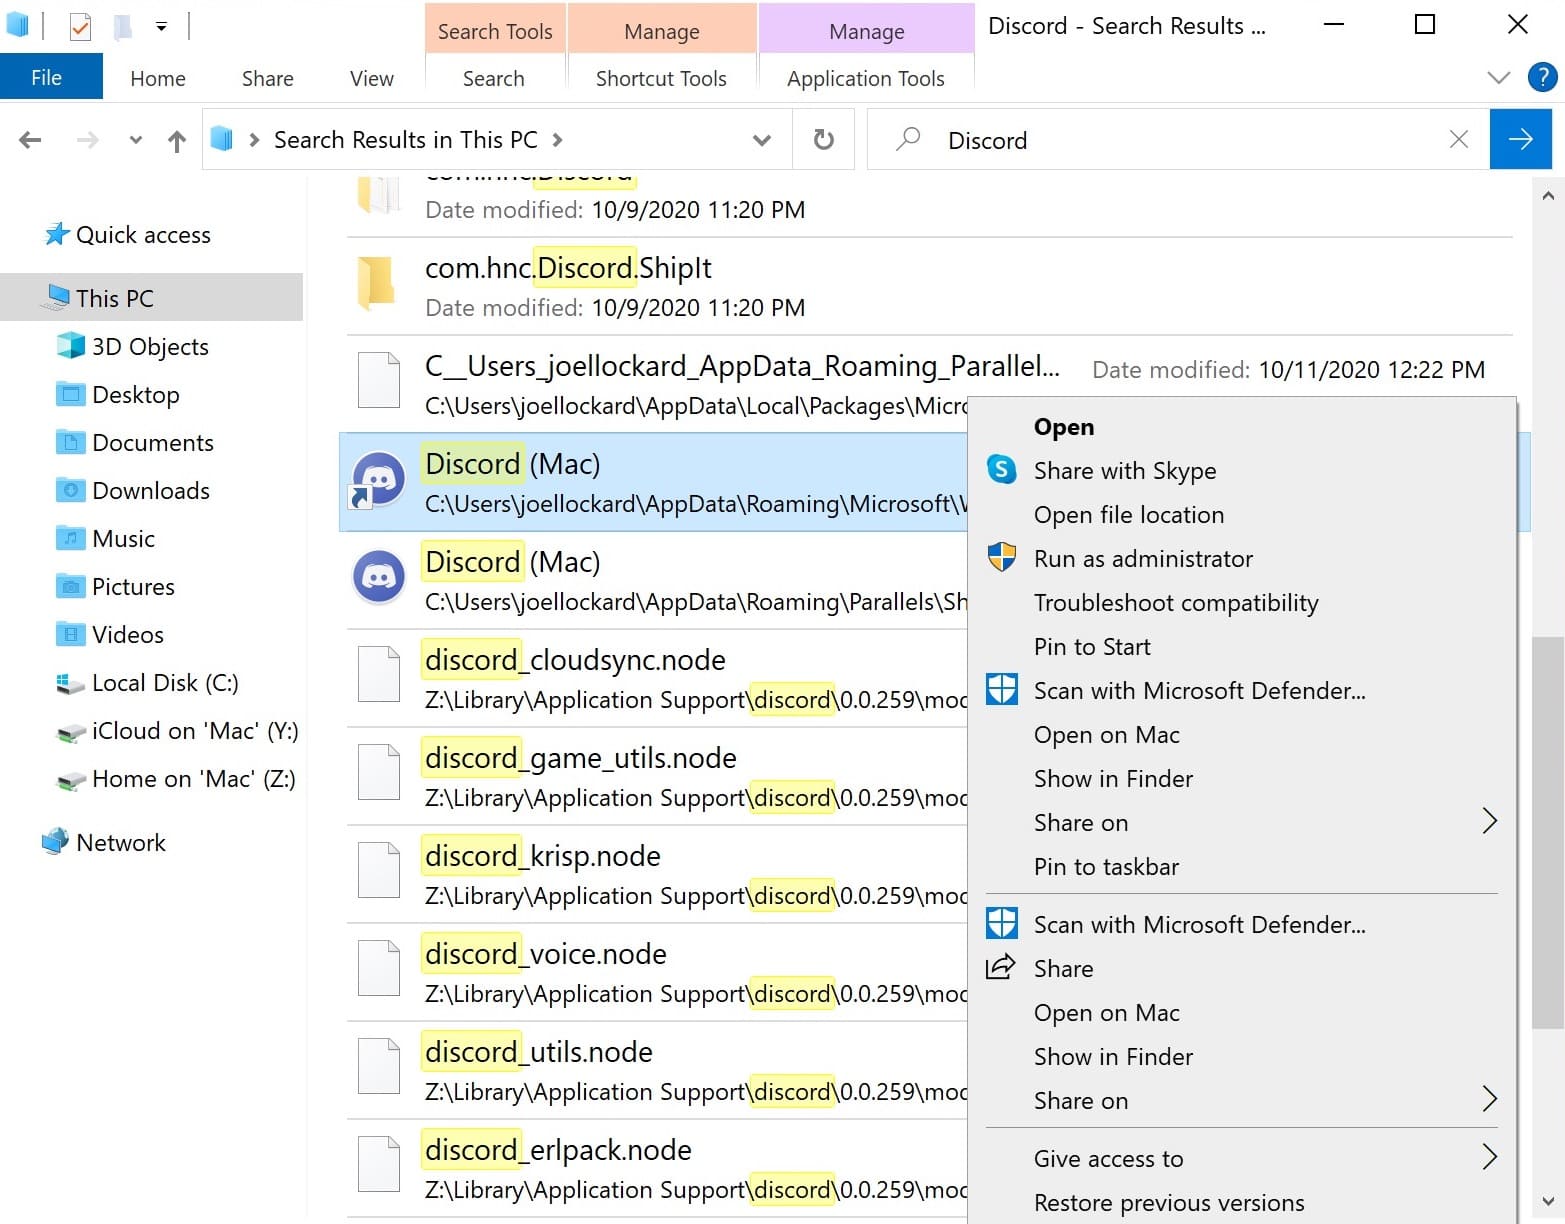
- Press the Windows Start key.
- Search for the name of the deleted download that you want to recover.
- If the software has the temporary files feature built into it, you should be able to find the file and then right-click on it to open it. You can also drag it from within this window to where you would like to place it.
Option 4: Use Data Recovery Software
If the file you downloaded has been deleted and can’t be retrieved using the steps above then it’s time to use data recovery software to recover the deleted file. Disk Drill allows to recover deleted downloads even after the recycling bin has been emptied and the file is no longer on our computer anymore. It is still there, but just not visible to us.
To recover deleted downloads with data recovery software follow these steps:
- Download and install Disk Drill for Windows on external hard drive or thumb drive. Putting it on your Windows computer could overwrite the downloaded file that we’re trying to recover. Also, try to limit installing other software or downloading other files as that can lower the chances of a successful recovery.
- Initiate a scan on your computer to search for the deleted download.
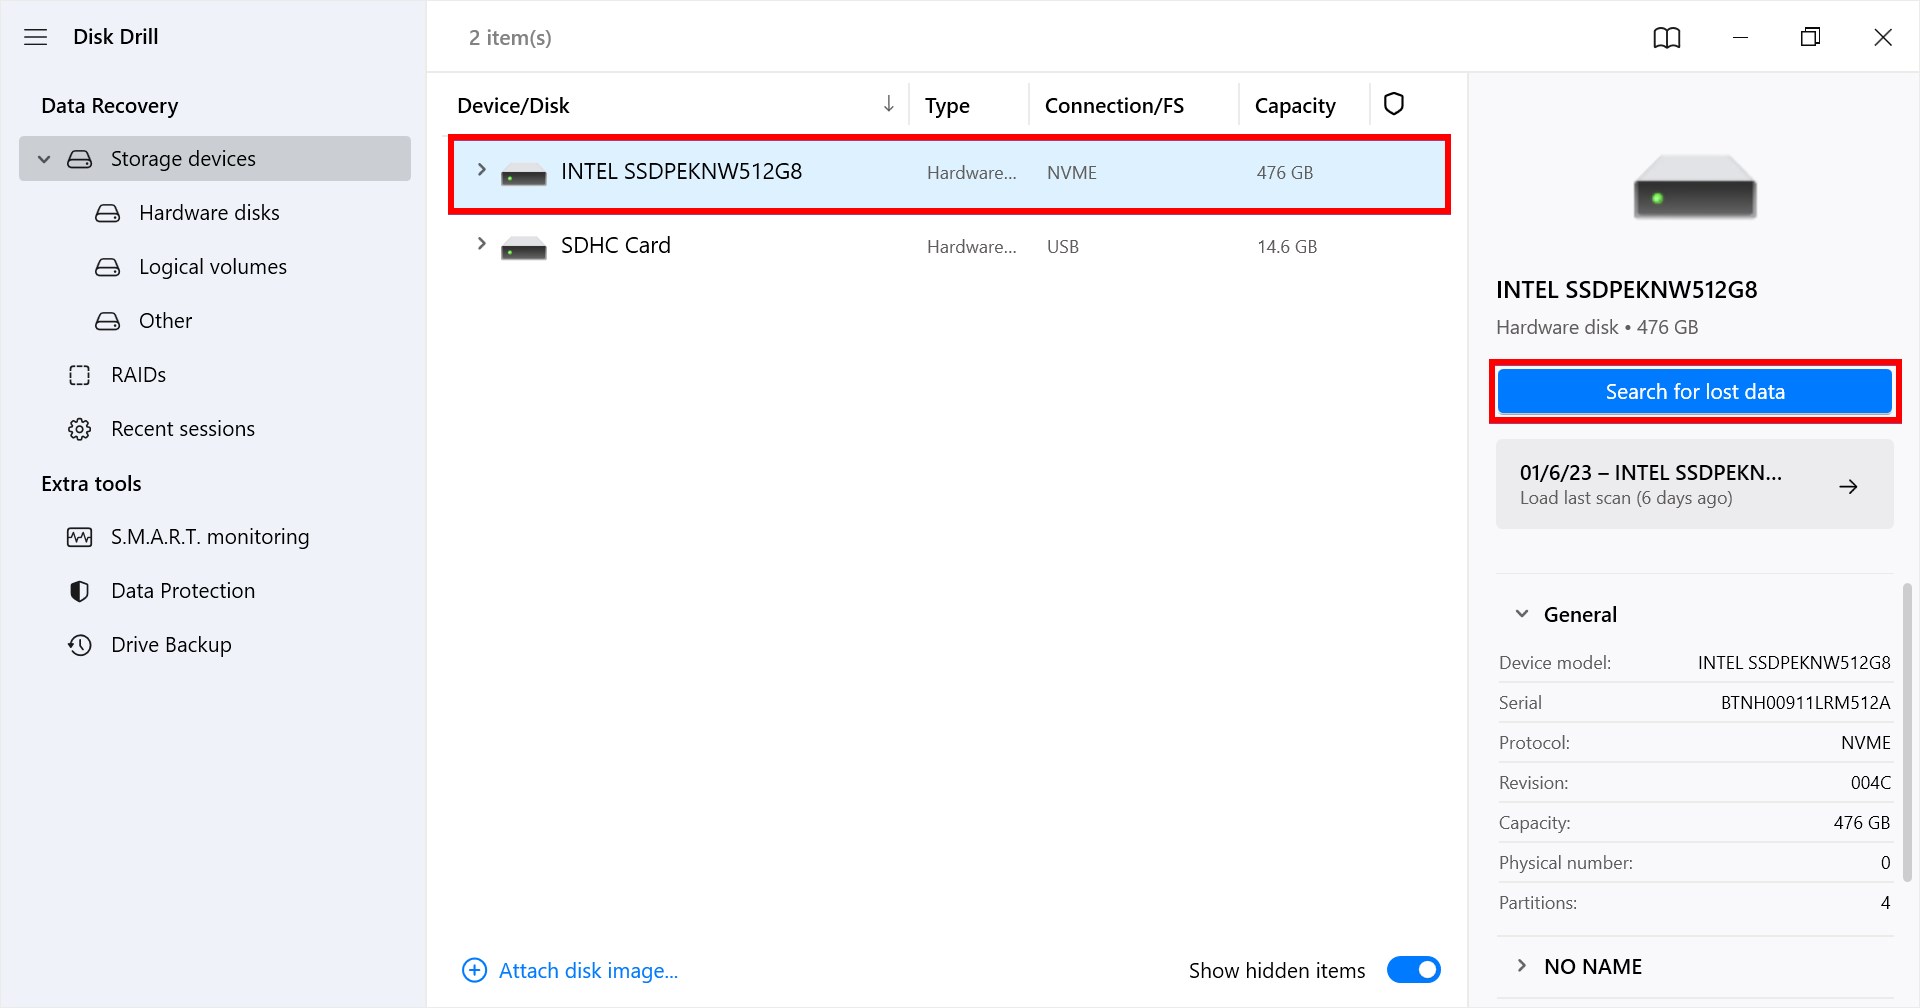
- Wait for the scan process to complete. This shouldn’t take long but will vary depending on how much data you have on your computer.
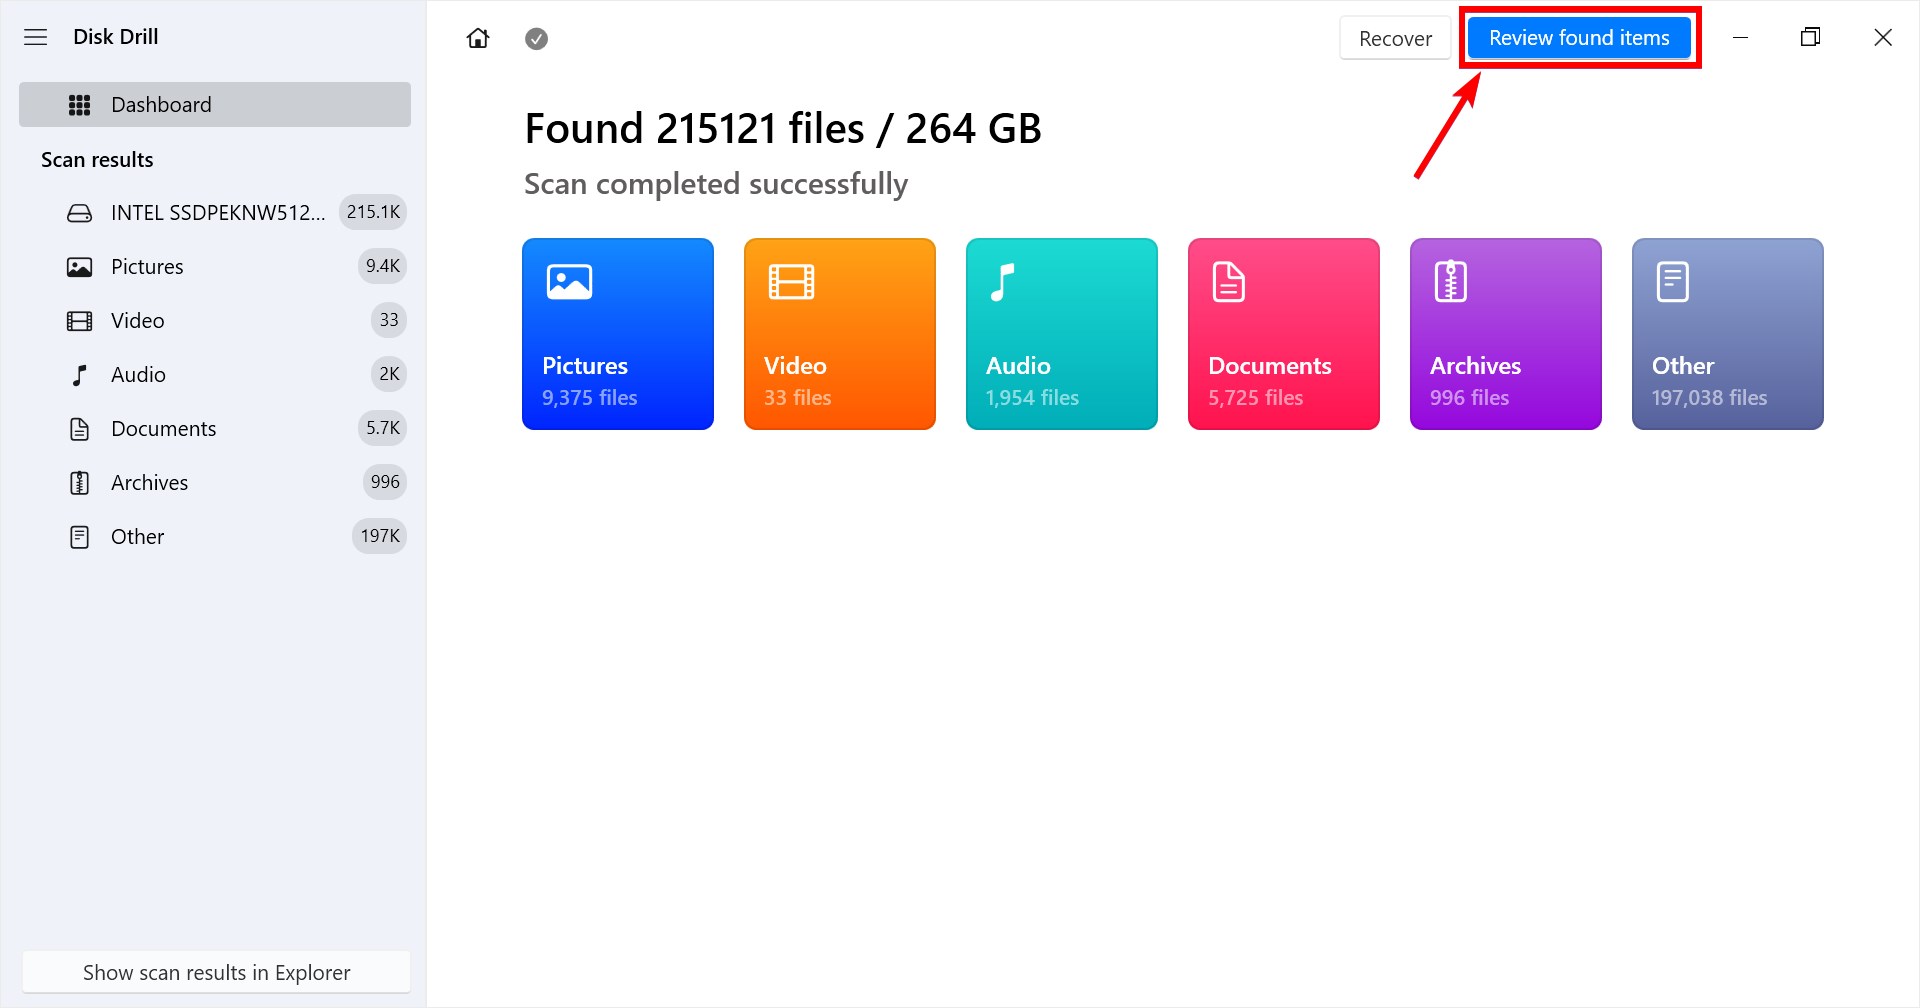
- Search for the file by typing in the name if you know it. This is super helpful if you have a lot of files on your hard drive and will make the process much quicker.
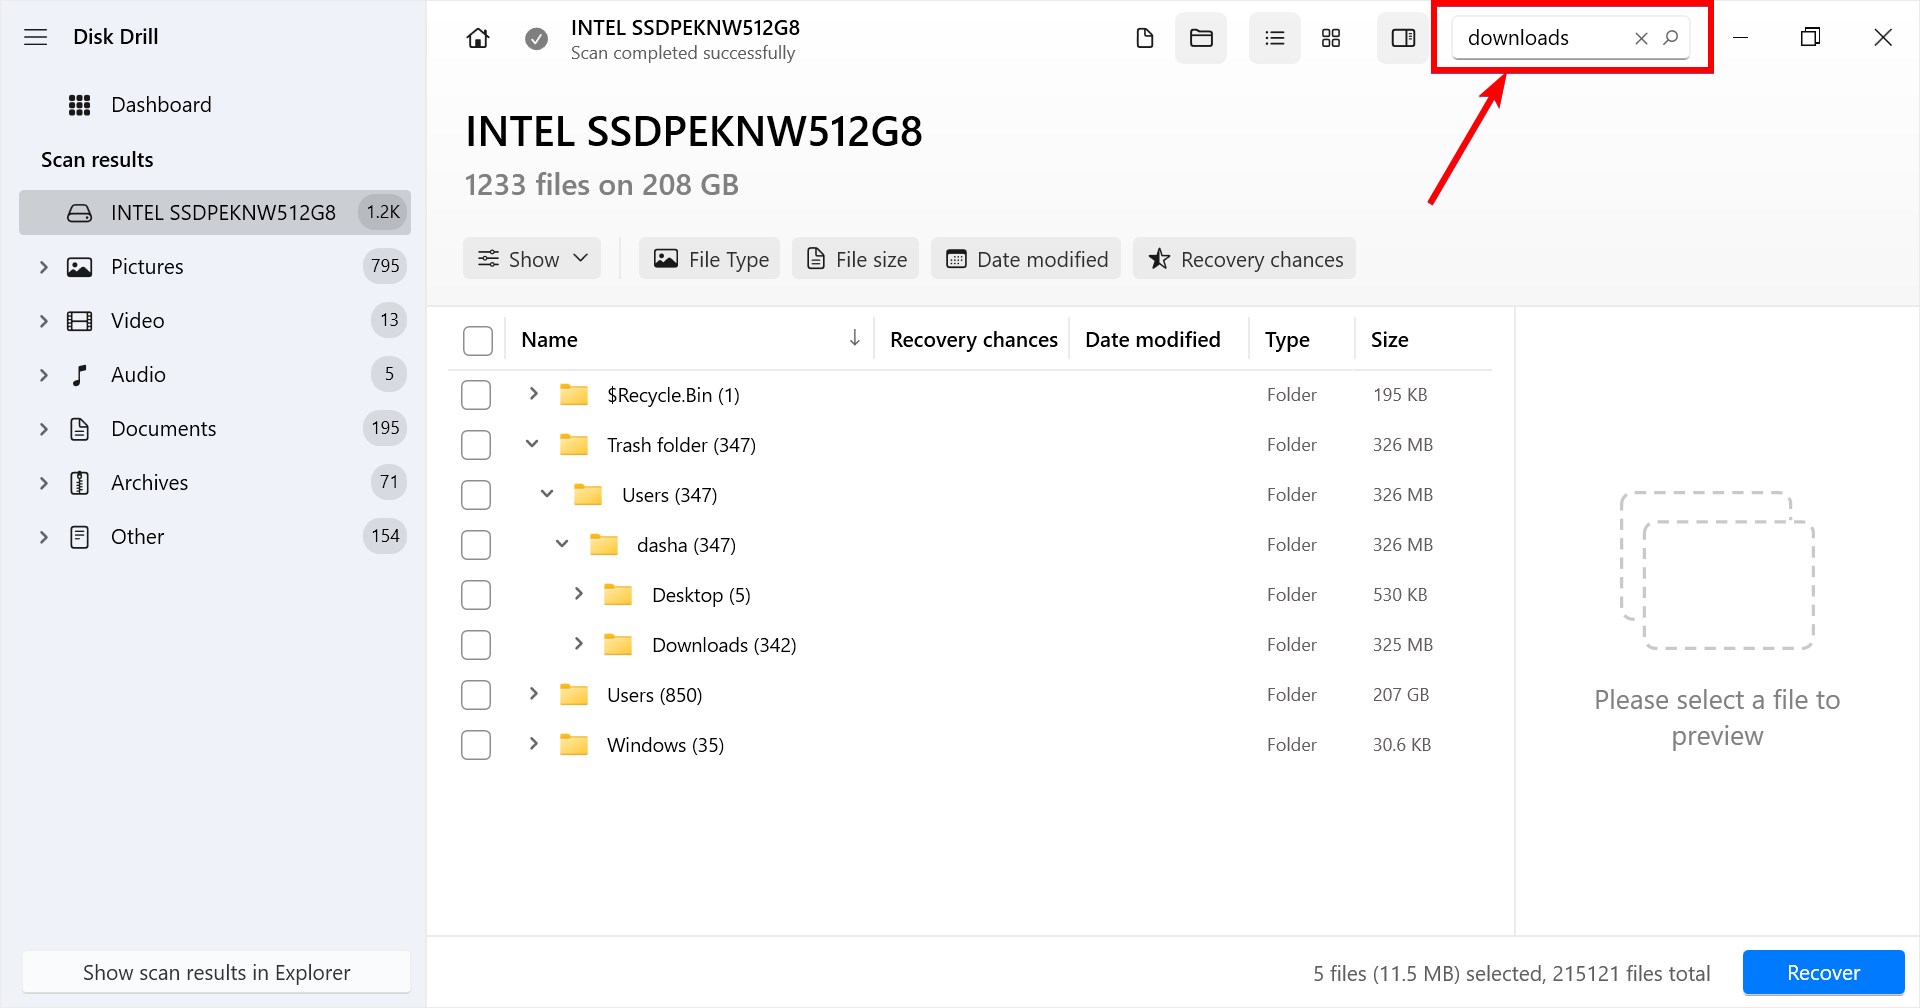
- Select the file that you would like to recover.
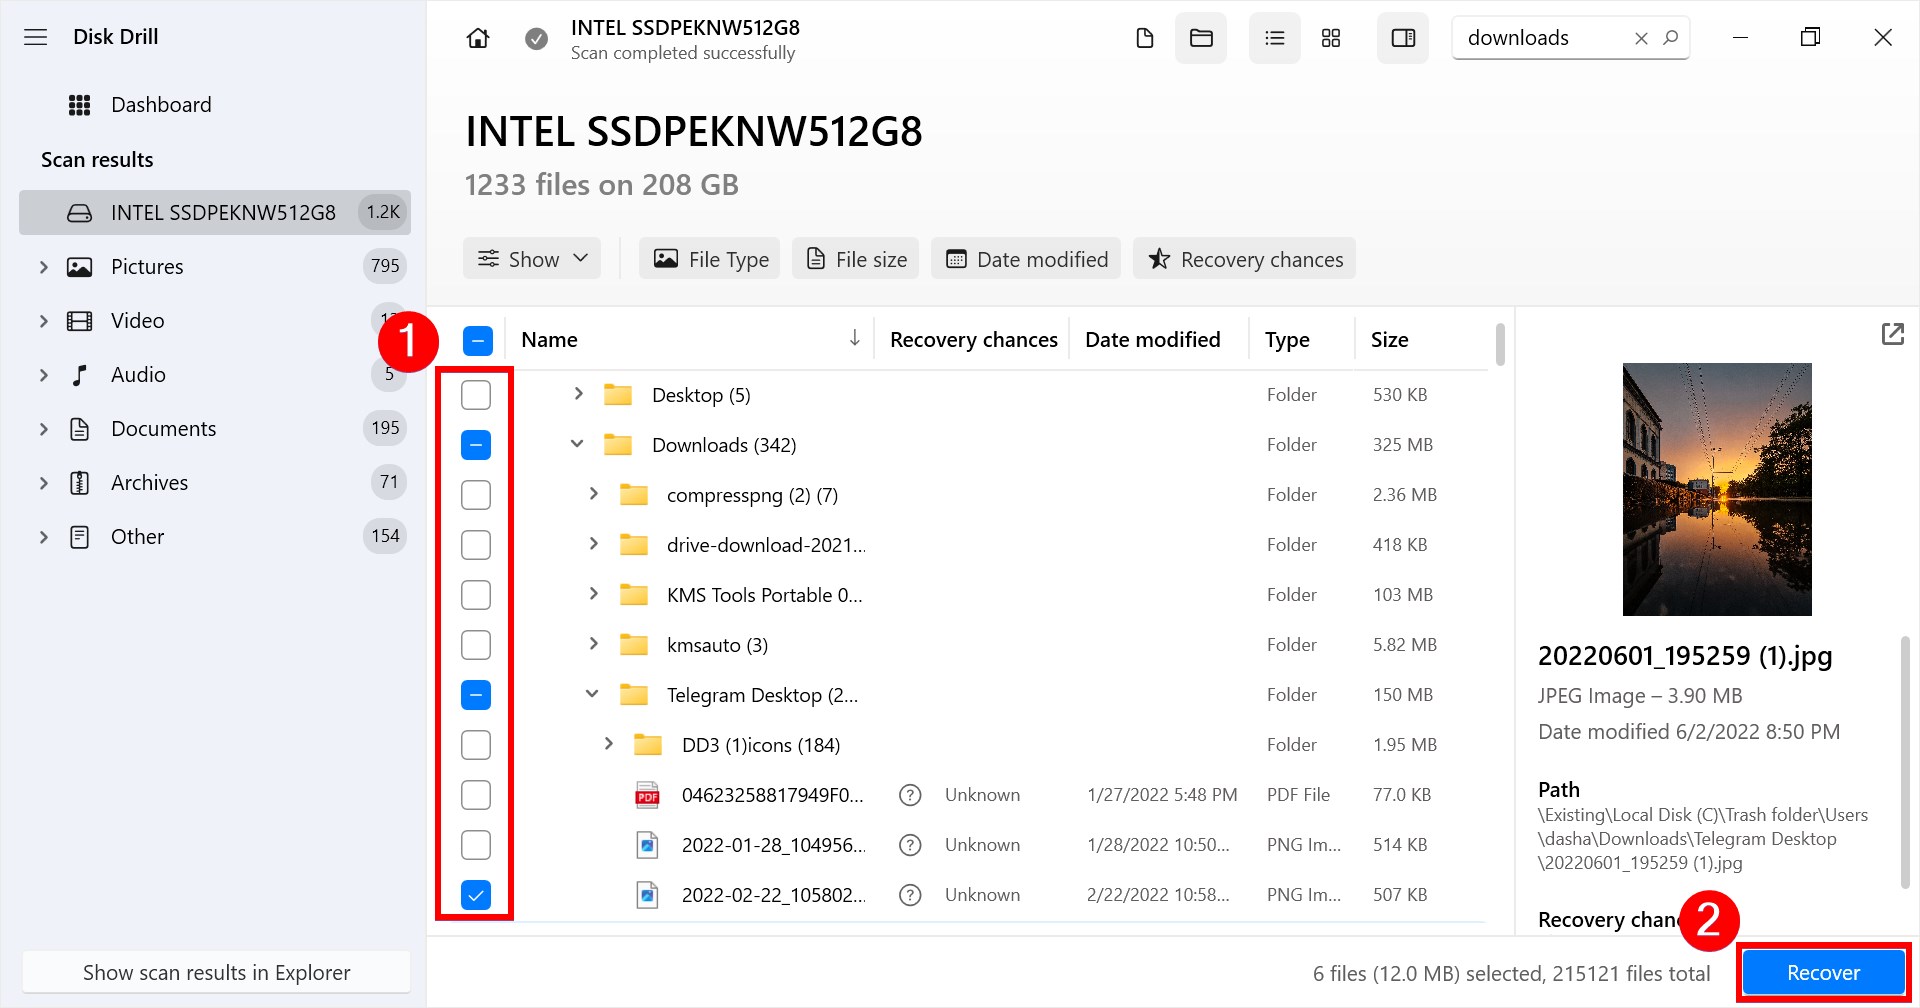
- Choose a path for Disk Drill to restore the deleted download to and click Next.
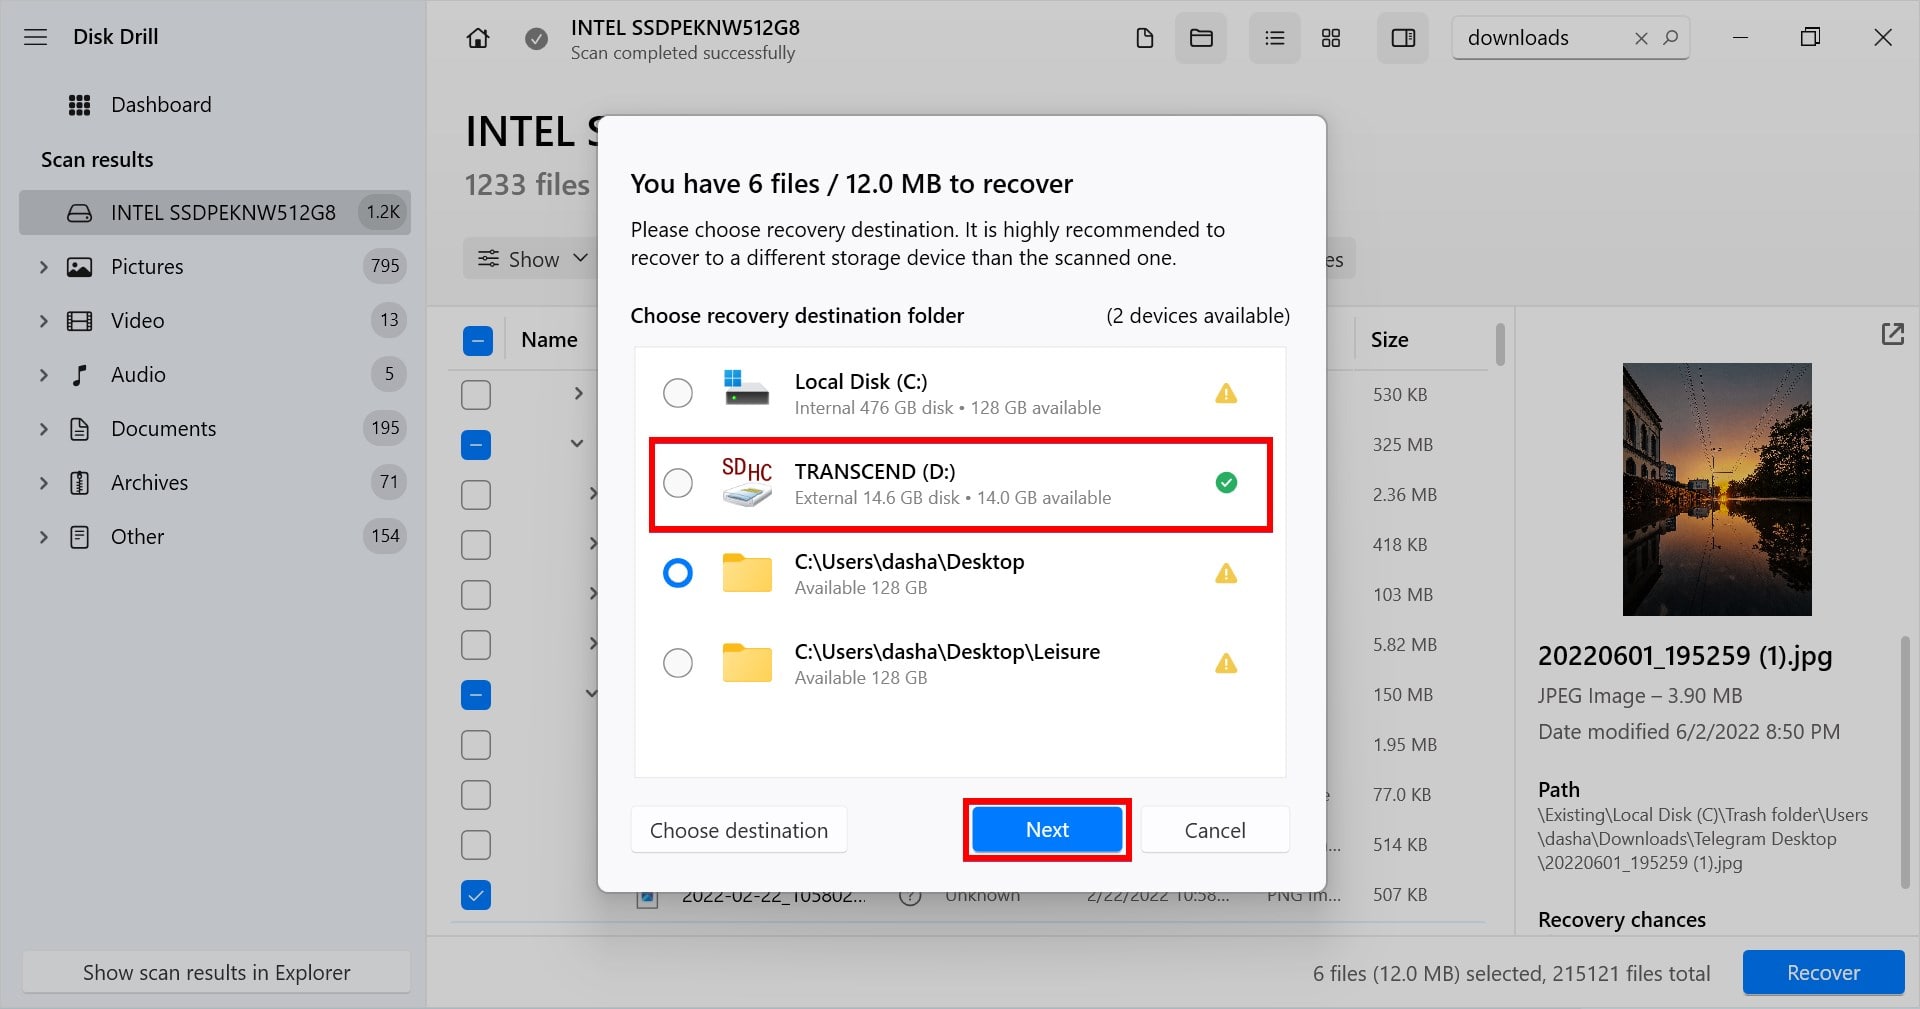
- You will receive a confirmation message letting you know that the recovery was successful. You can then click on the magnifying glass icon to go to the location of the file.
How to make Changes to Downloads in Windows
The downloads folder comes installed as part of Windows. You can change where files are downloaded to, the icon for the downloads folder, and where downloads are saved from within your web browser. This can allow you to be more efficient as your workflow is optimized around how you work, not how Windows has it set up by default.
Change Web Browser Settings
If you want to change the download location from within your web browser, you can do go into the settings and edit the download location. For this example, I will be using Google Chrome. You may not want to download a file every single time to the same place and by changing this setting, you can have your pictures go to a specific folder and your documents then to another. This ensures that you always know where a download is going and will solve the issue of losing them.
- Open your web browser.
- Click the three cascading dots in the upper right-hand corner to open the drop-down menu to go to Google Chrome’s settings. Note this may be different if you’re using a different web browser but going to settings will most likely allow you to have access to the same options.
- Scroll down to advanced settings and look under “Downloads” where you will be able to change the location. You can also turn on a prompt that will ask you where you want to download a file to each time you start a download.

Change the Location of Where Downloads Go on Windows 10
Changing where files go from within your web browser is the first step but you can also make changes at a system level as well. If you want to make changes to where downloads go from within Windows 10, it only takes a couple of steps to change the location. Changing the location of your downloads folder makes sure you know where downloads are going each time so that you can avoid losing them in the future.
- Open file explorer and right-click on the Downloads folder. Click on Properties.
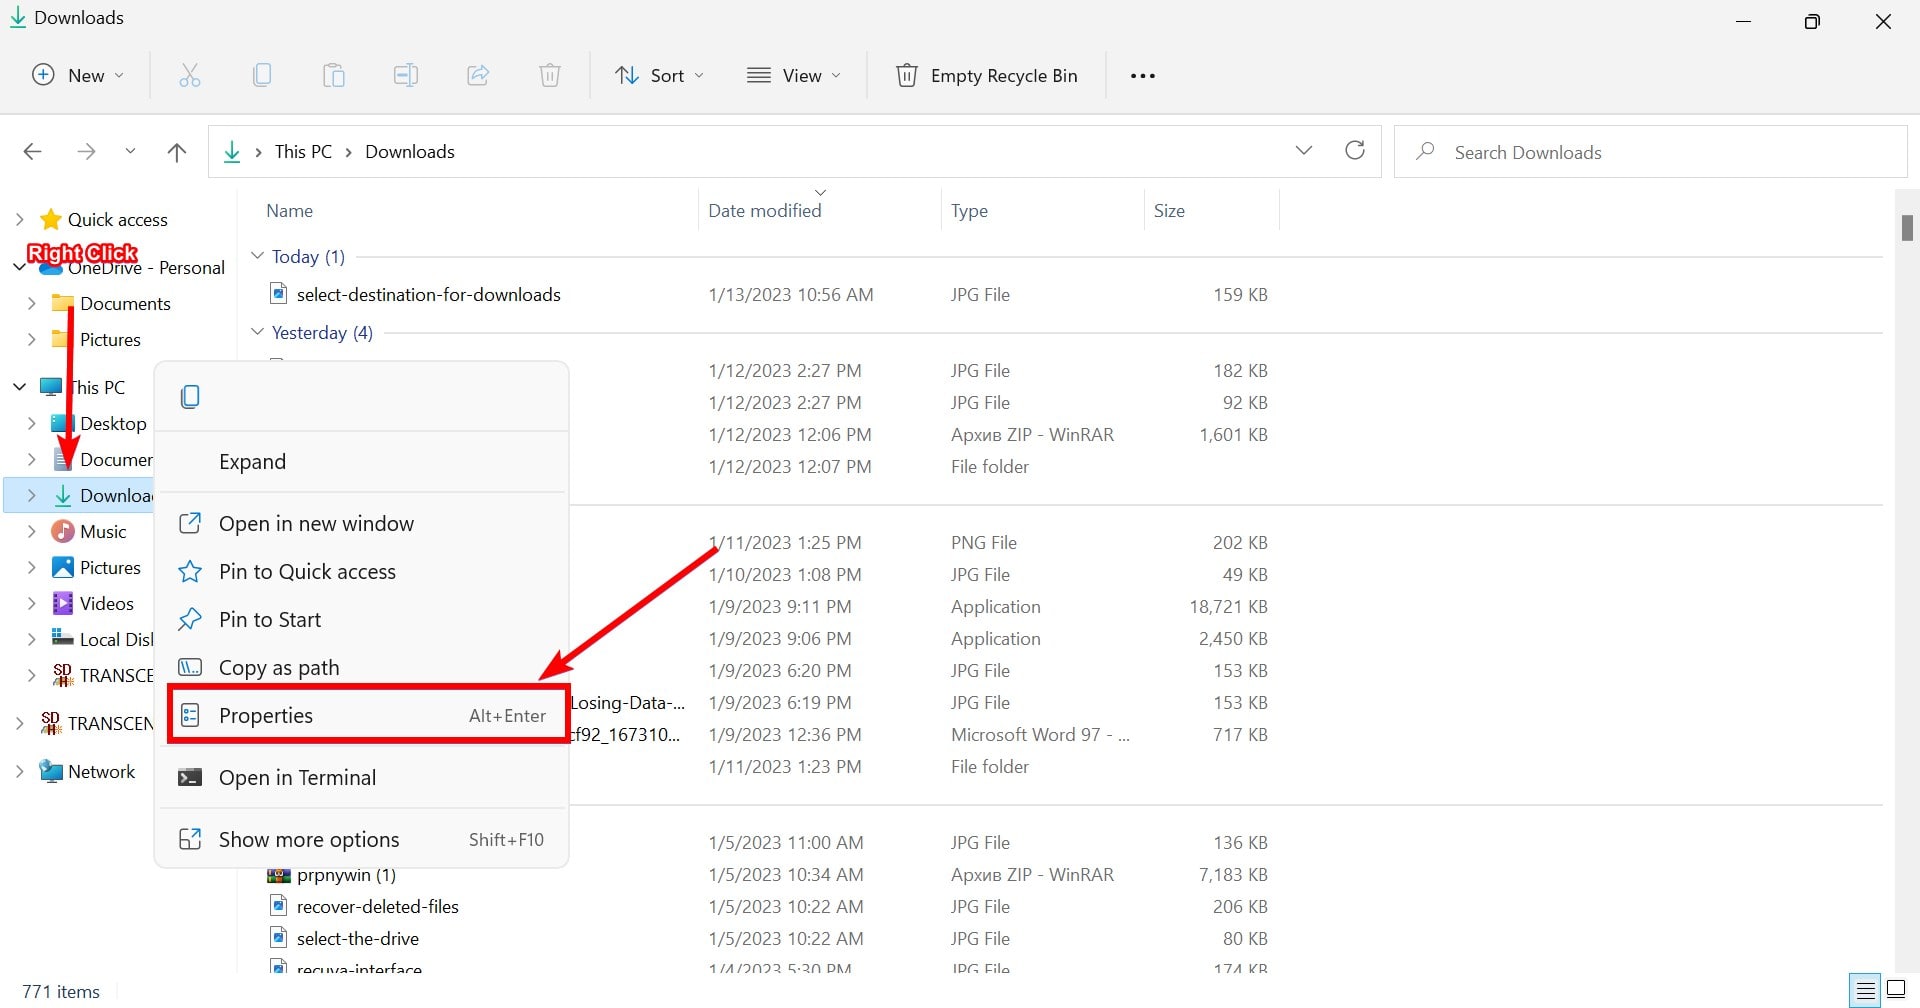
- From here, select the Location tab.
- You will see a path which you can change so that your files will download to a different location. Choose “Move” to select a new folder or you can type in the path manually if you know where you want your downloads to go from here on out.
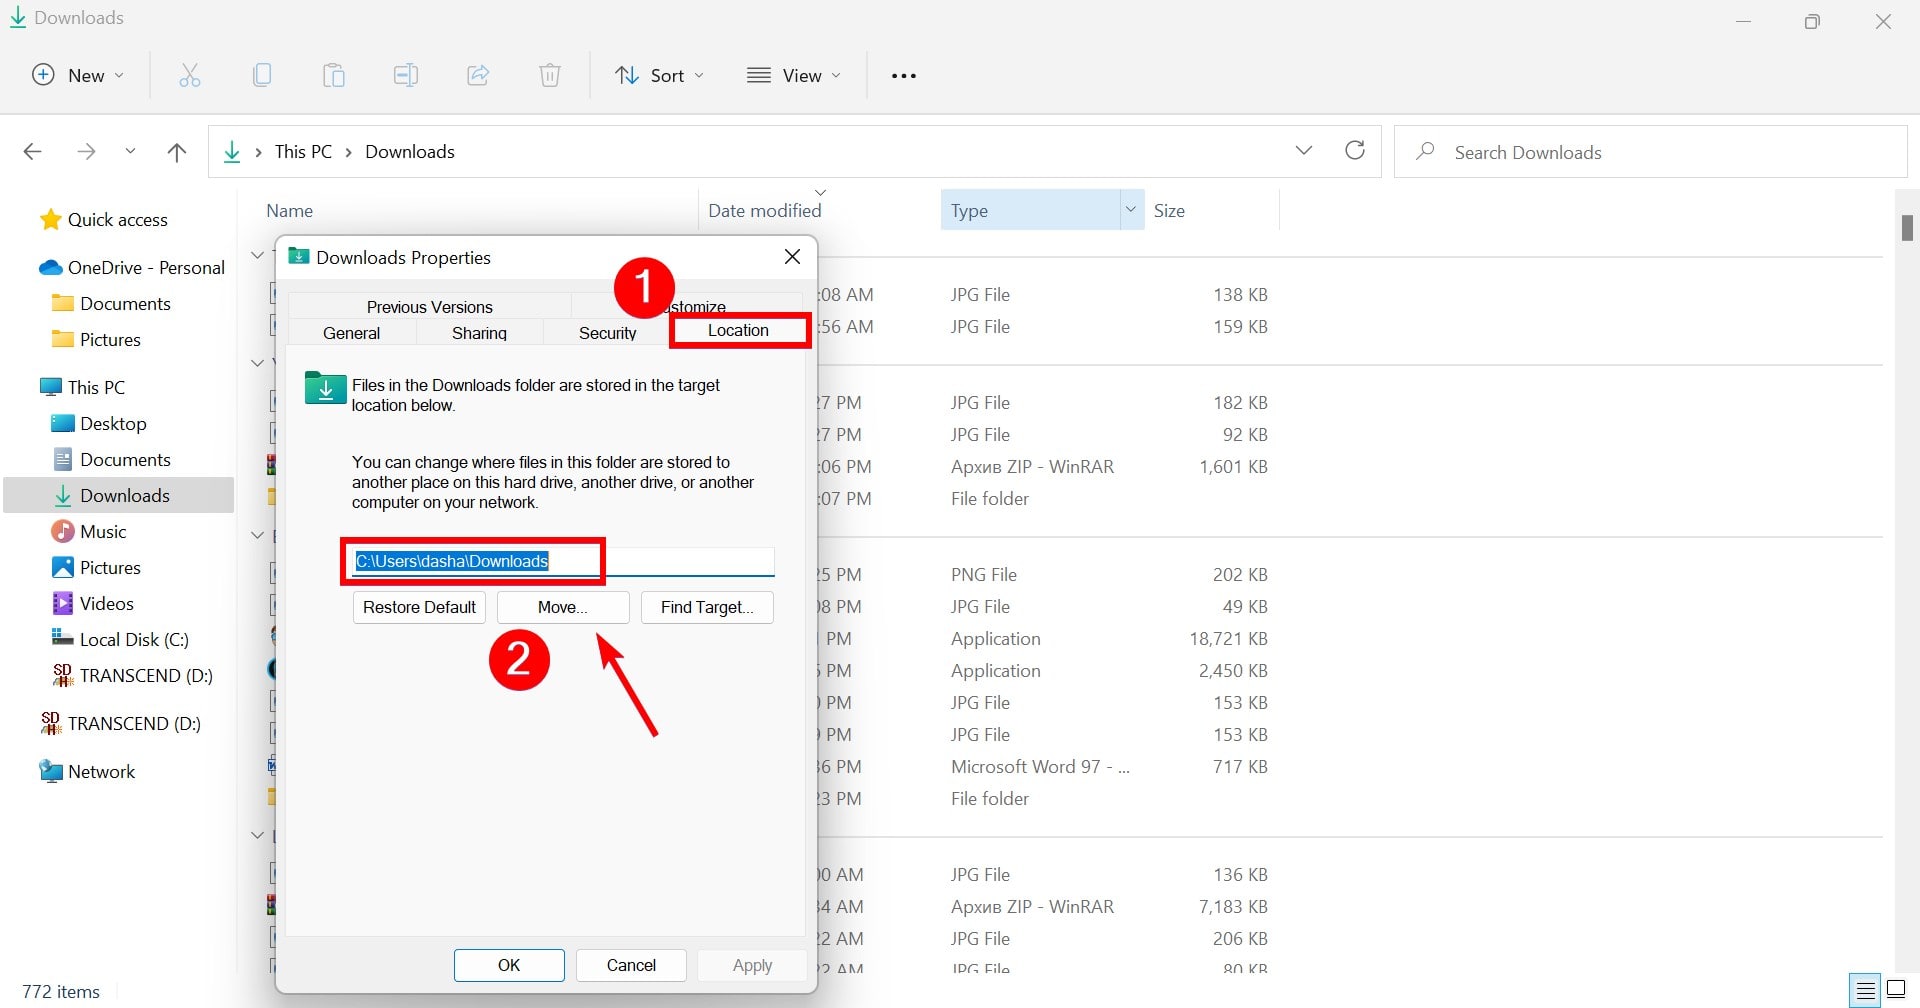
- Click “OK” and that’s it! If you ever want to change it back, you can come back to this screen and click “Restore Default”.
Change the Icon for the Downloads Folder
There isn’t a better way to bring a fresh look to your computer then changing the downloads folder icon. Not only can this make it easier to find amongst other folders, but can add some personality to your computer. Never lose the location of your downloads again!
- Open file explorer and right-click on the downloads folder.
- Click on Properties.
- Click on Customize from the options at the top.
- From within the customize window, you can select “Choose File…” and then upload a picture located on your computer for the new icon.
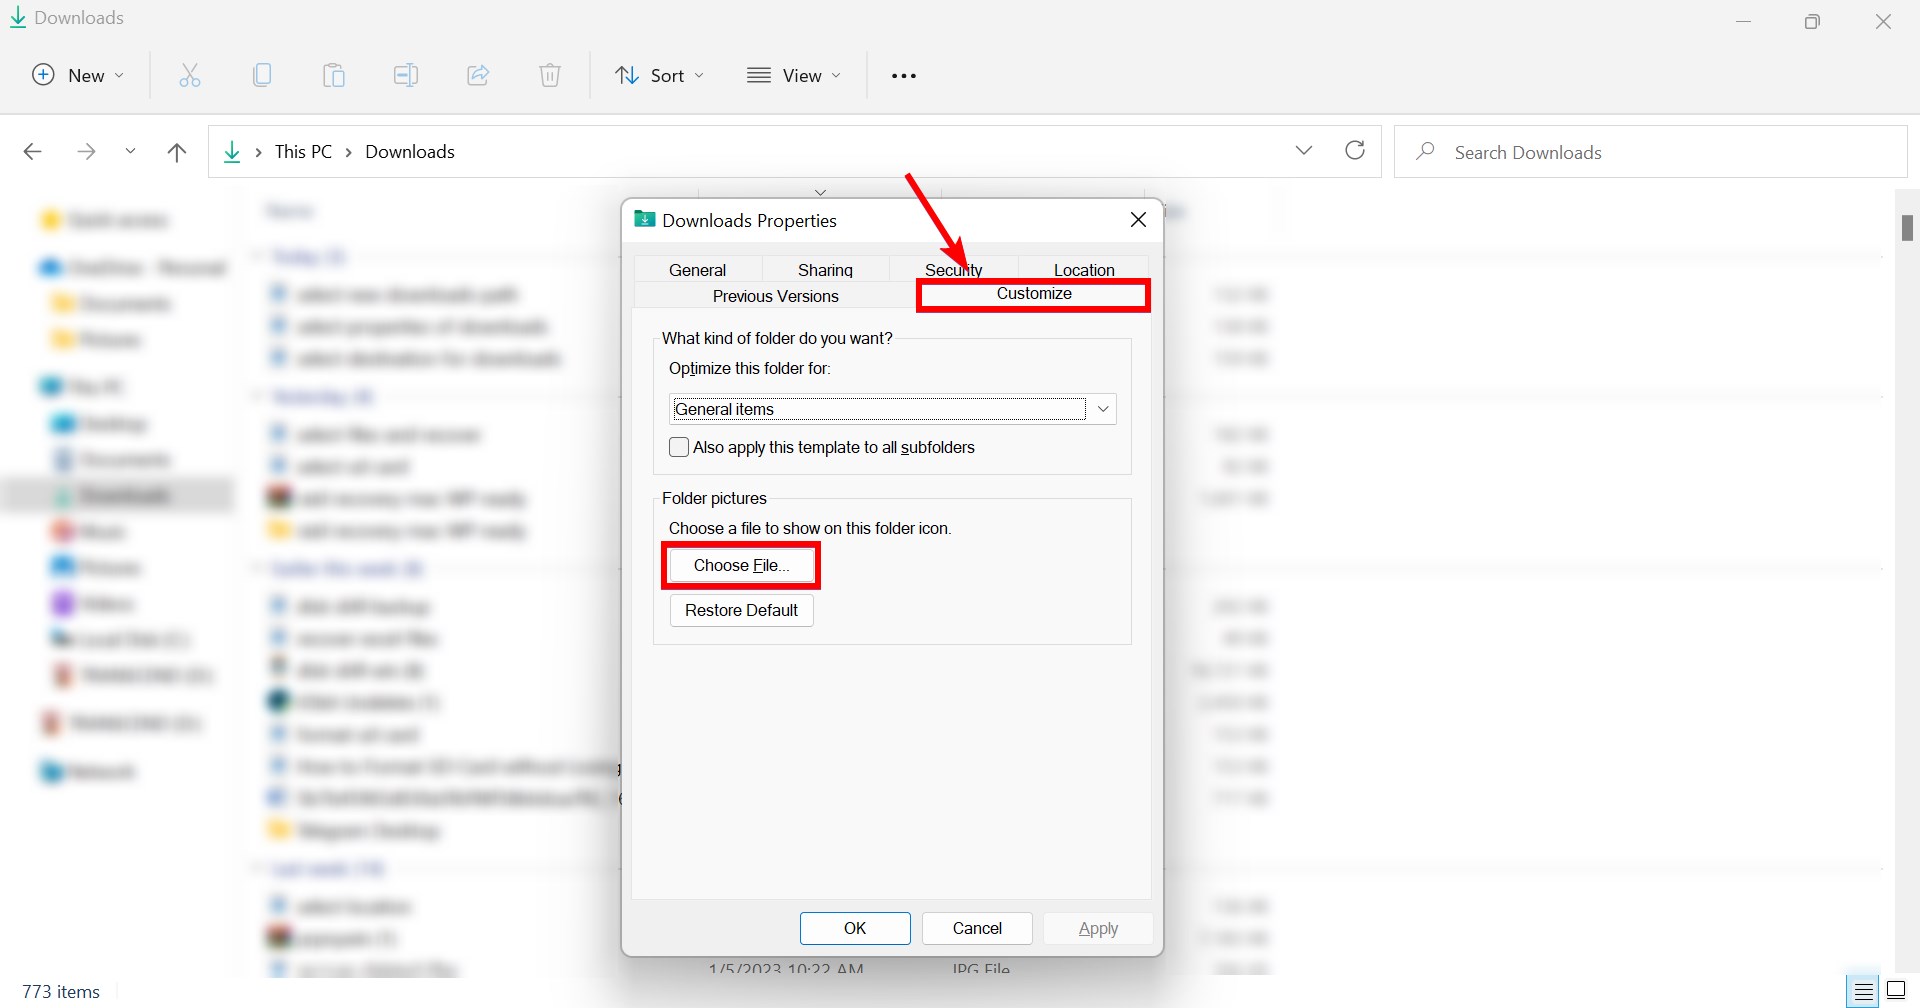
- Click “OK” and then the new image will replace the current one. If you ever want to change it back, you can go to this screen and choose “Restore Default”.

