 Did you delete emails on your Mac by mistake? Or maybe they disappeared because of hardware damage, or you simply clicked the wrong button? If it were just spam or an ad, that’s not a big deal. But when the missing message carried important work details or personal information, the situation changes completely. Fortunately, in most cases you can recover deleted emails on a Mac. In this guide, our 7 Data Recovery Experts team shares the same methods we use ourselves when we lose critical messages, so you can trust them as well.
Keep reading to learn how to recover your deleted emails on Mac, no matter which provider you use (Gmail, iCloud, Outlook, or any other)
Why Is It Possible to Recover Deleted Emails?
The way your emails can be recovered depends on how you access them. If you only use your mail account through a web browser, then you don’t actually keep local copies on your Mac. In that case, your recovery options are limited to what the mail service itself offers. Typically, these are folders like Trash or Deleted Items, where messages stay for a while before disappearing completely.
If you also use the built-in Mail app on macOS (or another email client), your account syncs with the app, and copies of your emails are stored locally on your Mac. When you delete a message, even if it disappears from the Trash, it doesn’t vanish instantly from your computer. The file still exists on your hard drive, but the space it occupied is simply marked as “available” for new data. Only once the system overwrites that space is the email considered permanently deleted (unless you have a backup).
This distinction is important:
- Webmail only > recovery depends on the provider’s Trash.
- Webmail + Mail app on Mac > you may also recover deleted emails from your Mac’s local storage using recovery tools, as long as the data hasn’t been overwritten, or a backup system if the emails were overwritten.
How to Restore Recently Deleted Emails on Mac
Whether you’re using webmail or an email client on your Mac, the first place where you should look for a deleted email is in the trash section. So all you need to do for this method is to locate the trash folder and restore the mistakenly deleted email.
Also, depending on the email client that you’re using, there may be a time limit on how long it stores deleted emails in the trash (for example, Gmail stores deleted messages in the Trash folder for 30 days, after that, they get automatically removed). Therefore, it is best not to waste any time and start the email recovery process as soon as you realize that you’ve noticed that you’re missing an email.
Here’s how to find deleted emails on Mac in the Trash folder and recover them:
- Open your mail in the browser, or launch the Mail app on your Mac (if you use it).

- From the sidebar, click Trash.
- Now you can view deleted emails and find the ones that you wish to recover. Right-click the email and choose Move to and select the location for the recovered email.

If your account is tied to iCloud Mail, you don’t have to rely only on the Mail app. You can also restore a deleted message through the iCloud website. To do this, go to icloud.com > Mail > Trash > select the email and click Move Message.
We’ll repeat that if the email is no longer in the Trash, it will be treated as permanently deleted. But that doesn’t mean you’re out of options — a bit further down we’ve outlined several methods you can use to retrieve such deleted emails on Mac.
Where are Emails Stored on a Mac?
Before we show how to recover permanently deleted emails on a MacBook (or another Mac computer), it’s worth pointing out where your messages are saved locally. This detail won’t change your chances of recovery, but it can make it easier to follow the methods we’ll cover next.
Here’s how to find where your emails are stored on a Mac:
- Launch Finder.
- From the menu bar, click Go > Go to Folder.
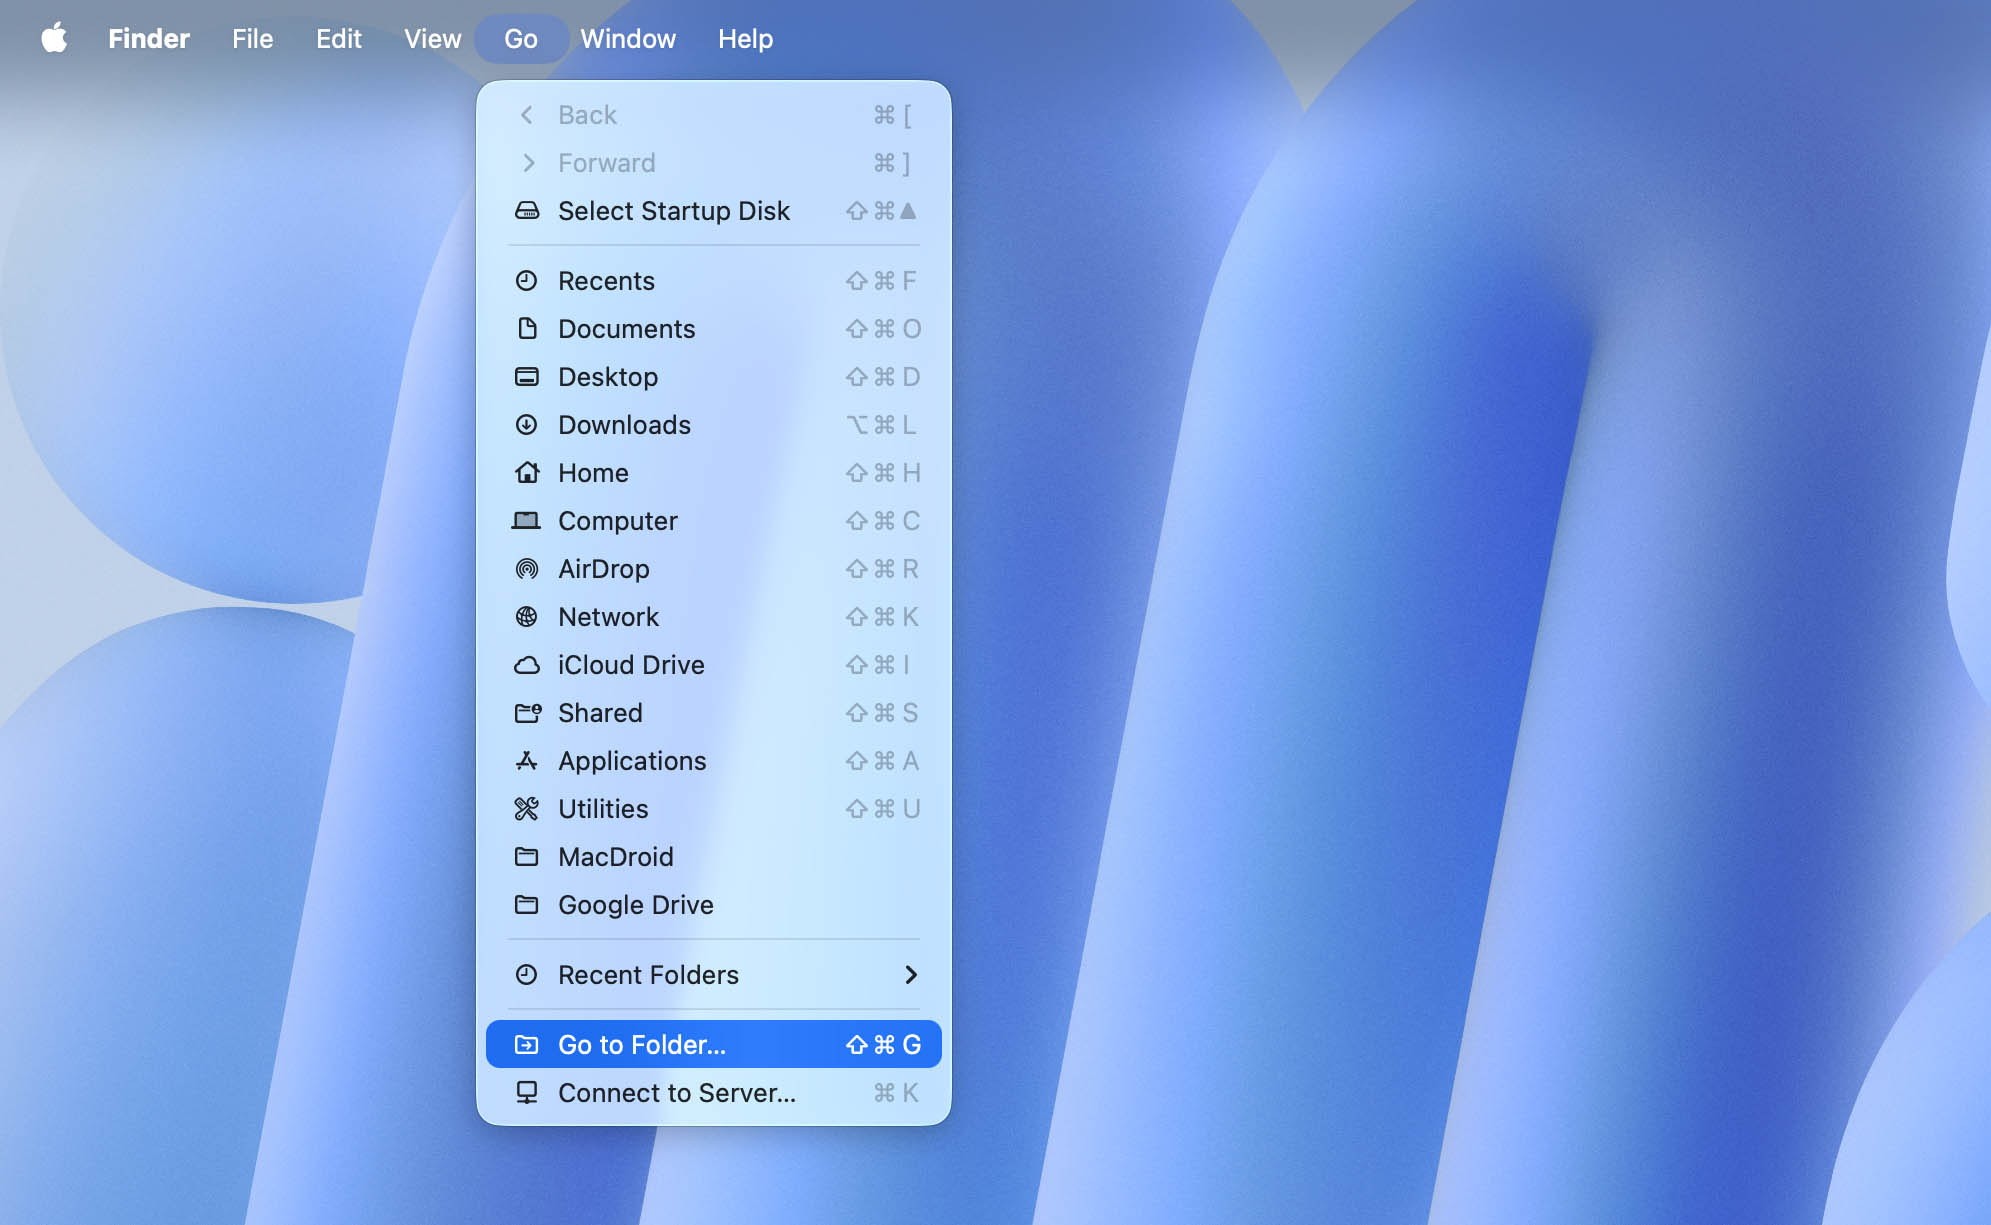
- In the search field, type in ~/Library/Mail/ and hit Enter.
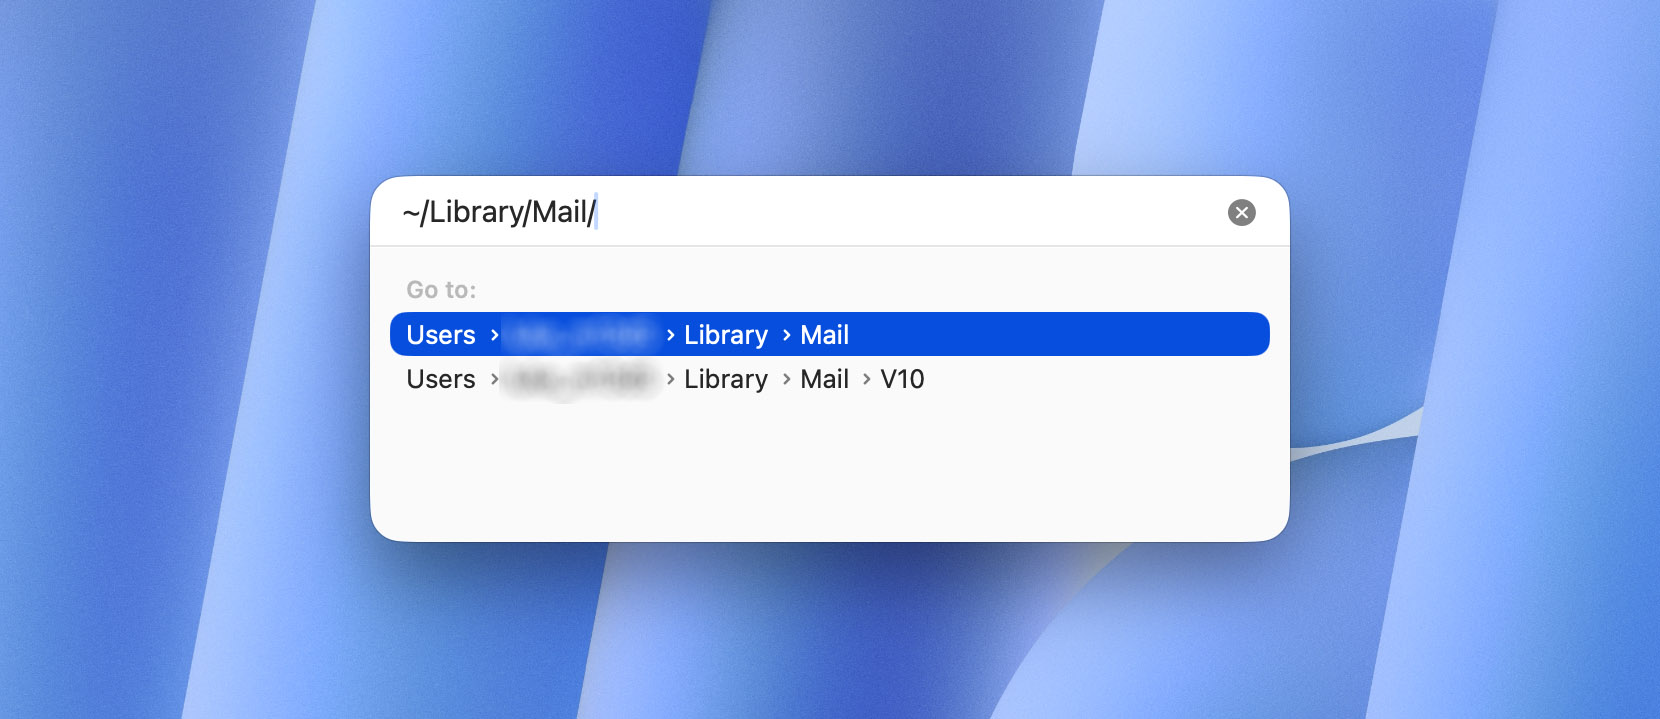
This way, you’ll be redirected to a file archive with all your email messages. To open your emails, click the folder named Vx (instead of x, there will be a corresponding version number).
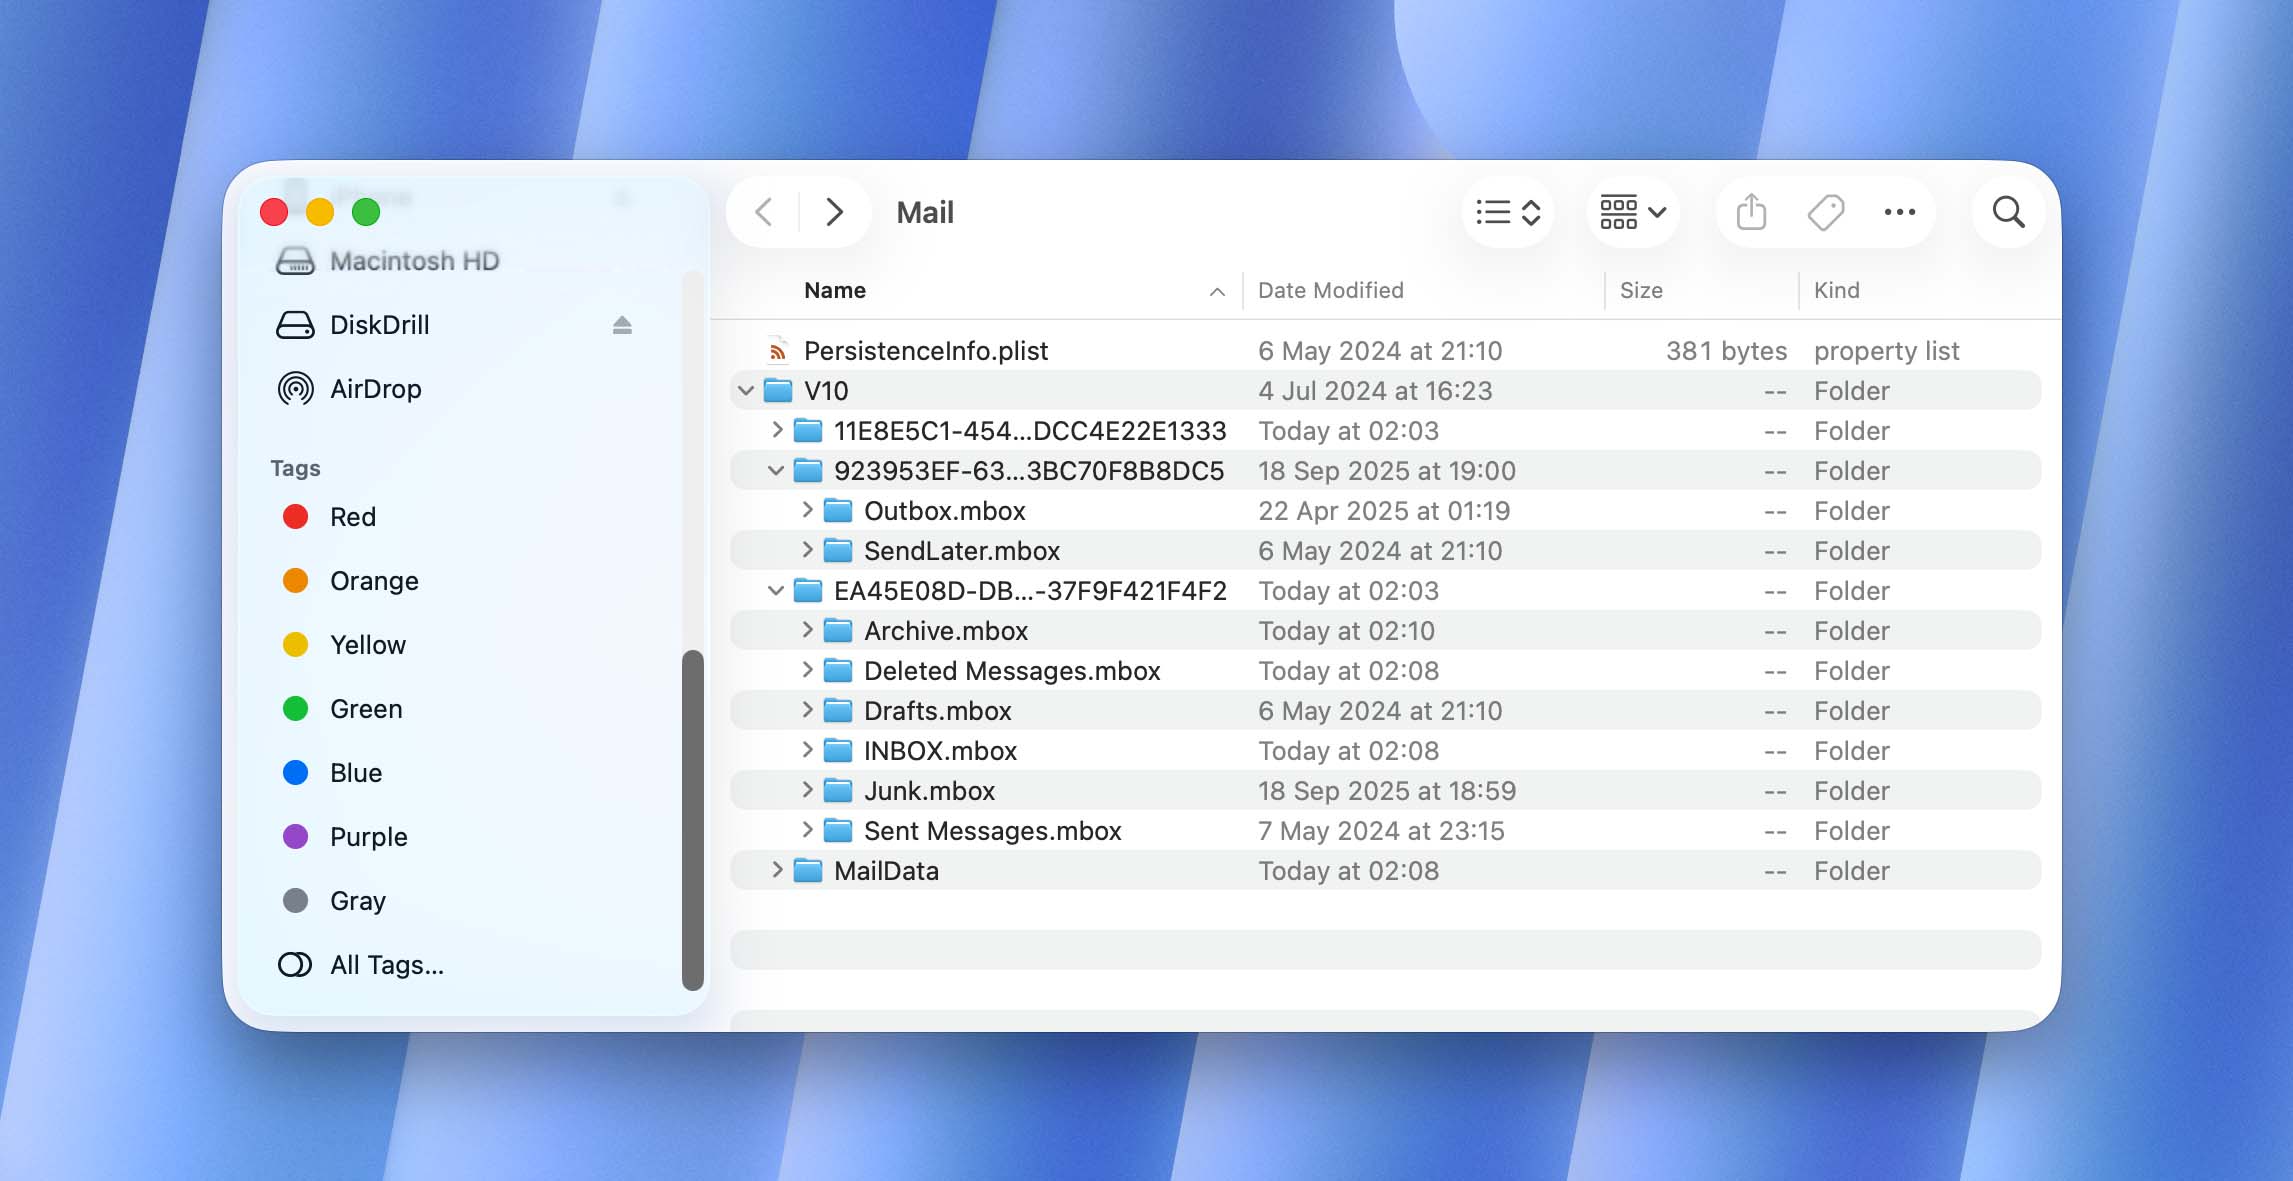
Once you open this folder, you’ll see that all your emails are grouped into separate subfolders. The folders named with a random line of numbers contain your email data. Click any such folder and you’ll see that the emails inside are also grouped into separate folders according to their type (drafts, sent messages, etc.).
How to Recover Permanently Deleted Emails on a Mac
If the emails are no longer in the Trash, recovering them will require either a backup that was created before the deletion or the use of special software. A backup makes the process simple — restoration is guaranteed if the files were included. But since not everyone has one, many users turn to data recovery tools. These programs scan your disk and attempt to bring back the deleted files. They have their own nuances, but when there’s no backup available, this is the only real way to get those emails back (that’s why this will be the first method we will cover).
If you already have a Time Machine backup, you can skip the first method and move straight to Method 2.
Method 1: Use Data Recovery Software
When you try to recover deleted emails (or any other files) with recovery software, the choice of program matters. Pick the wrong one and you’ll just waste time. Our team has been writing about data recovery for years, and during that time we’ve tested almost every popular tool on the market. For us, the most reliable option has consistently been Disk Drill. It offers powerful recovery features, is easy enough for anyone to use, and importantly, it works with Macs running on M1–M4, T2 chips (after installing the Kernel Extension). That last point is critical in our case, since deleted emails are stored on the system disk.
Another detail to keep in mind is the type of disk inside your Mac. Modern Macs use SSDs, and those drives rely on the TRIM command, which quickly clears unused blocks of data. Once TRIM runs, chances of recovery completely drop. That’s why it’s important to act quickly. If you want more background, check our separate guide on recovering data from SSDs on Mac.
Here’s how to recover deleted emails on a Mac using Disk Drill:
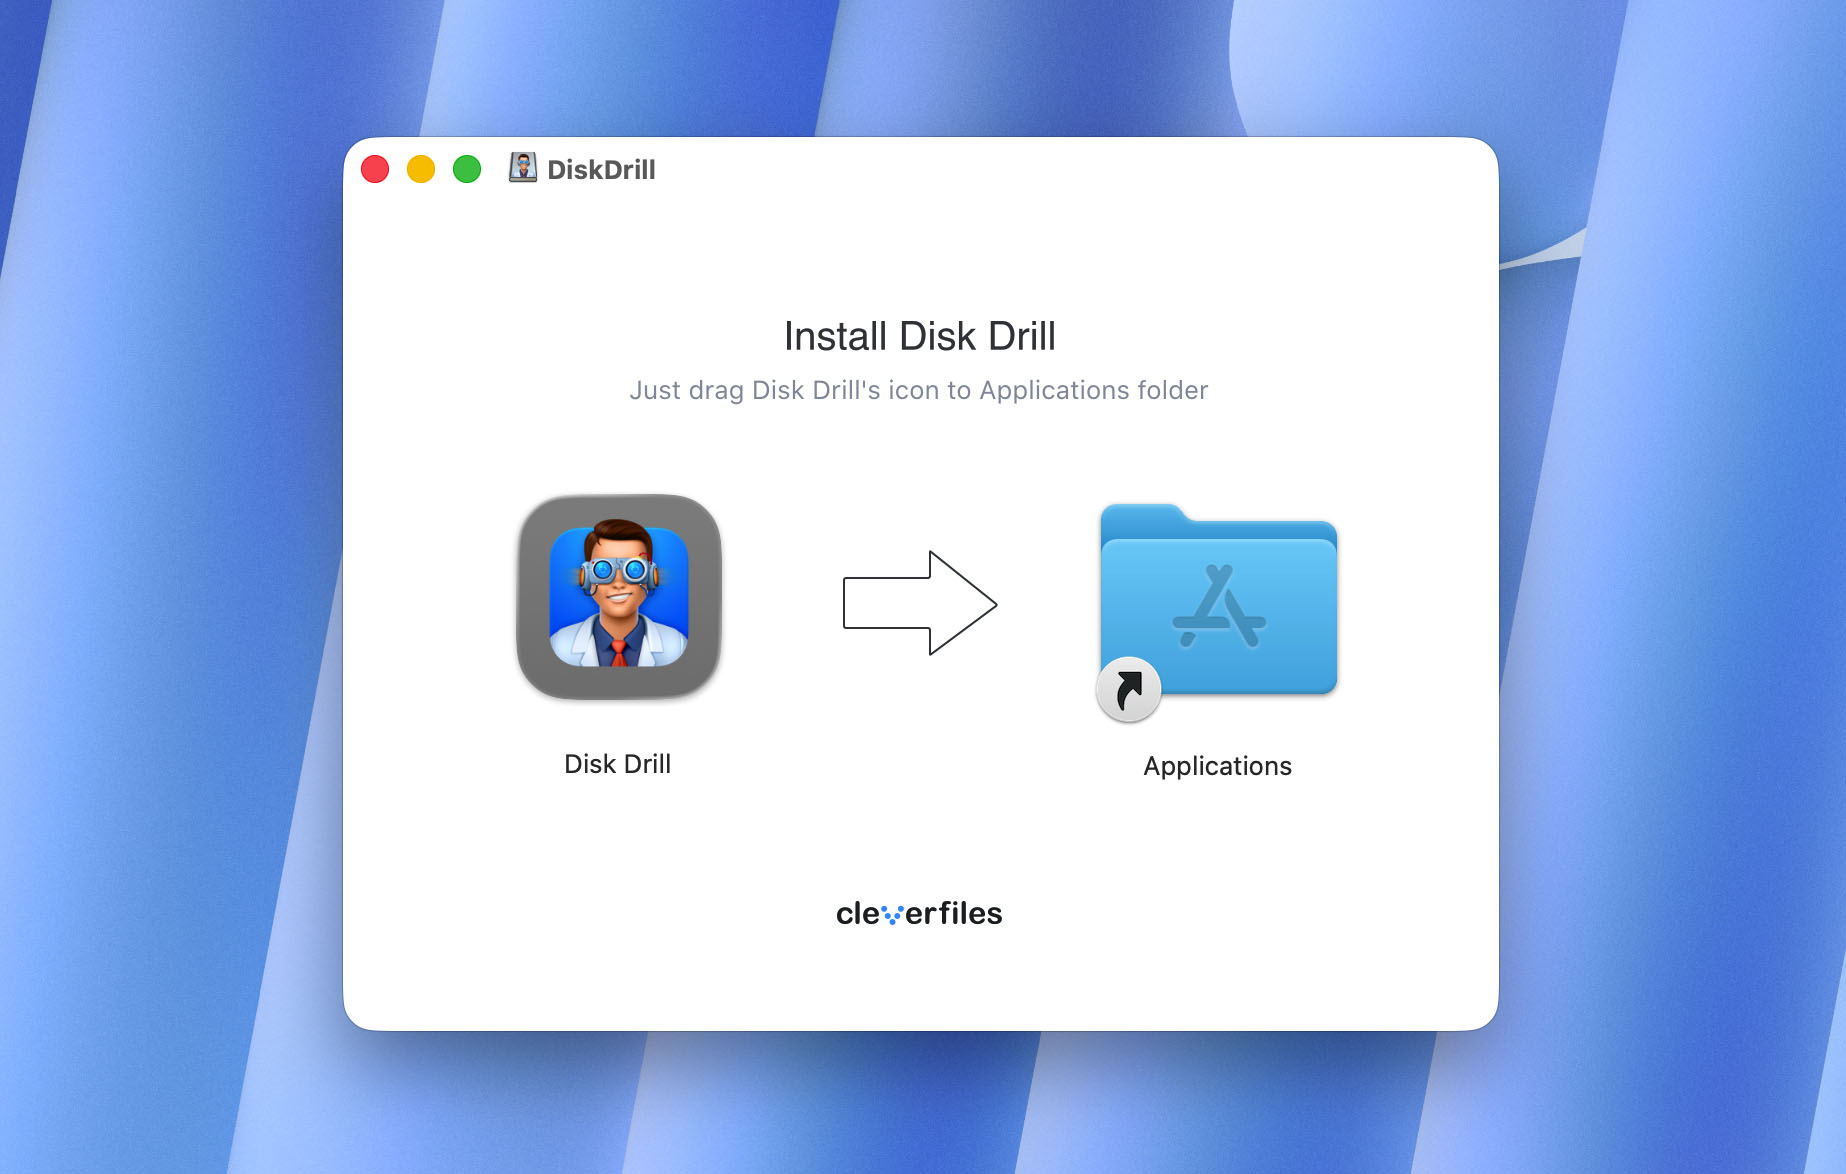
- Download Disk Drill from the official website and follow the onscreen instructions to install it (do not install the program on the same disk where the emails were deleted, since this can partially or completely overwrite them and make recovery impossible).
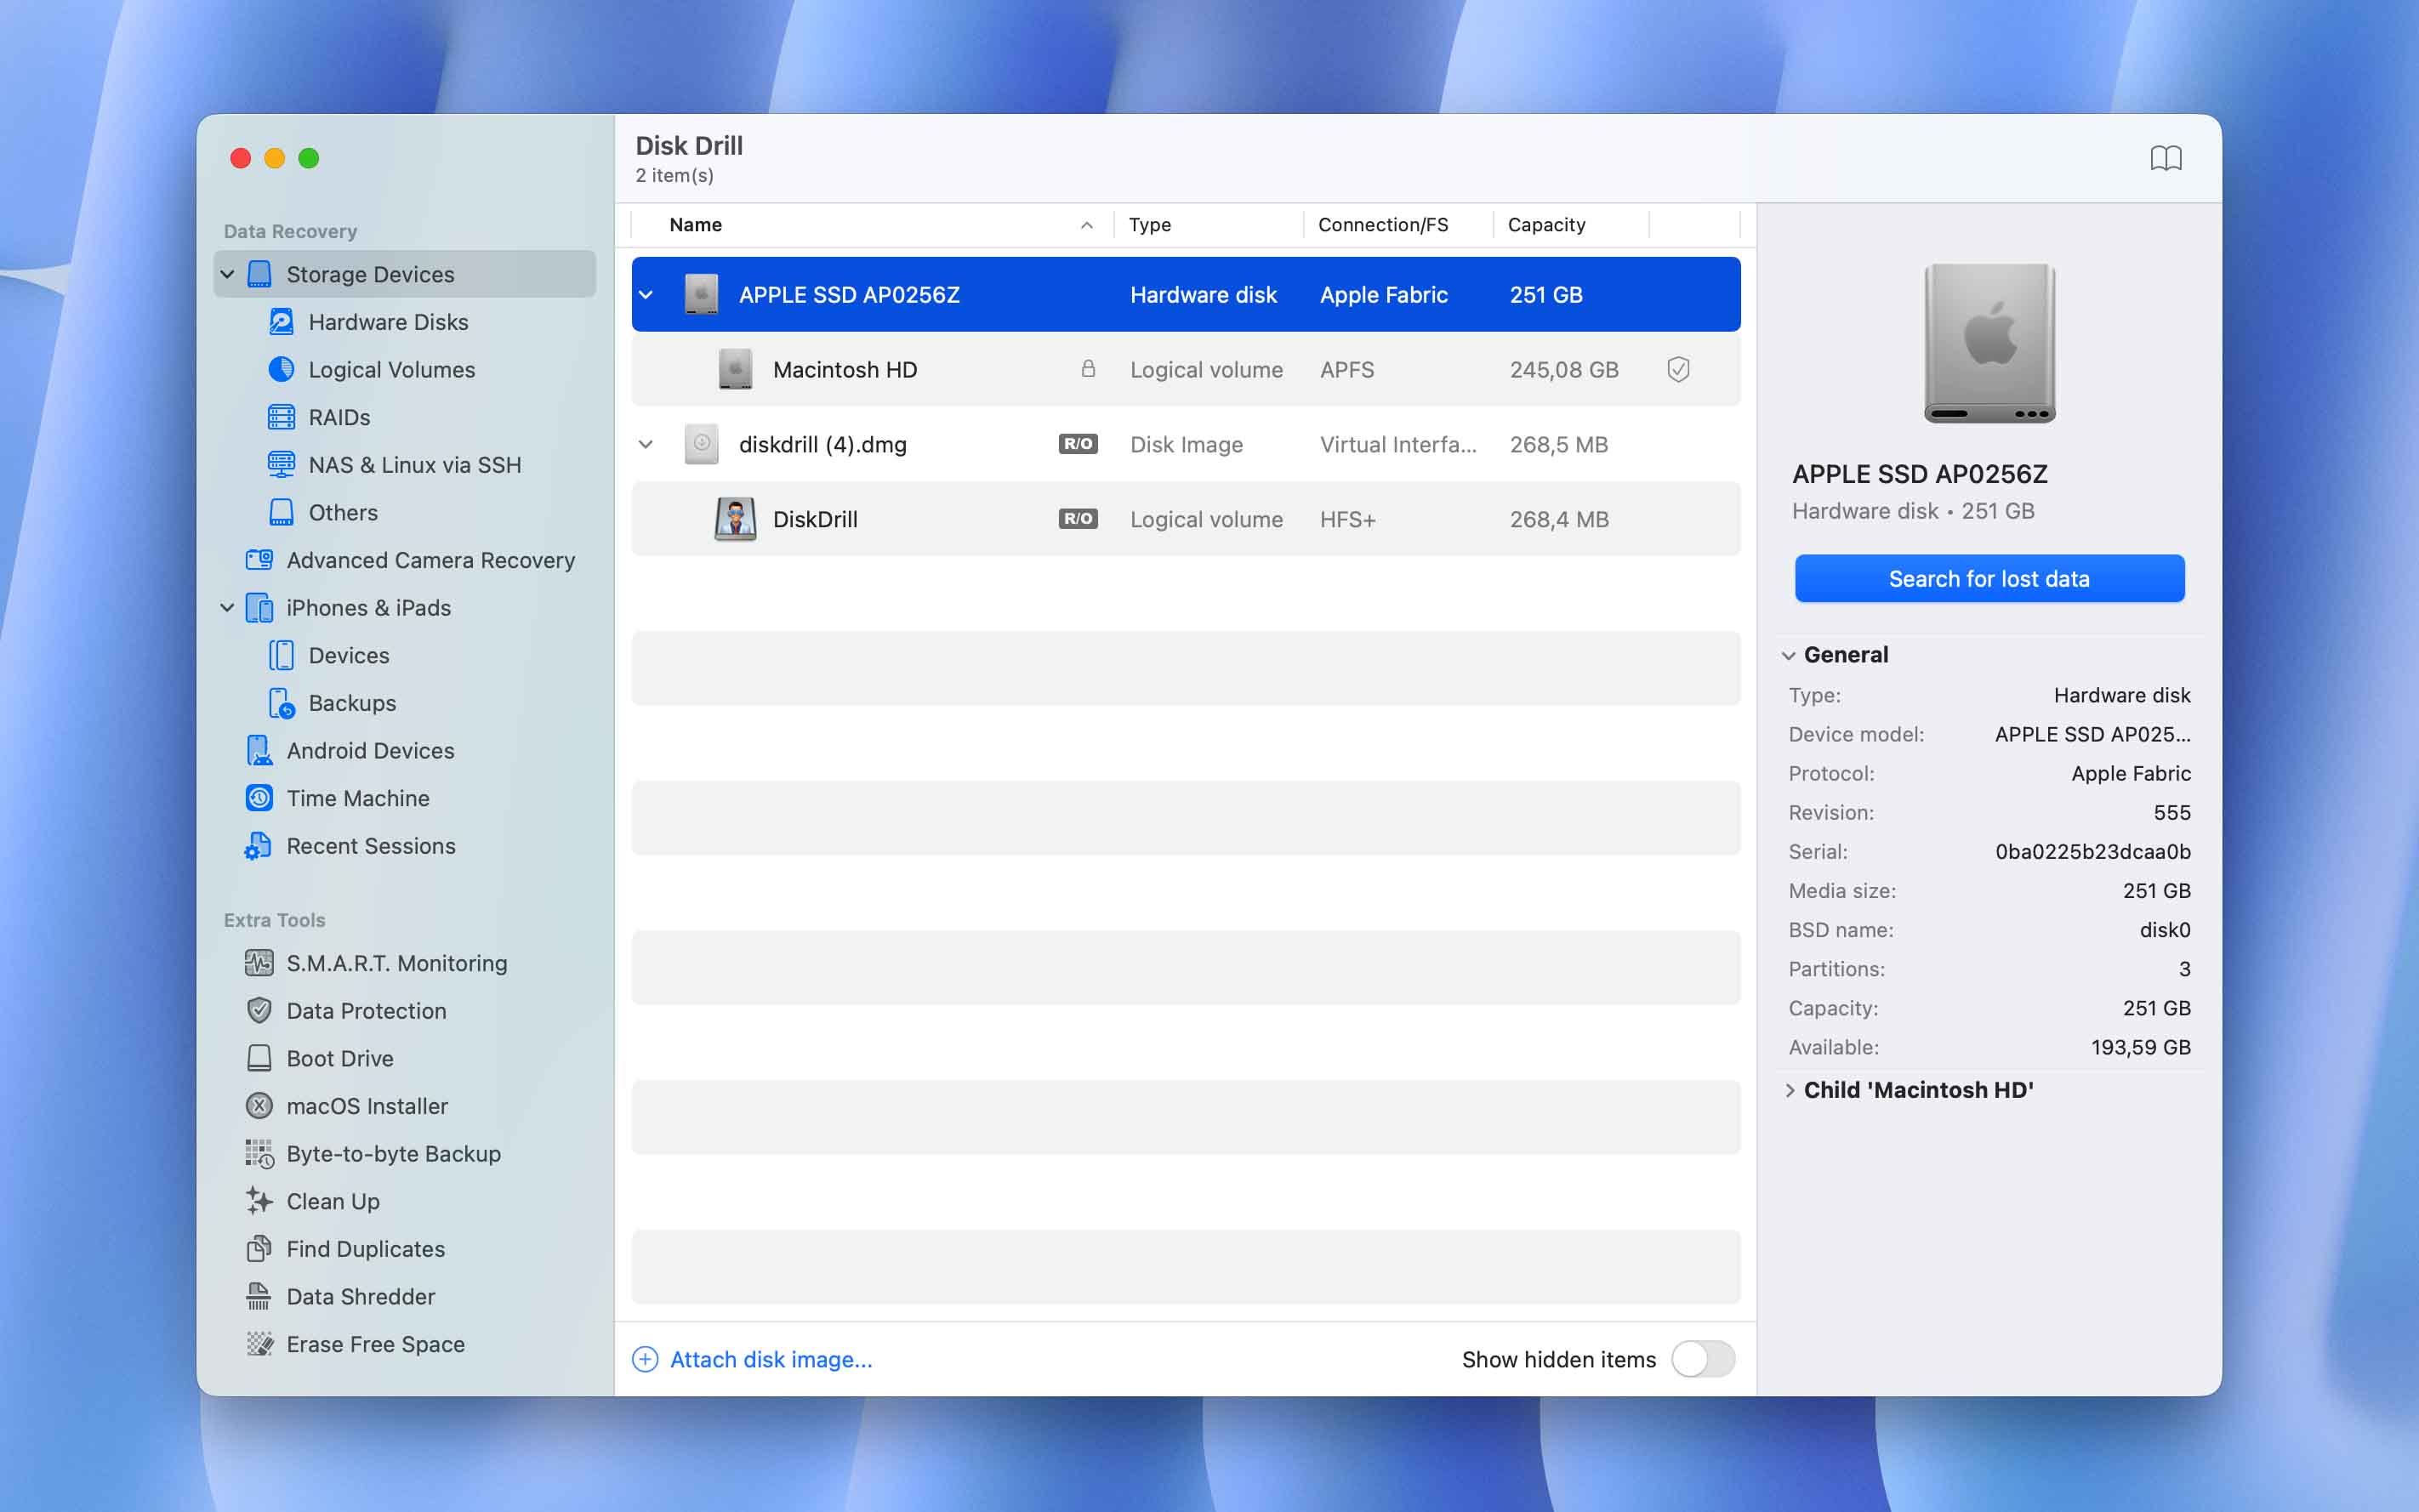
- Open the program. From the list of available devices, select the drive where your emails were stored (in most cases, your Mac’s internal system disk) and click Search for lost data.
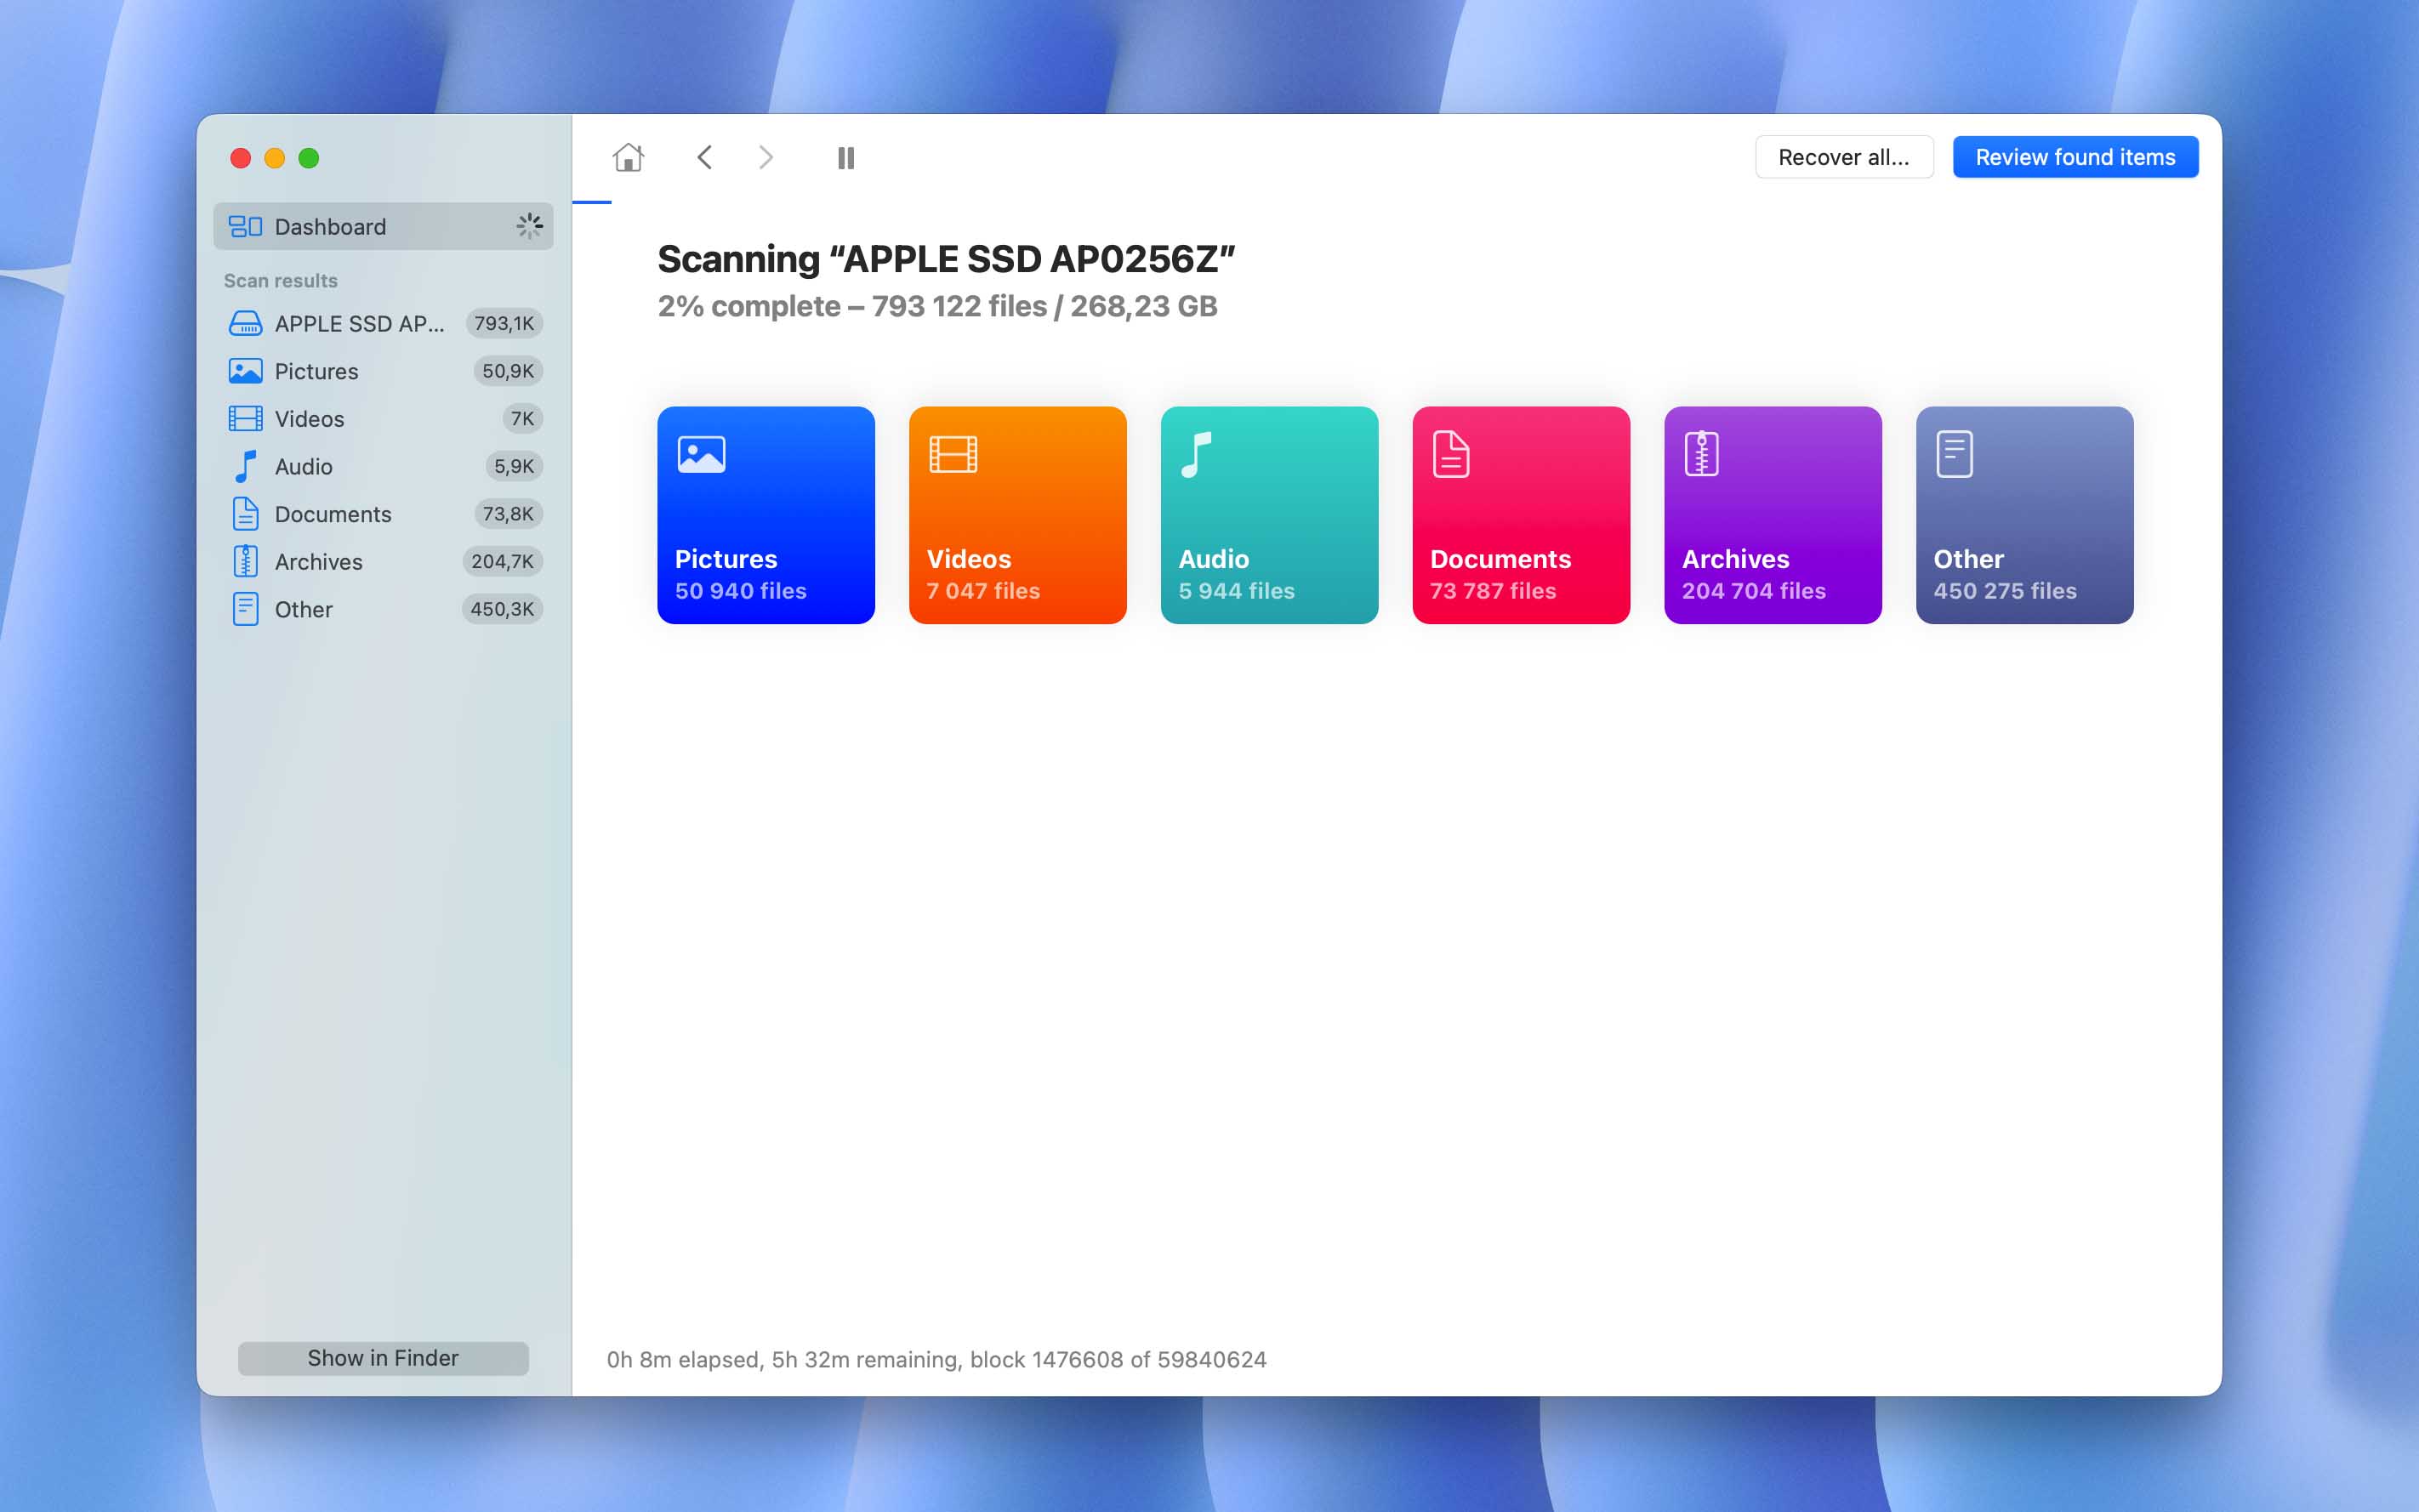
- Wait for the scan. You can click Review found items partway through if you don’t want to wait, but we recommend letting it finish. When the scan is complete, Disk Drill will show you the recovery chances for each file.
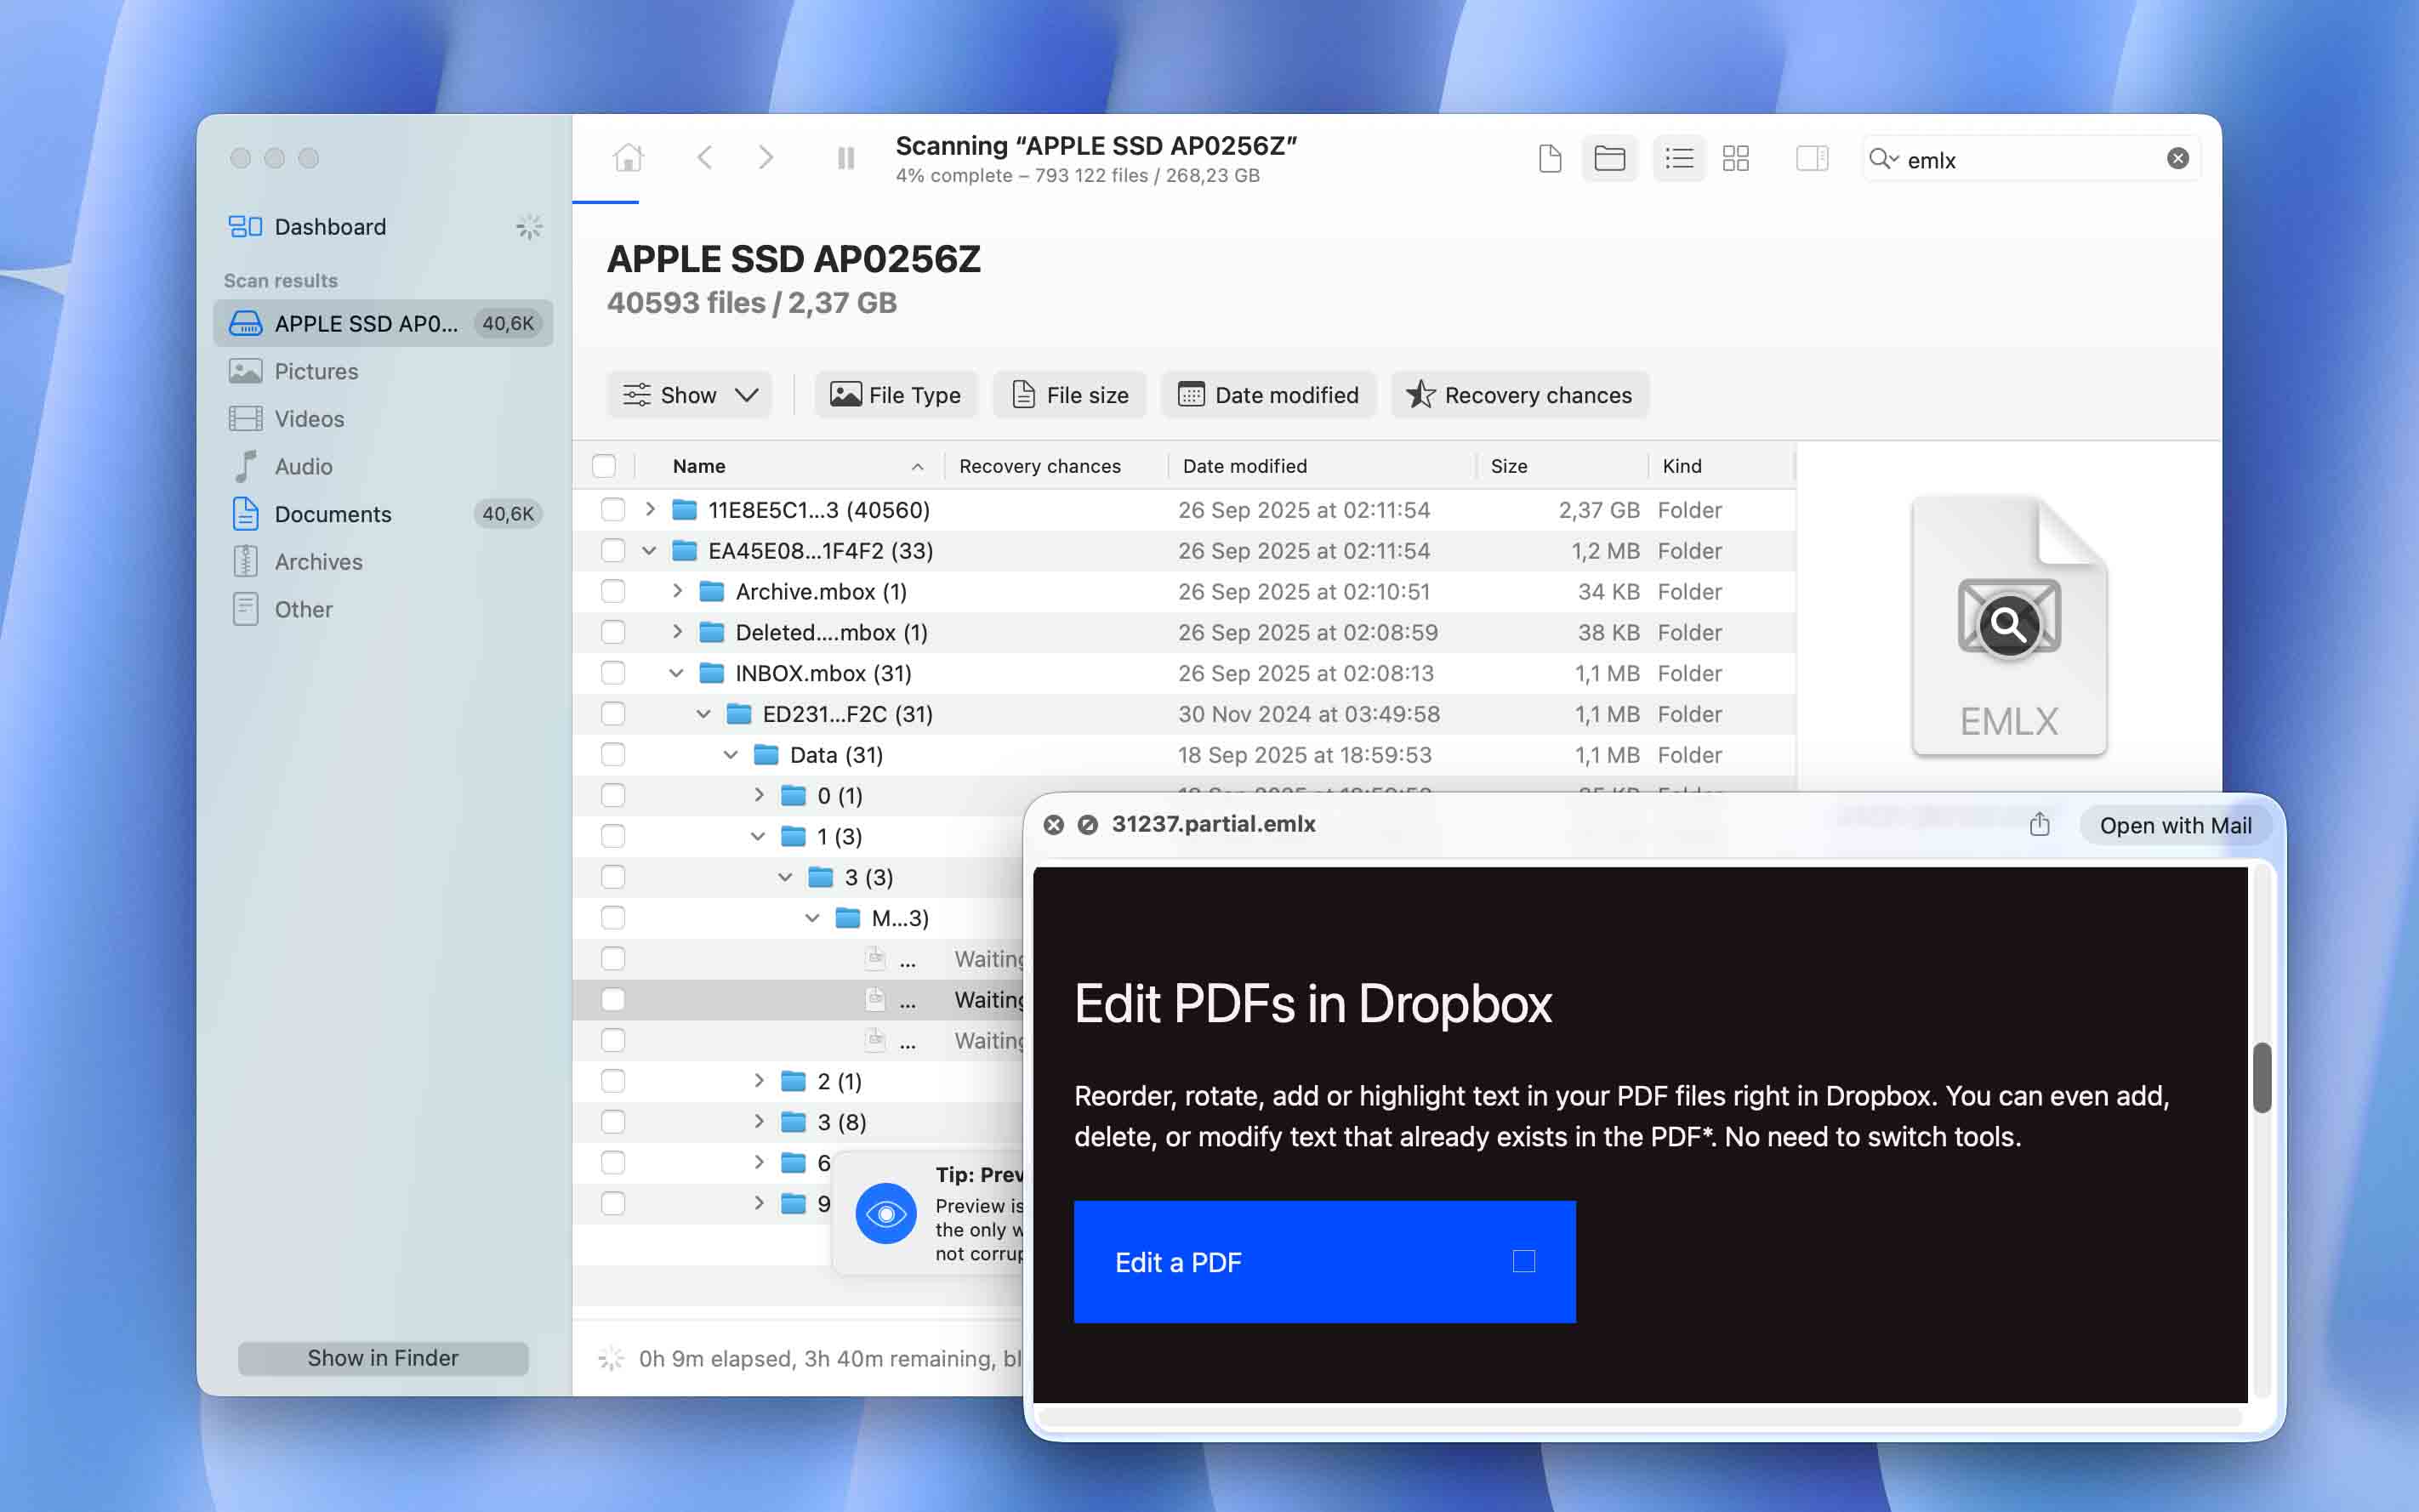
- Search for your emails. In the results window, either navigate to the folder where Mail stores local copies (explained earlier) or use the search bar in the top-right corner and type emlx — the format used for Apple Mail messages.
- Highlight any file, then click the magnifying glass icon in the preview pane to check the email content. This ensures you only restore the messages you need.
- Select the emails you want, click Recover, and choose a destination folder. Do not save them back onto the same disk you’re scanning — use an external drive instead.
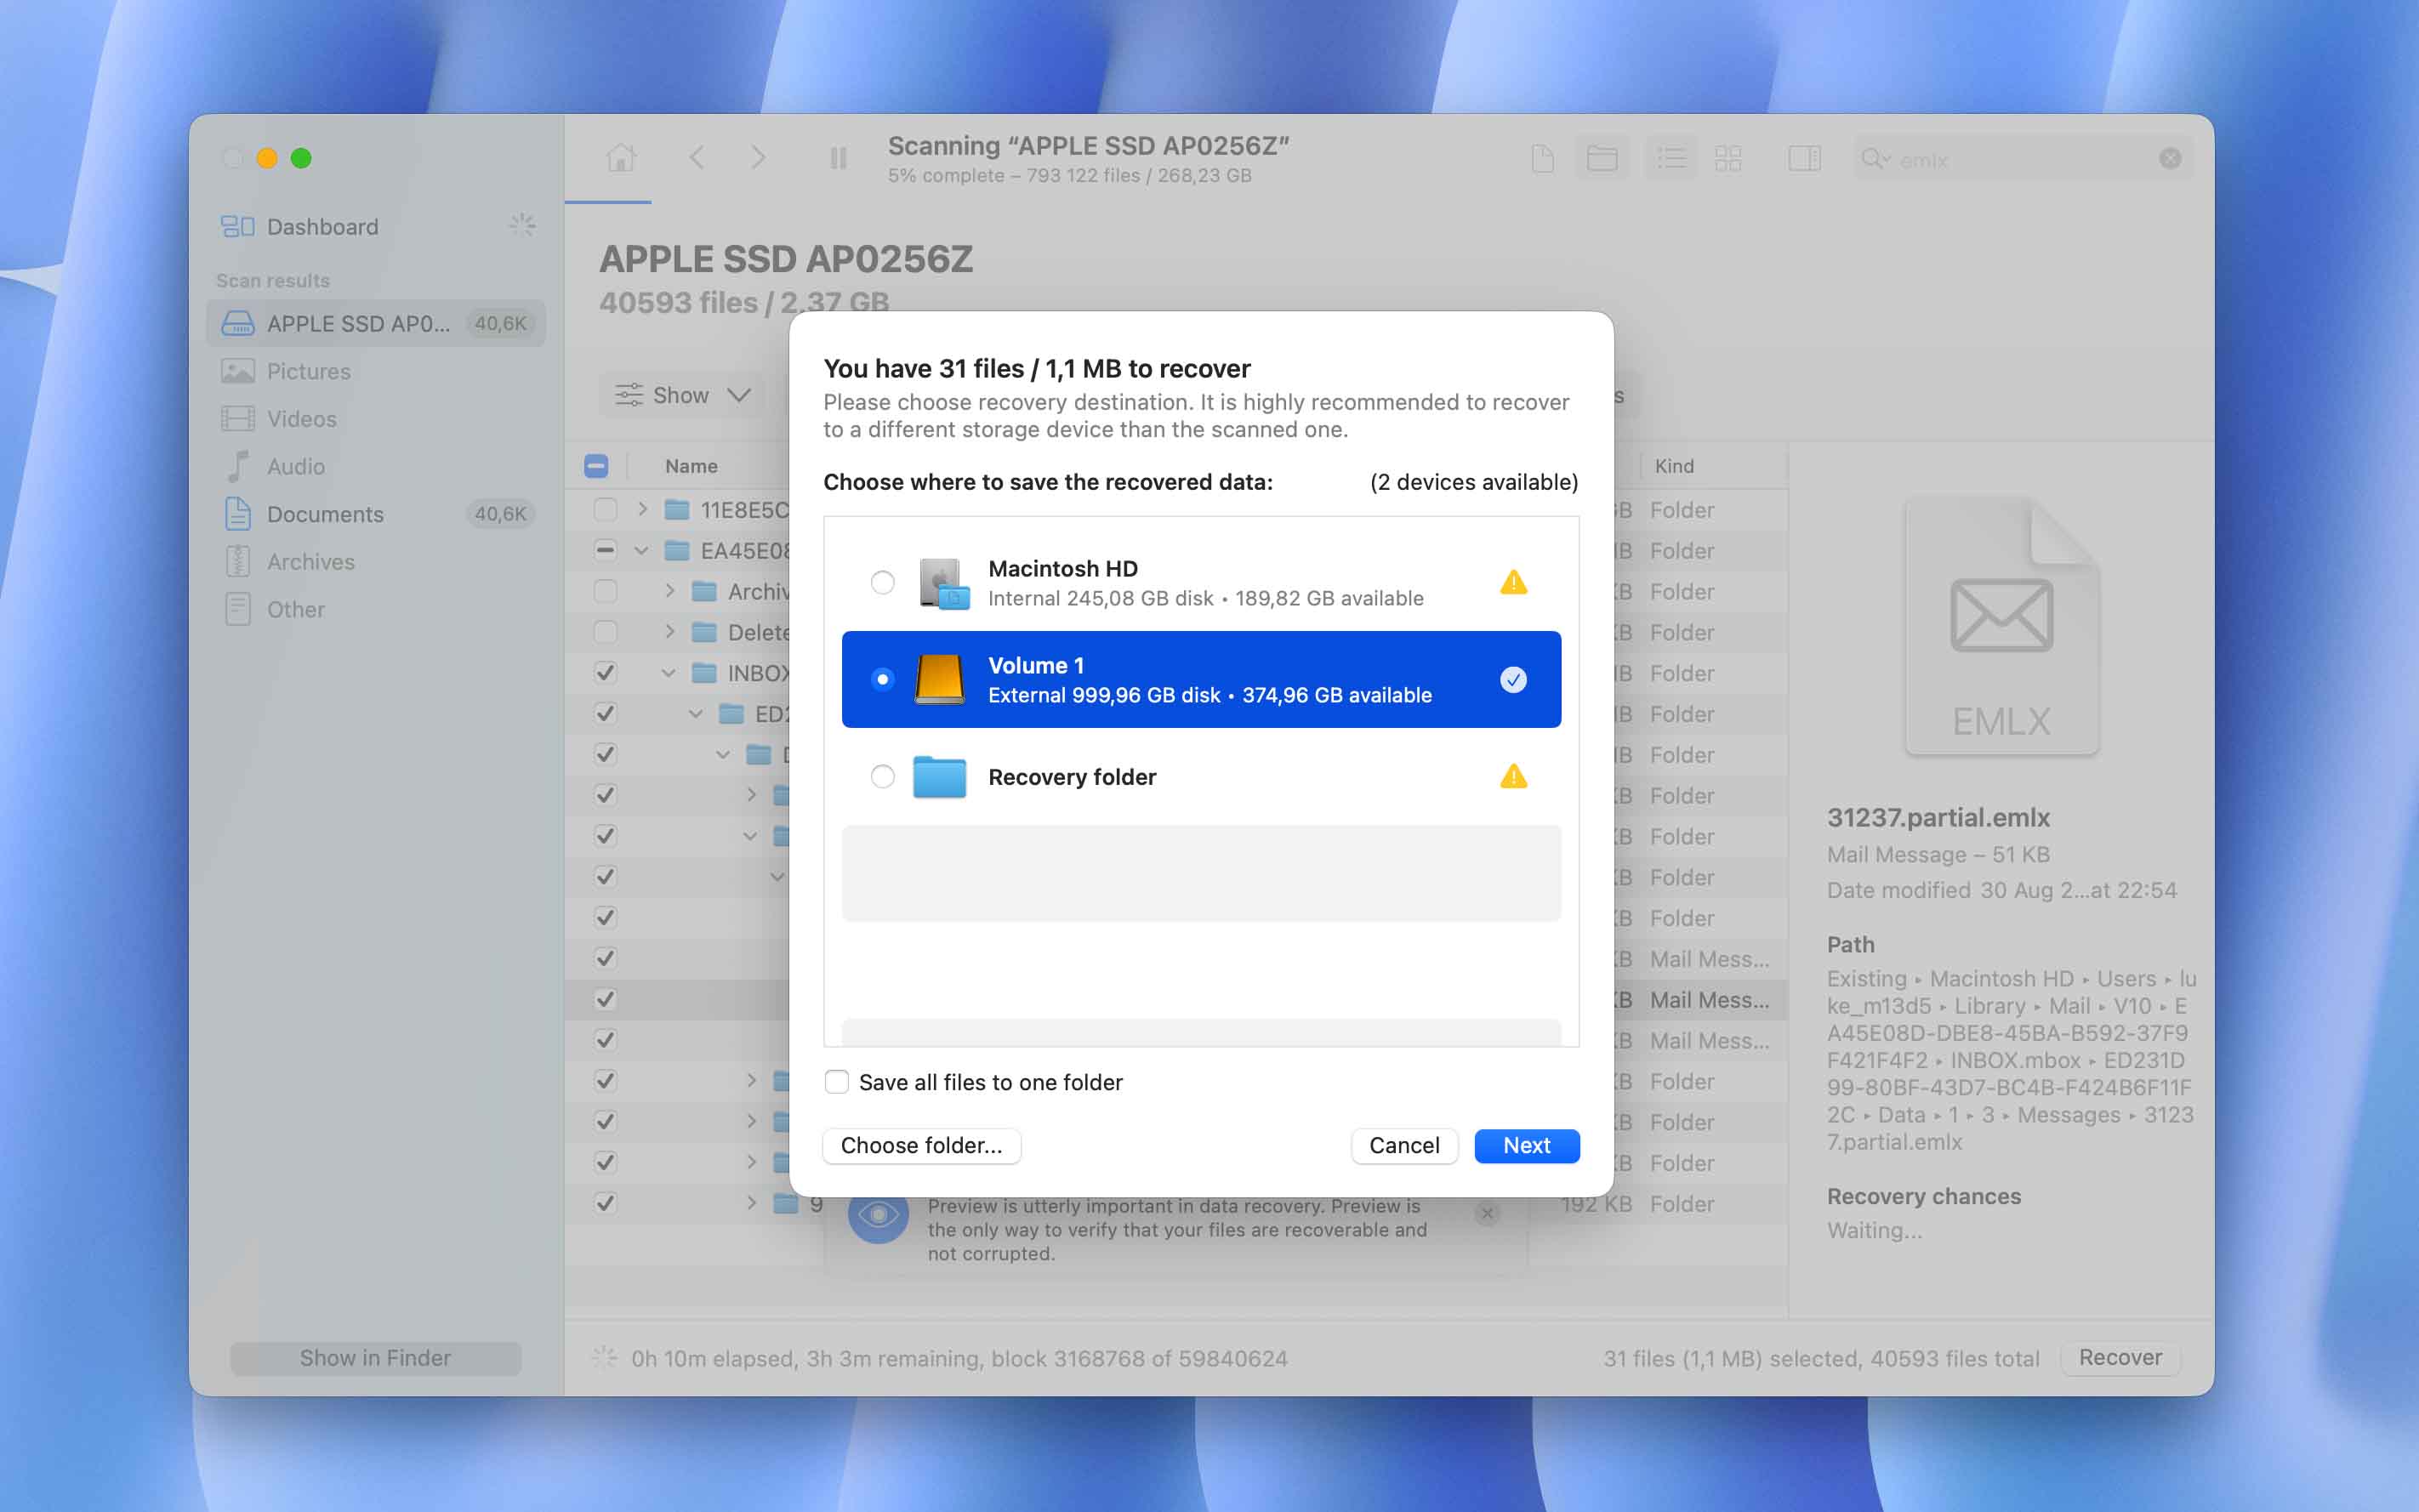
- Click Next. Disk Drill will restore your selected emails to the chosen folder.
After recovery, the files will be on your disk, but to read them directly in Apple Mail, you’ll need to import them. We’ve described those steps in a separate section below.
Disk Drill lets you scan and see whether your deleted emails are recoverable for free. However, to actually restore the files, you’ll need to upgrade to the Pro version.
Method 2: Use Your Time Machine Backup
If you’ve been regularly backing up your Mac with Time Machine, then you should be able to successfully recover any data from your recent backup, including a deleted email. However, this method will work only if you’ve made a Time Machine backup before deleting your emails.
If you want to recover deleted emails on Mac Mail or recover a deleted Mailbox from your Mac, then this data recovery method should help. Follow these steps to restore an email from Time Machine backup on your Mac:
- Open Finder on your Mac.
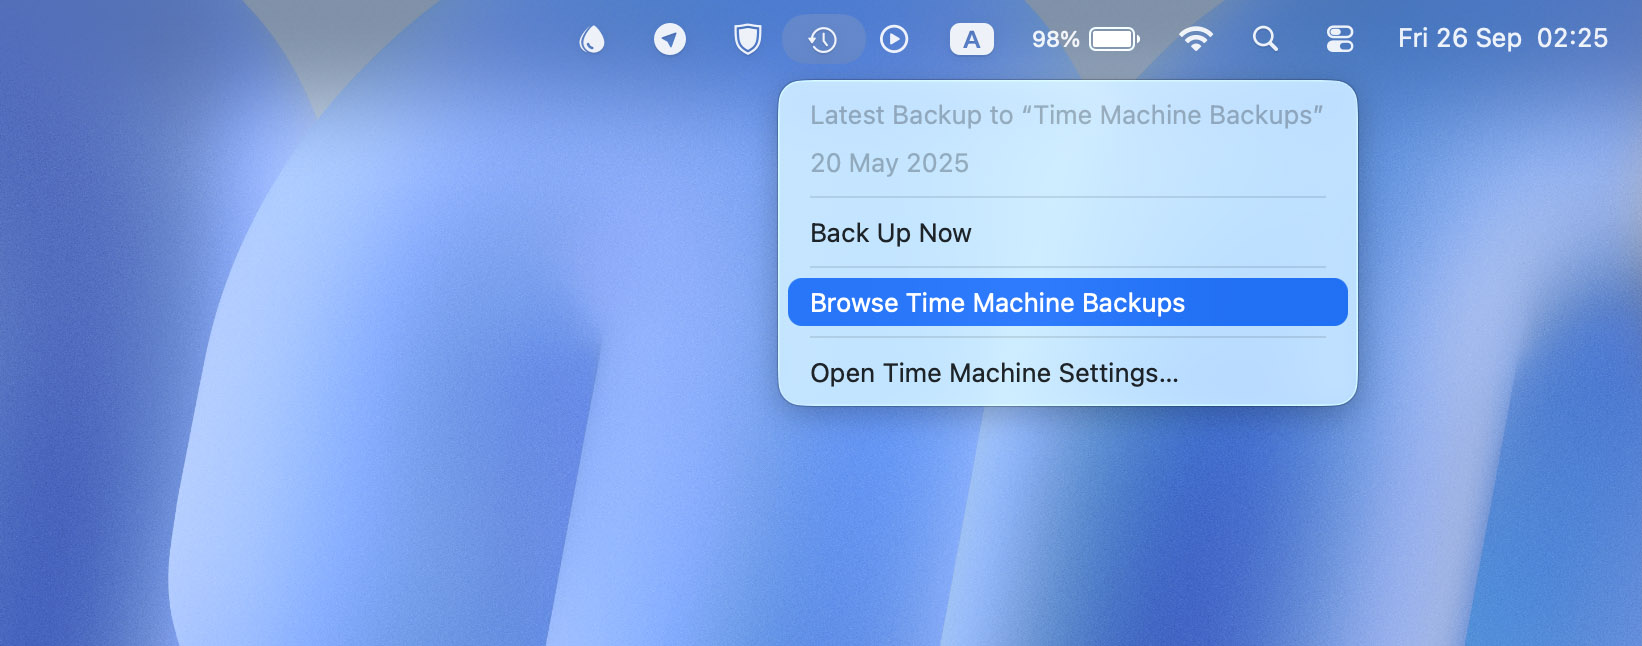
- From the menu bar at the top of the screen, click the Time Machine icon and choose Browse Time Machine Backups.
- In Finder, navigate to: ~/Library/Mail/ ( this is where the local Mail data is stored).
- Inside, open the folder named Vx (the “x” stands for the version number).
- Use the timeline on the right edge of the screen to browse through previous backups until you locate the version that still contains your deleted emails.
Select the Vx folder (or the subfolder with your account data) and click Restore.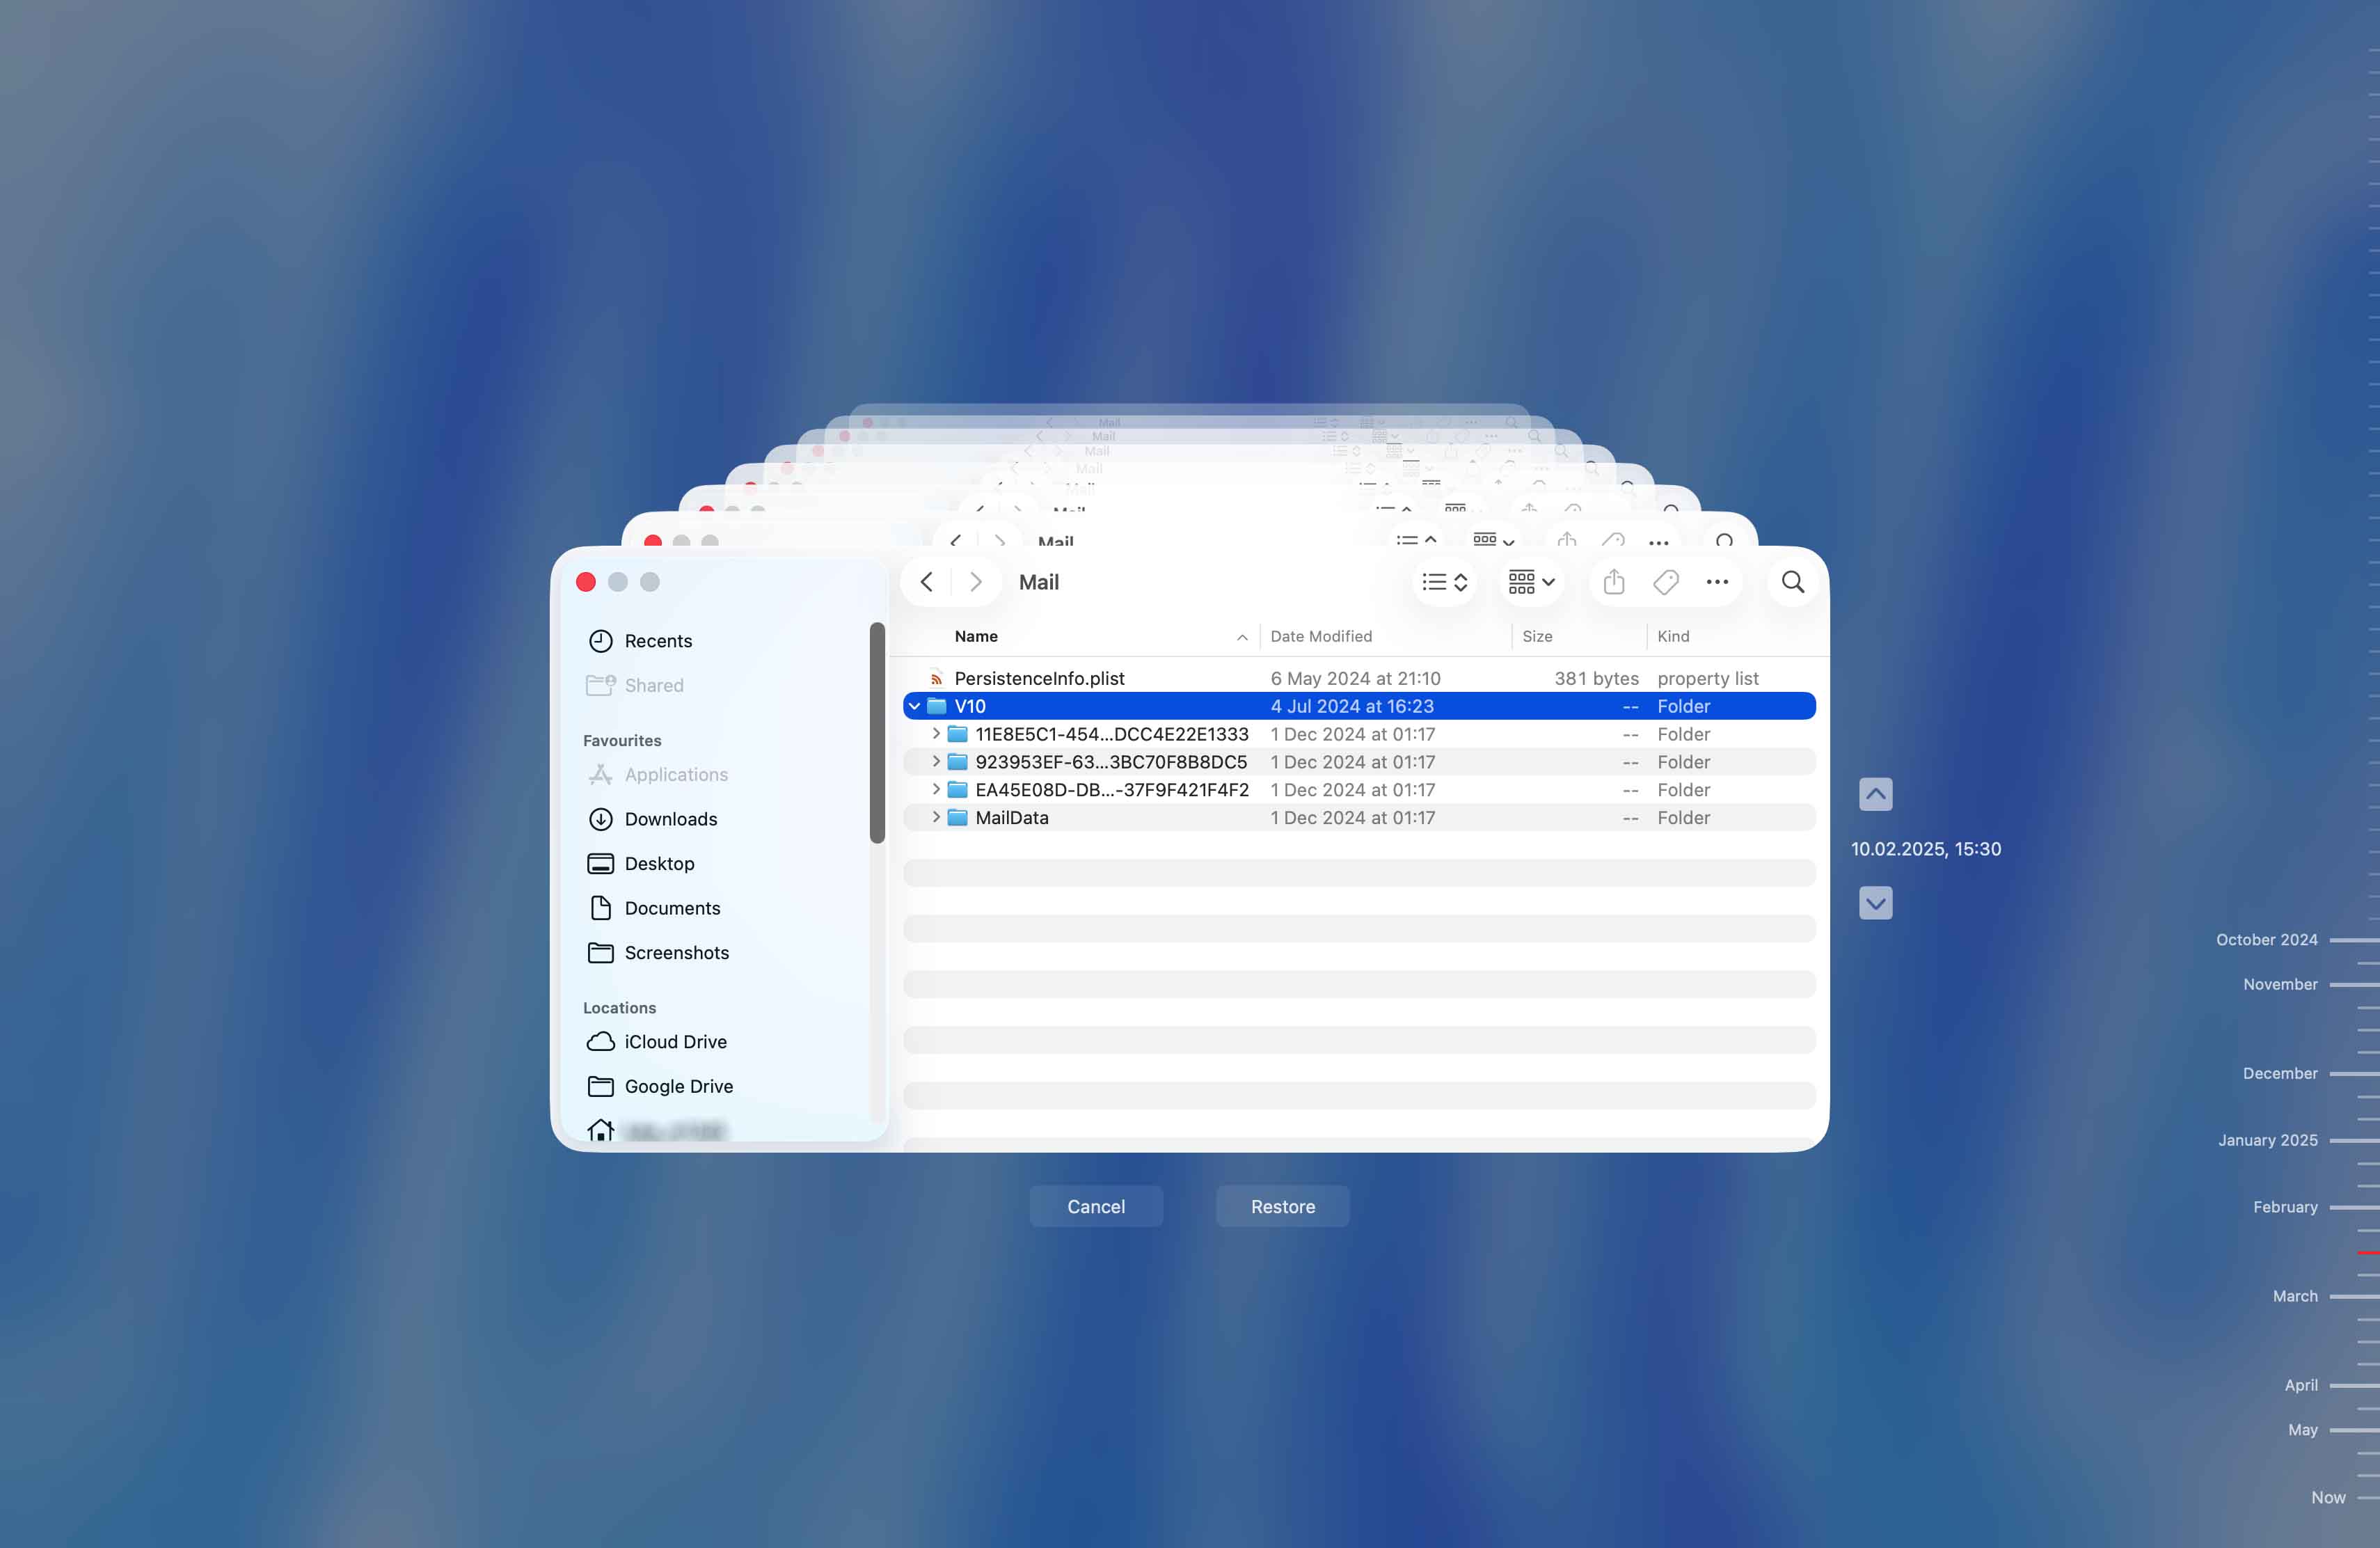
Although the files are restored directly to the same folder where they were originally stored, they won’t automatically appear in the Mail app (just like with the data recovery software method), and as we already mentioned, the way to fix this is described below.
How to Import Recovered Emails Back into Apple Mail
You can technically open the recovered email files right after restoring them, but once you do, you’ll see why it isn’t the best idea (the files include raw code mixed with the text, which makes them hard to read). To view the messages in a clean and convenient way, it’s better to import them back into the Mail app. This takes only a minute. Here’s what you should do:
- Open the Mail app on your Mac.
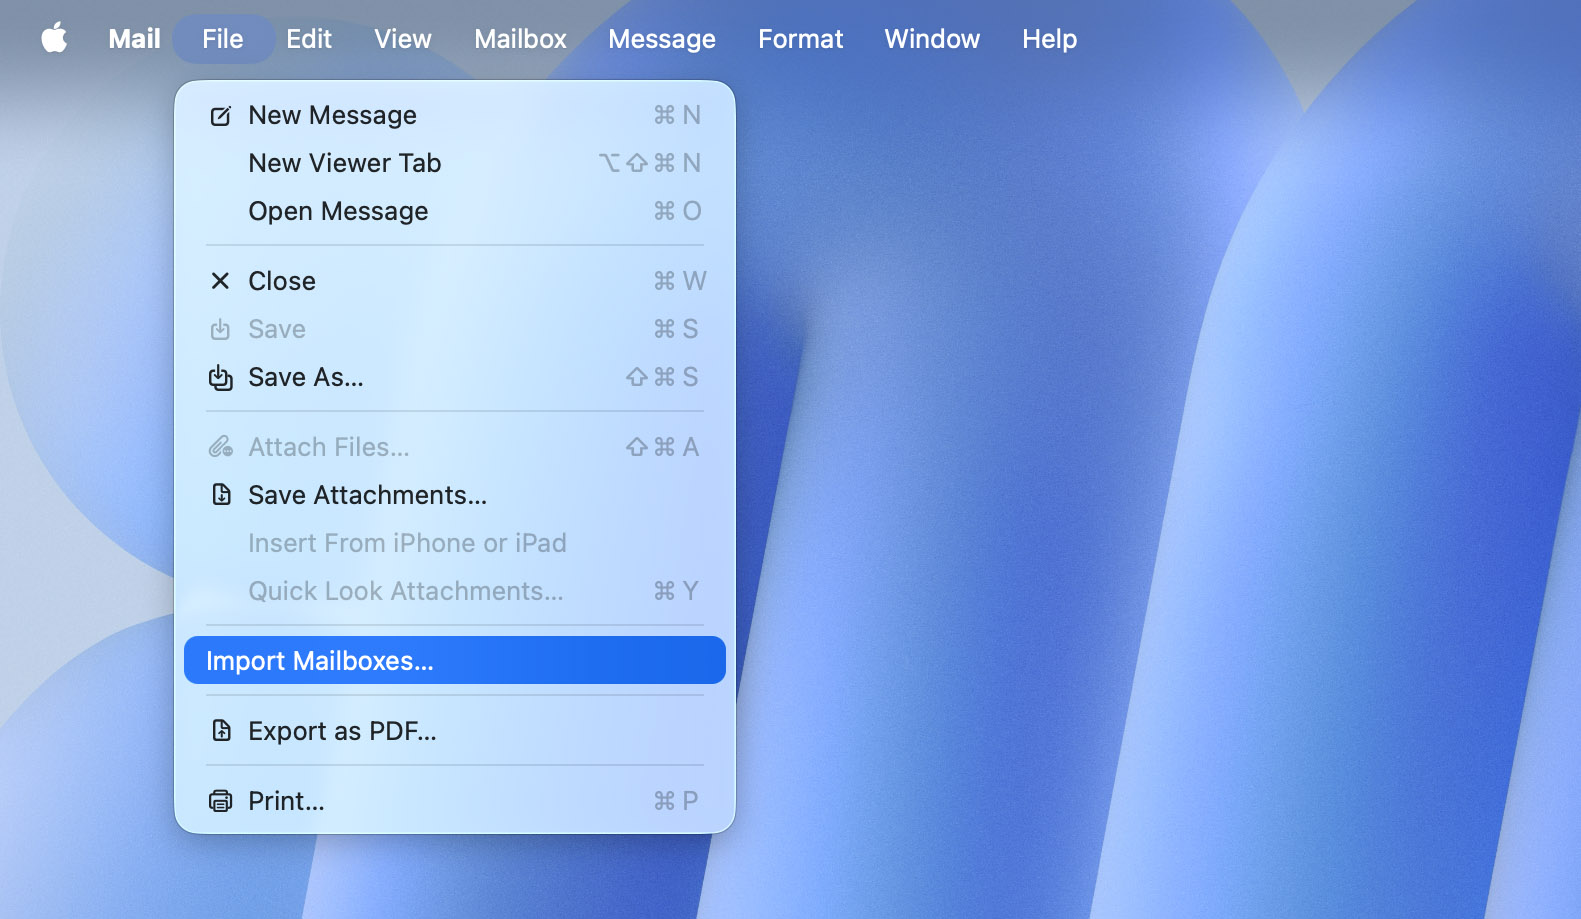
- In the menu bar, go to File > Import Mailboxes.
- Select Apple Mail as the data type.
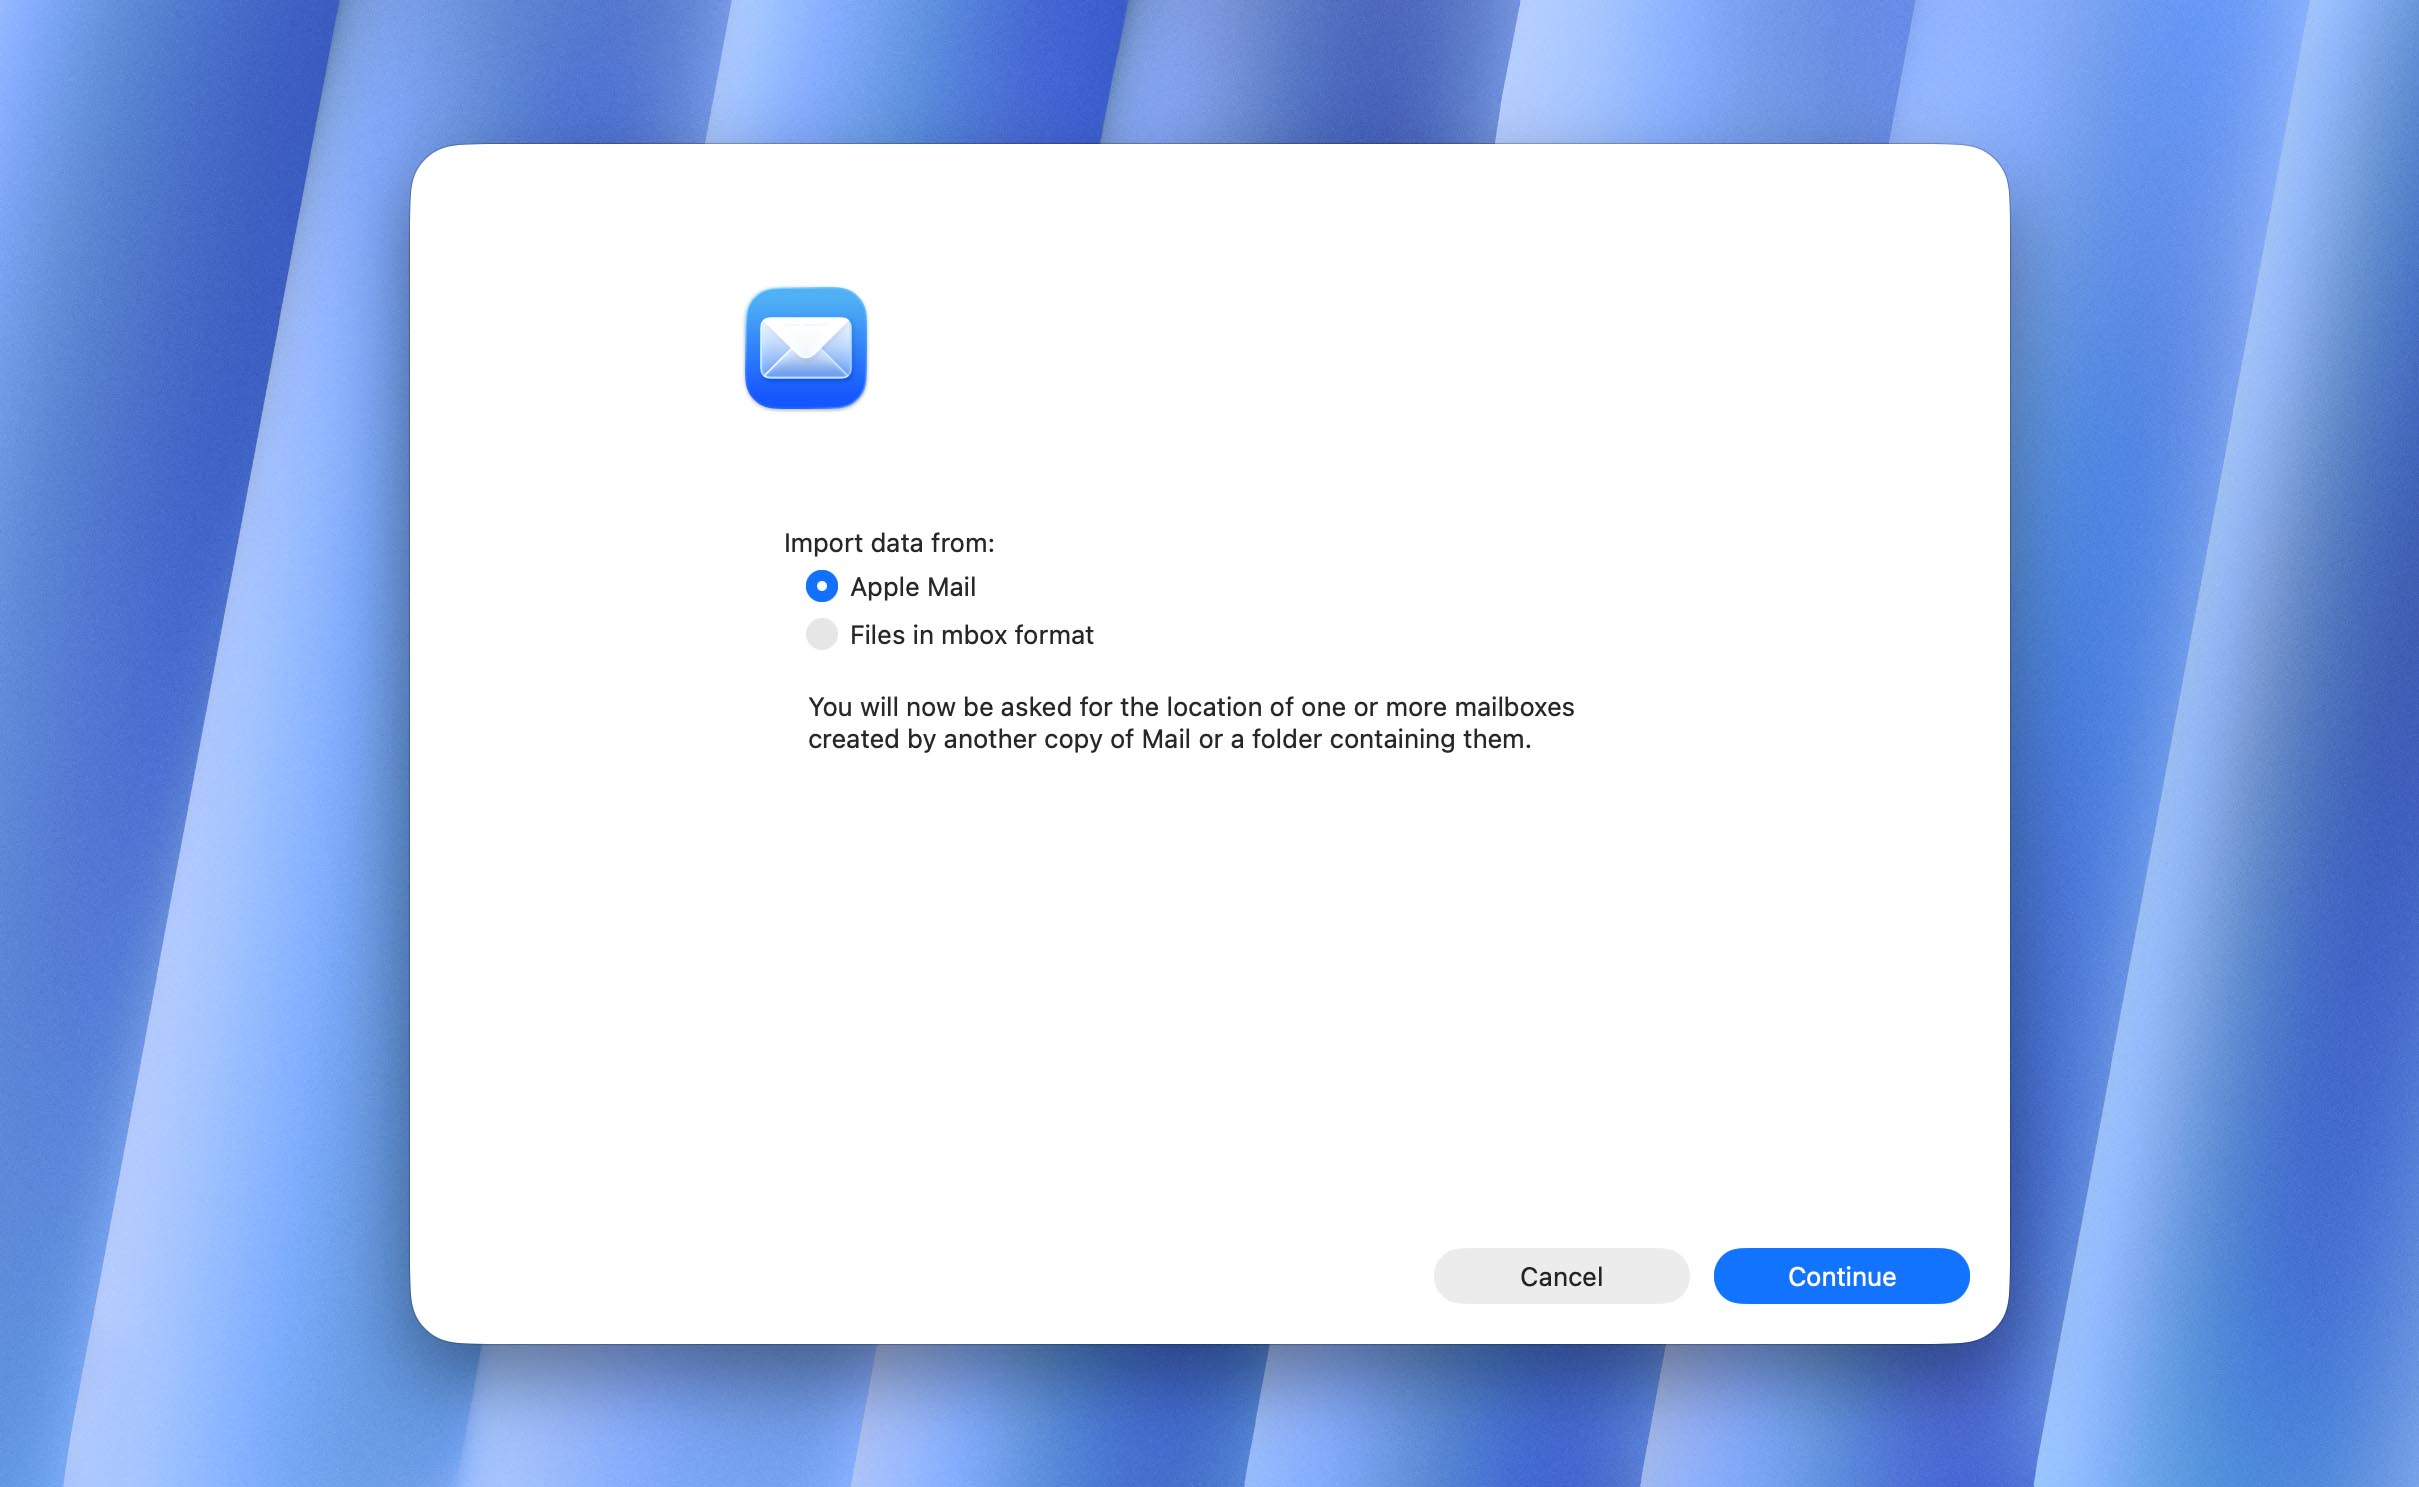
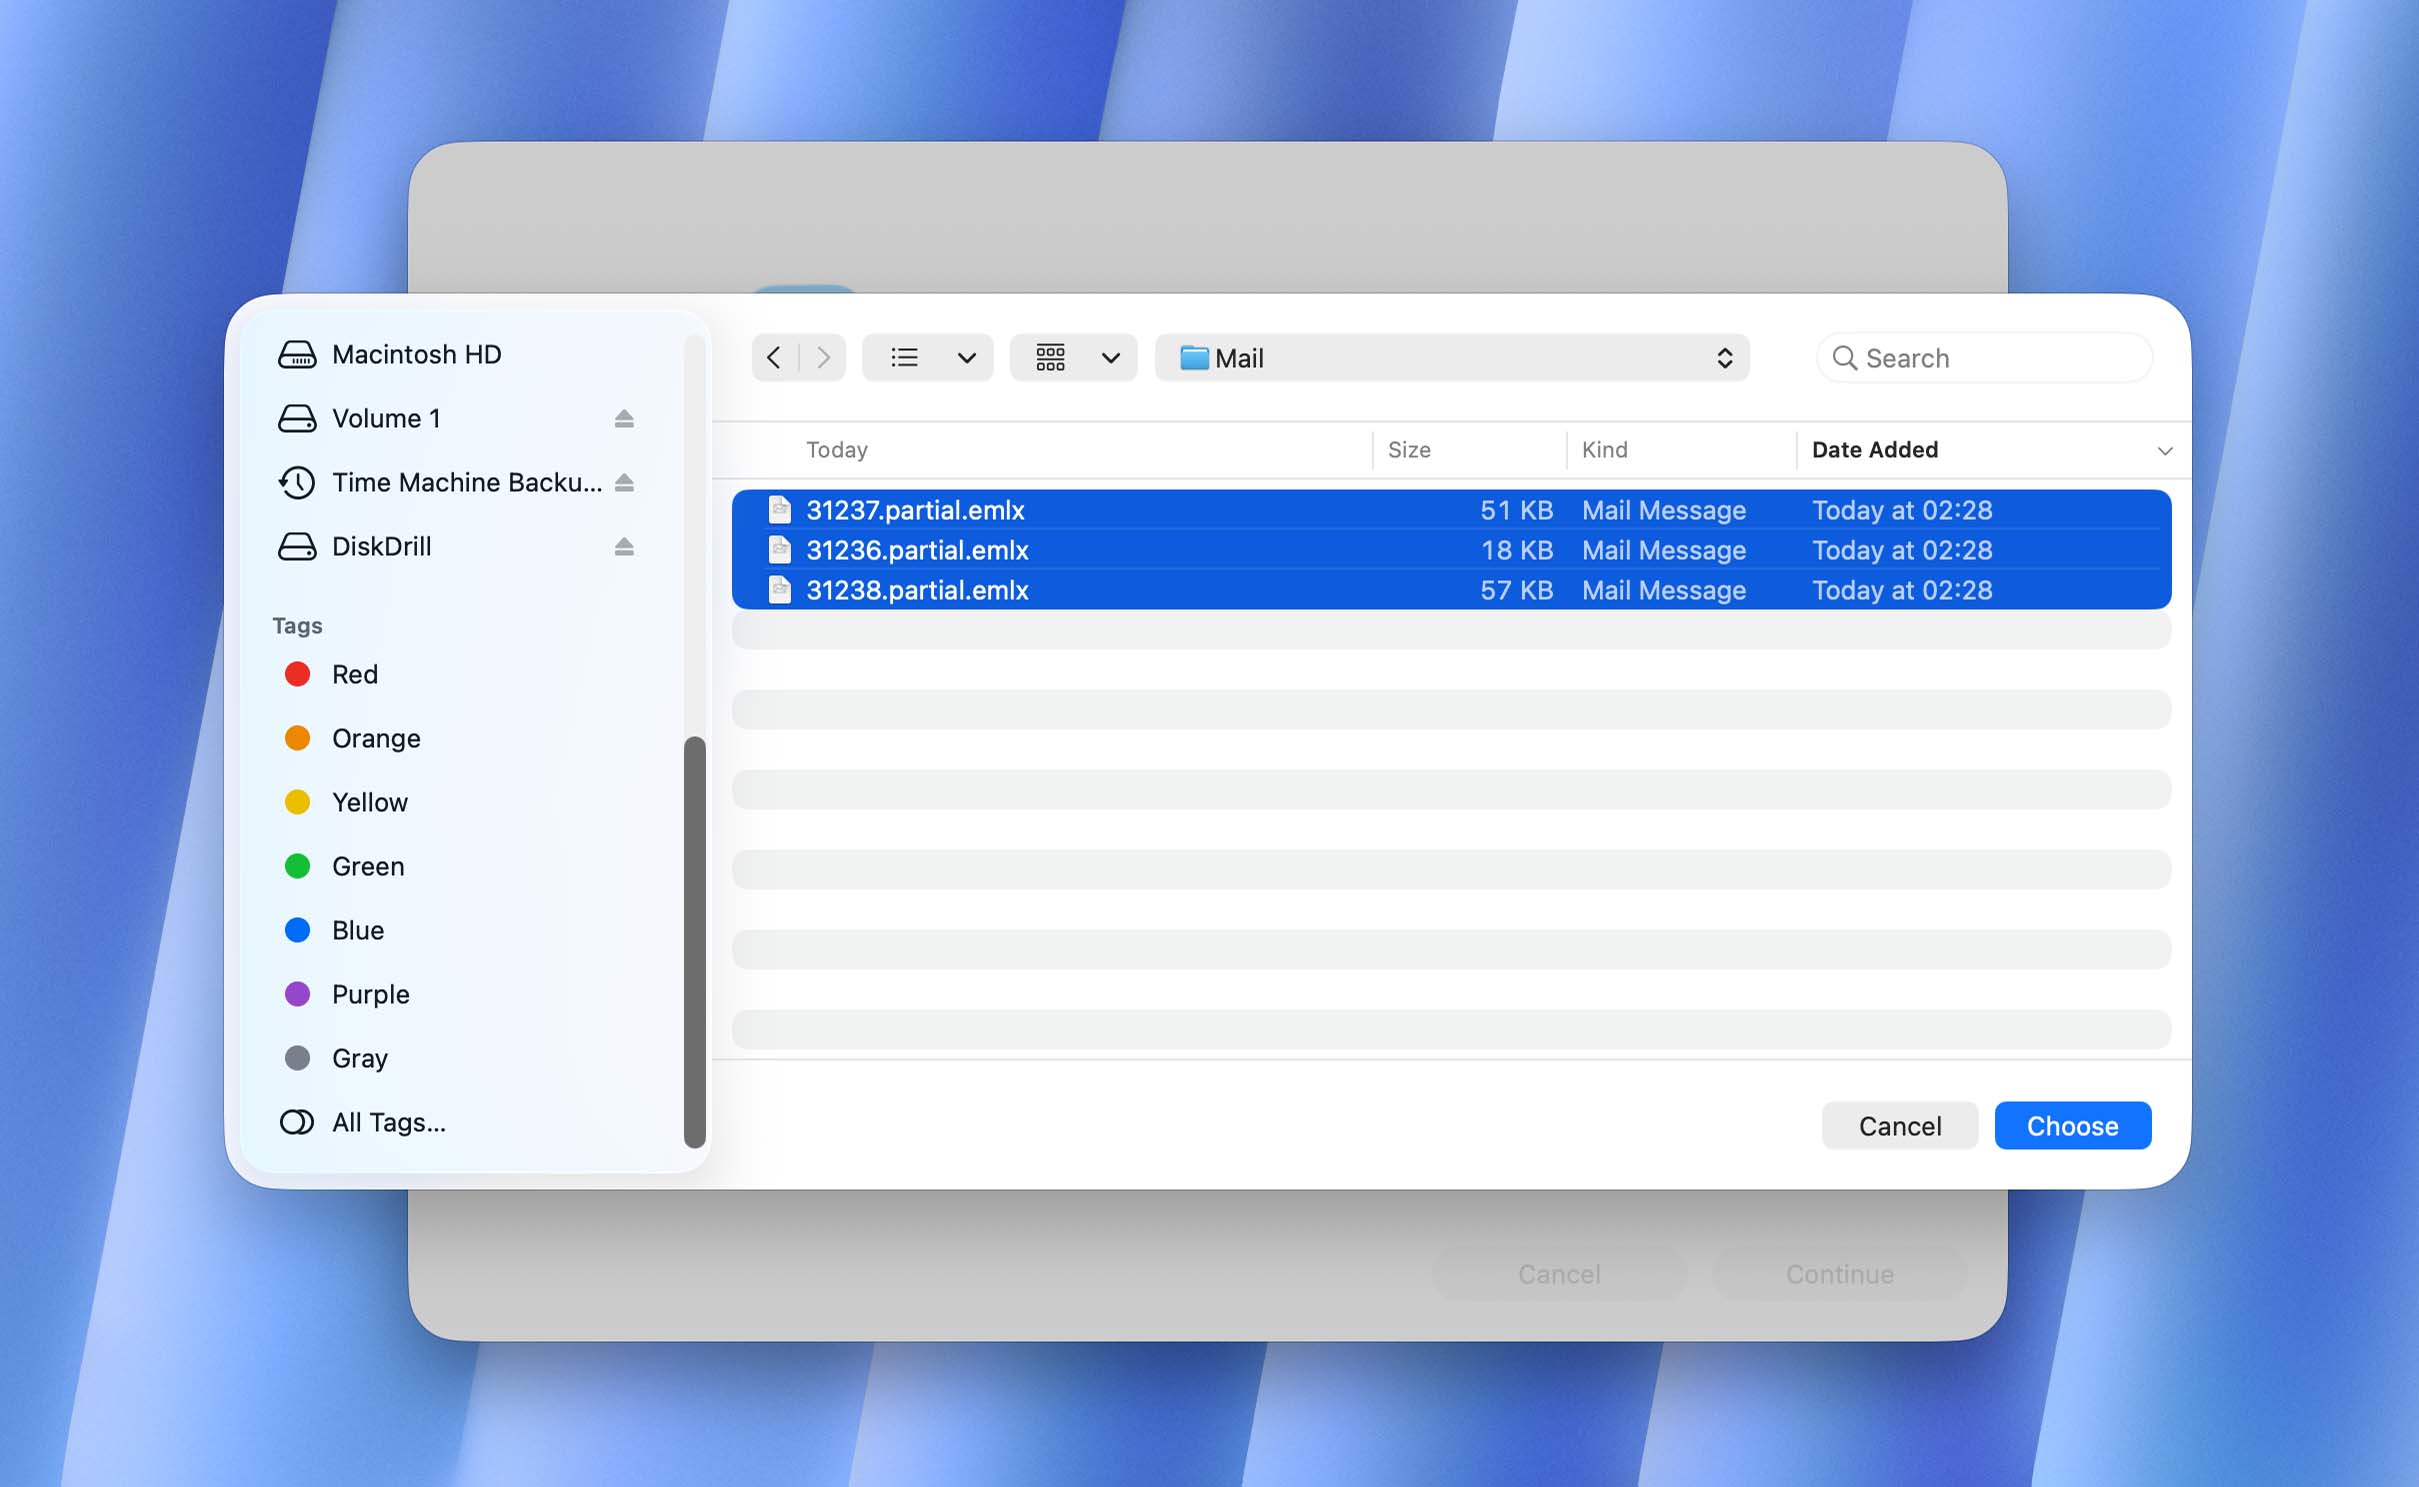
- Browse to the folder where your recovered emails are stored and click Choose.
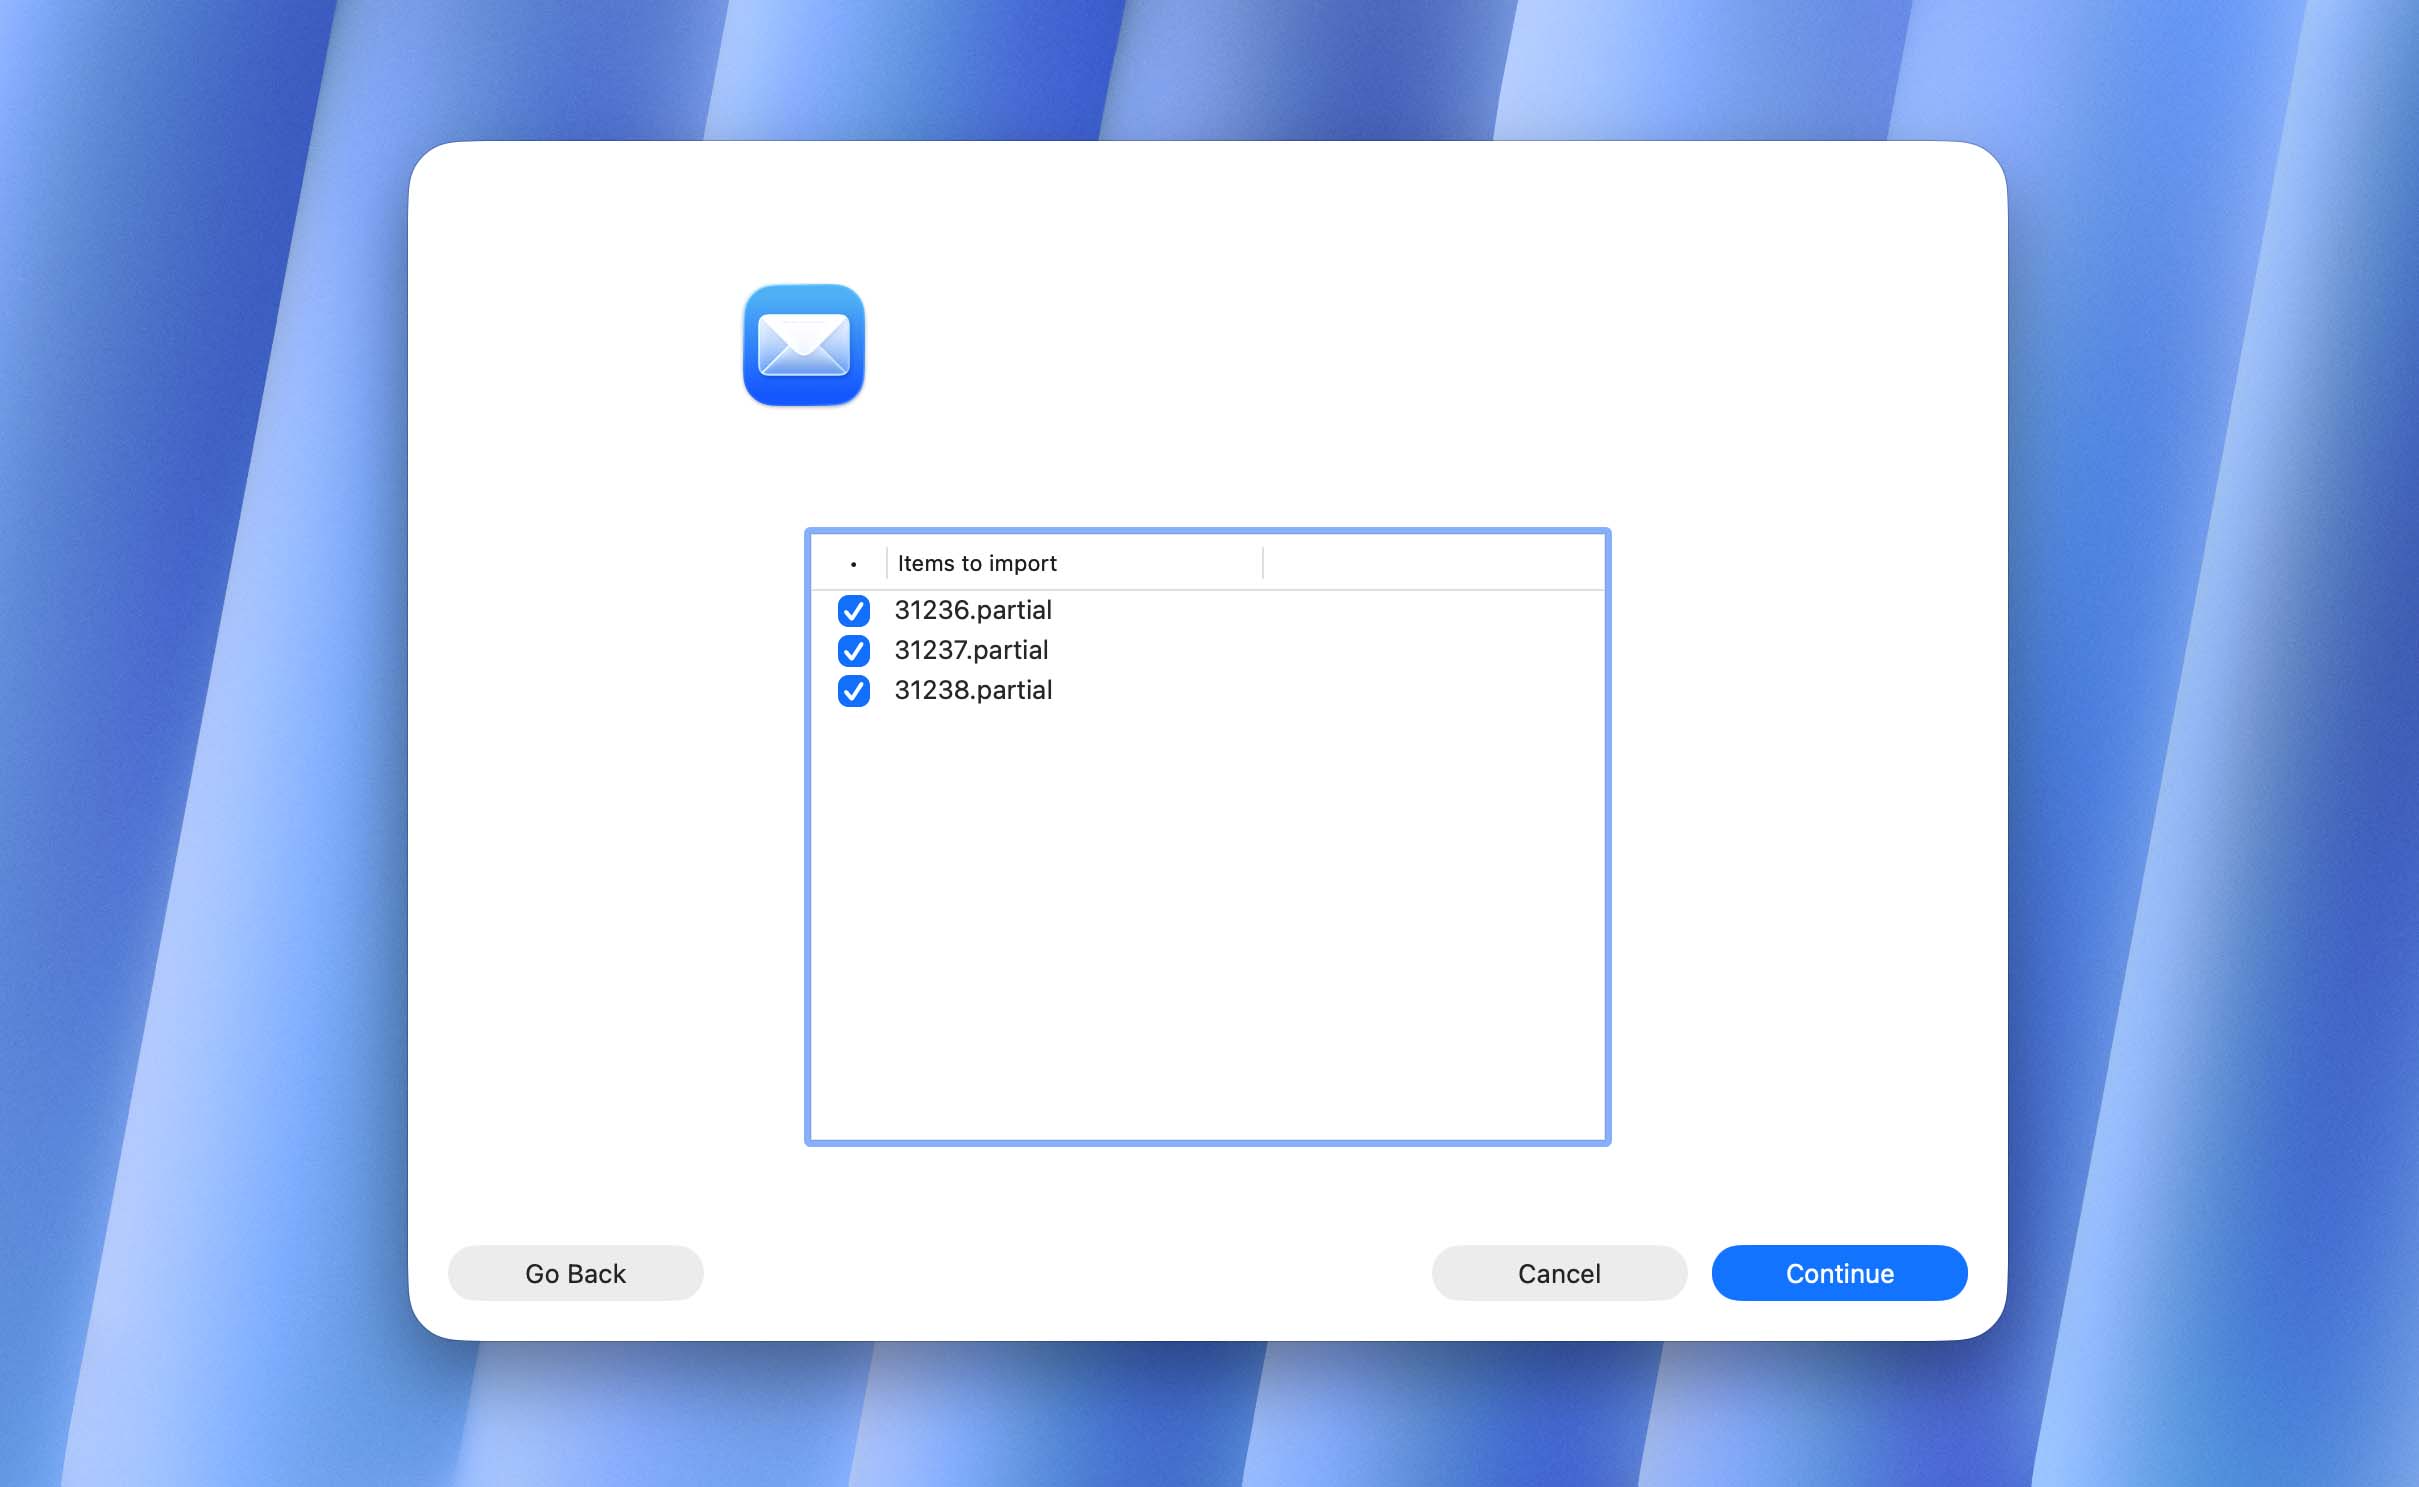
- Click Continue to import them into Mail.
- When the process finishes, click Done.
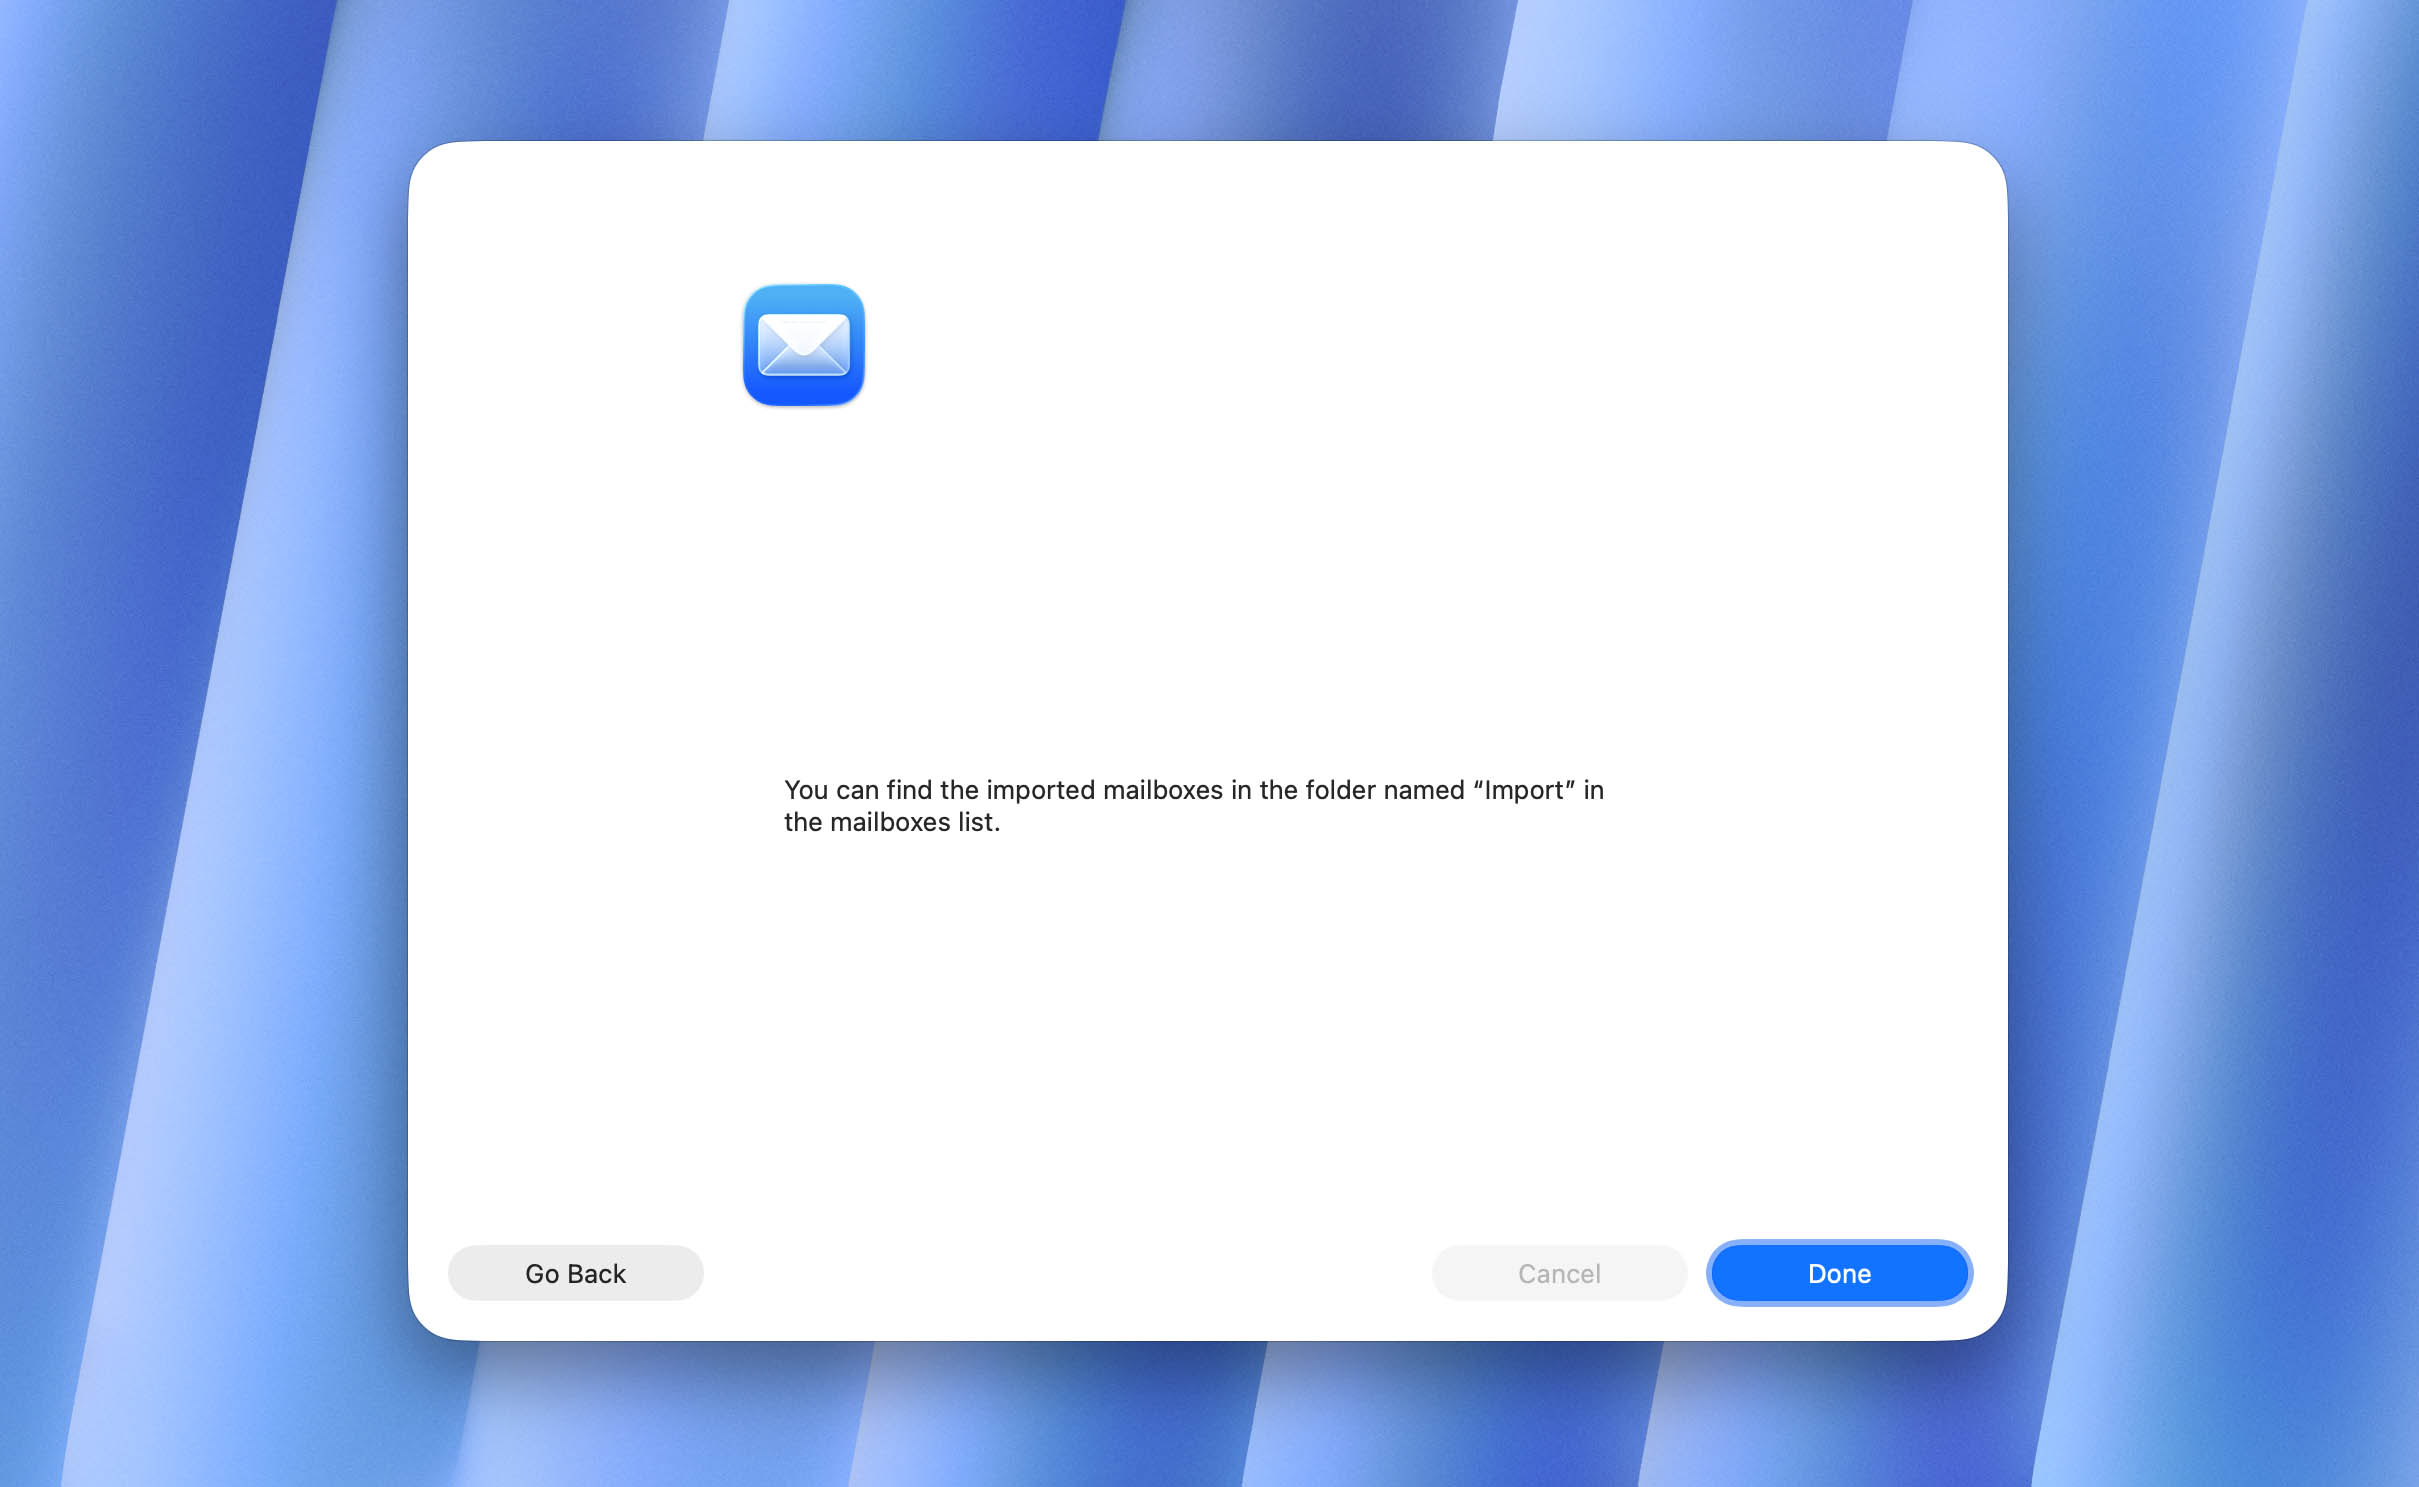
Imported emails usually appear in a separate folder called Import in the Mail sidebar. You can then move them back into your Inbox or any other folder you prefer.
Conclusion
We’ve gone through all the methods that can help you recover deleted emails on a Mac, whether they were removed recently or permanently. As you can see, the process isn’t complicated once you understand your situation and pick the right tool for it.
And what does “the right method” mean? If the email is still in the Trash, there’s no reason to waste time with Time Machine or data recovery software like Disk Drill. If you don’t have a backup, then don’t wait — install a recovery program and run a scan right away. Each case has its own solution, and knowing which one applies to you saves time.
We hope this guide helped you. Feel free to share your experience and feedback in the comments below — we’d love to hear which method worked best for you. And one more tip: avoid unnecessary deletions and always make use of your Mac’s built-in backup tools to stay on the safe side in the future.
FAQ:
- Your email account is offline or disabled
- If only emails from a specific sender are missing, check whether you’ve mistakenly blocked them
- You might be using a special filter that prevents the new messages from being shown
- Potential issue with the incoming Mail server
- Problem with logging into your account


