
It’s often possible to recover deleted photos from SD cards used in Android devices because they aren’t gone until overwritten with new data. We’ve helped countless users successfully retrieve their lost photos using proven recovery methods, and this guide will walk you through exactly how to do it.
💡 Note: This guide is divided into two main sections: recovering deleted photos using a computer and recovering photos directly on your Android phone without a computer. While we’ll cover both approaches, we strongly recommend the computer-based method whenever possible because it offers significantly better success rates and gives you more control over the recovery process.
How to Recover Deleted Photos From an SD Card With a Computer
When you delete photos from an SD card, the file system simply marks that storage space as “available” and removes the directory entry. The photo data remains intact on the card until new files overwrite it.
Files are marked as deleted rather than physically erased for efficiency. Actually wiping every byte of a deleted file would take significant time and cause unnecessary wear on the storage media. By simply marking the space as available, your device can instantly “delete” files and reuse that space only when needed.
Because of how the deletion process works, it’s often possible to retrieve deleted photos from SD card storage, sometimes weeks or even months after deletion (it all depends on how much you use the SD card after deletion).
⚠️ Important: It is imperative that you stop using the SD card as soon as you suspect you have experienced data loss. Using the card to save additional images runs the risk of overwriting the files before you can recover them. Put it to the side until you get a chance to recover the lost images.
Method 1: Use Disk Drill to Recover Photos from the SD Card
Disk Drill is one of the most effective tools to recover deleted pictures from SD card storage on both Windows and Mac computers. The Windows version offers 100 MB of free recovery, which is typically enough to retrieve around 50 photos (a fairly generous offer for a tool of its caliber).
We’ve put Disk Drill through extensive testing and found it delivers excellent results specifically for SD card recovery thanks to its powerful recovery engine and helpful additional features.
💡 Note: For a detailed analysis of Disk Drill’s capabilities, check out our full Disk Drill review.
To recover deleted photos from SD card on Android phone using Disk Drill:
- Download Disk Drill from the official download page and install it on your computer.

- Remove the SD card from your Android device and connect it to your SD card reader.
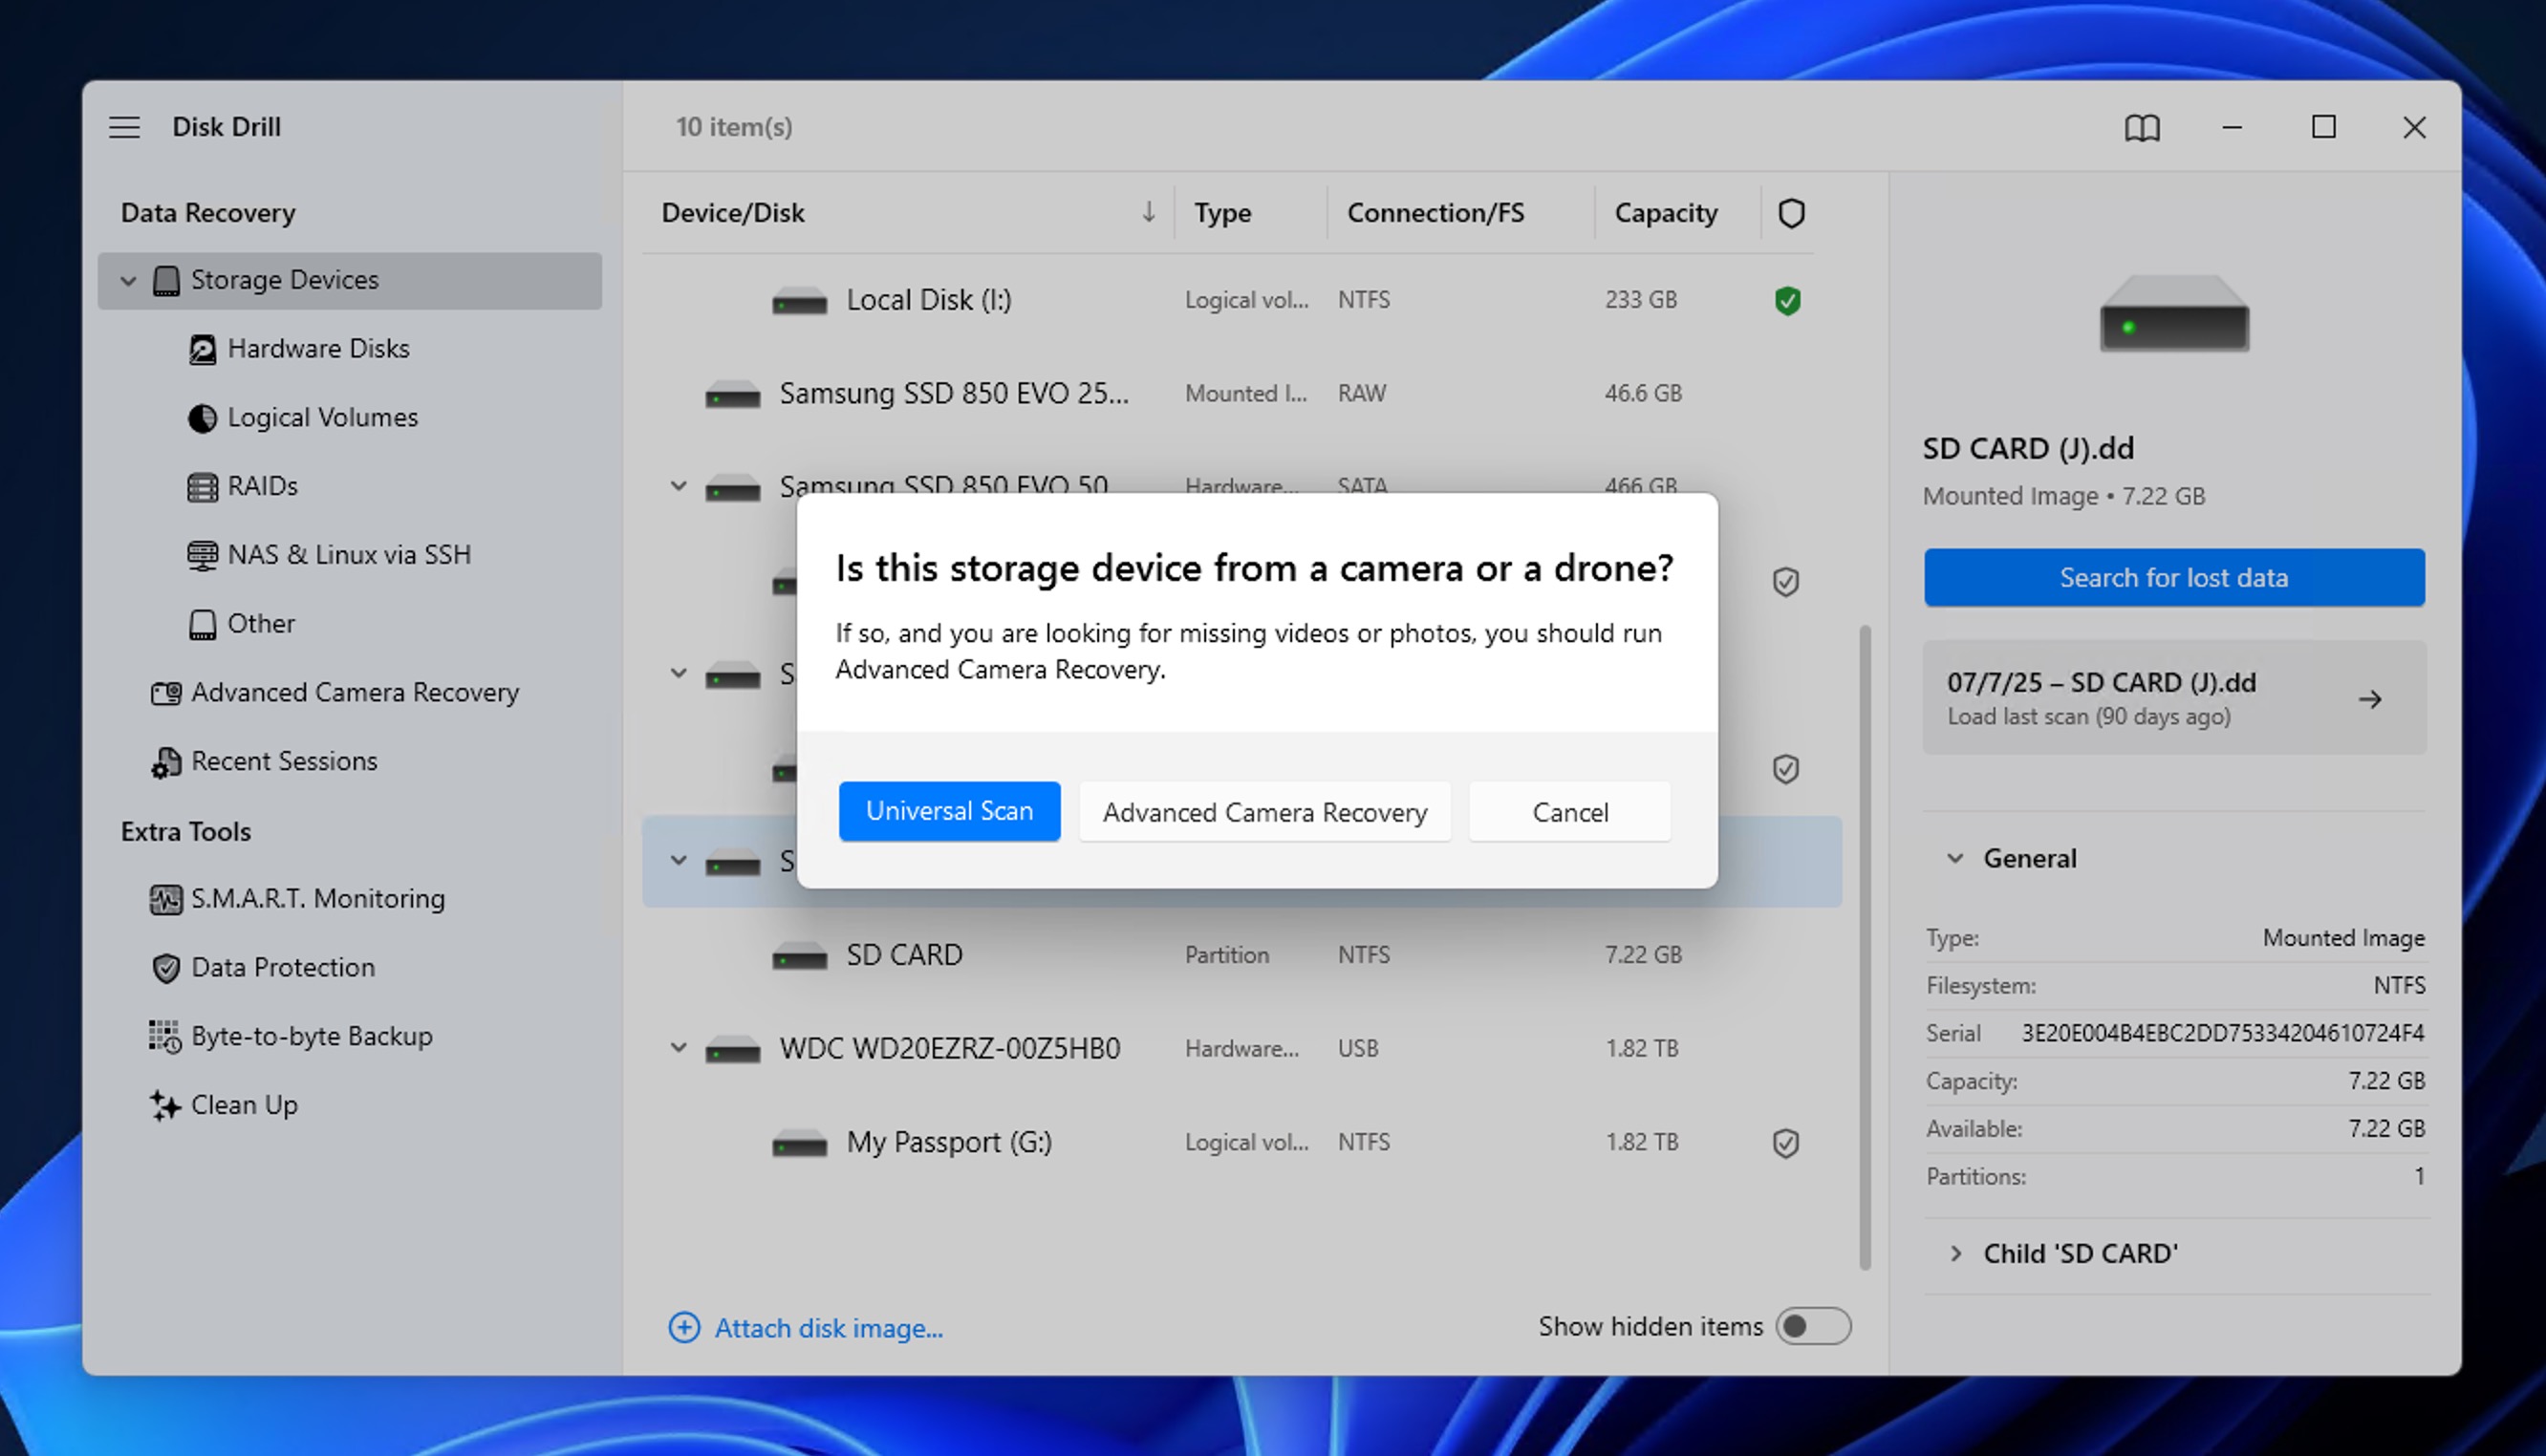
- Launch Disk Drill, select your SD card from the list of available storage devices, and click the Recover button.

- Disk Drill will prompt you to select between Universal Scan or Advanced Camera Recovery. We recommend starting with Universal Scan for most photo recovery scenarios, as it thoroughly searches for all recoverable files. Advanced Camera Recovery mode is useful in situations where your goal is to recover fragmented video files.
- Wait for Disk Drill to analyze the entire card and identify recoverable files.
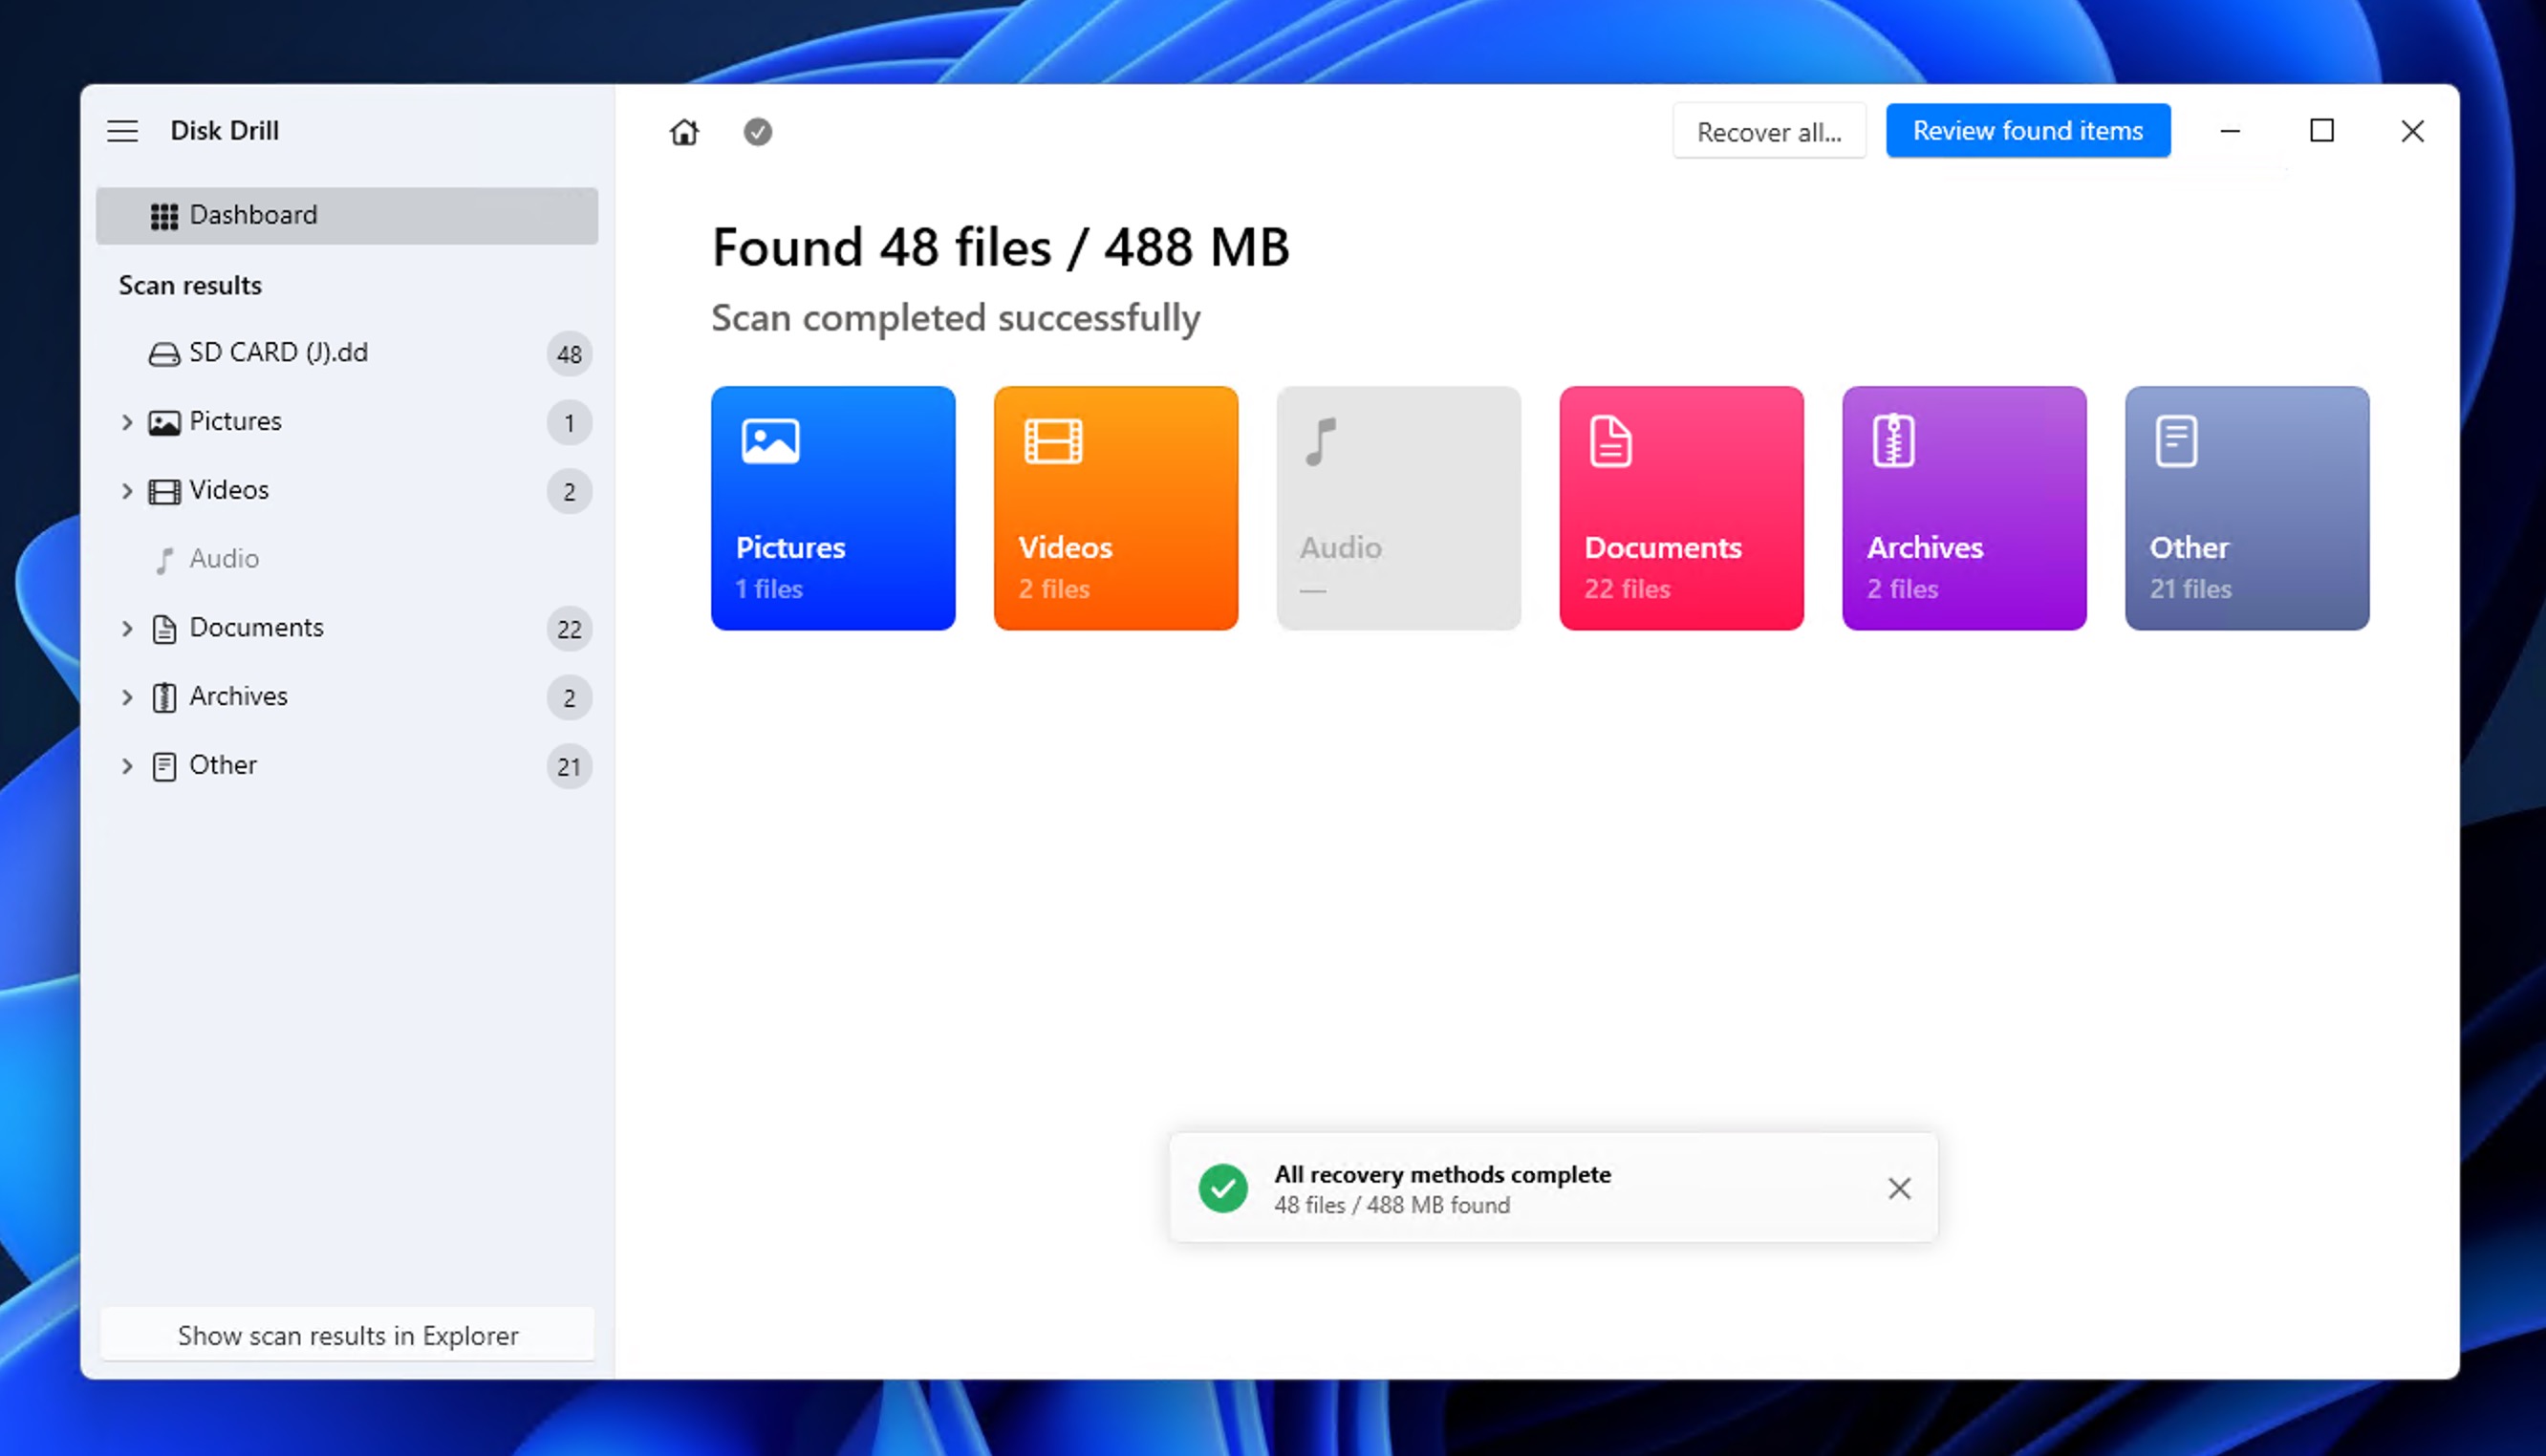
- The recovered files will be divided into three groups:
- Deleted or Lost: Files that were deleted or lost due to corruption
- Existing: Files currently present on the card
- Reconstructed: Files that Disk Drill pieced together from fragments
- You can further organize the recoverable files into categories like Pictures, Video, Audio, Documents, Archives, and Other Files. You can also take advantage of the search bar to quickly locate specific photos.
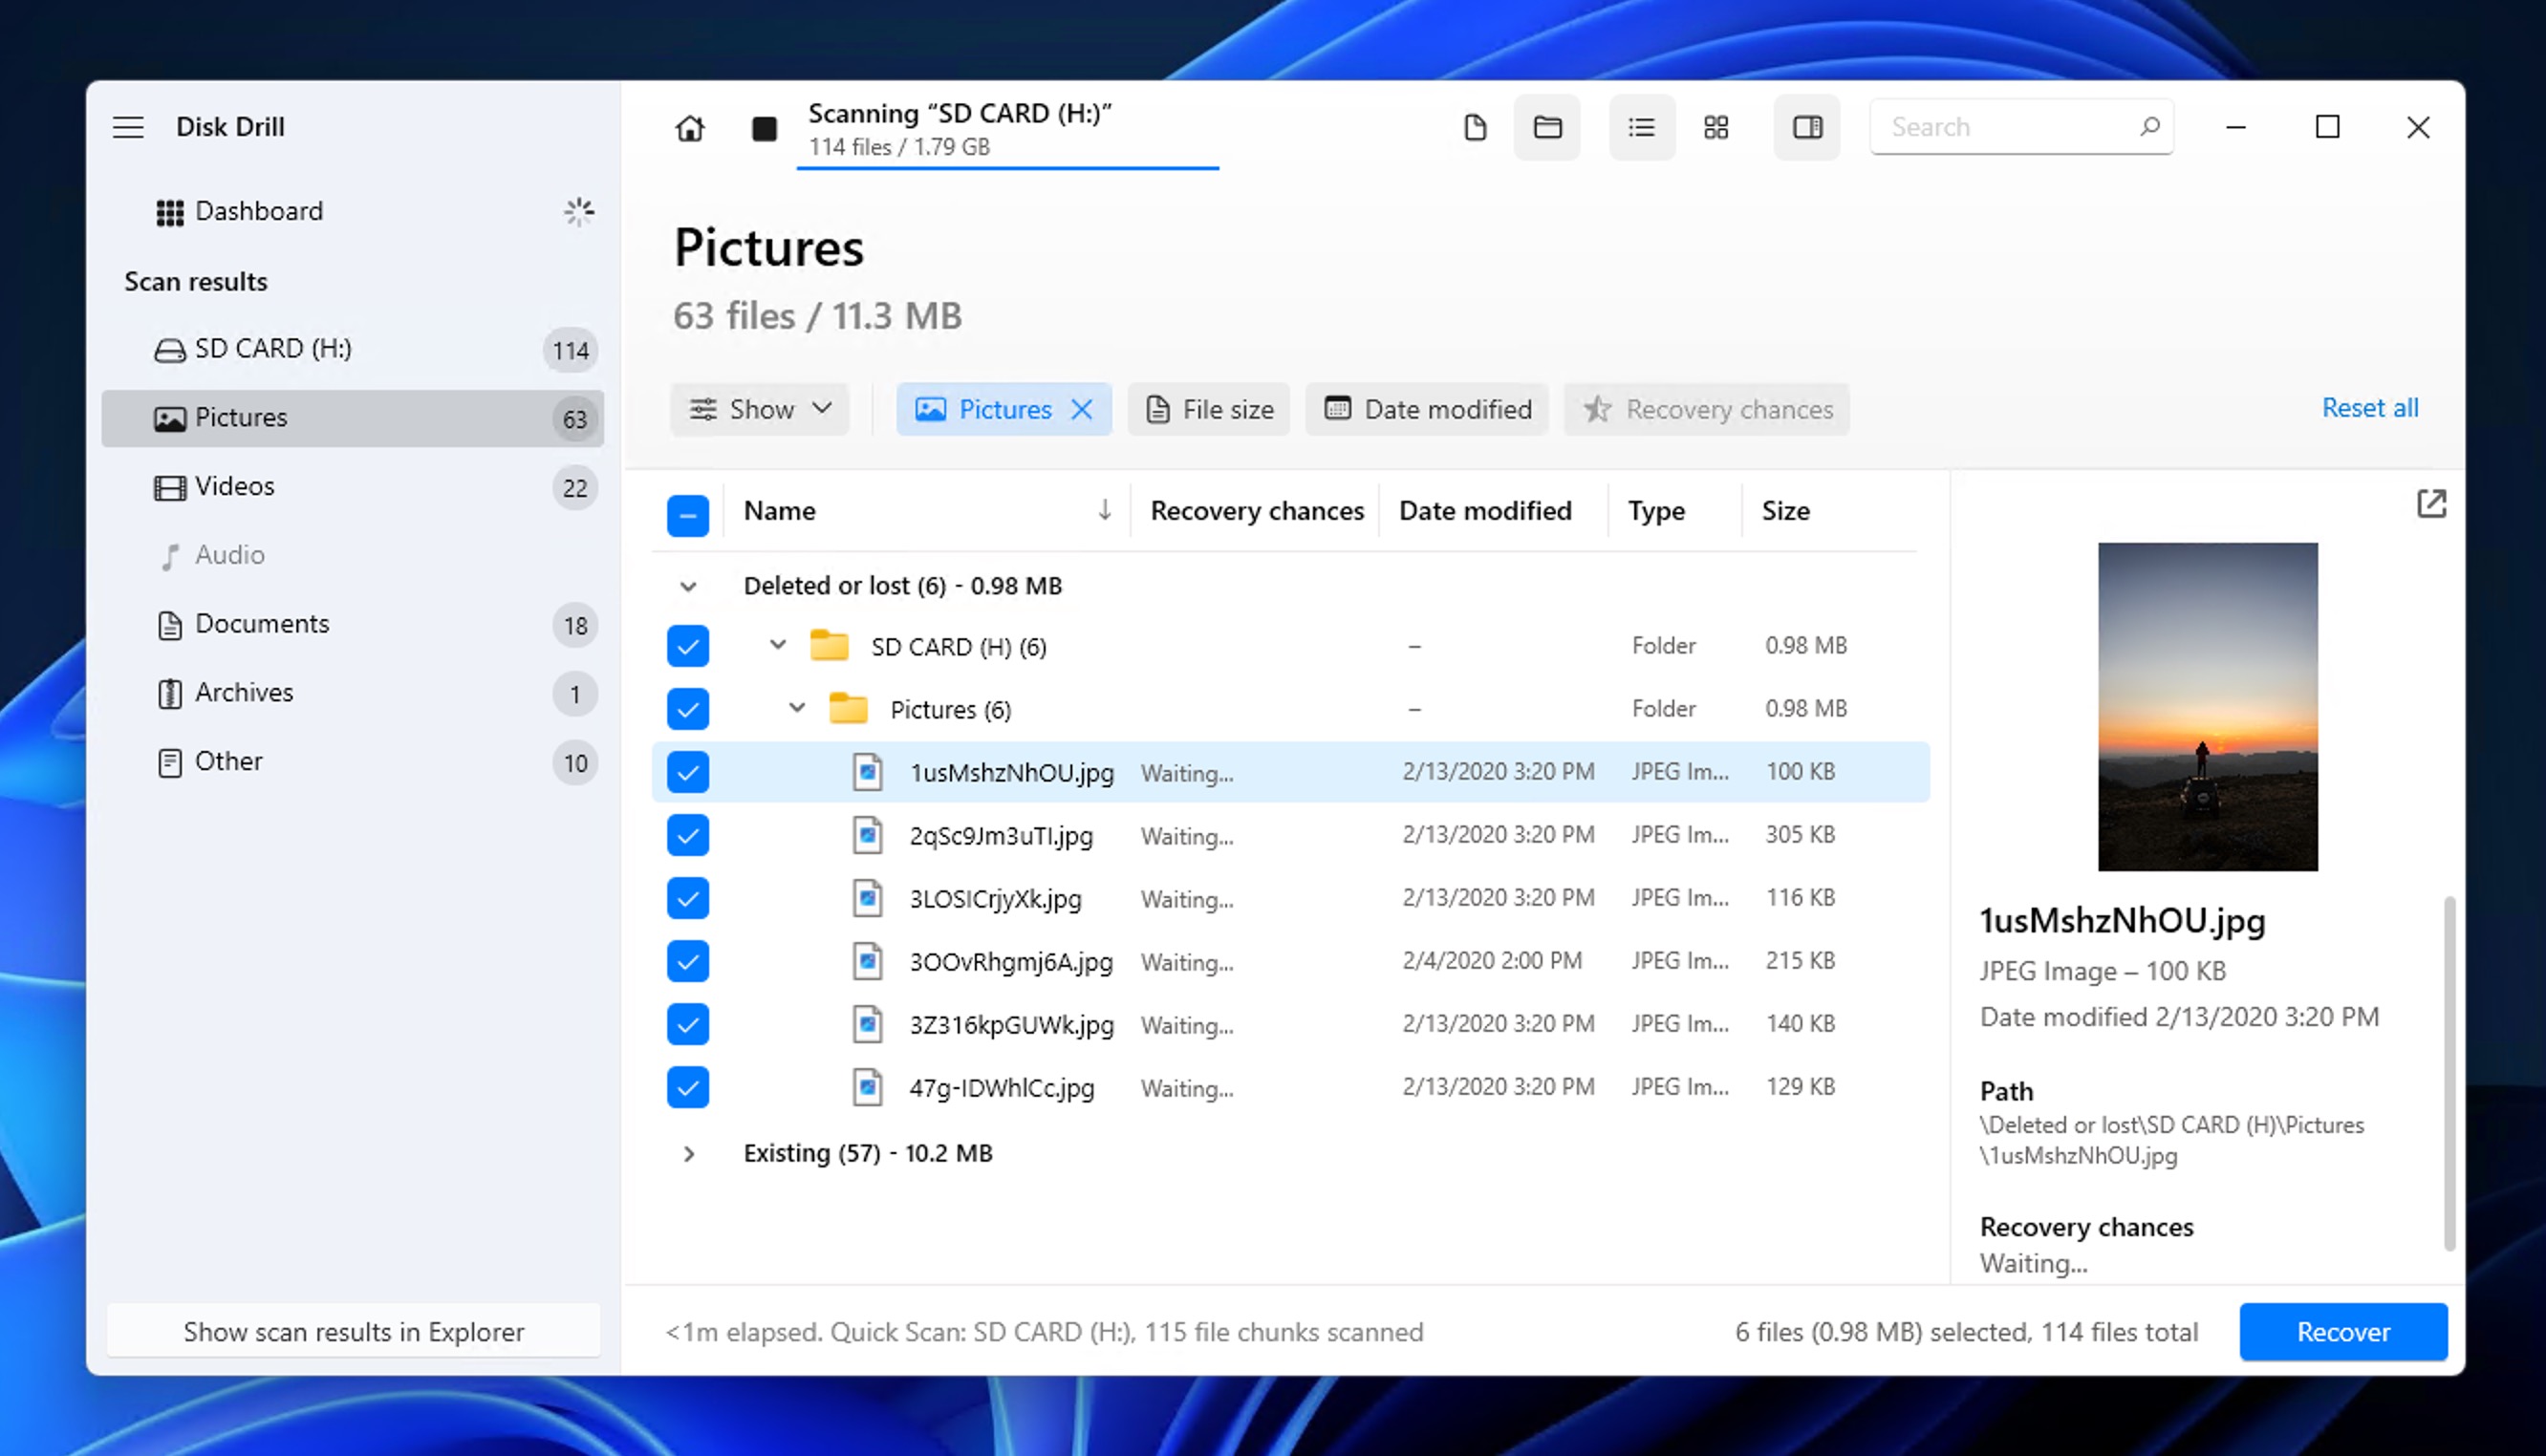
- Click on any image to preview it directly in Disk Drill. If the preview displays correctly, it’s a 100% guarantee that the photo is recoverable and will be restored without corruption.
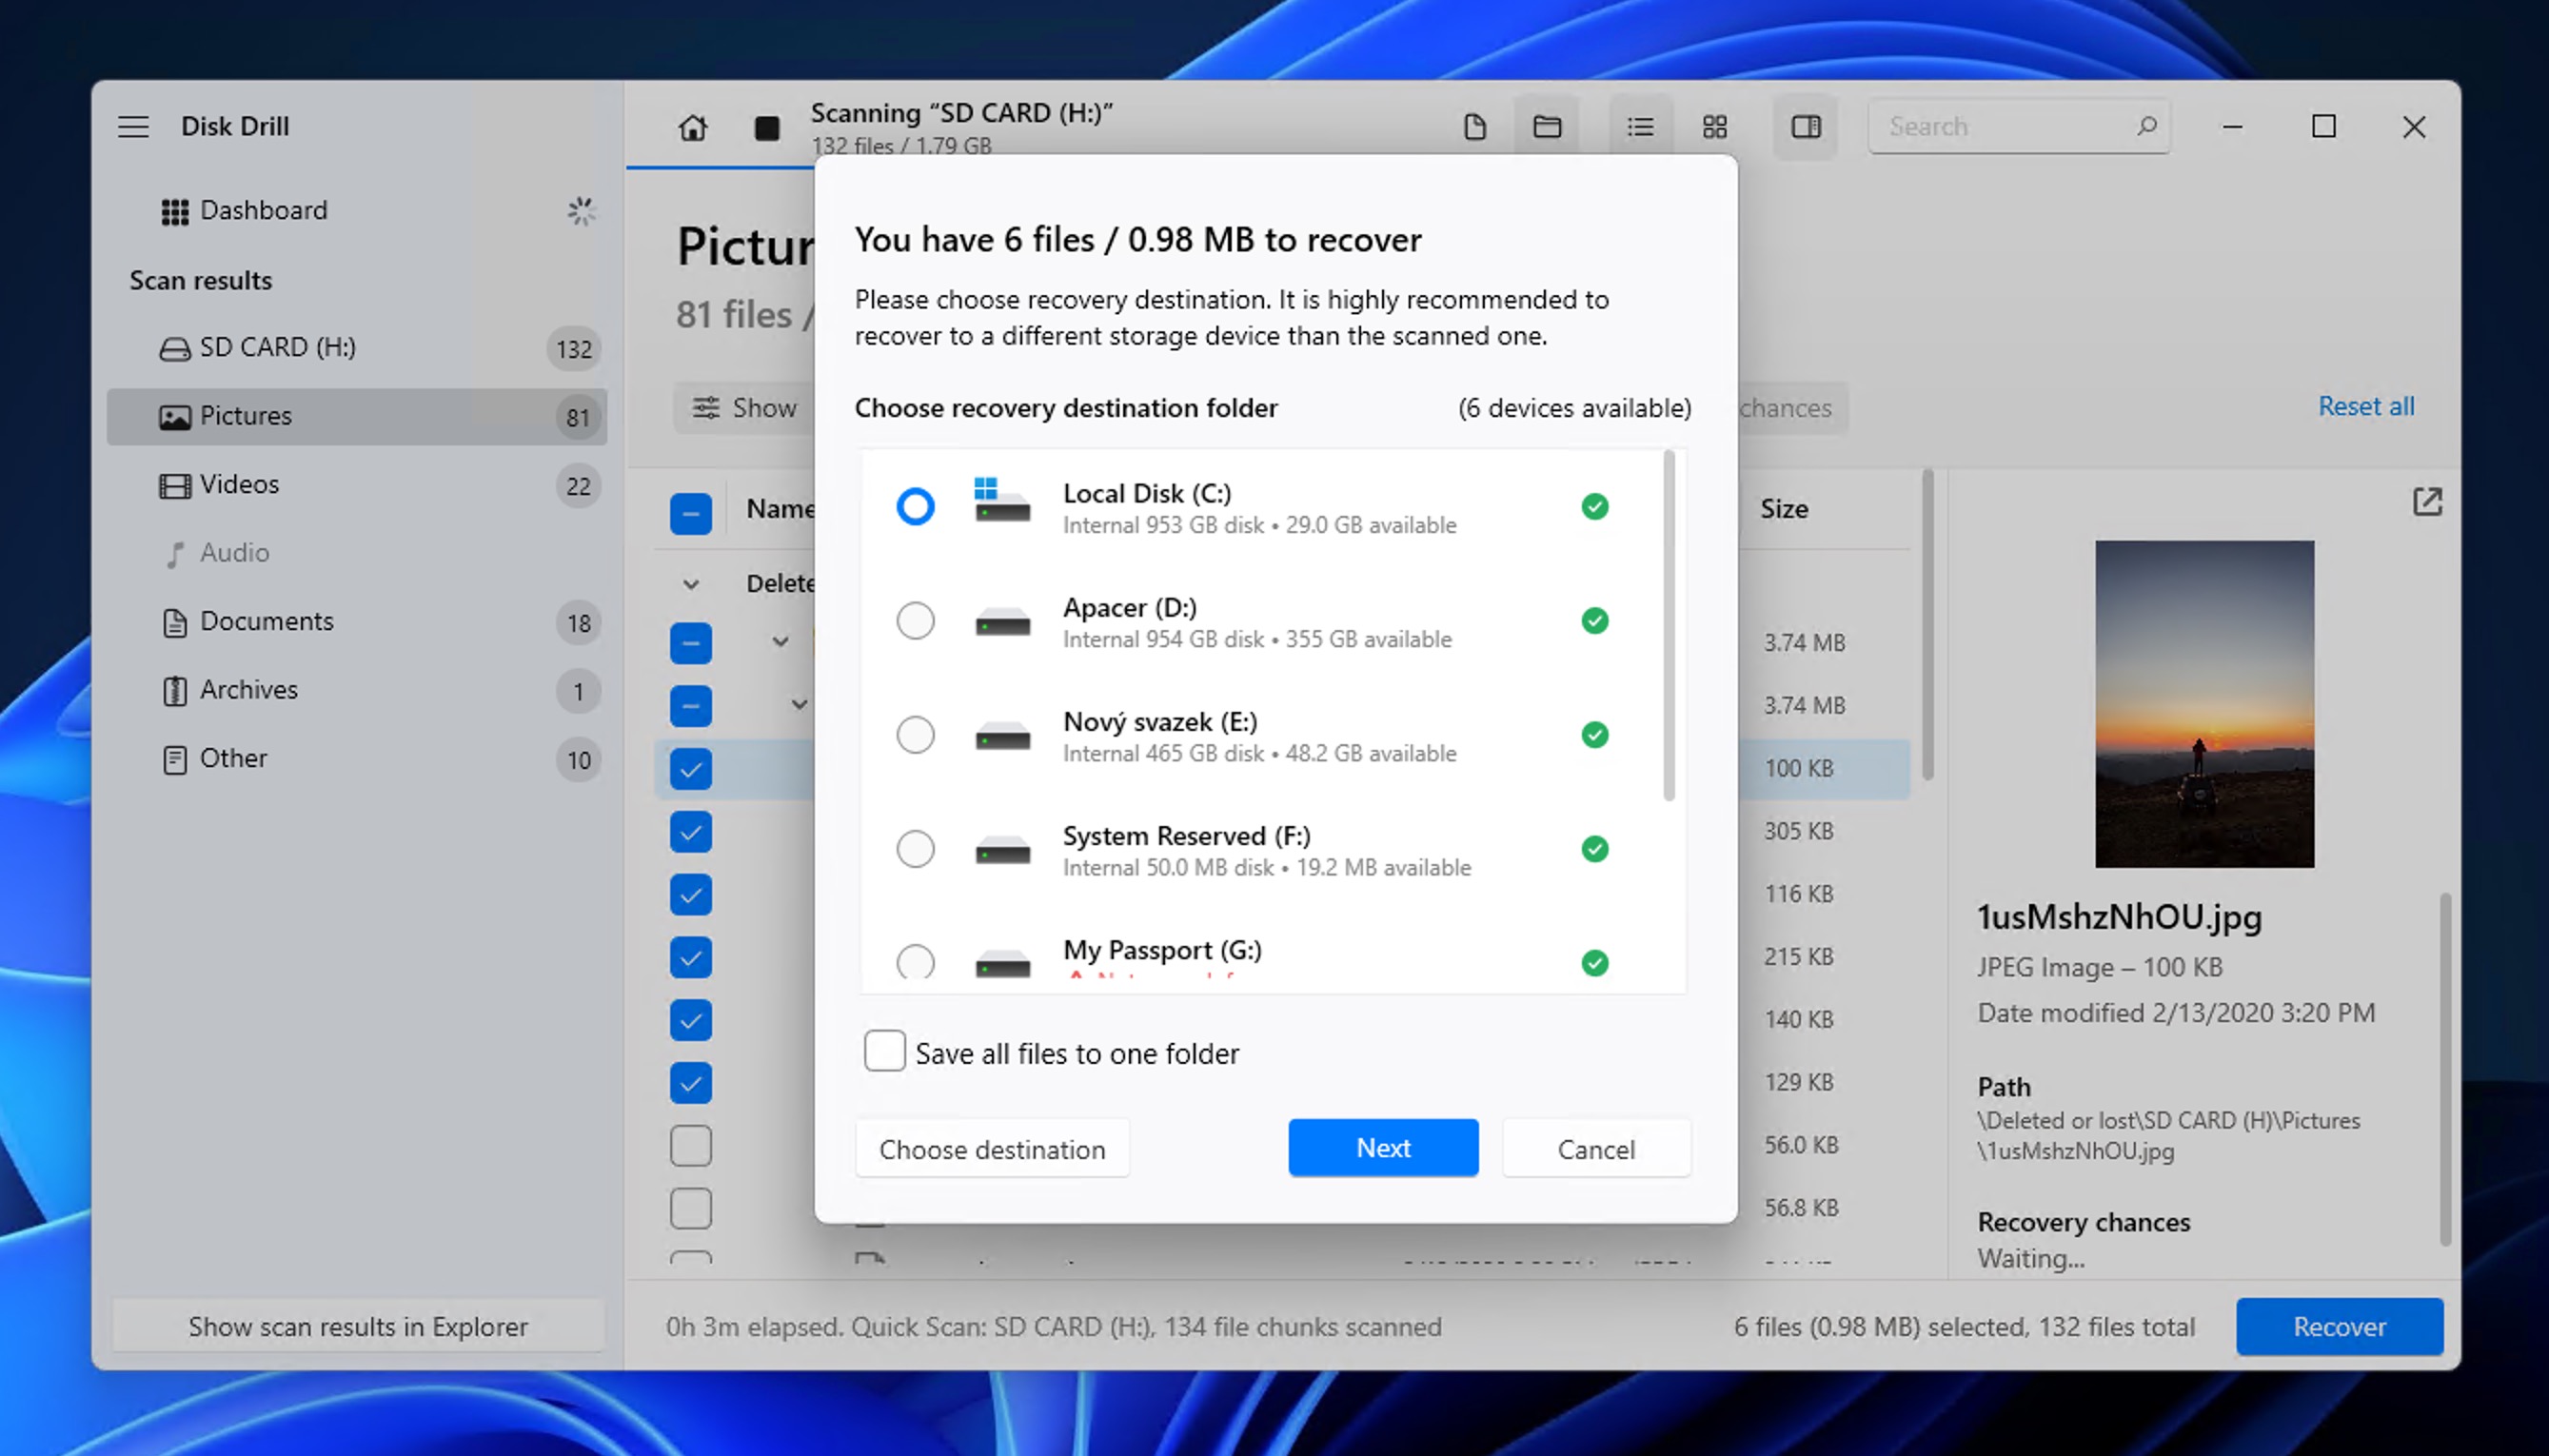
- Choose the photos you want to restore and click the Recover button.
- Specify a safe recovery location. Never save recovered files back to the same SD card as you could overwrite the recoverable data (Disk Drill would warn you if you were about to make this mistake).
Bonus feature: If your SD card is physically corrupted or showing errors, Disk Drill can also help. The software includes a byte-to-byte backup feature that creates an exact image of your damaged card, allowing you to safely attempt recovery without risking further damage to the original media. Learn more about this in our corrupted SD card recovery guide.
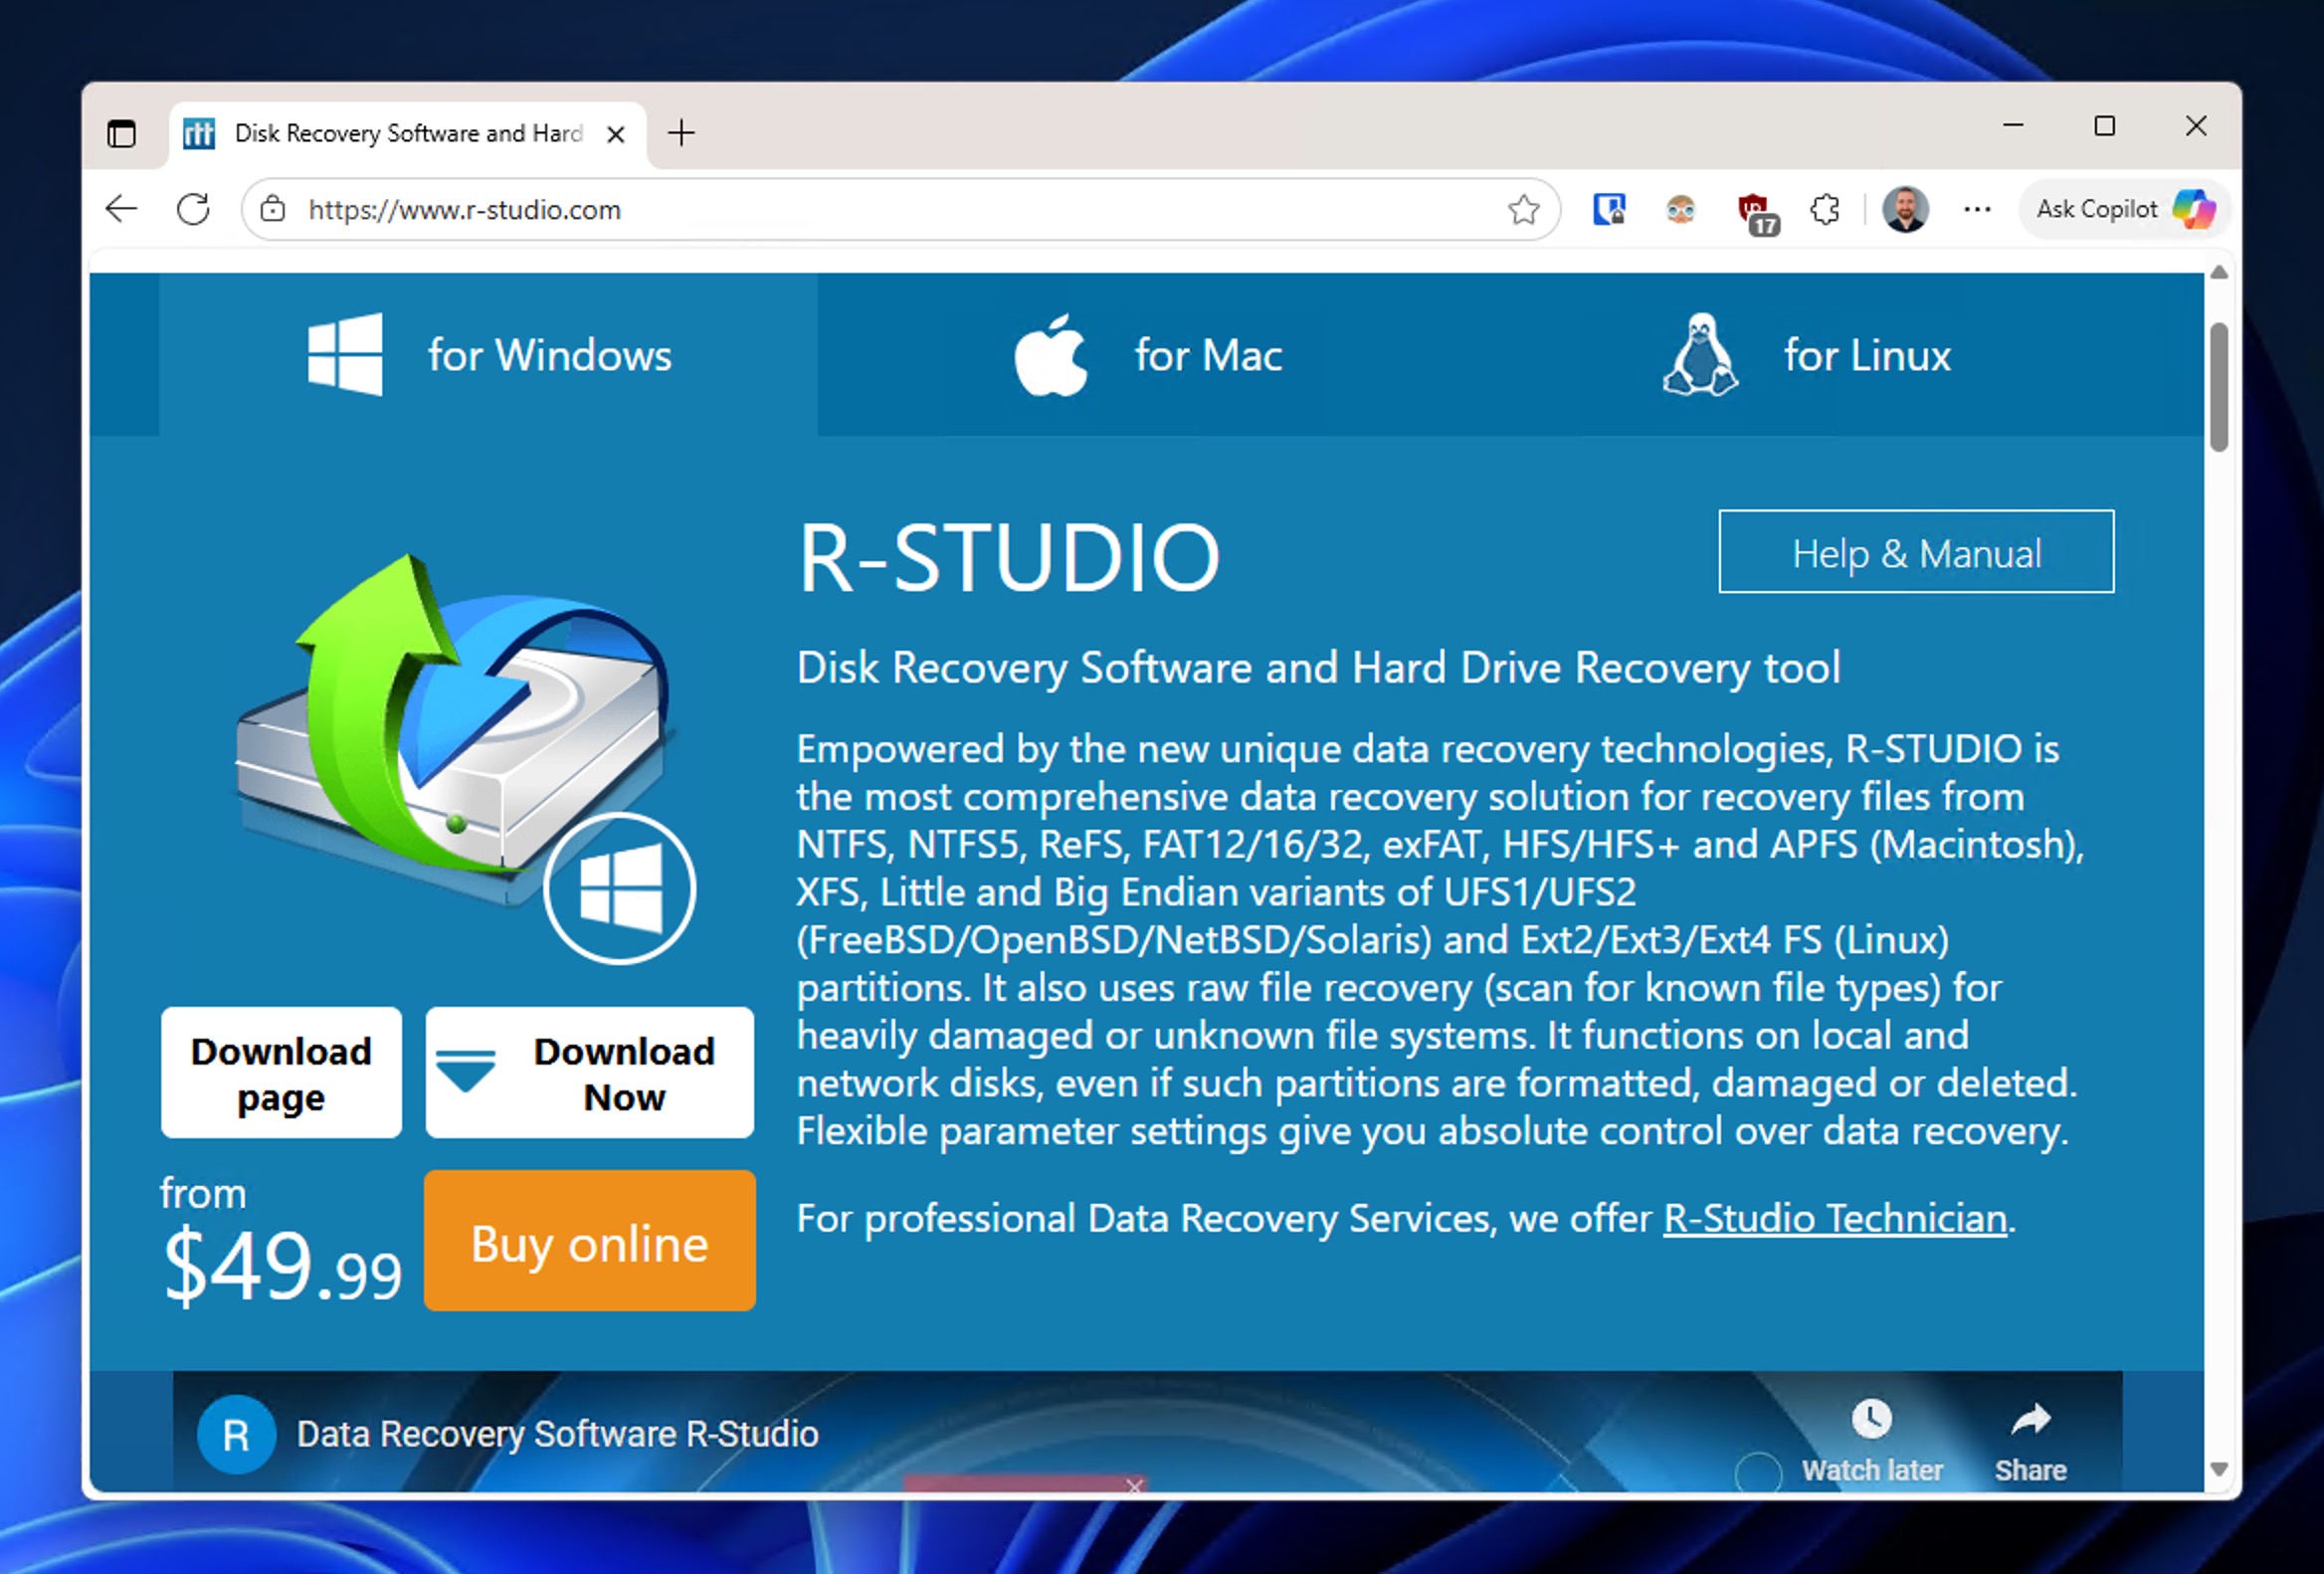
Method 2: Use R-Studio to Restore Photos from the SD Card
We’ve tested a lot more options for SD card recovery tools in our comprehensive SD card recovery software comparison, and another highly capable option worth demonstrating is R-Studio.
R-Studio is a professional-grade recovery tool that works on both Windows and Mac, much like Disk Drill. However, there’s one significant limitation to be aware of: its free version only allows recovery of files smaller than 256 KB, which means you can preview your photos and verify they’re recoverable, but you won’t be able to actually restore full-resolution images without purchasing a license.
💡 Note: For a detailed breakdown of R-Studio’s capabilities, strengths, and limitations, check out our full R-Studio review.
That said, R-Studio excels in complex data loss scenarios and offers advanced file system support. It’s particularly well-suited for tech-savvy users or those dealing with severely corrupted SD cards.
To recover deleted images from SD card using R-Studio:
- Download R-Studio from the official website and install it on your computer.
- Remove the SD card from your Android device and connect it to your card reader.
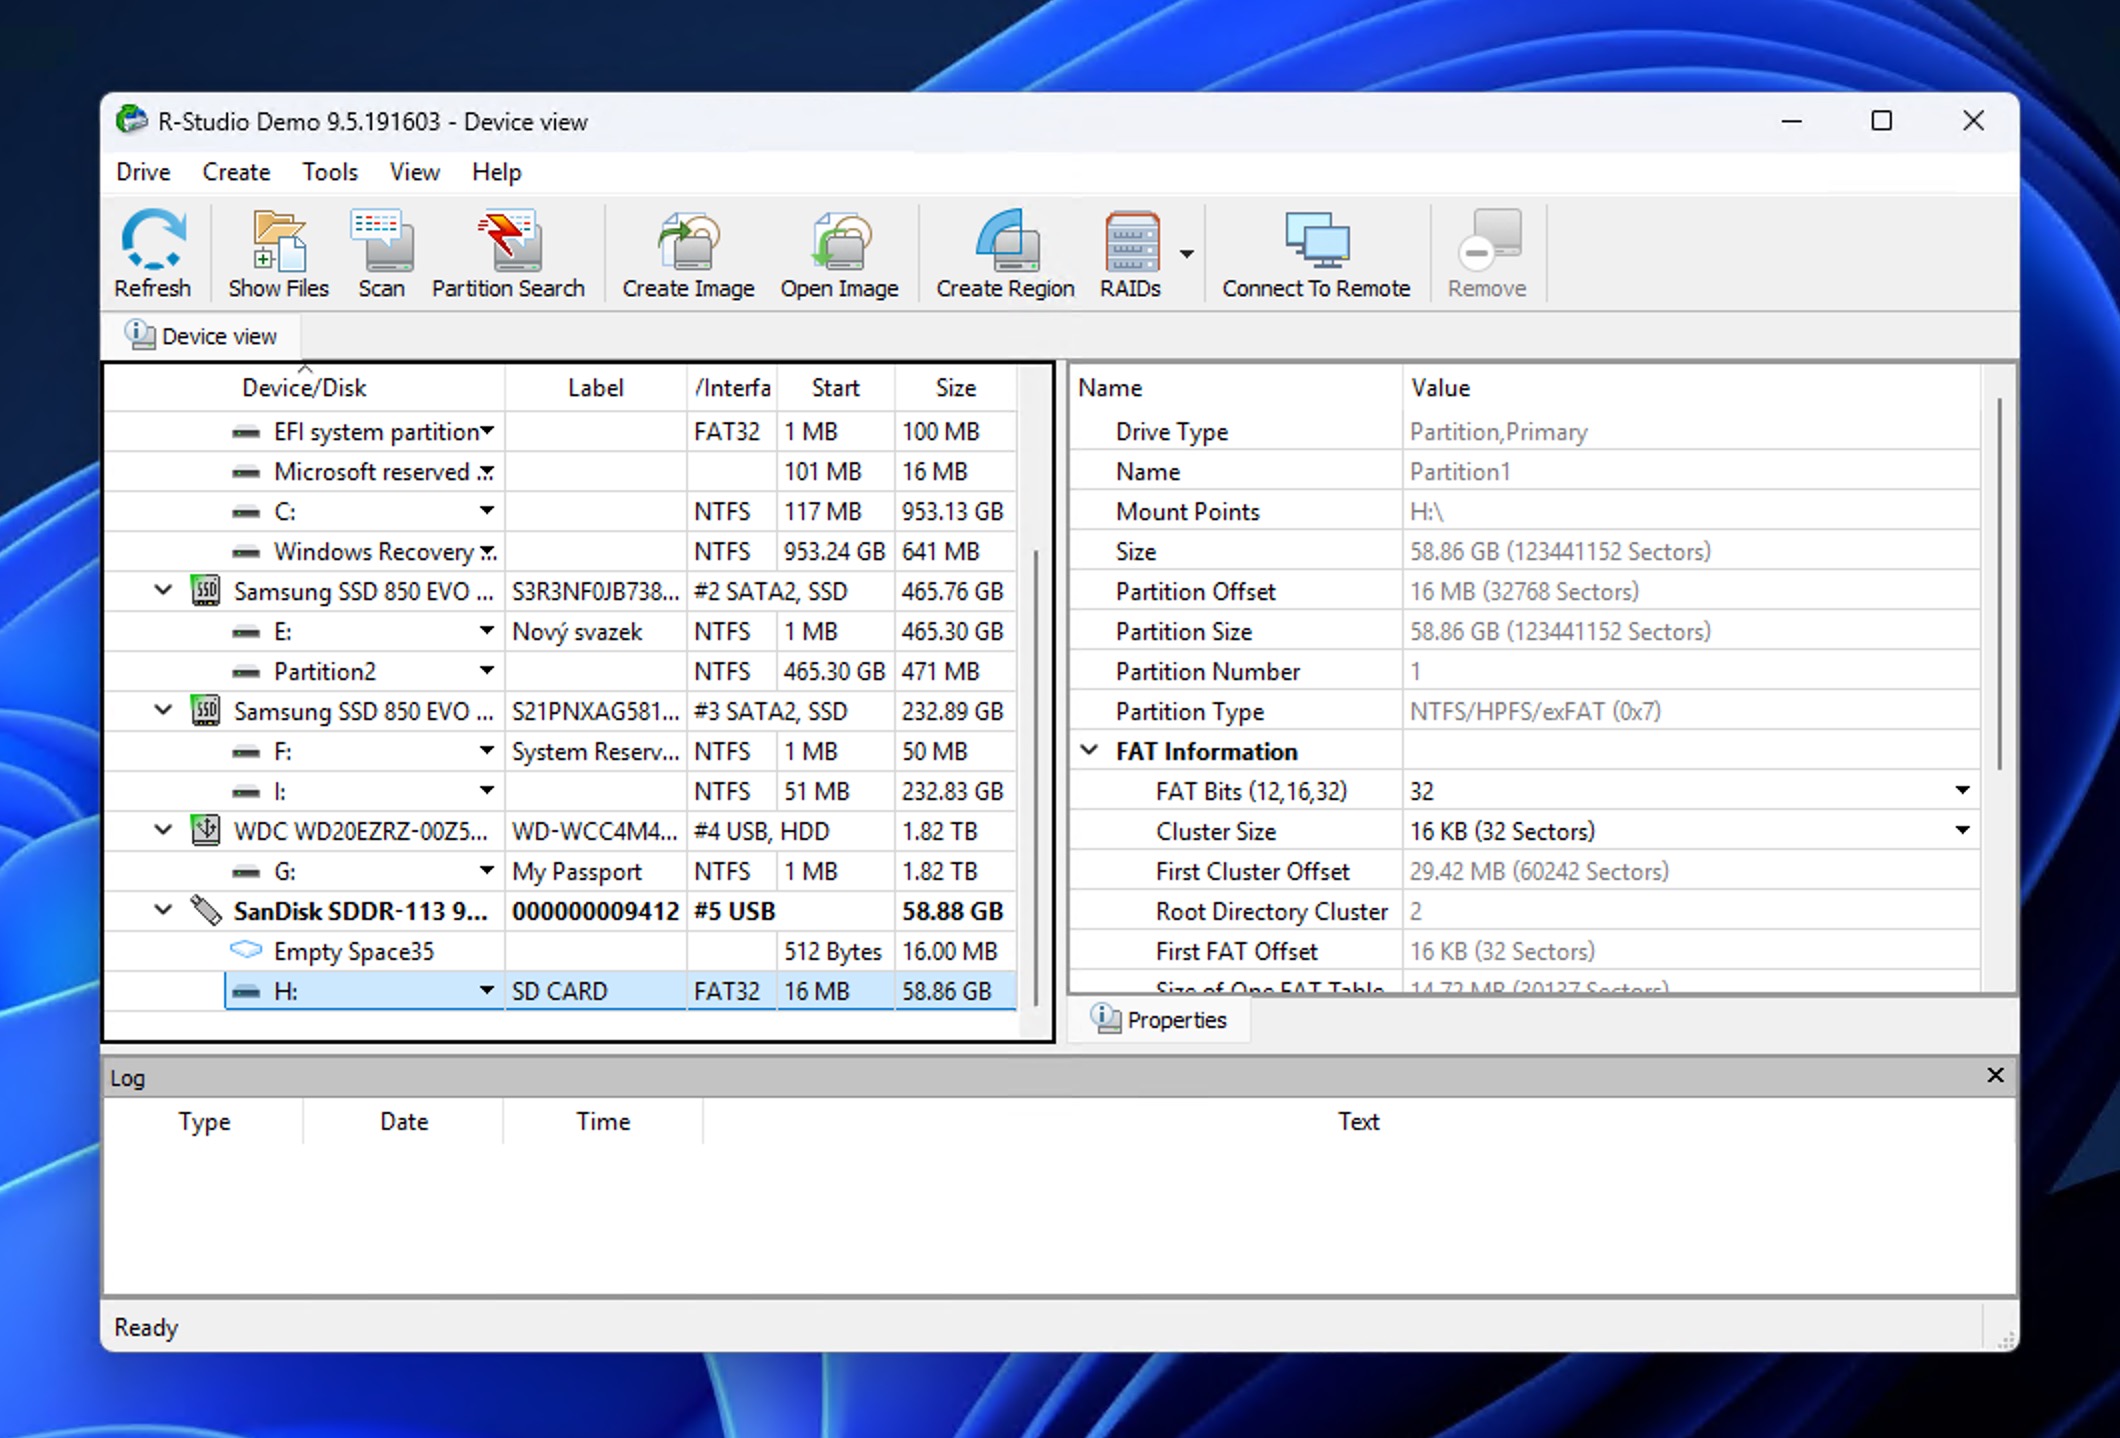
- Launch R-Studio and you’ll see a list of all available drives displayed in the main window. The interface may look more technical than other recovery tools, but don’t let that intimidate you.
- Locate your SD card in the drive list (it will typically appear with its drive letter like E: or F:) and click on it to select it.
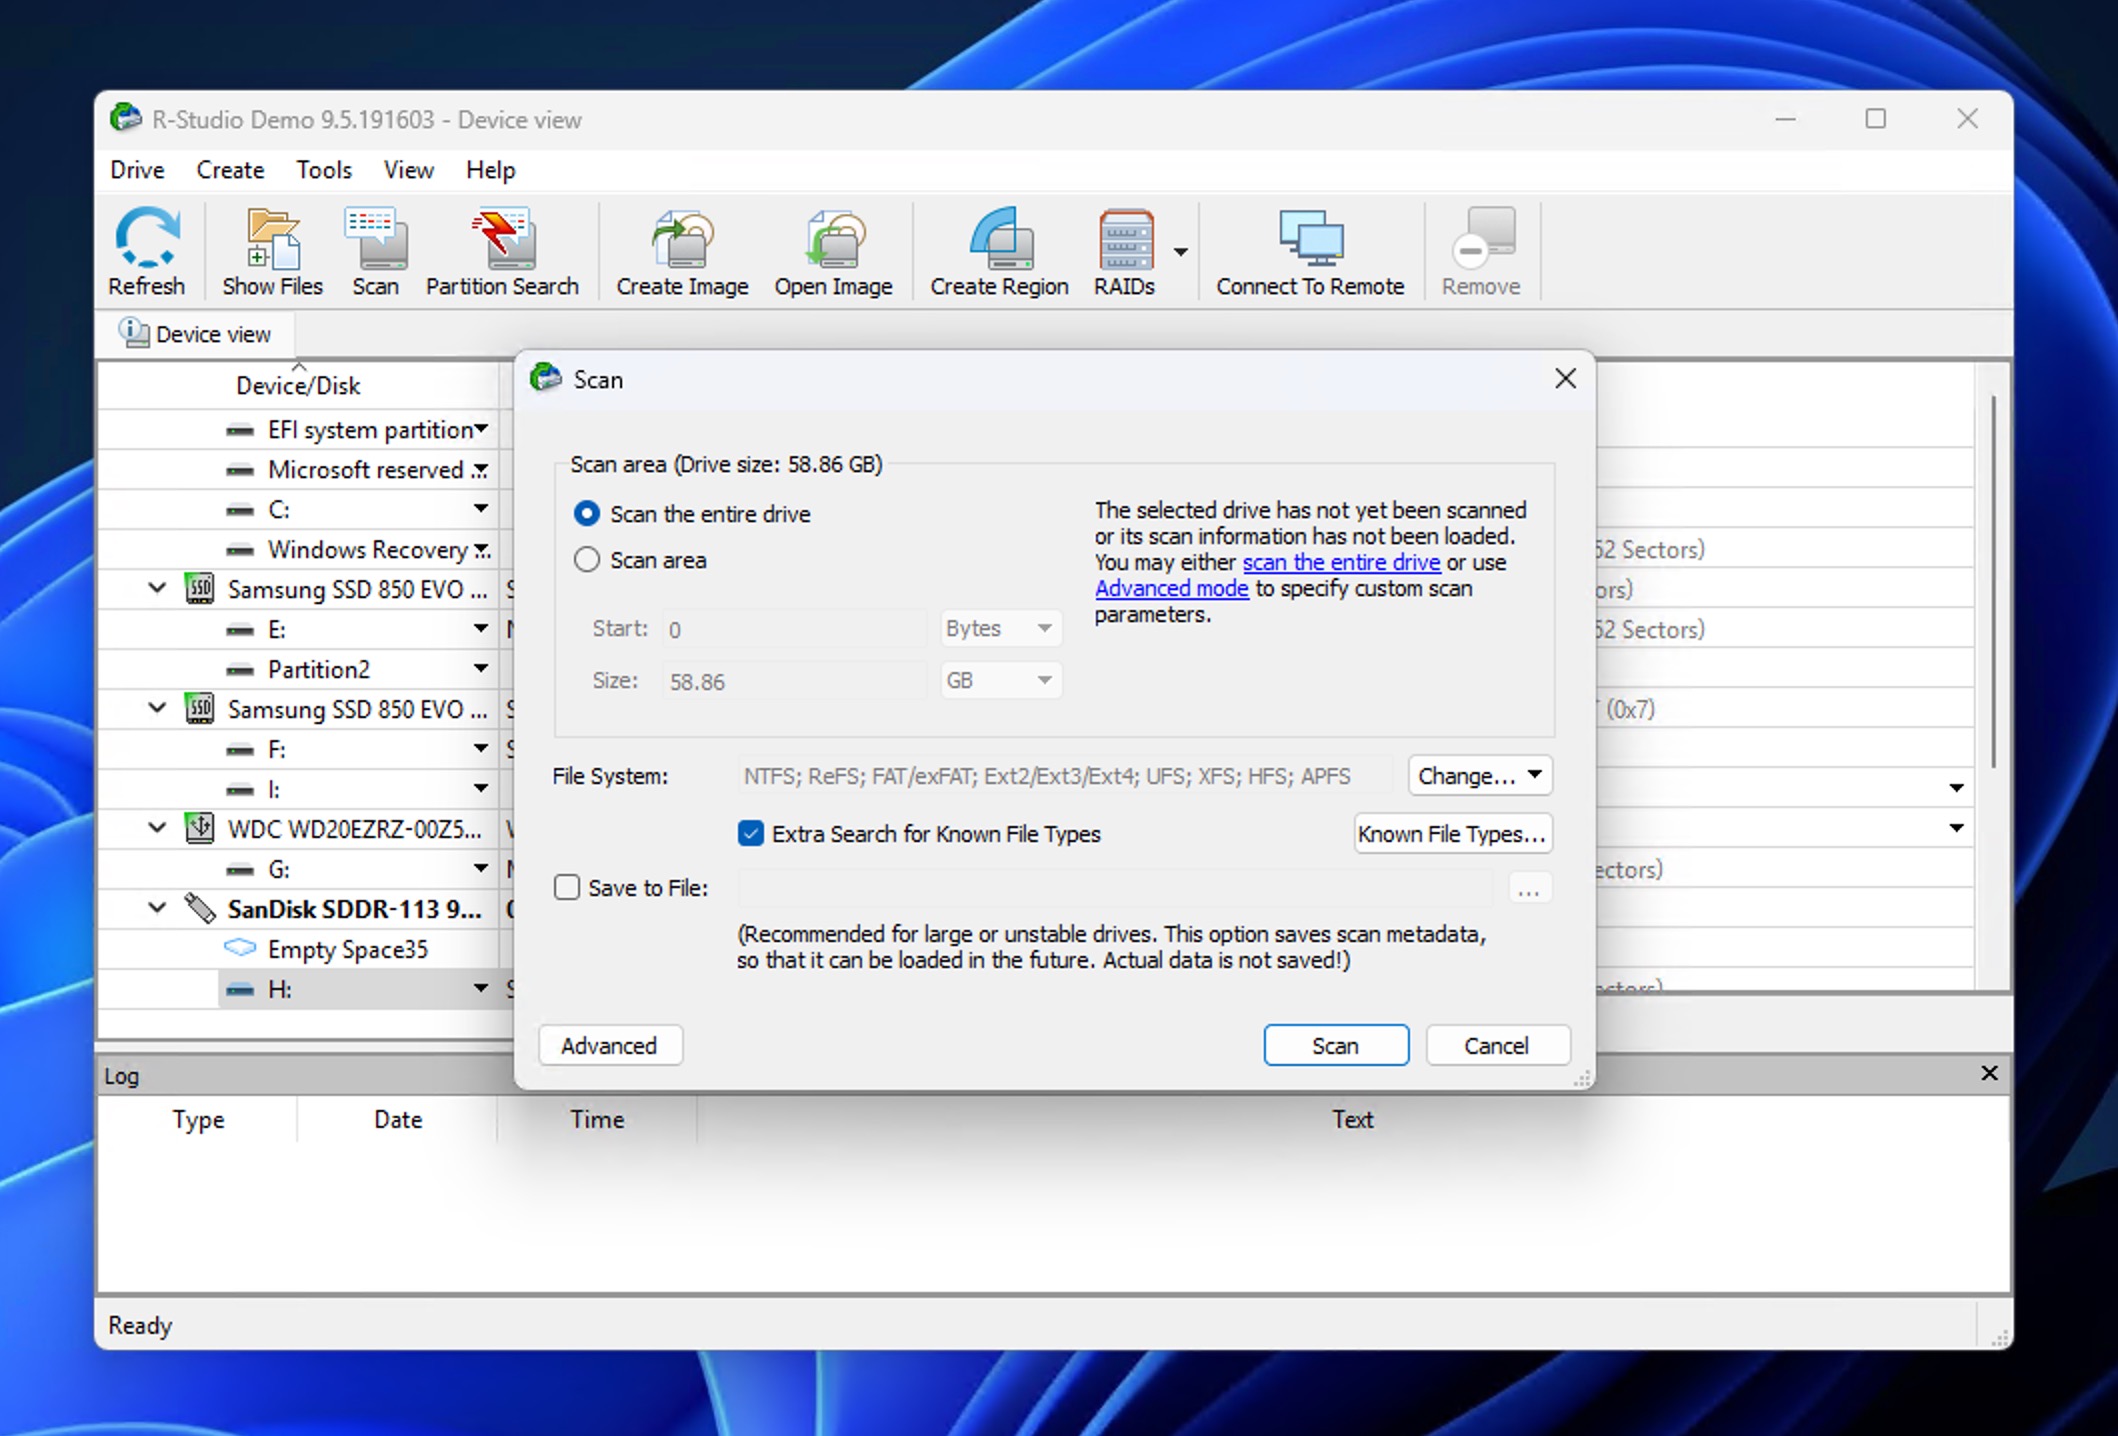
- Click the Scan button at the top of the window to begin analyzing your SD card for recoverable files.
- R-Studio will prompt you to choose scan options. For most SD card photo recovery scenarios, enable the Extra Search for Known File Types option and leave other settings at their defaults.
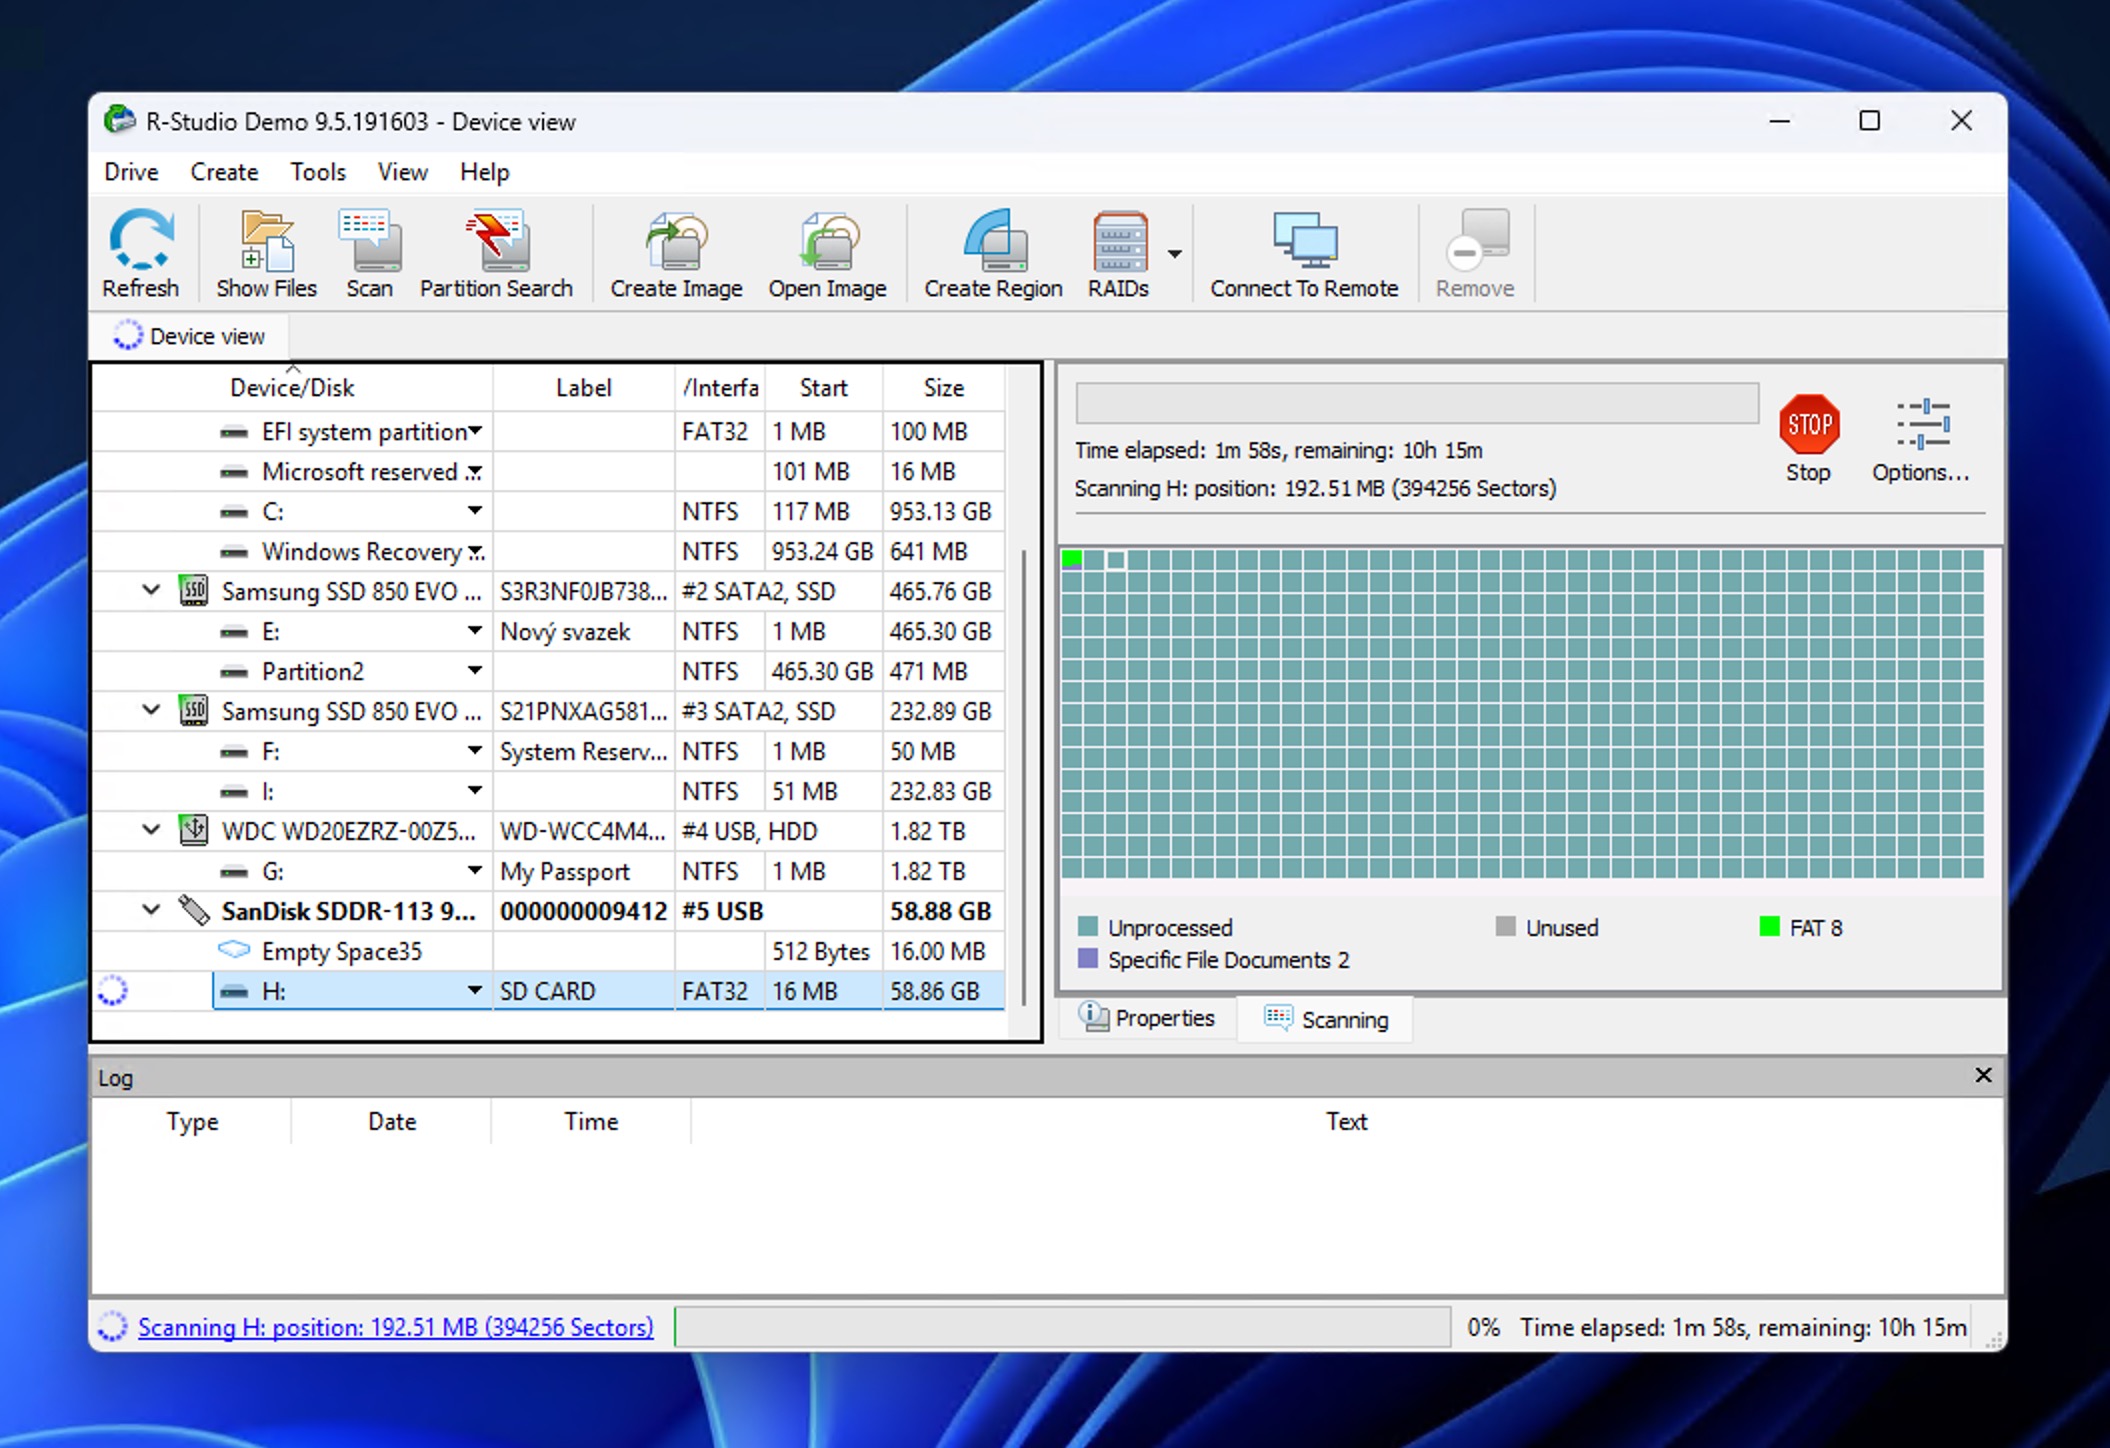
- Wait for R-Studio to complete the scan. The scan time depends on your card’s size and condition.
- Once finished, R-Studio displays a folder tree structure on the left side. Expand the folders to locate your photos. They’re usually organized by file type or in the original directory structure if it’s still intact.
- Double-click any image file to preview it in R-Studio’s built-in viewer. This helps you verify which photos are actually recoverable.
- Mark the checkboxes next to the photos you want to restore. You can select individual files or entire folders depending on your needs.
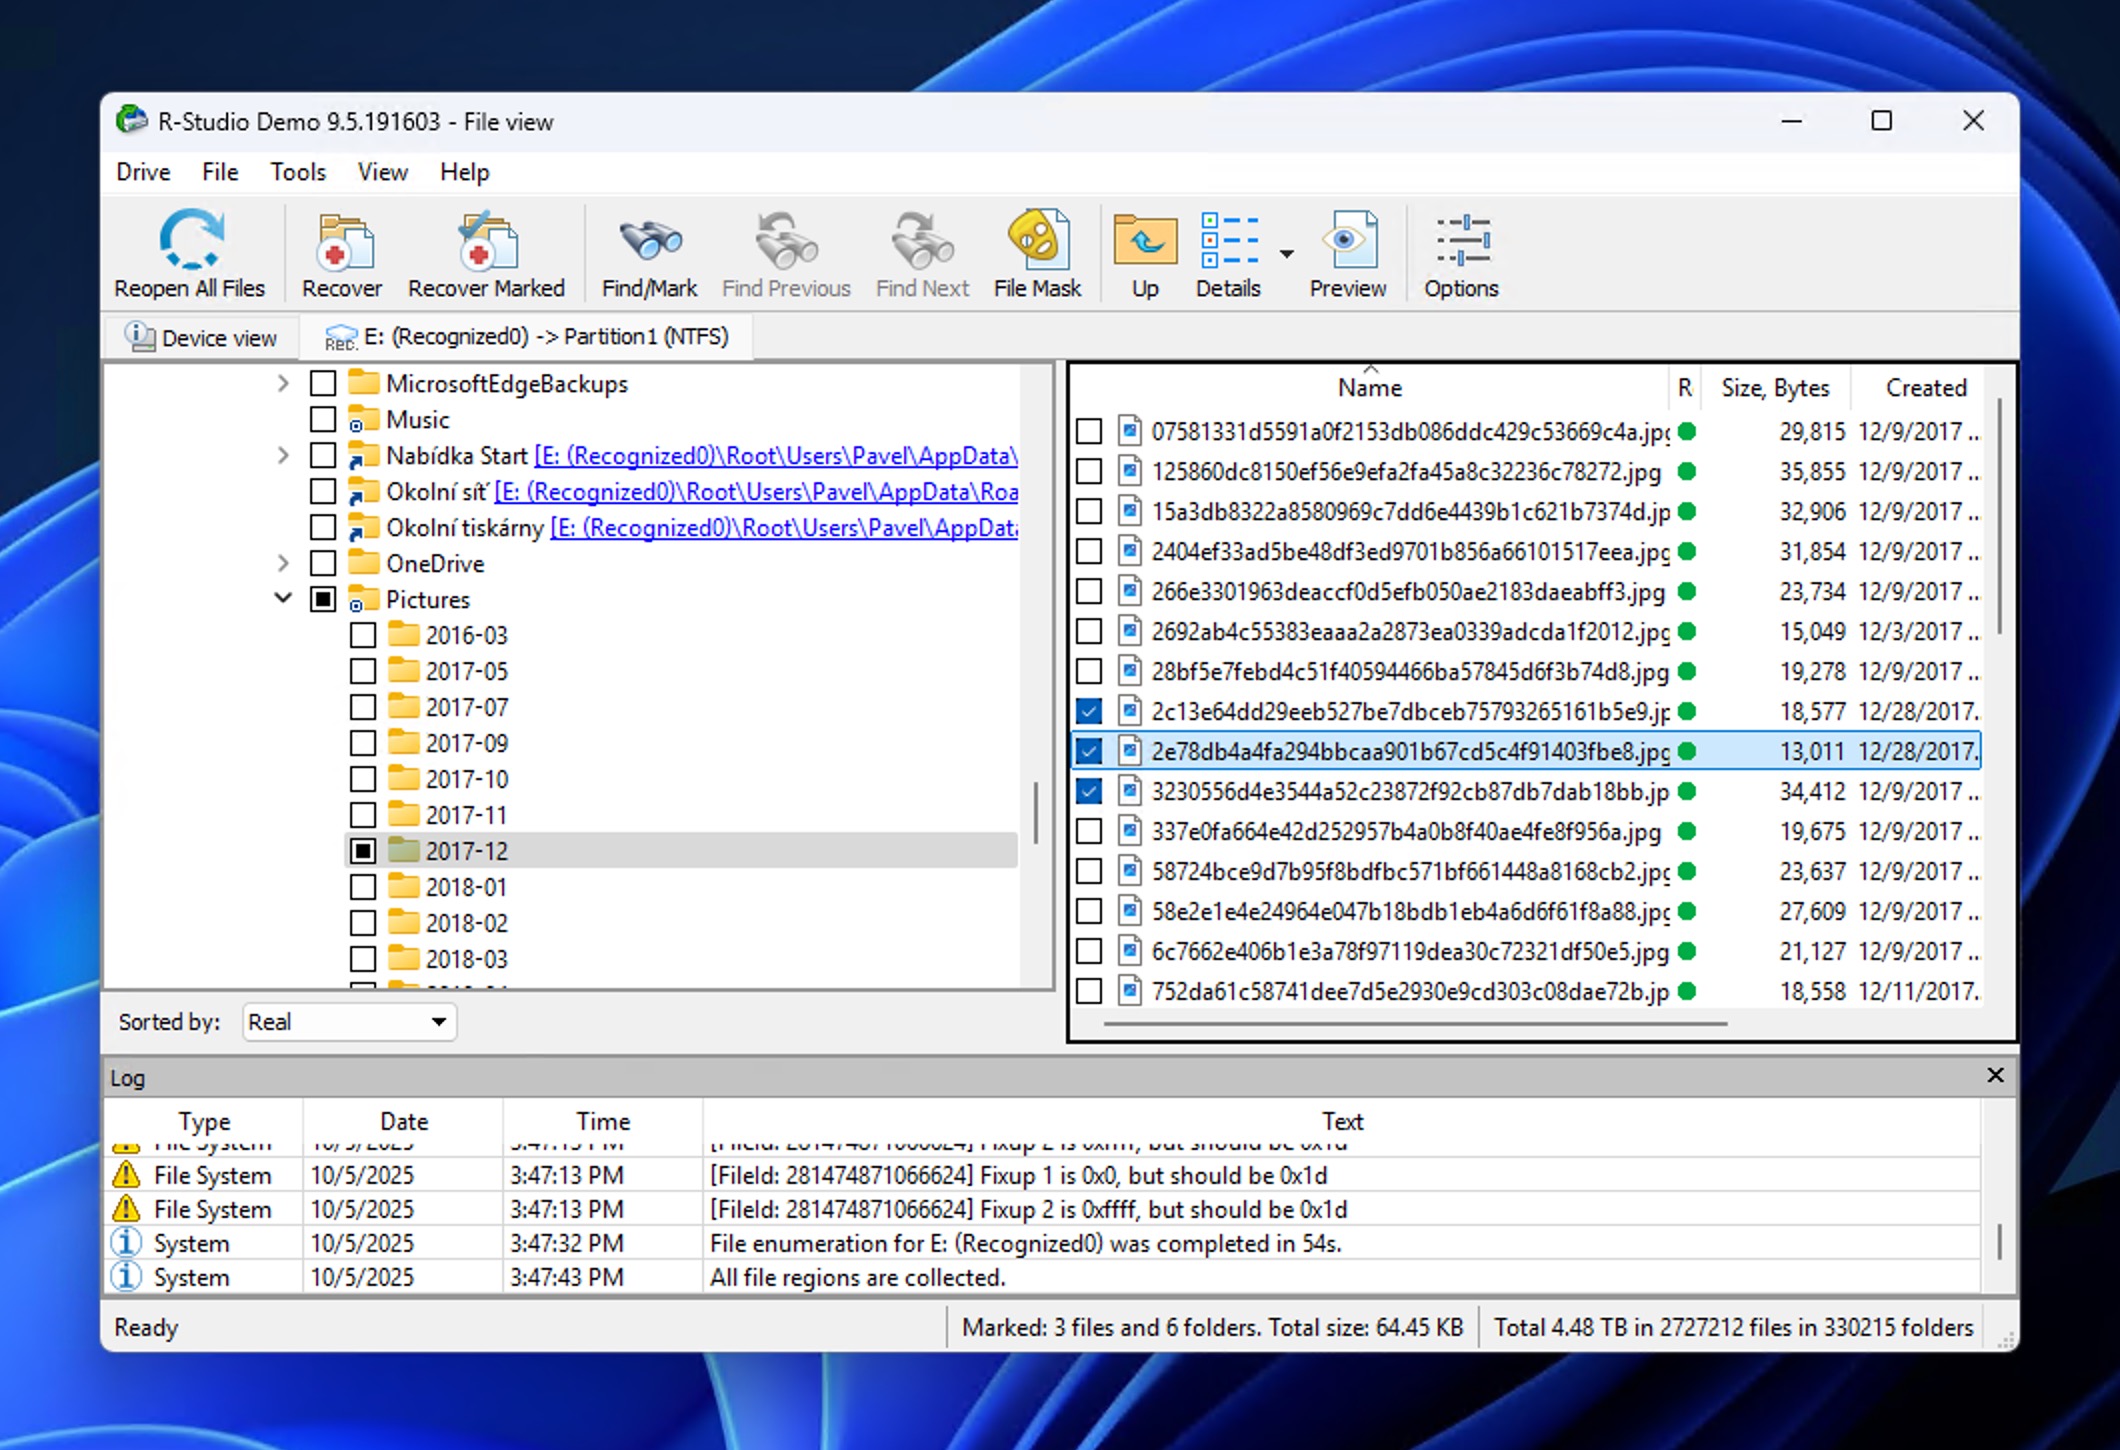
- Click Recover Marked at the top of the window and choose a safe destination to save your recovered photos. Never save recovered files back to the same SD card you’re recovering from.
While R-Studio’s interface might feel a bit overwhelming at first, especially compared to more user-friendly tools like Disk Drill, its recovery engine is solid and it handles various file systems exceptionally well (FAT32, exFAT, NTFS, ext2/3/4, and more).
If you’re comfortable with a steeper learning curve and need advanced recovery features, R-Studio is worth considering. However, if you prefer a more intuitive experience or need to recover larger files for free during testing, Disk Drill (from Method 1) is the better choice to recover photos from SD card on Android phone.
How to Recover Deleted Photos From an SD Card on an Android Phone Without a Computer
As we mentioned earlier, using a computer for SD card photo recovery gives you the best shot at success. Computer-based tools like Disk Drill and R-Studio have more powerful scanning engines, better file reconstruction capabilities, and direct access to your SD card’s raw data.
That said, not everyone has a computer, at least not at the time of the data loss incident. Maybe you’re traveling, or perhaps you simply don’t own a laptop or desktop. If that’s your situation, you can still try to recover deleted photos from SD card without computer using a few Android-based methods.
⚠️ Important: Most effective recovery apps require root access to your device. Apps that work without root can only perform limited scans and often retrieve low-resolution thumbnails instead of your original full-quality images.
Method 1: Retrieve Lost Photos from the SD Card Recycle Bin
Before jumping into recovery apps, check if your deleted photos are still sitting in your phone’s trash folder. Most Android manufacturers (Samsung, Xiaomi, OnePlus, Oppo, Vivo, and others) include a Recycle Bin or Recently Deleted folder directly in their Gallery apps.
When you delete photos from your Android device, they’re moved to this temporary holding area where they stick around for a set period (usually 30 days – learn more about Google Photos trash retention policies). This gives you a decent window to restore deleted photos from Android if you realize you made a mistake.
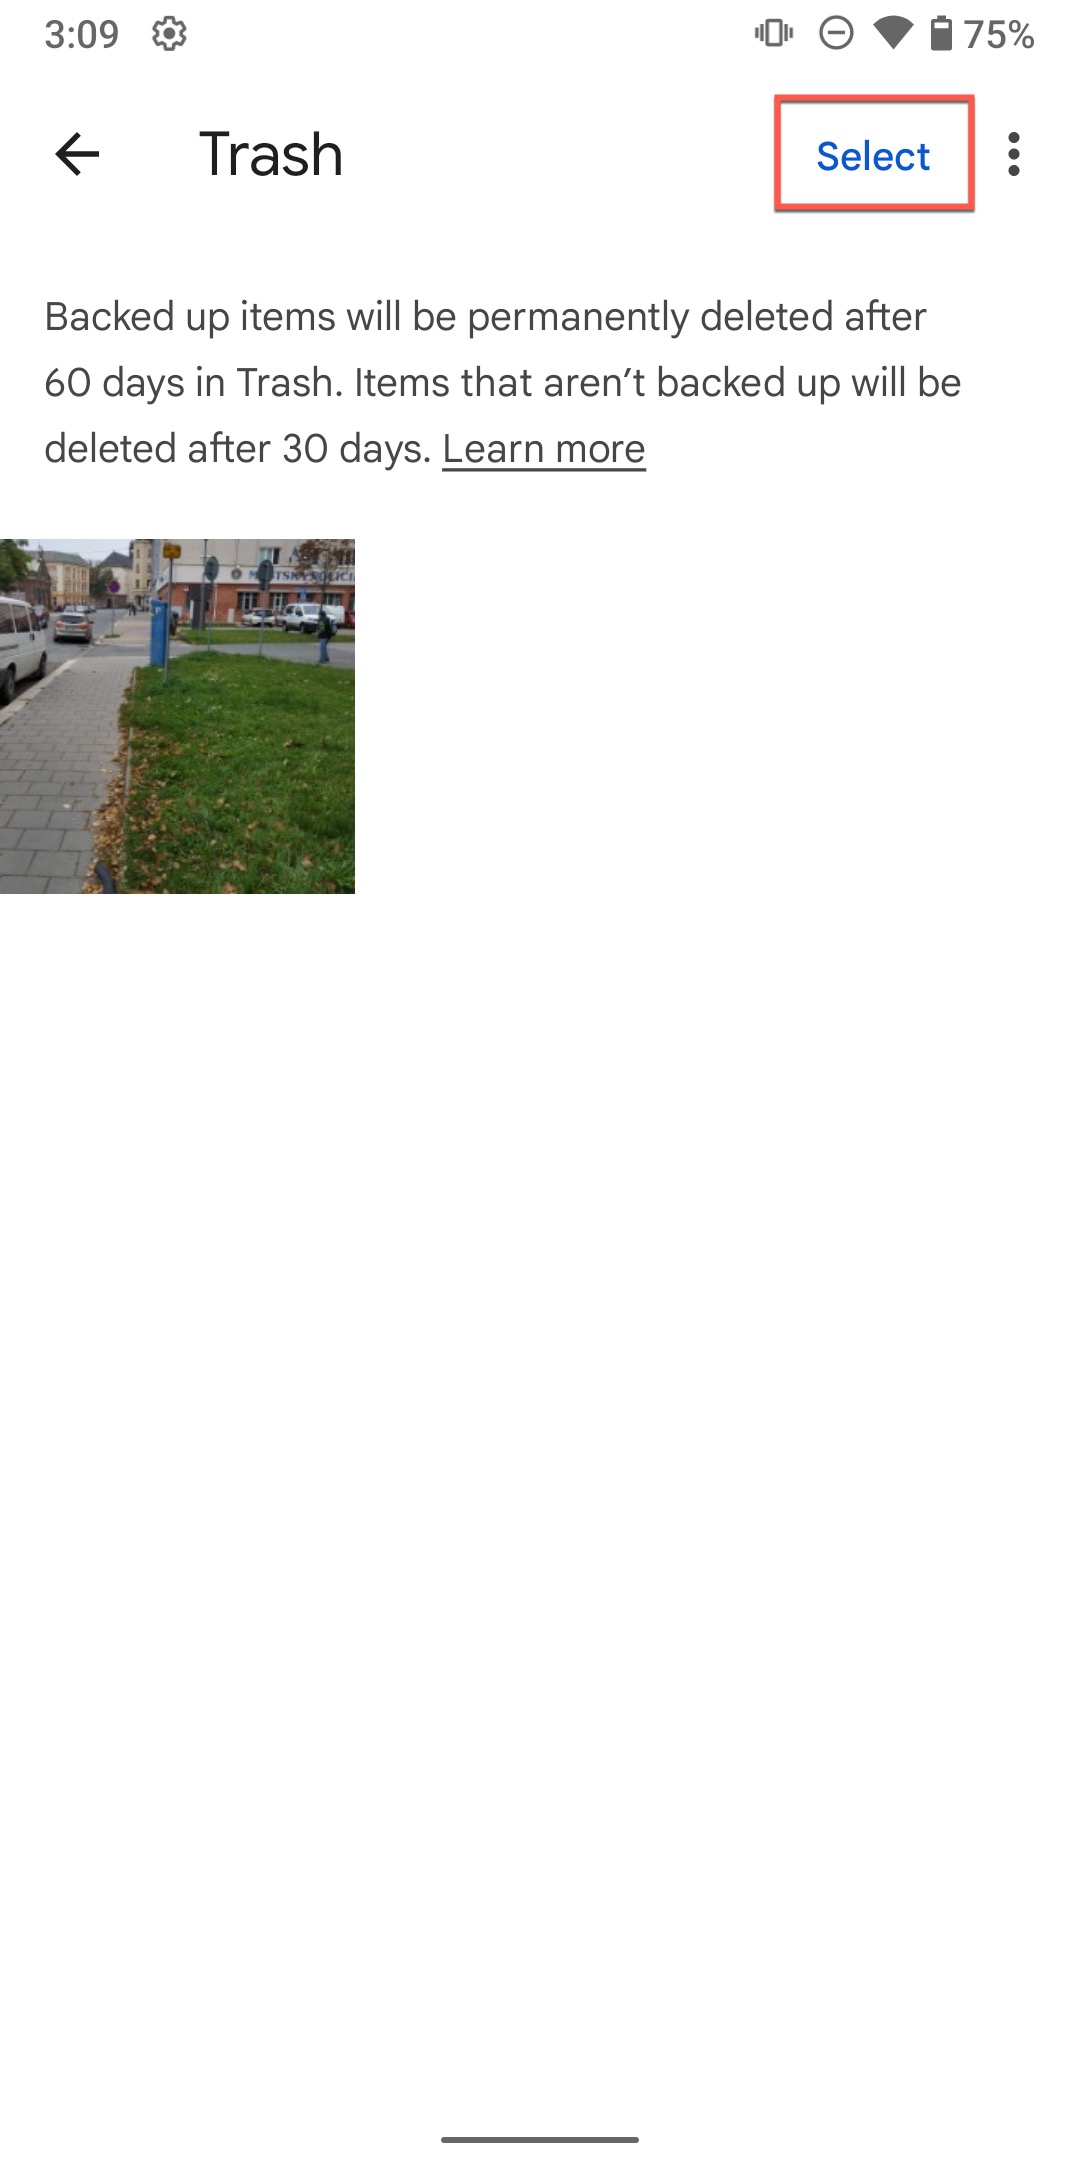
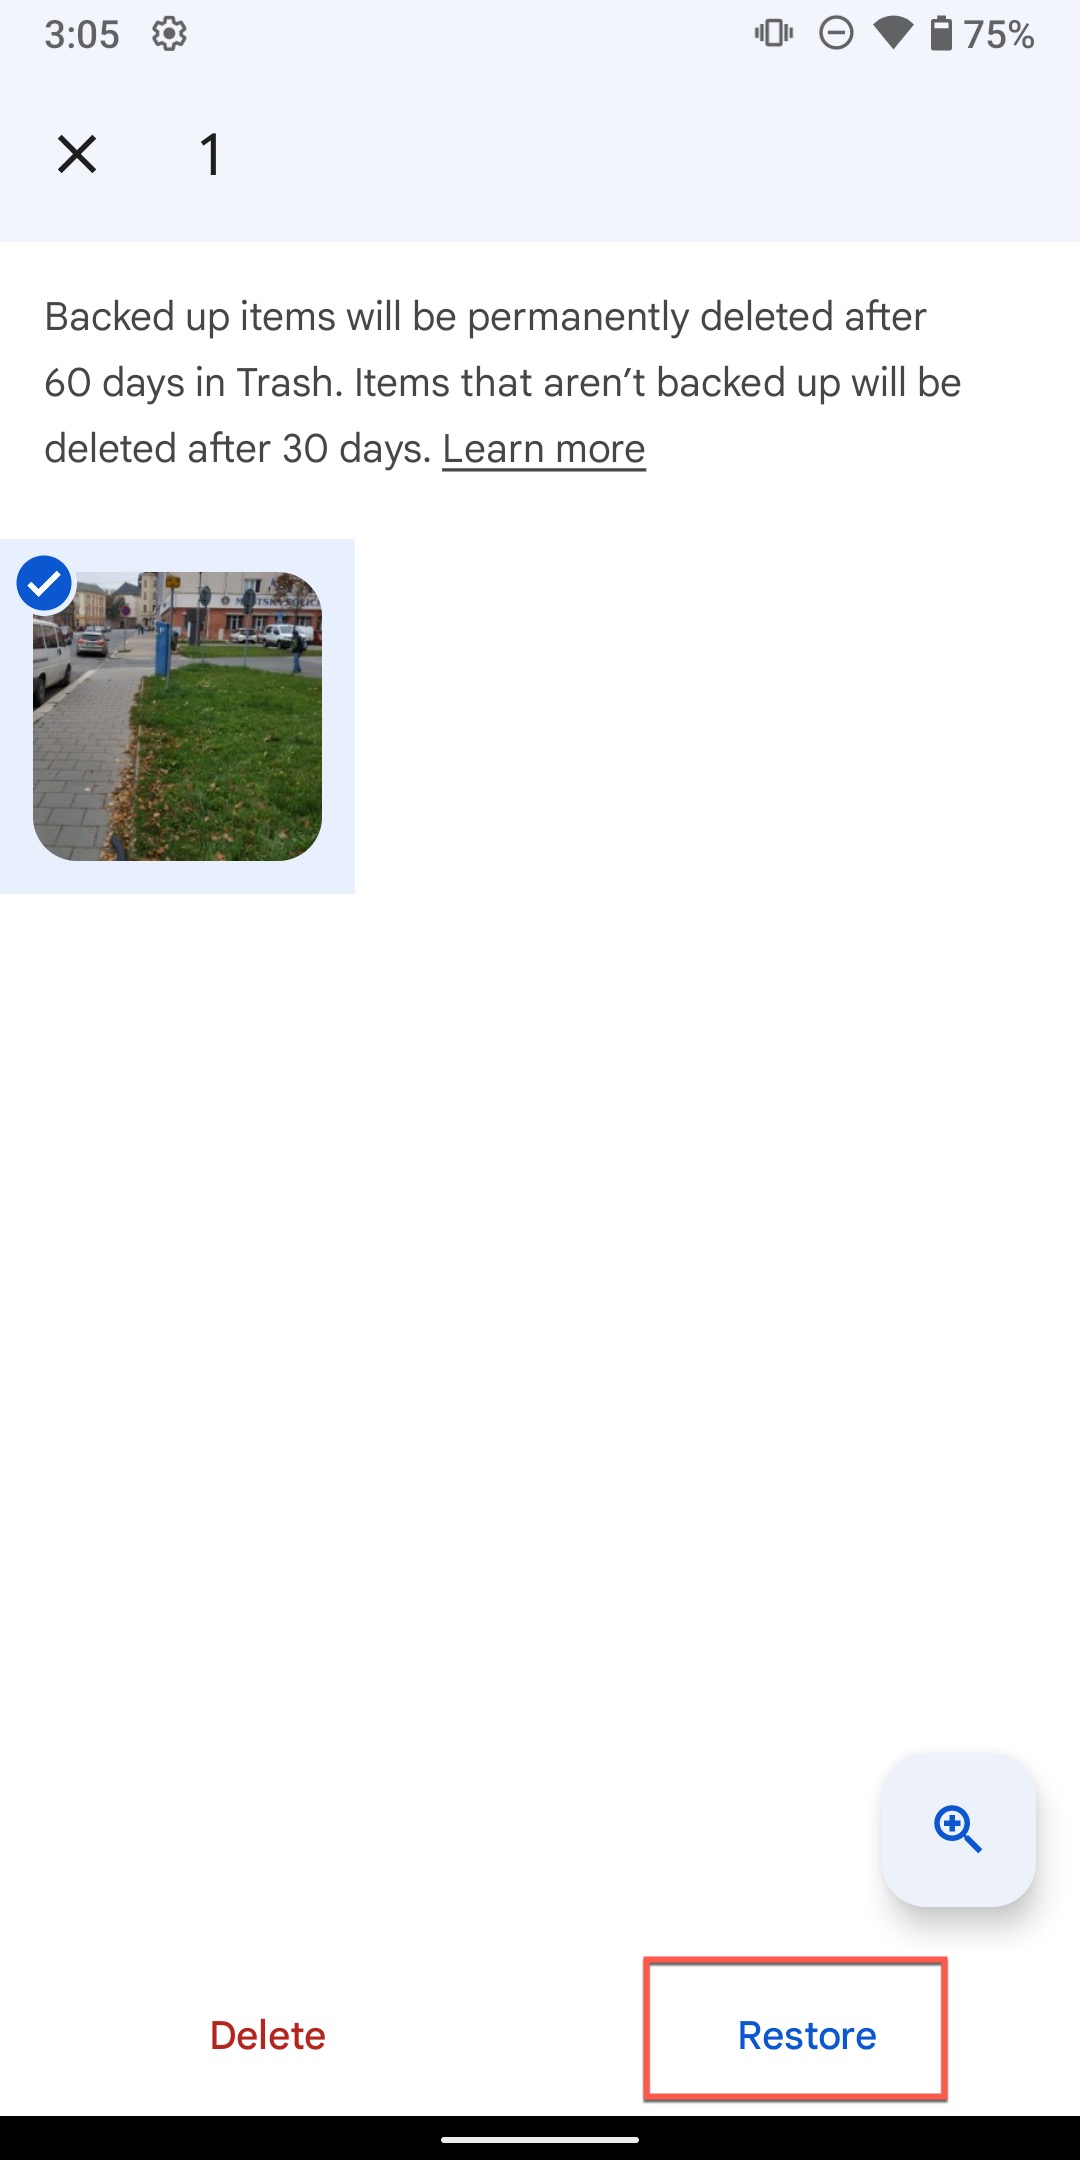
To recover deleted photos from Android gallery using the Recycle Bin:
- Open your phone’s Gallery app (it might be called Gallery, Photos, Album, or something similar).
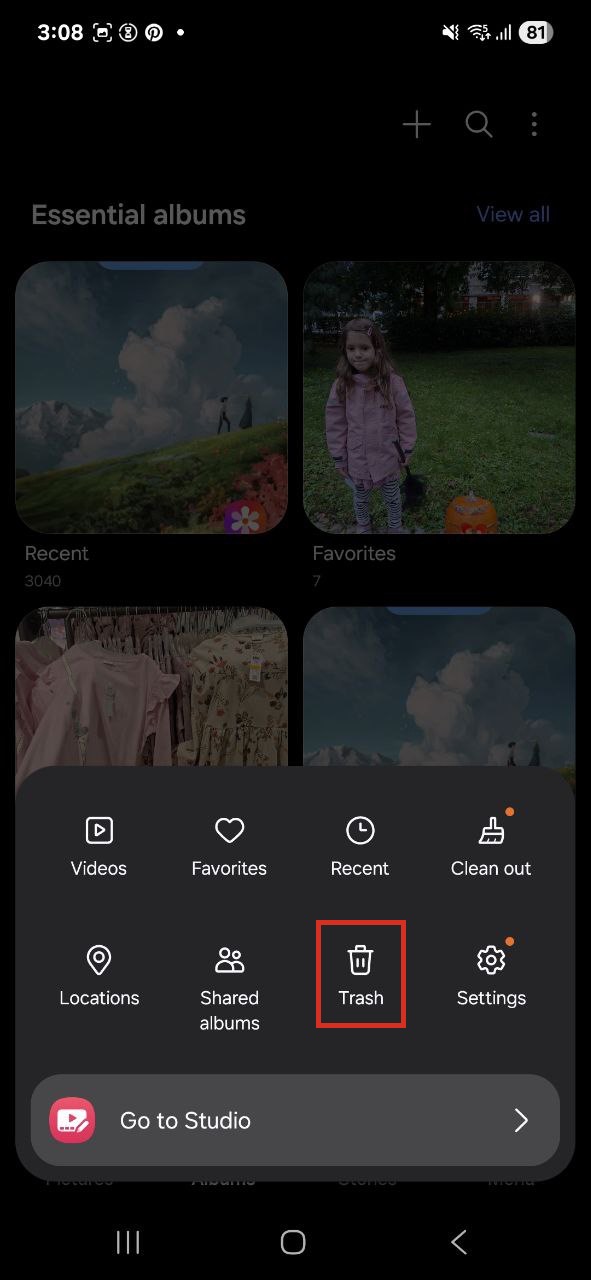
- Look for the recycle bin option. Depending on your phone brand, it might be called Recycle Bin, Trash, or Recently Deleted.
- Tap on the Recycle Bin/Trash folder and browse through the deleted photos. They’ll be organized by deletion date, with the most recently deleted items appearing first.
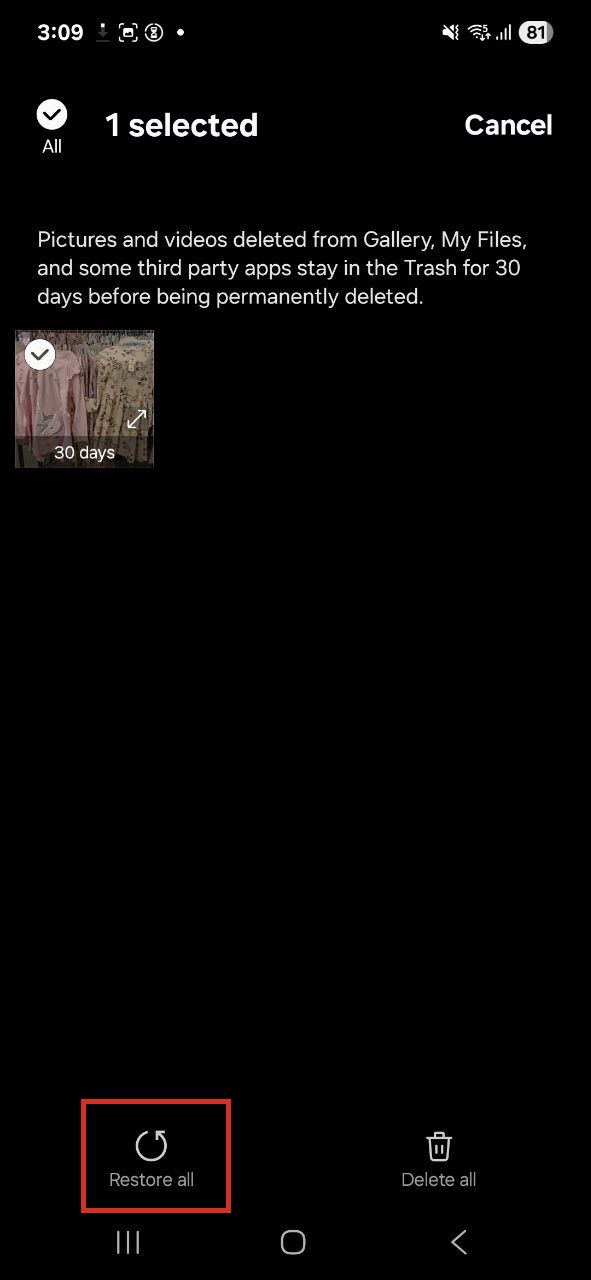
- Select the photos you want to recover by tapping on them. Most Gallery apps let you select multiple photos at once by long-pressing one photo, then tapping others.
- Tap the Restore or Recover button (usually at the bottom or top of the screen). Your photos will be moved back to their original album or location.
⚠️ Important: Again, this method only works if your photos were deleted within the retention window (typically 30-60 days) and you haven’t manually emptied the recycle bin. If you’ve already emptied the trash or the retention period has passed, you’ll need to try the other methods in this guide.
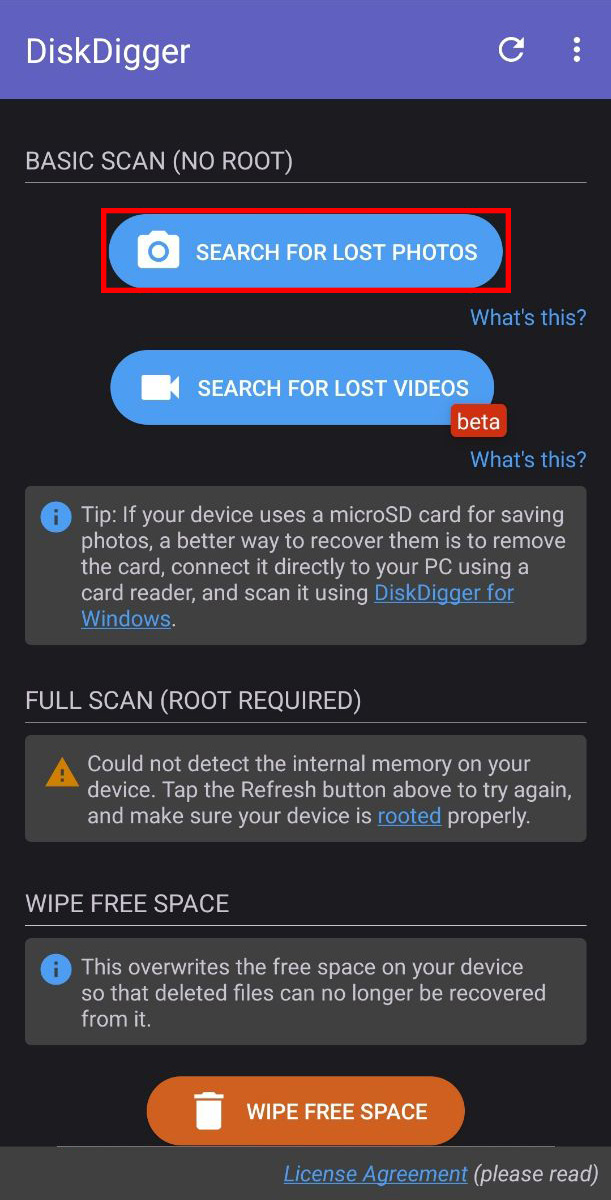
Method 2: Use DiskDigger to Recover Photos From SD Card Directly on Android Phone
DiskDigger is one of the few Android apps that can actually attempt to recover deleted pictures from SD card storage directly on your phone. It’s available for free on the Google Play Store and has helped many users undelete photos from memory card without needing a computer. The free version of DiskDigger can recover photos and videos. If you need to recover other file types (documents, audio files, etc.), you’ll need to upgrade to DiskDigger Pro.
However, DiskDigger’s capabilities depend entirely on whether your phone is rooted. Without root access, the app can only perform a basic scan that’s limited to cached thumbnails (tiny, low-resolution versions of your photos). With root access, DiskDigger can perform a full deep scan of your SD card and potentially recover deleted images from SD card at their original resolution.
⚠️ Important: Never root your phone after photos have already been deleted if recovery is your goal. The rooting process itself can overwrite data and make recovery impossible.
To recover deleted photos from SD card for free using DiskDigger:
- Download and install DiskDigger from the Google Play Store on your Android phone.
- Open DiskDigger and grant it the necessary permissions when prompted.
- The app will display available storage locations. Select your SD card (it will typically show the card’s size and label).
- Choose your scan type:
- Basic Scan (no root required): Scans for cached thumbnails and recently deleted photos. Results will likely be lower resolution.
- Full Scan (requires root): Performs a deep scan of the entire SD card for recoverable photos at full resolution.
- Wait for the scan to complete. This can take anywhere from a few minutes to over an hour depending on your SD card size and the scan type selected.
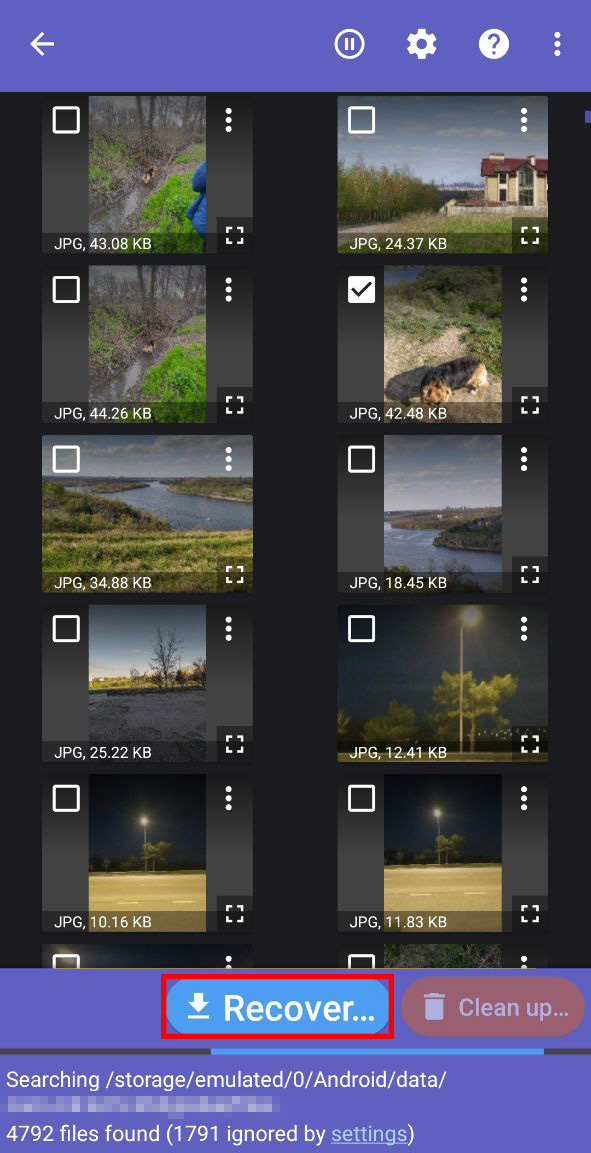
- Browse through the scan results and preview the recovered photos by tapping on them. DiskDigger will show you thumbnails of everything it found.
- Select the photos you want to recover by tapping the checkbox on each image. You can select multiple photos at once.
- Tap the Recover button (usually at the top of the screen) and choose where to save your recovered photos.
If DiskDigger didn’t find your missing photos or only recovered tiny thumbnail versions, then we strongly recommend trying the methods outlined in the How to Recover Deleted Photos From an SD Card With a Computer section of this guide. Tools like Disk Drill and R-Studio have significantly more powerful recovery engines and can access your SD card’s raw data in ways that Android apps simply cannot match.
Method 3: Recover Photos From Cloud Services
If you’ve enabled automatic cloud backup on your Android phone, there’s a chance your deleted photos might be waiting for you in the cloud because many Android users have Google Photos set up to automatically sync pictures.
When you delete a photo from your device with cloud photo synchronization turned on, it’s typically moved to the cloud service’s Trash or Recycle Bin rather than being erased immediately. Google Photos, for instance, keeps deleted photos in its Trash for 60 days before permanent deletion. Some phone manufacturers also offer their own cloud services (Samsung Cloud, Xiaomi Cloud, Huawei Cloud, and others), which work similarly by retaining deleted photos for a limited time (usually 30-60 days).
To get deleted photos from memory card using Google Photos:
- Open the Google Photos app on your Android phone (or visit photos.google.com on any web browser).
- Sign in with the Google account linked to your device if you’re not already logged in.
- Tap the Library tab at the bottom of the screen (it looks like a stack of photos).
- Scroll down and tap Trash (or Bin depending on your region).
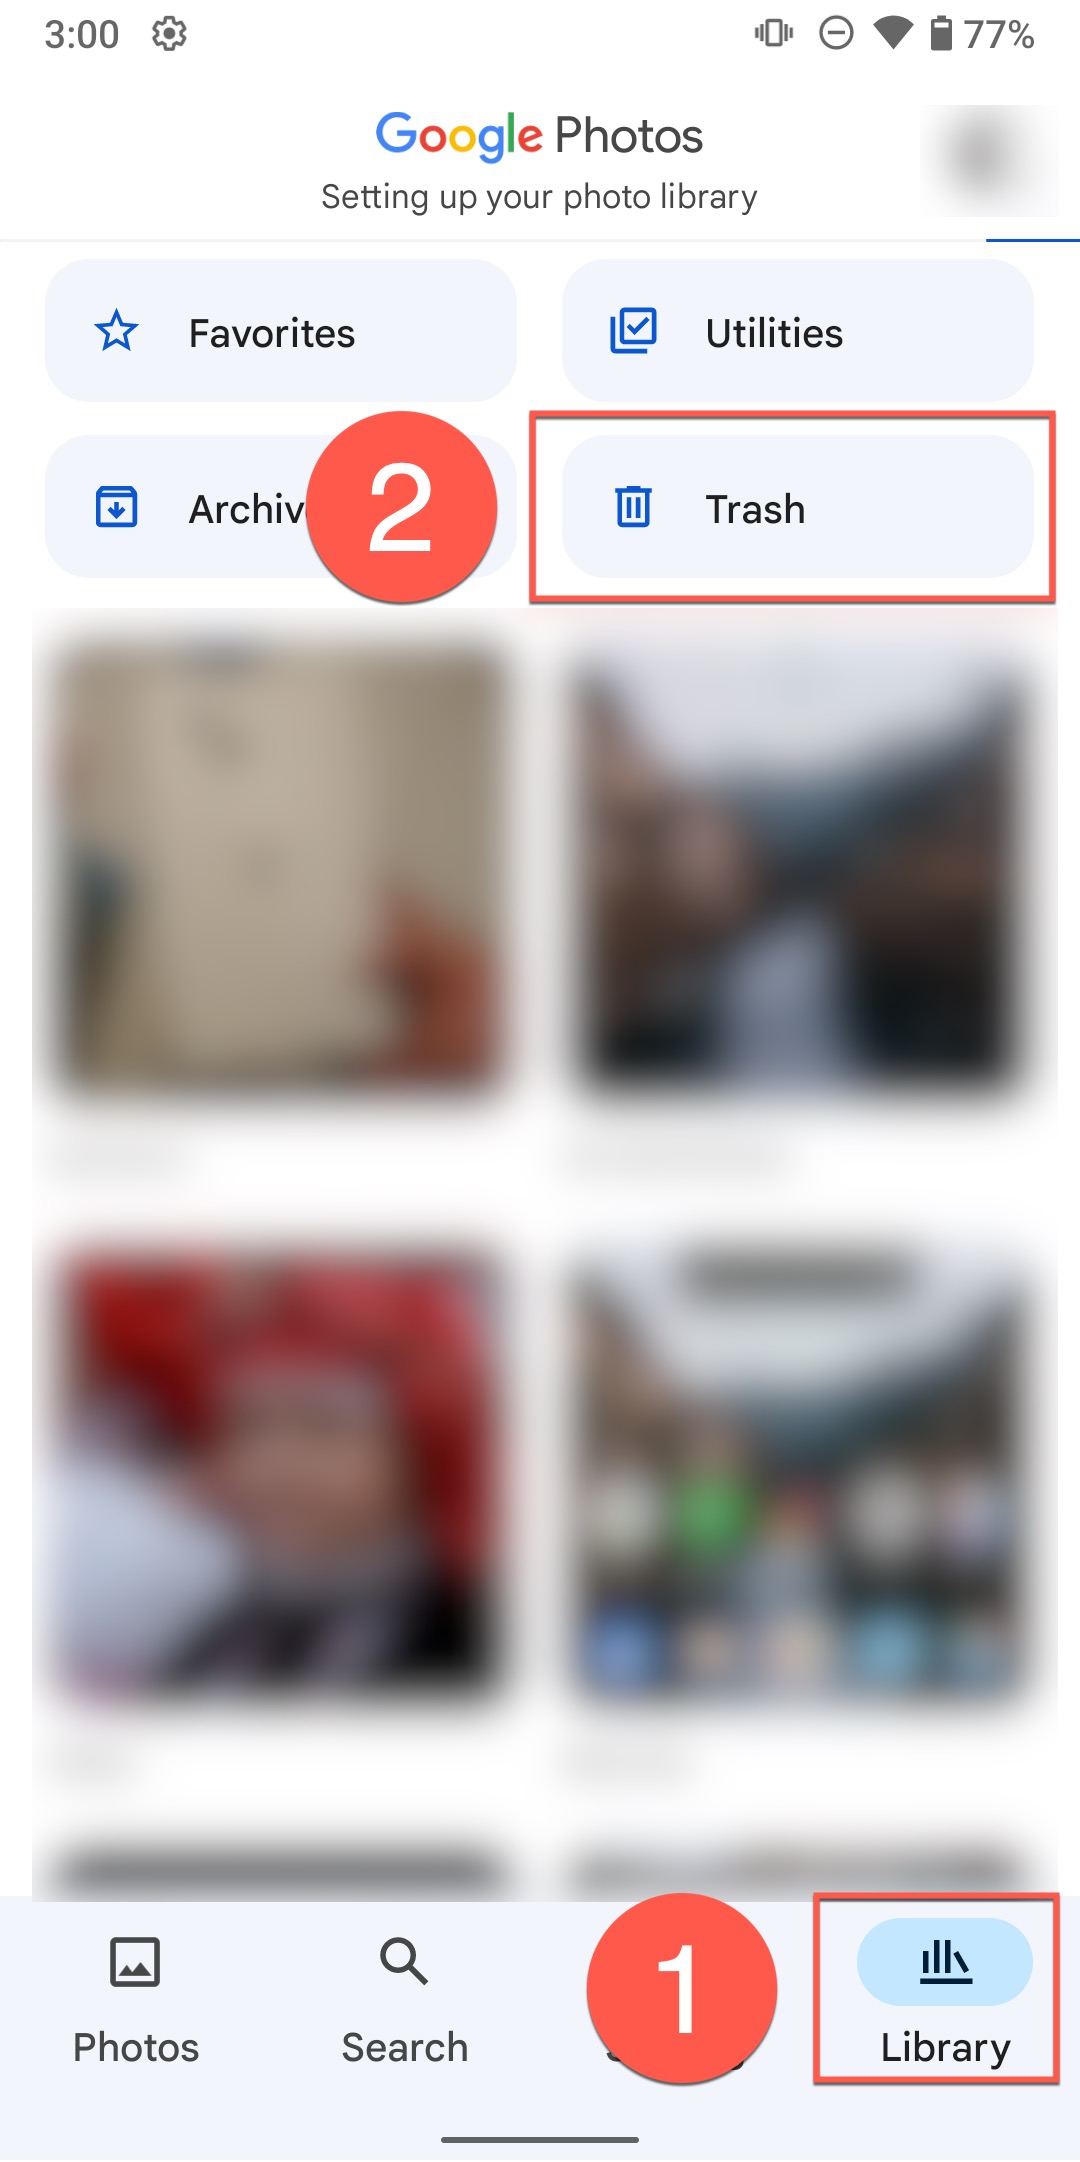
- Browse through your deleted photos and tap on any photo you want to recover. You can select multiple photos by long-pressing one, then tapping others.
- Once you’ve selected the photos, tap the Restore button at the bottom of the screen.
- The photos will be restored to your Google Photos library and will sync back to your device if you have sync enabled.
Keep in mind that cloud services sync both ways (creation and deletion). When you delete a photo on your phone, that deletion is automatically synced to the cloud. The photo moves to the cloud’s Trash, but it’s only temporarily protected. Once you manually empty the Trash or the retention period expires (typically 30-60 days), the photo is permanently deleted from the cloud with no way to recover it.
Common Pitfalls in SD Card Data Recovery for Android
Our team has heard about a lot of additional issues that can come up during SD card data recovery for Android, and here’s how to deal with them if you encounter one.
Recovered Photos Are Tiny or Low Quality
This is probably the most common complaint we see from users attempting SD card photo recovery, especially on platforms like Reddit. If your recovered photos are only a few kilobytes in size or appear as tiny thumbnails, you’ve likely retrieved cached preview images rather than the original full-resolution files because the original photo data was overwritten, or the recovery tool you used couldn’t access the full data.
Solution: Try a more powerful computer-based recovery tool like Disk Drill or R-Studio. They programs can perform deeper scans and access data that mobile apps simply can’t reach. If computer-based tools also only recover thumbnails, it’s a strong indication that your original photo data has been overwritten.
Recovered Images Won’t Open or Are Corrupted
Sometimes you’ll successfully recover photos, but they won’t open or display correctly when you try to view them because the files were partially overwritten or the file system became fragmented during the deletion process.
Solution: Try opening the corrupted images with different photo viewers. If only half the image displays, the remaining data was likely overwritten and is unrecoverable. As your last resort, you can use a photo repair tool, but don’t expect the results to be great. If only a small part of the image is missing, then generative AI tools like Google’s Nano Banana model can deliver suprisingly excellent results.
SD Card Not Recognized by PC
If your computer won’t recognize your SD card at all, recovery becomes significantly more challenging because it often indicates physical damage, file system corruption, or driver issues.
Solution: We have a detailed guide specifically for this problem, so check it out. The guide covers troubleshooting steps like trying different card readers, updating drivers, checking Disk Management (Windows) or Disk Utility (Mac), and determining whether the issue is hardware or software-related.
Quick Recap
It’s often possible to recover deleted photos from an Android SD card is often possible, but success depends heavily on how you approach it.
As we’ve covered throughout this guide, computer-based recovery methods using tools like Disk Drill or R-Studio offer the highest success rates and give you the most control over the process. Android-based recovery methods can work in certain situations, but they come with significant limitations, especially if you don’t have root access.
The takeaway is that if your photos are truly important and the simple methods (recycle bin, cloud backups) didn’t work, it’s worth finding access to a computer to use professional recovery software. The difference in recovery success rates is substantial.
Have you tried recovering photos from your SD card? We’d love to hear about your experience in the comments below. And if you’re still struggling to get your photos back or need guidance for a specific situation, feel free to reach out. We’re here to help.
FAQ
- Open the Gallery app.
- Tap Menu.
- Select the Trash option.
- Tap Edit.
- Choose the photos you want to recover and tap Restore.


Nice