In Windows, it takes just two extra keystrokes to bypass the Recycle Bin and permanently delete your files. Normally, that’s all well and good, but when you accidentally shift-delete the wrong files or have second thoughts about what you removed, the two keystrokes can suddenly create a major problem for you. The good news is that it’s often possible to recover shift-deleted files on Windows, but you need to act quickly and follow the steps described in this article.
Can You Recover Shift Deleted Files?
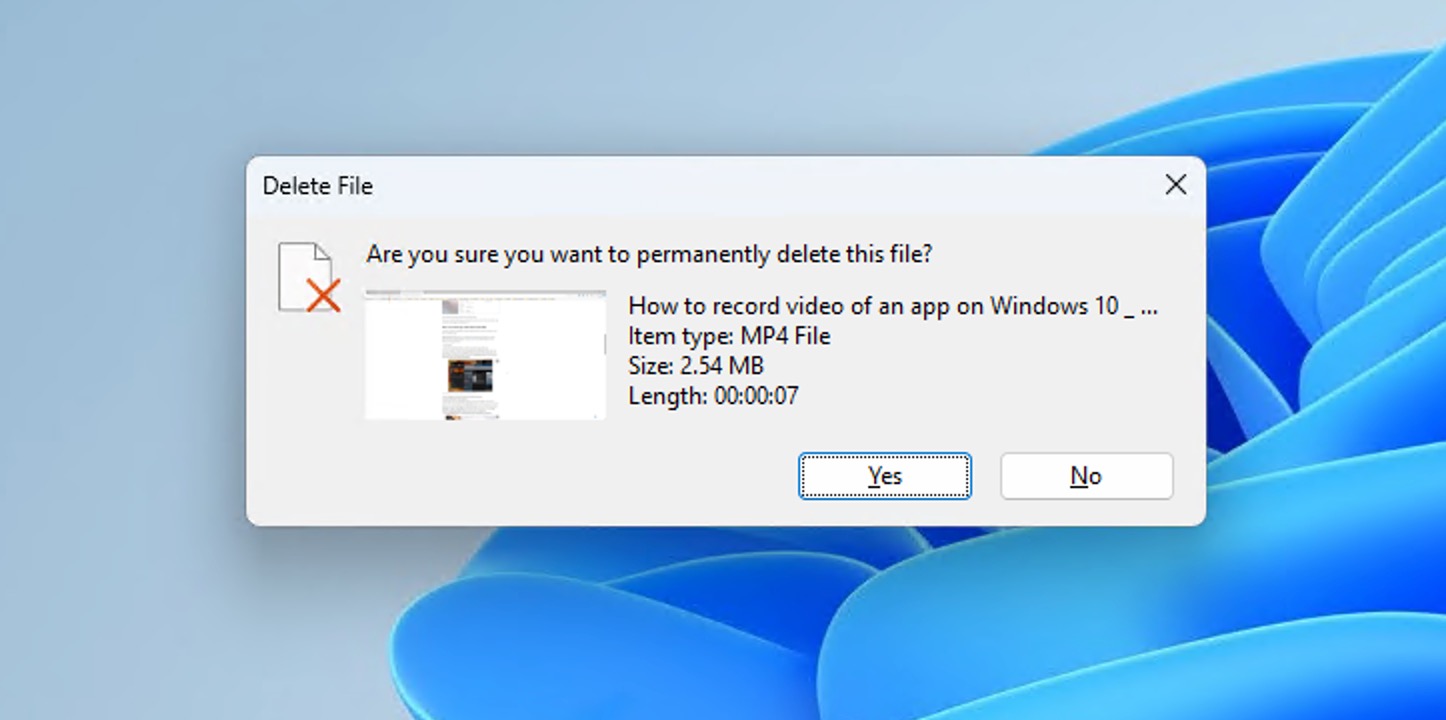
When you shift-delete a file, Windows erases the file’s entry from its file system table, the physical storage space is marked as available for new data, and all logical references to the file disappear from File Explorer.
This may make shift-deleted files seem to be completely impossible to recover, but that’s not really the case despite them not being in the Recycle Bin.
Because the physical storage space occupied by shift-deleted files is only marked as available (as opposed to being immediately erased), the actual data remains on your drive until Windows writes new data over it.
However, your window of opportunity for recovery varies depending on your storage type and usage:
- On traditional hard drives (HDDs), files might remain recoverable for weeks or even months.
- On SSDs with TRIM enabled, this window shrinks dramatically—sometimes to just minutes or hours.
- The more you use your computer and write new data, the higher the chance of overwriting your deleted files.
That’s why successful recovery of shift-deleted files is a race against time. The moment you realize you need those files back, stop using that drive and try one of the recovery methods I’ll show you next. The longer you wait, the more likely it is that Windows will overwrite your deleted files with new data, making them unrecoverable.
5 Methods to Recover Shift Deleted Files
Let me walk you through five methods that can help you recover shift-deleted files on Windows even if you consider yourself to be a regular user and not an expert. I will present the methods in order of their effectiveness and ease of use, starting with the approaches most likely to succeed. This way, you can work through them systematically and maximize your chances of getting your files back without wasting time on less reliable options first.
Method 1:Recover Files with Professional Data Recovery Software
My first tool of choice for recovering shift-deleted files is Disk Drill. It’s incredibly effective while remaining surprisingly easy to use, even if you’ve never used recovery software before.
What makes Disk Drill so effective is its dual-scanning approach. First, it analyzes any remaining file system information that might still point to your deleted files. Then, it scans your entire drive looking for file signatures (patterns that identify specific file types). With support for over 400 file signatures and all Windows file systems (FAT32, exFAT, NTFS, etc.), it can find almost any type of deleted file you’re looking for.
To recover shift-deleted files on Windows using Disk Drill, do the following:
- Download Disk Drill for Windows.
- Open the downloaded file and install Disk Drill (make sure to install it on a different drive than the one containing your deleted files).
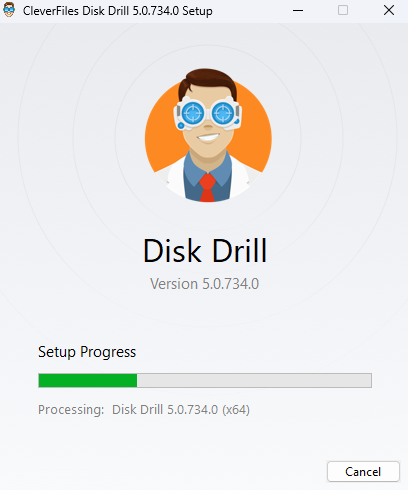
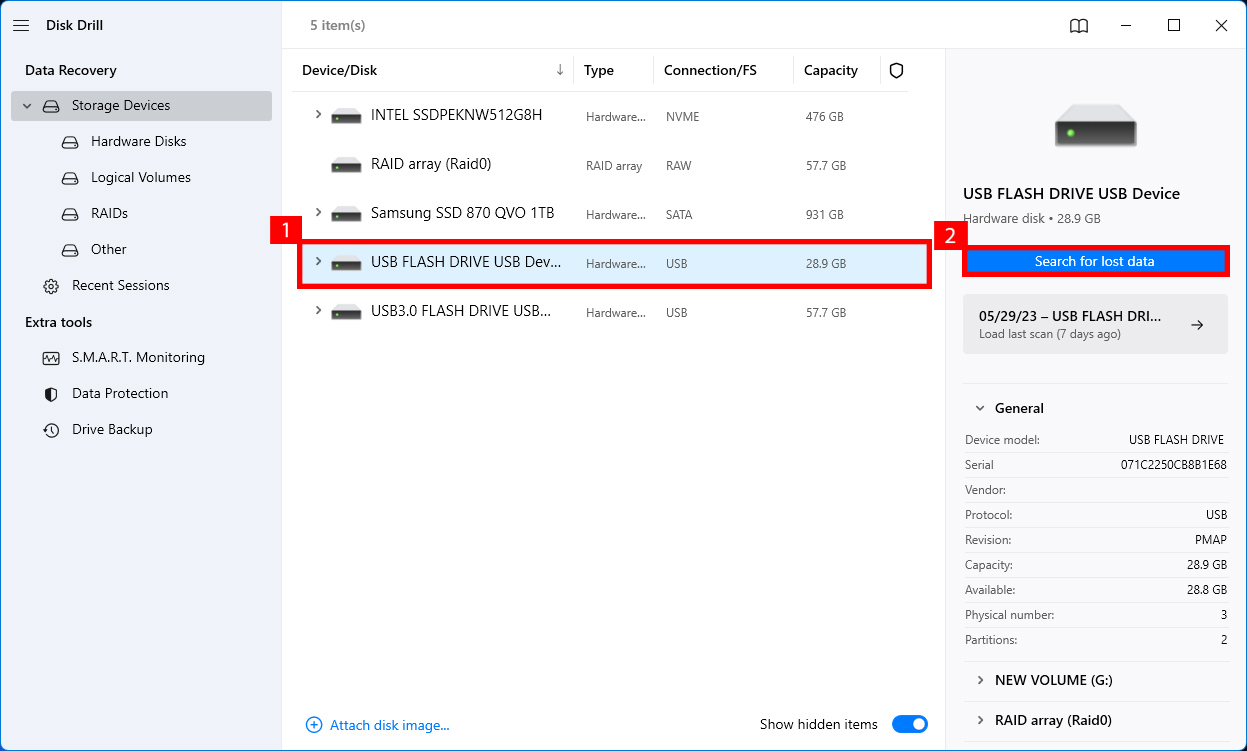
- Launch Disk Drill, select storage device from which you want to recover shift deleted files, and finally click the Search for lost data option on the right side of the app.
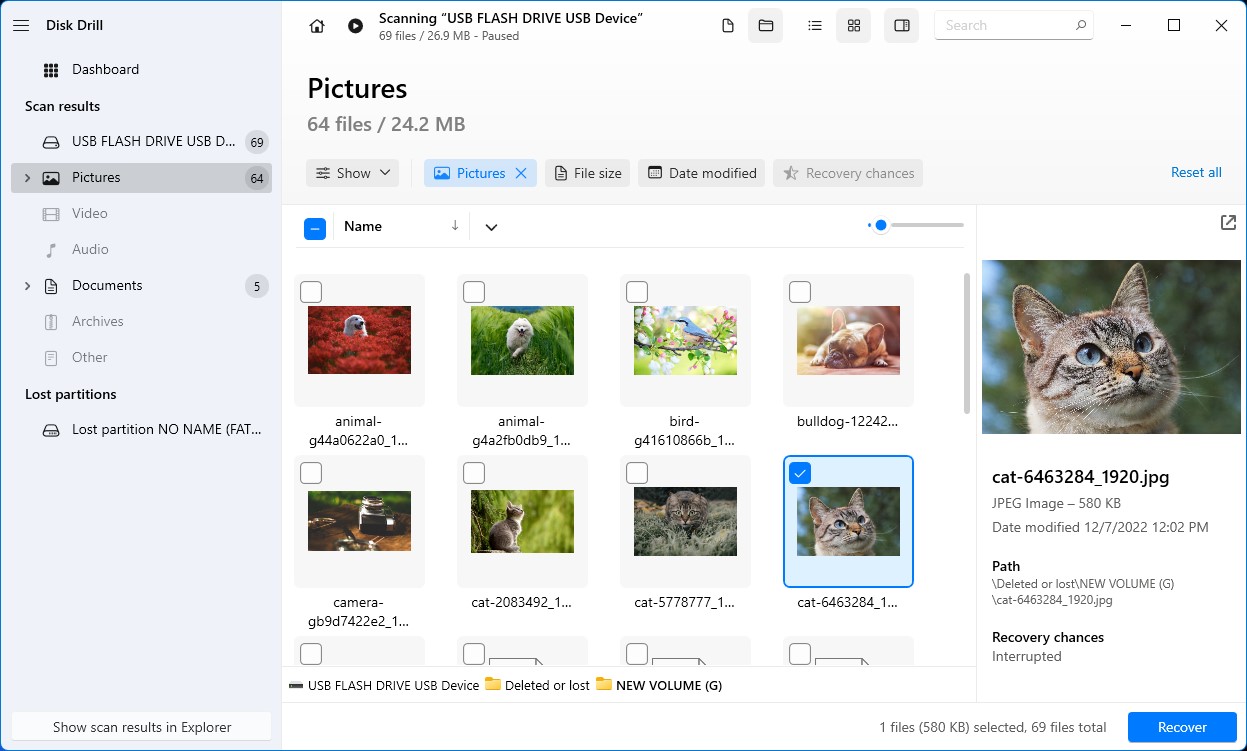
- Wait a few moments until Disk Drill finishes a full scan of the storage device.
- Using the preview feature from Disk Drill, select which files you want to recover and choose your preferred recovery location.
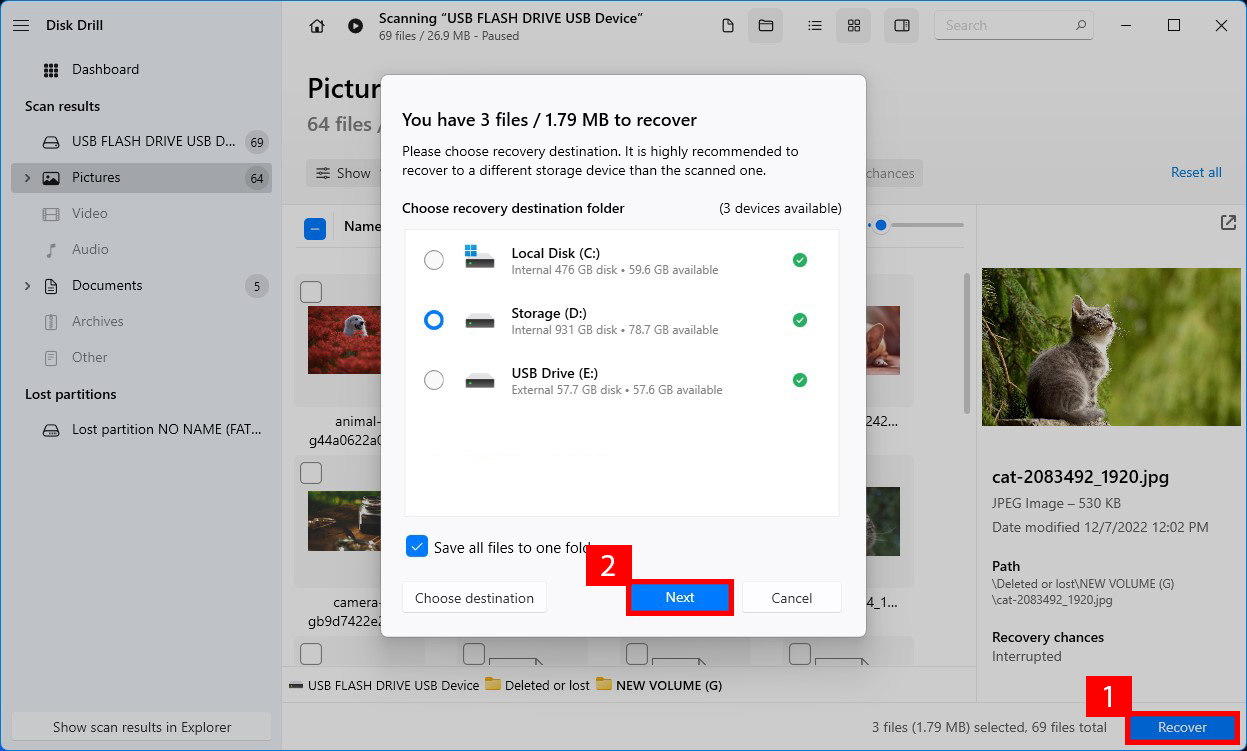
- Click Recover to restore your files and choose a recovery destination on a different drive.
The free version lets you preview an unlimited amount of files and recover up to 500 MB of data, which is plenty for recovering important documents or a folder of family photos. If you would like to learn more about Disk Drill before giving it a try, then I recommend you read our comprehensive review.
Method 2:Restore Data Using File History
If you were proactive enough to set up File History before the accidental deletion, you’re in luck. File History is Windows’ built-in backup tool that I consider to be severely underappreciated. Introduced with Windows 8 as a more user-friendly replacement for the old Backup and Restore feature, it’s now the go-to backup solution for Windows 10 and 11.
The process of recovering shift-deleted files using File History is simple, but it differs slightly between Windows 10 and 11, so I’ll guide you through both.
Restore Using File History on Windows 10
- Navigate to the folder that previously housed the permanently deleted files.
- Click History (located in the Home tab at the top).
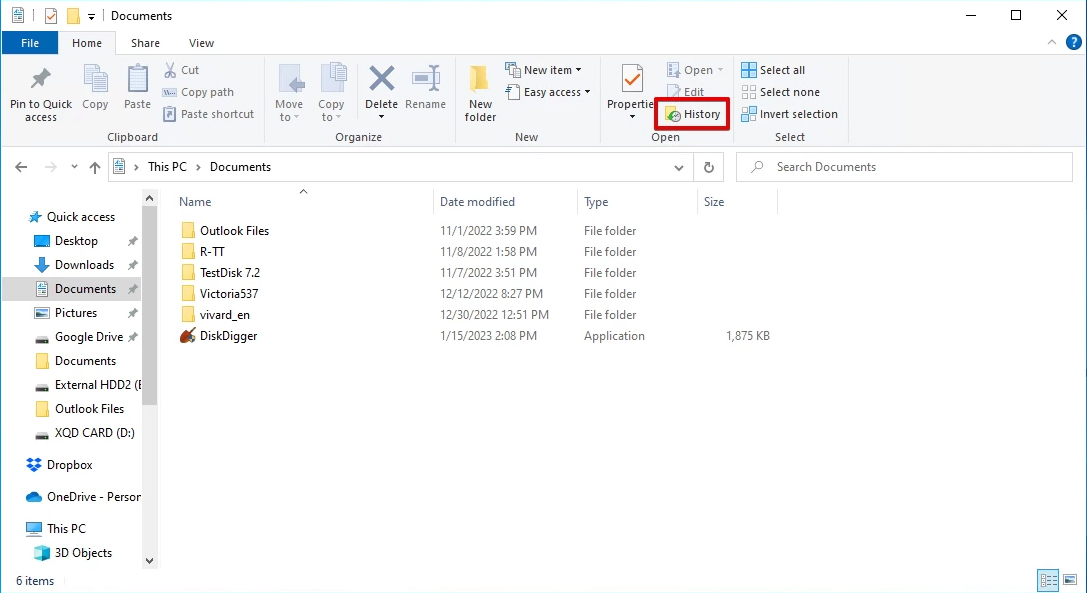
- Select the files you want to restore and click the green Restore button. File History keeps multiple versions of your files. You can use the arrows to browse through different backup dates.
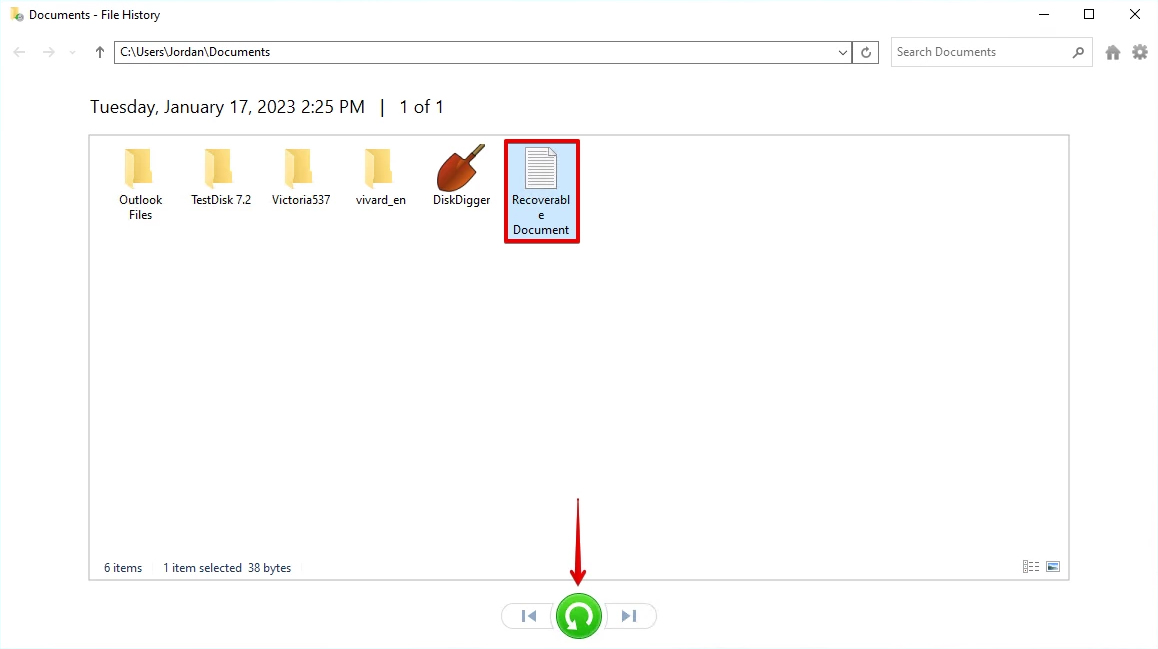
Once you click Restore, the files will return to their original location. To save the files to a new location instead, right-click the Restore button and click Restore to.
Restore Using File History on Windows 11
- Open Start and search Control Panel. Open the first result.
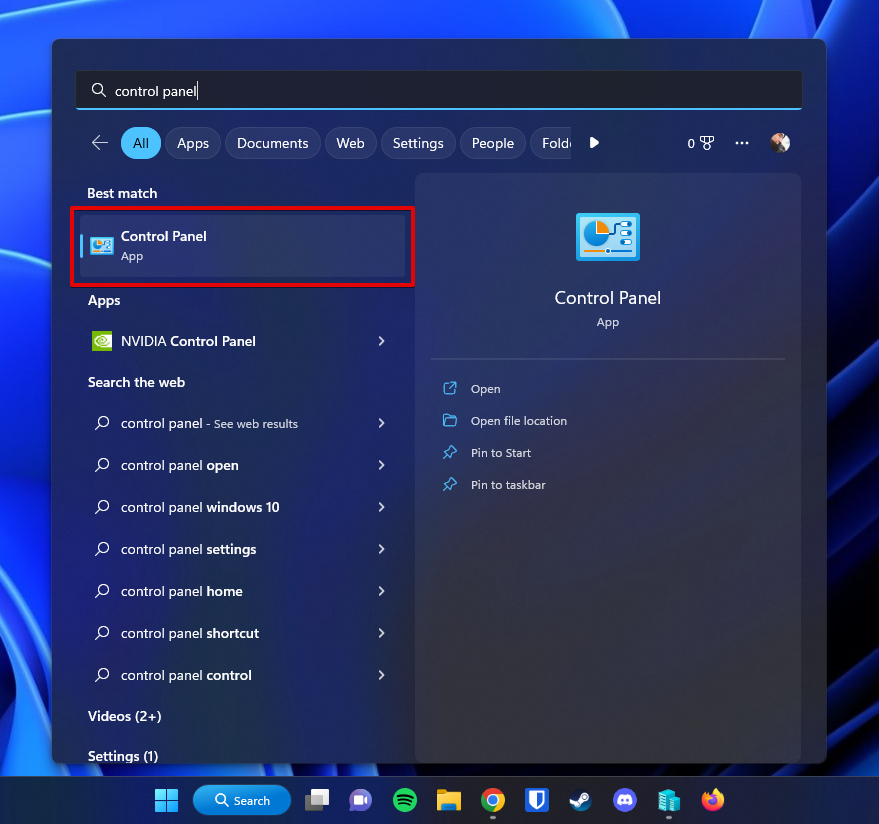
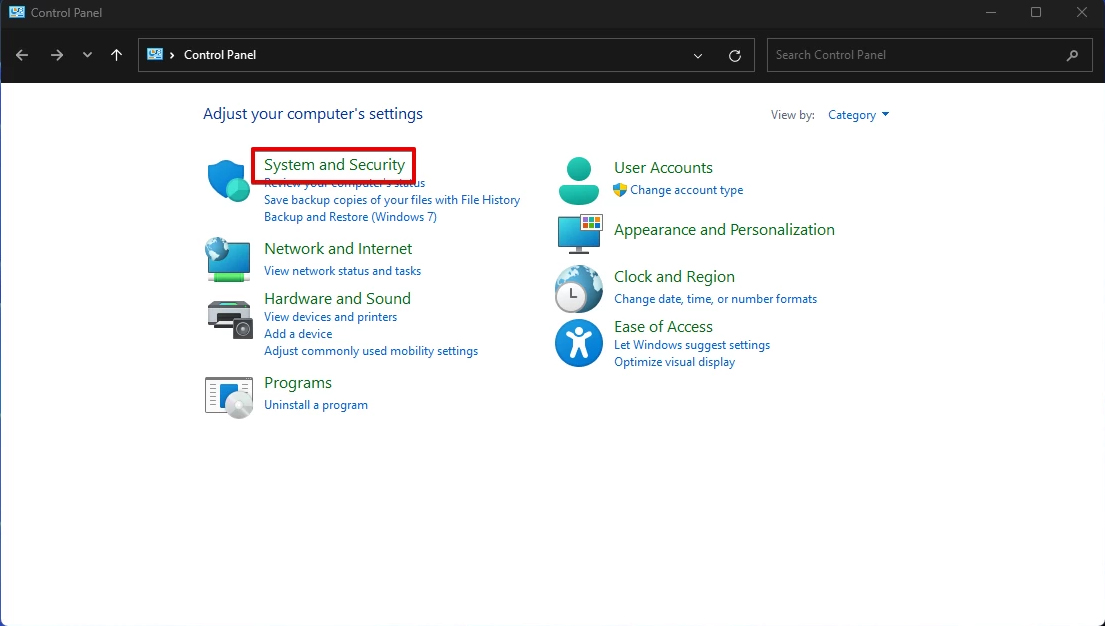
- Click System and Security.
- Click Restore your files with File History.
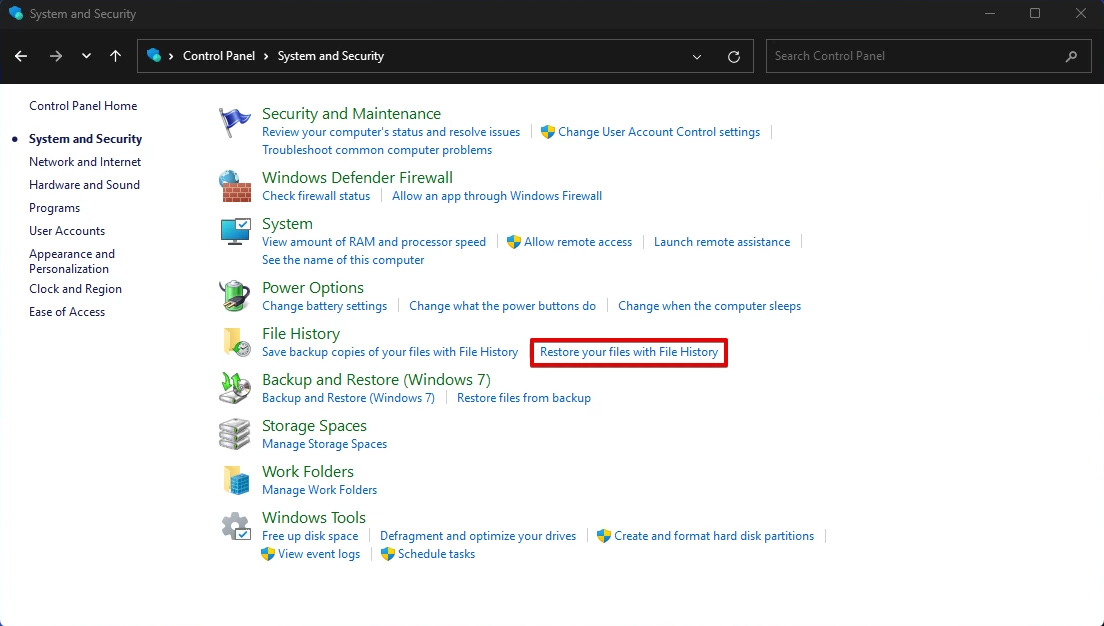
- Select the files you want to restore, then click the green Restore button.
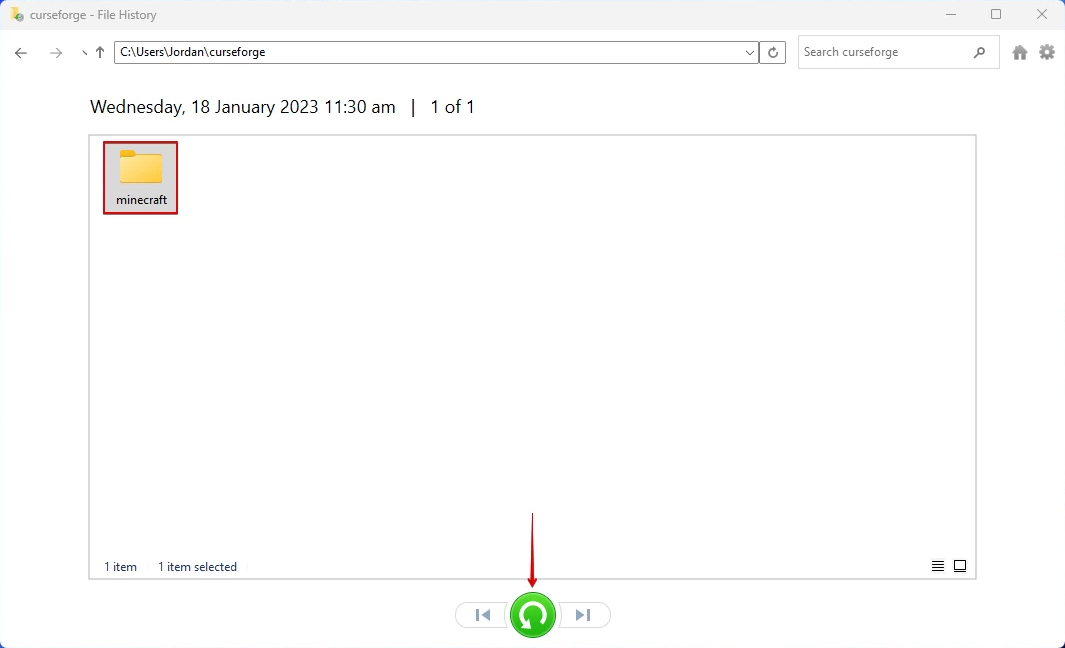
Once again, if you want to restore the files to a different location, be sure to right-click the Restore button and click Restore to.
Method 3:Restore Files Using Backup and Restore
While File History is Microsoft’s newer backup solution, I still encounter many users who prefer the classic Backup and Restore feature that debuted with Windows 7. If you’re one of them and you’ve been diligently creating backups, you’re in a good position to recover your shift-deleted files. Here’s how to do it:
- Connect your backup drive if you’re using external storage.
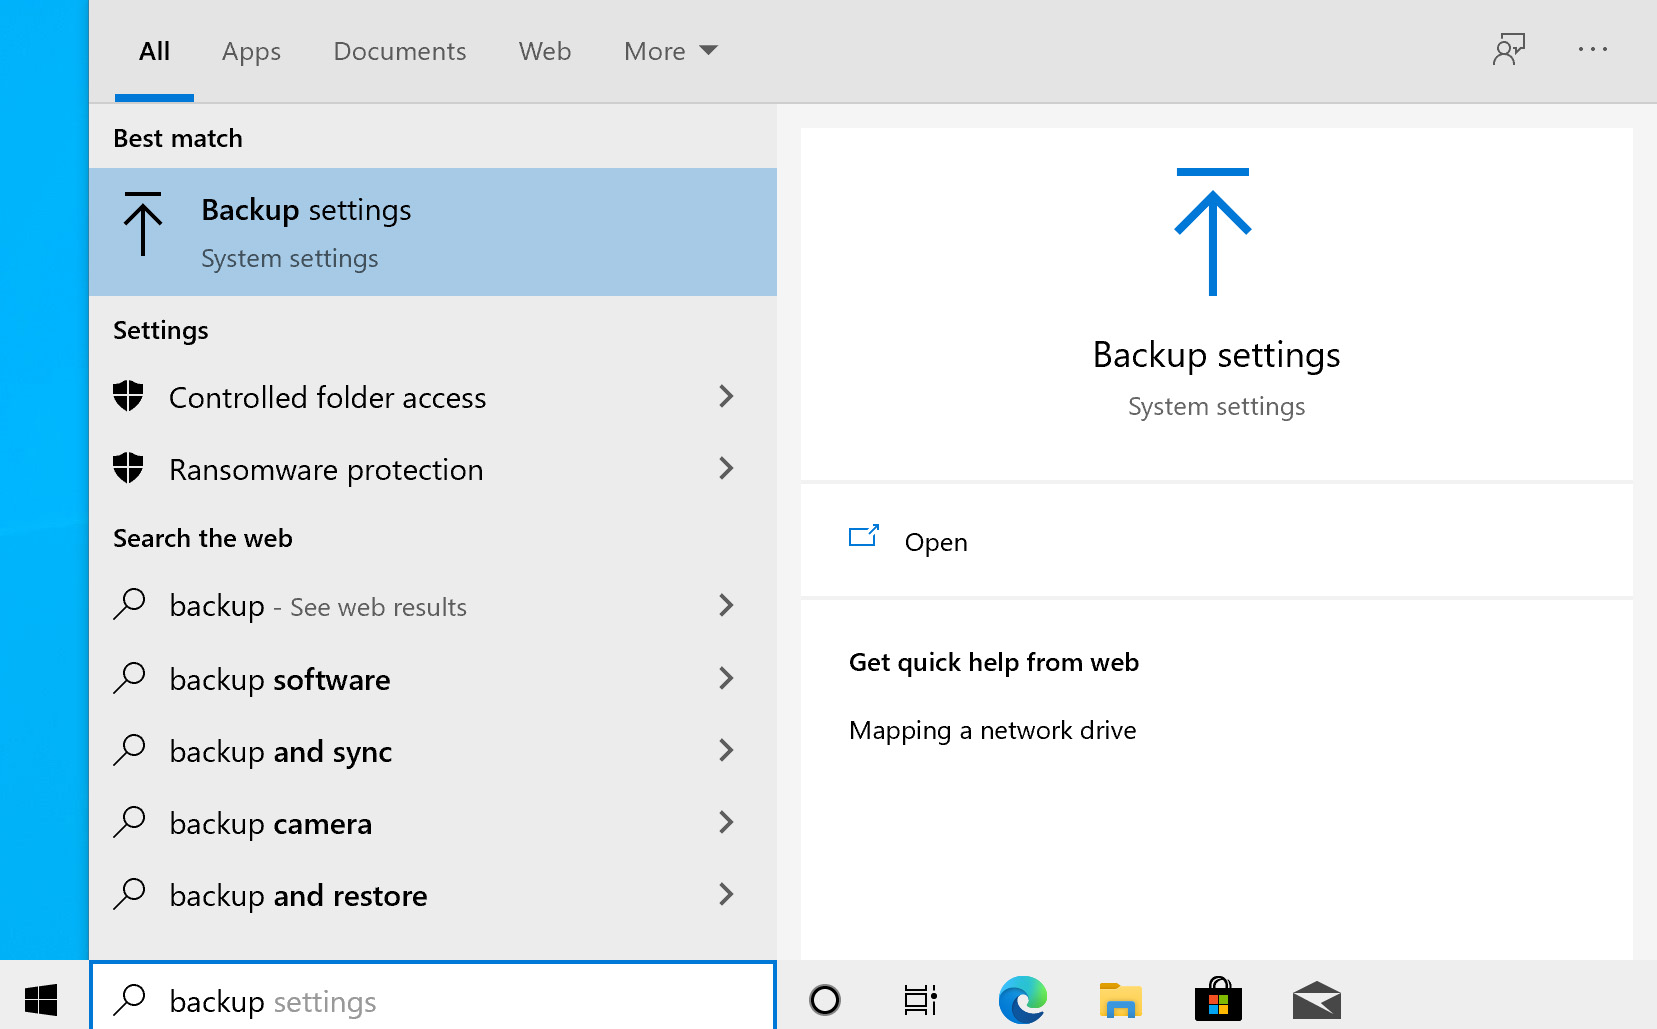
- Press Windows Key + S and search Backup settings.
- Open the relevant result (On Windows 11, you might need to open Control Panel first).
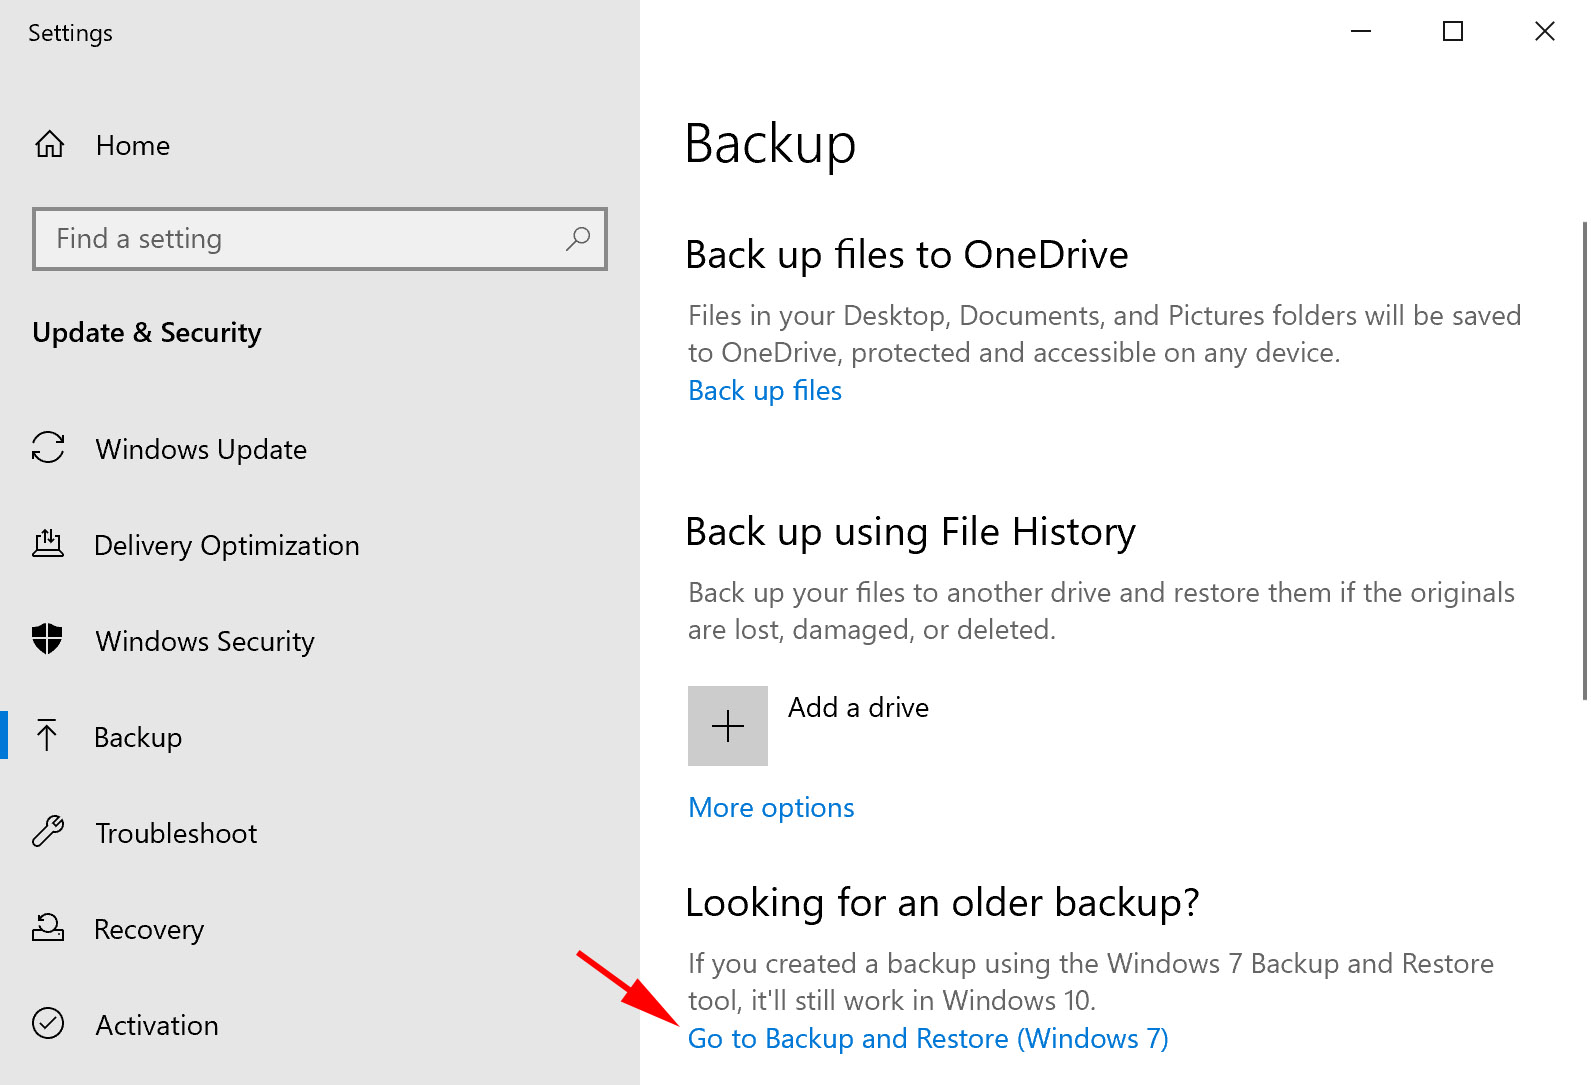
- Click Go to Backup and Restore (Windows 7).
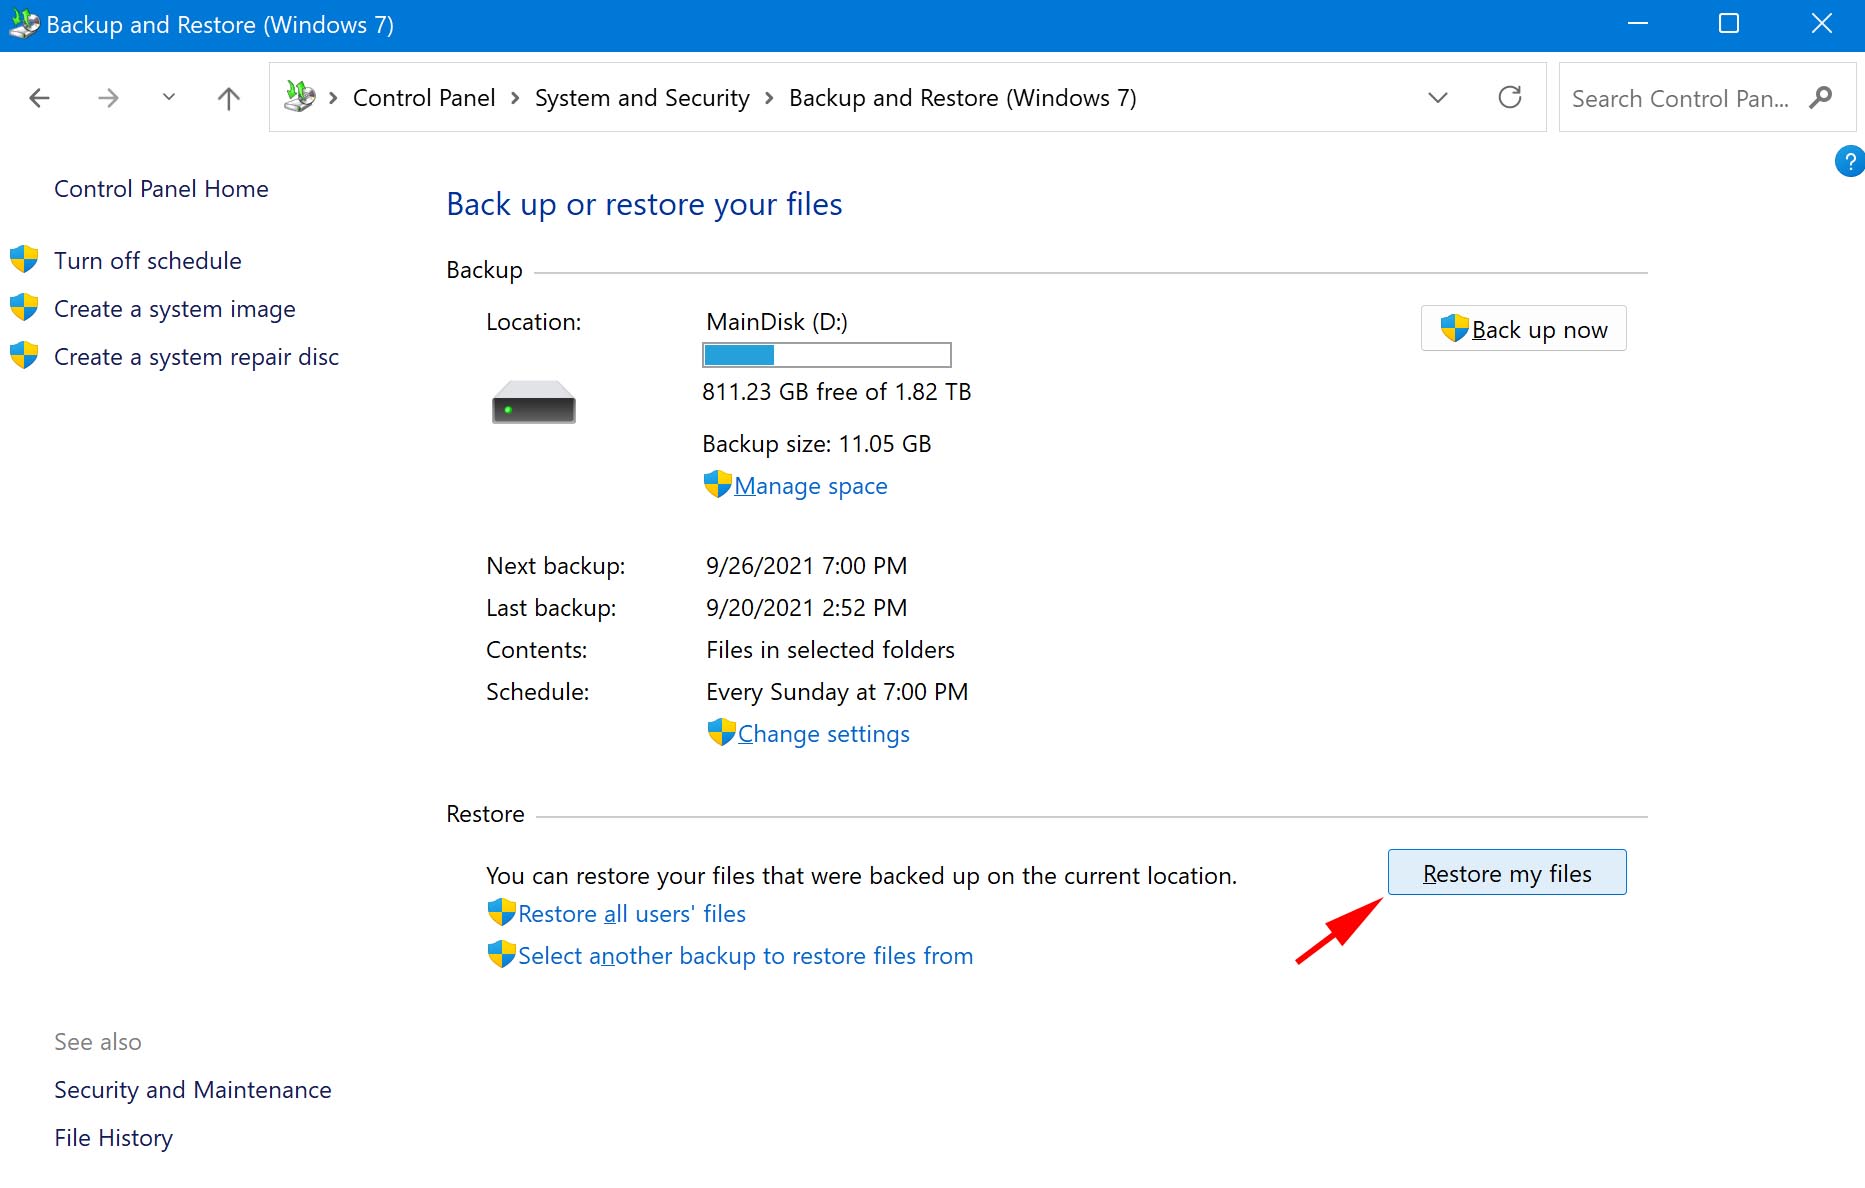
- Click Restore my files.
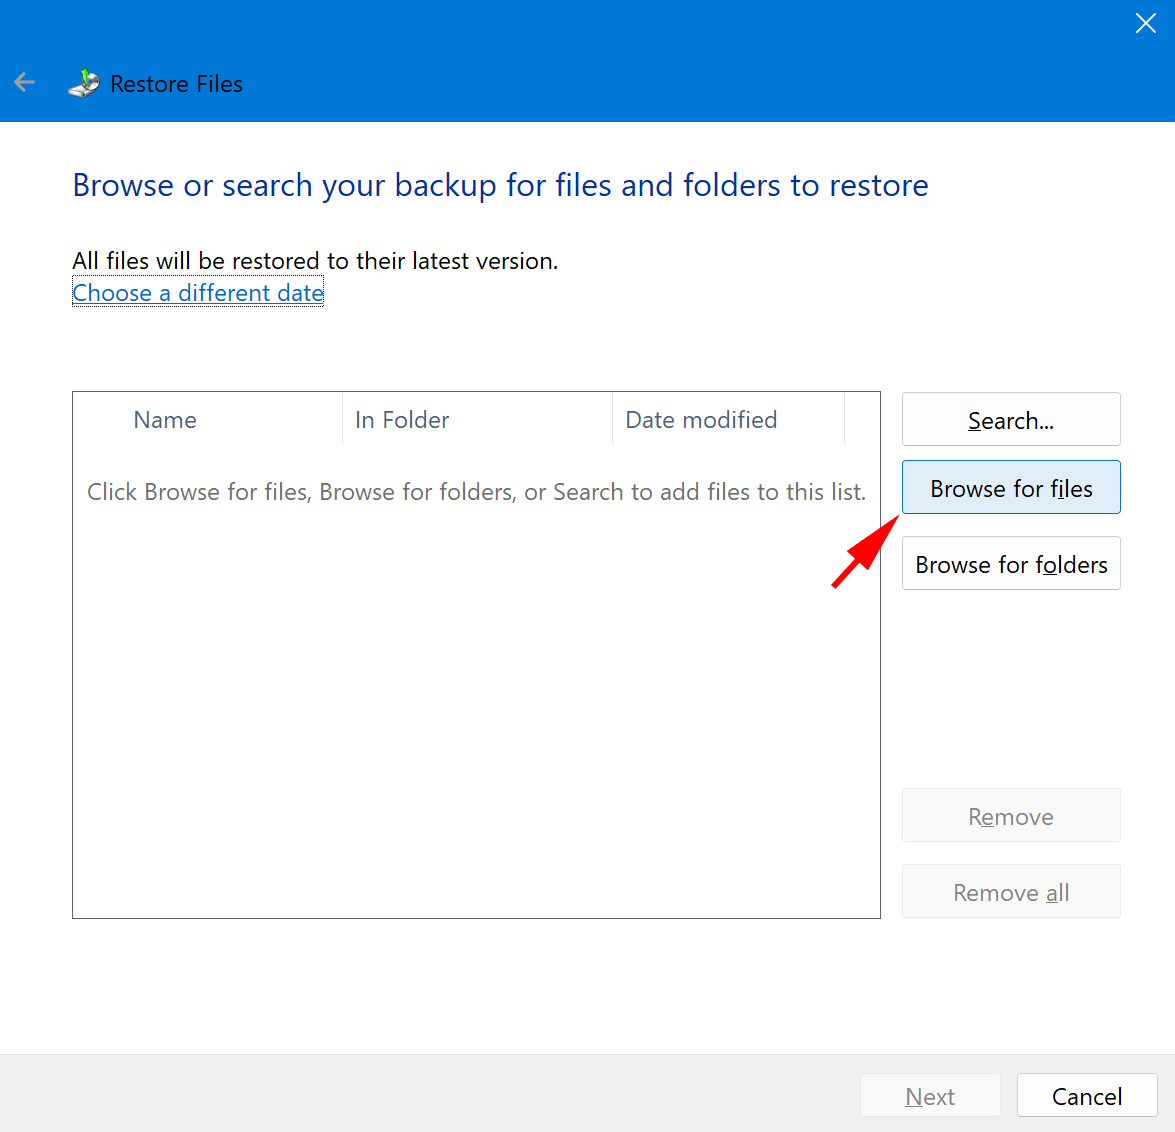
- Click Browse for files. Search for and select the shift deleted files you want to restore.
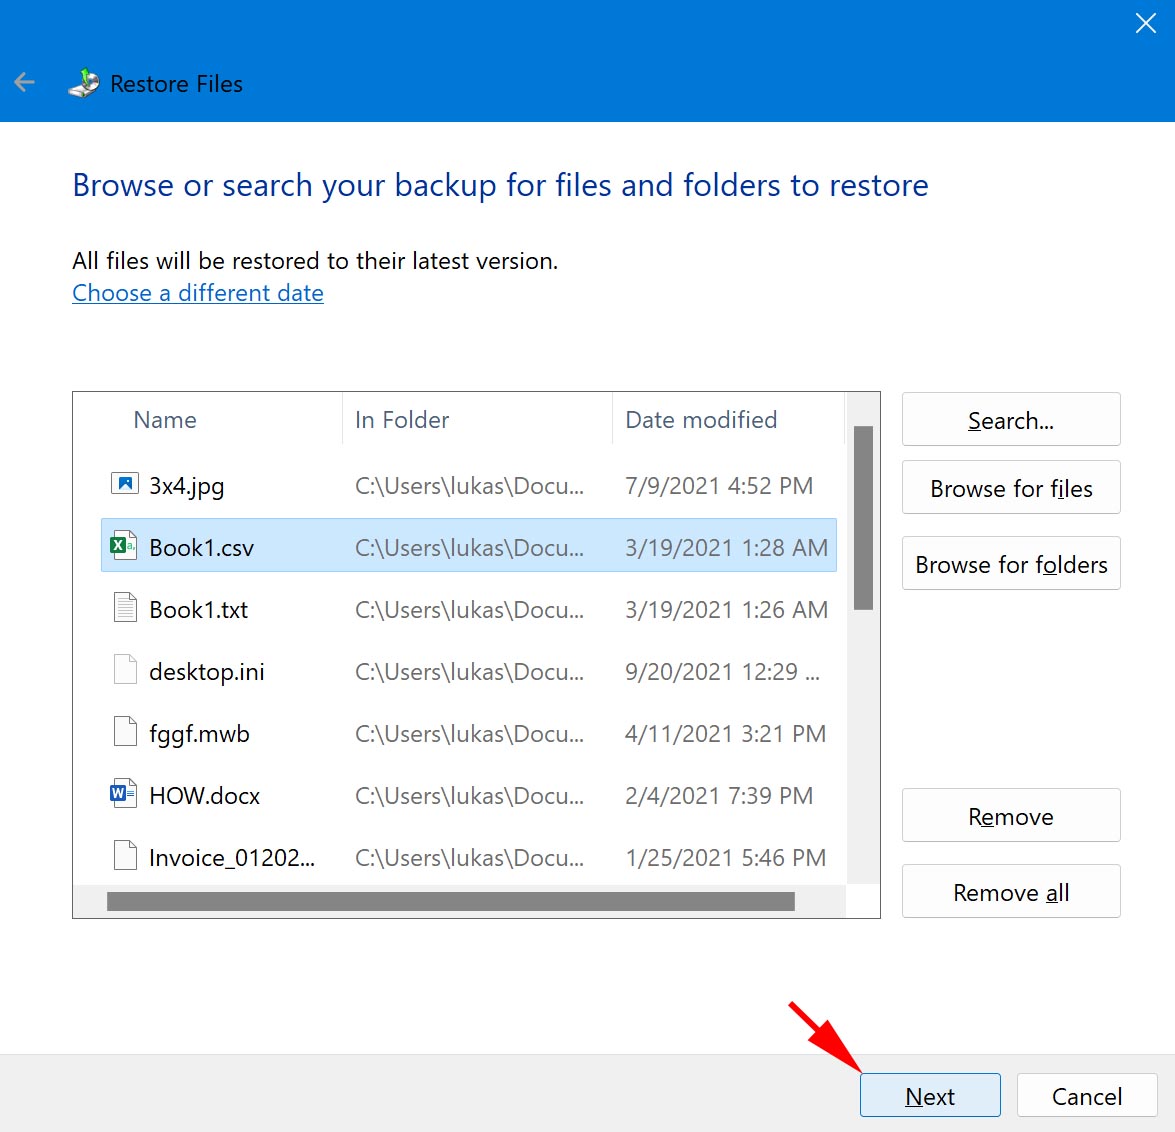
- Click Next.
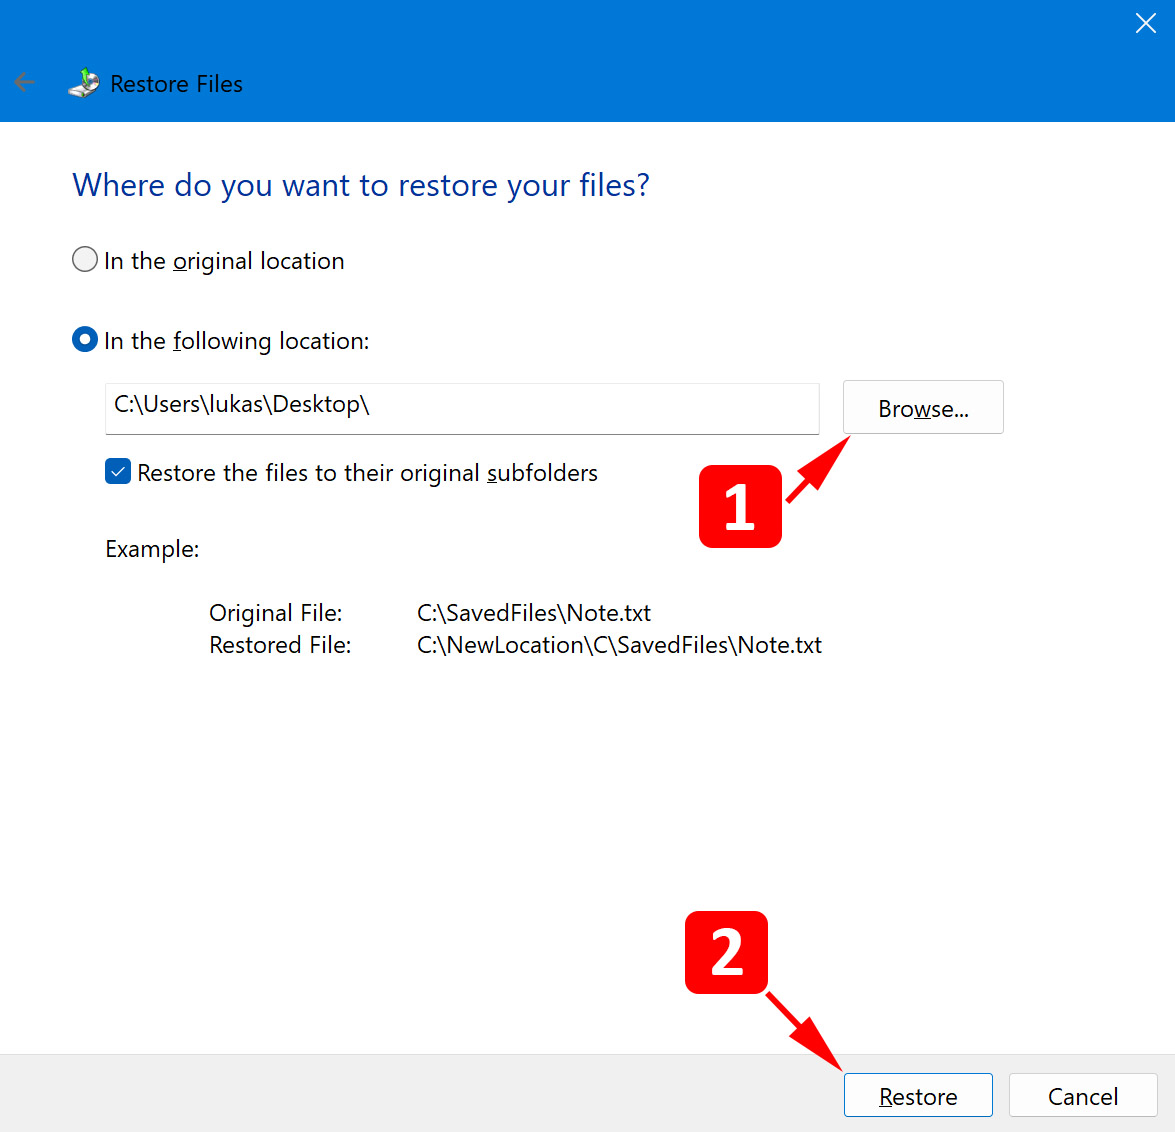
- Choose whether you want to restore the files to their original location, or to a specific folder. When done, click Restore.
Method 4:Use Windows File Recovery Tool
While Disk Drill is my go-to recovery solution, Microsoft actually offers its own free data recovery tool called Windows File Recovery.
I’ve placed it fourth on my list because it’s command-line only and supports fewer file formats than Disk Drill. However, it’s completely free and I’ve seen it work well in some cases, especially those when commonly used file formats like .docx or .pdf or .jpg were shift-deleted.
To use Windows File Recovery:
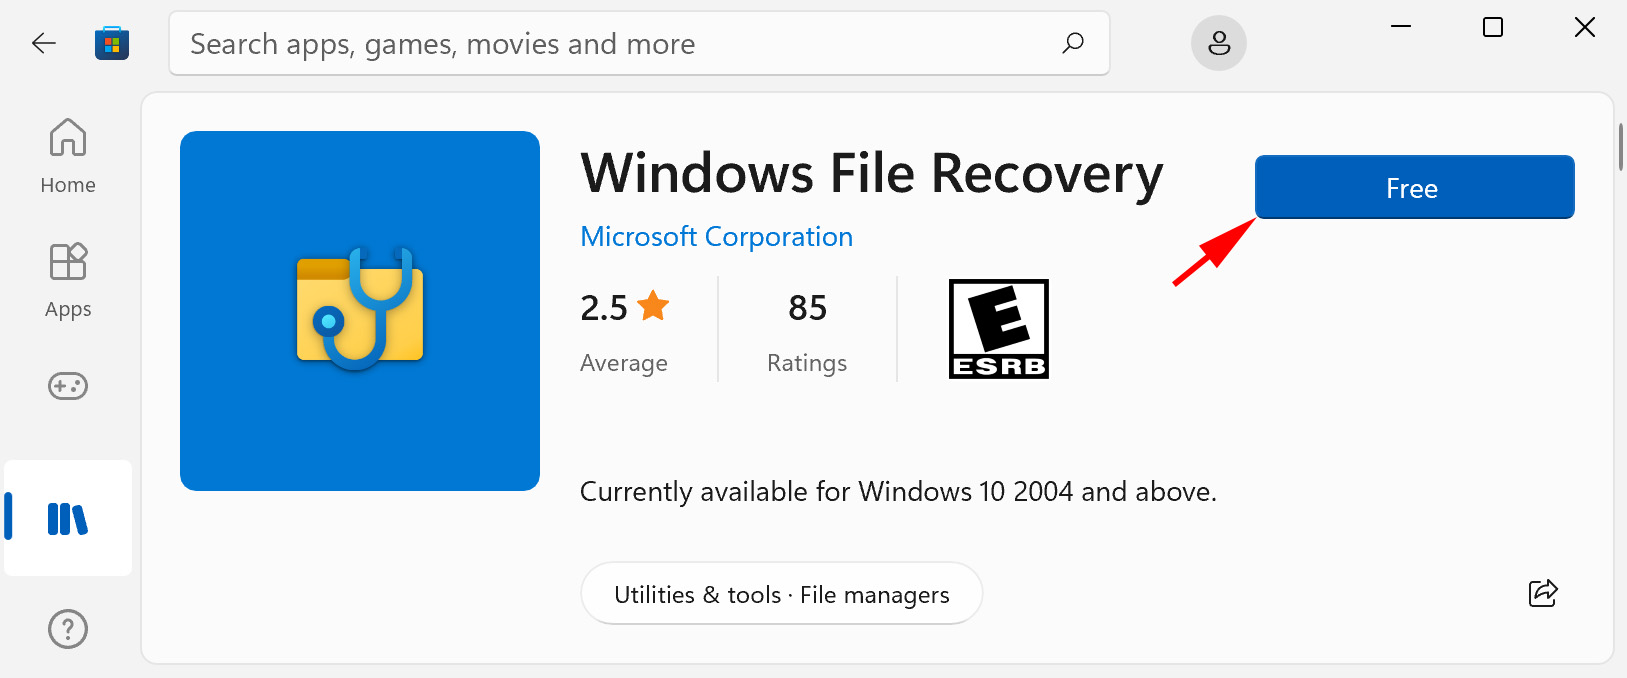
- Install Windows File Recovery from the Microsoft Store. Keep in mind that the tool works on Windows 10 and 11 only.
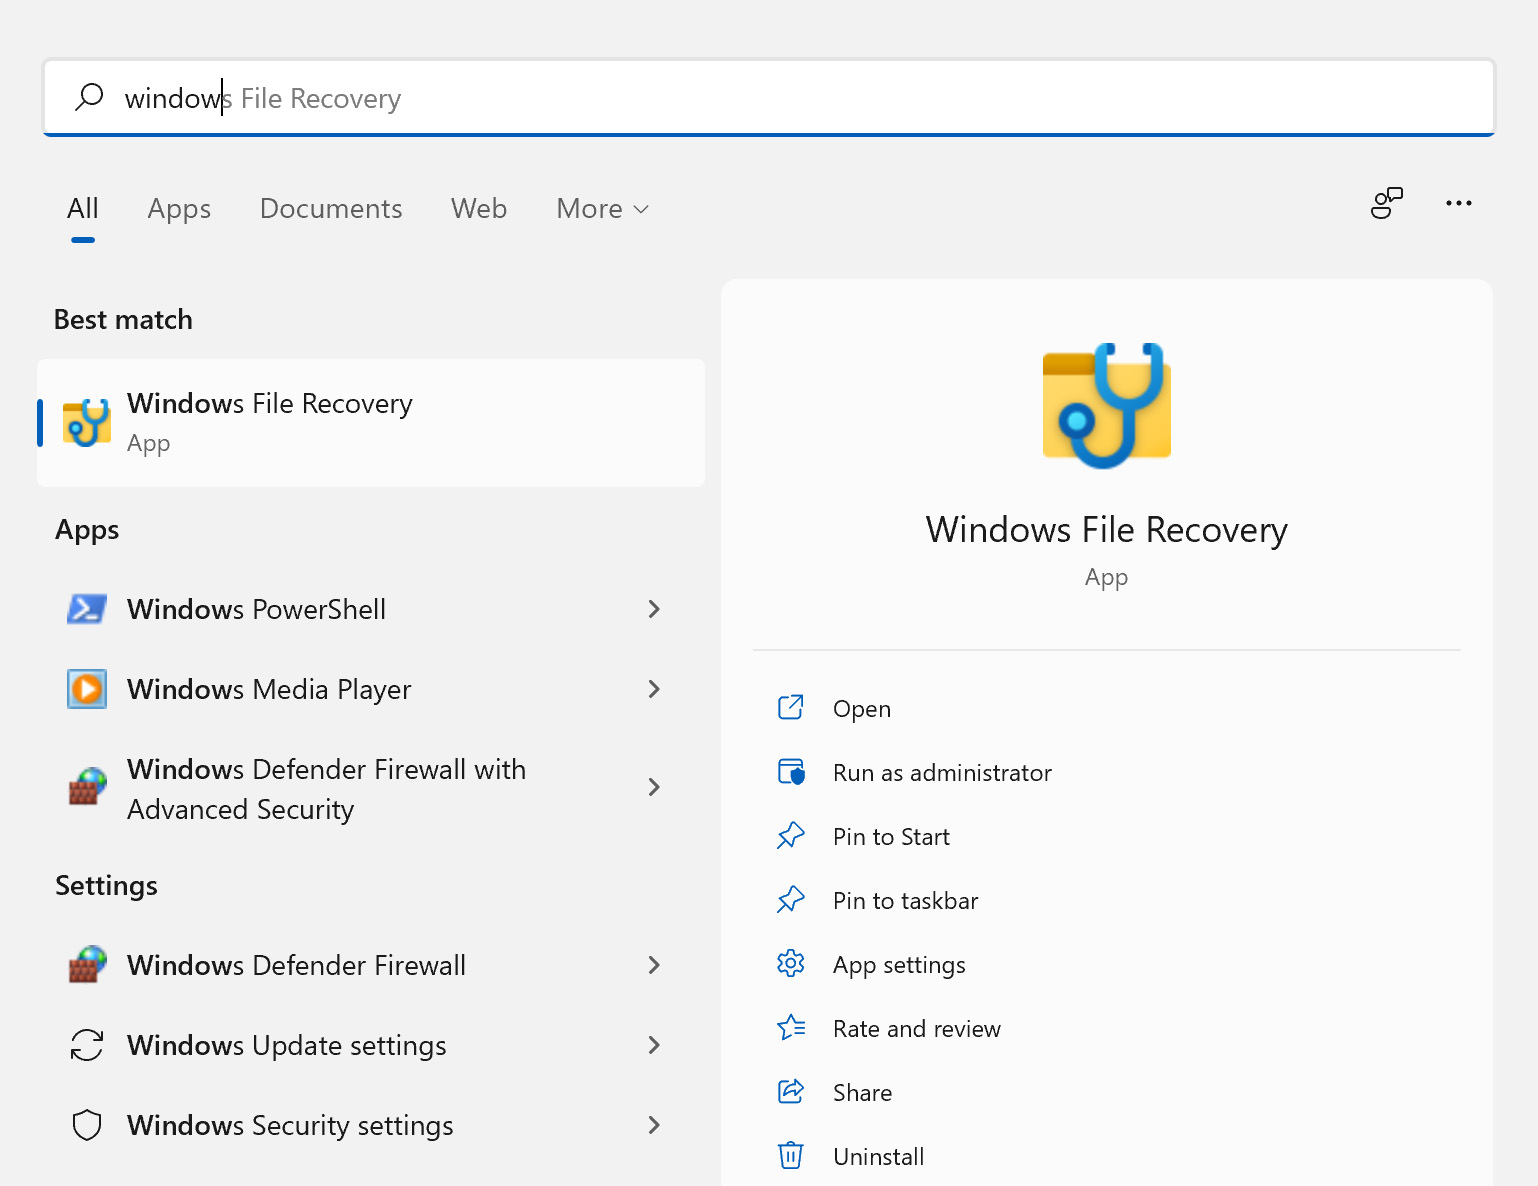
- Press Windows Key + S and search Windows File Recovery. Open the first result. If prompted to allow permission, click Yes.
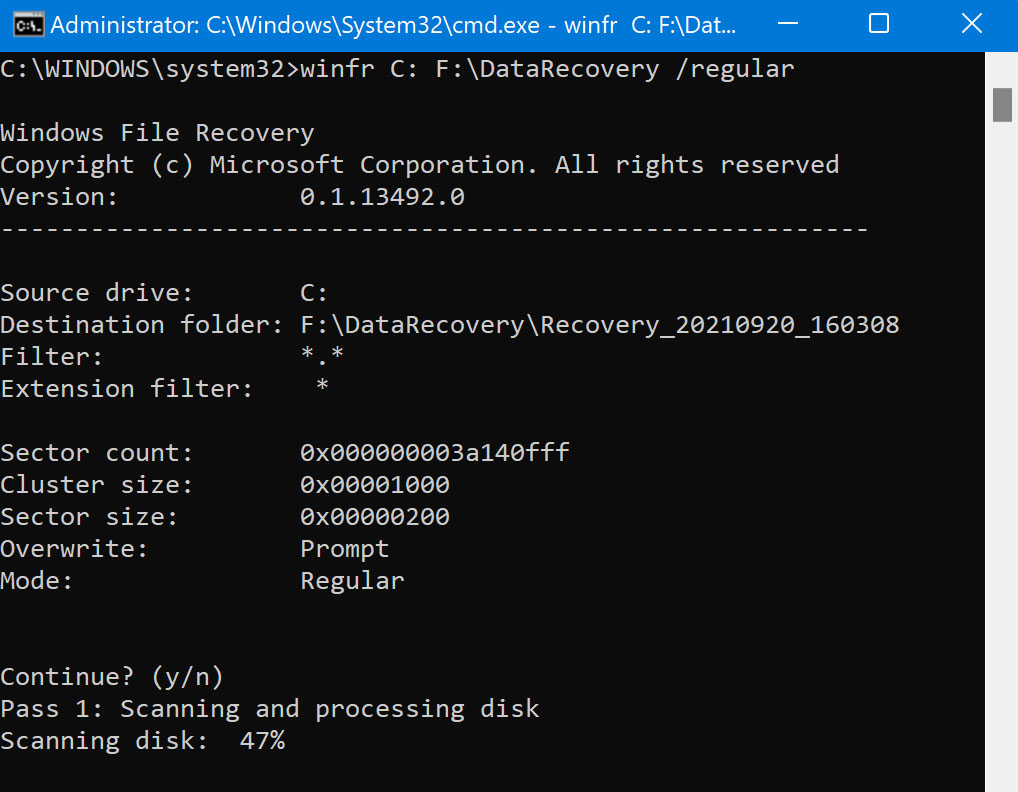
- Enter
winfr C: E:\DataRecovery /regular
Replace C: with the drive you want to recover from, and E:\Data Recovery with where you want the data recovered to. Press Enter. If prompted to continue, press Y to confirm. This command will recover whatever Windows Recovery Tool finds in its scan, including any shift deleted files.
- When the scan is finished, press Y to view the recovered files.
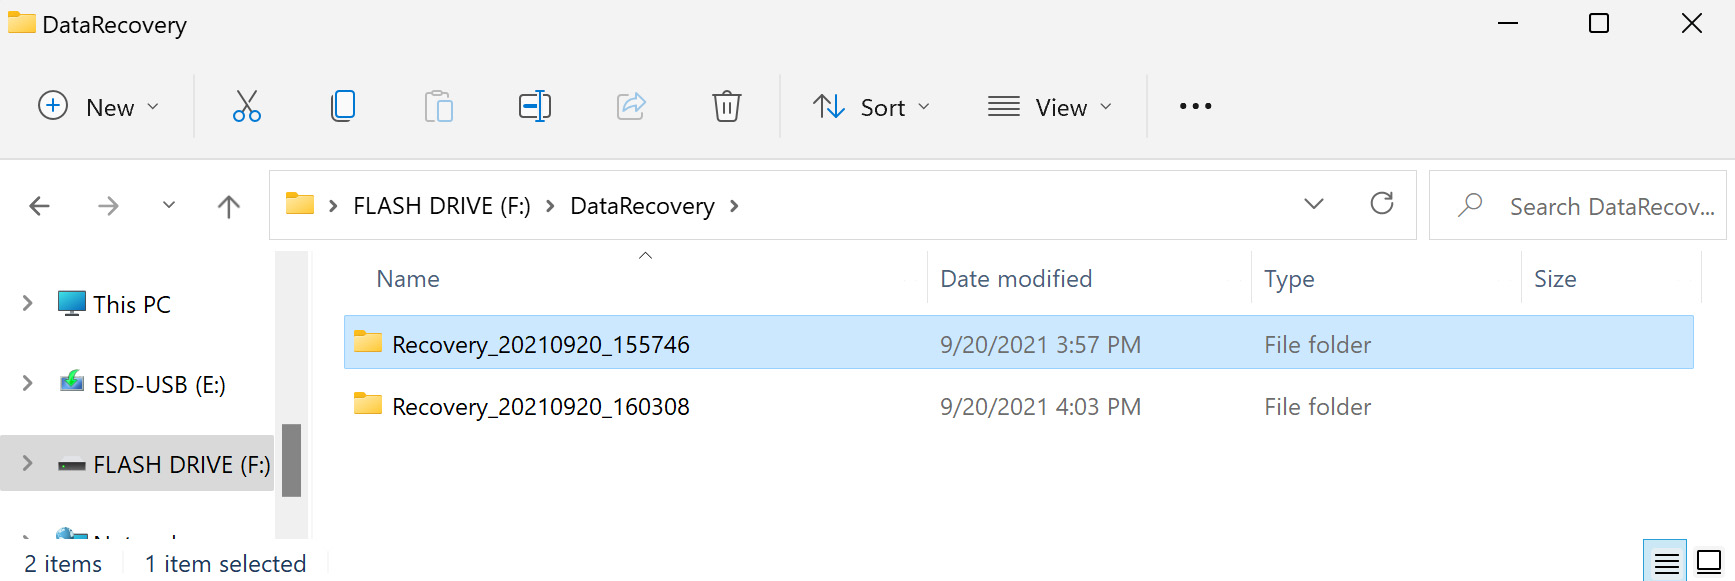
Besides the regular recovery mode, which I used above, Windows File Recovery offers two additional modes that might work better in specific situations. The extensive mode works well for older deletions and non-NTFS drives (like USB sticks), while signature mode is great for finding specific file types even when file system information is gone.
Example of extensive mode scan:
winfr C: E:\DataRecovery /extensive /n *.jpg
Example of signature mode scan:
winfr C: E:\DataRecovery /regular /n \Users\YourName\Documents\*.pdf /n *.docx
For more information about the available scanning modes and their usage, you can visit the official support page.
Method 5:Turn to Professional Assistance
If you haven’t succeeded using the methods above, or their implementation seemed too complex, there’s one more option you should know about.
Professional data recovery services employ trained technicians who use professional-grade equipment to address all kinds of data loss, including files deleted using the shift-delete keyboard shortcut. These experts can often recover files in situations where software solutions fail, like when dealing with damaged drives.
While this is my last recommended method due to its cost, it’s also the one with the highest success rate, especially if you choose the right service. One option I’m familiar with and recommend is the Data Recovery Center by CleverFiles.
Here’s what you need to do use their service:
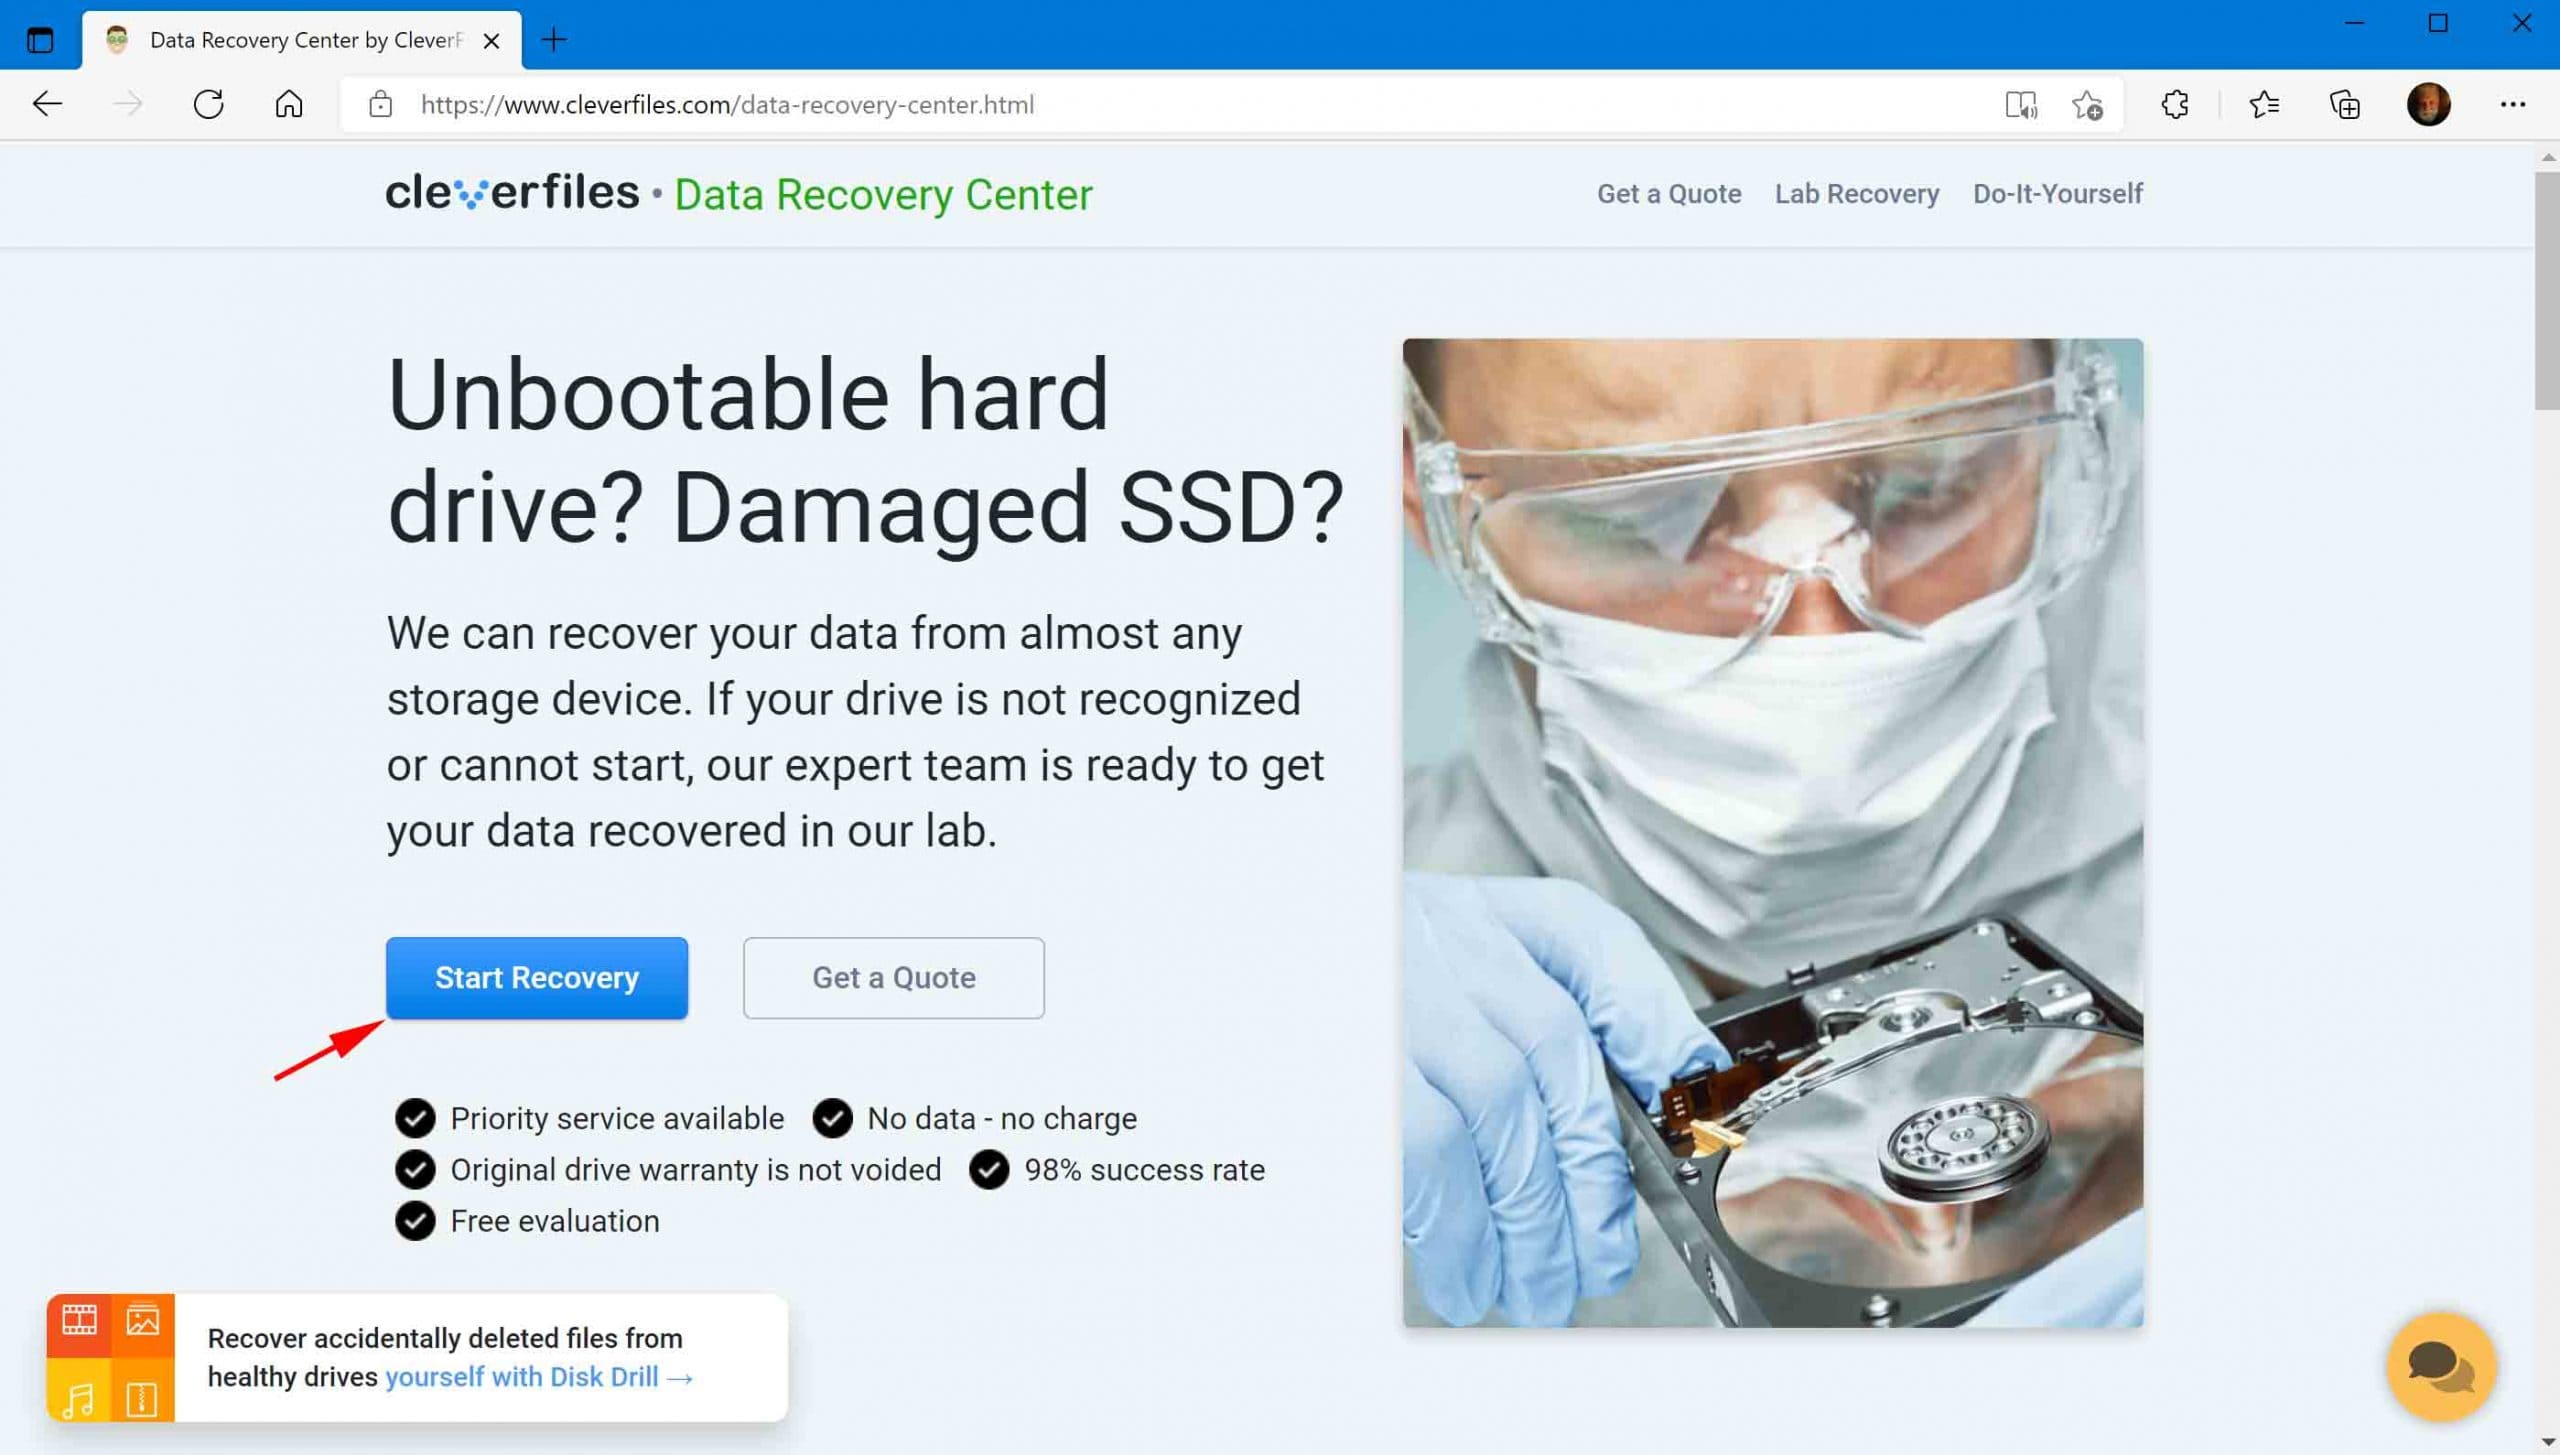
- Go to the Data Recovery Center and click Start Recovery.
- Complete the work order with all the necessary information. This will include your information, the level of service, as well as information pertaining to the device and what issues you’re facing.
- When the form is complete and you’ve reviewed the Terms and Conditions, click Complete my work order.
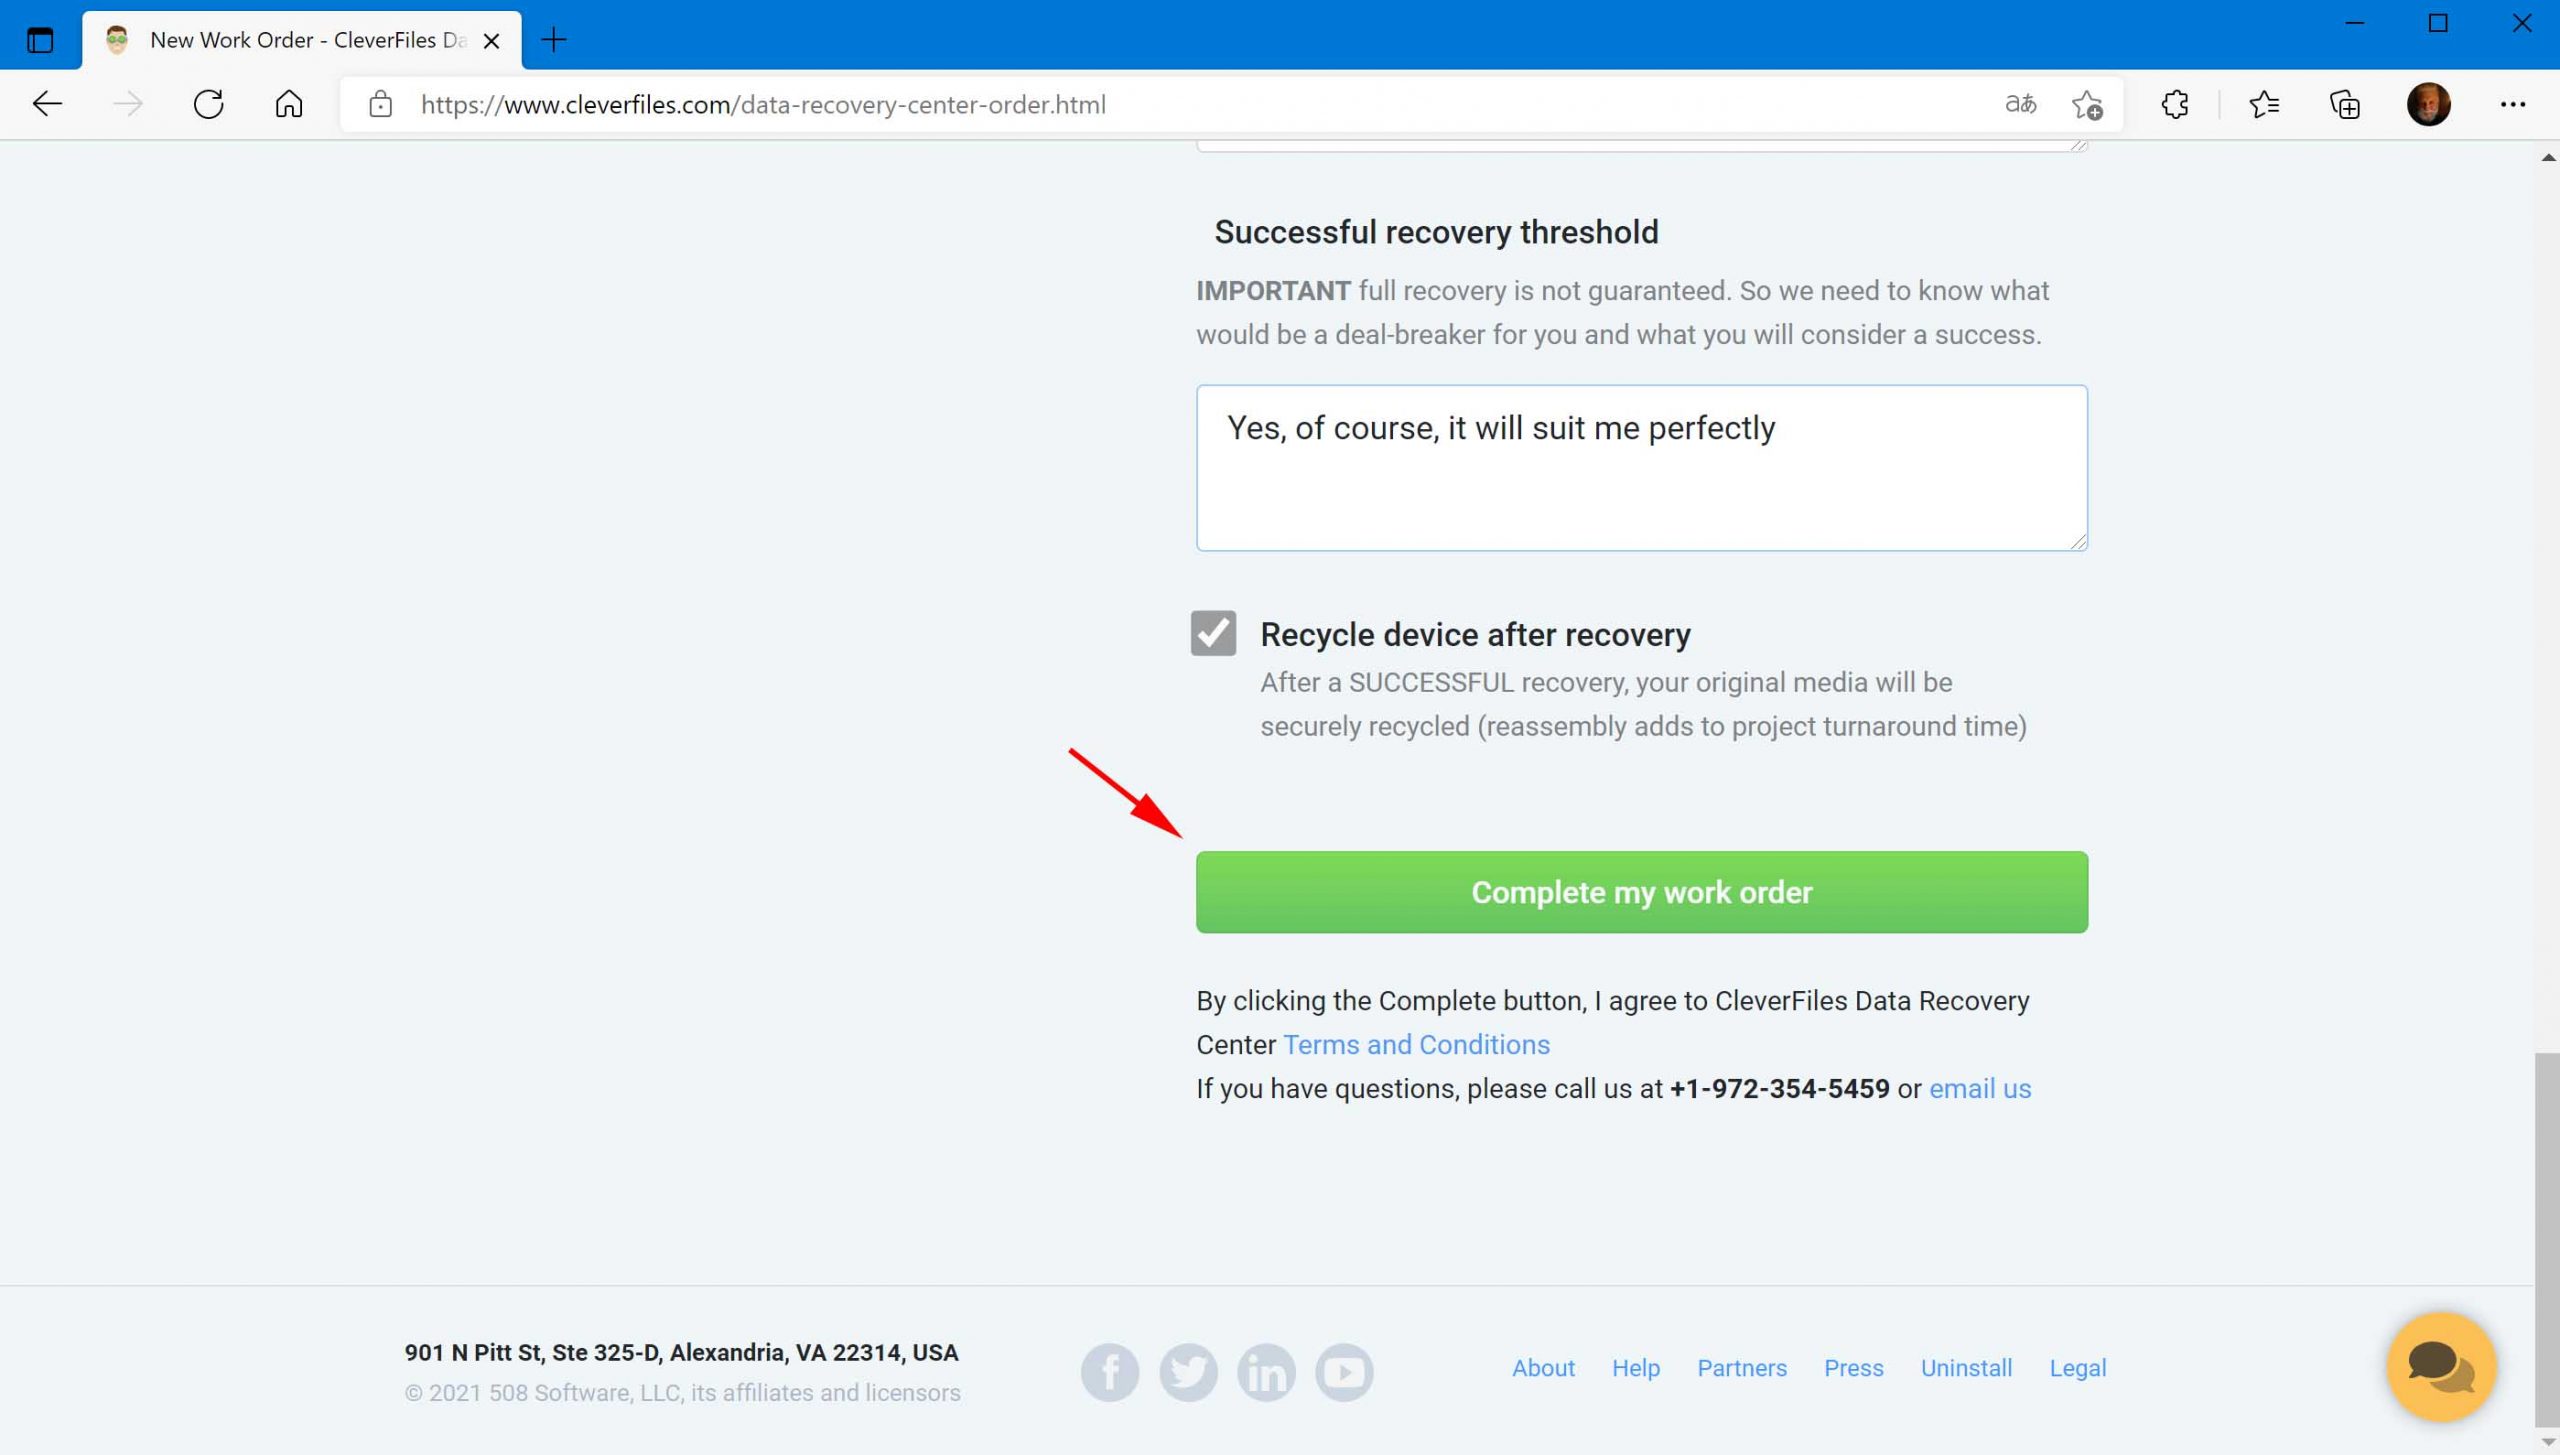
What I really like about the Data Recovery Center by CleverFiles is that they don’t charge any money until they actually recover your files. They’ll first evaluate your device for free, let you know exactly what can be recovered, and only then will you need to decide if you want to proceed with the full recovery service.
Conclusion
Shift-delete isn’t always as permanent as it seems. The five methods I’ve covered here can help you recover your files even when you’ve bypassed the Recycle Bin. The key is to act quickly and methodically. The moment you realize you need those files back, stop using that drive and try these recovery methods in the order I’ve presented them.
FAQ:
- Restore from a backup (if available).
- Use data recovery software to scan and undelete your data.
- Contact a professional data recovery service (as a last resort).
- Download and install Disk Drill to a separate drive.
- Select the hard drive that contains the lost files and click Search for lost data.
- Click Review found items once the scan is complete.
- Mark the shift deleted files for recovery and click Recover.
- Choose a recovery location on a separate drive and click Next.

