 An MP4 video that’s unplayable, stutters, or has skipped frames, may be corrupt. This can happen due to a myriad of reasons, but the good news is that it’s usually fixable. How? Well, there are various repair tools available that can help you repair MP4 files. The article below lists some good options, and how to use them.
Which Criteria Did I Use to Choose These MP4 Repair Tools
Choosing the correct option from the numerous video repair tools available can be a time-consuming process if you don’t know what to look for in the program. The web is littered with shady video repair tools that don’t work, and are just a waste of your time and money. Even if a program is good, it may be really slow, making video repair more tedious than it has to be.
I used the following criteria to come up with this list of the best MP4 repair tools across Mac, and Windows:
- File Format and Codec Support. Naturally, the programs I chose support MP4 file repair. However, I also ensured that the listed tools support MP4 files encoded with both H.264, or H.265 codecs. The more codec support the better.
- Types of Corruption. Not all tools deal well or are capable of dealing with the various corruption scenarios in an MP4 file. The tools I mention are versatile—they can fix header corruption, synchronization issues, indexing errors, visual glitches, and more.
- Ease of Use. I prioritized accessibility when choosing the MP4 repair tools in this list. The program should be easy-to-use, even for non-technical users. No one wants to spend time figuring out how to navigate a program when they’re already stressed about an important MP4 file that’s gone corrupt.
- Effectiveness, Reliability, and Speed. The programs in this list are tried and tested. They’re fast, have a high success rate when repairing MP4 files, and also try to retain the original video quality as far as possible.
- Cost. The programs I’ve listed are either free, or come with a free trial because let’s admit it, no one should pay for a program before testing it out.
How to Repair a Corrupted MP4 Video File Using Different Tools
I’ve outlined 5 tools that can successfully repair your corrupt MP4 videos. Keep in mind that most repair tools require a healthy video file from the same camera, or device that was used to record the corrupt MP4 video.
Here’s how you repair an MP4 file using different tools:
1. Use Clever Online Video Repair (Web-Based)
Online video repair tools offer unparalleled convenience—simply upload your corrupt video file, along with a healthy reference video file. The video repair service will do the rest. Among these online video repair services, I found Clever Online Video Repair to be the best one.
It’s user-friendly, reliable, and supports MP4 files with the H.264, and H.265 codecs. What particularly struck me was how user-friendly, and fast the tool is—you’ll have the repaired video ready within a few clicks. Privacy is always a concern when using online video repair tools. Clever Online Video Repair addresses this by allowing you to monitor which devices access your account.
The best part is that the tool is completely free-to-use. However, you can only upload videos that are less than 5 GB in size.
Here’s how to repair a corrupted MP4 video using Clever Online Video Repair:
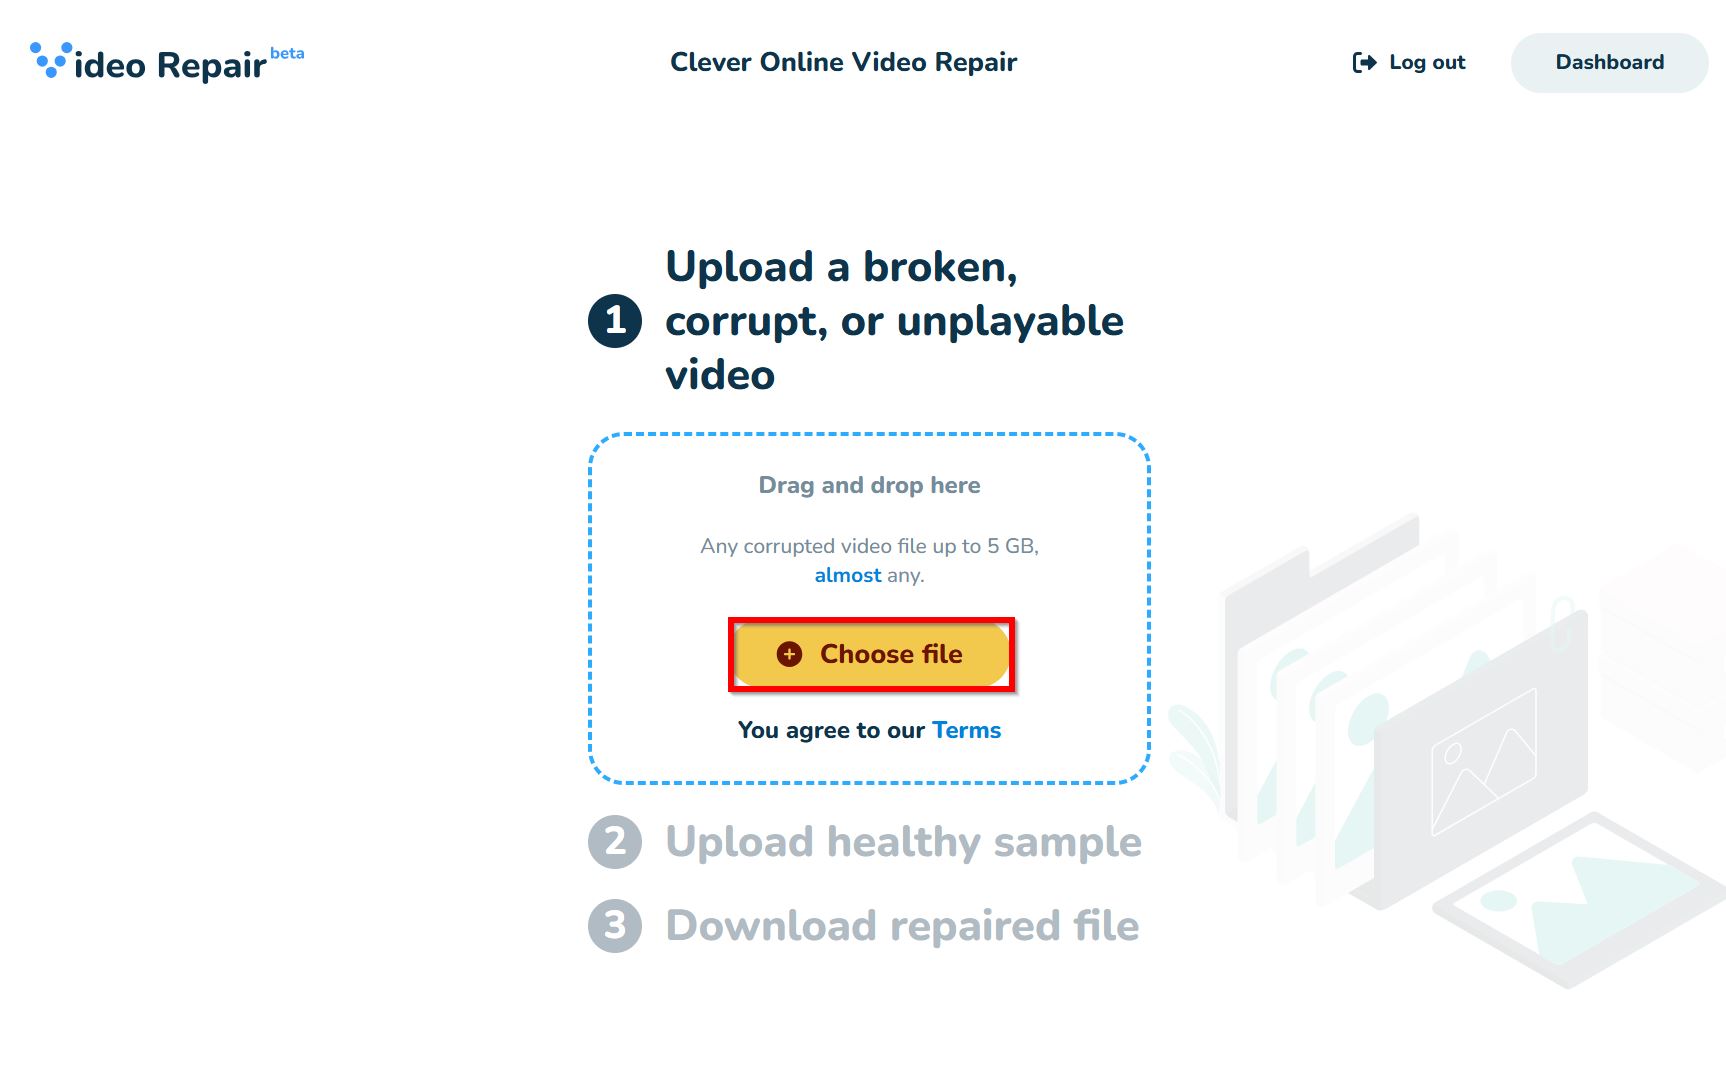
- Visit the Clever Online Video Repair website.
- Click Choose file, browse for the corrupt MP4 video, and click on Open.
- If you’d like, describe your issue and click Send. Else, simply click on Skip and repair.
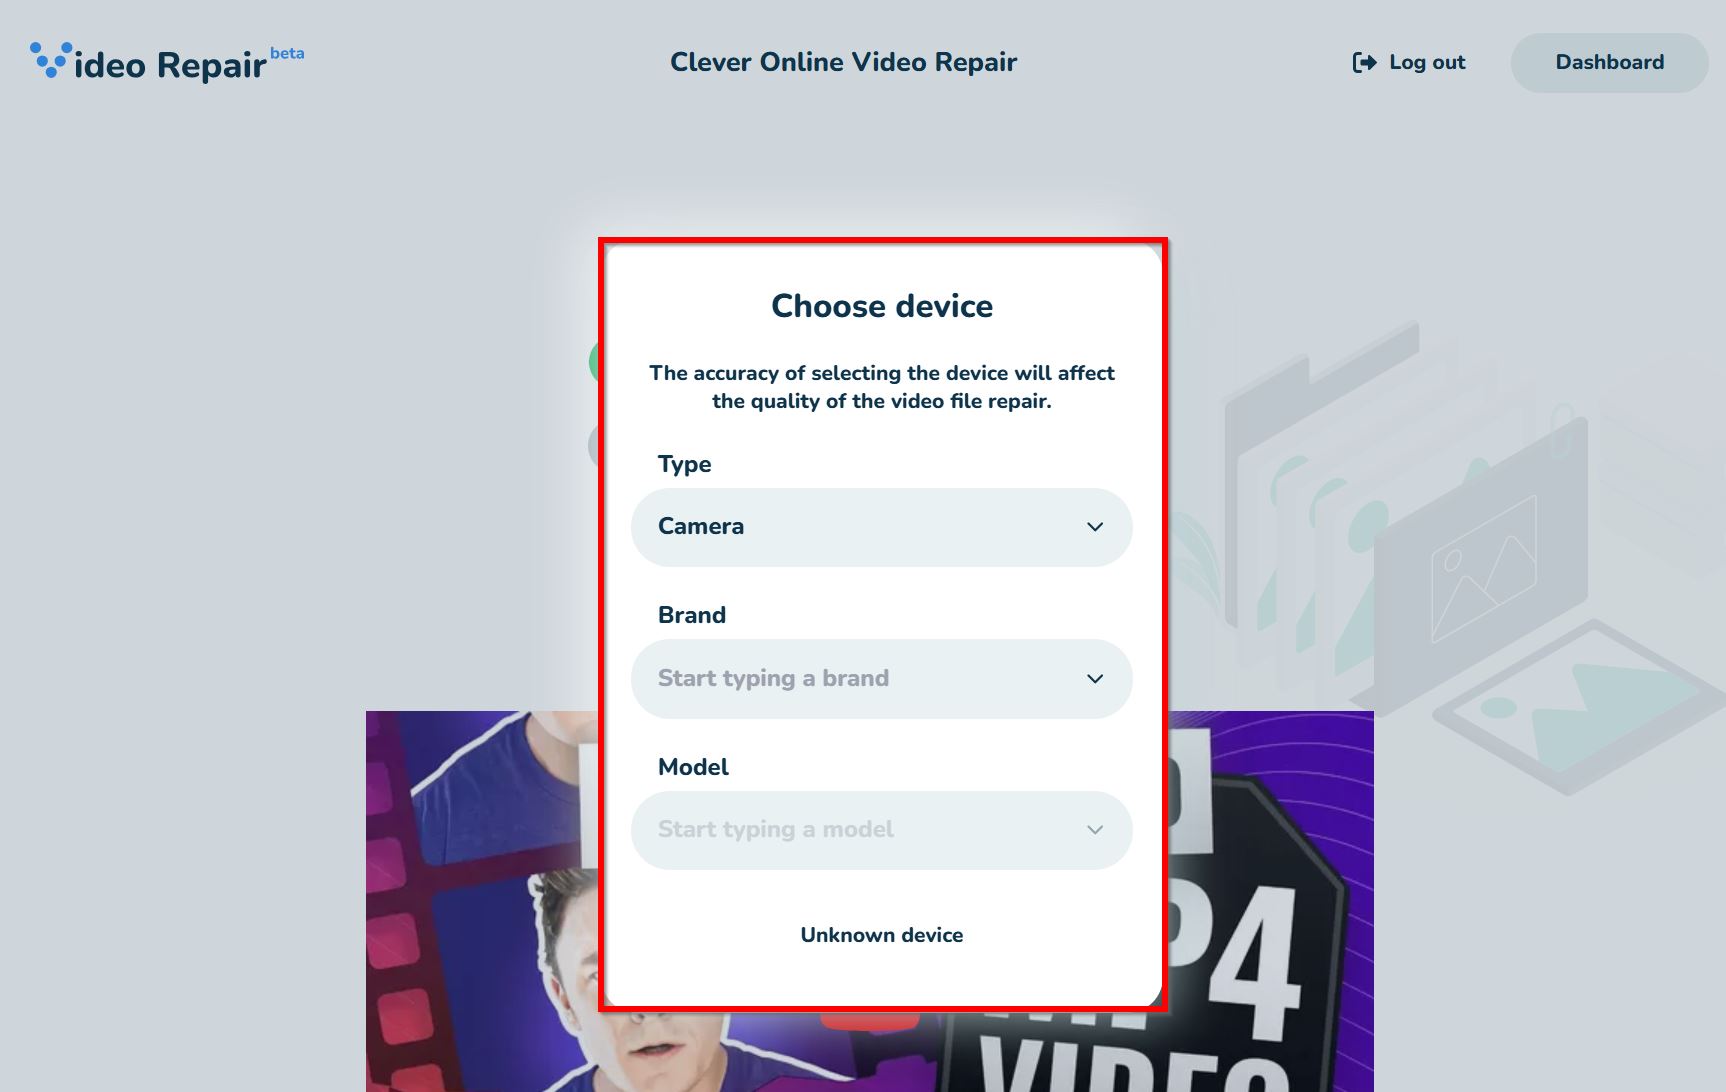
- Choose your recording device’s Type, Brand, and Model, then click Repair. If it’s not listed, click on Unknown device.
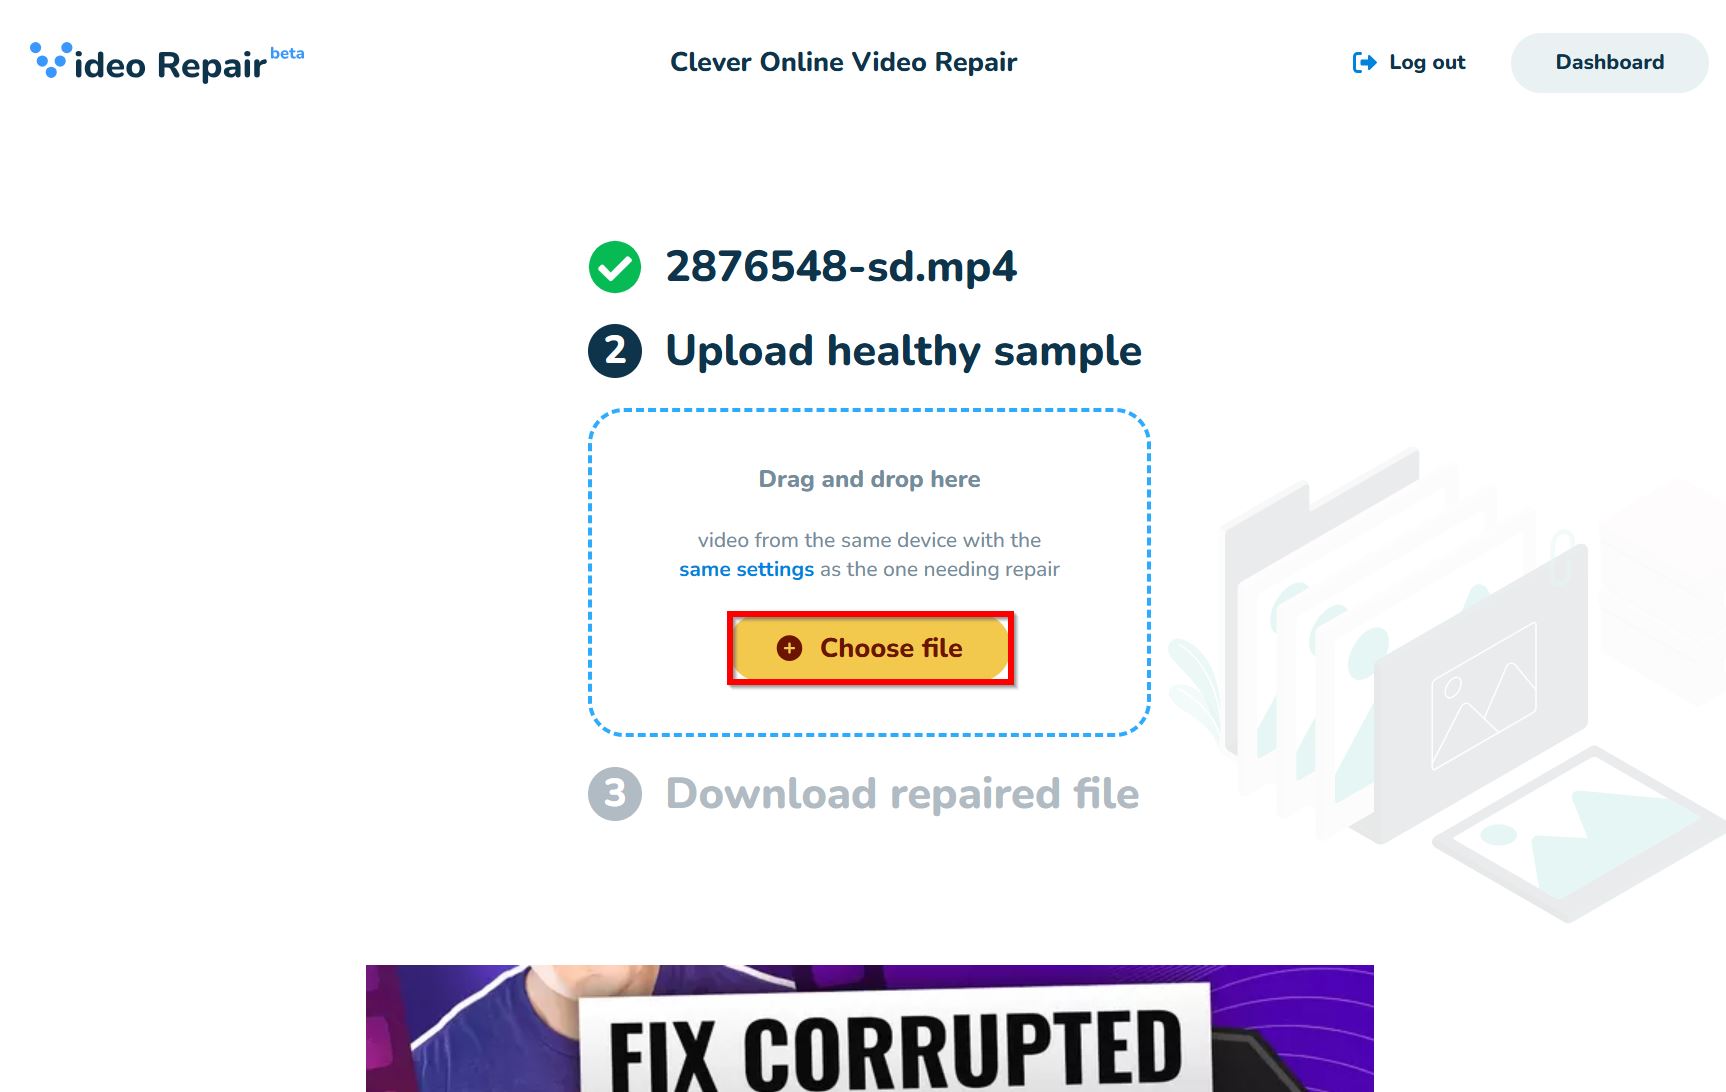
- Click on Choose file, find a healthy video from the same device used to record the corrupt one, and click Open.
- Register on the website.
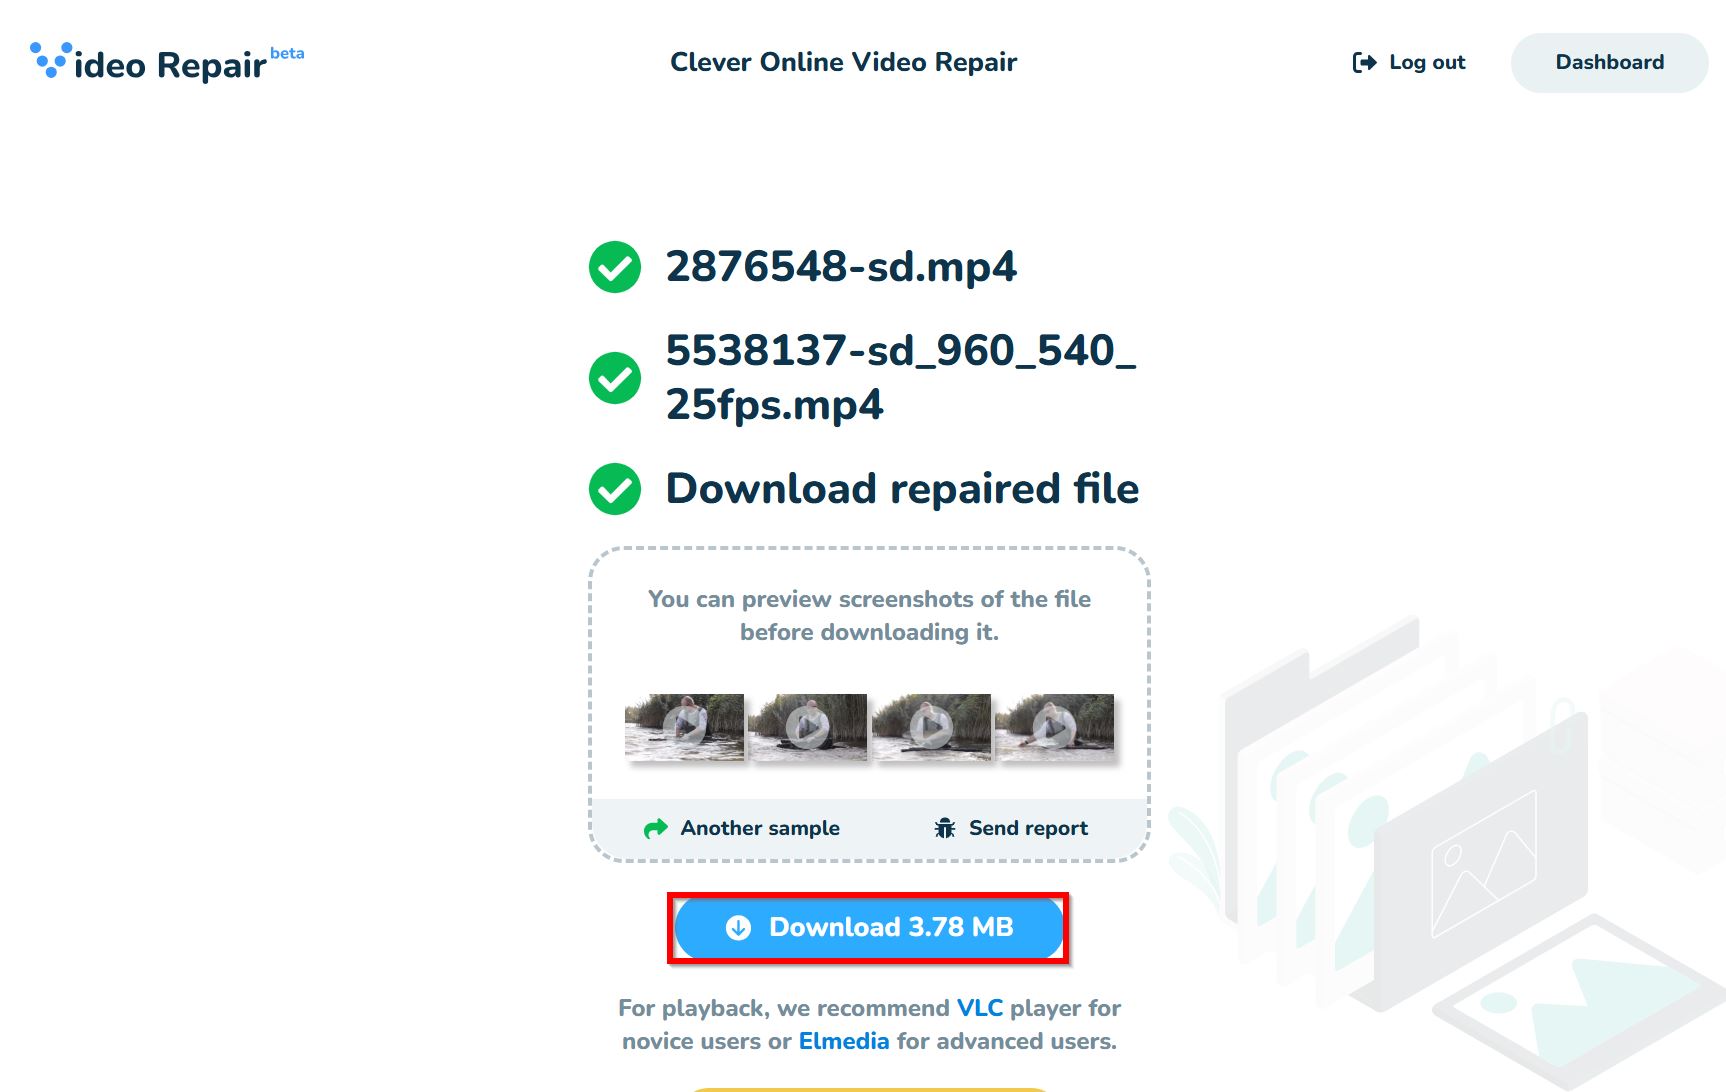
- Click on Download to begin downloading the repaired video. You can preview it before downloading by clicking the screenshots above the download button.
2. Fix the Corrupt MP4 File Using Untrunc GUI (Windows)
Untrunc GUI is an open-source video repair tool that excels at repairing MP4 files. While its original version is command-line based, there is a GUI version available for Windows users. It’s lightweight, free-to-use, and reliable.
In addition to other video formats, Untrunc GUI can fix MP4 files encoded with the H.264, or H.265 codecs. I observed that Untrunc’s repair process doesn’t take very long, but it’s not as fast as web-based tools. However, since it runs locally, the additional time taken to upload and download the videos is removed.
Here’s how to perform free MP4 file repair using Untrunc GUI:
- Visit Untrunc’s GitHub page, and click on untrunc_x64.zip to download it. Extract the downloaded file.
- Run untrunc-gui.exe from the extracted folder.
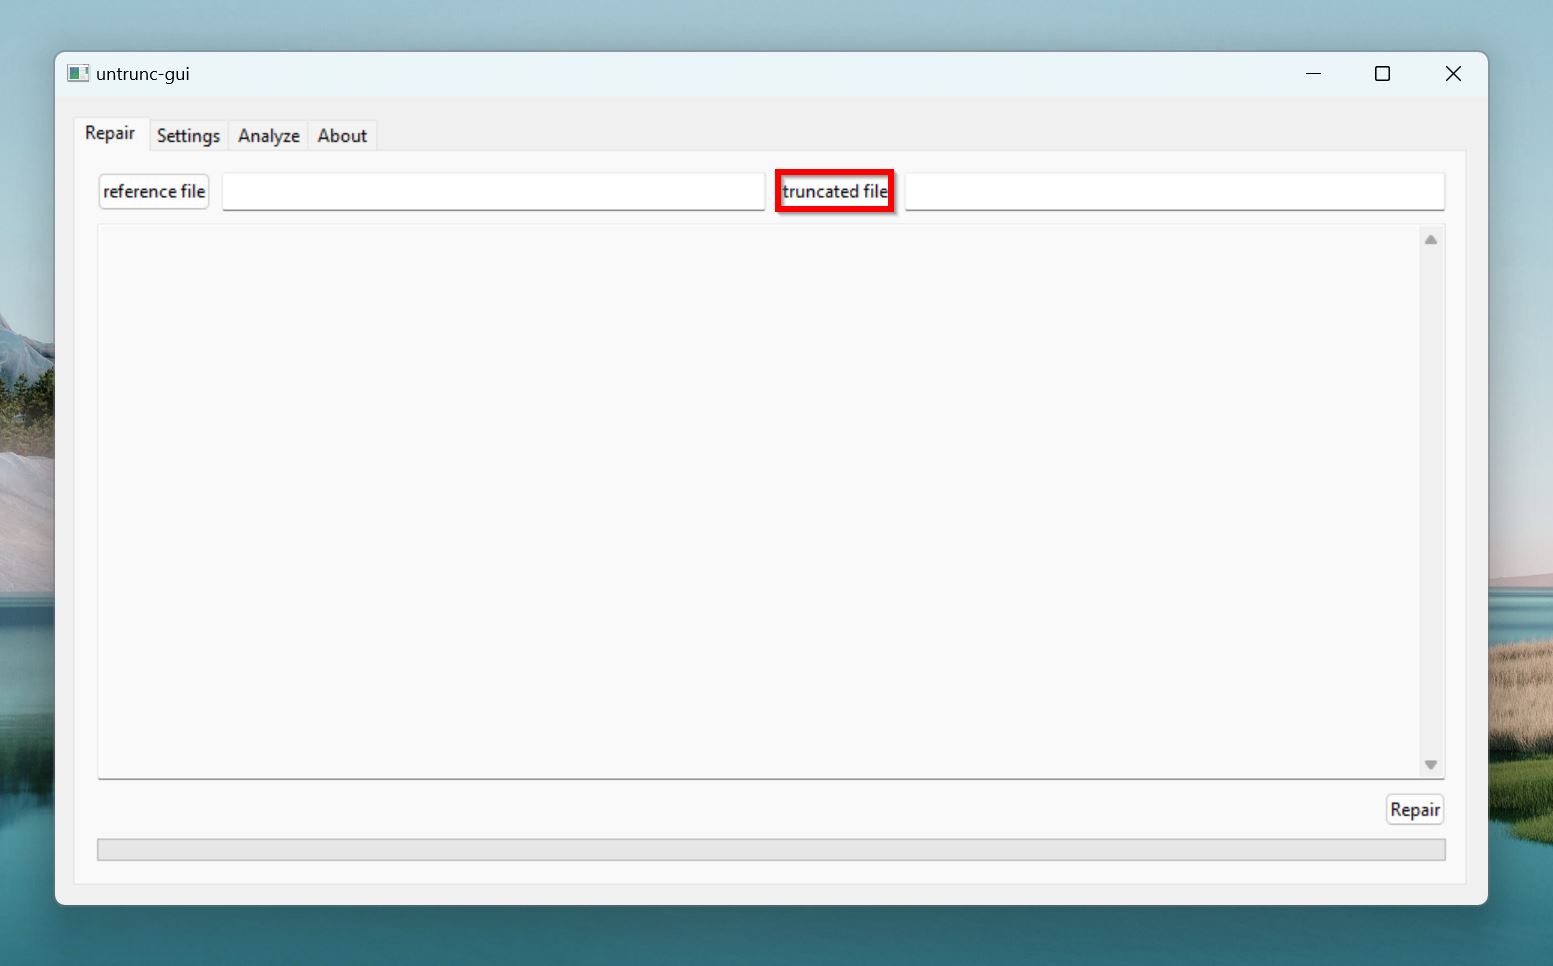
- Click the truncated file button, browse for the corrupted MP4 file, and double-click it.
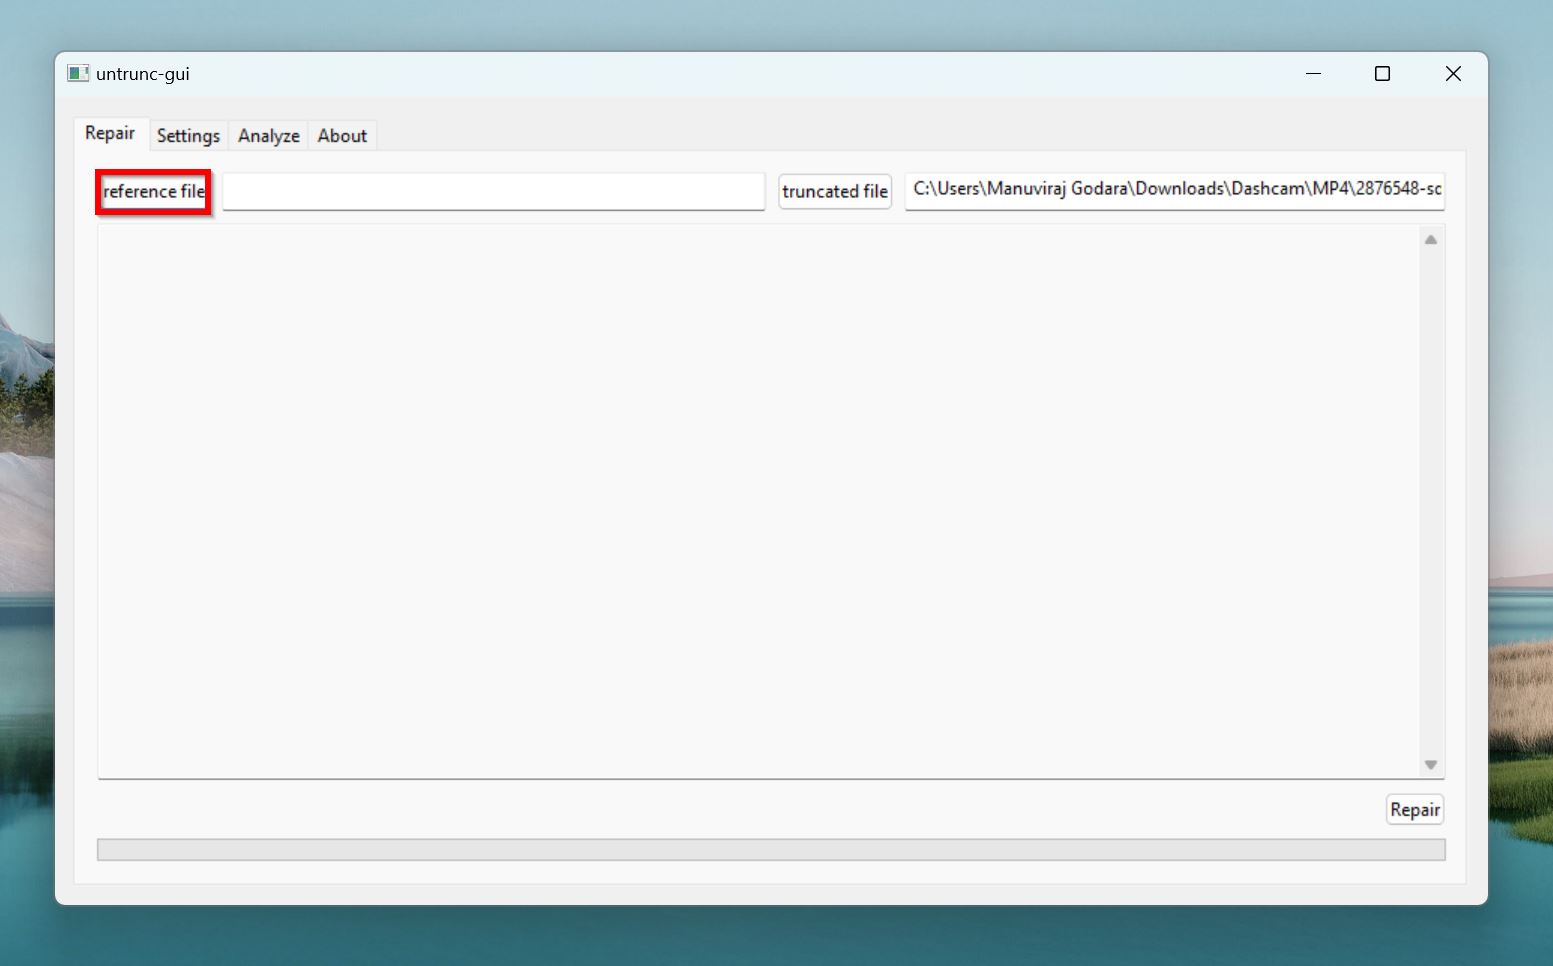
- Click the reference file button, find the healthy video, and double-click it.
- Click on repair towards the bottom-right corner.
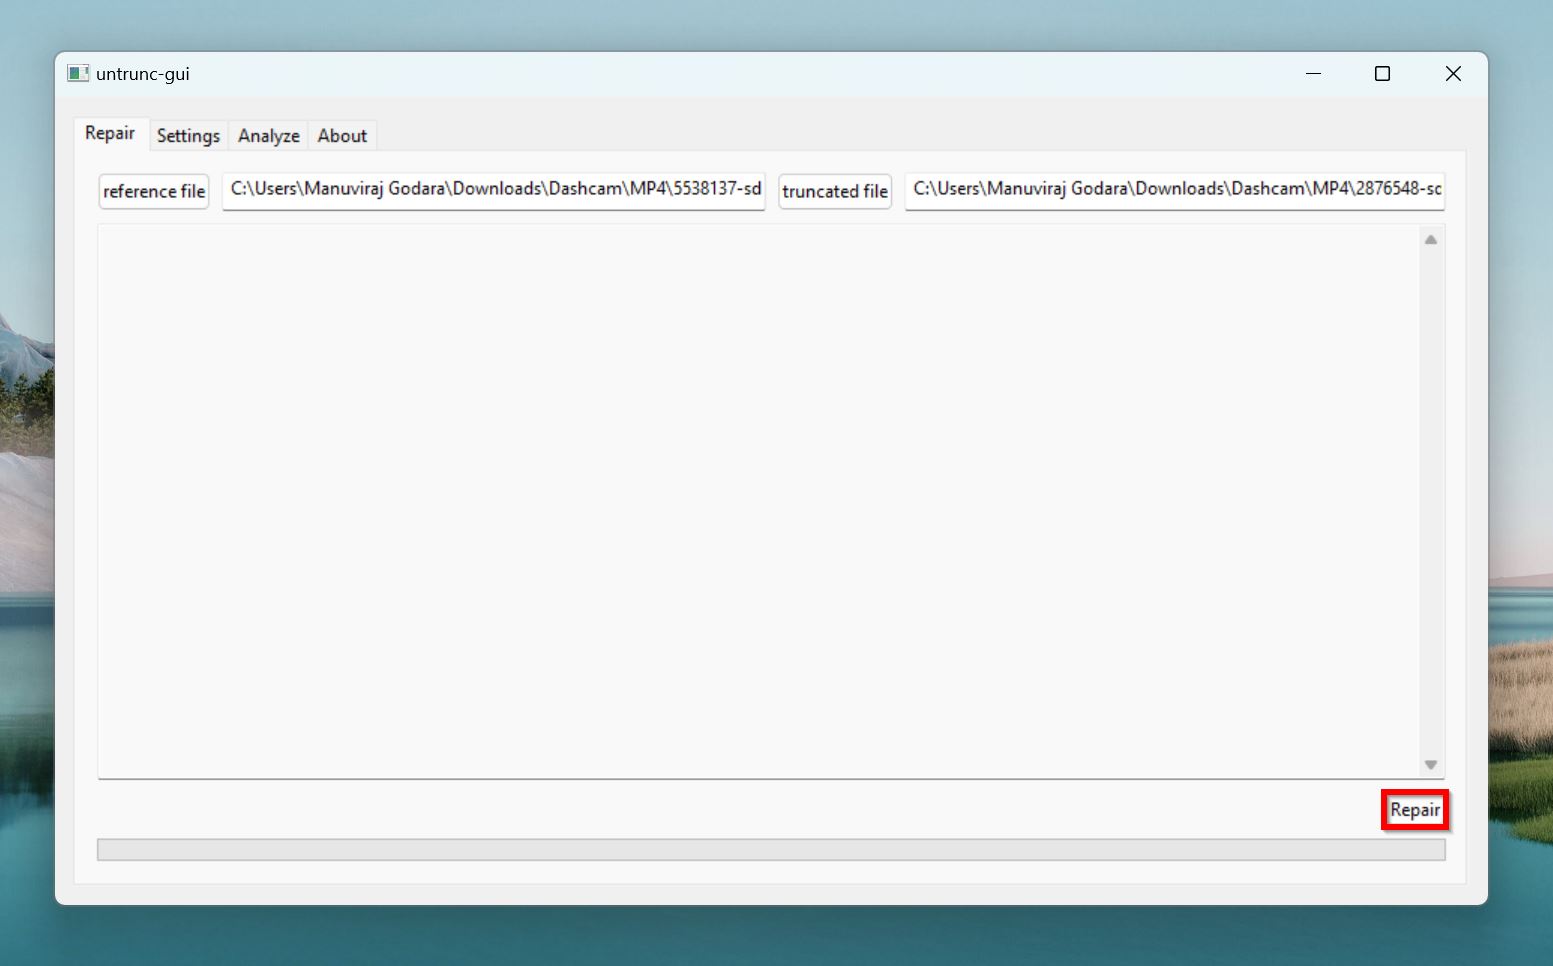
- Untrunc GUI will repair the MP4 file and save a copy in its original location.
3. Re-encode the MP4 Video Using HandBrake (Windows, macOS)
Video corruption can often be fixed by re-encoding the corrupt video. Re-encoding essentially rebuilds the video structure, and in the process, reconstructs the header and metadata. It also resolves any codec related issues.
HandBrake is a free, open-source tool you can use to re-encode the corrupt MP4 video and potentially repair it. There’s no loss of quality, and the process will fix any skipped or missing frames as well.
The tool is quite easy to use. Simply follow the steps below:
- Download HandBrake and install it.
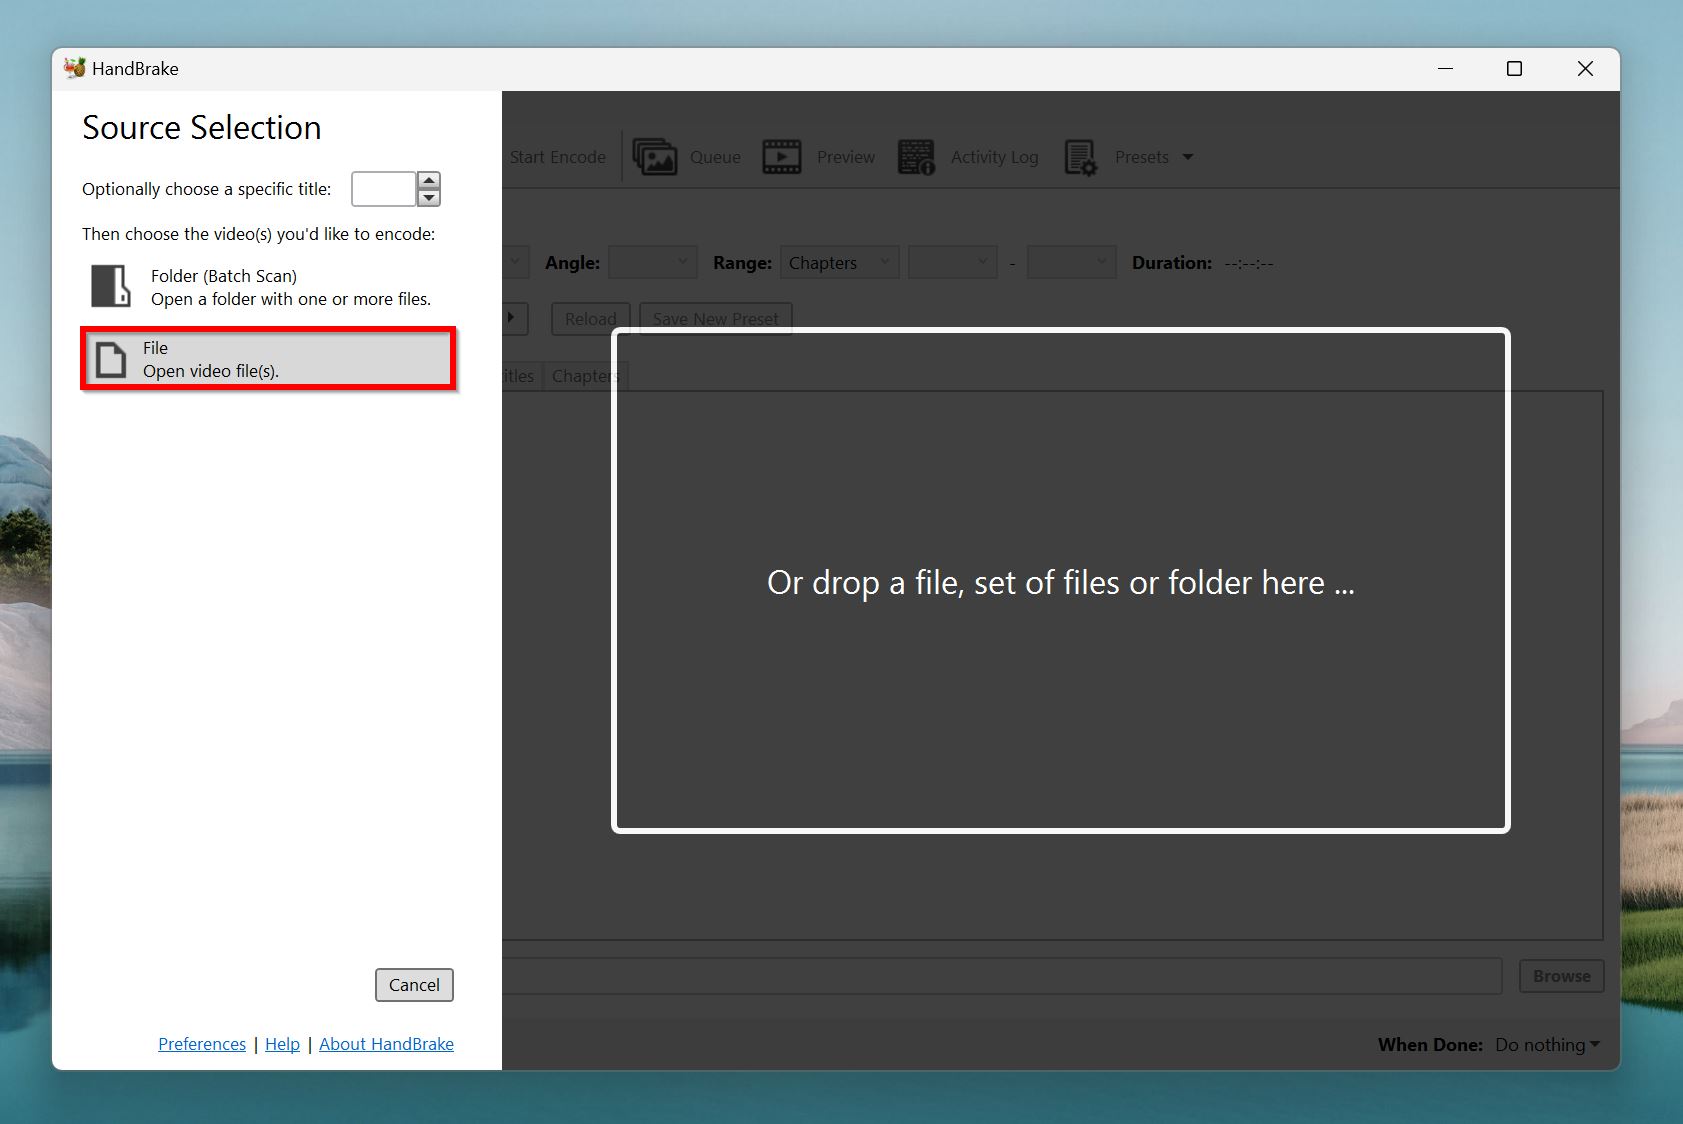
- Open HandBrake, and click File. In some versions, the File option may be absent—click on Open Source instead. Browse for the corrupt MP4 video, and double-click it.
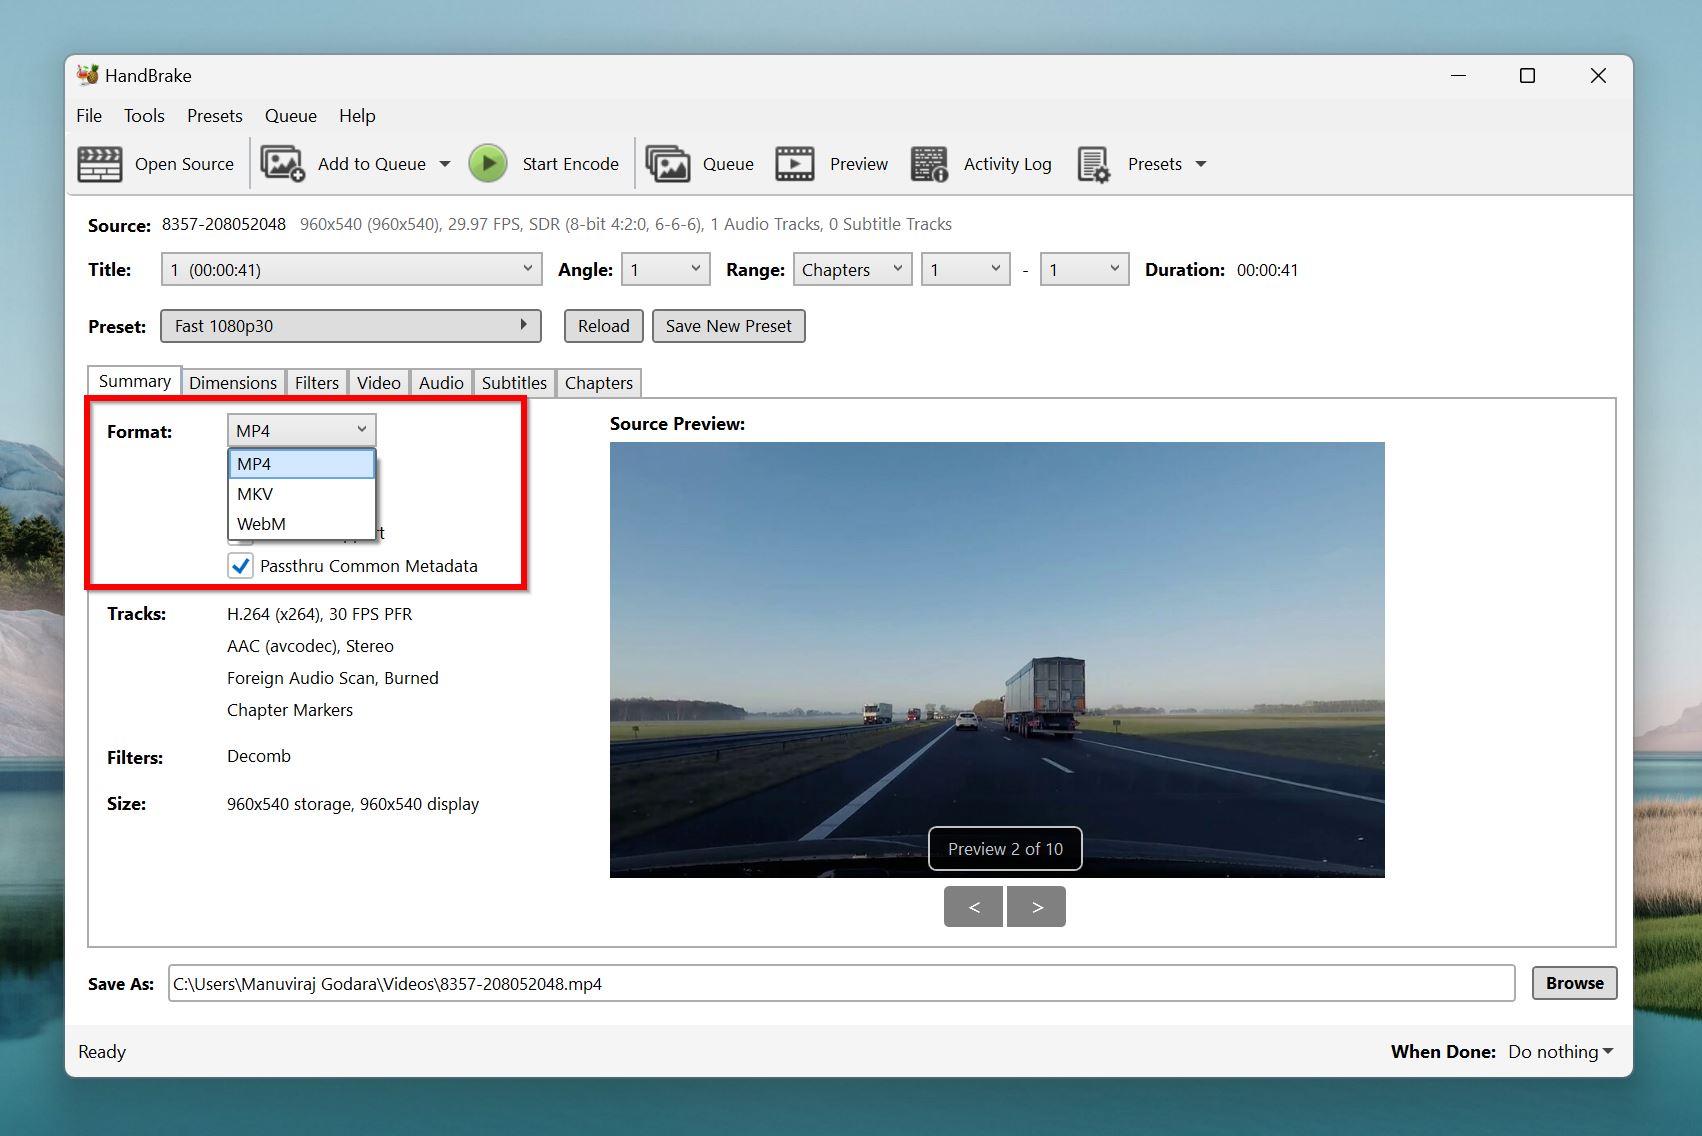
- Pick the MP4 format using the Format drop-down menu in the Summary tab. You can make further modifications by navigating through the other tabs.
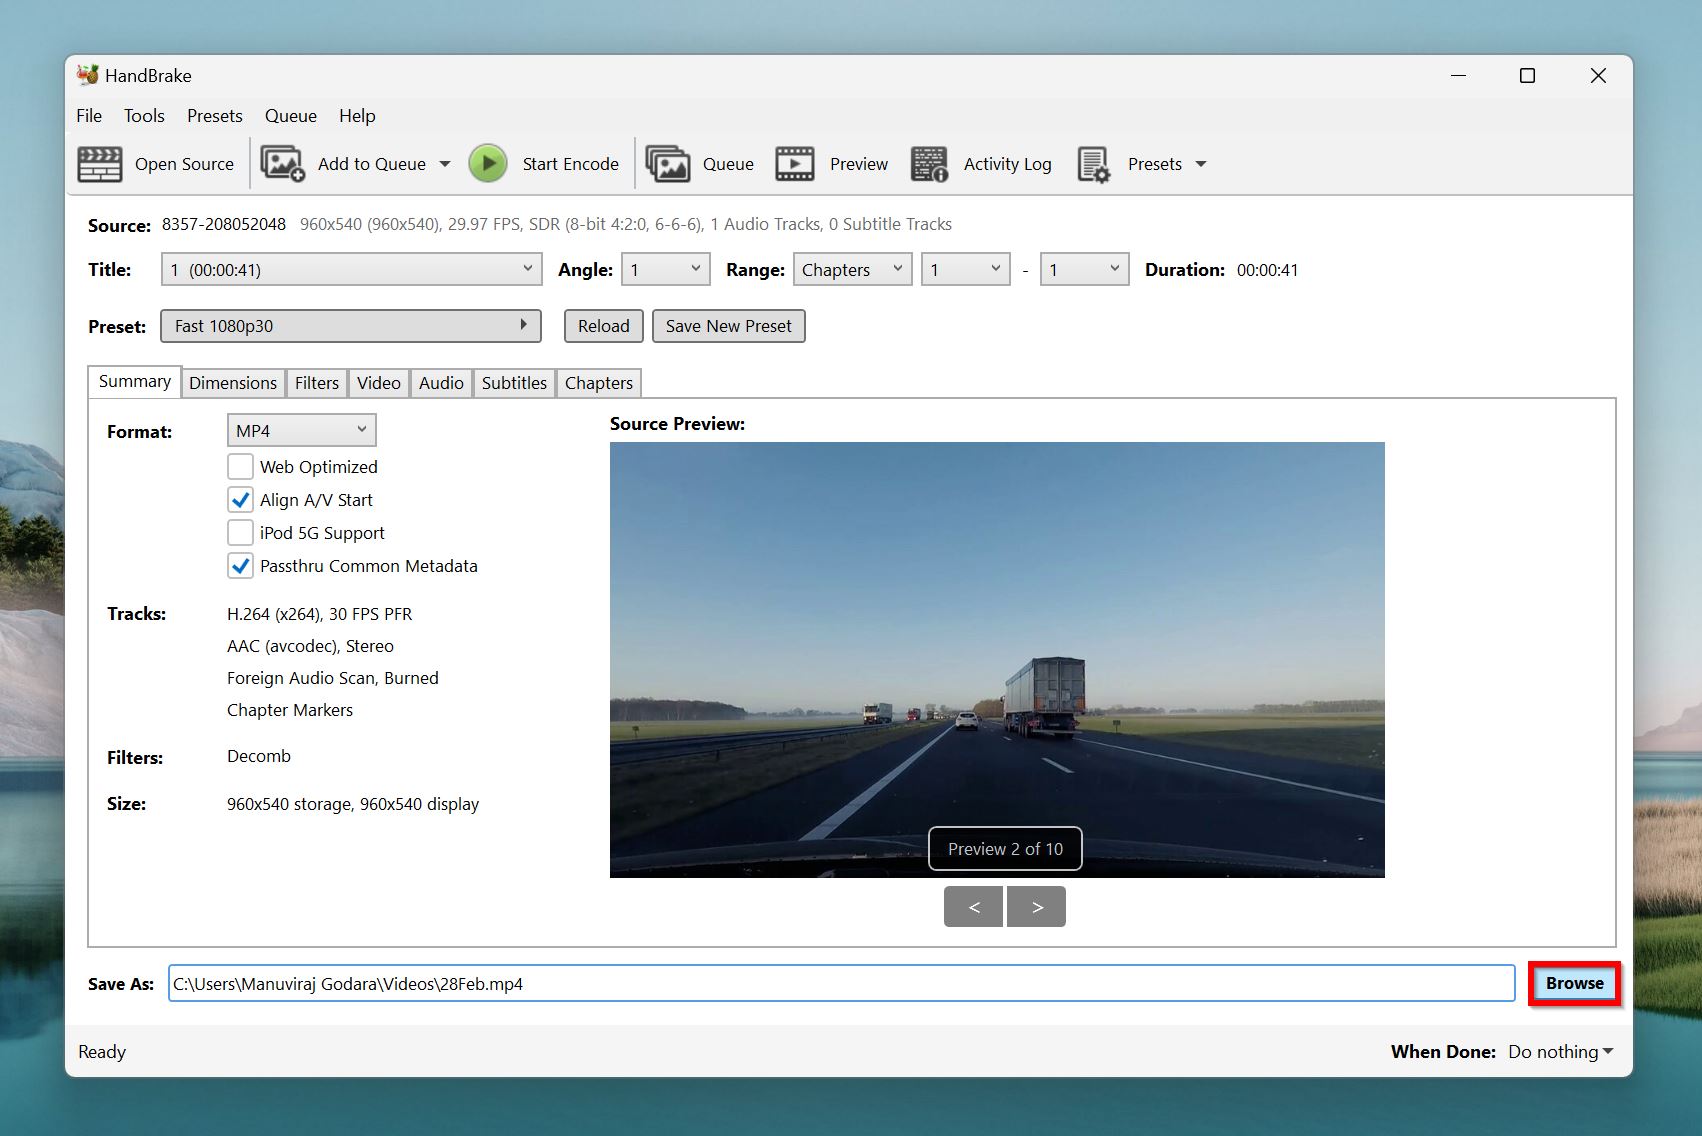
- Click Browse in the bottom-right, and choose where you want to save the new re-encoded video.
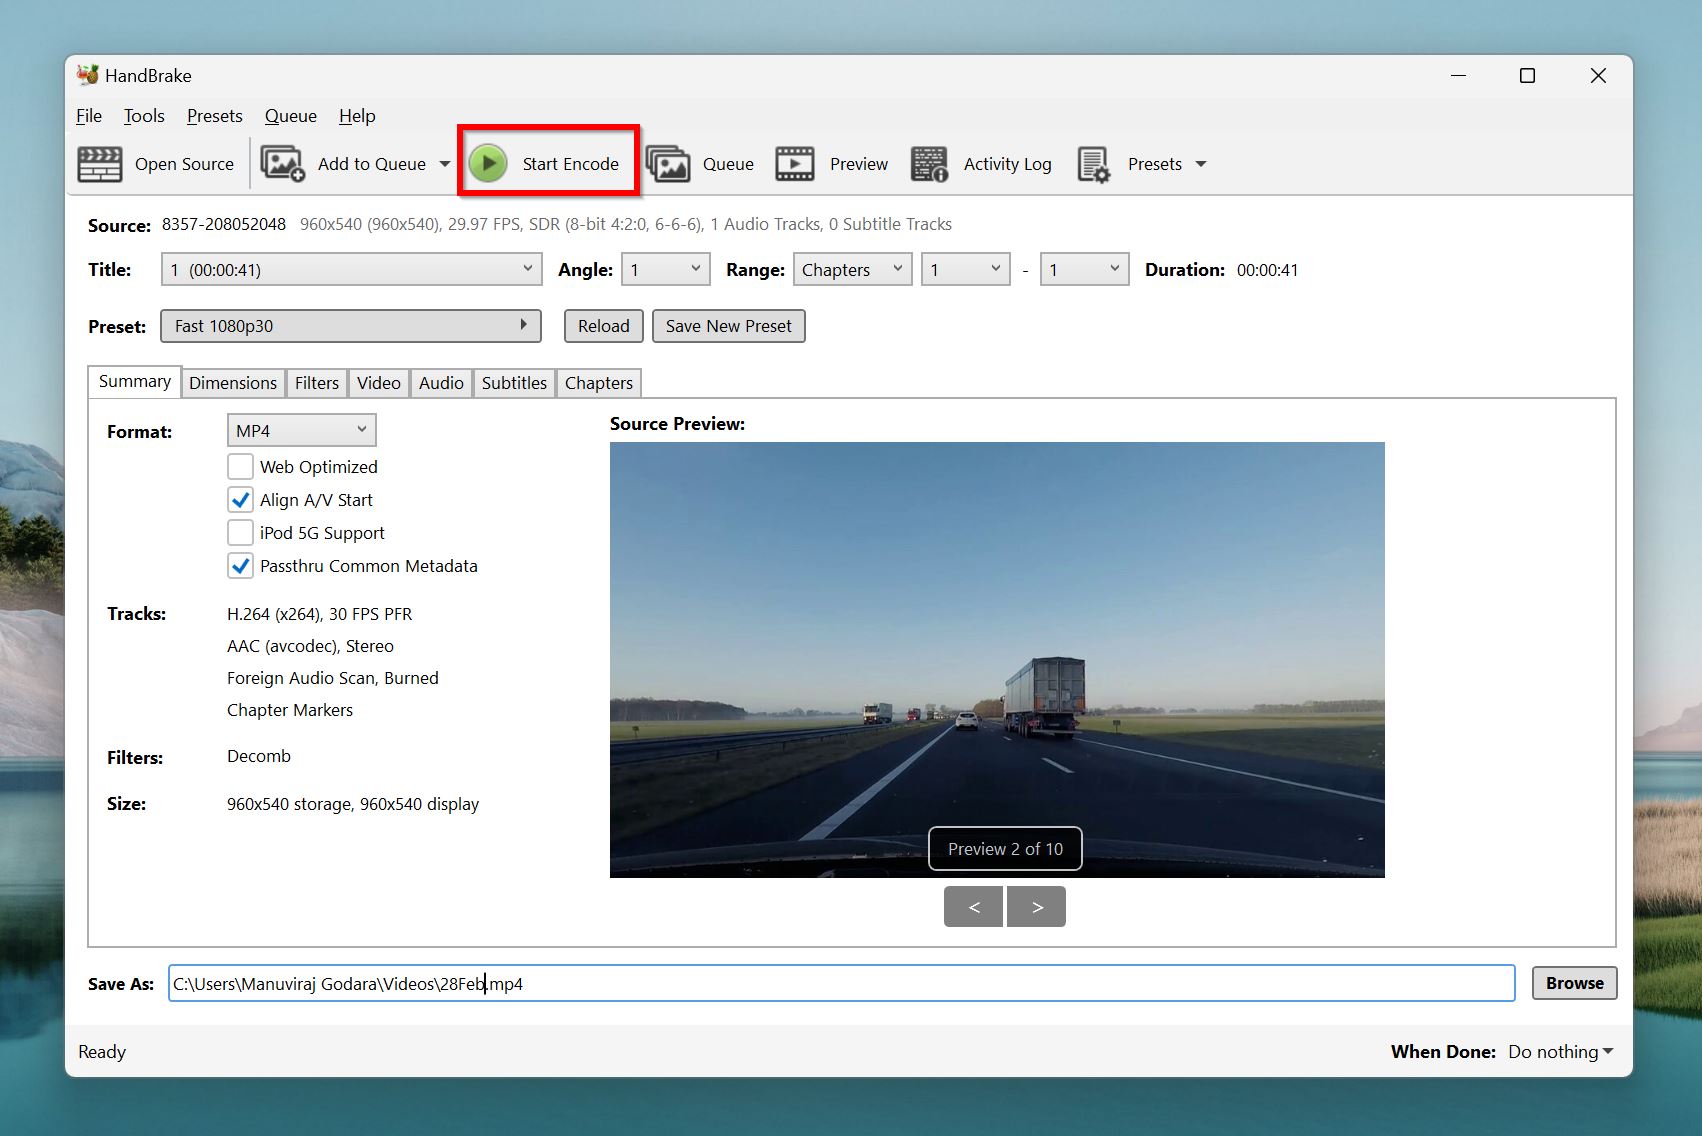
- Click on Start Encode to begin encoding the video.
4. Use VLC Media Player (Windows, macOS)
VLC Media Player is not just a capable media player, it can also help you fix corrupted MP4 videos. There are two features that help you achieve this—the Always fix feature (available on Windows only), or VLC’s re-encoding feature (available on Windows, and macOS).
The Always fix feature only works on AVI files, so you’ll need to rename the corrupt MP4 file to AVI before using VLC Media Player. If that doesn’t work, you can re-encode the video using VLC’s Convert feature. In fact, you can even re-encode the video to AVI, and then run VLC’s Always fix feature.
Here’s how I used VLC Media Player to repair MP4 videos:
Use the Always Fix Feature (Windows Only)
- Download VLC Media Player and install it.
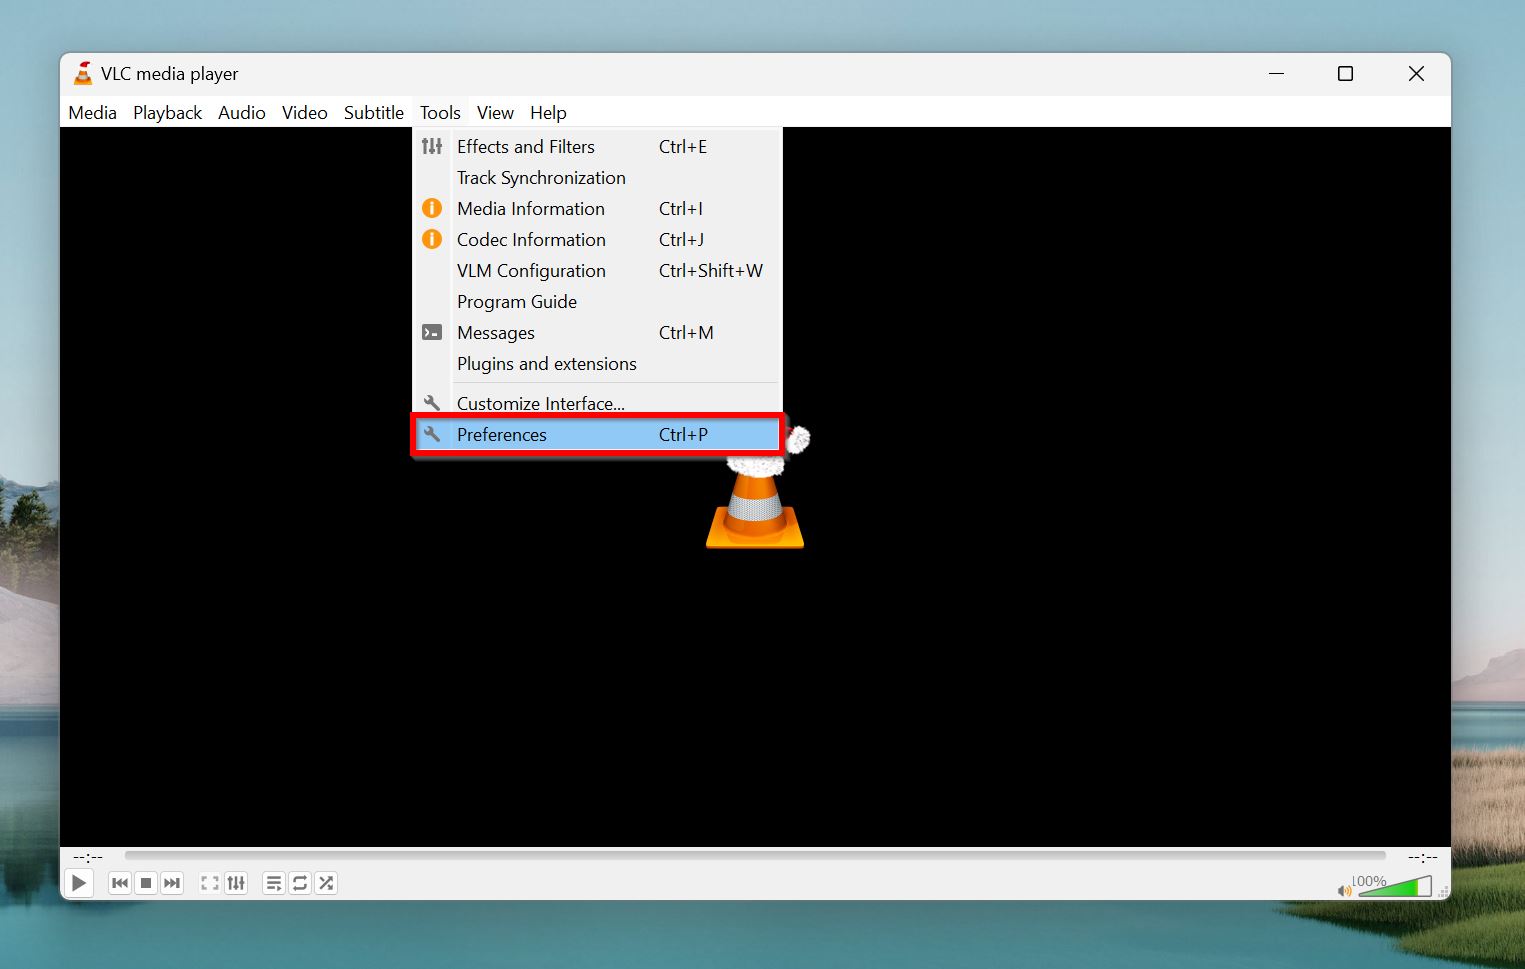
- Open VLC Media Player, and click on Tools > Preferences.
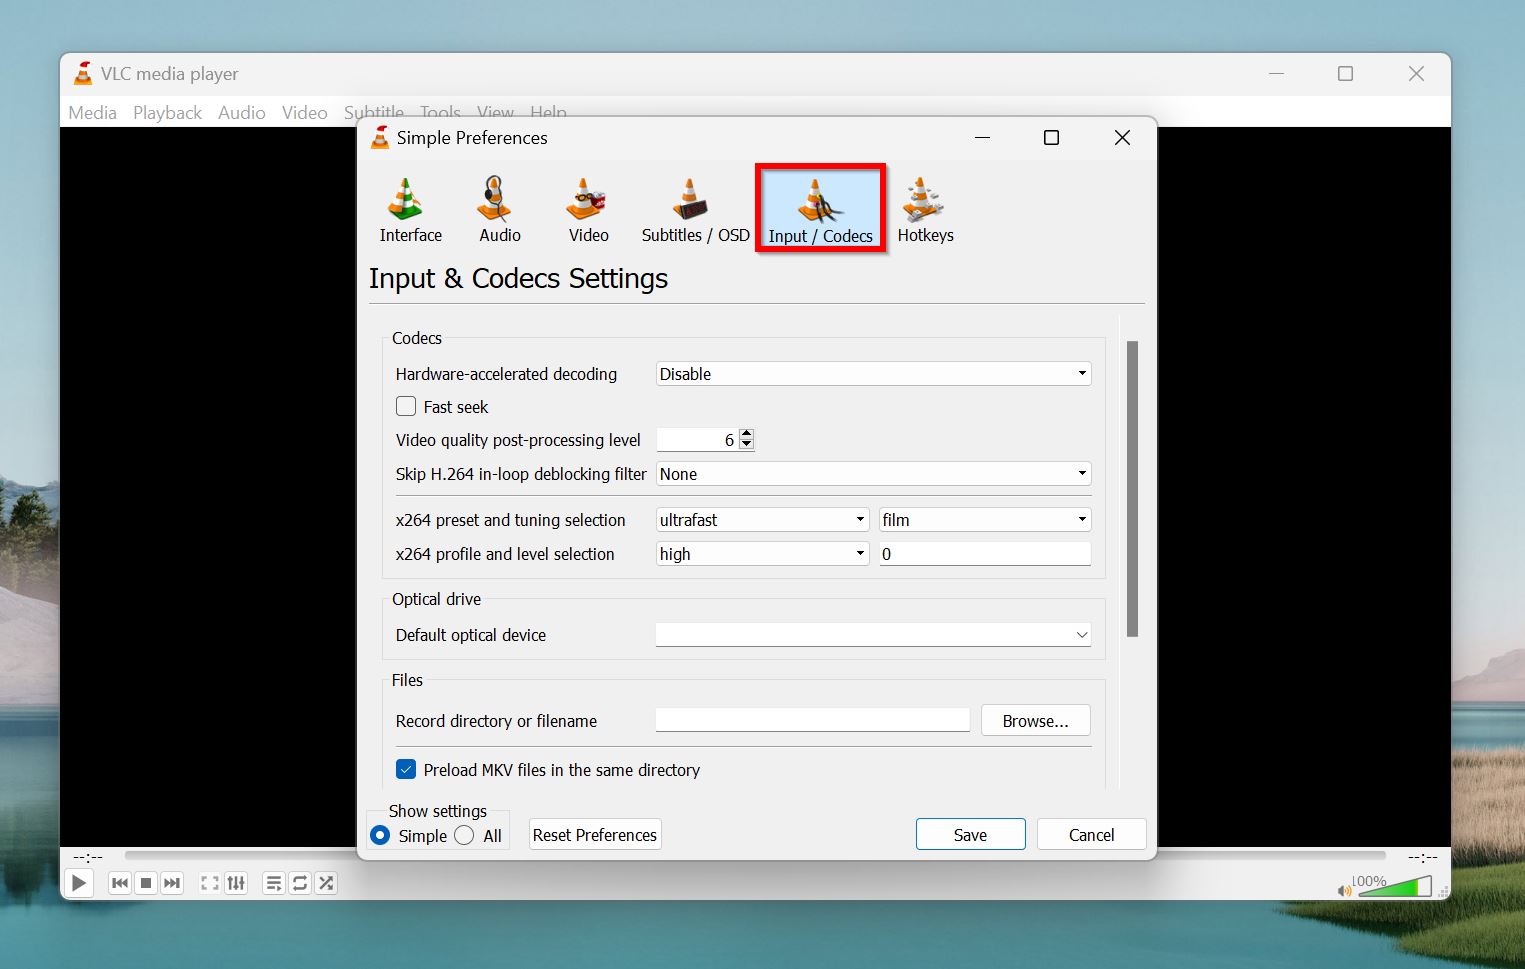
- Click on the Inputs/Codecs tab.
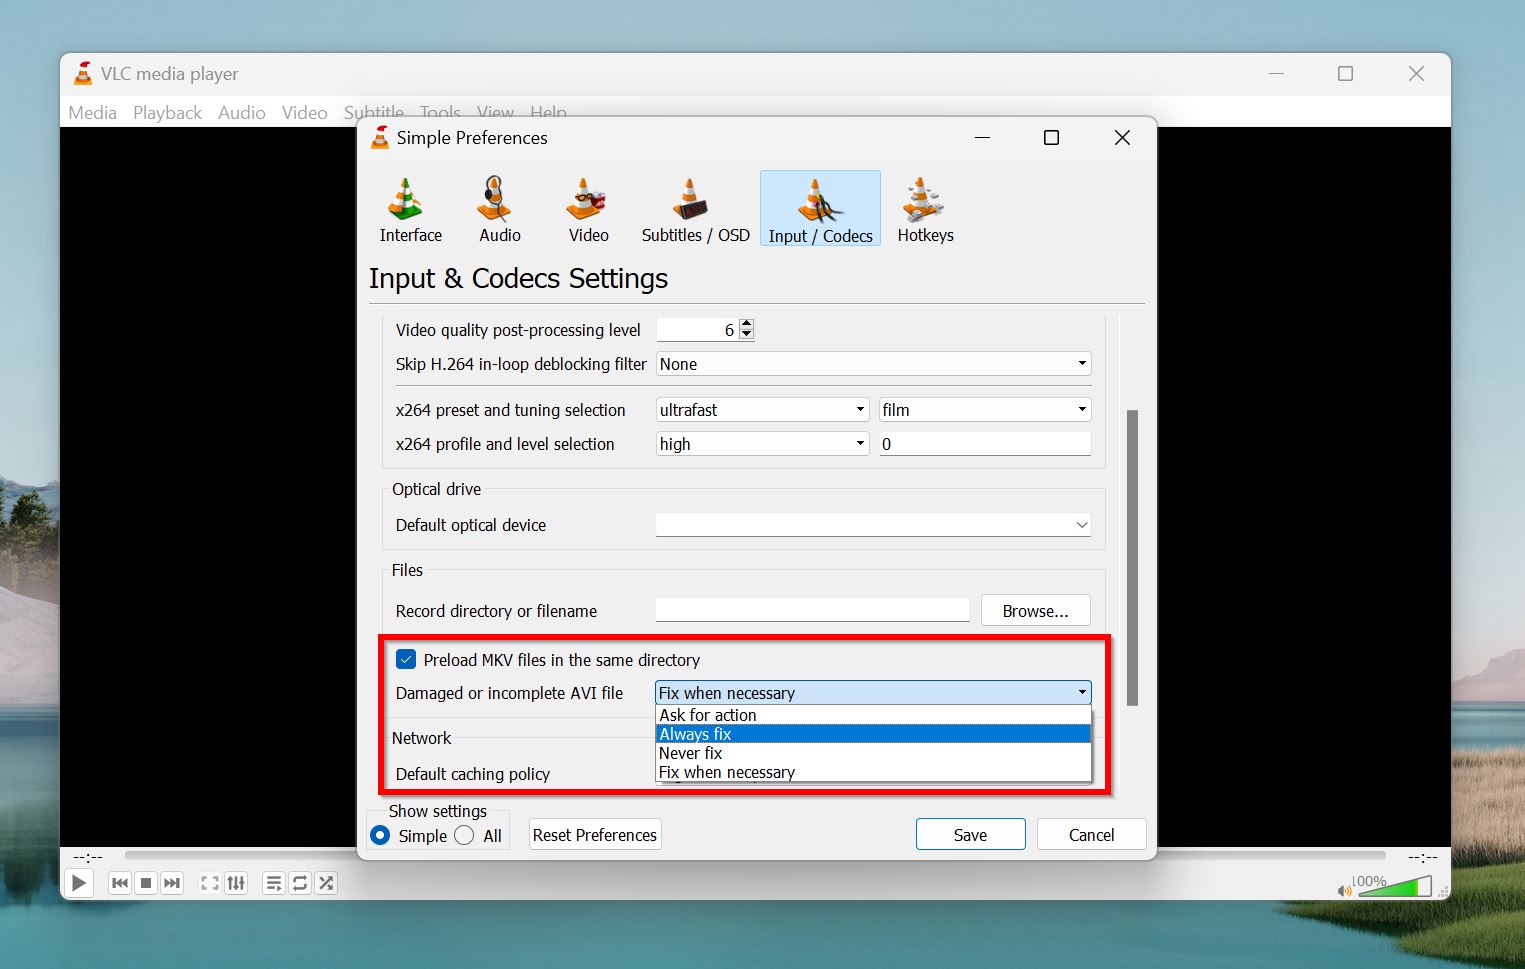
- Click on the Damaged or incomplete AVI file drop-down menu, and choose Always fix.
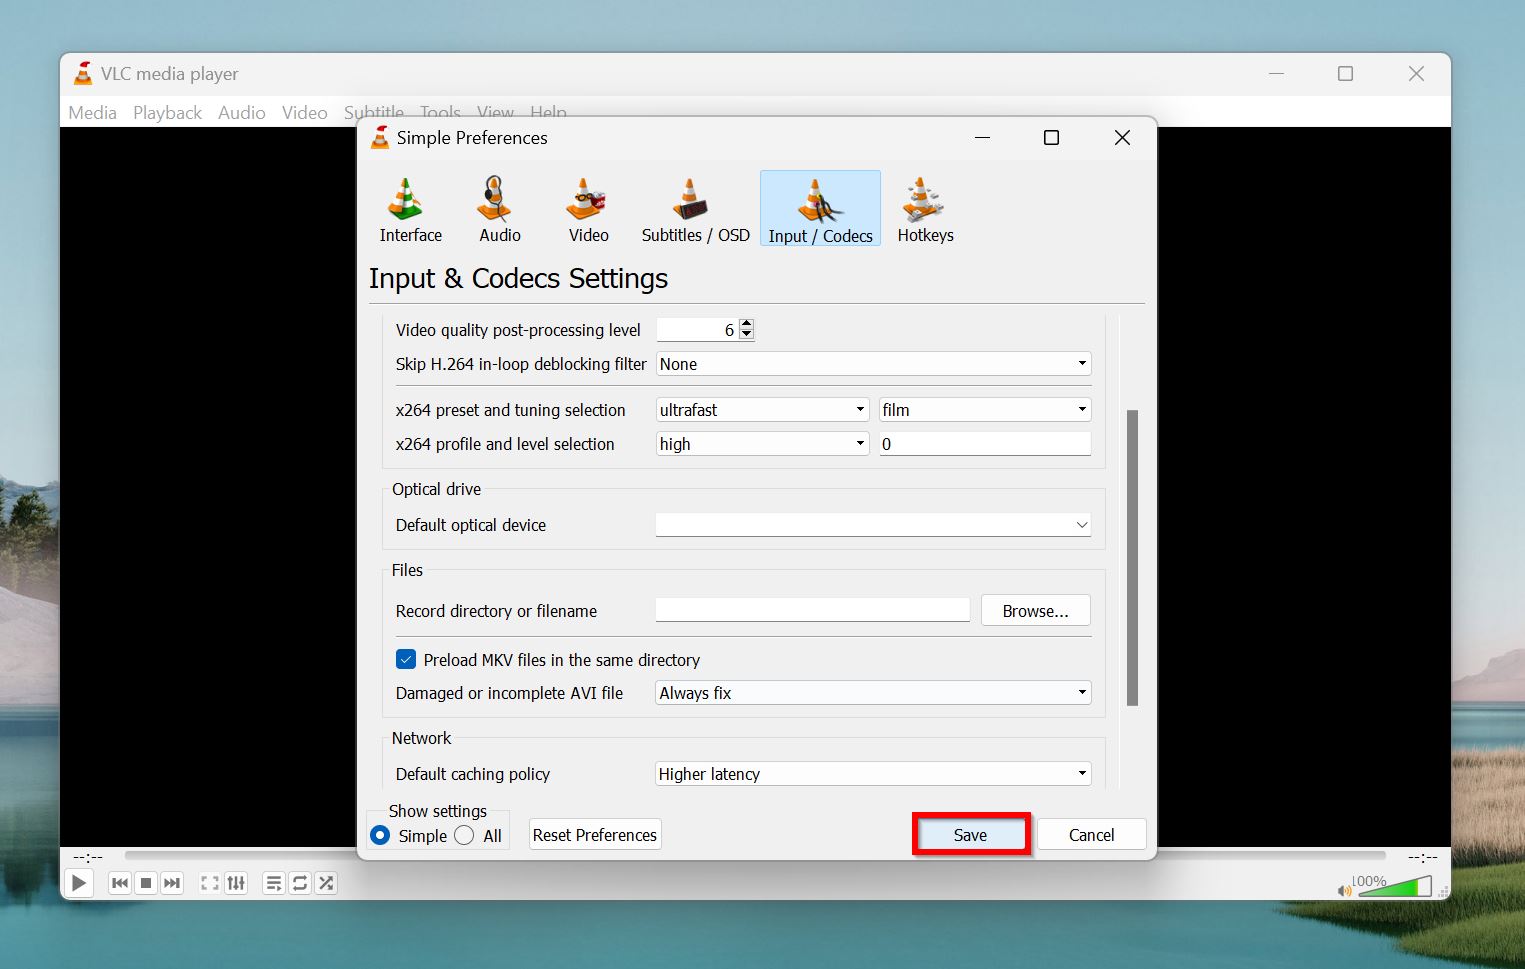
- Click on Save.
- Now, navigate to the corrupt MP4 file in File Explorer, and rename it with a .AVI extension.
- Open the file using VLC Media Player.
Note: Renaming the MP4 file to AVI doesn’t change its internal structure, so this method is only likely to work in cases of superficial corruption.
Re-encode the Video Using VLC Media Player (Windows, and macOS)
- Download and install VLC Media Player, if you haven’t already.
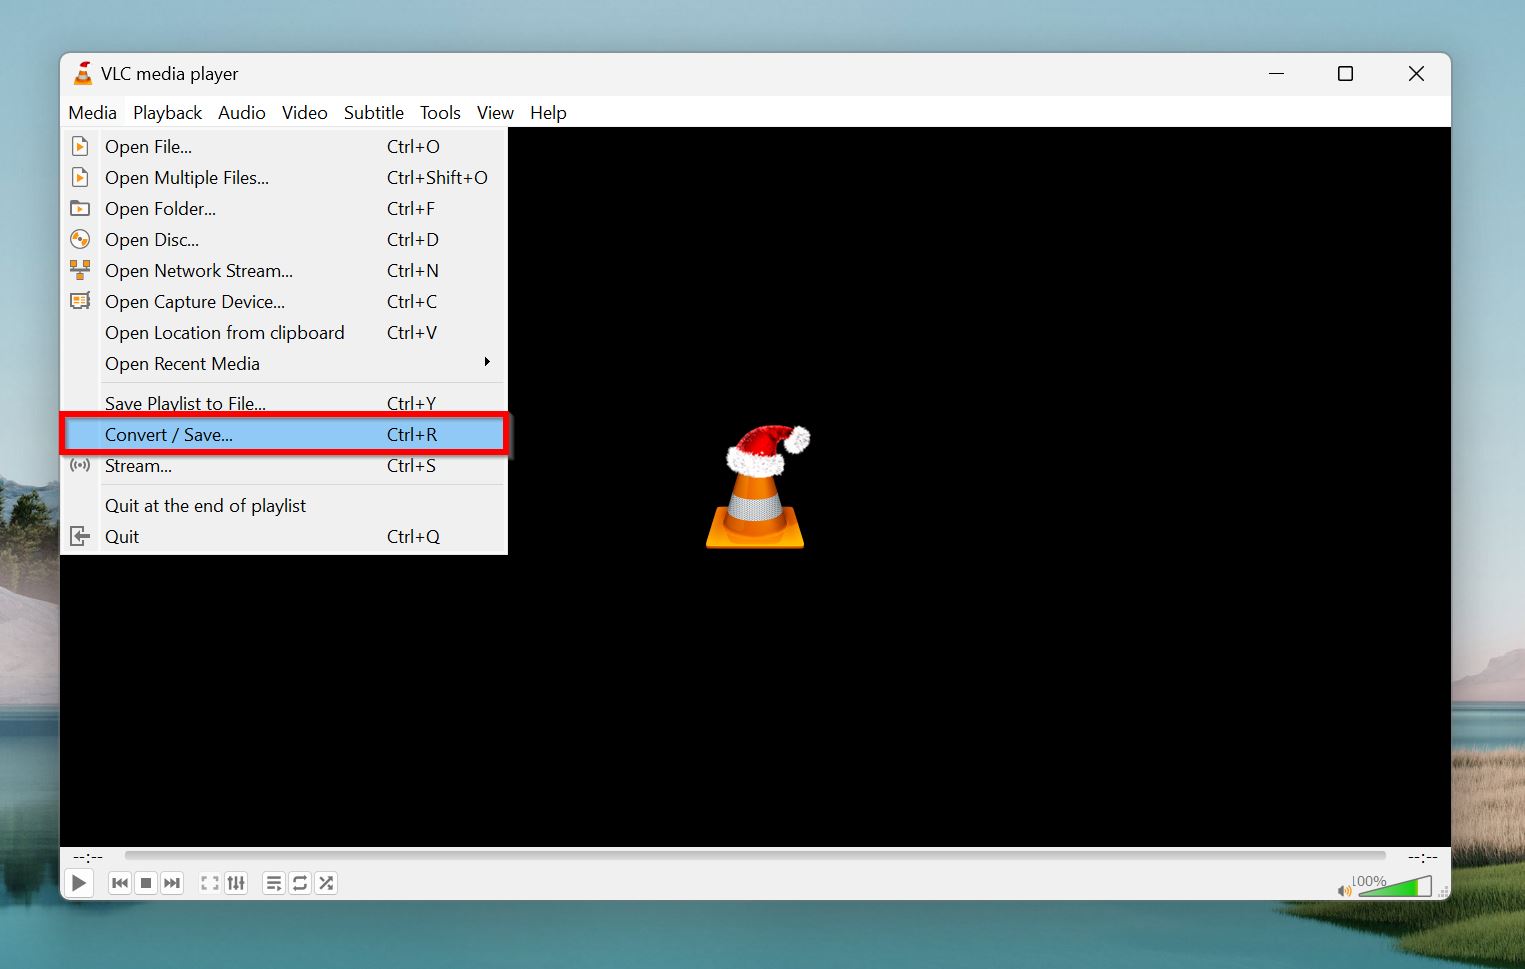
- Open VLC Media Player, and click on Media > Convert / Save.
- Click Add, navigate to the corrupted MP4 file, and double-click on it.
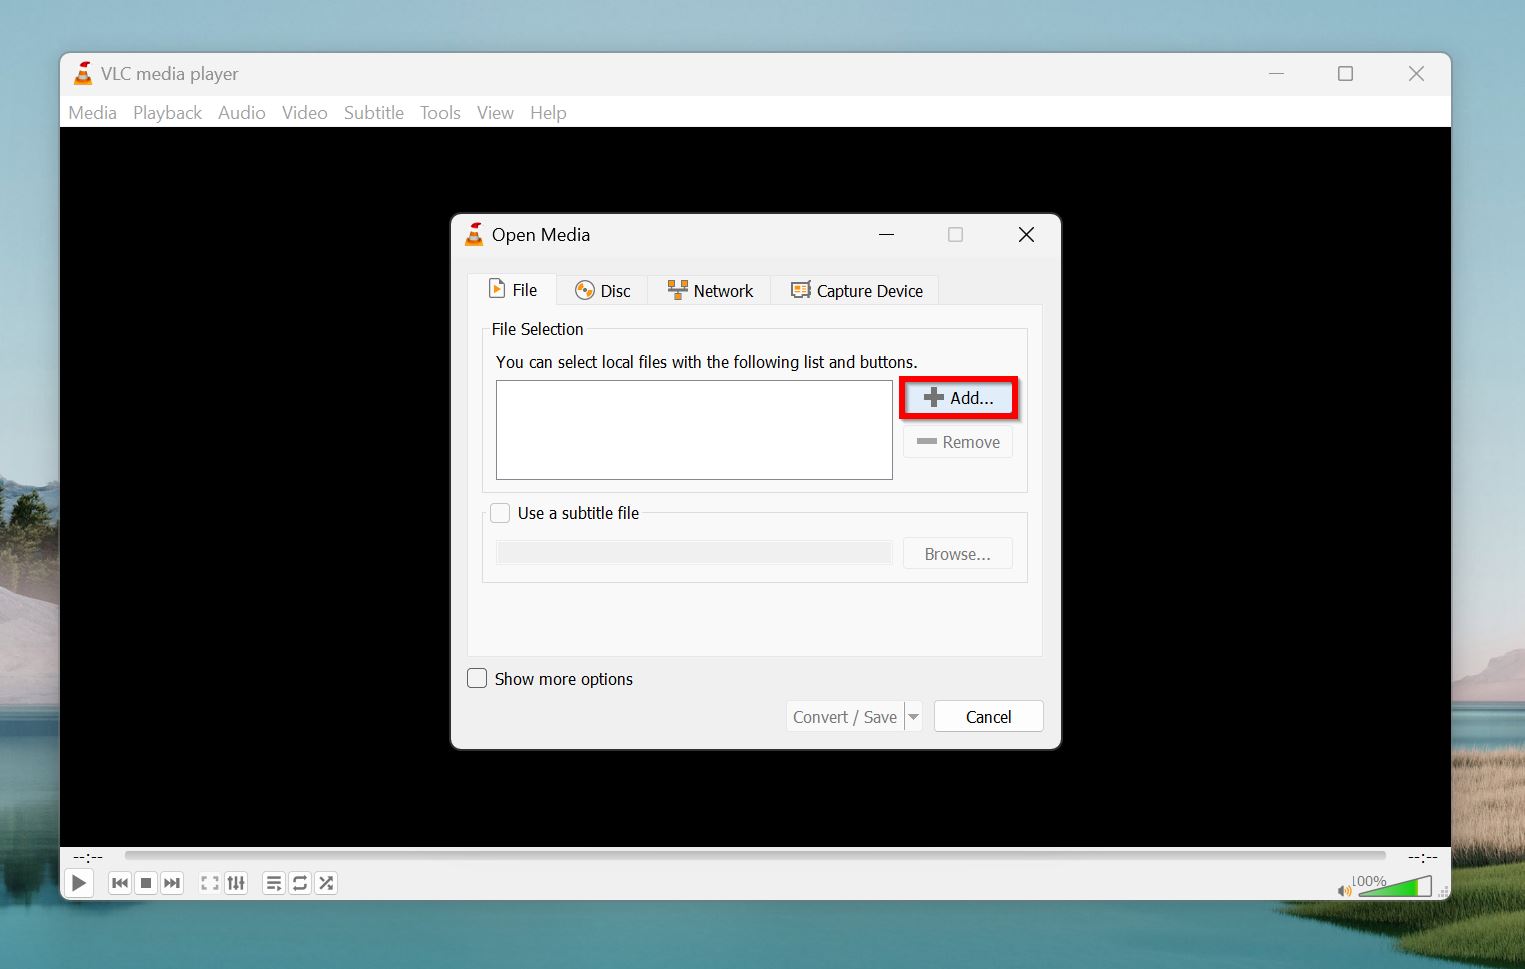
- Click on the Convert/Save button.
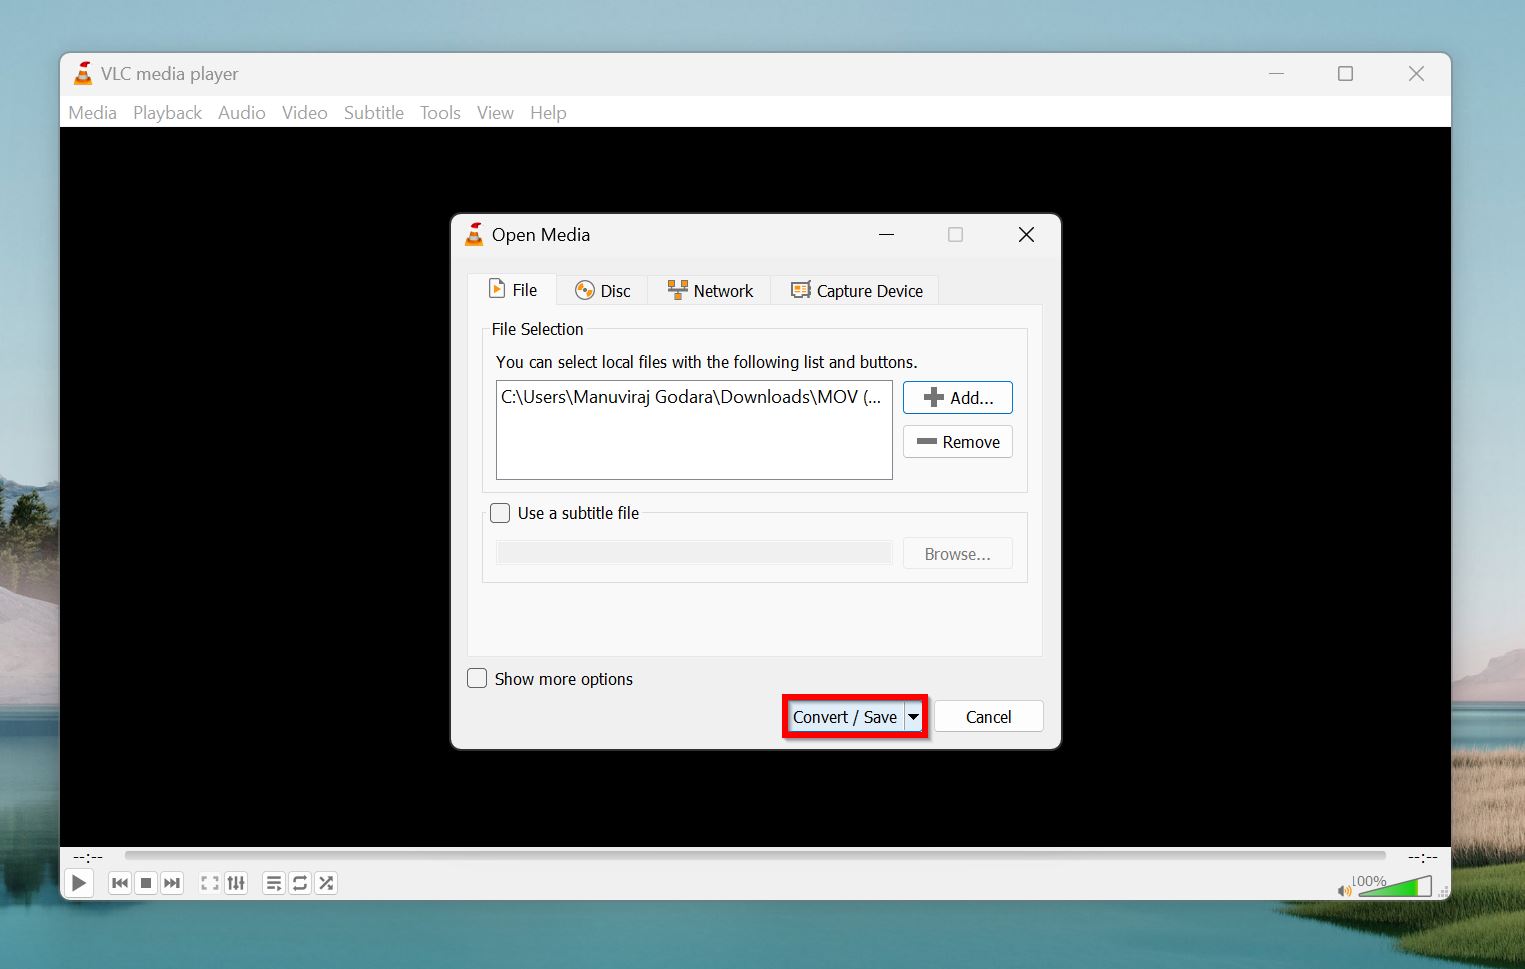
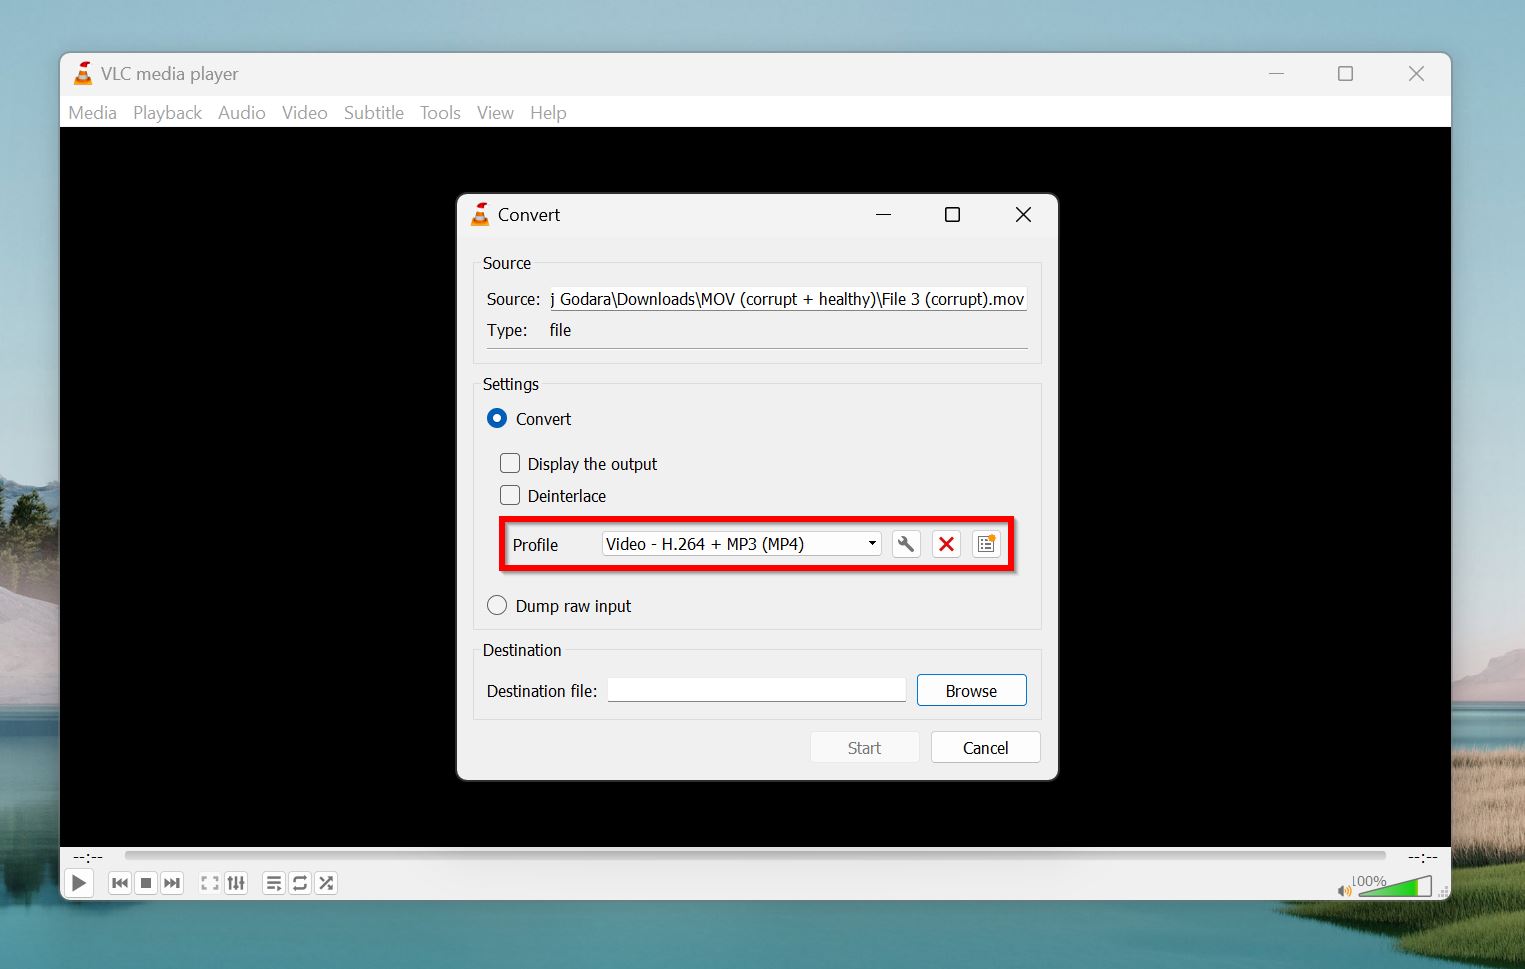
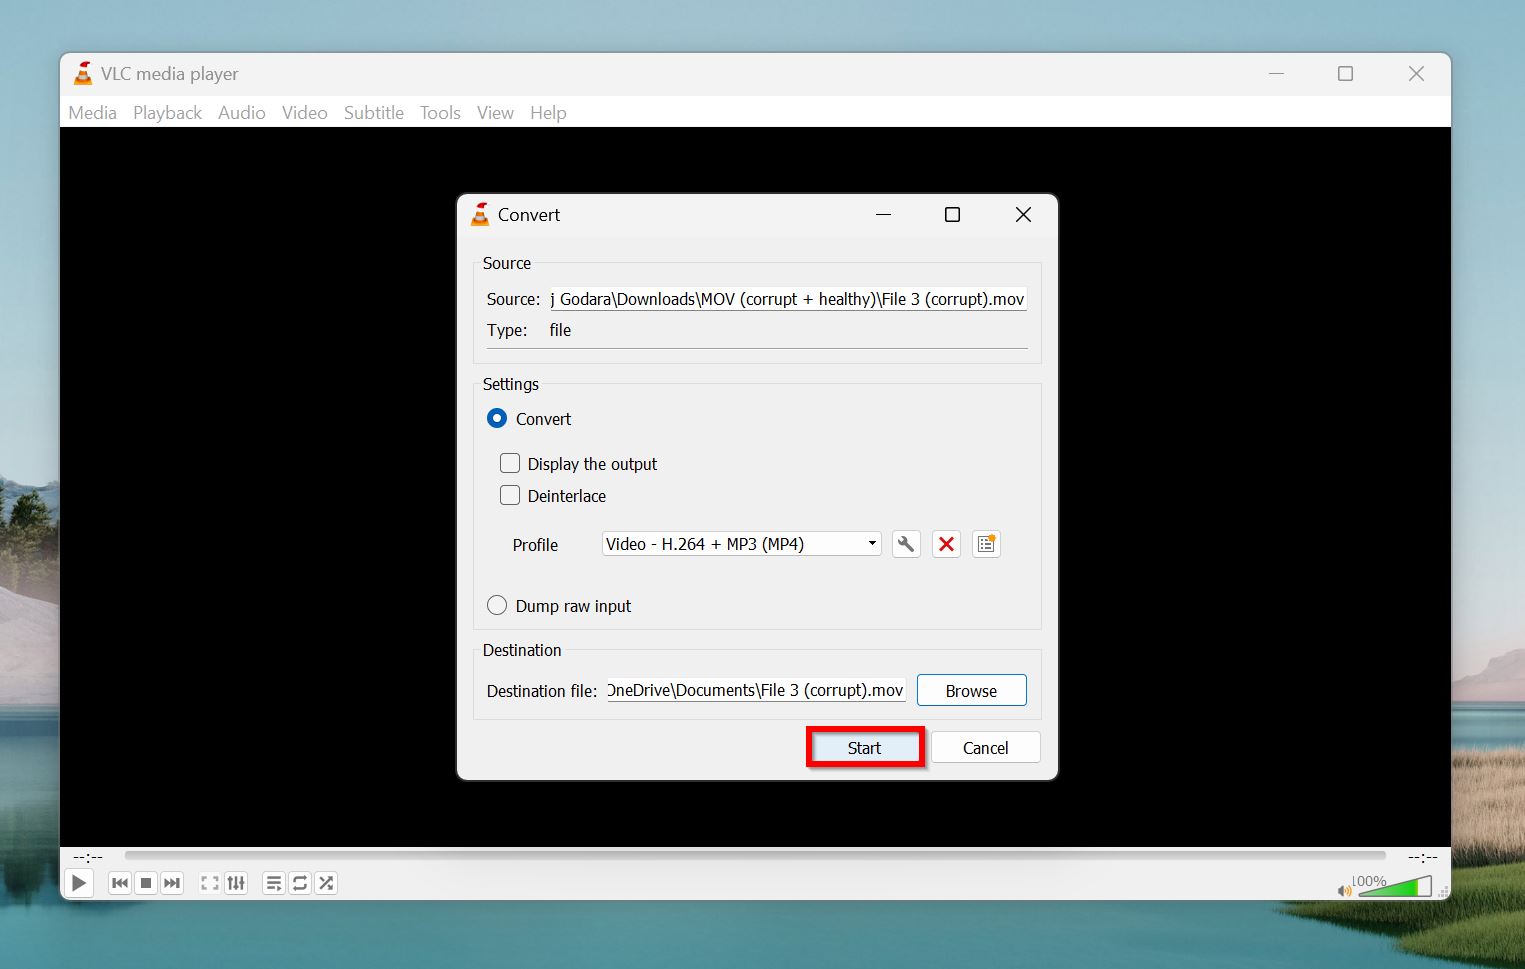
- Use the Profile menu to choose the video format and codec. You can let it be as it is too.
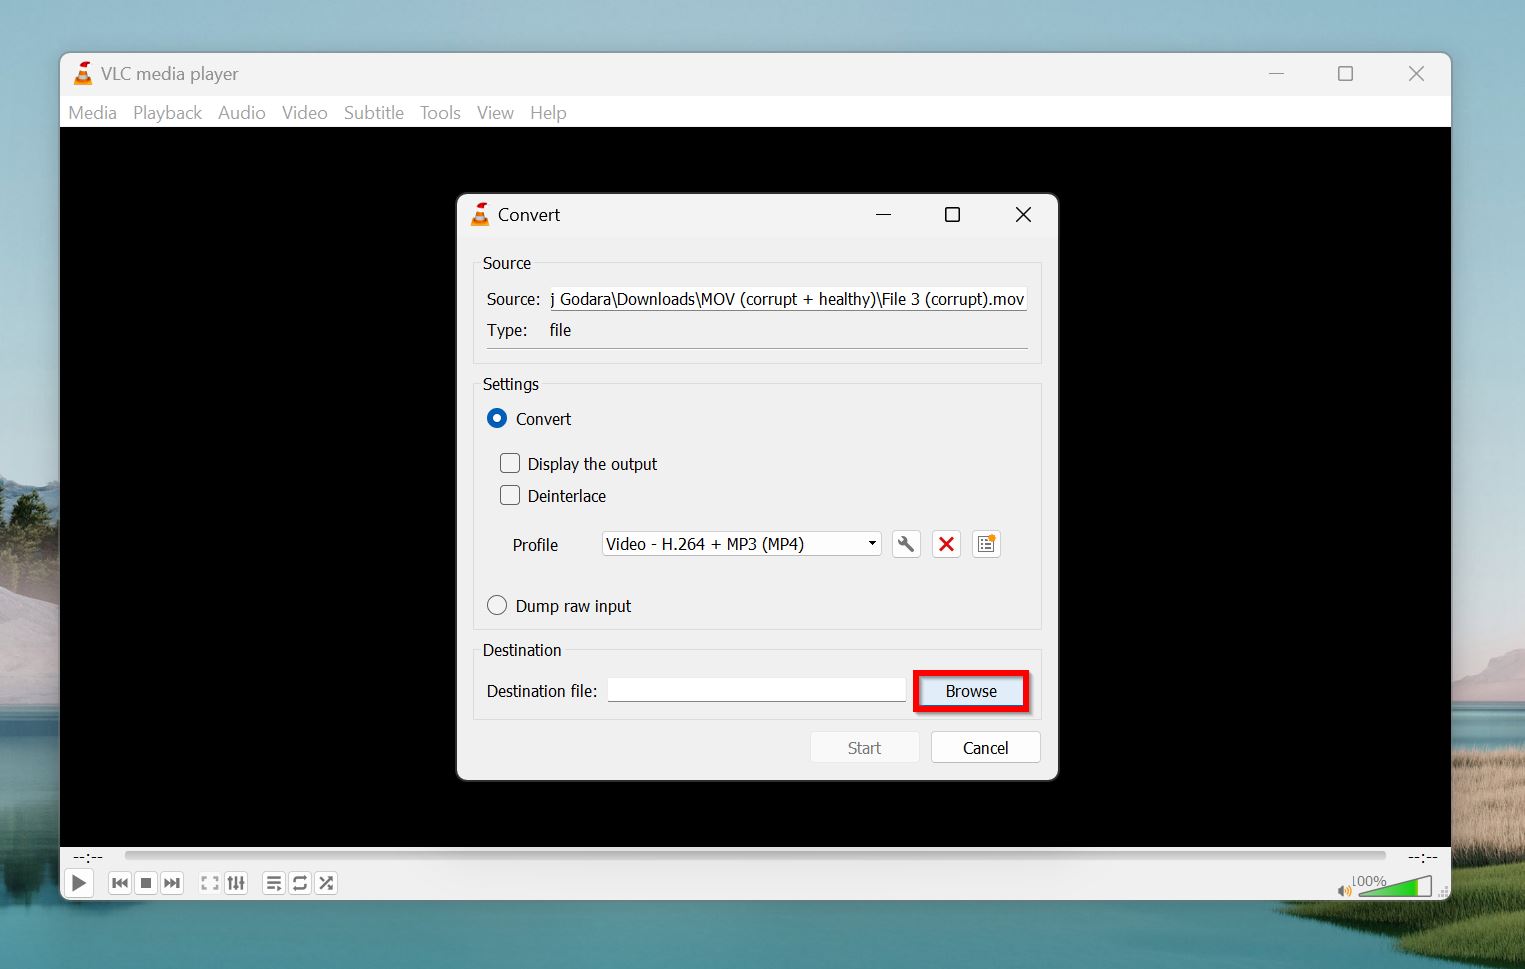
- Click on Browse, and navigate to the directory where you wish to save the re-encoded video.
- Click Start to begin encoding.
5. Repair the MP4 Video Using Restore.Media (Web-Based)
Restore.Media is another well-reputed online video repair service that works well with MP4 videos. It works with both H.264/AVC, and H.265/HEVC codecs. You can choose from two servers—Europe, or USA. Choose the one closer to you for faster processing of your videos.
However, Restore.Media isn’t free. You can upload your video, repair it, and see a preview for free, but downloading requires a fee.
Here’s how to use Restore.Media to fix a corrupted MP4 file:
- Visit Restore.Media on your web browser.
- Register on the website using your email. You’ll need to confirm your email to finish registration.
- After signing in, click on Get Started.

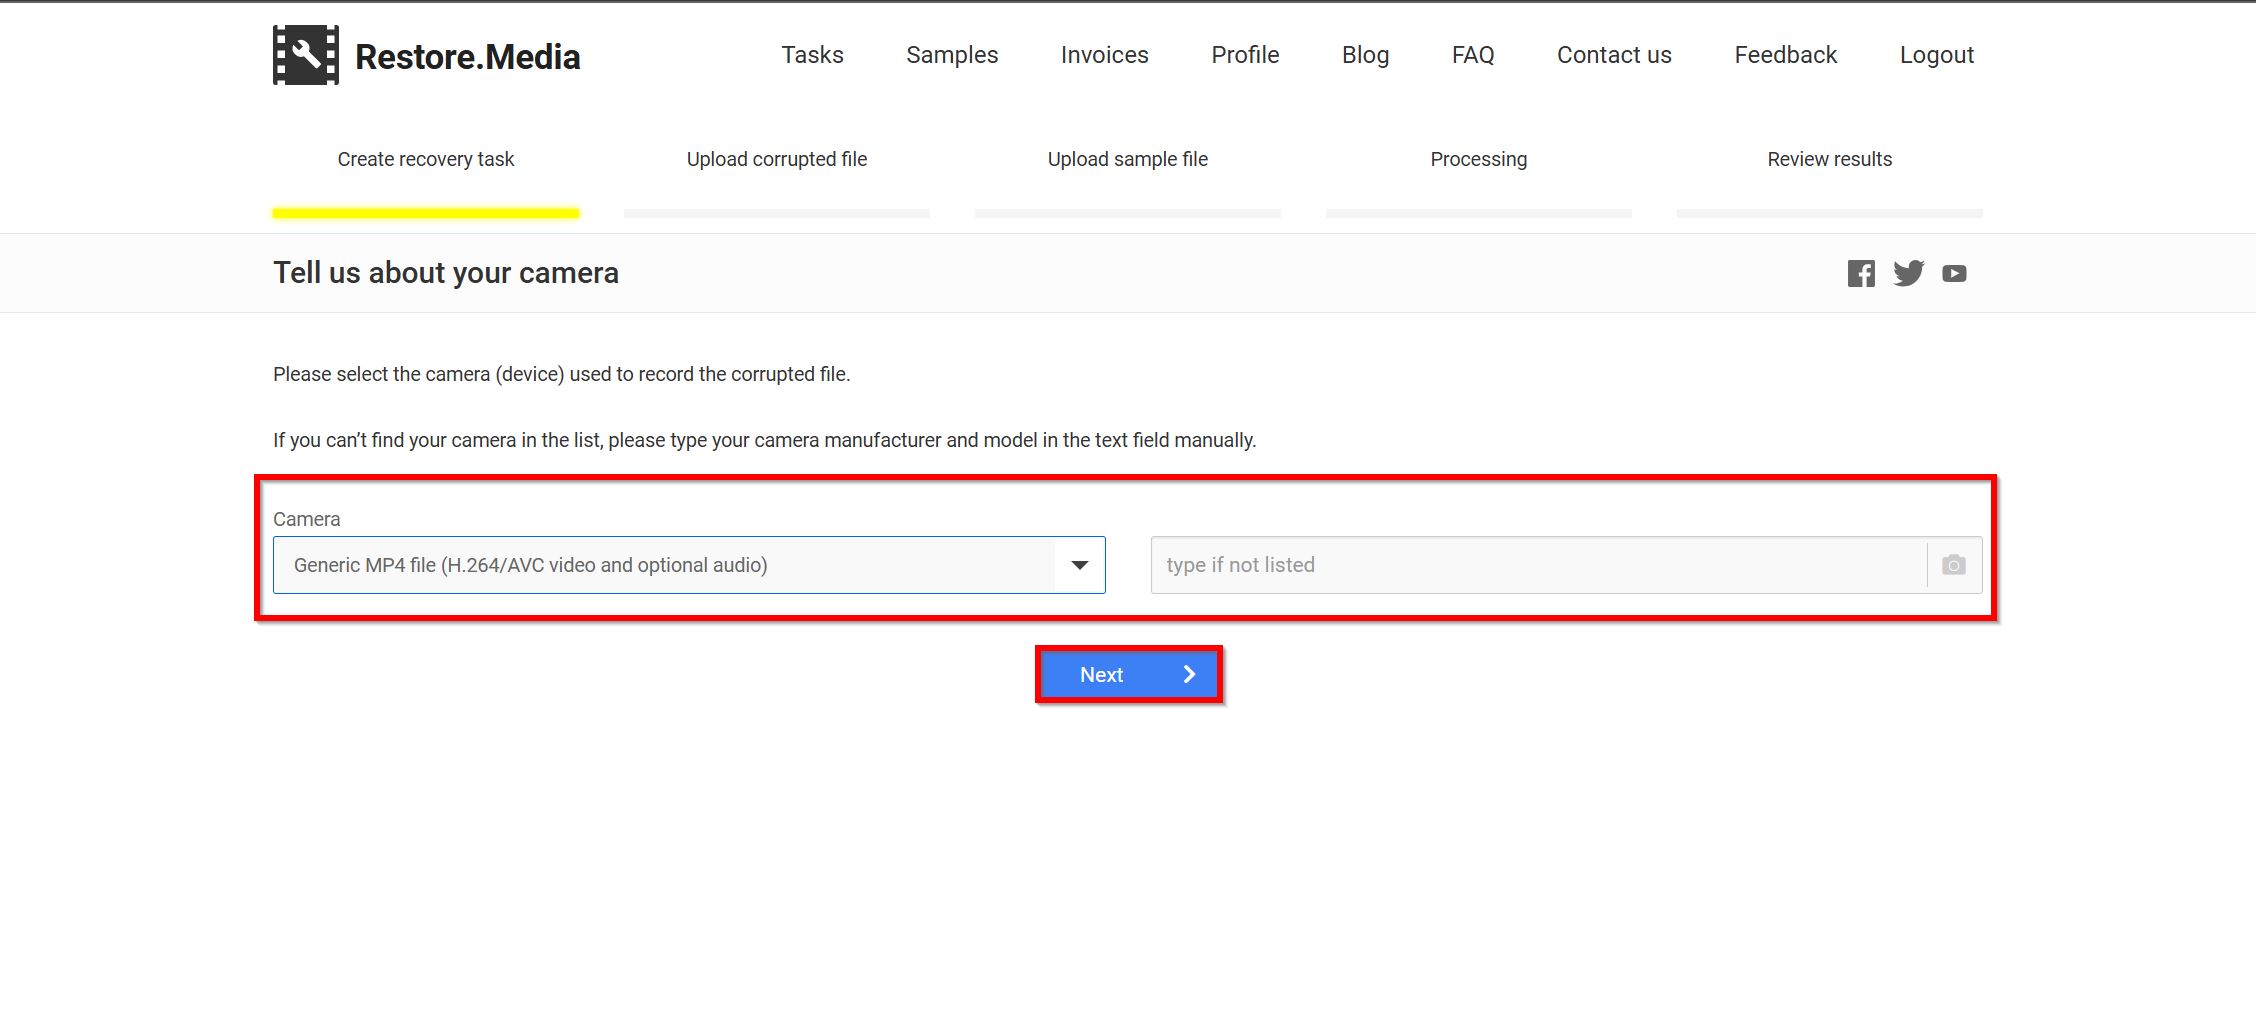
- Choose the camera used to record the MP4 video from the drop-down menu. If you don’t see it, just type the camera’s name in the adjacent text field. If you don’t know which camera was used to record the video, select Generic MP4 file (H.264/AVC video and optional audio) from the drop-down menu. Click Next.
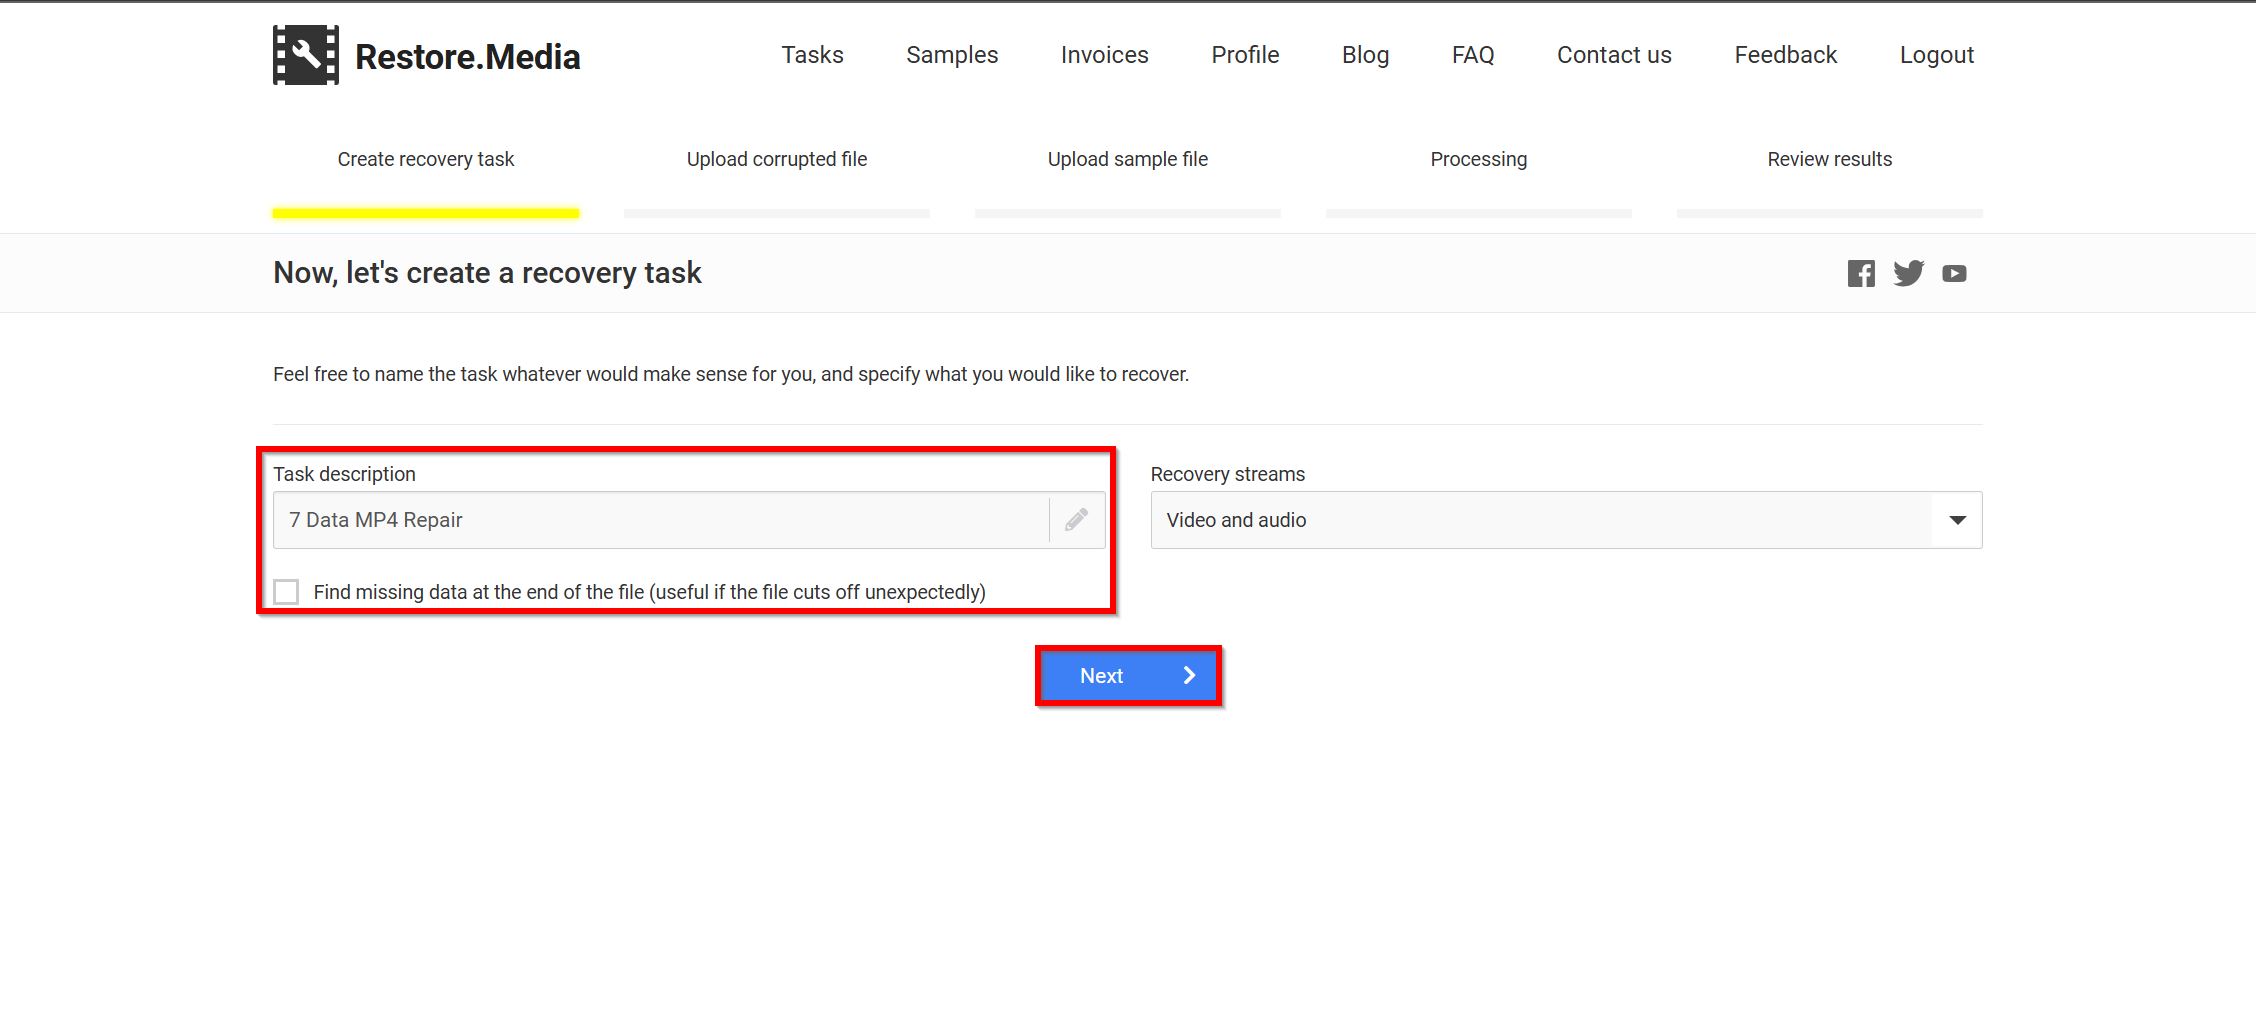
- Give the video repair task a name, and click Next.
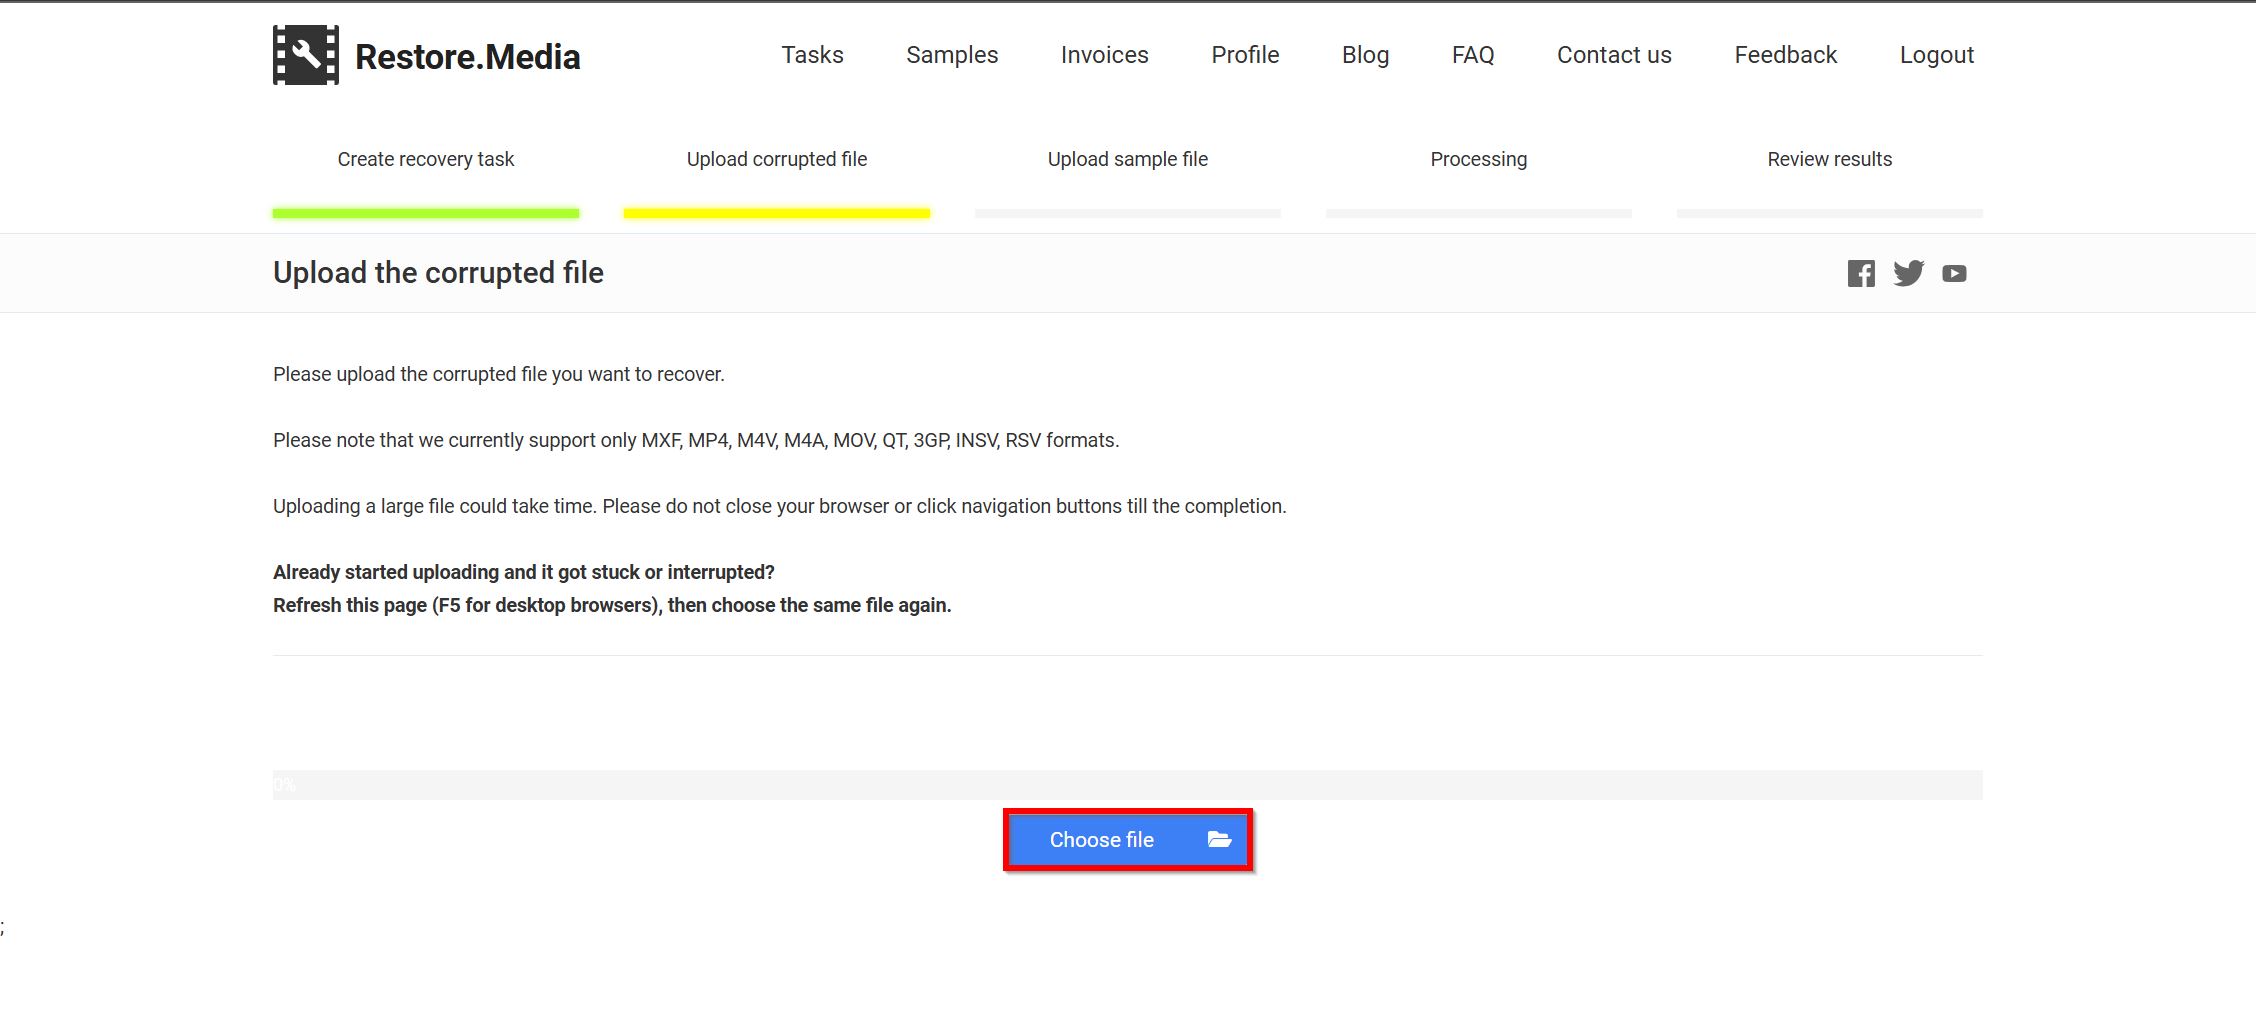
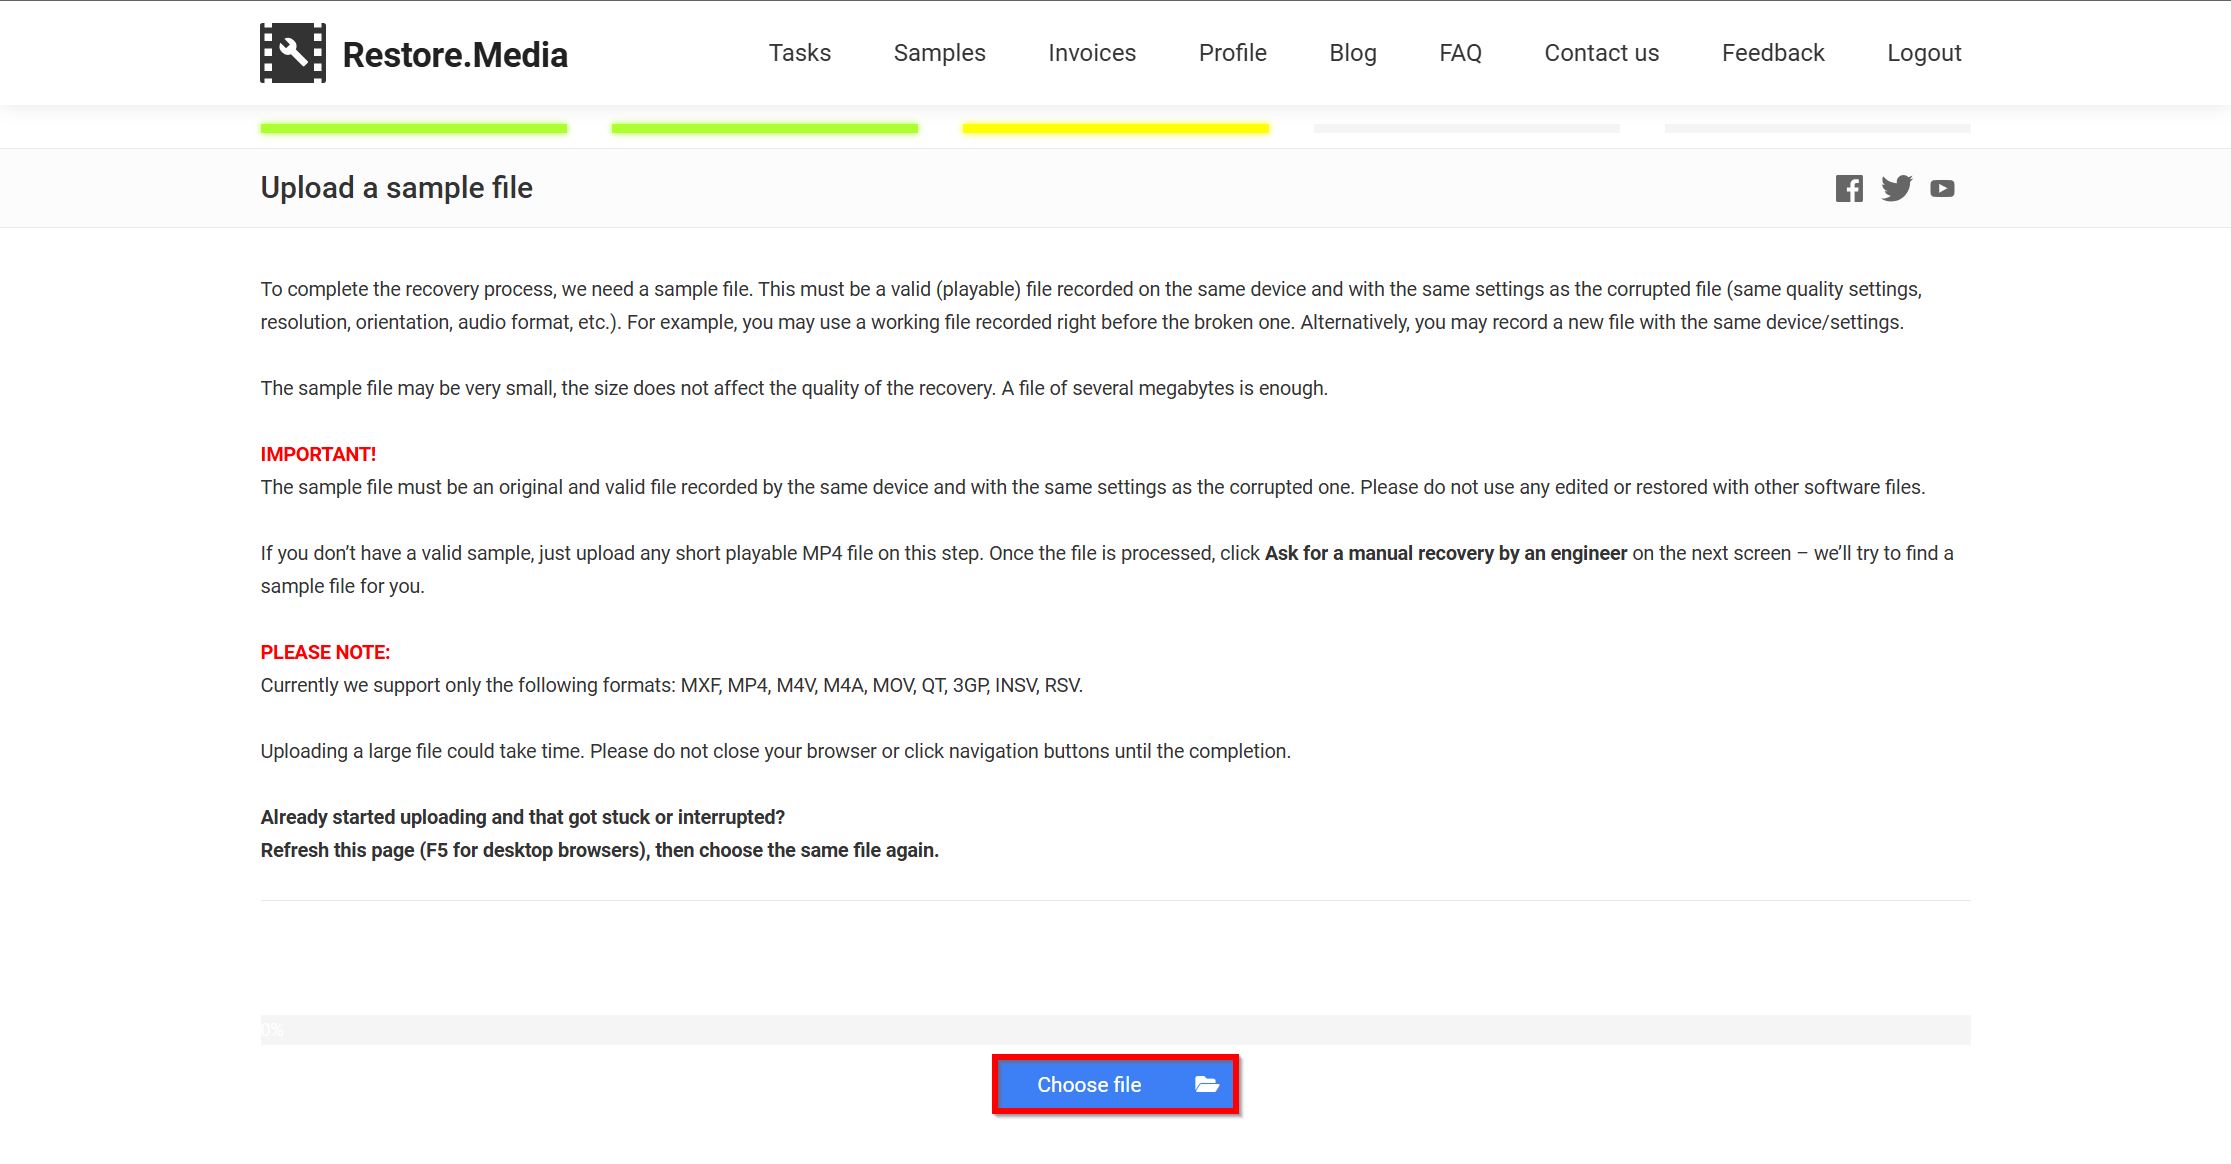
- Click on Choose file, browse to the corrupt MP4 video, and double-click it.
- Click on Choose file in the next screen, find a healthy video from the same device used to record the corrupt one, and double-click it.
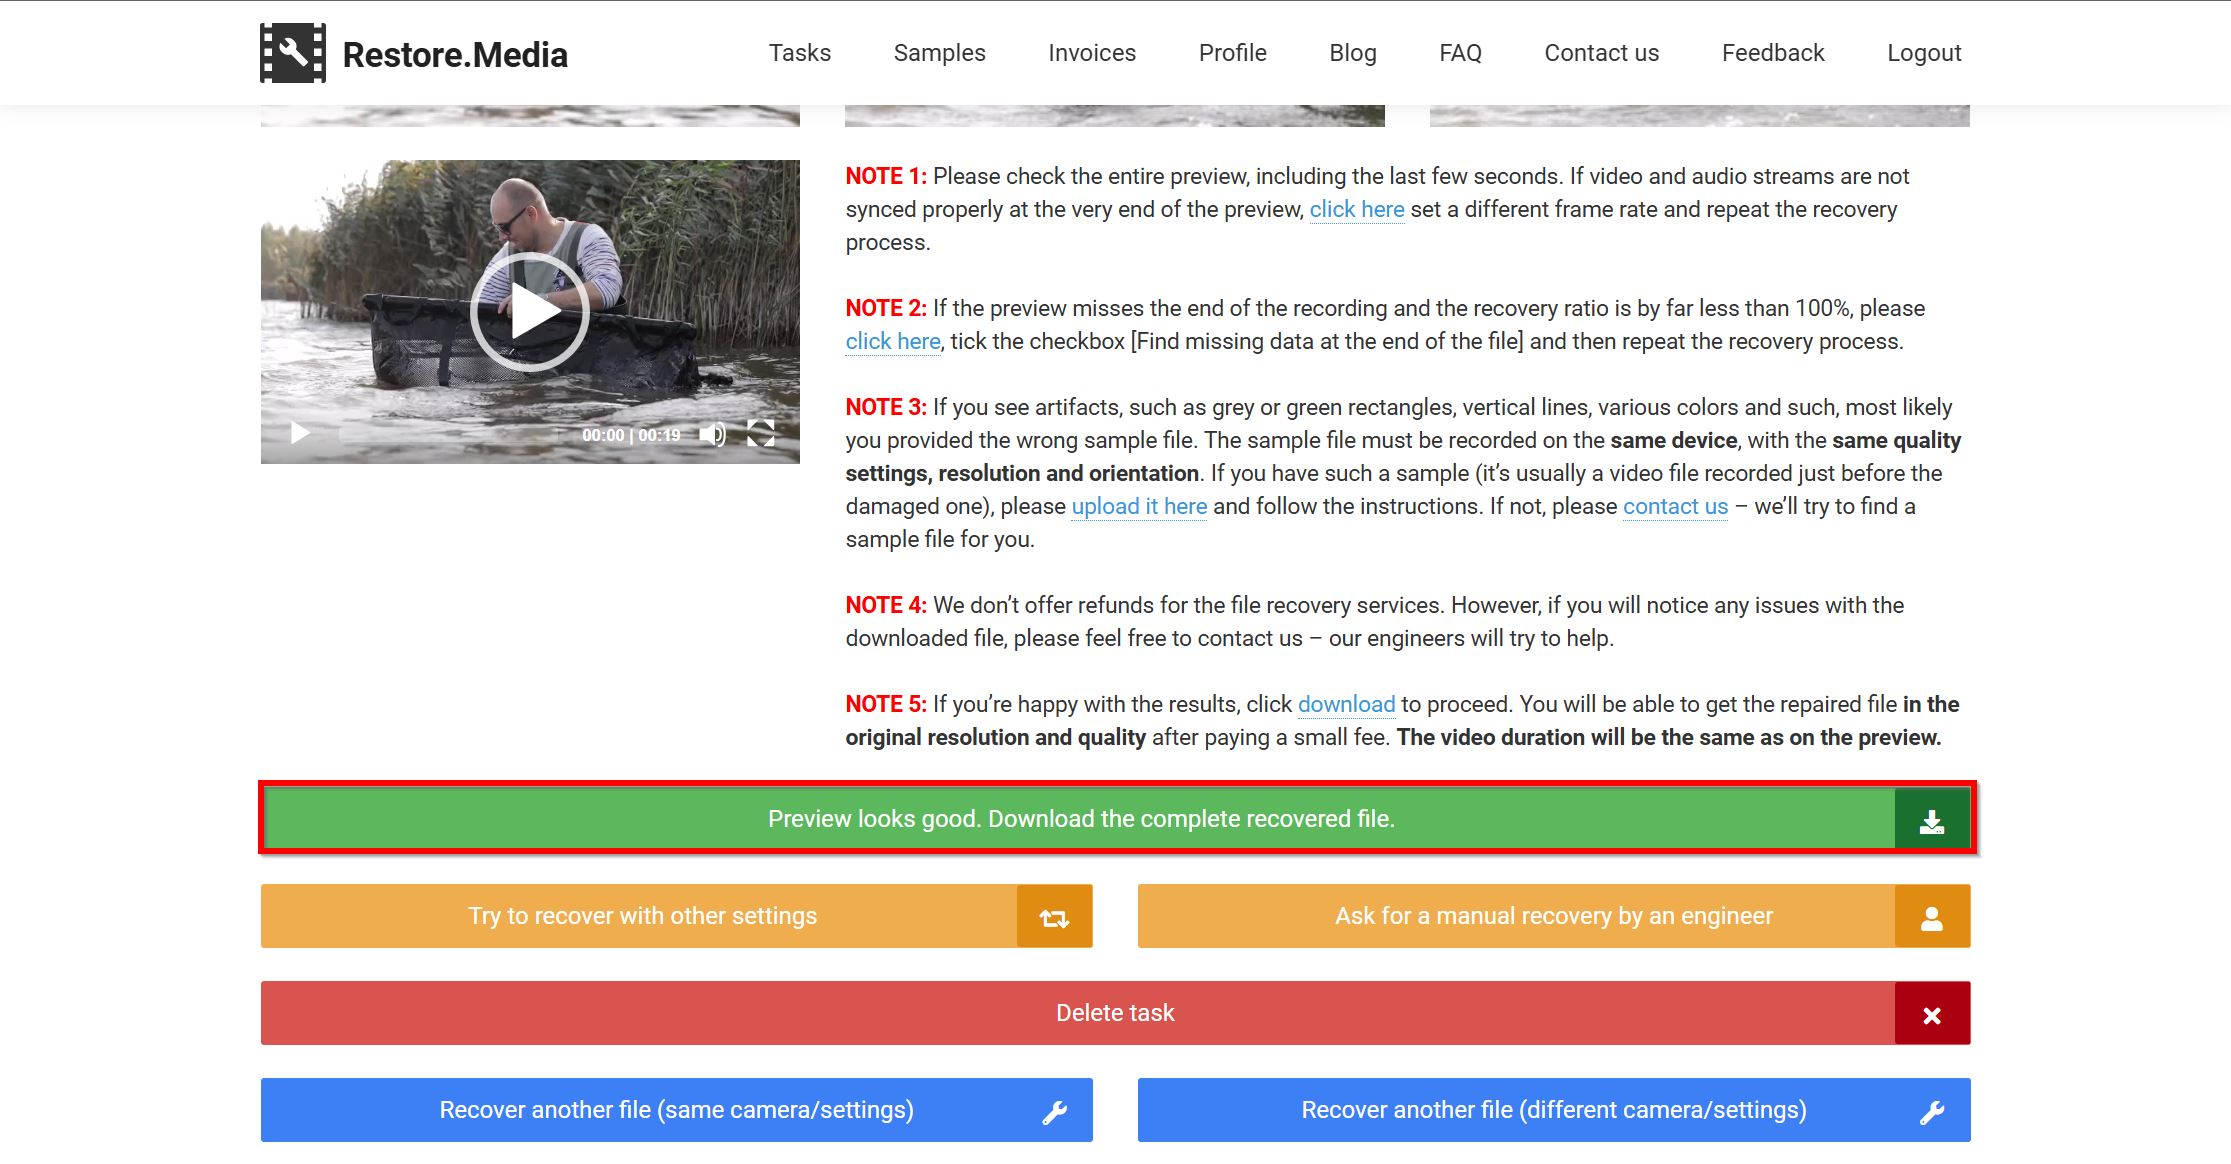
- Restore.Media will repair the corrupted video. You can see a low-quality preview of the videos, as well as full-resolution screenshots for free. Click Download, pay the fee, and your repaired MP4 video will start downloading.
Conclusion
Corrupt MP4 videos can typically be repaired using video repair tools. Depending on your needs, you could choose web-based tools like Clever Online Video Repair (Free), and Restore.Media (Paid), or local tools like Untrunc GUI (Free). In some cases, simply re-encoding the MP4 video using VLC Media Player, or HandBrake may be enough. However, severe corruption can be impossible to undo, that’s why it’s best to create regular backups of your videos.
