 Perhaps you’ve made some changes to a file that weren’t supposed to be made. If you have the file open, sometimes you can undo what you’ve done until you reach a point where the file is back to its original state. But, if you closed it already, there’s no way to do that.
Instead, you must restore the file to a previous version. This can be tricky sometimes, but it’s definitely possible. This article will cover what you need to know about restoring previous versions of files and folders.
Methods to Restore Previous Versions of a File or Folder
There are multiple avenues you can explore to revert a file to a previous version. Try each method below until you successfully revert your file or folder.
Method 1:Restore Using File History
File History is a backup utility included with Windows that’s great for restoring old files. When enabled, it takes regular snapshots of specified files and folders, allowing you to not only restore them if they’re deleted but also restore a specific version of said file or folder.
This option is not available for you unless File History was enabled for the file or folder when it was in a state that you want to restore.
File History is available on Windows 10 and Windows 11. Below we’ll cover how to restore a file to a previous version on both versions of Windows.
Windows 10
- Press Windows Key + E on your keyboard and navigate to the location of the file or file you want to restore.
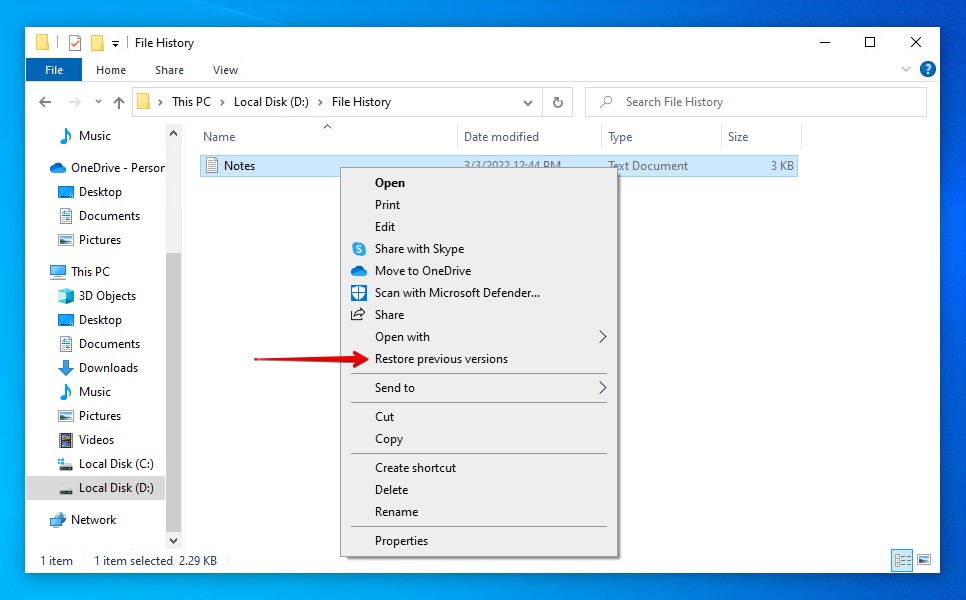
- Right-click the file or folder, then click Restore to a previous version.
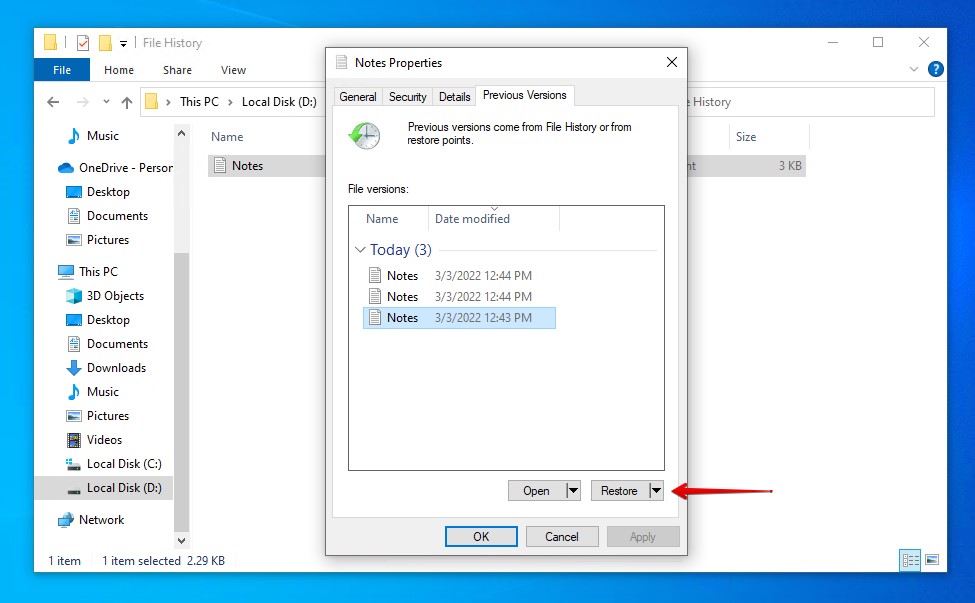
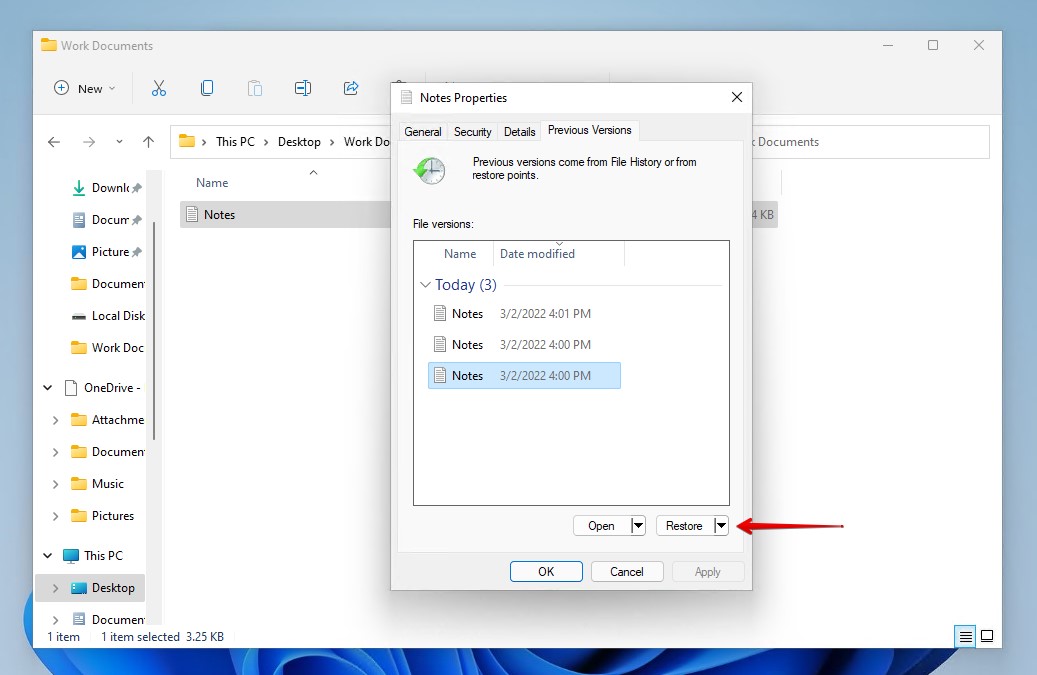
- Select the version you want to restore, then click Restore. If you want to restore it to a different location, click the dropdown arrow instead and click Restore to.
Windows 11
- Press Windows Key + E on your keyboard and navigate to the location of the file or file you want to restore.
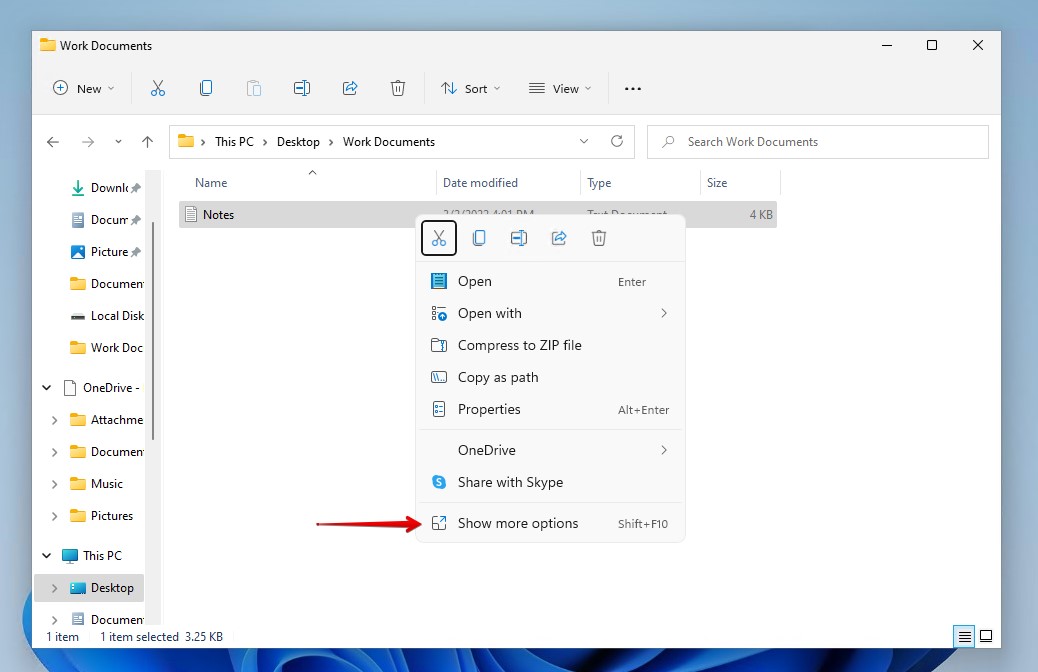
- Right-click the file or folder, then click Show more options.
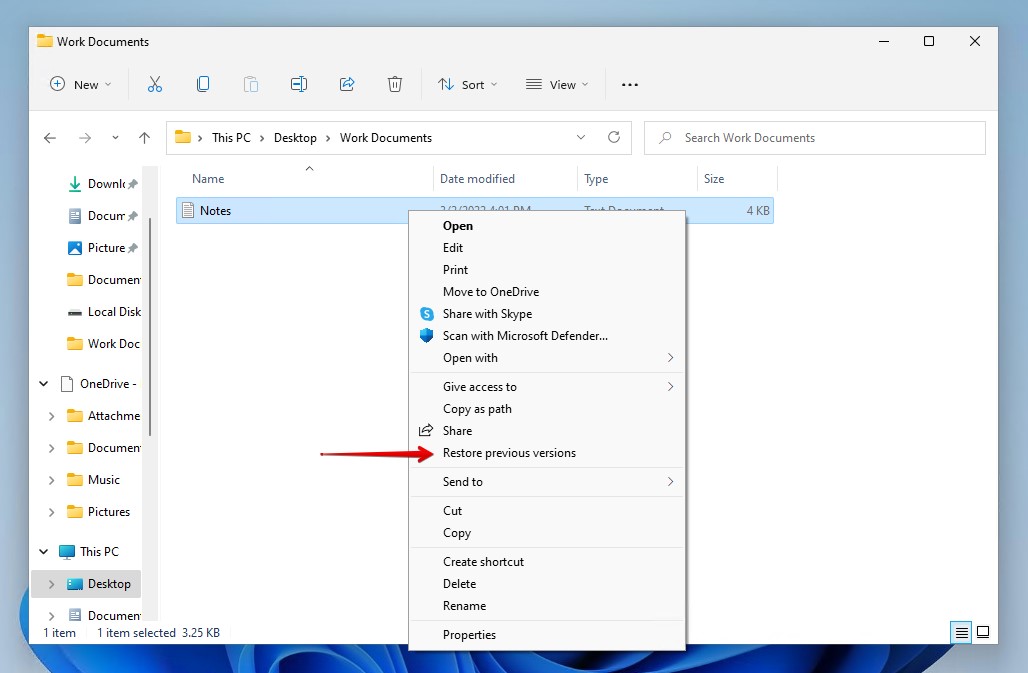
- Click Restore previous versions.
- Select the version you want to restore, then click Restore. Again, like Windows 10, you can click the dropdown arrow instead and click Restore to if you want to restore the file to a new location.
Method 2:Restore Using Data Recovery Software
You can restore an old file using data recovery software if it was located in a folder but has since been lost or deleted. Data recovery tools like Disk Drill use advanced algorithms that scan your drive for traces of data and present them to you with an indication of their recoverability (which decreases with time and hard drive use).
Follow these instructions to recover data using Disk Drill.
- Download and install Disk Drill to a separate partition to avoid overwriting your data.
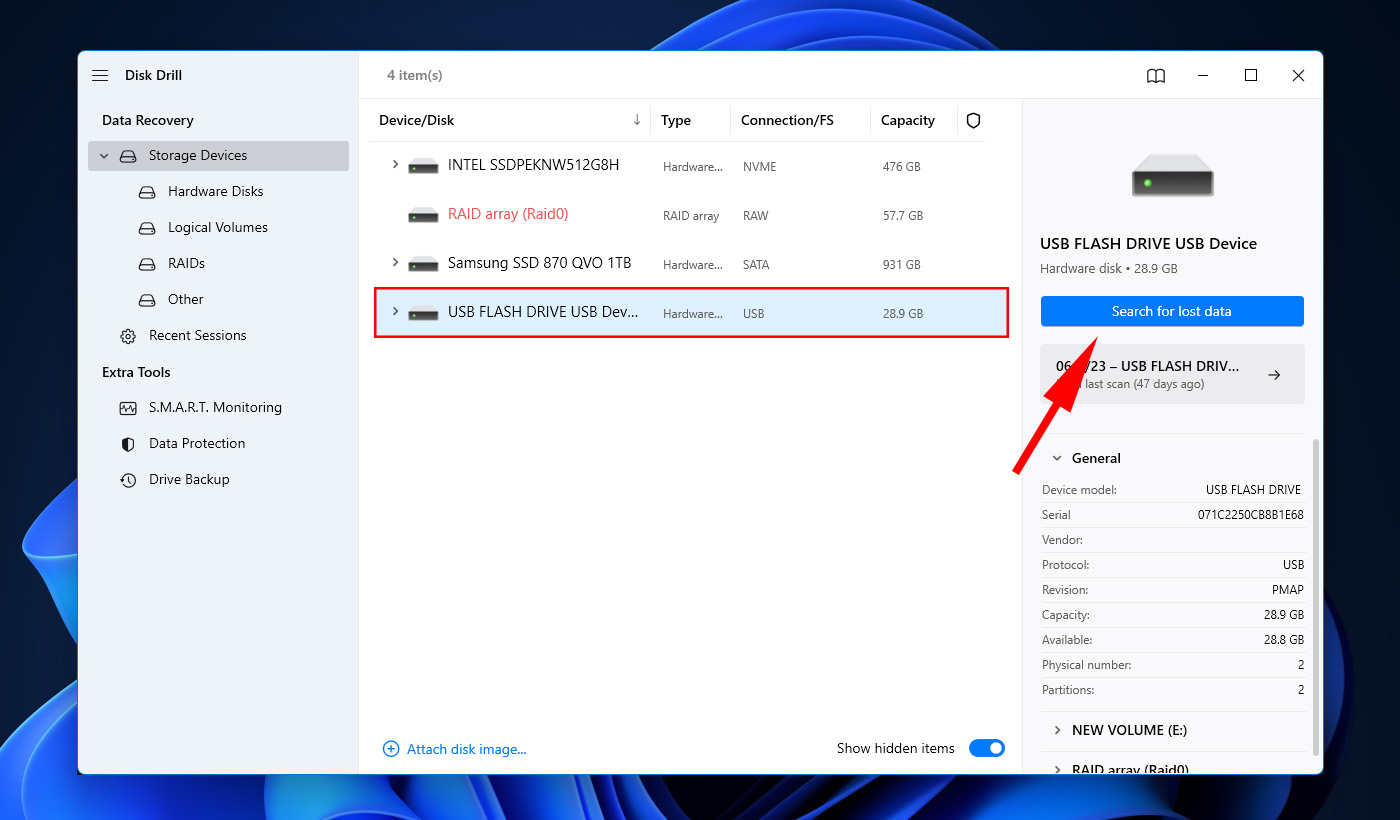
- Select the drive that contains the lost files or folder, then click Search for lost data.
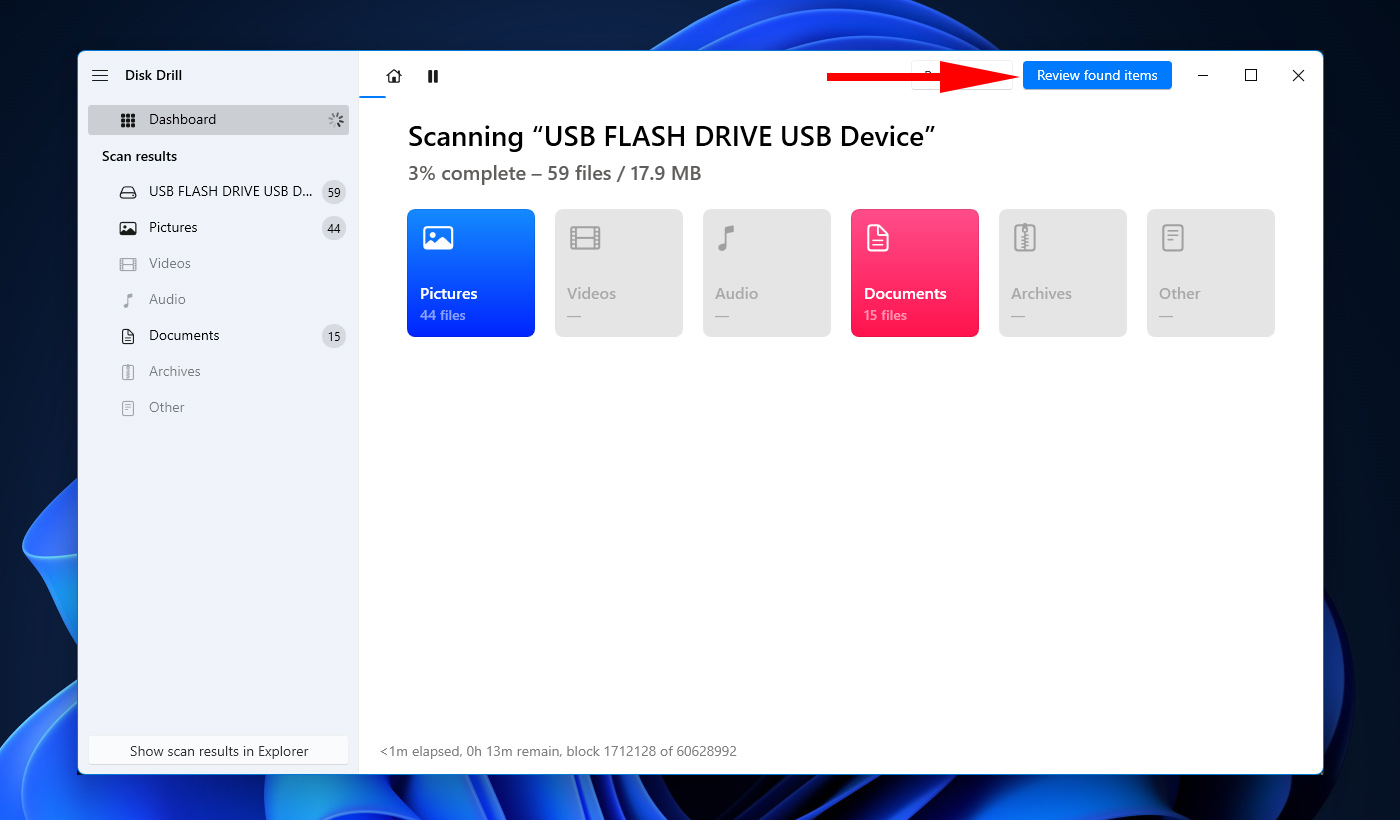
- Click Review found items when the scan is finished.
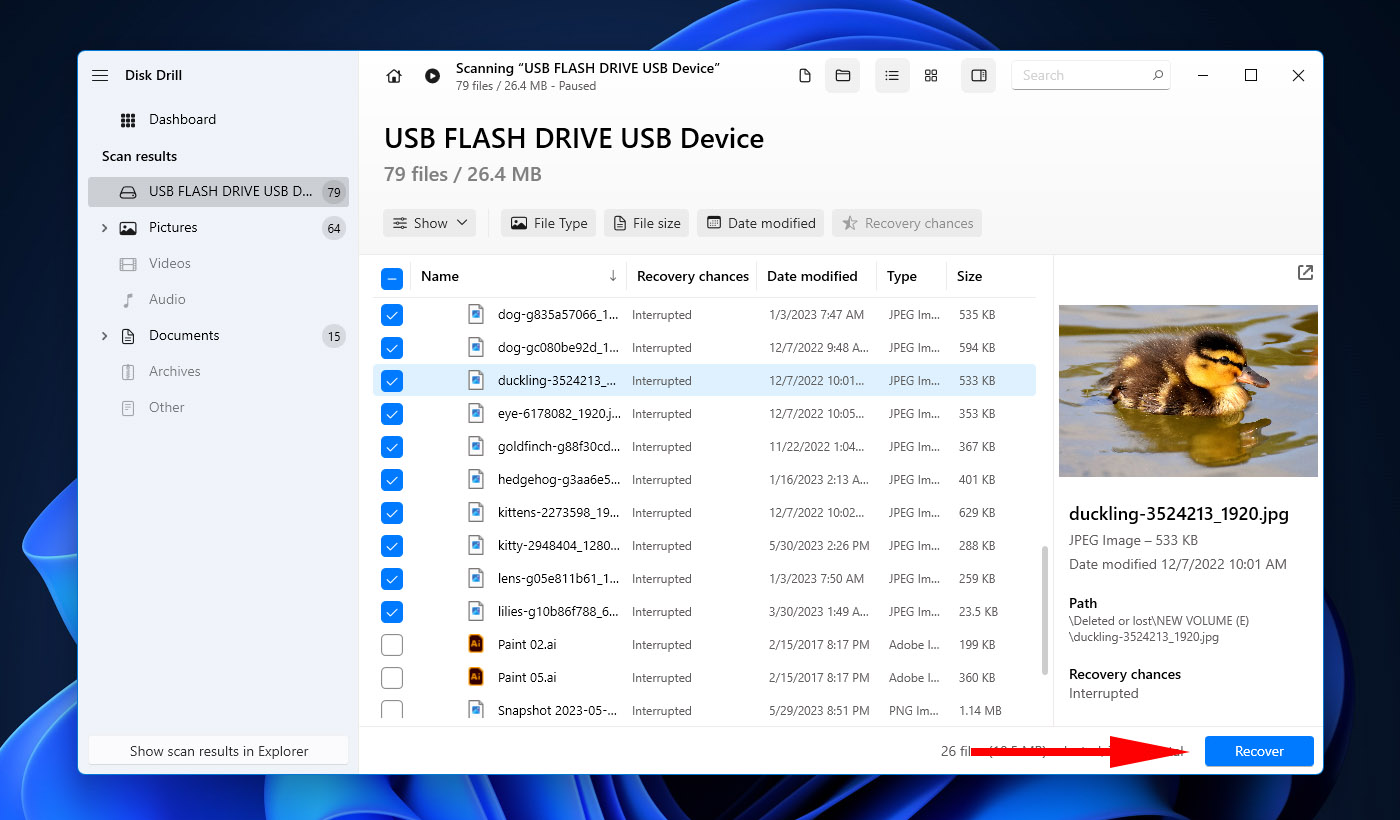
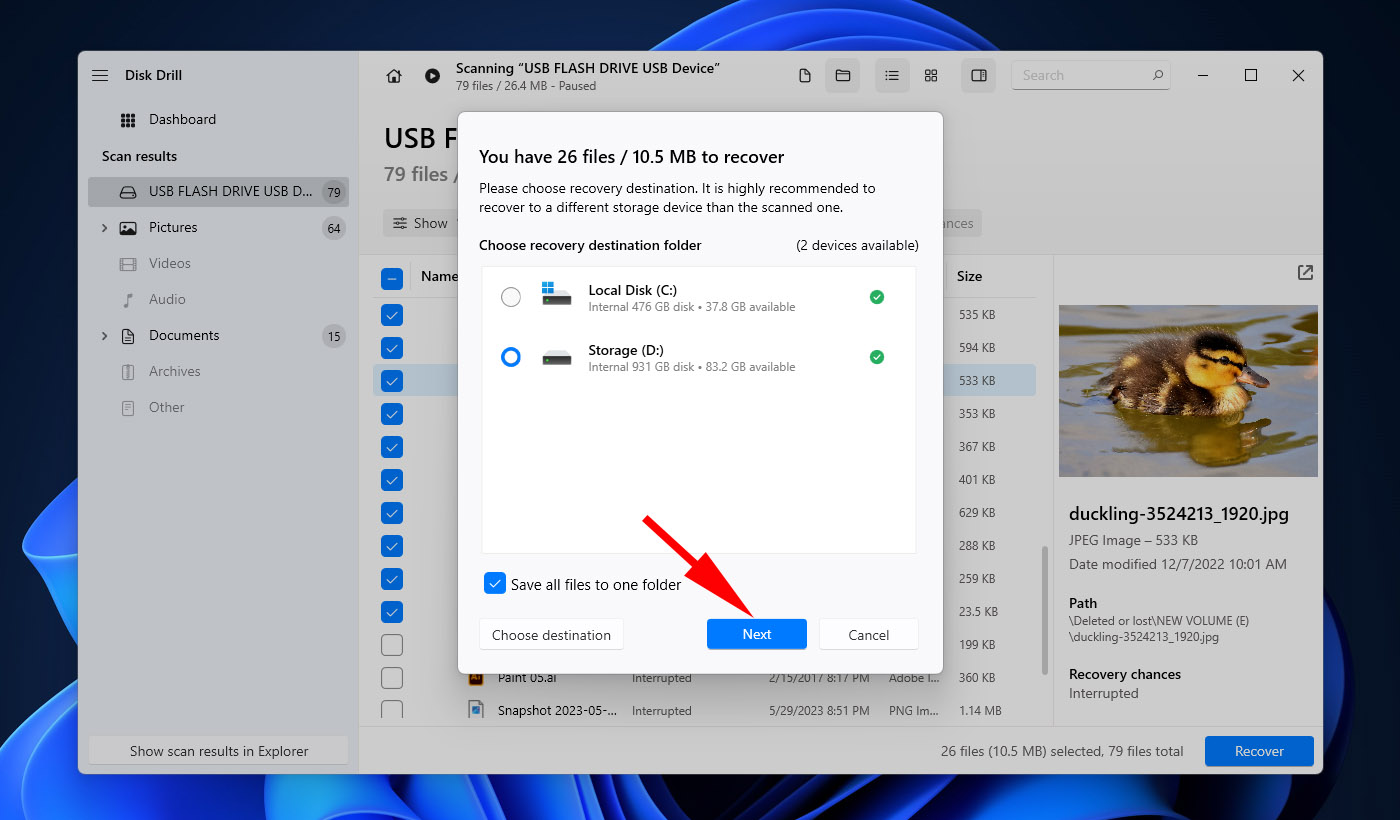
- Select the files and folders you want to restore. Each list item will include a recoverability indicator that shows your chances of successfully recovering each file. Click Recover when ready.
- Select an output location on a separate partition, then click OK.
Method 3:Restore From a Cloud Backup
Cloud solutions, like OneDrive, may contain a record of the changes you’ve made to your files. If they’re backed up, OneDrive automatically takes snapshots of your files when they’re saved, allowing you to revert to a previous version.
From March 1, 2022, Windows 7, 8, and 8.1 devices will no longer receive updates for their OneDrive versions and personal files will no longer be synced. Instead, users must upload files directly to OneDrive using a browser. Therefore, we recommend upgrading to Windows 10 or 11 to receive full support, as well as access to Personal Vault.
The below steps will cover restoring previous versions of a OneDrive-synced file or folder.
- Press Windows Key + E on your keyboard and navigate to the location of the file or file you want to restore in OneDrive.
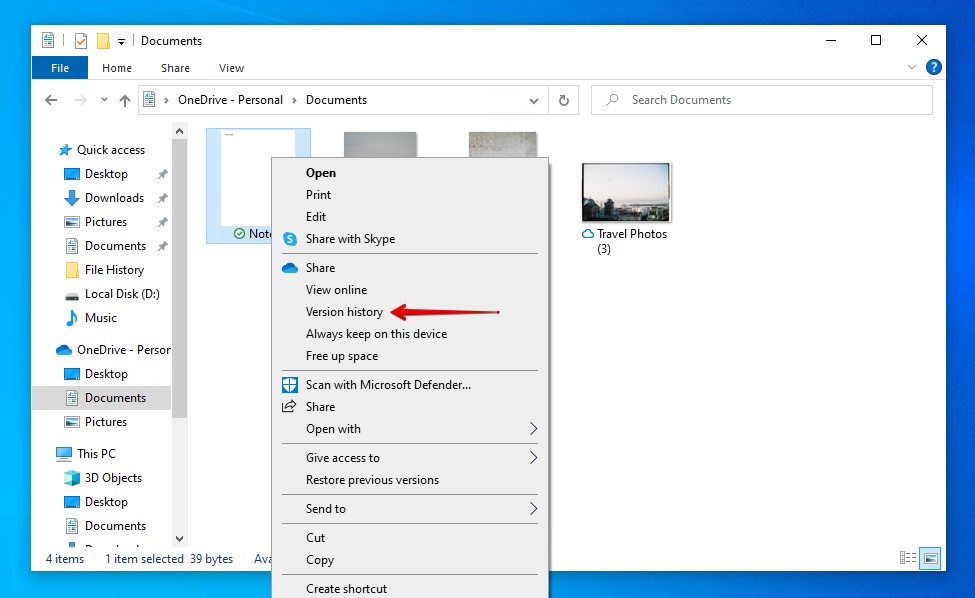
- Right-click the file or folder, then click Version history.
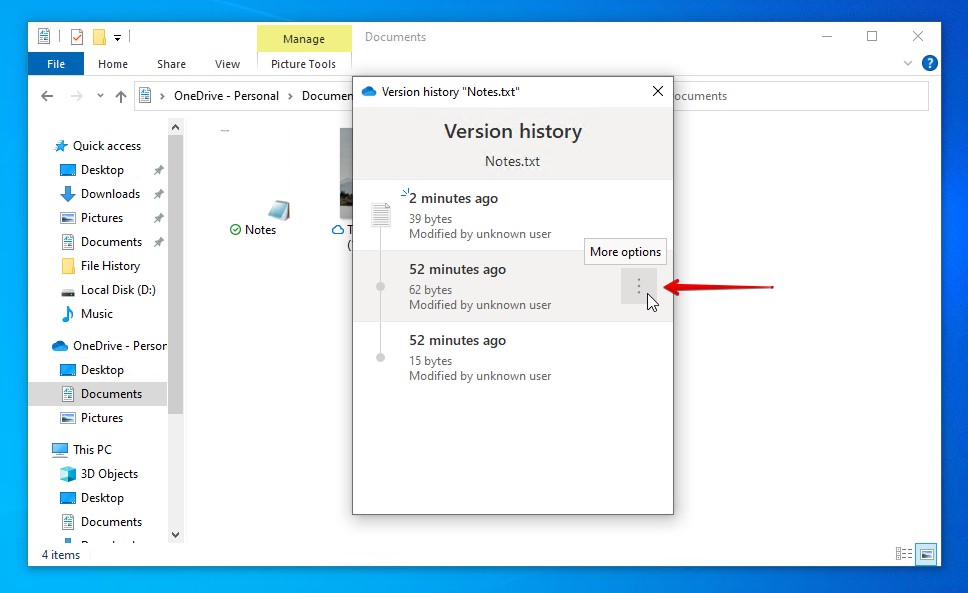
- Hover over the version you want to restore, then click the three More options dots.
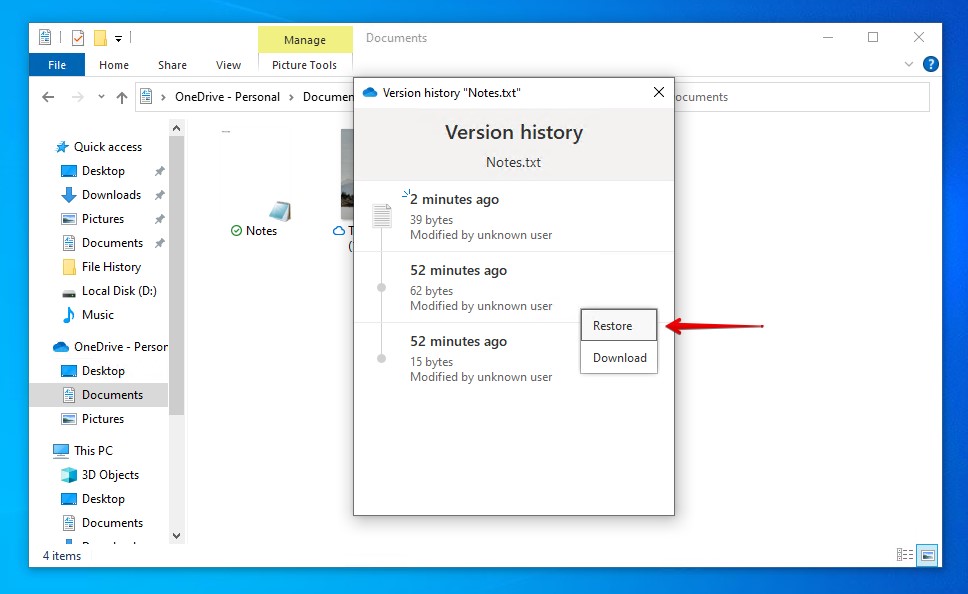
- Click Restore.
Method 4:Restore From the Temp Folder
Every Windows installation comes with a temp folder by default. This folder is used by Windows, as well as installed applications, to store temporary files that are necessary for them to function properly. Microsoft 365 also includes a temp folder for unsaved files, allowing for easier recovery of Excel files and other 365 products
If you were using a program when it suddenly crashed and you’re trying to restore the unsaved copy of the file, there’s a chance that it can be found here. Once the temporary file is found, it can be opened with the application you were using it with.
Follow these steps to restore the previous version of a file from the temp folder.
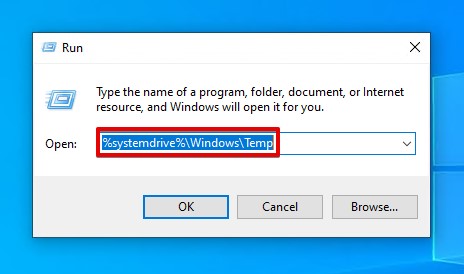
- Press Windows Key + R and type %systemdrive%\Windows\Temp. Press Enter. Repeat this step with %userprofile%\AppData\Local\Temp.
- Search the folders. Once you’ve found your file, right-click it and select Open with.
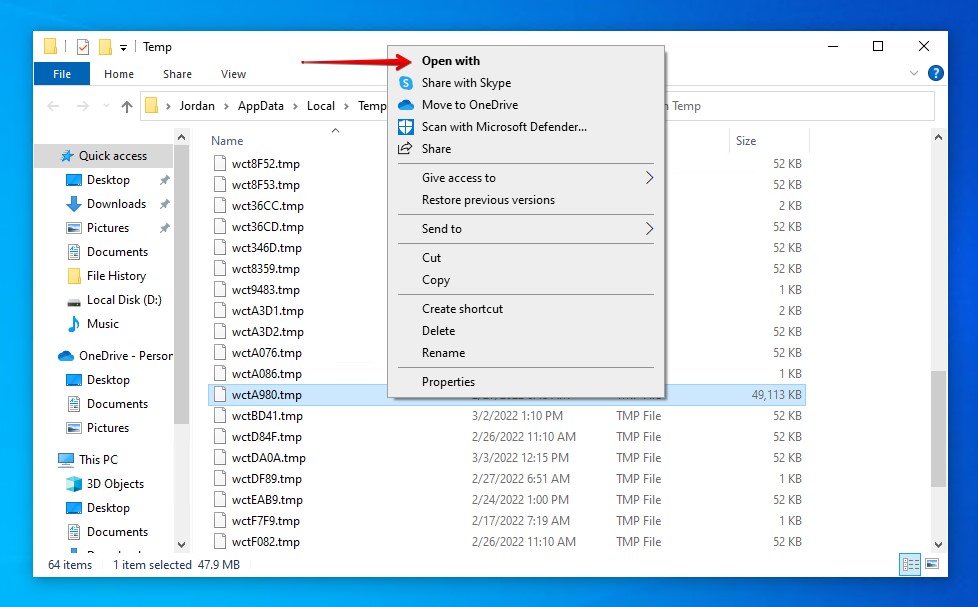
- Select the application you want to open the file with.
FAQ:
- Press Windows Key + I then click Update & Security.
- Click Recovery.
- Click Get started under Go back to the previous version of Windows 10.
- Open the latest version of the Word document.
- At the top of the window, click on the name of your file, then click Version History.
- Select the version you want to restore, then click Open version.


![How to Recover Corrupted Files on Windows [Best Methods] Recover corrupted files on Windows](https://blog.7datarecovery.com/wp-content/uploads/2021/03/recover-corrupted-files-windows-218x150.jpg)