 Accidentally dropped your external hard drive and now it’s not working? That can turn into a serious problem fast. Mechanical hard drives are fragile, and even a short fall can mess up the delicate parts inside. In some cases, the damage is permanent, but there are times when you can still bring it back or at least recover your data.
Today, we want to explain what likely happened after the drop, what you can safely try at home, and how to repair an external hard drive after it was dropped. Step by step.
What Happens When an External Hard Drive Is Dropped
Your external hard drive contains numerous moving parts and is more delicate than you think. No matter how short the fall is and how soft the surface where it fell, a dropped external hard drive will suffer physical damage in one form or another. Of course, the severity of the fall will affect the extent of the damage. An important factor that determines the type of physical damage caused to your drive, is whether it was connected to your PC or not.
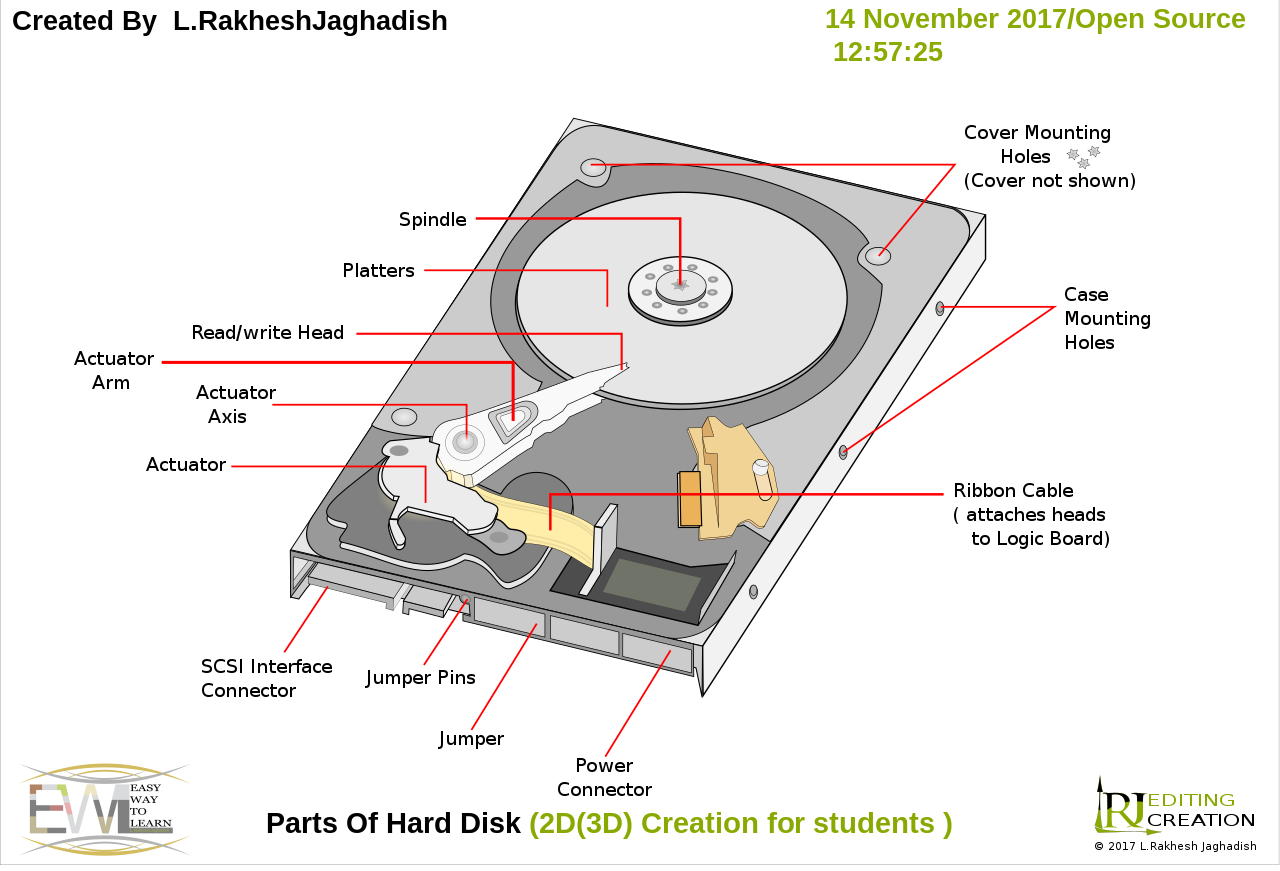
Take a look at the image above. The read/write head of the drive hovers nanometers above the platter (which stores all your data). When dropped, the read/write magnetic head can touch the platter, causing irreversible data loss to your drive. However, this occurs if the drive was in use and connected to your computer at the time of the fall. If your drive isn’t in use, the read/write head is parked away from the platter, resulting in lesser damage to the platter, and your data. In the case of older hard drives, the parking or landing zone is located at the inner edge of the platter. Therefore, a strong enough impact may damage the platter, even if it’s not in use. While the read/write heads are the most common points of failure in a dropped external hard drive, severe falls can result in a bent platter or the spindle motor seizing. If your drive is connected, a fall may also damage its cable and connector port.
Here’s what can happen after a dropped external hard drive hits the ground: things you might hear, see, or notice:
| Symptom | Description |
| 🔊 Clicking sounds | A consistent and loud clicking sound is caused by damage to the actuator, actuator arm, or the actuator axis. The actuator is responsible for moving the magnetic read/write heads to the correct position. When it’s unable to do so, or the read/write heads are having trouble reading your data, a clicking sound will be heard from your external HDD. |
| 🎙️ Whirring sounds | A whirring sound indicates a spindle or a read/write head crash. The magnetic head could be dragging across the disk platter. Power off your external HDD as soon as you hear a whirring noise from it. |
| 🚨 Beeping noise | An electronic beep sound from your external HDD is usually caused by a malfunctioning or damaged spindle motor hub. The spindle may not be receiving enough power to spin the platters, or the spindle itself has failed completely. In either case, it’s best to disconnect your drive as soon as you hear a beeping sound. |
| 💽 Drive not recognized | Windows may not recognize or detect your drive after it has been dropped. There may not be any sound from your external HDD, and that’s because it’s not booting up at all. |
| 💻 Drive may work as usual | In some cases, the damage may only become apparent later. The drive may work like it normally would. Rarely, you could be lucky and there is no physical damage caused to the drive. If it works – back it up now. |
| 🐌 Performance issues | Your drive could be recognized by Windows, but perform slower than usual, frequently hang, or you could have trouble accessing all your files. |
| 📈 Bad sectors | If the magnetic read/write head comes in contact with your HDD’s platter, it will result in data loss and bad sectors on your drive. Some files may disappear and reappear randomly, and the drive may seem sluggish. |
How to Fix an External Hard Drive After a Drop
We’ll be honest with you: we do not recommend you try to physically repair a dropped external hard drive yourself.
Yes, we’ve seen the same posts you probably have. Someone on Reddit saying “put it in the freezer for a few hours” or that they opened it up and cleaned the platters.
But here’s the reality: none of that is safe if you care about your data.
- Freezing the drive might’ve worked on ancient hardware from the early 2000s, but modern drives are tighter and more delicate. When you freeze them, moisture builds up. That leads to condensation, and that can permanently destroy the platters or electronics the moment you plug it back in.
- Head swaps and platters? Forget it. The tiniest dust particle or bump during disassembly can ruin everything. Professional data recovery services can handle that. They can fix a clicking hard drive and pull data from it. But recovery costs a lot and takes time. Some charge $500 or more. And if you’re in a remote area, you might not find a reliable lab nearby at all.
So, how to repair an external hard drive after it was dropped? Realistically, you don’t repair it. You recover data from it. That’s the goal. And if you’re lucky, there are a few smart things you can try at home without opening it up or making things worse. That’s where we’re headed next.
But first, let’s look at what you can actually do, safely.
Step 1: Examine the drive
If you dropped your external hard drive and now your computer won’t recognize it, sometimes it’s something basic, like a bent USB plug or a cable that got yanked loose.
- Unplug the drive. Look at the cable first. Try another one if you have a spare. Then check the port on the drive itself. Does it look tilted or damaged? If it was plugged in when it fell, that connector might be the only thing broken.
- Now the casing. Check for any dents or cracks. Doesn’t have to be visible damage. Even if it looks fine on the outside, the impact may have shifted parts inside the enclosure.
Step 2: Check Disk Management
When the drive is connected, the best way to check if your computer still detects it at all is with Disk Management. Even if it doesn’t show up in File Explorer, it might still be listed there.
To get there, right-click the Start button and choose Disk Management from the menu. It might take a few seconds to load.
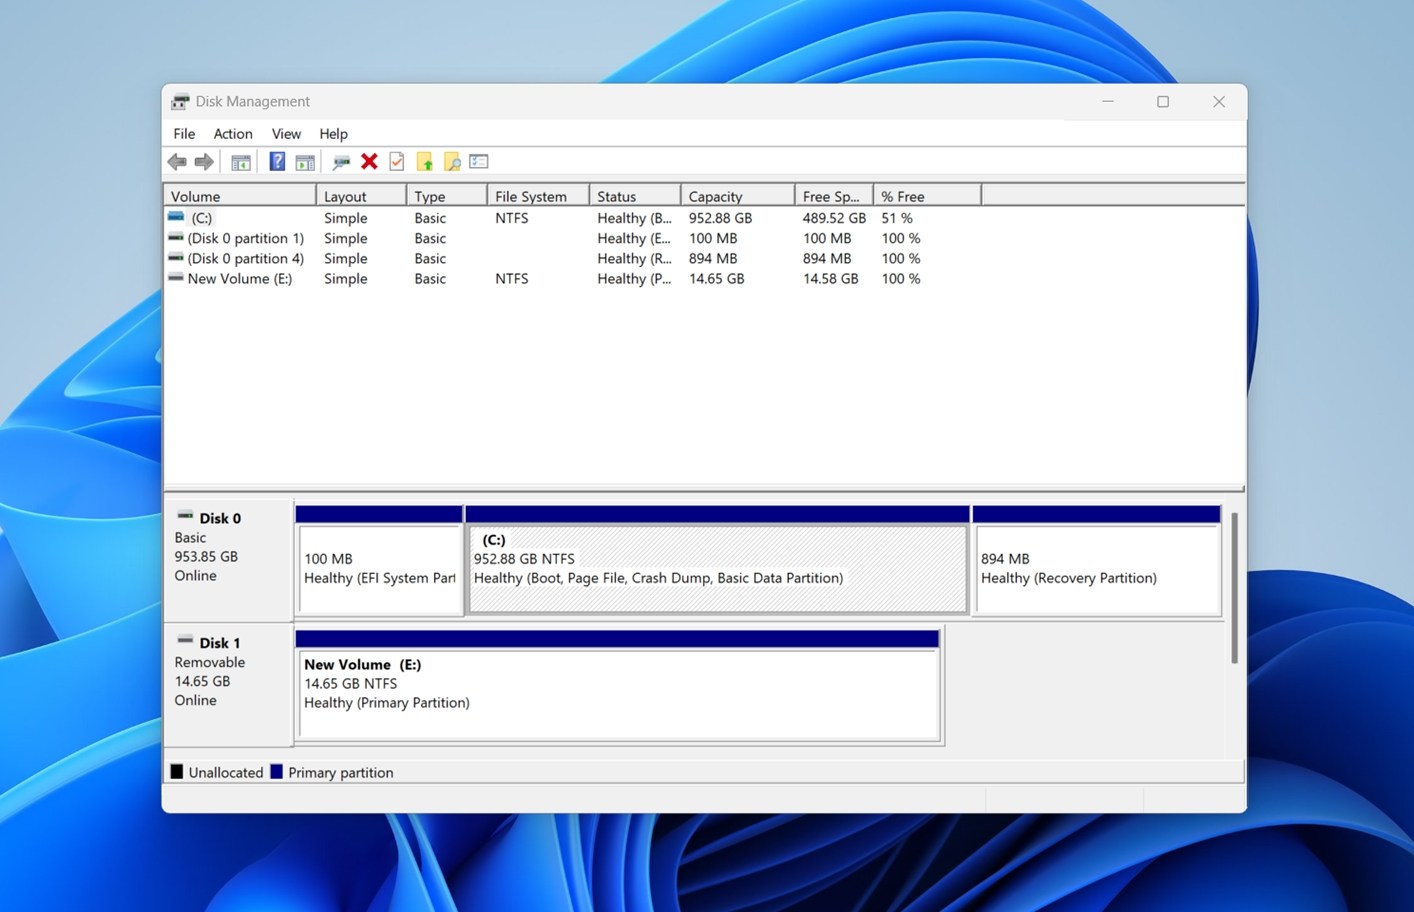
Look for something labeled like “Disk 1” or “Disk 2” that matches the size of your external drive. That size detail matters – if it shows the correct capacity (like 1TB or 2TB), that usually means the system sees the hardware correctly. And if that’s the case, you can often recover your data using software without doing anything risky.
If the drive doesn’t appear at all (or it shows some tiny, unrealistic size), your DIY options are pretty much over. That likely means internal damage, not something software can fix. If the data is important, you’ll need to look into professional recovery.
You might also see the drive listed as RAW, Unallocated, or Not Initialized. Don’t click any prompts to initialize or format it. That can erase what’s left on it. If the drive shows up in Disk Management at all, that’s a good sign. It means the system can still talk to it at some level, and recovery software might be able to help next.
Step 3: Check the S.M.A.R.T. status
If your drive is visible in Disk Management, you can also check its S.M.A.R.T. status. This can help figure out what’s going on under the hood, without opening anything up.
S.M.A.R.T. stands for Self-Monitoring, Analysis, and Reporting Technology. It’s built into most drives and reports key stats like reallocated sectors, read errors, and hardware failures. You can view this info with a free tool like CrystalDiskInfo.

After you install it, open the app and find your external drive in the list. Look at the Raw Values column for these two codes:
- 05 (Reallocated Sectors Count)
- C5 (Current Pending Sector Count)
If you see three-digit numbers (like 120, 203, or more), that’s bad news. The drive is already failing or close to it. Stop using it right away. Recovery software won’t help if the physical damage gets worse. Shut it down and contact a data recovery lab.
If the values are low two-digit numbers, like 05 or 12, you still have a shot. At this point, your best move is to create a full disk image (a sector-by-sector copy of the drive) and try to recover data from that image instead. It’s safer, and it reduces wear on the original drive.
How to Recover Data from a Dropped Hard Drive
So if your drive passed the earlier checks (shows up in Disk Management with the correct size, makes no weird clicking/whirring sounds, and the S.M.A.R.T. values look reasonable), you can try to recover your data safely.
The best way to start recovery, like we mentioned earlier, is to make a full disk image. This avoids extra stress on the drive and helps preserve whatever state it’s currently in. It also gives you a safety net in case the drive starts failing during recovery.
There are quite a few data recovery apps that offer disk imaging, and we’ve tested and reviewed most of them. For this guide, we’ll show how it works in Disk Drill, since its recent update includes a solid imaging tool called Byte-to-Byte Backup. We found that it works well for dropped external hard drive recovery when the damage isn’t too severe. It handles the drive with a light touch and avoids hammering it with read requests. Disk Drill also includes a few extra tools that come in handy here, like the S.M.A.R.T. monitoring feature. So in one app, you can check drive health, create a disk image, and scan for recoverable files.
We’ll break the recovery into two parts: first, making a disk image, and then actually scanning it for files.
Part 1: Create a Disk Image Using Disk Drill
Here’s how to get data off a dropped external hard drive:
- Download Disk Drill and install it.

- Connect the dropped external hard drive to your PC.
- Open Disk Drill, and click on the Byte-to-byte Backup option under Extra Tools. You can find this option in the left navigation bar.
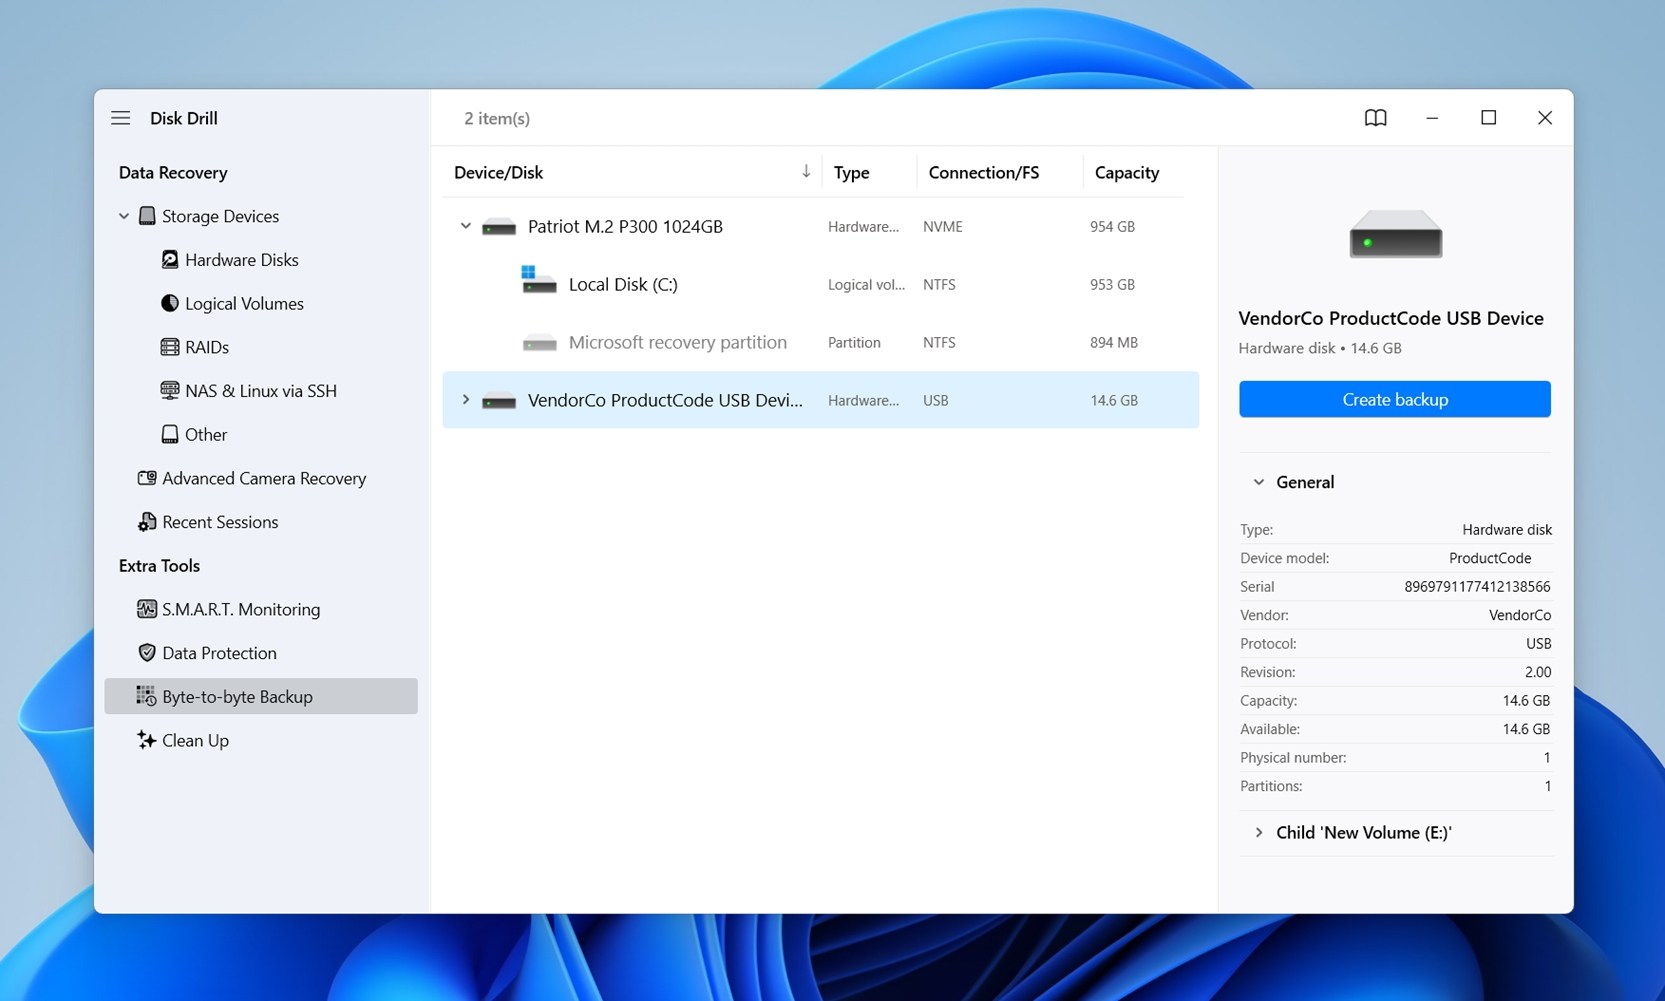
- Select the fallen hard drive from the list, and click on the Create backup button.
- Choose where you want to store the disk image.
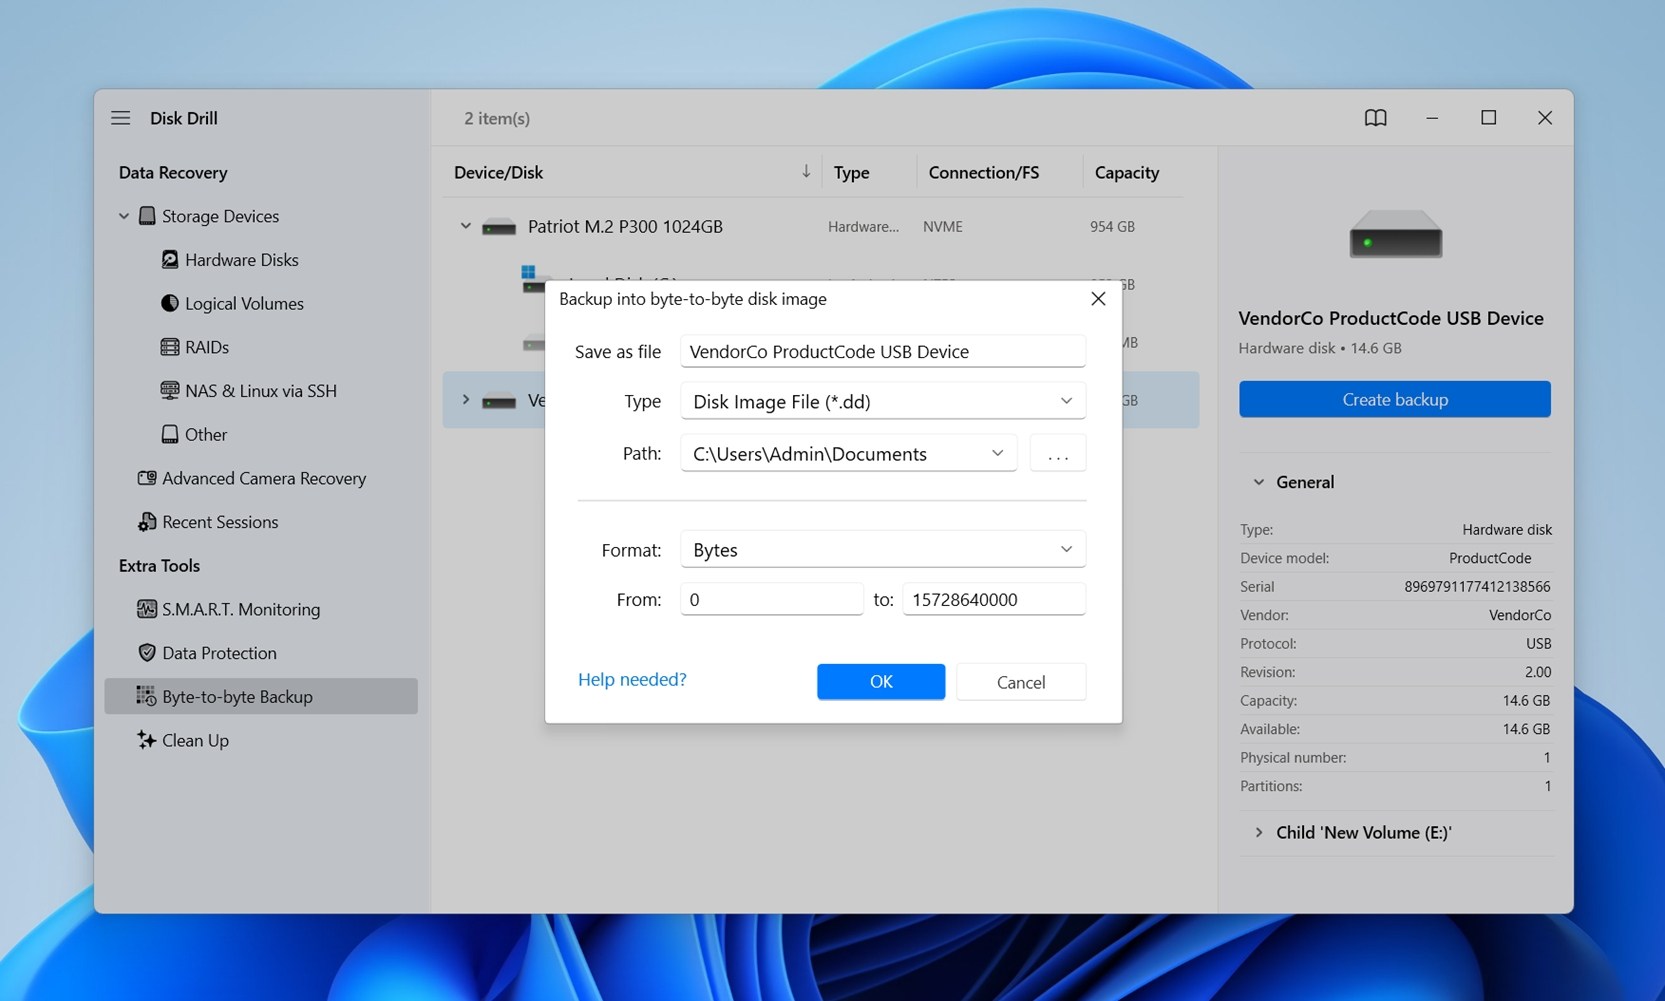 The destination should have enough space equivalent to or more than the total storage volume of the external HDD. Click OK.
 - Wait for Disk Drill to create the disk image.
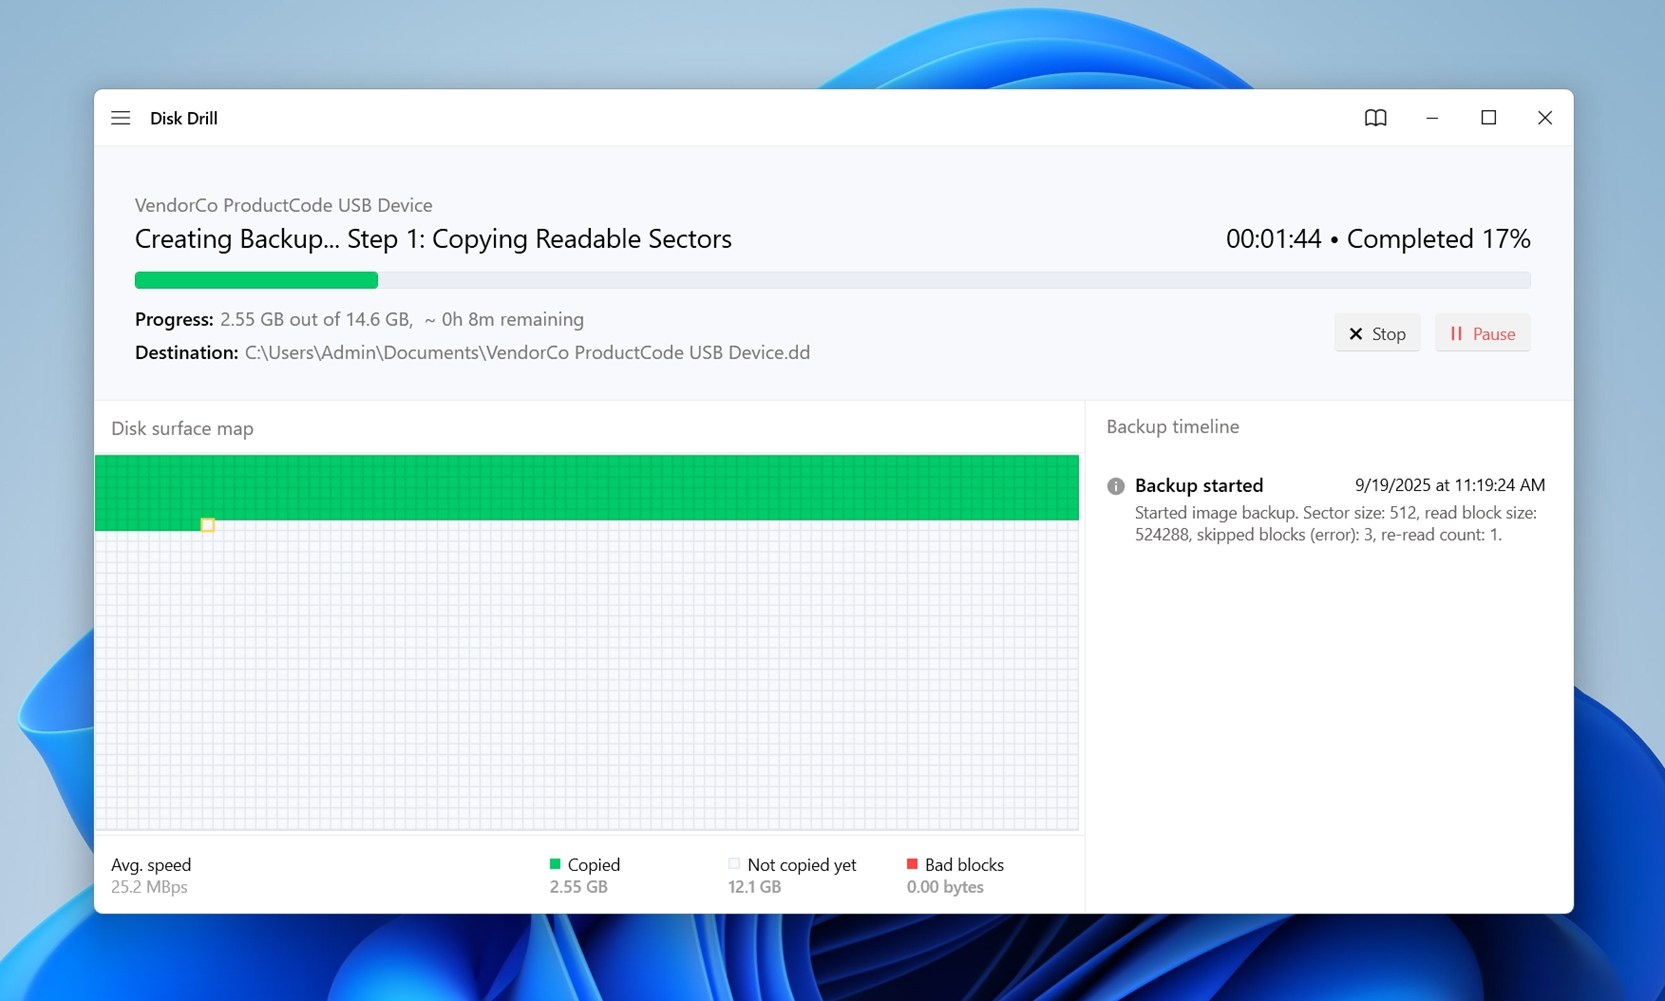 The imaging can take a long time. How long depends on two factors: the size of the drive and its condition. A healthy 1 TB drive might finish in a few hours. A dropped drive with many bad sectors could take much longer.
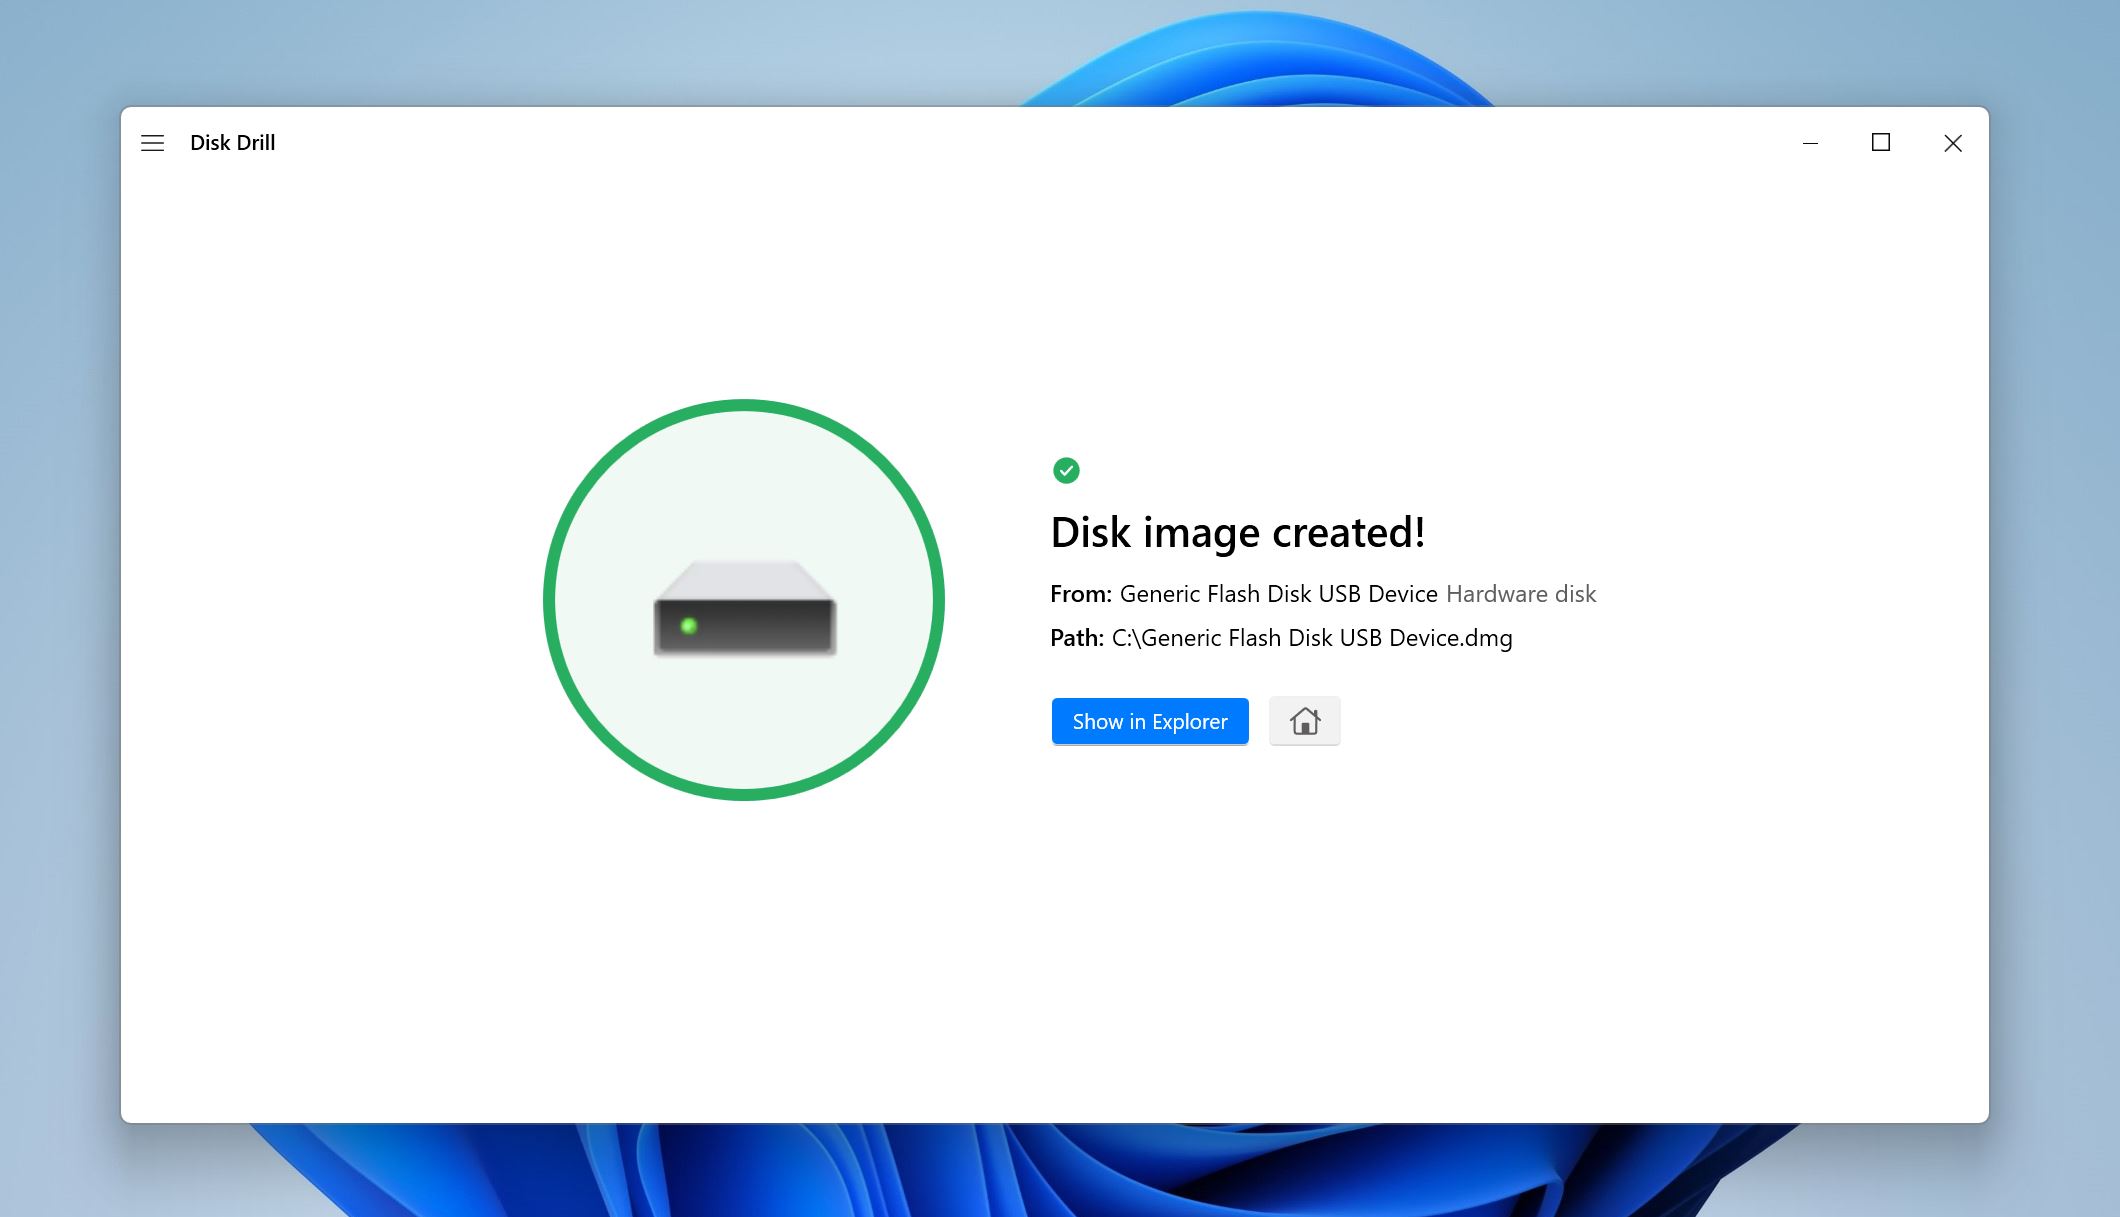
Note on how Disk Drill’s disk imaging works. Byte-to-Byte Backup creates a sector-level copy of a drive, including empty areas and bad sectors. The process is designed for unstable disks, so instead of trying to read everything in one pass, the software first skips over unreadable blocks to complete the image quickly. After that, it makes additional attempts on the skipped areas, gradually reducing the read block size (from 64 KB down to 512 bytes) to extract as much data as possible.
The program uses multithreaded I/O, which separates read and write operations into different threads. This helps maintain speed and prevents the software from locking up when the disk stalls. It also adjusts automatically if the drive disconnects or slows down, ensuring the copy can continue with smaller, safer reads.
During the process, you’ll see a map of the disk, which marks good and bad sectors. If you don’t want to spend time re-reading damaged areas, you can stop the process once the important data is imaged.
The resulting file is a plain, uncompressed image (.dd, .dmg, or .iso, depending on the system). This makes it compatible with other recovery and forensic tools, so you’re not locked into using Disk Drill alone.
Part 2: Scan the Disk Image
After the disk imaging is done, the hardest part is behind you. From now on, no matter what happens to the original drive, your data is safe inside that image file. Everything is there: existing files, deleted files that might still be recoverable, even hidden system data. The image is your full copy of the drive’s state at the time of backup.
Now here’s how you can extract your files from this image:
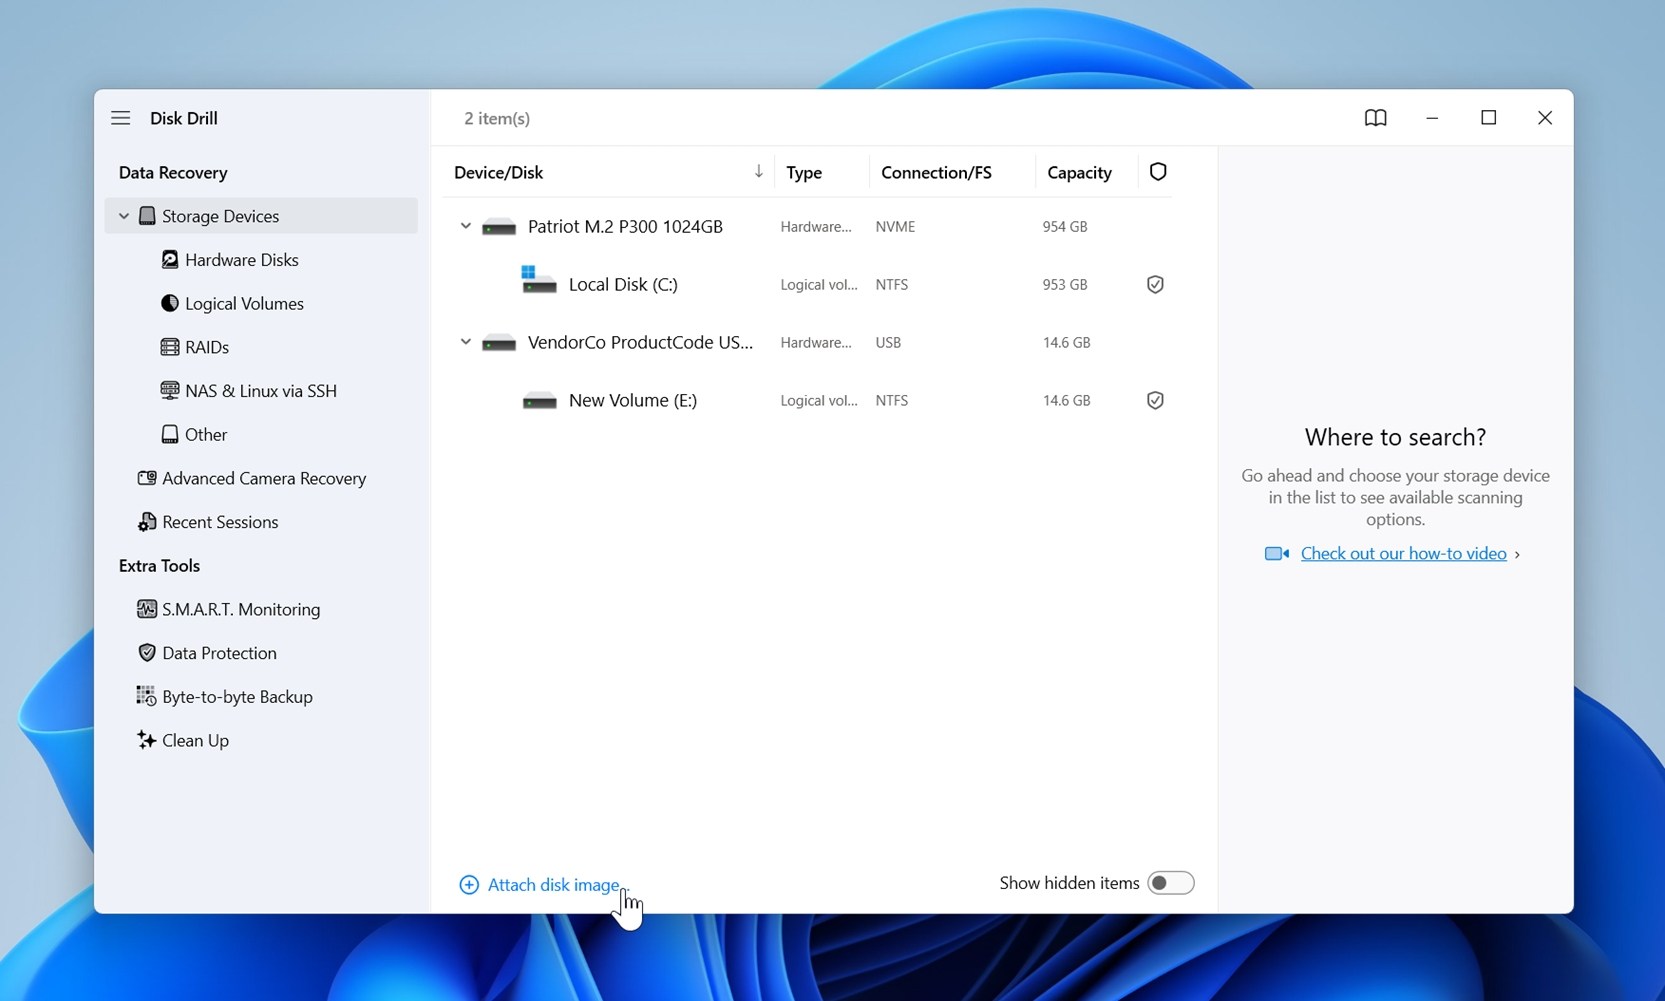
- Open Disk Drill, and ensure you’re on the Storage Devices screen, under Data Recovery.
- Click on the Attach disk image option and browse for the disk image you created earlier. Double-click on it, and it’ll be added to Disk Drill’s list of storage drives.
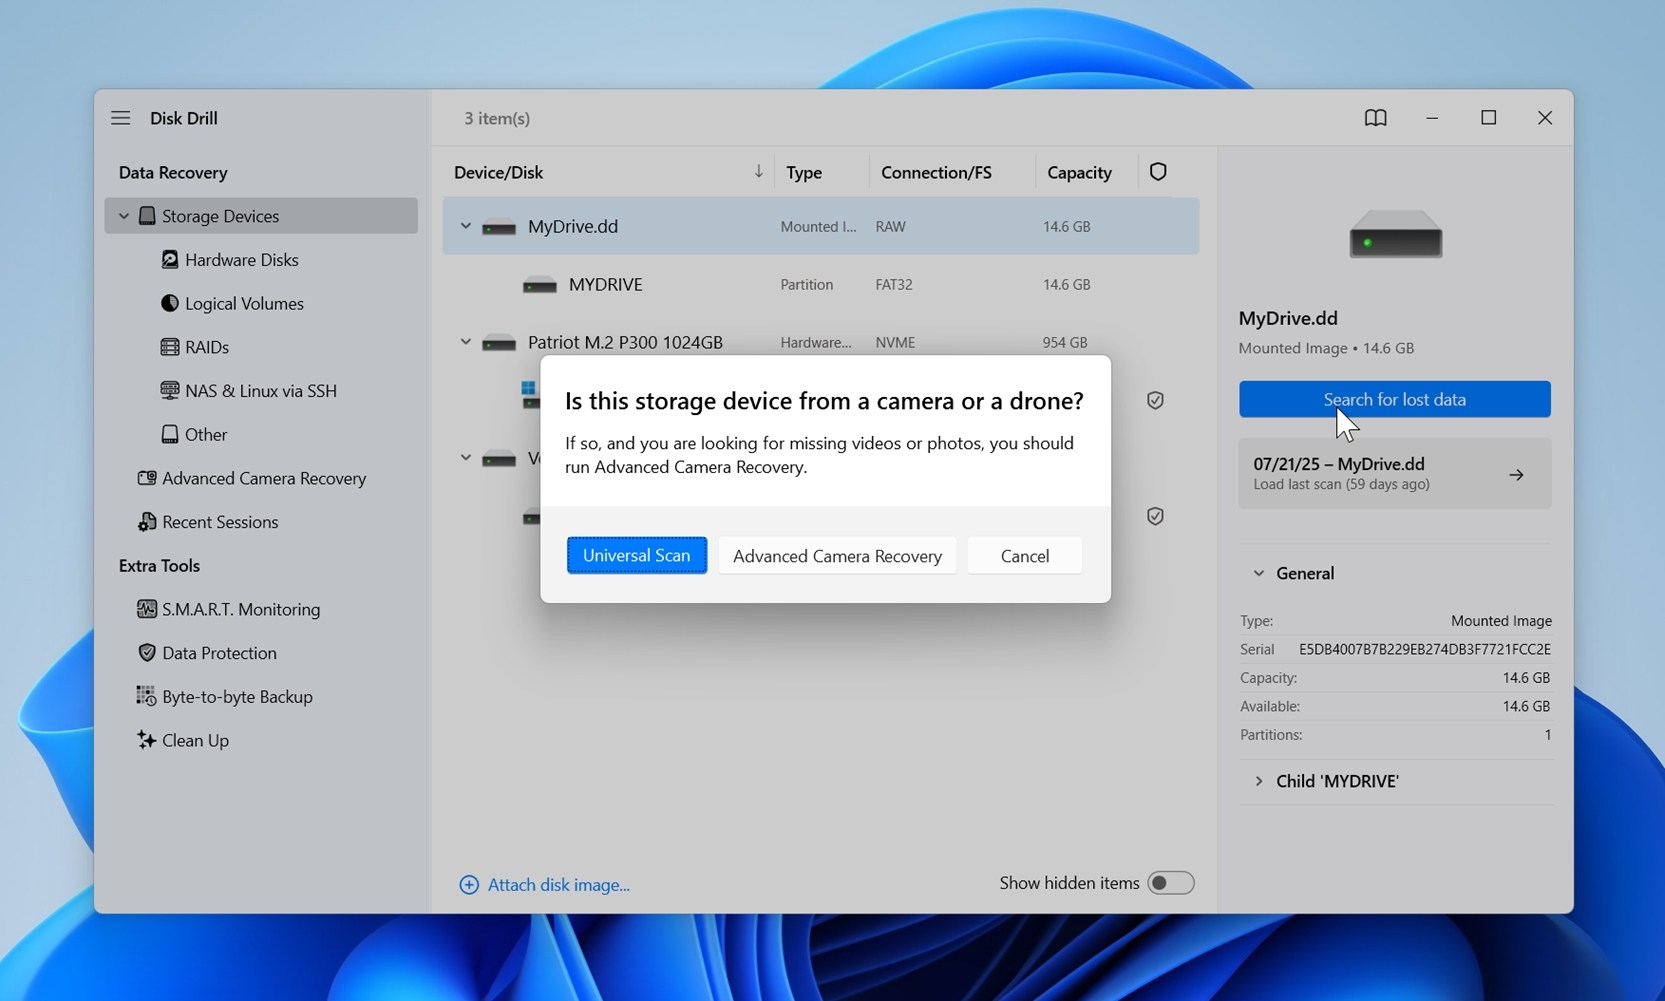
- Select the disk image of your external hard drive in Disk Drill, then click Search for lost data. When prompted, choose Universal Scan. Disk Drill will begin scanning the disk image for data.
- Once the scan finishes, you can click Recover all to retrieve everything Disk Drill found. Just make sure you choose a safe destination. Use a different disk or SSD with enough free space.
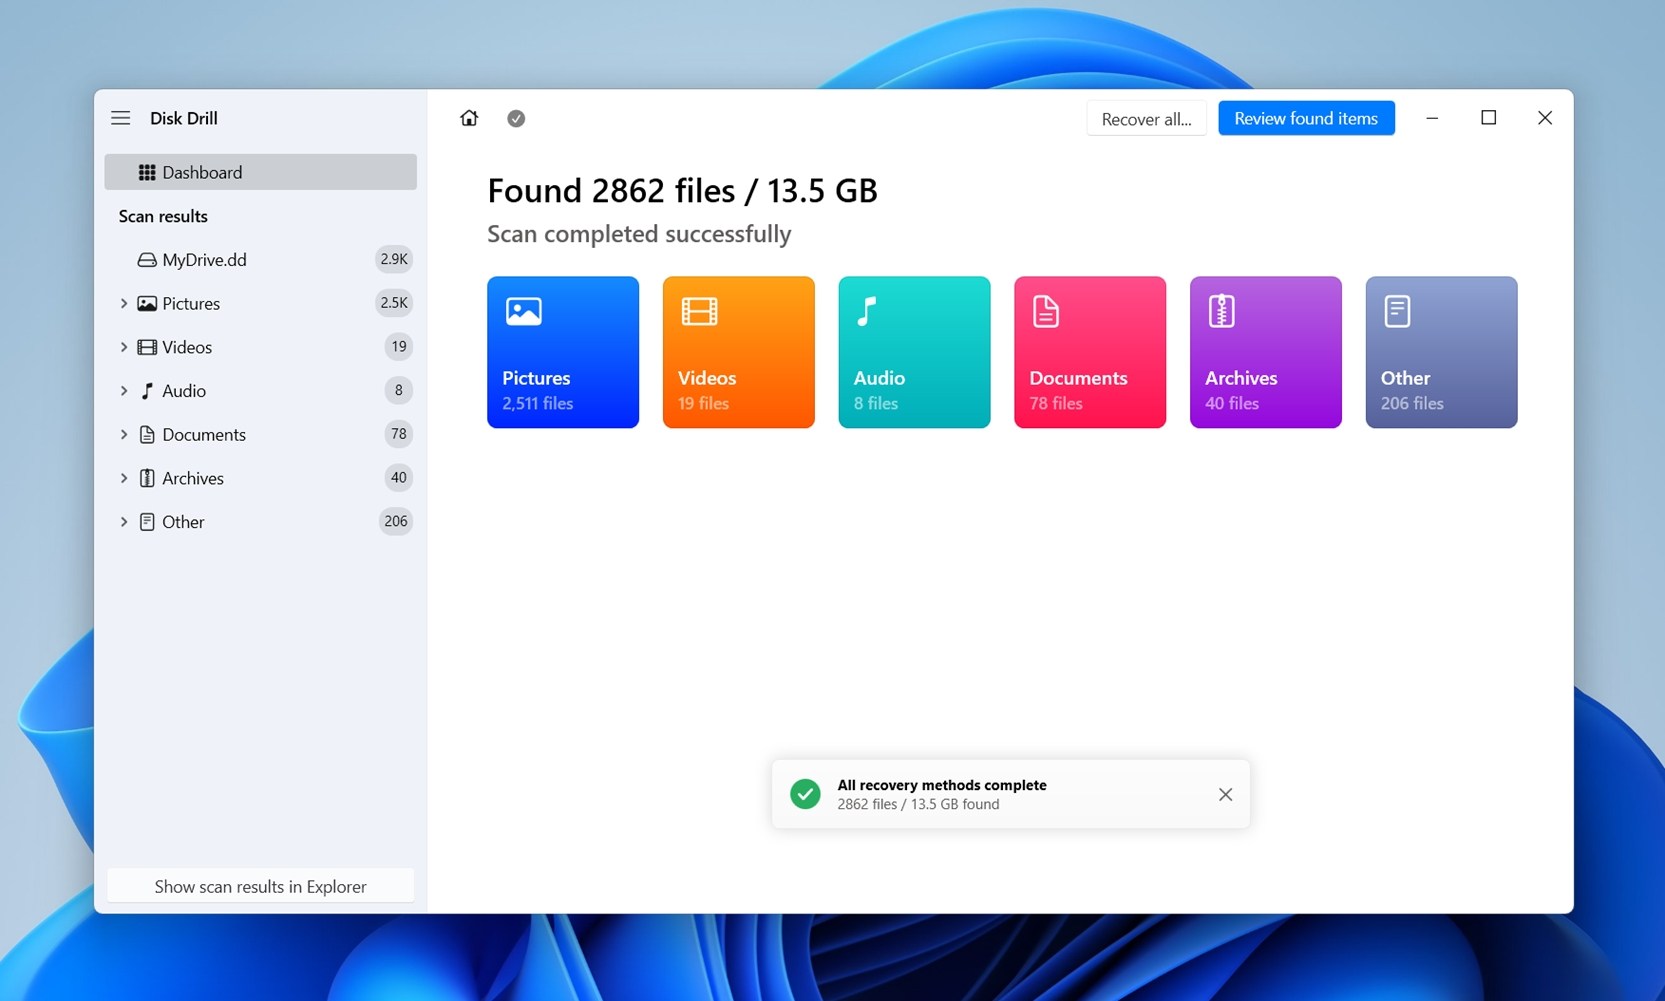
- If you don’t want to wait until the scan is completely done, Disk Drill lets you browse results as they appear. Click a category like Videos to view only video files, or select Review found items to see everything discovered so far. This makes it easier to quickly grab a few important files without sitting through the full scan.
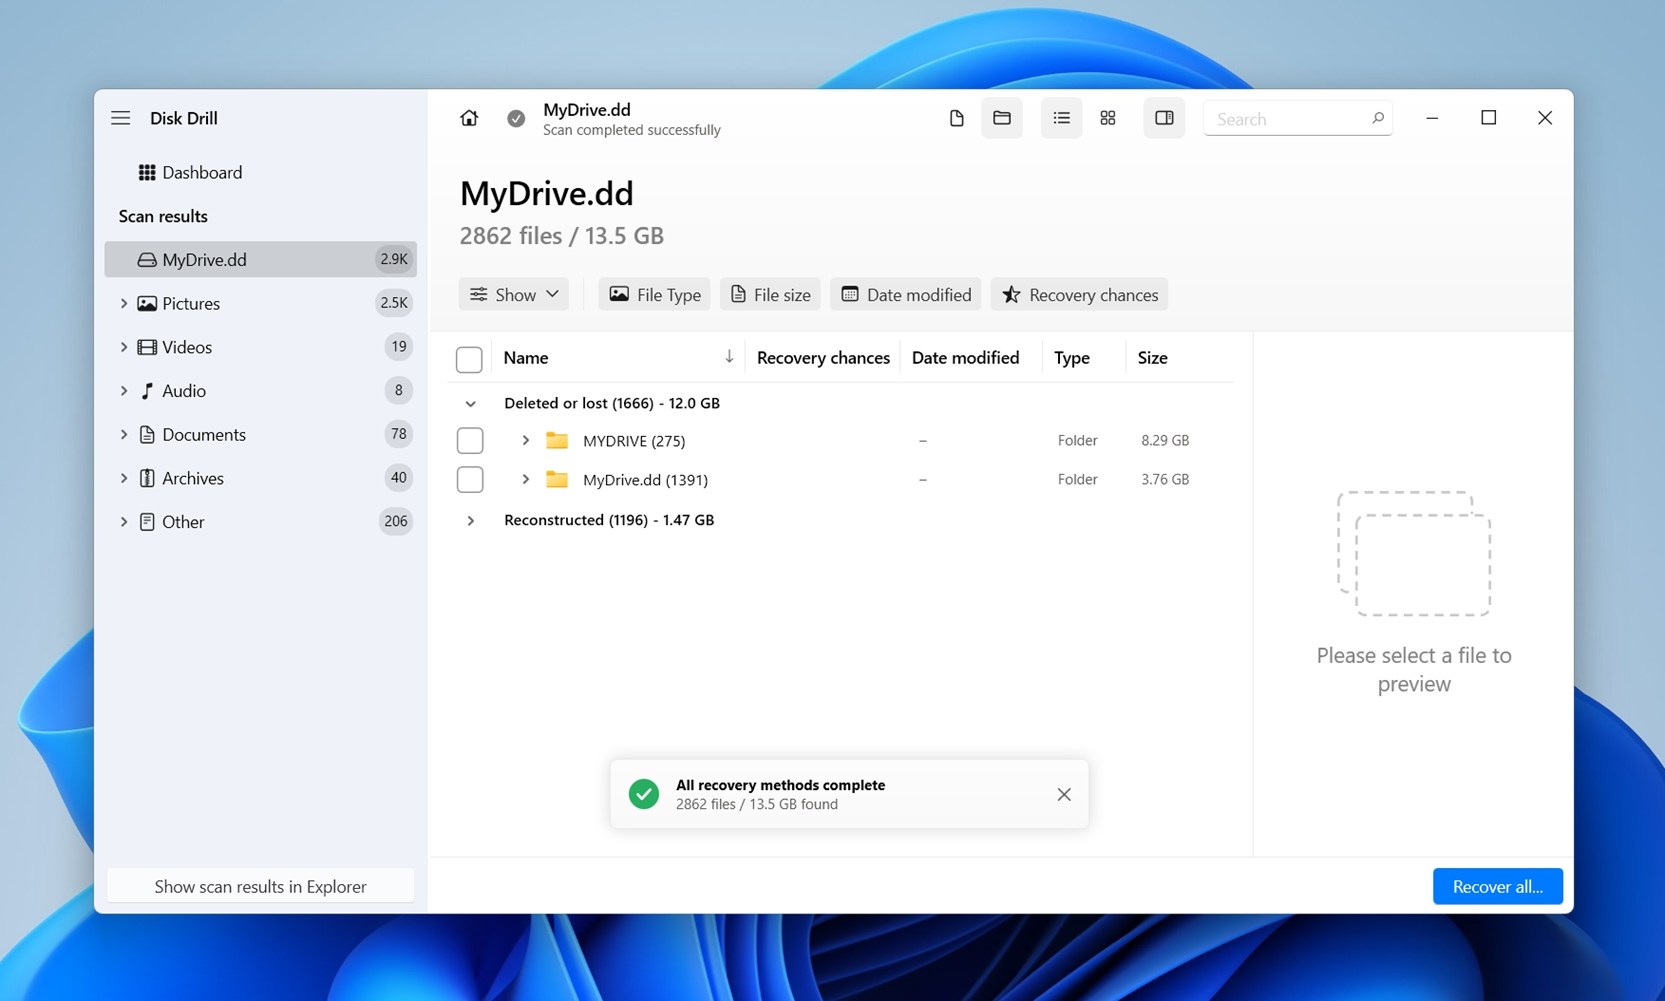
- If you choose Review Found Items, Disk Drill will show you a structured list of everything it’s uncovered so far. Results are divided into three groups: Deleted or Lost, Existing, and Reconstructed. This is handy because it separates the files still intact from ones that were deleted in the past (and are recoverable if they haven’t been overwritten).
- Click on any file to see a preview on the right side. Disk Drill supports previews for most formats, either through Windows itself or through third-party apps already installed on your PC.
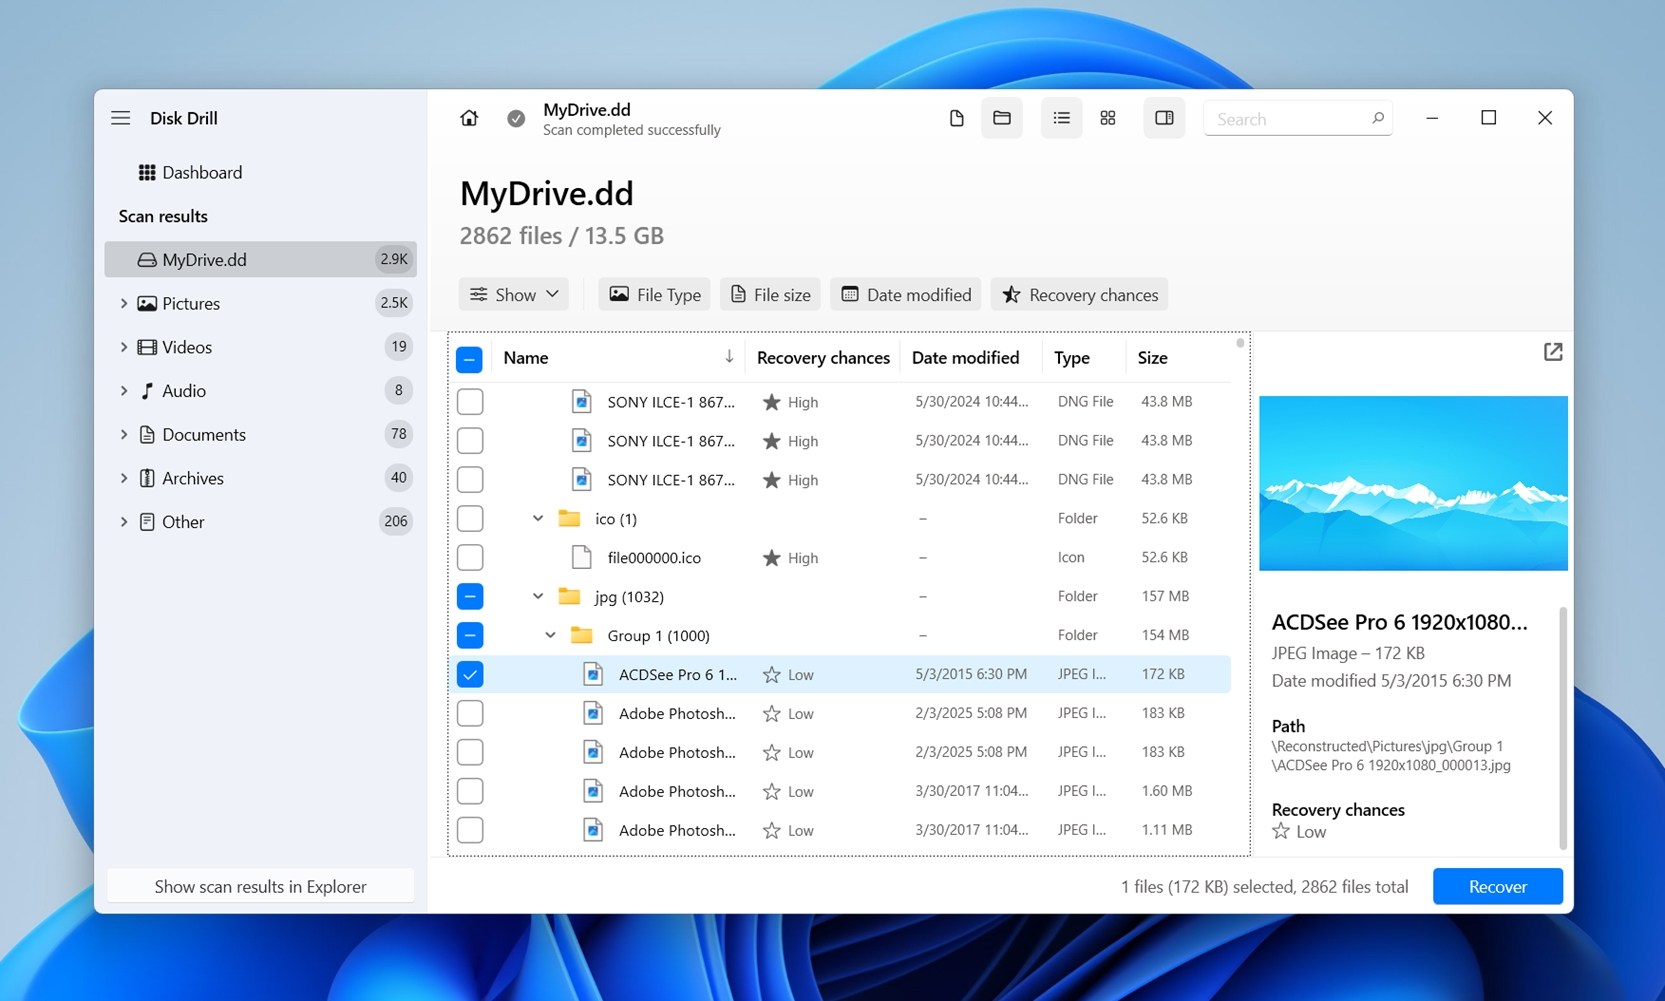
- Use the checkboxes to select the files you want. Disk Drill displays a preview of the currently selected file. After confirmation, click Recover.
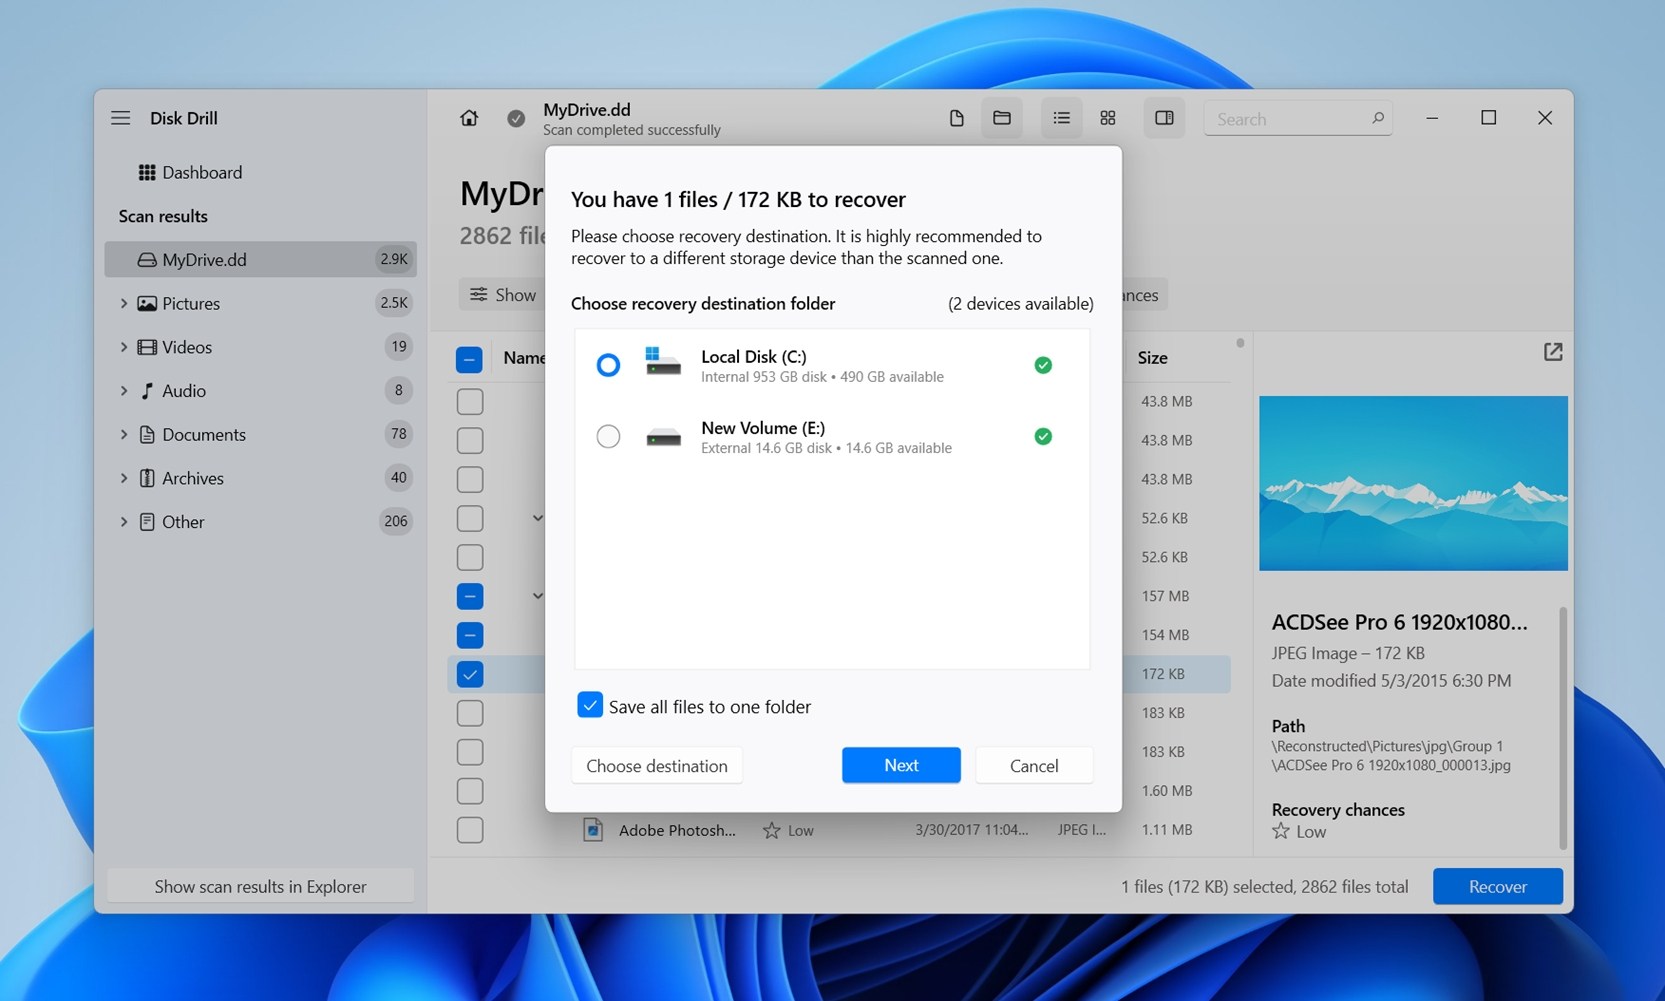
- Choose a recovery destination for the files. Click Next. You can recover up to 100 MB of data for free, as part of Disk Drill’s trial. Further recovery requires you to purchase a one-time license.
- After the recovery finishes, Disk Drill prompts you with Show recovered data in Explorer.
 Click it, and Windows opens a File Explorer window with the folder you selected. Review the files. Open a few of them to confirm they are intact. If some appear incomplete or corrupted, note which ones fail (this often means the damaged sectors on the original drive prevented a full recovery).
What to Do if Your External Hard Drive Dropped and Now Isn’t Working at All
If you’ve read this far, you already know the probability of a dropped external hard drive working well enough for DIY recovery is low. In fact, 8 out of 10 times the only way to recover data from a dropped external hard drive is to contact a professional recovery lab.
So if your drive isn’t detected at all, makes weird noises, or can’t be accessed by recovery software, the DIY path is over. At that point, you face two choices:
- If the data matters, send it to a professional data recovery service. These labs have the tools and clean-room setups to handle head swaps, motor issues, and damaged platters.
- If the data doesn’t matter, buying a replacement drive is the smarter move. It’s far cheaper than recovery, which can range from a few hundred dollars to over a thousand.
Professional labs can be expensive and time-consuming, but they’re the only realistic option once a drive is physically dead. If you don’t need the files badly, save yourself the cost and stress – pick up a new drive and set up a backup plan to avoid this situation again.
What to expect from professional recovery labs:
- Most reputable data recovery labs follow a “no data, no cost” policy. This means you won’t pay if they can’t retrieve anything from your drive. Always confirm this before you send your disk in, since some companies charge evaluation or handling fees regardless of the outcome.
- You’ll usually need to ship your drive to the lab for assessment. The cost of shipping is on you, and because these drives often contain sensitive or irreplaceable data, it’s worth using insured, trackable shipping. Pack the drive securely with anti-static material and padding so it doesn’t suffer more damage in transit.
- Expect the lab to run an evaluation first. They’ll typically give you a report on what they found, the likelihood of recovery, and a price estimate. This can take a few days, sometimes longer depending on workload. If you agree to the cost, they proceed with the recovery and return the data on a new drive (which is often included in the final price).
- Prices vary widely. Simple jobs (like a failed USB enclosure) might cost a few hundred dollars. More complex cases, such as head swaps or platter damage, often run into four figures. Turnaround time depends on the severity of the damage and the lab’s queue.
- One last point: if privacy is a concern, ask about their confidentiality policy. Established labs treat client data under strict non-disclosure rules.
FAQ
- Logical issues. The drive still powers on, shows up in Disk Management, and has the correct capacity, but the file system is corrupted. These cases often allow recovery at home with software. Imaging the drive first and then scanning the image with recovery tools is the safest approach.
- Physical issues. Clicking, beeping, or no detection at all. These point to damaged heads, platters, or motors. DIY software won’t help here, and continued attempts may cause more harm. Recovery is still possible, but only in a professional clean room with the right tools and donor parts.


