
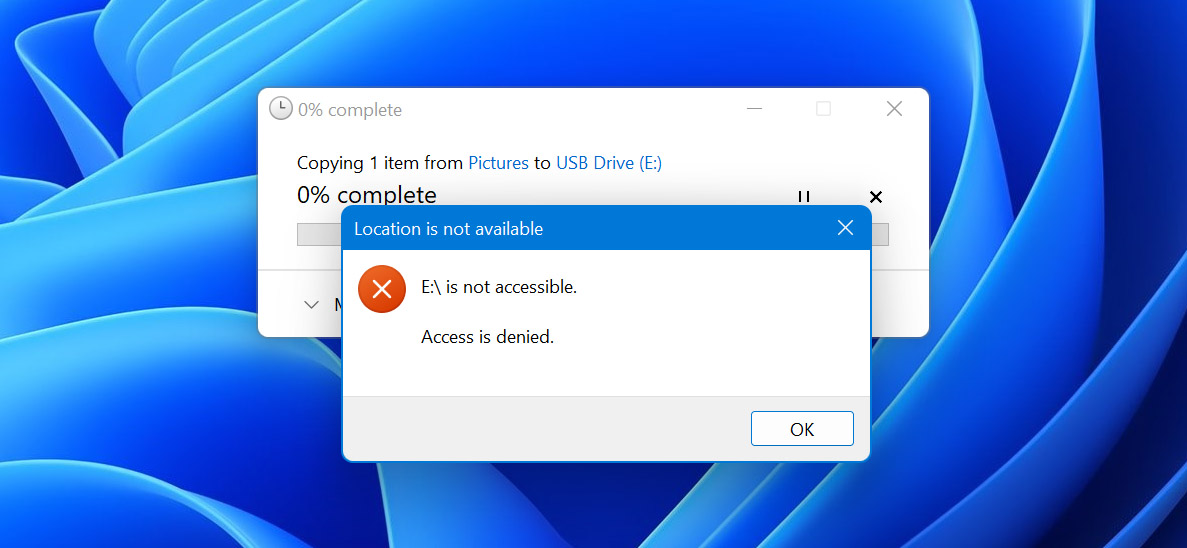
Trying to add or remove something from your SD card, but keep getting an error message stating that your access is denied? This is likely because the card is currently write-protected. Until this write protection is removed, you won’t be able to make changes to the data on the SD card.
Unlocking an SD card is very easy. In this article, we’ll discuss what a locked SD card is, why SD cards have this feature, and how to unlock an SD card.
What Happens When You Lock an SD Card?
What does the lock do on an SD card exactly? The purpose of an SD card’s lock is to protect anything from being written to or deleted from the SD card. When an SD card is locked, you only have read-only access to that card. Therefore, you will only be able to view the files on the card, not modify them.
To clarify, when an SD card is locked and you try to save a file to it, you’ll be met with a message that indicates the SD card is locked and nothing can be written to it to protect the contents on that card from accidental deletion or overwriting.
How to Tell If SD Card Is Locked
In most cases, you can easily tell that an SD card is locked or unlocked if you have it in your hand. On the left side of it, there is typically a small lock switch that’s used to determine the SD card lock position. If it’s switched down, that means it is locked. Sliding it upward will unlock the card and give you write access.
However, it’s not always that simple. Perhaps the lock switch has broken, or, for some reason, you can’t physically access the card because it’s stuck in a device. This can be a little bit trickier, but you can typically determine whether the card is locked by trying to modify a file on the card.
For instance, if it’s in a camera, try to take a photo and see if it saves. If it does, try to delete it. If you were able to, chances are the SD card is probably unlocked. If you weren’t, it’s locked. There’s also the possibility that the read-only attribute appears on the card by itself. In this case, it could indicate damage or wear to the card, causing some data to disappear. In this case, before removing read-only access from the card, you should recover the lost files in the next section.
Recover Lost Files From a Locked SD Card
If you’ve experienced data loss, you need to recover the files from that card before performing any other actions. At this point, implementing any of the fixes presented in this article puts your data at risk of being overwritten. Once overwritten, the data is unrecoverable.
We highly recommend creating a byte-to-byte backup and recovering your files from that, rather than the SD card itself. Since write-protection can come about from a memory card issue, scanning and recovering data from the byte-level backup is safer in the event the memory card crashes.
For SD card data recovery, we prefer to use Disk Drill. It supports all major file systems used by Windows, macOS, and Linux, and gives you a better chance of recovering more since it utilizes several scanning methods.
This is how to recover data from an SD card, locked or unlocked:
- Download, install, and open Disk Drill.
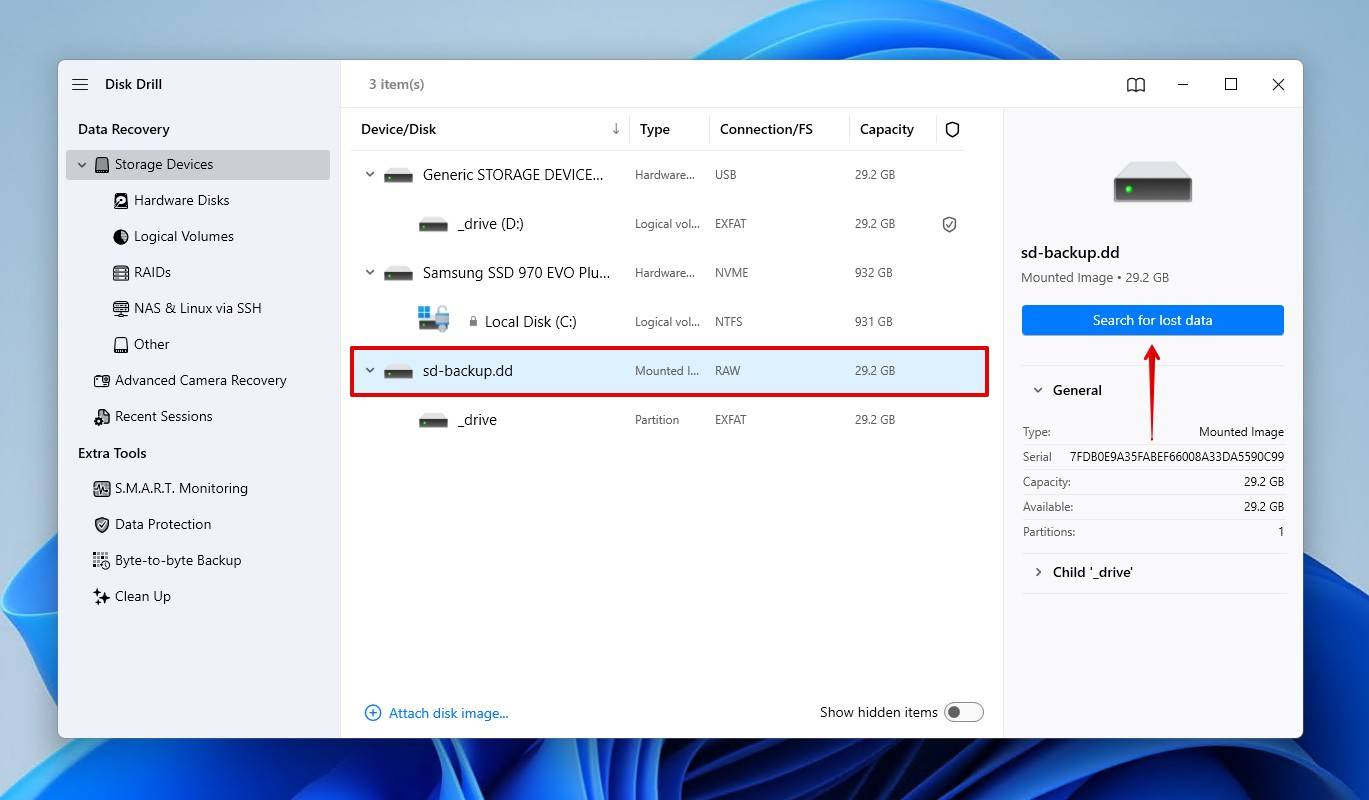
- Connect your SD card, then select it from the list of devices. If you are scanning a disk image, attach it using the Attach disk image option, then select it. Click Search for lost data.
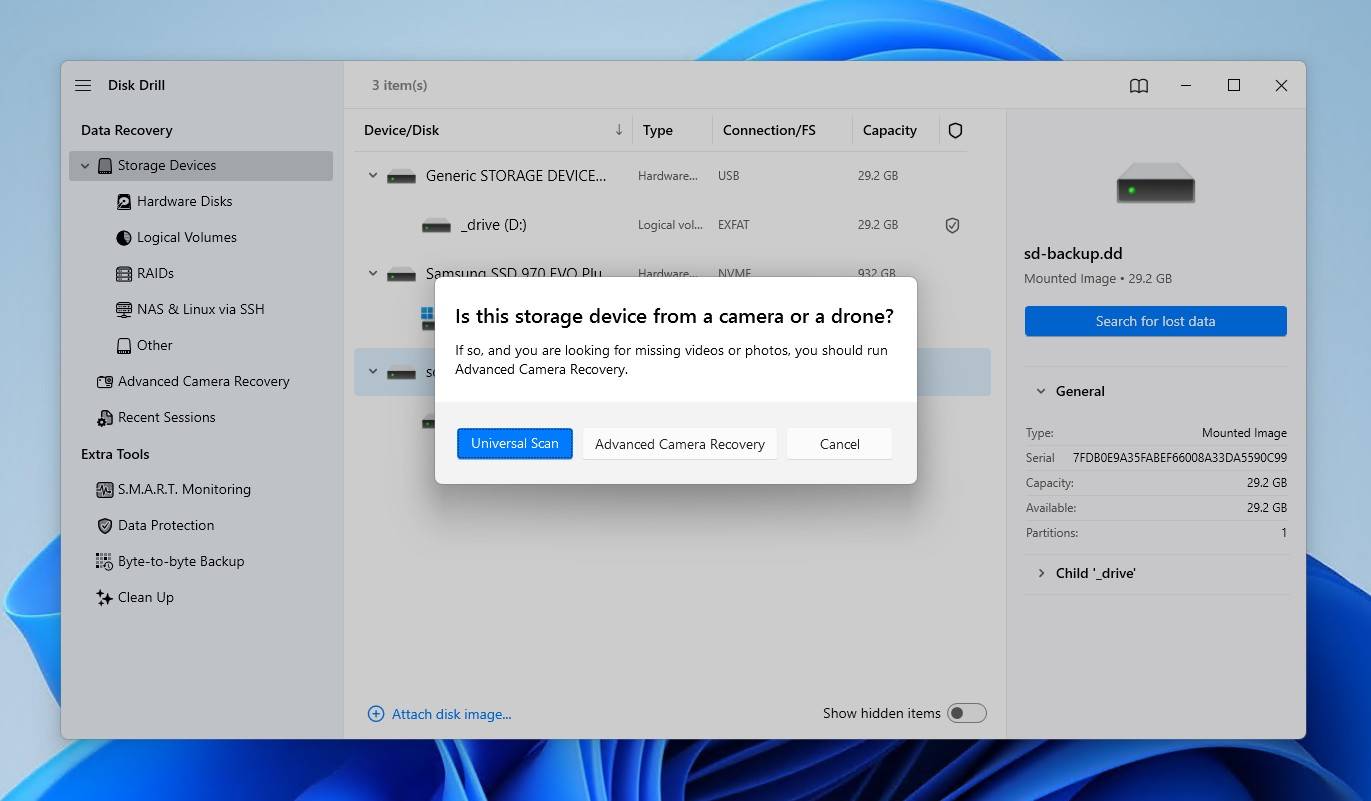
- Choose a scan type. Universal Scan will search for all files, whereas Advanced Camera Recovery is ideal for finding unedited videos from cameras and drones.
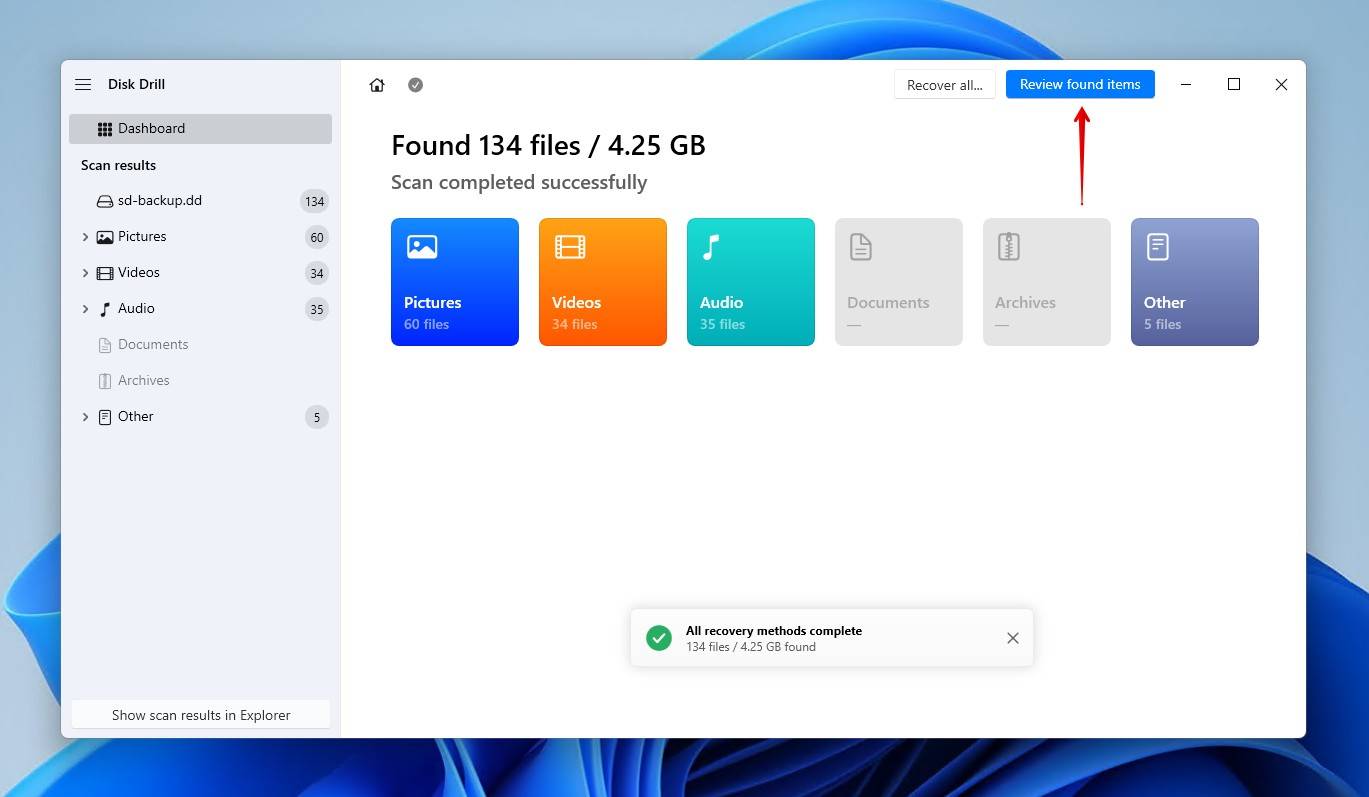
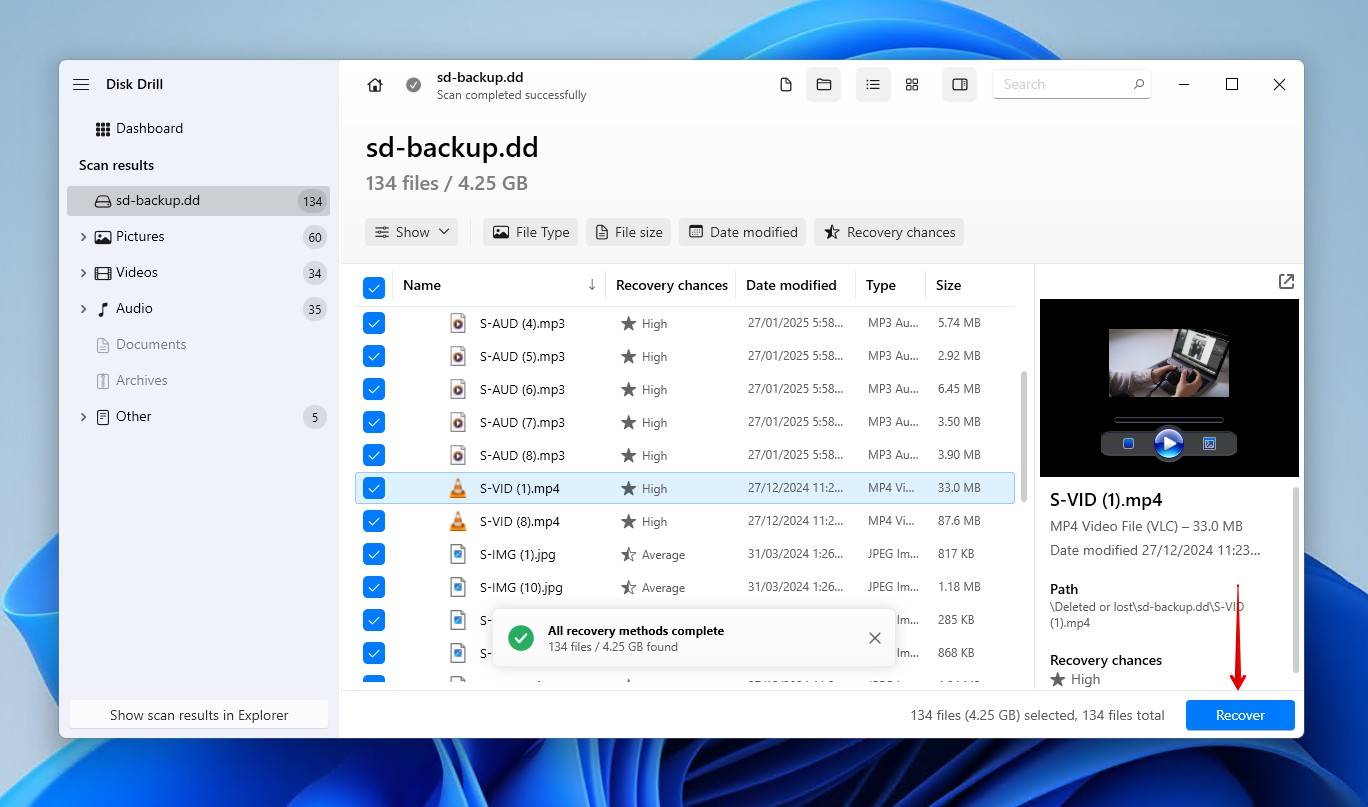
- Click Review found items, to see what Disk Drill found on the SD card.
- Preview and select your files. Use the filter options to refine the results, or use the search box to find specific files. When ready, click Recover.
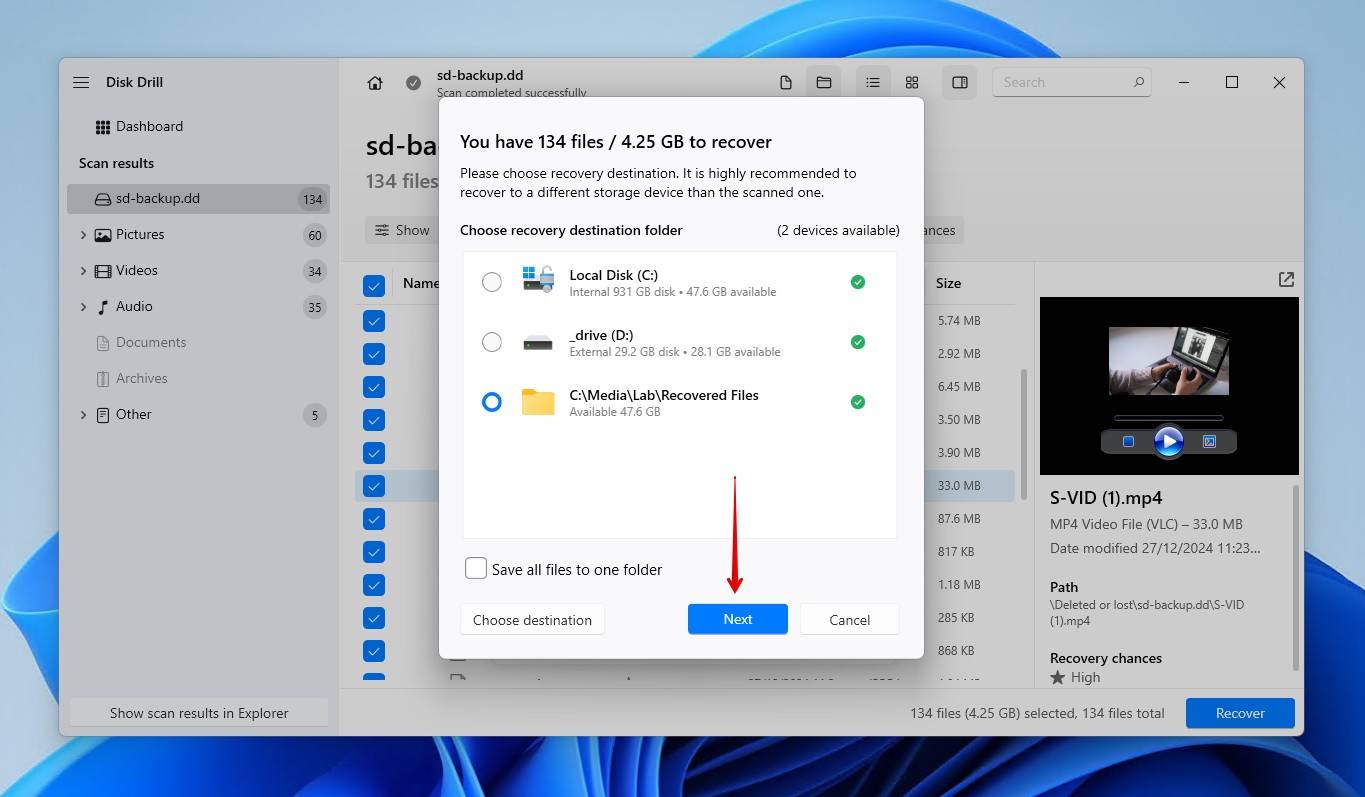
- Choose a separate physical storage device to save the files to. Then, click Next to complete recovery.
Once the data is recovered, you can unlock the SD card within Disk Drill. Right-click on your SD card, then click Remount volume in read/write mode.
3 Methods for Unlocking an SD Card
There are multiple ways you can unlock a locked SD card. These methods allow you to unlock a SanDisk memory card, and any other brand, including PNY, Lexar, and Samsung cards. Use the methods below to understand how to unlock an SD card. The methods below will cover both physical and software-based write protection.
Method 1: Physical Lock
Unlocking a locked SD card by flipping the lock switch is by far the easiest method. The same is true for locking an SD card. The physical switch actually does nothing inside the SD card. It simply acts as a way for card readers to know whether the card can be written to or not. Therefore, if switching the switch does nothing, the problem may be with the SD card reader.
This method is only possible on cards that actually have a lock switch, as not all cards will feature one. Here’s how to unlock a memory card using the physical switch:
- Take the SD card out of the device it’s being used in.
- On the side, flip the lock switch into the unlocked position. Typically, this is up.
- Test the SD card to ensure it’s unlocked.
Method 2: DiskPart
If your SD card doesn’t have a switch, or if you don’t have physical access to the SD card, you can unlock it through your operating system instead. Here’s how to unlock an SD card without a switch.
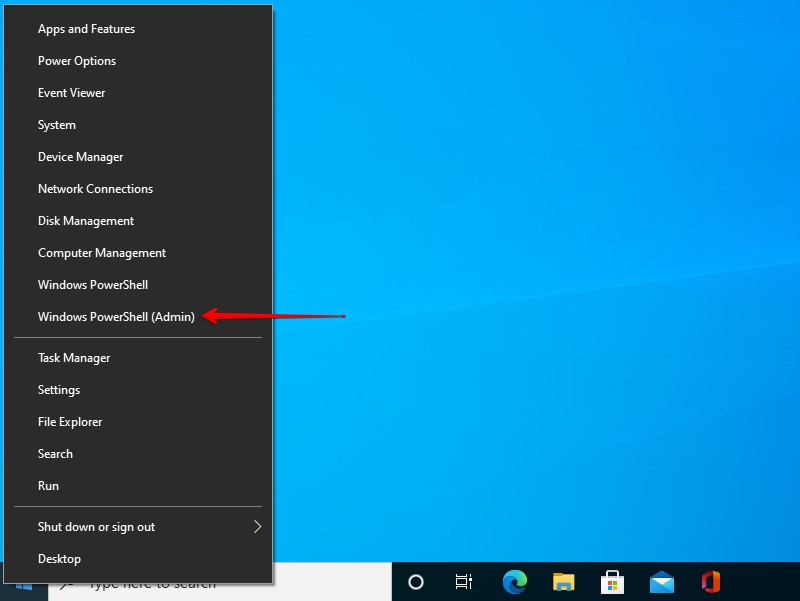
- Right-click Start and click Windows PowerShell (Admin). Click Yes if prompted by UAC.
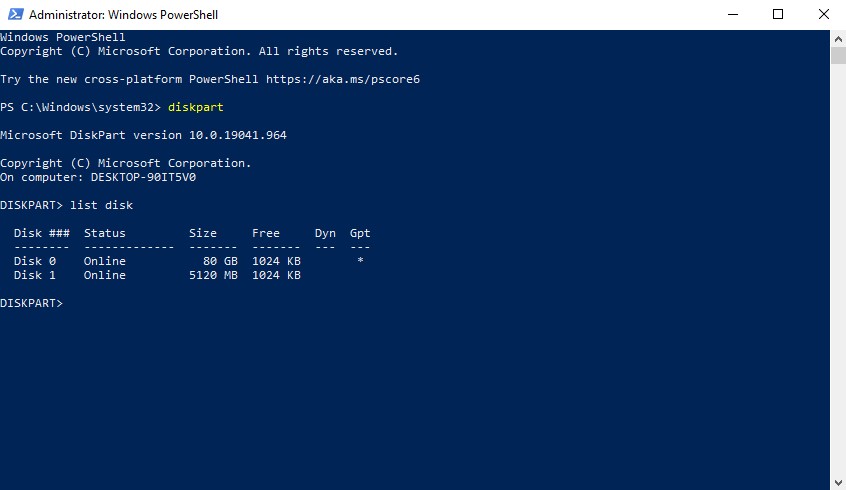
- Type diskpart and press Enter.
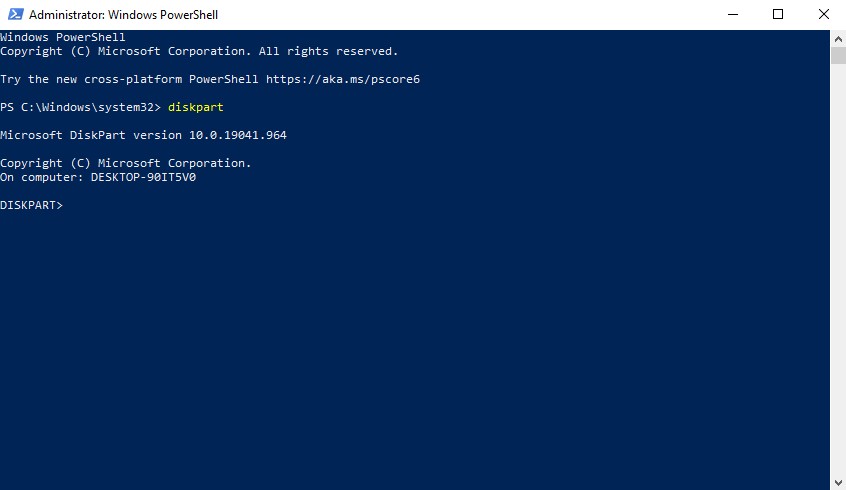
- Type list disk and press Enter.
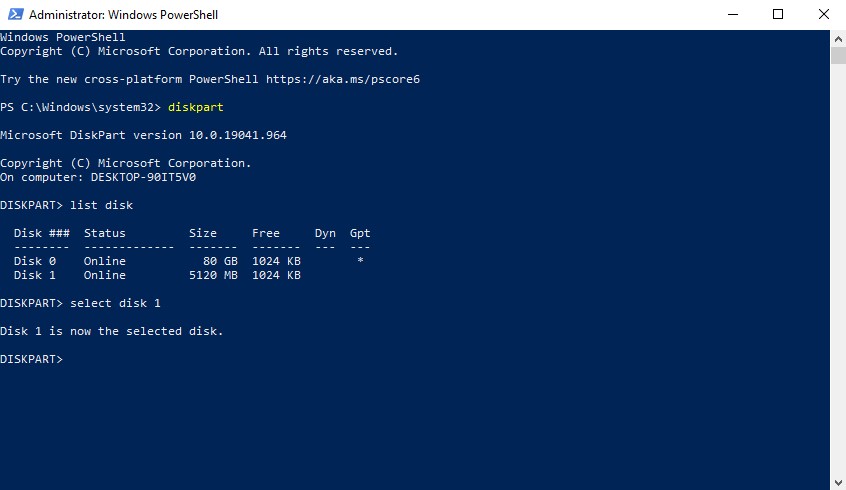
- Type select disk #. Replace the hash with your SD card’s disk number.
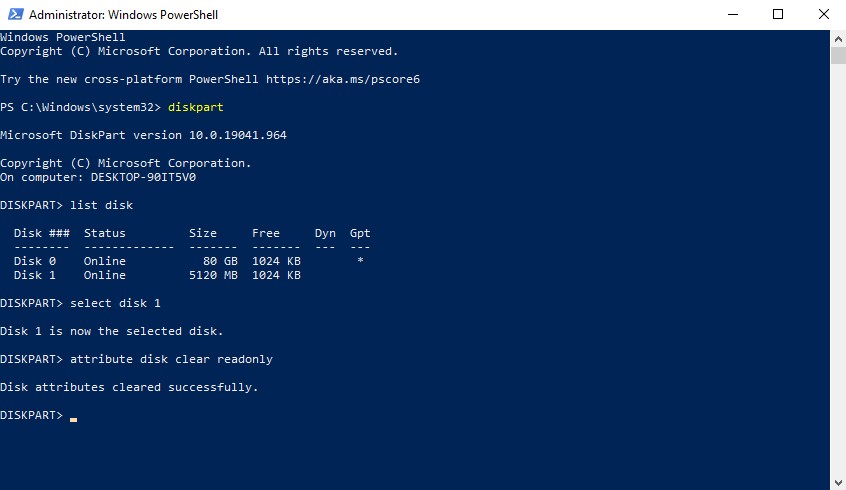
- Type attribute disk clear readonly and press Enter. This will remove the read-only tag that’s associated with the card.
Method 3: Registry Editor
If you’re desperate to regain write access to your SD card without formatting the card, you can try a more advanced method using the Registry Editor available on Windows.
Your computer’s registry contains very delicate information. Be very careful when making changes, as even the smallest changes can cause major problems.
This is how to unlock the SD card on PC through the Registry Editor:
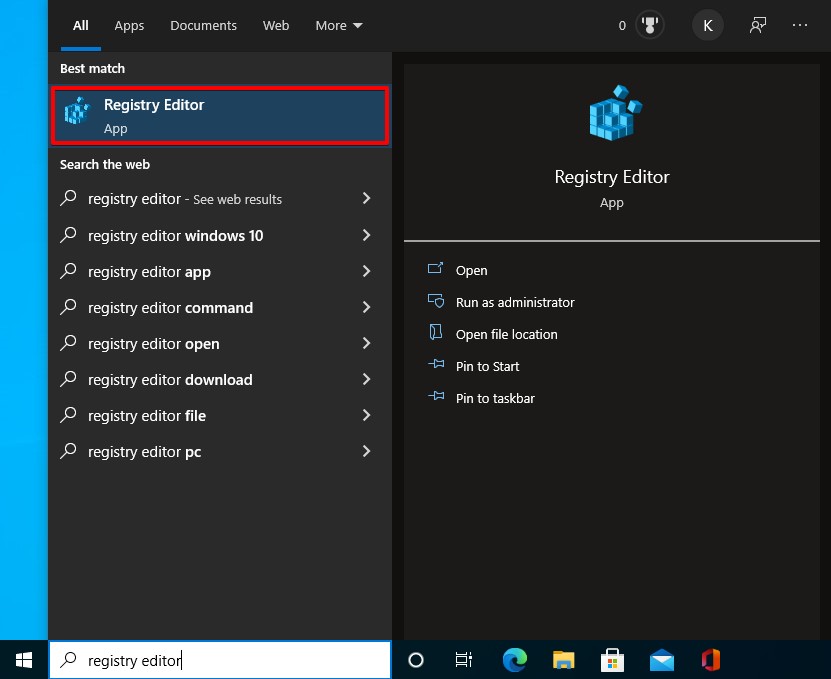
- Press Windows Key + S and search Registry Editor. Open the first result. If prompted by UAC, click Yes.
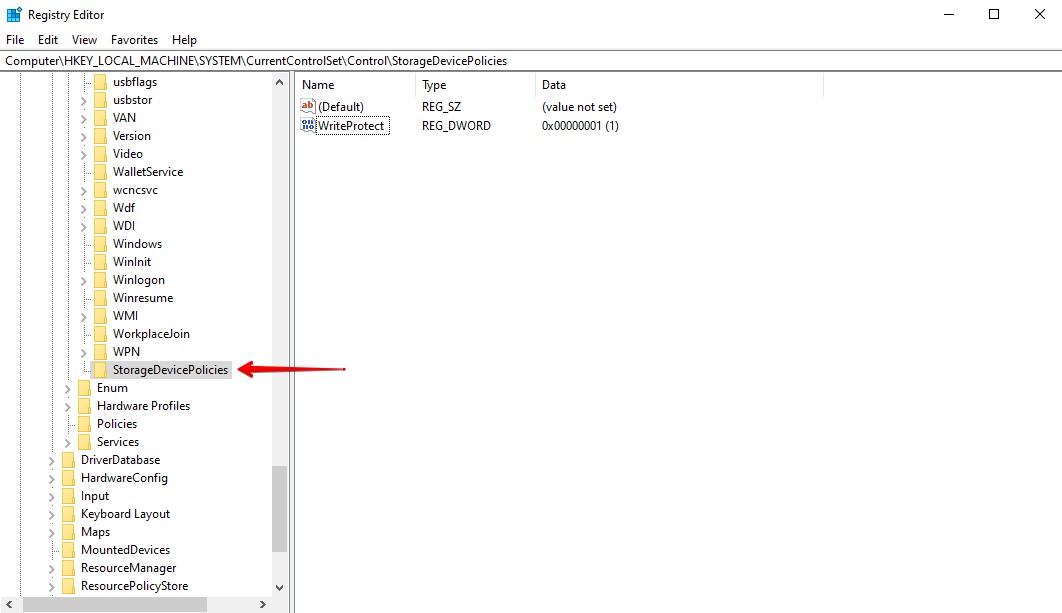
- Navigate to HKEY_LOCAL_MACHINE/SYSTEM/CurrentControlSet/Control/StorageDevicePolicies. If it doesn’t exist, right-click the Control folder and click New > Key to create it.
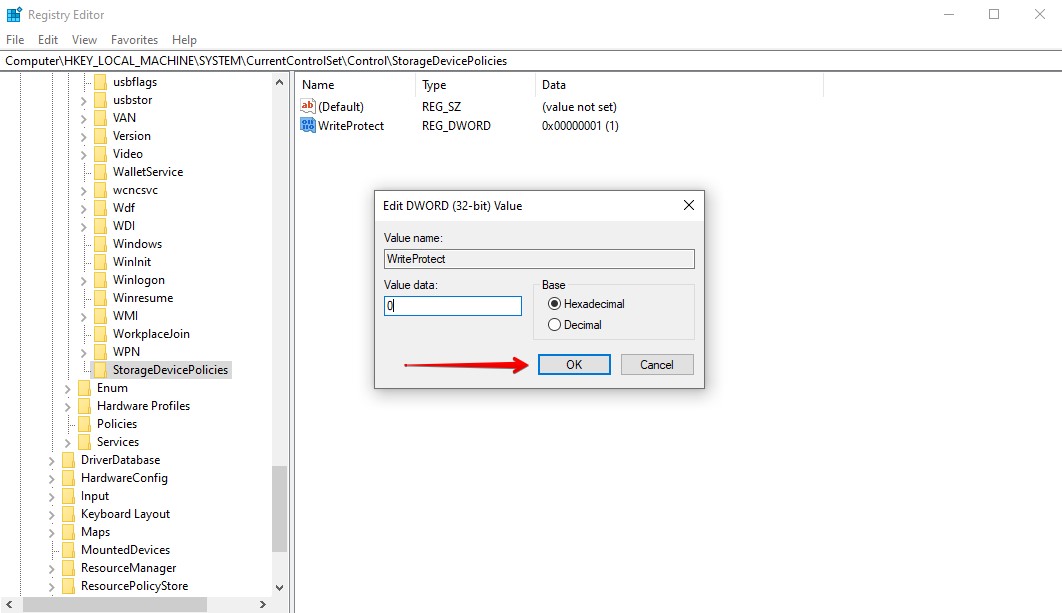
- Double-click WriteProtect and set the value to 0. Press OK. This will remove write protection. If WriteProtect doesn’t exist, create it by right-clicking the StorageDevicePolicies folder and clicking New > Dword.
When finished, try removing your SD card and connecting it again.
Conclusion
With your data recovered and an understanding of how to unlock a memory card, you know how to tackle this issue if it ever happens again. Keeping a backup is the recommended plan going forward, but seeing as that’s harder for SD cards, leaving the card untouched until recovery is the next best thing.
We hope that this article helped you. Let us know what your experience was like in the comments below. Which method worked? Was it harder than you thought? We’d love to hear your feedback.
If you’re interested, check out our list of the best SD card recovery software for alternatives to Disk Drill, or our guide on recovering accidentally formatted SD card files for recovering data post-format.
FAQ:
- Connect the SD card to your Mac using a card reader or by inserting it into a SD card slot.
- Use the Spotlight search function to search for and open Disk Utility.
- Select the SD card in the upper-left of the window and click First Aid.
- Clicking Run will unlock your SD card.


Hi Sorry but none of those fixes worked not even the format