 Nikon makes some of the world’s best cameras. However, Nikon cameras are still prone to data loss. If you’ve taken some wholesome pictures of your wedding or stored someone’s professional photoshoot on your camera, you’ll want to back it up as soon as possible so you don’t lose the data by accident or otherwise.
If you’ve already lost data, we can help you recover your photos in a few minutes. In this guide, we explain the common reasons why Nikon cameras suffer data loss, the Nikon photo recovery process, how to prevent loss in the future, and how to repair corrupt photos once you’ve recovered them.
Common Reasons for Data Loss from Nikon Cameras
Various reasons can lead to data loss on Nikon cameras. Here are the most common reasons you might lose your photos from a Nikon camera:
| Reason | Description |
| ⚠️ Accidental deletion | When you’re operating your Nikon camera in a rush, you might accidentally delete photos without realizing you want to keep them. You might also accidentally format the SD card in your Nikon camera if you think it’s empty. On cameras like Nikon D5300, formatting is only a three-step process. You can simply go to setup, select the formatting option, and confirm the format. Since it’s quick, you won’t have much time to remember if you do have important data on your Nikon camera. |
| 🐞 Virus or malware | Your Nikon camera’s SD card might get infected with virus or malware when you insert it into your PC to transfer data to the computer. This could lead to file corruption and data loss without any fault of your own. |
| 🛑 Interrupted file transfer | If something like a power cut or computer crash interrupted the file transfer process while you were copying photos from the Nikon SD card, the data may be lost. Photos lost during transfer can also become corrupt, so you’ll need to repair those files once you’ve recovered them. |
| 🤕 Physical damage | Your Nikon SD card may undergo physical damage as you continue using it over time. This is especially a possibility for professional photographers who need to insert and remove the SD card from the Nikon camera often. |
How to Recover Photos Deleted from Nikon DSLR?
You’ll need to connect the Nikon DSLR with your computer before starting Nikon photo recovery. You can either connect the camera directly using a cable or insert the SD card into the computer’s card reader.
Once you have access to the SD card’s storage, you’ll need to use a robust data recovery tool. Disk Drill is the best Nikon photo recovery software solution because it’s intelligent and easy to use.
Here is an easy 4-step process you need to follow to recover photos from your SD card:
Step 1. Download and Install Disk Drill
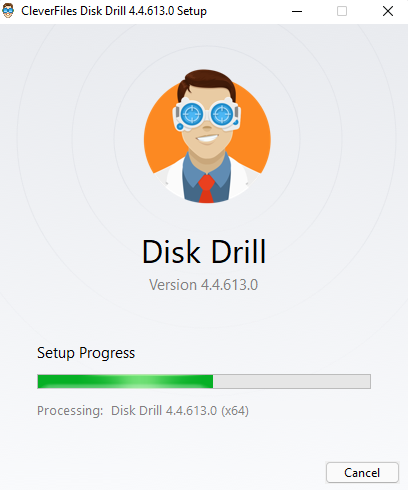
Start by downloading Disk Drill and installing it on your PC.
Step 2. Scan the SD Card
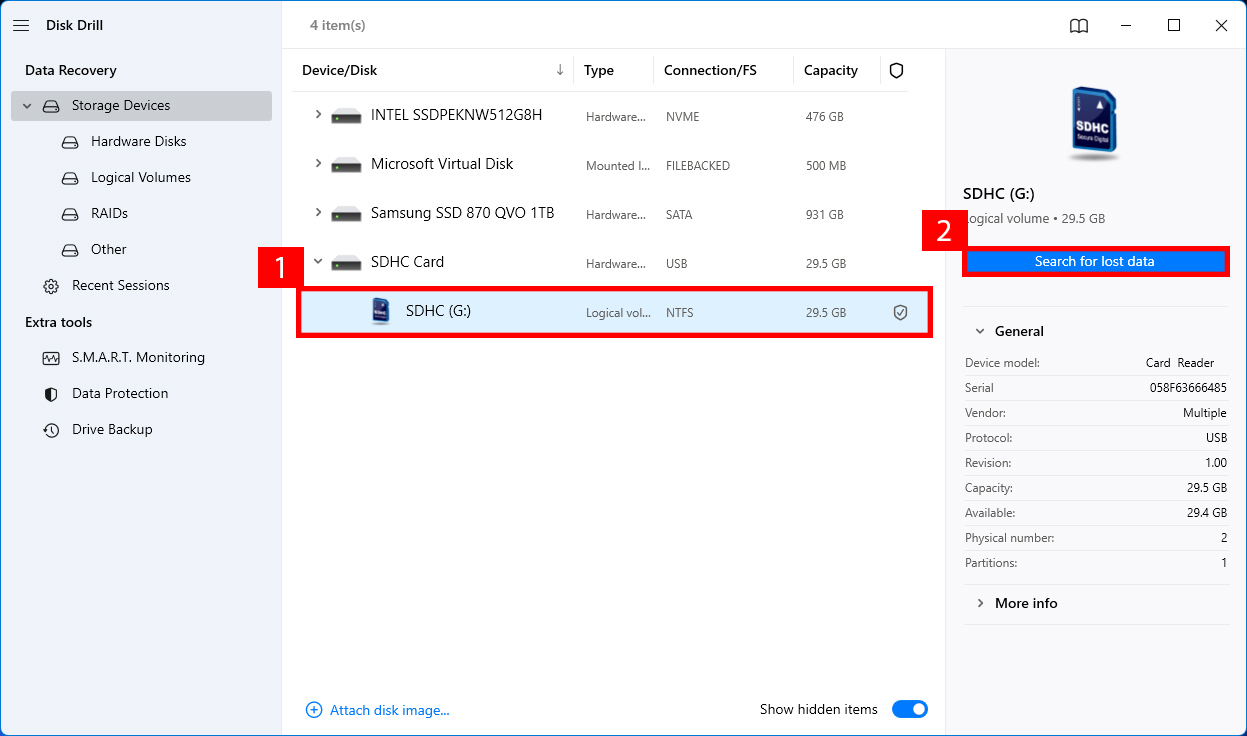
Launch Disk Drill and select the SD card from the home screen. Click on the Search for lost data button to initiate the scan.
Step 3. Find the Files
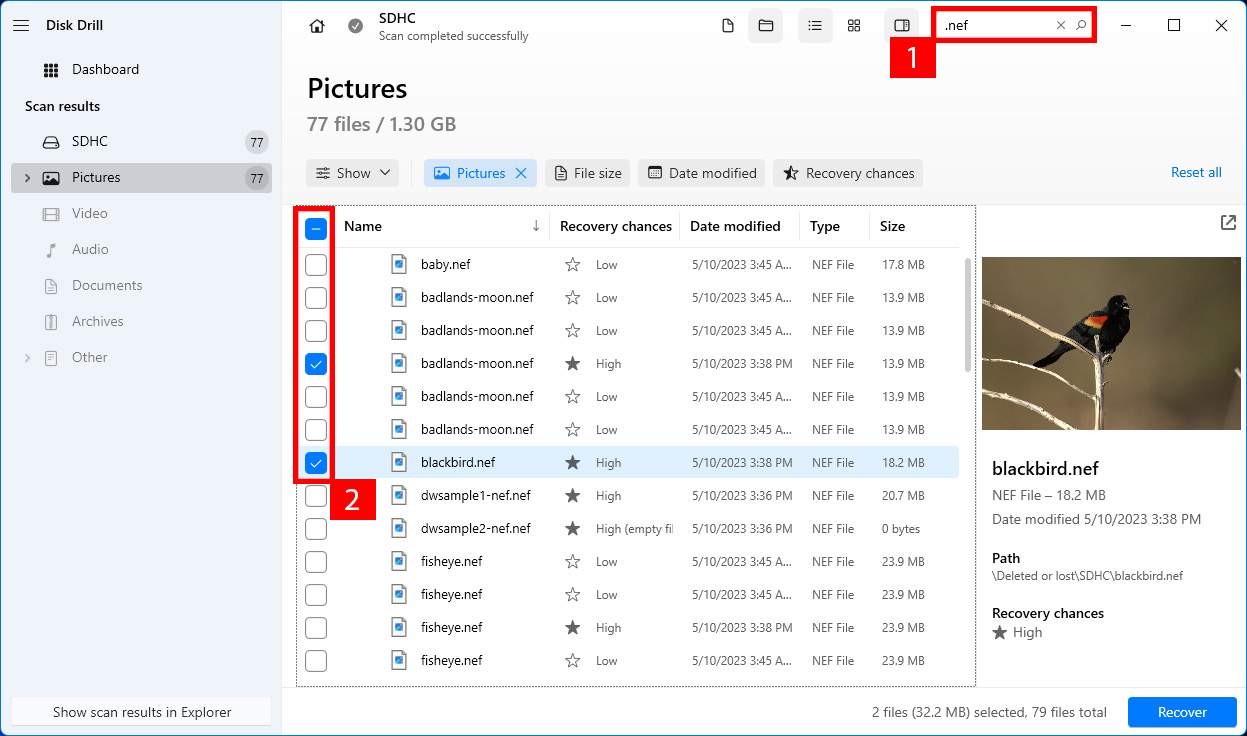
Once the scan completes, you’ll see a list of files Disk Drill found on the SD card. If you used the card exclusively for your Nikon camera, you’ll only see .NEF files. However, if you use the SD card on other devices too, you might want to filter the search results for .NEF files.
.NEF (Nikon Electronic Format) is a RAW file format Nikon cameras use. You can filter the search results by entering “.nef” in the search bar at the top-right of Disk Drill. Once you’ve found the files you want to recover, check the box to their left.
Step 4. Recover the Files
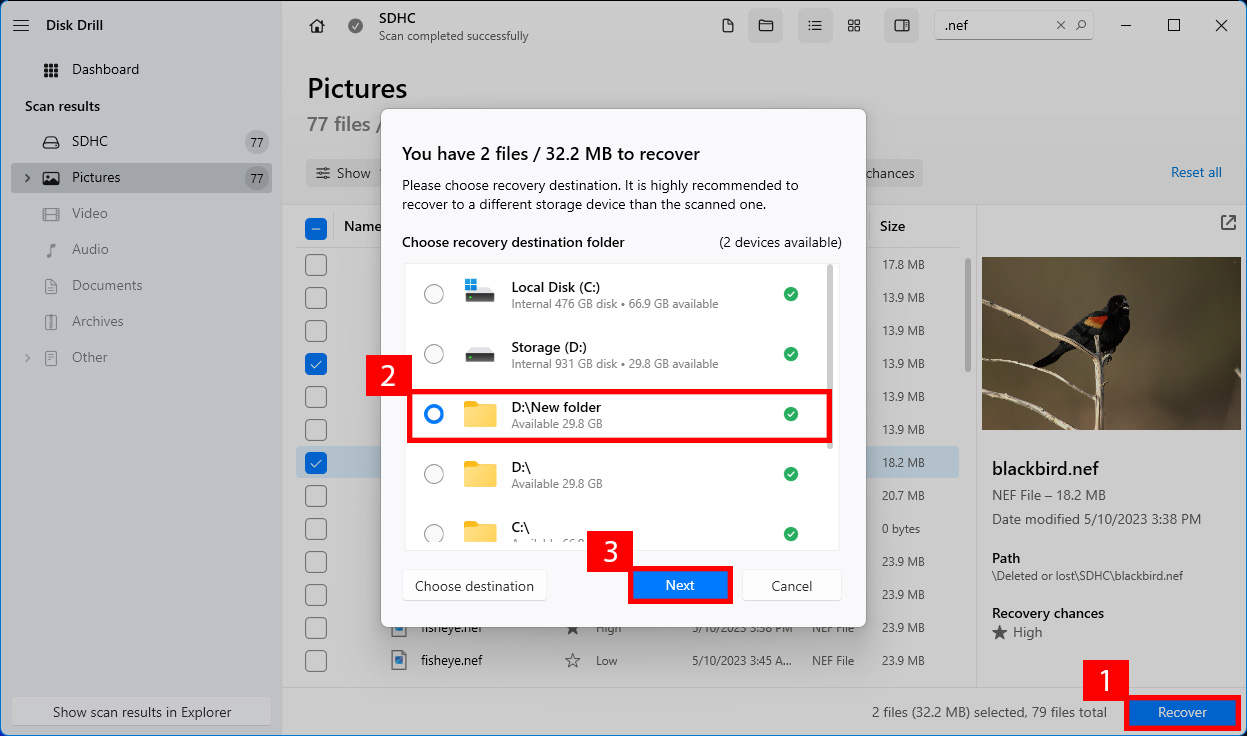
After you’re done selecting files, click on the Recover button. You’ll need to select a path where you want to save the recovered Nikon camera photos. Select a destination different from the SD card to avoid overwriting the data on the SD card. Click Next once you’ve selected a location.
How to Fix Corrupted Nikon Photos
If the reason behind the data loss was a virus attack, the NEF files on your Nikon camera may have been corrupted before they were deleted. Similarly, if the physical sectors on the SD card on which the NEF files are saved have been damaged, the file may become corrupt.
Regardless of the cause, if the NEF files had become corrupt before you lost them, the recovered files will also be corrupt and you won’t be able to open them. Fortunately, fixing a corrupt NEF file is possible. Try one of the following methods to repair a corrupt NEF file:
Method 1:CHKDSK Utility
CHKDSK (Check Disk) is a built-in Windows utility that checks for both logical file system errors and bad sectors on a storage device. If your files have become corrupt because of bad sectors, you might be able to fix it using CHKDSK.
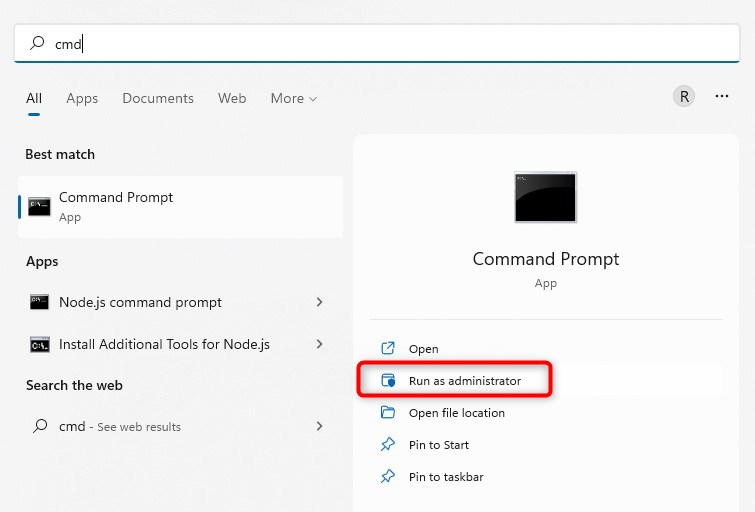
- Launch an elevated command prompt by searching for cmd in the Start Menu, hovering the cursor over Command Prompt, and select Run as administrator.
- Execute the following command to use chkdsk on the SD card:
chkdsk F: /f
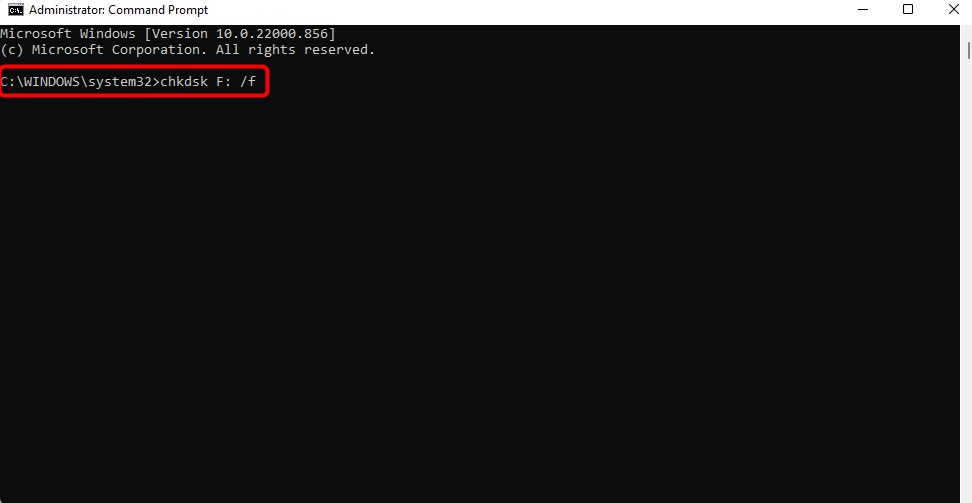
Let the utility scan the SD card for issues. If chkdsk finds an issue, it will try to fix the issue automatically. Once the process is complete, try accessing the NEF files and see if it opens.
Method 2:Convert NEF File to Another Format
One of the simplest ways to repair corrupt NEF files is by changing the file format. For example, when trying to fix corrupt NEF files, you can convert the photos to png or jpg and see if that fixes the problem. Sure, the RAW image data may be lost, but you’ll at least have access to the pictures.
You can convert files into a different format in various ways. Typically, you can simply google the phrase “convert NEF to jpg” or similar to find web-based conversion tools.
Convertio is one such free tool that can help you convert NEF files into a different file format so your files become accessible. Upload your file to Convertio, select a format to convert the file into, and download the file after conversion.
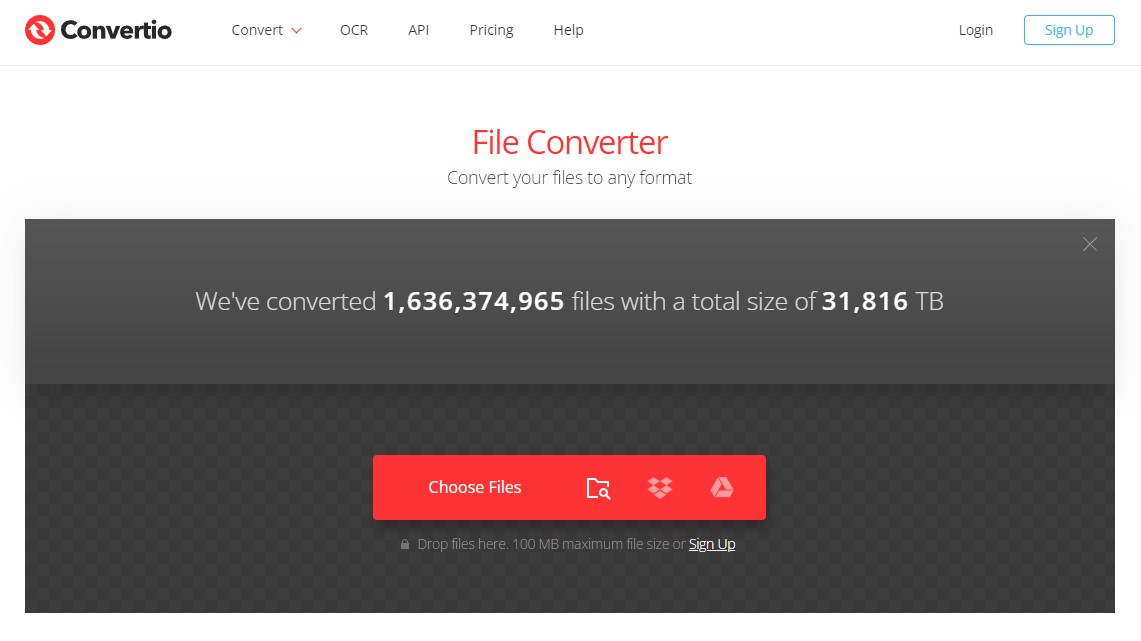
Try opening the converted file, and hopefully, it should open just fine.
Method 3:Use File Repair Software
You can also use a tool like JPEG Repairninja to repair corrupt NEF files. Here’s how you can use JPEG Repairninja:
- Download JPEG Repairninja. it’s a portable utility so you don’t need to install it on your PC. Just launch the zip file and open the file named JPEGrepair.exe.
- Click Continue on the app’s launch screen. Don’t insert the key, we just need to use the demo version.
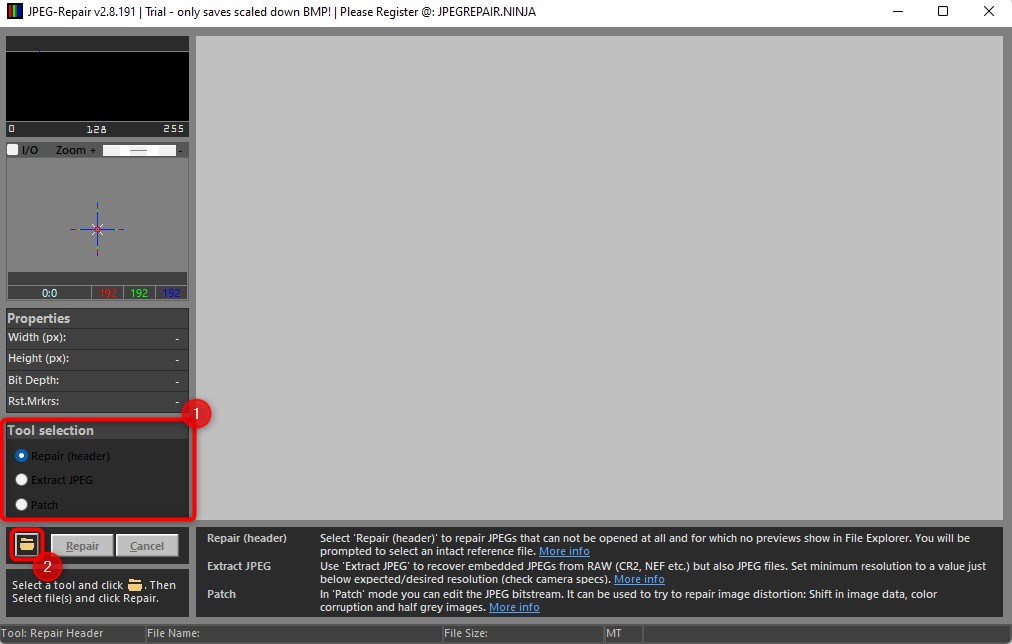
- Select Repair (header) under the Tool selection section. Click on the folder icon and select the NEF file you want to repair. Select a file and click OK.
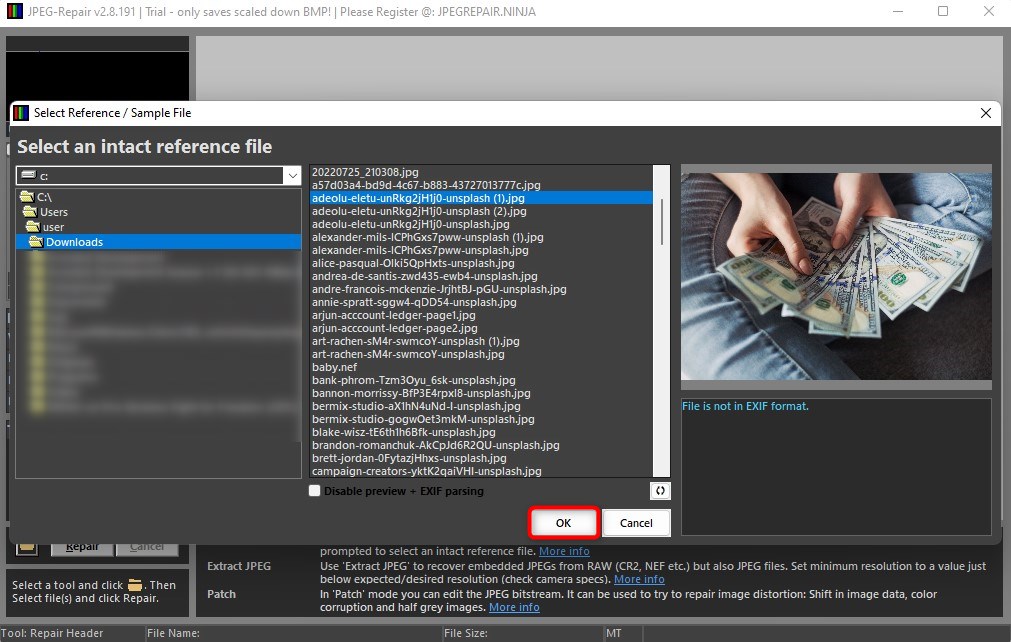
- On the next screen, you’ll need to provide a reference file. The file must be a JPEG file shot with the same camera and settings. Select a JPEG file from your PC or an external storage device and select OK.
- Click Repair.
This should repair your corrupt NEF file. Note that the output file will be in JPG format, not NEF.
How to Prevent Photo Loss on Nikon
Data loss can happen to anyone. However, following these best practices ensure that you don’t fall victim to data loss frequently:
- Back up often: Don’t leave your photos on the SD card. Since you use it often for taking photos, there’s a higher chance something might go wrong, causing you to lose data.
- Have multiple backups: Don’t put all your eggs in one basket. Even when you back up the pictures taken with Nikon cameras, the storage device you’ve backed up on can become corrupt or stop working. It’s best to back up data on multiple devices, especially if you’re a professional photographer.
- Change memory cards during a photoshoot: Just as creating multiple back ups helps minimize the risk of losing data when a storage device is damaged, changing memory cards during the shoot helps minimize data loss too. If you end up losing a memory card or damaging it, you won’t lose all your data and will need to recover a smaller volume of data.
Wrapping Up
Nikon photo recovery is possible in most cases, especially if it hasn’t been long since you lost them. Your best bet is to use a data recovery tool that can help recover lost data from your Nikon camera. Hopefully, you were able to recover NEF files using one of the methods above.
