 Shared network drives are a great way to share files with other users and help keep your local storage space low. However, because the drive isn’t physically connected to your computer, the data recovery process for restoring deleted or lost files is slightly different.
Even so, data recovery is still very much possible if you act quickly enough. We’re going to explain how data deletion works on network drives, and how to recover deleted files from network drives.
Where Do Files Go When Deleted From a Network Drive
This depends on how the network drive is configured. When you delete a file on a local drive, it’s sent to your Recycle Bin. Well, it can work the same way for network drives too. When you delete a file, it may be sent to the Recycle Bin on the remote computer it’s physically connected to. However, it’s also possible that the network drive was configured to automatically delete data permanently, skipping the Recycle Bin.
Regardless of how the network drive is configured, you do have a few options for recovery. Let’s explore those next.
3 Ways to Recover Data From Network Storage
Here are a few ways you can recover data that was deleted on a network drive. Bear in mind that these methods are aimed at tackling data that was deleted from remote storage on a PC that’s connected to your network.
Method 1: Restore Previous Version
Shadow copies are snapshots of your data. On a personal machine, File History makes use of shadow copies to protect your data and restore previous versions. If your organization stores shadow copies of the data on the server, you can restore a previous version of the folder that contains the files before they were deleted.
Rather than restoring a previous version on the network drive directly, make a local copy to your machine and restore the previous version that way.
Follow these steps to restore a previous version of your lost data:
- Open File Explorer.
- Navigate to the parent folder that contained the data you deleted.
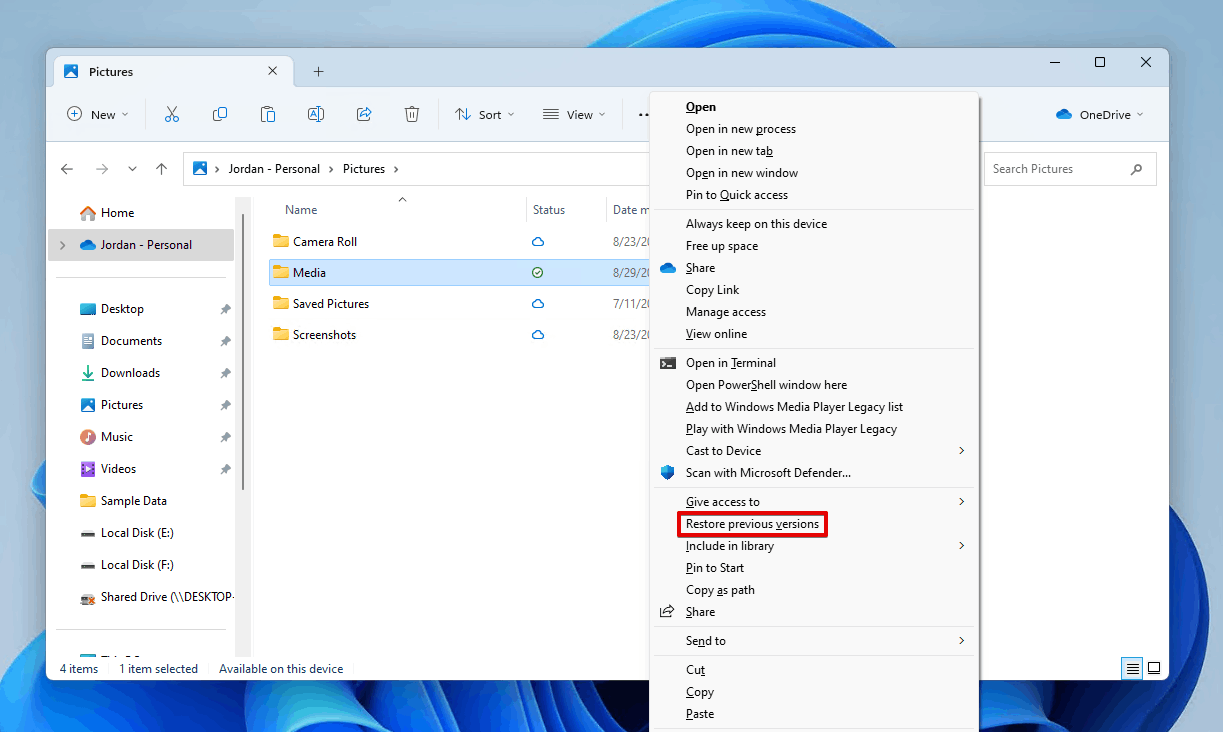
- Shift right-click the folder and click Restore previous versions.
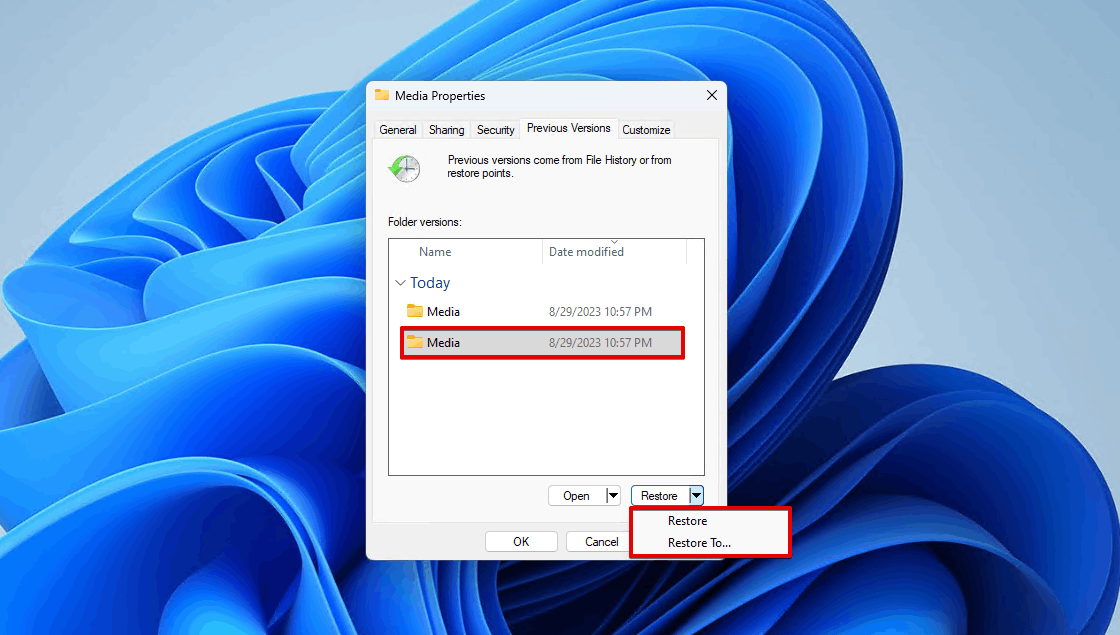
- Select a version to restore, then either click the Restore button to restore the data in place, or click Restore To and choose a custom destination for the files.
Method 2: Check the Recycle Bin on the Remote Computer
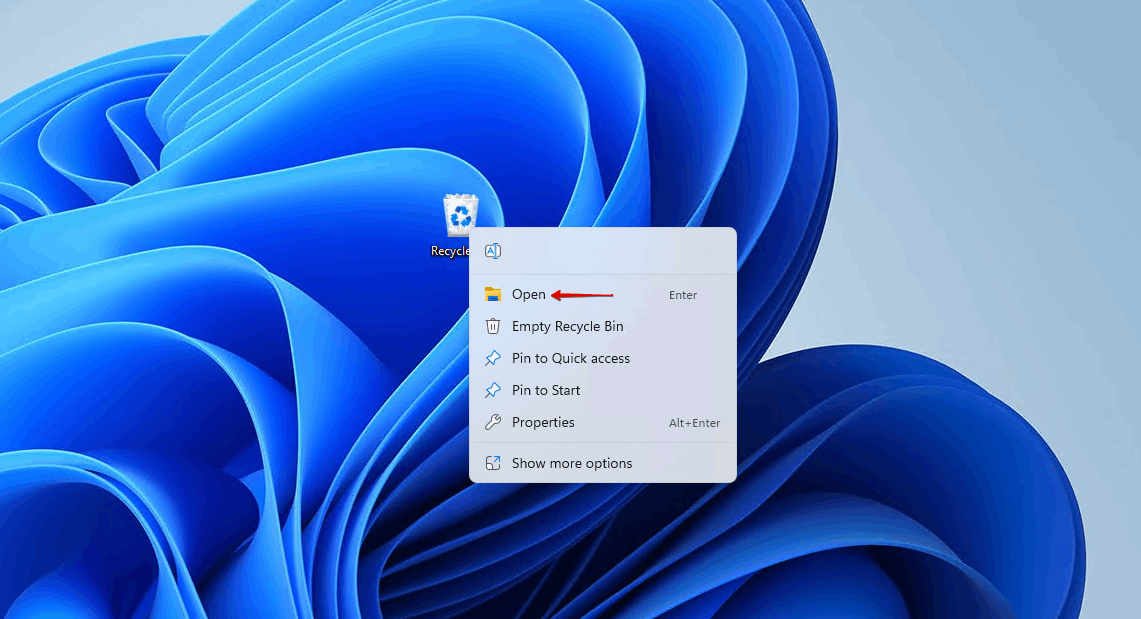
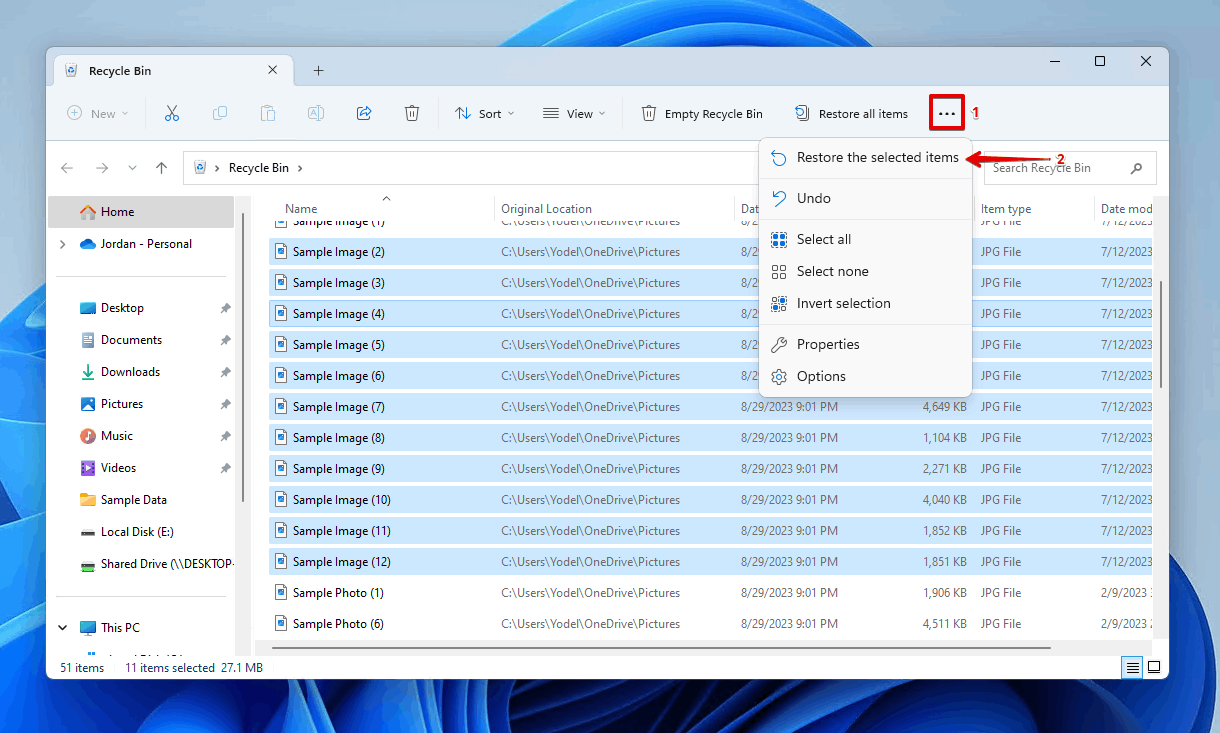
For this method, you will need access to the remote computer. You can log in to the shared computer and see if the files are stored in the shared drive’s Recycle Bin. If they are, you can restore them before they’re permanently deleted. The Recycle Bin is found on the Desktop. If you’re having trouble finding it, see our guide on how to locate the Recycle Bin in Windows.
Follow these steps to access deleted files that are stored in the Recycle Bin on the network drive:
- Open Recycle Bin.
- Select the files you want to restore, then click Restore the selected items.
Method 3: Use a Professional Data Recovery Tool
If you can’t restore a previous version of the deleted files or recover them from Recycle Bin, then your next option is data recovery software. Data recovery software is specially designed to scan your drive and recover data that has been deleted.
Our preferred choice of data recovery software is Disk Drill. It’s an excellent option for recovering deleted files on a network drive because it uses robust scanning techniques to dig up any data that’s recoverable. Furthermore, it has a very user-friendly interface that makes it easy to preview and recover your data without a hitch.
You cannot use Disk Drill to recover data from the drive remotely. You must either install Disk Drill on the remote machine or remove the network drive and connect it locally.
The below recovery steps are being performed on Windows 11, but they are the same for any other version of Windows. Here’s how you can recover deleted files on a network drive using Disk Drill:
- Download and install Disk Drill.
- Connect the shared drive to your computer (unless you’re performing recovery on the remote computer).
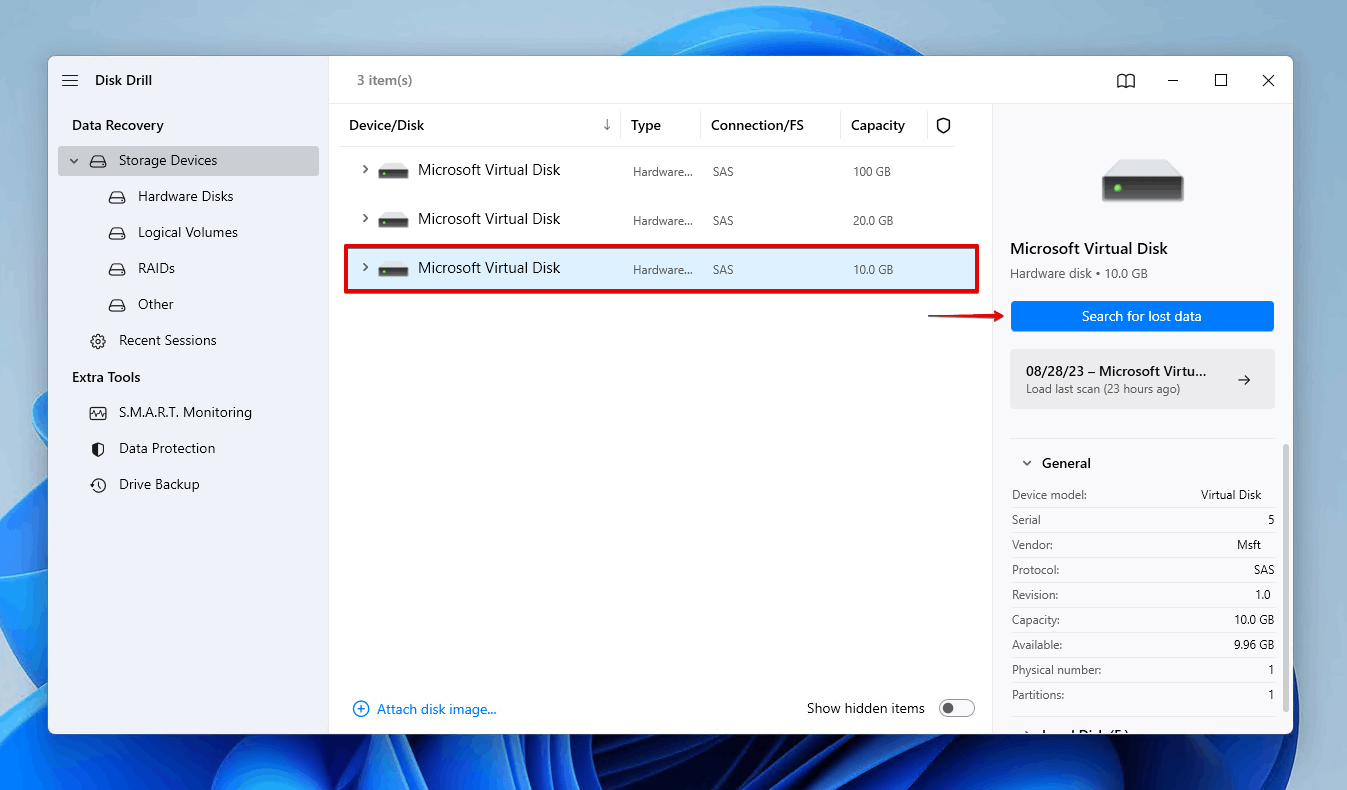
- Select the network drive and click Search for lost data to begin the scan.
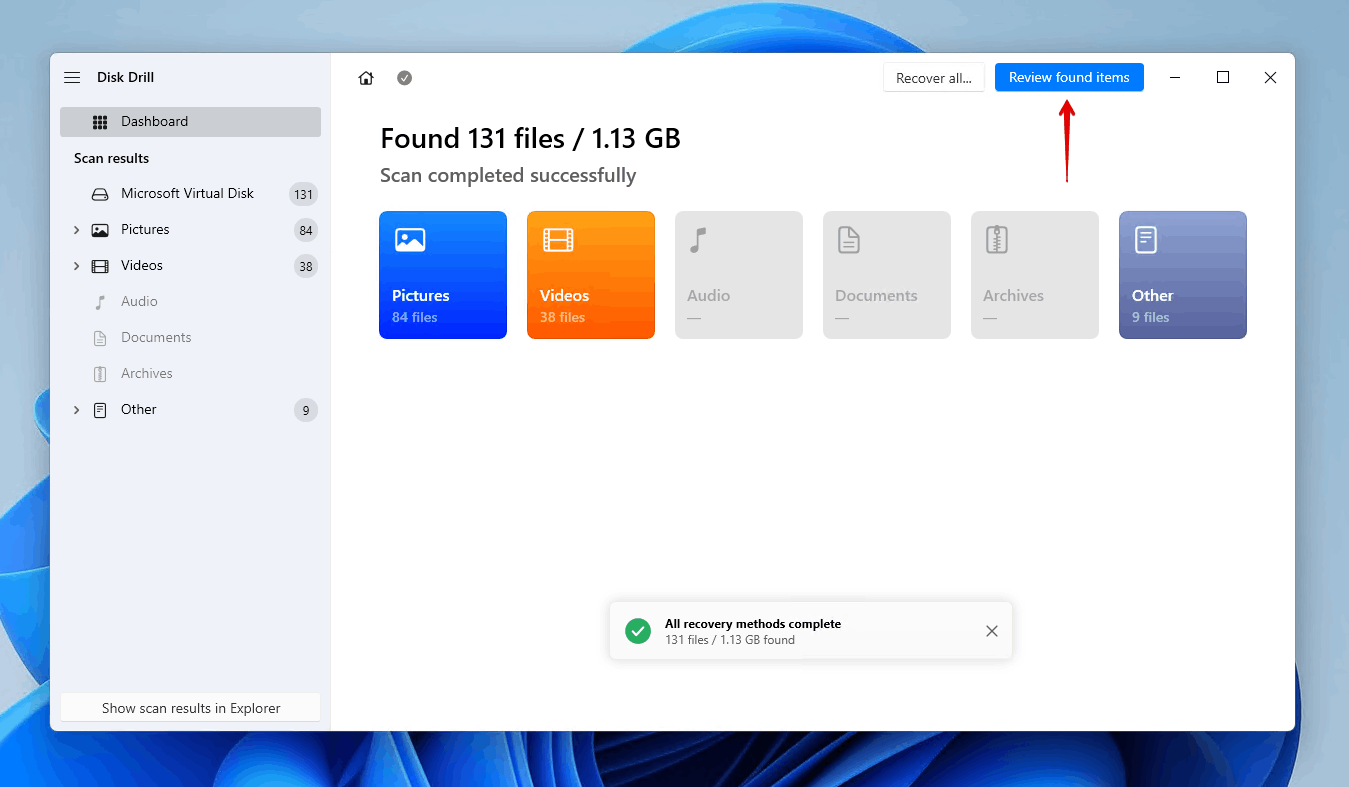
- Click Review found items once the scan has finished. If you want to recover everything instead, click Recover all.
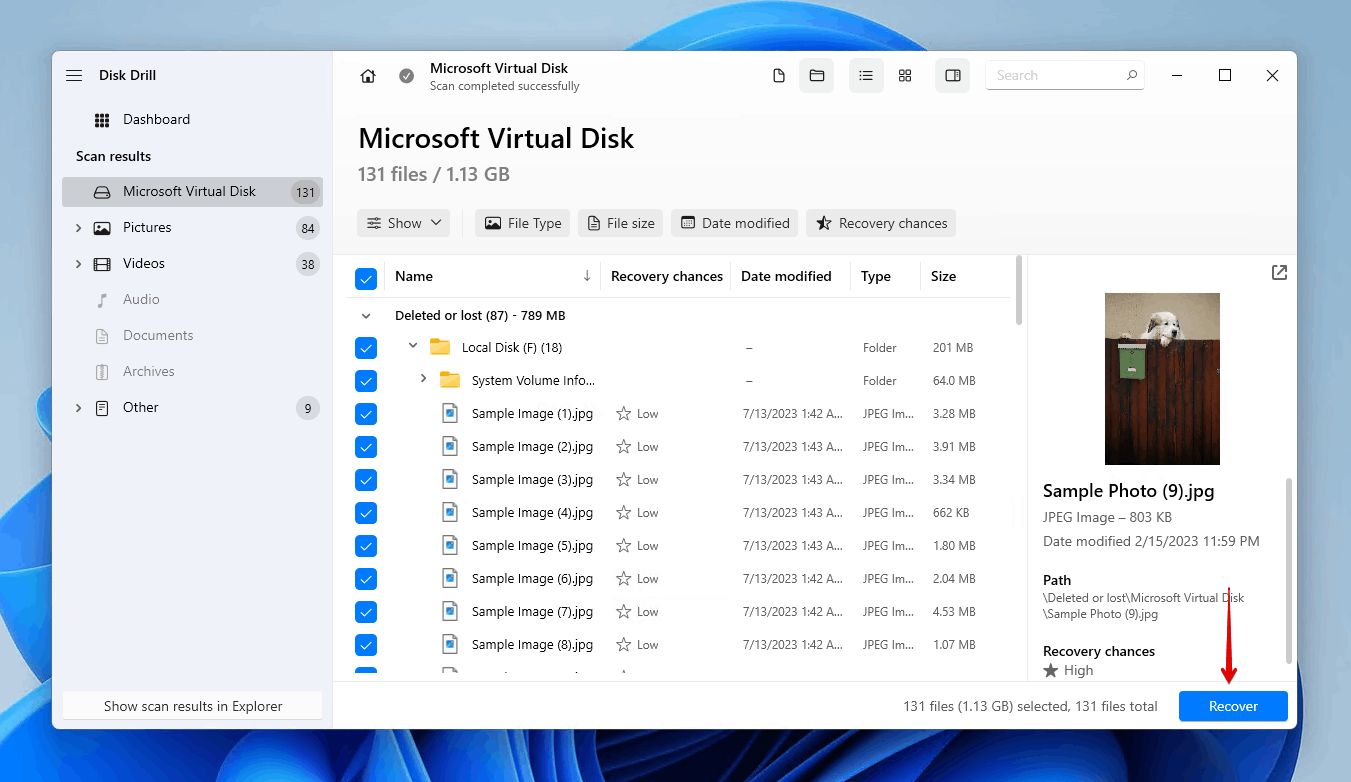
- Choose what files you want to recover from the network drive. Deleted data can be found in the Deleted or lost and Reconstructed sections of the recovery window. Be sure to preview your data before recovery and use the recovery chances column to see what files have the best chance of being restored successfully. Click Recover when you’re ready.
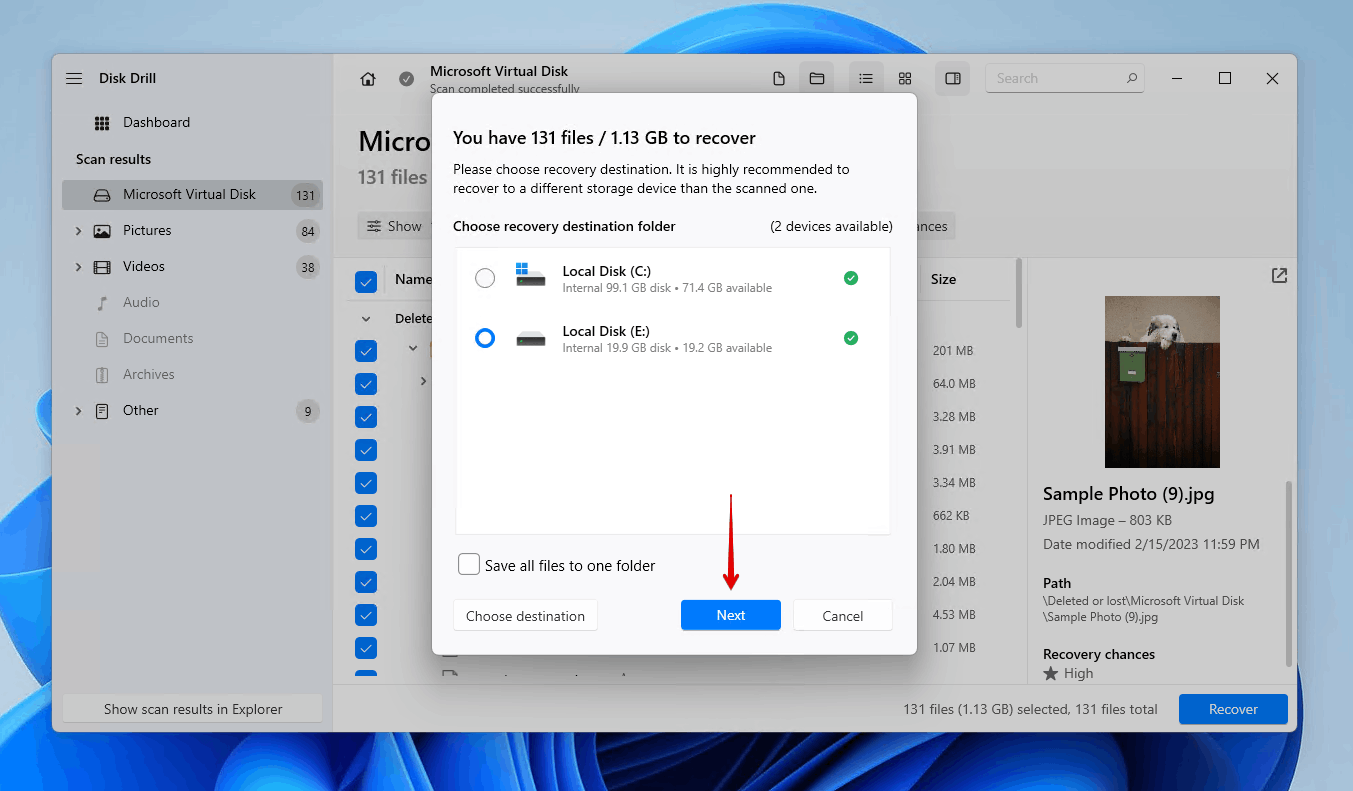
- Choose a safe location for recovery on a separate storage device, then click Next.
Conclusion
Recovering data from a network drive is definitely possible, as is similarly seen with NAS data recovery. However, the method of recovery you use may vary depending on the situation.
You can first try restoring the data from a previous version that was saved by File History. If no backup is available, you can also check the Recycle Bin on the remote computer. Otherwise, if the data was permanently deleted, you must perform data recovery using data recovery software either on the remote machine or by connecting the network drive to another computer to perform local recovery.


