Turned on your computer, only to discover an entire partition has gone missing? Or, perhaps you made a mistake in Disk Management and deleted the wrong partition. Either way, your partition, along with all of the data it contains, is now gone.
The good news is that there’s more than one way to recover a deleted partition and restore your data. However, the key to success is acting fast, because the longer you wait, the higher the risk of your files being lost for good. We’ll guide you through the proven ways to safely recover your data.
Why the Partition May Be Deleted
Most of the time, when a partition is missing or deleted, it’s caused by some sort of logical (software-related) or physical issue.
Your next steps will depend on your situation, which usually falls into one of these three categories:
- The partition is missing, but not confirmed to be deleted. Sometimes the partition is actually just hidden, not deleted. If you didn’t explicitly delete it, check Disk Management and assign or change the drive letter.
- The partition was deleted, either by you or an error. If the partition was definitely deleted, the data itself is likely still intact. Recover the data with Disk Drill, or restore the partition with TestDisk.
- The partition was deleted, and a new one created. The new partition may have overwritten older metadata (if it was the same file system), which usually only leaves the possibility of signature recovery. Scan and recover the data with Disk Drill, or try to restore the old partition with TestDisk.
The most common and main reasons that your partition could either have been lost or is not showing up anymore are:
| Reason | Description |
| 👤 Accidental deletion | If you’re not sure what you’re doing, or you’re making quick adjustments in Disk Management or DiskPart and make a mistake, you can end up accidentally deleting the partition entirely. |
| 🗃️ Partitioning error | While you’re shrinking a partition, you may enter the incorrect value and shrink it more than you intended to. Or, your computer may crash while you’re trying to extend or shrink the volume, causing it to become corrupted or damaged. |
| 💥 Power failure | Sudden power failure can interrupt important processes, like formatting, that will leave your partition in a corrupted or RAW state. If you were in the process of writing data to the drive, it can also cause some of your files to become corrupted and unusable. |
| 💻 OS update | If your computer shuts down before it finishes updating the operating system, a number of issues could occur, like your system partition becoming corrupted. |
| 📊 Partition table corruption | When a partition table becomes corrupted, the operating system will not know how to locate the partitions on the drive. Therefore, you will lose access to all of the data on those partitions until the partition table is repaired or restored. |
| 💿 Hardware failure | Sudden hardware failures, like a failing power supply, hard drive motor, or any other moving parts, can suddenly stop critical processes on your computer and result in the corruption of your hard drive. |
| 🕷️ Malware | Malware, like viruses, can be designed to intentionally damage the partition table of your drive (in addition to other areas of your computer). In such cases, you may find some of your partitions (and the data on them) become lost or encrypted. |
| 🗄️ Firmware Issues | Drivers are an essential firmware component of your storage device. Outdated or corrupted storage device drivers will break down communication between your drive and Windows. Until it’s fixed, you won’t be able to access the data on the drive. |
Unless the hard drive has experienced physical damage, the partition should be recoverable. The quicker that you act, the better the chance you have of successfully recovering the missing partition and the data that is on it.
Solid-state drives (SSDs), the presence of TRIM can complicate recover. However, deleting a partition does not always trigger a TRIM command right away, so recovery is possible if you act quick. However, if you created a new partition, there’s a high chance that TRIM has already erased the data. Regardless, scan the drive with Disk Drill for free and use the Hex view to confirm if data is present, or if only zeros remain.
How to Recover Specific Files from a Deleted Windows Partition
Before troubleshooting, deleted partition data recovery comes first. Any action, including fixes, can cause the data to be overwritten, making it unrecoverable. If you want to recover Windows partition data, a reliable recovery tool is needed.
We rely on Disk Drill for this, as it can detect a deleted partition as a whole and keep the original folder structure and file names. It supports all major file systems, including FAT32, exFAT, NTFS, ReFS, and more. Even the less-technical details stand out, like the streamlined user interface and ability to preview files before recovery. This, along with free scans and 100 MB of free recovery, makes it a good choice for users of all skill levels.
If the drive was already unstable before the partition was lost or deleted, we strongly recommend creating a byte-to-byte backup of the disk and scanning the image instead. This prevents worsening the physical condition of the drive during recovery.
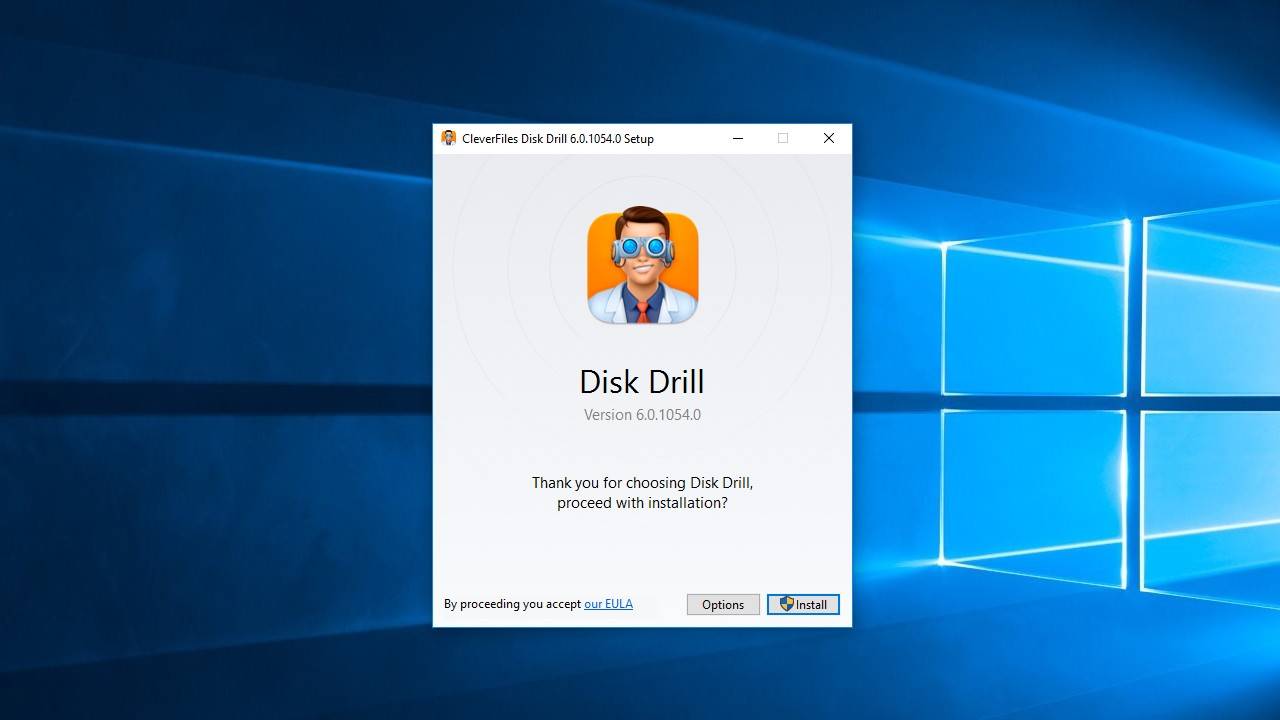
Step 1. Download, install, and open Disk Drill for Windows.
Keep in mind that when installing Disk Drill you will have the best chance of success by installing it onto a separate physical drive, be it internal or external. We want to avoid choosing the same physical storage device that we’re trying to recover data from, so that the data on it is not overwritten.
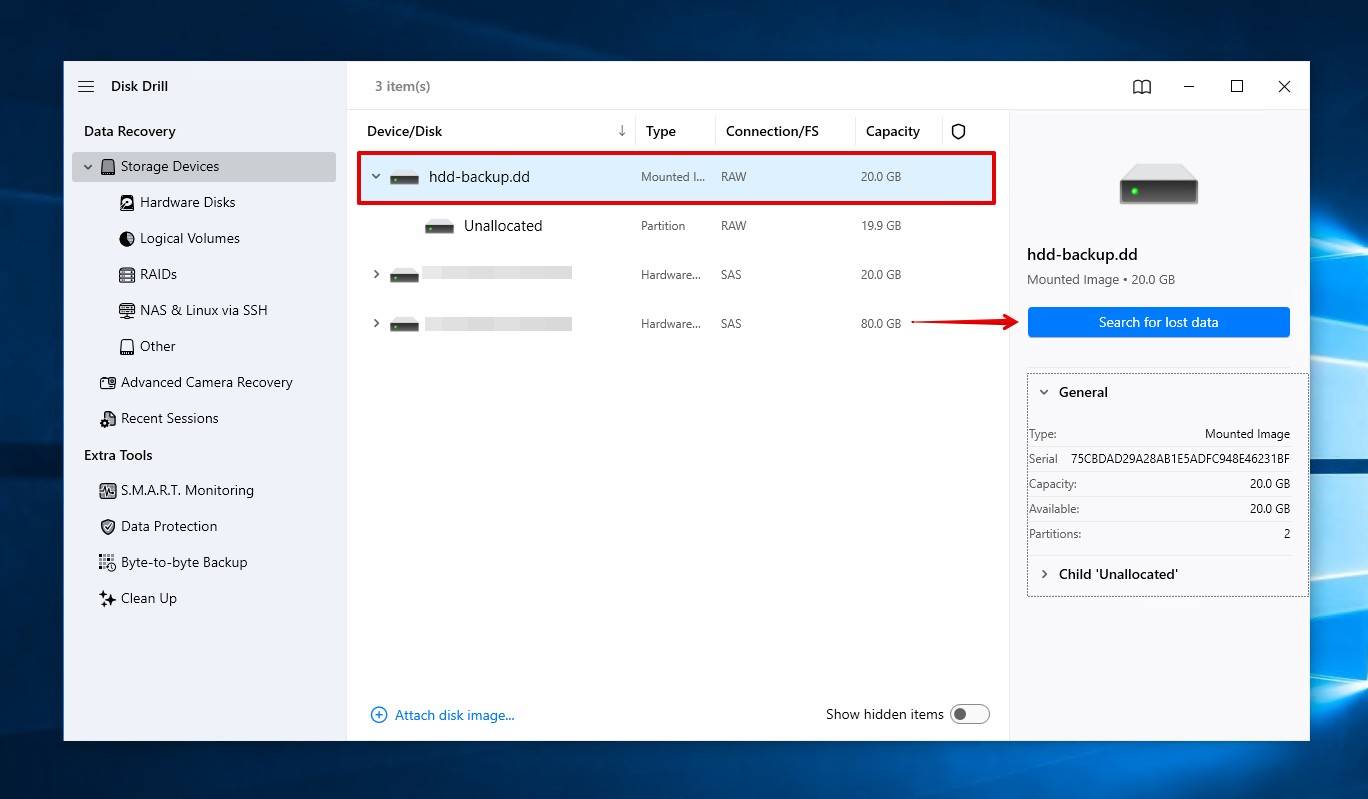
Step 2. Scan your Windows computer.
After launching Disk Drill, you’ll automatically be met with the Storage Devices screen, which shows all currently connected (and readable) storage devices. Select your drive, then click on the “Search for last data”.
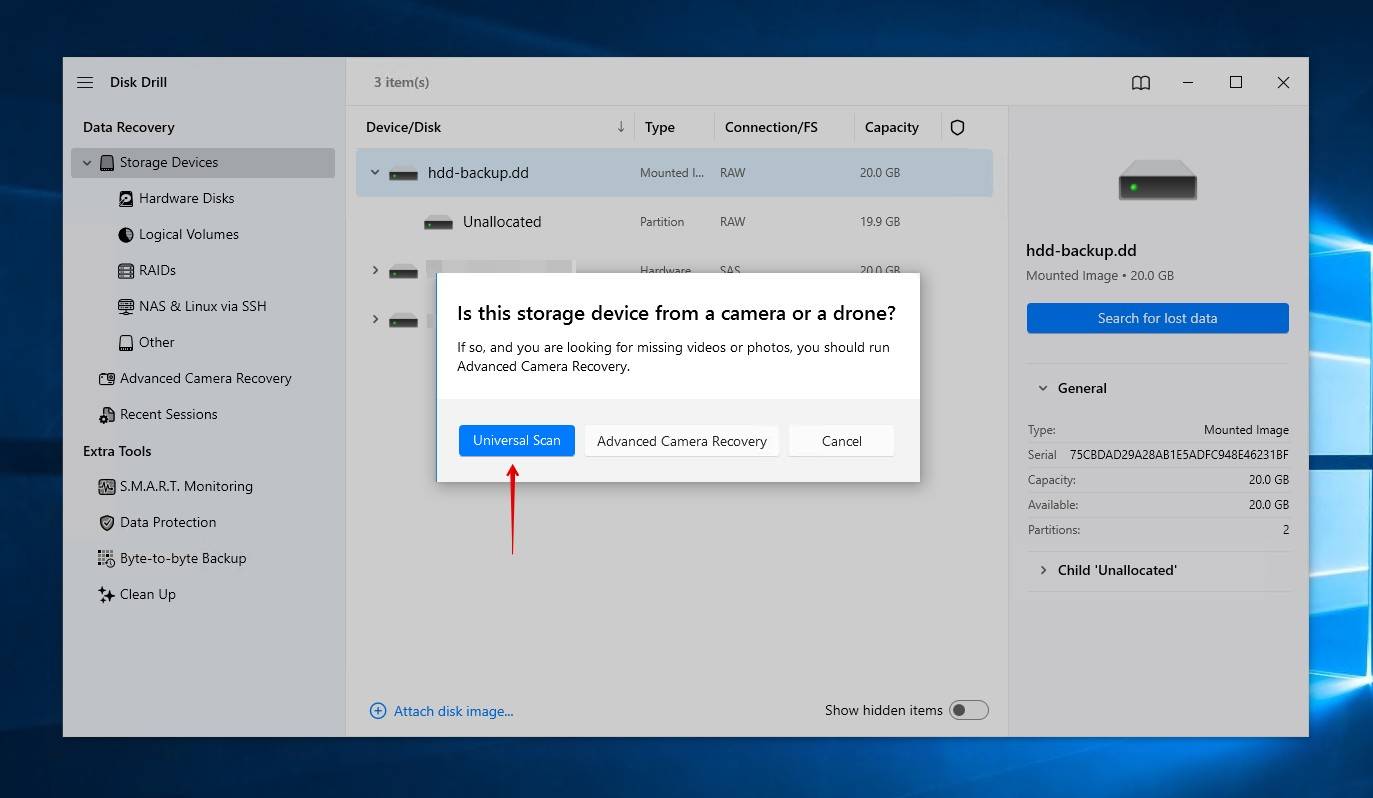
Step 3. Choose a scan type.
Time to choose your scan type. Universal Scan is what we’ll be using, which scans for lost or deleted data and partitions. Advanced Camera Recovery is reserved for the recovery of fragmented videos from cameras and drones.
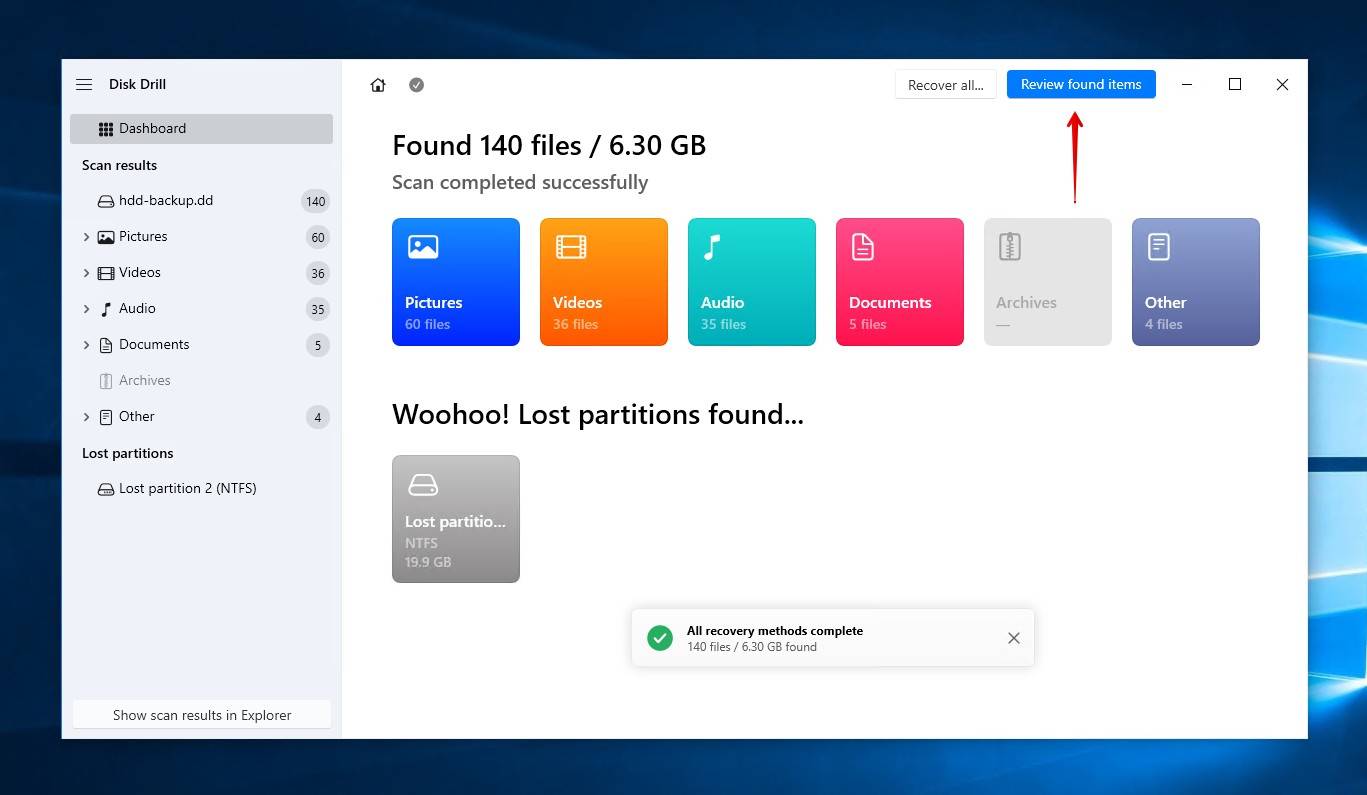
Step 4. View the recovered data.
As our computer is being scanned, Disk Drill will start to populate the window with the number of files it has found, broken down by file format. Under “Wooho! Lost partitions found…”, you’ll also see that Disk Drill includes the deleted partition we were looking for. You can click on the lost partition to only explore that data, or click “Review found items” in the upper right-hand corner to explore everything.
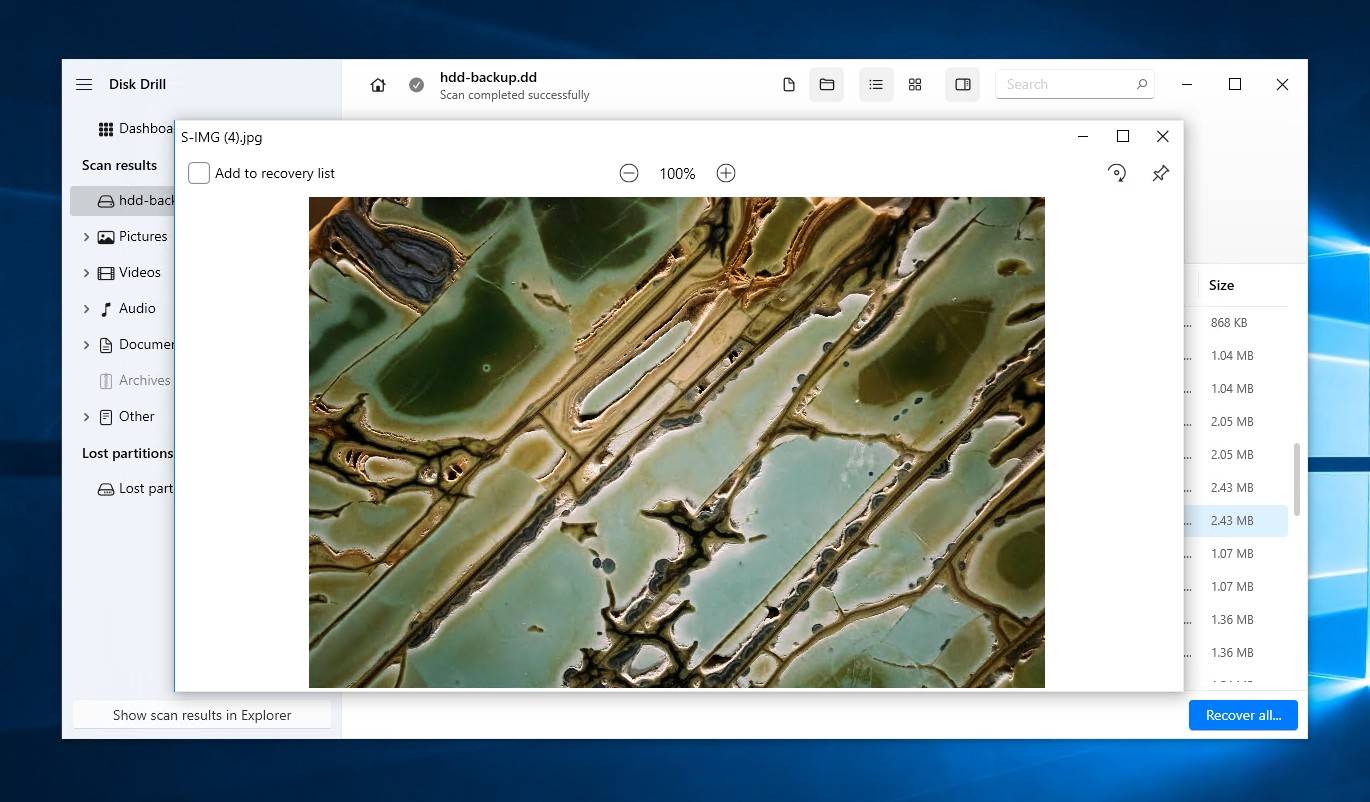
Step 5. Preview selected files before recovering.
Double-click on a file to enter the “preview” mode and look at the image before recovering it. Be aware that anything that has a preview can be recovered. Disk Drill undoubtedly found more files than you actually need, so you can refine the results by filtering by file type, size, date modified, or recovery chances. In the left, you can also view certain file formats only, like Pictures or Videos, to filter out the irrelevant data.
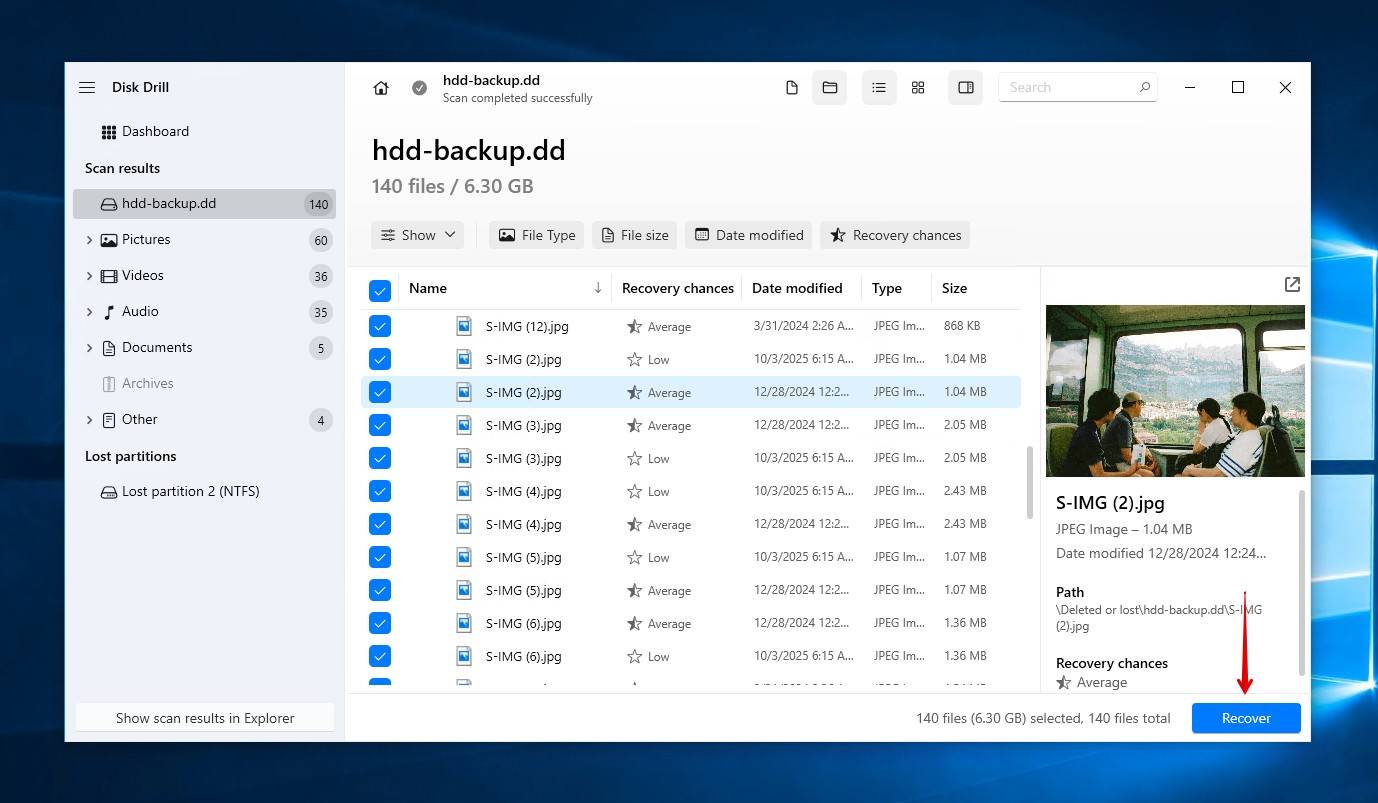
Step 6. Choose what to recover.
Select the files you wish to recover by ticking the checkbox next to each. Disk Drill lets you recover up to 100 MB for free, enough to recover essential data or just trial what the software can do. When you’re ready, click on the Recover button at the bottom-right.
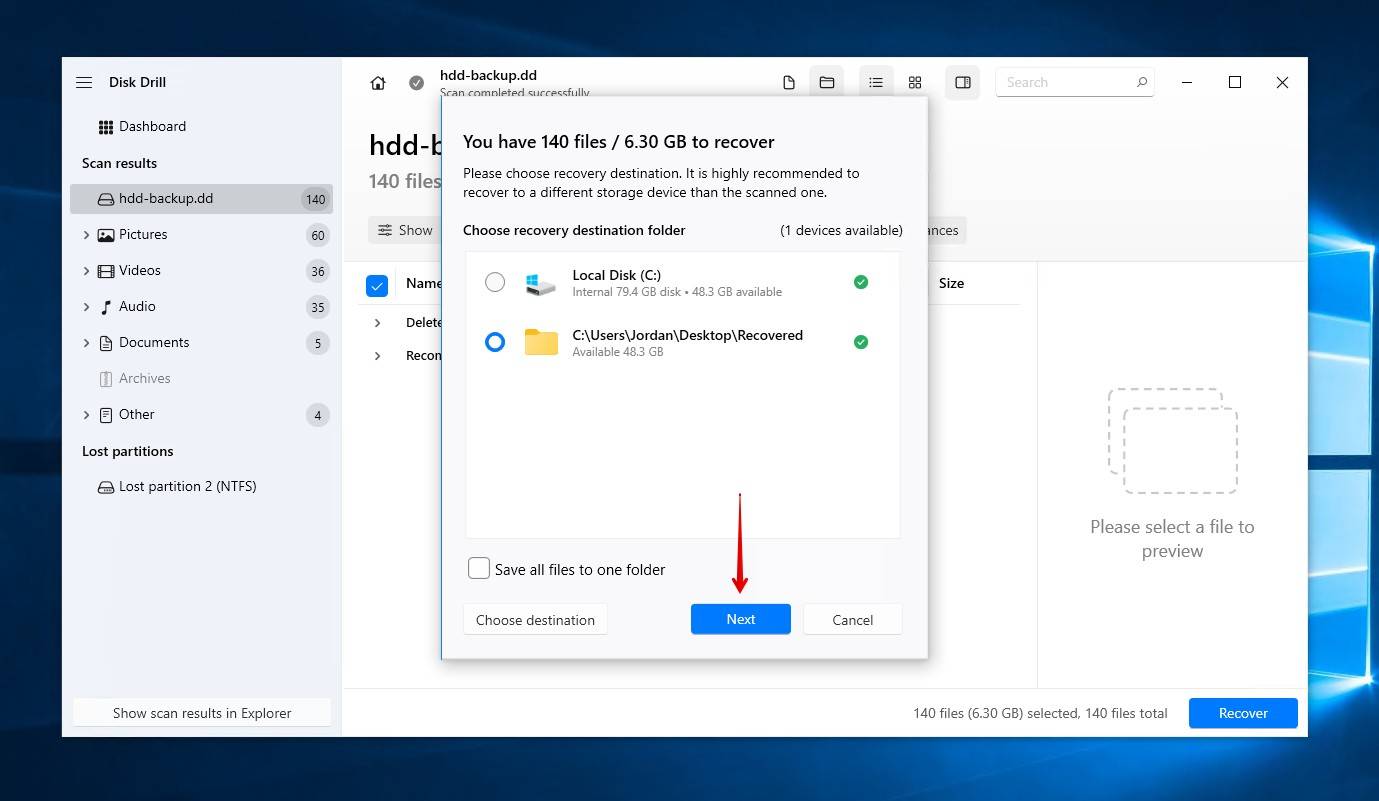
Step 7. Recover your missing data.
Choose where you want to store the recovered files. Again, just like with installing Disk Drill, it’s best to choose a separate physical drive from the one you’re recovering the data from to avoid corrupting it during recovery. When ready, click Next.
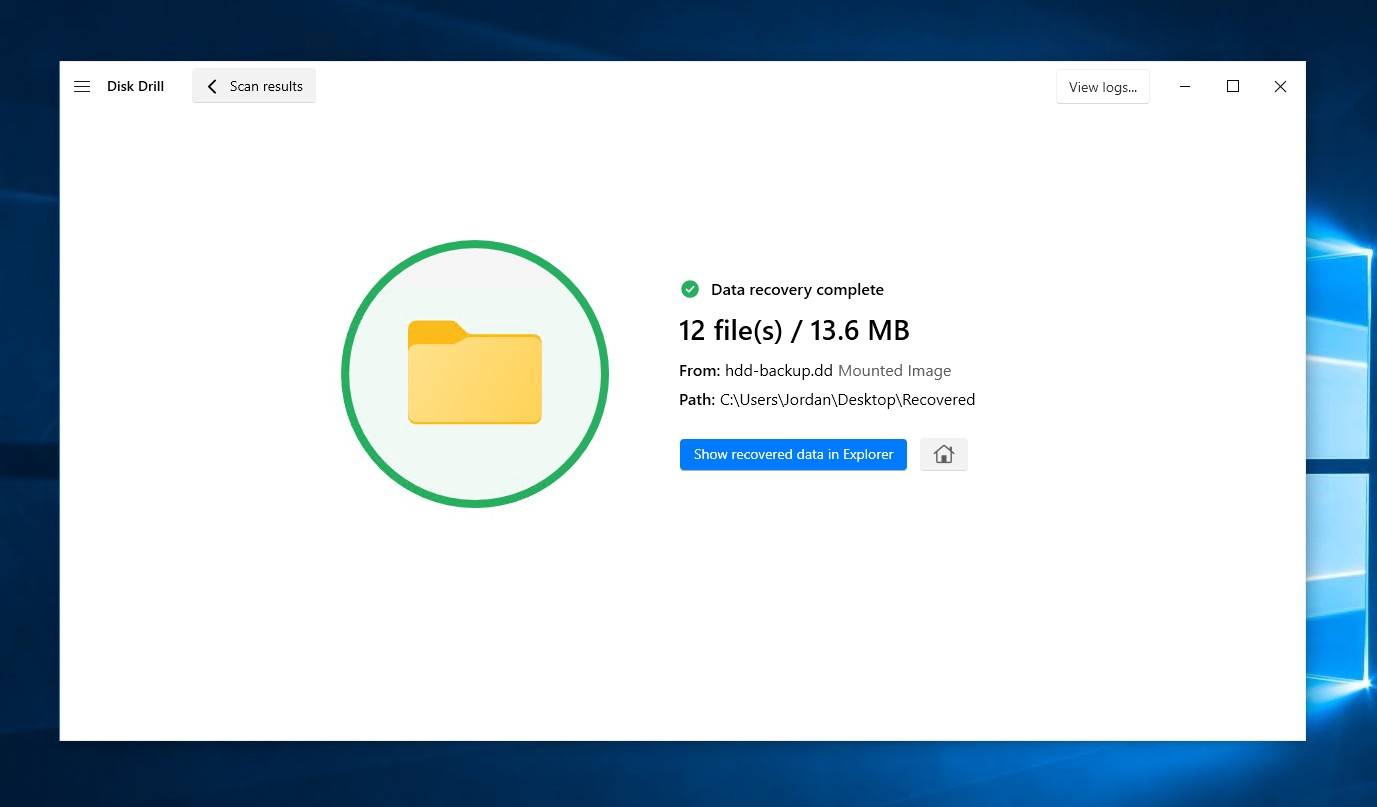
Step 8. Verify the recovery was successful.
After the recovery has finished, Disk Drill will give you a confirmation notification along with the option to open the folder I chose for recovery.
How to Recover the Entire Partition
If you only managed to restore part of your data using the previous method, or you decided against recovering the data before jumping into fixes, this section will cover the methods you can use to recover deleted partitions in Windows 10 by fixing the underlying issue.
Already recovered your data and just want to restore your partition to working order? Jump ahead to how to create a new partition.
Method 1:Assign or Change Drive Letter
If your partition is not visible in File Explorer, you need to check it in Disk Management. Windows automatically assigns drive letters to storage devices you connect to your computer. If the drive letter has dropped, or if Windows failed to assign one, assigning a drive letter or changing the existing one may be enough to make it visible and accessible again.
This method is only viable if the partition is still visible in Disk Management. If it’s not, you will need to create a brand new partition using the next method instead.
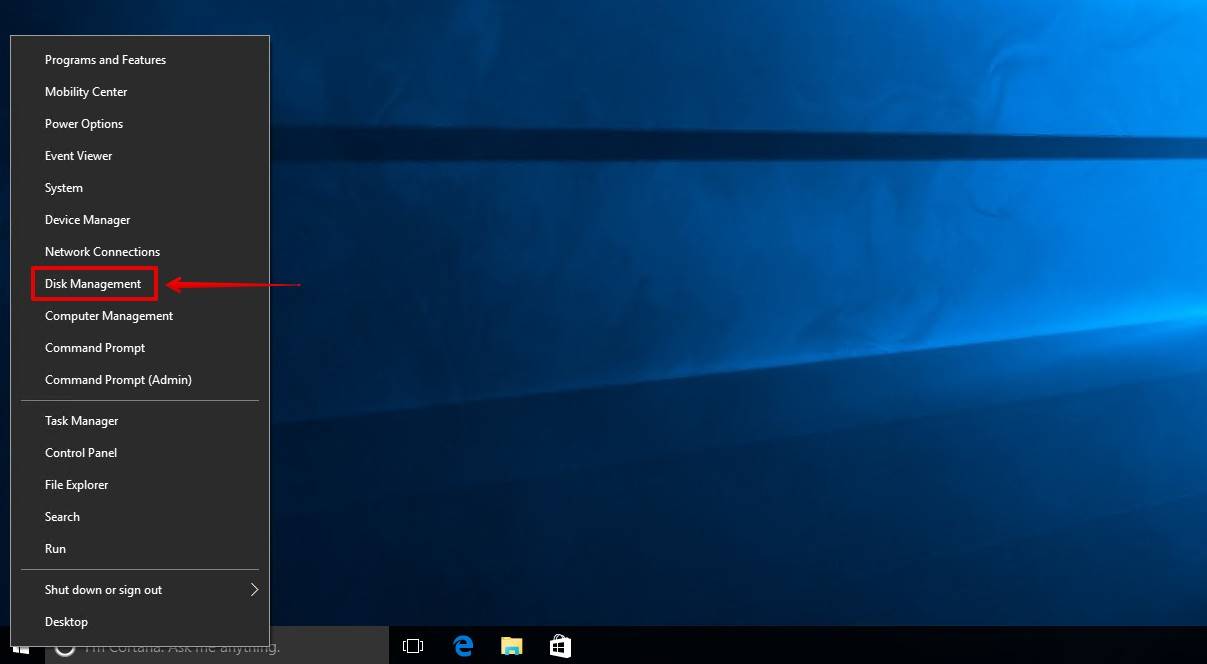
- Right-click Start and click Disk Management.
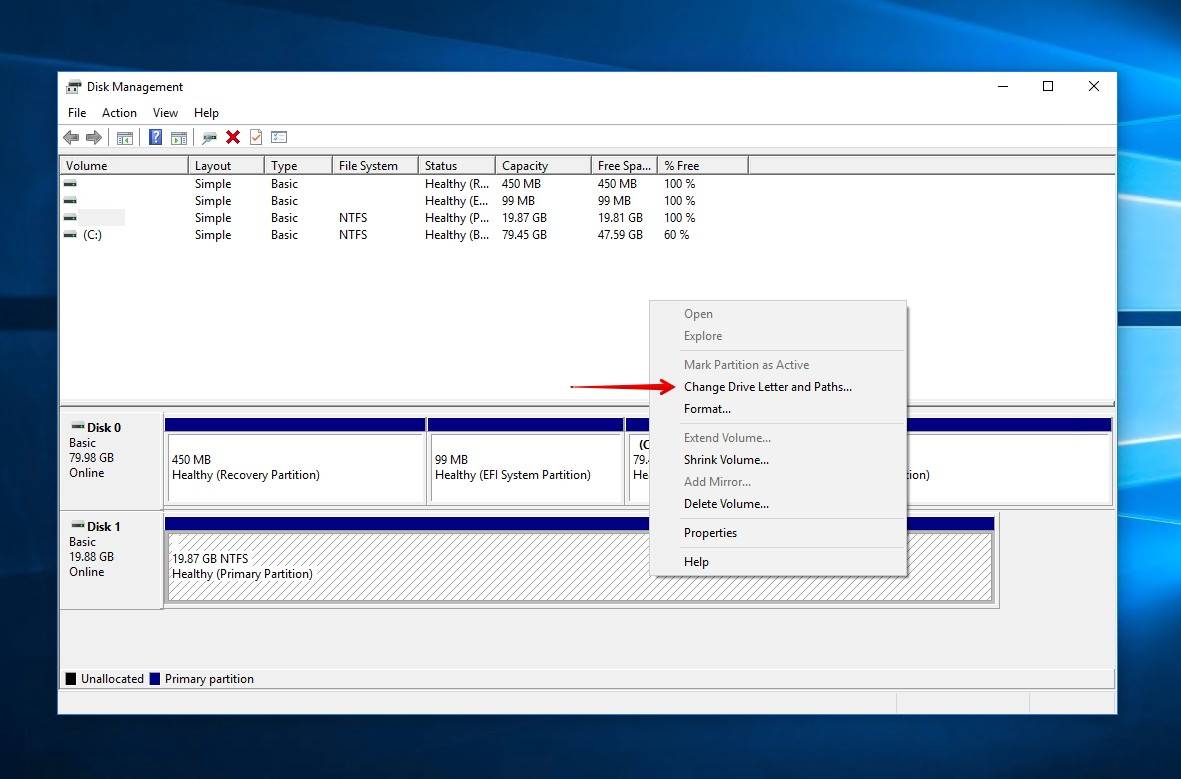
- Right-click the volume if the partition is visible. Select Change Drive Letter and Paths.
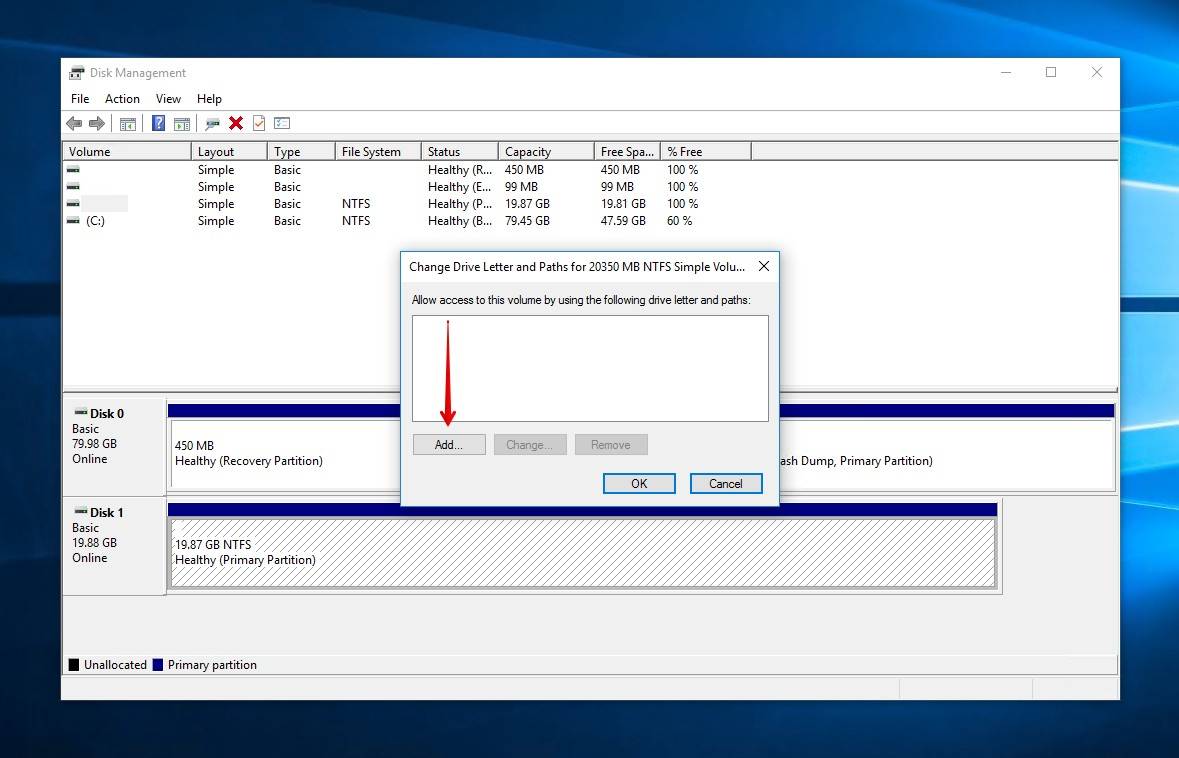
- Click Change if a drive letter is already assigned. If there is no drive letter, click Add instead.
- Select a new drive letter from the dropdown menu and click OK.
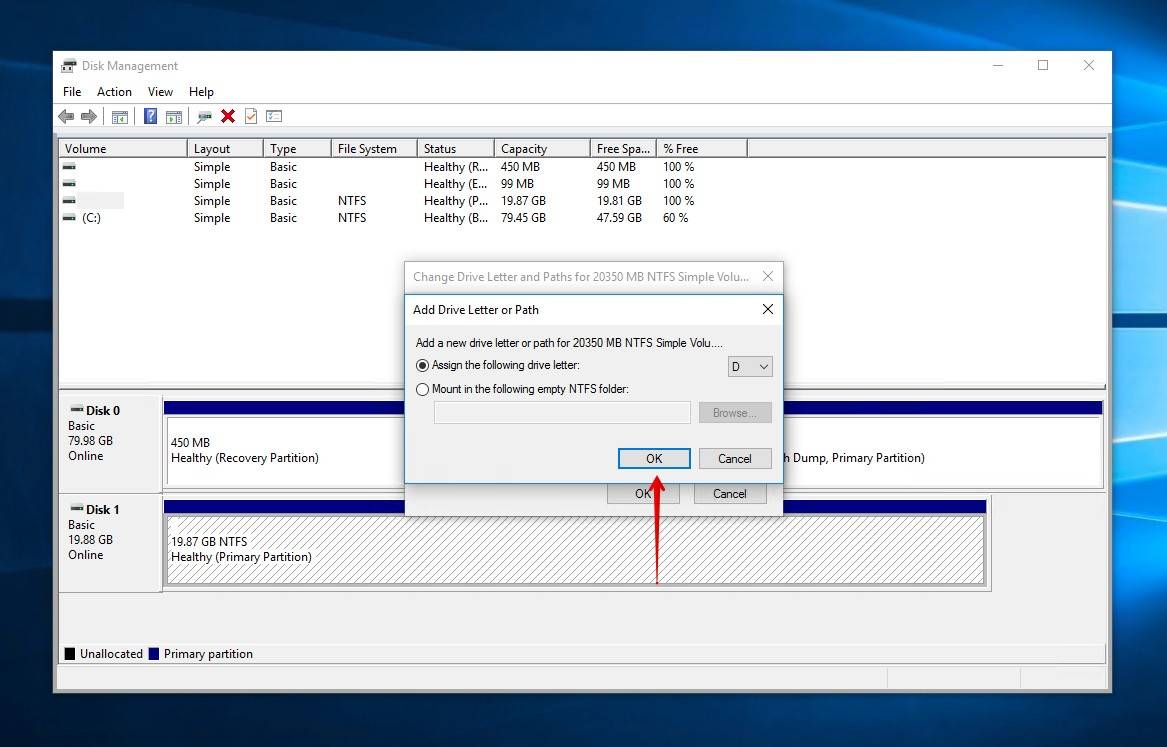
- Click Yes if prompted to confirm the drive letter change.
Method 2:Use TestDisk to Restore Partition
If you’re recovering a partition that’s simply used for data storage, you can use TestDisk to recover the entire partition, as well as the data on it. TestDisk is an open-source partition recovery tool. It’s trusted in the recovery community for its efficiency and favored by many because it’s free.
TestDisk is a slightly more technical method. Choosing the wrong option or pressing the wrong button can cause further damage, potentially even making some of the data unrecoverable. Therefore, making a byte-to-byte backup of the partition first is recommended.
It can scan your drive for any lost partitions and recover them to their original state, either by repairing the corrupted partition table or rewriting the partition from an existing backup. Here’s how to use TestDisk to perform lost partition recovery:
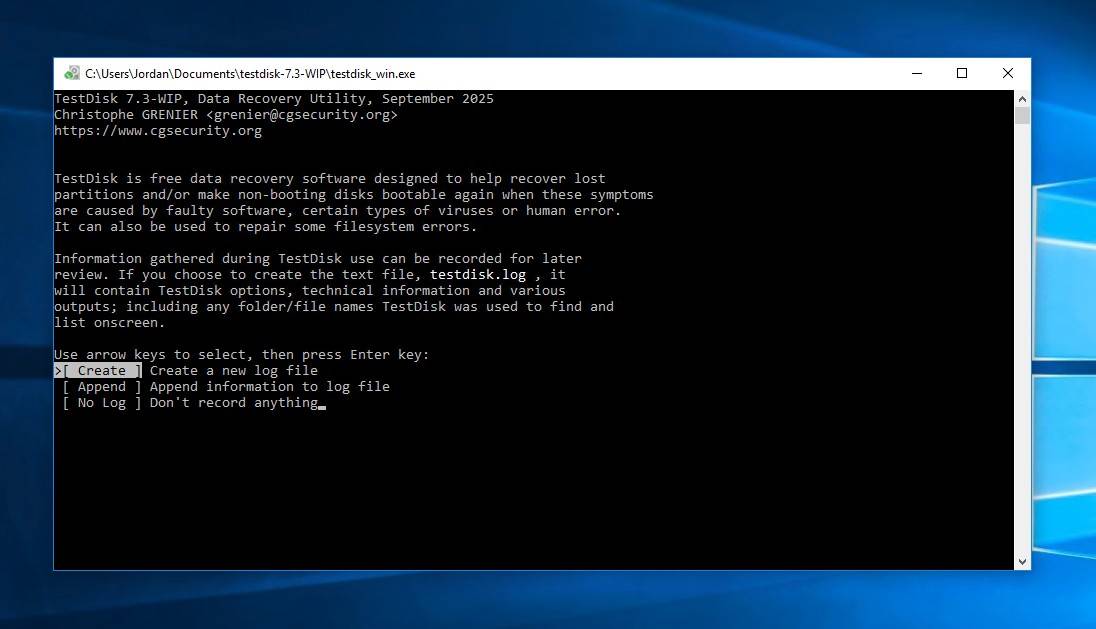
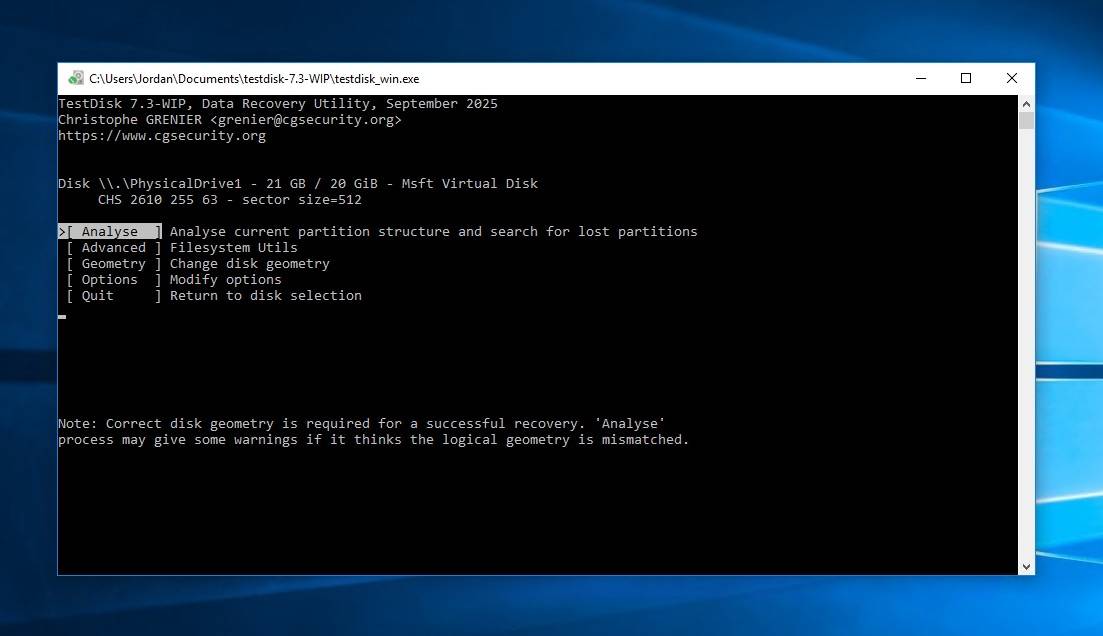
- Download TestDisk and extract the contents. Open testdisk_win.
- Press Enter on the Create option to create a log of the actions you’re performing.
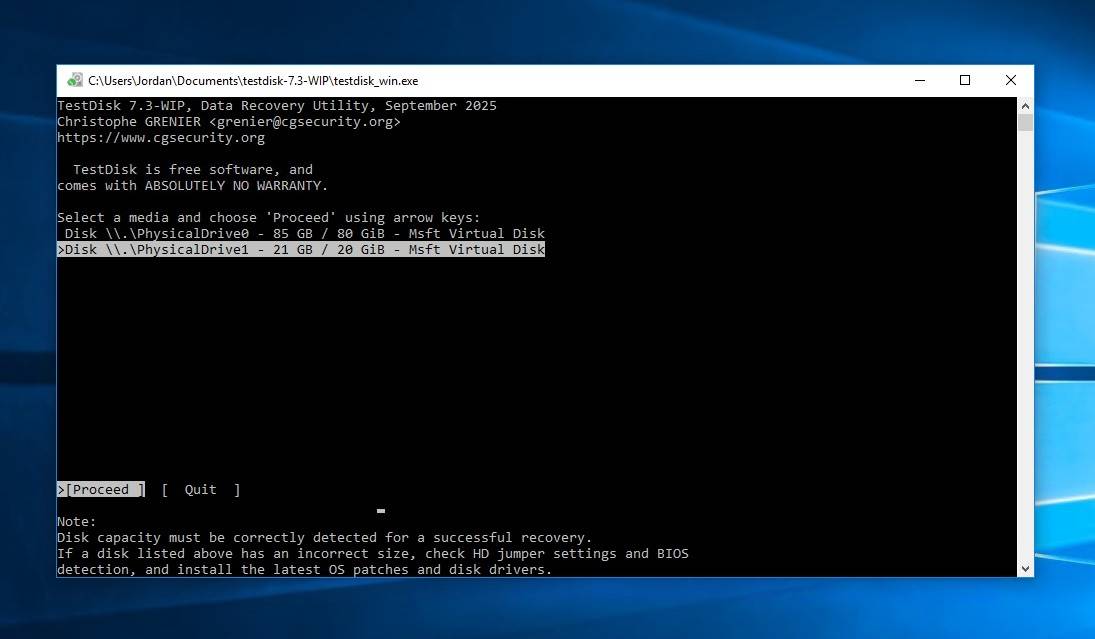
- Highlight the disk that contains the lost partition and press Enter.
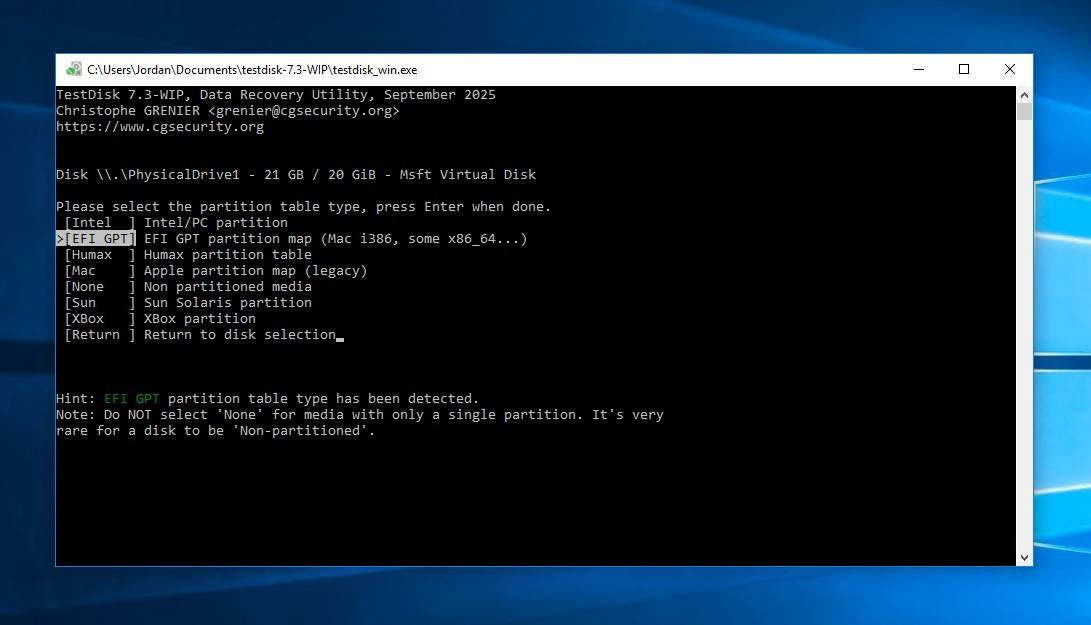
- Highlight your partition table type. TestDisk automatically selects the one it detects. Press Enter.
- Press Enter on the Analyse option.
- Press Enter again to start the Quick Search.
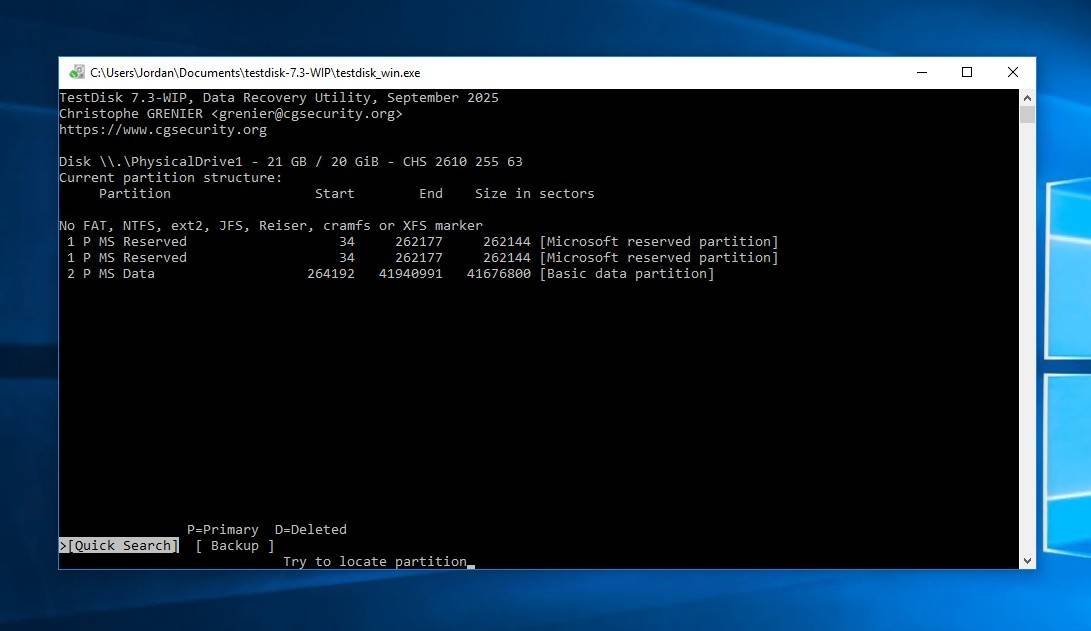
- Press Enter.
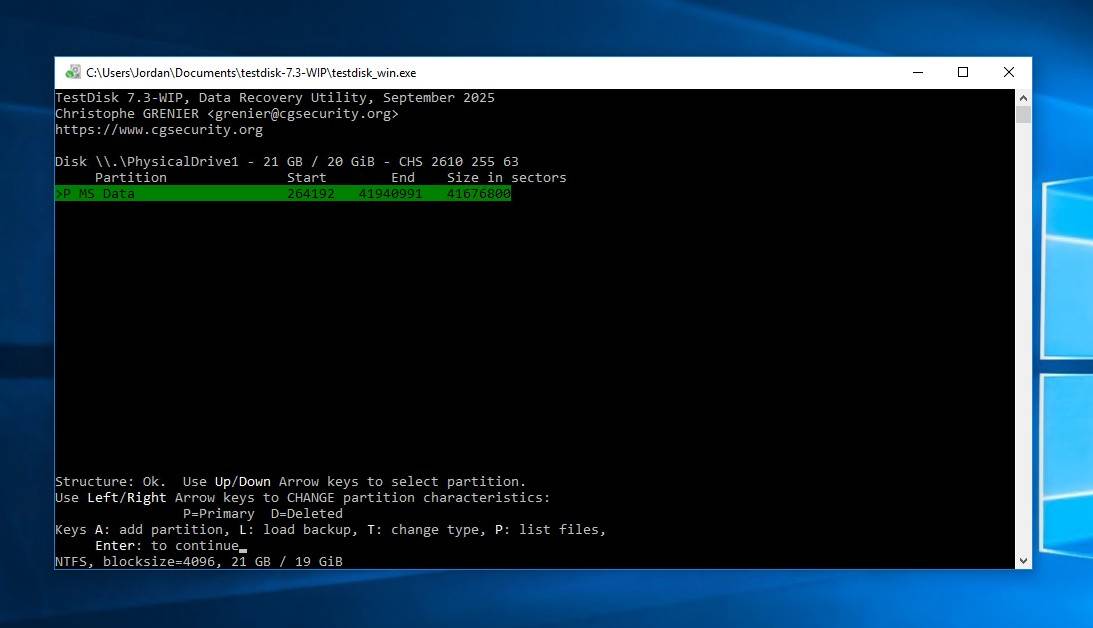
- Move to the Write action and press Enter to restore the partition. If the partition wasn’t found, choose the Deeper Search option instead.
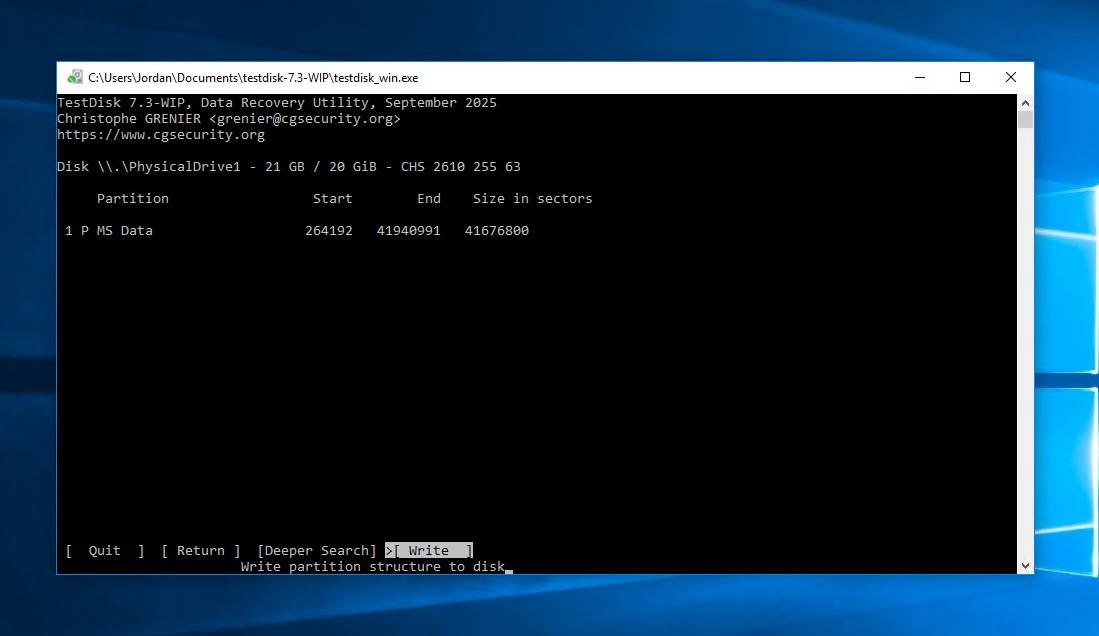
- Press Y to confirm.
Method 3:Recreate Partition Using Disk Management
If the previous methods haven’t brought your partition back and you’ve already recovered the data you need, the final step is to create a new partition. This will involve writing a fresh, new file system to the partition, effectively overwriting any logical issues with the last one.
The built-in Disk Management can do this in just a few clicks:
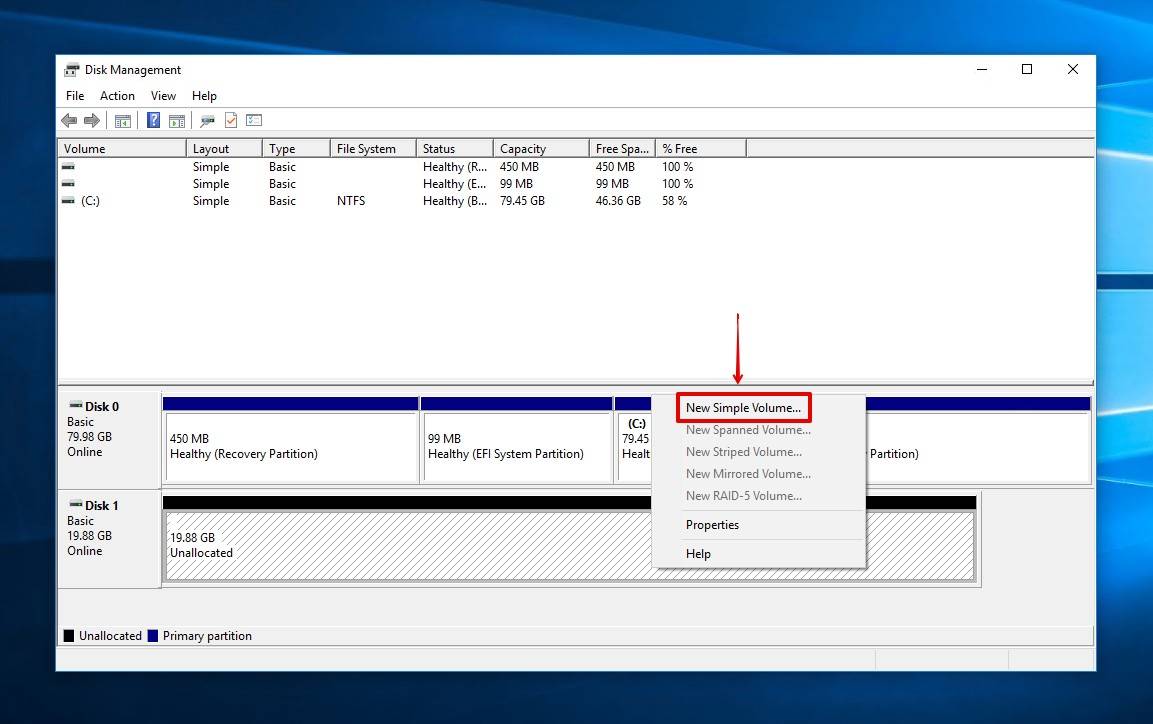
- Right-click Start and click Disk Management.
- Right-click the unallocated space and click New Simple Volume.
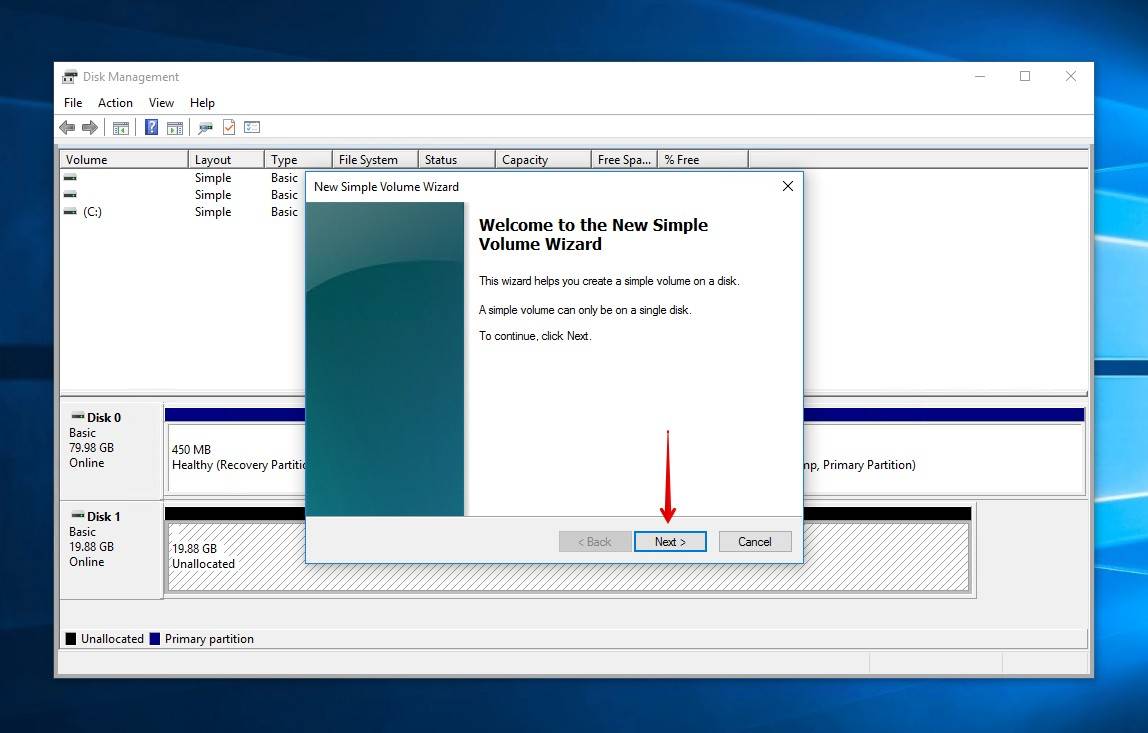
- Click Next.
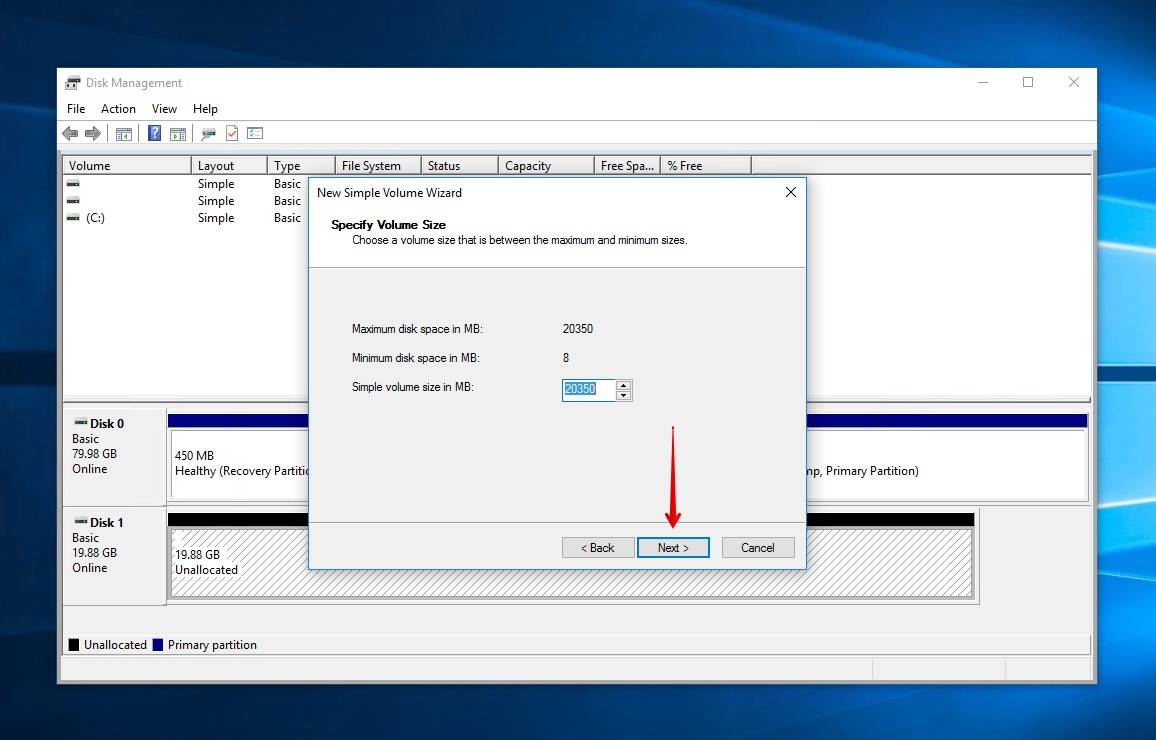
- Specify how large you want the volume to be. Click Next.
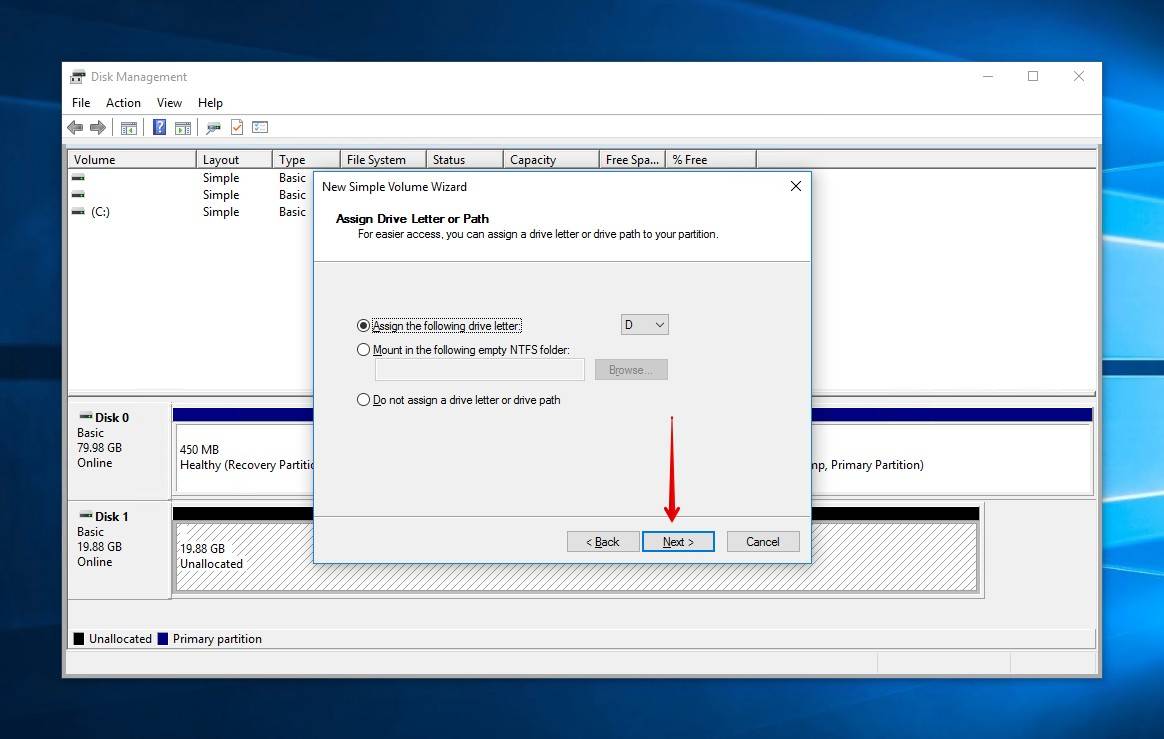
- Choose a drive letter and click Next.
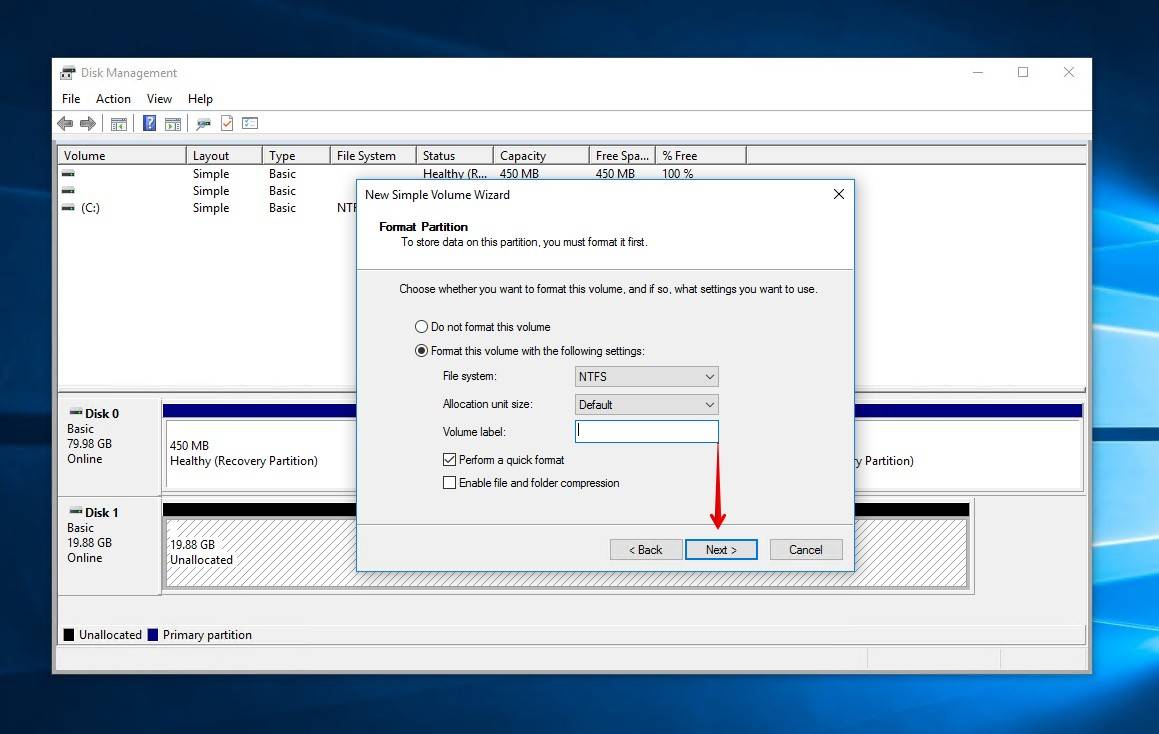
- Choose a label for your volume and make sure it’s being formatted with the NTFS file system. Ensure Perform a quick format is ticked. Click Next.
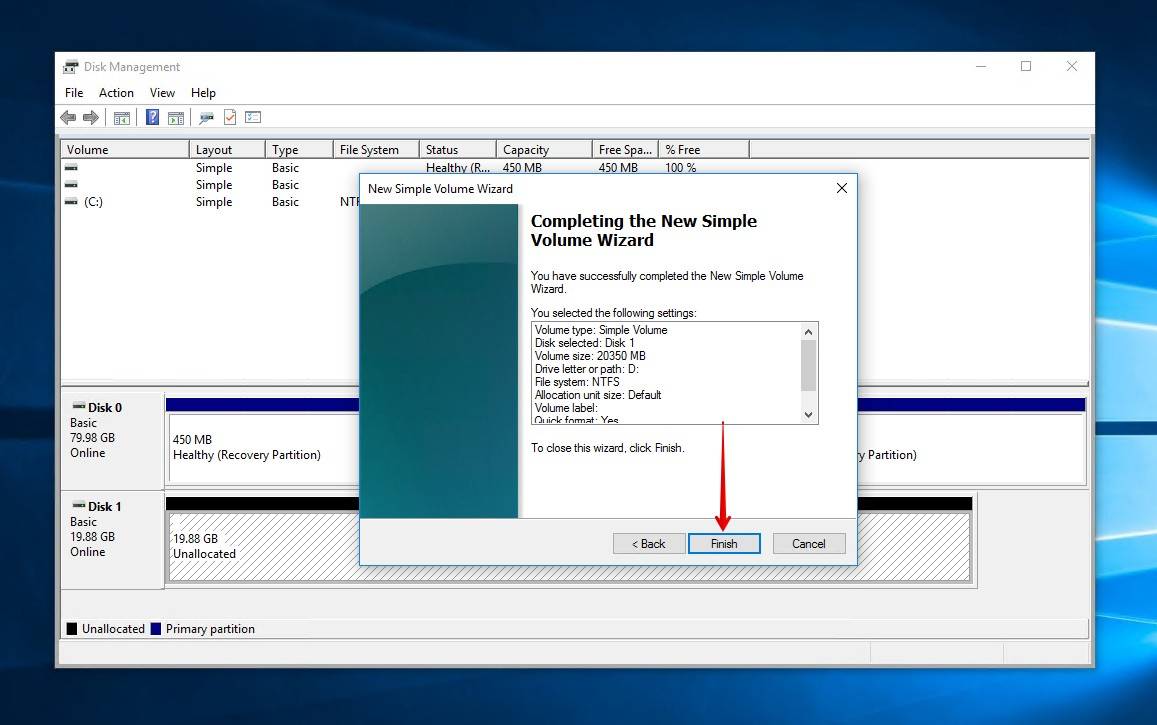
- Click Finish.
Conclusion
Recovering a lost partition is simple, but always proceed carefully. Of course, now that you know how to recover a lost partition, you just need to avoid it. Here are some very simple but useful tips that might just save you in the future.
- Stop using the drive immediately after noticing data loss,
- Avoid clicking options you don’t fully understand,
- And don’t allow low-level access to programs you don’t trust.
If you have questions or want to share your experience with this issue, leave a comment below. Dealing with a flash drive? See our guide on how to recover a deleted partition on a USB drive, or if the partition has issues, how to repair a damaged or corrupted partition.


