
If you opened this article, it’s obvious that you are looking for options for recovering permanently deleted files on your Windows 10. If you think that this is not possible, then you may be surprised to learn that permanently deleted data isn’t always deleted right away, and in many cases, you can recover it in Windows 10, as well as other versions of Windows, with ease.
However, due to the peculiarity of processing permanently deleted files, you’re in a race against the clock to get your data back. Each action taken on the drive puts the data at risk of being lost forever. So we advise you to quickly read the guide, choose a method that meets your conditions, and recover the lost files. Ready? Let’s start.
Your first action when a data loss is discovered should be to stop using the affected storage device as soon as possible. This will minimize the chance that Windows will overwrite the files before recovery can be performed.
Is it Possible to Recover Permanently Deleted Files
Yes, even if a file has been permanently deleted, there is a chance of recovery. Though, it really depends on a few factors.
Yes, even if a file has been permanently deleted, there is a chance of recovery. Though, it really depends on a few factors.
Logically deleted files can remain resident on their hard drive for an extended period of time, based on your computer usage. This is the process that your computer goes through when a file is permanently deleted:
- The file is deleted and skips the Recycle Bin (for example, deleted by the Shift + Delete combination, or you emptied the Recycle Bin yourself). Windows then removes the index entry of the file from the file system.
- Windows marks the same physical space on the drive as available, allowing new data to be written there when the time comes.
- Eventually, Windows will write new data to that same physical location, overwriting the old data and rendering it unrecoverable.
The file is still physically available until Windows overwrites it with new data, although you can no longer access it through Windows Explorer. If you have current backups containing the permanently deleted files you need, then you don’t need to worry about overwriting and this whole process. However, without backups, your only option is special data recovery software, which relies on the time window between deletion and overwriting to restore files on Windows 10 computers.
In this case, it’s also worth considering the type of drive from which you deleted the files. If it’s an HDD, the process works as described above. However, if you use an SSD, the principle is different. After deleting files, the TRIM command is triggered, which reorganizes the blocks where the files were stored, making recovery impossible. The only chance to recover such files without a backup using recovery software is to act before TRIM is executed. You can read more about this in our guide on how to recover deleted files from an SSD.
To make it easier to choose the right approach, here’s a quick overview of common file loss situations and the recovery methods that best address them.
| Situation of File Loss | Recovery Method |
| Files disappeared from the previous location | Use Windows search and check the Recycle Bin, or recover files with Disk Drill ✅ |
| Accidentally deleted a file with Shift + Delete or emptied the Recycle Bin | Restore from a File History Backup or Backup and Restore (Windows 7) tool |
| Files were permanently deleted without existing backups | Use Disk Drill data recovery software ✅ |
| Permanently deleted synced files with the cloud | Recover from a cloud Trash Bin |
Make Sure the Files Are Permanently Deleted
Before we jump into methods to recover permanently deleted files on Windows, it’s a good practice to check that the files are exactly lost. There are situations where users lose files in a pile of others and mistakenly believe they are deleted, when in fact, they are still in a different folder. The check will only take a few minutes, and it won’t reduce your chances of recovery. But if the files are still on the computer, it will save time by avoiding unnecessary recovery methods. To check, use one of the following options:
Method 1: Use the Built-in Search Function
Windows has a very useful search function. You can use this to search your entire drive to find the file by name (or file extension if you don’t remember the name).
To ensure you’re not missing data that has been hidden, make sure all files on the drive are visible. You can do this in File Explorer by going to the View tab and enabling the option Hidden items. Once activated, Windows will display hidden files and folders.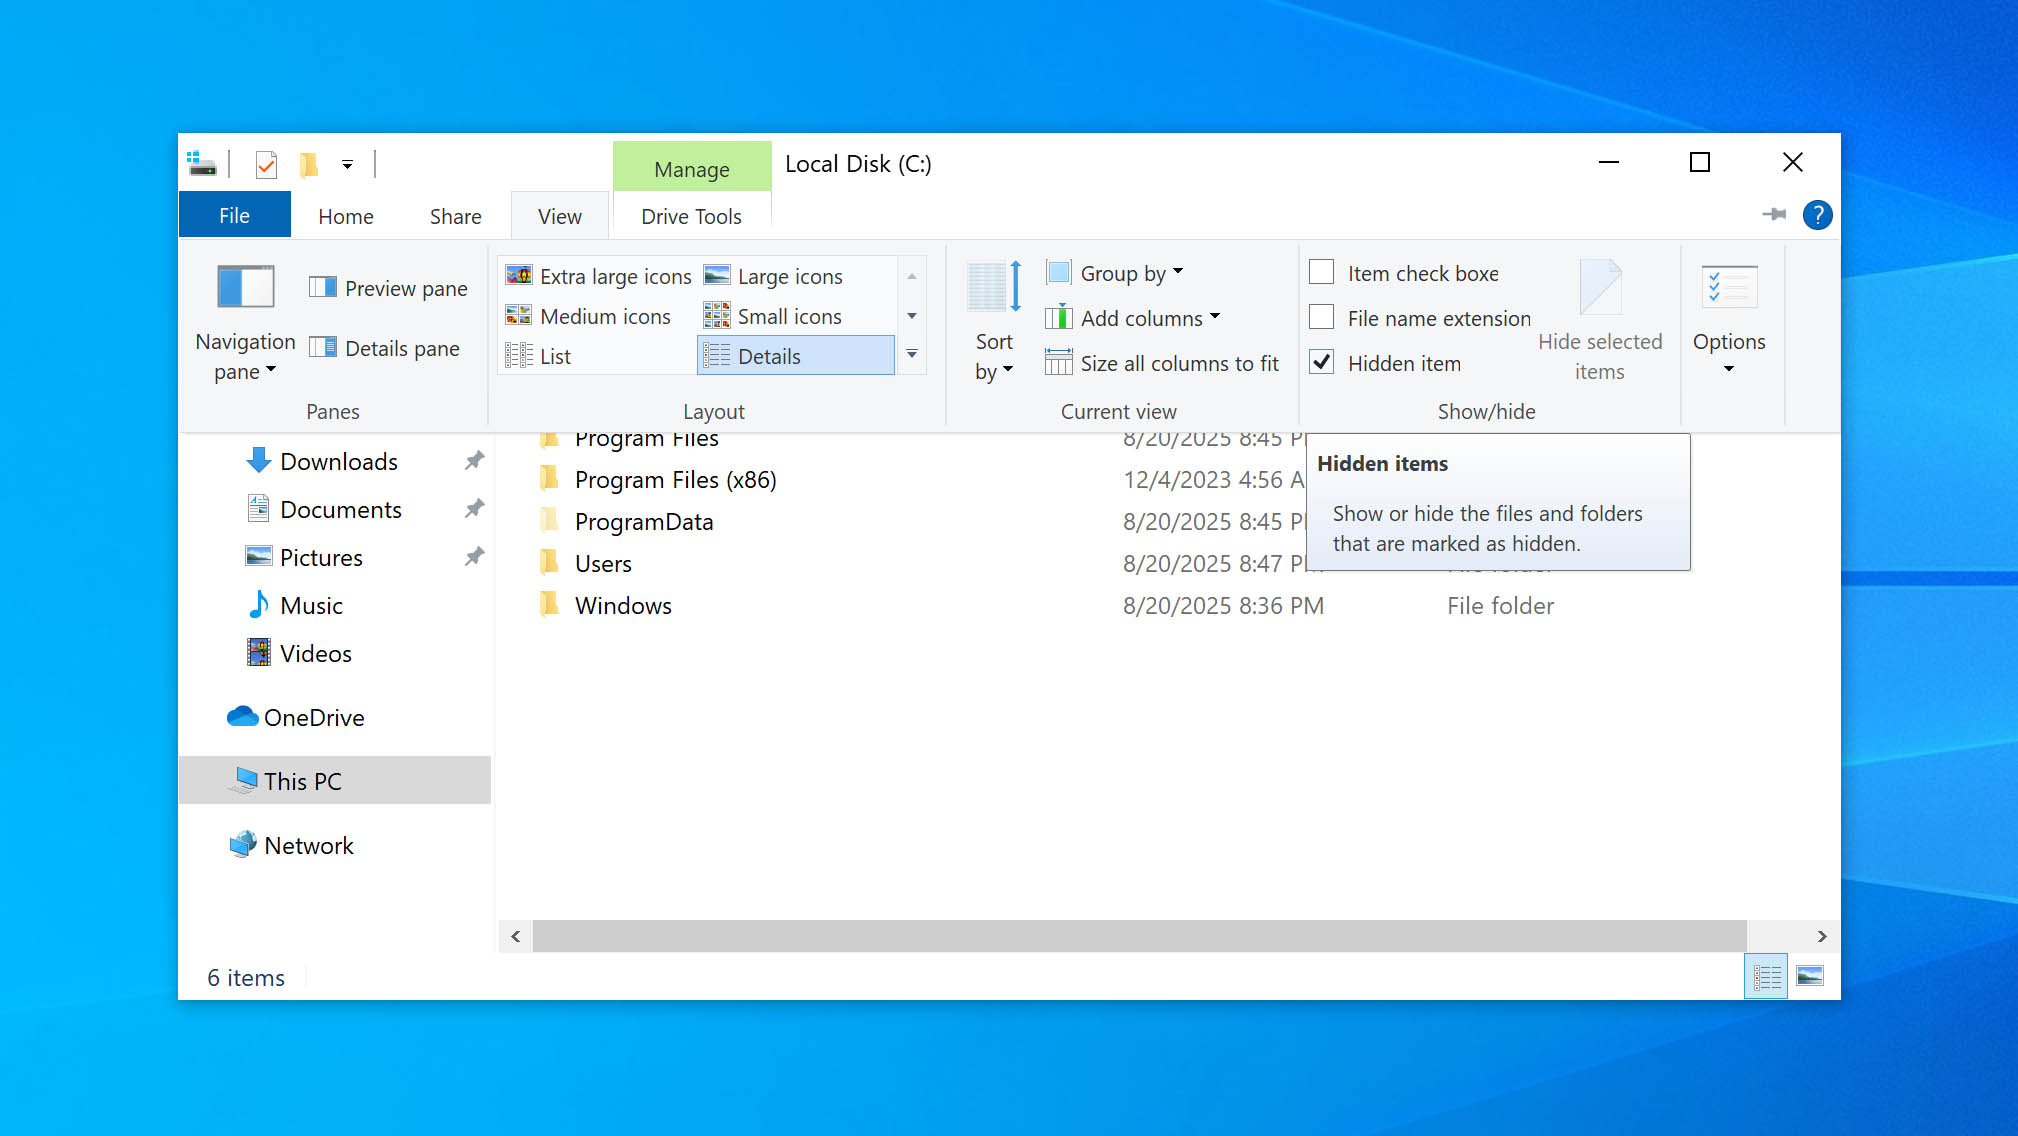
Here’s how you can use the search function in File Explorer to find your lost files:
- Open File Explorer.
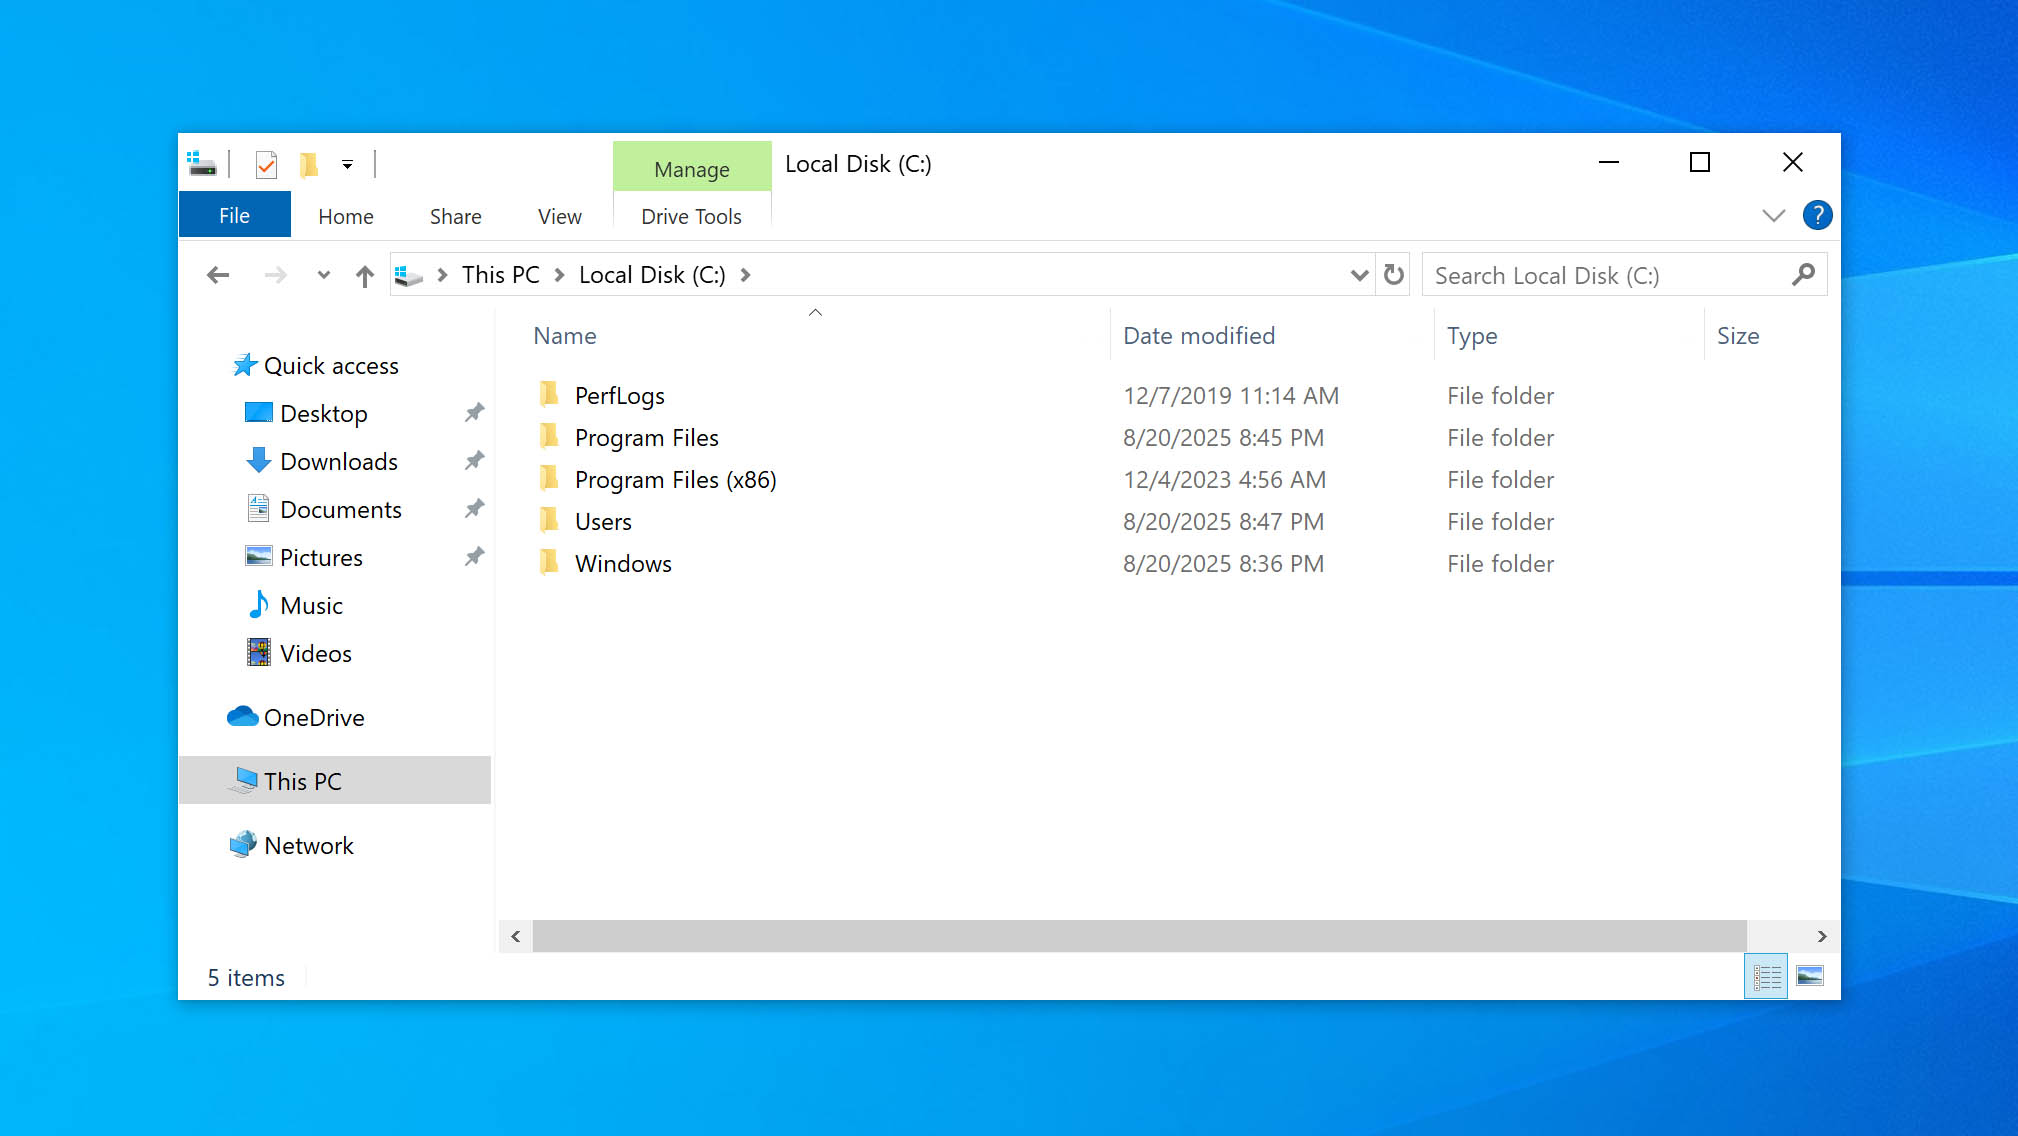
- Navigate to the top level of your C: drive (or whichever drive the file was stored). This ensures Windows will search every subfolder on the partition or drive.
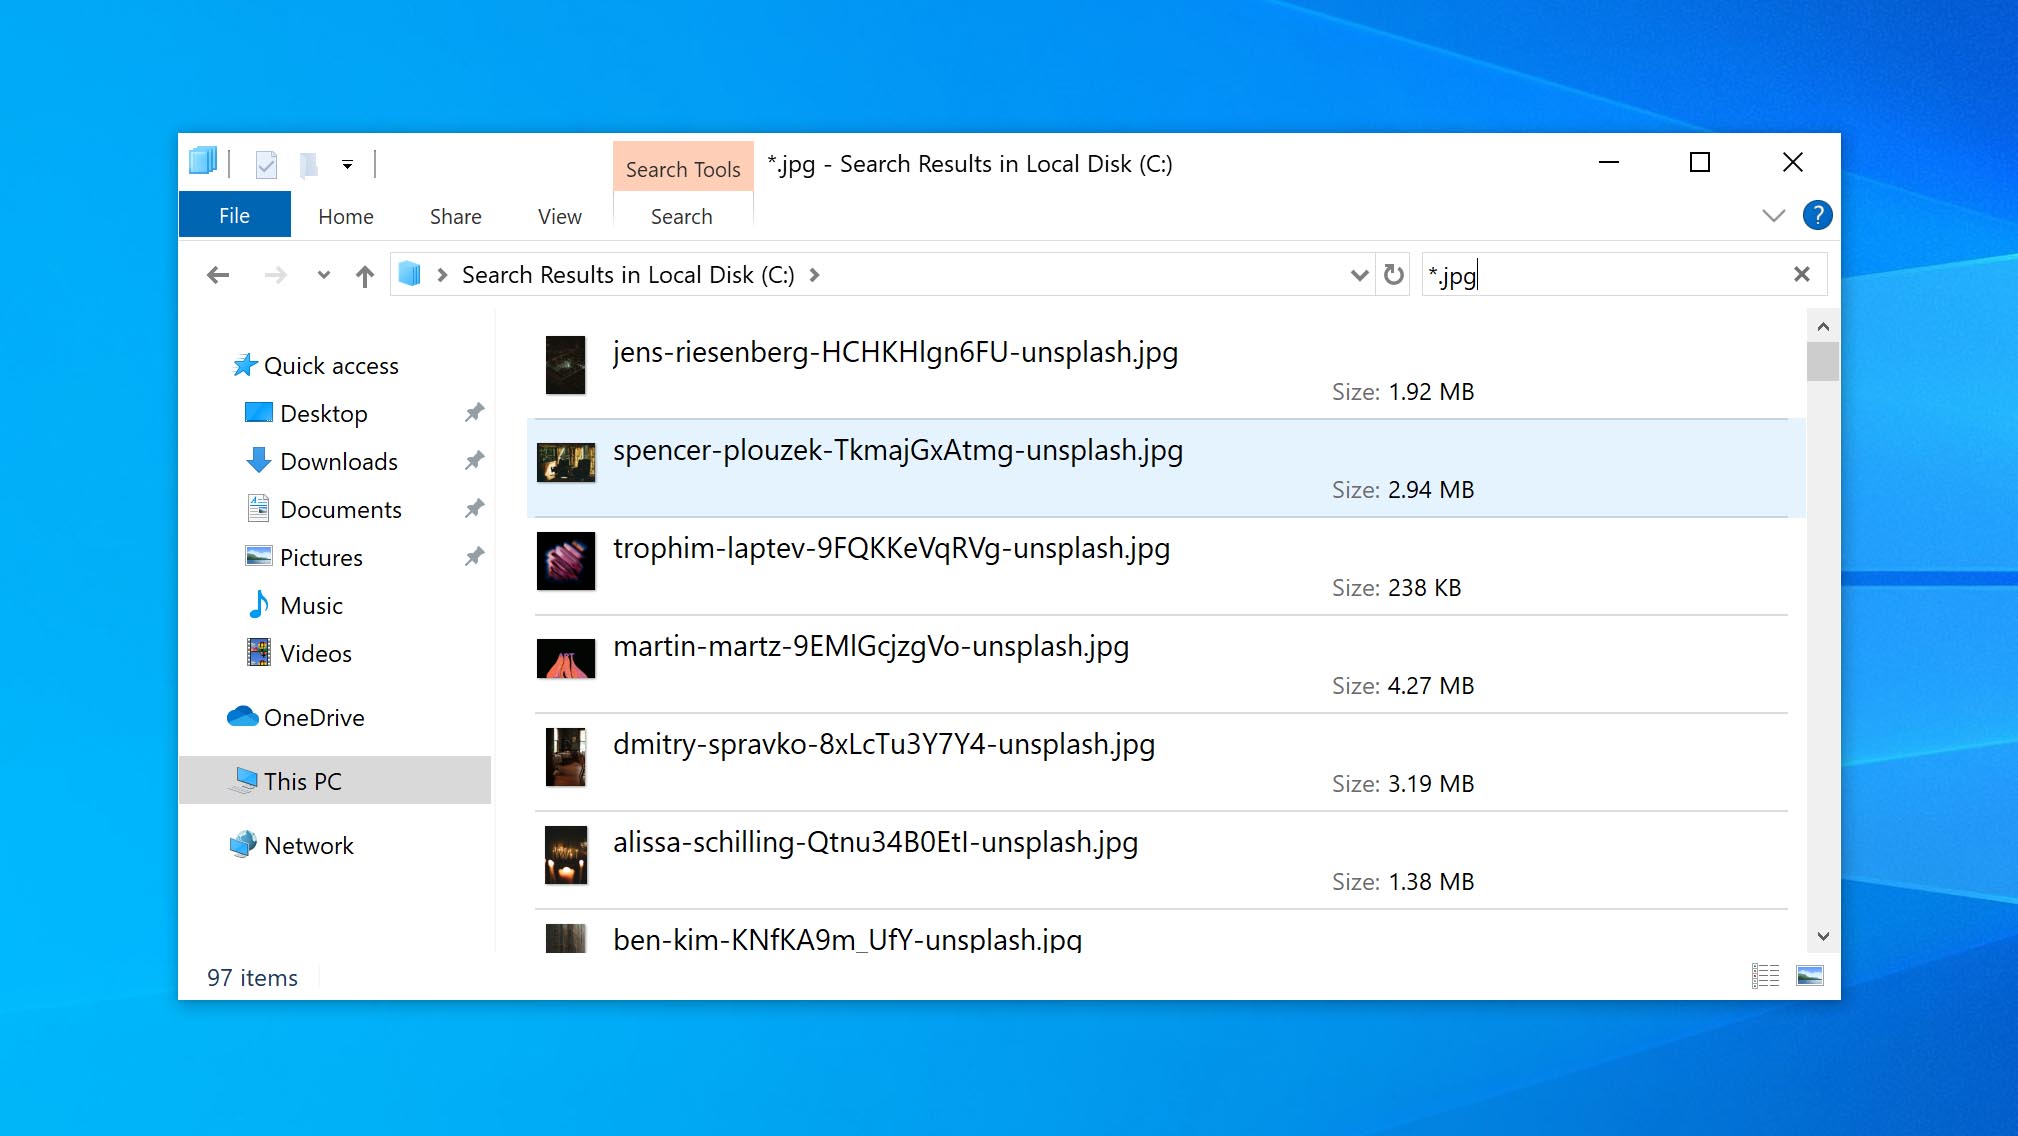
- Enter the file name in the search box. If you don’t know the file name, enter the file extension instead. For example, *.jpg will pull all JPG files.
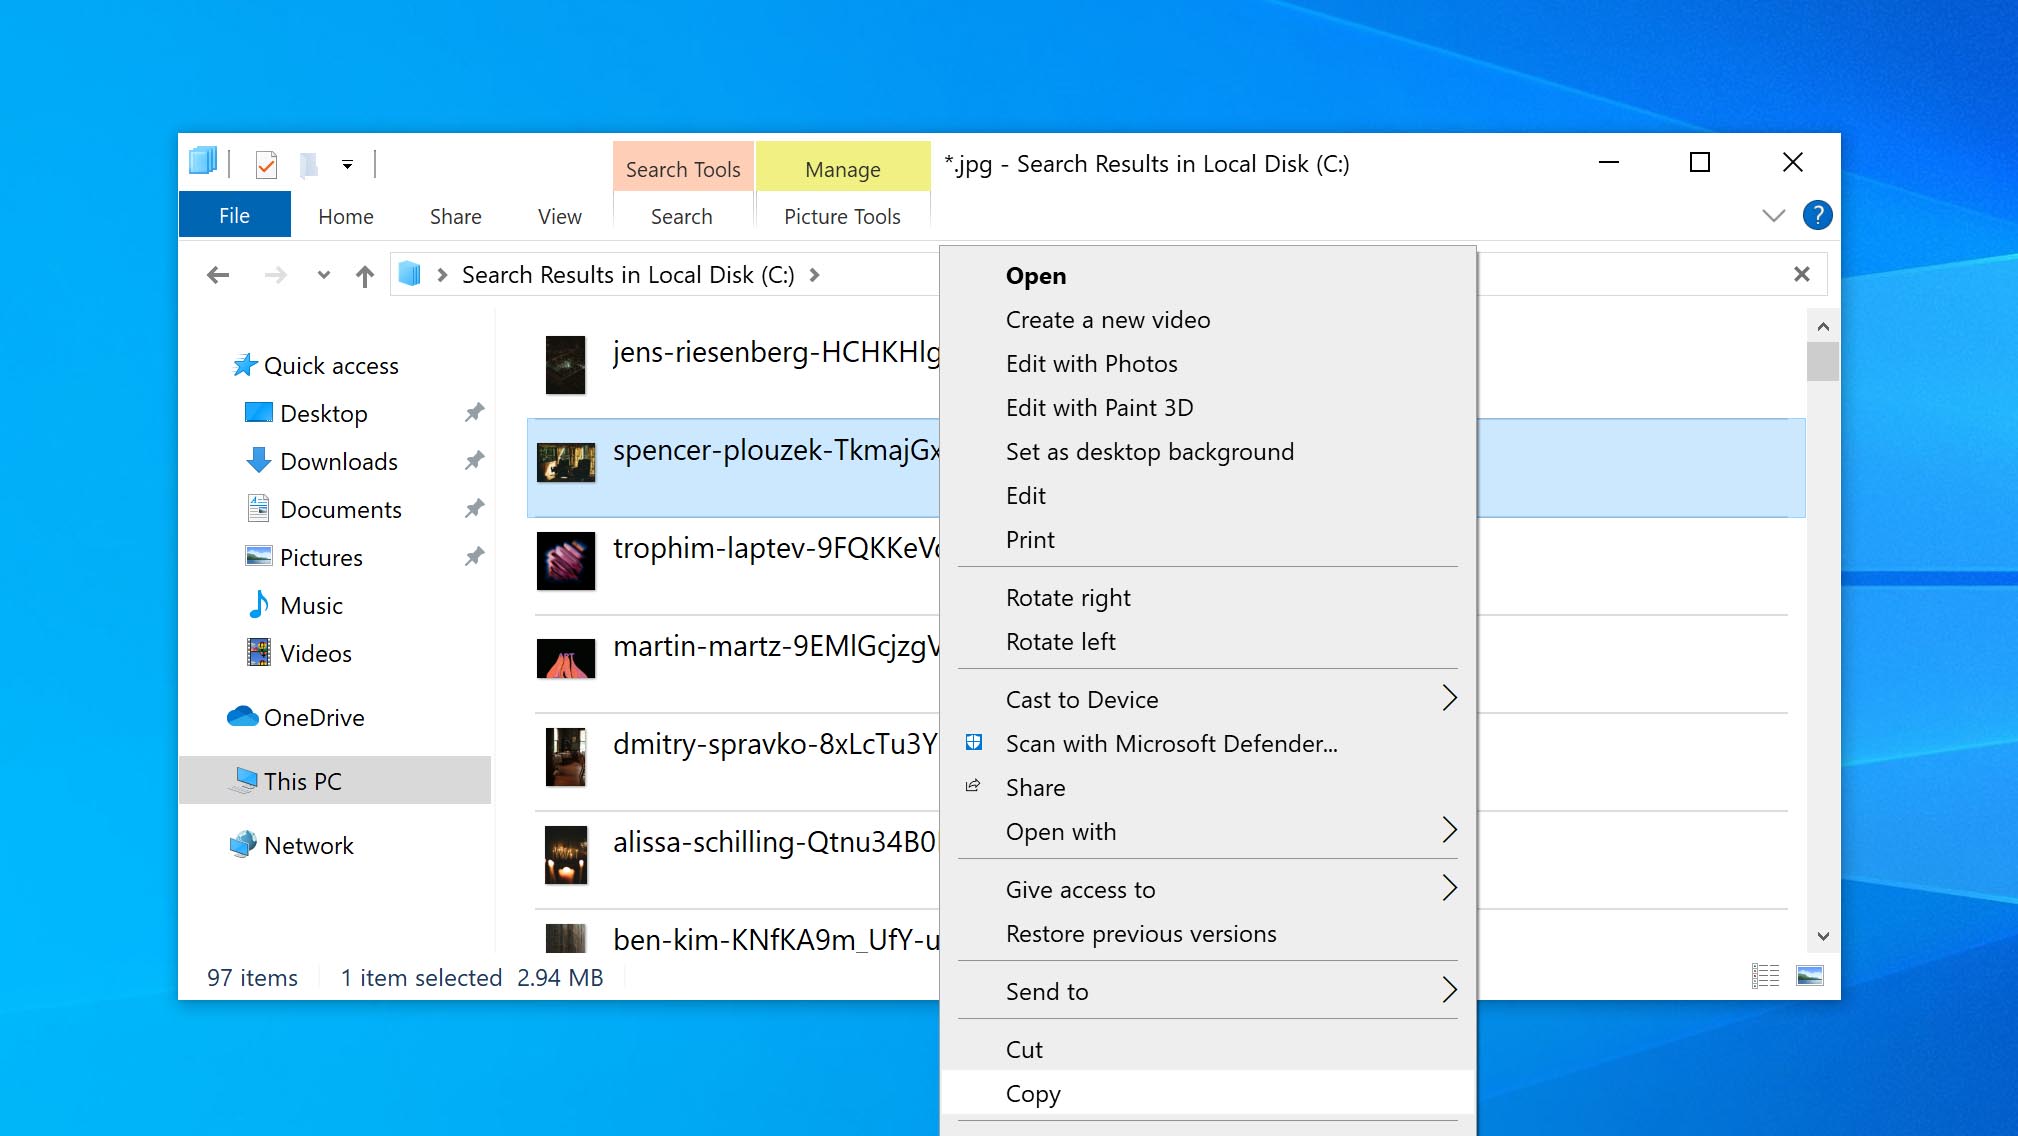
- Copy the file to a new location.
Method 2: Check the Recycle Bin
Checking the Recycle Bin is one of the fastest ways you can recover deleted files on Windows 10 computers. Although the topic of this article focuses on permanently deleted files, it’s always good to double-check the Recycle Bin to see if the files made their way there instead.
To restore deleted files follow these steps:
- Double-click on the Recycle Bin to open it.
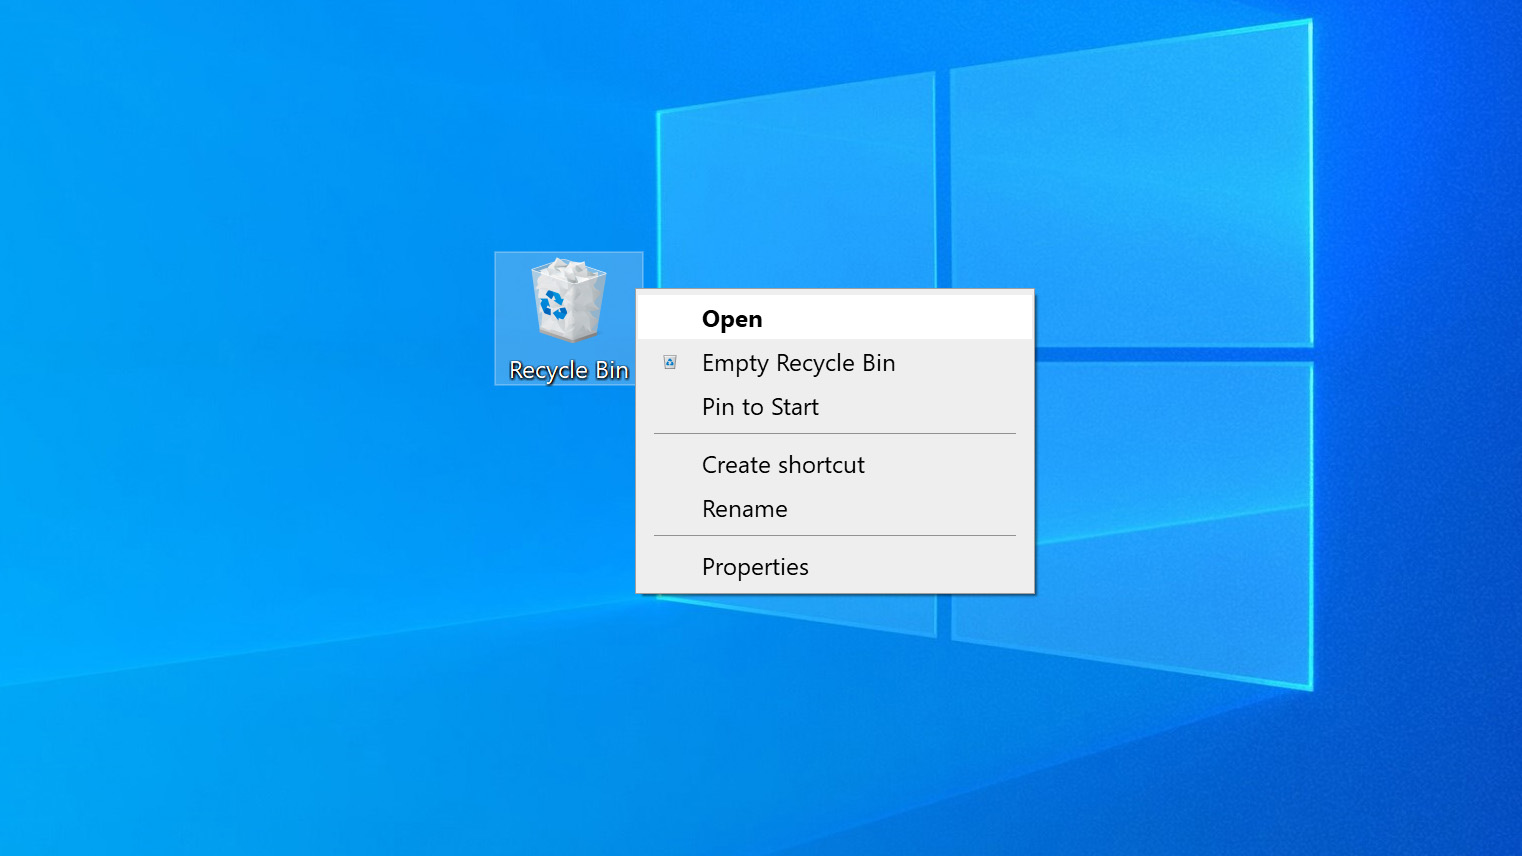
- Find and see the files to be recovered. You can use the Ctrl and Shift keys to choose multiple items at once.
- Right-click on the selection and choose Restore. This will restore the file to its original location. You can also drag the file out of the Recycle Bin and drop it on a new location where it will be stored.
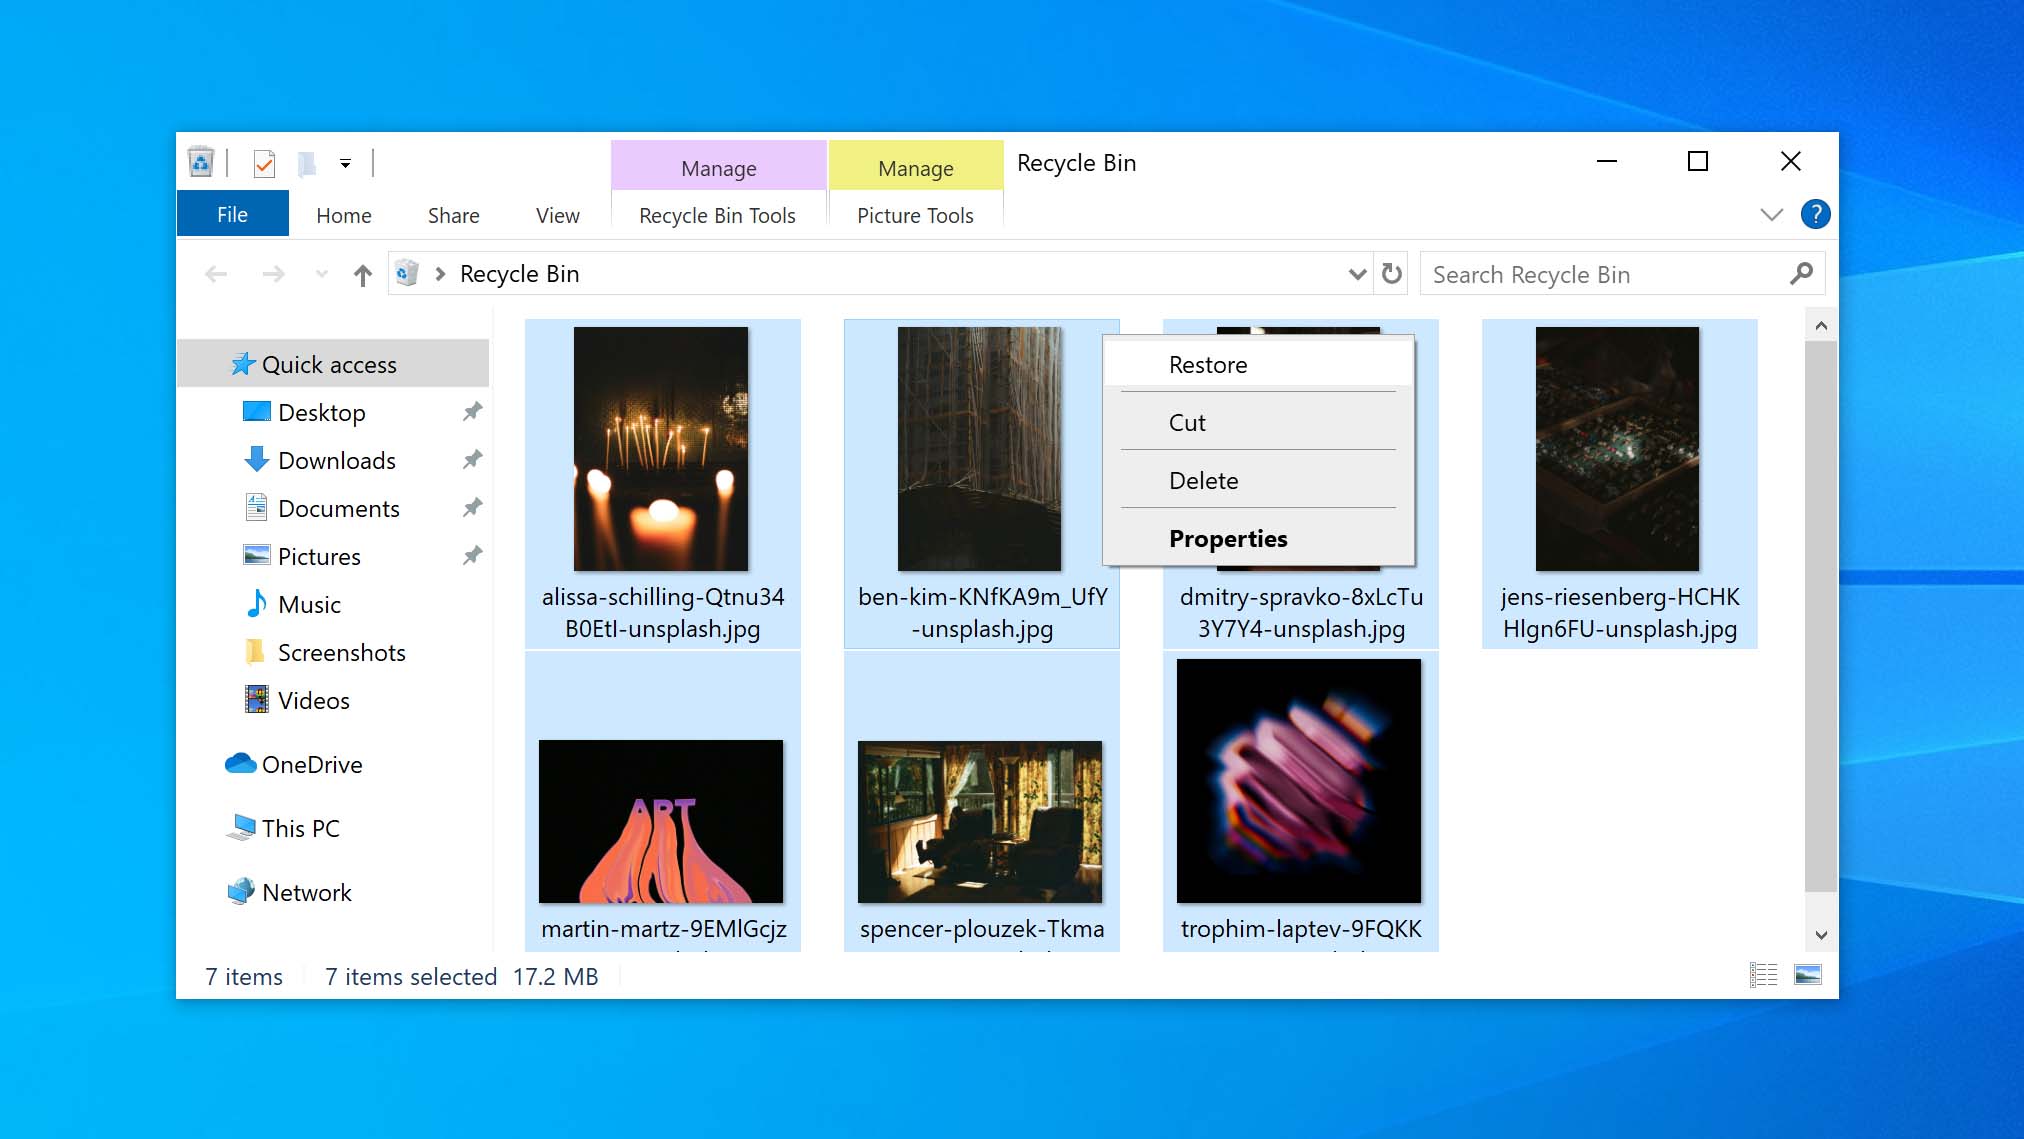
- Verify the files have indeed been restored to their original or new location.
Files that exceed the capacity of the Bin will be permanently deleted instead of stored for potential recovery. You will not find these files in the Recycle Bin. You can adjust the size of the Recycle Bin and how long it retains files by modifying its settings. If your lost files are not in the Recycle Bin, you will need to use another method for recovery. Read on to see what other options you have to recover lost or deleted files.
4 Ways to Recover Permanently Deleted Files
Failing to locate the files on your computer means your next focus is data recovery. Given that everyone’s situation is unique, we’ve included a range of options to help you get the data back. Some solutions are native to Windows, while others may require the use of third-party software. Let’s get started.
Method 1: Use Data Recovery Software
Using data recovery software, you can scan and recover permanently deleted files from your drive. We’ve put this at the top of the list because we realize that not everyone has a backed-up copy of their data. Given that the majority of the subsequently mentioned solutions primarily focus on the use of backups, we felt it’s best to put this option first.
There are a lot of recovery tools out there. We’ve already created a list of the best data recovery software for Windows, but our preferred tool is Disk Drill for Windows. Due to its comprehensive scanning methods and ease of use, it’s a favorite tool for many because it makes data recovery possible for basically anyone. The preview function allows you to inspect your files to ensure they’re intact, and the built-in recovery chance indicator will tell you which files have a good chance of being recovered.
Here are the steps to recover lost data with Disk Drill.
- Download and install Disk Drill. It is strongly recommended that you do not use the disk that will be used for the recovery. Installing on that disk can lead to corruption or overwritten files before you get the chance to recover them.

- Launch the application and select the disk or partition where the files were located from the list in the application’s window. Click the Search for lost data button to initiate Disk Drill’s scanning algorithms.
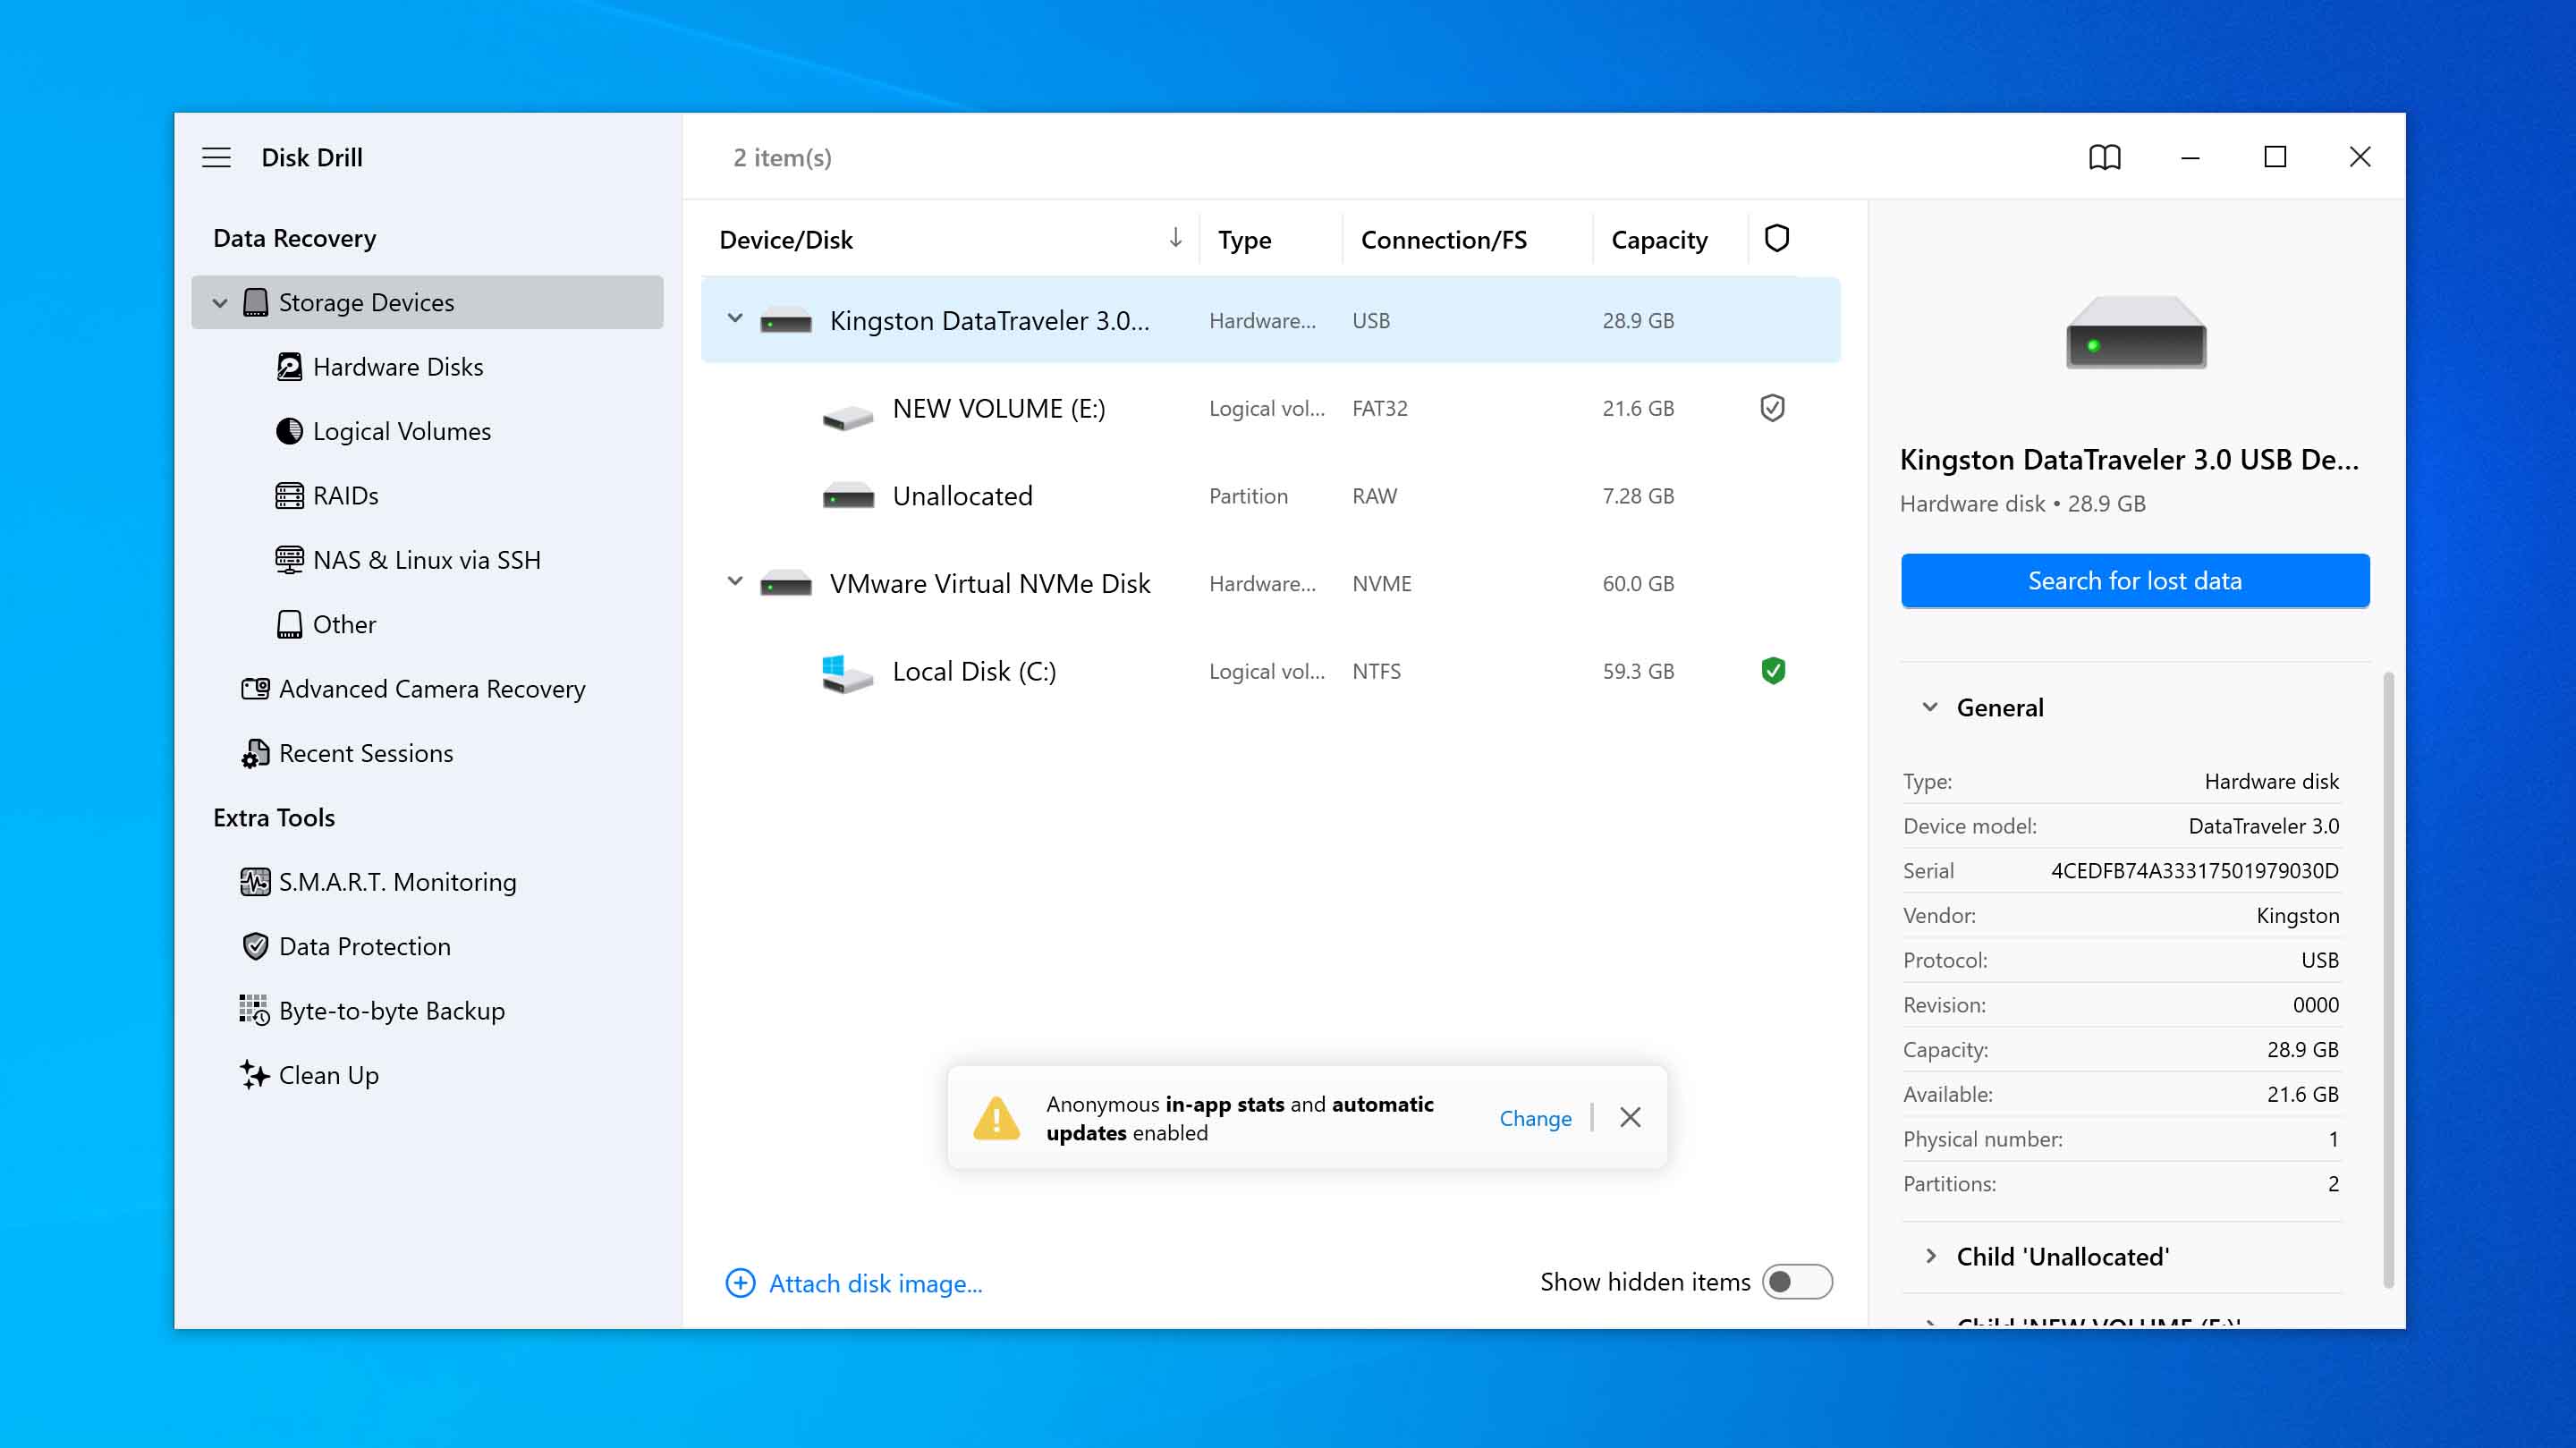
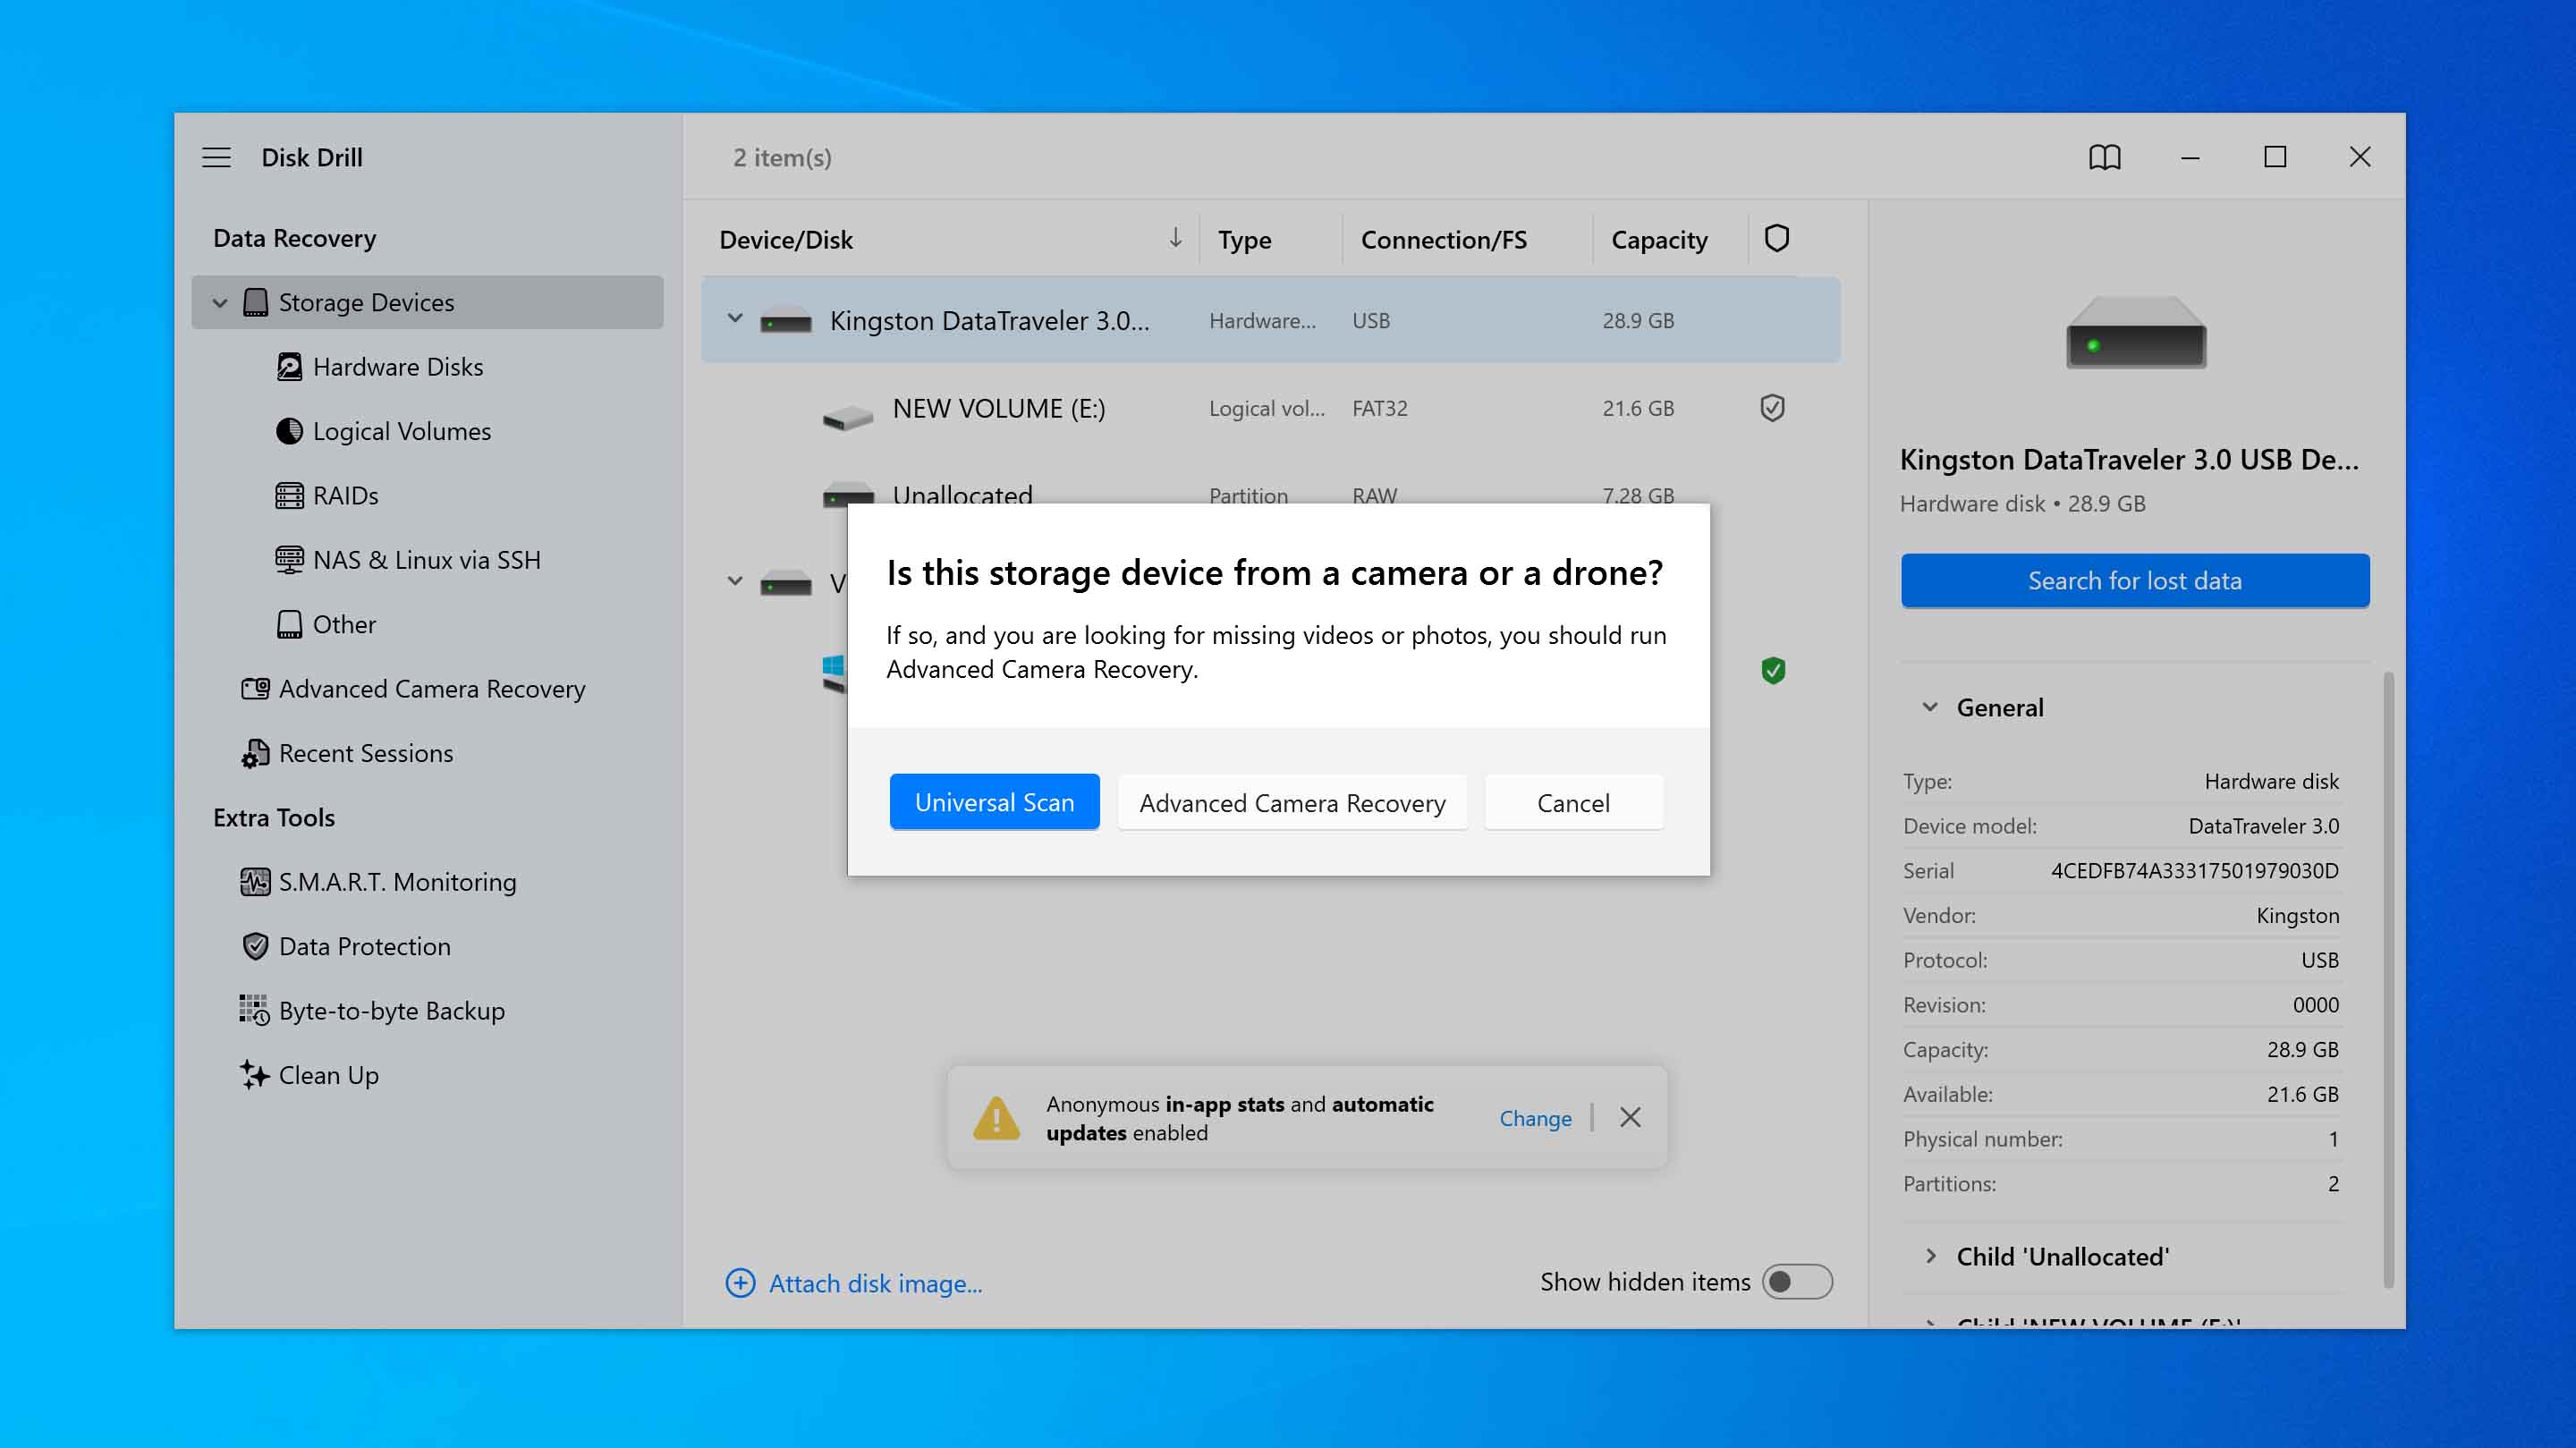
- When the scan type selection window appears, choose the Universal Scan. If you are trying to recover videos from SD cards used in cameras or drones and the universal scan does not return the results you need, you can run Advanced Camera Recovery as a second scan.
- As the scan progresses, Disk Drill will display the files that can be recovered, but it is best to wait until the scan finishes. Once completed, the program will also indicate the recovery chances for each file.
- You can filter the scan results by file extension, date of last modification, or even search by name to quickly find the files you need. After locating them, check the boxes next to the files you want to restore and click the Recover button.

- A window will then appear asking you to choose a location to save the restored files. Do not select their original location, as this can lead to corruption during the recovery. Click Next to perform the recovery.
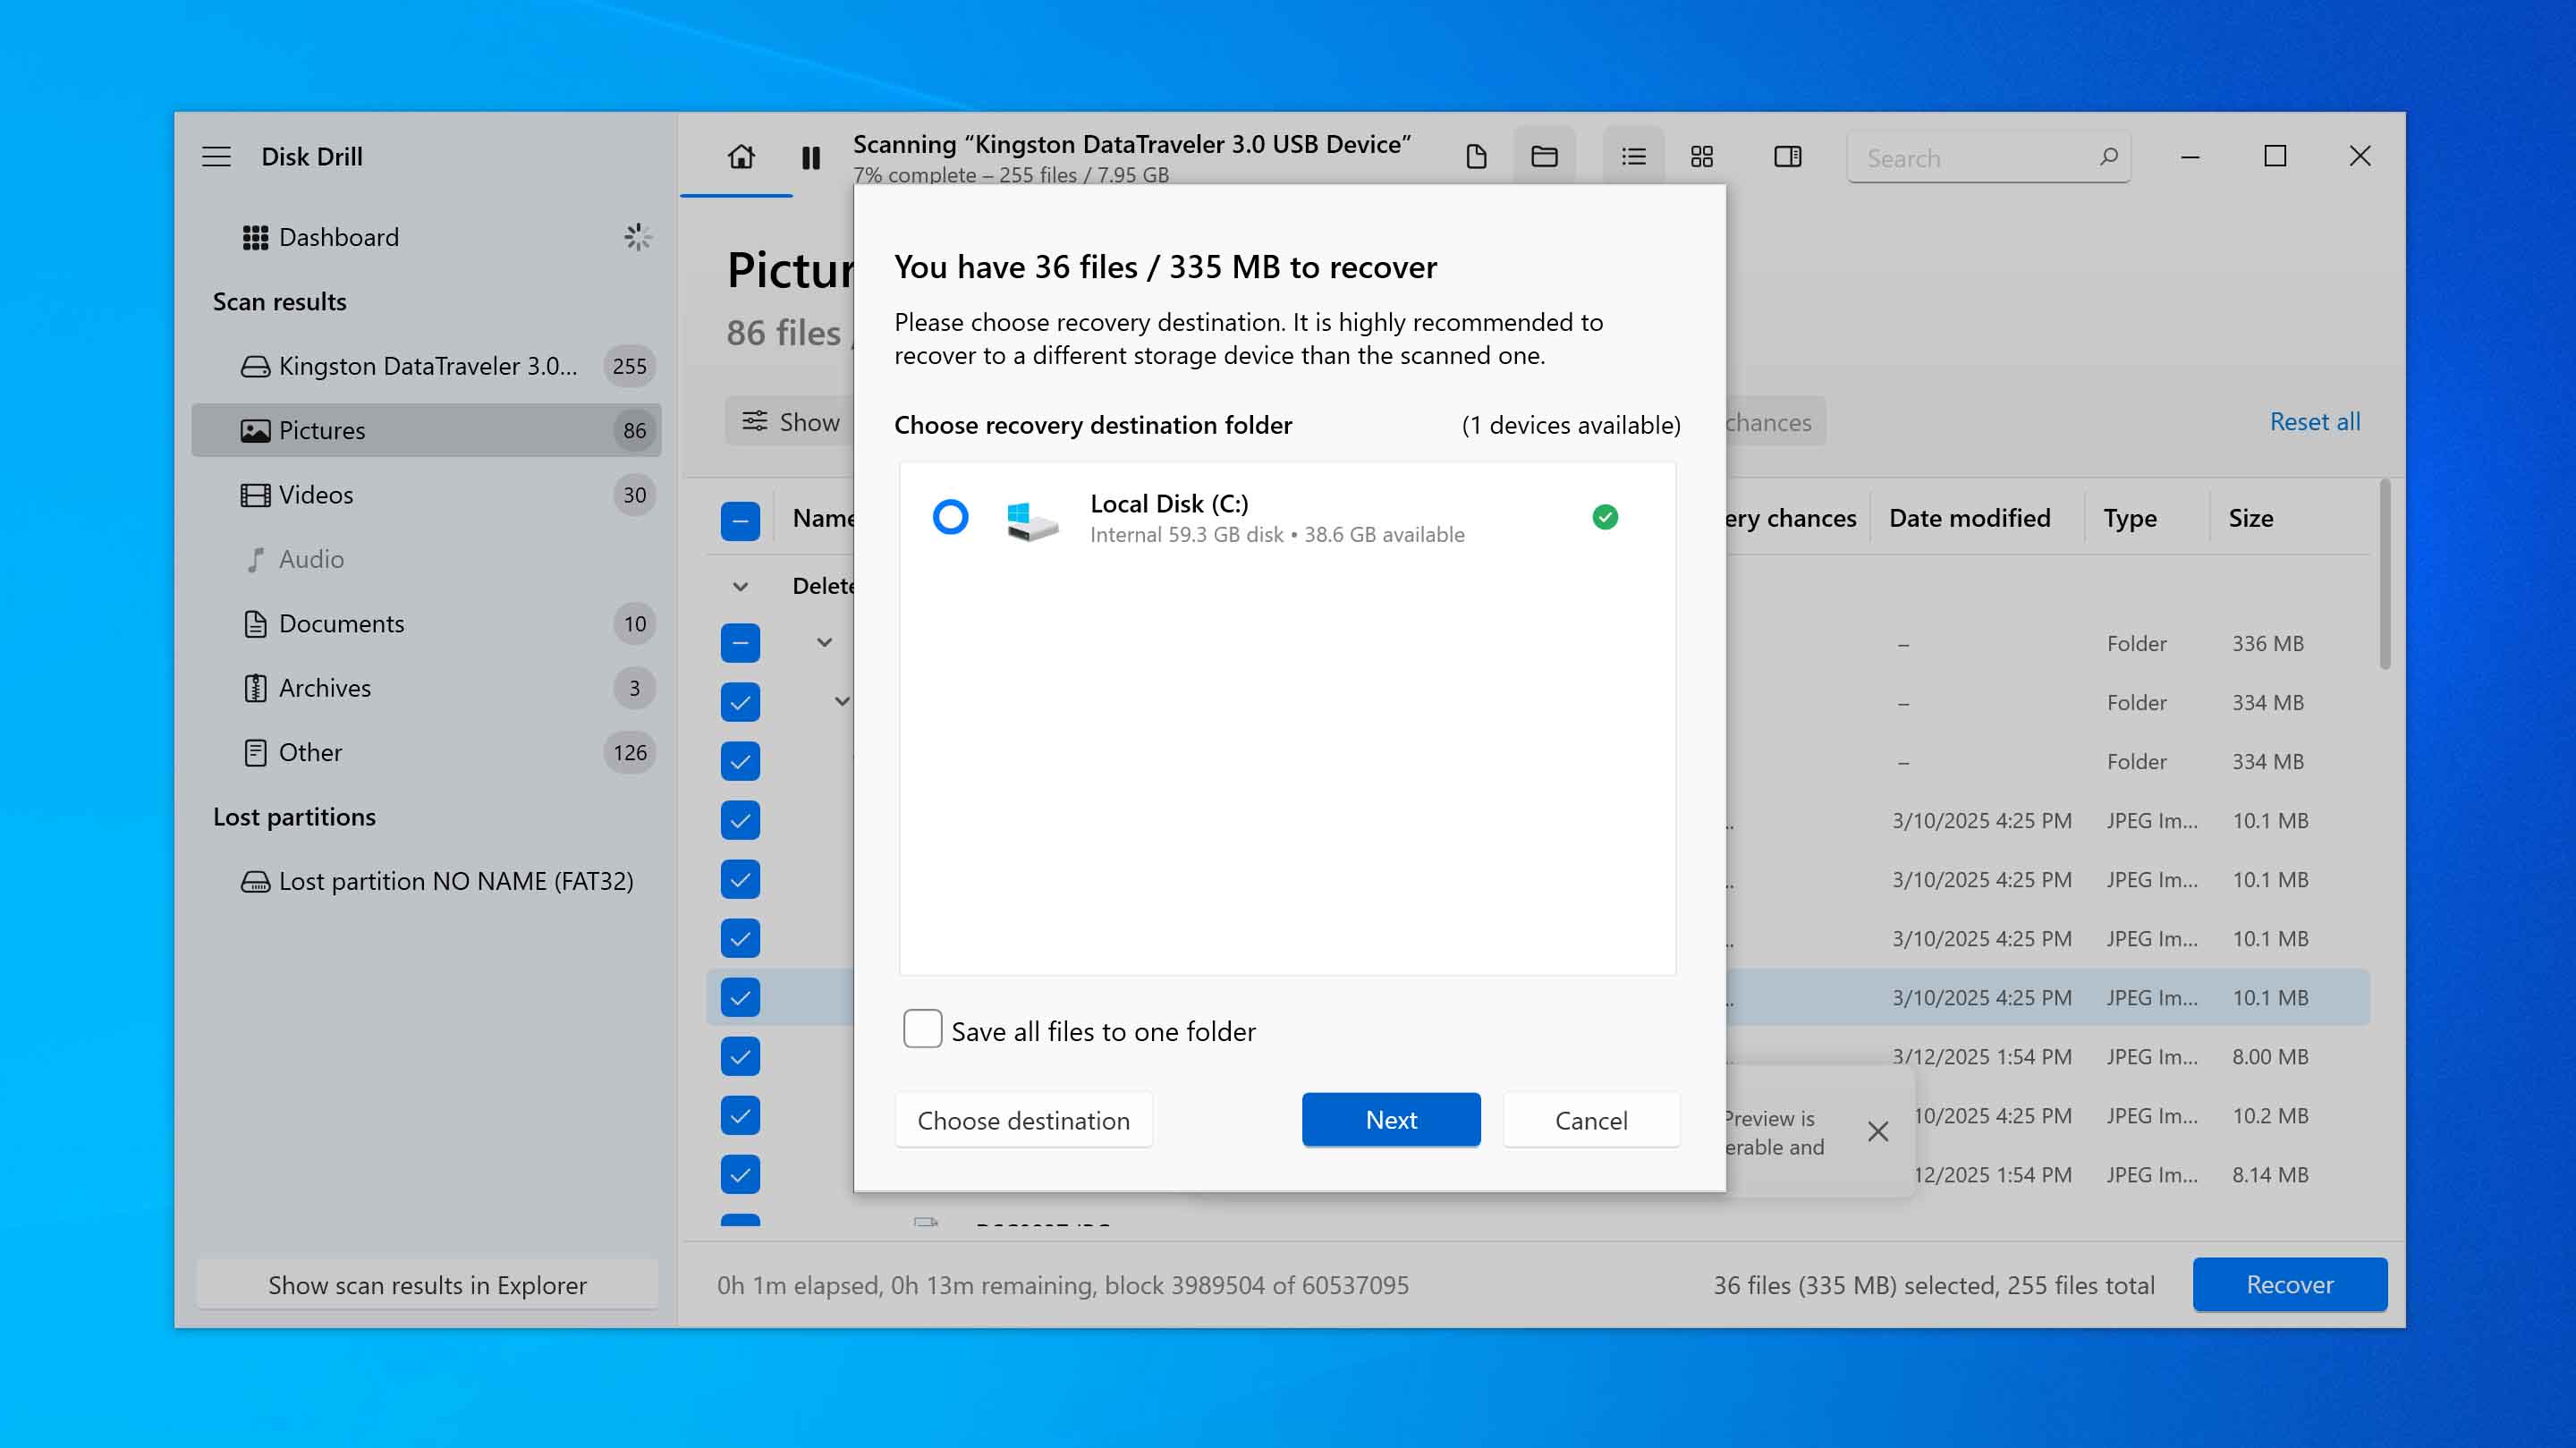
- And finally, navigate to the chosen folder to verify that the files are fully recovered and usable by your applications.
Disk Drill can be downloaded for free and can be used to recover up to 500MB of data and view all files that are available for recovery without any financial investment. Larger restores will necessitate the purchase of the Pro version of the tool.
If you were unable to restore permanently deleted files using Disk Drill, it means that the data has already been overwritten by new information on the drive. Once this happens, recovery software can no longer restore the files. In such cases, the only way to get them back is through backups (provided they are available, of course), which we will discuss in the following sections.
Method 2: Restore From a File History Backup
Windows includes several built-in options for backing up your disk, yet many users ignore them until it’s too late. If you have already created a backup that contains the files you permanently deleted, recovery becomes much easier because you won’t need any third-party tools. One of the most common options in Windows 10 and other versions is File History, which allows you to restore copies of files that were saved before they were lost.
It’s important that File History only backs up libraries (such as Documents, Pictures, Music, Videos) and Favorites. If the files you’re trying to recover were stored somewhere else on your computer, this method won’t work.
Here are the steps to recover deleted files from a File History Backup.
- Click on the File Explorer icon and open the folder that contained the items that you want to recover.
- Click the Home tab and then the History button.
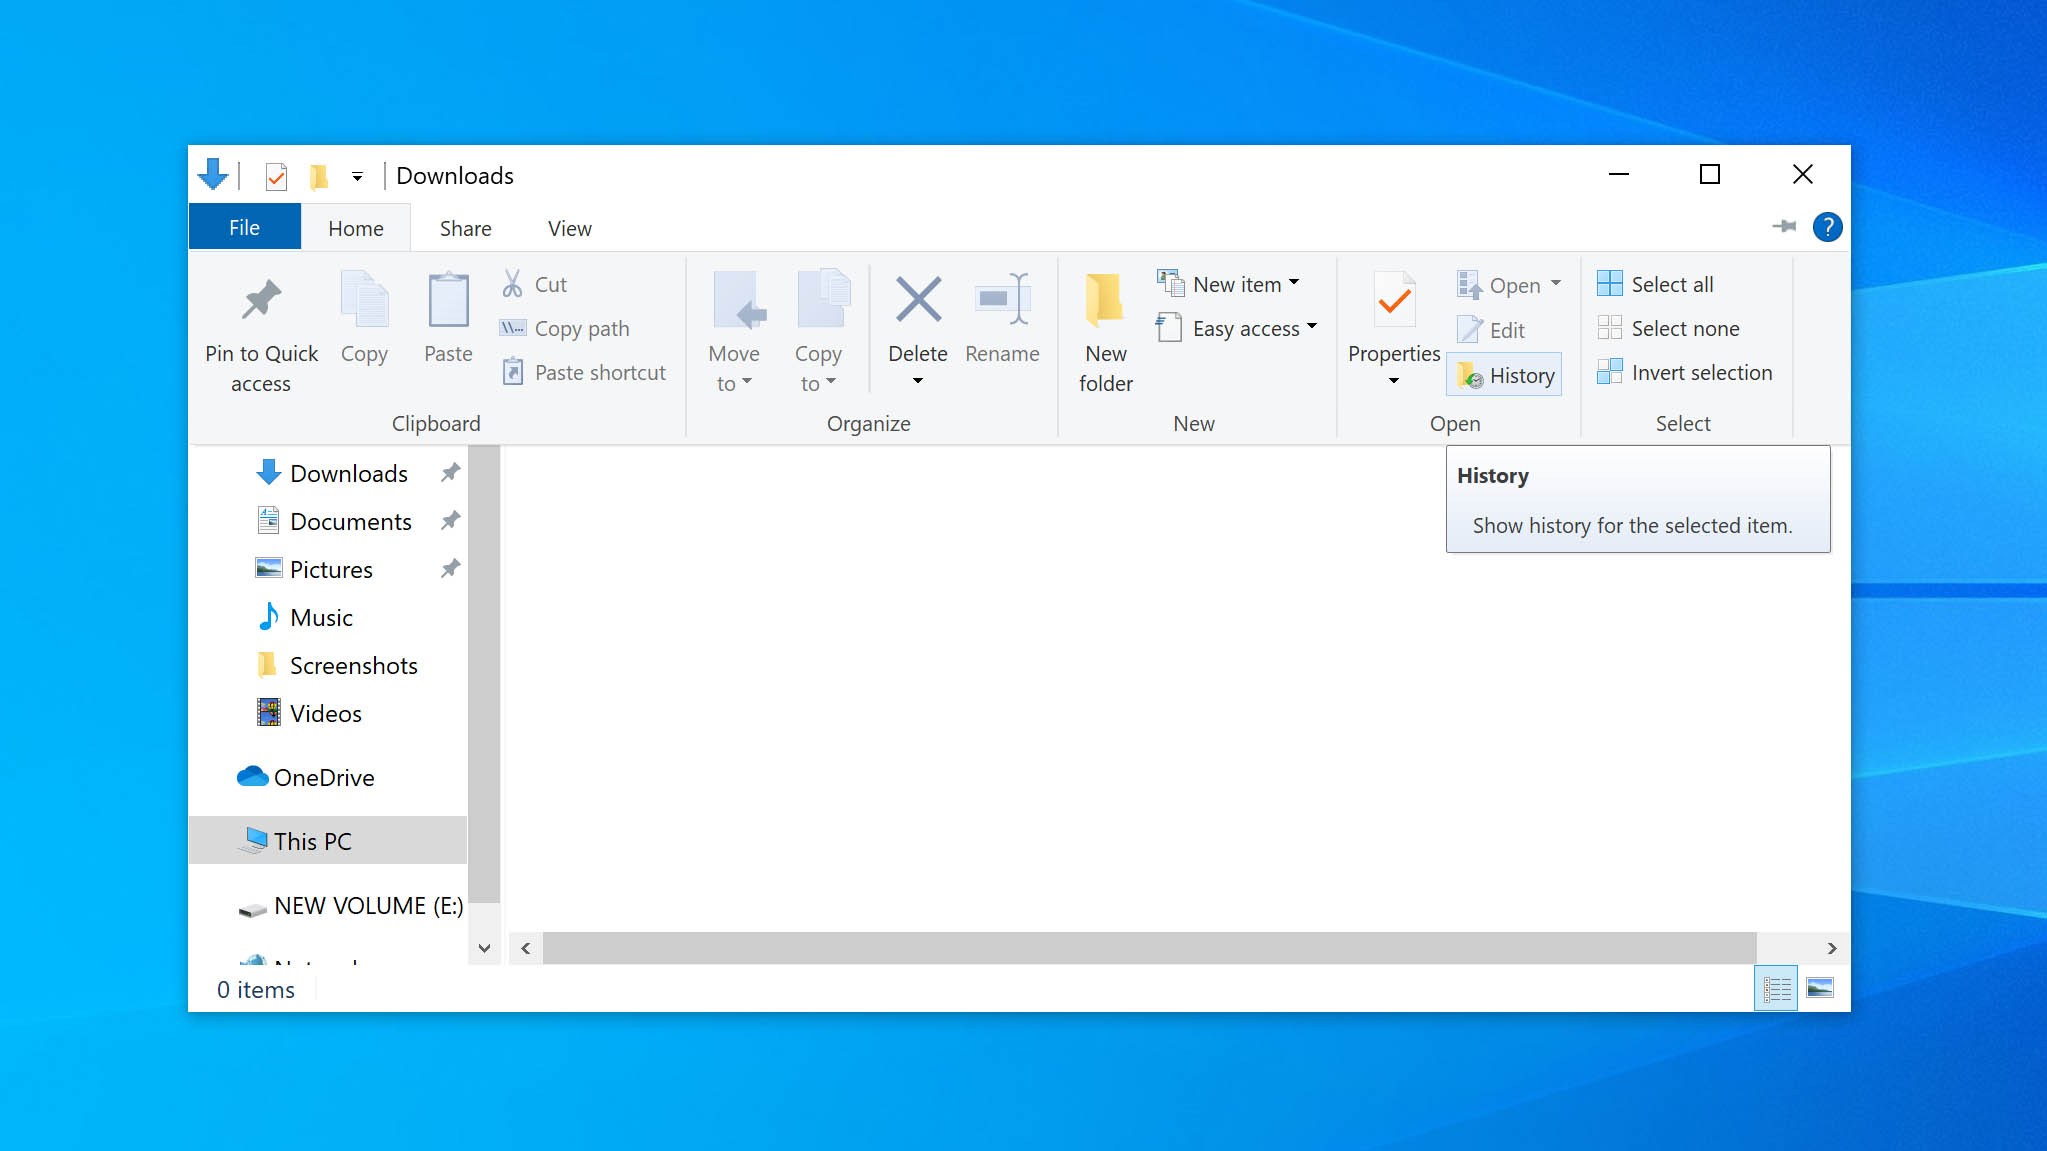
- Select the files or folder that you wish to restore.
- Navigate through time with the arrows to search for the version you want to recover.
- Click the Restore button to restore the file to its original location.

- Address any naming conflicts by replacing the original file with the restored version, skipping the file, or keeping both for your review.
If you use File History for backups, you can also try the Restore previous versions function to get back permanently deleted files. This option works because File History keeps snapshots of certain folders, so Windows can show older copies of files that were saved there. You only need to right-click the folder or file’s original location, choose Restore previous versions, and pick the version you want.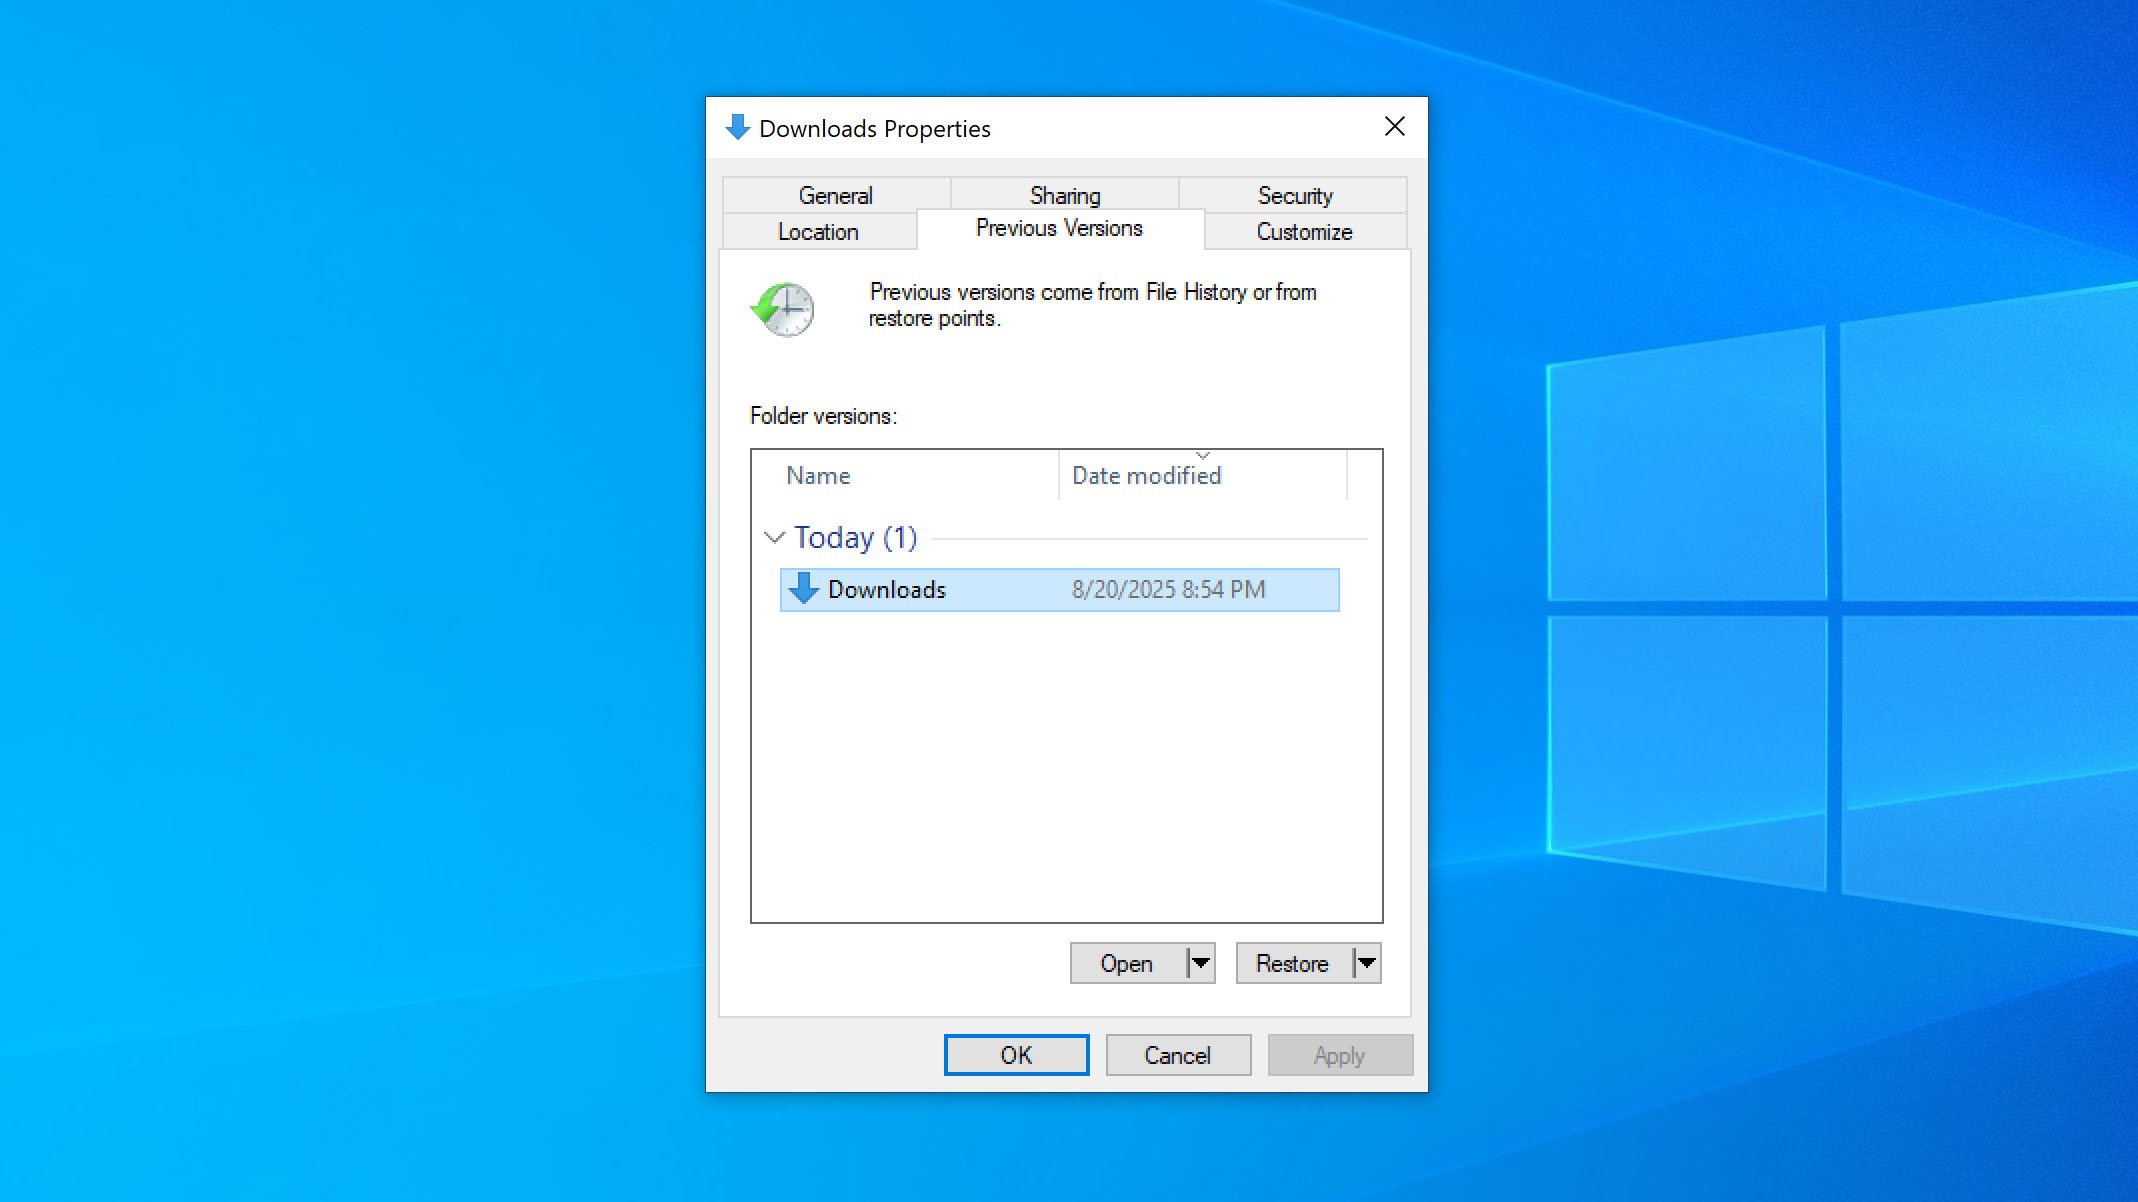
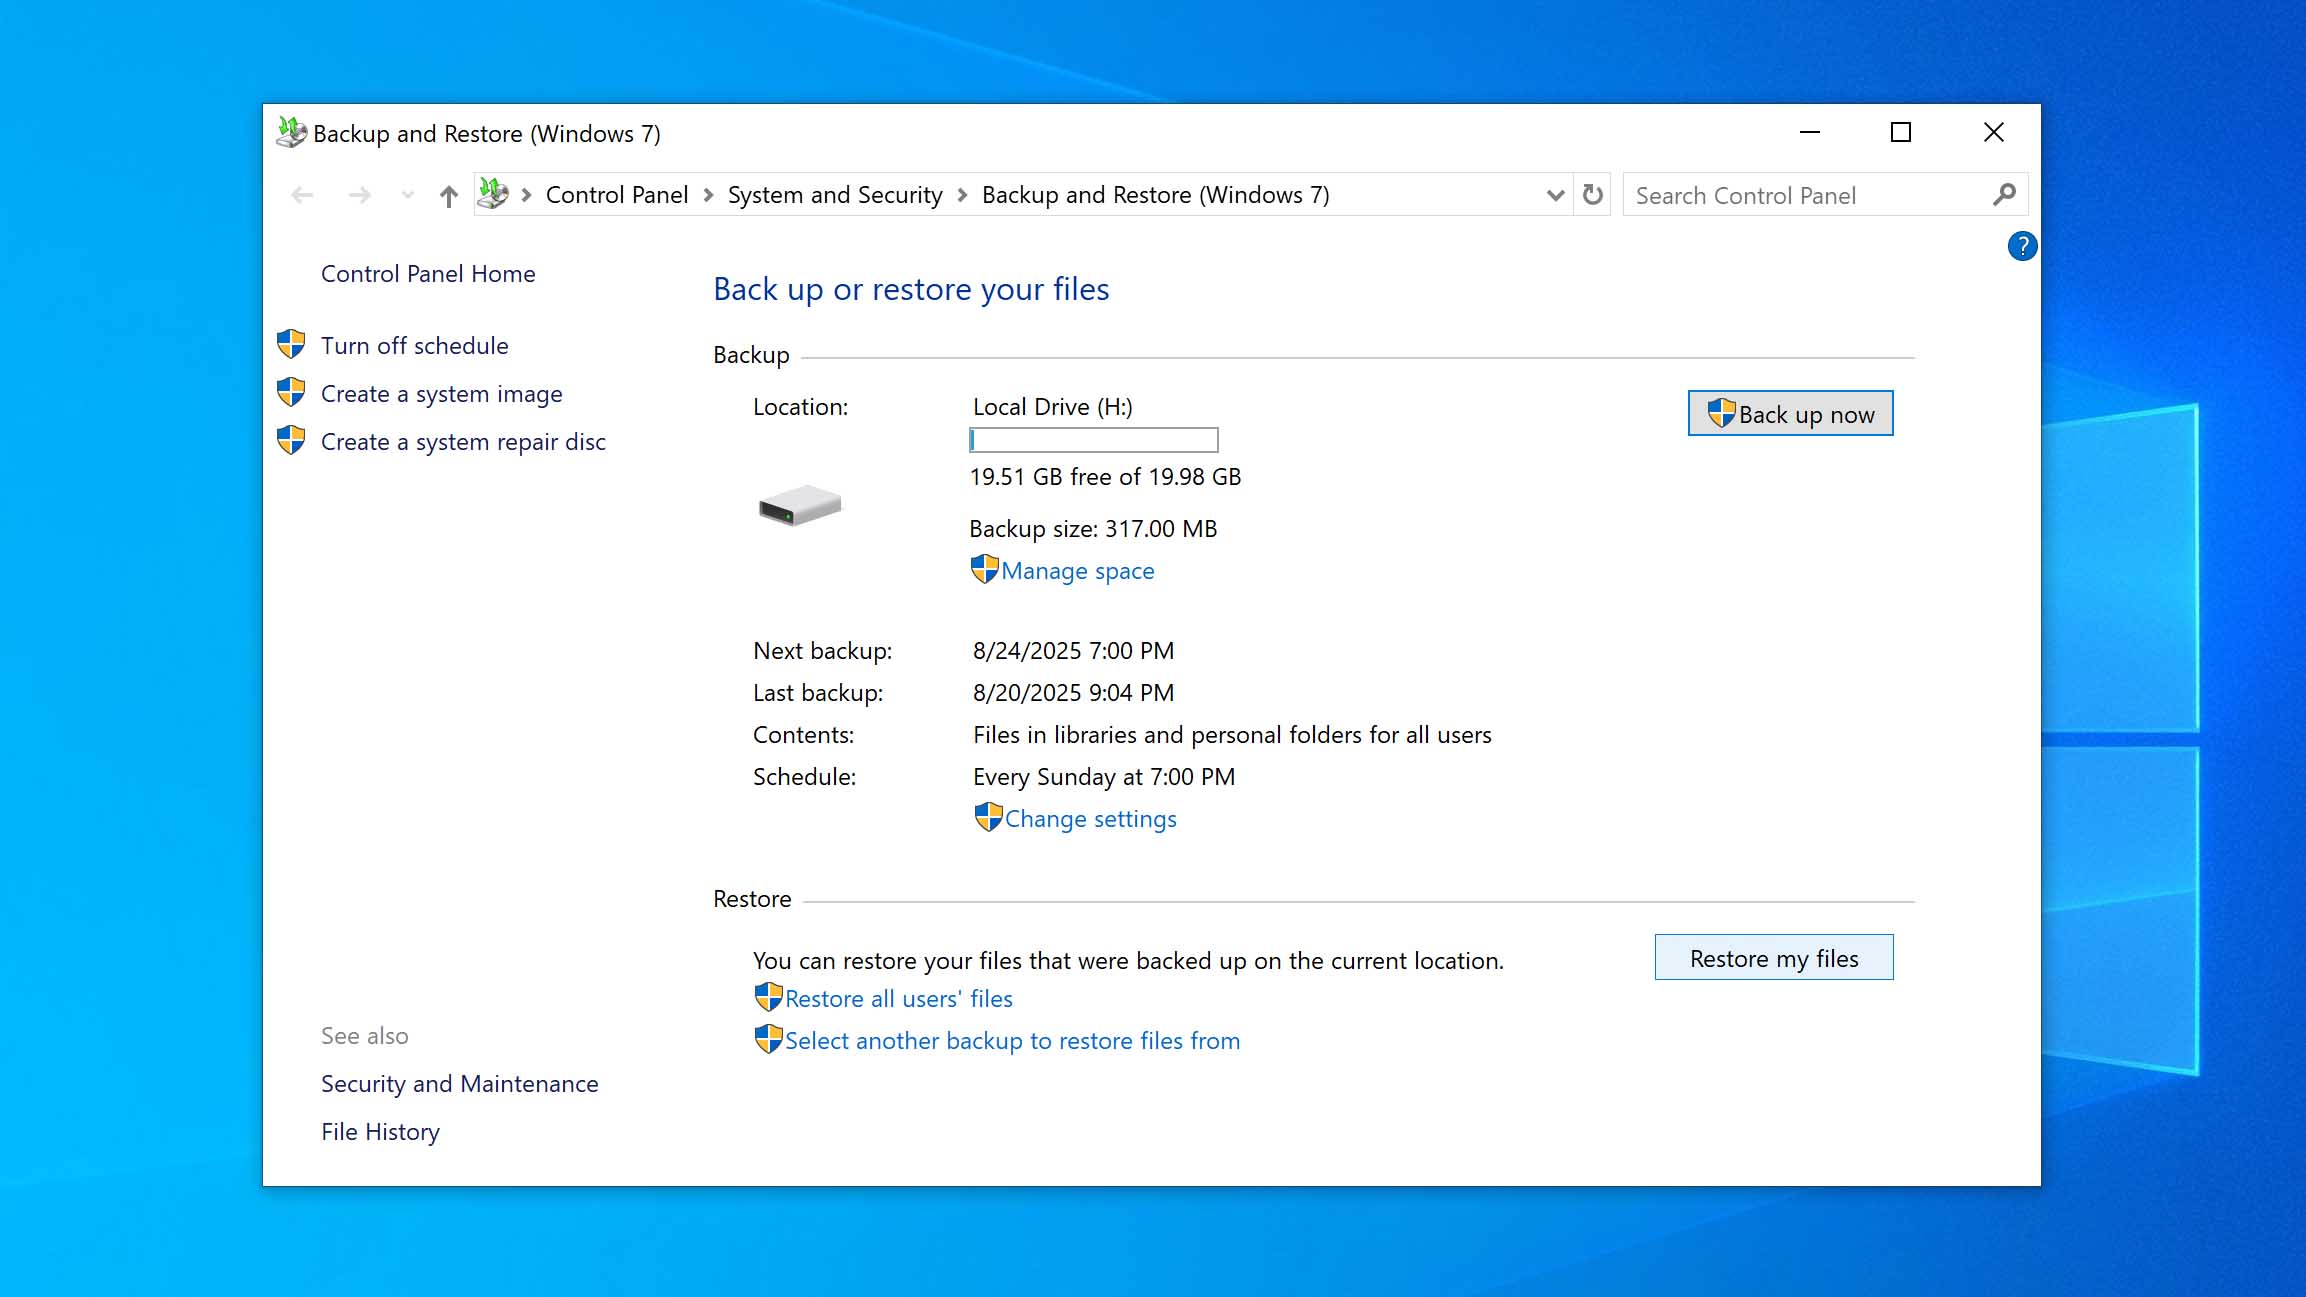
Method 3:Use Backup and Restore Tool
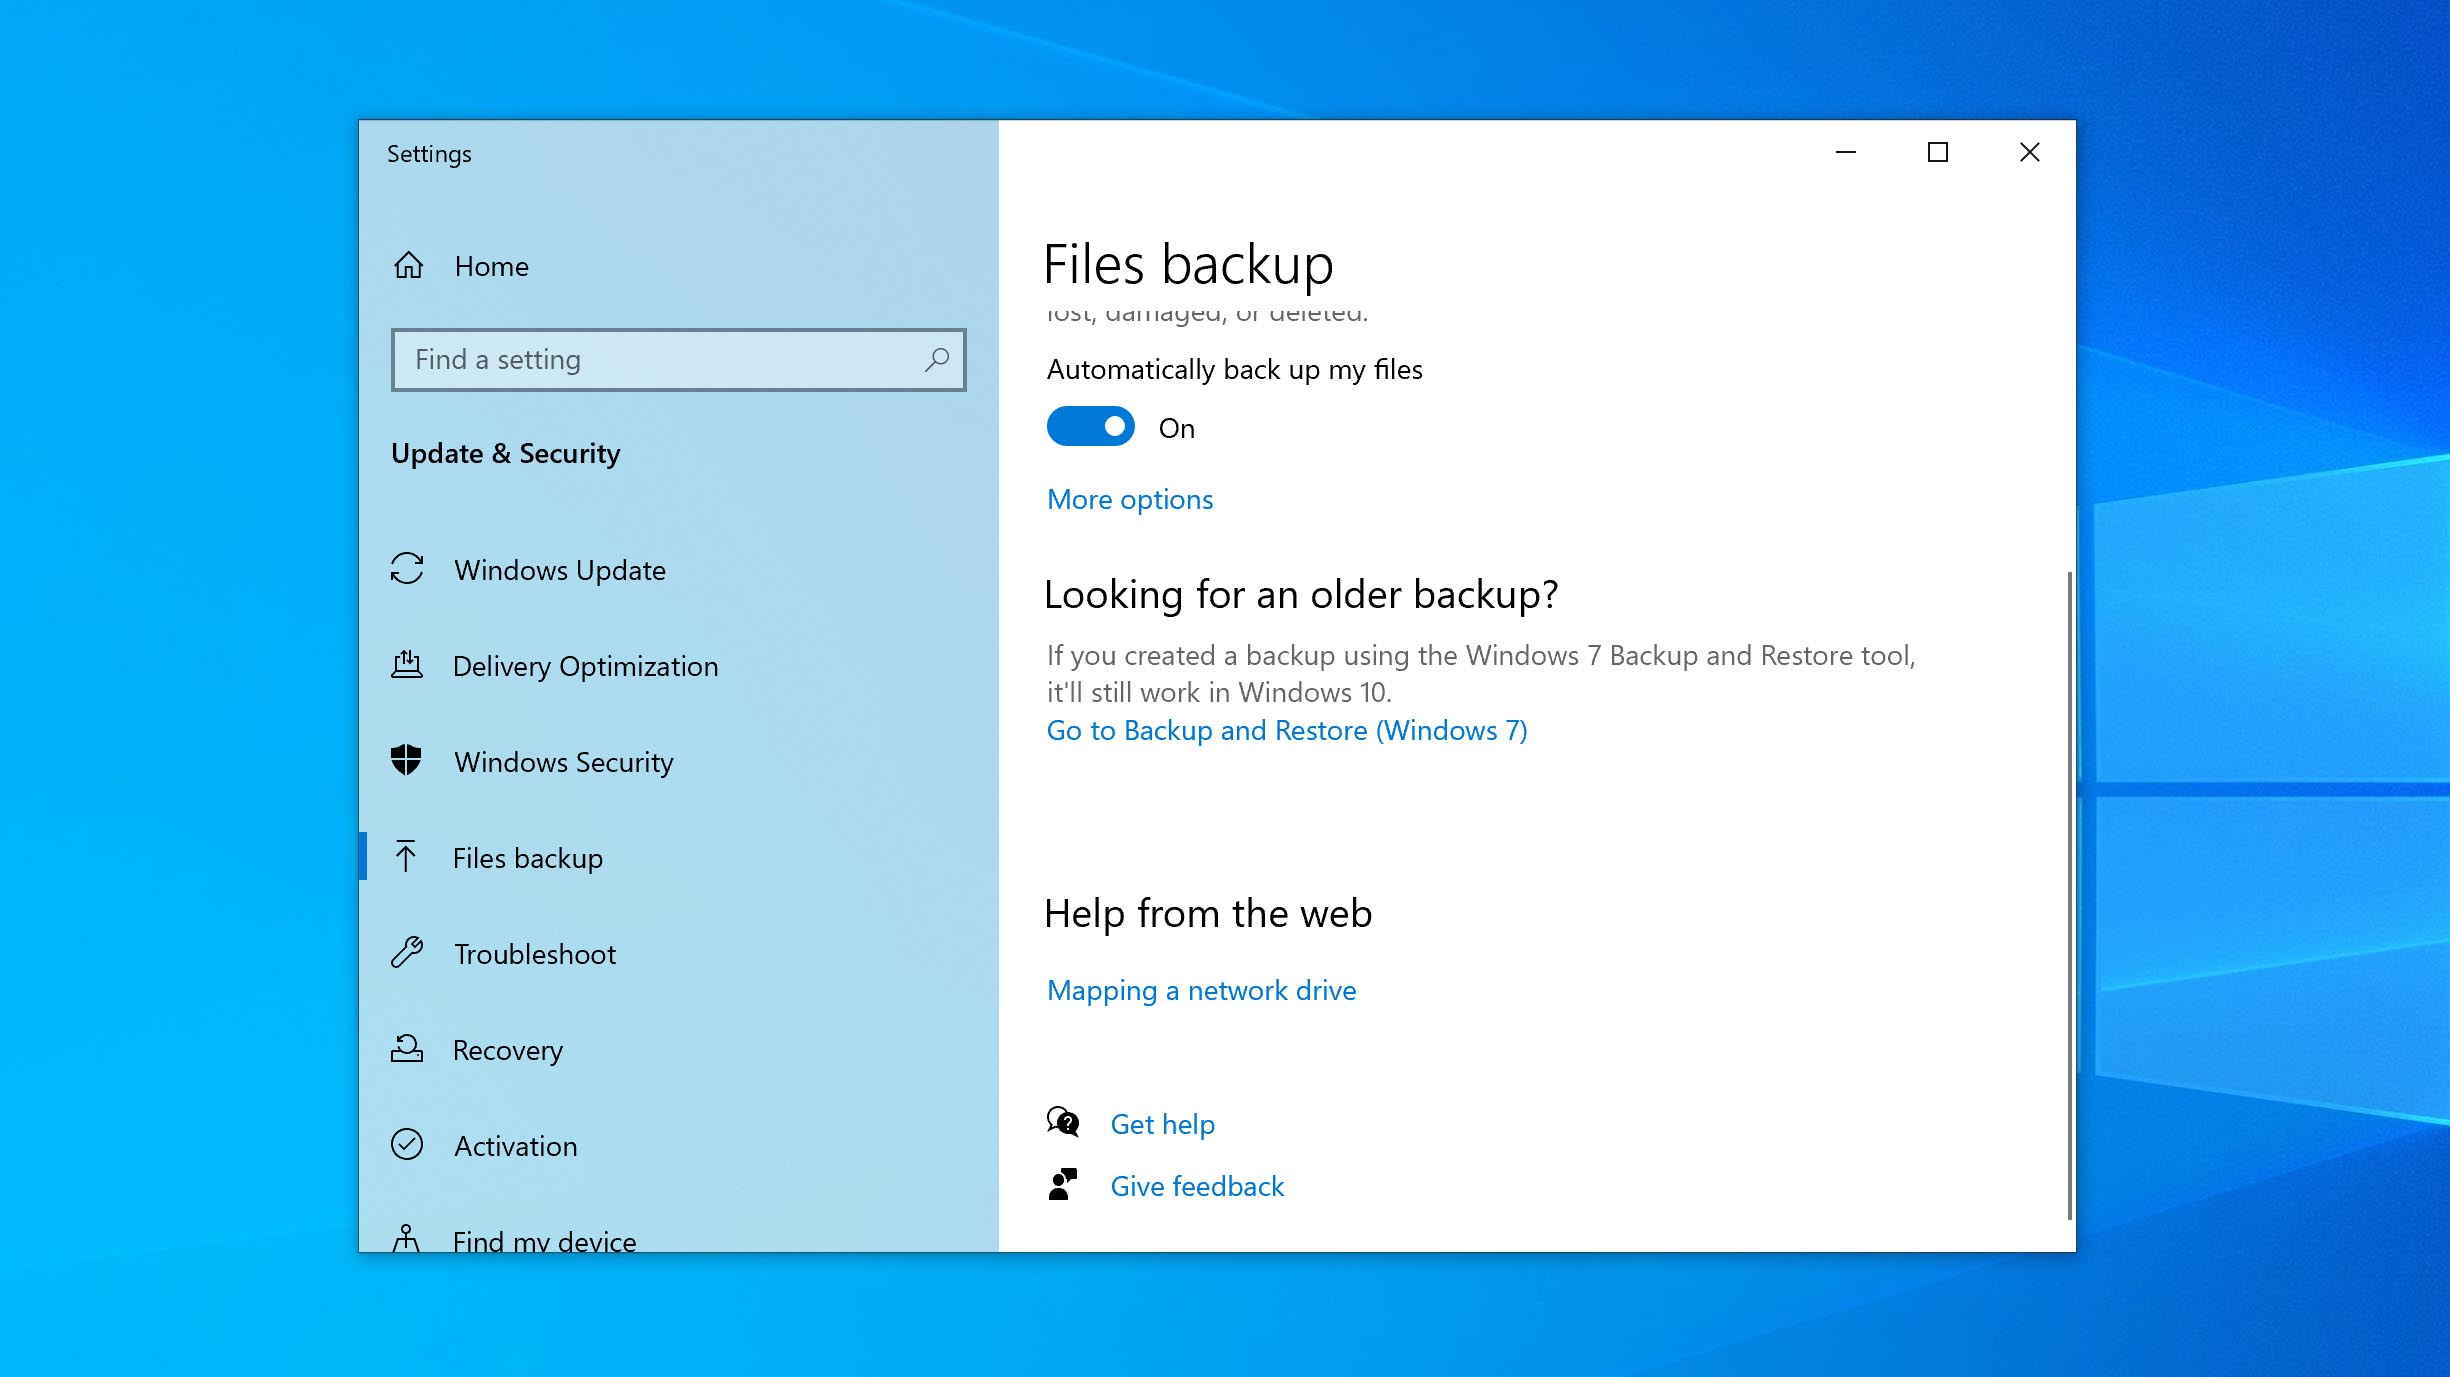
Backup and Restore (Windows 7) is another built-in option for restoring permanently deleted files in Windows 10 and later. Despite the name, it remains available in current versions of Windows. Unlike File History, it can create full system backups, including system images, which you can use to recover files and even the operating system. As with any backup method, it must be set up before the data loss; otherwise, there’s nothing to restore. If you configured Backup and Restore in advance, you can recover your files directly from a saved backup by following these steps:
- Press Windows Key + S and search for Backup settings. Select the first option.

- Click Go to Backup and Restore (Windows 7).
- Click Restore my files.
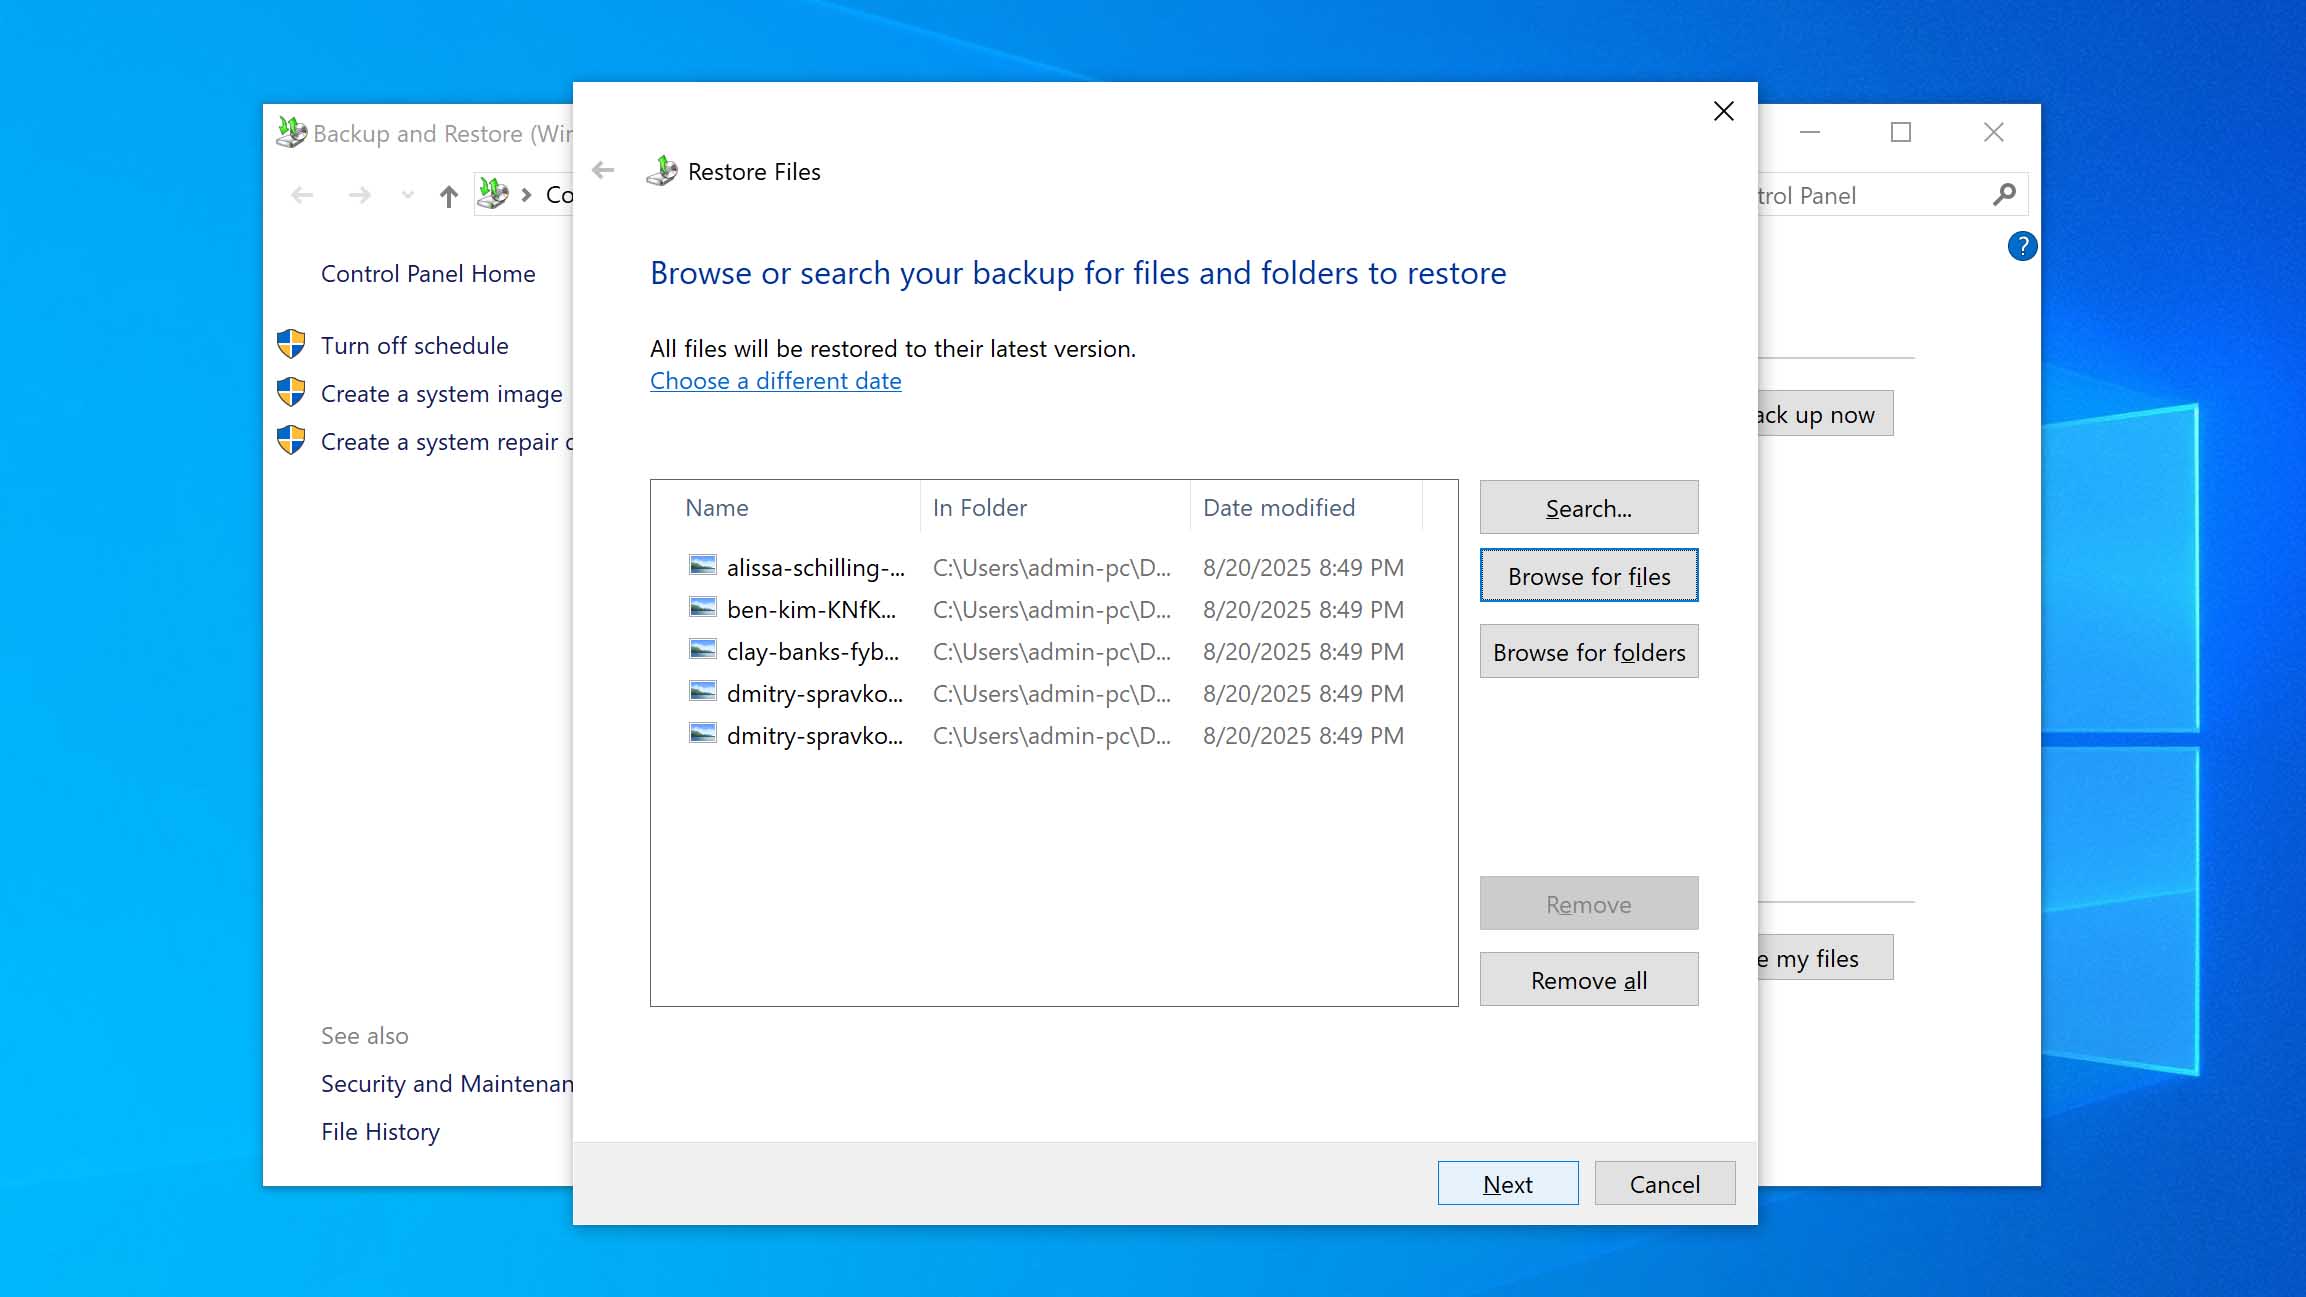
- Click Browse for files. Find your files and mark them for restoration.
- Click Next.
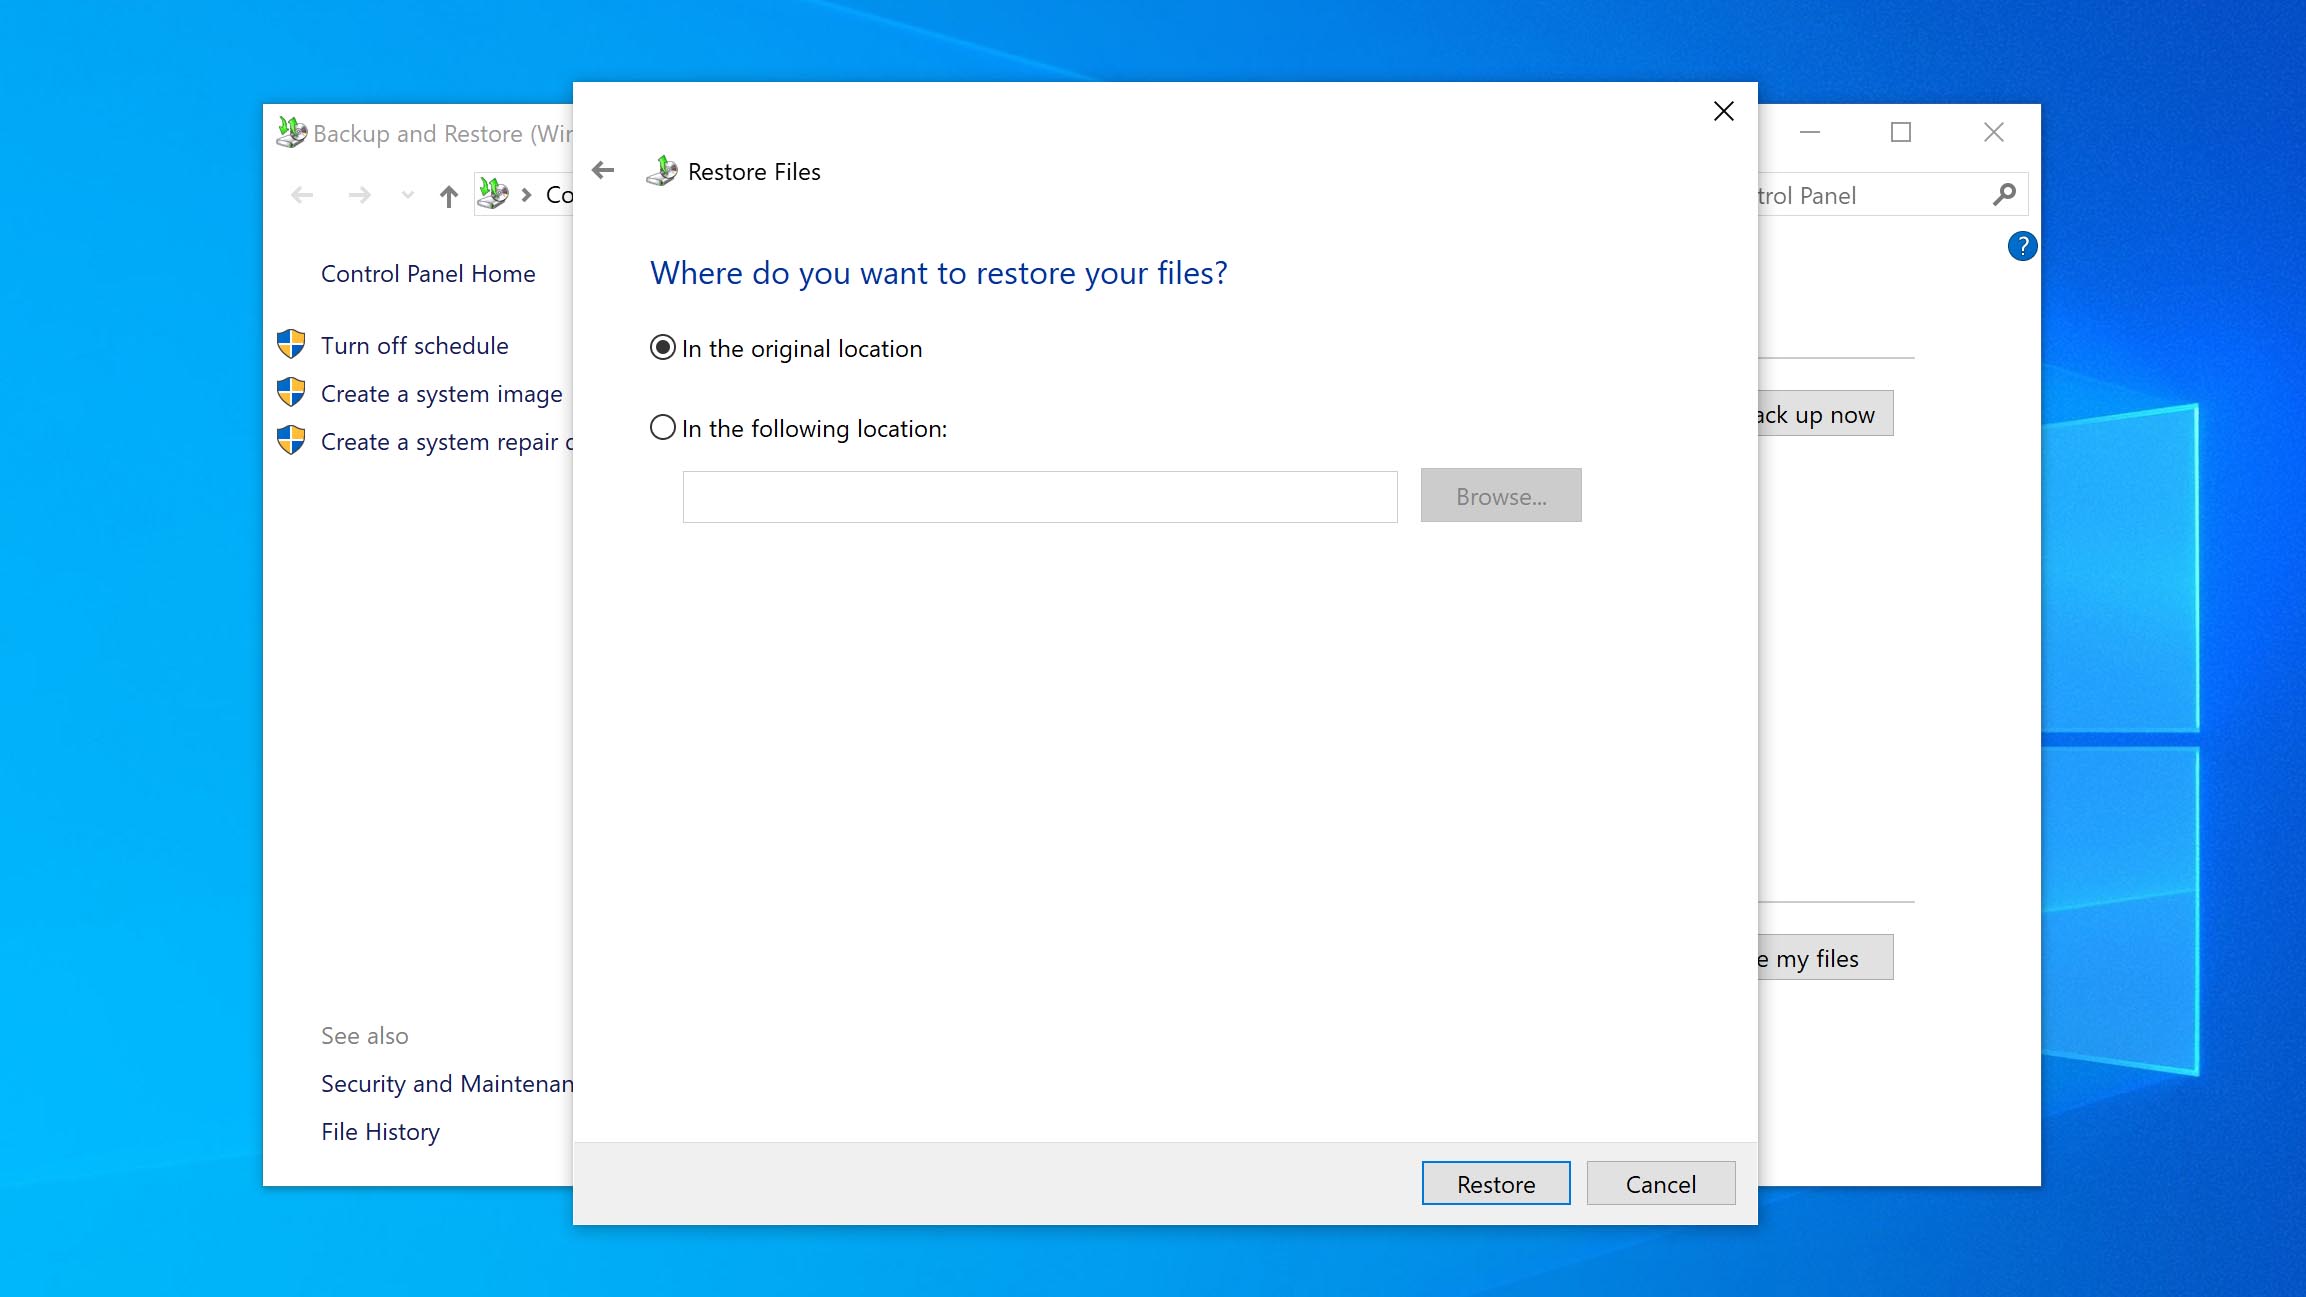
- Choose whether you want to restore the files to their original location or a new one. When ready, click Restore. Once you click Restore, the files will either be returned to their original location or a new one, depending on which option you chose.
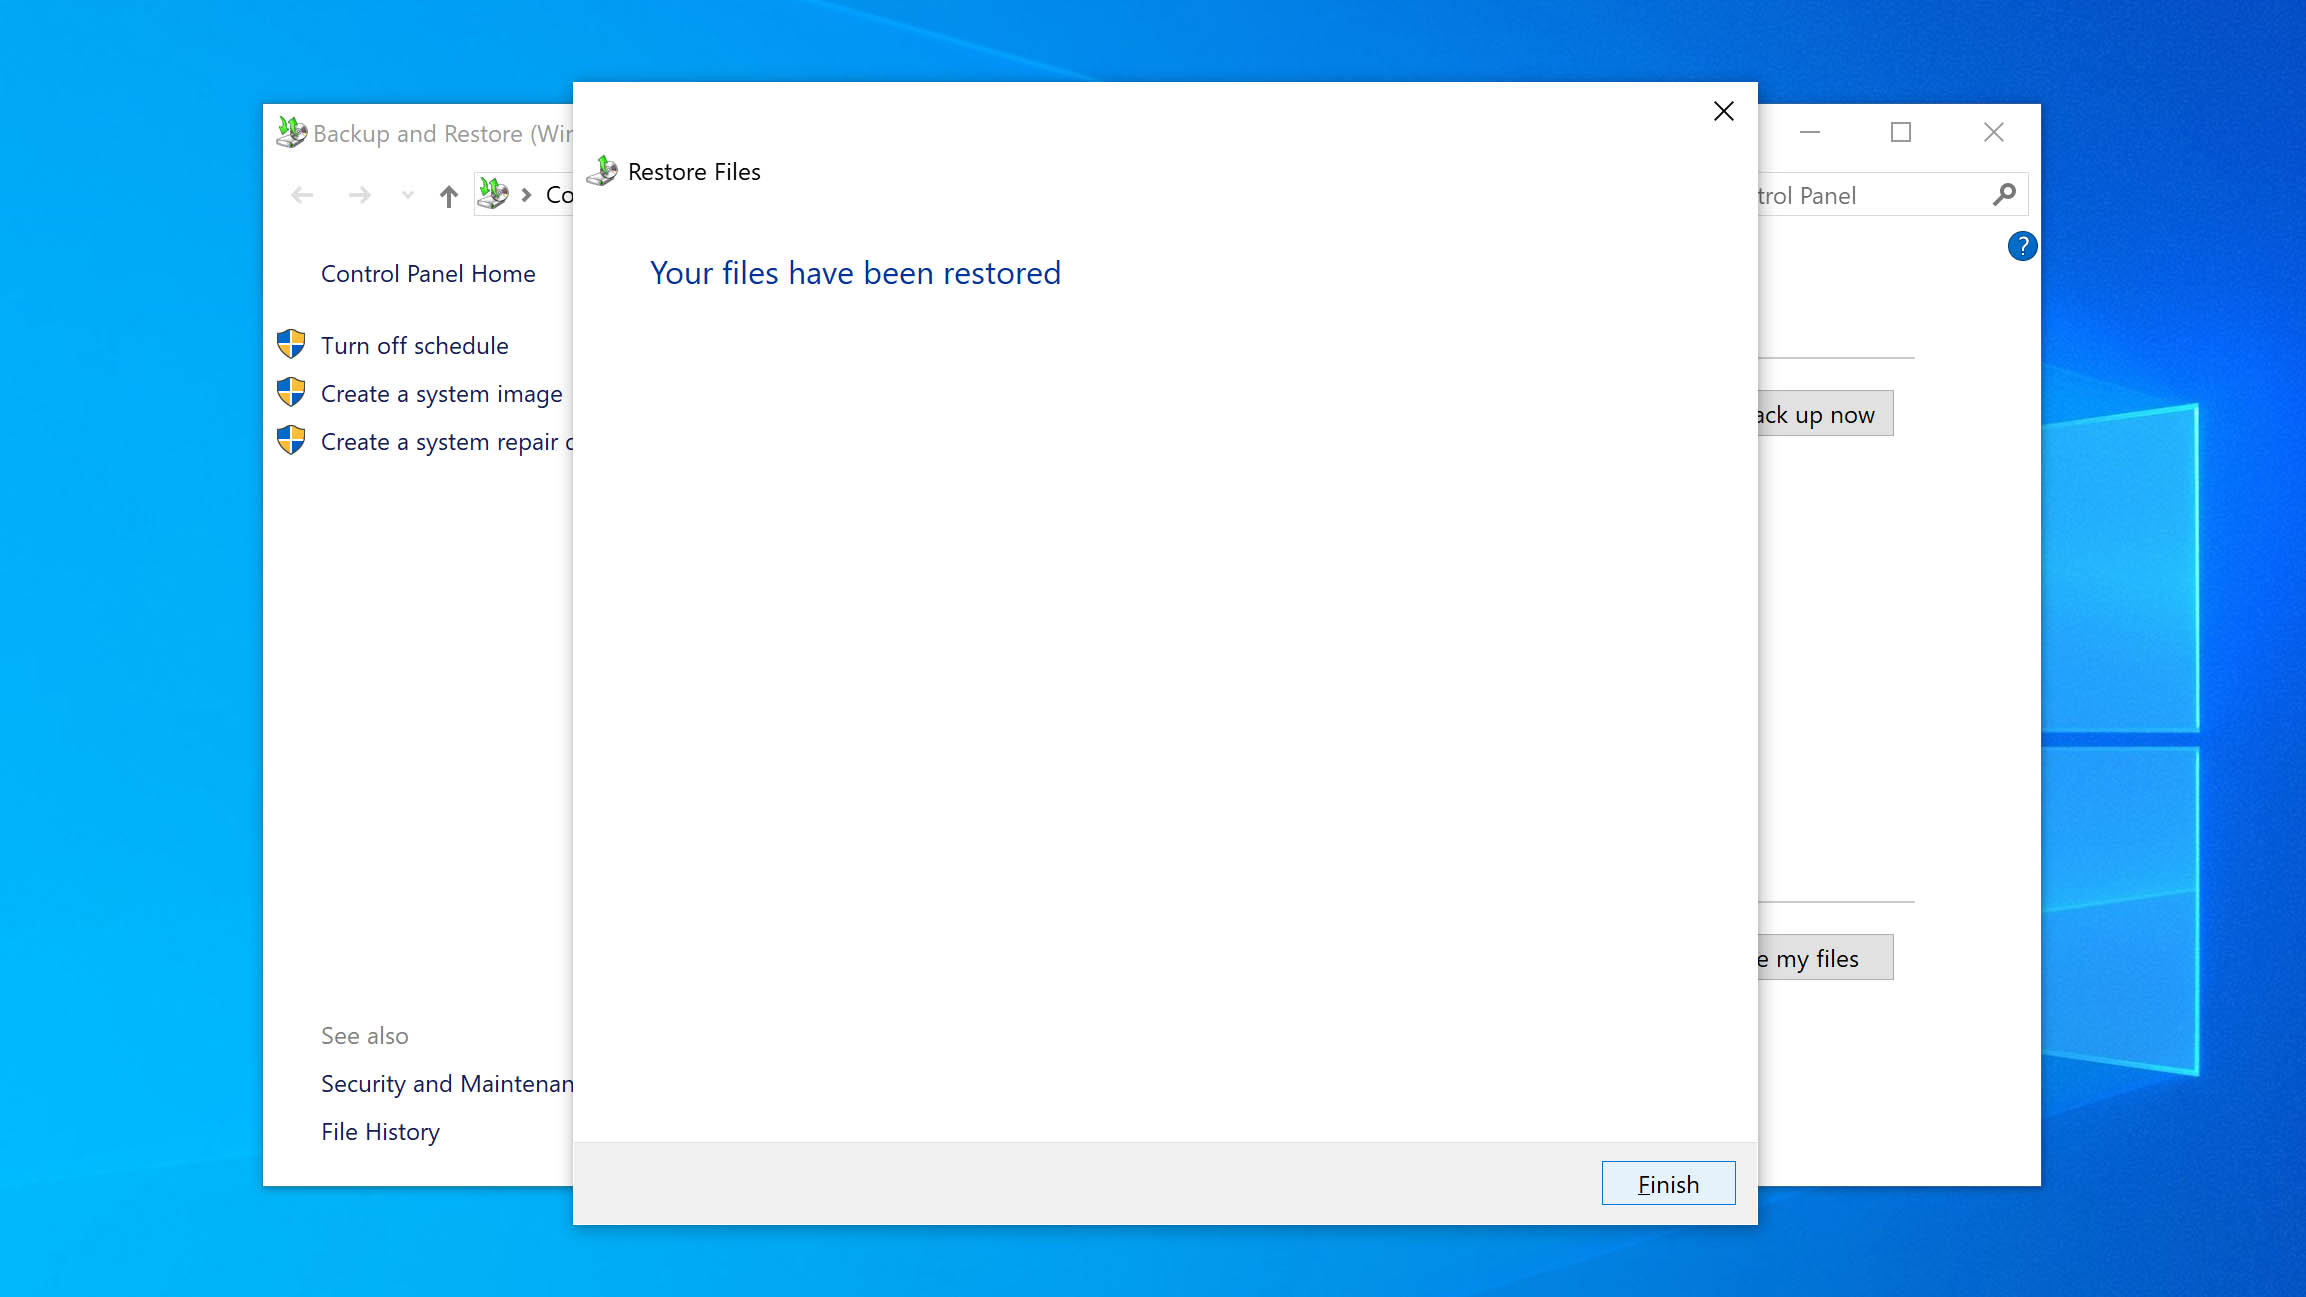
- Click Finish.
Method 4: Check Cloud Backup
Cloud-based storage applications like OneDrive and Google Drive include bin systems similar to the Recycle Bin found in Windows. When a file is deleted, there’s a chance the file is sent to the bin instead of being deleted for good. This acts as a safeguard against accidental deletion.
Something to consider is Google Drive will automatically delete files in the Trash after 30 days. Other cloud-based solutions have similar policies. Of course, this will depend on the type of plan you have. Until the data is deleted from the bin, it acts as a reliable method to recover permanently deleted files from a PC easily and safely.
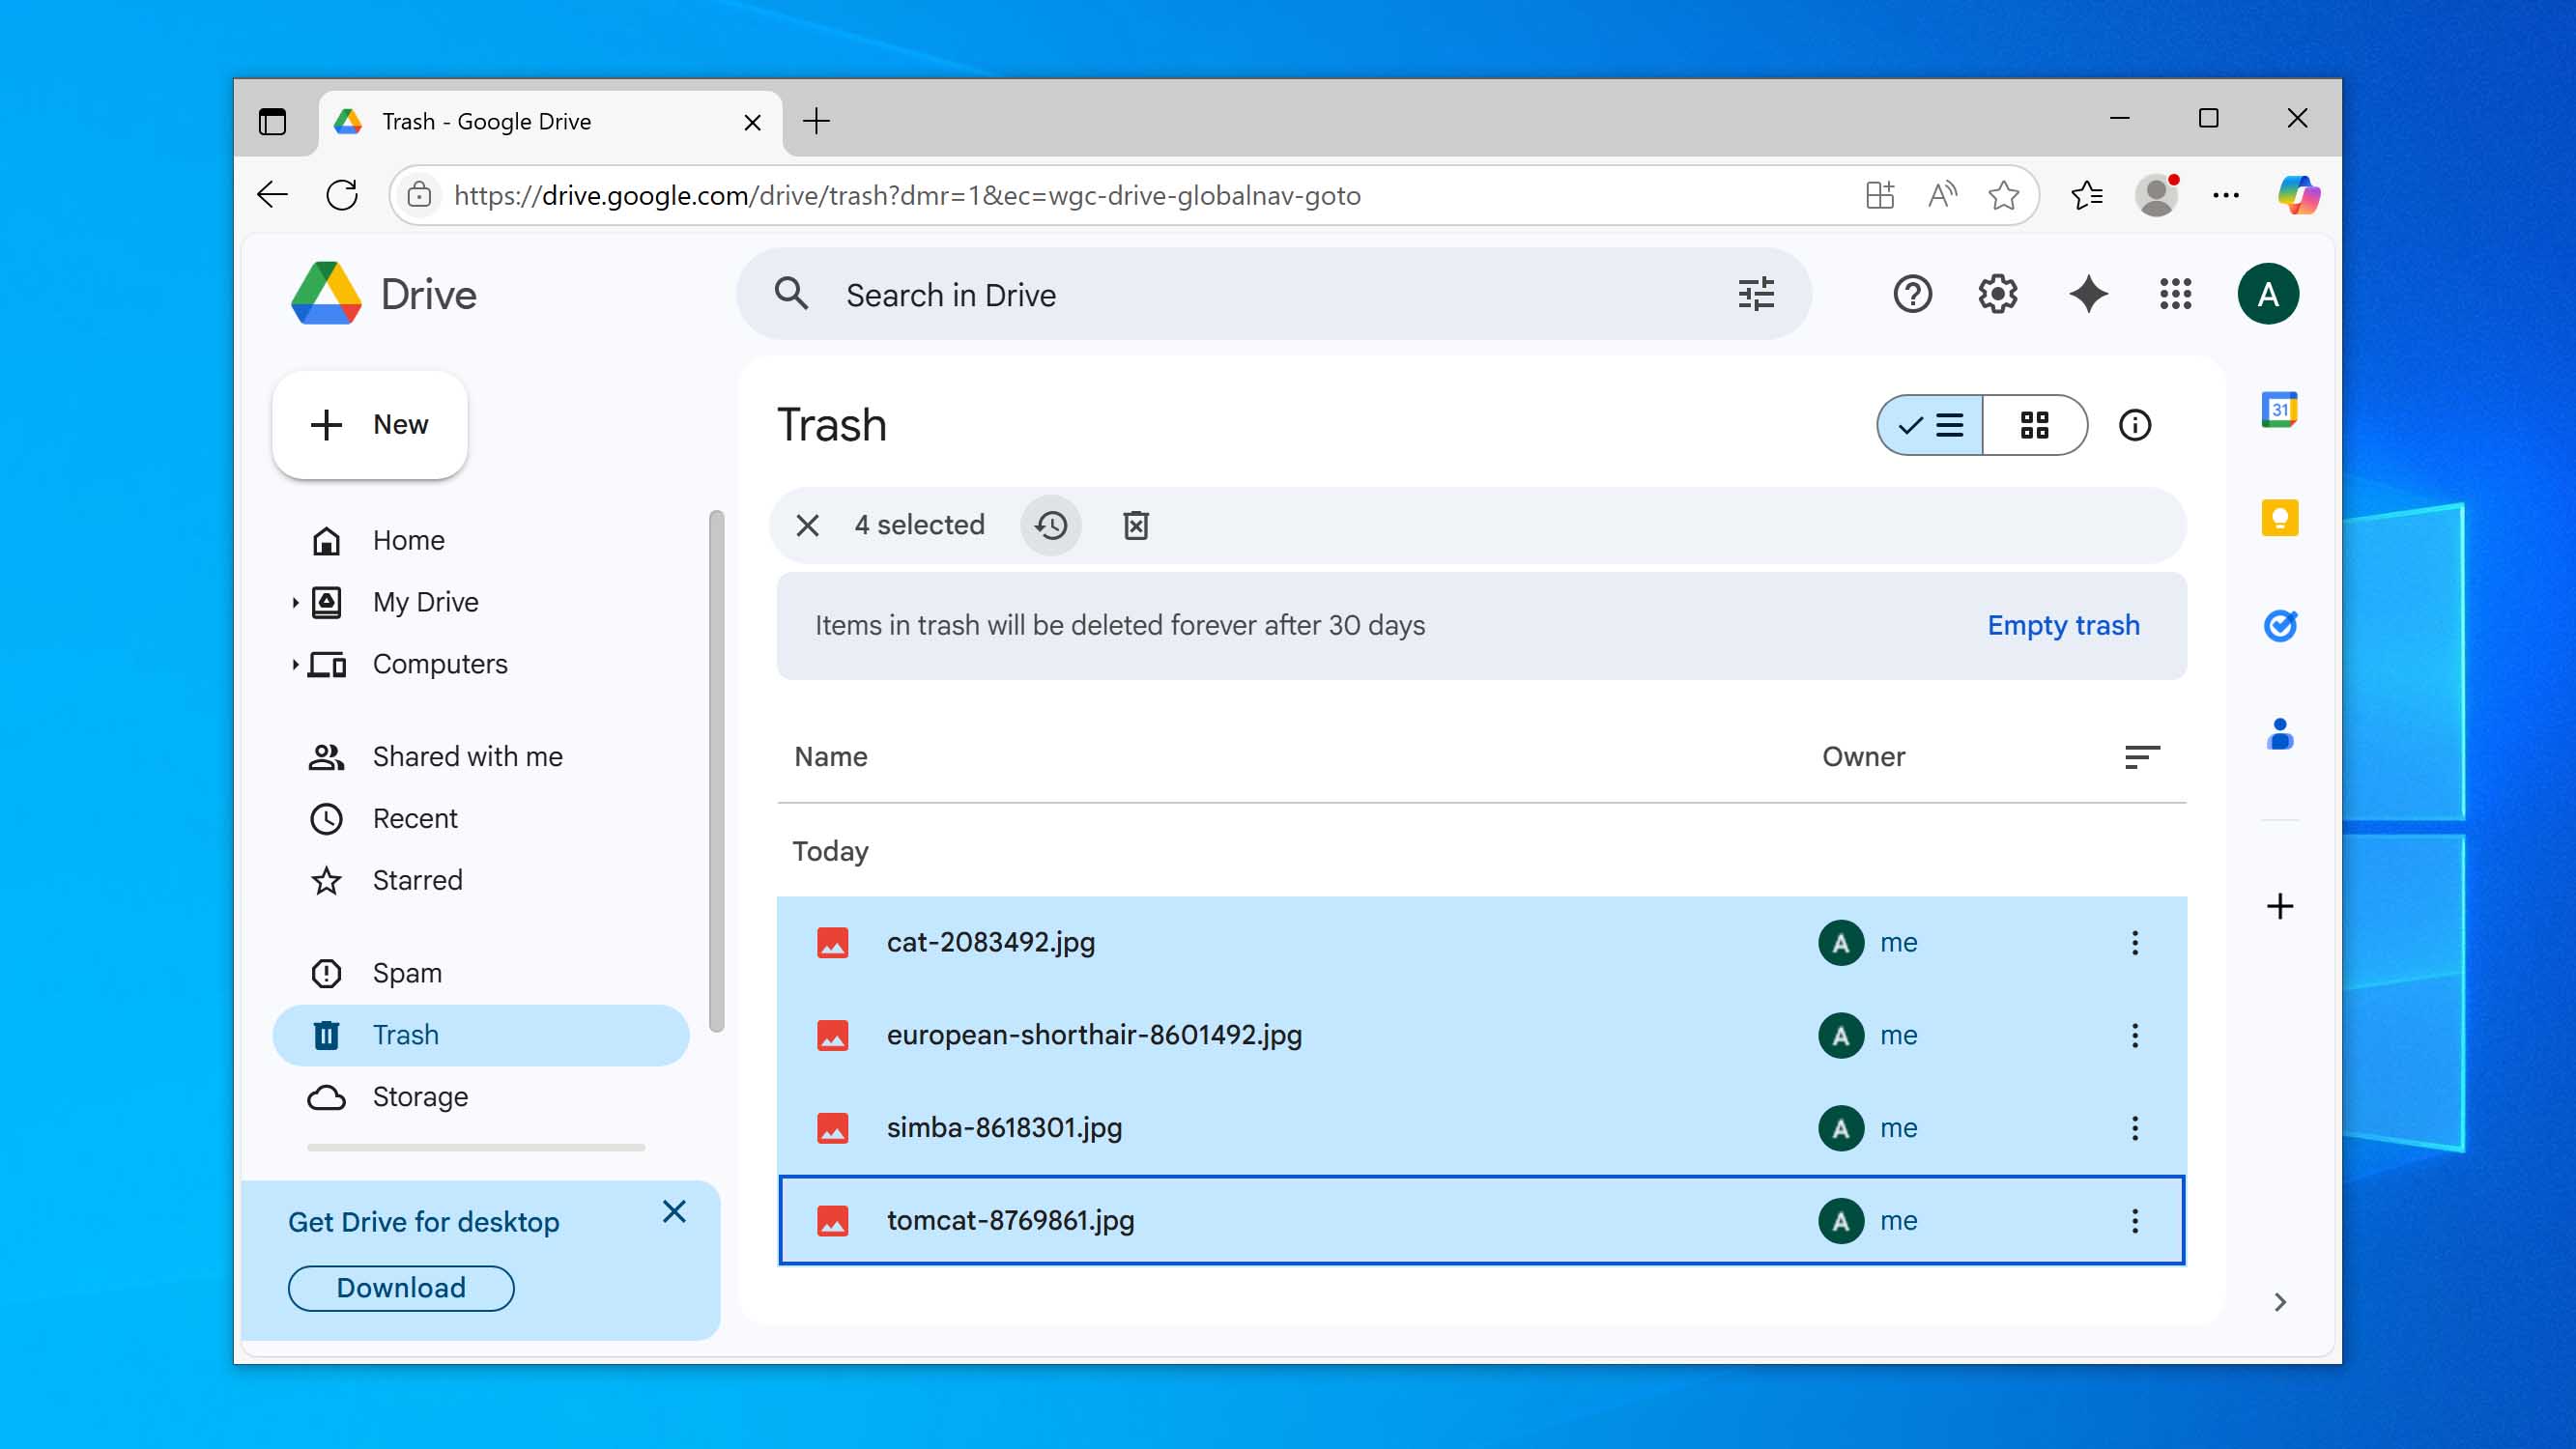
In this method, I’ll demonstrate what recovering a file from the Trash in Google Drive is like:
- Go to your Google Drive storage and log in using your credentials.
- In the left panel, click Trash.
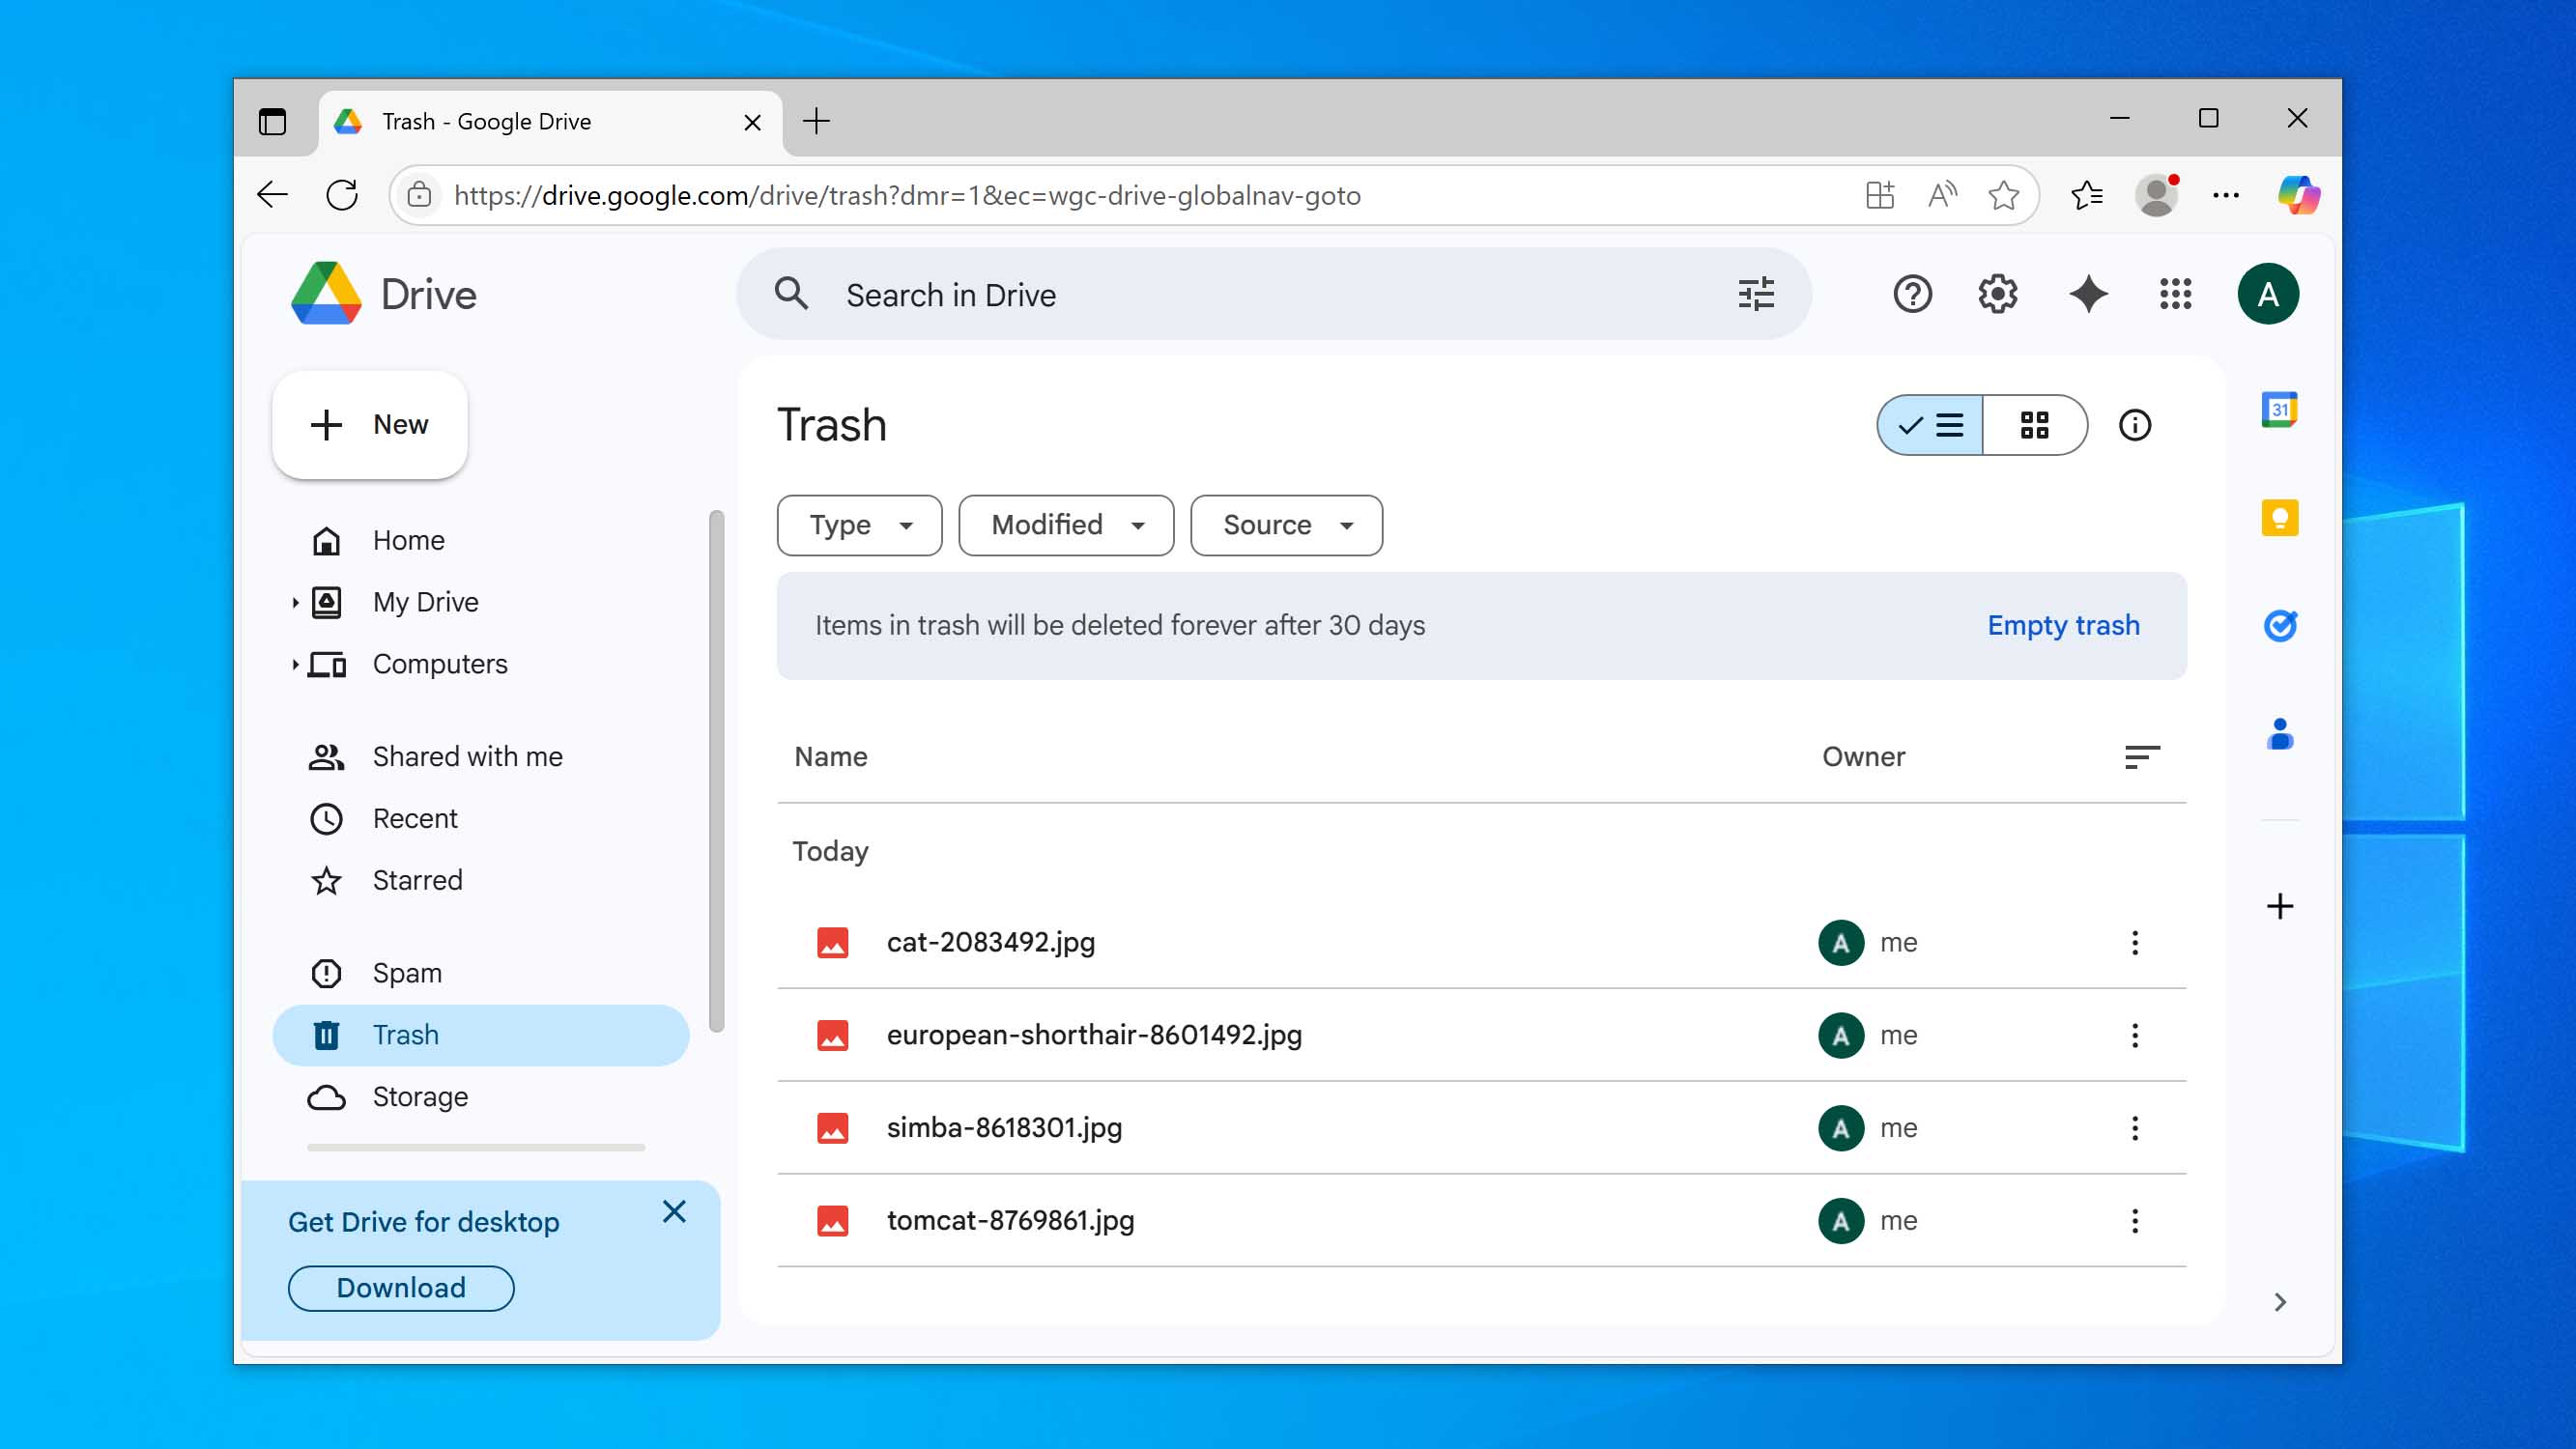
- Right-click the file you want to restore and click Restore.
When you restore the files, they will be restored to their original location in your cloud storage. This may be different if you’re using a different cloud solution. Once restored, consider keeping a local backup of the files if they’re important to circumvent the 30-day limitation of the Trash folder.
Conclusion
Now you know how to recover files even if they are permanently deleted on Windows 10 or other versions. As you can see, it’s possible whether you have backups or not. For the future, here are a few tips to help you avoid the need to recover deleted files again:
- Always be careful when working with files and avoid holding down keys or clicking the mouse or touchpad by mistake. If you delete something accidentally, try using the Ctrl + Z shortcut to undo the last action, but make sure the last action was indeed a deletion so you don’t lose other changes.
- Another important step is to use the backup tools available in Windows. This way you always have a copy of your files to fall back on. If File History or Backup and Restore doesn’t suit your needs, you can still keep extra copies of your most important files on external storage, such as a flash drive. With luck, you’ll never need these backups, but if recovery software can’t help because the files have already been overwritten, those backups will be the only way to bring your data back.
We hope this guide was useful. If you have any questions or run into problems, leave a comment below and we’ll do our best to help.


this was usefull
think you fore him
best
nice
i want this saptweyar
thank you