 An MOV file that appears garbled, randomly freezes or stutters, or refuses to play, is likely corrupt. Now, this can happen due to various reasons. Maybe your camera lost power during recording, or there was an error while encoding the video. Additionally, interruptions during file transfer, or problems with the storage drive (logical or physical corruption) can corrupt your videos too. However, as long as the underlying video data is largely intact, you can repair the MOV file by using a video repair website or app, re-encoding it, or using VLC’s Always fix feature—the sections below explain how.
Choosing the Right MOV Repair Method
There are several methods you can use to repair a corrupt MOV video. The closest thing to a one-size-fits-all solution is using an online, or offline video repair tool. But, these tools only work if you have a healthy video file recorded on the same device as the corrupt one. If you don’t have a healthy MOV video from the same device, try re-encoding the video, or using expert help.
To save your time, here’s a table outlining common types of MOV file corruption, why it happens, and which method is the most likely to work for that specific issue:
| Symptom | Possible Reasons | Suggested Fix |
| Unplayable MOV file | Missing moov atom (stores metadata), or some kind of structural damage. | Use an online, or local video repair tool. |
| Freezing or stuttering during playback | Missing or corrupted frames. It could also be the result of codec issues, or a damaged mdat atom (stores raw audio and video samples). | Re-encode the video using a video transcoder to fix audio-video sync issues. Alternatively, try using VLC’s Always fix feature. If the video data is missing, you may need to use an online video repair tool. |
| Desynchronized audio and video streams | Corrupted timestamps or errors during editing and conversion. | Re-encode the video using a video transcoder, or use VLC’s Always fix feature. |
| Distorted visuals and warping of the MOV video file | Compression issues and inconsistent bitrate | Use a video repair website, or a local video repair tool. If that doesn’t help, attempt re-encoding the video using a video transcoder, or using the Always fix feature in VLC. |
| Error messages when opening the MOV file | Unsupported file format, or corrupted/missing header and metadata. | Try playing the MOV file using another video player (I suggest VLC Media Player). If the file remains unplayable, fix it using an online video repair tool. |
Method 1: Use an Online Video Repair Service
Web-based video repair services greatly simplify MOV file repair. You just need to upload the corrupt MOV file, upload a healthy MOV file (recorded on the same device as the corrupt one), and click repair.
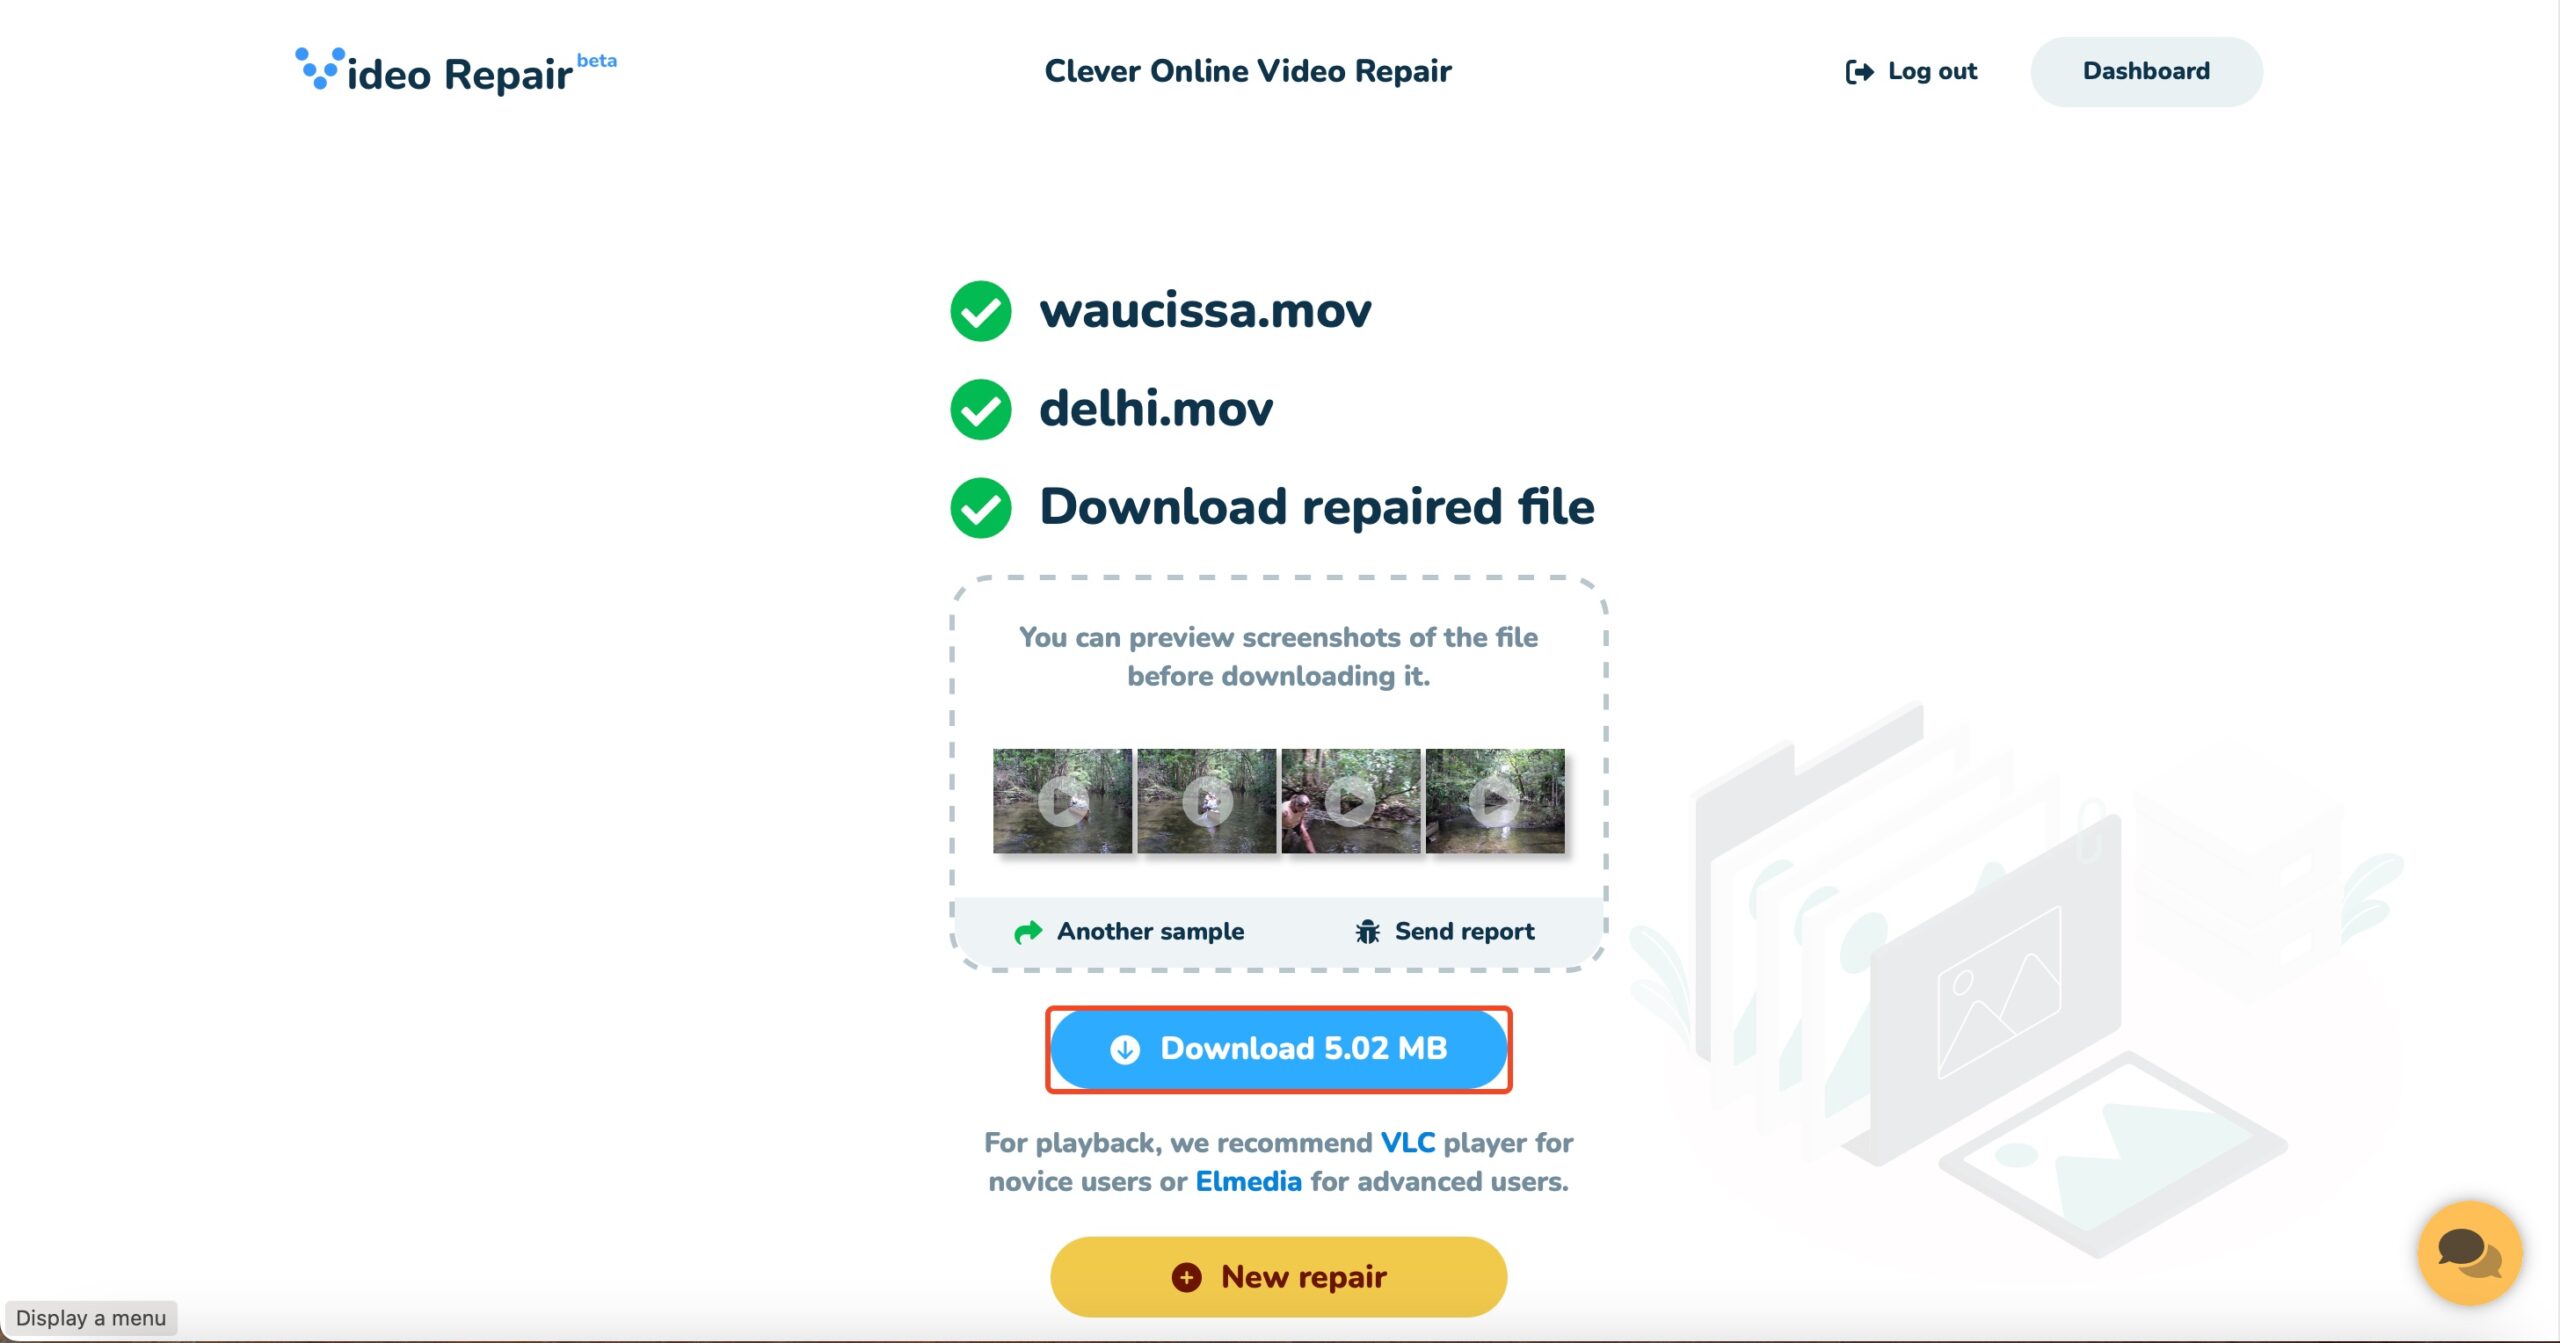
Among online video repair tools, Clever Online Video Repair is my go-to choice. It’s user-friendly, free to use, and fast. I particularly appreciate its 5 GB upload limit, which is much higher than its competitors which usually have a free video repair limit of 2 GB or less. Importantly, it takes privacy seriously—the connection is encrypted using HTTPS. You need to sign up to complete video repair, but if you choose not to, the uploaded videos are deleted within 24 hours.
Here’s how to repair an MOV file using Clever Online Video Repair:
- Visit Clever Online Video Repair on your browser.
- Click on Choose file, then browse to the corrupt MOV file, and double-click it.
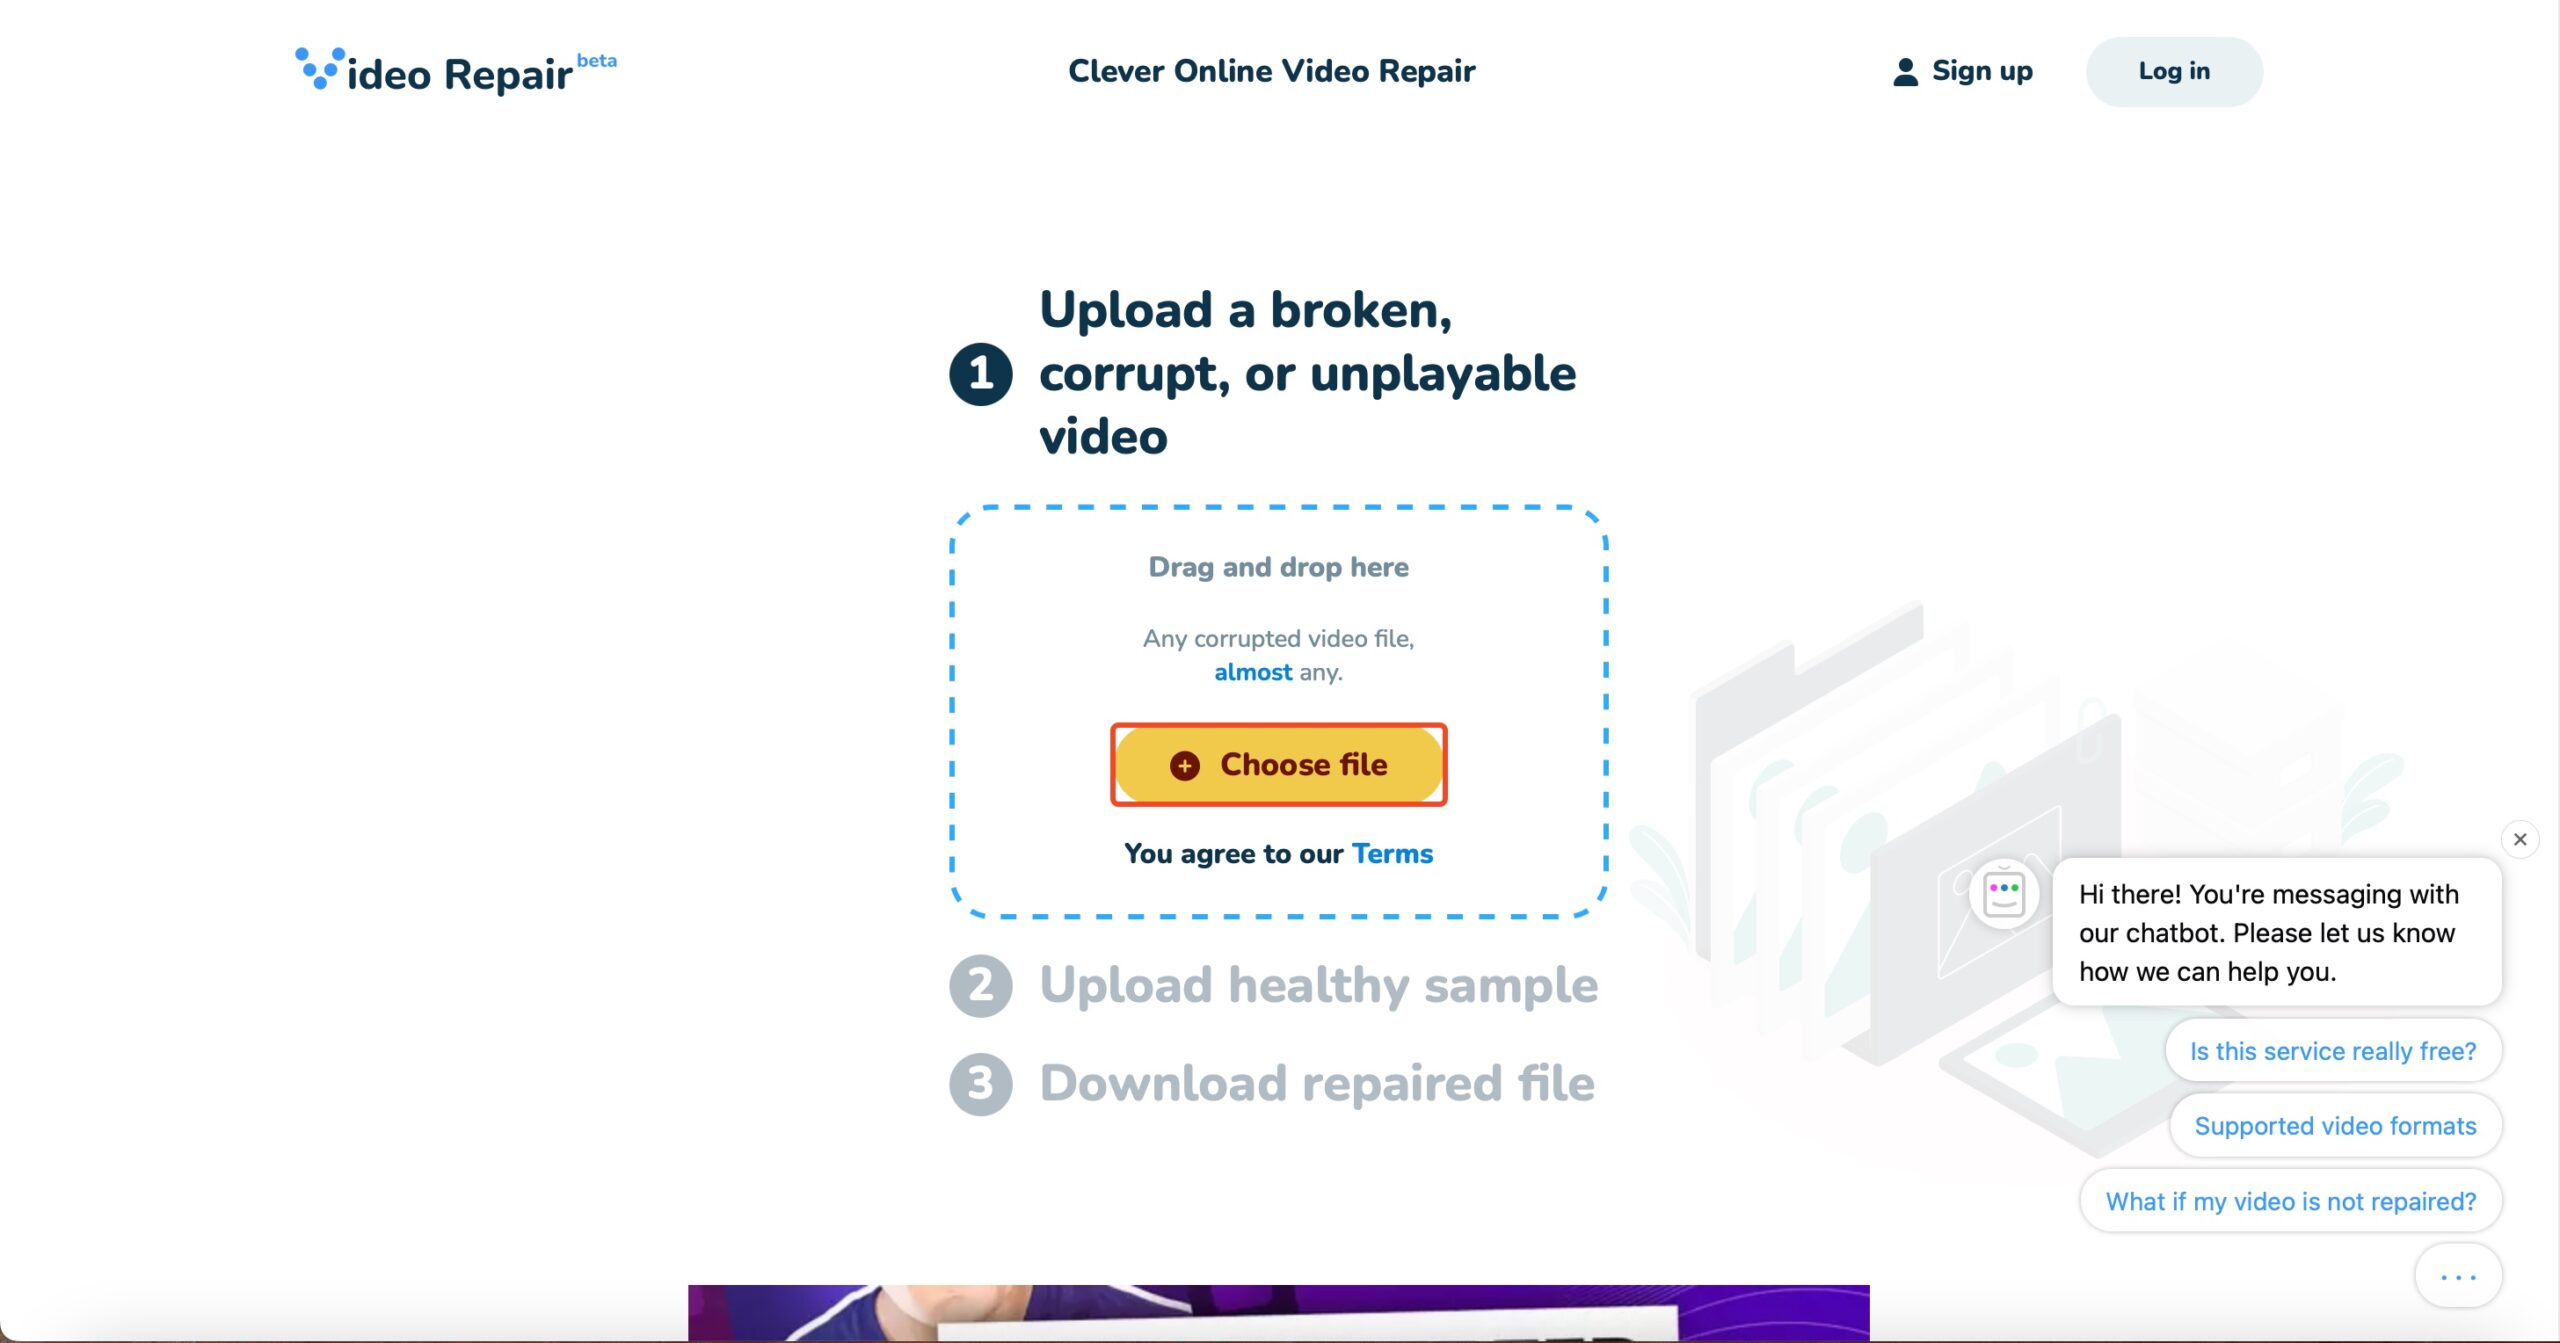
- (Optional) Describe the issue you’re facing with the MOV file. Does it not open at all? Or do you observe skipped frames, stuttering, etc? Click on Send. Else, click on Skip and repair.
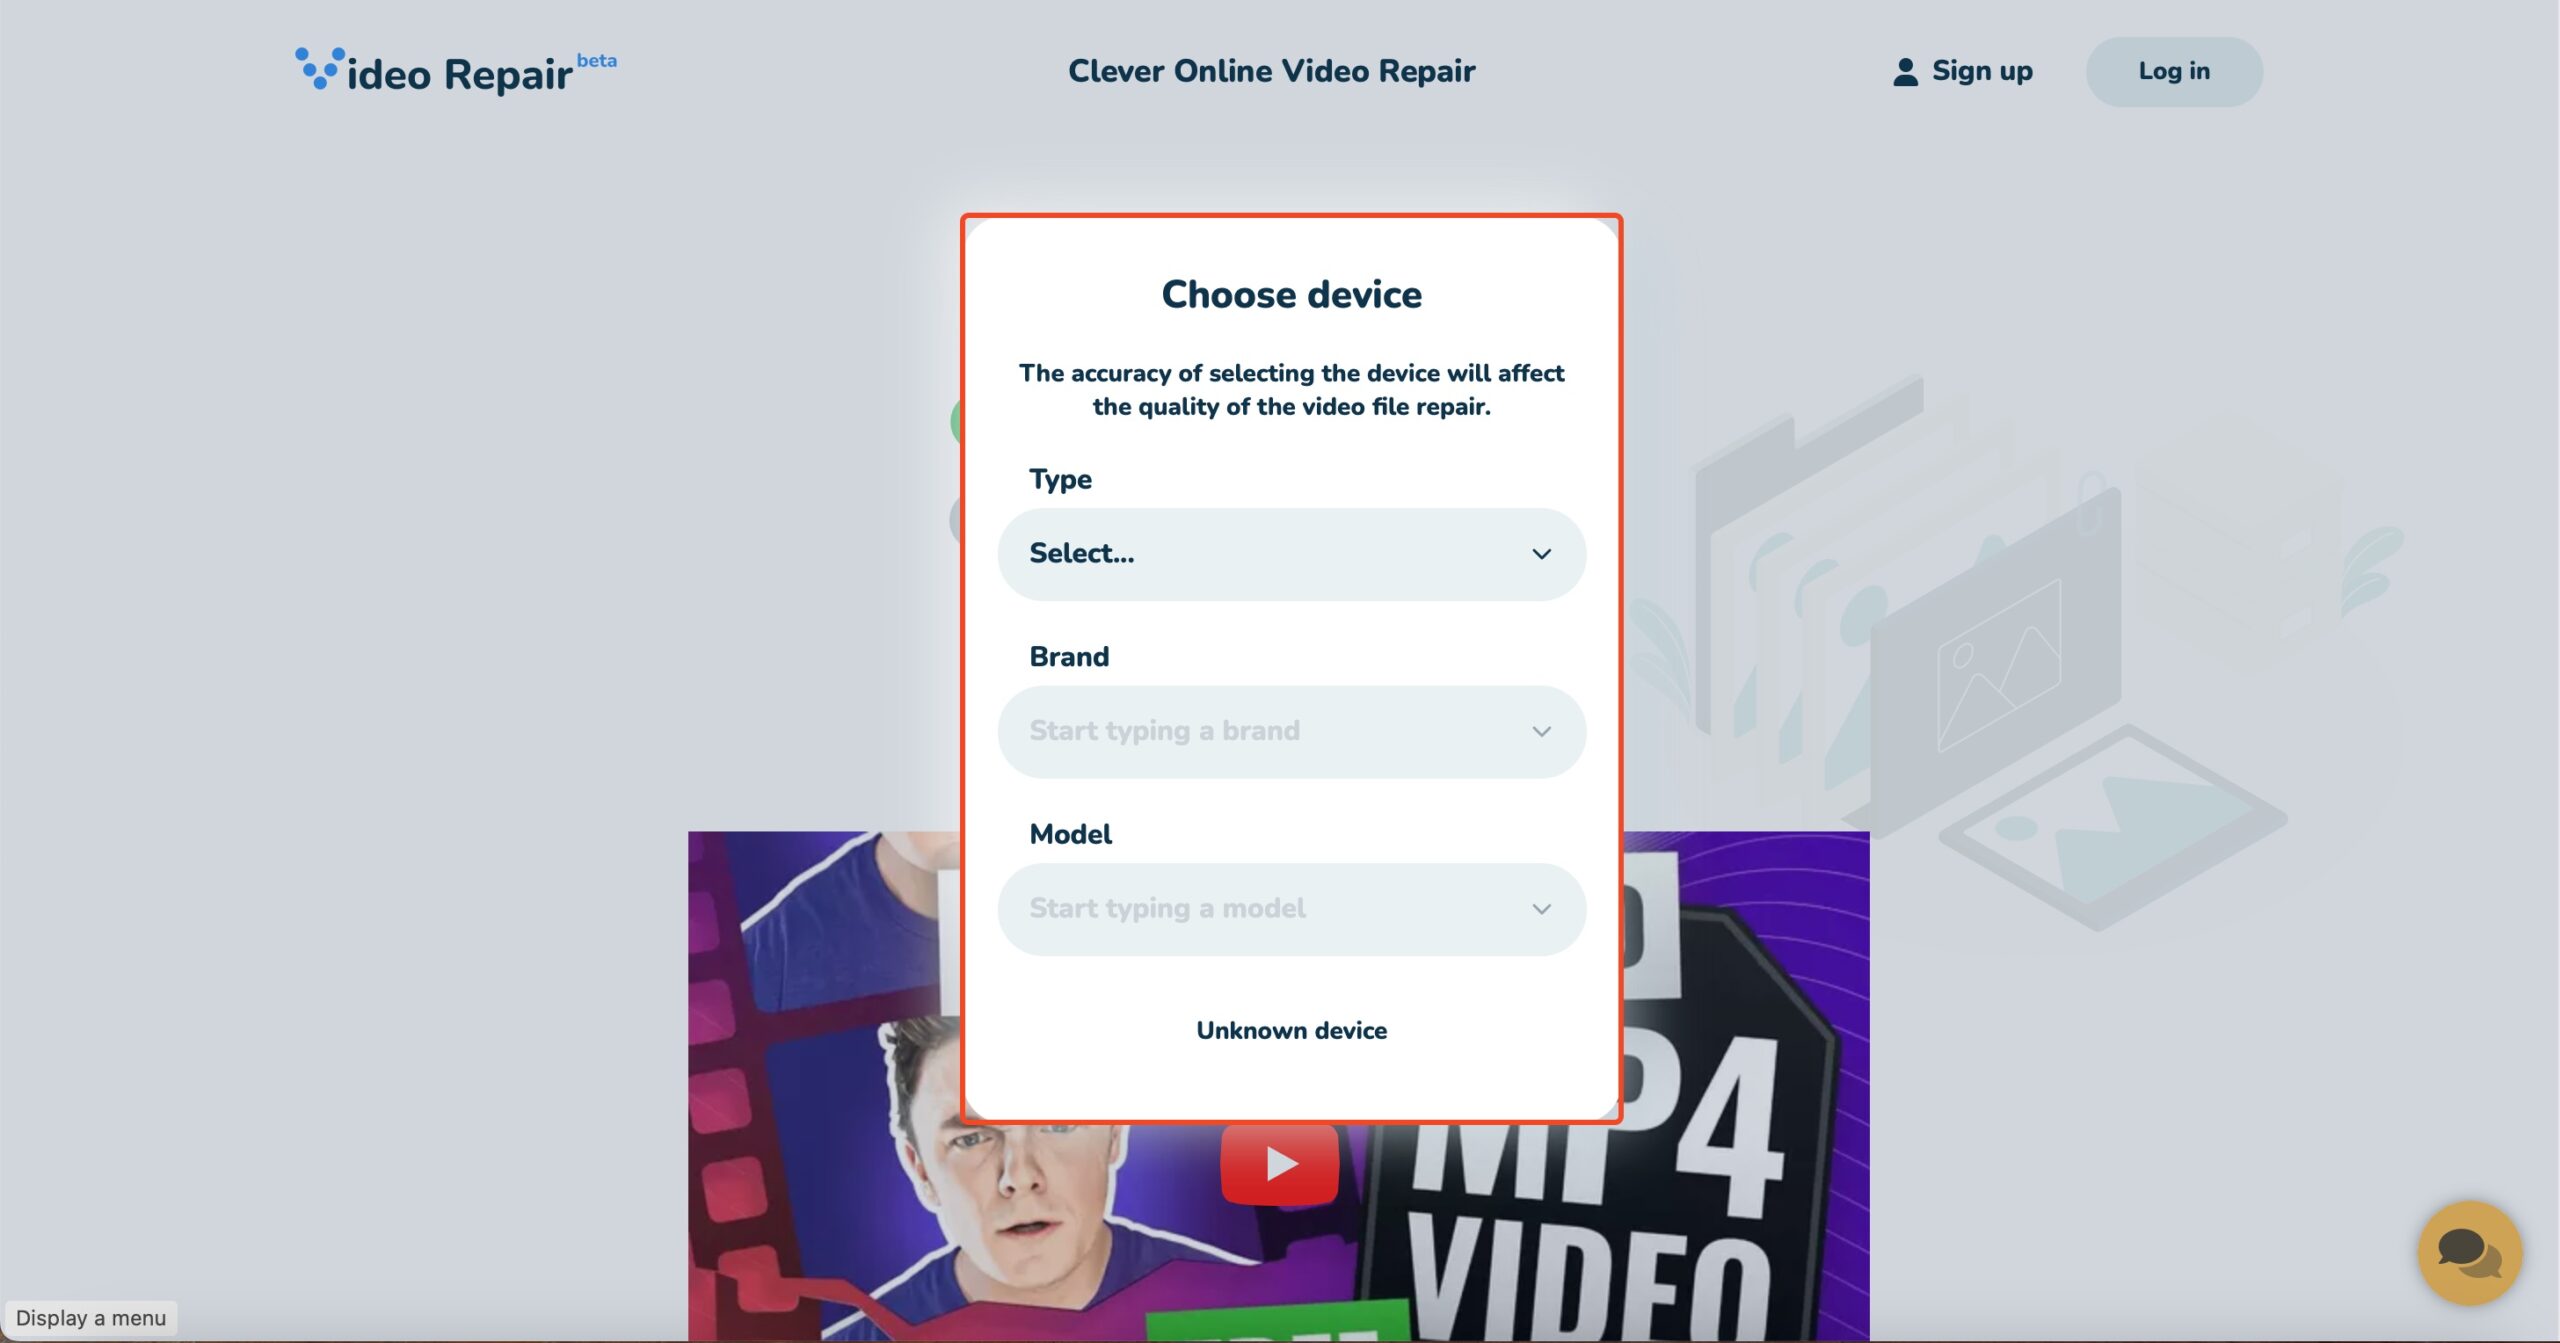
- Select the device, brand, and model used to record the corrupt MOV file, and click on Repair. In case the device isn’t listed, click on Unknown device.
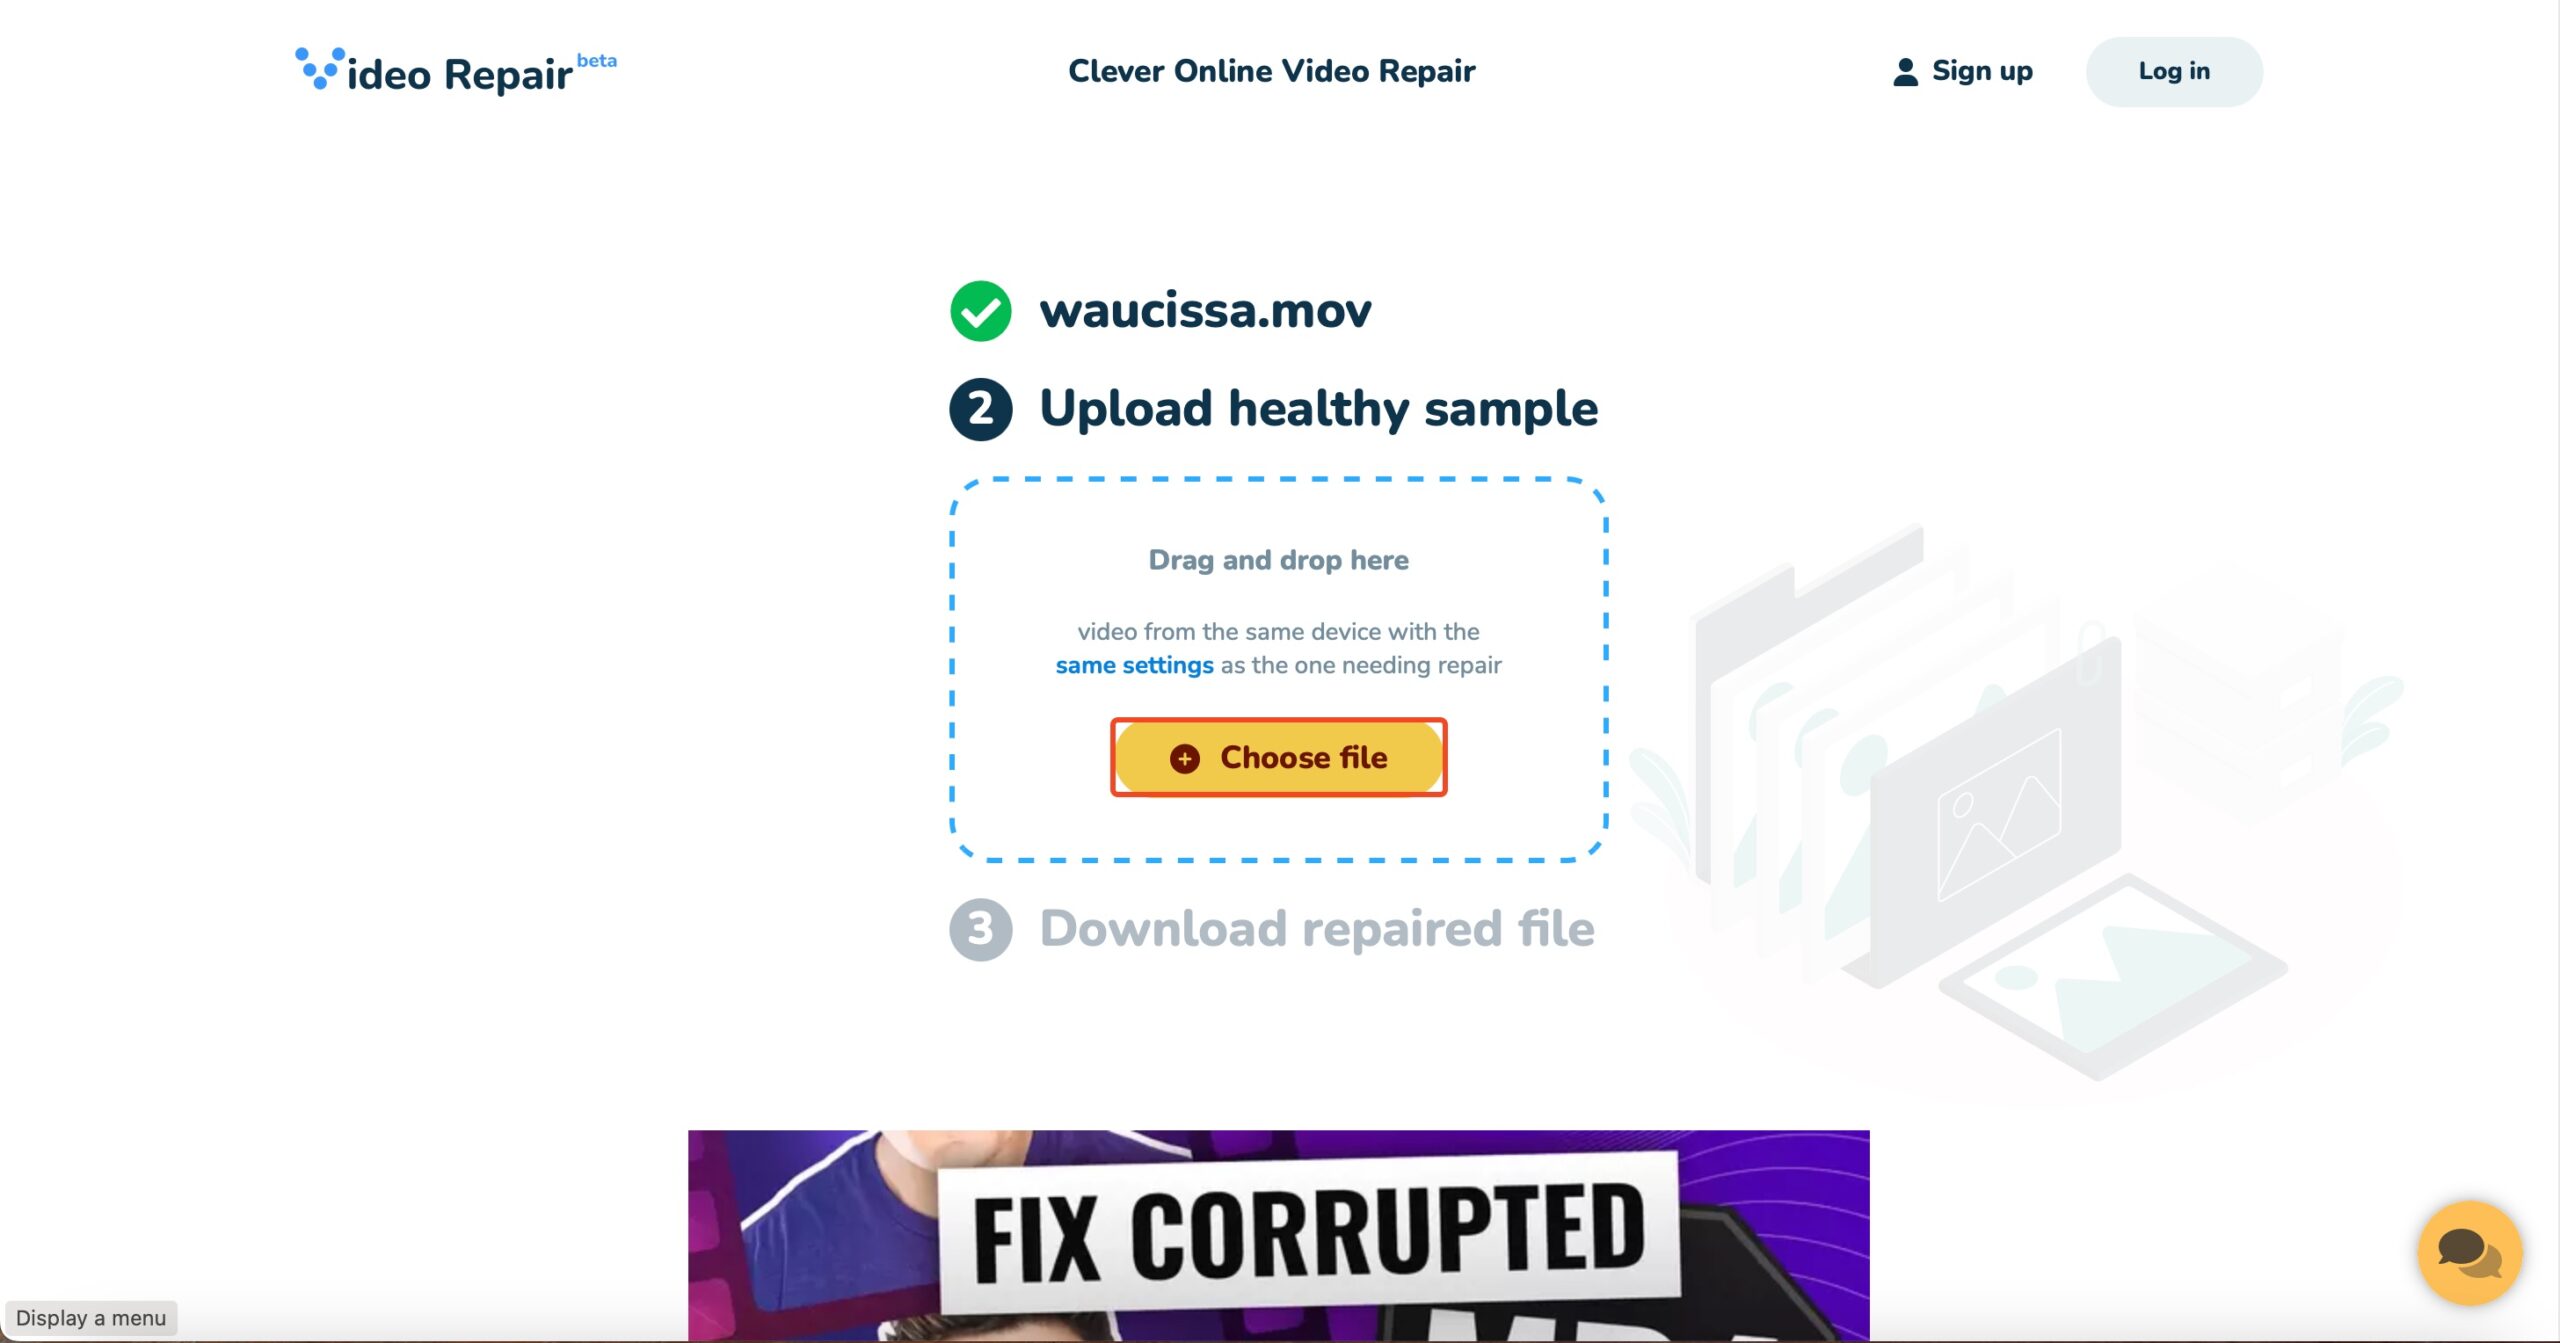
- Click on Choose file, and navigate to a healthy MOV file recorded on the same device used to record the corrupt one, and double-click it.
- Clever Online Video Repair will fix the corrupt MOV video. Cycle through the screenshots to confirm the quality of the repaired video, and click Download if you’re satisfied.
Method 2: Use Local Video Repair Tools
You may want to use a local video repair tool over a video repair website for two reasons. Either, the video is too large, and exceeds the file size limit of video repair websites. Or, you’re uncomfortable uploading a sensitive video to a third-party video repair website, and prefer fixing it offline.
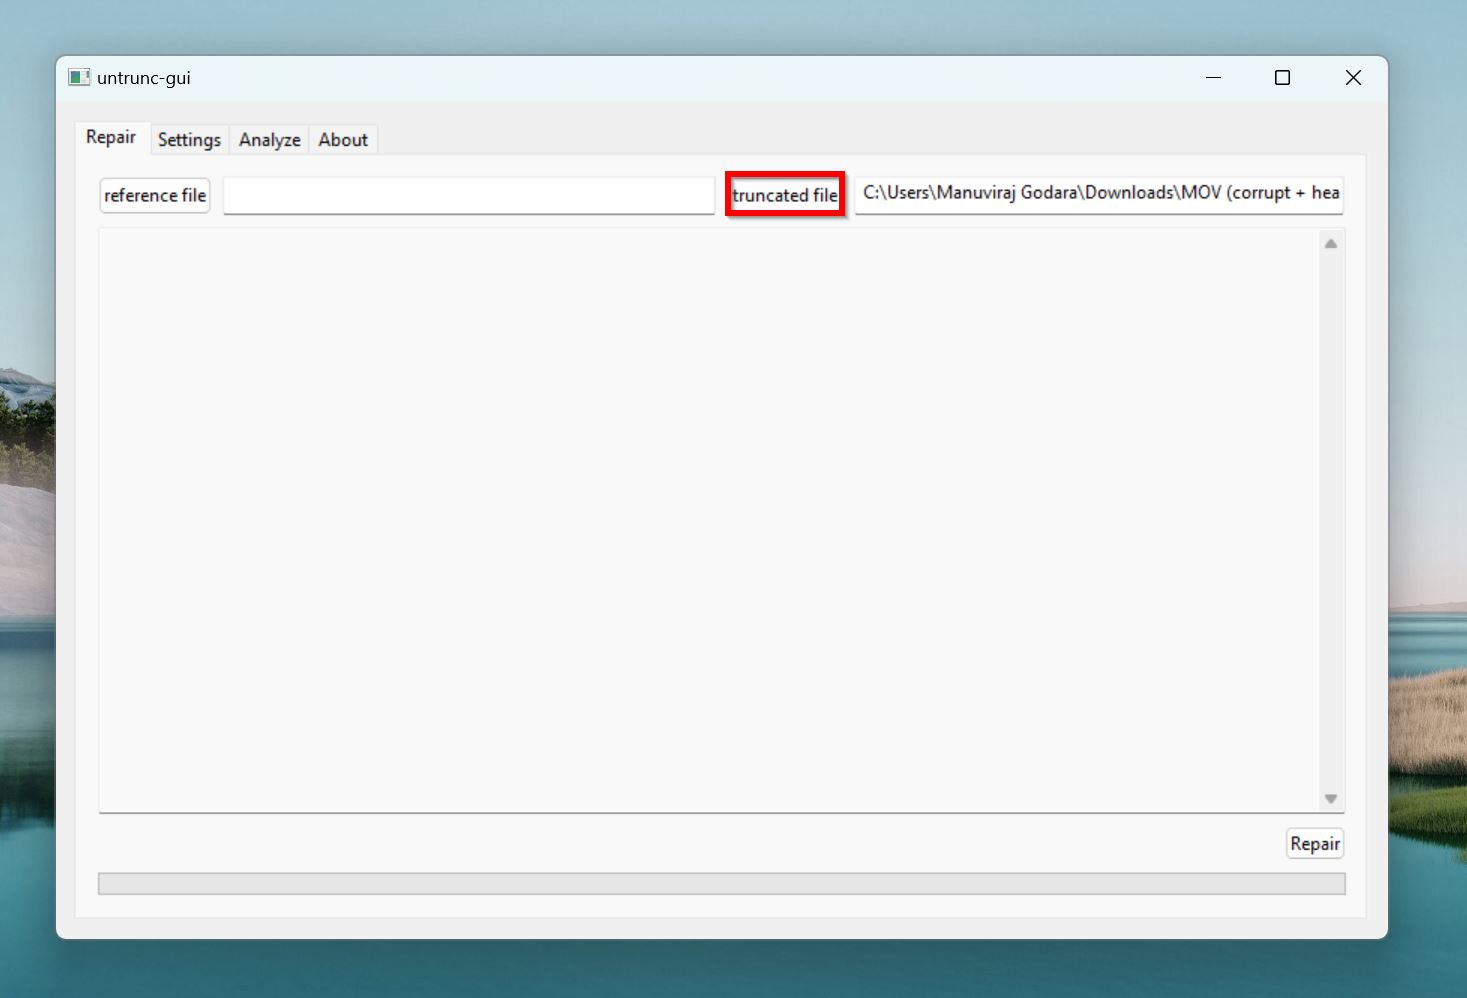
My go-to offline video repair tool is Untrunc—an open-source, free-to-use, lightweight app that’s available on Windows, and macOS. In addition to MOV files, it also repairs other popular formats like MP4, M4V, and 3GP. My only qualm with Untrunc is its lack of a GUI, and complex installation on macOS—I spent the better part of an hour figuring it out. On a Windows PC, you can simply run the GUI version that’s included in the download.
Here’s how to repair damaged MOV files on Windows and Mac using Untrunc:
Untrunc for Windows
- Visit Untrunc’s GitHub page, and expand the Assets menu. Depending on your PC’s system architecture (32-bit, or 64-bit), click on untrunc_x32.zip, or untrunc_x64.zip, respectively to begin downloading the tool.
- Extract the contents of the ZIP file. Run untrunc-gui.exe from the folder you just extracted.
- Click the truncated file button, find the corrupt MOV file, and double-click it
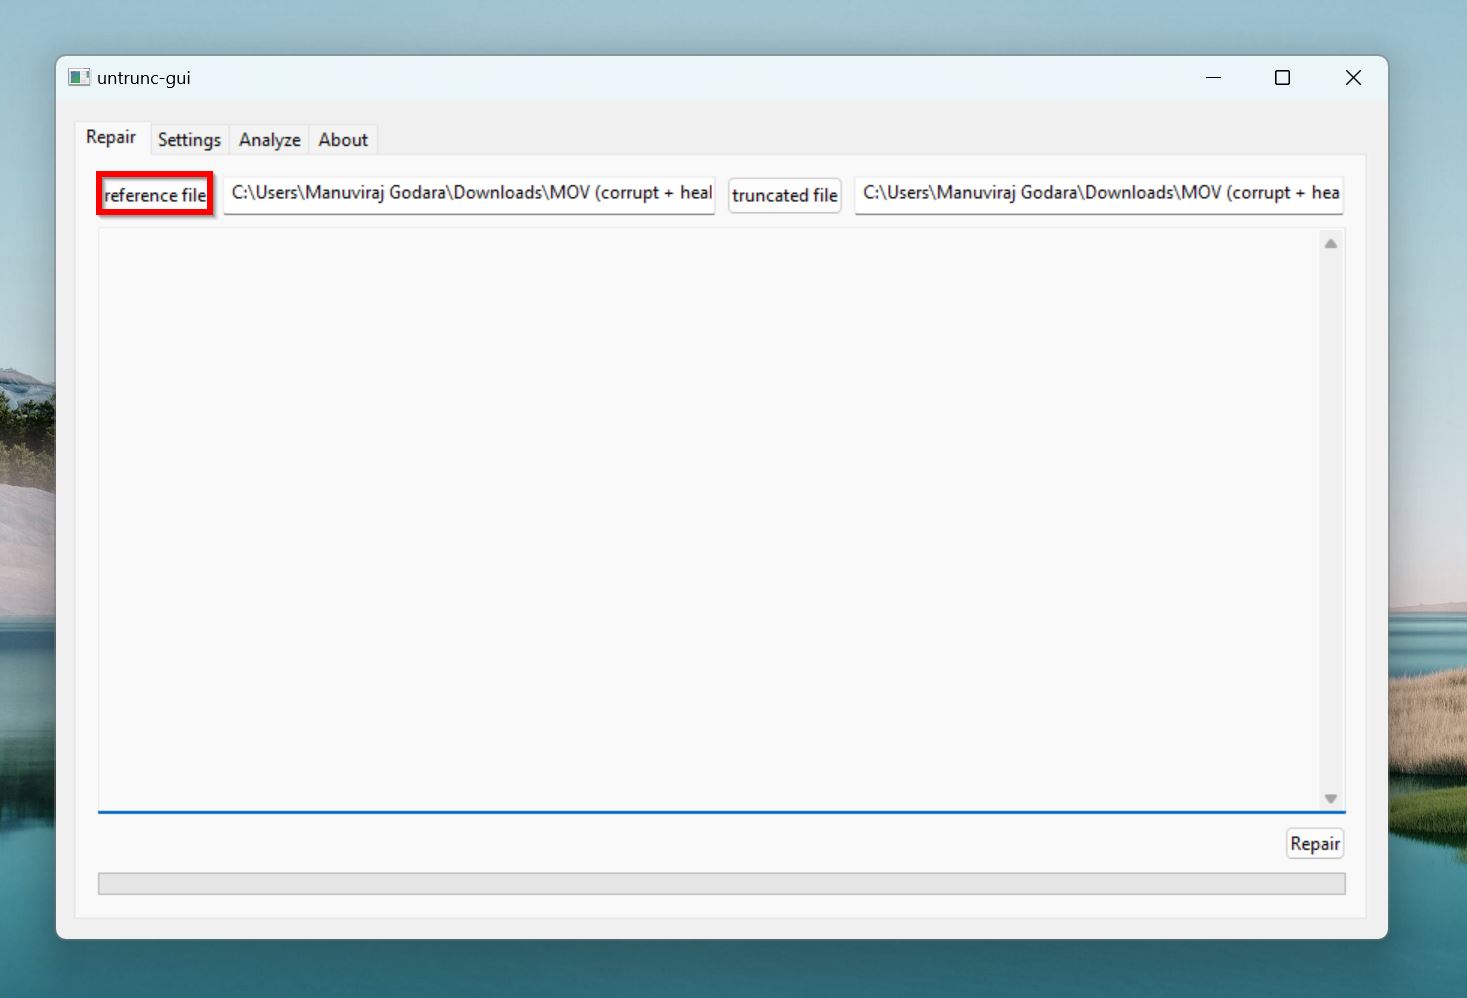
- Click the reference file button, browse for the healthy MOV file, and double-click it.
- Click the repair button in the bottom-right corner.
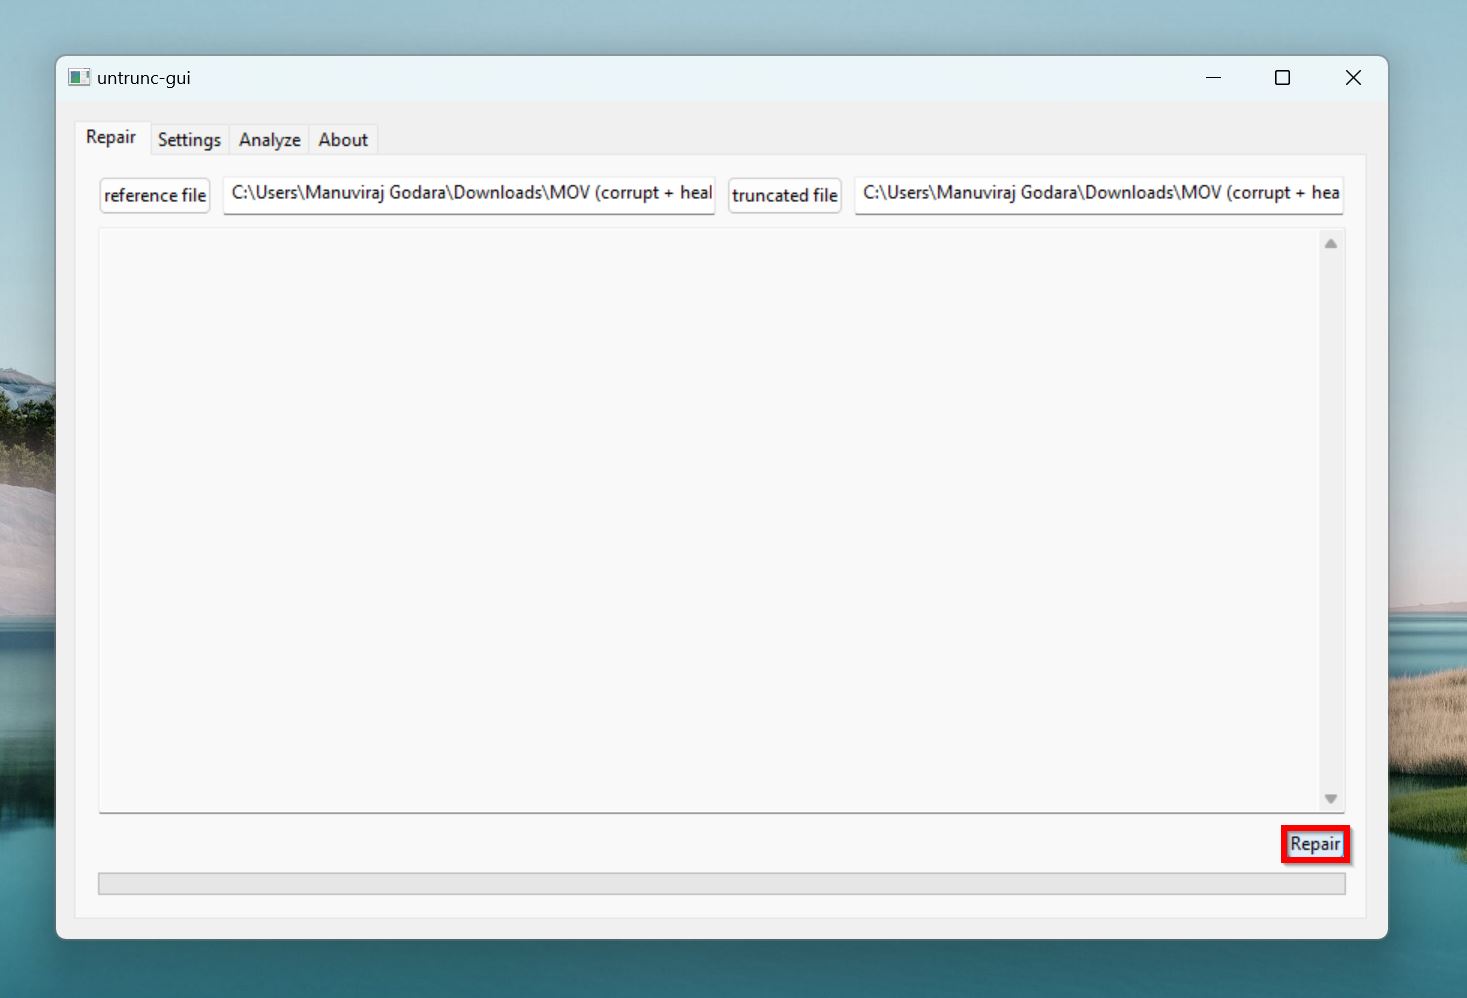
- Untrunc will repair the corrupt MOV file and save a copy of it in the original folder.
Untrunc for Mac
- Ensure you’re connected to the internet, and open Terminal on your Mac.
- Type the following command and press Enter:
/bin/bash -c $(curl -fsSL https://raw.githubusercontent.com/Homebrew/install/HEAD/install.sh). This command installs Homebrew, a free software package manager that makes installing open-source apps and packages a breeze. You’ll need it to install Untrunc.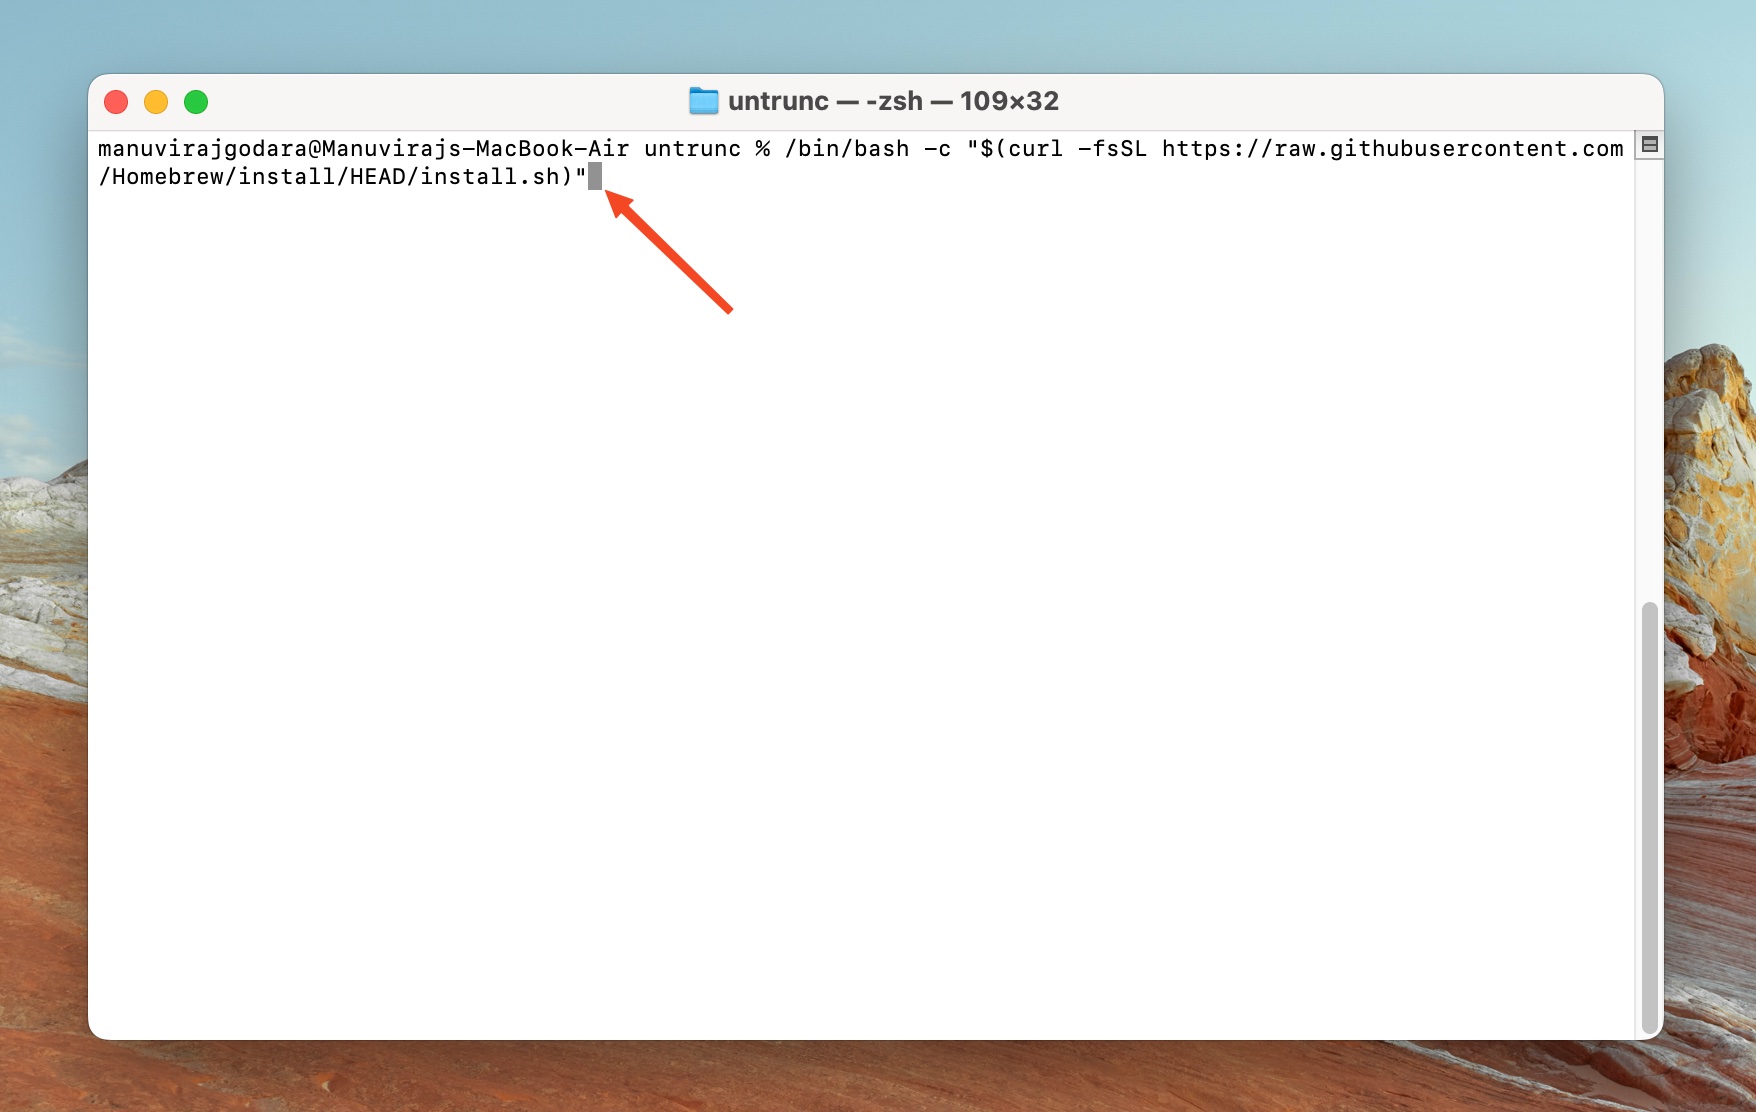
- Type
brew install --cask dockerand press Enter. Homebrew will automatically download and install Docker. If that doesn’t work for some reason, you can download Docker from its official website and manually install it on your Mac.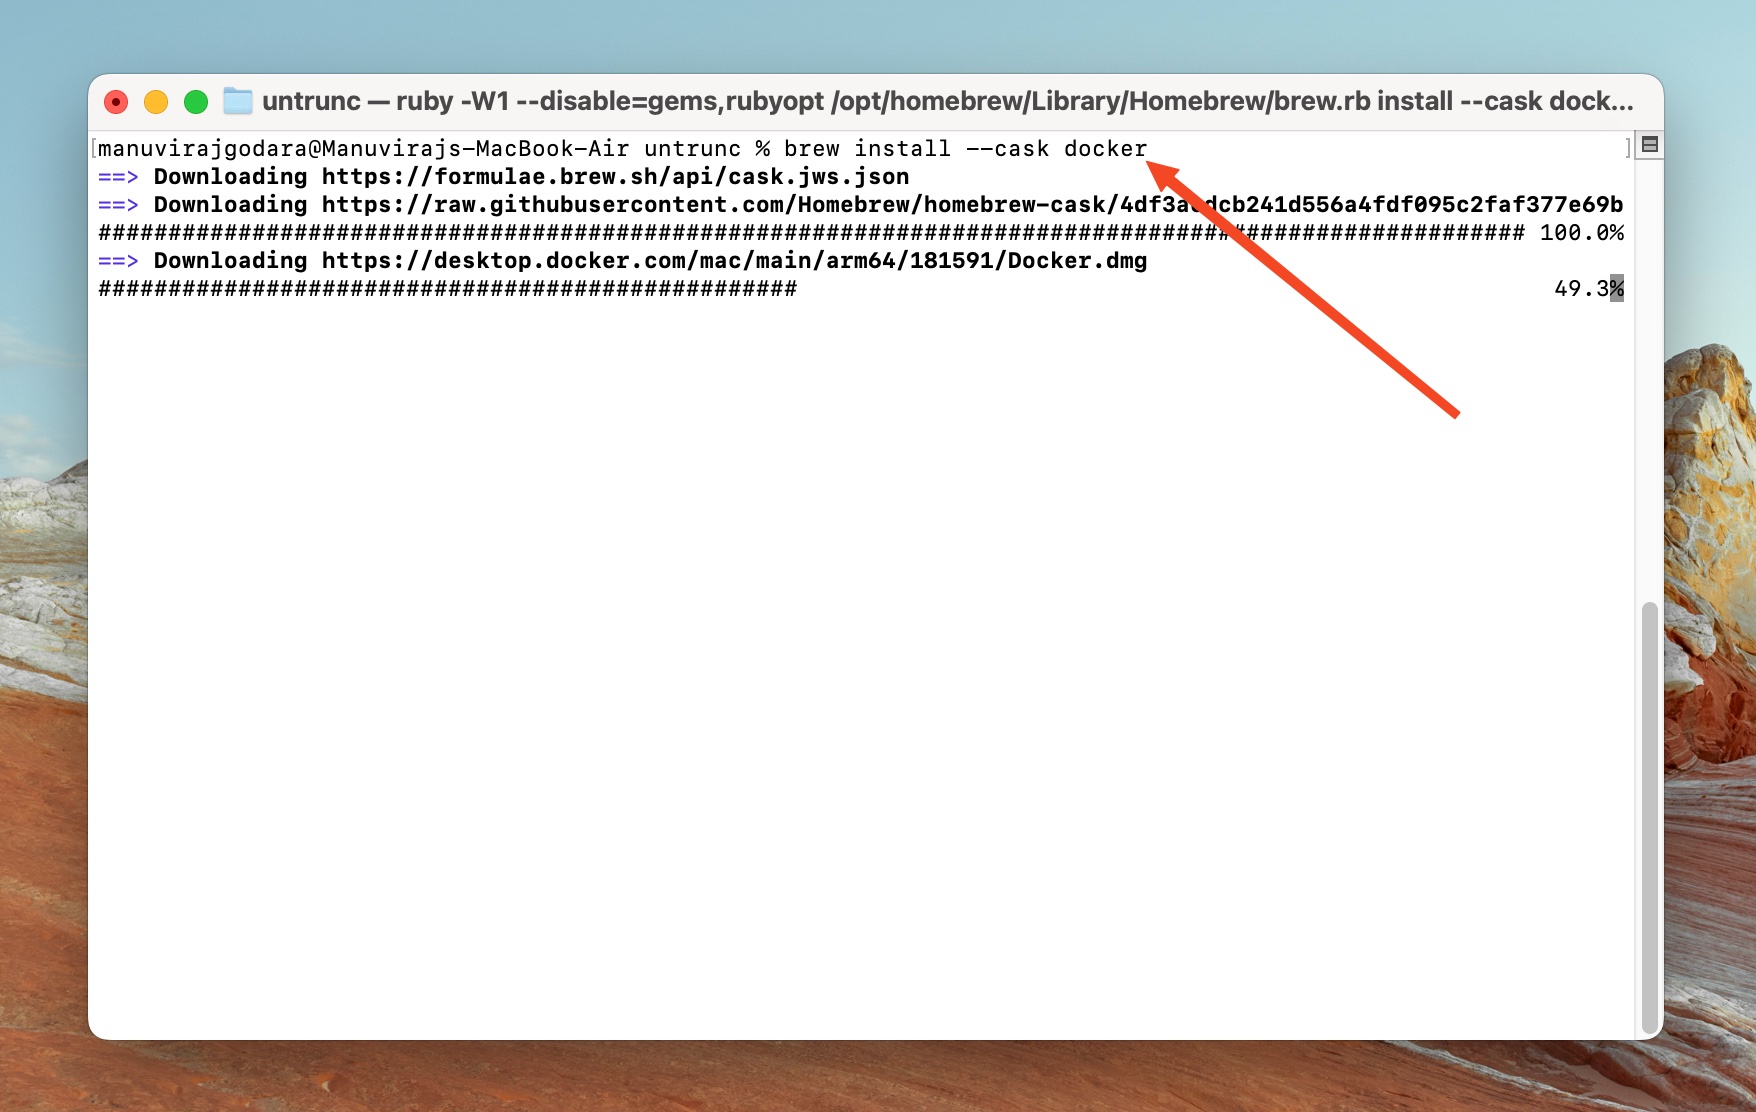
- Run the Docker app by going to Finder > Applications > Docker.app. Look for the “Engine Running” message in the bottom-left corner of the Docker app.
- Install Untrunc using the following command, and press Enter:
git clone https://github.com/ponchio/untrunc.git.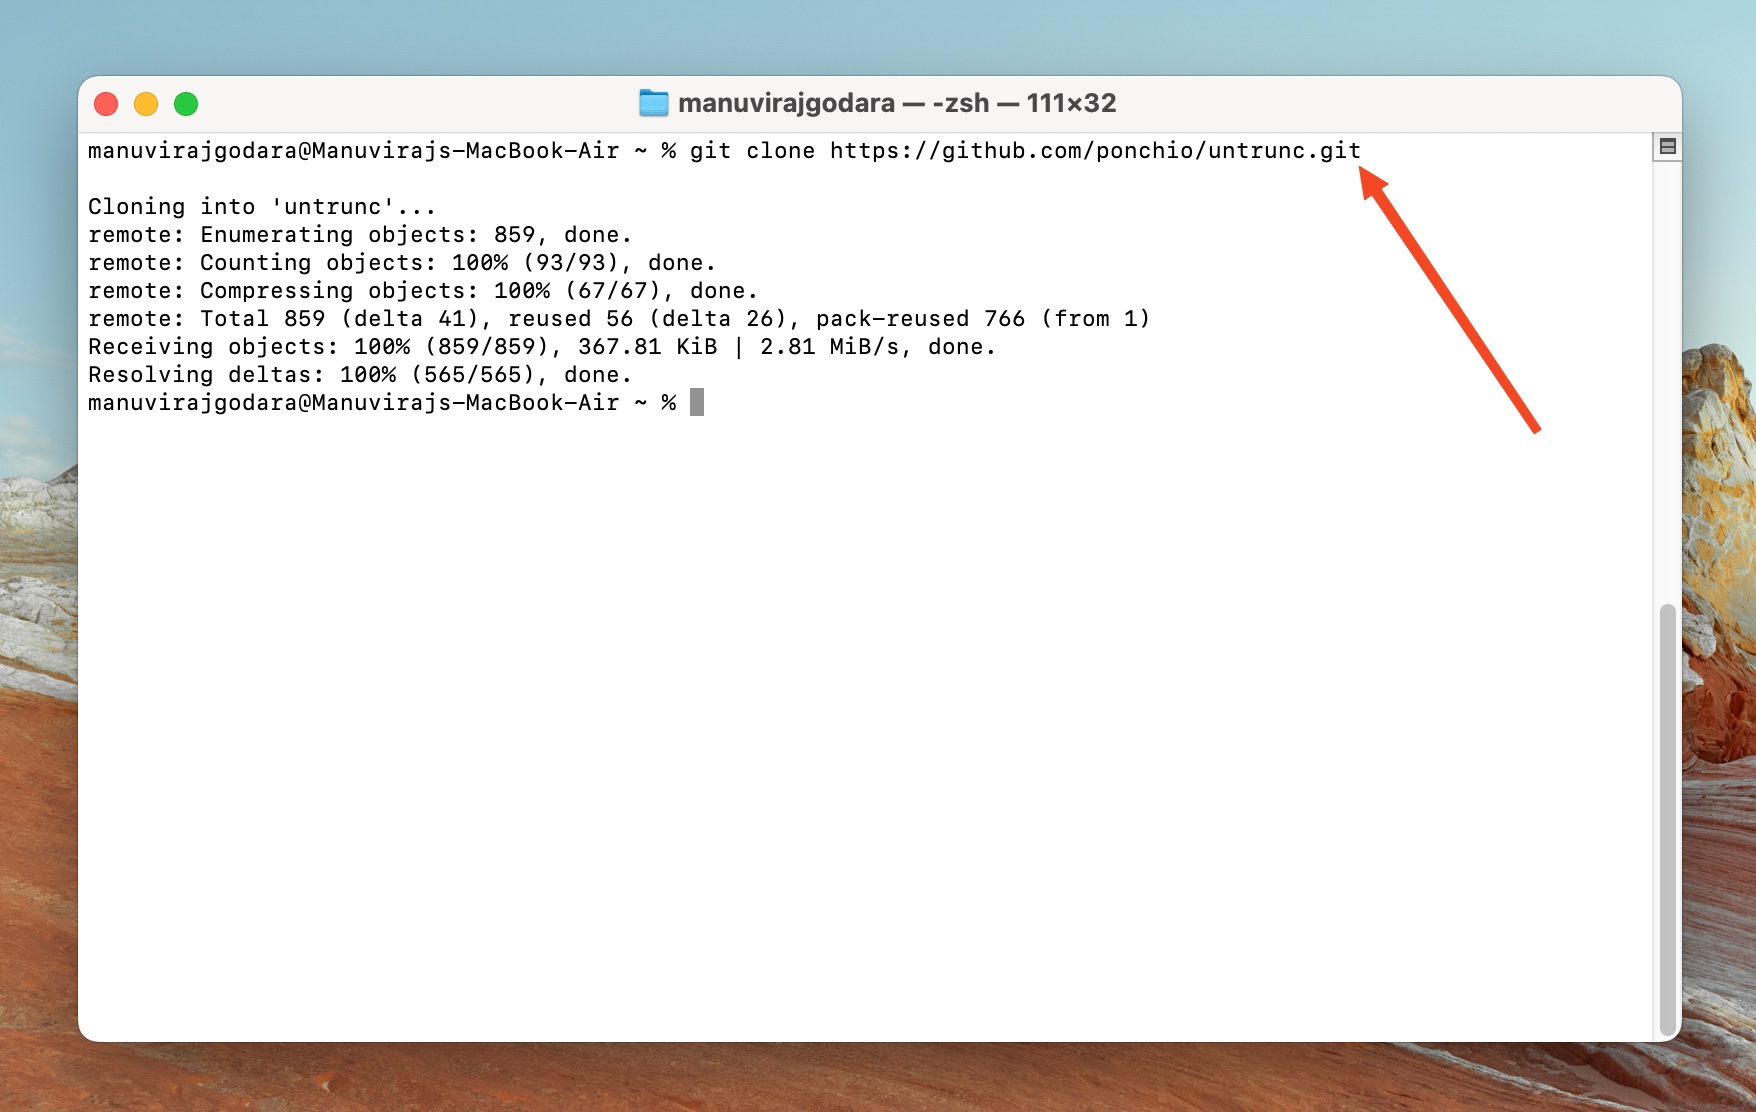
- In Terminal, type
cd /Users/YourUsername/untruncand press Enter. Replace “YourUsername” with your macOS’ username—in my case, it was manuvirajgodara.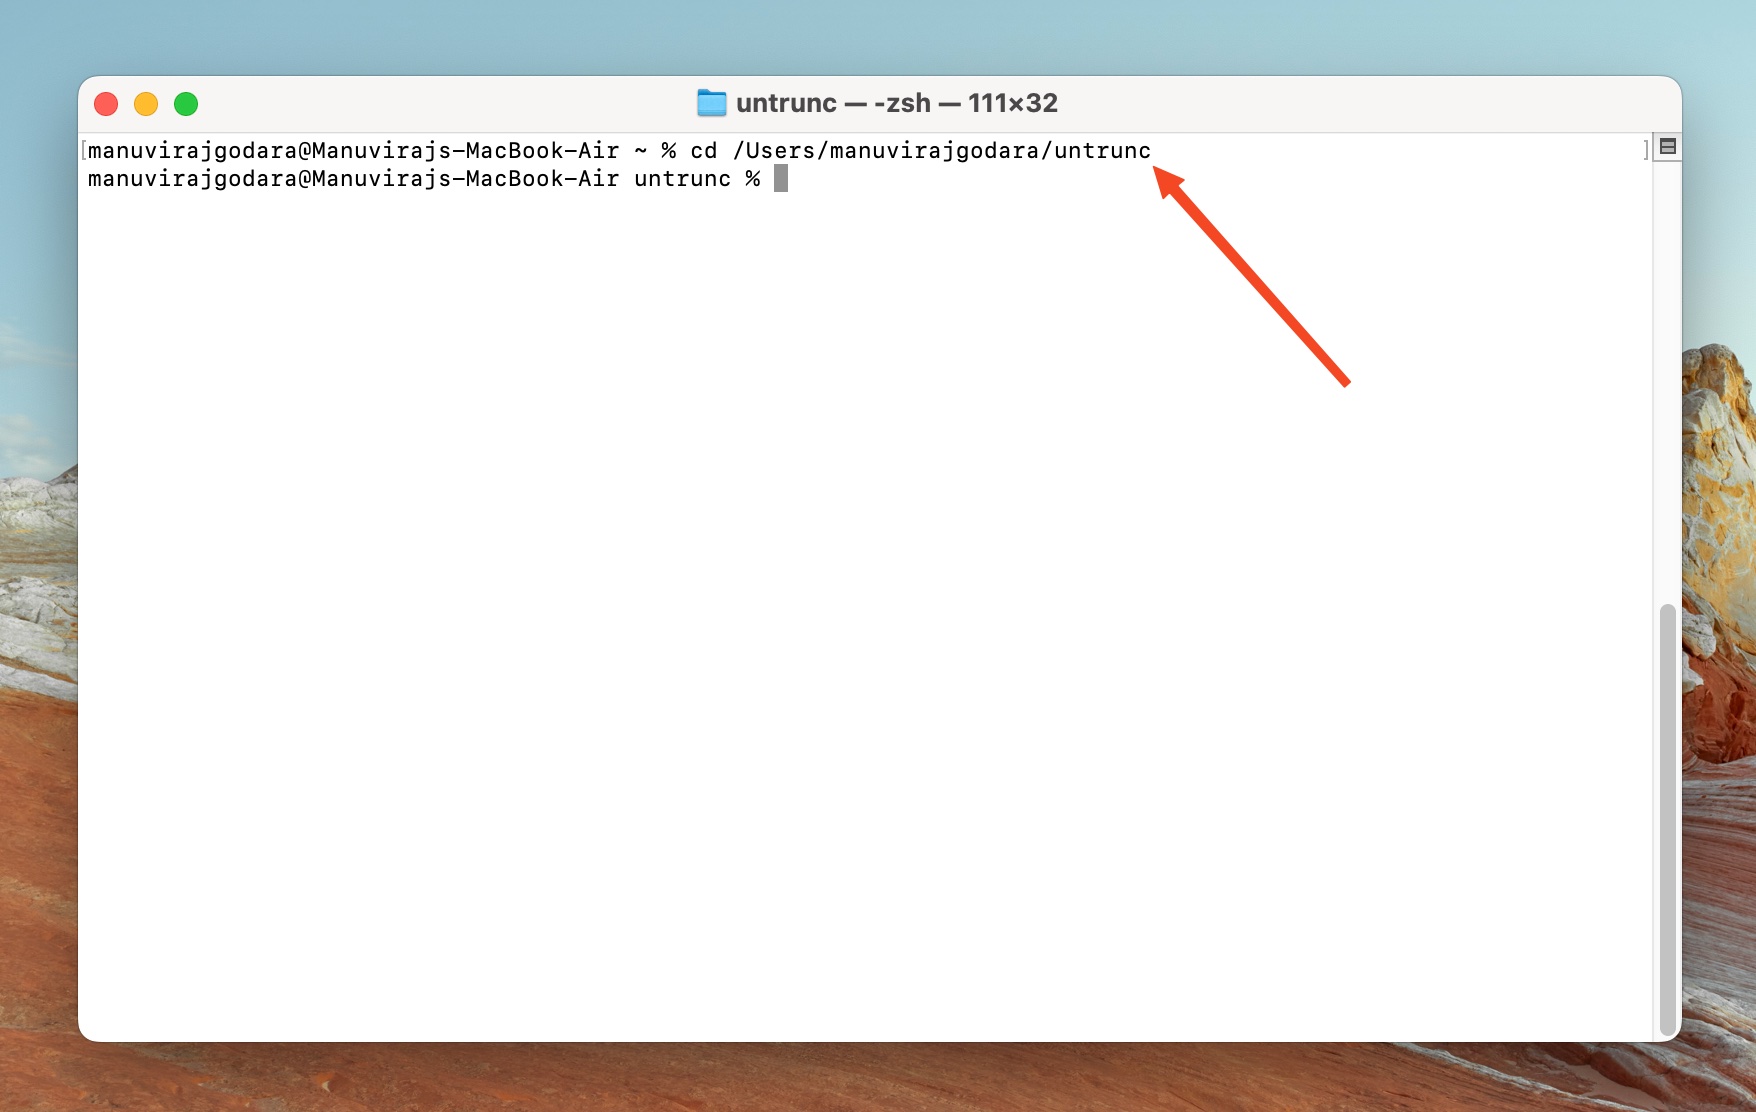
- Before moving to the next step, ensure the corrupt MOV file and the healthy MOV file are in the same folder.
- Type
docker build -t untrunc .and press Enter. Note the space before the period.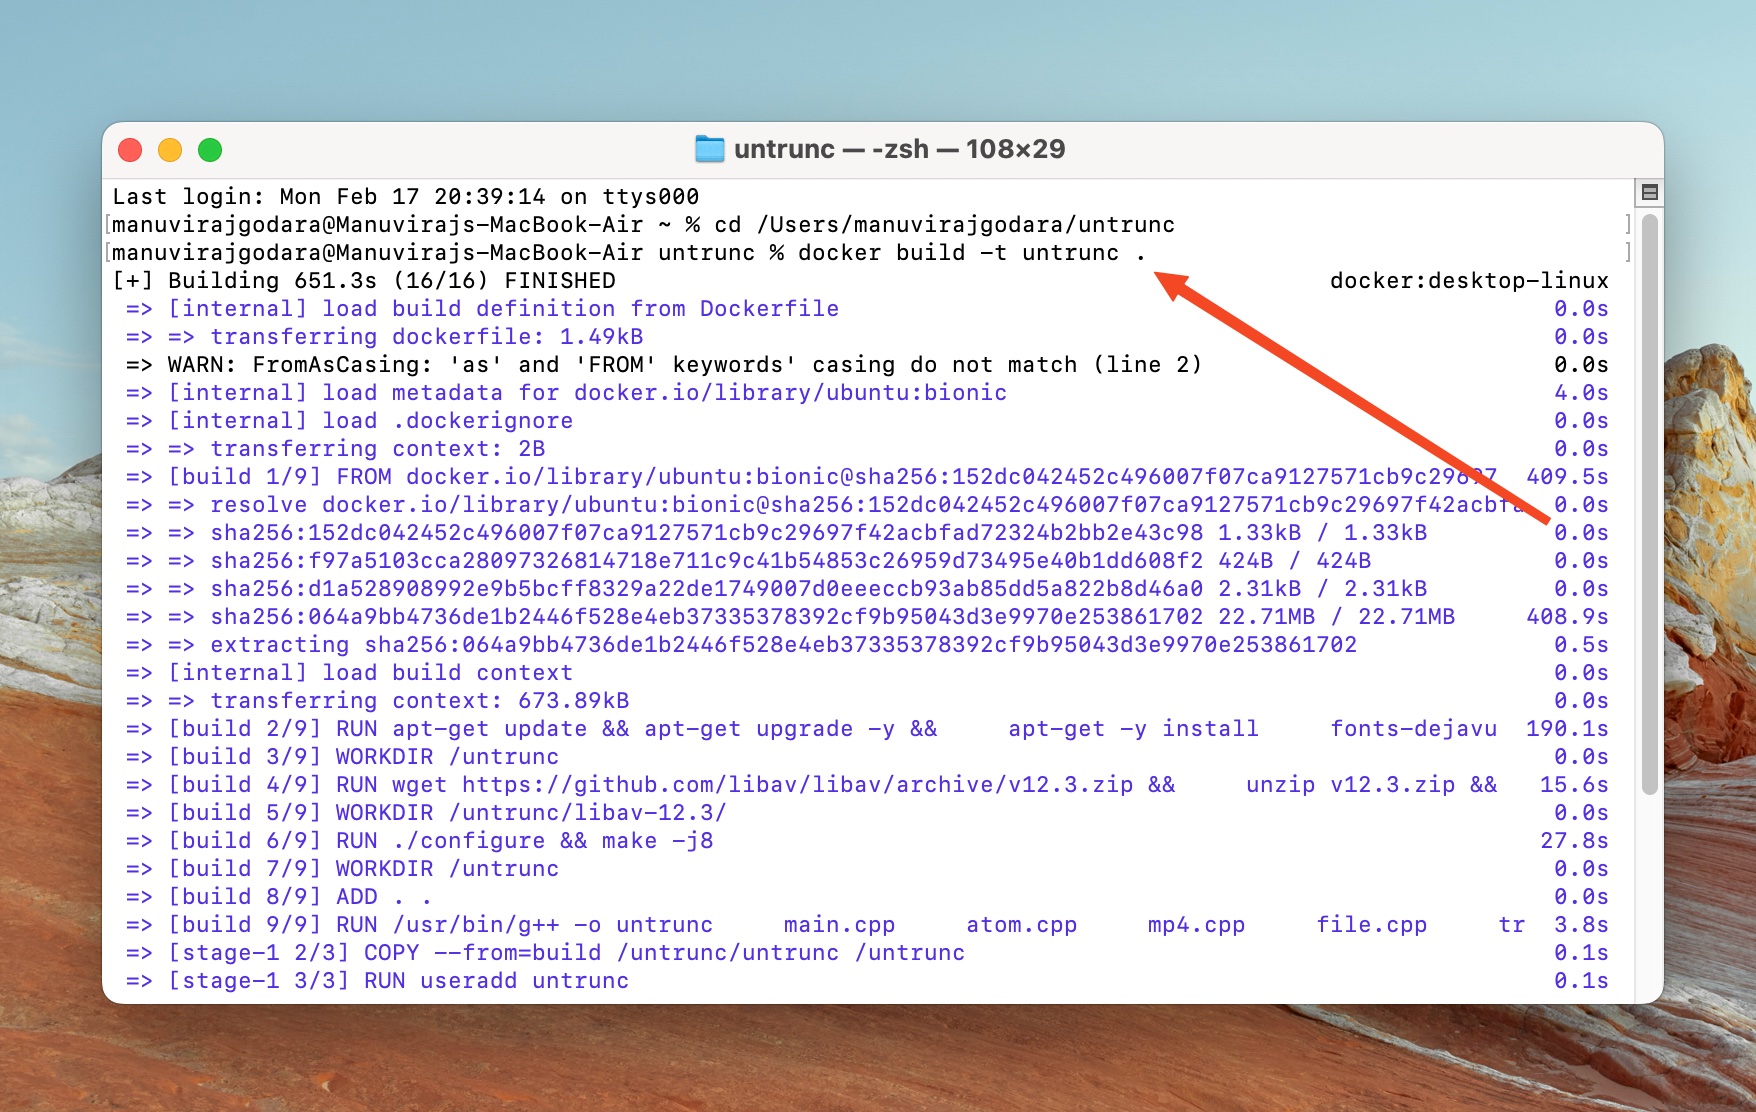
- Type docker run -v ~/MOV Path/:/mnt untrunc /mnt/healthyMOV.mov /mnt/corruptMOV.mov. Replace ~/MOV Path/ with the filepath of the folder containing the corrupt and healthy MOV files—you can copy this by navigating to the folder in Finder, right-clicking it while holding down the Option Key, and clicking the Copy as Pathname option. As for healthyMOV.mov and corruptMOV.mov, replace them with the filenames of the healthy and corrupt MOV files respectively.
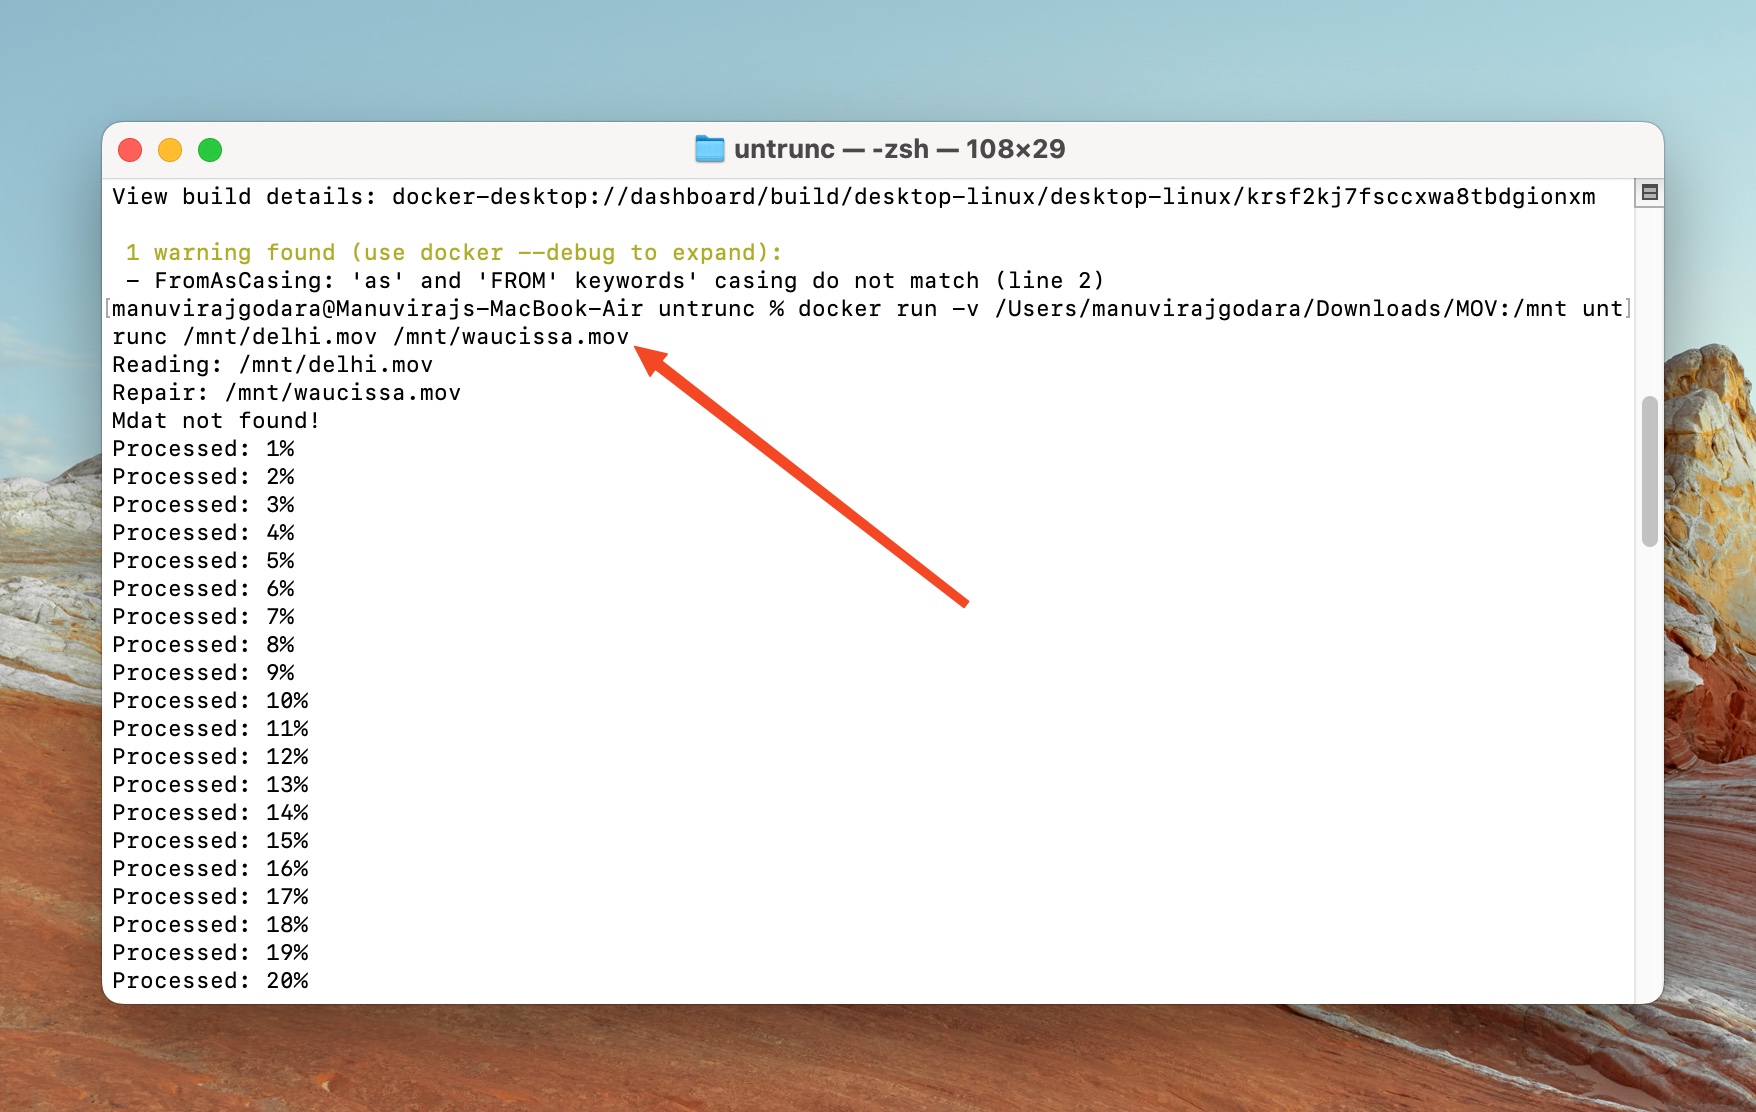
- Untrunc will repair the MOV file and save a copy in the original directory of the MOV files.
Method 3: Re-Encode the MOV File
Re-encoding is an effective way to fix MOV files that are stuttering, freezing, or have other audio-visual issues. It’s not as effective on MOV files with missing data, rendering them completely unplayable.
Unfortunately, if you don’t have a healthy MOV file, re-encoding is your best resort, apart from using VLC’s Always fix feature (which has a lower success rate than re-encoding), or paying a professional to fix it.
From the methods above, it’s clear that I’m partial towards free, open-source apps. Here too, I wholeheartedly recommend using HandBrake, or Shutter Encoder to re-encode the corrupt MOV video. Both are free, open-source, easy-to-use, and available for both Windows, and macOS.
Option 1: HandBrake (Windows, macOS)
- Download HandBrake, and install it.
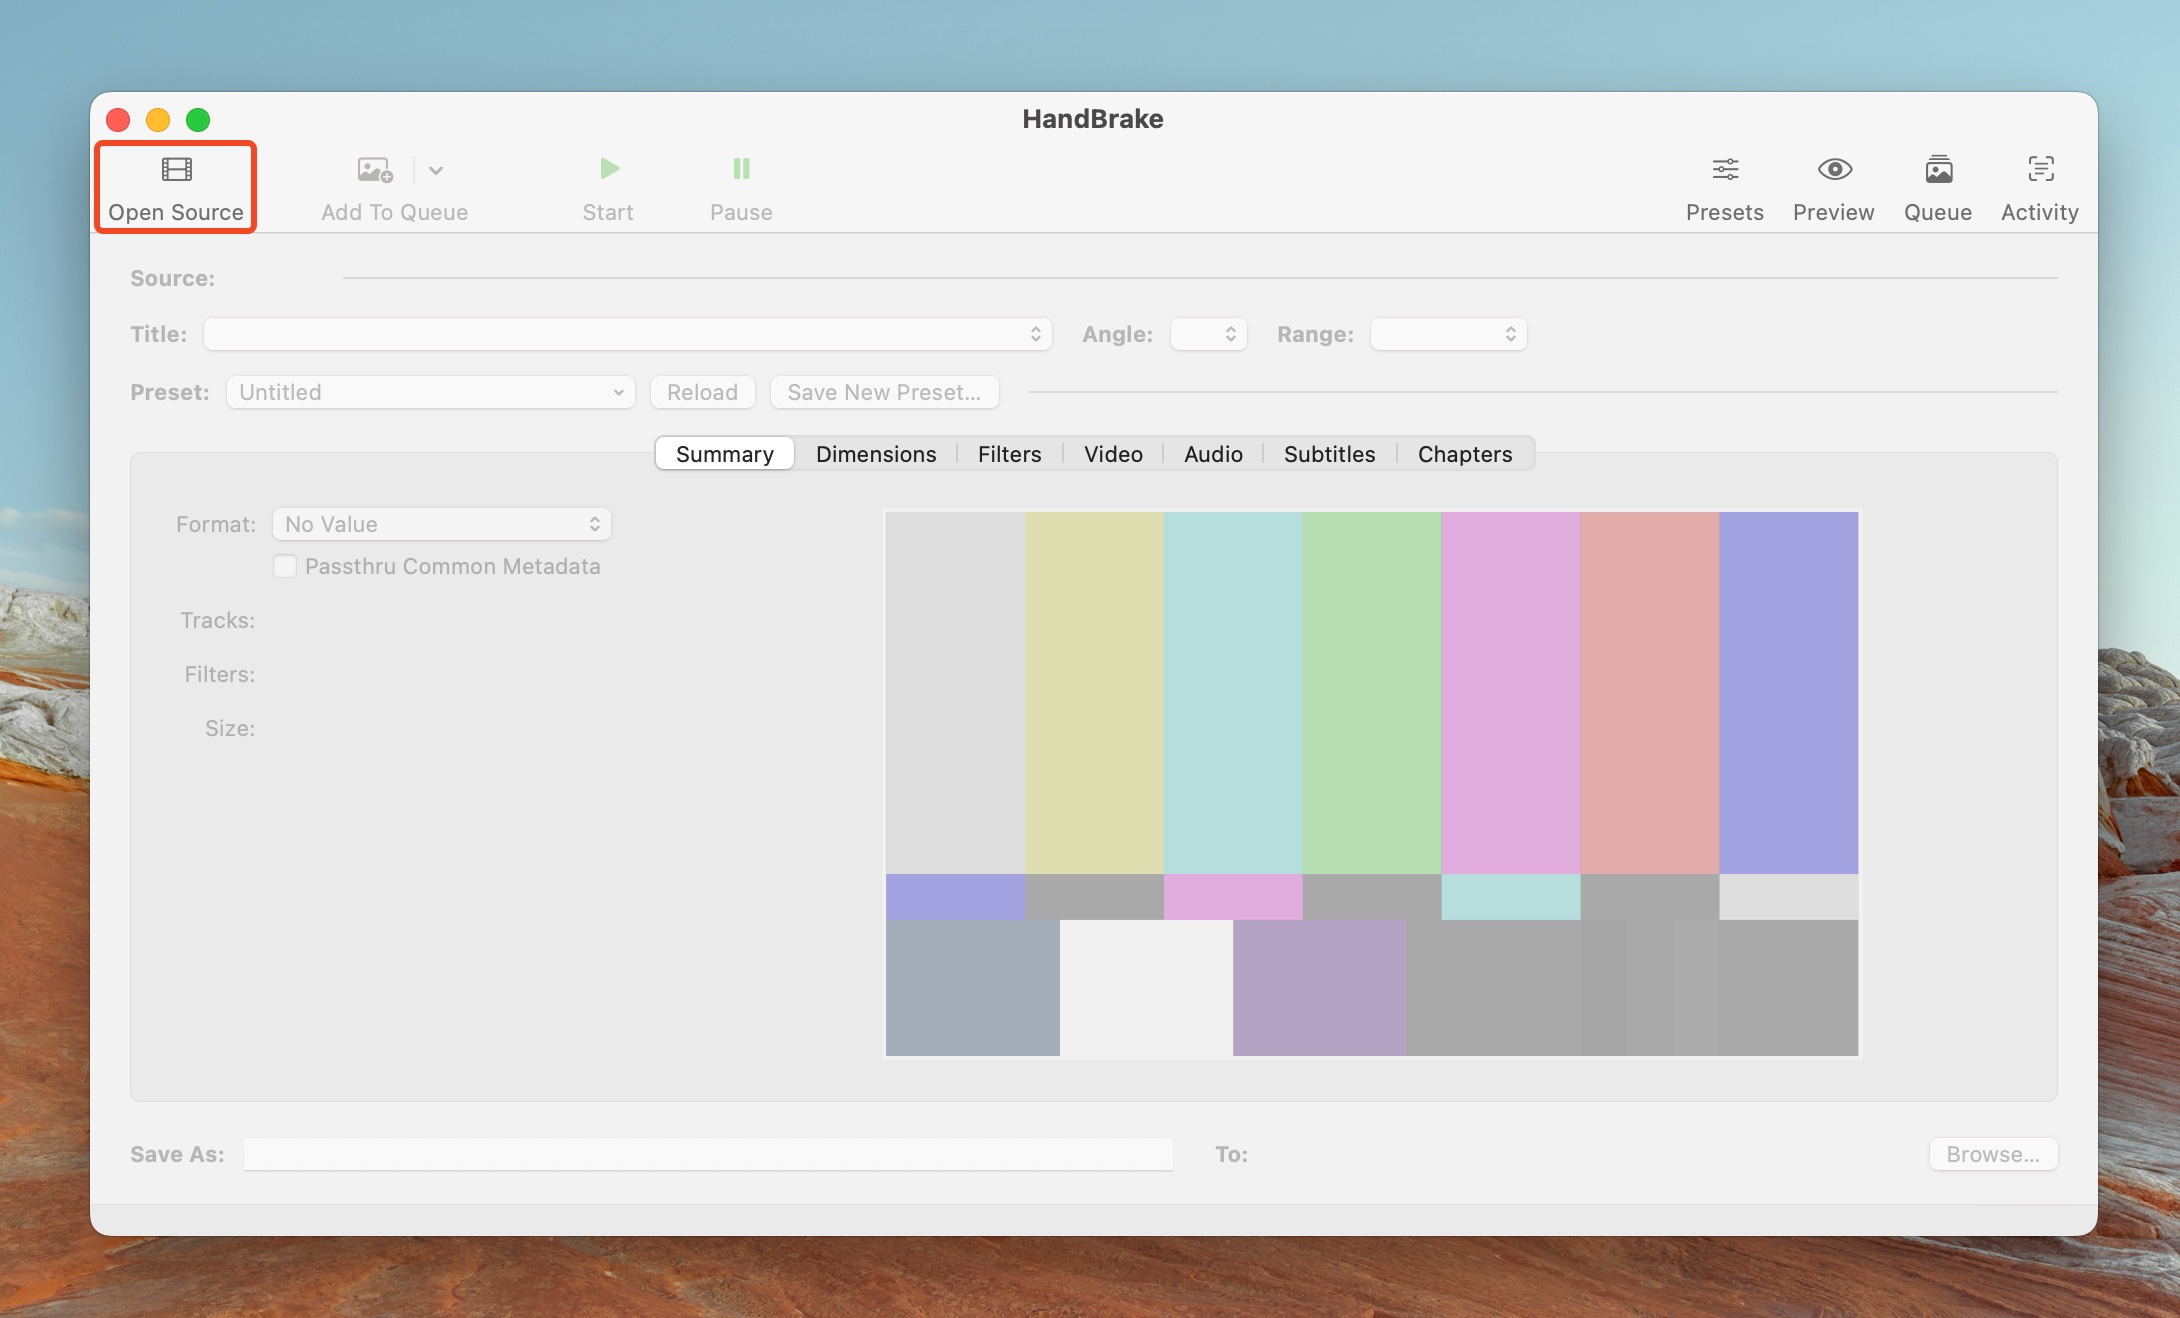
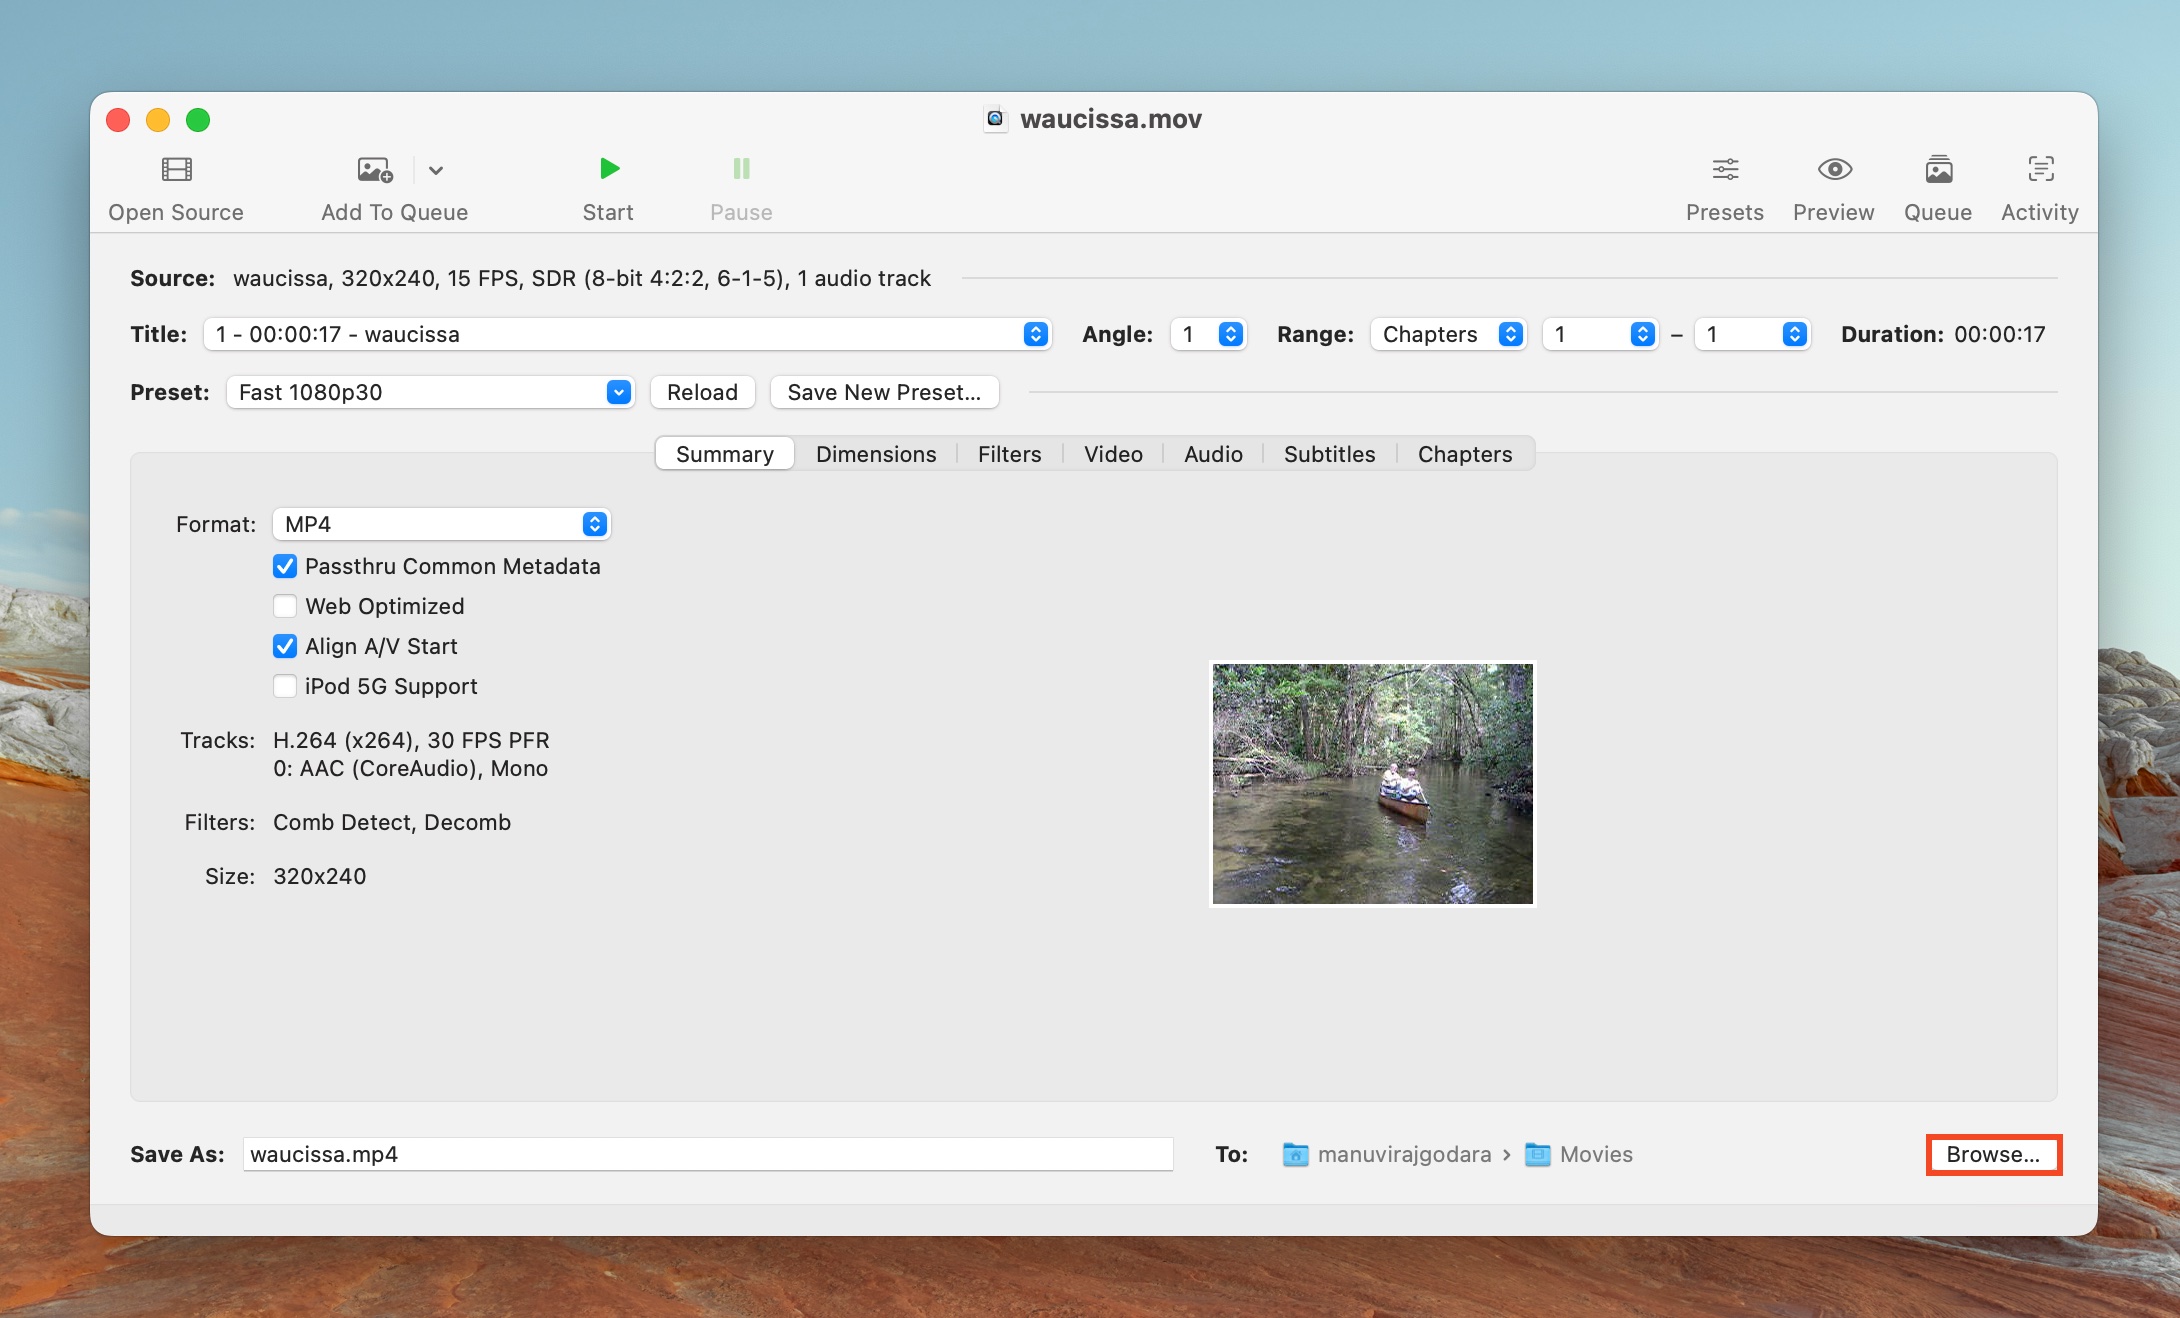
- Open HandBrake, and click File. If you don’t see the option directly, click on Open Source > File. Navigate to the corrupt MOV video, and double-click it.
- Choose a video format from the Format drop-down menu in the Summary tab. You can make other changes by going through the remaining tabs.
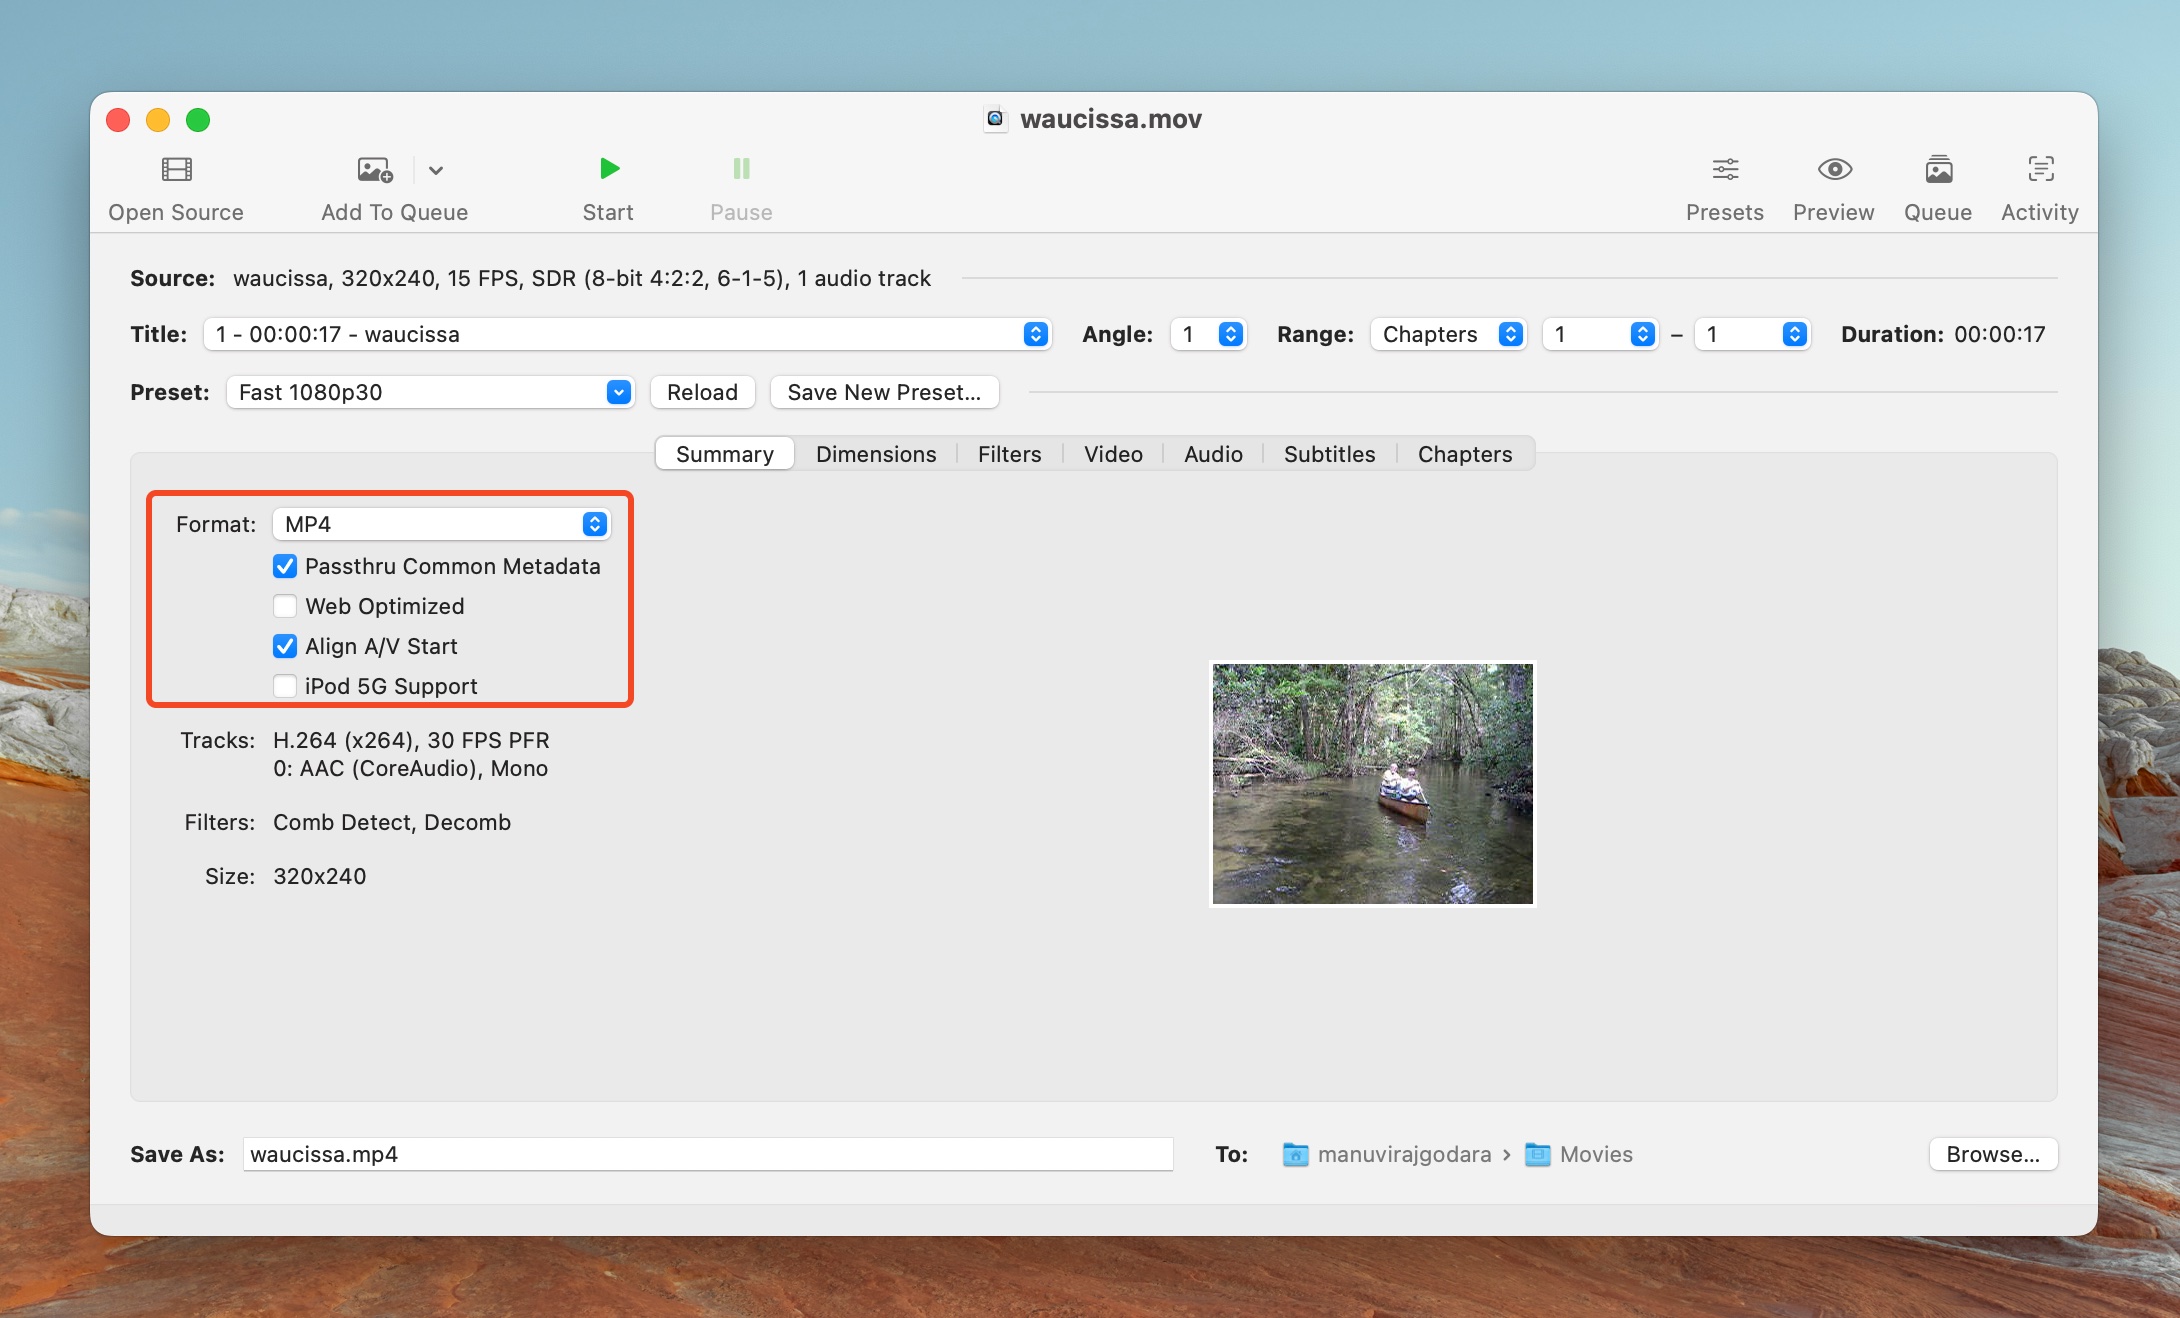
- Click on Browse in the bottom-right corner. Choose a save location for the re-encoded video.
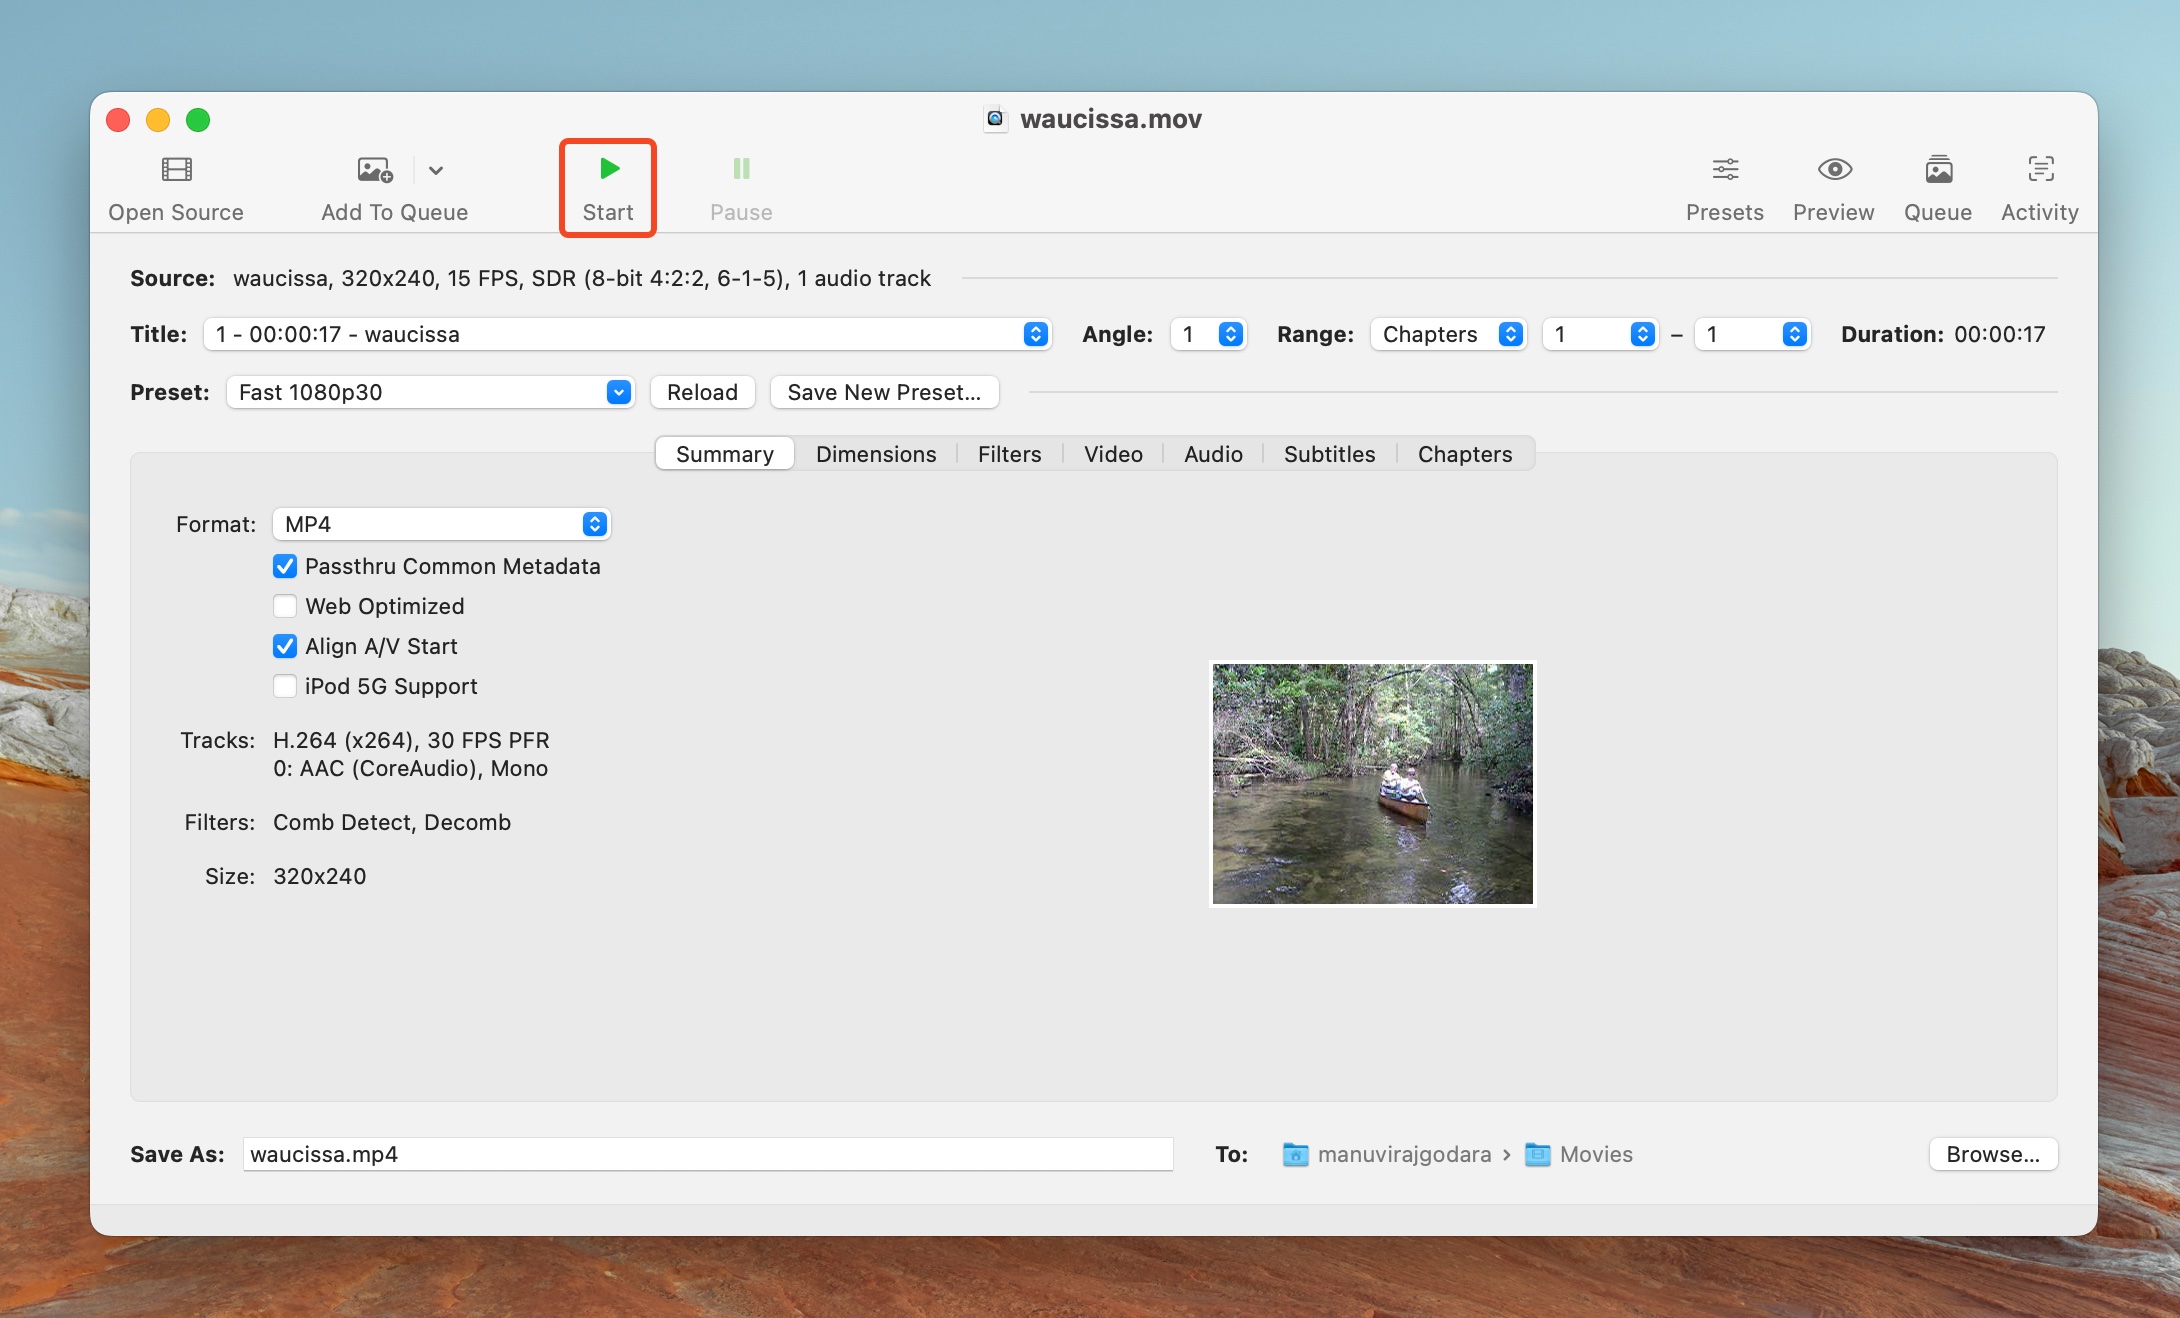
- Click on Start Encode.
Option 2: Shutter Encoder (Windows, macOS)
- Download Shutter Encoder, and install it.
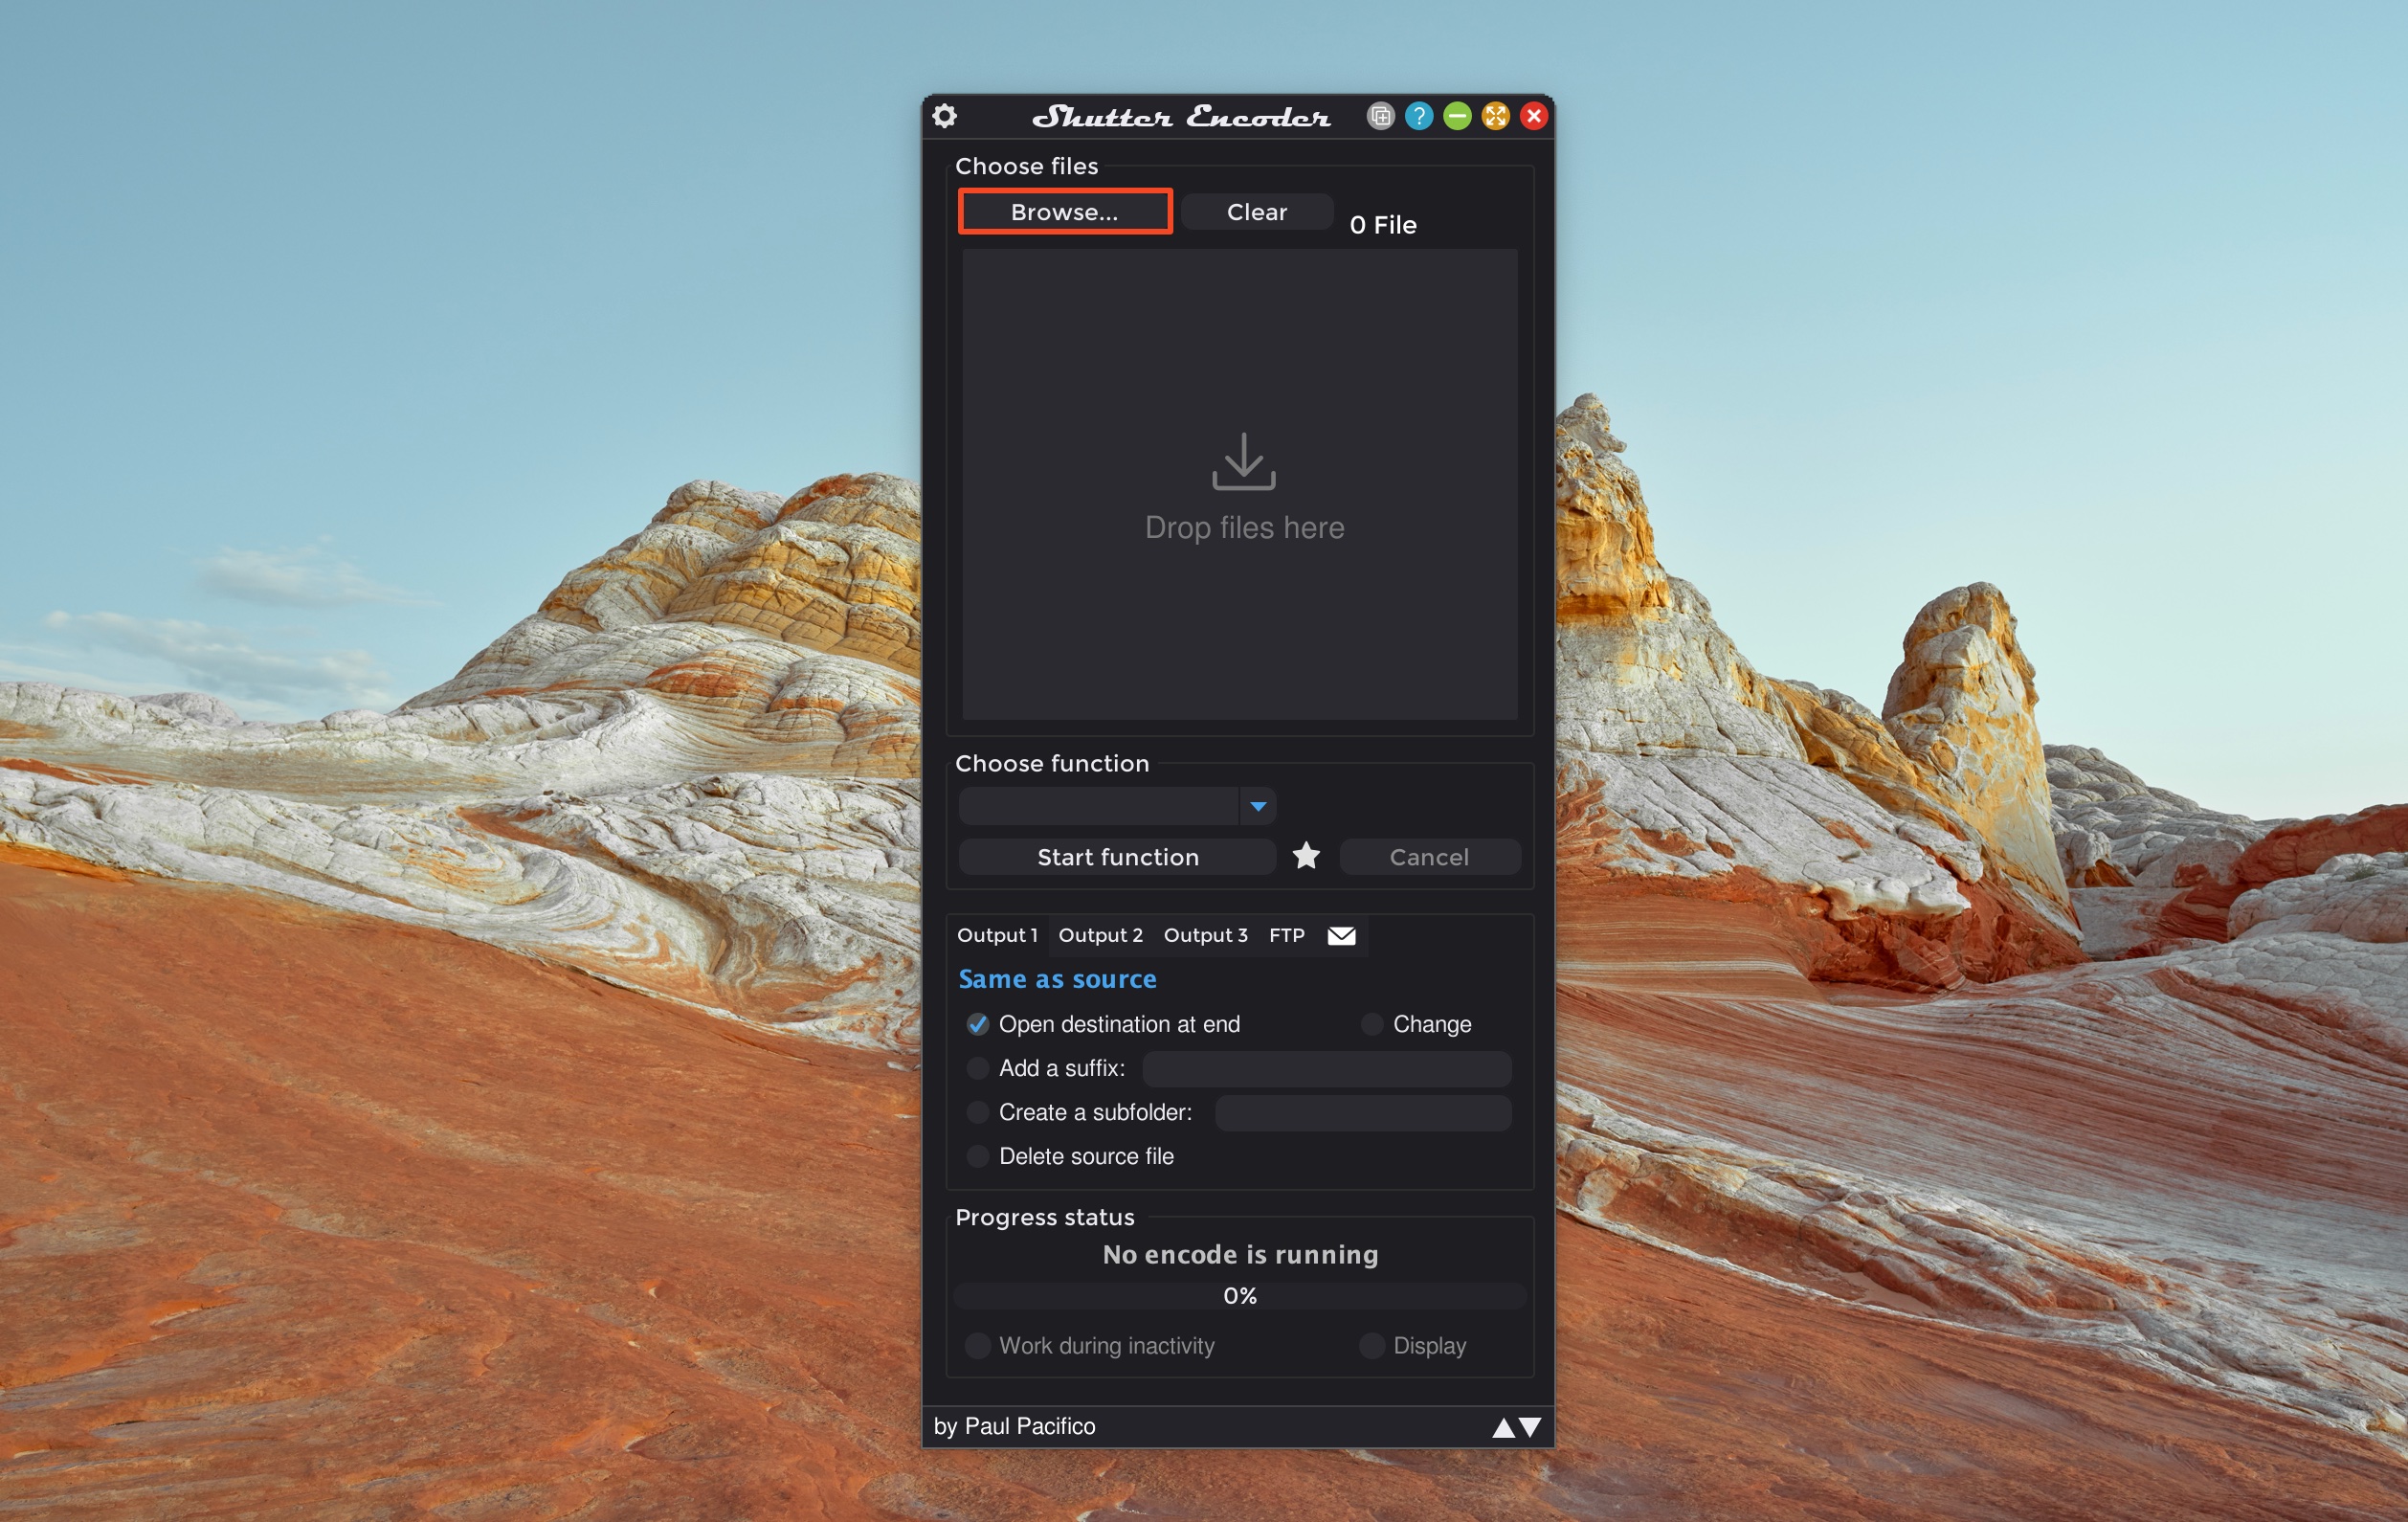
- Open Shutter Encoder, and click Browse. Find the corrupt MOV file, select it, and click Open. You can add multiple files as well.
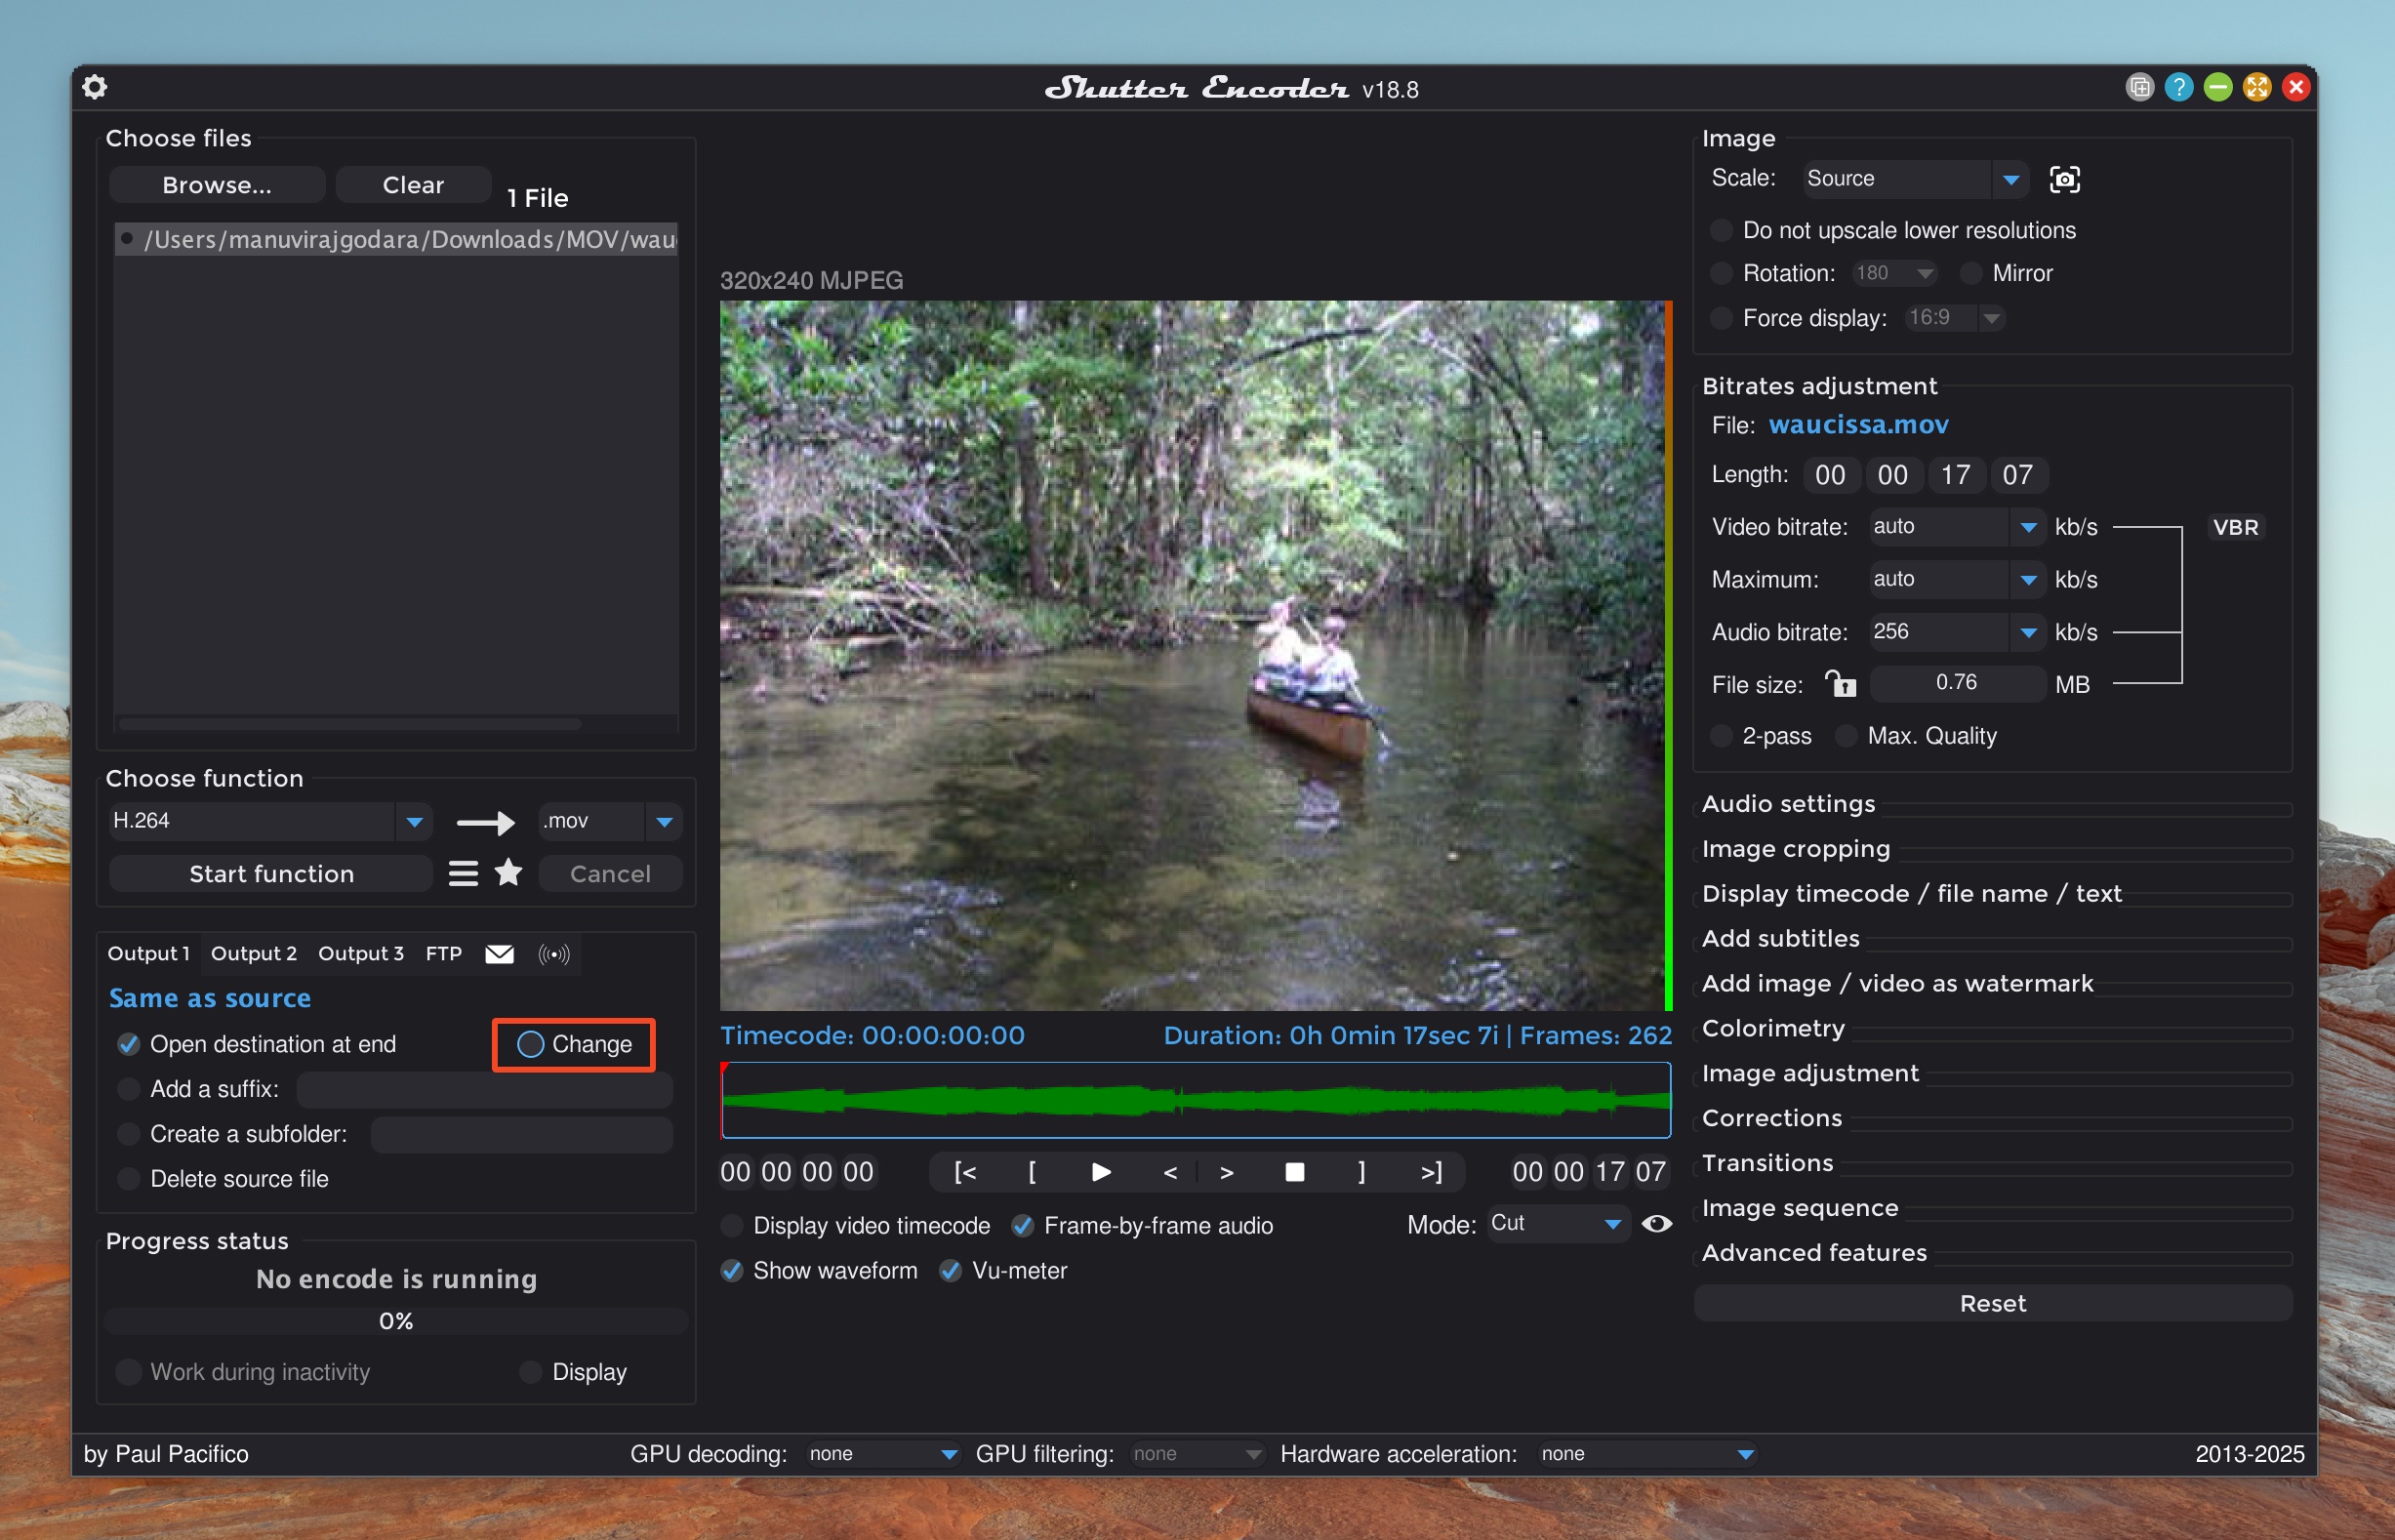
- Select H.264 from the Choose function drop-down menu and pick the video format as .MOV using the drop-down menu next to the arrow.

- By default, the re-encoded video will be saved to the same destination as the corrupt one. To change this, click on Change, and select the folder where you wish to save the re-encoded video.
- Click on Start function to begin encoding.

Method 4: Use VLC Media Player’s Always Fix Feature
While not as effective as other methods on this list, the Always fix feature in VLC Media Player did surprise me a few times when dealing with corrupt videos. However, the feature only works with AVI files, so you will have to change the corrupt MOV file’s extension to .AVI before proceeding forward.
Once you’ve changed the corrupt MOV video’s extension to .AVI, follow these steps to fix it using VLC:
- Download and install VLC Media Player.
- On Windows, open VLC, and click on Tools > Preferences. On macOS, click on VLC > Settings….
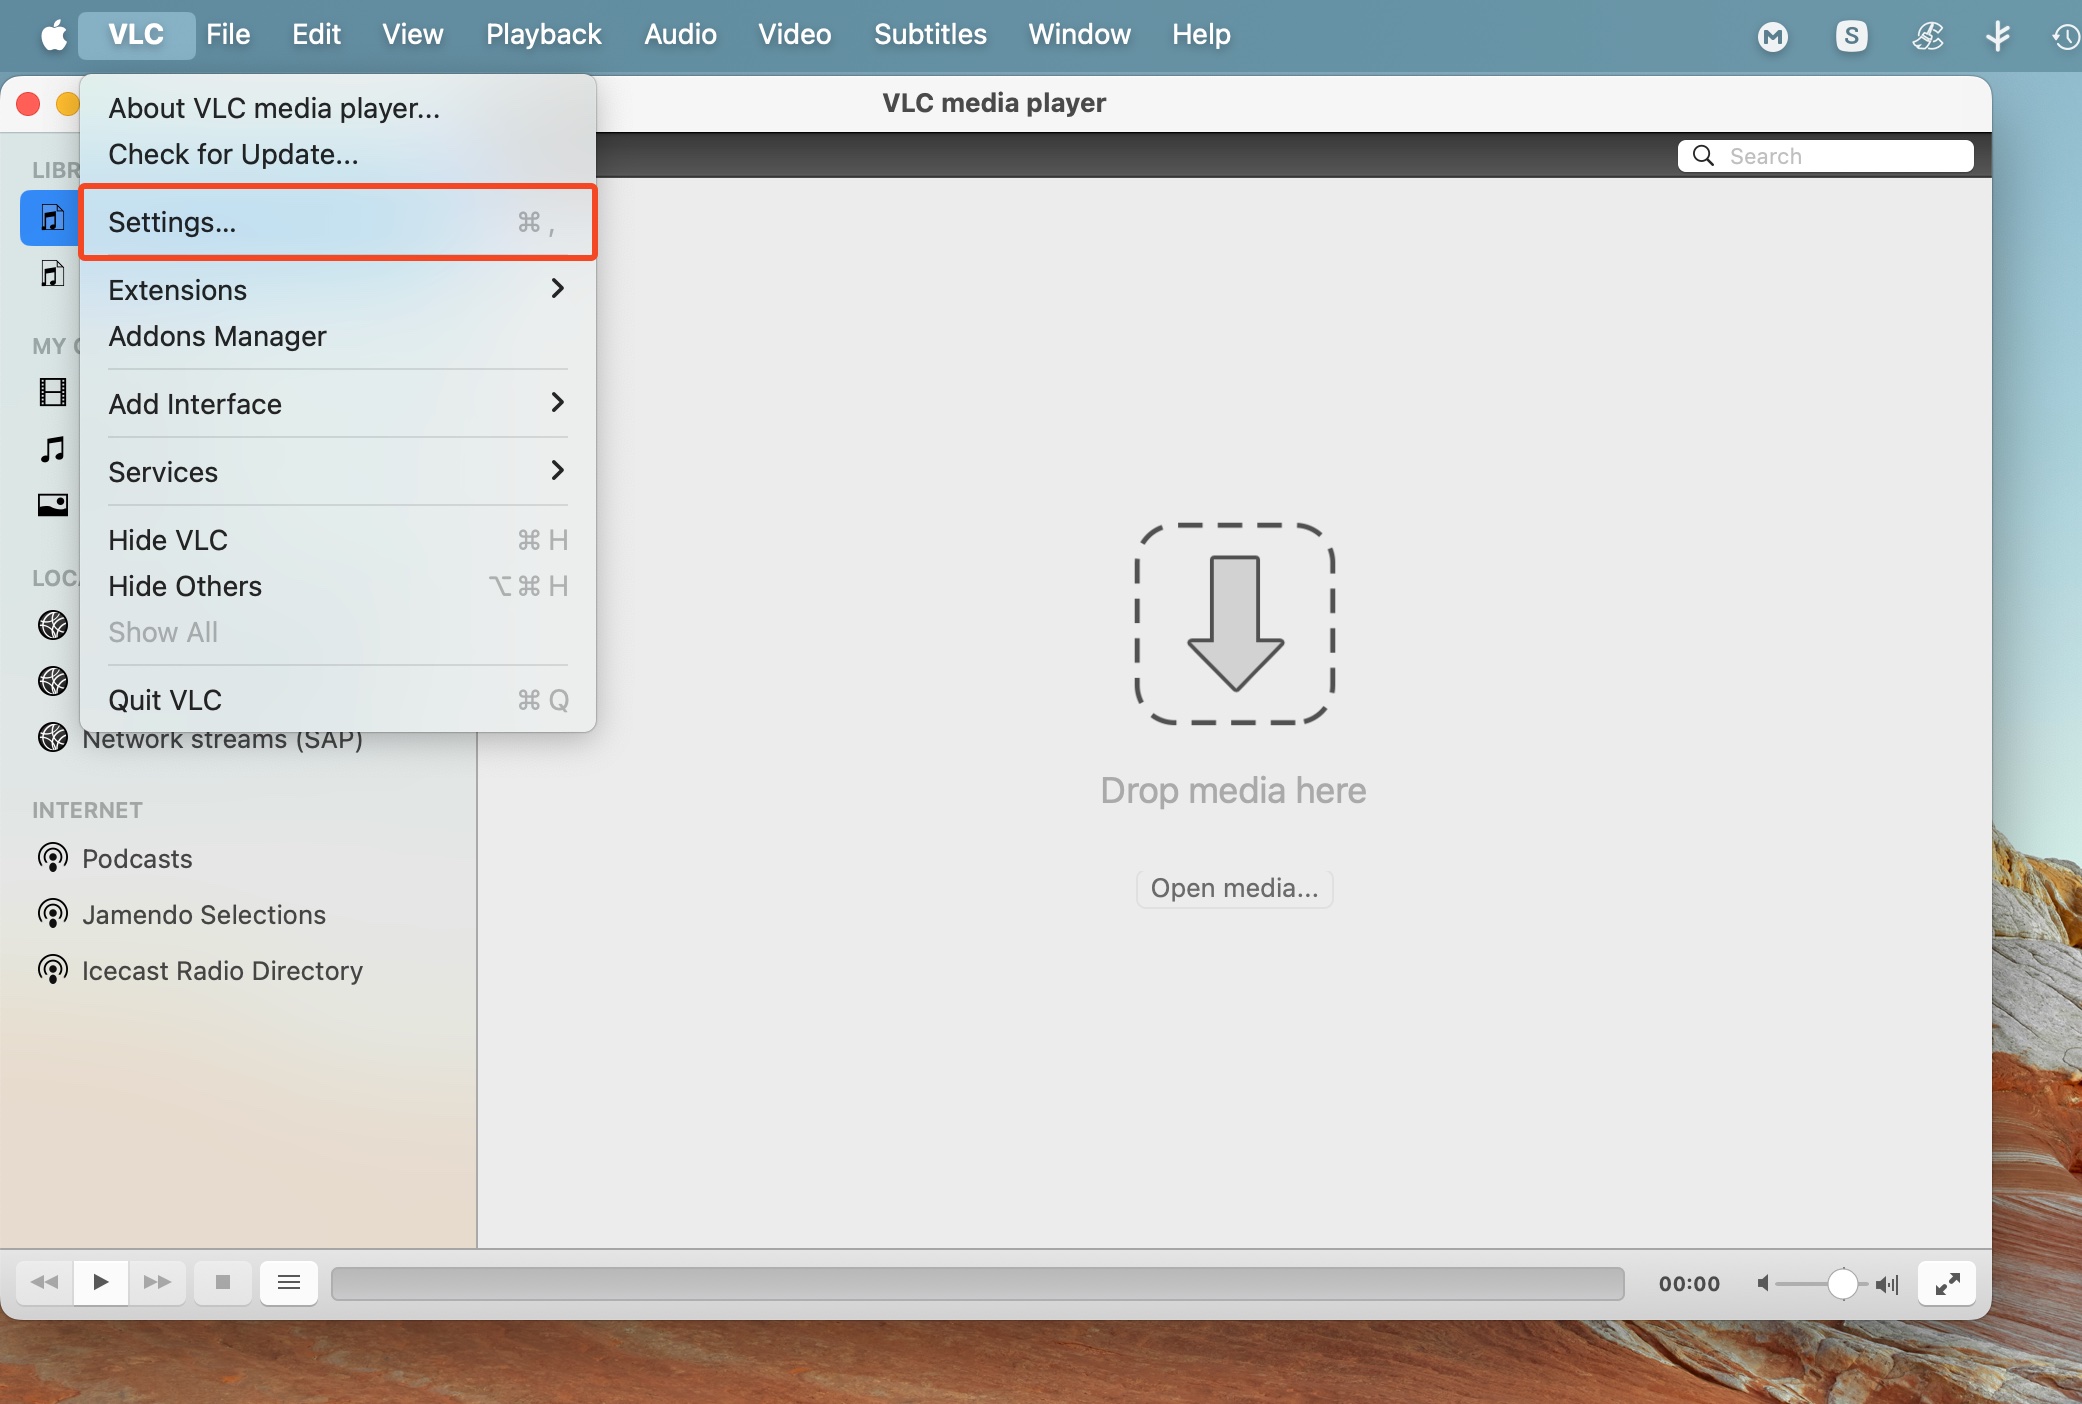
- Click the Input/Codecs tab.
- Click on the Damaged or incomplete AVI file drop-down menu, and choose the Always fix option.
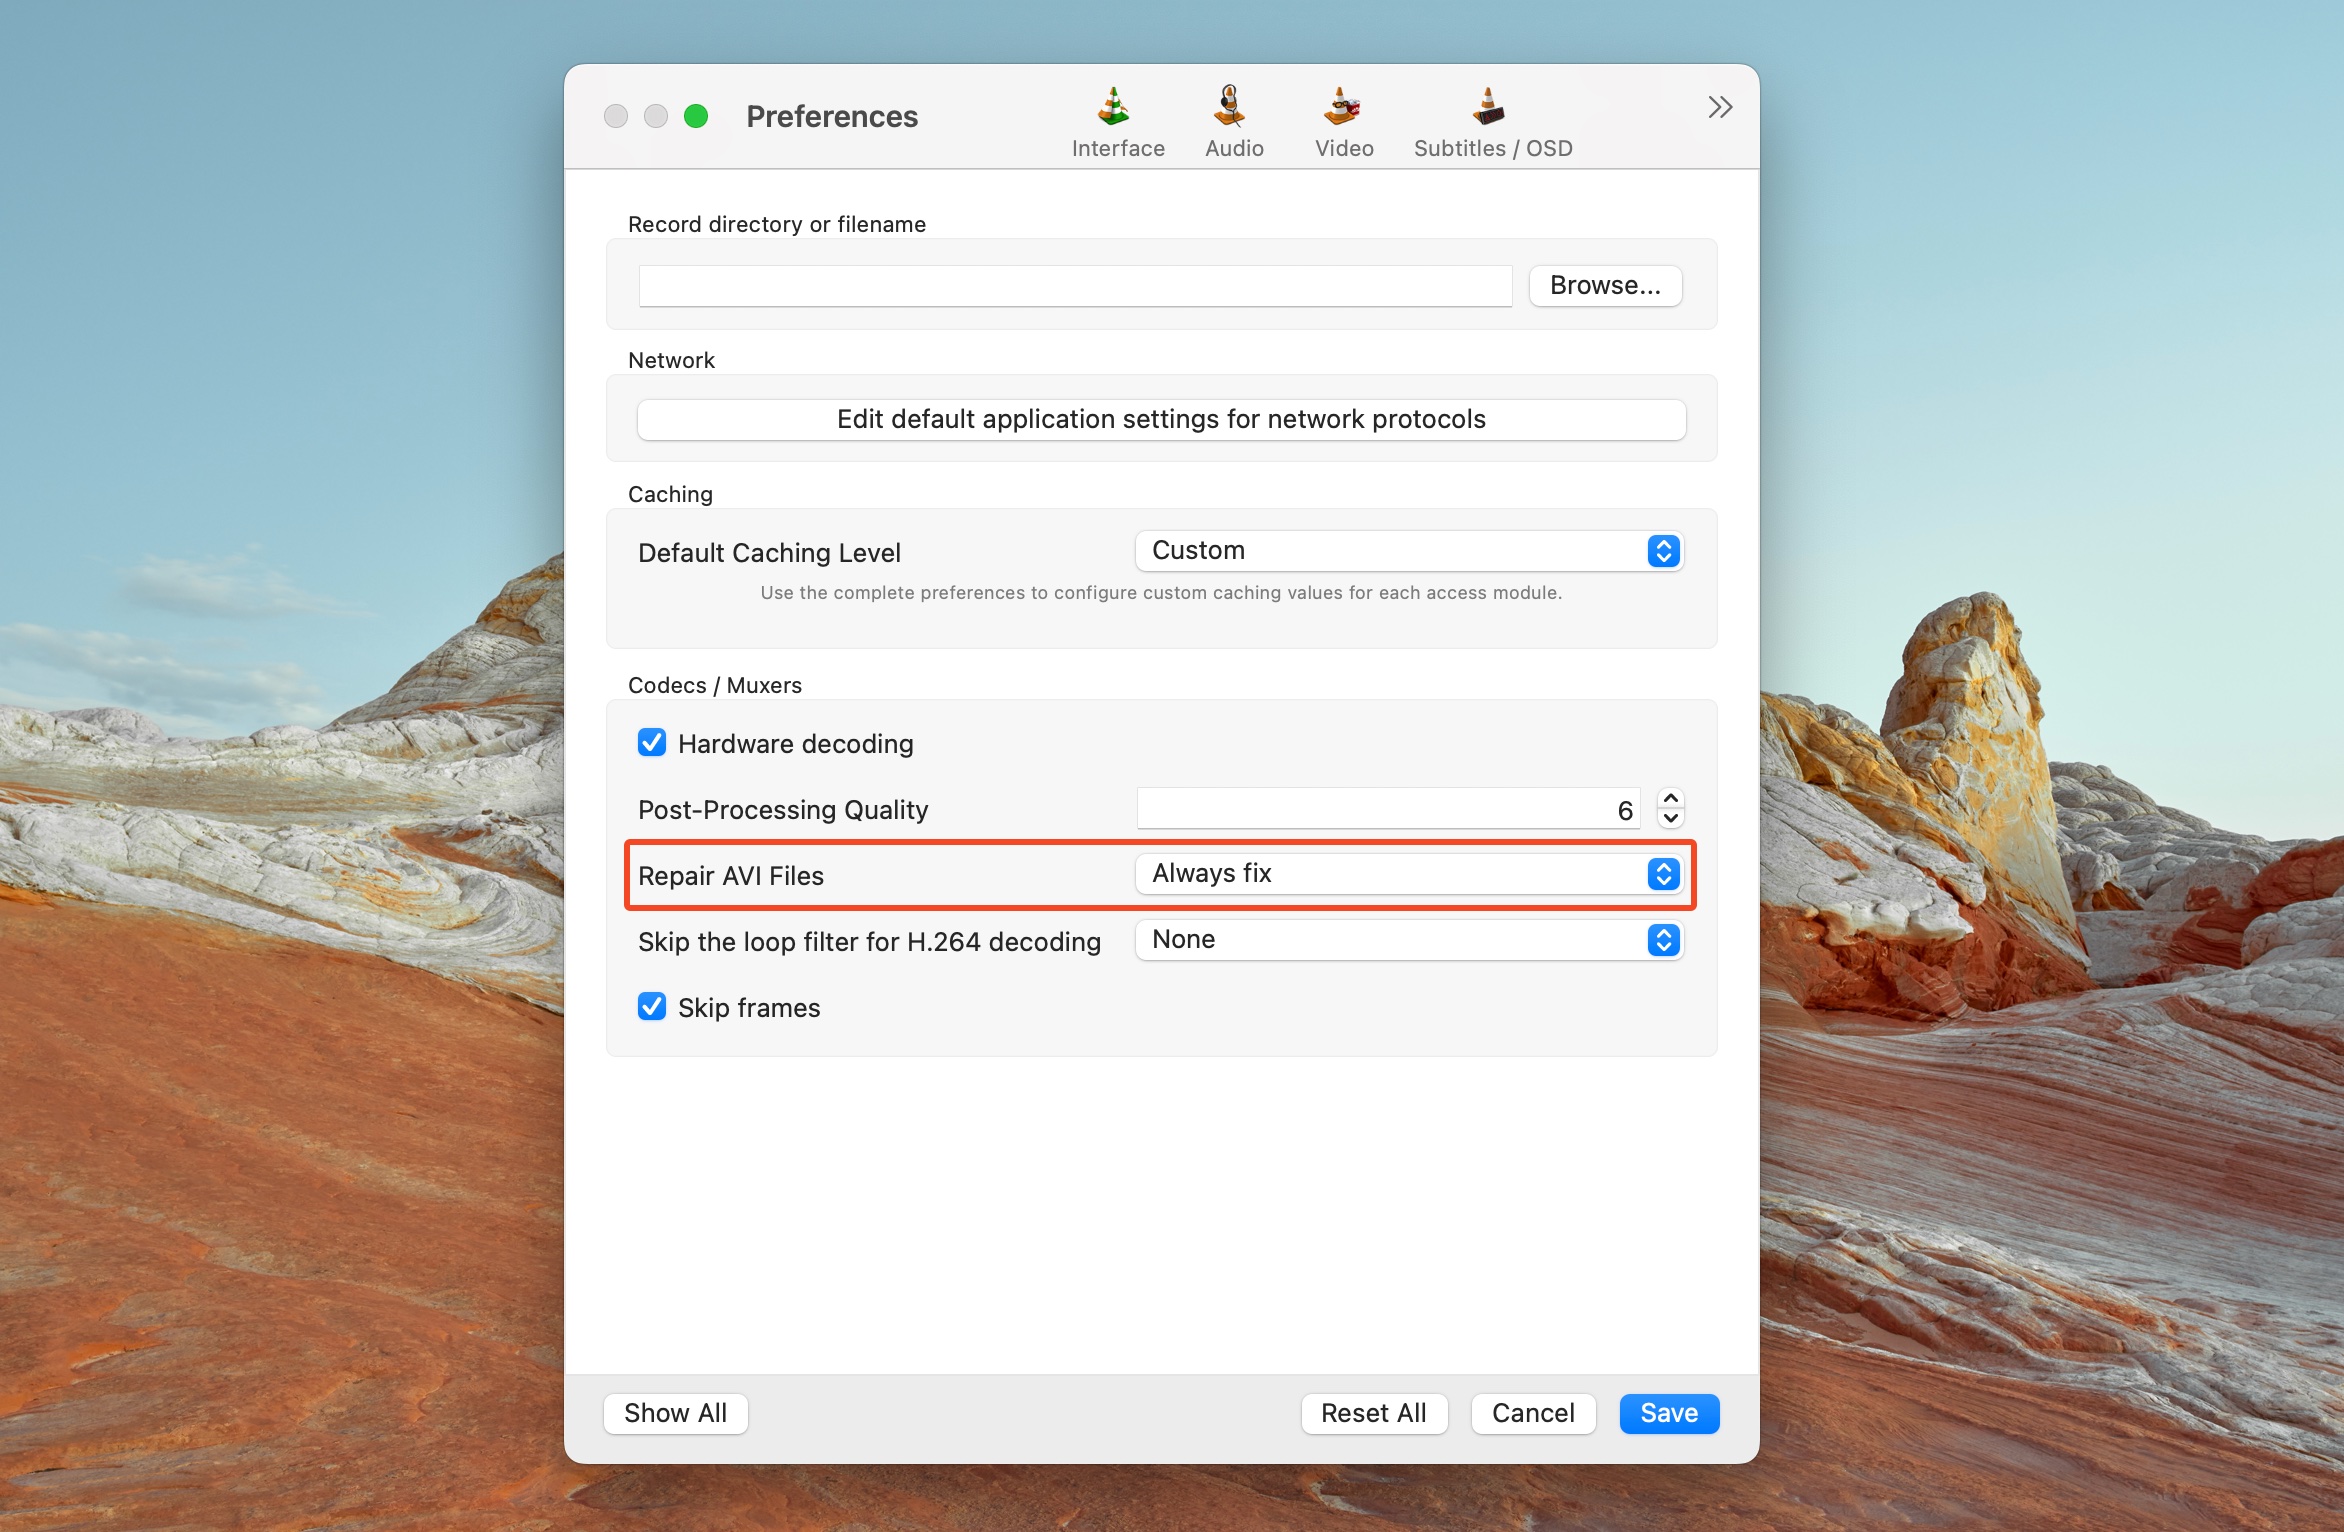
- Click on Save.

- Open the corrupt MOV video (renamed to .AVI) using VLC.
Conclusion
One of the methods above should completely fix your corrupt MOV file. But, in many cases, combining methods is the best approach. For example, you could repair the video’s metadata using online or offline video repair tools, then re-encode the video to smoothen out any video playback issues that persist.
In case video corruption is a recurring issue, move your videos to another storage drive proactively. Recurring video corruption can indicate a logically or physically damaged SD card. Once you’ve moved existing videos, you can try fixing and recovering data from the SD card if need be.


