
After connecting your Western Digital (WD) hard drive to your system, you notice something’s wrong. Maybe some of your files are missing, the drive refuses to open, or Windows doesn’t recognize it at all. Despite the seemingly countless ways your data can vanish from your WD drive, there are ways to get it back.
We’ve gathered and tested the most reliable ways to get your data back, whether it’s inaccessible or deleted. The solutions in this guide have helped many readers with Western Digital data recovery already, so rest assured, you’re in the right place.
Choose Your Western Digital Recovery Scenario
The exact process you follow for WD HDD data recovery depends on the situation you’re in, as each case might require a different approach. We’ve included a table below to help you identify which situation suits you best, along with the recommended recovery options.
| Scenario | What Happened |
| Scenario 1: Deleted Files | The files were permanently deleted using Shift+Delete or emptied from the Recycle Bin. |
| Scenario 2: Formatted Drive | The drive or partition was formatted, and all data was deleted. |
| Scenario 3: Windows Won’t Boot | Your computer won’t boot, and the operating system (OS) doesn’t load. |
| Scenario 4: Corrupted/Not Detected/RAW Drive | The WD drive shows up as RAW, corrupted, or not detected in Windows. |
| Scenario 5: My Passport Encryption | Your WD drive is inaccessible due to password-protection or encryption. |
| Scenario 6: Physical Damage | The drive is making clicking or grinding noises, or won’t spin up. |
If you’ve used WD My Cloud to back up your files, be sure to check there for a copy of your data. Restoring from a backup is much more reliable than recovering the data after the fact.
Scenario 1: Western Digital File Recovery After Accidental Deletion
Accidentally deleted the wrong files and already emptied the Recycle Bin? Or, you chose to skip the Recycle Bin entirely and permanently deleted them using Shift+Delete. It’s not too late to get those files back if you act fast.
After you delete a file, only the reference to the file is actually deleted. The contents of that file remain until it’s eventually overwritten by new data. Until then, it can be recovered. The most effective approach in this case is to use data recovery software capable of WD hard drive recovery. There are so many options out there, but since we’ve already tested the best recovery tools for WD drives, we’ll echo our top picks: Disk Drill, R-Studio, and EaseUS.
| Tool | Pros | Cons | Price | Demo Version | Supported OS |
| Disk Drill | Beginner-friendly, adaptable, strong recovery results | No phone support. | $89 (PRO) | Recover up to 100 MB for free on Windows. | Windows, macOS |
| R-Studio | Well-suited for professionals, handles complex RAID recovery | Steeper learning curve | $79.99 (Standard) | Preview only. | Windows, macOS, Linux |
| EaseUS | Simple, fast, and reliable with great customer support. | Costlier compared to most options. | $69.95 (per month), $127.96 (lifetime) | Recover up to 2 GB for free. | Windows, macOS |
We’re going to demonstrate what WD data recovery looks like with Disk Drill, not just because it’s beginner-friendly, but because it can handle a wide range of different recovery scenarios, like this one. This is how to recover data from Western Digital external hard drive:
- Download, install, and open Disk Drill.
- Connect your WD drive, select it, and click Search for lost data.
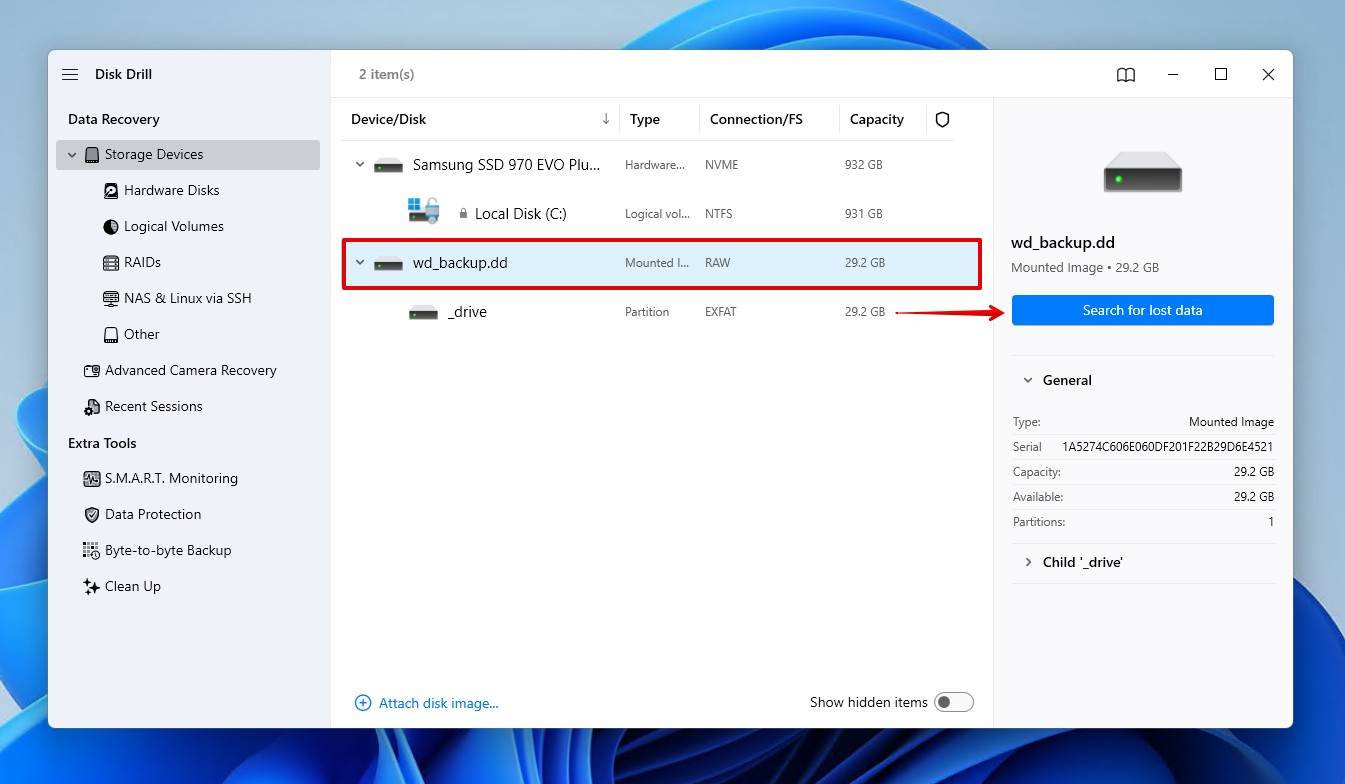
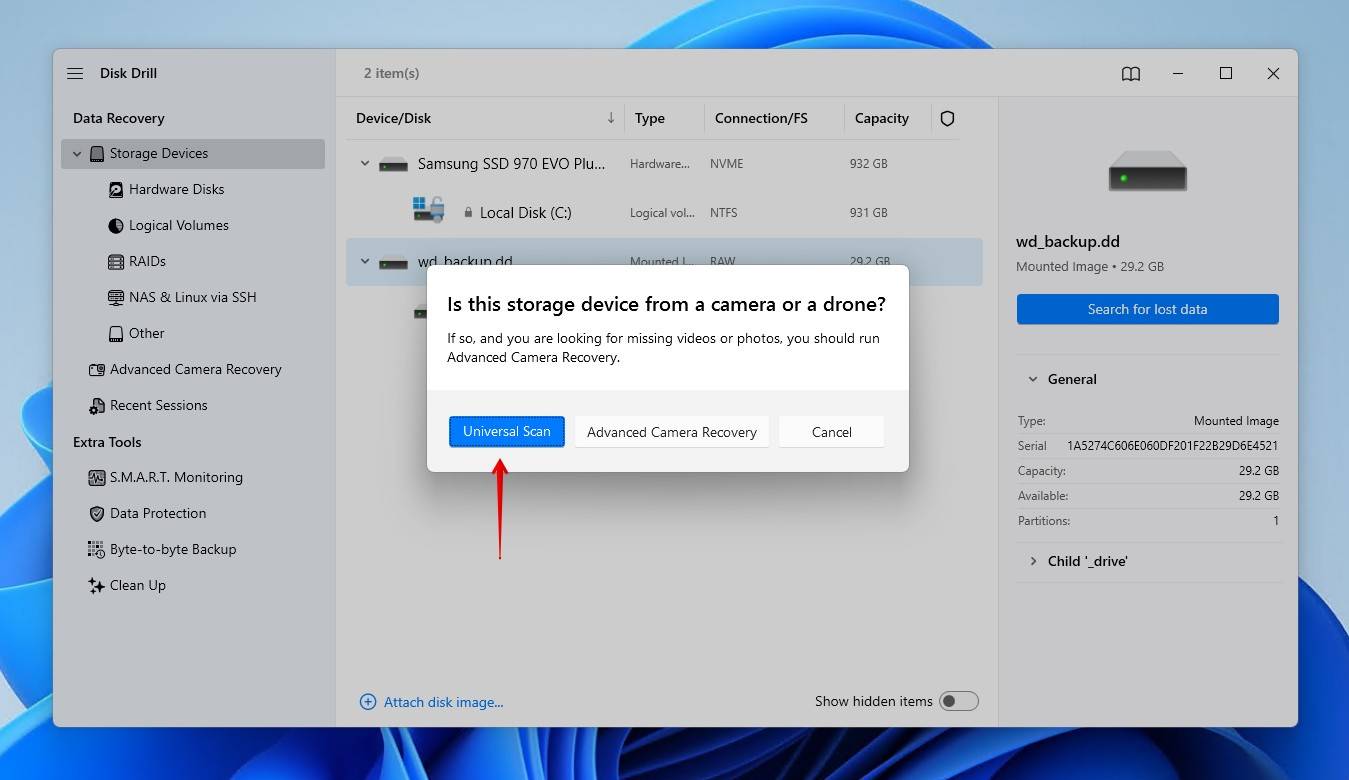
- Click Universal Scan, which will search for all files on the drive. Advanced Camera Recovery is best for recovering footage from cameras and drones.
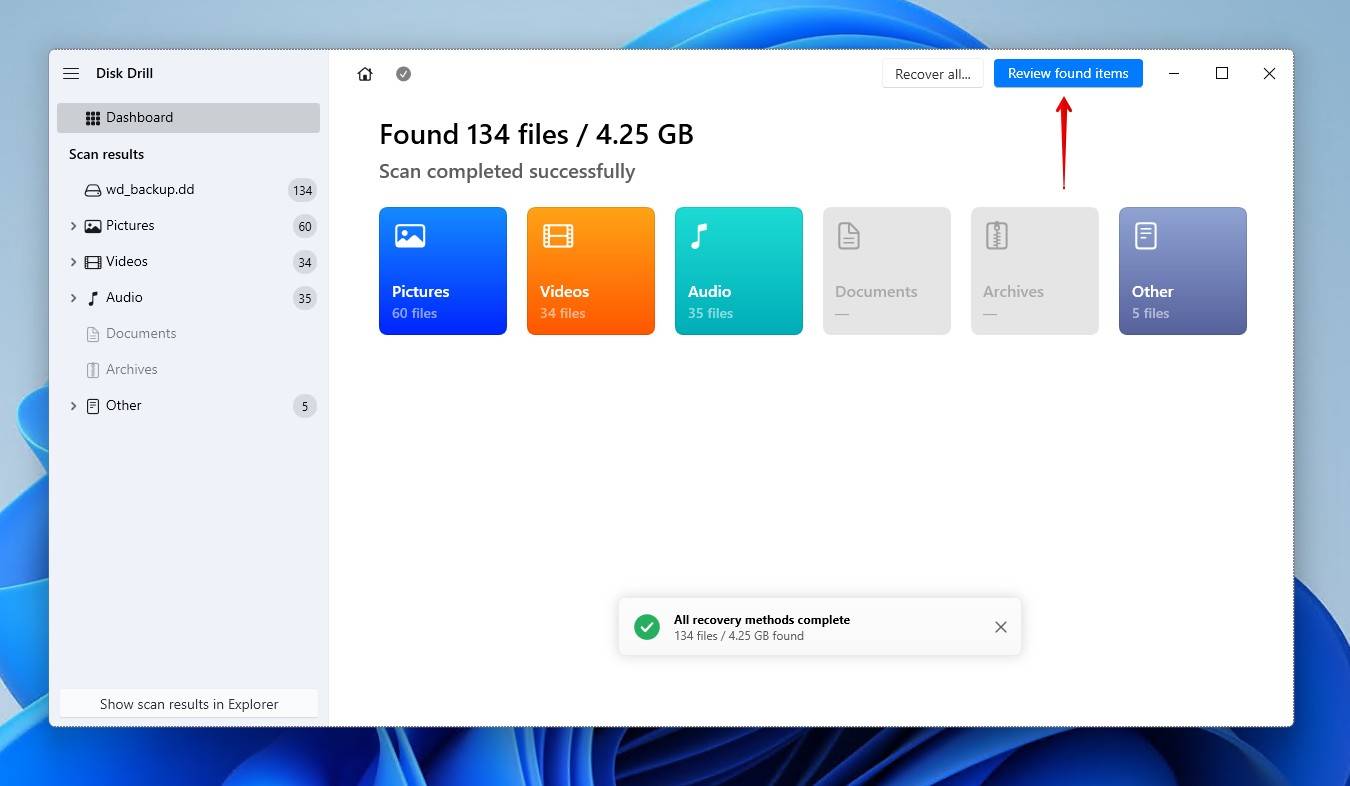
- Click Review found items once the scan is complete. Alternatively, you can click Recover all to restore everything immediately.
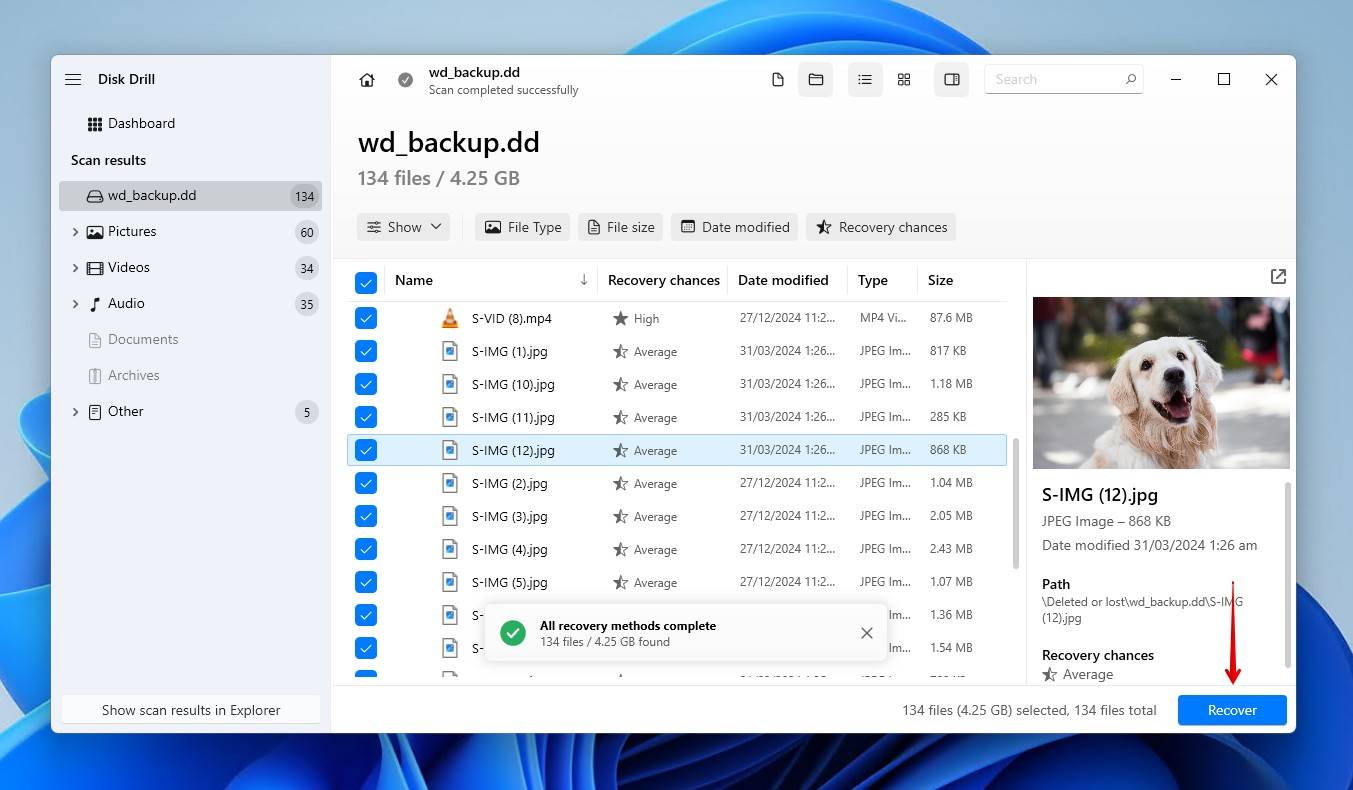
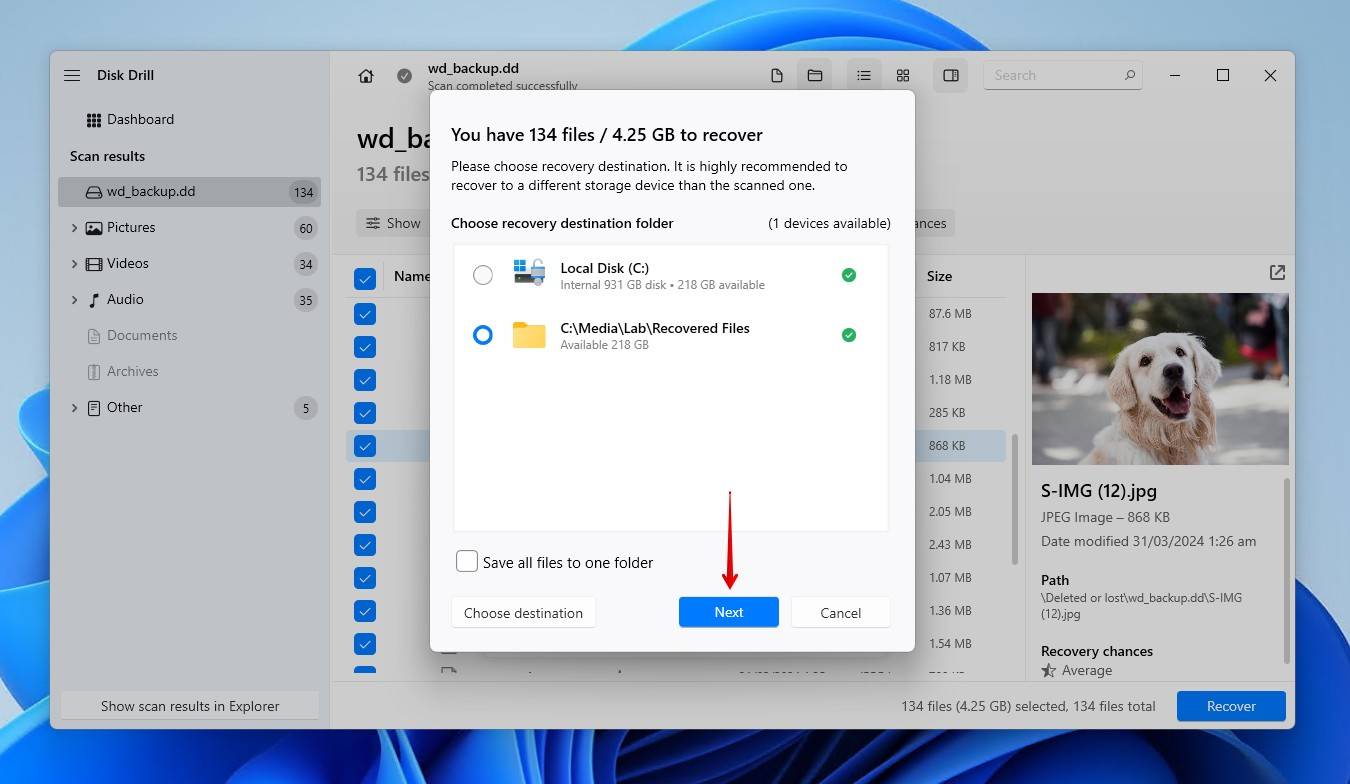
- Preview and select the files you want to recover. You can filter the options by file type, size, and date modified to refine the results. Click Recover when you’re ready to restore them.
- Select an appropriate recovery location that doesn’t reside on the Western Digital hard drive. Click Next to complete recovery.
Once your data is back, make sure you back it up. Since support for WD Backup has ended, Western Digital recommends Acronis True Image for Western Digital as the primary method of backing up your drives.
Scenario 2: WD External Hard Drive Recovery After Formatting
WD drive recovery is possible after formatting, but it really depends on the type of format you performed: quick, or full.
- Quick format. Similar to regular file deletion, a quick format only deletes the pointers to the data. Sometimes even those are intact, if a different file system was used. The data itself is still recoverable.
- Full format. Every sector or block on the drive is zeroed. In doing so, all data is overwritten, essentially removing any chance of recovery, even with professional tools.
Most of the time, unless you specifically unselect the quick format option, Windows’ default formatting parameters will lead to a quick format. In this case, the steps for Western Digital file recovery are the same as above – scan the drive and recover the formatted data using data recovery software.
If you’re using a solid-state drive (SSD), Western Digital drive recovery is complicated by the presence of TRIM. TRIM automatically clears unused blocks with a TRIM command. After TRIM is run, it makes recovery impossible. Although unlikely, you may have a slim chance of recovering data from the SSD if TRIM hasn’t run.
Scenario 3: WD Hard Drive Recovery When Windows Won’t Boot
When you’re using a WD drive as your boot device, the recovery process is a little bit trickier. Since the OS won’t load, you can’t install and use data recovery software to recover WD external hard drive data. You have two potential options.
Option 1: Use a Live USB or Bootable Recovery Media
A Live USB is a portable operating system you can boot from, bypassing the unbootable system drive. Using the Windows ISO, you can create a bootable USB with tools like Rufus. From there, you can:
- Copy your files to another drive or cloud storage.
- Run recovery software directly from the live environment.
Option 2: Connect the WD Drive to Another Computer
If Windows won’t boot, you can remove your WD drive and connect it to another PC using a SATA-to-USB adapter, or a spare SATA port.
- If it opens normally, copy your files right away.
- If it appears RAW or corrupted, use Western Digital hard drive recovery software and follow the earlier steps
We won’t be going into detail here since we already have a full, dedicated guide on recovering data from a non-bootable hard drive, so be sure to check it out.
Scenario 4: Western Digital External Hard Drive Recovery When It’s Corrupted or Not Detected
Arguably, the most common problem WD users report is trying to access an external drive that Windows doesn’t recognize correctly. Sometimes the drive shows up as corrupted, displays a RAW file system, prompts you to format it, or simply doesn’t appear in File Explorer. Your first step is to confirm its status in Disk Management. These steps apply to most WD external hard drive recovery situations, especially when your device suddenly stops:
- Right-click Start and click Disk Management.
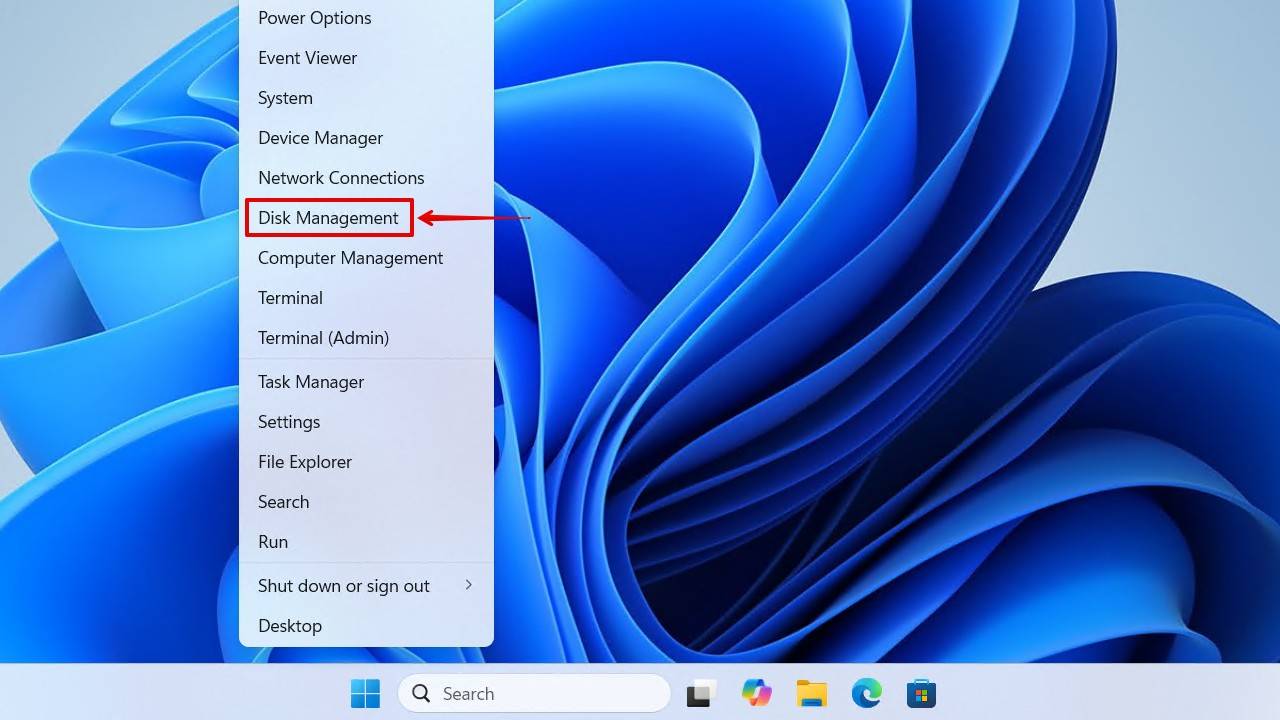
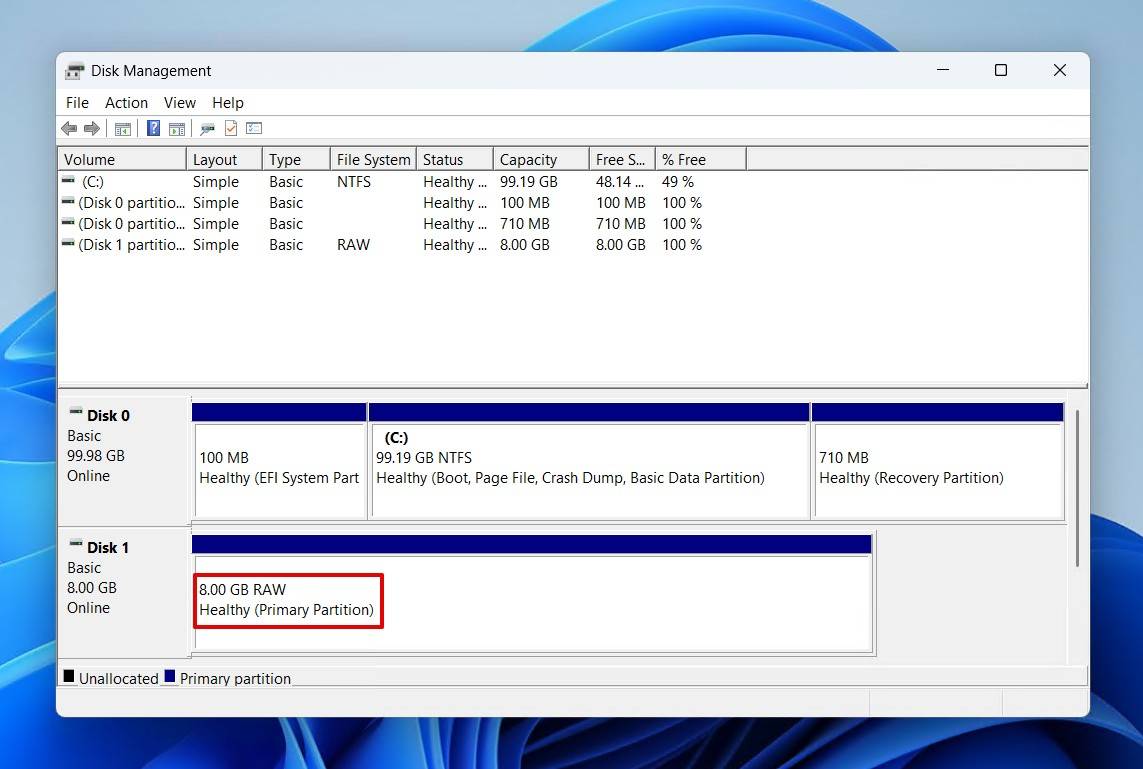
- Look for your WD drive and confirm its size and file system.
From there, your steps will depend on its status:
- Detected correctly: Use Western Digital data recovery software to restore the data.
- Shows RAW/errors: File system is corrupted. Avoid formatting and use data WD external hard drive data recovery software to bypass the errors and recover the data.
- Note detected: Try another USB cable, port, or PC. If it still fails, the issue may be hardware-related, and professional recovery might be needed (which we discuss in Scenario 6).
You can fix a WD drive that’s showing errors, but there’s a specific order you should follow so as not to lose your data.
Step 1: Save Your Data
Taking any action on your drive when it’s corrupted has a chance of making your data unrecoverable. This includes fixes, as well as recovery, because it puts additional stress on the drive. That’s why we recommend prefacing Western Digital external hard drive data recovery with a backup first.
Creating a byte-to-byte backup image and scanning that instead is the best option for Western Digital recovery. This backup will preserve your drive’s current state, so even if the physical drive gets worse, the recoverable data will not be affected in the image. This step is super simple step that can be the difference between recovering some data and recovering none.
We’ll show you how to create a byte-to-byte backup of your WD drive using Disk Drill:
- Return to Disk Drill. If you haven’t downloaded it, do so now.
- Click Byte-to-byte Backup.
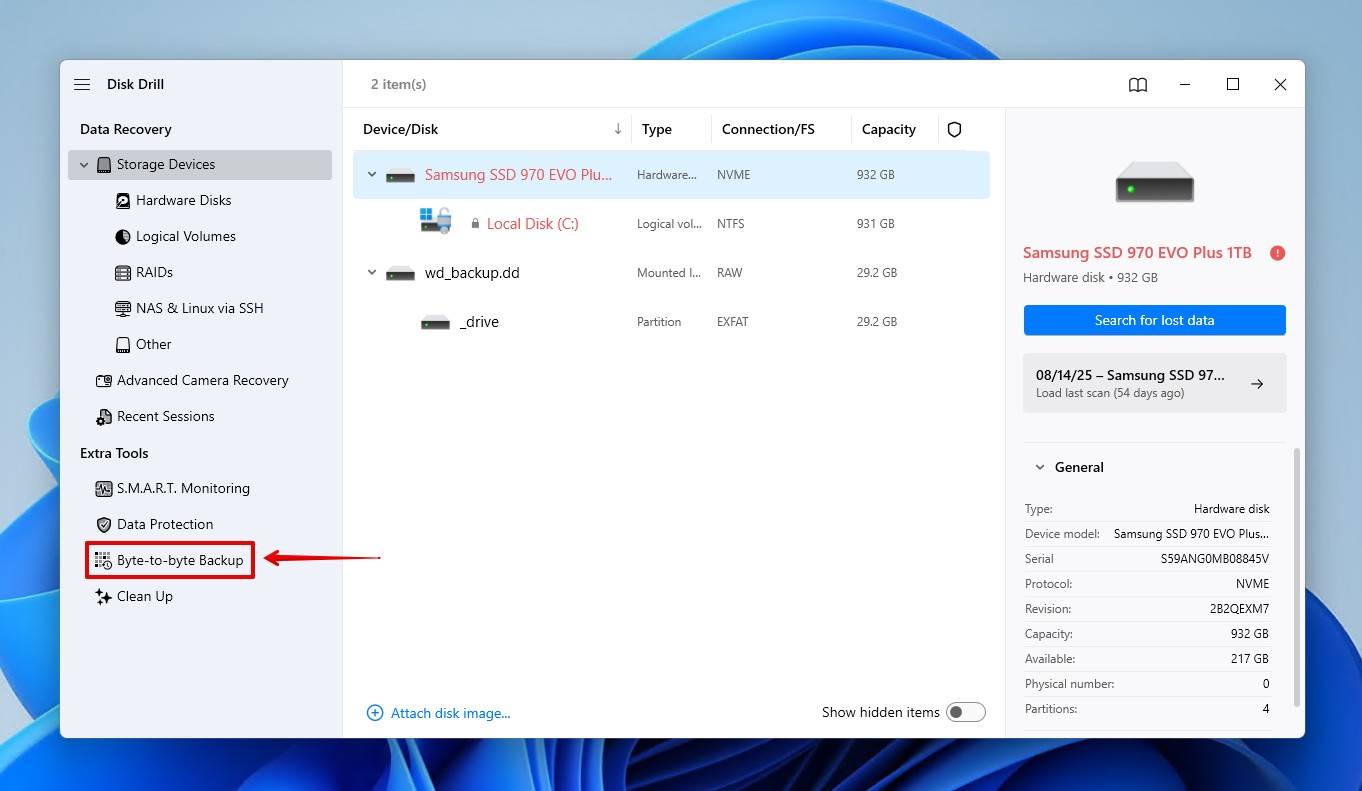
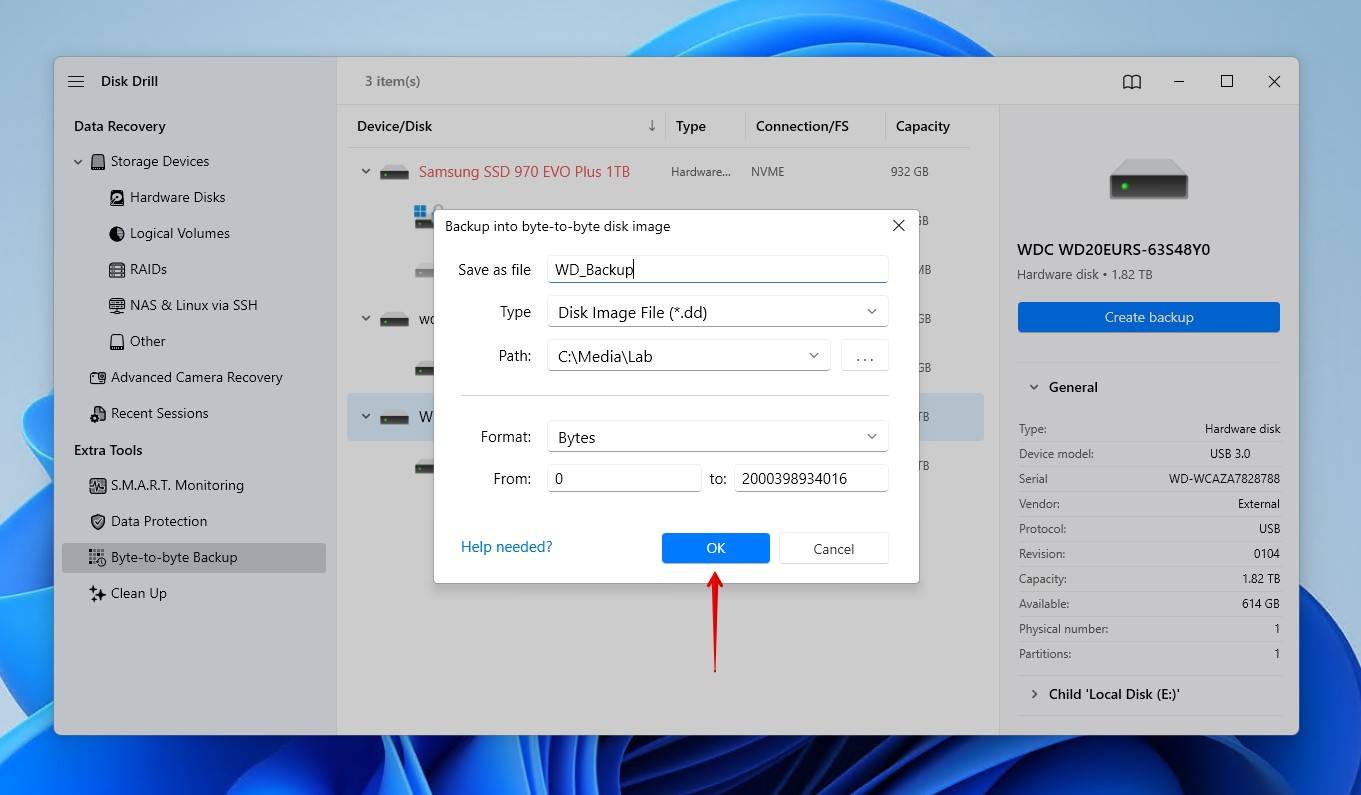
- Select your WD drive, then click Create backup.

- Give the backup a name, and choose somewhere on a separate drive to store the backup. The receiving drive must be the same size or larger than the drive being backed up. Click OK.
- Return to Storage Devices.
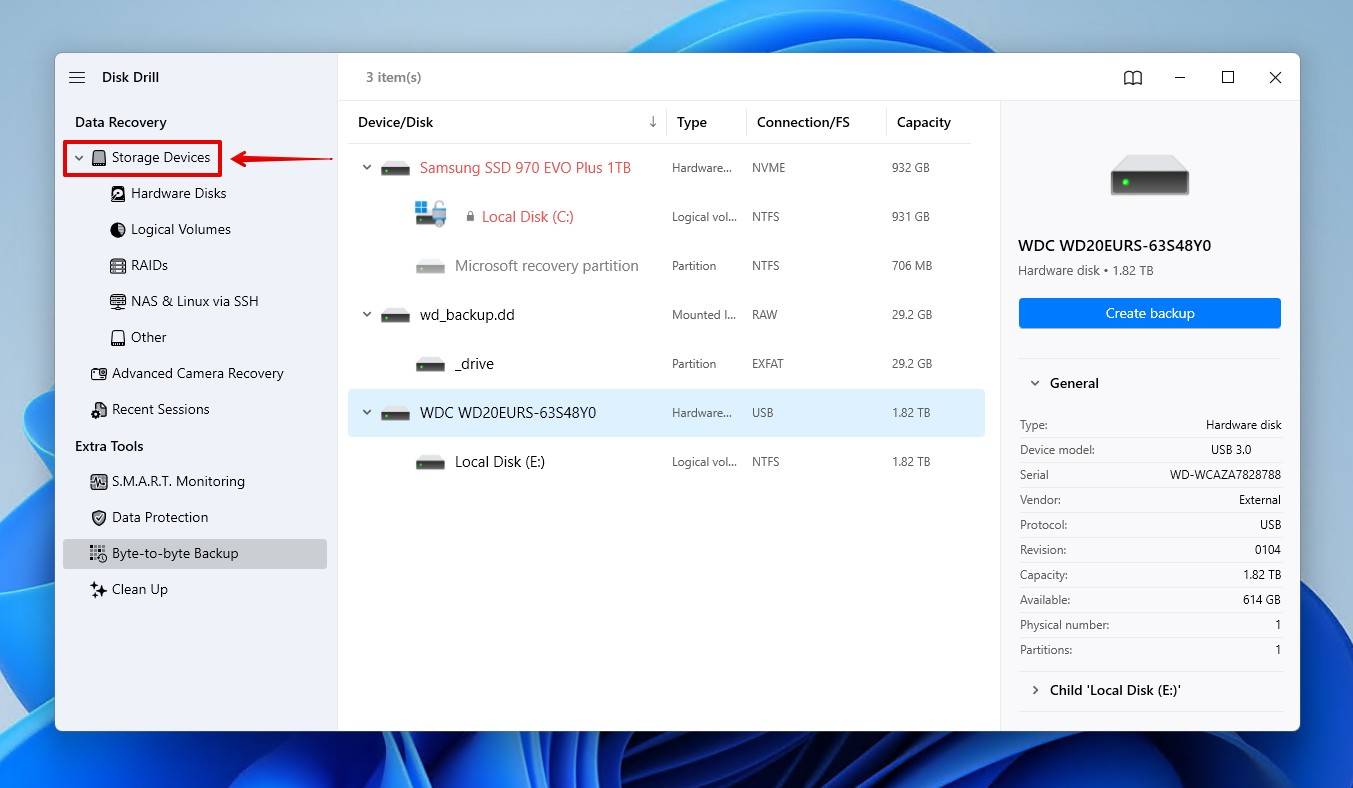
- Click Attach disk image and select the backup image you just created.
- For recovery, see the steps in Scenario 1.
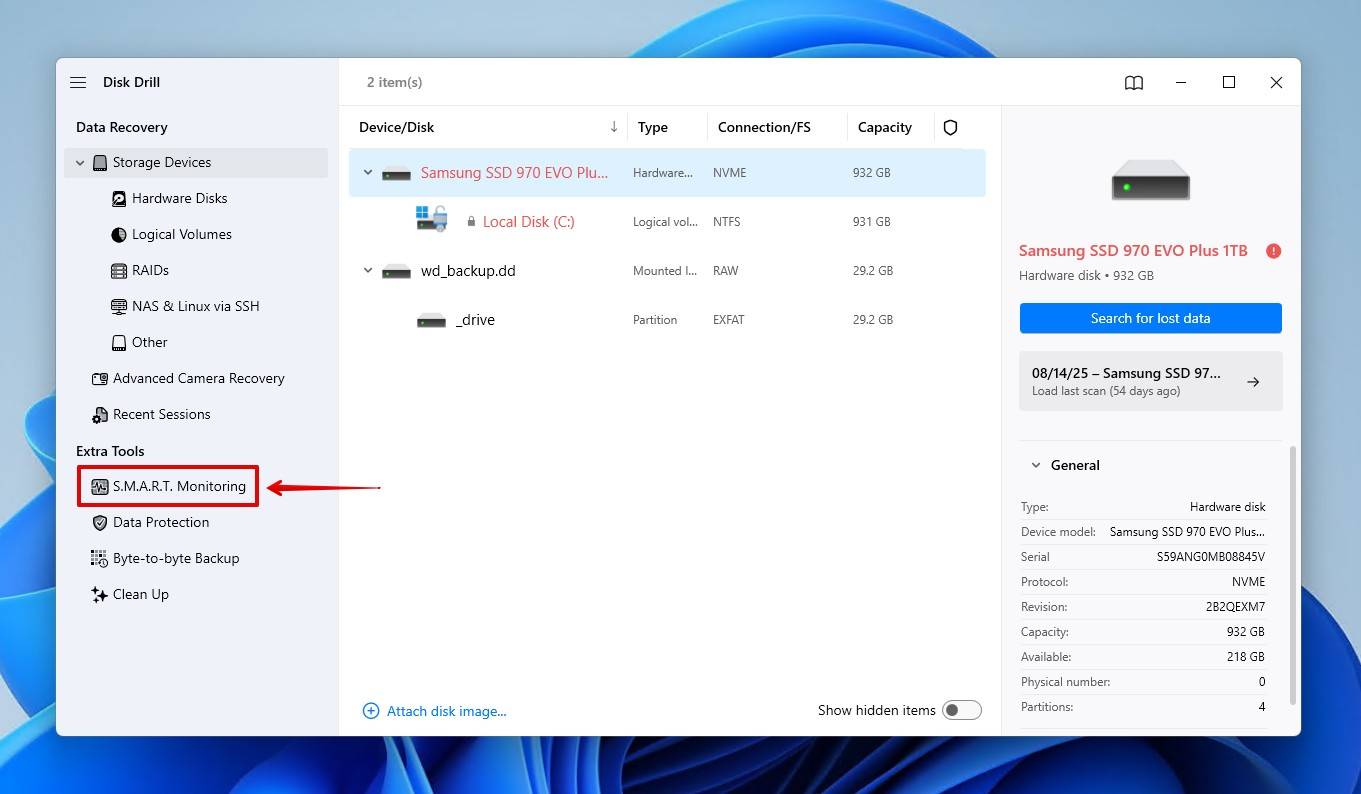
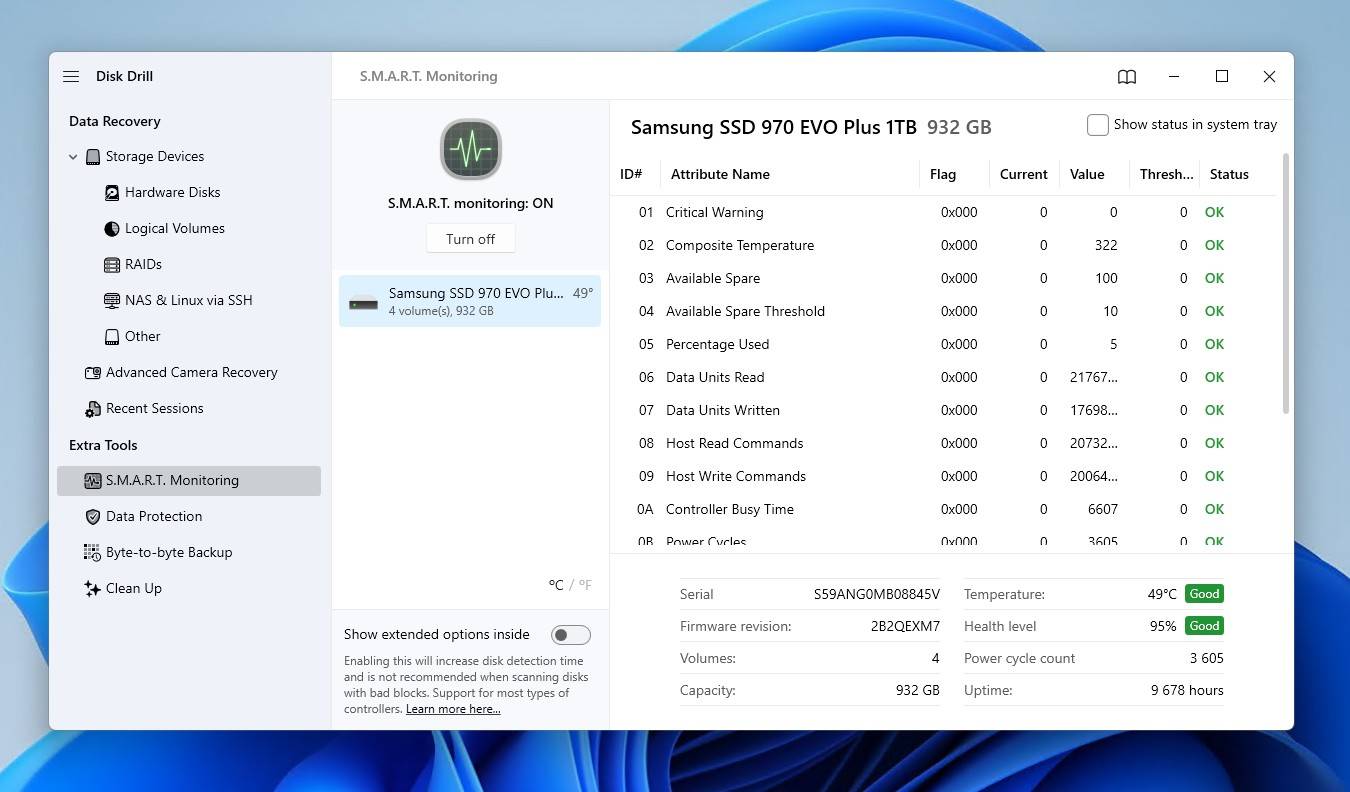
Disk Drill also includes active S.M.A.R.T. monitoring, which keeps tabs on your WD drive’s health, both alerting you to problems it detects and giving you a run-down of the drive’s integrity. You can access it like so:
- In Disk Drill, click S.M.A.R.T. Monitoring.
- Select your WD drive.
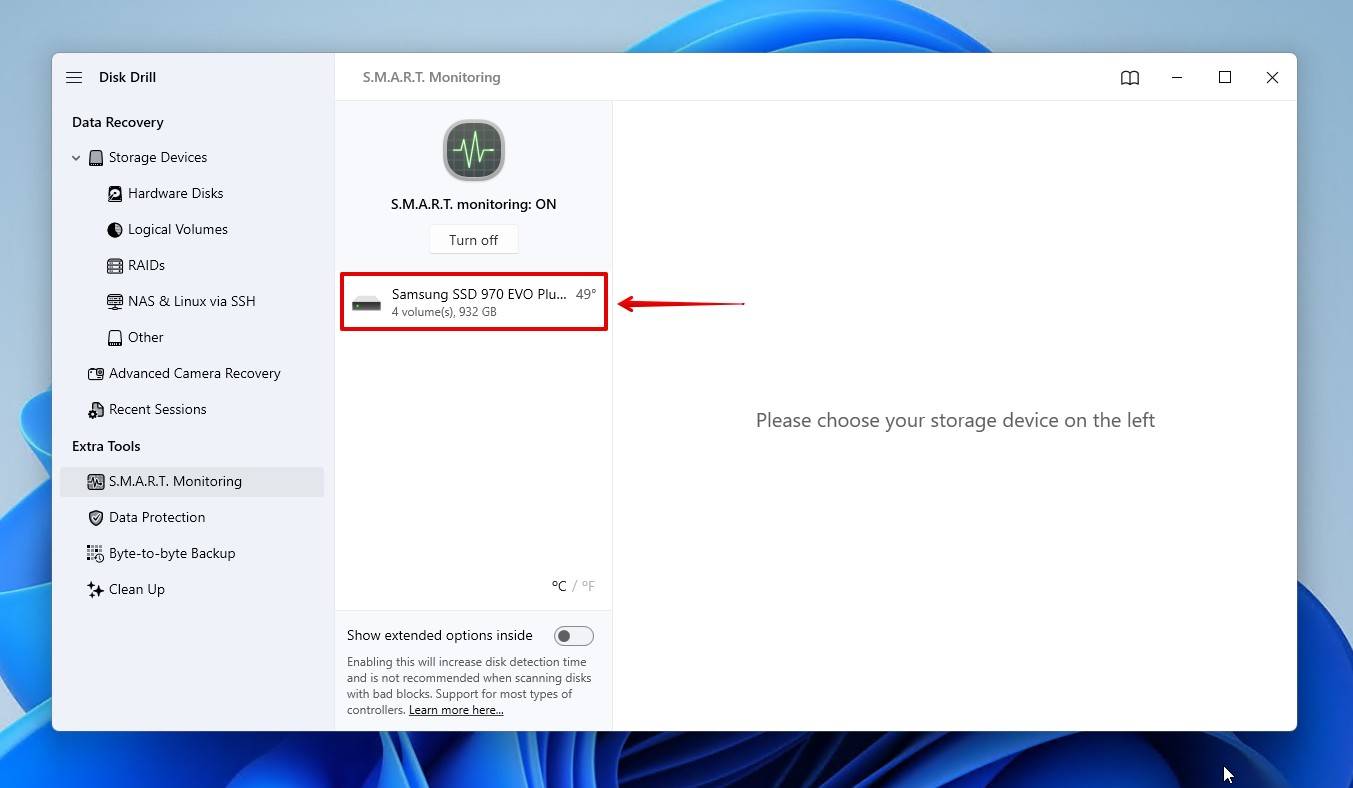
- Note the disk’s status. OK indicates the drive is fine, while Warning and Failing are indications that action is needed.
Step 2: Fix the Drive
Windows has its own built-in repair utility called CHKDSK, which focuses on the repair of file system-related errors. We’ve left this option out until now because CHKDSK can lead to further data loss, so it’s best only to use it once your data is backed up or recovered.
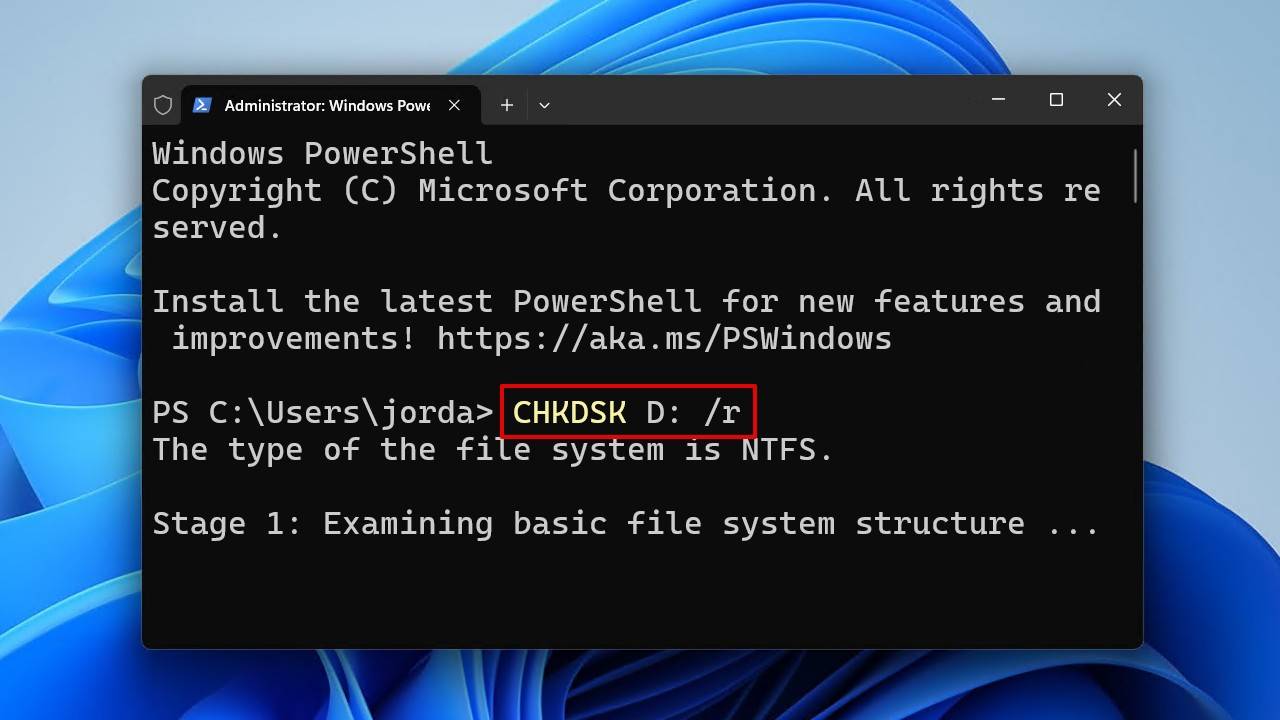
Here’s how you use CHKDSK after WD hard disk data recovery:
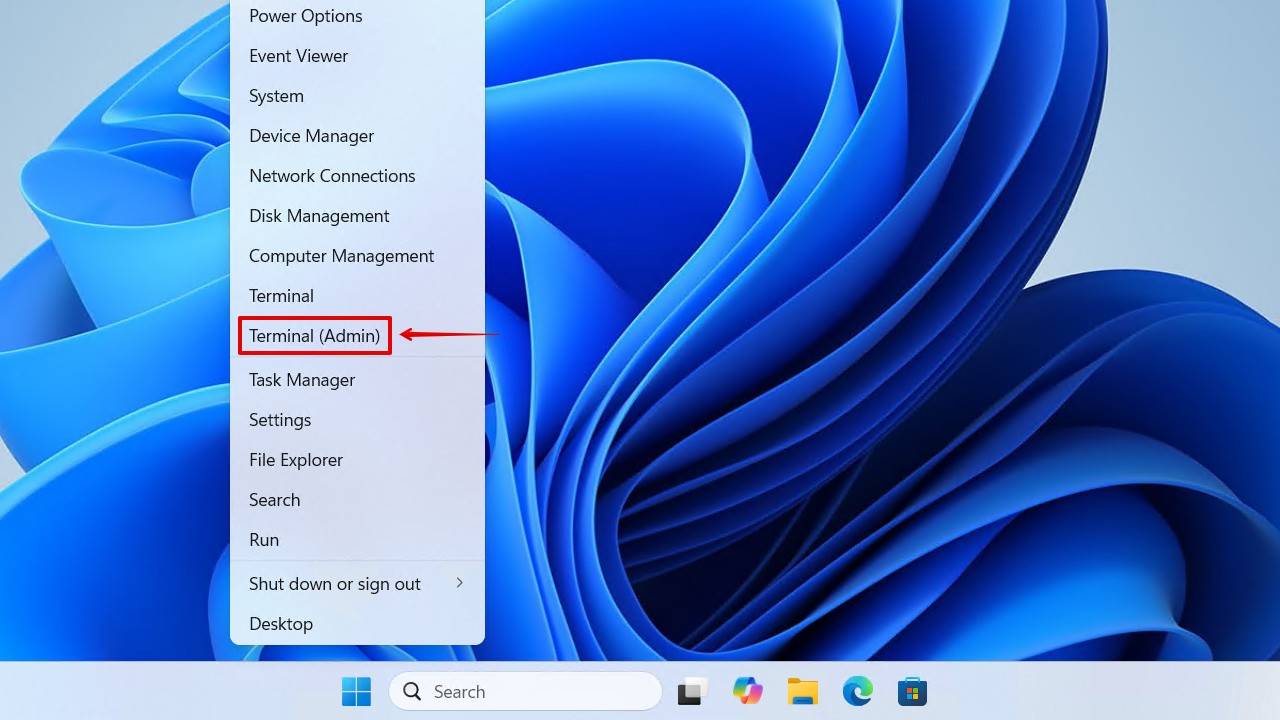
- Right-click Start and click Terminal (Admin).
- Type chkdsk *: /r. Replace * with your WD drive letter. Press Enter.
While CHKDSK is useful in many cases, it’s not a one-stop solution for everything. In some cases, you may need to reformat the drive. And while yes, this will erase the data, it will eliminate any corruption on the drive and restore it to working order. And since you recovered the data earlier, this won’t be an issue.
This is how you format the drive after Western Digital hard disk data recovery:
- Right-click Start and click Disk Management.
- Right-click your WD drive, then click Format.
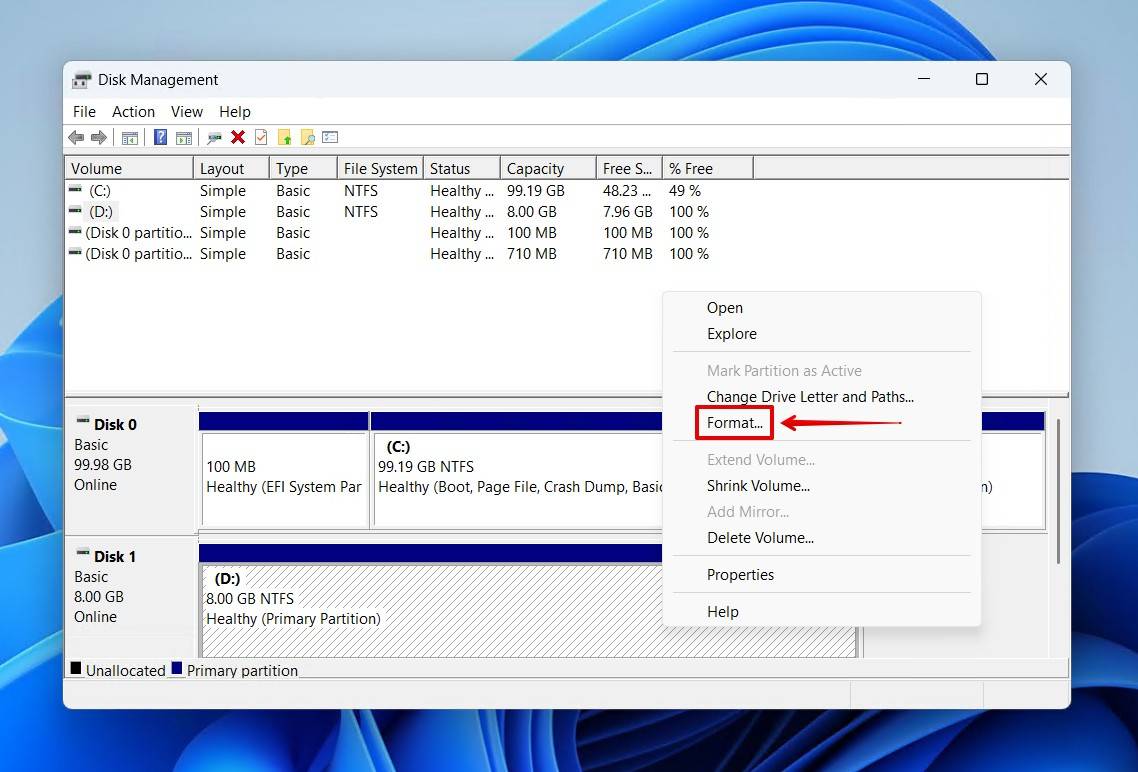
- Provide a volume label, make sure Perform a quick format is ticked, then press OK.
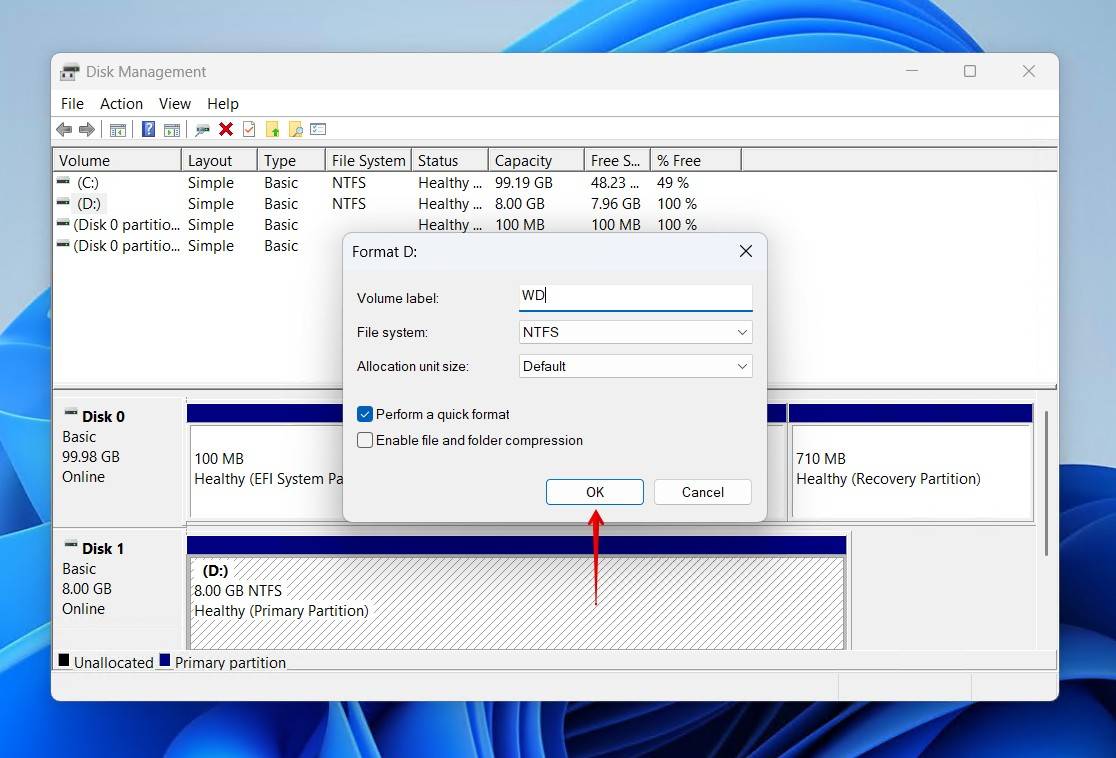
- Click OK again to confirm.
Scenario 5: Western Digital My Passport Data Recovery (Encryption Issues)
Most WD My Passport drives use hardware encryption by default, which can affect recovery. If your drive is password-protected, recovery software cannot see what data can be recovered until the drive is unlocked.
- If you have the password and the original enclosure still works, you can unlock the drive and attempt recovery just as we demonstrated earlier.
- If you don’t have the password, the data cannot be decrypted with third-party tools. WD confirms that for drives encrypted with WD Security, a lost password cannot be reset and the data is unrecoverable.
Scenario 6: WD Drive Recovery When Drive Is Physically Damaged
Using a professional recovery service is reserved for the worst-case scenarios – drives that are physically failing. This includes drives that are clicking, grinding, not spinning, or showing signs of being dead.
Do not attempt DIY fixes such as freezing, shaking, or opening the enclosure. These methods can, and will, exacerbate the issue. Leave it to specialized labs with clean rooms and the tools to safely perform repairs, such as read/write head replacement, platters swap, and PCB/controller board transplant.
Western Digital does not provide data recovery services directly, but they do have a network of data recovery service providers around the world who can do it for you.
- US-based customers can purchase a 2-year or 3-year Data Recovery Plan for eligible products. Recovery jobs can be submitted online through Ontrack.
- Non-US customers, or US customers without a plan, can use WD-approved data recovery partners. Using approved providers doesn’t void your warranty, so long as all of the conditions are met.
Professional recovery is complex and never cheap. Costs range from hundreds to maybe thousands of dollars, depending on the case. However, it’s also the best option for getting your data back. So, at the end of the day, it all comes down to how valuable that data is to you.


