 If you have troubles with your Seagate external hard drive, this guide’s going to help. We’ve worked with every flavor of Seagate drive, from the older Backup Plus models to the newer One Touch and Expansion series, and based on what we’ve seen, they’re just as prone to problems as any other brand. In some cases, maybe even more – for example, the 12TB Seagate ST12000NM0007 has shown a 9.47% failure rate, according to Backblaze’s drive reliability data. That’s not small.
Whether your drive lost data, became unreadable, was accidentally formatted, or started clicking, we’ll walk you through every Seagate data recovery option that’s worth trying.
How to Improve Seagate HDD Data Recovery Success
Before you do anything else, run through this quick checklist. It can make a huge difference.
All Seagate drive issues that lead to data loss tend to fall into two categories: logical or physical.
- Logical problems include accidental deletion, formatting, file system errors, or the drive suddenly showing up as RAW in Disk Management. These are the most common – and also the most recoverable, if you act quickly.
- Physical issues, on the other hand, usually show up as clicking noises, grinding, no spin, or Windows not detecting the drive at all. These cases often need pro help.
Here’s what to do (and what to avoid) if your Seagate external hard drive starts acting up:
✅ Do:
- Unplug the drive right away if it’s behaving oddly
- Try a different USB cable and port (we’ve seen Seagate drives fail from cheap cables alone)
- Check Disk Management – even if it doesn’t show in File Explorer, it might still be listed (If you see your hard drive in the console listed with its correct size, you’ll be able to scan the drive for data)
- If possible, make a byte-for-byte backup (we’ll explain how to do it)
- Recover to a separate drive, not the same one you’re scanning
❌ Don’t:
- Don’t install recovery software onto the Seagate drive itself
- Don’t format the drive if Windows prompts you to (cancel and scan it first)
- Don’t run CHKDSK yet – it can make data recovery harder
- Don’t keep reconnecting it over and over hoping it’ll “just work”
- Don’t touch it if it makes unusual noises like clicking/grinding (that usually means physical damage)
How to Recover Data from a Seagate External Hard Drive
Now let’s talk about Seagate data recovery. We’ll break this into two parts. First, the method you can try yourself – recovery software. Then, what to do when the drive looks physically damaged and software alone won’t cut it.
Let’s start with the DIY method.
Method 1: Use Seagate Hard Drive Data Recovery Tools
In our experience, most problems with Seagate external drives fall under logical failure. That means deleted files, corrupted file systems, or folders that vanish after a crash. These issues usually don’t involve actual hardware failure, and you can often fix them without professional help.
Seagate used to offer its own data recovery tool called Seagate Recovery Suite. It came bundled with some drives or through their older software packages, often preinstalled on Backup Plus and Expansion models. It had a basic UI, file previews, and simple recovery options. But honestly, it wasn’t great. In many cases, it missed files that third-party tools had no trouble finding.
Eventually, Seagate stopped actively promoting or updating the tool. Now, most users rely on recovery software from companies like CleverFiles, EaseUS, or CGSecurity.
For this guide, we recommend using Disk Drill. In our experience, it handles just about any Seagate drive recovery with great results. The recovery engine works well with the file systems you usually see on Seagate drives (NTFS, exFAT, even RAW). On top of that, it includes a built-in byte-to-byte backup feature, which, as we mentioned earlier, is often critical when the drive starts to fail or show read errors. It’s easy to use but still gives you pro-level features when you need them.
So let’s go over how to recover data from a Seagate external hard drive using Disk Drill. We’ll keep it step-by-step:
- Download Disk Drill from the official website and install it on a drive that isn’t the Seagate one you’re trying to recover.
- Connect your Seagate external hard drive to the PC using a good cable. If the drive appears in Disk Management with the correct size, you’re good to go.
- Launch Disk Drill.
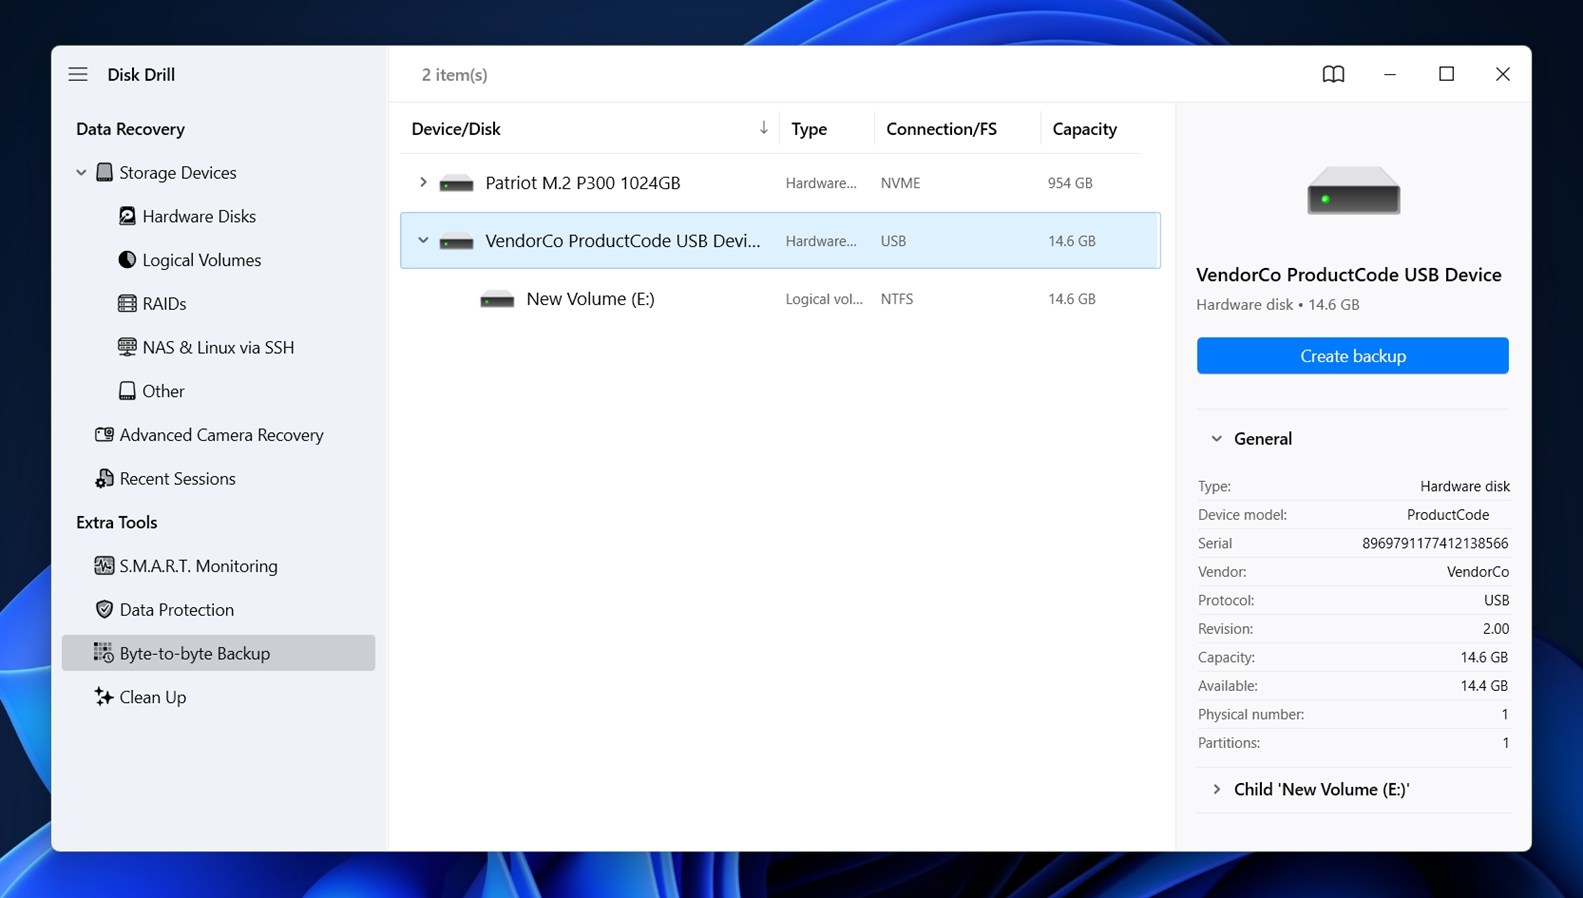
- On the left side, see a menu labeled “Extra Tools”. Look for the option called “Byte-to-byte Backup” and select it.
- A list of drives should appear. Find your Seagate drive in the list. Click on it, then hit the “Create backup” button.
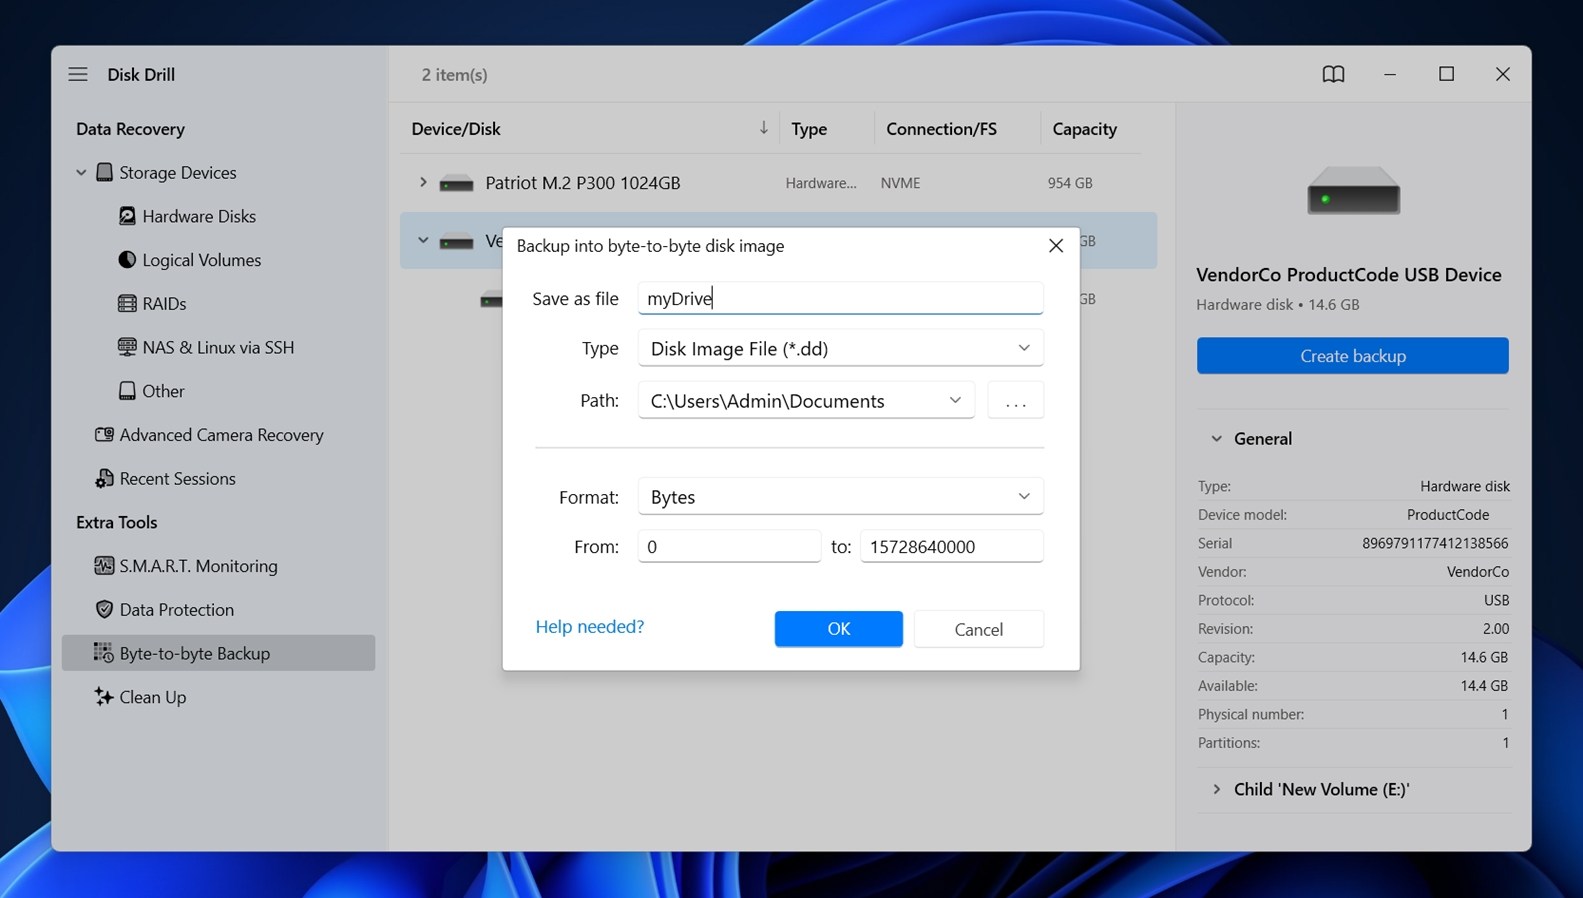
- A window will pop up asking where to save the image. Pick a different drive that has enough space (equal to or more than your Seagate’s full size). Click OK to confirm.
- The backup process will start. Expect it to take a few hours for a healthy 1TB drive. If the drive has bad sectors, the wait could be much longer. Once the image finishes, go back to the main screen in Disk Drill.
- Go back to the “Storage Devices” tab. Find the option at the bottom labeled “Attach disk image”- click it.
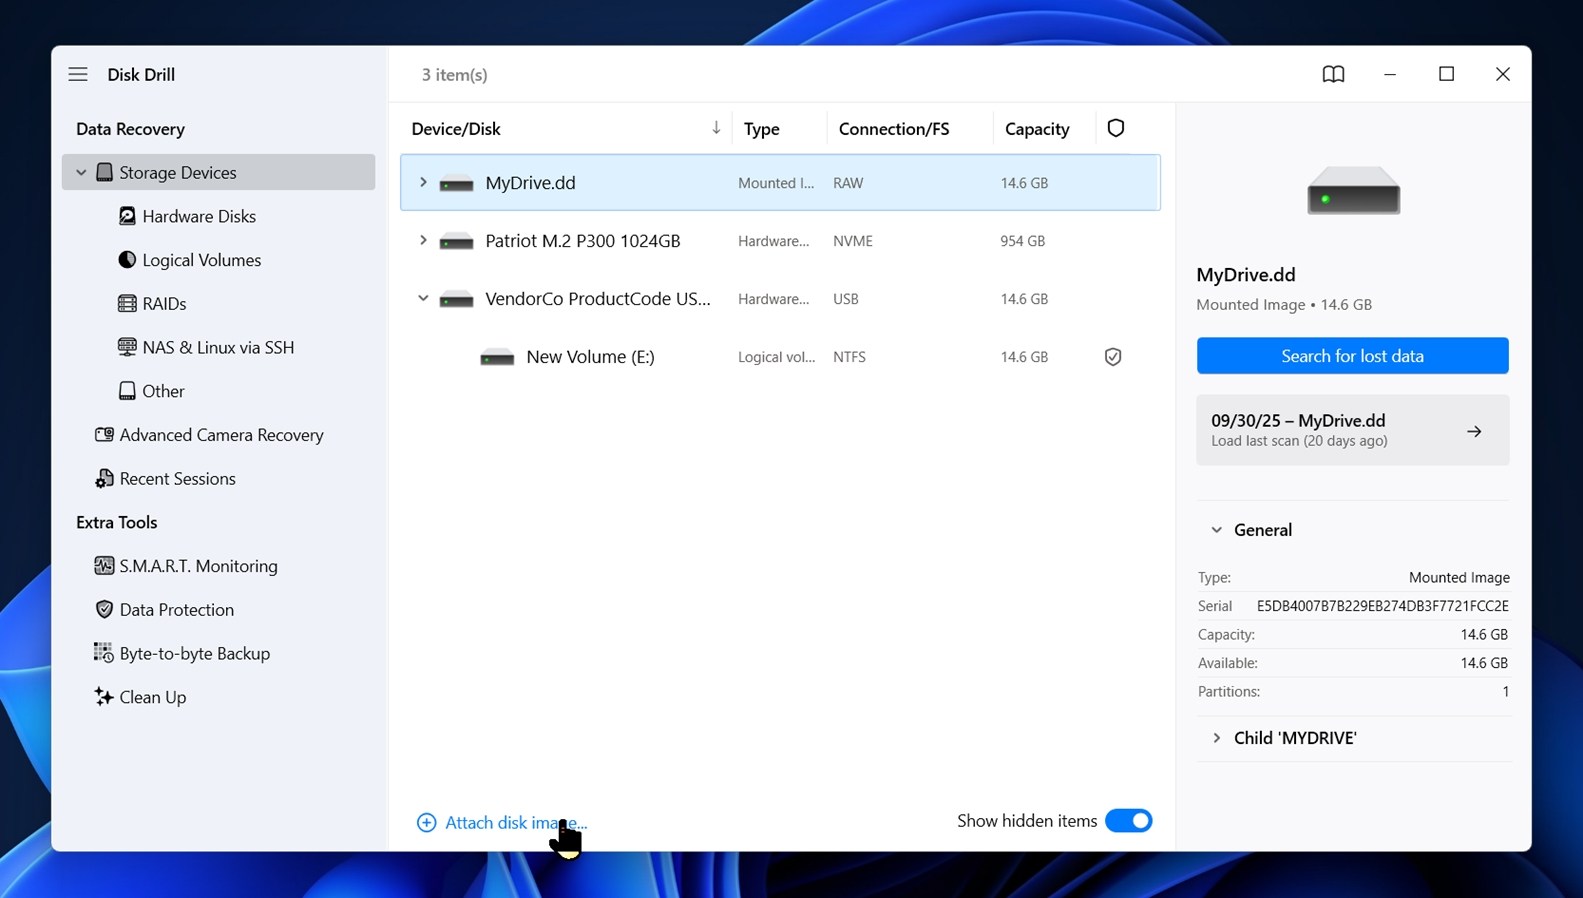
- Browse for the image file you just created and double-click it. Disk Drill will now list it as if it were a physical drive.
- Click on your new disk image. Then select “Search for lost data.”
- When asked, choose “Universal Scan.”
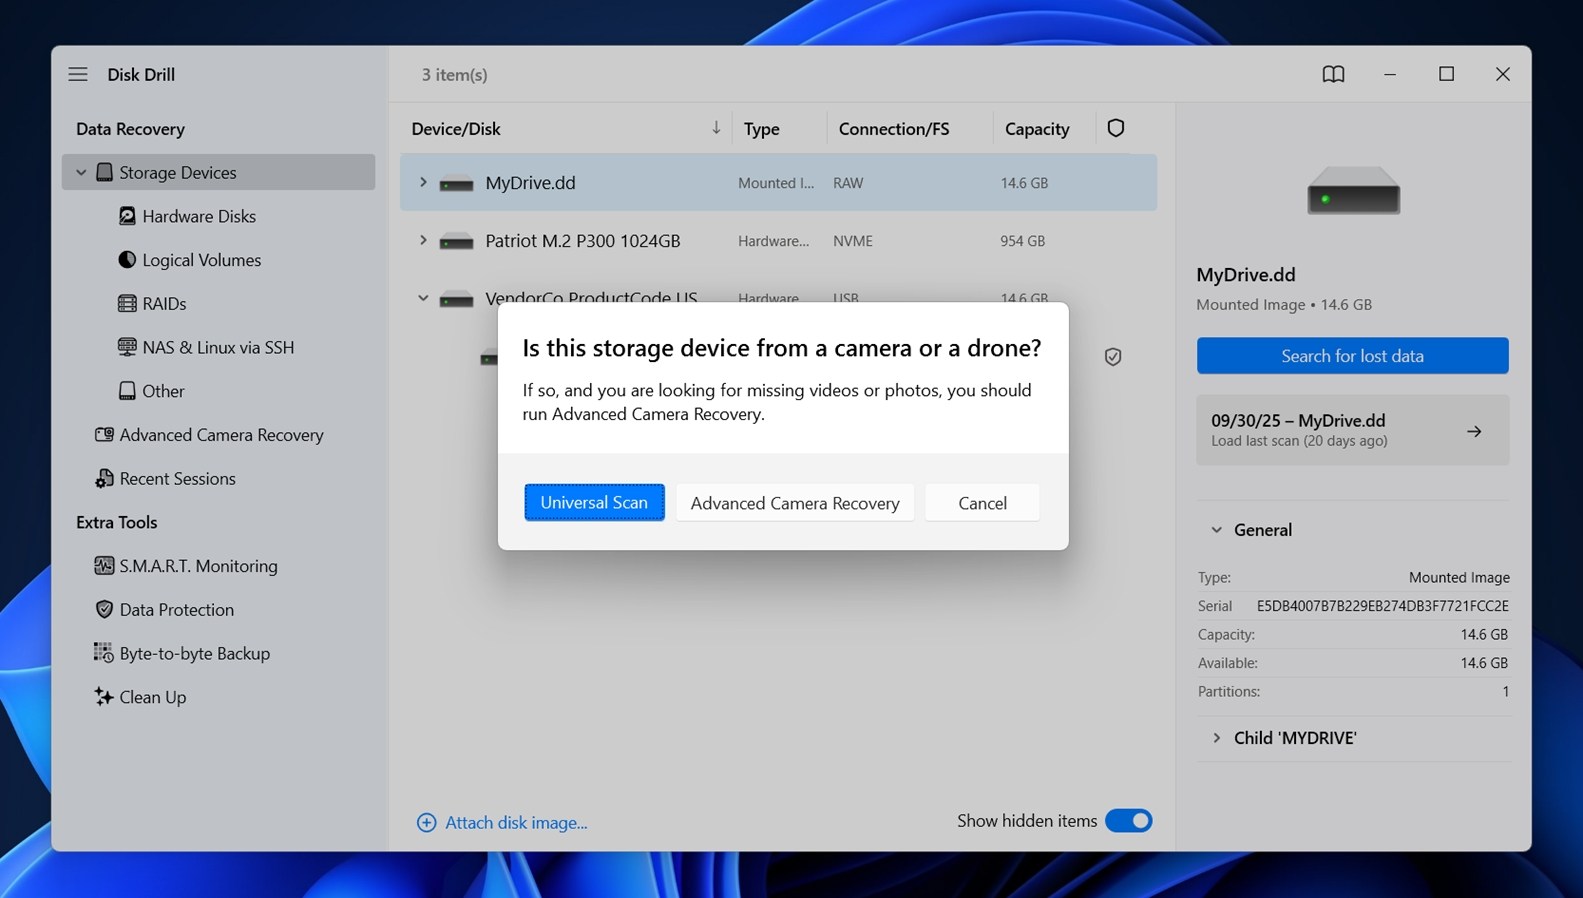 Disk Drill will begin scanning the image. You’ll see categories appear as it finds files: Documents, Videos, Pictures, and so on. You can click on one to view that file type specifically, or click “Review found items” to open the full list.
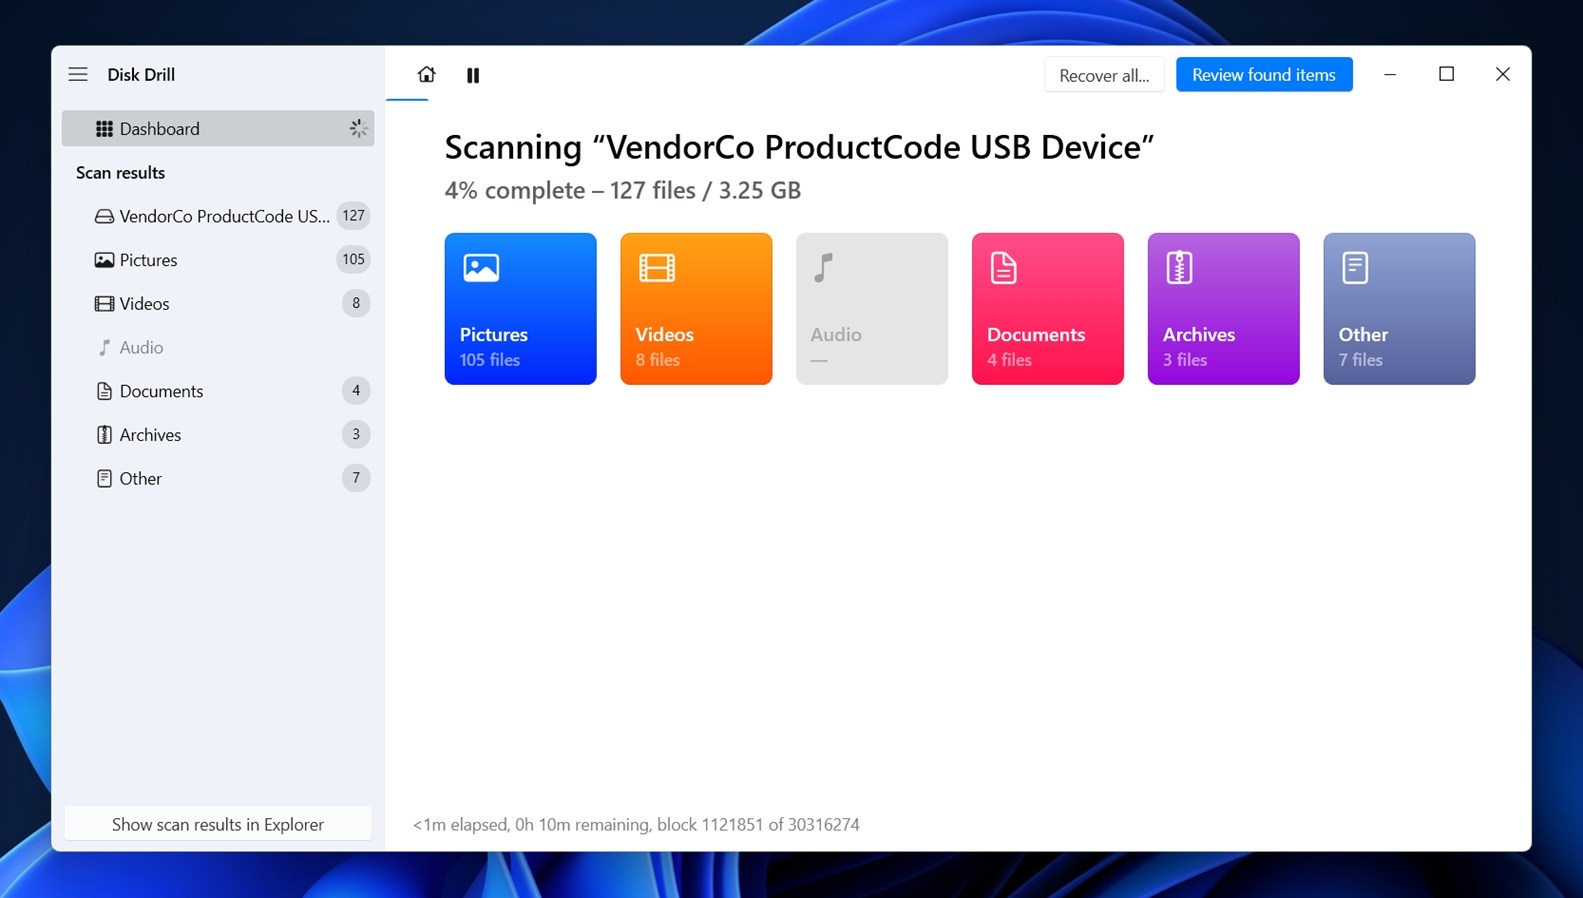
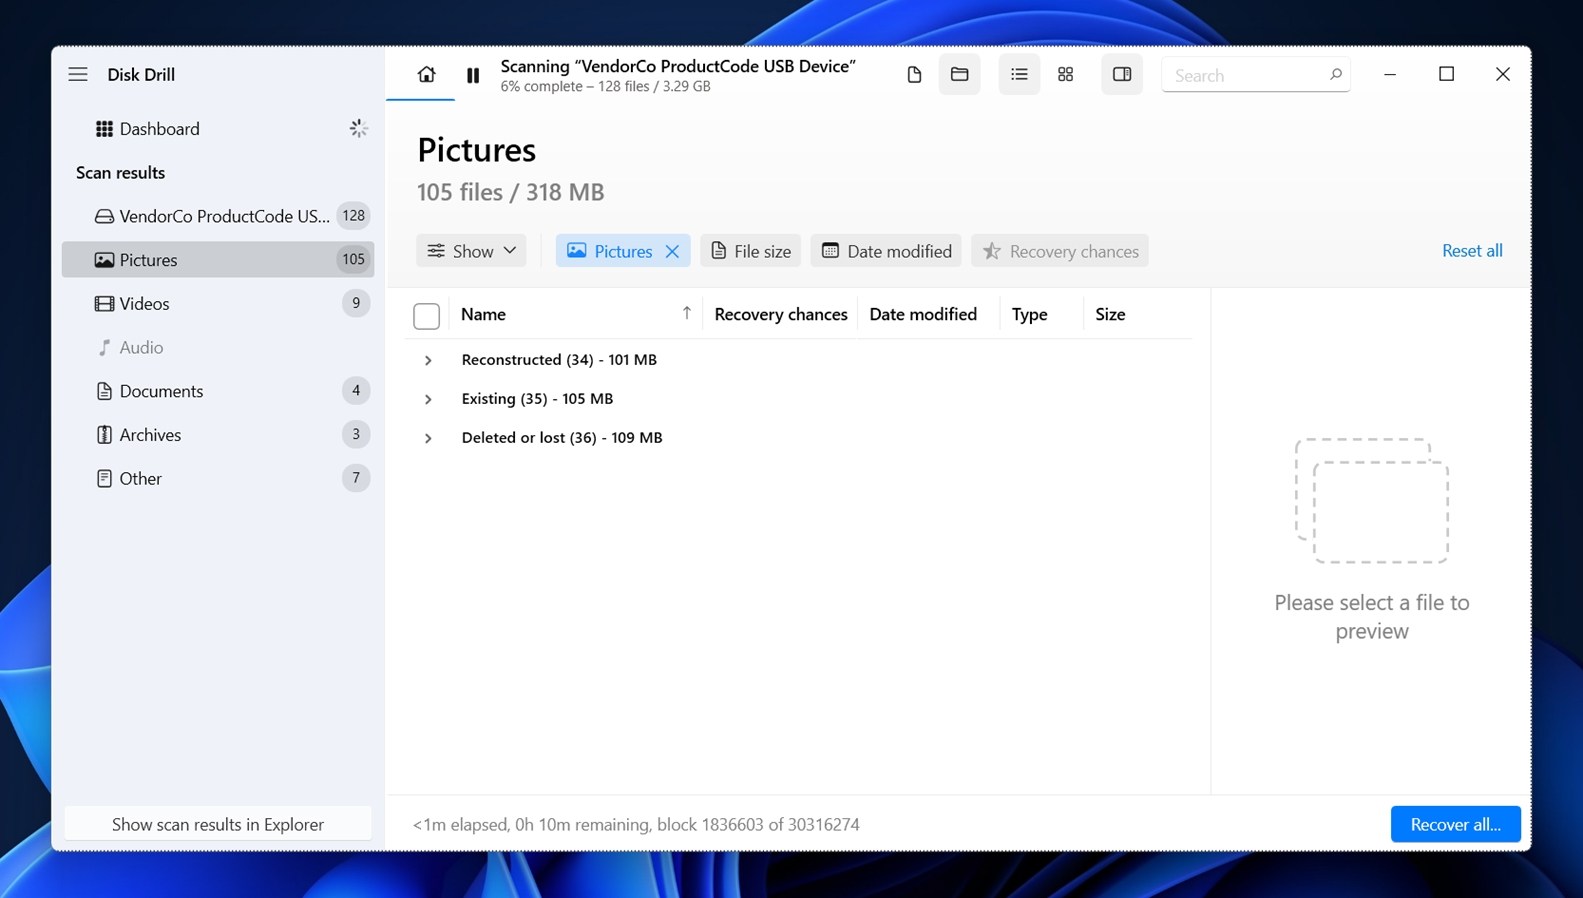
- Once inside the review screen, notice three sections: Deleted or Lost (these are files that were removed), Existing (These are files that still live on the drive and haven’t been deleted at all), and Reconstructed (these are files Disk Drill found using signature-based detection).
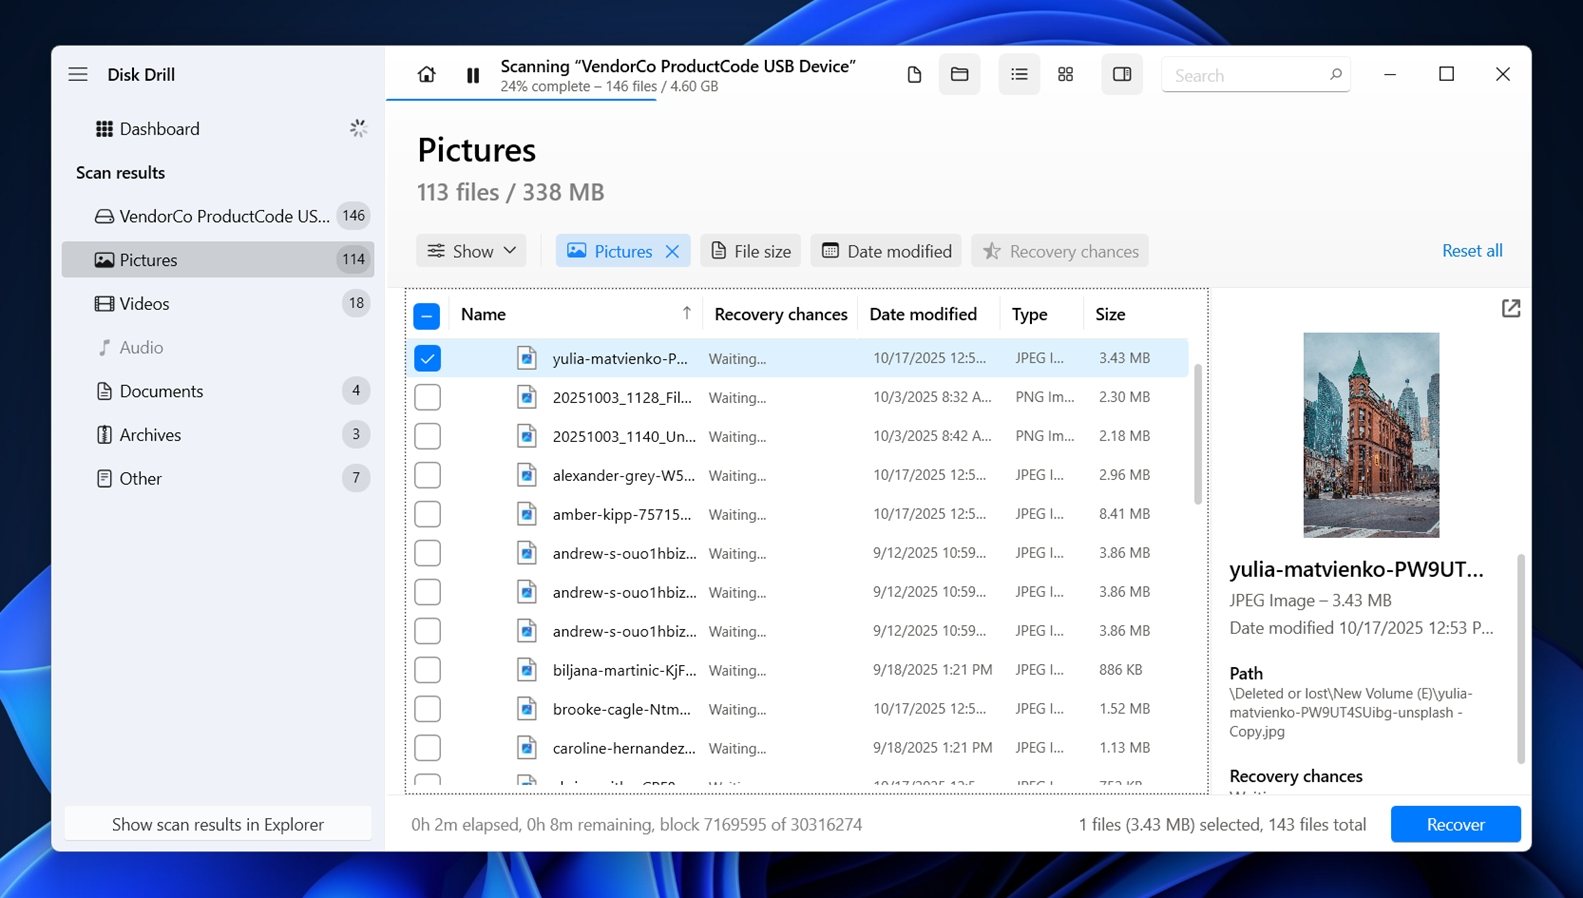
- Use the checkboxes to mark the files you want. Select any file and a preview will appear on the right (if you can see a preview it’s a sure sign that file is 100% recoverable).
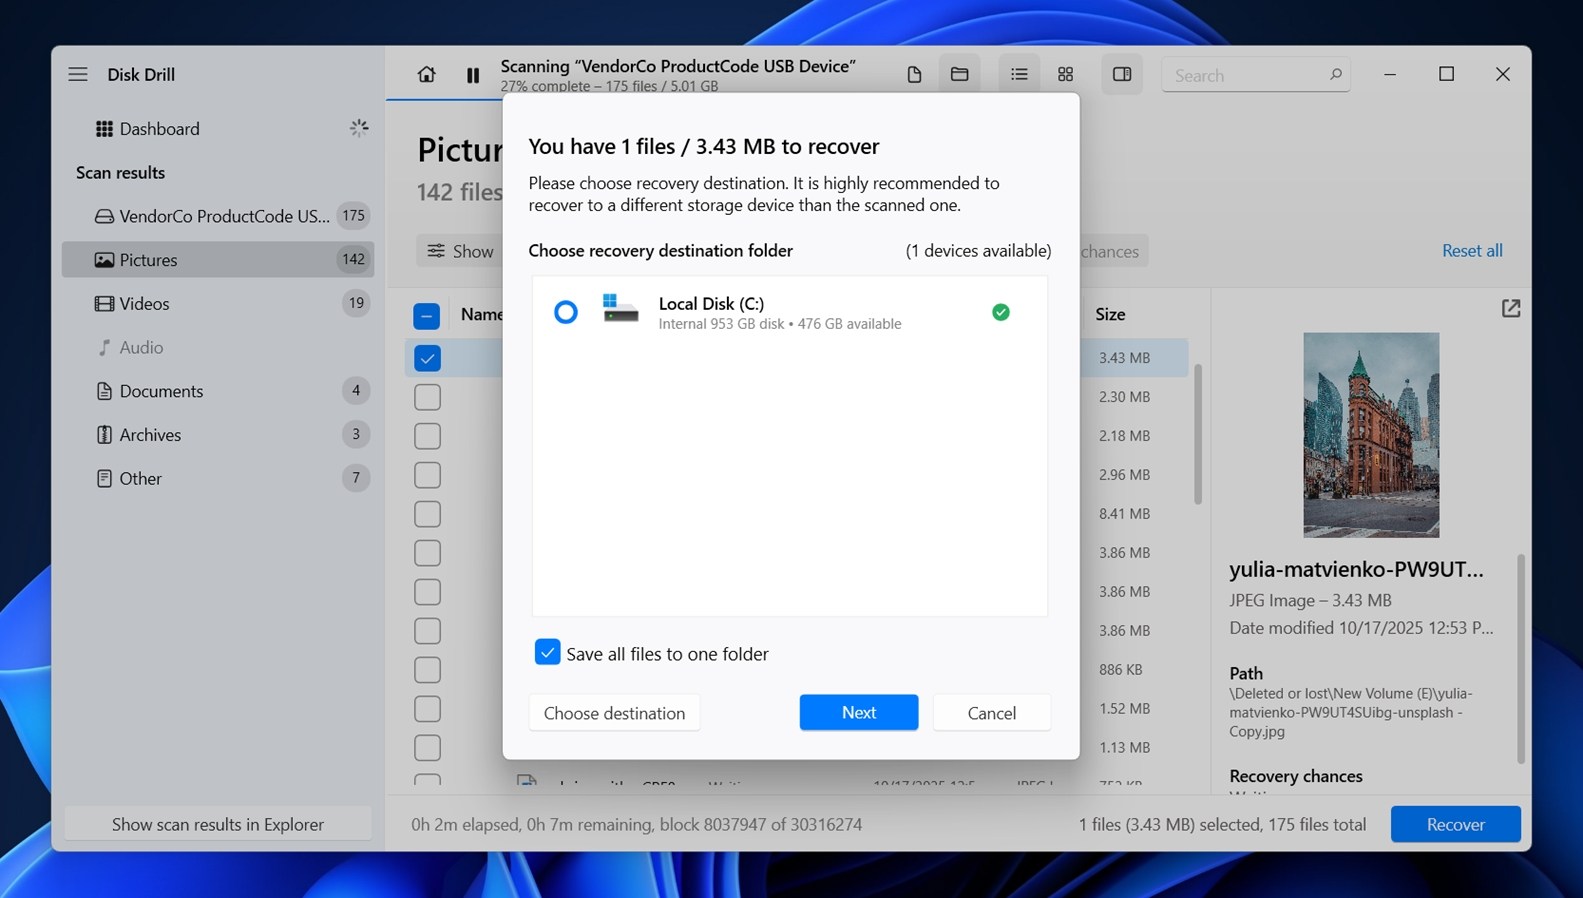
- Click “Recover” at the bottom. Choose where to save the recovered files (again, not your Seagate drive).
- Hit “Next” to start recovery.
After Disk Drill completes recovery, it will prompt you to view the results in File Explorer. Click the button, and the folder with your recovered data will open. In its free version on Windows, Disk Drill lets you recover up to 100 MB of data. This limit exists mainly to show whether the software can actually access and save your files before you decide to buy a license. But 100 MB can go a long way – sometimes enough to recover one or two important photos, or a handful of documents like Word files, PDFs, or Excel spreadsheets. For quick tests or small losses, that might be all you need. If you see your files, and they open fine, that’s your green light.
Quick Tip: While you’re in Disk Drill, take a second to check the S.M.A.R.T. Monitoring section under Extra Tools. It shows detailed health info for your Seagate drive – things like temperature, power-on hours, and reallocated sectors. If the drive is in bad shape, you’ll usually see warnings there. It’s a helpful way to know whether the drive’s issues are getting worse or if it’s safe to keep using it.
Method 2: Use Seagate Rescue Data Recovery Services
If the issue is physical, like your Seagate drive refuses to show up in Disk Management, doesn’t spin, or makes clicking sounds when powered on, then software won’t help.
At that point, you’re dealing with hardware-level failure. Stop everything and look into Seagate Rescue Data Recovery Services.
Rescue is Seagate’s own in-lab recovery option. Some drives come with a Rescue plan included in the box (usually noted on the packaging or inside the warranty info).
For reference, here’s a quick list of Seagate drives that include or support Rescue coverage:
External drives:
- Ultra Touch
- One Touch
- Expansion
- Backup Plus
- Photo Drive
Internal drives:
- IronWolf/IronWolf Pro
- SkyHawk/SkyHawk AI
- FireCuda
If yours doesn’t, you can still pay for the service separately.
Here’s how it works: you file a request through Seagate’s website, ship them your broken drive using their prepaid label, and their lab tries to recover your data. If they succeed, they send your files back (usually on a new external drive). If they can’t recover anything, they don’t charge you beyond the plan cost. Most cases take a few weeks.
This is the option to pick if the drive is physically damaged or not recognized by anything. No clicks, no lights, or repeating disconnects usually point to controller failure or internal hardware issues.
It’s not instant, but if your data matters and the drive won’t cooperate at all, Rescue is often the safest move.
How to Fix Common Seagate Hard Drive Problems
Now that, hopefully, you’ve recovered your files, let’s talk about Seagate hard drive recovery in the context of common issues many people run into. Not everything needs a lab. Sometimes, a few simple steps can bring a drive back to life or make it usable again. We’ve gathered a handful of fixes that, in our experience, actually work in many everyday cases.
We also have a dedicated guide that covers more tools and advanced methods, in case you’re dealing with edge cases. It includes recovery options using tools like TestDisk (great for lost partitions) and AOMEI Partition Assistant, which can help when the issue involves messed-up partition tables. These aren’t always necessary, but they can be useful in specific Seagate external hard drive recovery situations (or any HDDs, really, since most hard drive recovery principles apply across the board).
Method 1: Run Seagate Diagnostic Tool
SeaTools is Seagate’s tool for testing a drive’s health and fixing it. It comes with a graphical interface as well as a bootable program that’s more powerful. In either case, the tool helps you test your Seagate hard drive.
Here’s how to run it:
- Download SeaTools from Seagate’s official site and install it.
- Once you launch the app, your connected drives appear on the main screen.
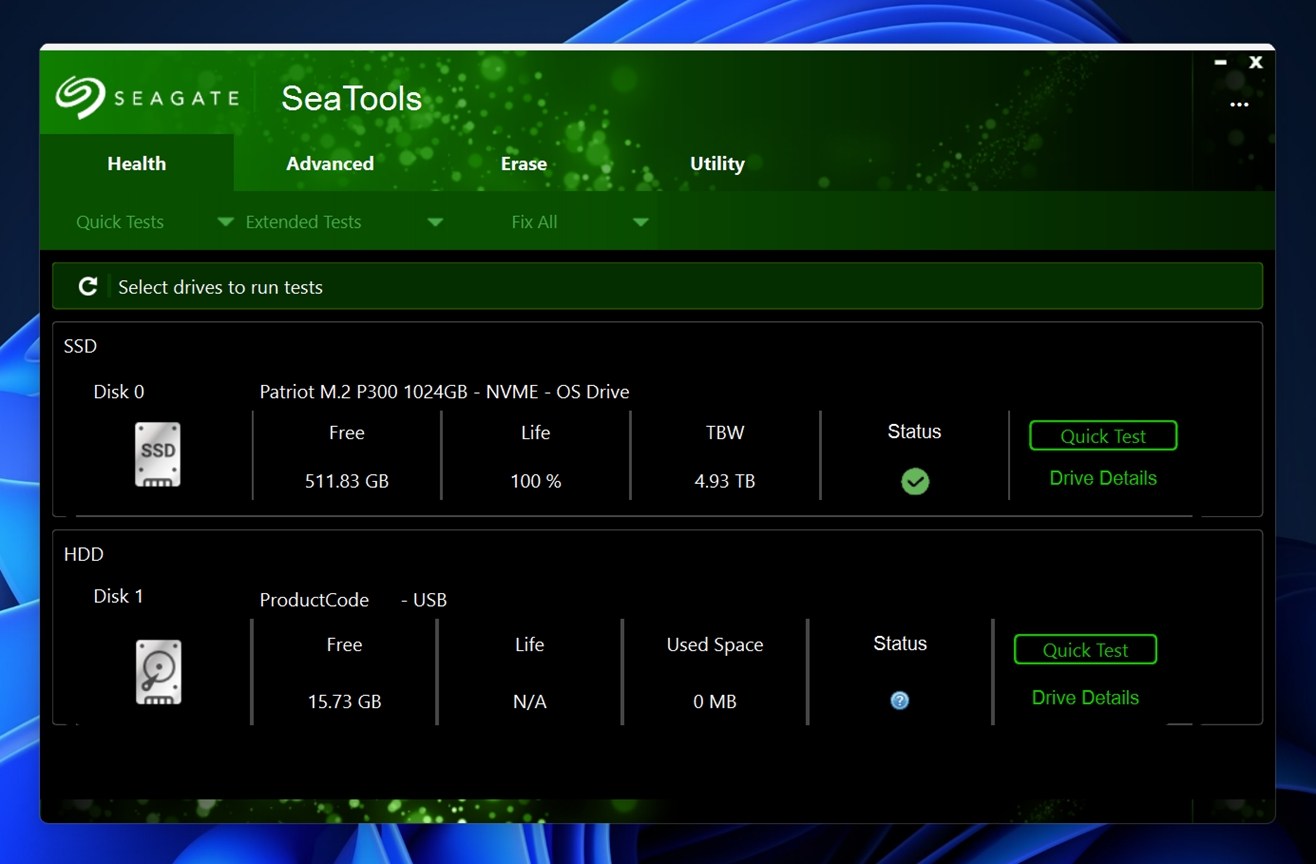
- You’ll see labels like “Disk 0” or “Disk 1,” and under that, info such as the drive’s type, capacity, firmware version, and status.
- If the Seagate logo shows up and the status has a green checkmark, that means the tool recognizes the drive, and you’re ready to run a test.
Click on the drive you want to test. Then head to the top menu bar and look under Health> Extended Tests. You’ll see main options.
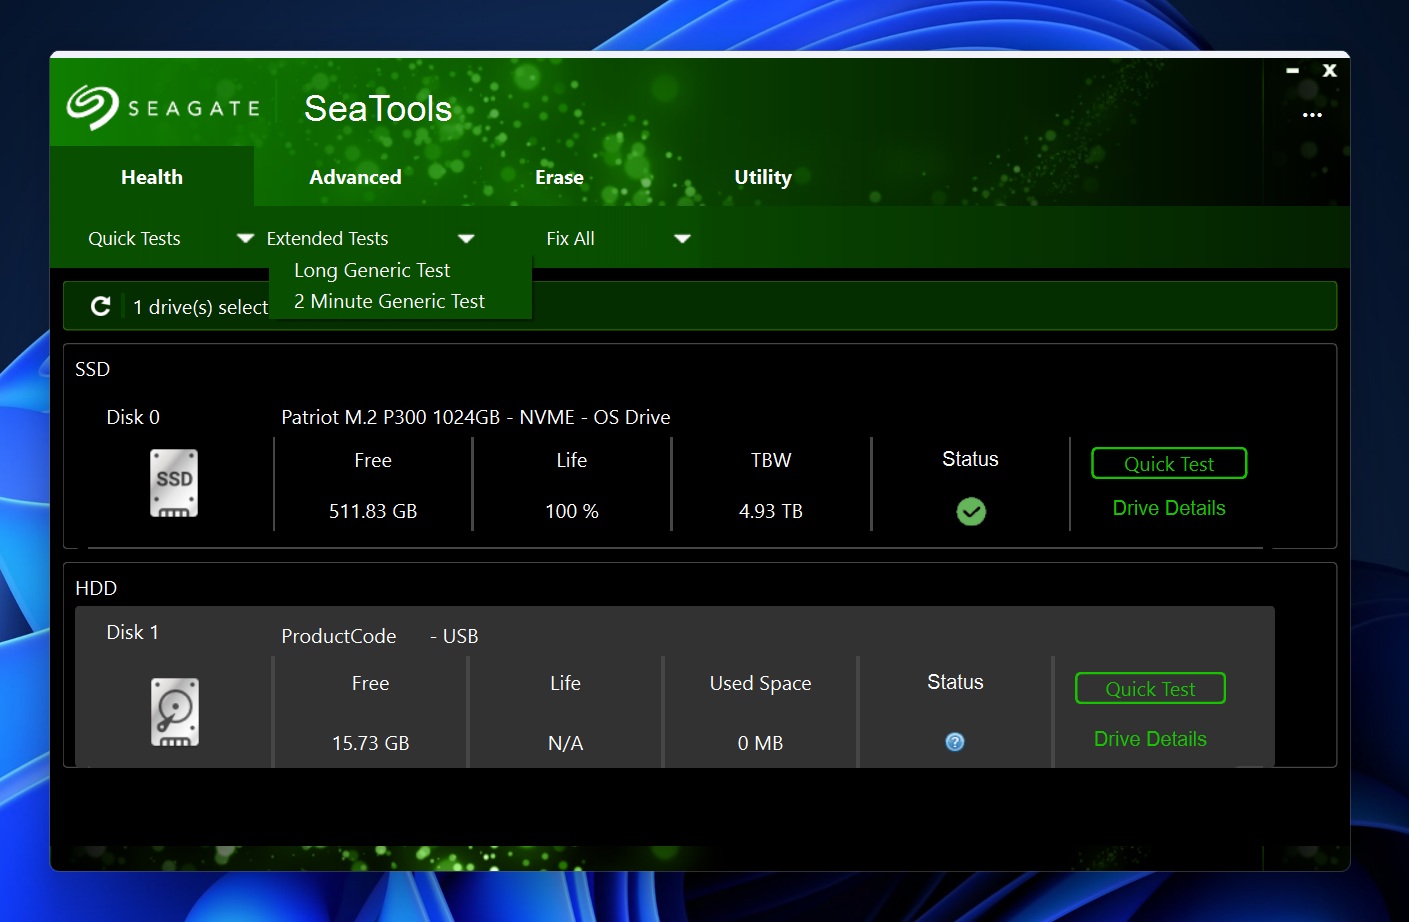
- Long Generic Test. This one goes sector by sector, reading each part of the drive to look for read errors or unstable areas. It’s useful for catching signs of physical wear or failing media. If this test hangs or fails, the drive may have bad sectors.
- 2 Minute Generic Test. A quick read test for basic health status. It’s faster, but won’t catch deep issues. Use this when you just want to rule out obvious problems quickly.
If the test finishes and says “Passed”, the drive is likely healthy on a hardware level. If it fails or freezes partway, that usually means physical damage or serious wear, and you’ll want to image the drive immediately or contact a recovery lab.
From the main screen, you can also click Drive Details to see things like S.M.A.R.T. status and power-on hours, or click Test Results to review a log of previous runs.
This tool doesn’t really “repair” drives or recover data, but it tells you whether the hardware is worth trusting, or if you’re running out of time. Always good to check this before you start reusing a drive.
Also, under the Utility tab in SeaTools, you’ll find a few extra tools that can be useful for advanced users or in edge cases:
- Set Max LBA. This lets you manually change the maximum accessible size of the drive by adjusting the Logical Block Addressing (LBA) limit. Most users will never need this. But in rare cases, if the drive was previously used in a device that set a size limit (like DVRs or NAS systems), restoring the full size with this tool might help. It’s also useful if the drive appears smaller than it should in Windows.

- Tunable Capacity. This is related to Set Max LBA. It’s another method of adjusting how much space the operating system can access on the drive. Some advanced RAID/NAS setups use this to lock in a specific usable size. Again, best left alone unless you’re working with a very specific configuration or following instructions from a support tech.
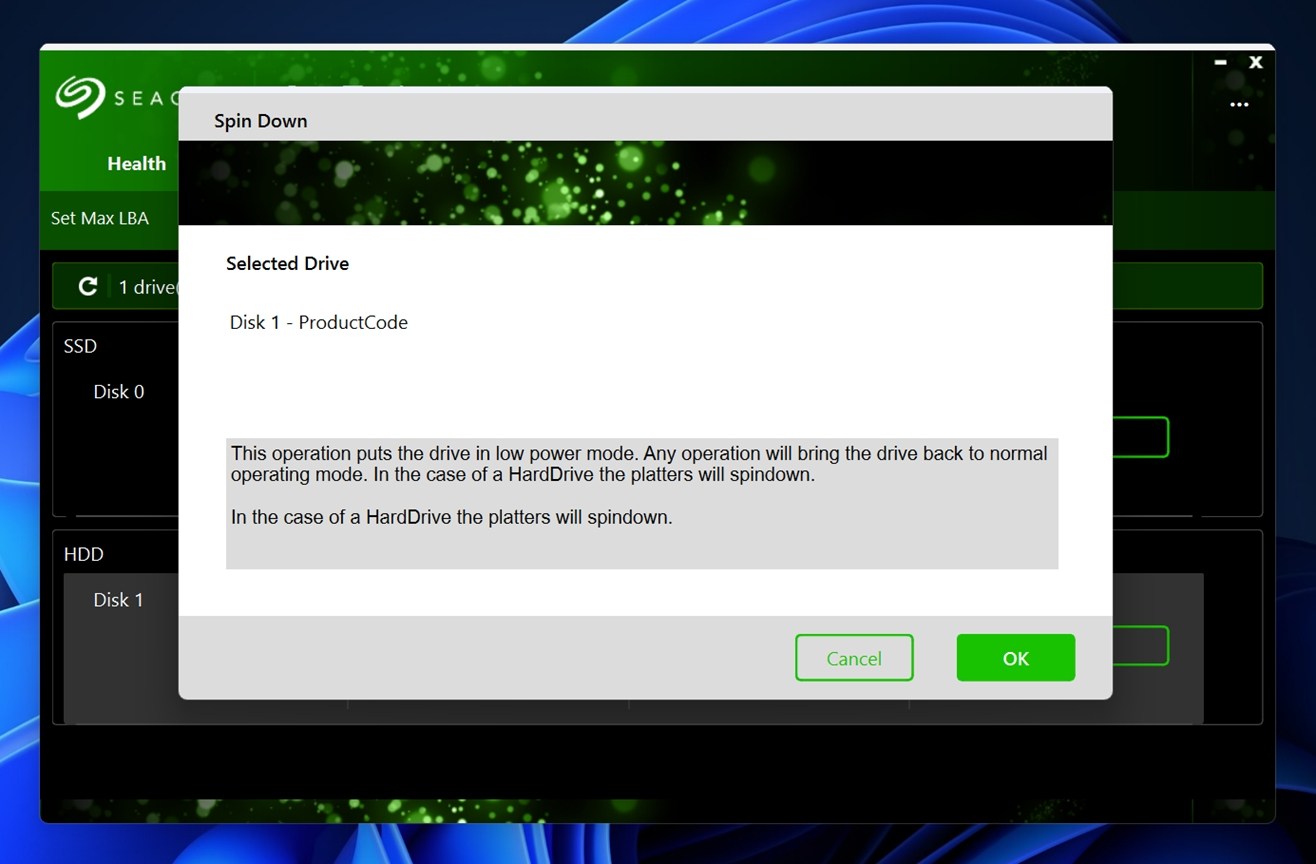
- Spin Down. This feature forces the drive to stop spinning. Useful for safe removal or testing how the system reacts when the drive powers down. It’s mainly for troubleshooting hardware behavior.
- Firmware Update. This one checks for firmware updates from Seagate’s servers and installs them directly. If your drive is acting strangely or has a known firmware bug, this can fix it. SeaTools will show the current firmware version and whether a newer one is available.
Method 2: CHKDSK
You’ve probably heard of this one before – CHKDSK is built into Windows and can fix certain drive problems automatically, like file system errors or bad sectors. If either of those is causing your hard disk to act up, Chkdsk will be able to fix it.
- Start by pressing Win+ R, typing cmd, and pressing Ctrl+Shift+Enter to launch an elevated Command Prompt.
- Execute the following command:
chkdsk F: /r /x
(Replace F: with the relevant drive letter)
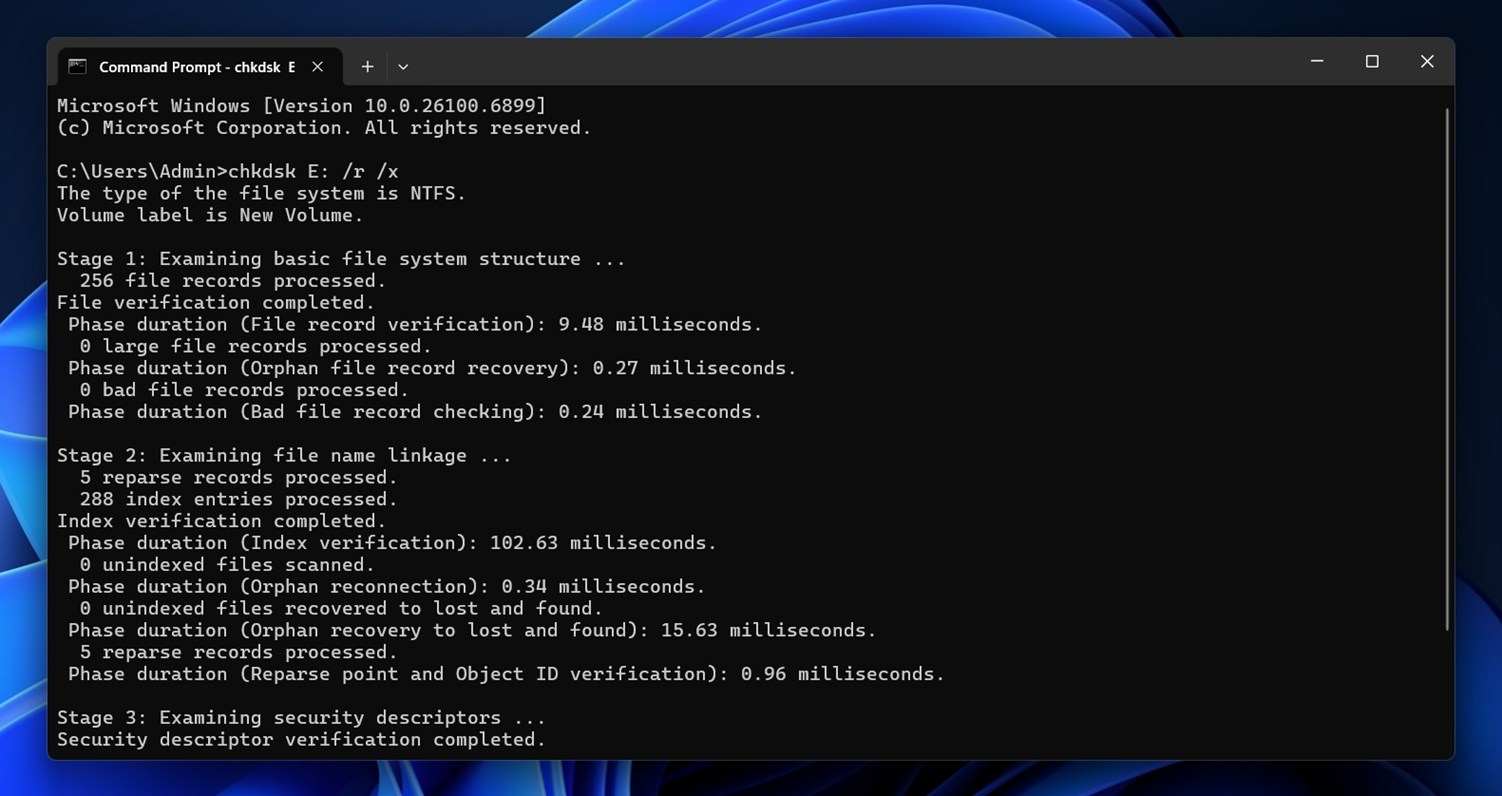
- Let the scan complete and then exit the window.
If Chkdsk finds errors, it will try to fix the errors automatically. After you’re done, see if you can access the hard drive.
If you want to dig deeper into how CHKDSK works, what those /f, /r, and /x switches actually do, and when it makes sense to use them, we’ve got a full guide that breaks it all down. It explains the safe use cases and how to check results after running it. Worth a look.
Method 3: Formatting
And of course, the most reliable way to clear up almost any non-physical issue with a Seagate drive is to format it.
If you’ve already recovered your data, a clean format usually fixes all problems. It wipes out corrupted partitions, resets the file system, and gives you a fresh start.
To explain that in more technical terms: formatting does two things.
- First, it erases the file system metadata – the part that keeps track of where files are stored, what folders exist, and what structure the drive follows. If that data is broken (like with a RAW file system or corrupt MFT), Windows can’t understand the drive. Formatting resets this map from scratch.
- Second, formatting creates a new file allocation table or volume boot record, depending on the file system you choose. NTFS, for example, builds a new MFT (Master File Table), which is critical for how Windows reads and writes to the disk. exFAT builds a simpler structure, more cross-platform but without journaling support.
You can format the hard drive from the Disk Management console like so:
- Press Win+R, type diskmgmt.msc, and press Enter to launch the Disk Management console.
- Right-click on the Seagate hard drive and select Format.
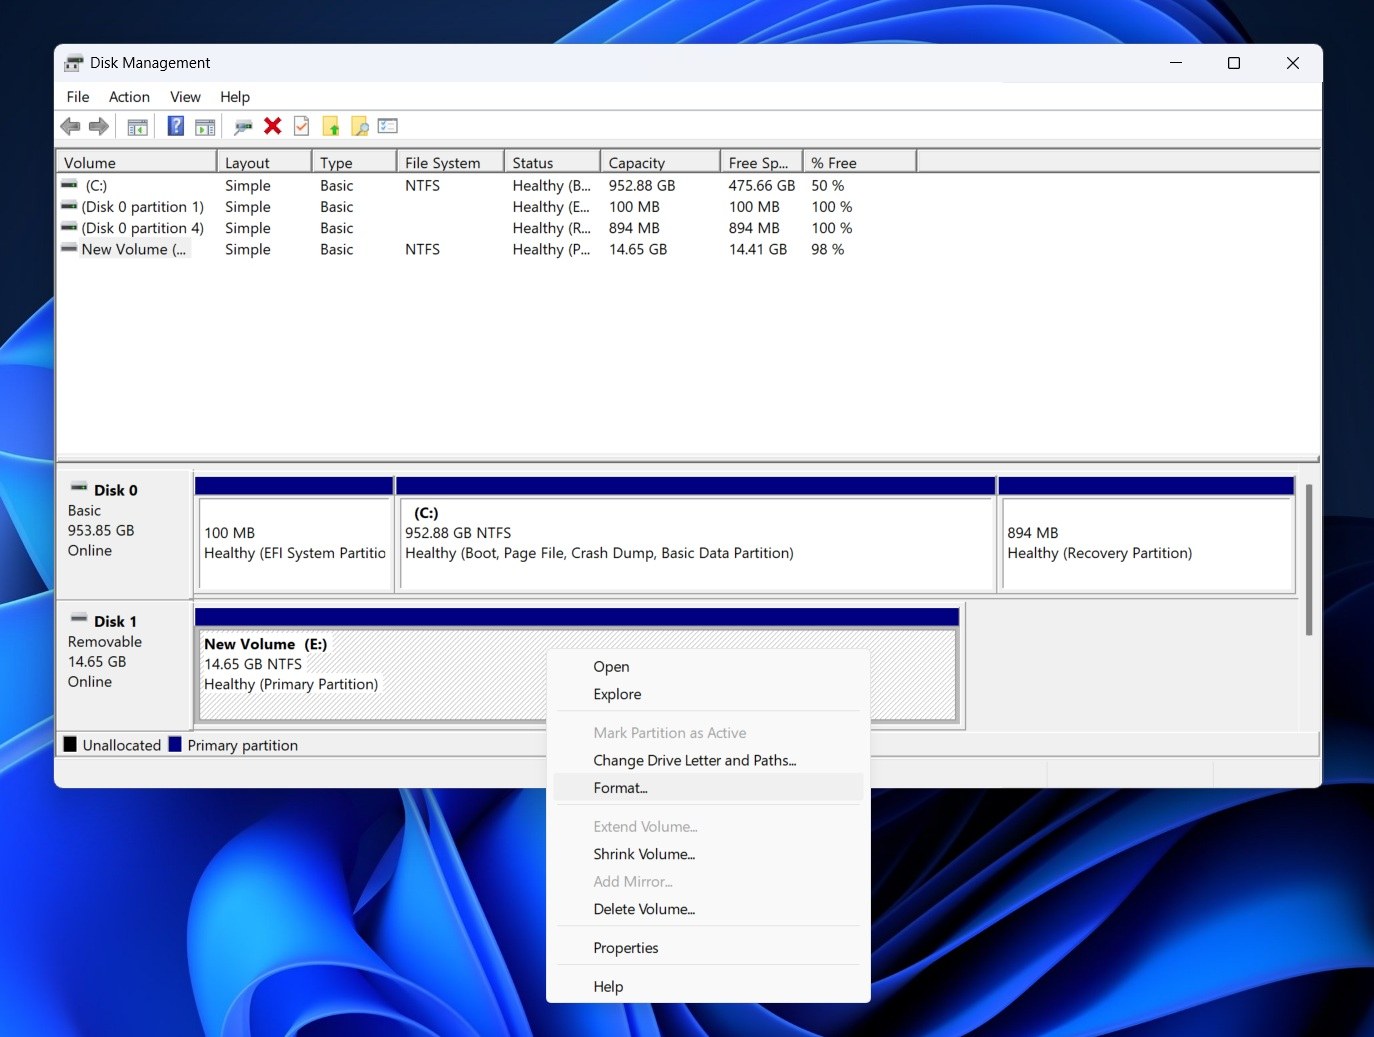
- In the format window, select a file system, check the box next to Perform a quick format, and select OK. Leave other fields as-is, unless you want to change the Volume label to something else.

Once you’re done formatting, you should be able to access the disk, unless it has been damaged physically.
Still Have Unanswered Questions About Seagate Disk Recovery?
If you’ve made it this far and something still isn’t clear (or your Seagate drive is doing something weird we didn’t cover), feel free to leave us a comment right under this article. We check and reply regularly, and your question might help others too.
Also, don’t forget to scroll through the FAQs section. We’ve gathered common questions from real users, and sometimes share quick solutions that don’t always make it into the main guide. You might find a quick answer to exactly what you’re dealing with.
FAQs
What are the chances of 100% Seagate hard disk data recovery?
No one, not even Seagate’s own lab, can guarantee a 100% recovery. It depends entirely on the condition of the drive and what happened after the problem started.
If your Seagate drive had a simple file system issue or was accidentally formatted (and you stopped using it right away), your chances are pretty good. We’ve seen plenty of cases where people recovered everything – every folder, every file. But if the drive kept running or new files were saved after the loss, that changes things.
That’s because when data gets deleted, the files aren’t really “gone” right away – they’re just marked as free space. New data can overwrite them at any point. And once a sector is overwritten, nothing (no software, no lab) can bring that data back.
So it all comes down to timing and how the drive was used after the issue. If you acted fast, used safe recovery steps, and avoided writing anything new to the drive, you gave yourself the best shot.
Does Seagate offer free data recovery?
Yes, but with a caveat. Seagate offers its in‑lab “Rescue Data Recovery Services” for free only if your specific drive came with a valid Rescue plan included.
Here’s what you should know:
- Some Seagate drives (especially certain external lines) include a Rescue plan at purchase.
- If your drive did not include the Rescue plan, you’ll need to pay to add it or pay for the in‑lab service.
- Free doesn’t mean unlimited. Even with a Rescue plan, the “free” service is typically a single attempt, may involve shipping the drive to Seagate, and only applies to data recoveries that meet their policy and conditions.
- If your drive has physical damage, or you miss the plan window, or the damage is outside of what the plan covers, you might end up paying, or Seagate may deem the drive unrecoverable under the free plan.
If I don’t qualify for free recovery, what is the Seagate data recovery cost?
The cost for Seagate’s in‑lab recovery varies, and Seagate itself doesn’t publish flat rates for all cases. The Seagate data recovery cost depends entirely on the situation – on what went wrong, how much work is involved, and what type of drive you’re sending in.
Expect prices to start in the several-hundred-dollar range and go up from there. In our experience, recovery for logical issues can cost anywhere from $300 to $600, depending on drive size and condition. If the problem is physical, the cost can jump to $1,000 or more (especially if clean-room work is needed).
Also, you don’t have to use Seagate’s lab. Other reputable recovery services exist, and sometimes they’re faster or more flexible. Hard drives follow the same basic recovery principles regardless of brand, so you’re not locked into Seagate’s ecosystem once the drive is out of warranty.
How does Seagate external hard disk data recovery differ from internal ones?
When it comes to Seagate external hard drive data recovery, the core process is mostly the same as with internal drives. But there are a few differences to keep in mind:
- Seagate external drives include a USB-to-SATA bridge built into the enclosure. If the drive isn’t recognized, it’s sometimes not the actual hard disk that’s broken – it’s the USB controller board. In many cases, the internal SATA drive is still fine, but the enclosure makes it harder to access.
- With external models like Backup Plus, Expansion, and One Touch, bad cables, underpowered USB ports, or faulty power adapters can make the drive appear “dead.” Internal drives don’t have this problem, they’re plugged directly into the system’s motherboard and power supply.
- Some Seagate external drives use built-in hardware encryption. If the USB controller fails, even connecting the bare drive to a SATA port may not help. You’d still need that exact controller board to decrypt the data. Internal drives rarely come with this kind of encryption unless it’s software-based.
That said, internal drives come with their own complication, especially if it’s a system drive (the one running Windows). If the OS is damaged or the system won’t boot, you may not even be able to run recovery software without booting into another environment. In those cases, you often need to remove the drive, connect it to a working PC, or use a bootable recovery disk or external OS setup.


