 If you closed Notepad without saving or deleted a text file by mistake, you’ve landed on the right guide. We’ve seen tons of people ask how to recover Notepad files in situations like these, so we decided to put together every method that has proven useful. Whether it’s built-in recovery features or third-party options, we’ll walk you through what works, what doesn’t, and what to try first.
Does Notepad Autosave on Windows?
Let’s clear something up right at the start – classic Notepad does not autosave. If you’re using the regular Notepad app on Windows 10 or even some versions of Windows 11, and you close a file without saving, that text is gone. There’s no backup in the background. No auto-recovery feature like you’d find in Microsoft Word. Notepad was built to be lightweight and minimal, which unfortunately includes having zero safety nets for unsaved work.
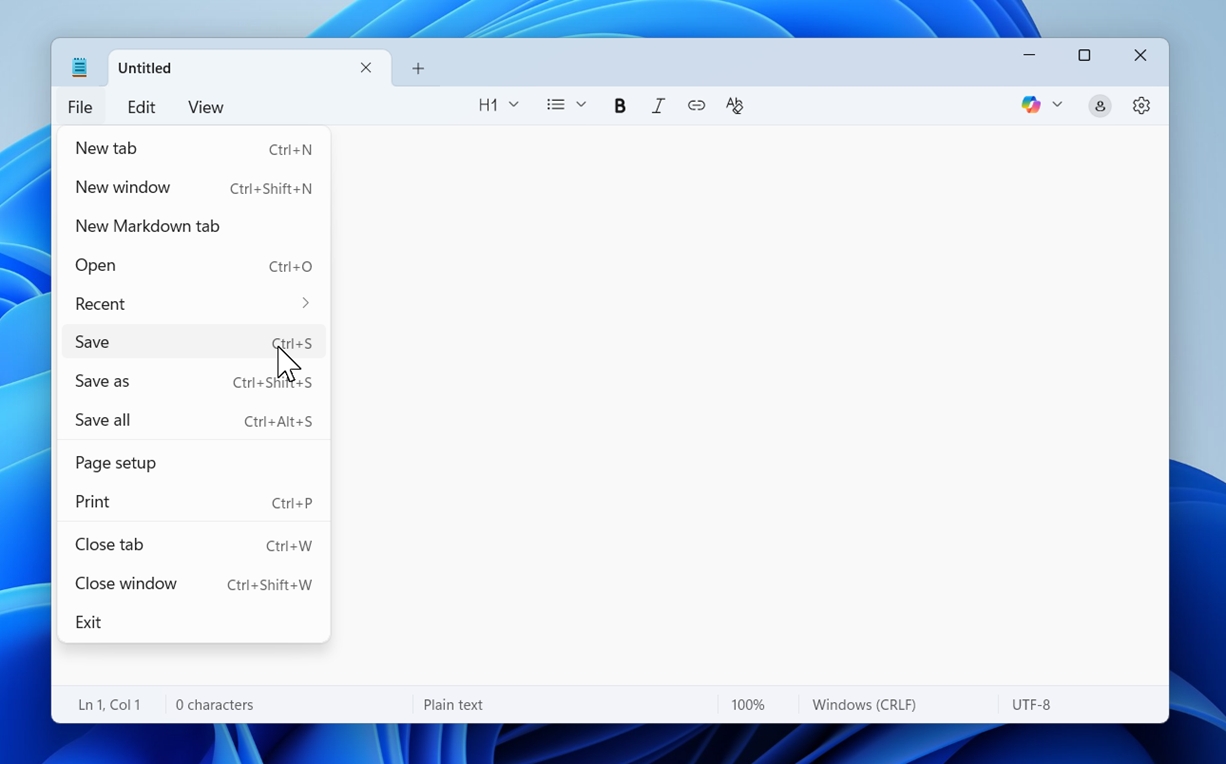
Now, if you’re using the newer Notepad app that comes with Windows 11 (starting with version 11.2307.22.0), there’s a bit of good news. It includes a session restore feature. That means if you had tabs open and didn’t save your work, Notepad can bring those tabs back when you reopen the app. It’s not a full autosave, but it’s close.
Still, it’s important to manage expectations.
We’ll cover all your options in detail – with step-by-step instructions, screenshots, and clear examples – so you’re not left guessing. To keep things simple, this guide is split into two parts:
First, we’ll walk through how to recover deleted Notepad files – those you saved at least once but lost later. Then we’ll tackle the unsaved file scenarios, where Notepad was closed before you ever hit Save.
This way, you can jump straight to the part that matches your situation and avoid wasting time on fixes that don’t apply.
How to Recover a Deleted Notepad File
Now, here are all the methods you can use to recover a deleted Notepad file. We’ll start with the simplest (and let’s be honest, the most obvious) ones first, like checking the Recycle Bin. Then we’ll move into more advanced options like version history and recovery tools.
If you already know the Recycle Bin is a dead end for you, feel free to skip ahead. We’re including every possible method because each situation is a little different – and the one that didn’t help someone else might be exactly what works for you.
Method 1: Use the Ctrl + Z Command
If you’ve only just deleted your Notepad file or accidentally moved it, your first move should be to try Ctrl + Z. This is the basic “undo” shortcut in Windows, and yes, it can work outside of Notepad.
Here’s when it might help:
- You deleted a file from a folder using right-click or Delete.
- You accidentally dragged it into another folder.
- You renamed a file and lost track of the original name.
To try it, open the folder where the file was and simply press Ctrl + Z. If that folder was active when you deleted or renamed the file, Windows might undo the last file action.
It doesn’t work in every case. If you’ve restarted your system or done other actions in between, the undo history might be cleared. But if you act quickly, this is the fastest possible way to bring back a deleted Notepad file without any tools or settings.
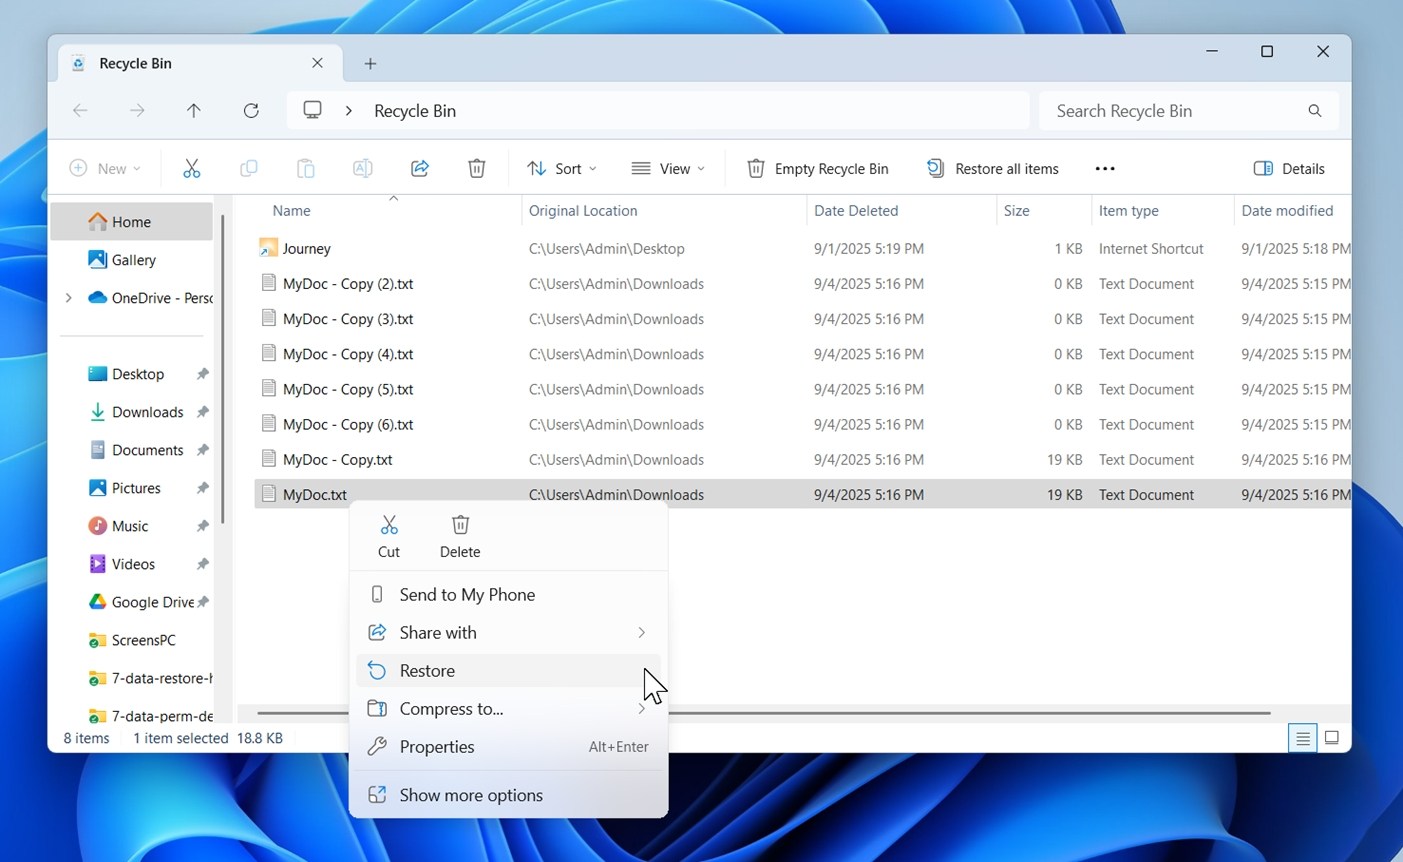
Method 2: Restore Notepad File from the Recycle Bin
Usually, a deleted file is sent to the Recycle Bin if you didn’t press Shift + Delete (permanently delete) to delete your Notepad file. So you can try to recover a Notepad file by checking the Recycle Bin and searching to see if your file is still there.
Restore your file by doing the following:
- Open the Recycle Bin.
- Scroll down until you see your file, or use the search bar if there are a lot of files in the Recycle Bin.
- Once you locate your file, right-click on it and choose Restore. This will return the file to its original location.
Method 3: Recover Notepad Files Using Data Recovery Software
If the file’s not in the Recycle Bin, maybe it was already cleared, or it never went there in the first place. In that case, your best bet to recover a lost Notepad file is to use a data recovery tool.
These apps scan your drive for deleted files that still physically exist on the disk, even if Windows no longer shows them. Notepad files, being simple .txt documents, are usually easy to detect – if they haven’t been overwritten yet.
There are plenty of recovery tools out there, and we’ve actually put together a full ranking of the best data recovery software for Windows where you can compare your options in detail. Many of them are more than capable of recovering Notepad files. But for the sake of this guide, we’ll focus on Disk Drill, because in our experience it strikes the best balance between recovery performance and ease of use. It also includes features that allow you to actively take care of your data so that data recovery is much easier going forward.
Follow the instructions below on how to recover Notepad files using Disk Drill:
- Download Disk Drill. Install it, then open it.
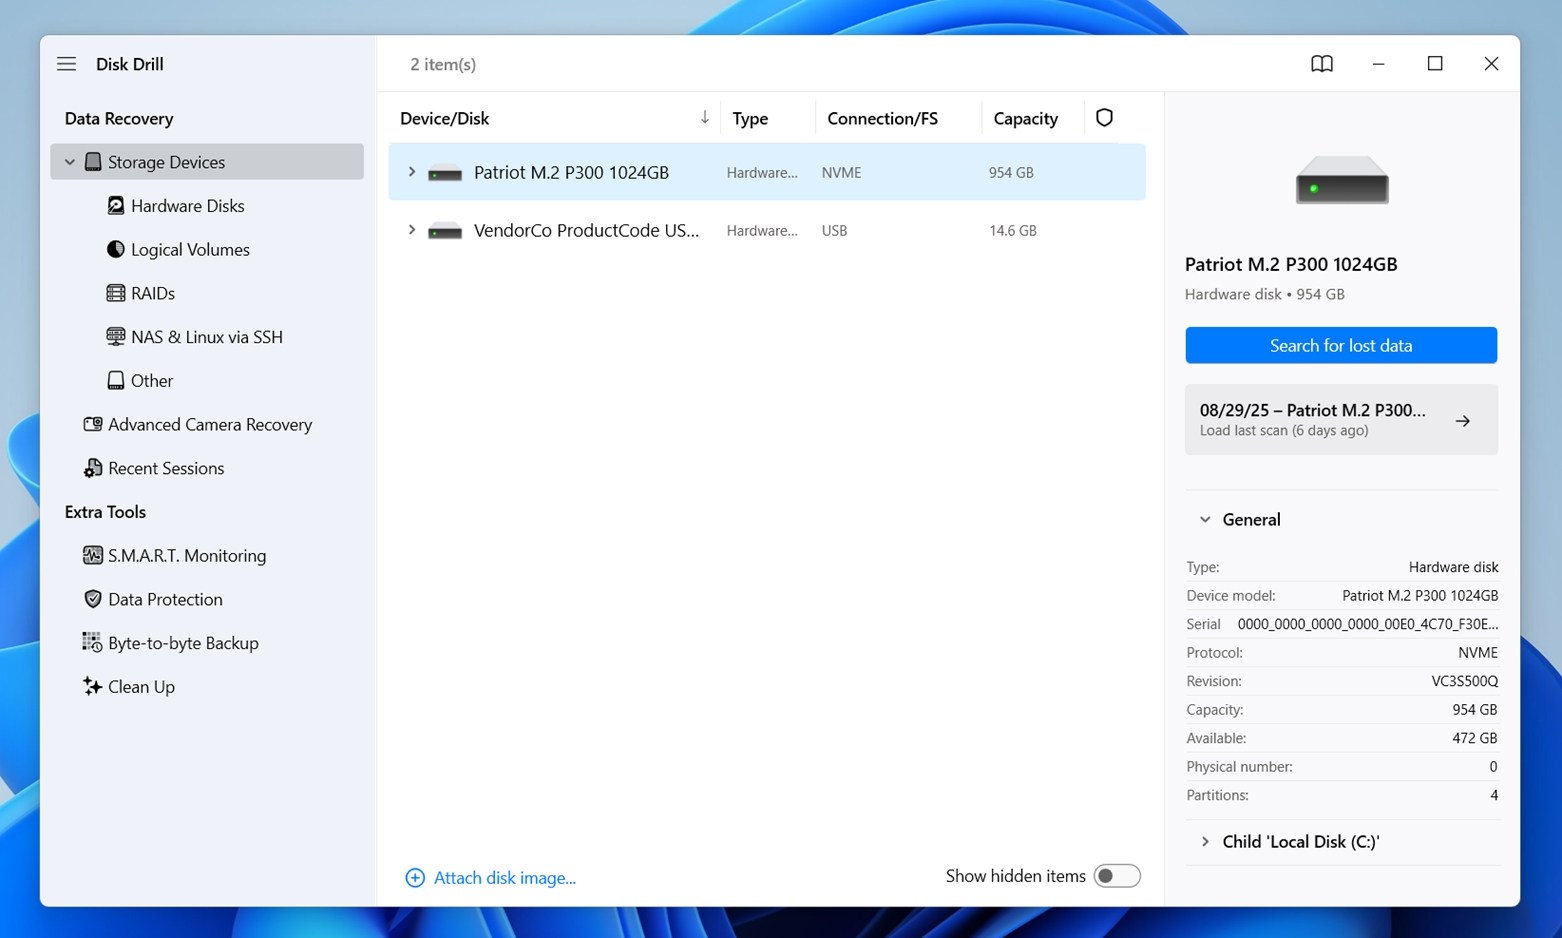
- Select the drive that contained the Notepad file before it was deleted. Click Search for lost data. This will begin the scan for any recoverable data. It might take a bit, depending on the size and condition of the drive. USB sticks and external drives with slower connections may take longer. If your file was on an external device, Disk Drill may prompt you to select a scan type – go with Universal Scan. It works especially well for documents, including plain-text files like Notepad notes.
- You don’t have to wait for the scan to finish to start looking.
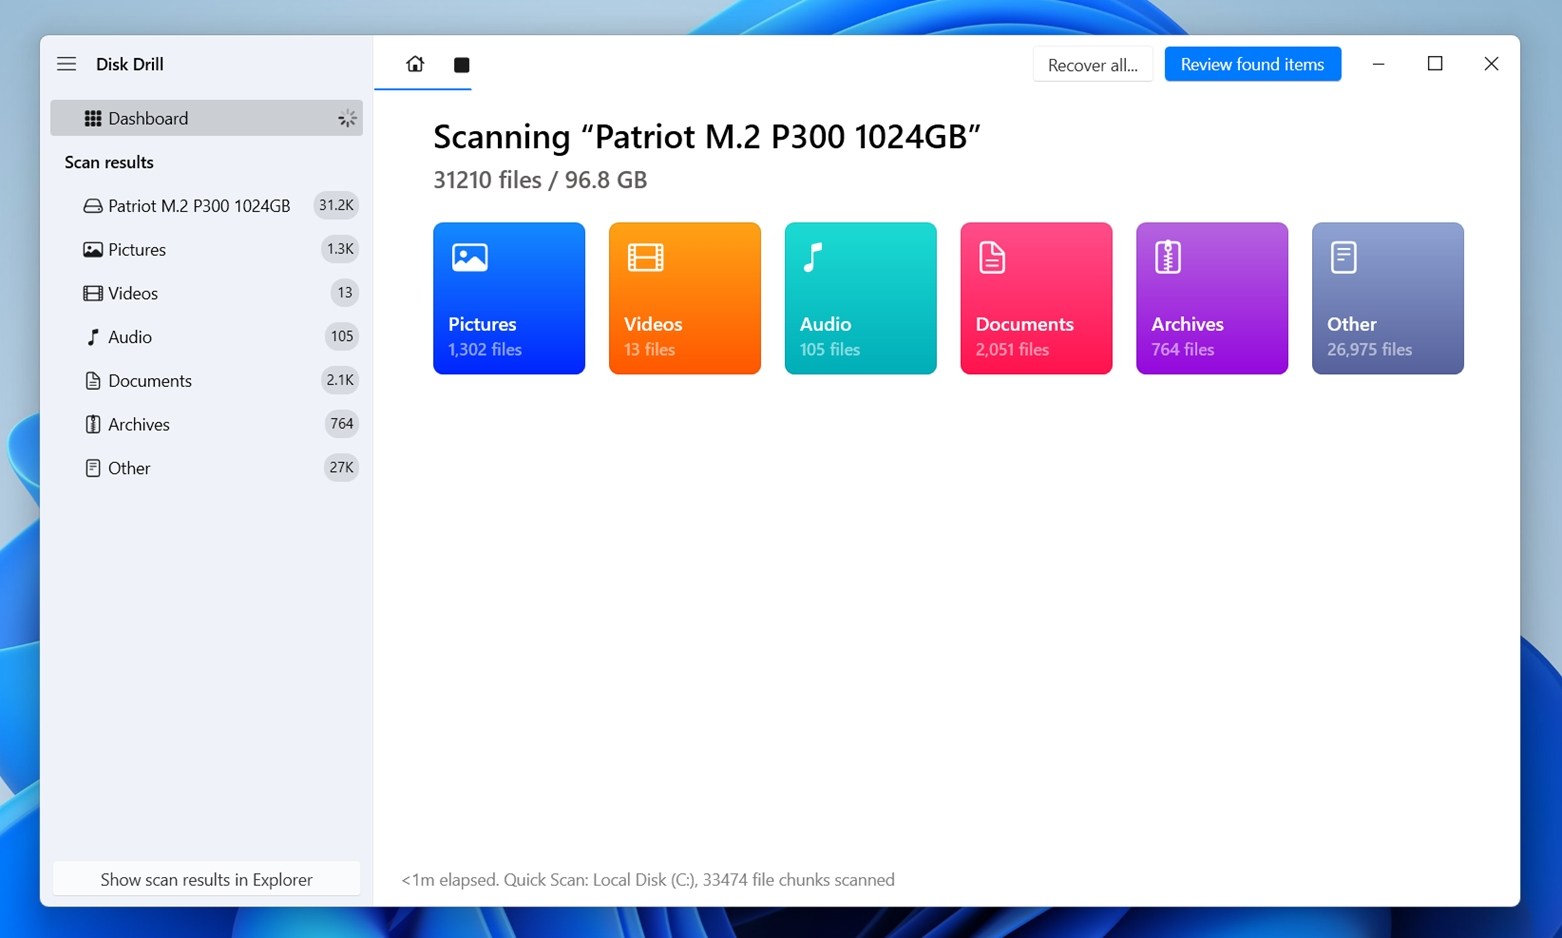 You can click Review found items at any time to browse what Disk Drill is discovering in real time.
The results will be grouped into categories like Documents, Pictures, Archives, etc. You can either go with the Documents section right away or view all files and then search manually.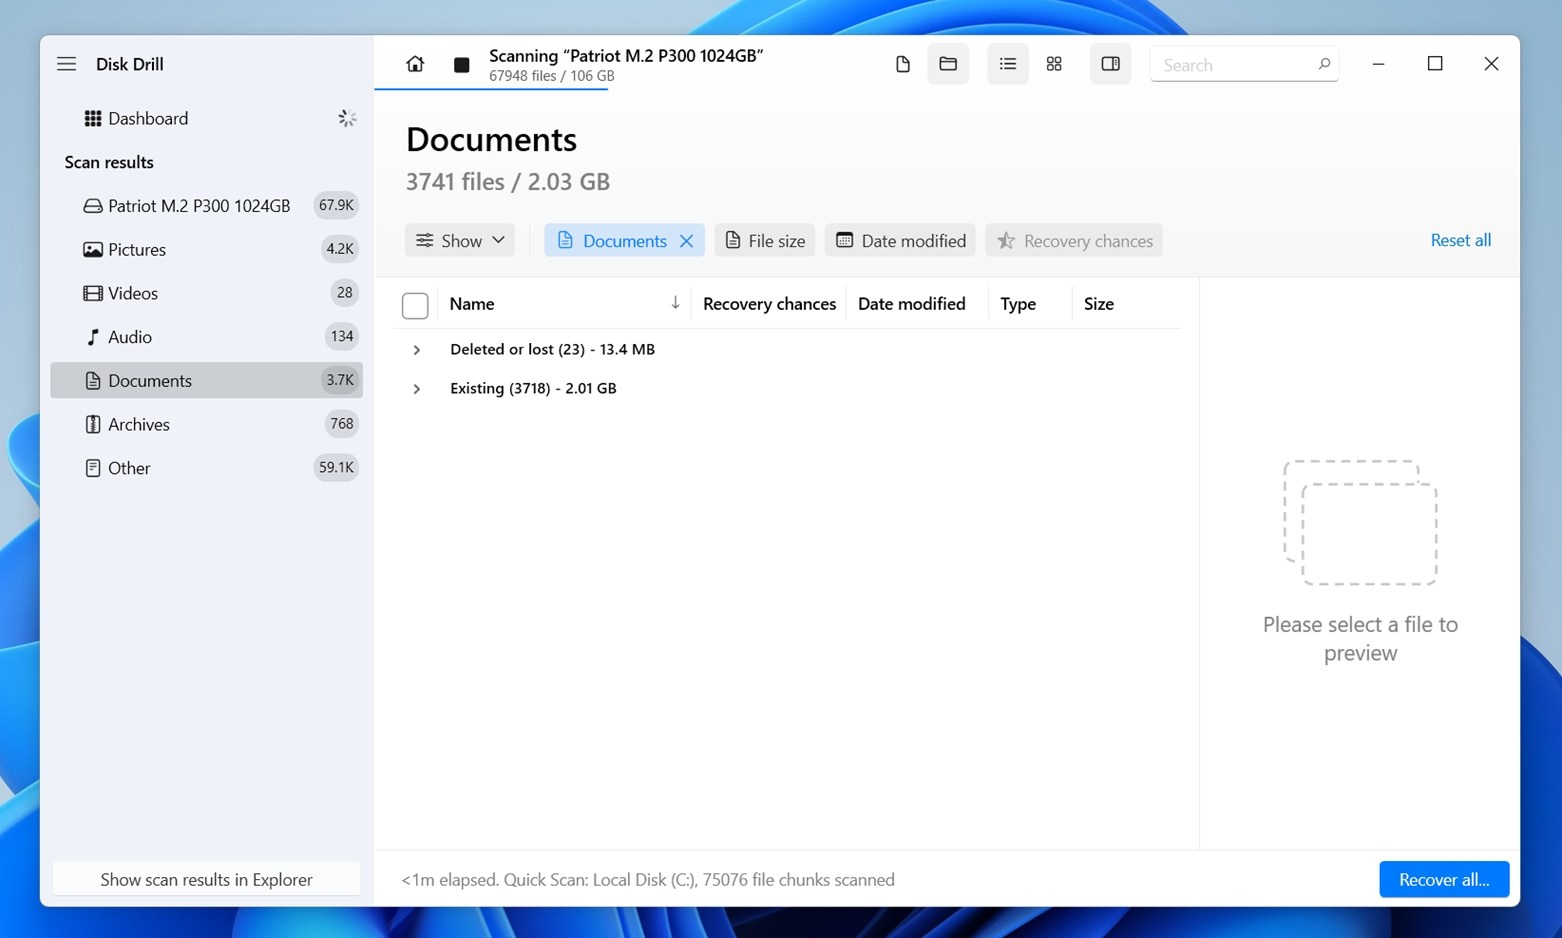
- Once you’re inside the file list, you’ll see Disk Drill’s typical layout with tabs like: Deleted or Lost (likely where your .txt file will appear), Reconstructed (files Disk Drill rebuilt using file signatures), Existing (not as relevant here, but good to check if you think the file was hidden or inaccessible).
You can also switch to Tree View if you’re looking for familiar folder paths or use the left panel to filter down by format (e.g., TXT under Documents). - To save time, use the search bar at the top of the window and type either the original filename, part of the name, or simply .txt to list all recoverable Notepad files.
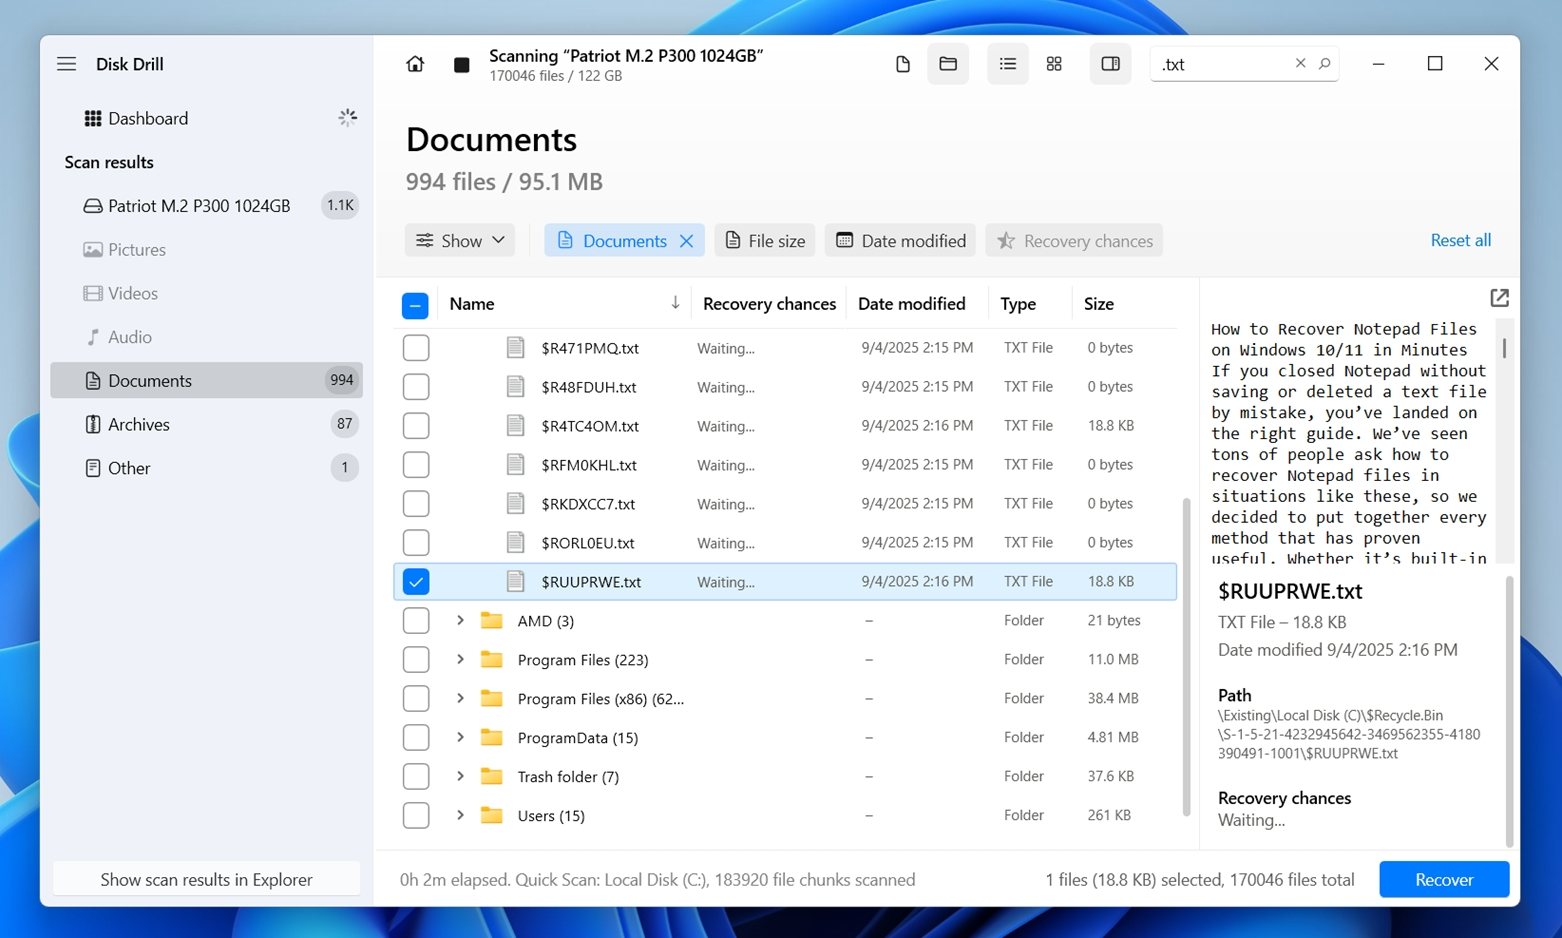
- When you click on a file, Disk Drill shows a preview on the right. If the text appears clearly in the preview, that’s a 100% sign that the file is recoverable. You’ll also notice each file has a recovery chance indicator, ranging from High to Low. A High rating almost always means success, while Average or Low suggests the file may be partially corrupted or overwritten.
- Once you’ve identified the Notepad files you want back, click the Recover button.
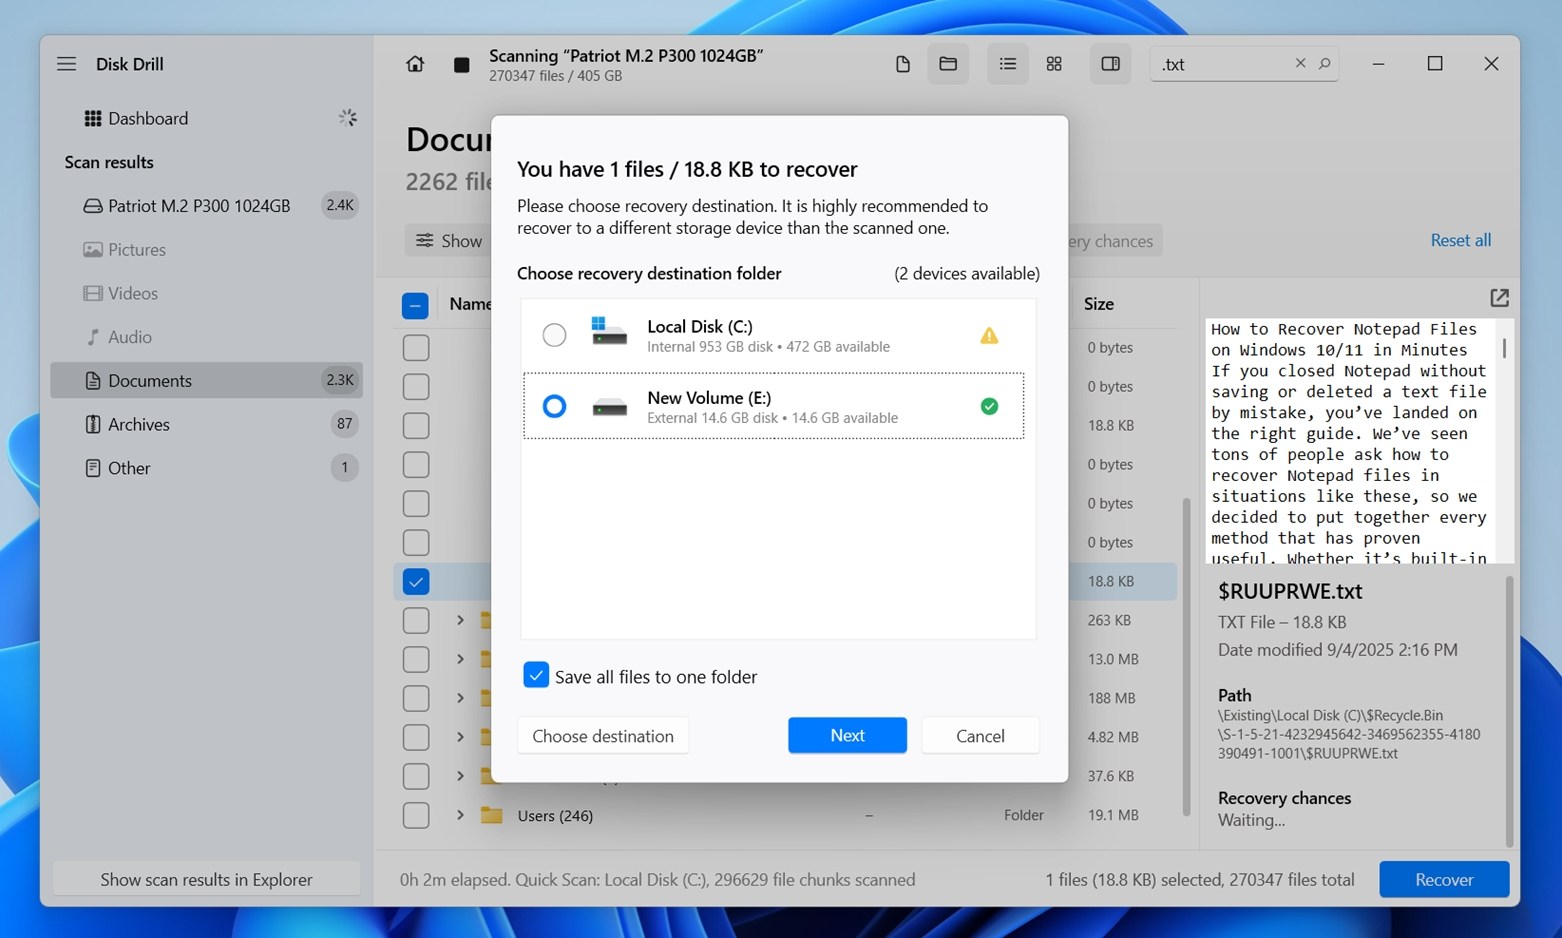 Disk Drill will prompt you to choose a destination folder. If possible, recover to a different drive than the one being scanned (otherwise you risk overwriting the very data you’re trying to restore).
 - After recovery finishes, Disk Drill gives you the option to open the folder in File Explorer so you can immediately check your restored .txt files. If the preview looked good earlier, chances are high the file will open in Notepad without issues.
This same process can be repeated for recovering any type of file, even recovering entire hard drives. As of now, Disk Drill lets Windows users recover up to 100 MB of data for free without a license. In the context of Notepad file recovery, that’s actually a lot more than it sounds. A single .txt file usually takes up only a few kilobytes, so you can bring back hundreds of deleted Notepad files without paying a cent.
If you’re curious about how Disk Drill performs outside of simple text file recovery, or you want to know more about its strengths and weaknesses, check out our full Disk Drill review guide here.
Method 4: Use File History to Recover Notepad Files
Another way of bringing back a deleted Notepad file is by using backups. One of the most convenient backup tools built into Windows is File History, which was first introduced in Windows 8 and has carried over into both Windows 10 and 11.
If File History was enabled on your computer, it automatically kept snapshots of your files at regular intervals. That means even if you deleted (or overwrote) a Notepad file, you might be able to roll back the folder it was in and pull out an older copy.
This method will only work if File History had already been enabled and configured before the file was lost. If you never turned it on, or if you didn’t make a backup of the folder where the file was stored, Windows won’t be able to restore your Notepad file this way. In that case, you’ll need to fall back on data recovery software, as explained in the previous method.
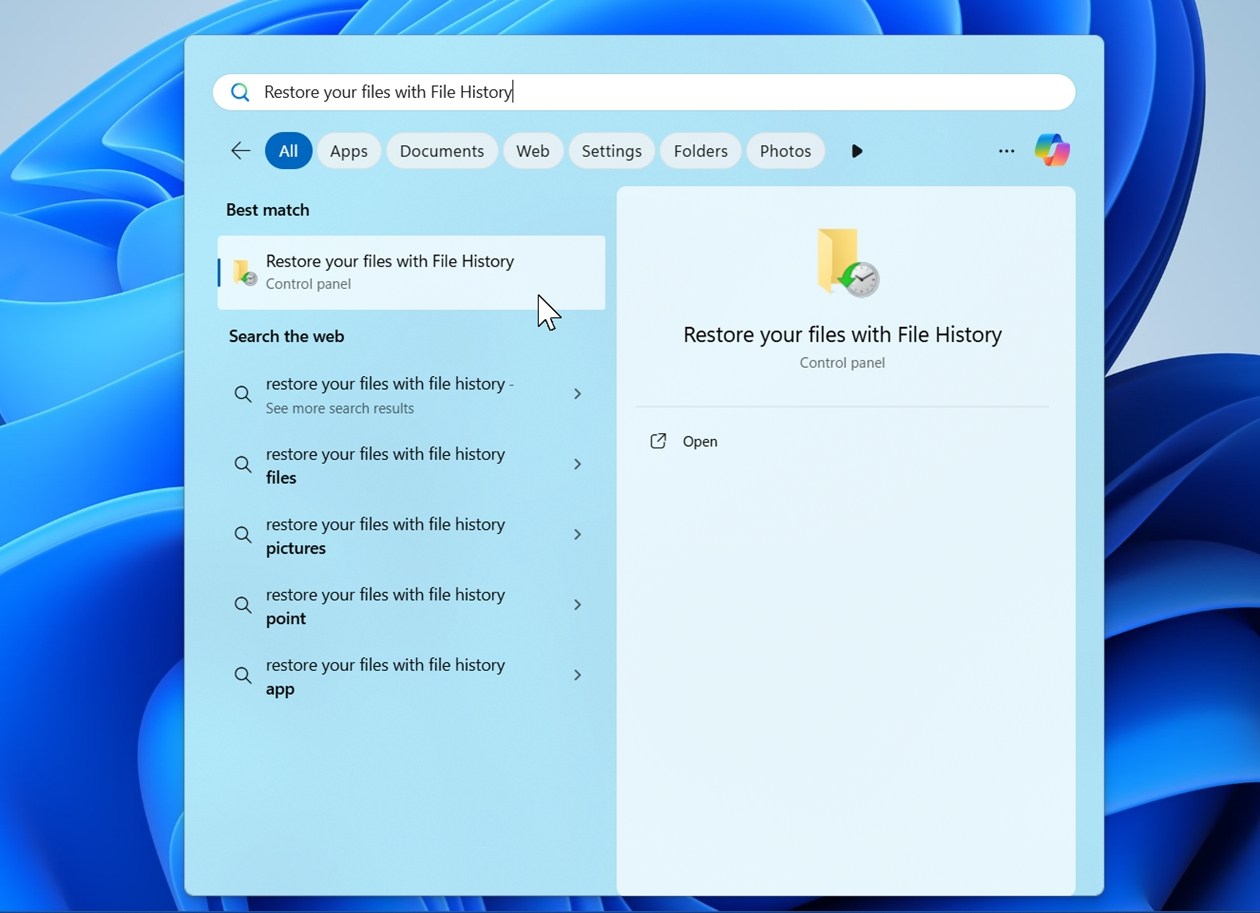
- In the search bar, type “Restore your files with File History” and open the matching result.
- Use the left and right navigation buttons to locate a version of the file you want to restore. When ready, click the file to select it, then click the green recover button with an encircling arrow.
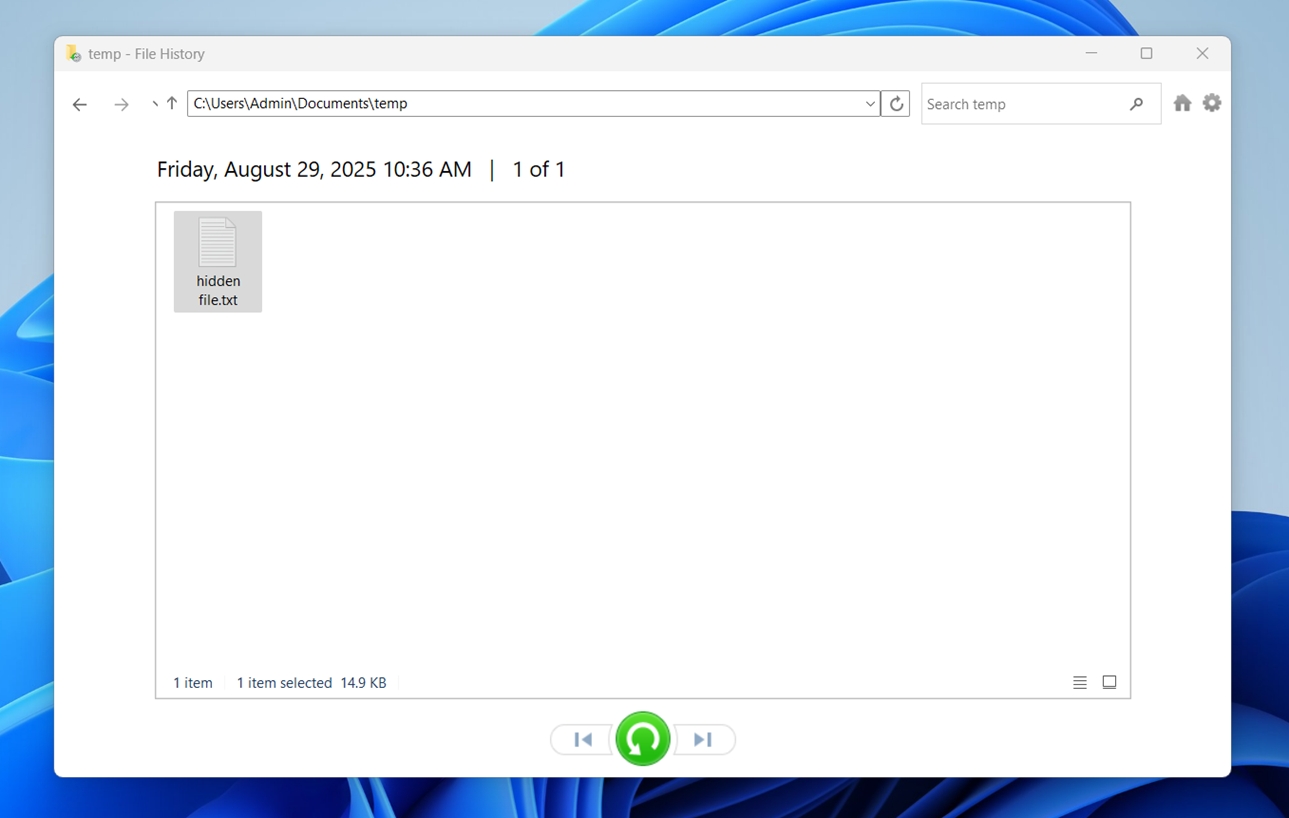
When recovered, the file will appear in its original directory.
You can also try the Previous Versions feature in Windows. It’s closely tied to File History because it uses the same snapshots to let you roll back a folder or file to an earlier state. If File History or restore points were enabled, you may find older versions of your Notepad file there.
Right-click the folder where the file was stored, select Properties, and check the Previous Versions tab to see what’s available.
Method 5: Restore From Backup and Restore
Another option worth checking is the Backup and Restore feature in Windows. This is the older backup system that dates back to Windows 7, but is still present in Windows 10 and 11 for compatibility.
Just like with File History and other backup methods, this only works if Backup and Restore was set up before your file was lost. If you never created backups with it, Windows won’t be able to bring the file back. In that case, your best alternative is still data recovery software, which can scan the disk directly for deleted Notepad files.
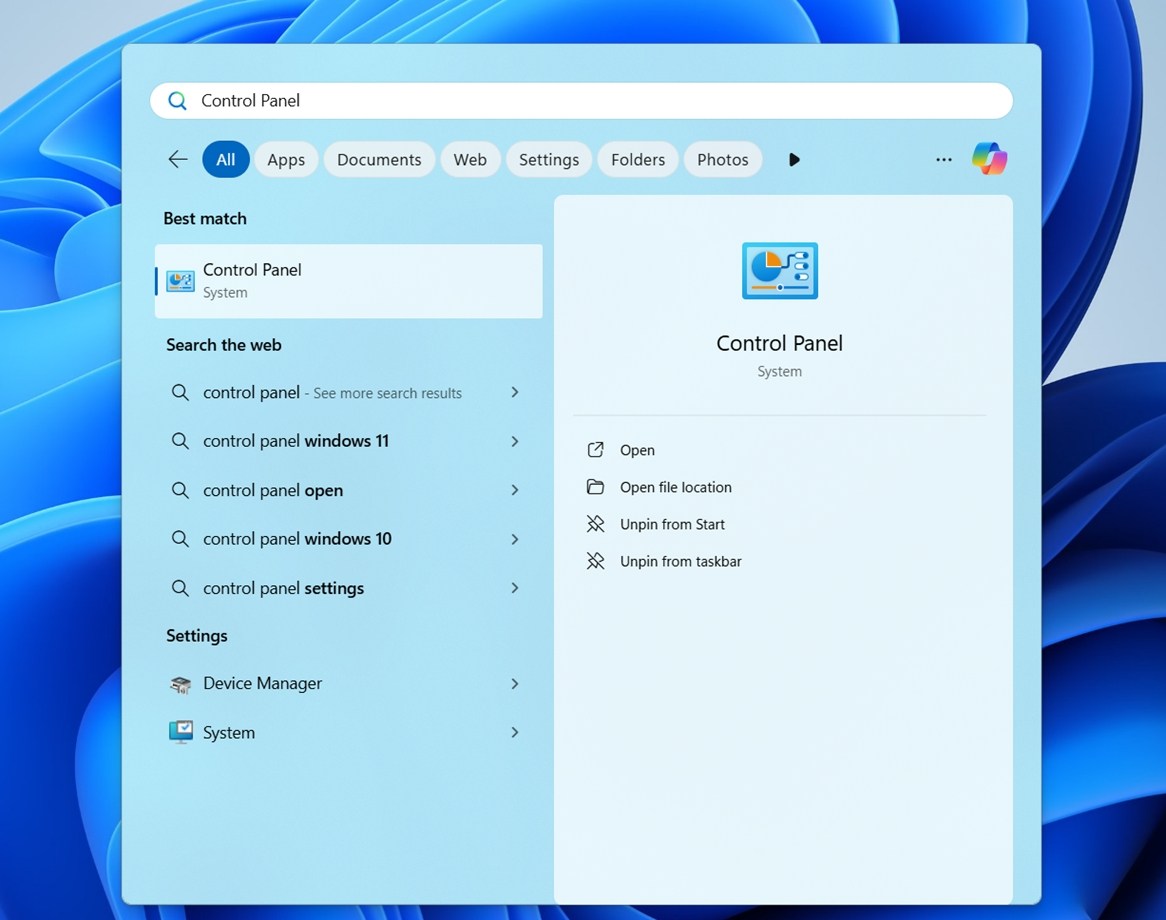
- Open the Control Panel (press Start and search for it).
- Go to System and Security > Backup and Restore (Windows 7).
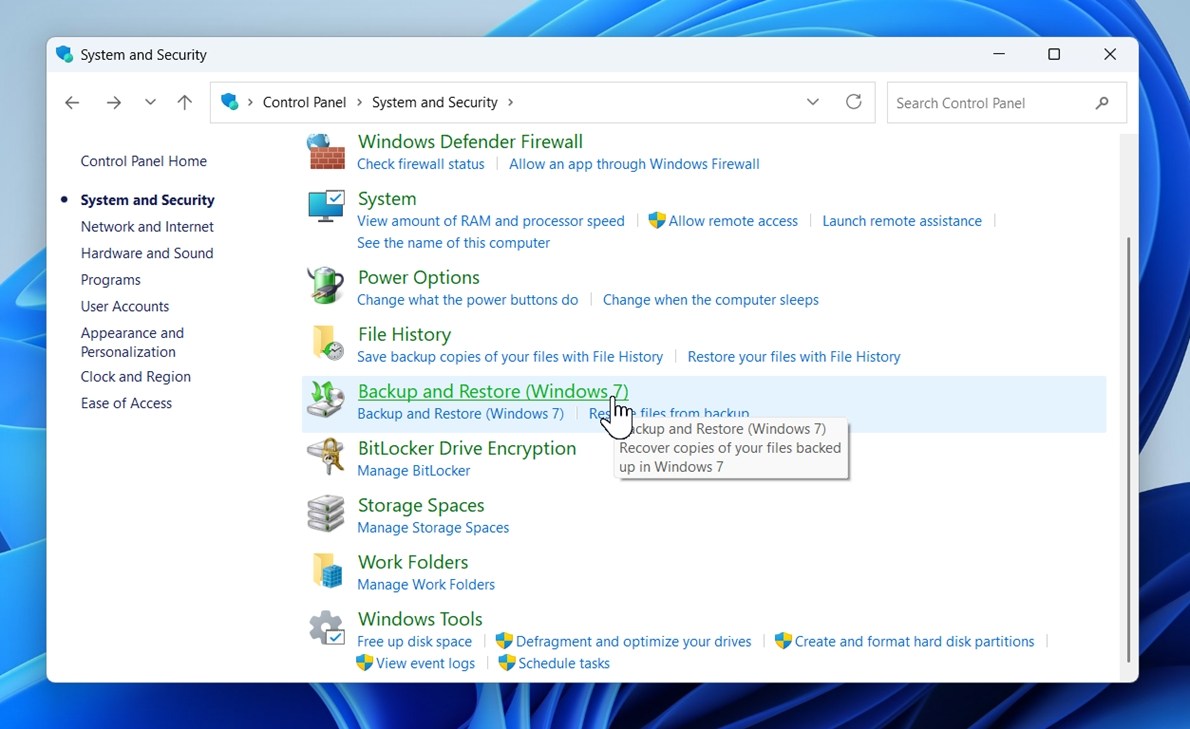
- Under the Restore section, click Restore my files.
- Use the search box or browse options to look through your backup for the deleted Notepad file.
- Click Restore. If you want to restore it to a different location, specify the location in the In the following location: field.
When restored, you will find the file either in the original location or the specified location, depending on which option you chose.
Don’t forget about cloud storage. If you had OneDrive, Google Drive, or another sync service running on your computer, your deleted Notepad file might still be recoverable there. In some cases, even if you’ve emptied your local Recycle Bin, the cloud service keeps a copy in its own trash folder. This is especially common with Google Drive – when a file is deleted on your PC, it may simply “unsync” locally while the original copy stays in Google Drive’s Trash online.
It only takes a minute to log into your account and check, and it could save you the trouble of running a full recovery scan.
How to Recover Unsaved Notepad Files
Okay, we’ve covered what to do when a Notepad file gets deleted. Now let’s talk about the tougher scenario: what if you forgot to save it in the first place, or never had the chance to before Notepad closed?
Method 1: Reopen Notepad (Windows 11 Session Restore)
If you’re on Windows 11, you may get lucky thanks to a new feature that wasn’t around in older versions: session restore. The app can now reopen tabs that were left unsaved when you last closed it.
Here’s how to recover unsaved Notepad docs in Windows 11: you simply open Notepad again. Let’s say you had a note open with unsaved text and closed Notepad by accident. When you launch Notepad again, the app checks the last session and offers to reopen it automatically.
If the feature is enabled, your unsaved text should appear right where you left it.
By default, session restore is turned on, but it’s worth checking.
- Open Notepad, click the settings gear in the top-right corner.
- Look for the option “When Notepad starts”.
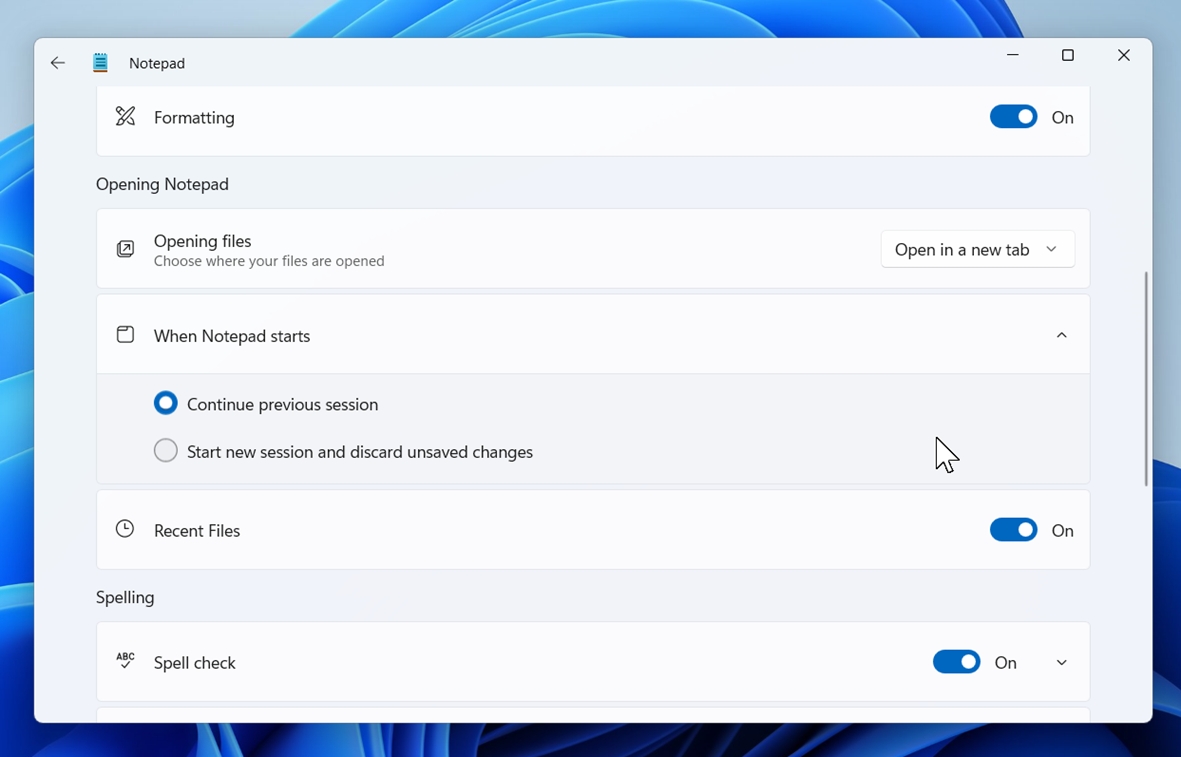
- Make sure it’s set to Continue where I left off. That’s what tells Notepad to reload tabs and unsaved content at startup.
It’s important to know this isn’t a full-blown autosave. If your system crashed before Notepad could update its session data, or if you’re using an older version of Windows without the updated Notepad app, your unsaved text won’t come back. But for everyday slip-ups, this feature is a huge step in the right direction.
Method 2: Check Temp and AppData Folders
If you’re not on Windows 11, or you reopened Notepad and didn’t see any session restore, there are still a couple of places worth checking. Sometimes Windows creates temporary files behind the scenes, and with a bit of luck, your missing text might be there.
Here’s how to find unsaved Notepad files:
- Start with the Temp folder. Press Win + R, type %temp%, and hit Enter.
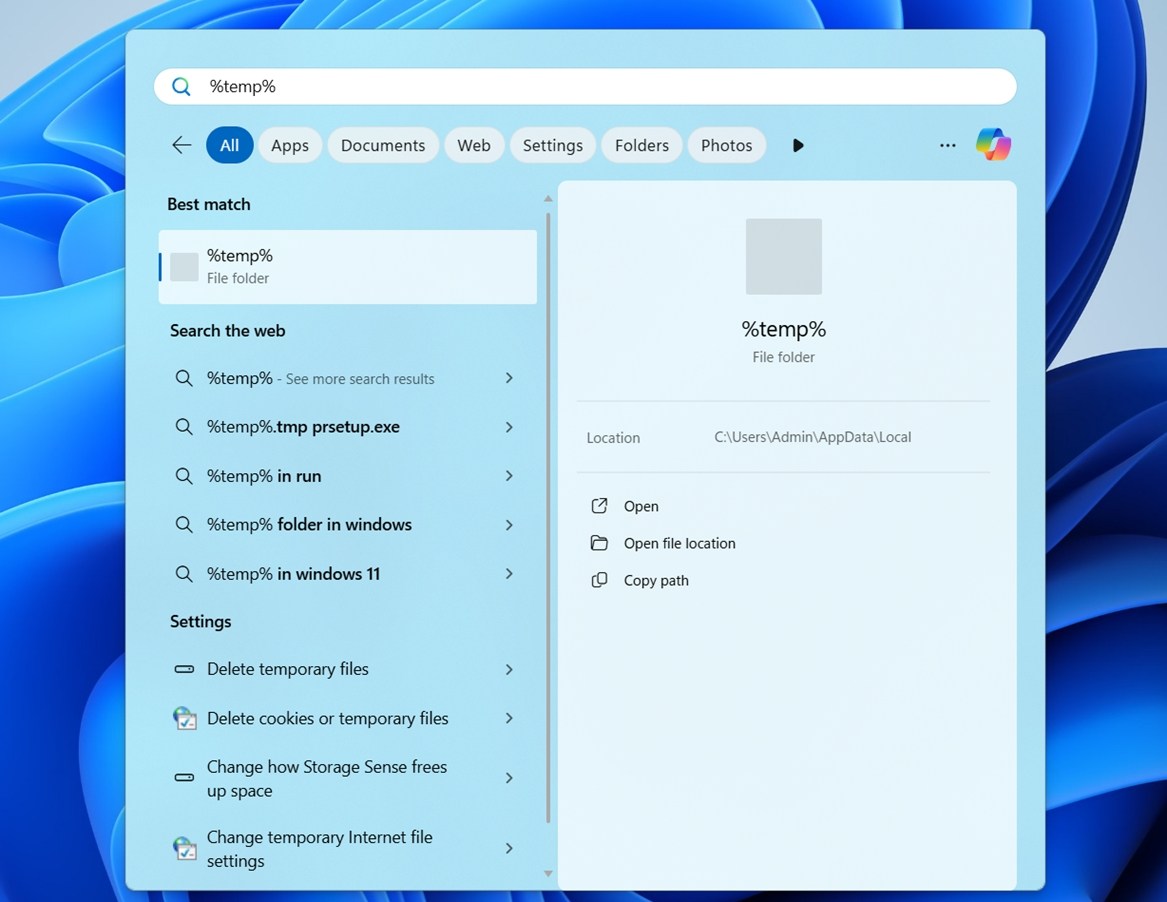 This opens a directory full of temporary files that Windows and apps use while they’re running.
 - Scroll through and look for anything with a .tmp extension, or sort by date and check files created around the time you lost your note.
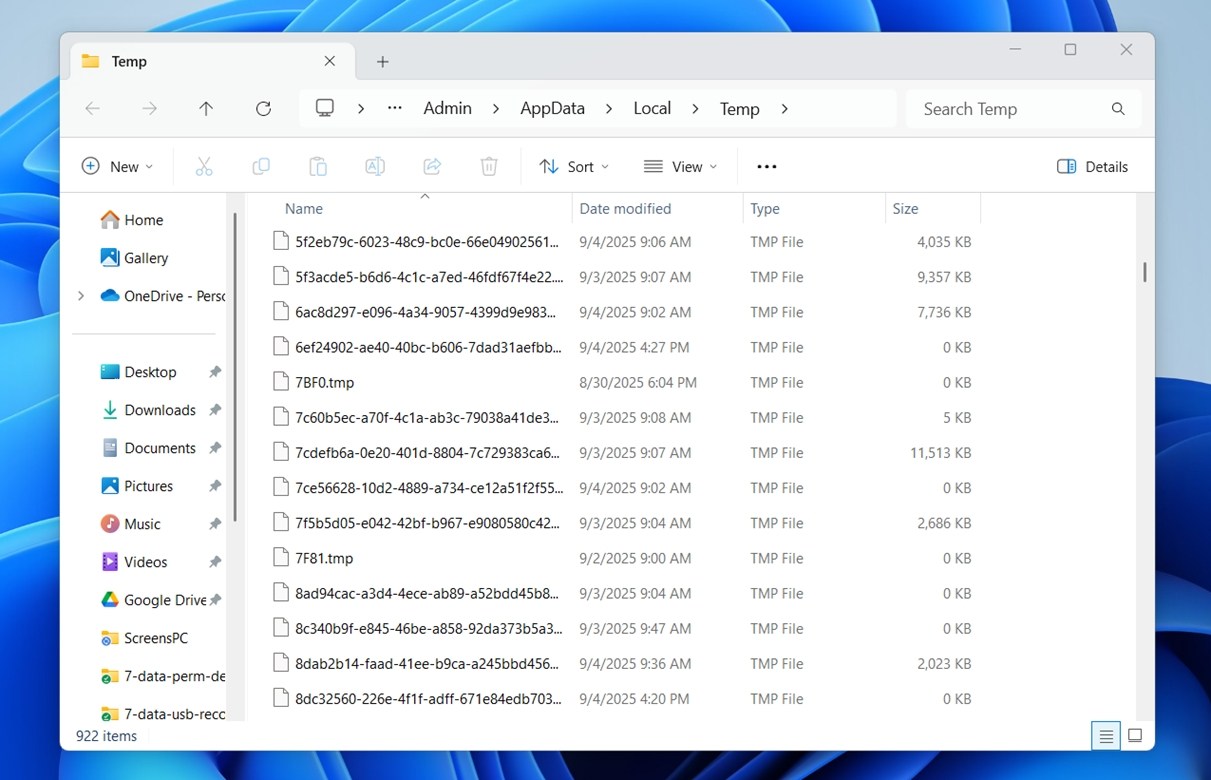 Double-click them – many open in Notepad, and you might spot your lost text.
 - Another spot is your AppData folder. Press Win + R, type %AppData%, and browse through the Roaming and Local folders.
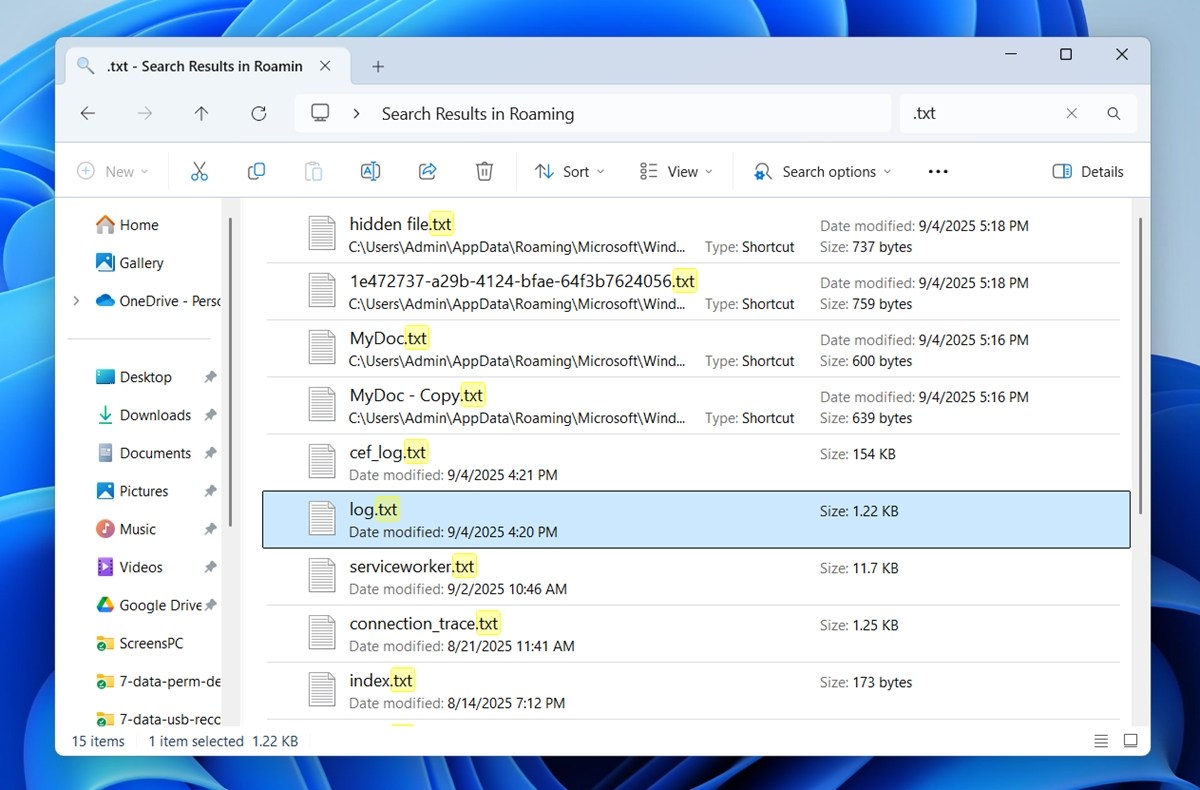 From there, search for .txt files or sort by recent changes. Sometimes unsaved fragments or copies end up in these directories.
It’s not guaranteed – classic Notepad doesn’t reliably create temp files for unsaved content – but some people have recovered partial notes this way. The key is to check right after the loss, before restarting your PC, because temporary files are often wiped during reboot.
Final Words
Well, that’s the whole guide. Now you know how to retrieve a deleted Notepad file – and maybe even fish out an unsaved one if luck’s on your side. Hopefully, one of the methods worked for you.
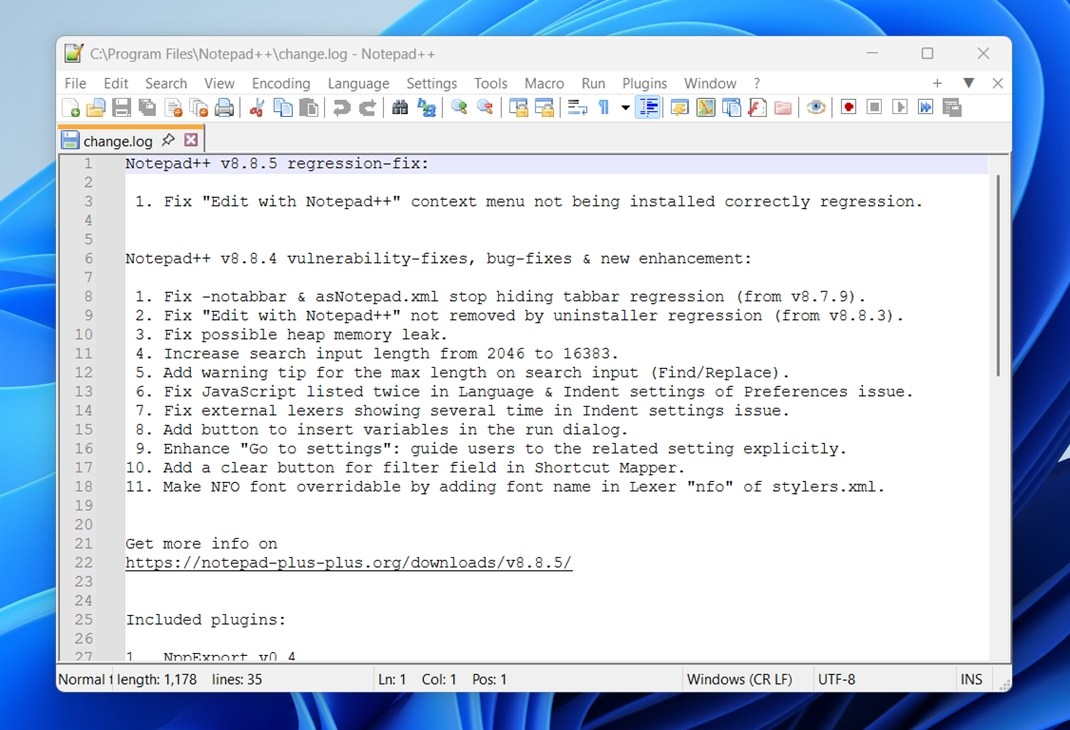
Before you head out, we do want to suggest something: if you rely on Notepad for important stuff, it might be time to switch to something a little more capable. A lot of people swear by Notepad++ (and we do too). It’s free, lightweight, and comes with autosave, session restore, and even backup features built in. It’s basically what Notepad wishes it could be.
Or, if you like to keep things synced across devices, Google Docs is another solid option. It saves your changes automatically every few seconds, and everything lives in the cloud, so it’s almost impossible to lose your work unless you delete it manually (and even then, it sits in Trash for 30 days).
If you have any questions, or want to share your own recovery experience – what worked, what didn’t – feel free to leave a comment below. We’d love to hear what happened and maybe even include it in a future update.
FAQs
- If the file was deleted, check the Recycle Bin first. If it’s not there, try restoring from File History or use recovery software like Disk Drill or Recuva.
- If the file was never saved, your options are more limited. On Windows 11, Notepad may restore unsaved tabs automatically if session restore is enabled. If not, check the Temp or AppData folders, but recovery isn’t guaranteed.
- If you use cloud sync (like OneDrive or Google Drive), log in to your account and check the Trash folder - sometimes the file is still stored there even if it’s gone from your PC.
- Go to the Start menu. Alternatively, you can press the Windows key + S to open the search bar.
- Search for “*.txt” to search for all the text files available on your system. Adjust the search filters as you see fit to increase the chances of finding all the Notepad files on Windows 10.


