
Opened your computer to keep working on a project or send it to someone, but noticed that your desktop files disappeared from your Mac? We get it — moments like this are never pleasant. Still, don’t jump to conclusions, as in most cases, those files aren’t lost permanently and can be returned in just a few minutes.
This happens more often than people think. Pretty much everyone on our team has faced it at least once. So, we decided to put together everything we’ve learned from the experience of the entire team and write this guide to show you how to recover files and folders that have disappeared from your Mac desktop.
Why Files Disappear from the Mac Desktop
In fact, there can be plenty of reasons why your Mac desktop files disappeared — from simply moving them somewhere else to deleting them completely. However, if you didn’t notice the moment they vanished and only see that they’re gone now, it’s almost impossible to pinpoint the exact cause. And honestly, knowing the reason usually won’t help bring them back.
We won’t get into a long list of possible reasons here. It’s not really useful anyway. Instead, every method below comes with a short note about when it usually helps. You’ll probably need to try several of them one by one until you find the one that restores your missing desktop folder or files. Even if some don’t help this time, they may come in handy later.
How to Recover Deleted Desktop Files and Folders
First, let’s go over the ways to recover deleted files or folders from the Desktop on your Mac. You’re probably wondering why, if they only suddenly disappeared, right? Well, here’s the thing — it’s very easy to delete something without realizing it. Maybe you pressed Delete by mistake or dragged a folder to the Trash without noticing. Or perhaps you were experimenting in Terminal and used the rm command, which removes files permanently, skipping the Trash altogether.
Unlike moved files that can usually be found later, deleted ones are time-sensitive. The sooner you start the recovery, the better your chances are. That’s why we decided to begin with these methods — so you don’t waste time on other checks, thereby reducing the possibility of recovering your data.
Option 1: Check the Trash for Missing Files
When will this method help? If you deleted the file but haven’t emptied the Trash Bin yet.
Usually, the most common reason why Mac users lose files is accidental deletion. Luckily whenever you delete a file from the Desktop on your Mac, it doesn’t get permanently erased from the computer right away. First, the deleted file or folder gets moved to the Trash Bin, and only after 30 days (if you’ve set it up) or when you clear it manually, it’s removed from your Mac completely. So, the Trash Bin should be the first place you check. If your files are still there, you can restore them in just two clicks, no extra tools or effort needed.
So it’s always a good idea to check the Trash Bin on your Mac when looking for missing Desktop files or folders:
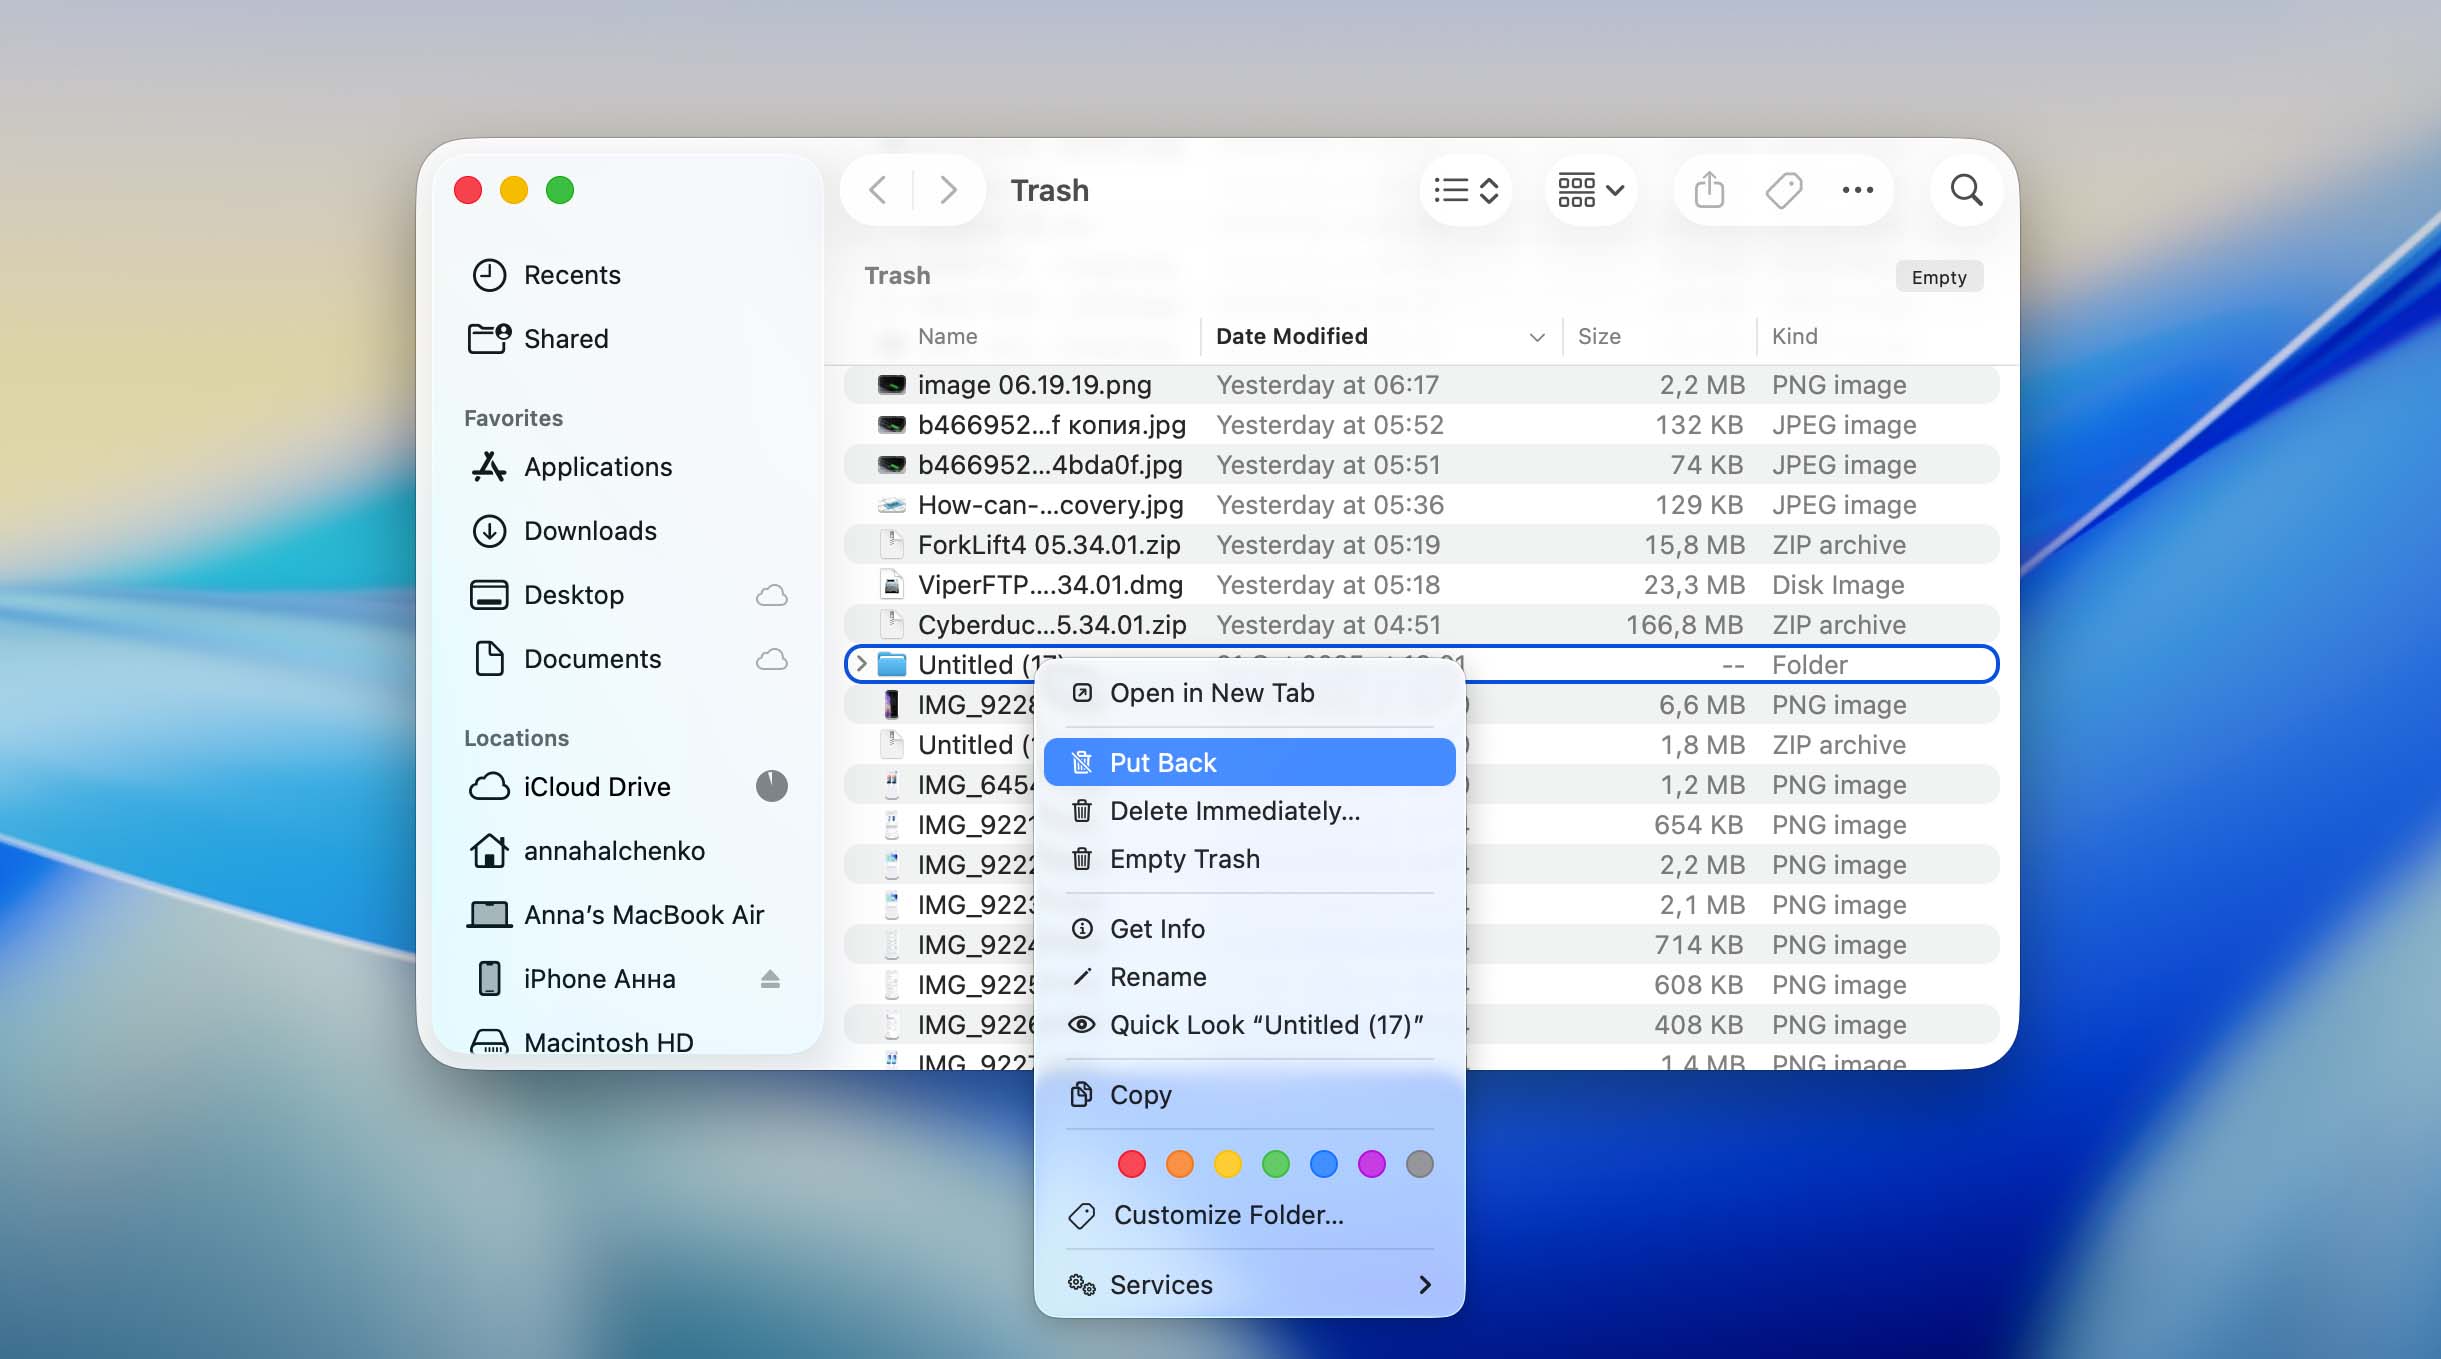
- Click the Trash Bin icon on the Dock to open it.
- Look through the files and folders to locate the needed one.
- Right-click the file or folder you want to recover and choose Put Back from the drop-down menu.
And that’s it — if the files or folders that disappeared from your desktop aren’t in the Trash Bin, move on to the methods below.
Option 2: Use iCloud Backup
When will this method help? If you use synchronization and the file was deleted not through normal deletion, but with the rm command or a similar method.
If you’ve been using iCloud to sync files from your Desktop to your Mac, there’s a chance you can recover the missing ones through iCloud. However, keep in mind that this method basically mirrors what already exists on your Mac. So, if a file isn’t in the Trash, it usually won’t appear in iCloud either — unless it was removed in a different way, such as by using the rm command in Terminal.
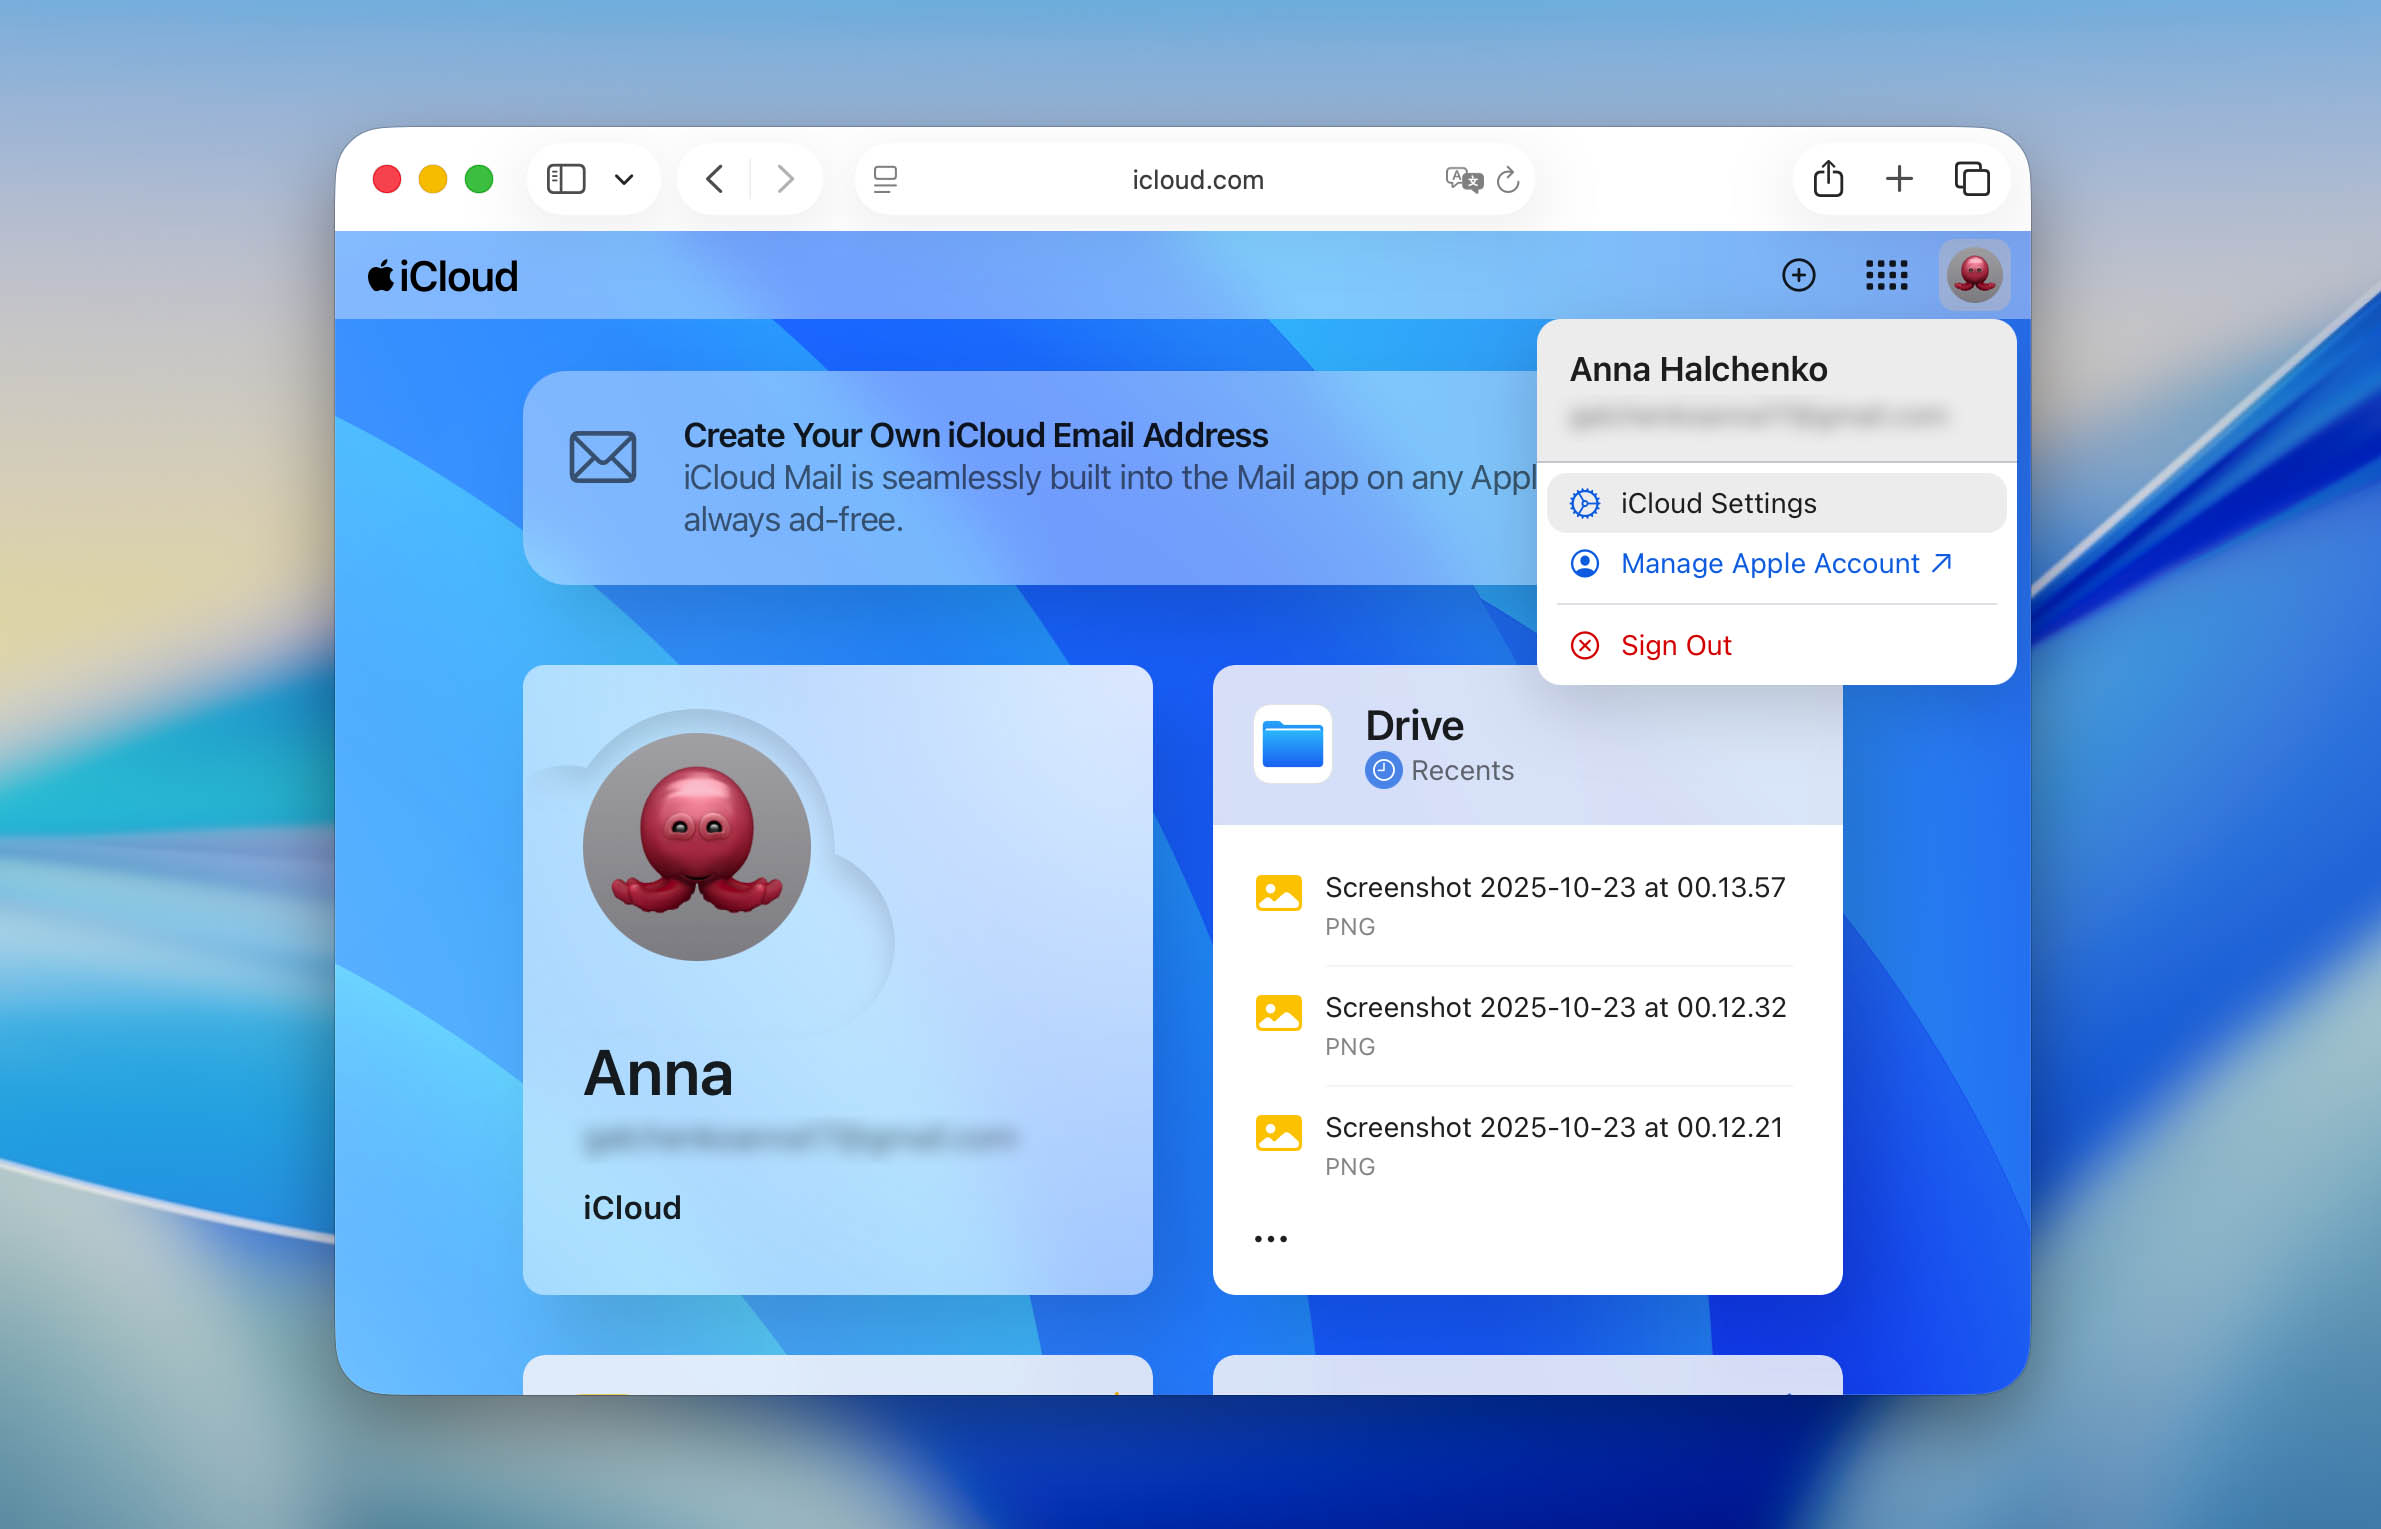
- Go to iCloud.com and use your Apple ID login and password to sign into the account.

- Click your account name and go to iCloud Settings.
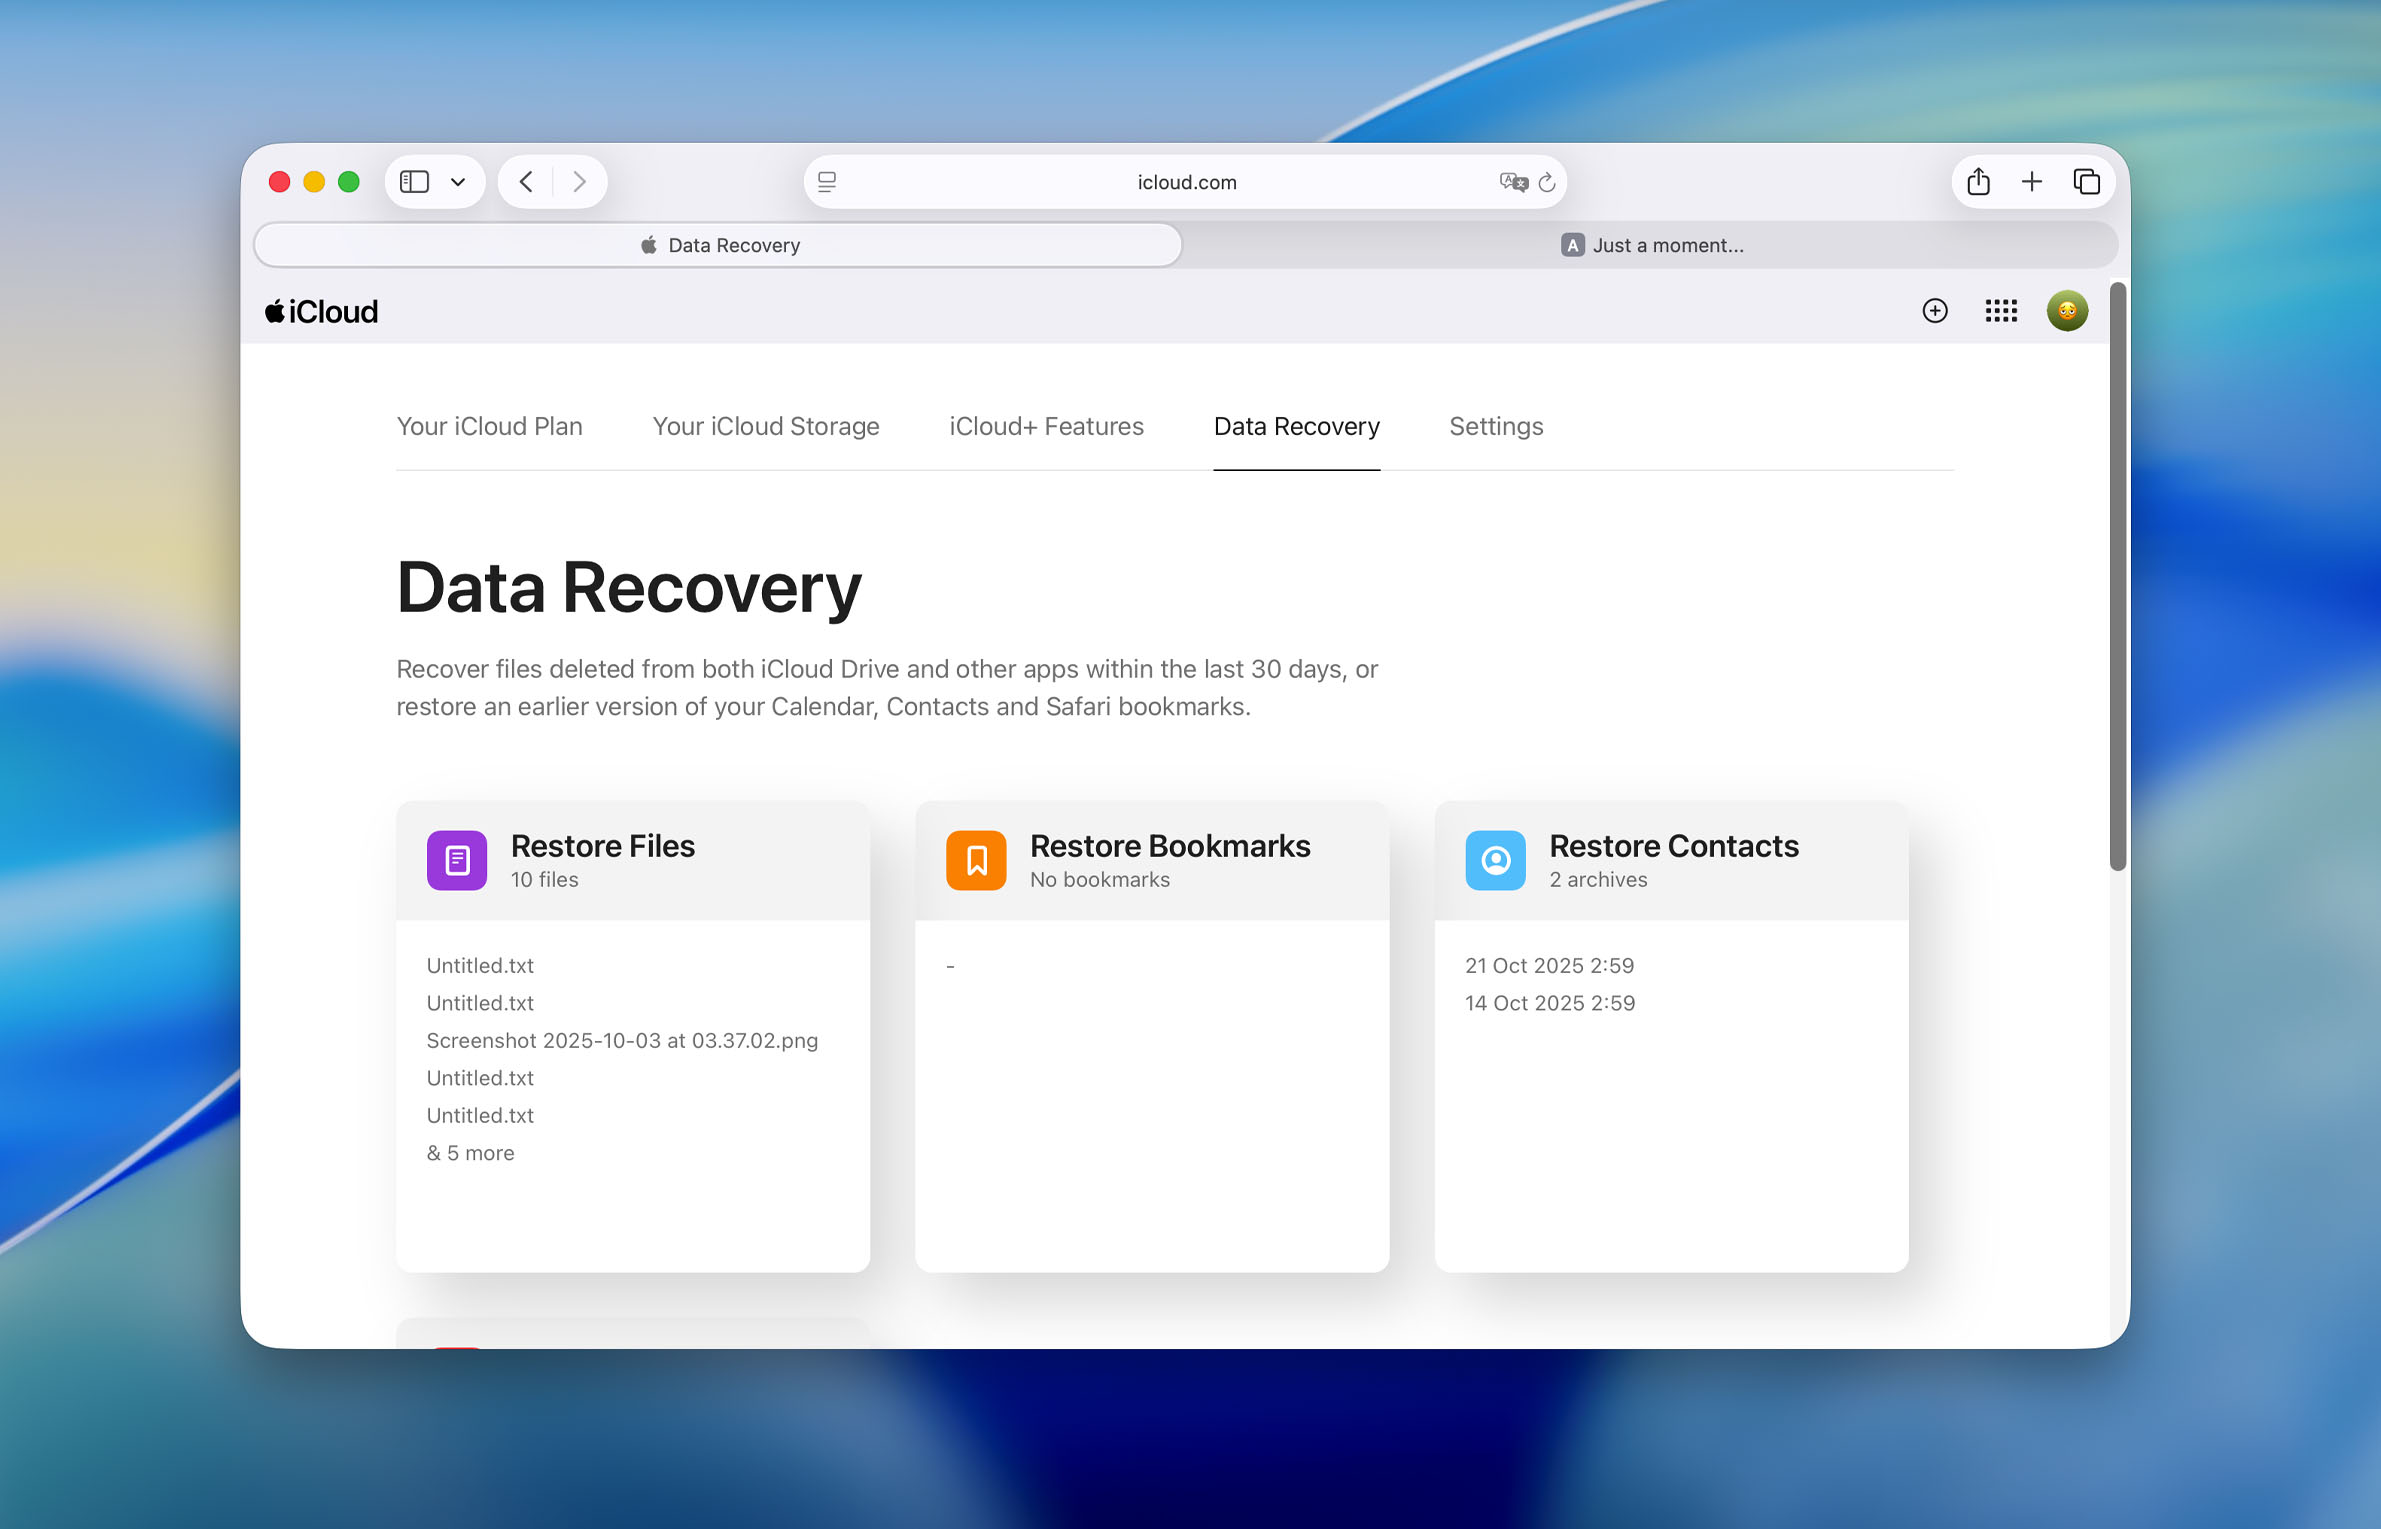
- Click the Data Recovery page and click Restore Files.
- On the pop-up that appears, use the checkboxes to select which files you want to restore or use Select All to choose all of the files.
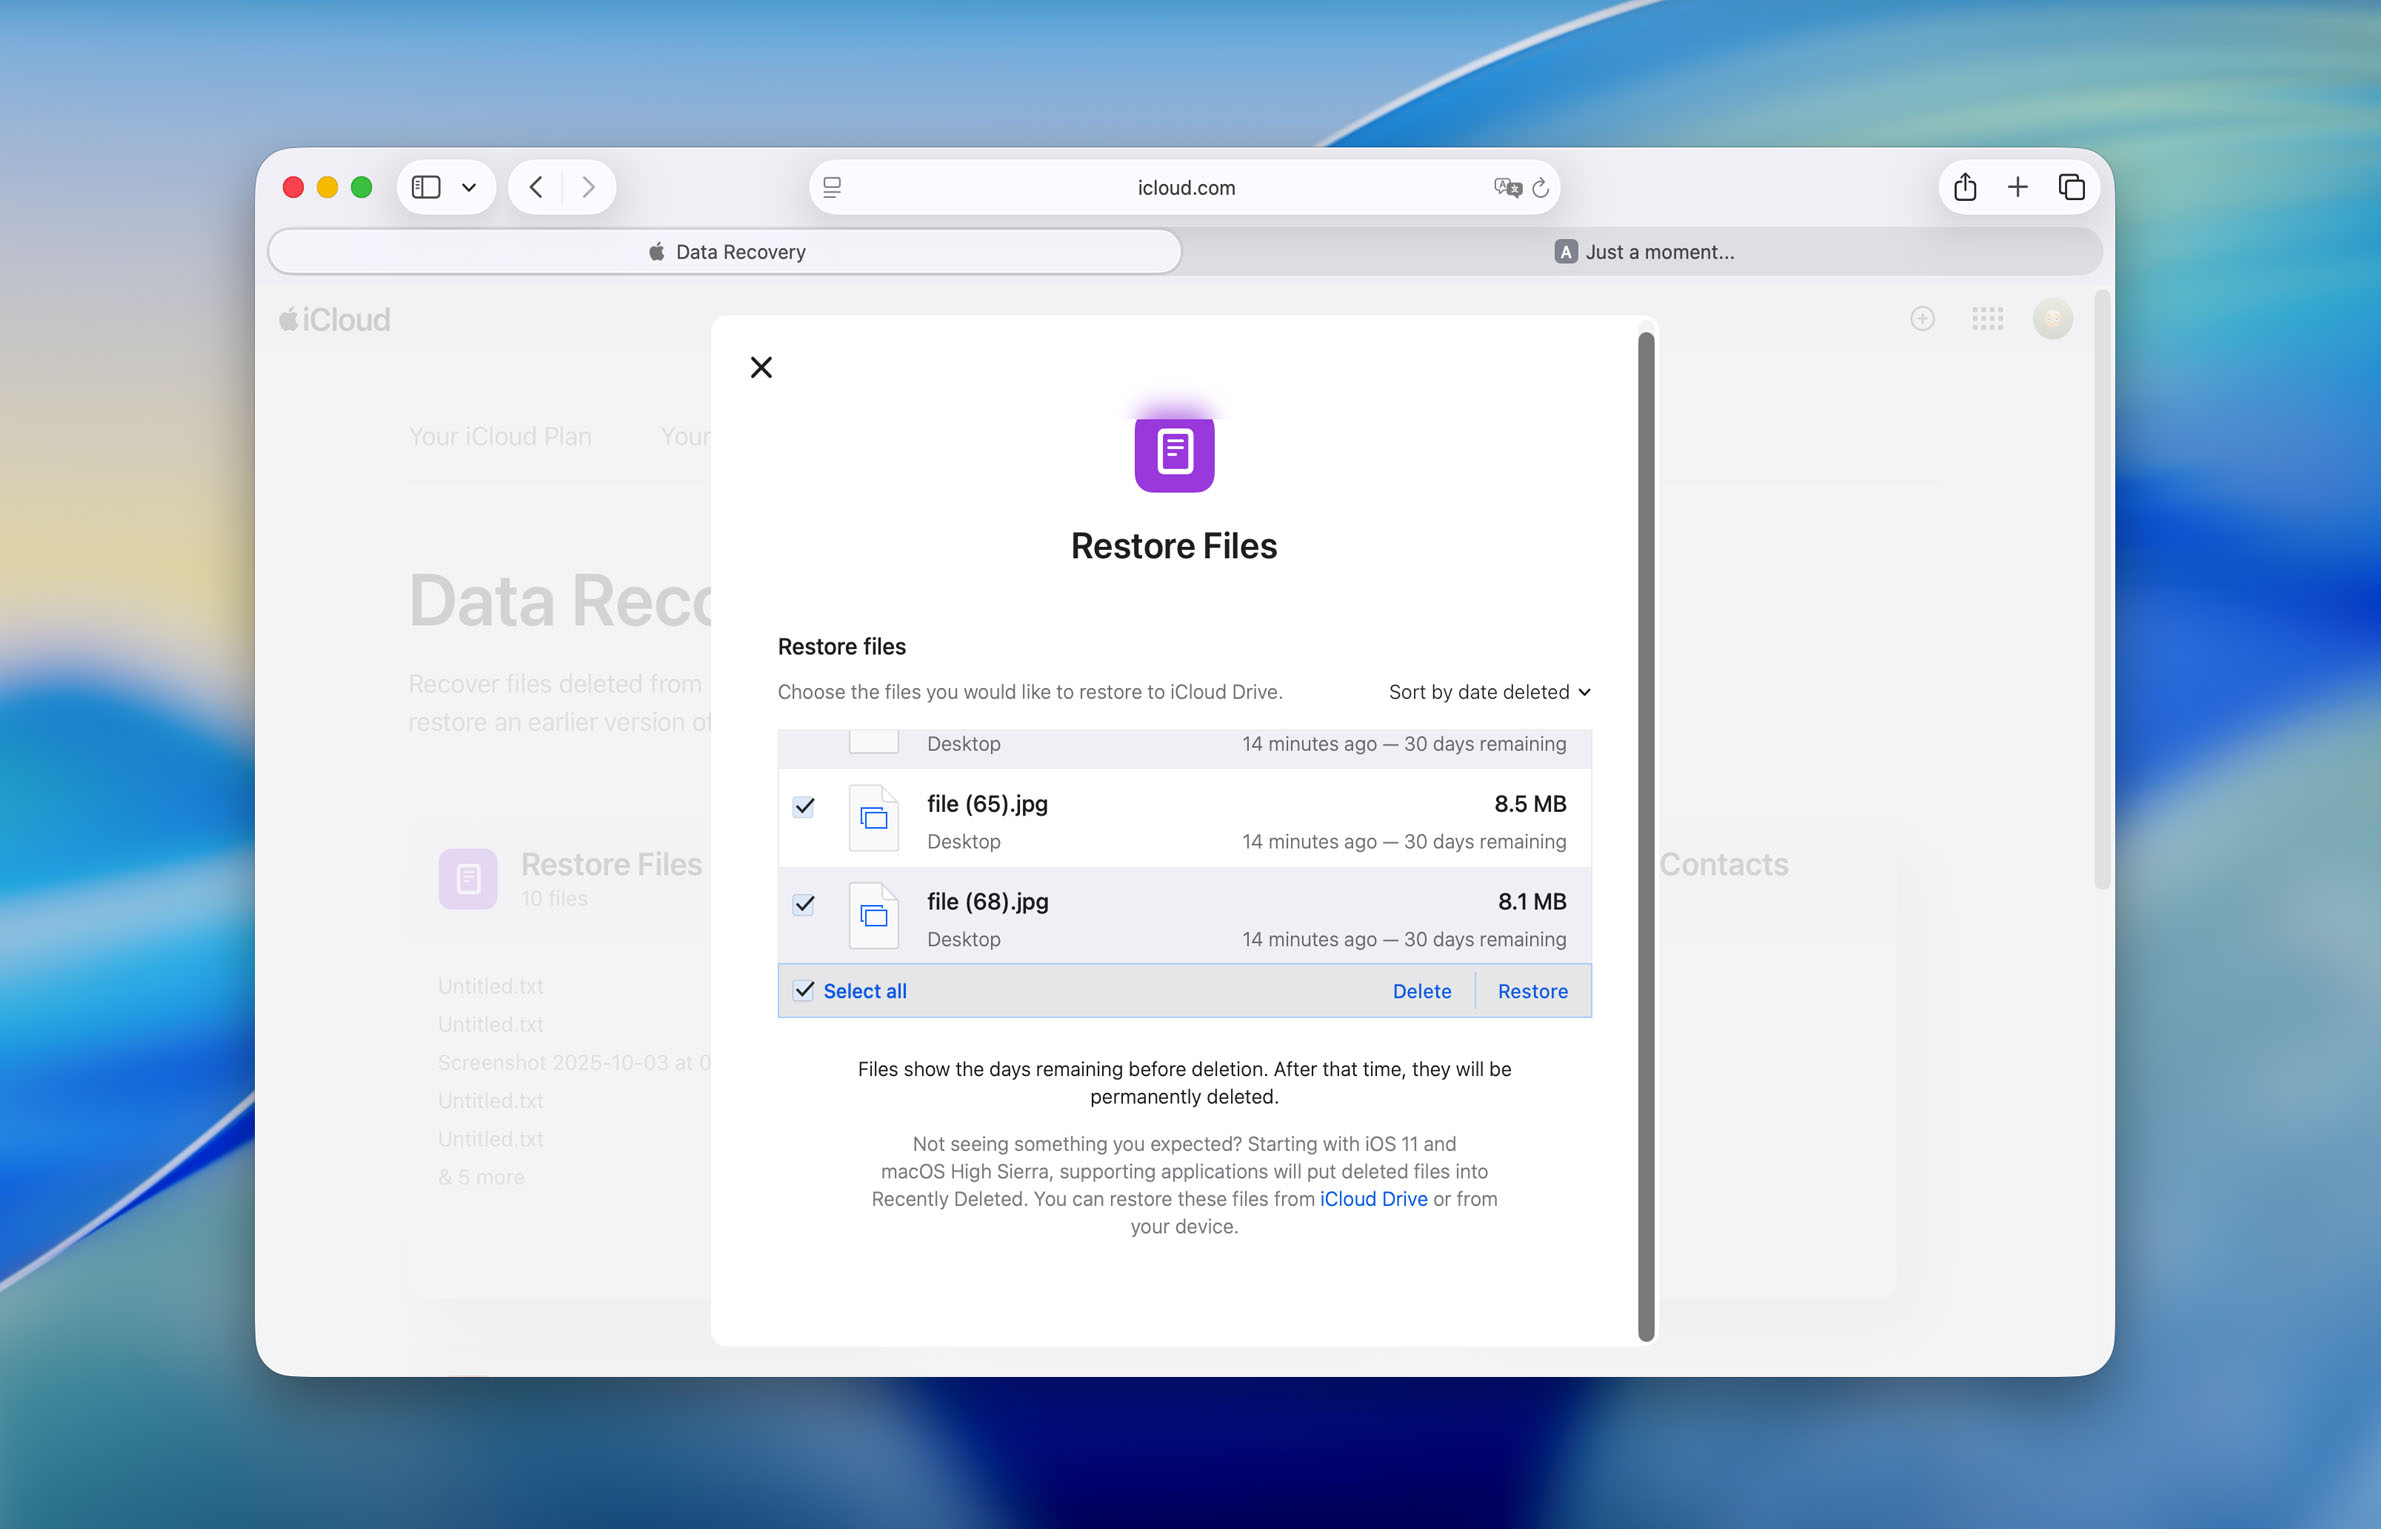
- Wait for the confirmation, then click Done.
After you’ve completed this process, open up your Mac’s Desktop to see whether the chosen files are back.
Option 3: Use Data Recovery Software
When will this method help? If the needed files or folders were not found in the Trash.
If the previous two methods didn’t help you recover the files that disappeared from your Mac desktop, they’re most likely permanently deleted. In that case, you’ll need data recovery software to bring them back. These programs can scan your disk’s file system, detect traces of deleted data, and restore them.
There are plenty of Mac recovery tools out there, and we’ve even made several lists of the best ones. Still, in our own work, we almost always use Disk Drill. It’s compatible with most macOS versions (from Mac OS X Leopard to the latest macOS Tahoe) and can detect and restore over 400 file types. Just as important, Disk Drill works on Macs with M1–M4 and T2 chips, something not every recovery app supports. To make that possible, you’ll need to install Disk Drill’s Kernel Extension (here’s a link explaining how to do it).
This is one of those cases where speed really matters. Disk Drill and similar tools can recover files only if they haven’t been overwritten by new data yet. So, once you realize that your desktop files are missing, avoid saving, downloading, or creating anything new on your Mac. Also note that most modern Macs use SSDs, not HDDs — and SSDs automatically trigger TRIM when deleting files, which nearly eliminates the chance of recovery. If that’s your situation, check out our related article on how to recover deleted files from an SSD. So don’t wait, run the scan, and try to bring those files back as soon as possible.
Here’s how to recover Desktop files on a Mac using Disk Drill:
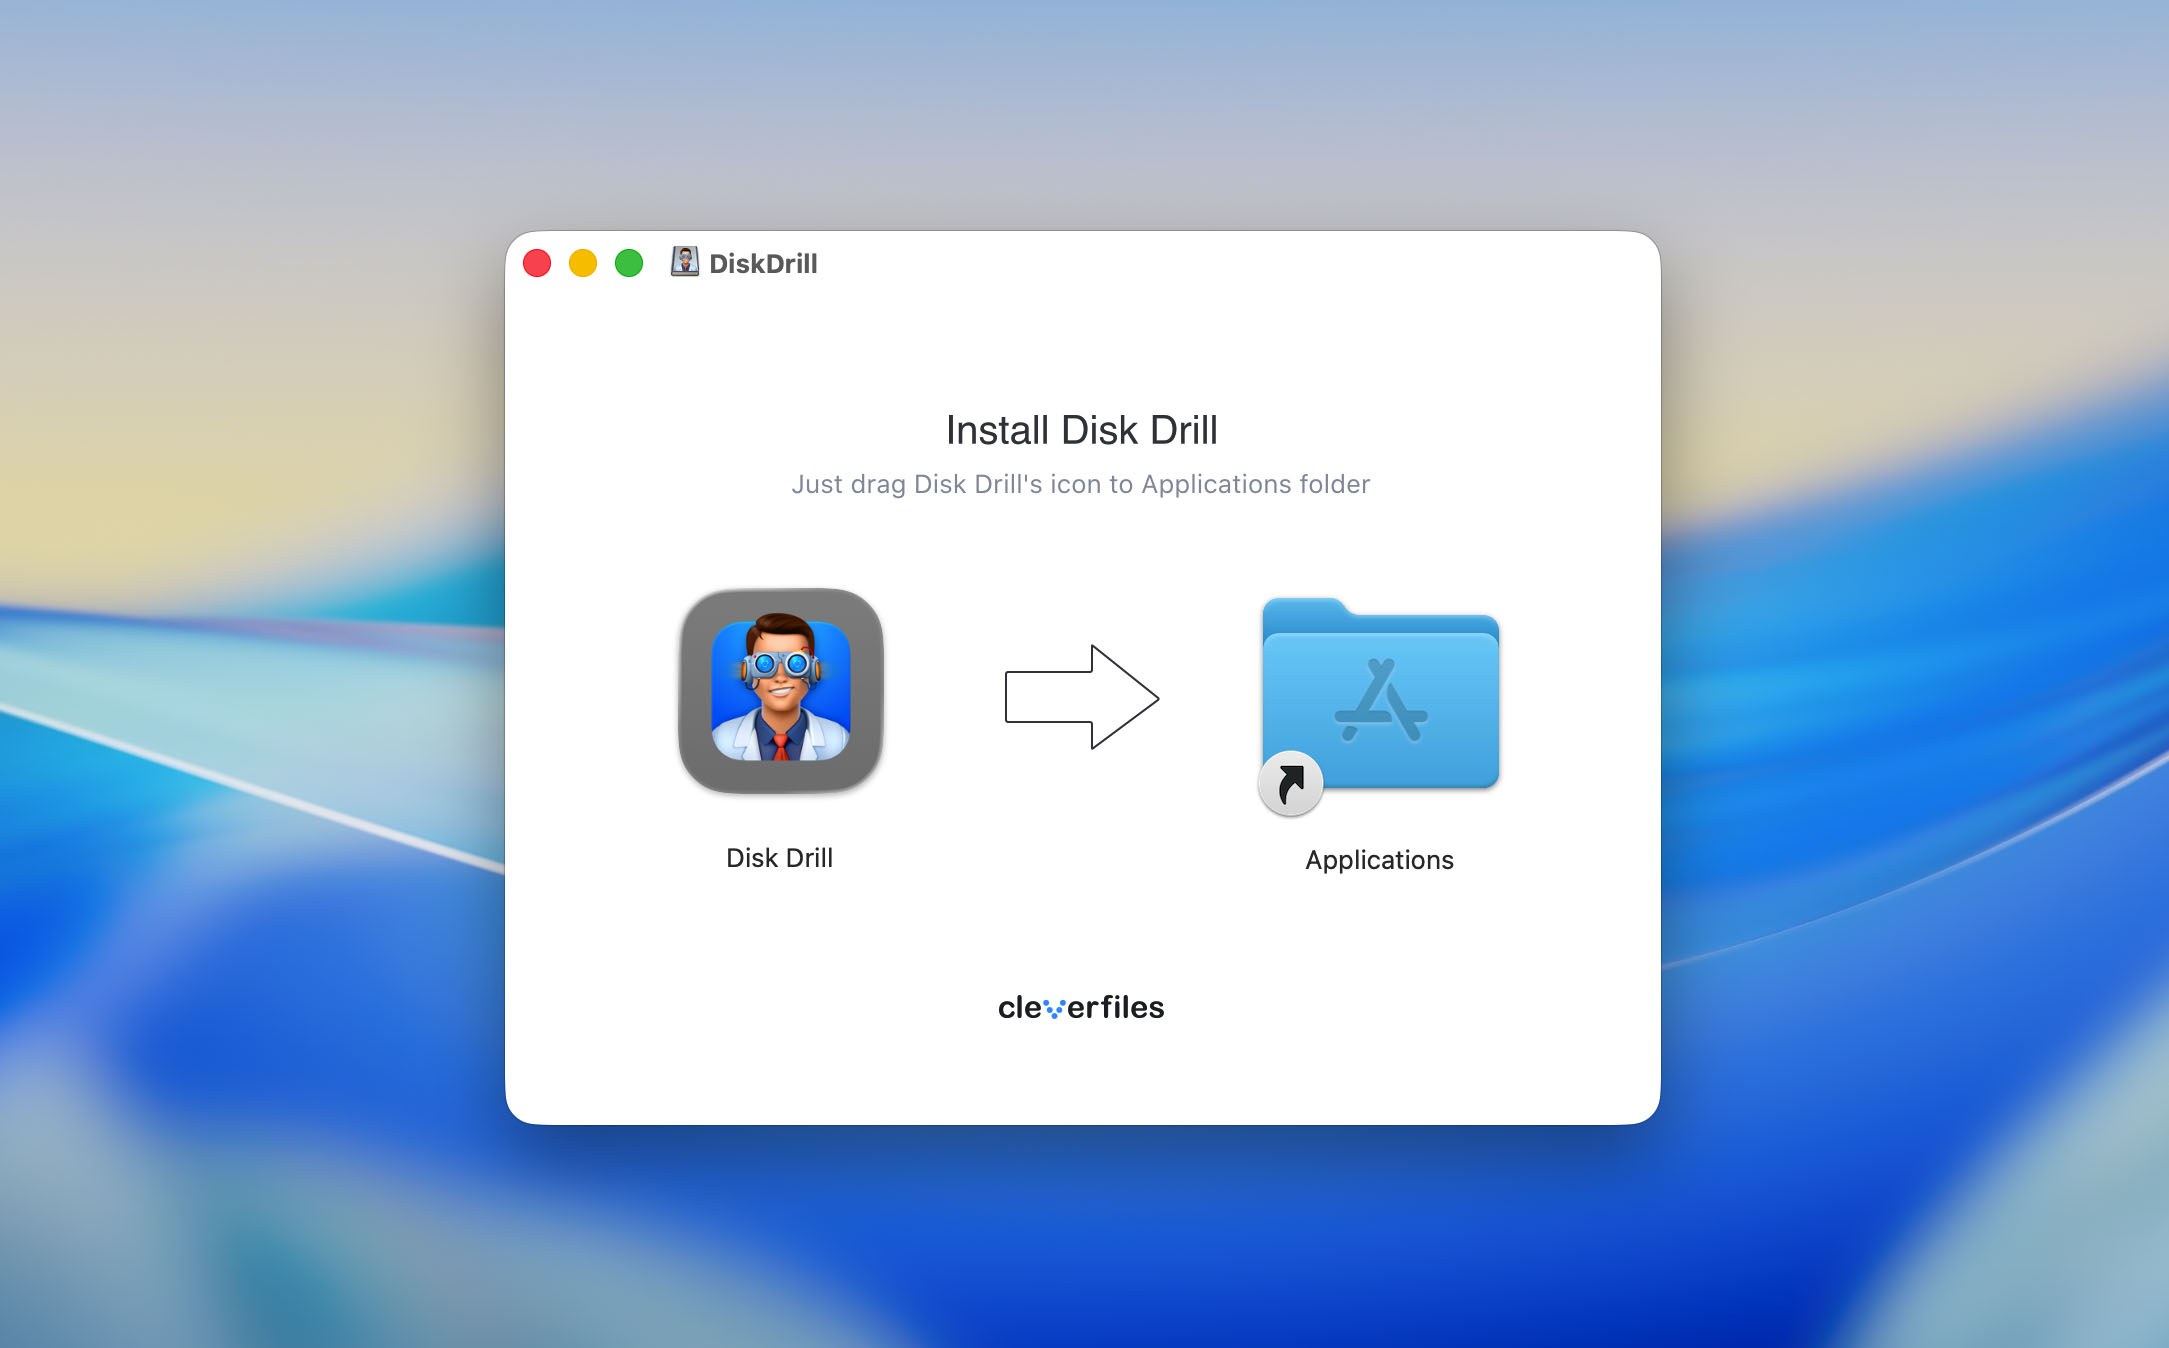
- Download and install Disk Drill on your Mac. Don’t install it on the same disk where your files disappeared — it could overwrite the data and make recovery impossible.
- Open Disk Drill and select your Mac drive from the list of available devices. Then click Search for lost data to start the scan.

- Wait until the scan completes, or click Review found items to start checking files as they appear.
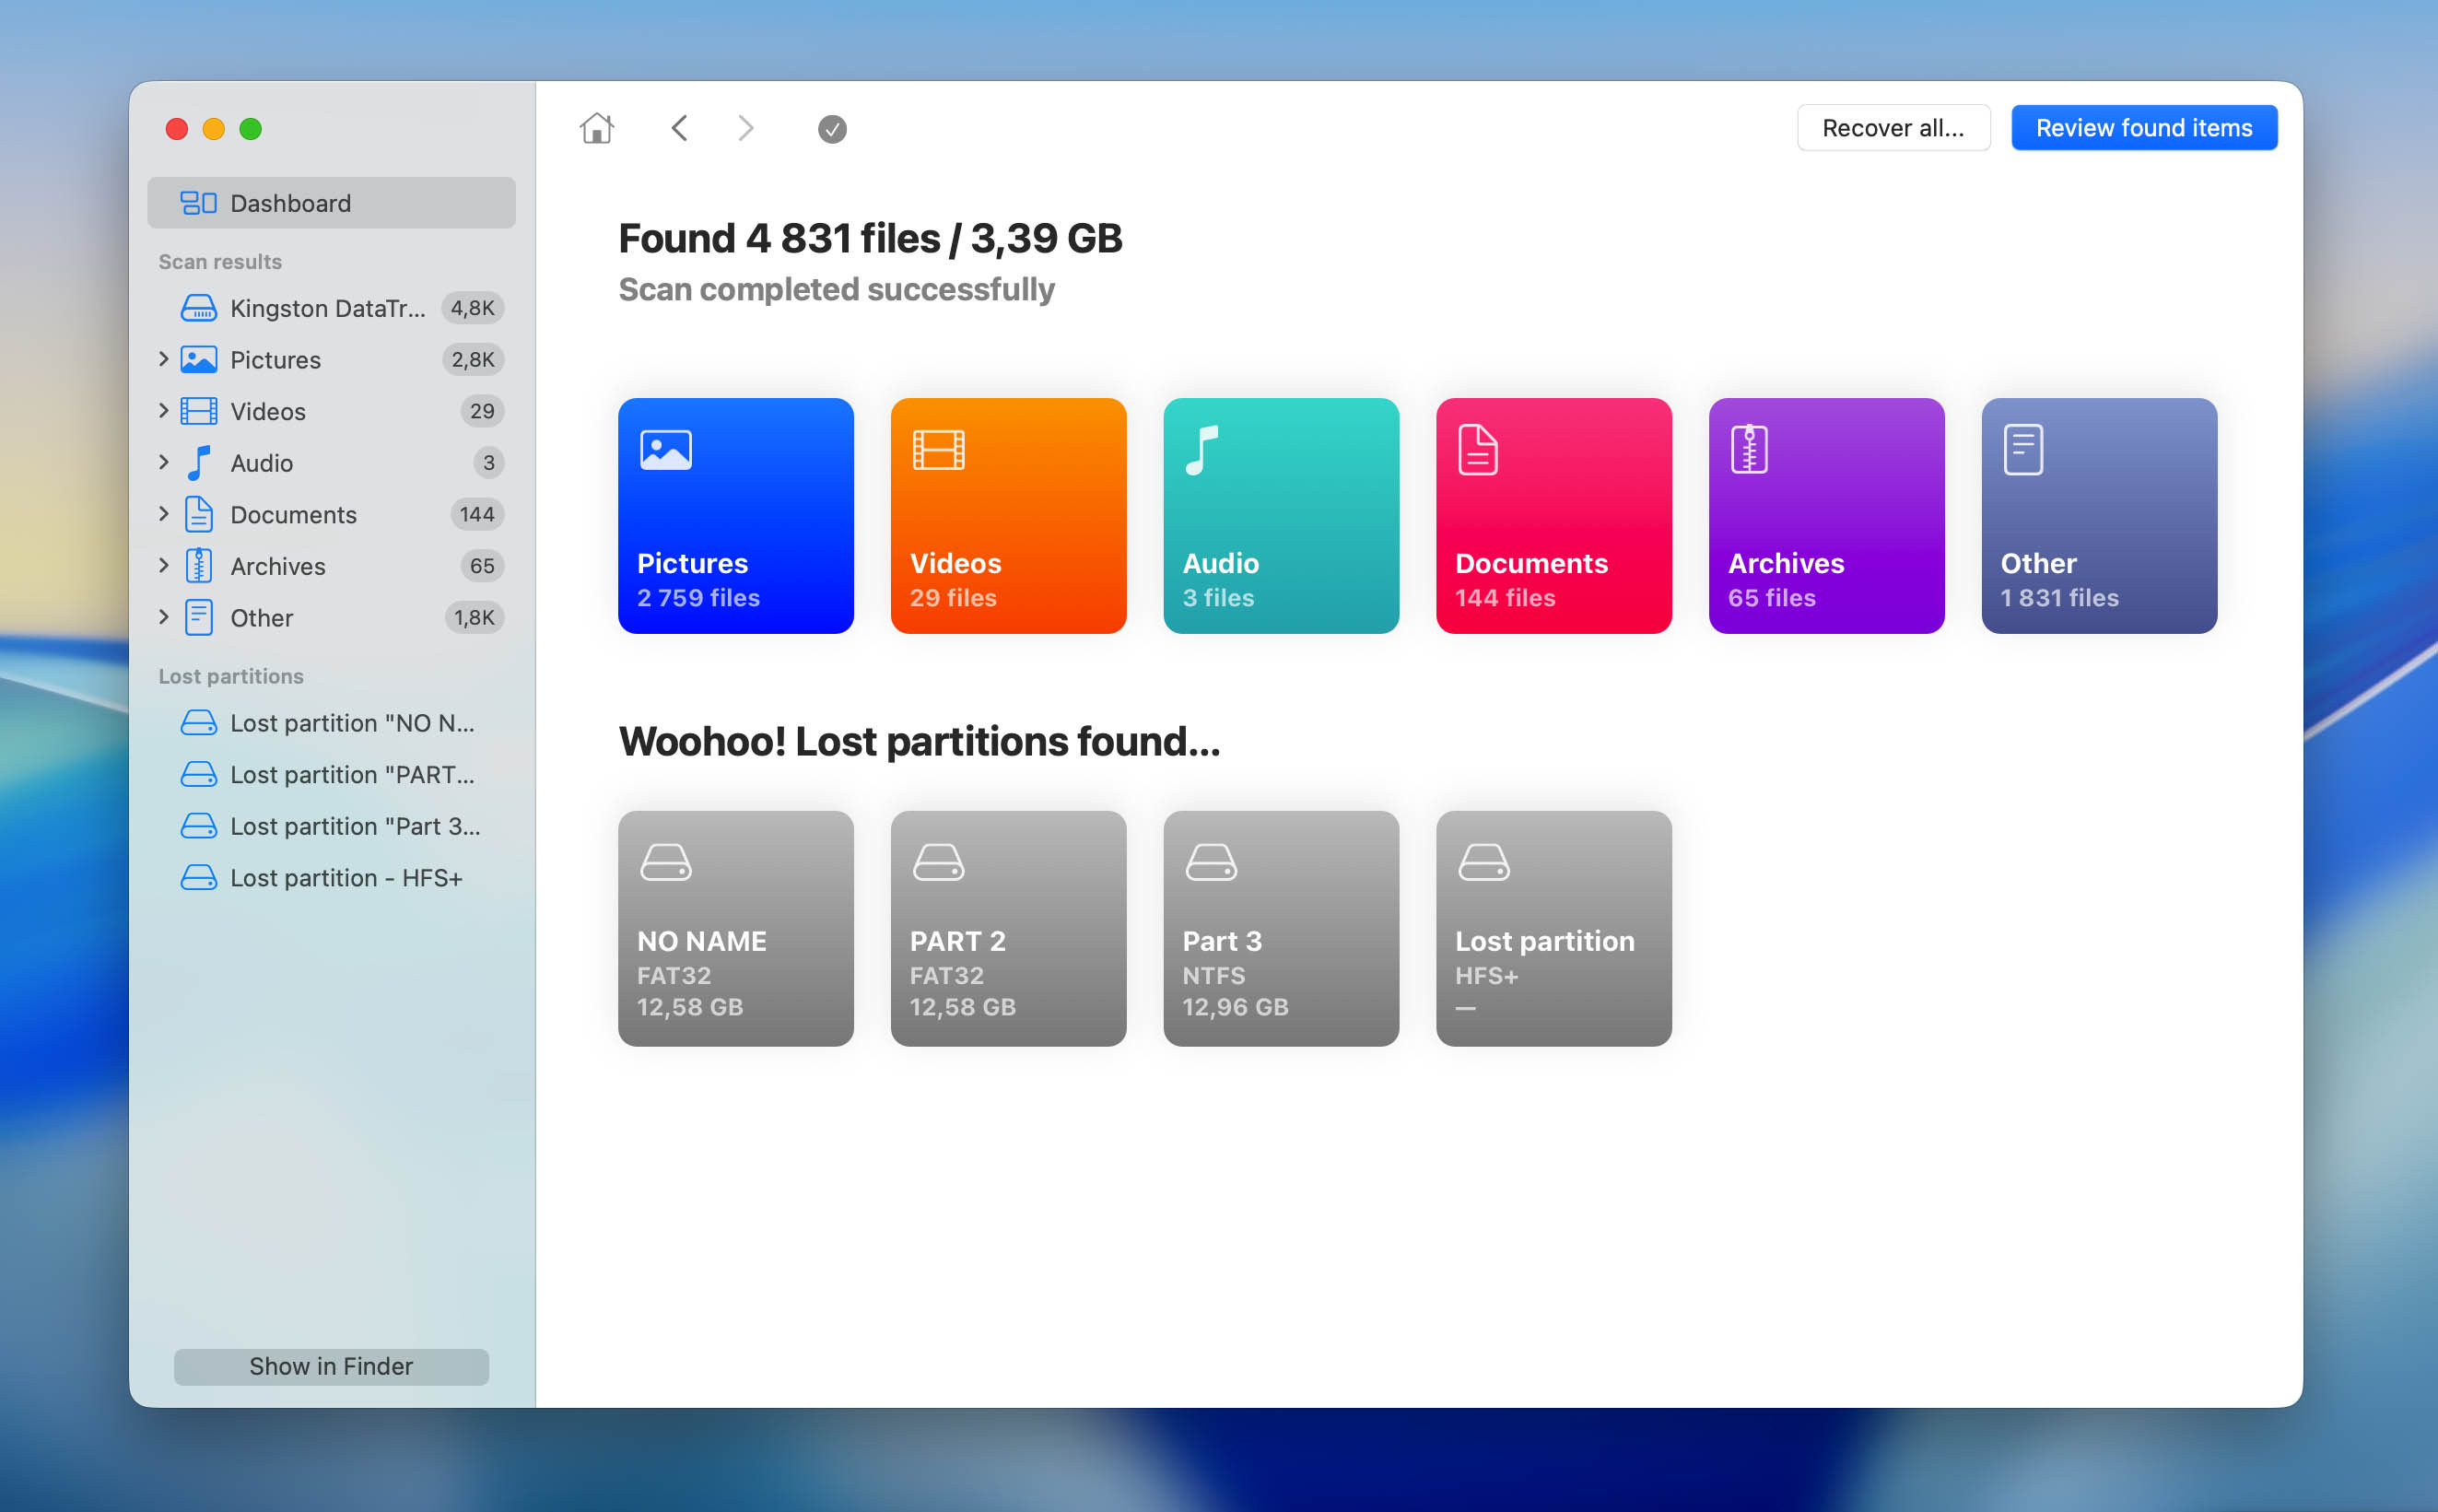
- Once the scan is done, you’ll see three main categories of results: Existing, Deleted, and Reconstructed and Lost. If you’re sure the files were deleted, open the Deleted category first. If you’re not sure, check Existing — sometimes desktop items just move to another system location.

- Use the search field in the upper-right corner to look for a specific file or folder by name or type. You can also filter results using the sidebar on the left. Click the eye icon next to a file to preview it before recovery.
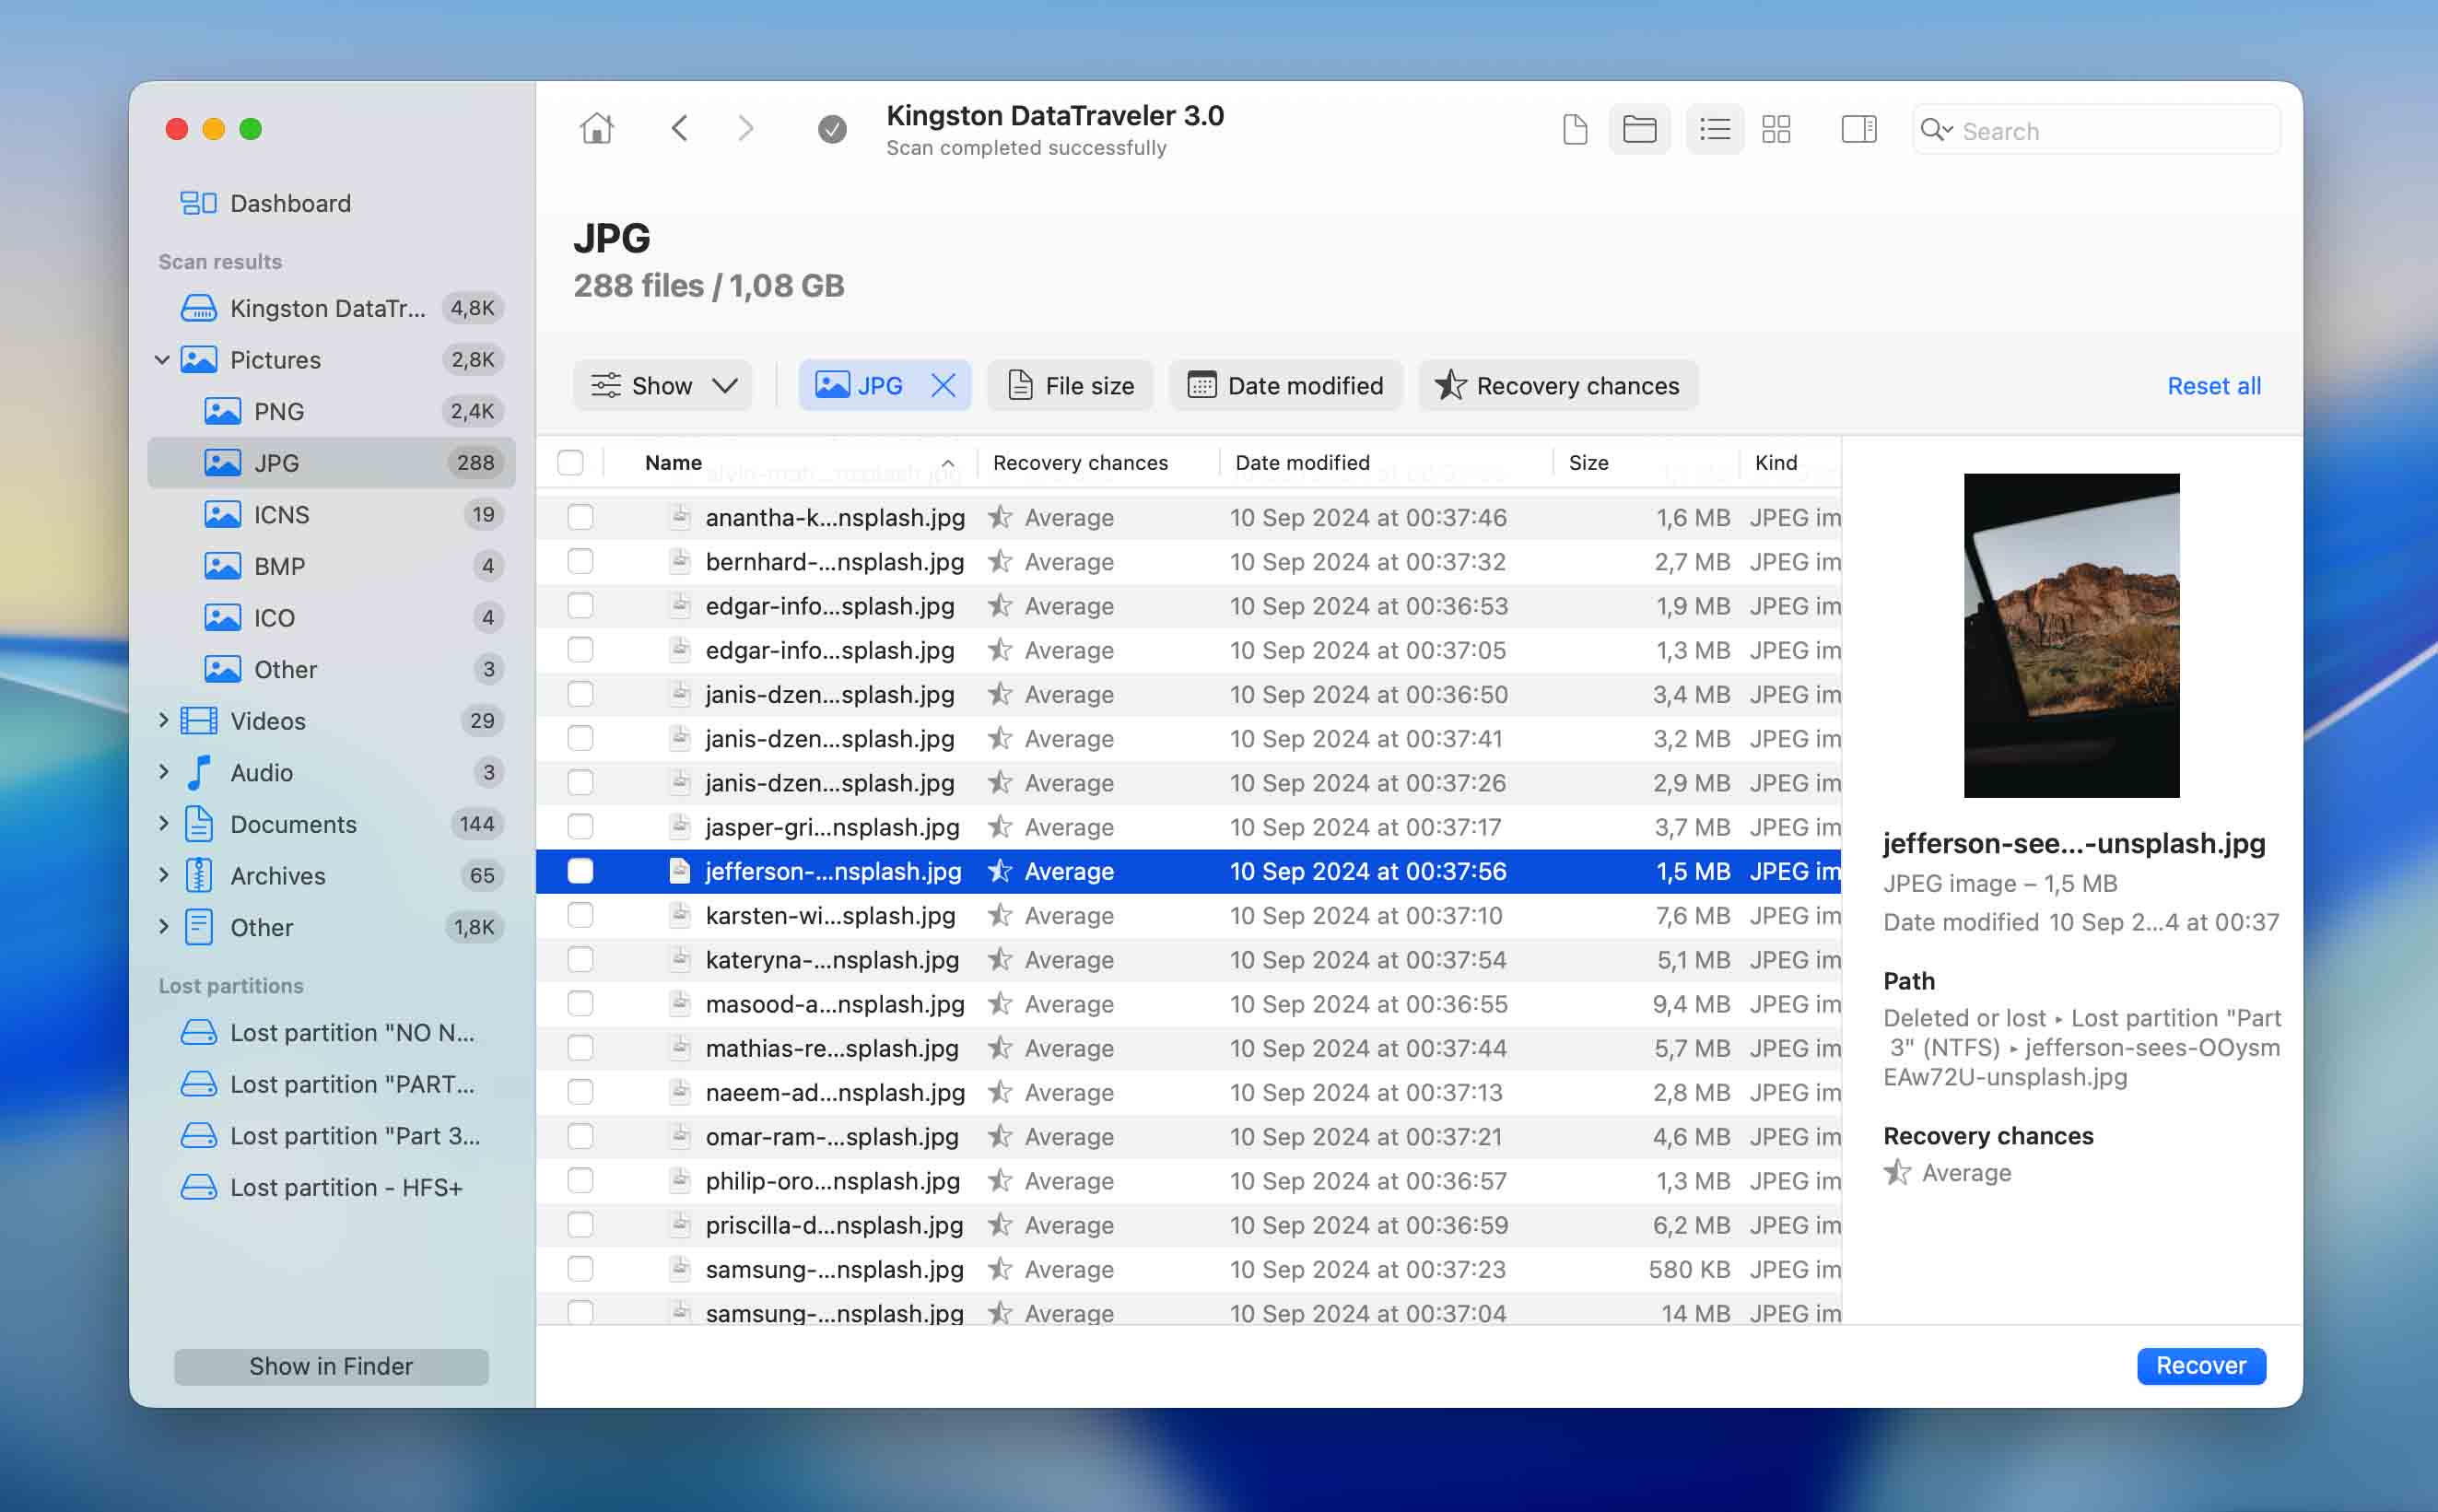
- Select the files or folders you want to restore and click Recover.
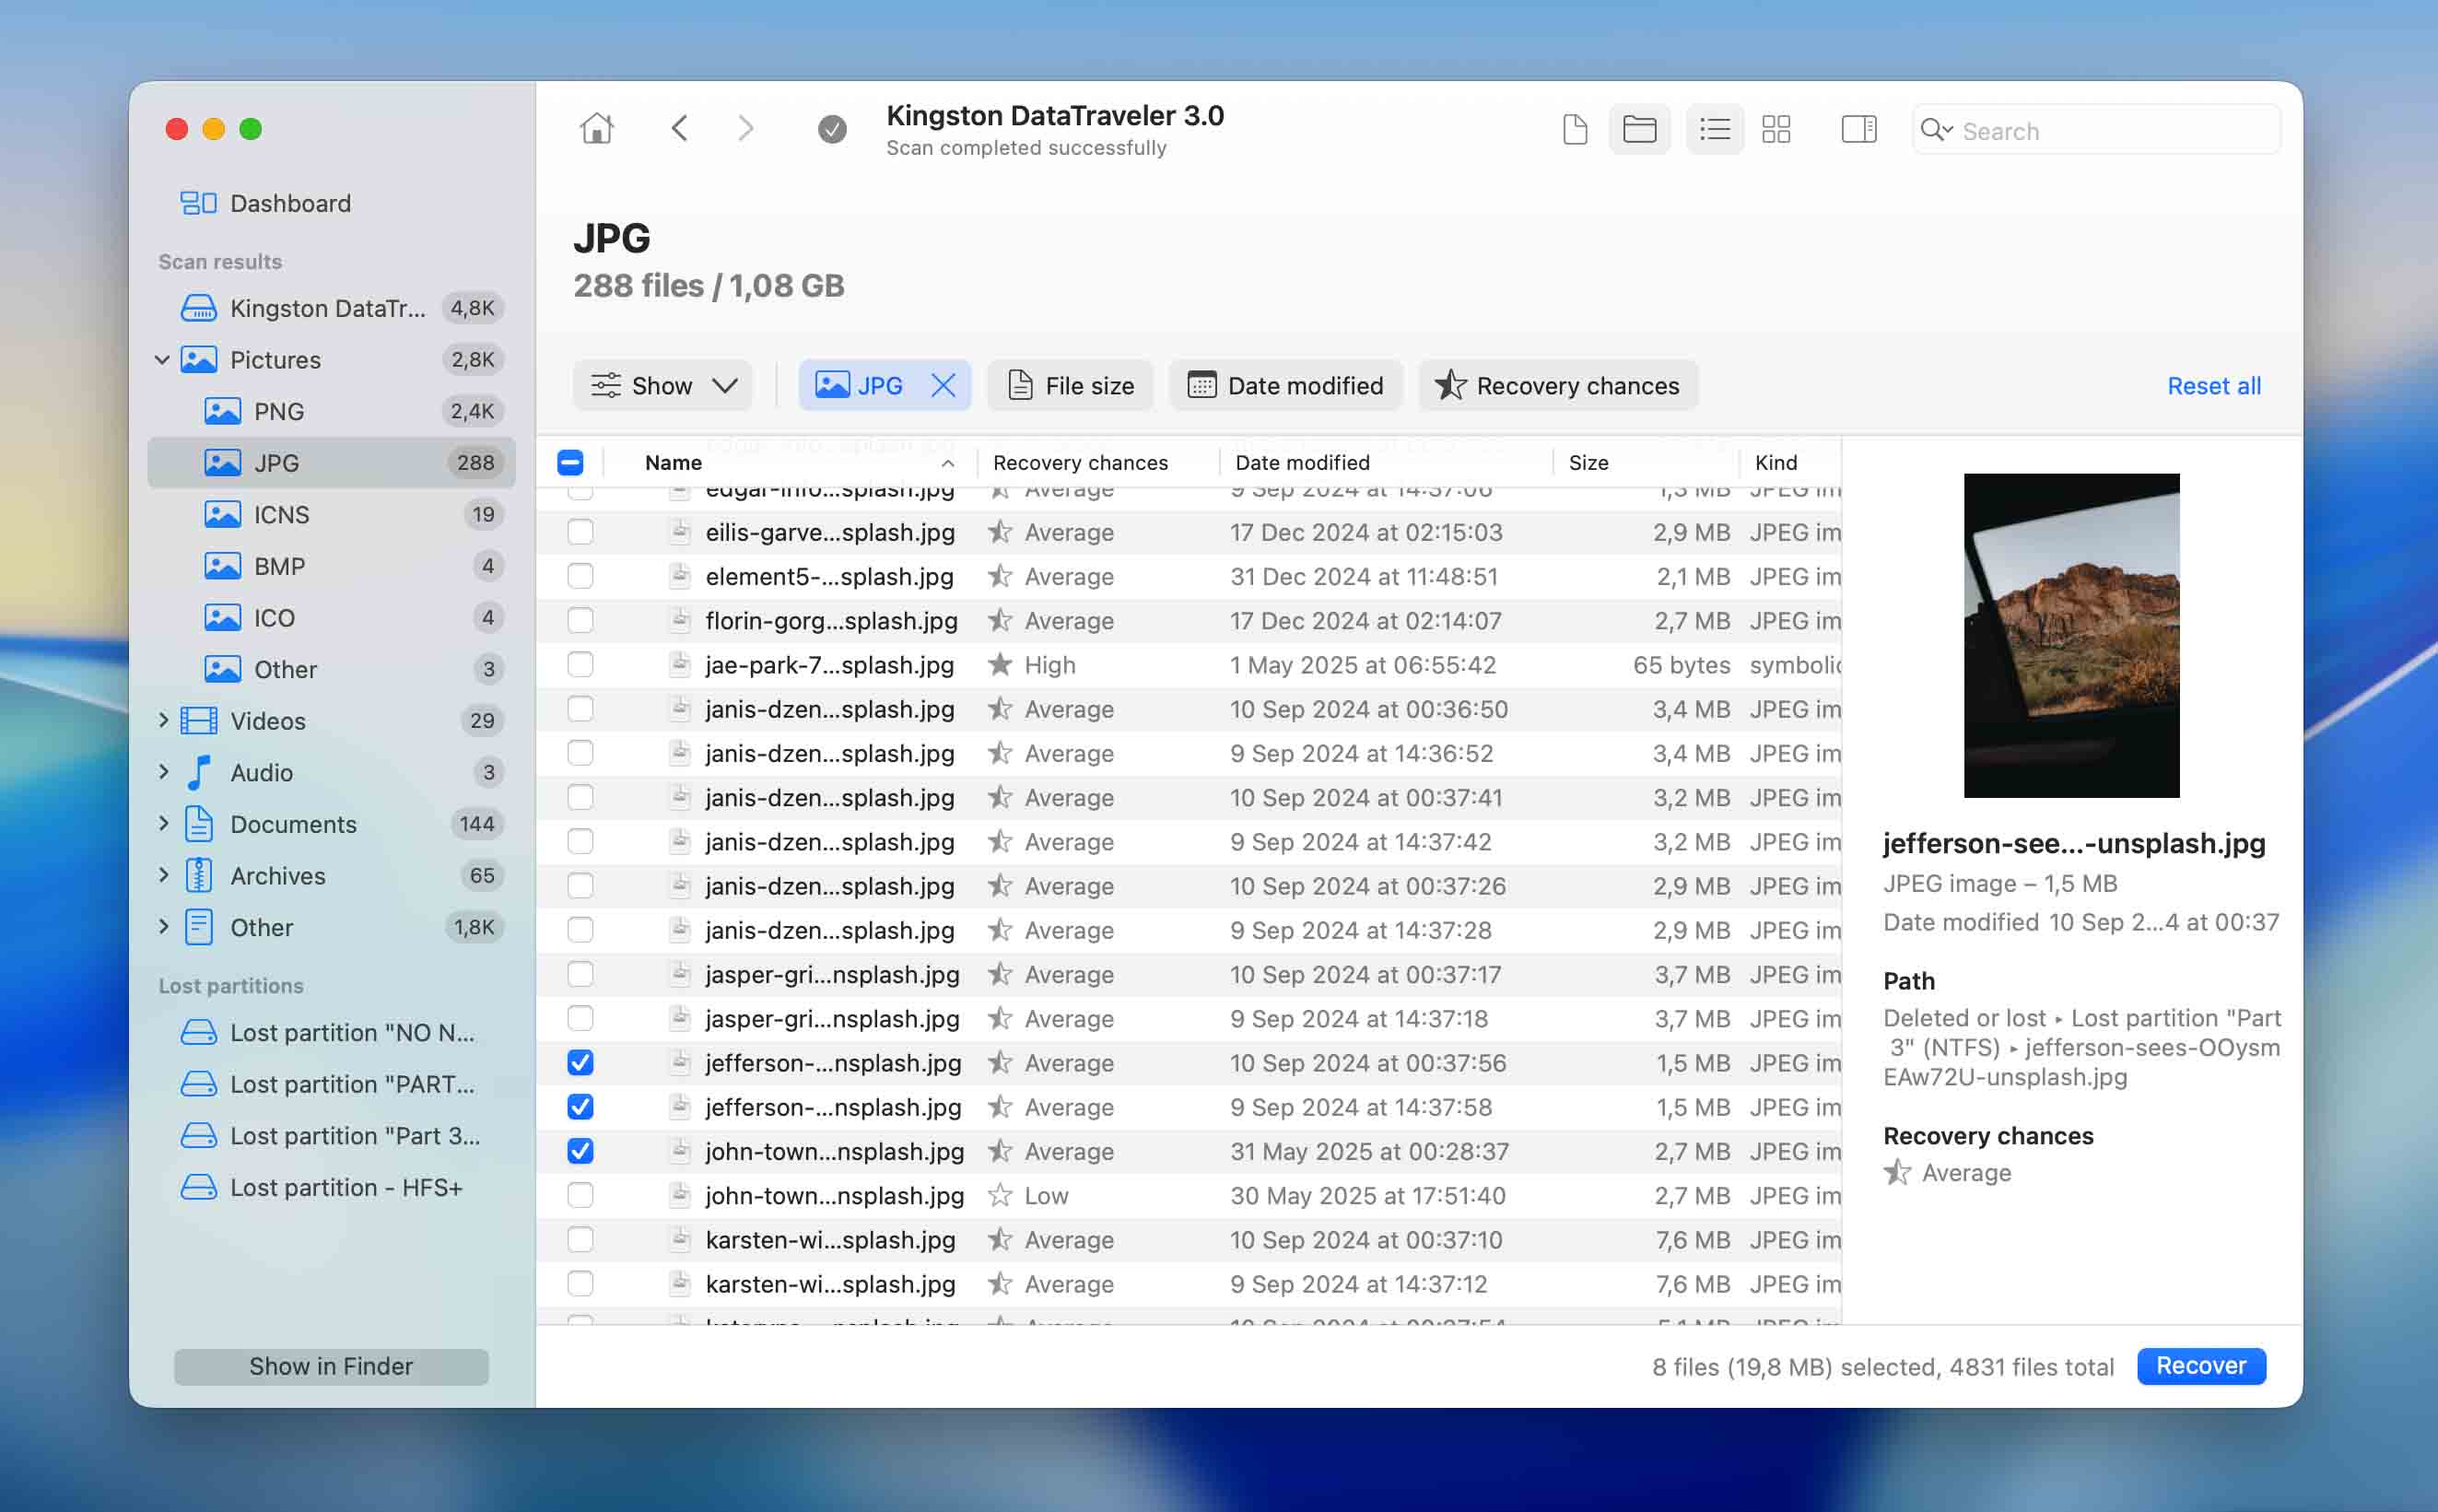
- When prompted, choose where to save the recovered data — pick a different drive, such as a USB flash drive, external SSD, or HDD, not the same disk where the files were deleted.
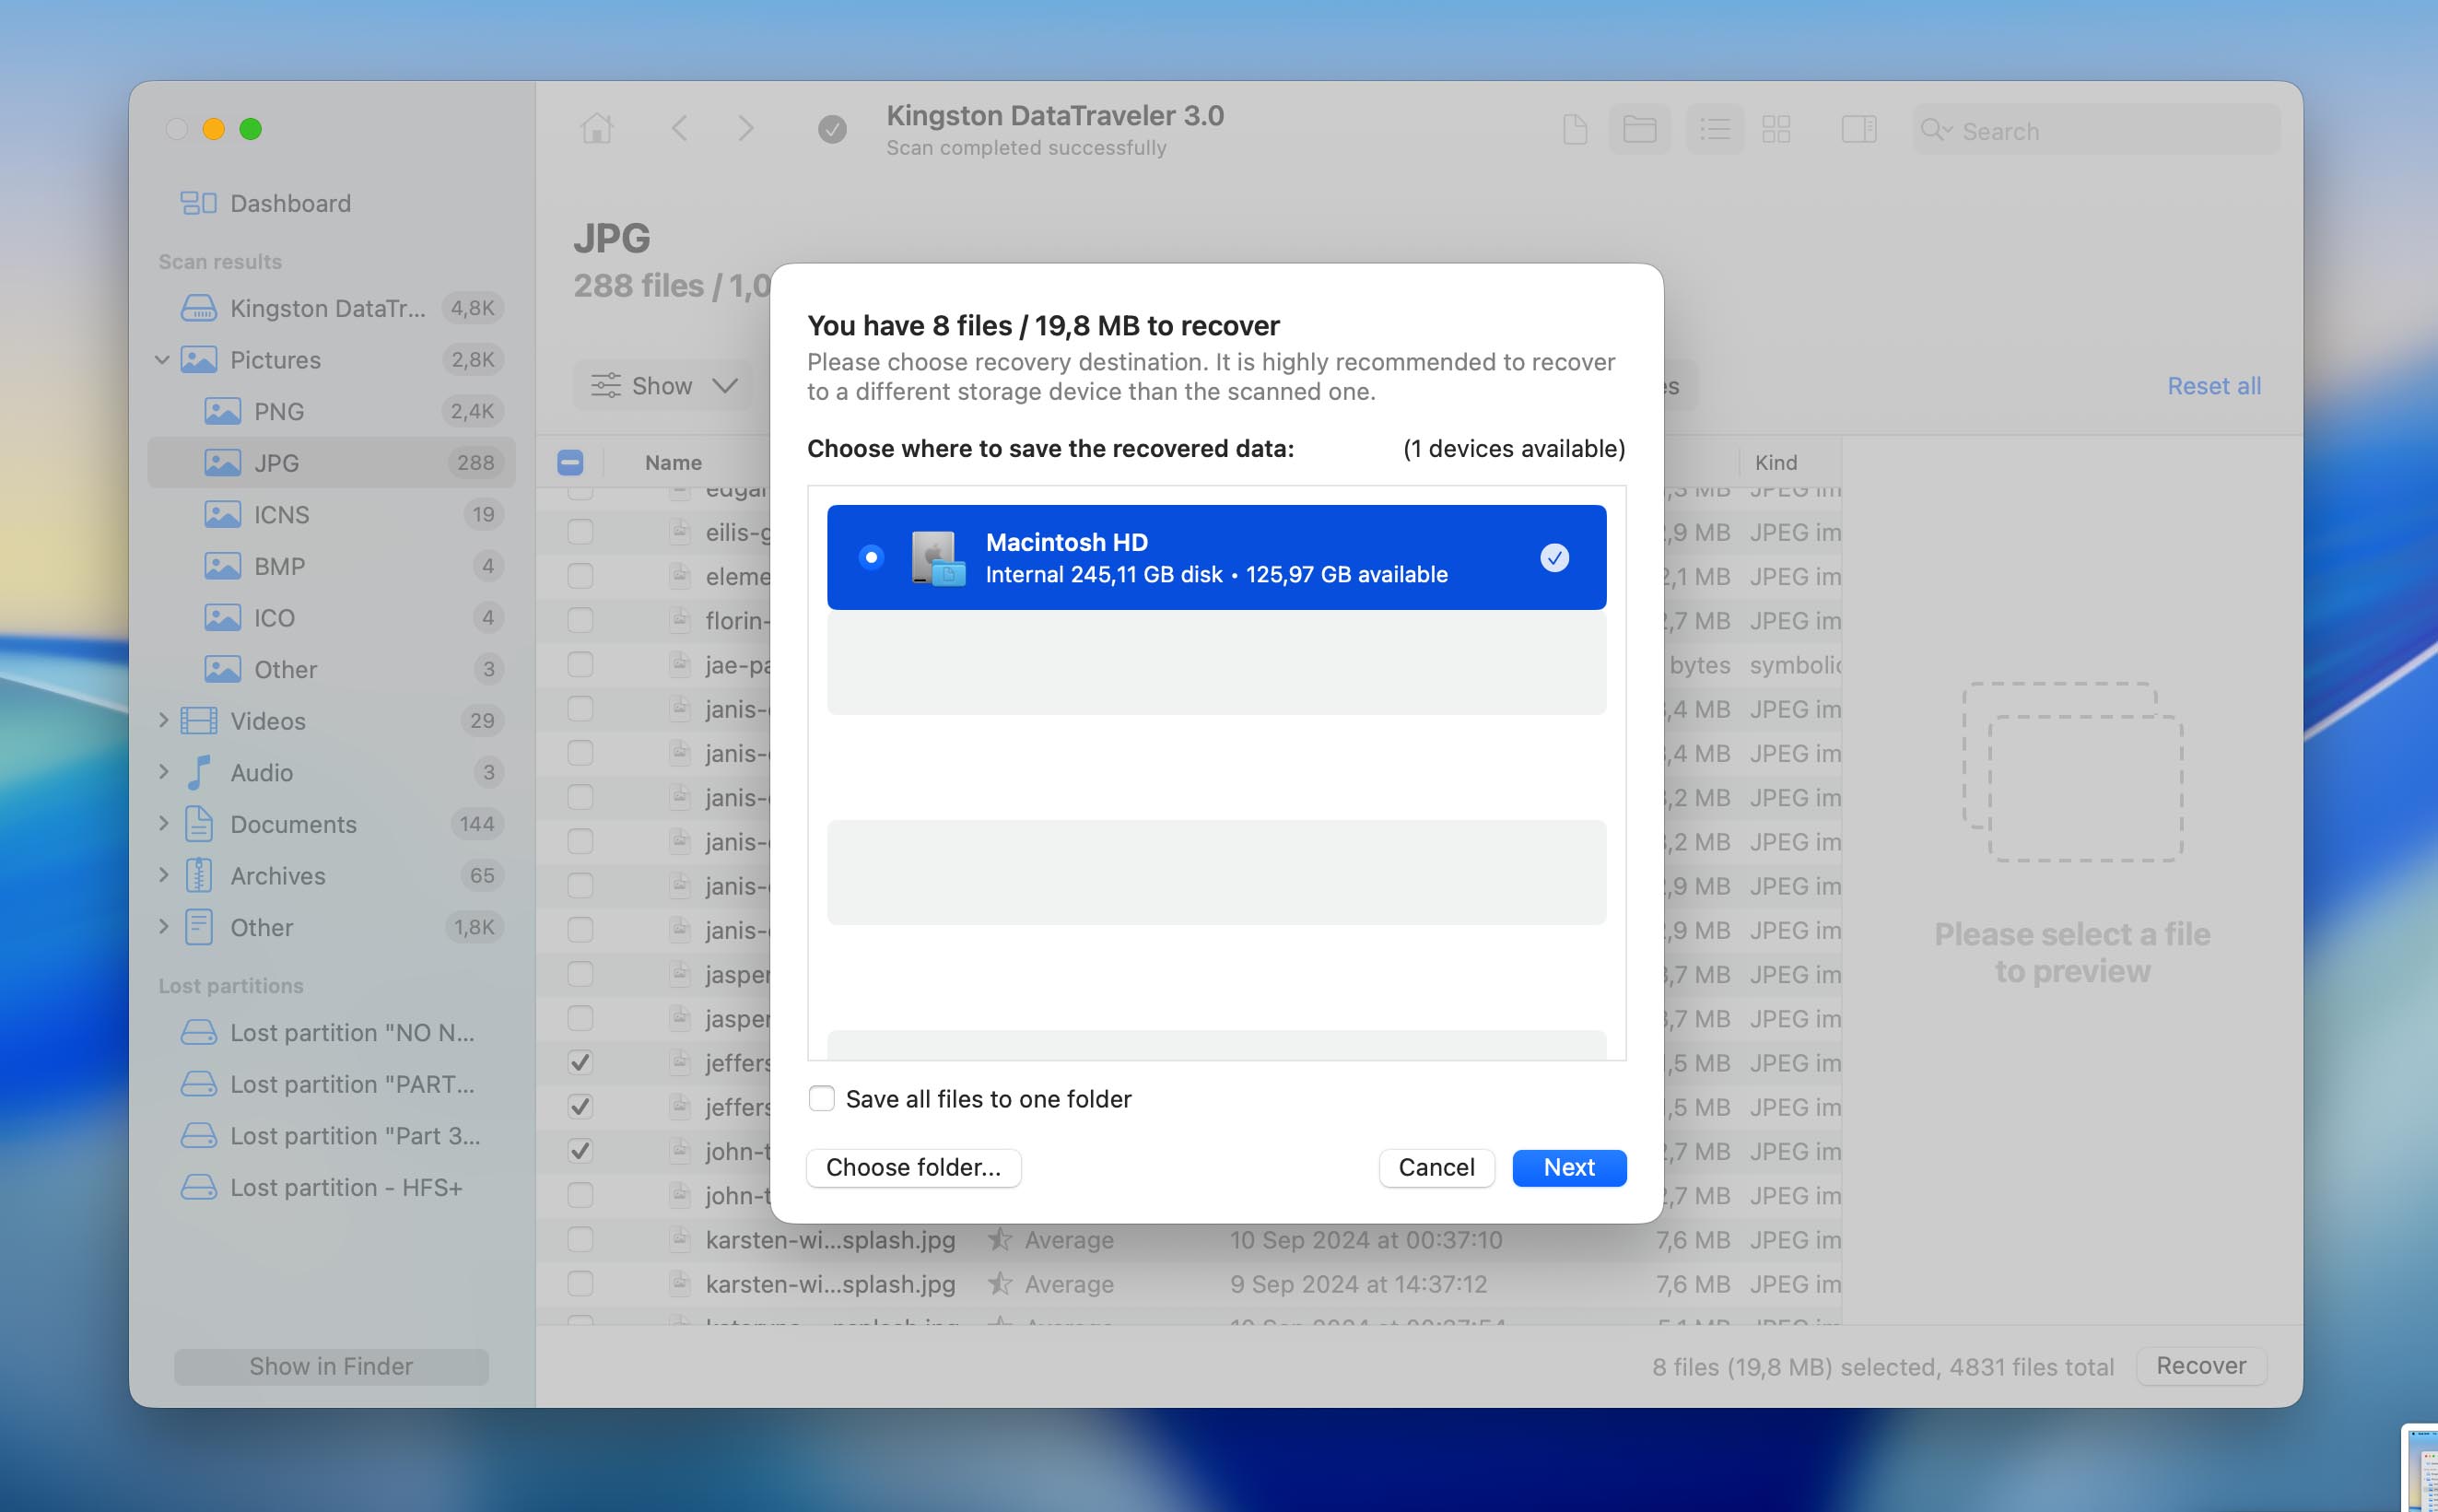
- Disk Drill will start the recovery process. Once it finishes, open the folder you selected and check the restored files.
Option 4: Use Time Machine Backup
When will this method help? If you had regular Time Machine backups set up before the files disappeared.
If you use all the built-in features of your Mac and have Time Machine set up to back up your system regularly, this can be one of the best ways to restore files that disappeared from your desktop. Unlike data recovery software, you don’t have to worry about overwriting or TRIM. The only thing that matters is that the backup created before the files disappeared is still available and up to date.
Follow these steps to restore deleted Desktop files on a Mac using a Time Machine backup:
- Connect the drive containing your backup to your Mac.
- Launch Finder and click Desktop from the sidebar on the left (or any other folder where the missing file or folder was previously located).
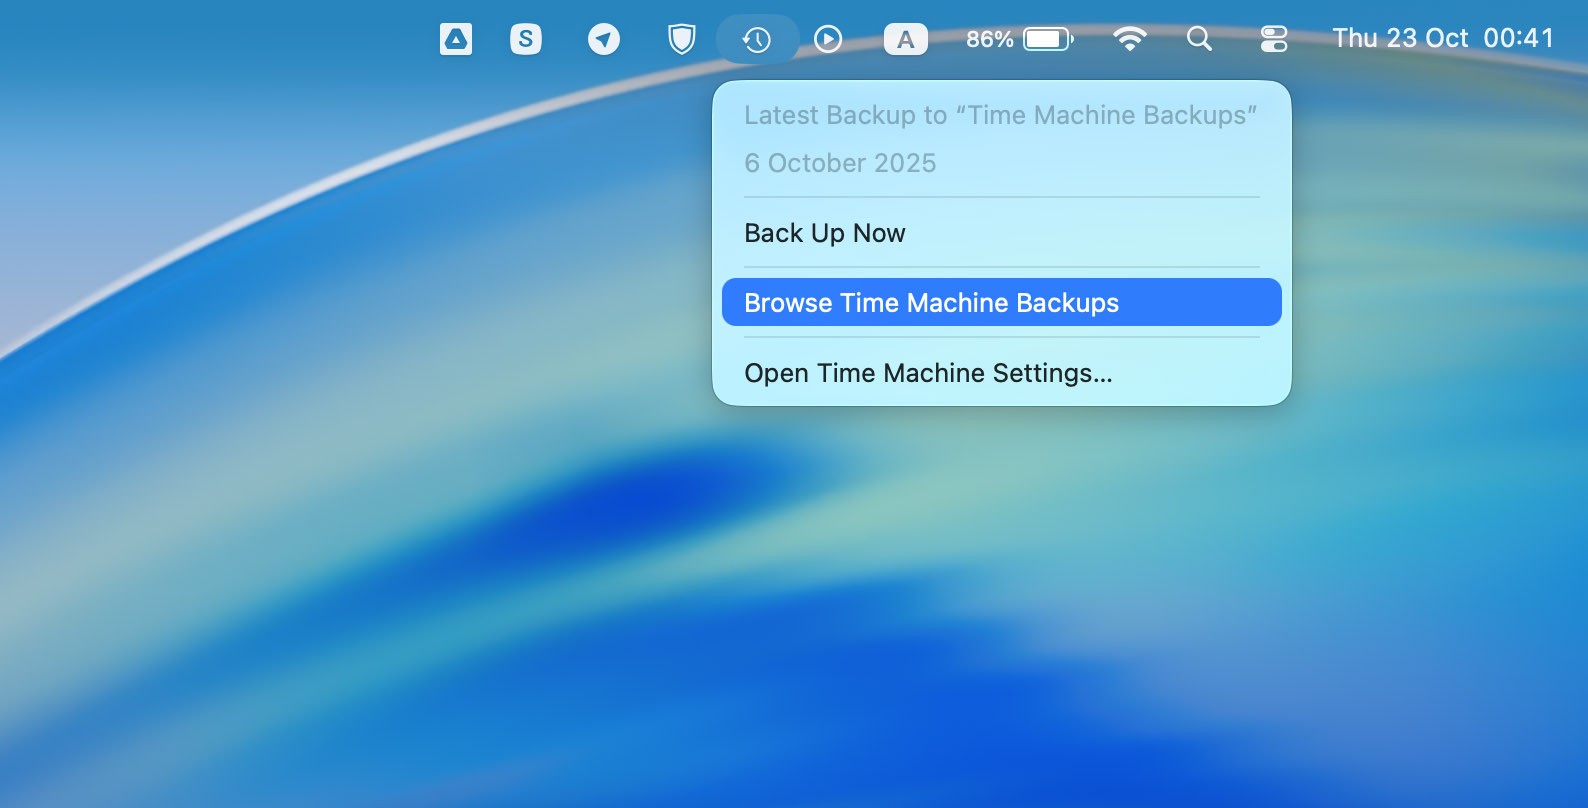
- From the menu at the top of your screen, click the Time Machine icon.
- Select Browse Time Machine Backups.
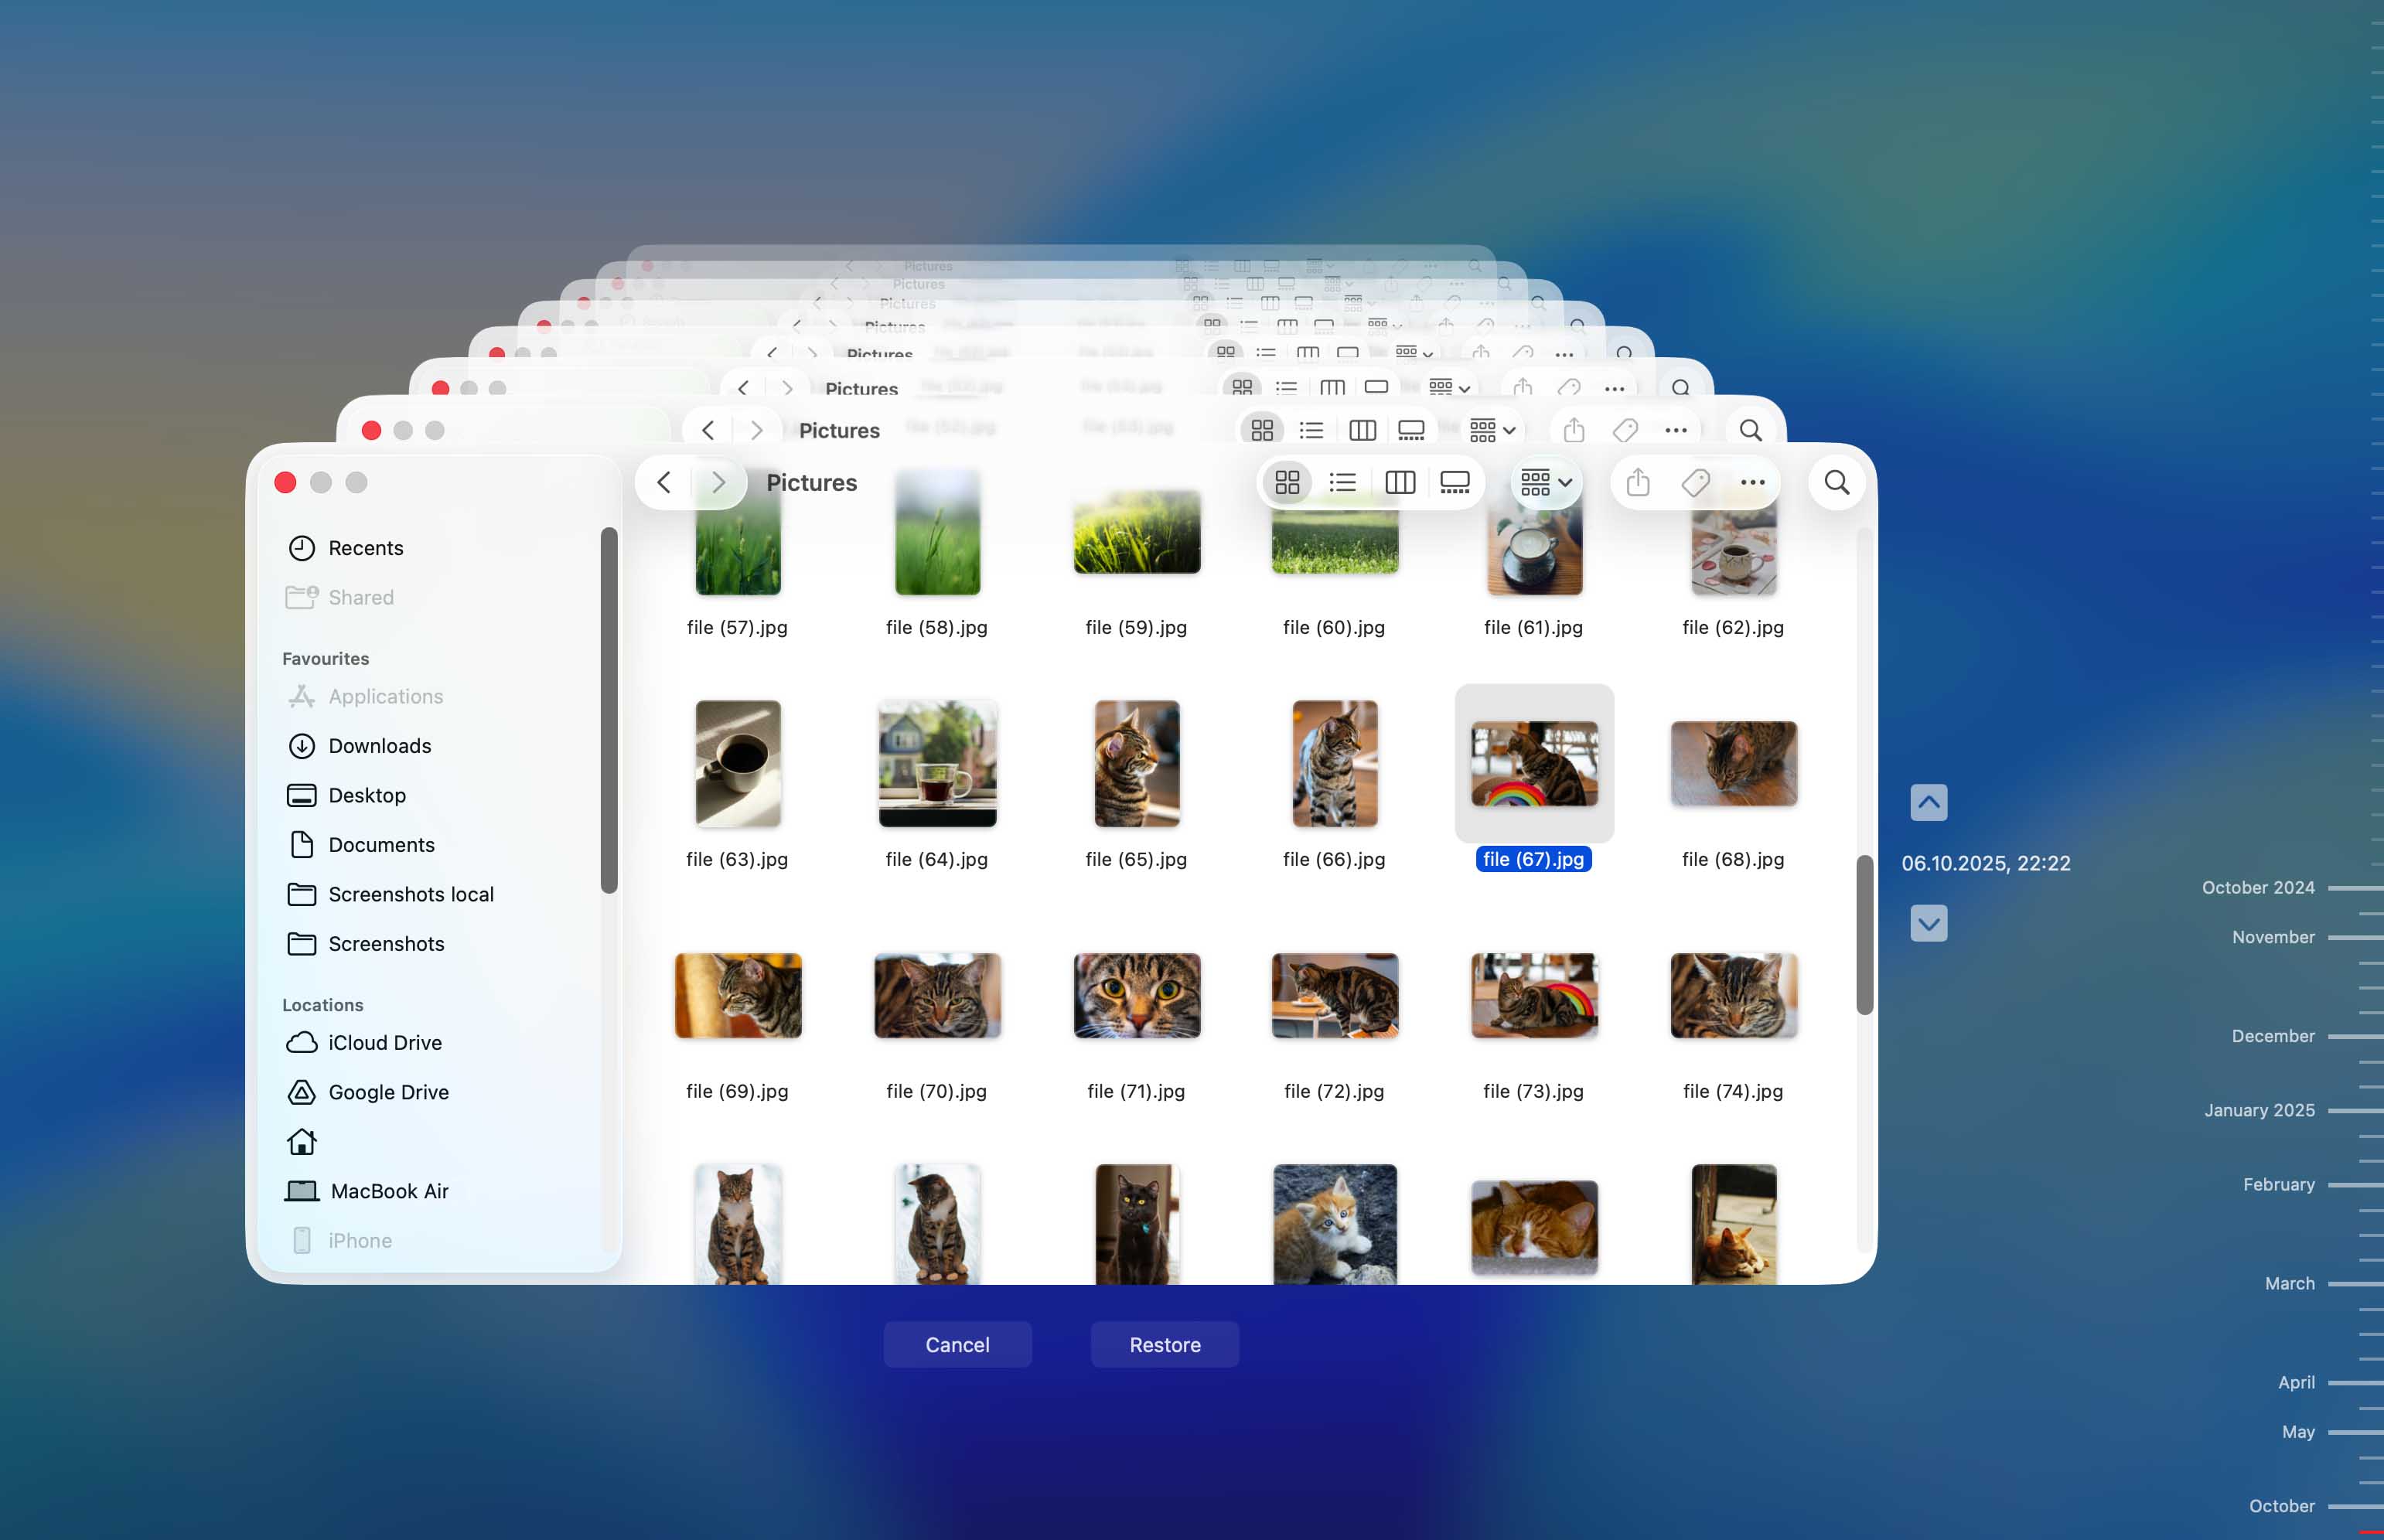
- On the right of the screen, use the timeline to choose the needed backup version. Then either use the search bar or manually search for the needed file or folder.
- Choose the file or folder you wish to recover and click Recover.
Note: If you haven’t been using Time Machine to back up your Mac but have now decided otherwise, it’s a good idea to set up Time Machine after you’ve recovered the lost Desktop files.
How to Find Files and Folders Missing from the Desktop
If you tried the data recovery methods above and managed to bring back your missing files and folders from the desktop — great, you’re done and don’t need this part. But if recovery didn’t work and you’ve already spent a few minutes trying, it’s time to move on to another group of methods that focus more on searching than on recovery. By this point, you’ve ruled out the possibility of deletion, so time isn’t critical anymore. Just go through each method at your own pace — some of them might help you find the disappeared desktop folder or files on your Mac.
Option 1: Make Sure Your Drive Icons are Showing
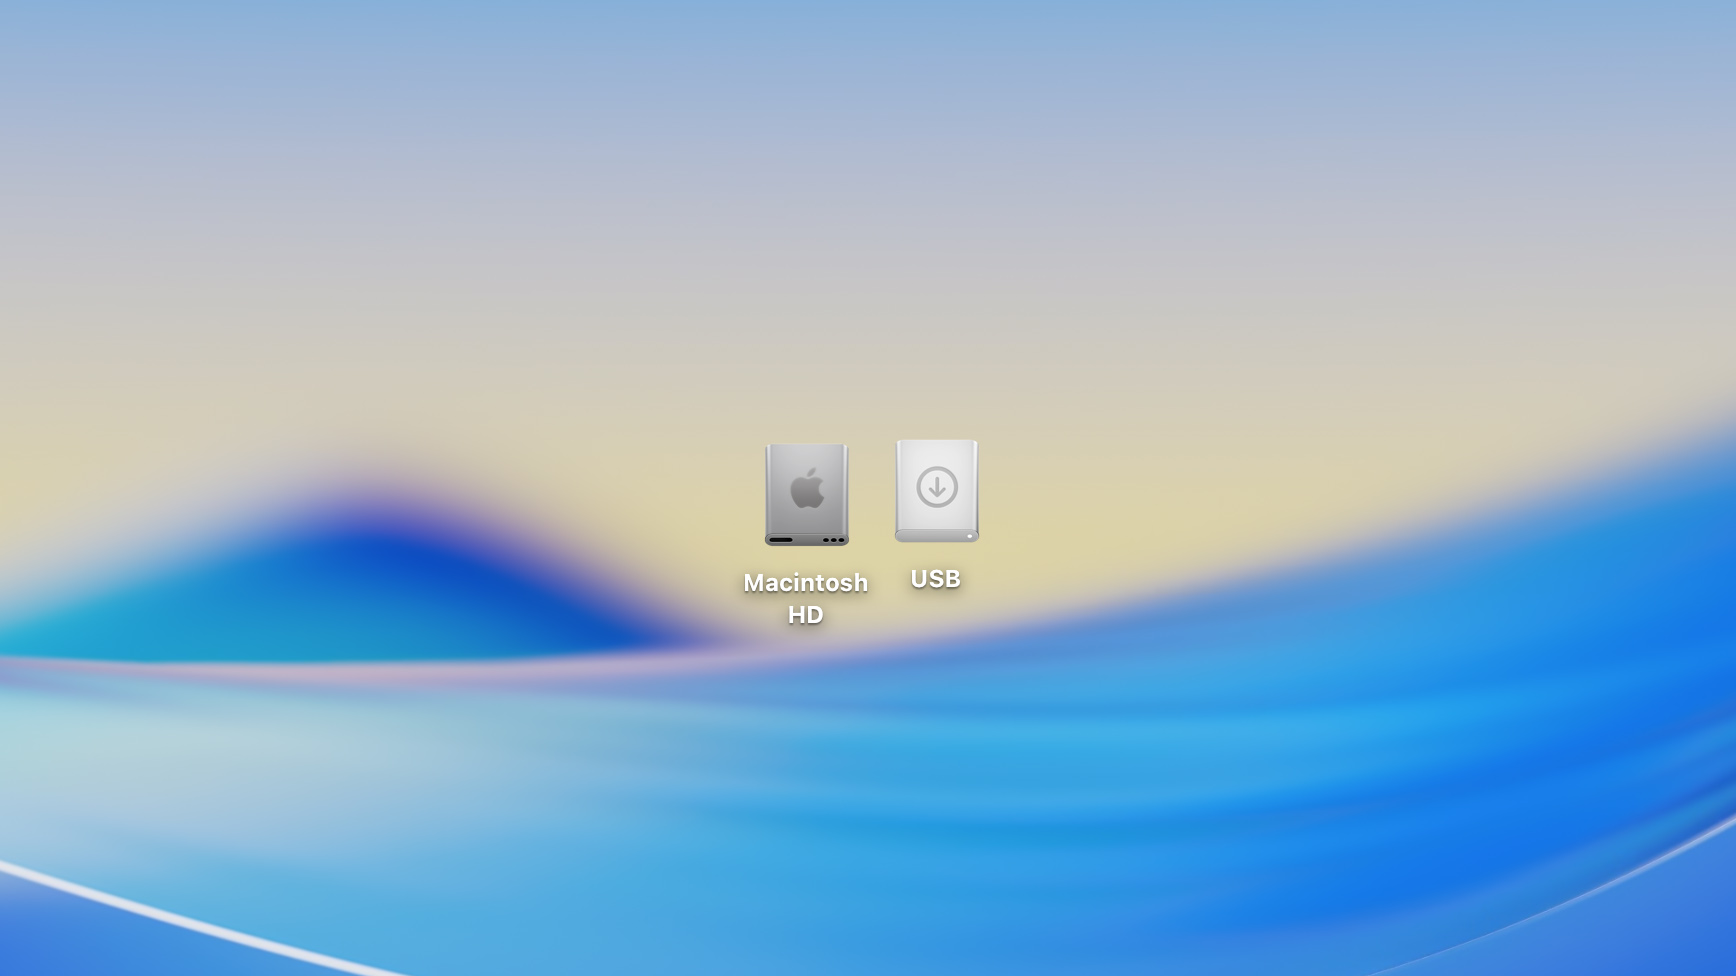
When will this method help? If your Mac desktop folders disappeared and you don’t see any connected external storage devices.
If you’re not seeing any connected hard disks and external drives on your Mac’s Desktop, it’s a good idea to check the settings to make sure that they’re tweaked the right way. Here’s what you should do:
- Launch Finder.
- Click Finder at the top of the screen and choose Settings from the drop-down menu.
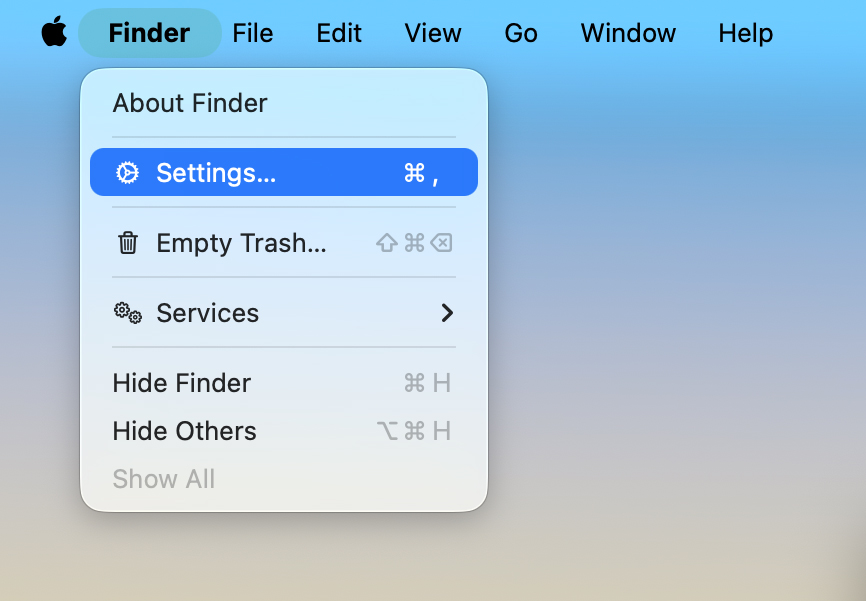
- Click the General tab.
- Make sure there is a tick near Hard disks and External disks (if not, click the box near the options).
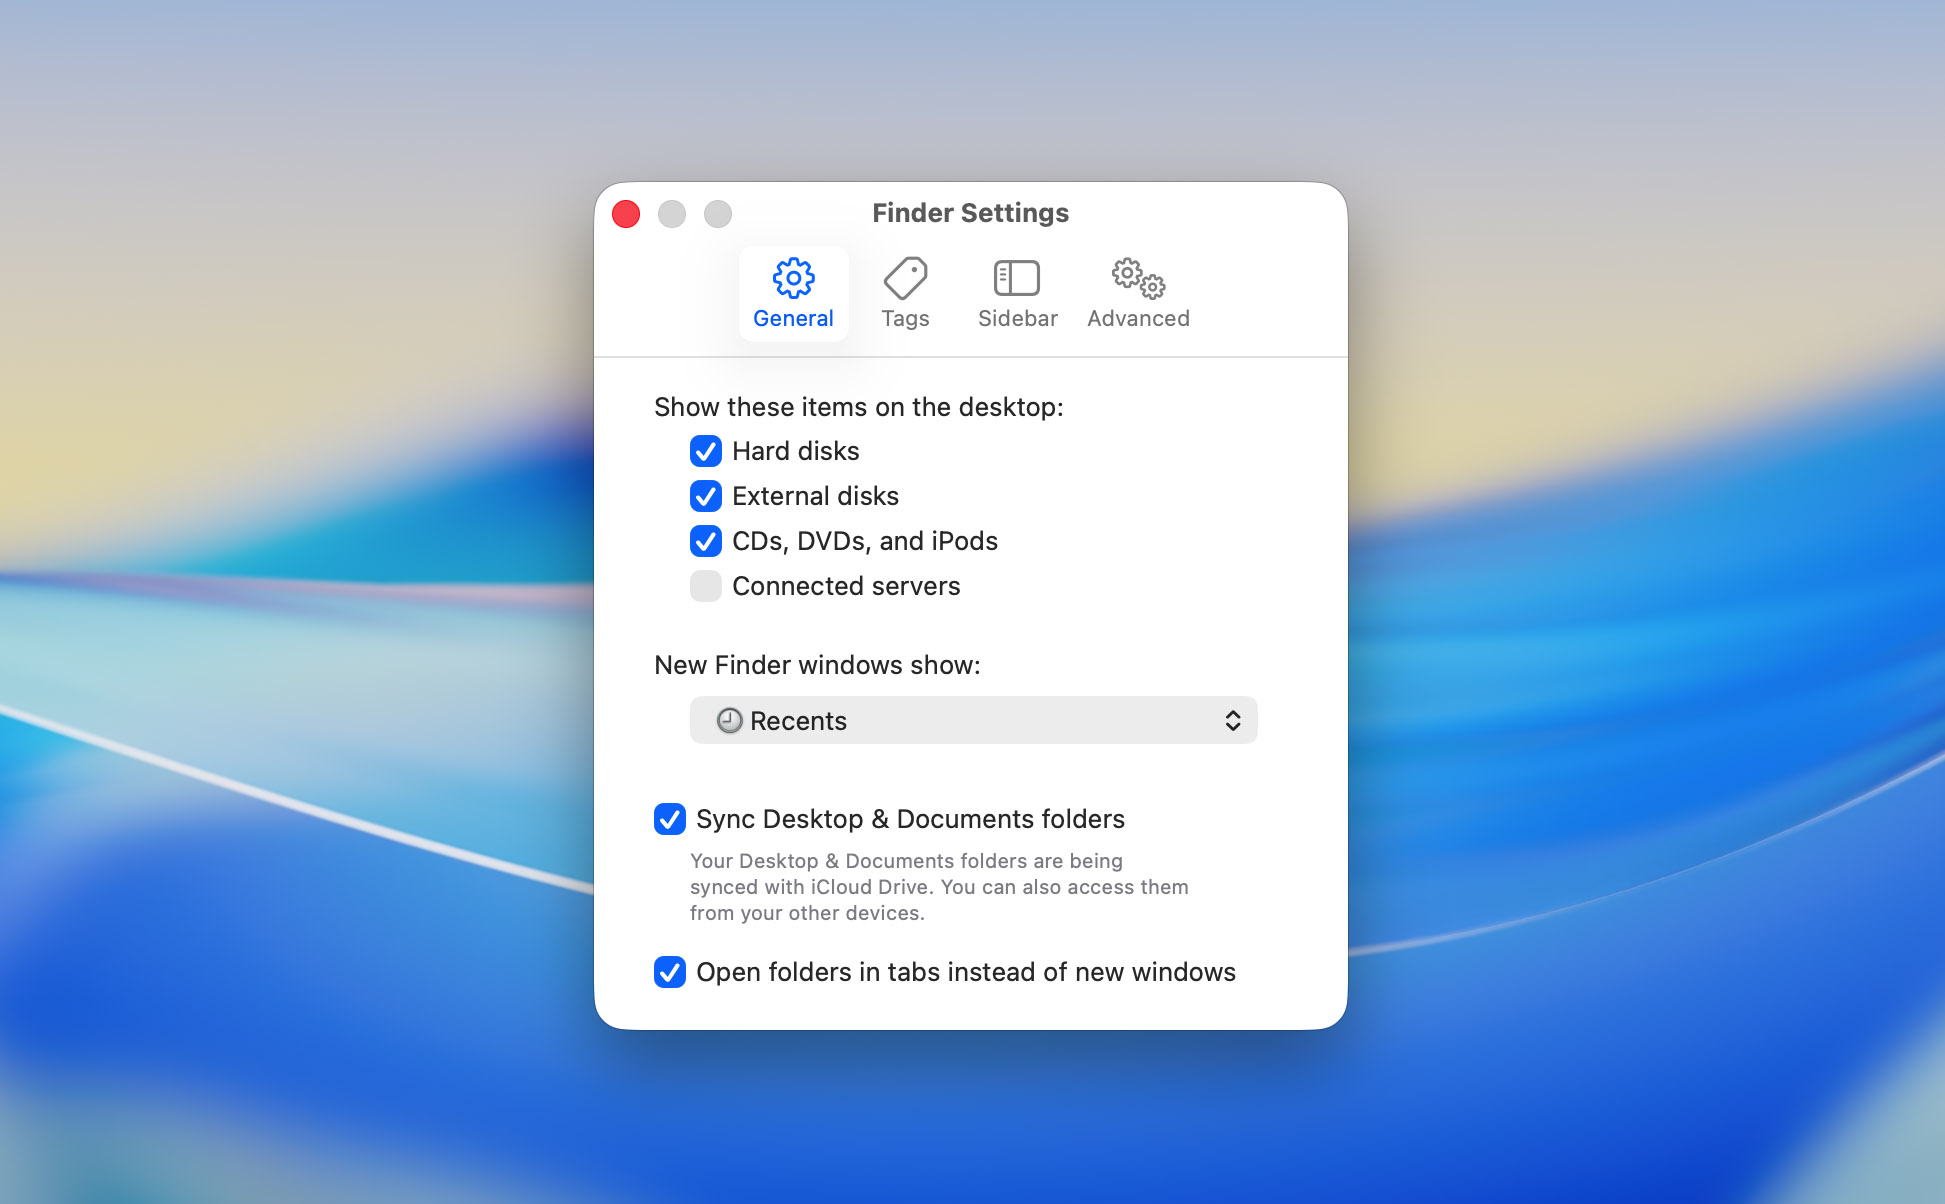
- Go to the Desktop on your Mac to check if the drive icons have appeared.
Option 2: Check for Hidden Files in Finder
When will this method help? If the files or folders didn’t get deleted but were hidden manually or by mistake, for example, after using key shortcuts or system commands that hide items on the desktop.
If some of the files disappeared from the Desktop on your Mac, there is a chance that you’ve hidden the files on your Desktop by yourself, either without noticing it or on purpose. Luckily, it’s possible to easily unhide the files on your Mac with a simple key combination.
To unhide Desktop folders on Mac, follow these steps:
- Launch the Finder app.
- Navigate to the Desktop folder (either click Desktop on the sidebar on the left, or if Desktop is missing from Finder, click Go from the menu on the top and choose Desktop).
- Press the following keys on the keyboard: Command + Shift + . (period)

- If you notice files or folders among them that you actually need to keep visible, move those specific items to a new location before hiding everything again.
If you’ve actually hidden the files on the Desktop by yourself, this method should reveal those files. Otherwise, move on to the next method.
When you unhide all files on your Mac, you’ll also reveal system and service files that are normally hidden for a reason. Be careful when browsing through them — deleting, renaming, or moving such files can cause your macOS to malfunction, apps to stop launching, or the system to fail to boot properly. So, look for your disappeared desktop files carefully and avoid touching anything unfamiliar.
Option 3: Try to Find Your Files through Finder
When will this method help? If you suspect that the files or folders that disappeared from your Mac desktop were accidentally moved to another location.
Not sure how to find files on a MacBook? You can try using Finder for this task. This tool can help you quickly locate the needed Desktop file or folder on your Mac.
Follow these steps to search for the lost Desktop files with the help of Finder:
- Launch Finder.
- Press the following keys: Command + Shift + G
- In the field that has appeared, type in /Users/Shared/ and hit Return.
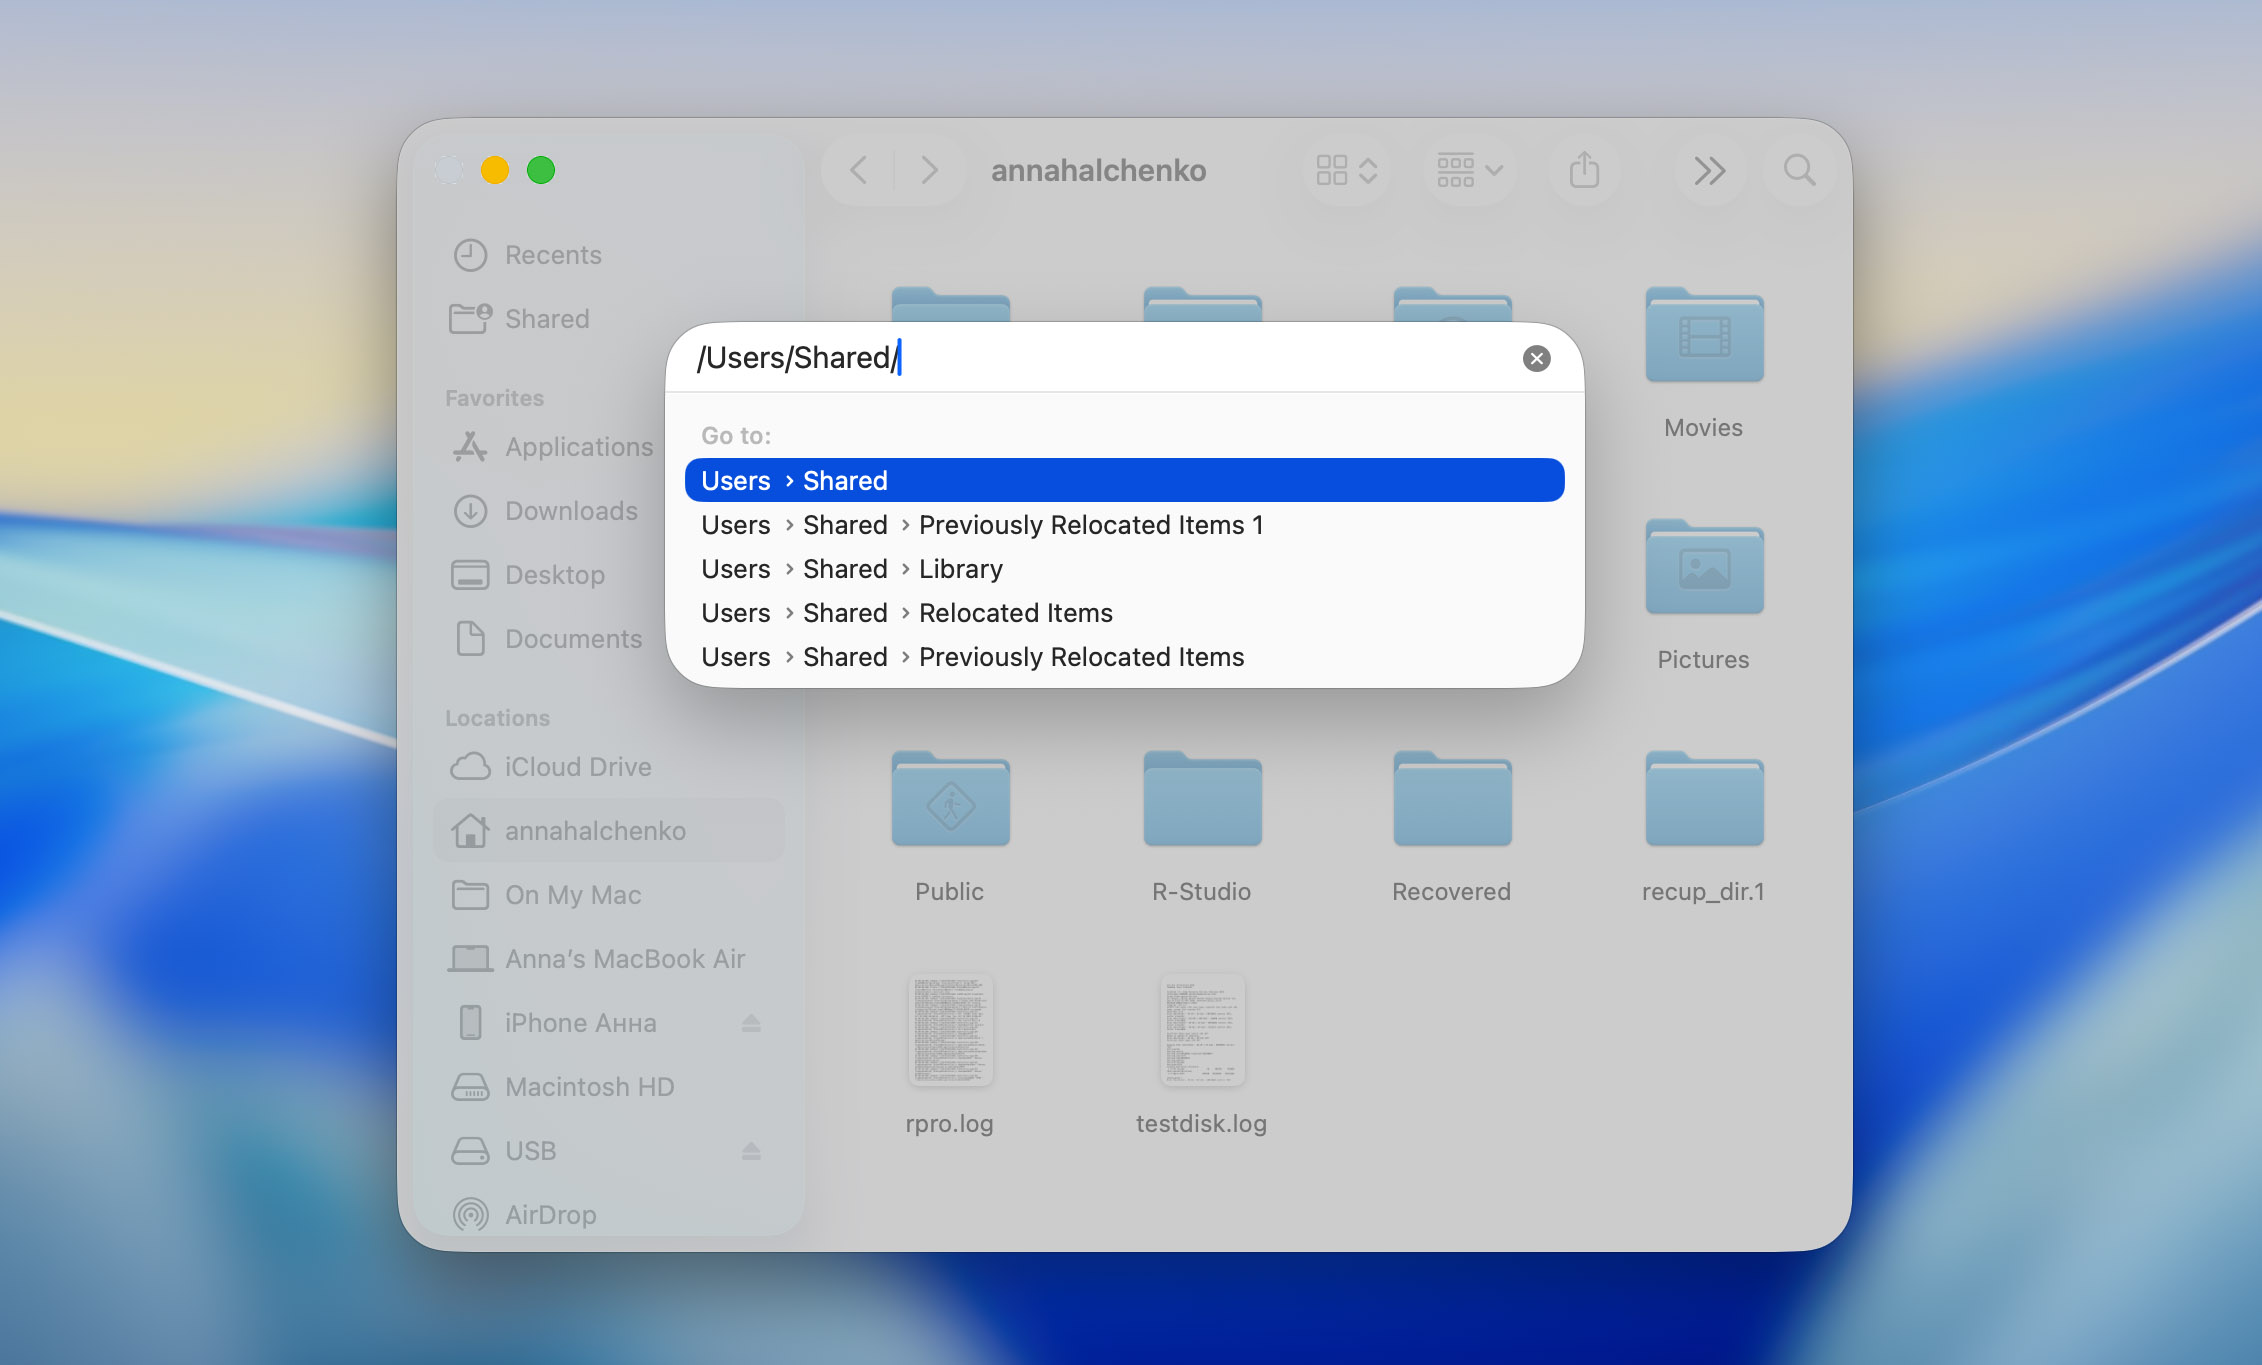
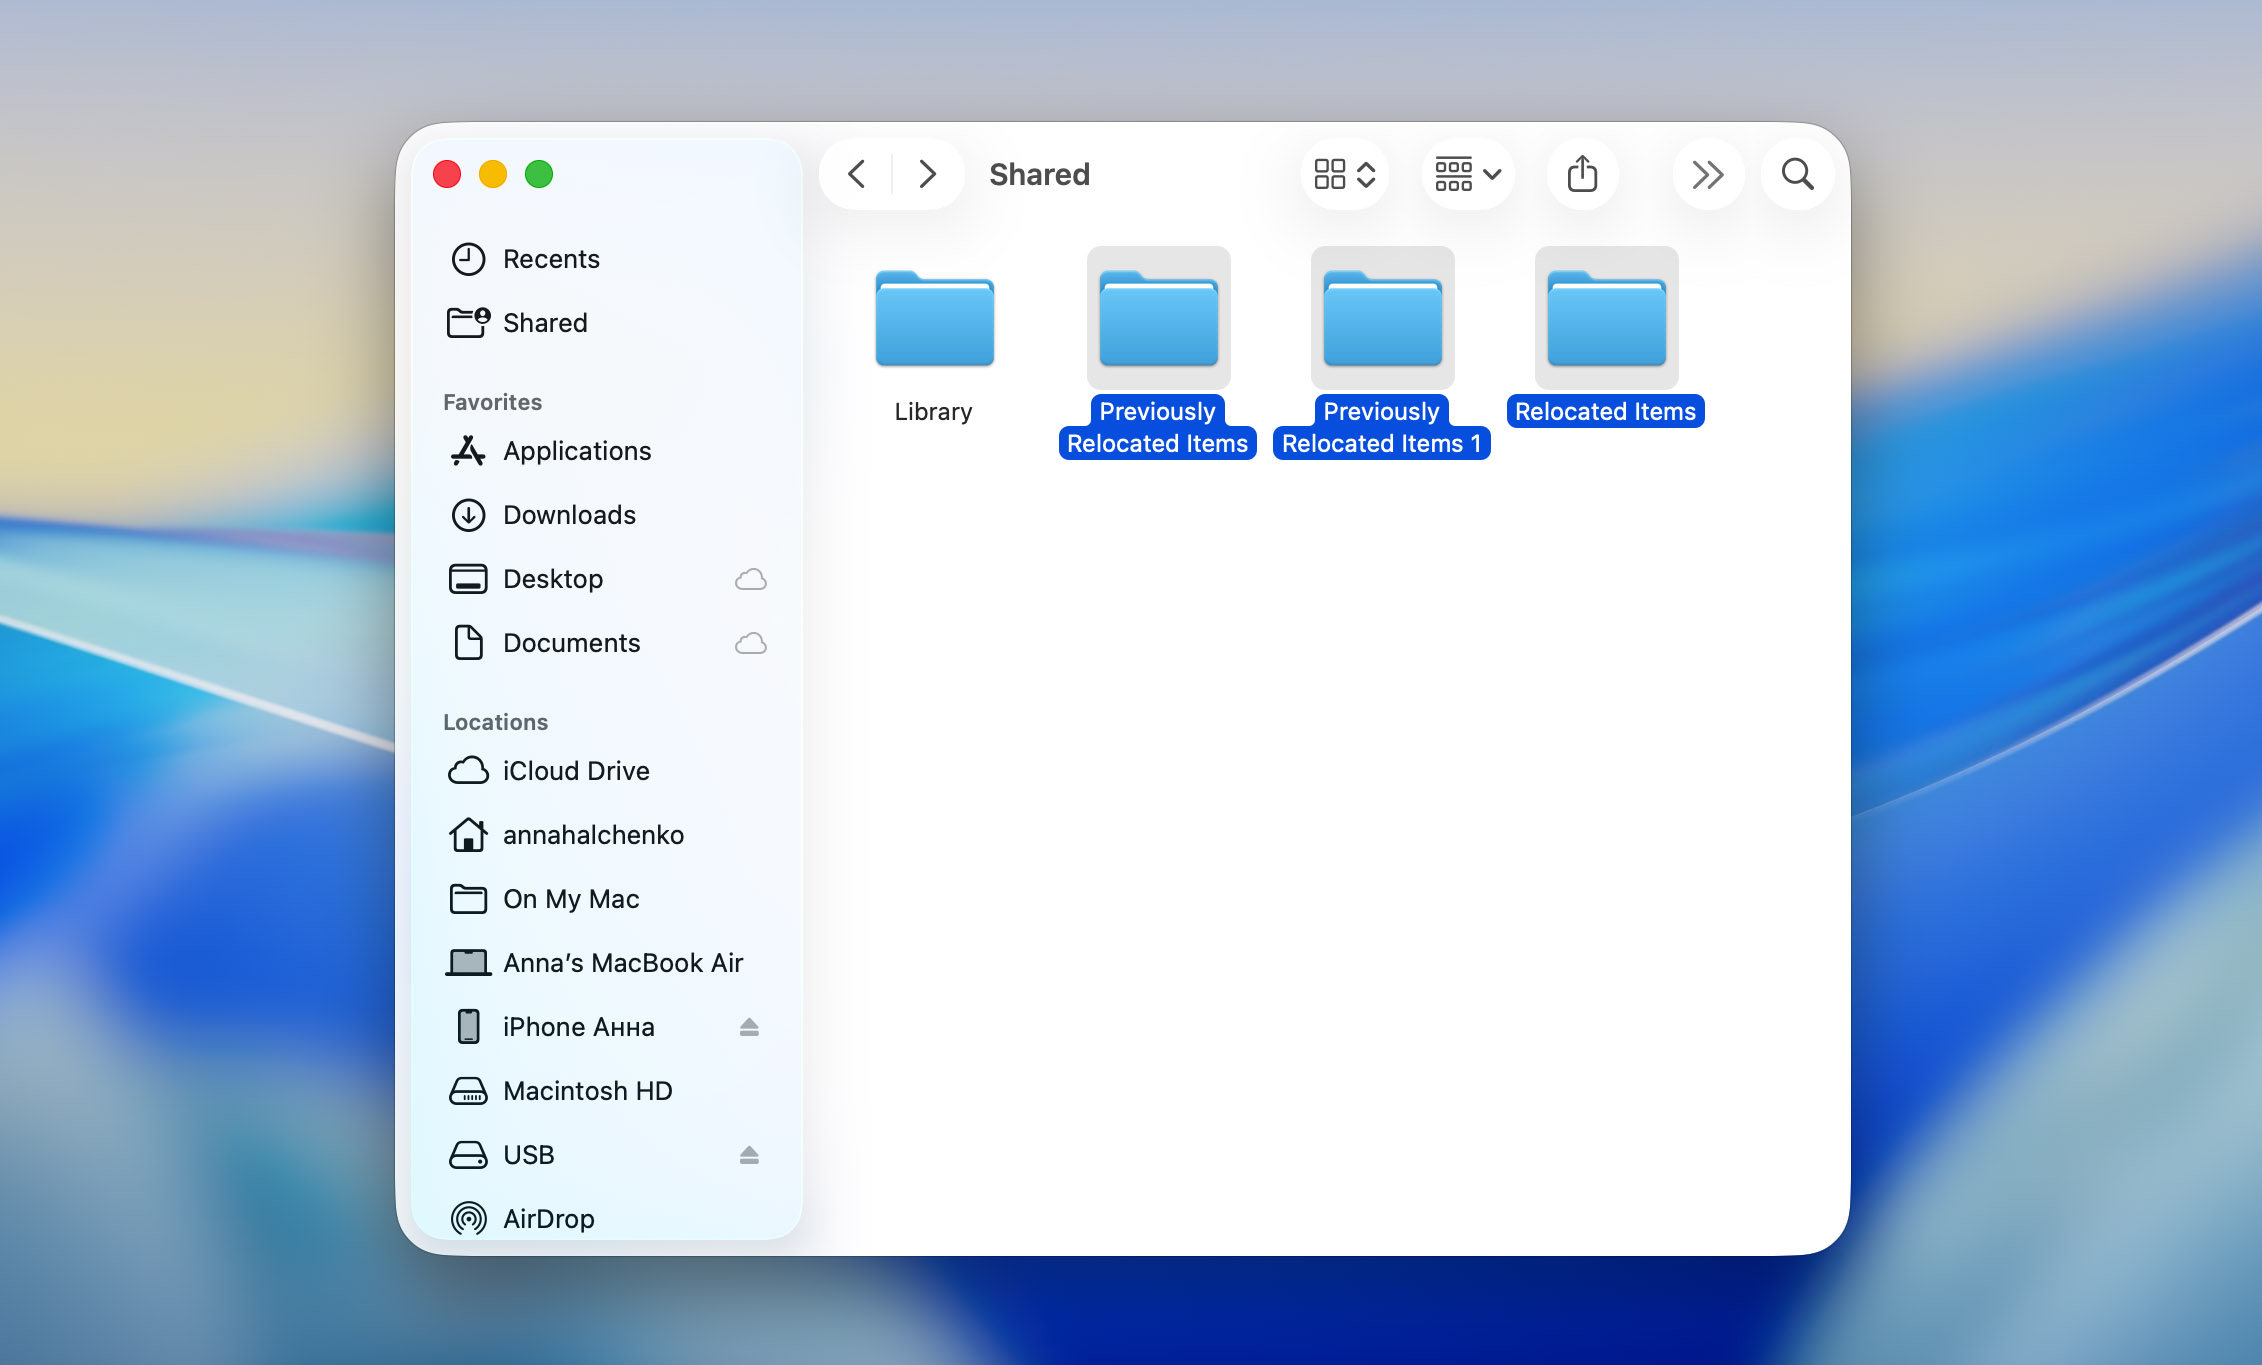
- Look for the disappeared files in the Relocated Items and Previously Located Items folders.
Option 4: Use Spotlight Search to Find the Files
When will this method help? If you remember at least part of the file’s name, format, or text inside it.
Another way to find missing desktop files on your Mac is through Spotlight Search. In macOS 26 Tahoe, this feature was noticeably improved — now Spotlight can show file previews right in the results list, recognize parts of text inside documents, and even search within folders stored in iCloud Drive. So, if you remember at least something about the file (its name, type, or even a phrase it contained), Spotlight will likely help you locate it much faster.
There are a few ways to launch Spotlight on your Mac:
- Click the Spotlight icon (if shown) in the menu bar.
- Press Command + Space bar on the keyboard.
- Press the Spotlight icon (if available) in the row of function keys on the keyboard.

Once you see the Spotlight search field, you can use the following queries to set parameters that will narrow down your search for the missing file:
| Parameter | Explanation | Example |
| name | filter search by file name | name: report2023 |
| date | filter search by last known interaction with the file | date: 02/05/2021 |
| kind | filter search by file type | kind: pdf |
| author | filter search by author of the file | author: romana |
Option 5: Toggle the Stacks Feature
When will this method help? If your desktop is cluttered and you can’t spot the needed file among many others.
If your Mac desktop looks cluttered with hundreds of screenshots, folders, and random files, it can be nearly impossible to spot the one you actually need. In macOS 26 Tahoe, Apple has improved the Stacks feature — it can now automatically group files not only by type but also by date or tags. This helps quickly tidy up the desktop and makes it much easier to spot anything that seemed to “disappear.” Once Stacks are enabled, all your items are neatly sorted, and the missing file you were looking for might suddenly appear right where it belongs.
Follow these steps to use the Stacks feature on your Mac’s Desktop:
- Go to your Desktop. Make sure you can see all the files and folders spread across it.
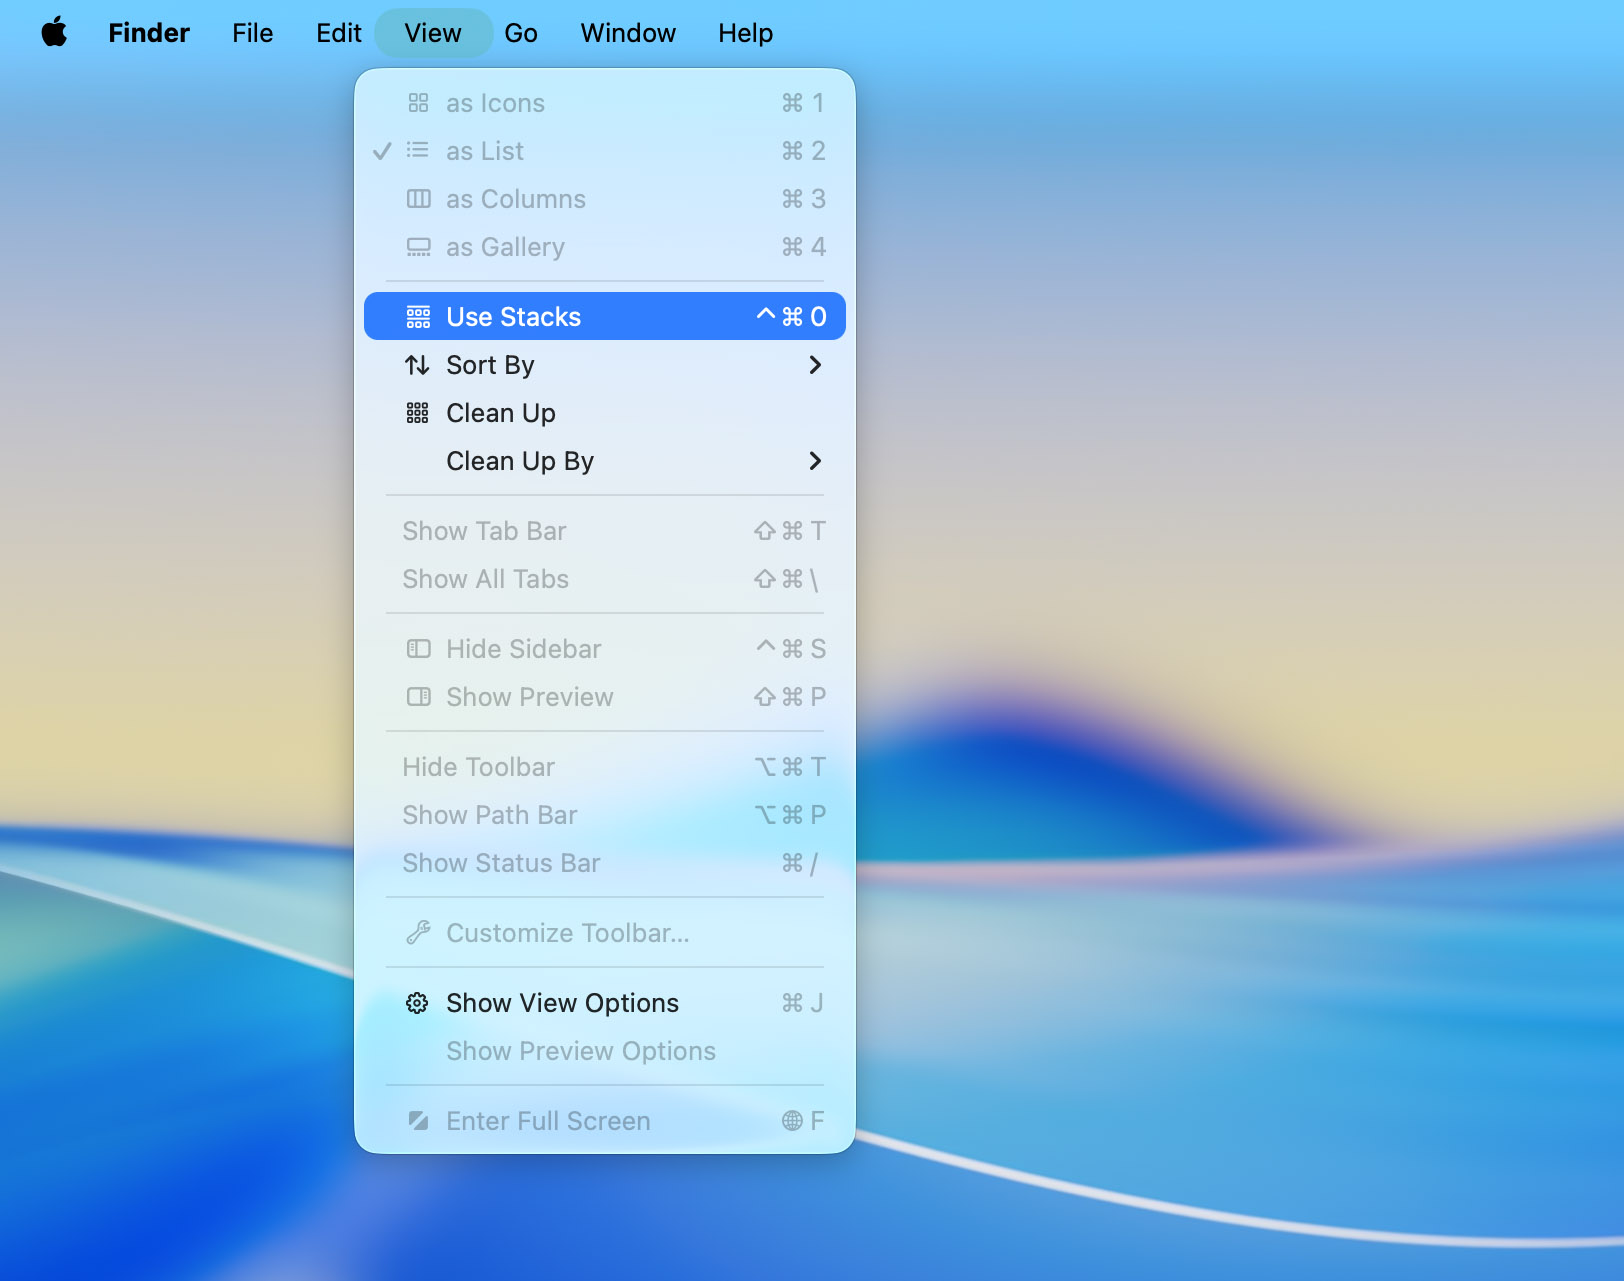
- Click View in the top menu bar. A drop-down menu will appear with several organization options.
- Select Use Stacks. Once you click it, all desktop items will be grouped automatically — by default, they’re sorted by file type (images, documents, folders, etc.).
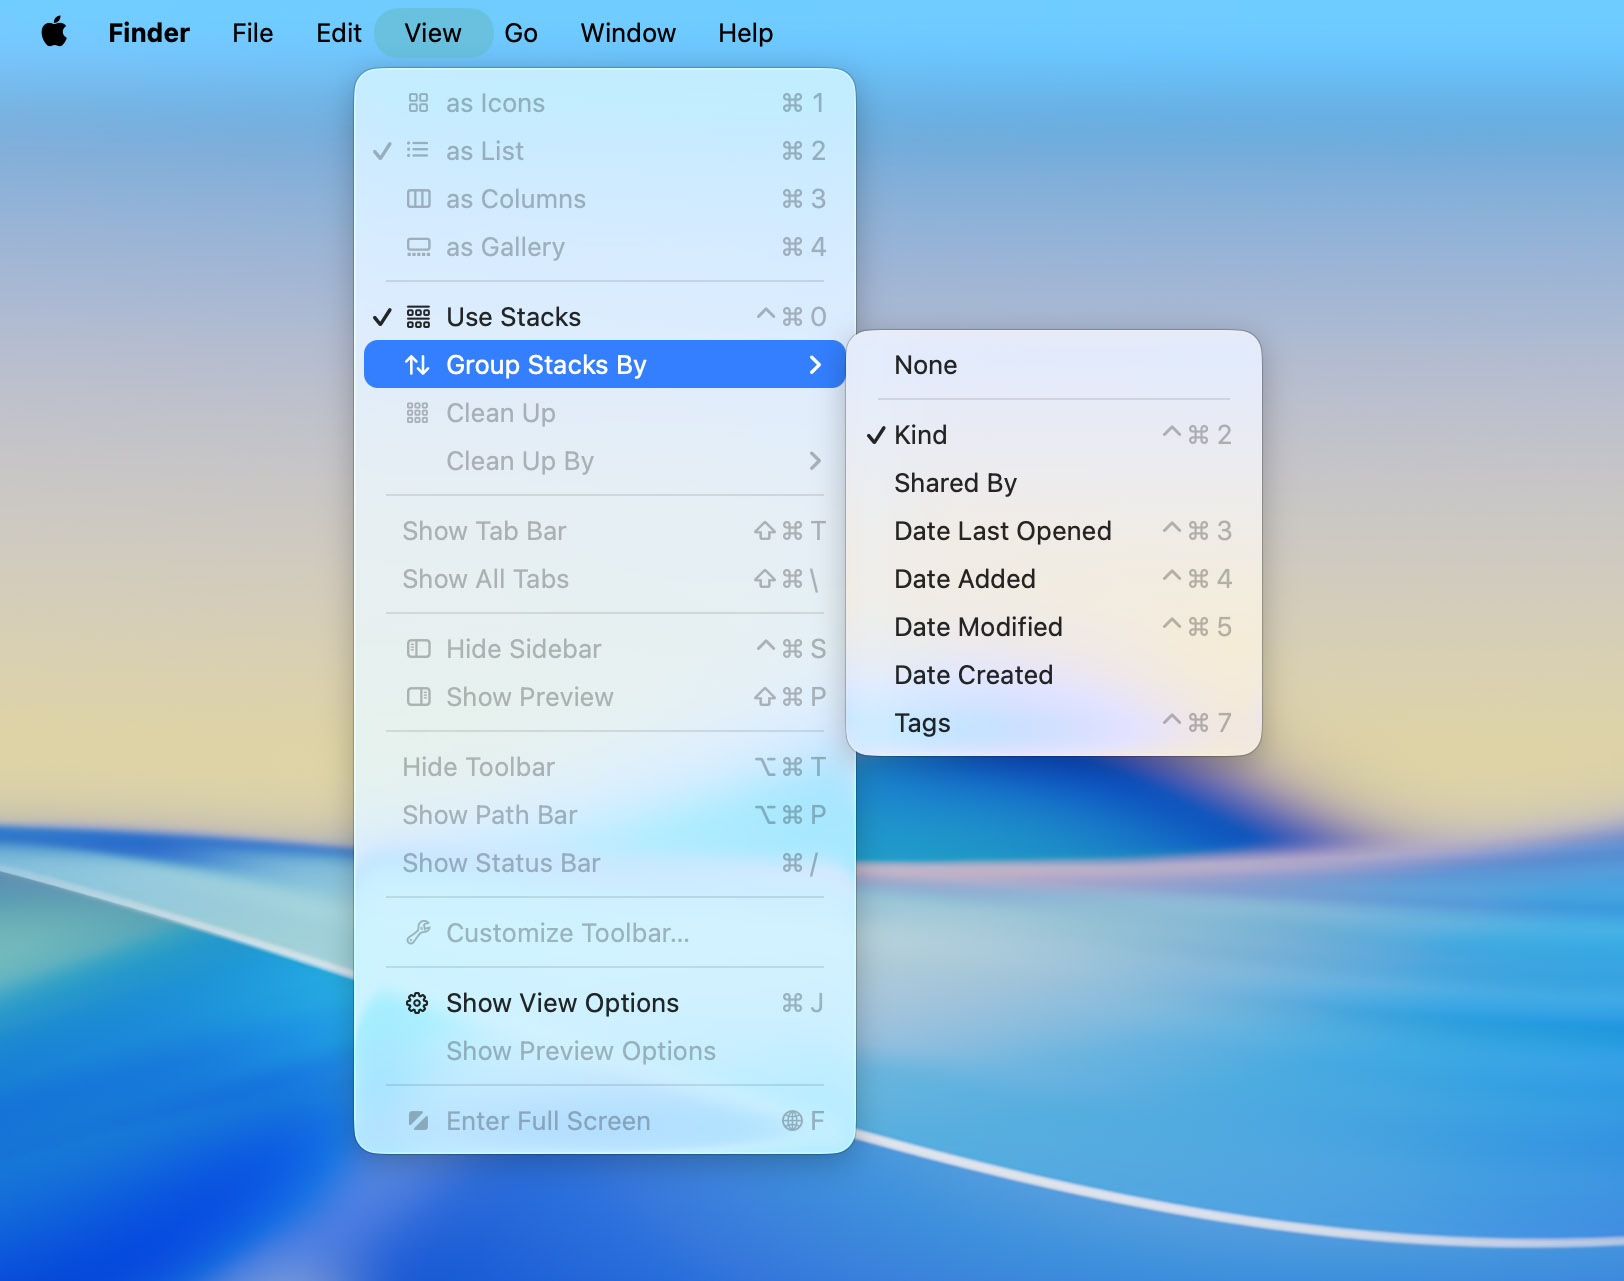
- Customize how stacks are grouped. Click View > Group Stacks By, then choose one of the available options: Kind (default), Date Last Opened, Date Modified, Date Created, or Tags.
- Click on any stack to see all the files it contains. Click again to collapse it back.
- Once your desktop is sorted into stacks, browse through the categories — the file or folder that disappeared might now be grouped neatly under its proper type or date.
Summary
As you’ve seen from this article, recovering missing desktop files on a Mac is absolutely possible, whether they were simply moved somewhere else or actually deleted. We want to stress once again that it’s best to follow the methods in the same order we described them. If you start with Finder or other search tools before checking for deleted data, you might accidentally create or save new files that overwrite the ones you’re trying to recover.
We’ve shared every method that truly works and that our team has personally tested. Now it’s your turn — try them out and see which one helps you. And we’d really love to hear back from you: did your files turn out to be deleted or just misplaced? Your feedback helps us understand which solutions work best in real situations.
FAQ:
- Click the Apple icon at the top of the screen on the left.
- Choose System Settings from the drop-down menu.
- Click Apple ID on the sidebar on the left and choose iCloud.
- Go to iCloud Drive > Options.
- Choose Desktop & Documents Folders.
- Click Done to confirm.


