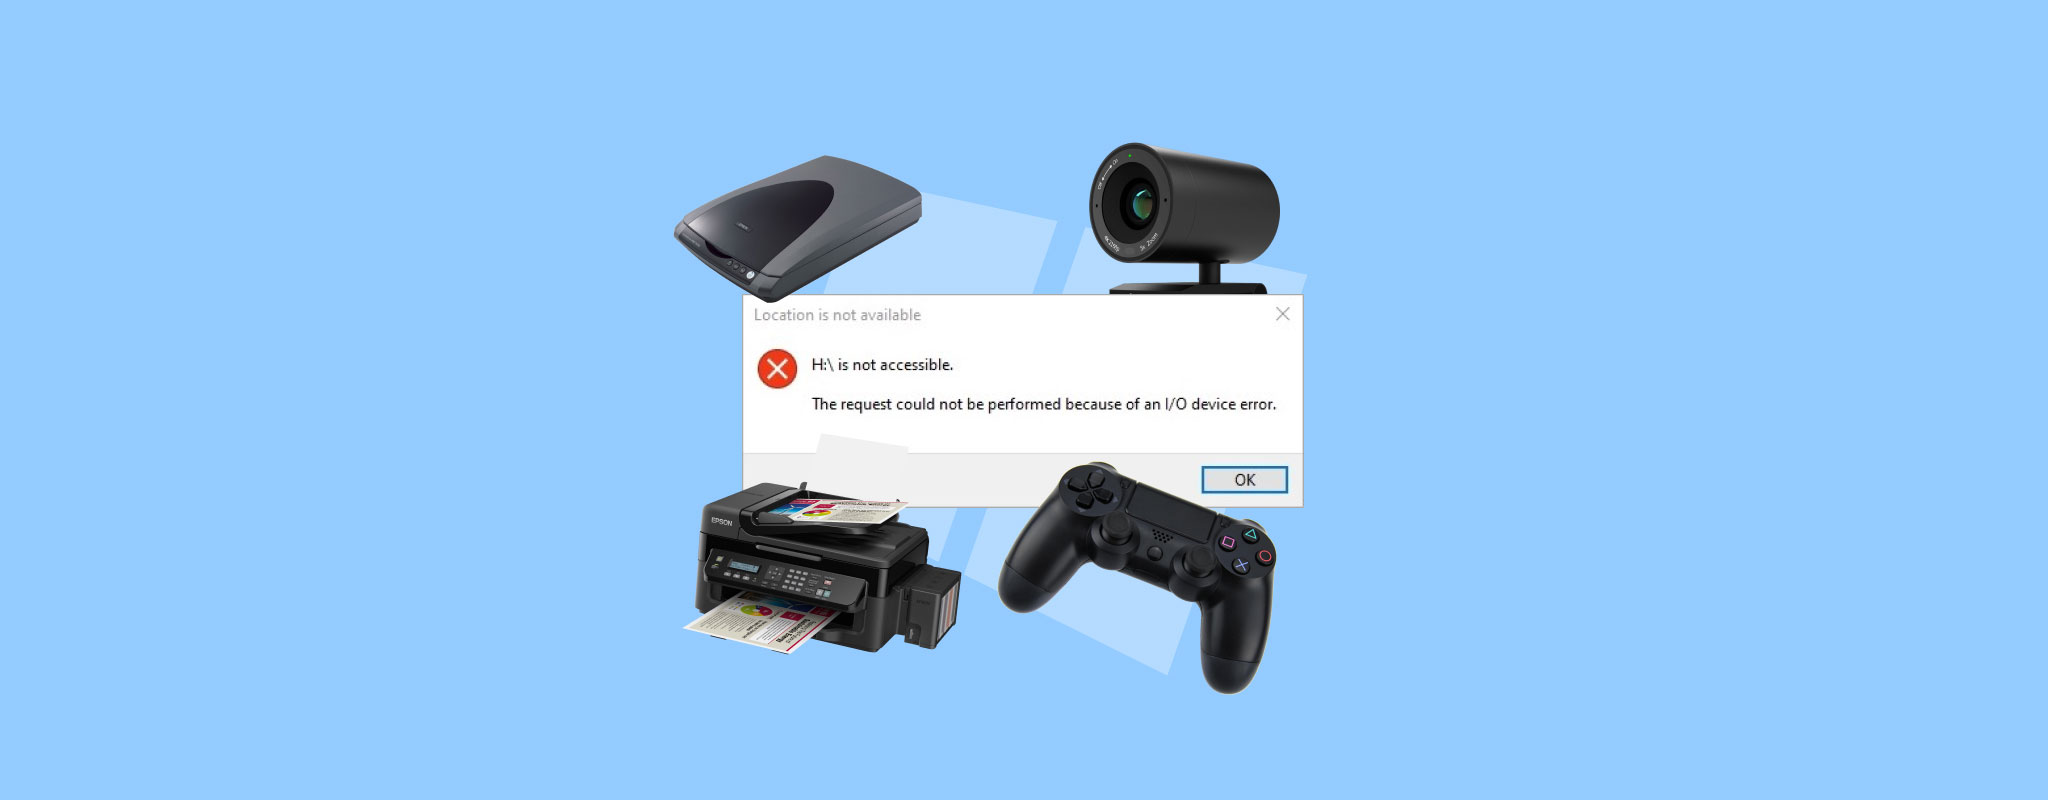
Sometimes, when you try to read or write to a drive, initialize it, and even while booting, you may get the message, “The request could not be performed because of an I/O device error.” The issue is an indication that your PC is having trouble reading or writing to the drive. So, how do you resolve it and ensure your data is safe? Our guide will answer these questions for you.
What Is the I/O Device Error and What Causes It
An I/O device error appears when Windows has trouble communicating with hardware. It can occur with many types of peripherals, including printers, CD/DVD drives, or external accessories. However, it’s most concerning when the error shows up while working with storage devices such as hard drives, SSDs, USB flash drives, or memory cards—because that’s where your files are at risk.
In many cases, the problem comes down to a faulty device or a bad connection, such as a damaged cable or port. But software-related issues can also trigger the error, including corrupted or incompatible drivers and system misconfigurations.
The following table lists the common reasons that lead to the input-output error:
| Reason | Description |
| 🔌 Incorrectly connected storage drive | Windows won’t be able to read an improperly connected storage drive. Even if your PC detects the drive, it can’t work with it. There can be numerous reasons behind this, including a physically damaged drive. |
| ➰ Damaged ports or cables | A broken or worn cable or port can prevent data transfer, even if the drive is detected. |
| 💻 Incompatible, missing, or corrupted drivers | In most cases, Windows automatically installs standard drivers that are sufficient for common devices. However, some hardware, such as hybrid drives or other specialized storage solutions, requires specific drivers to function correctly. If those drivers are missing, outdated, corrupted, or incompatible, Windows may fail to communicate with the device and trigger an I/O error. |
| 🔨 Physical damage | If the storage drive is physically damaged, Windows will have trouble reading it. Regular wear and tear, heat, water, and physical shock can all lead to physical damage on your drive. It’s best to stop using a physically damaged disk and seek the help of data recovery experts. |
How to Recover Data From a Storage Device That Encountered the I/O Device Error
Before you try to fix a disk that shows an I/O error, it is essential to save the data stored on it. Another scenario doesn’t mean you’ll necessarily be losing all your files. As long as the disk still shows its correct size in Disk Management–even when it cannot be recognized by File Explorer –if you act promptly, most of your documents should probably still be saved
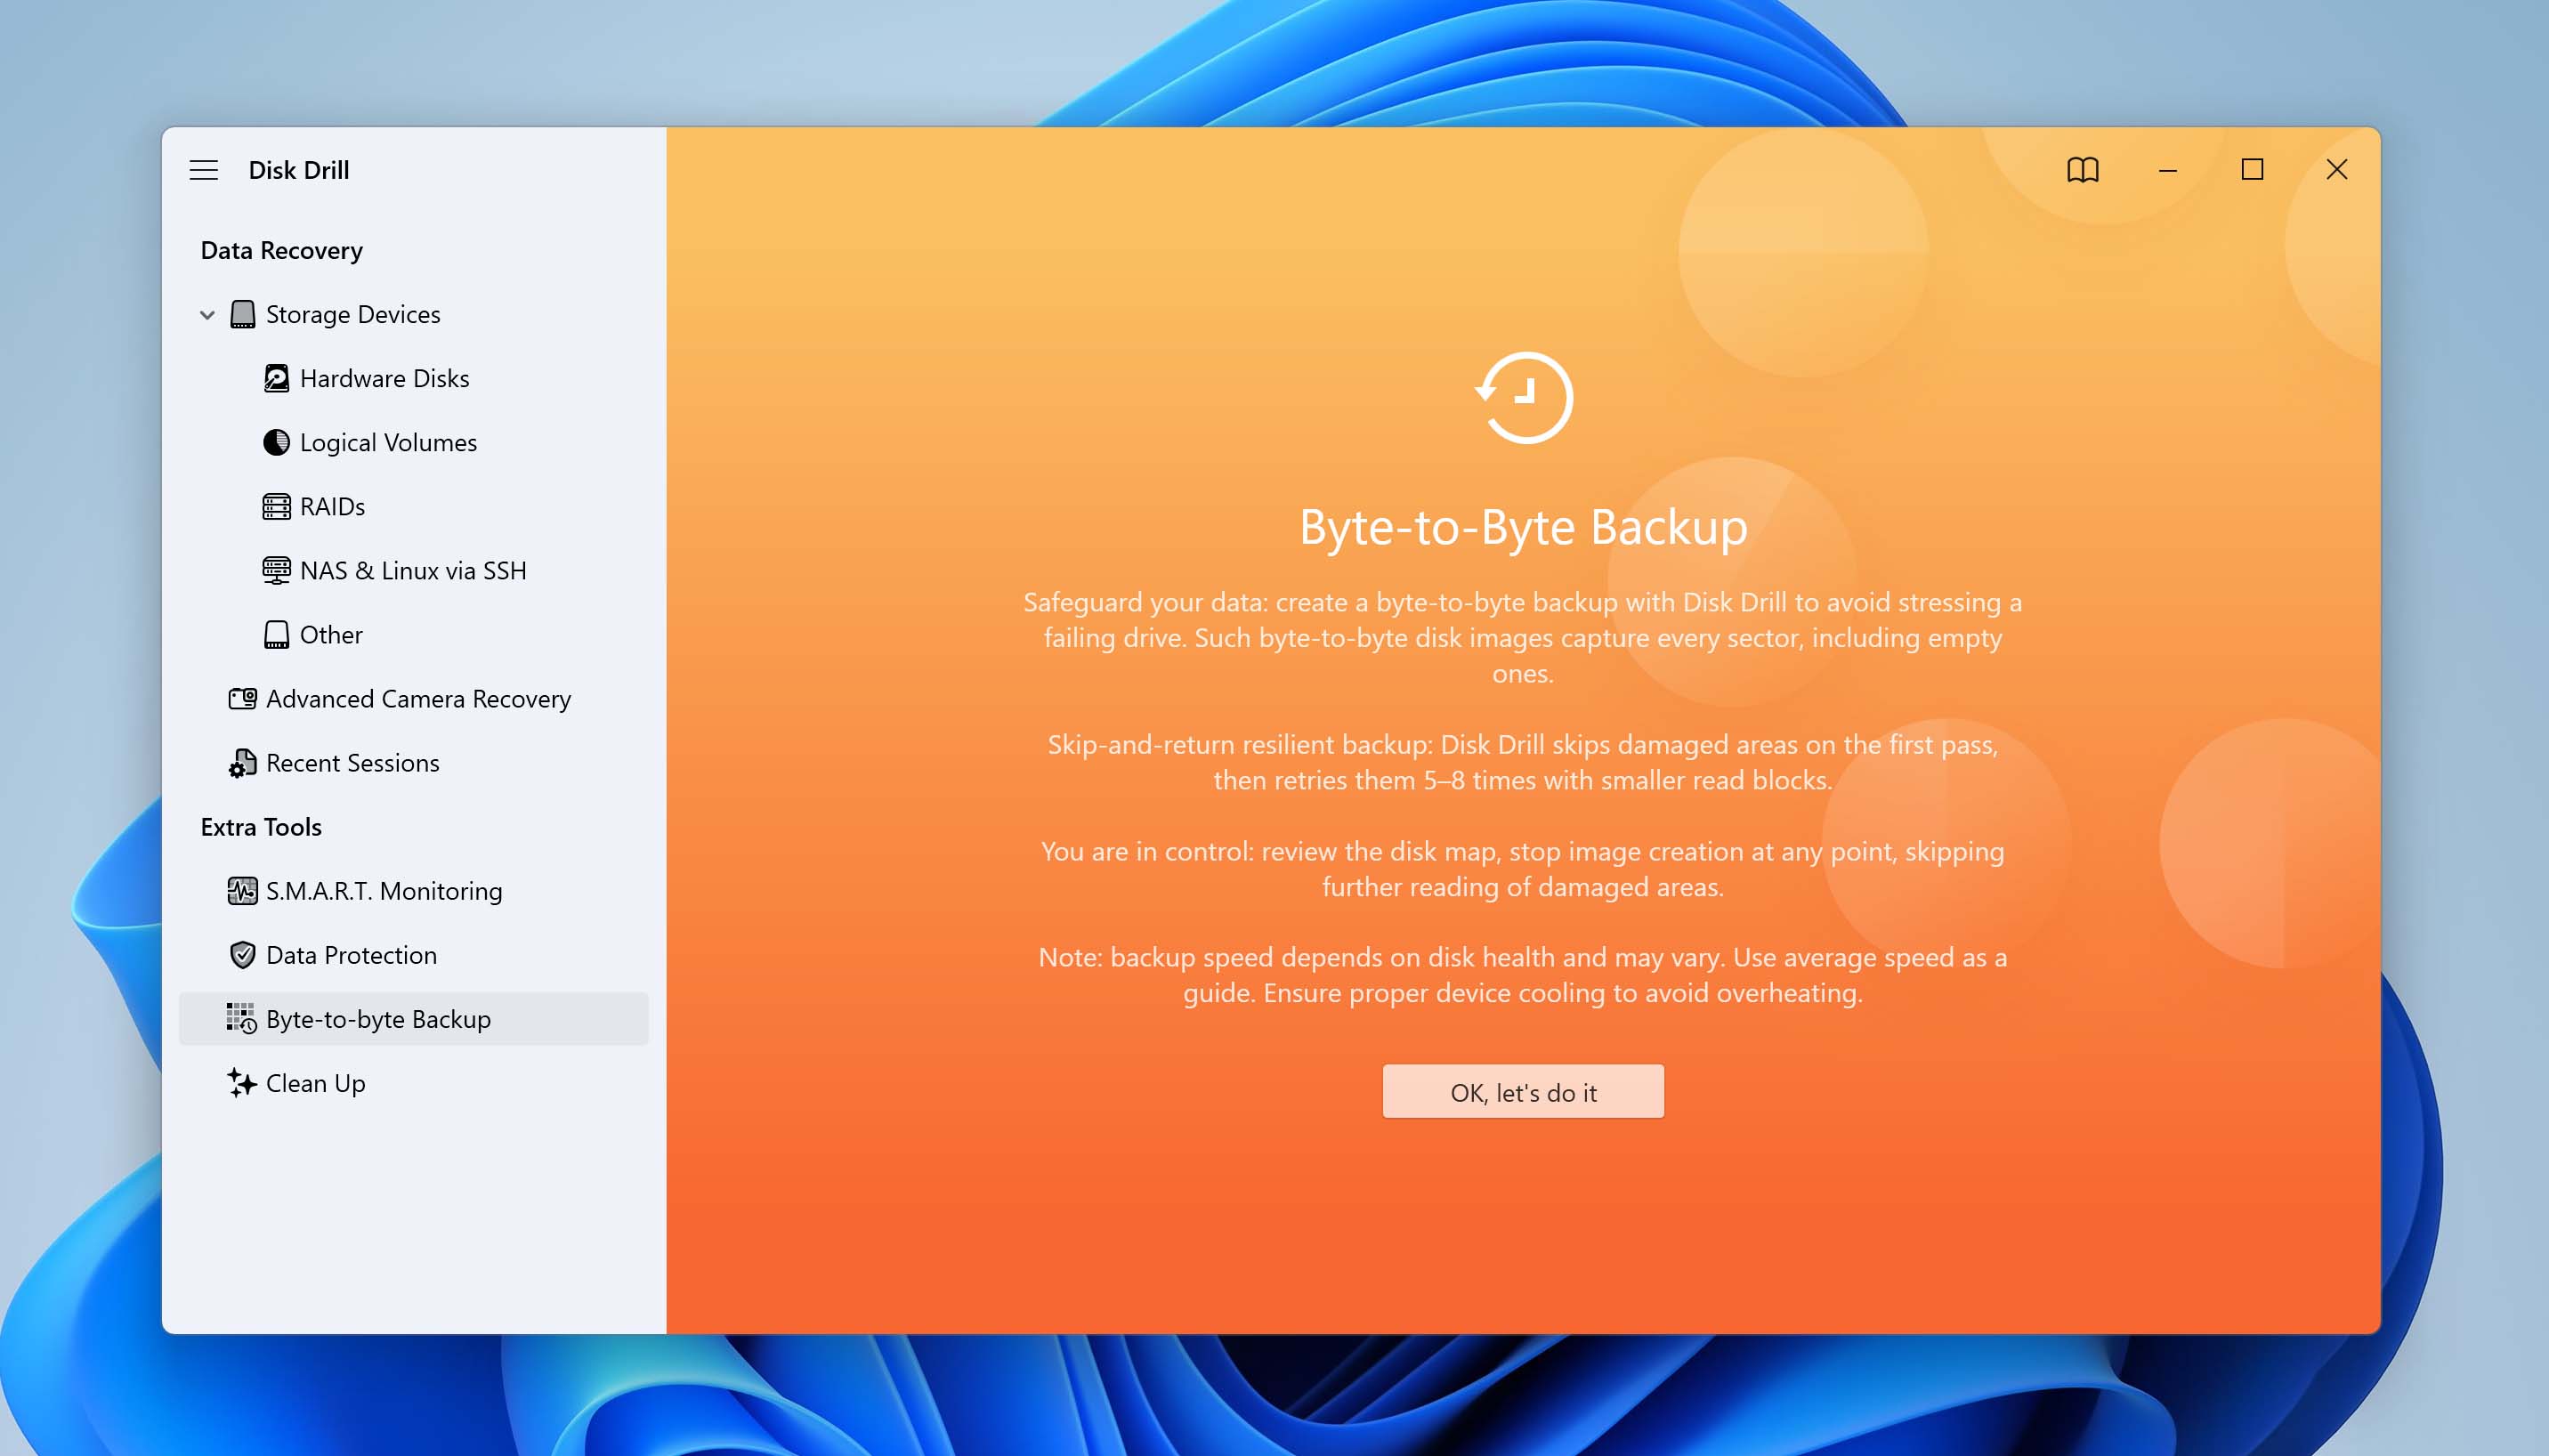
The best way to do this is by making a byte-for-byte copy of the disk and then scanning that copy for recoverable files. This is where Disk Drill comes in. Its recovery module can generate a complete disk image and then restore data from it. A byte-by-byte copy is recommended because drives affected by I/O errors tend to be unstable, and scanning them directly can worsen their physical condition.
In version 6, Disk Drill’s backup capability was boosted, especially to work with unreliable drives, so it’s right at the top of the list for any data to be preserved before you start any fixing attempts.
There are 2 major steps of the recovery in Disk Drill: first of all, you create the disk image, and then scan the image for the files.
- Download and install Disk Drill, then open the program and go to Byte-to-byte Backup under Extra tools.
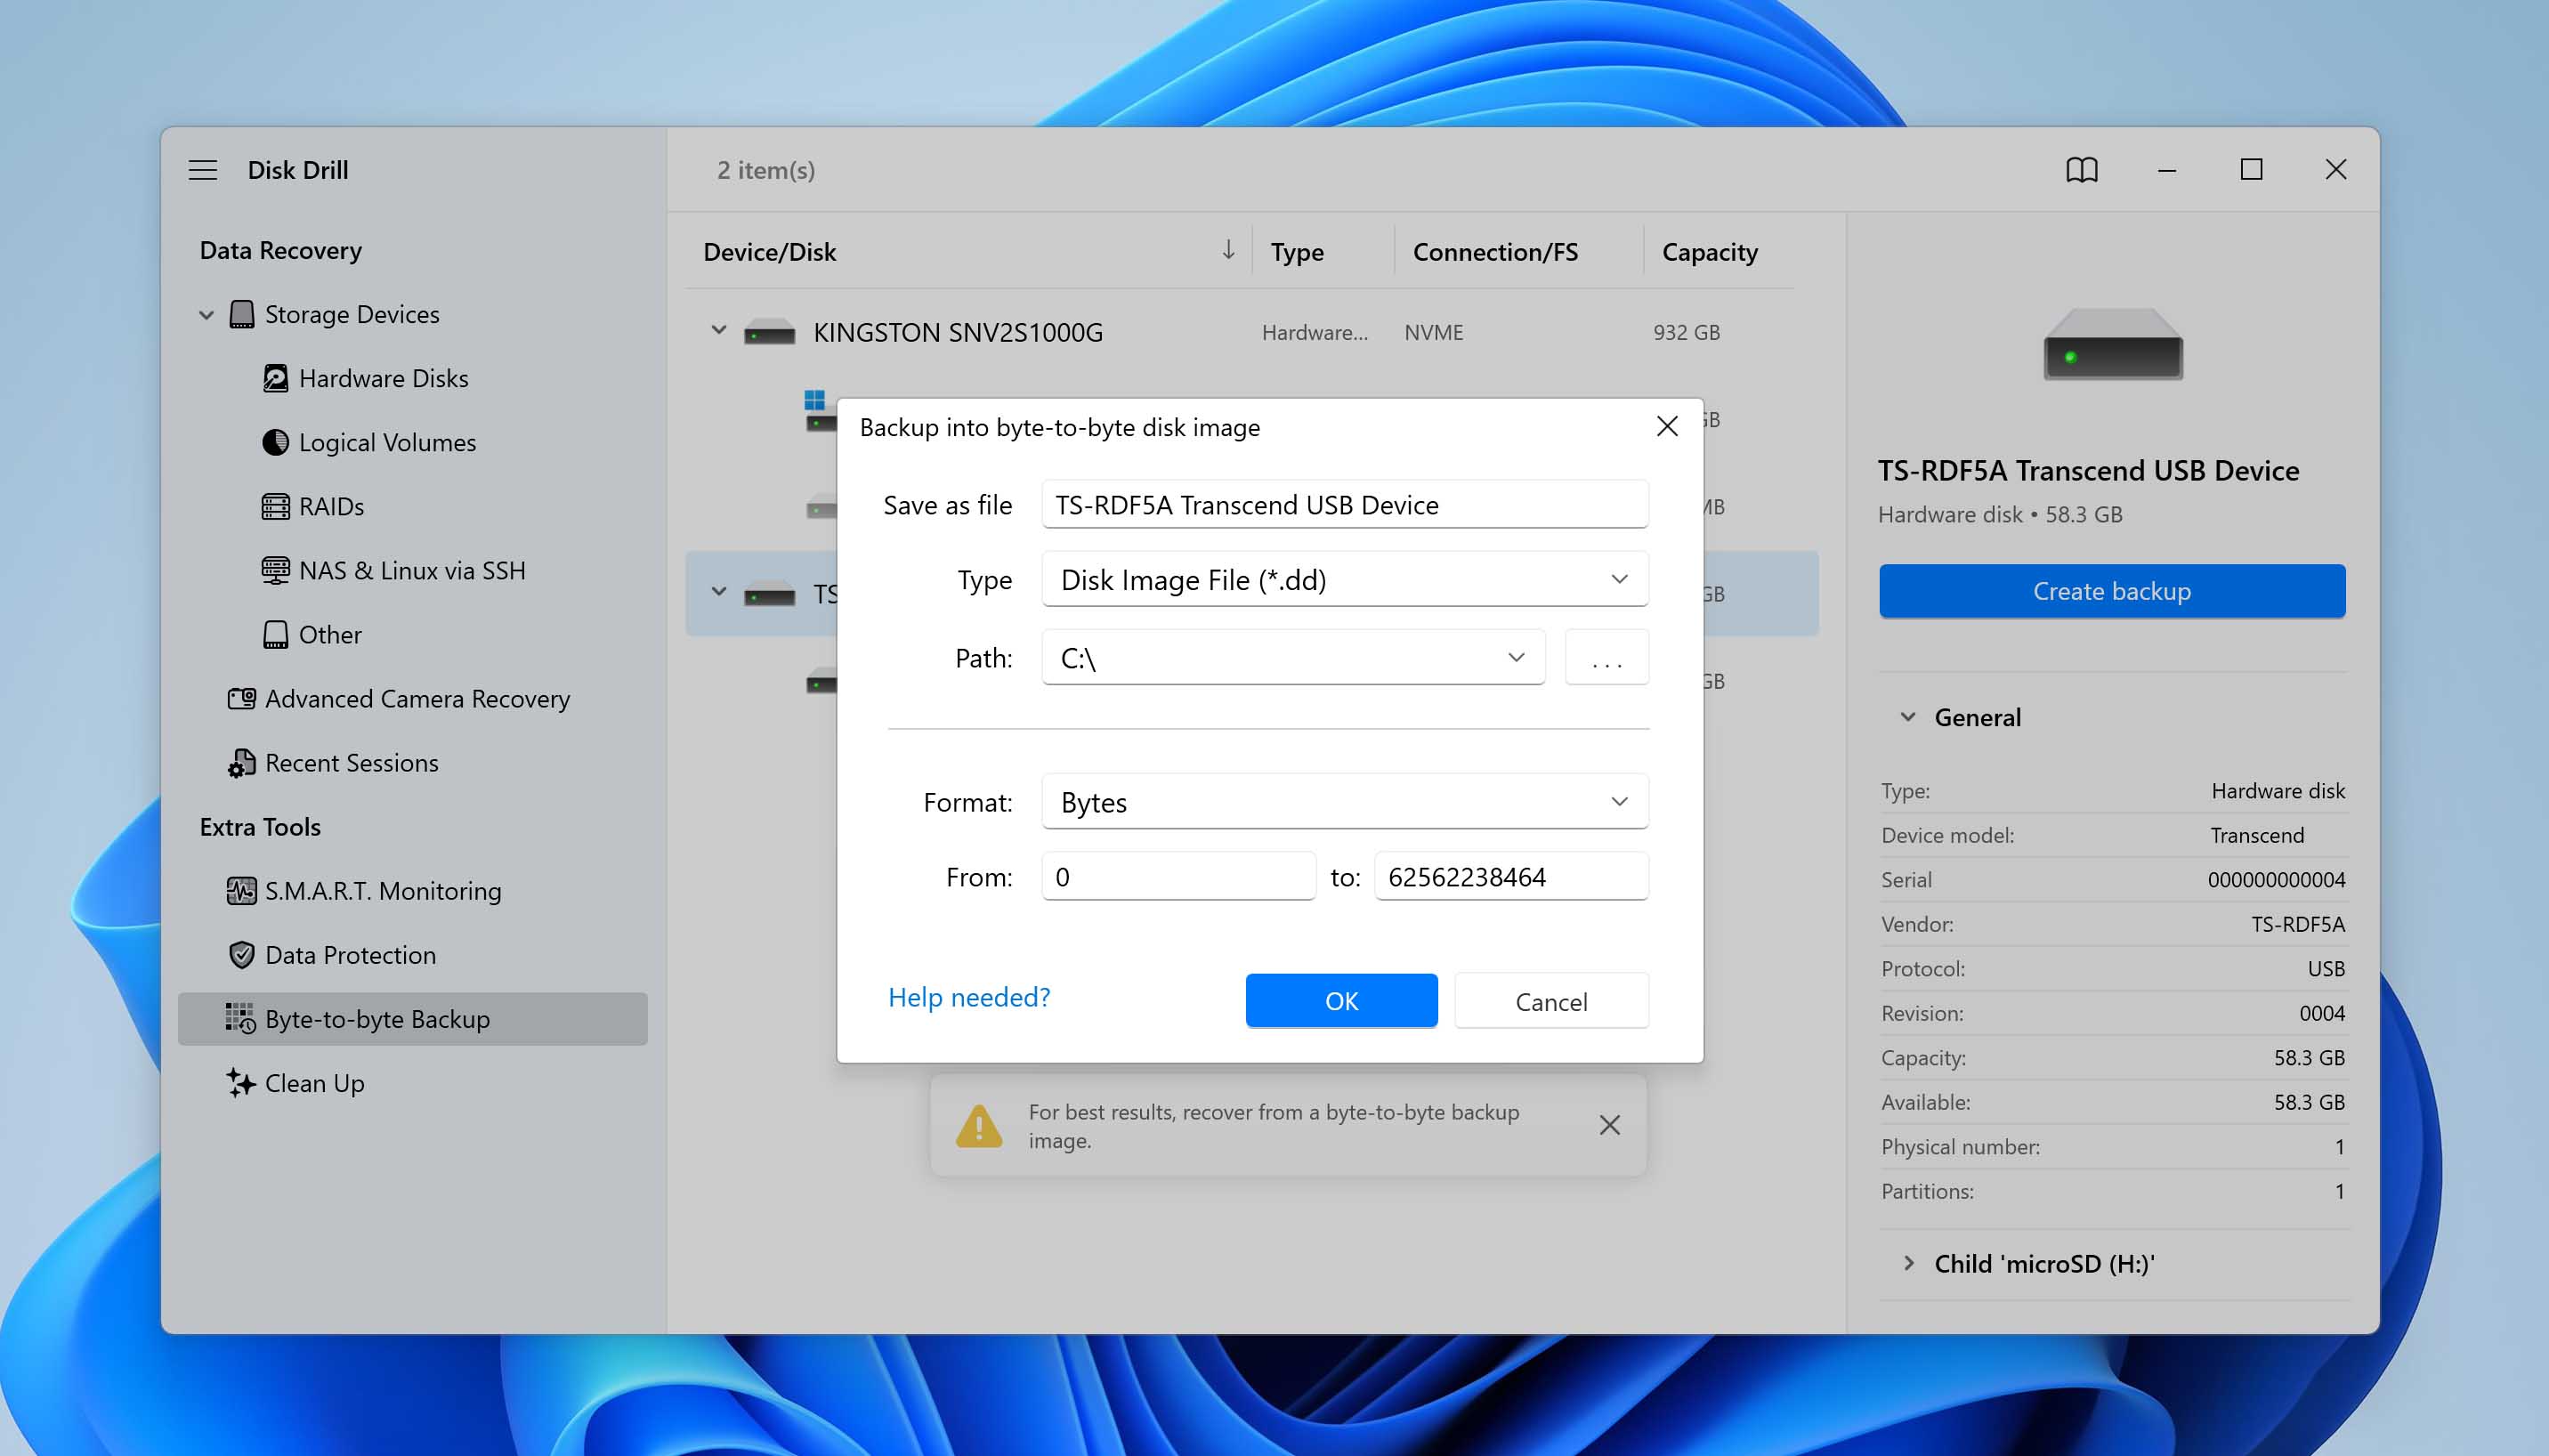
- Select the drive that shows the I/O device error, and click Byte-to-byte Backup.

- Choose a safe destination with enough free space to hold the image larger than the failing drive, and then confirm to create the disk image.
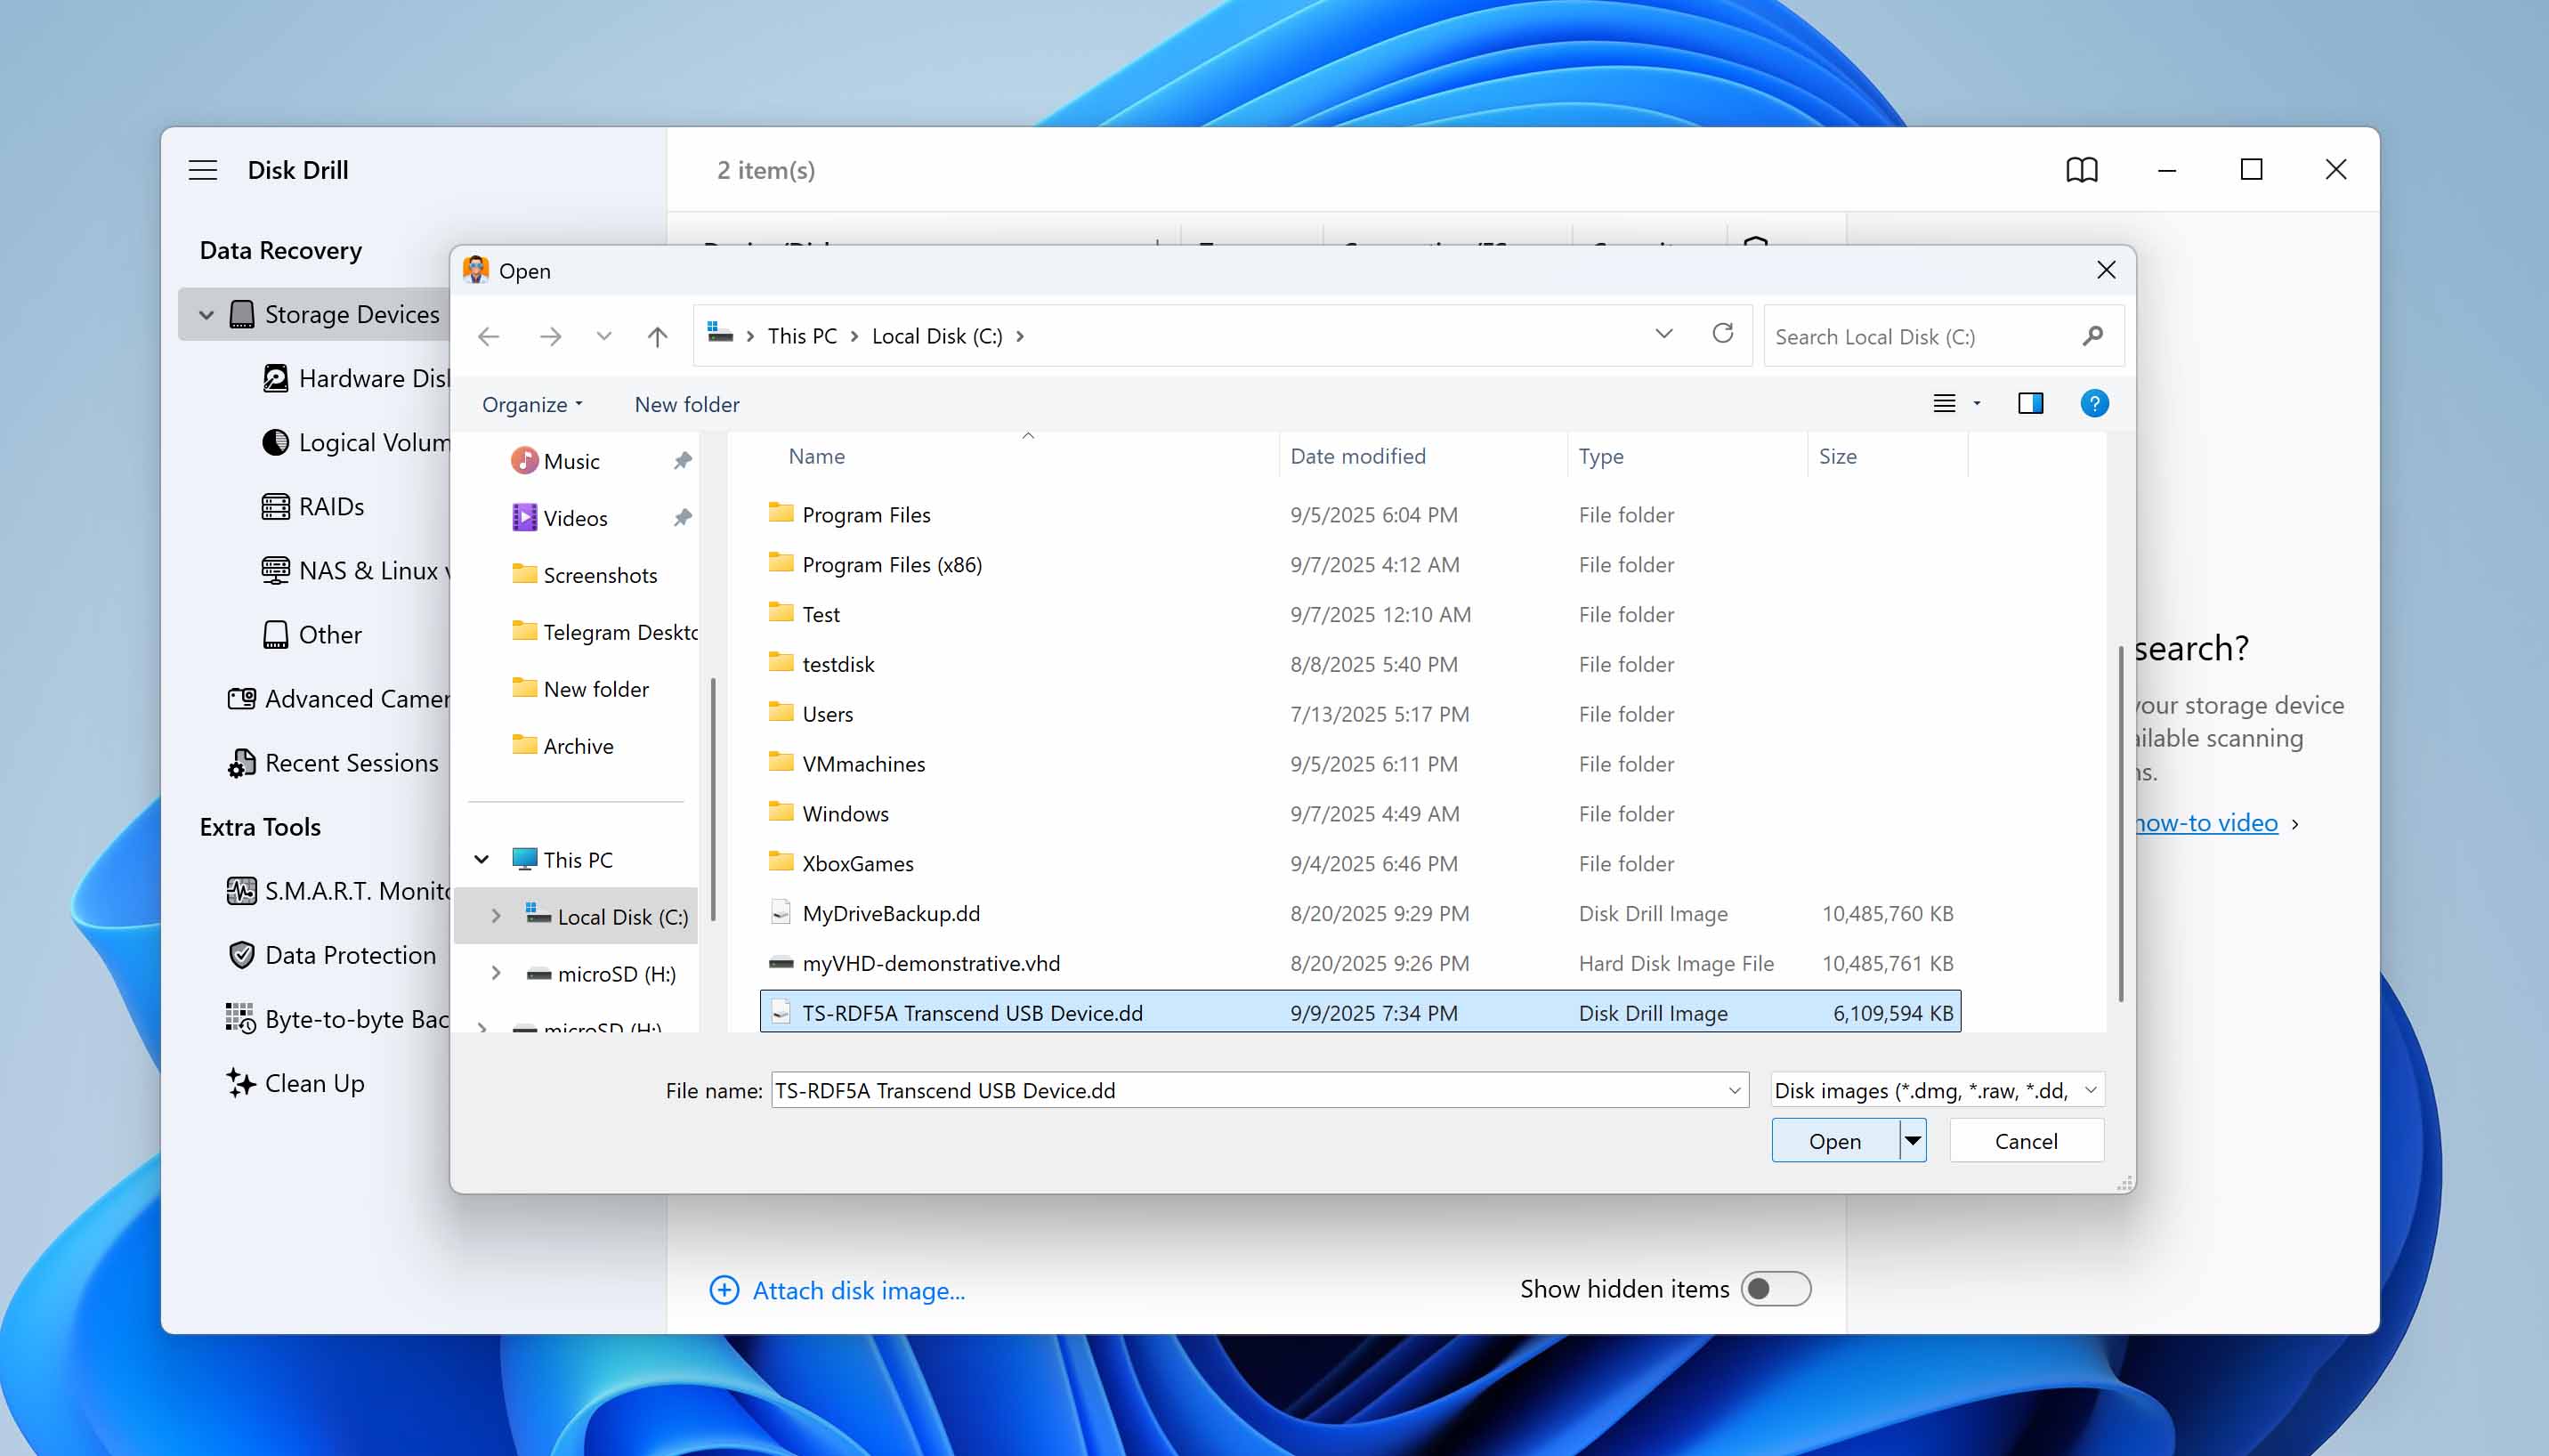
- Once the backup is done, click Attach Disk Image from the main Disk Drill window and locate the corresponding file. Double-click the backup to show it as a virtual drive in the program.
- Select the attached image, click Search for Lost Data, and choose Universal Scan in the pop-up window.

- When the scan is complete, select Review found items.
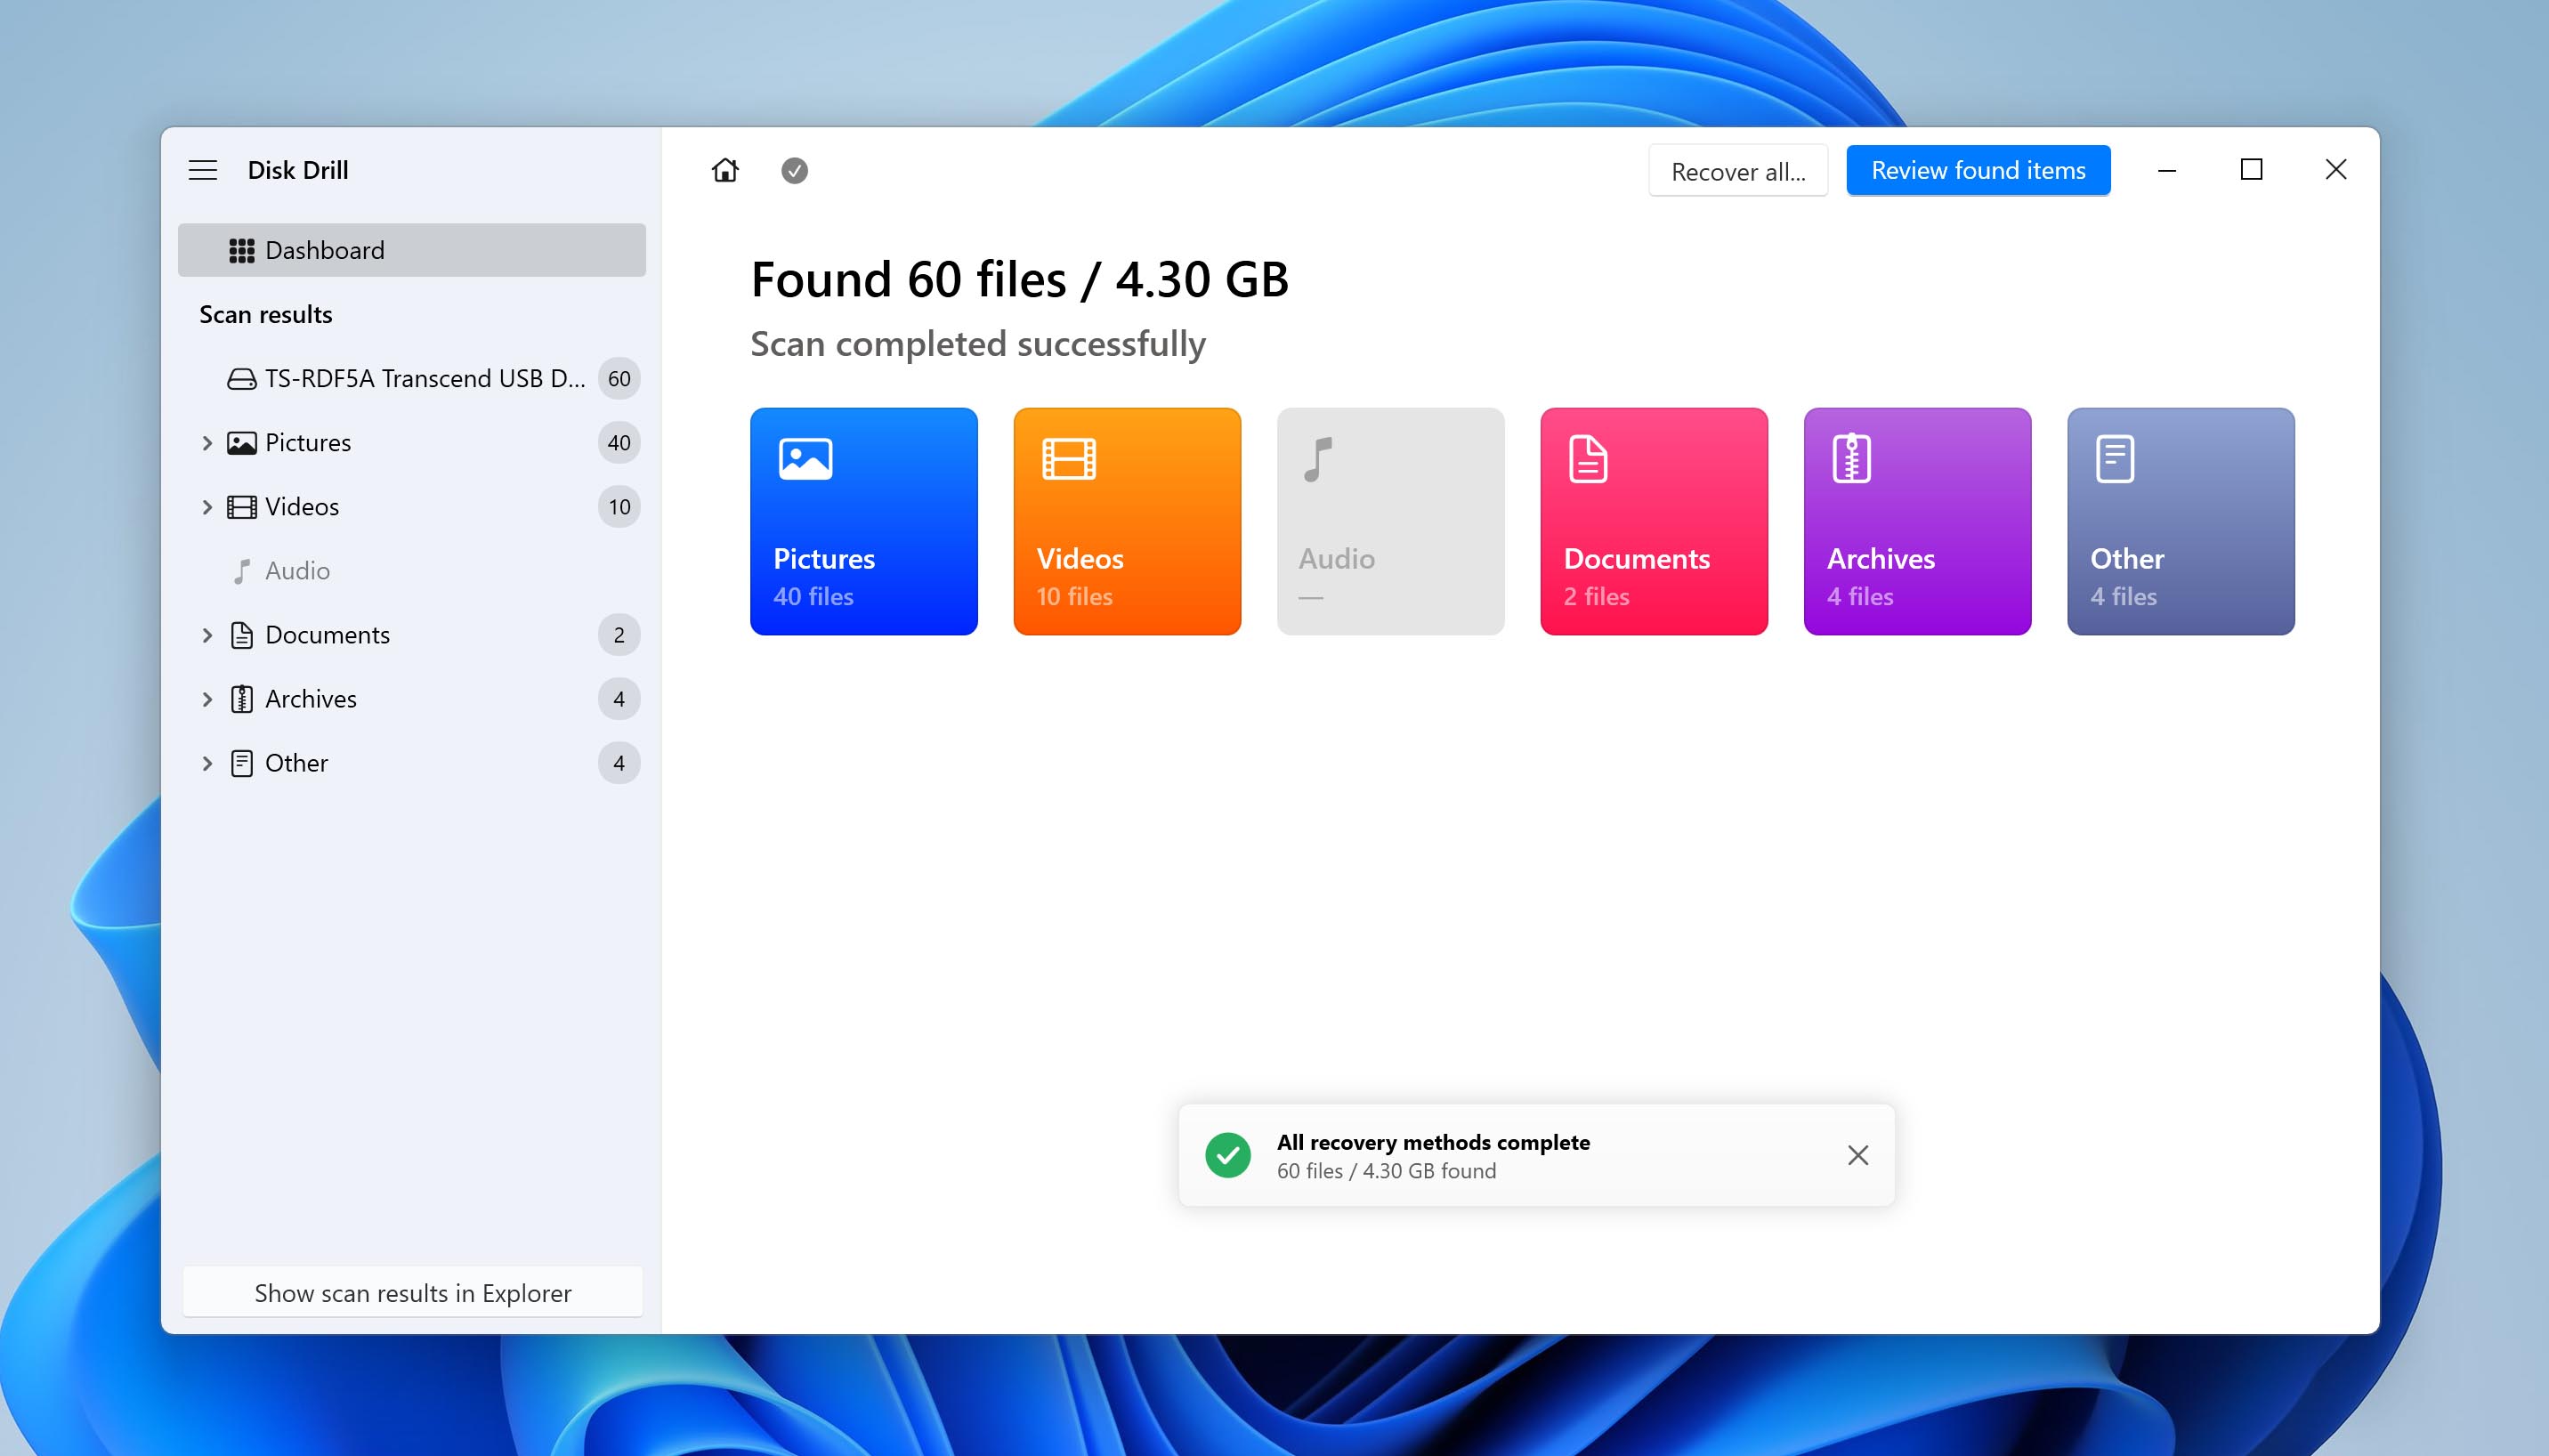
- You can filter by file type, browse the Existing, Deleted or lost, and Reconstructed sections. You can preview the files by clicking on the “eye” icon.
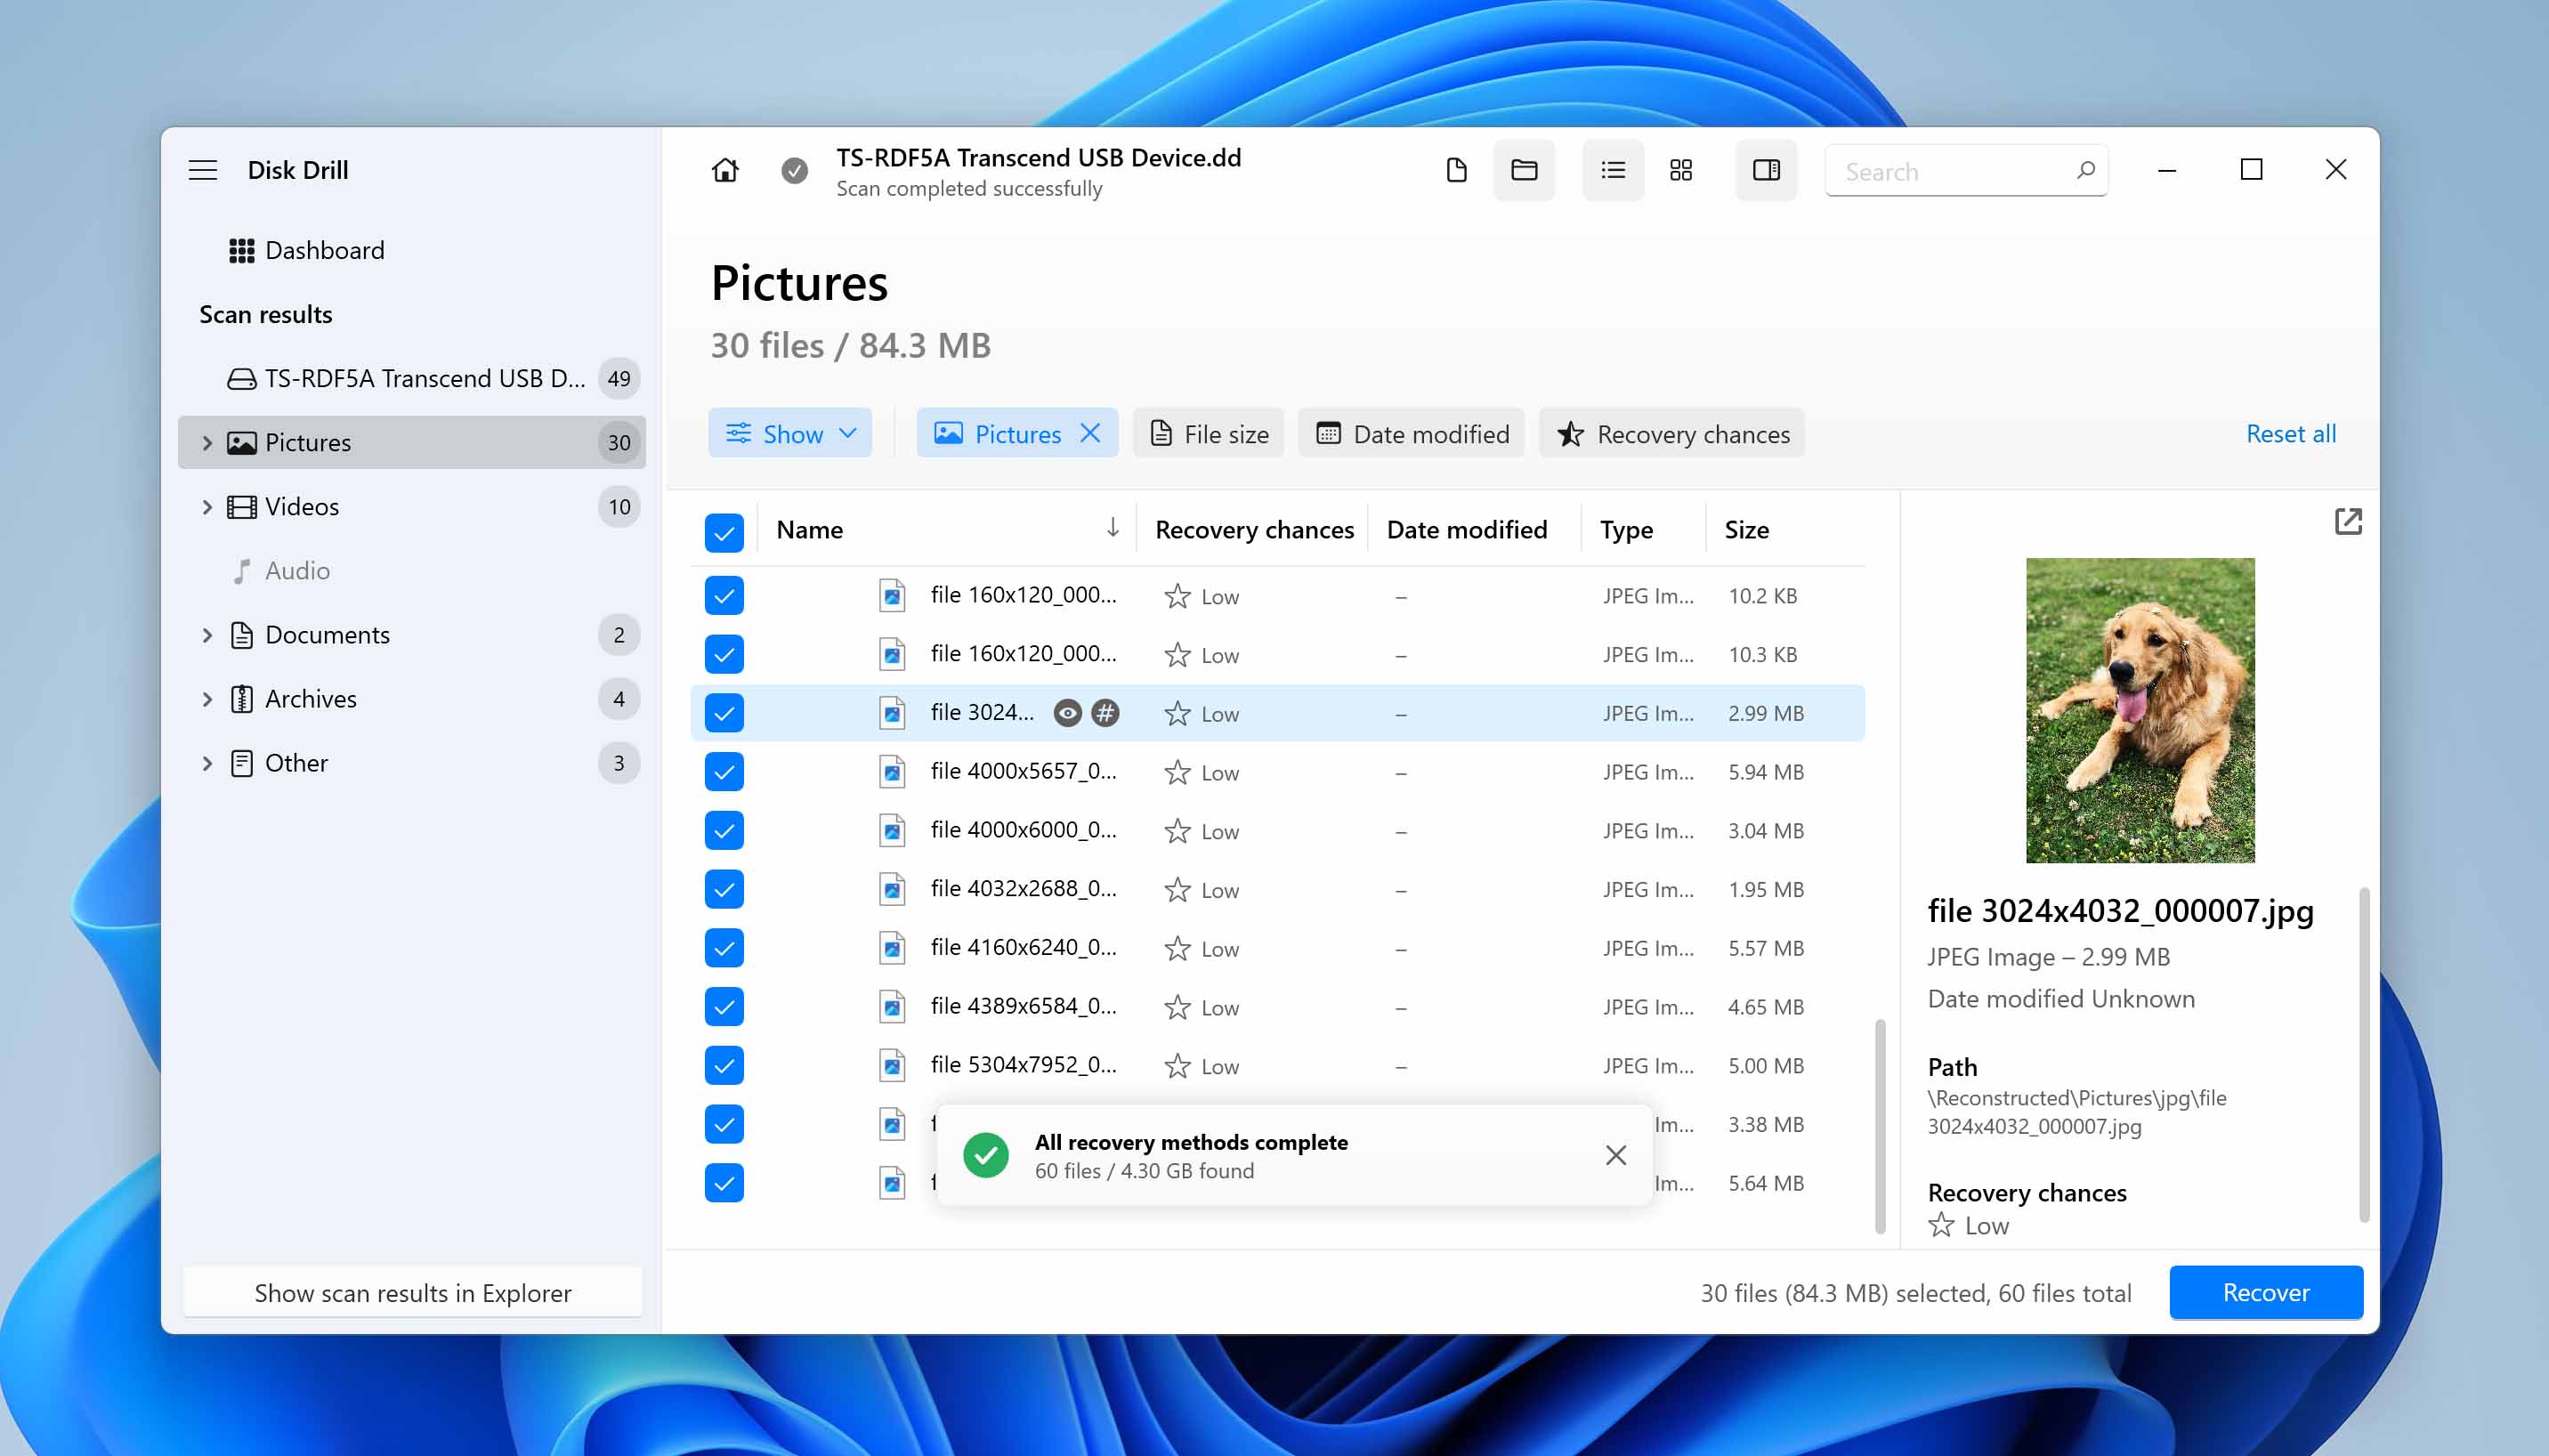
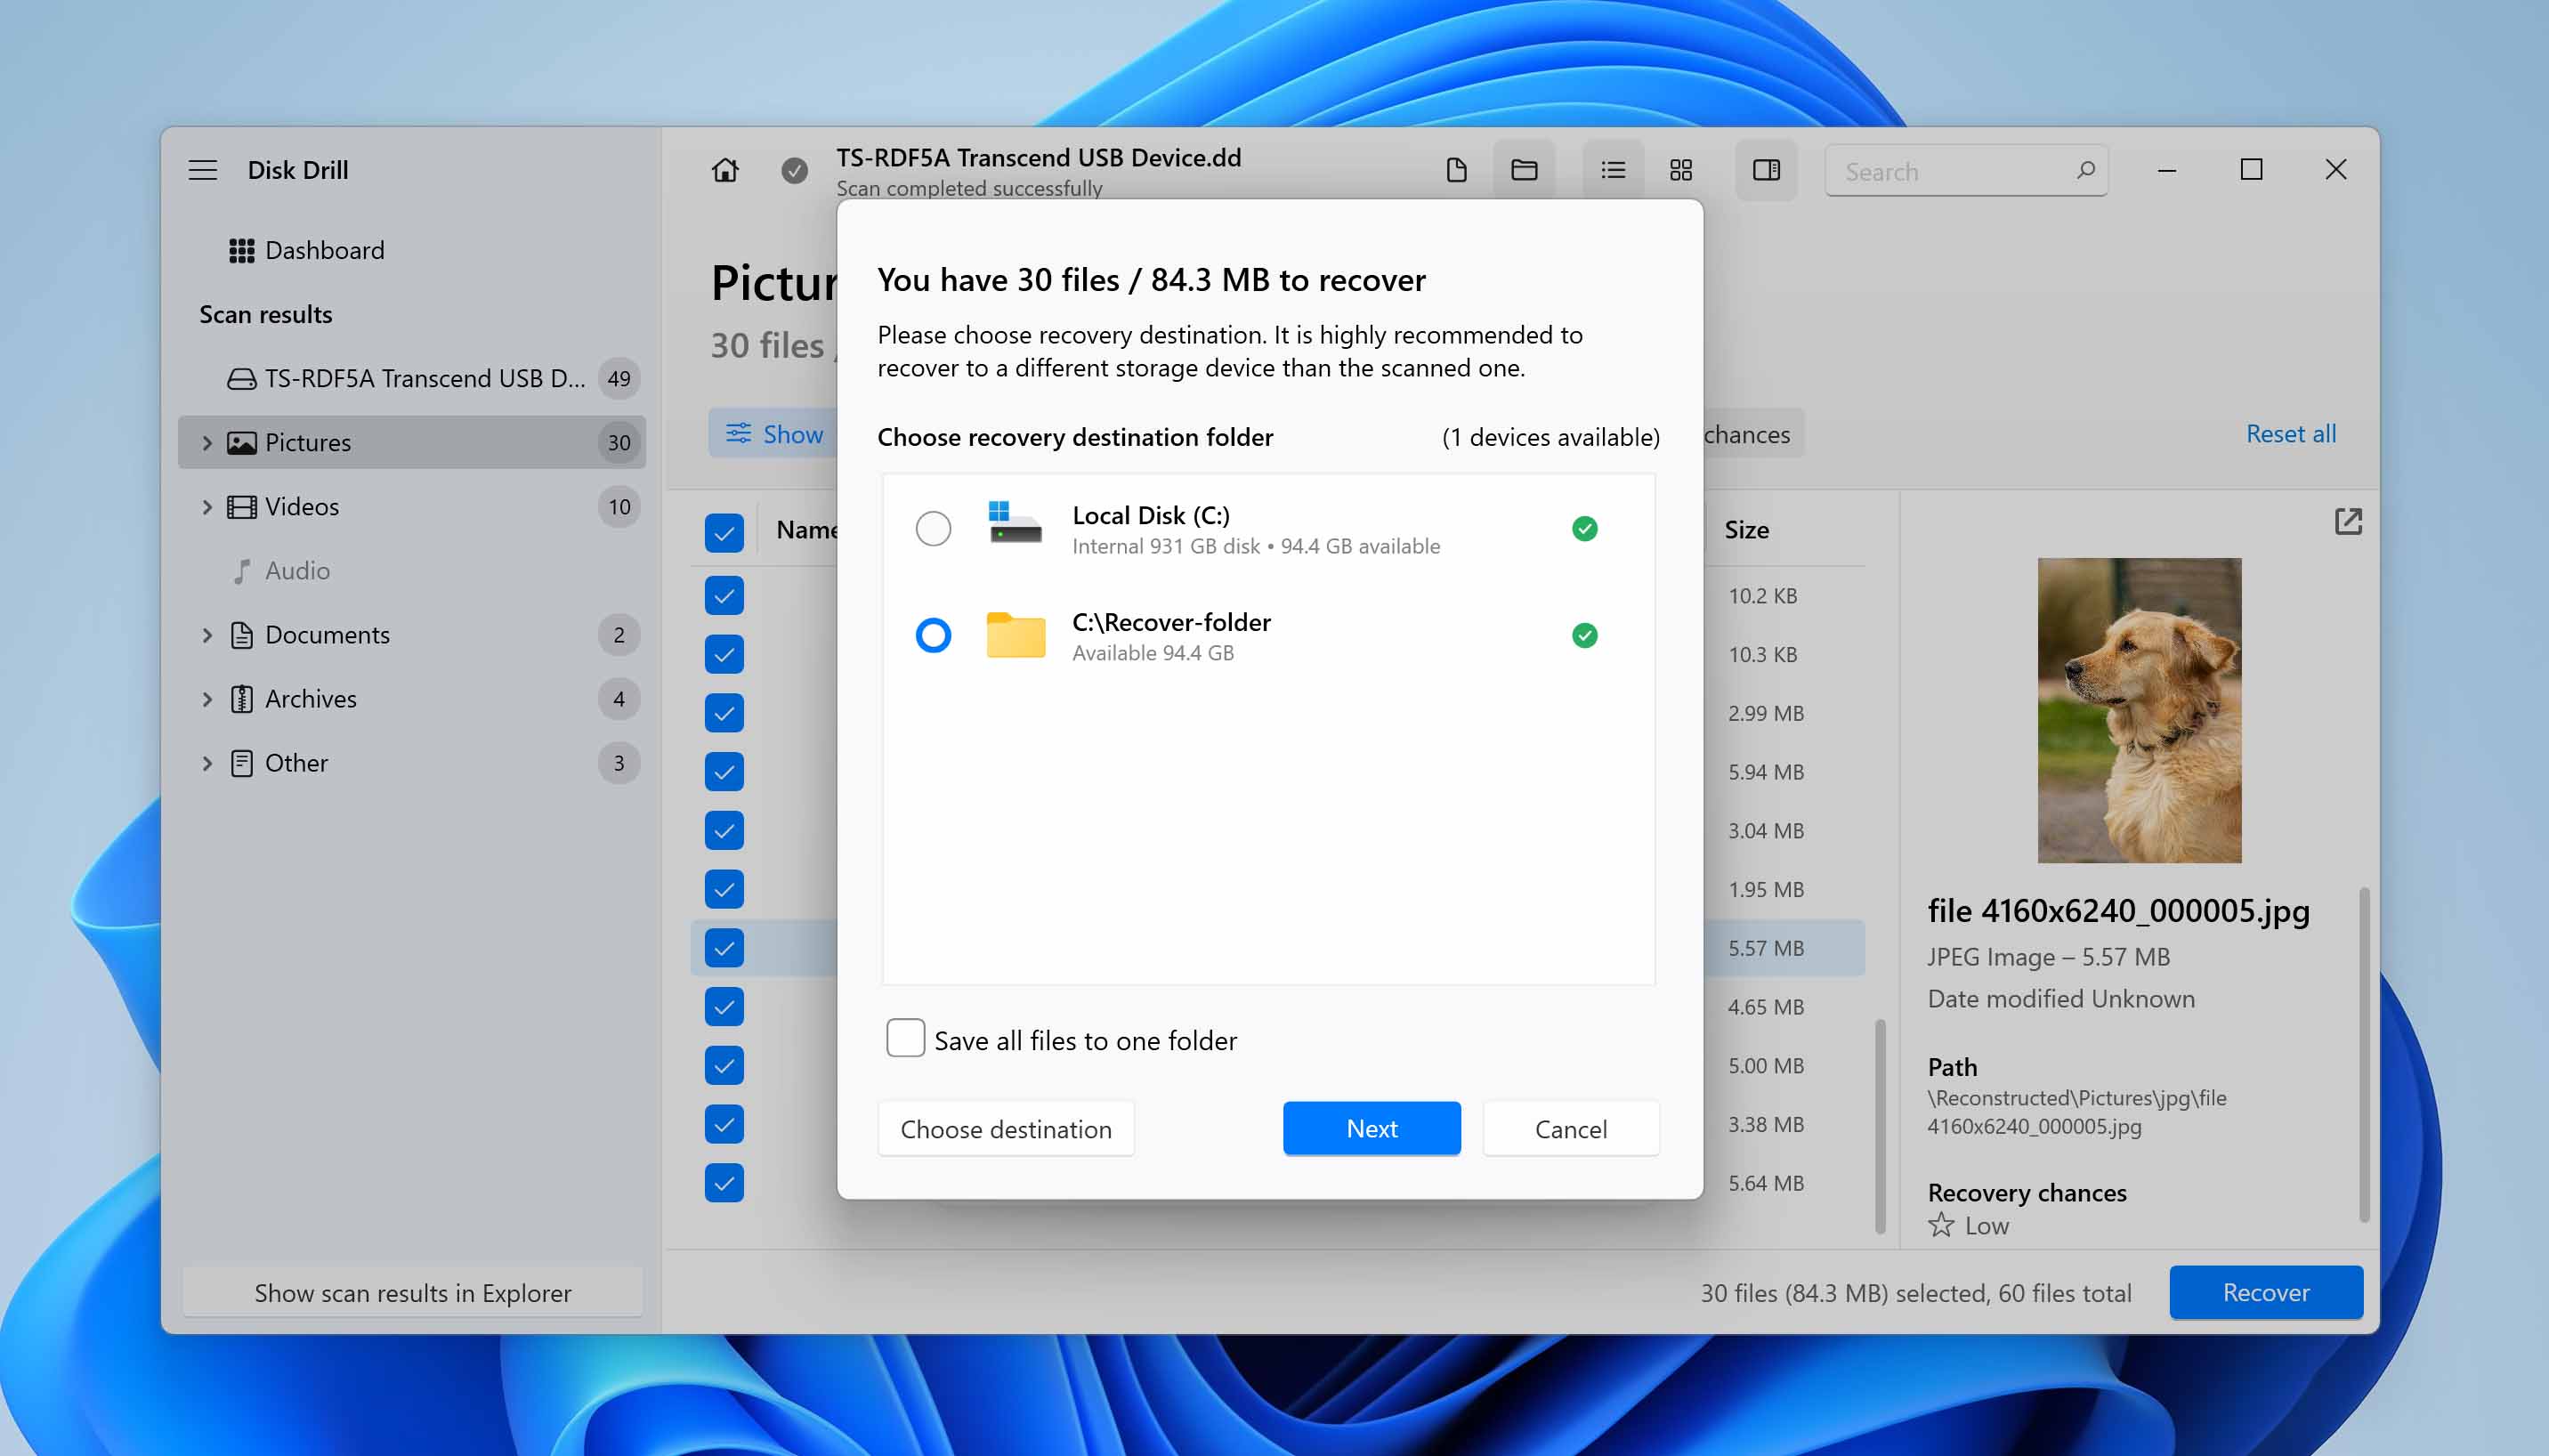
- Once you have chosen the files you wish to recover by checking the corresponding boxes, click Recover, pick a safe location apart from the source drive, and then hit Next. Disk Drill will take care of restoring your files from the backup.
After you have the file, you can then focus on repairing the disk. That said, you do want to be cautious about the drive. And perhaps the fixes do seem to fix the problem, but there is no way to know that the error does not return. Better to retire that drive for anything that’s mission-critical and replace it with a new storage device that you can trust to work the way it’s supposed to.
How to Fix the I/O Device Error in Windows
Depending on what caused the error, there are different ways to resolve the I/O device issue. Typically, you’ll be able to sign in to your PC and perform these fixes. But, if you can’t boot the computer, it’s best to connect the internal drive to another PC using a disk enclosure or create a live USB to boot into Windows.
Fix 1: Restart the Computer
A simple restart can often fix the most notorious errors. Before you proceed to use any other fix, simply restart your PC. After rebooting, try accessing your drive and performing the same operation that resulted in the I/O device error.
Fix 2: Check Cables and Ports
Damaged cables and ports are one of the most common reasons behind the I/O device error. Thankfully, cables are easy to replace, and you can always use a different port to connect the drive to your PC.
Here are some checks you can do to ensure that the cables and ports are working properly:
- Check the cables for damage- if anything is peeling or stretched, or if there is an abnormal bend, the cables should be replaced.
- Reinsert the SATA or USB cable and ensure a firm fit into the port. Dust off anything- even a little amount of dust will be an impediment.
- If you are connecting an external hard drive or even another USB, go for the USB ports on the motherboard instead of those on the computer case.
- You can also switch cables and connect the drives to another working computer to see if the error persists. If the drive works fine, there’s likely an issue with the original PC’s software configuration.
Fix 3: Update the Driver
Outdated drivers hamper the connectivity between your storage drive and the computer. In most cases, Windows automatically downloads and installs the latest updates. However, Windows may miss some updates, especially for specific drives, so it is best to update the relevant drivers manually.
Before proceeding to update individual drivers, check whether there’s a Windows update available. These updates usually contain driver updates as well, saving you the trouble of having to update the software drivers manually. To check for Windows updates, right-click on Start, then choose Settings > Windows Update.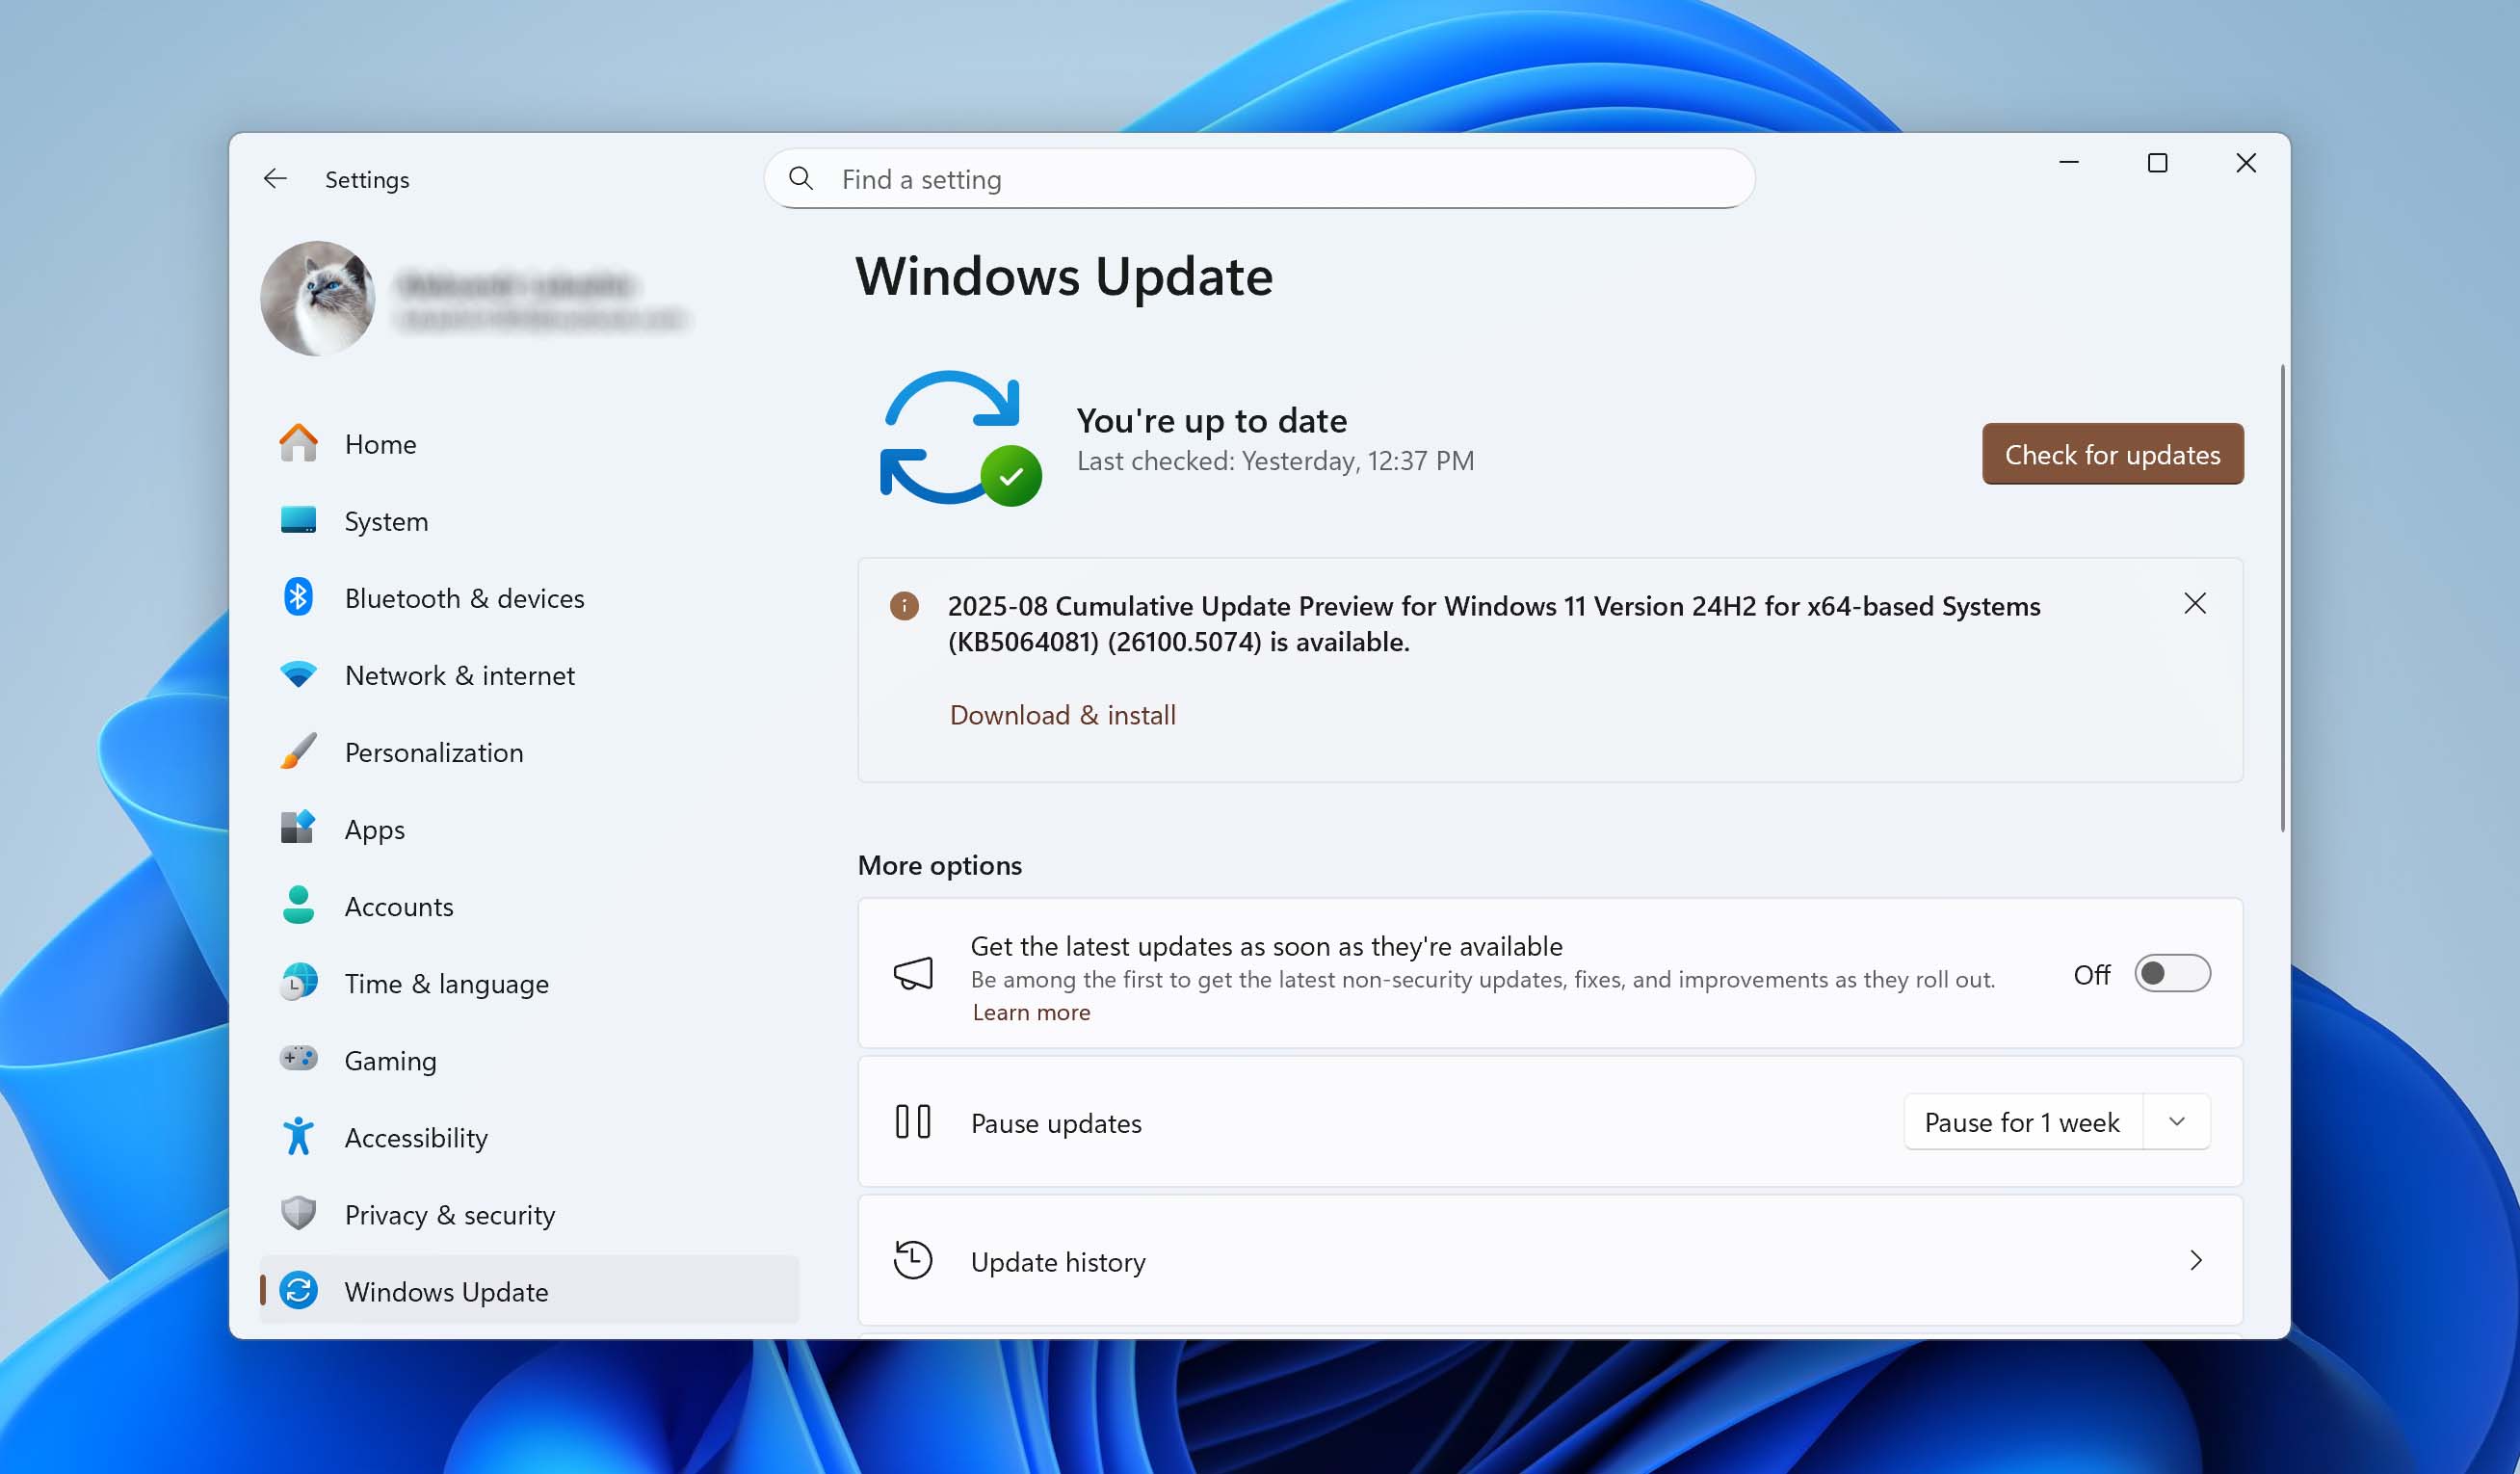
To update the drivers for your storage drive, follow these steps:
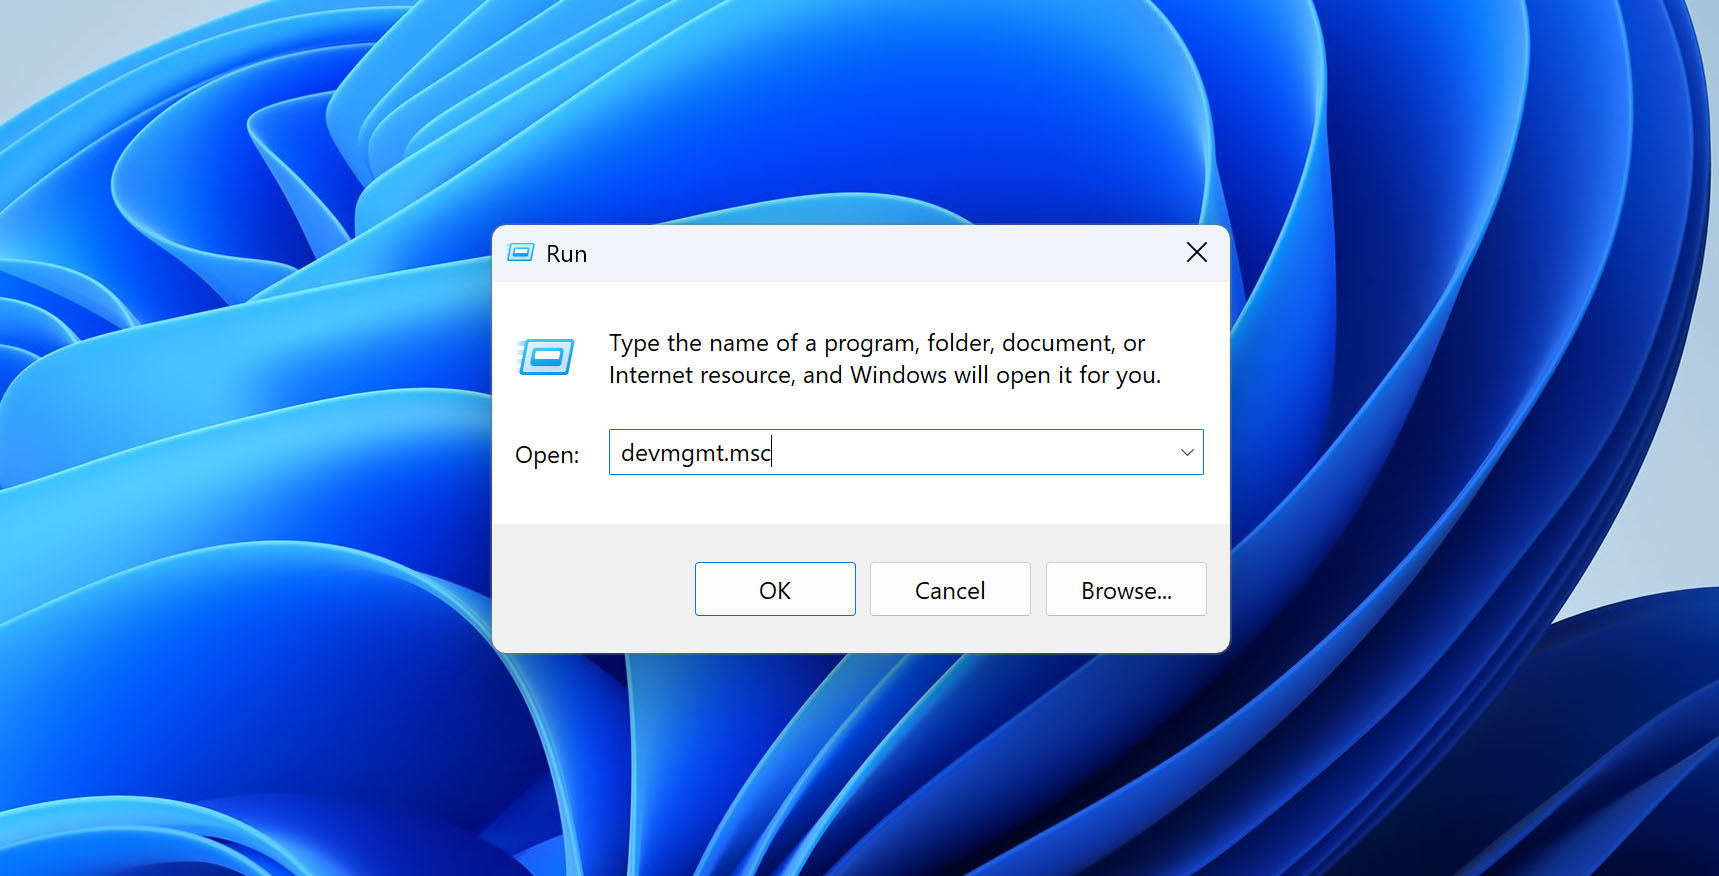
- Press Windows Key + R, type devmgmt.msc in the Run text box and press Enter. This will launch the Device Manager utility.
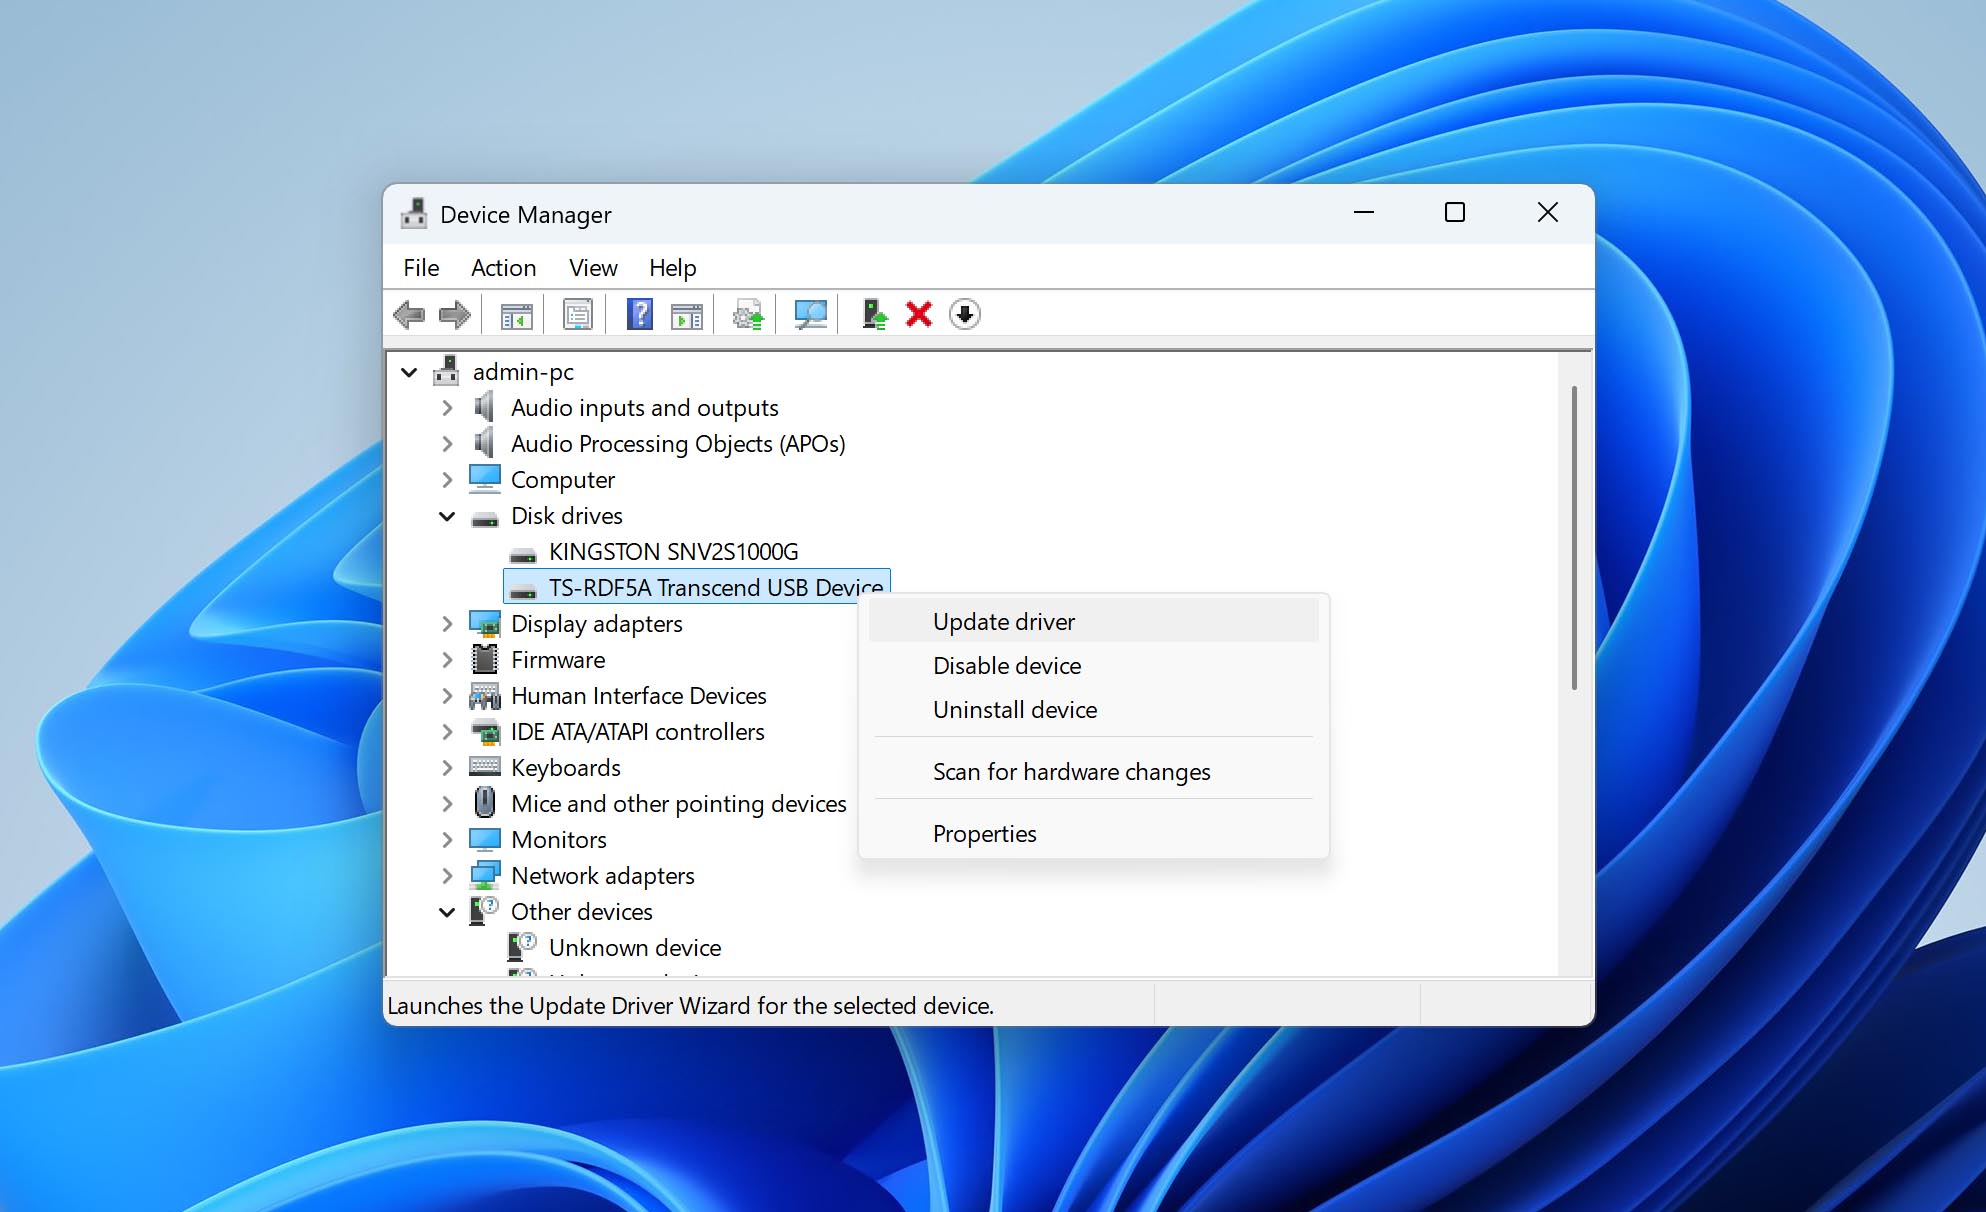
- Expand the Disk Drives menu in the Device Manager.
- Right-click on the storage device that’s showing the I/O Device Error and click on Update driver.
- Click on Search automatically for drivers.
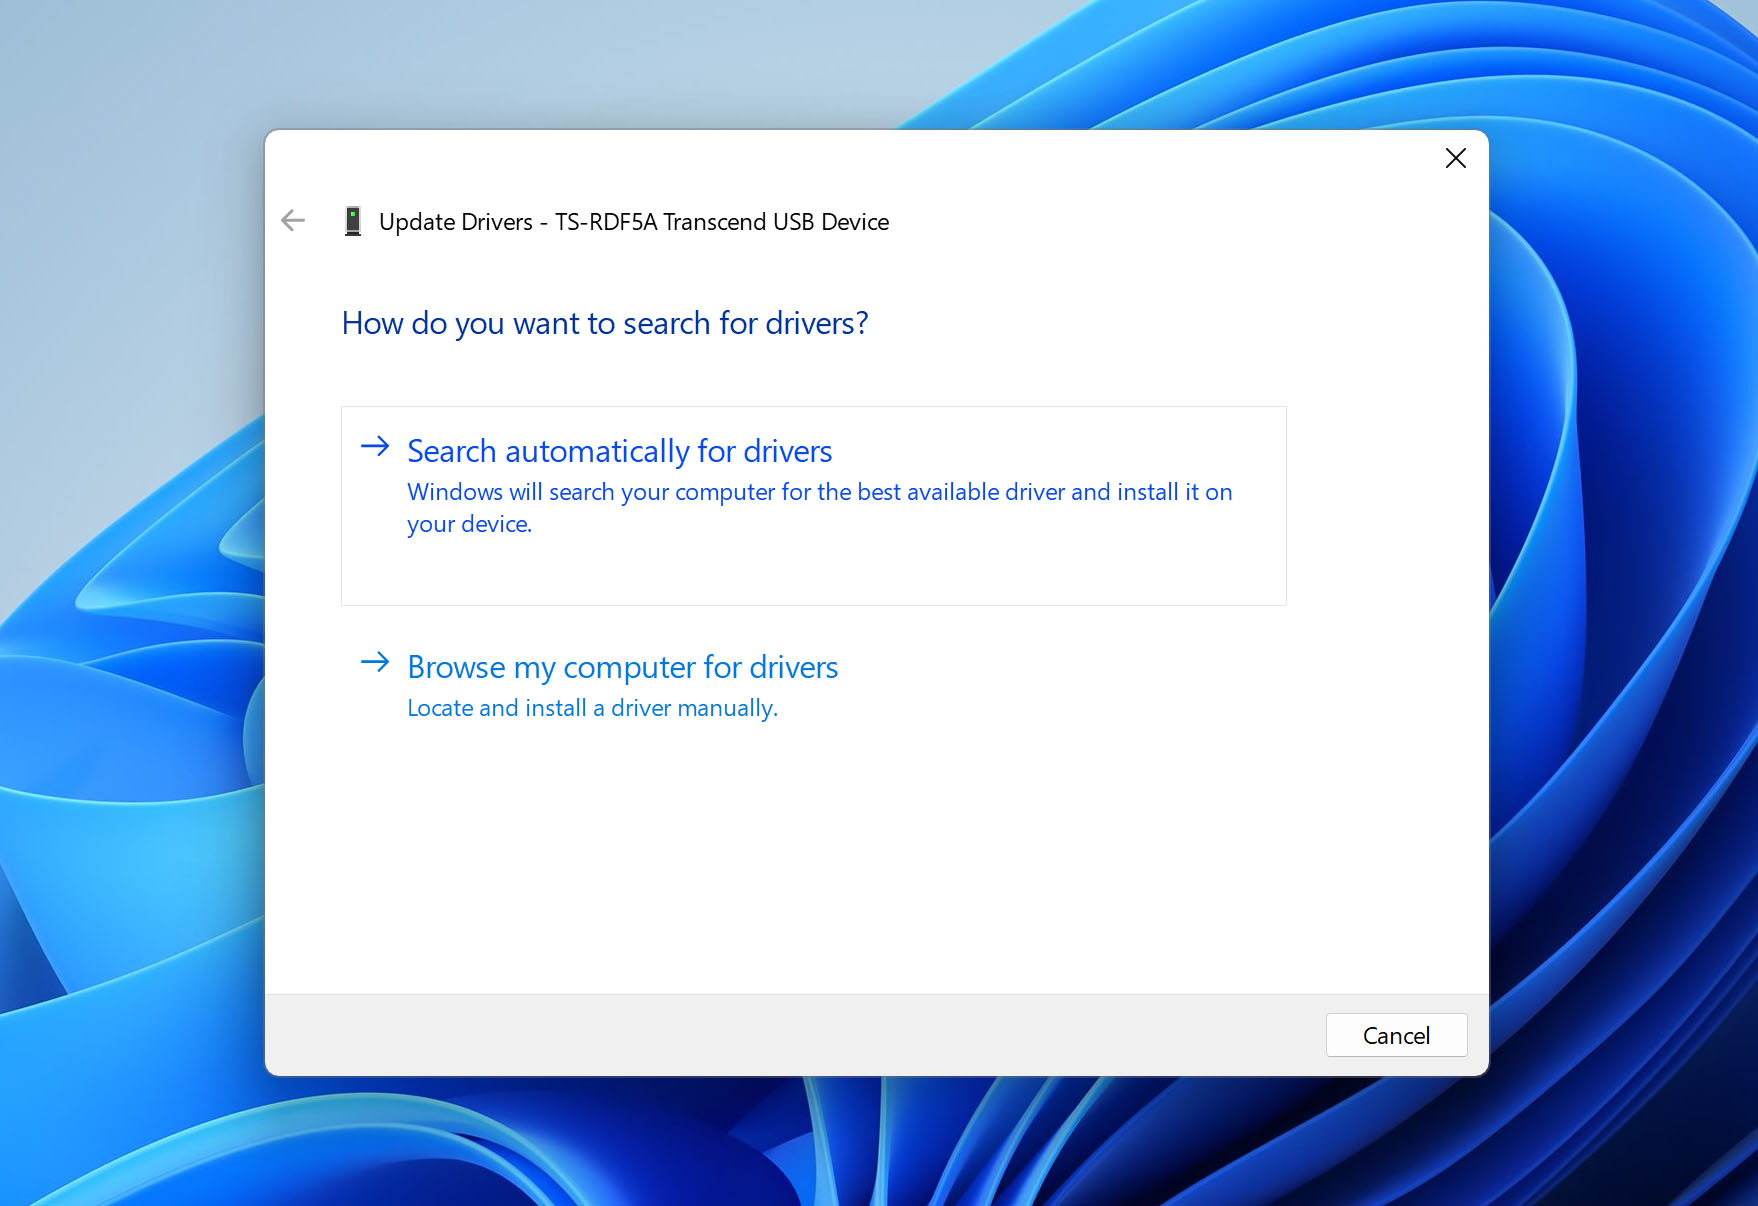
- Windows will download and install the latest drivers. Reboot your PC.
If Windows doesn’t find any new drivers through Device Manager, it’s worth checking the support section of your device manufacturer’s website. Many vendors publish driver updates there first, especially for specialized hardware, and installing the latest version directly from the source can often resolve stubborn I/O errors.
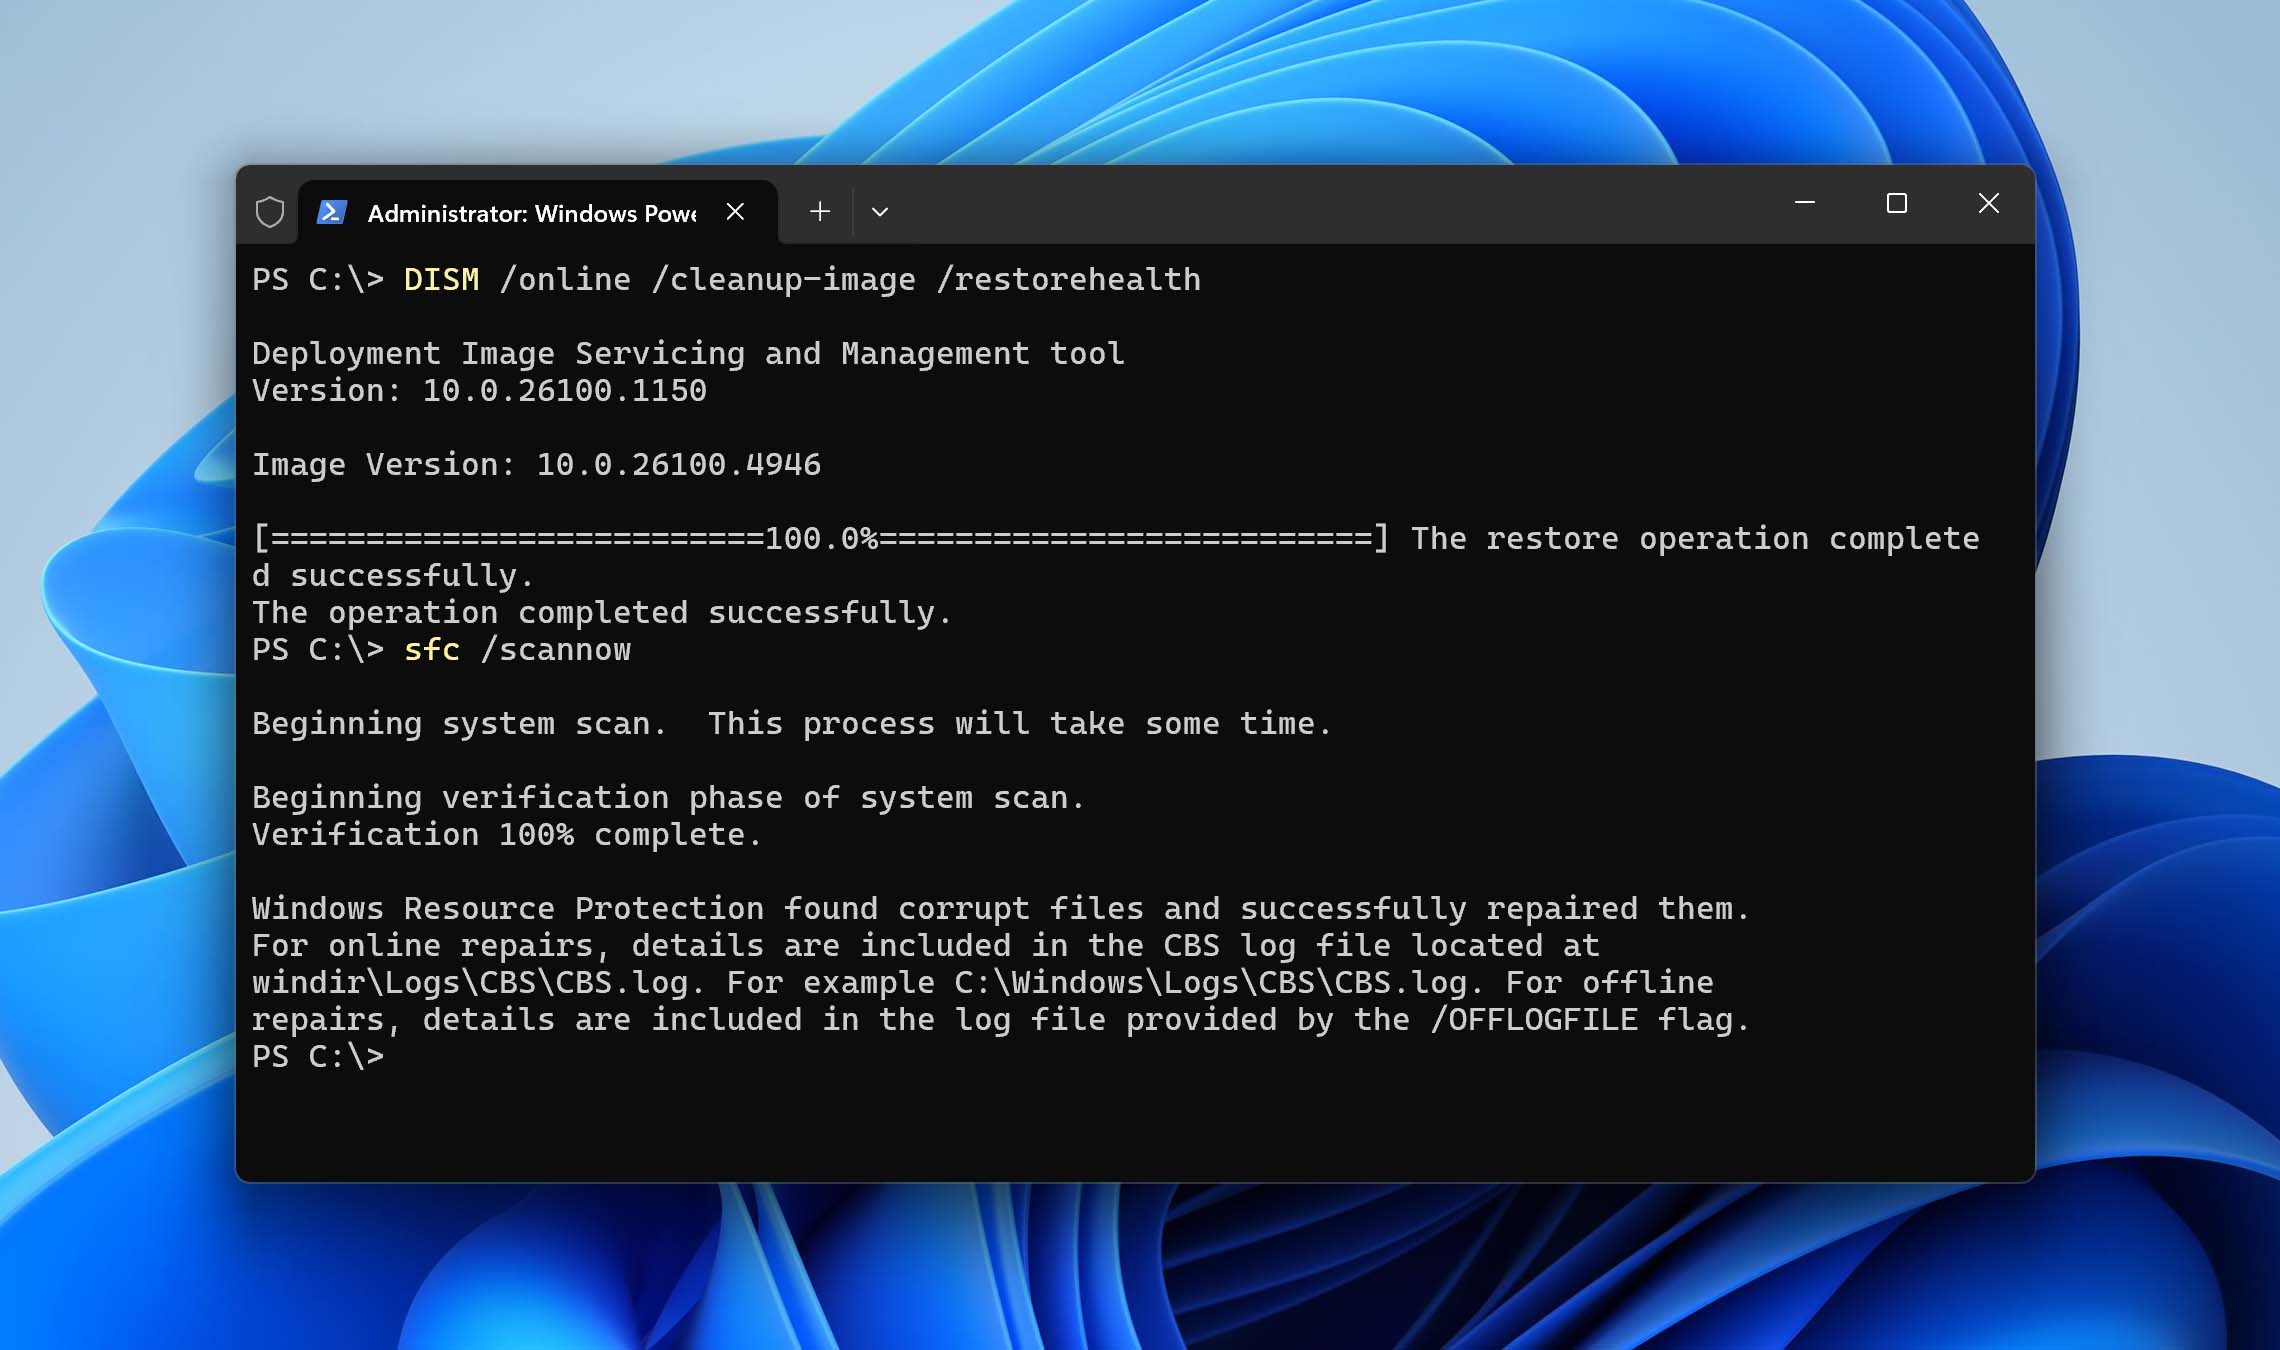
Fix 4: Run the System File Checker (SFC)
Sometimes an I/O device error can be caused by corrupted or missing system files in Windows. The built-in System File Checker (SFC) utility scans your operating system for these problems and attempts to repair them automatically.
Here’s how to use it:
- Run the Terminal as administrator.
- Type this command and press Enter – DISM /online /cleanup-image /restorehealth. Skip this step if you don’t have an active internet connection.
- Now, type sfc /scannow and press Enter.
Fix 5: Check the Drive’s S.M.A.R.T. Status
Self-Monitoring Analysis and Reporting Technology (S.M.A.R.T.) lets you see your drive’s health across numerous parameters. Using a disk’s S.M.A.R.T. status, you can determine if it’s failing or if there’s an accumulation of bad sectors on it.
There are plenty of third-party tools that can provide you with an in-depth S.M.A.R.T. report of your drive. A good choice is CrystalDiskInfo or Disk Drill’s S.M.A.R.T module.
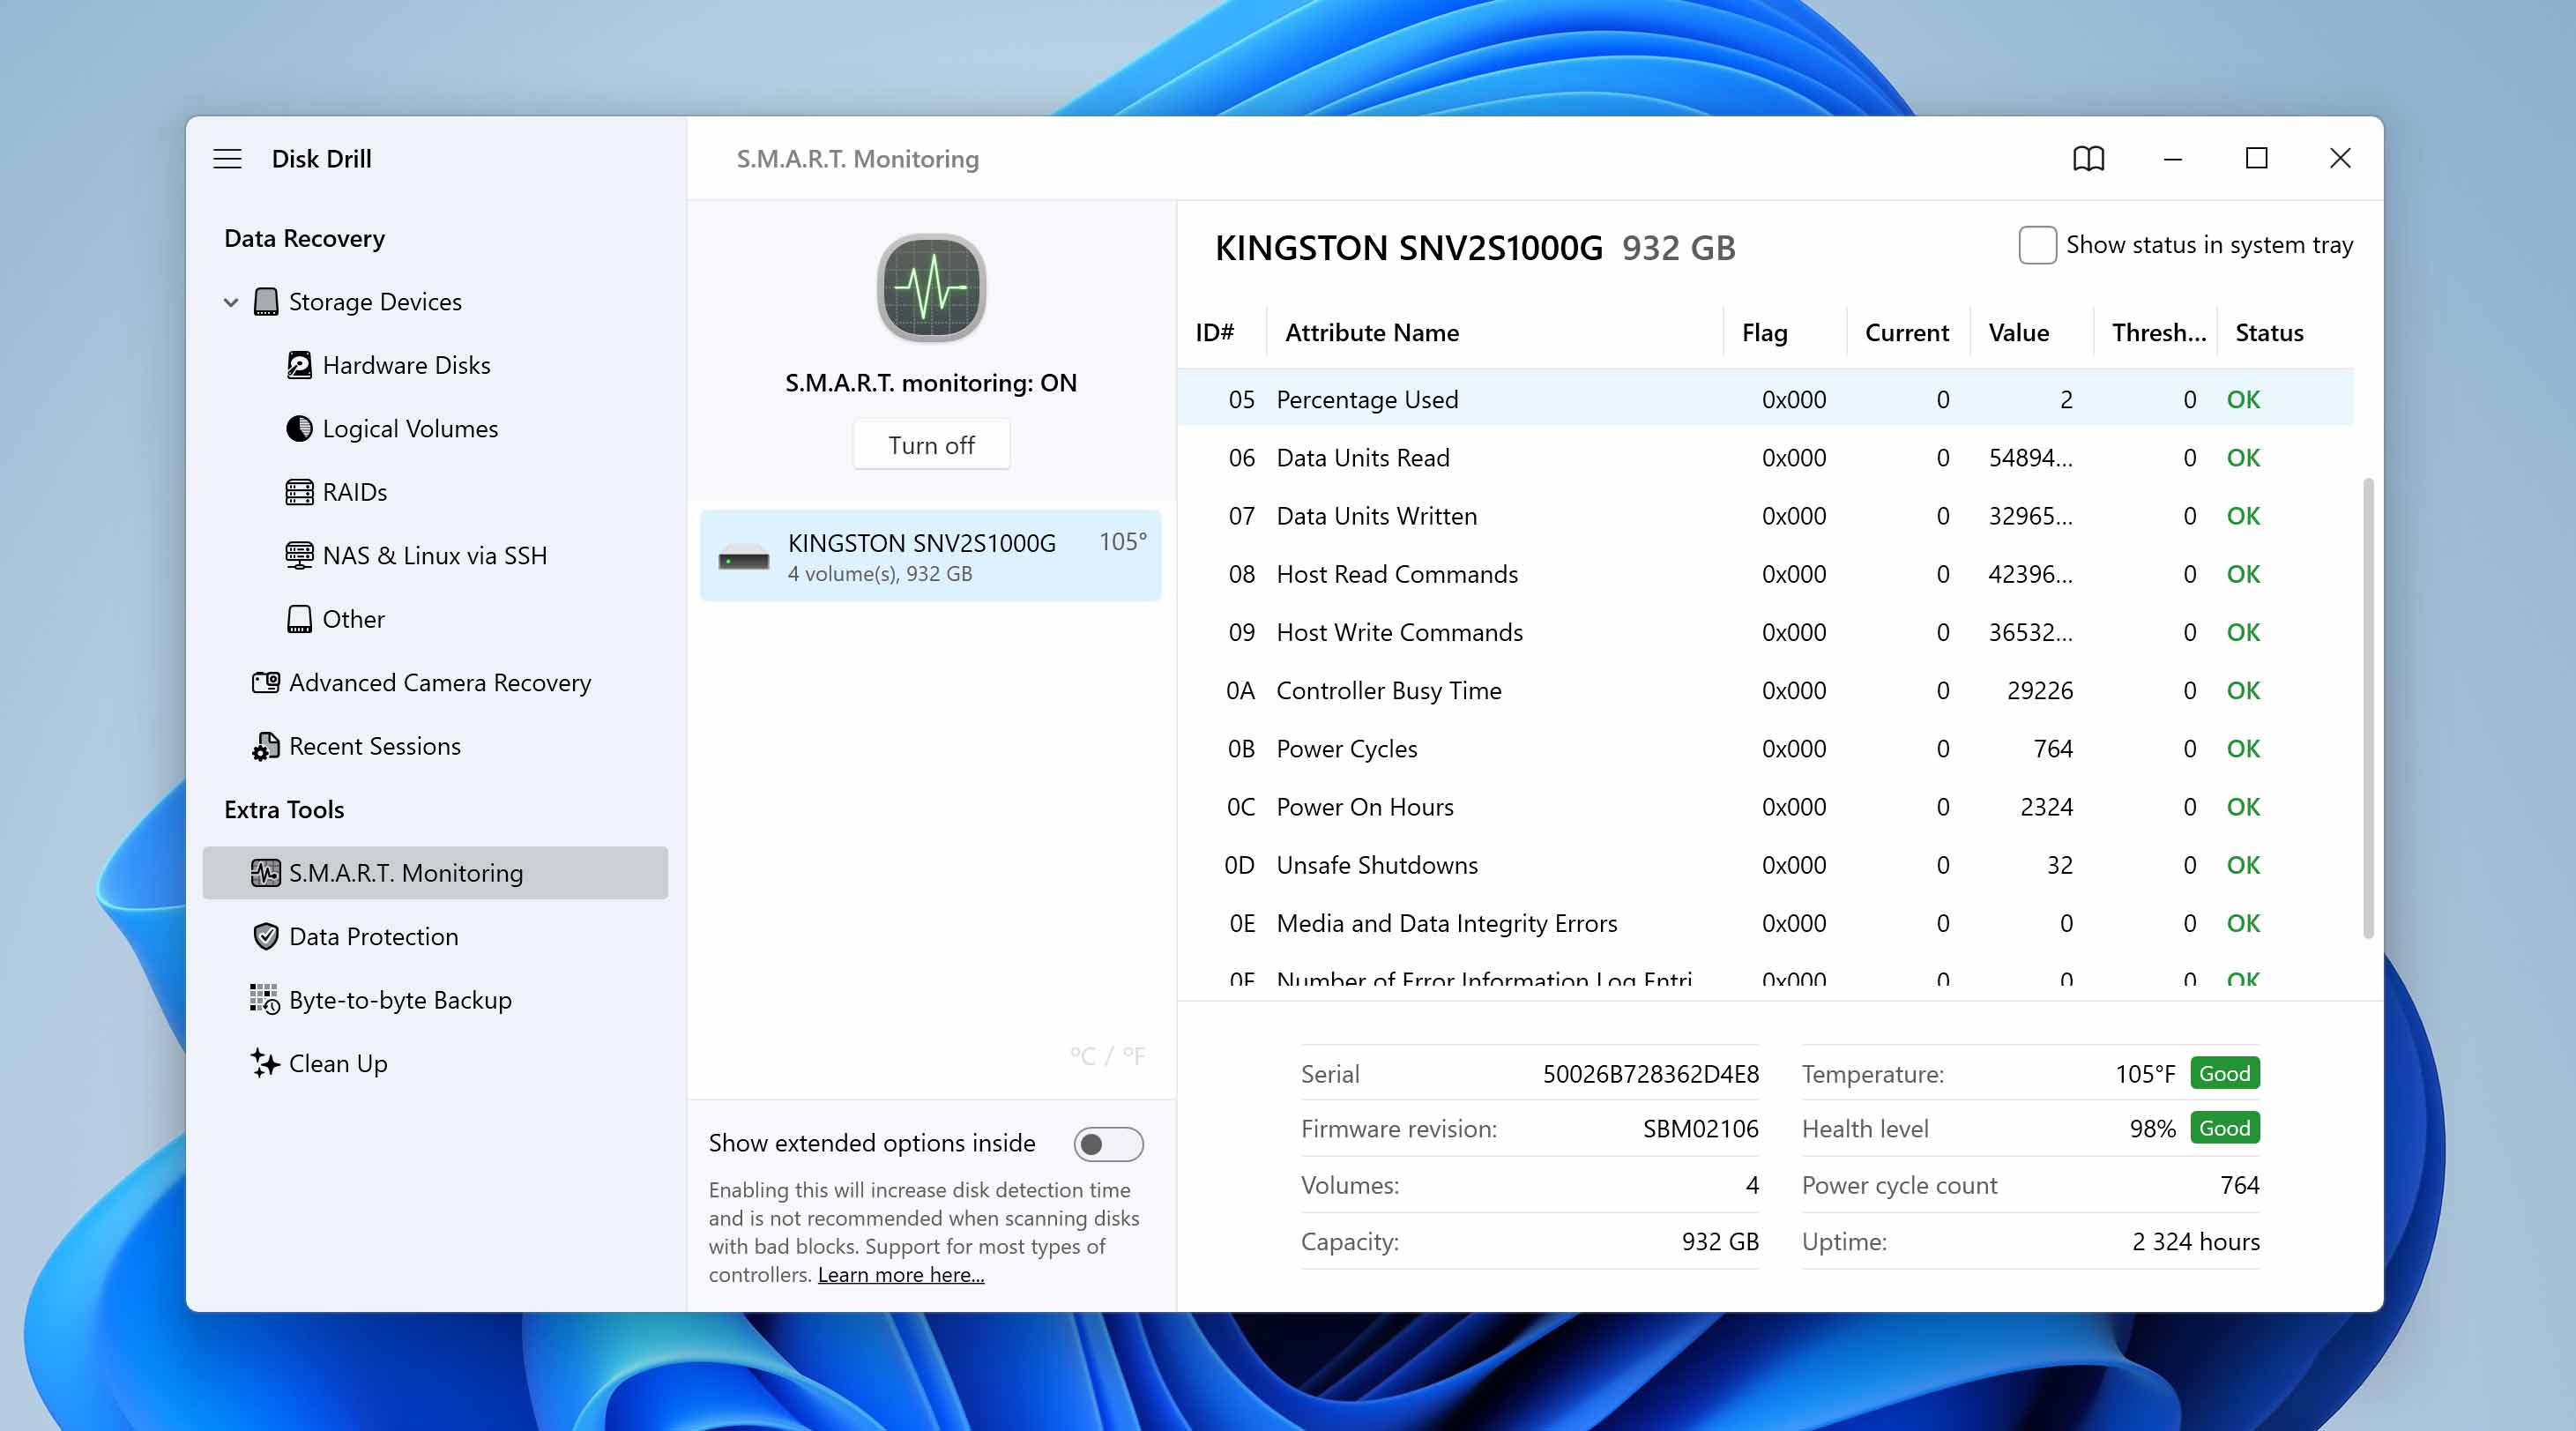
In the S.M.A.R.T. report of your drive, look at the following fields:
- 05: Reallocated Sectors Count
- 0A: Spin Retry Account (Not applicable to flash storage devices like USB drives, SSDs, and memory cards)
- C4: Reallocation Event Count
- C5: Current Pending Sector Count
- C6: Uncorrectable Sector Count
If the values in these fields are in triple digits or more, it indicates a failing drive. You should stop using the drive immediately and contact a professional data recovery service. Continued data usage can result in permanent data loss.
In case the values are in double digits or below, you can perform a full format of the drive and continue using it. However, your data will be lost irrecoverably, and it’s still recommended you change the drive soon.
Conclusion
Now you know what an I/O device error is, what causes it, and how to handle it without risking the files. Most often, you can indeed solve most problems. However, the best approach is to first save your data by creating a full backup, and then proceed with the fix. And once signs of trouble become apparent, it is always wise never to rely on such a hard drive for anything important again.
It is hoped that this guide has helped you resolve the issue. Please let us know in the comments which workaround worked for your case and whether you have successfully recovered your data.
If you are still experiencing problems related to data storage: corrupted memory cards, lost photos, or inaccessible external drives, do not forget to check our other recovery guides. Perhaps your solution is there too.
FAQ
- Restart the PC.
- Check the cables and ports for damage. Reconnect the drive.
- Perform a clean boot of your PC and see if the error persists.
- Ensure the transfer mode is correct in the IDE channel properties.


