 Deleting a file by mistake can cause a lot of drama, but it gets even worse when you delete a whole folder. Luckily, there are ways to recover deleted folders on Mac. Even if you’re not tech-savvy, you’ll be able to handle this issue like a pro.
This article walks you through the 3 best folder recovery methods suitable for different situations. Just pick a suitable method and follow the step-by-step instructions to recover your deleted folder.
| Folder loss scenario | Recovery technique |
| 📂 I’ve recently deleted a folder by mistake. | Look through the files and folder located in Trash, it’s possible that the folder is still there (Method #1). |
| 🗑️ I accidentally deleted a folder and emptied Trash afterwards. | Use a data recovery tool to recover the whole folder (Method #2). |
| 🕒 I deleted a folder from my Mac but have a Time Machine backup containing that folder. | Use the Time Machine backup to restore the deleted folder (Method #3). |
Is It Possible to Undelete a Folder on Mac?
Luckily, the answer is YES. If you’ve just deleted a folder, you can use the Undo command to restore it instantly. There is one significant limitation to using this method: you can only go back one action at a time. Moreover, the history of previous actions will be lost after a reboot.
To undelete a folder on your Mac, just press Command + Z on your keyboard. Or, alternatively, click Edit from the screen’s top menu, and choose Undo Move of “…” (name of your folder).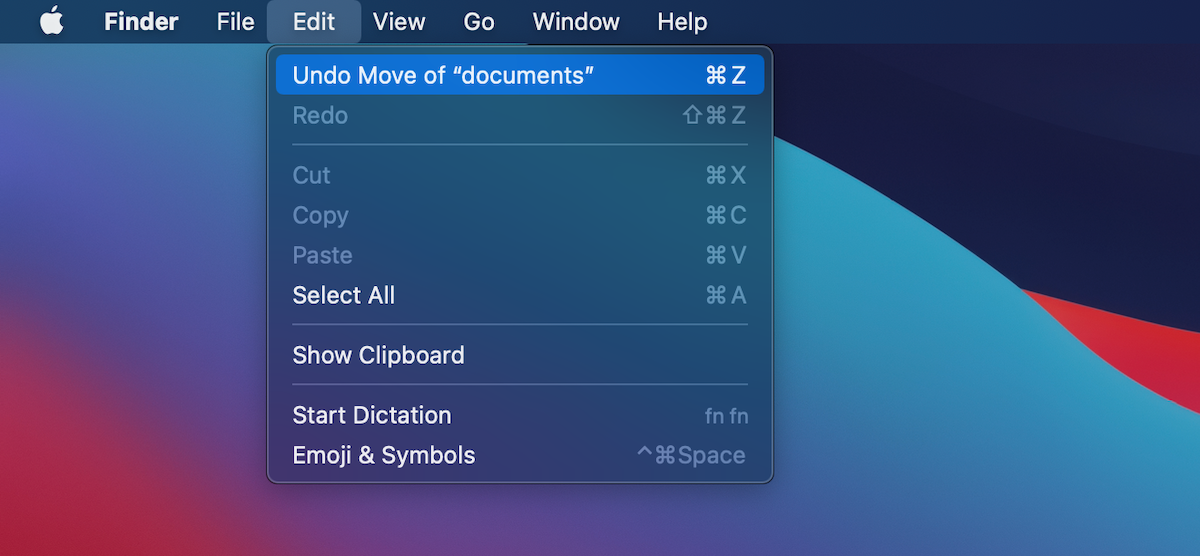
How to Find Folders on a Mac
Don’t remember deleting a folder but still can’t locate it on your Mac? Maybe it’s not actually gone, and you need to search for it more carefully.
In general, there are two main methods that you can use to look for files and folders on your Mac: using Finder and using Spotlight search.
To use these methods, you need to know either the name of your folder or the date when it was created (month and year). If not, it may be more complicated to find it using these methods (or even impossible).
Here’s how to search for a missing folder on Mac via Finder:
- Launch Finder from Dock on your Mac (it usually goes first in Dock).
- On the top-right side of the screen, click the magnifying glass icon. Once the search box appears, type in the name of your folder (or a search term that defines your folder). If you’re sure that the name that you entered is the correct one for your folder, then click Name matches. If not, then just hit Return.
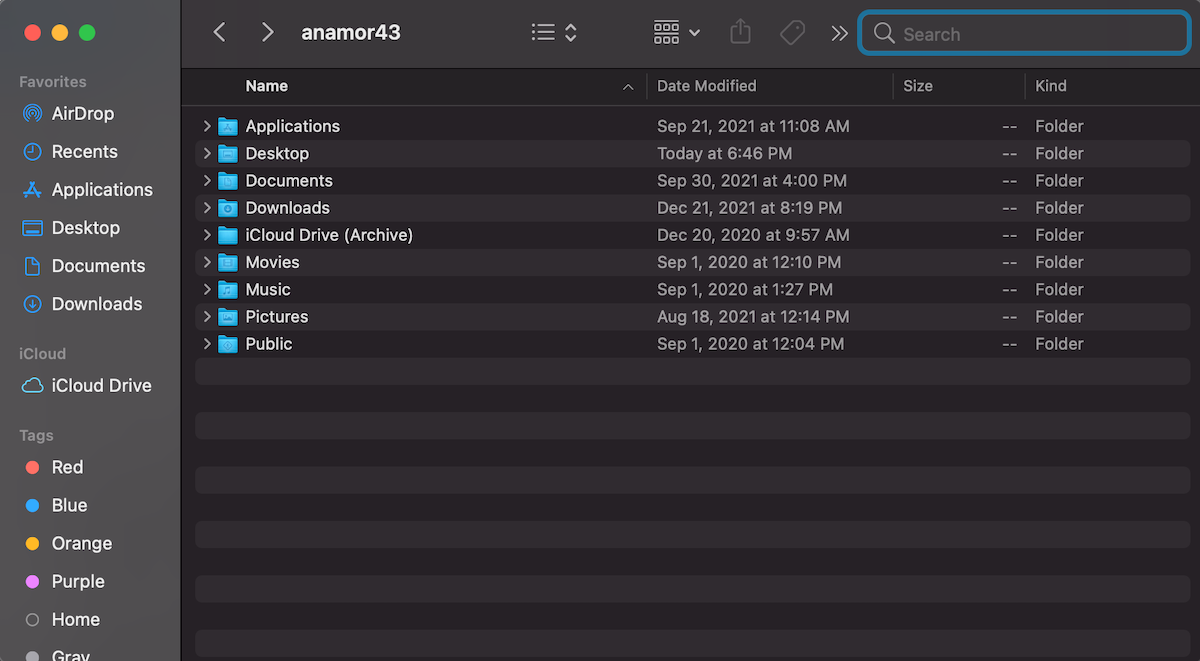
- If you know the month and the year when the folder was created, you can type them in the search field and then click Dates from the drop-down menu. Finder will show you all the files and folders created at that date.
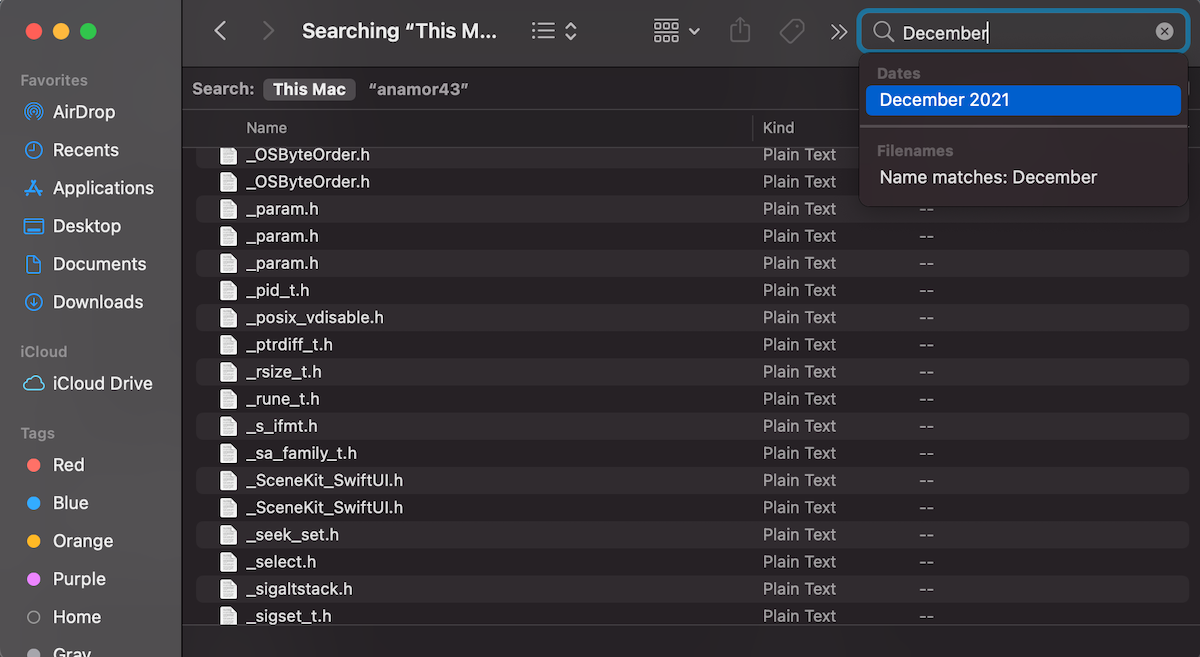
- You can choose either to search for that folder on your whole Mac or a specific folder.
Another way to look for files or folders on your Mac is via Spotlight search. Follow these steps to do it:
- Launch Spotlight search. You can do this either by clicking on the magnifying glass icon on the top right of your screen or press Command + Space on your keyboard.

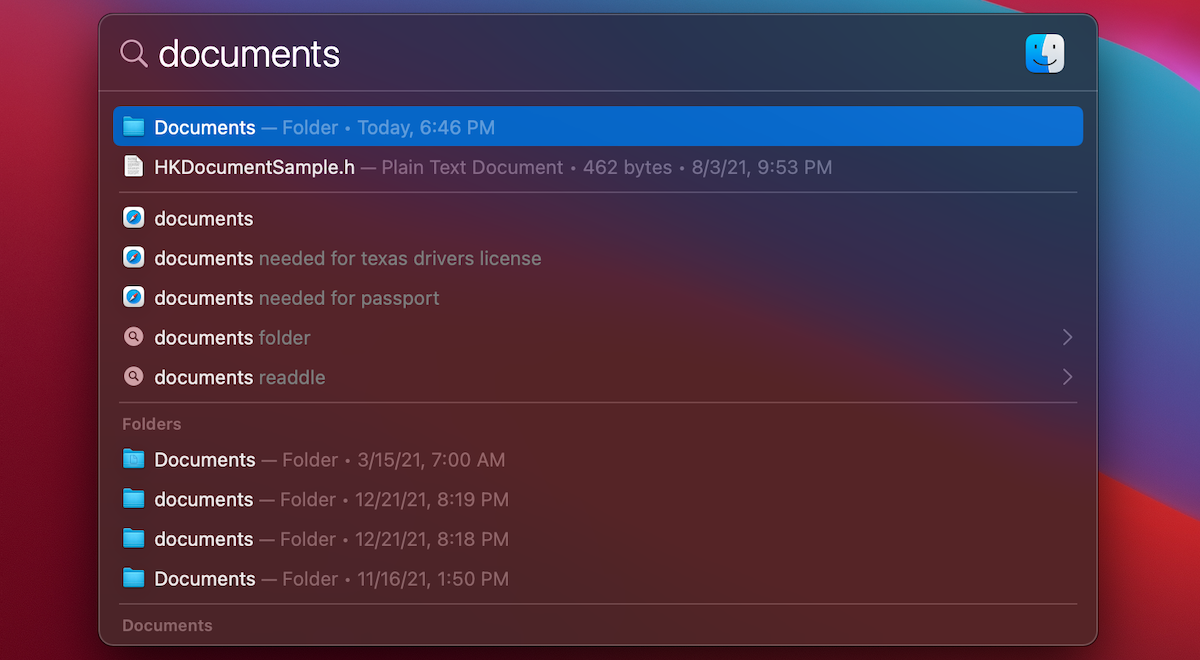
- Enter either the folder’s name or a search term that defines that folder.
- Spotlight search will show you all relevant results: files, folders, and even websites related to that search term. Look through the list to find your lost folder.
Also, almost every Mac contains hidden files. In most cases, such files are hidden because they are beneficial to your device, and removing them may cause serious issues. So it is best not to unhide them unless you’re aware of what you’re doing.
Here’s how to unhide folders on your Mac:
- Launch Finder and open the needed location (the Home folder or any other one from the folder directory on Mac).
- Press Command + Shift + . on your keyboard at the same time. This will show you the hidden folders.
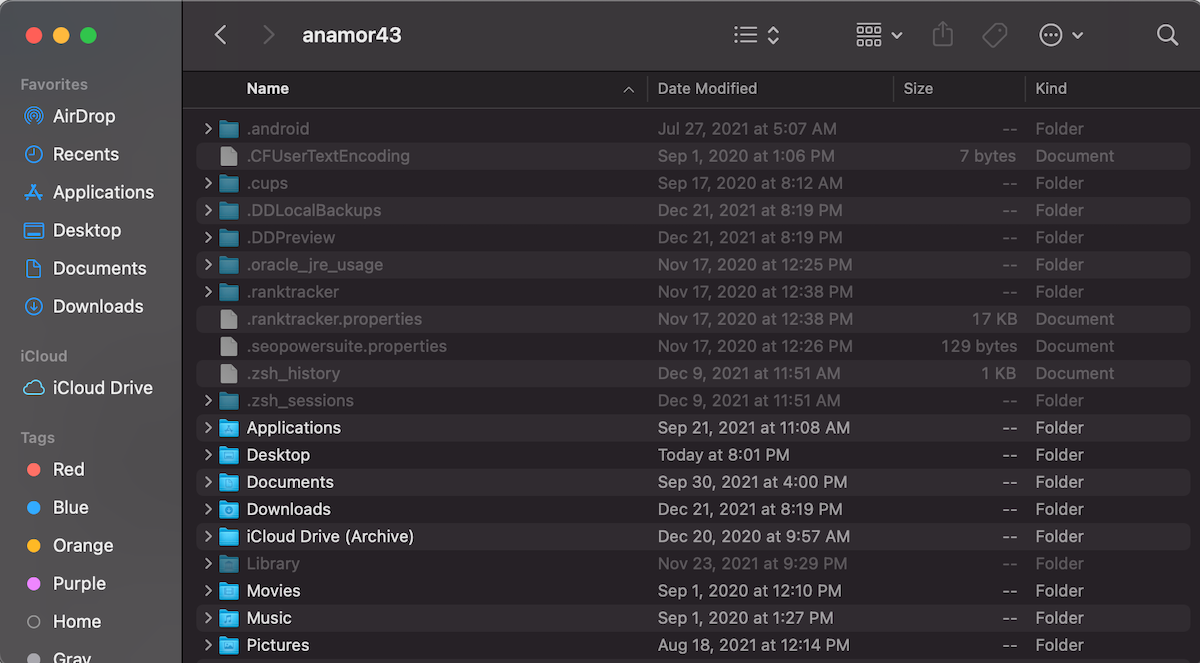
- To hide them back again, press the same keyboard combination.
How to Recover Deleted Folders on a Mac
If you’re certain that the needed folder is deleted, you should choose a recovery method depending on your situation and move forward with the folder recovery.
Method 1:Check Your Trash Bin
After you realize that you’ve mistakenly deleted an important folder, the first thing that you should do is to check your trash bin. Once you delete a file or a folder from your Mac, it goes directly into Trash.
So if you haven’t emptied Trash on your Mac after deleting the folder, the chances are it’s there. Here’s what you should do to recover a deleted folder from Trash on Mac:
- Launch Trash from Dock.
- Look through the files and folders located there. Once you find the missing folder, using the trackpad, click with two fingers on that folder.
- From the drop-down menu, select Put Back. Or just drag and drop the folder out of Trash into any folder that you want.
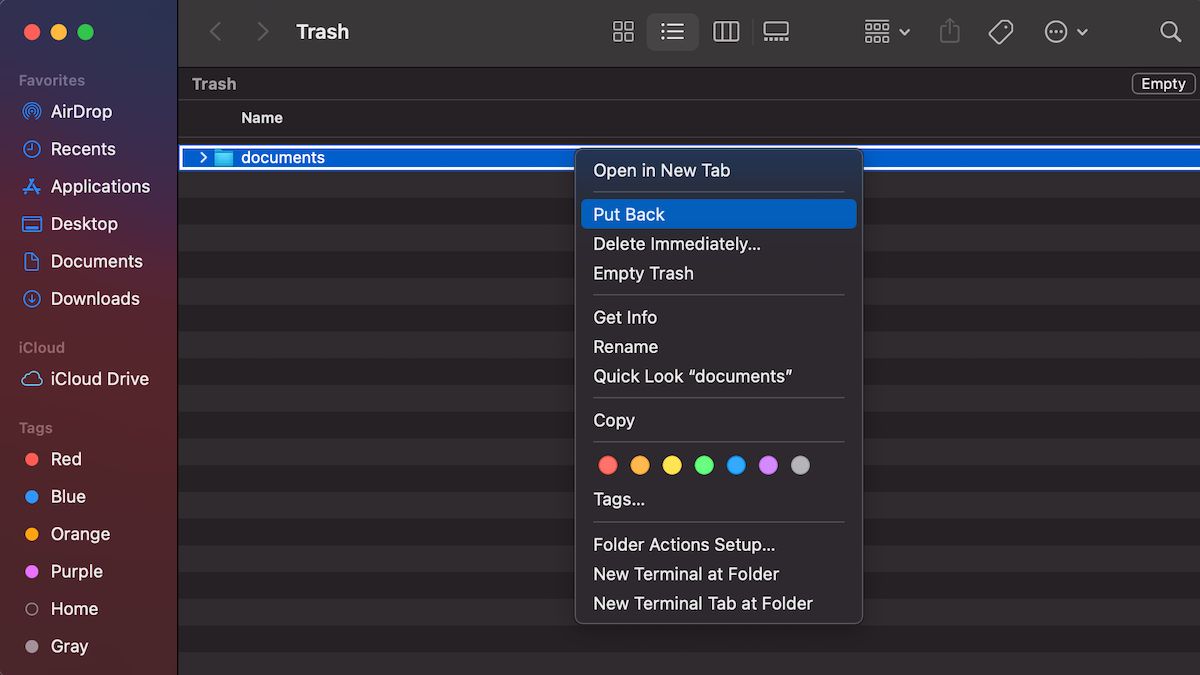
That’s it! The missing folder will be placed back into its original location.
Method 2:Use Data Recovery Software
If you’ve already emptied Trash on your Mac and your deleted folder is gone, there still is some hope.
One of the options that you have now is to use third-party data recovery software for this job. Disk Drill is a great example of such a tool since it is pretty straightforward to navigate and can recover folder structure with different file systems (exFAT, FAT32, NTFS, HFS, and APFS).
Important: Stop using your Mac after realizing that you’ve mistakenly deleted a folder. This will help to avoid overwriting.
Now you’re ready to move forward. Here’s what you should do next to recover permanently deleted folders on Mac via Disk Drill:
- Download and install Disk Drill. Then click diskdrill.dmg and follow the on-screen instructions to finish the installation process.
- Launch Disk Drill.
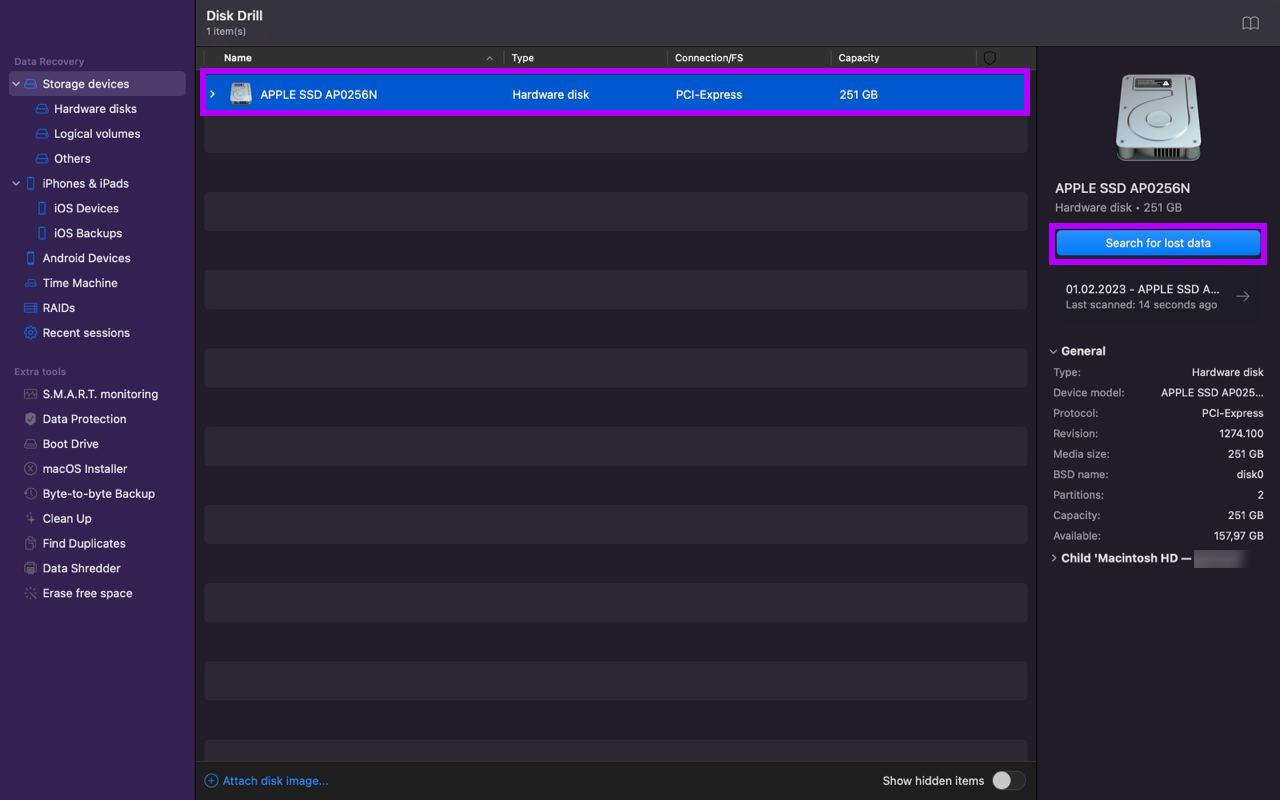
- You’ll see a list of available devices on your Mac. Choose the disk drive where the deleted folder was located. Click the Search for lost data button on the bottom-right of the screen.
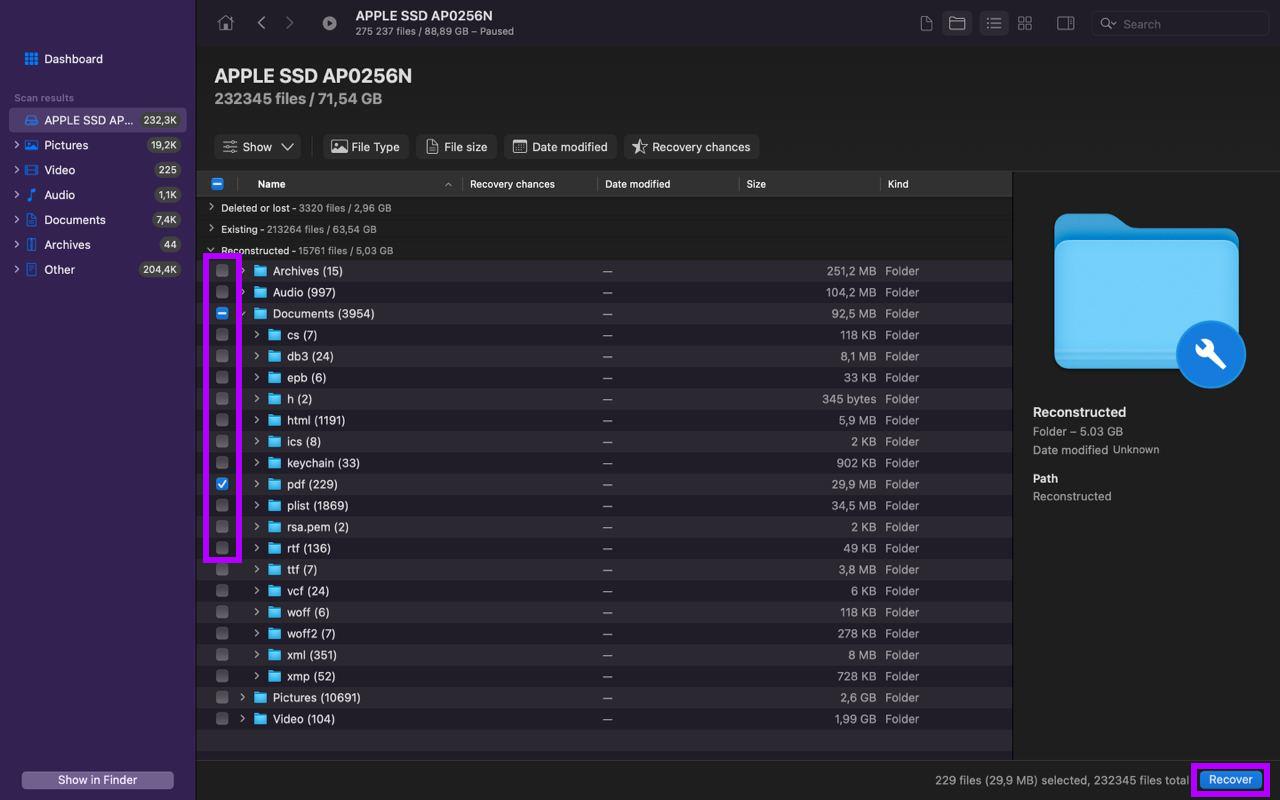
- Wait for the scan to finish, or start looking for your folder right away. Once you’ve located the needed folder, place a checkmark near it to select all of the files that it contains. Click Recover.
- You’ll be asked to choose the recovery location of your folder. It is best to choose a location that isn’t on the same drive. Click Next to proceed.
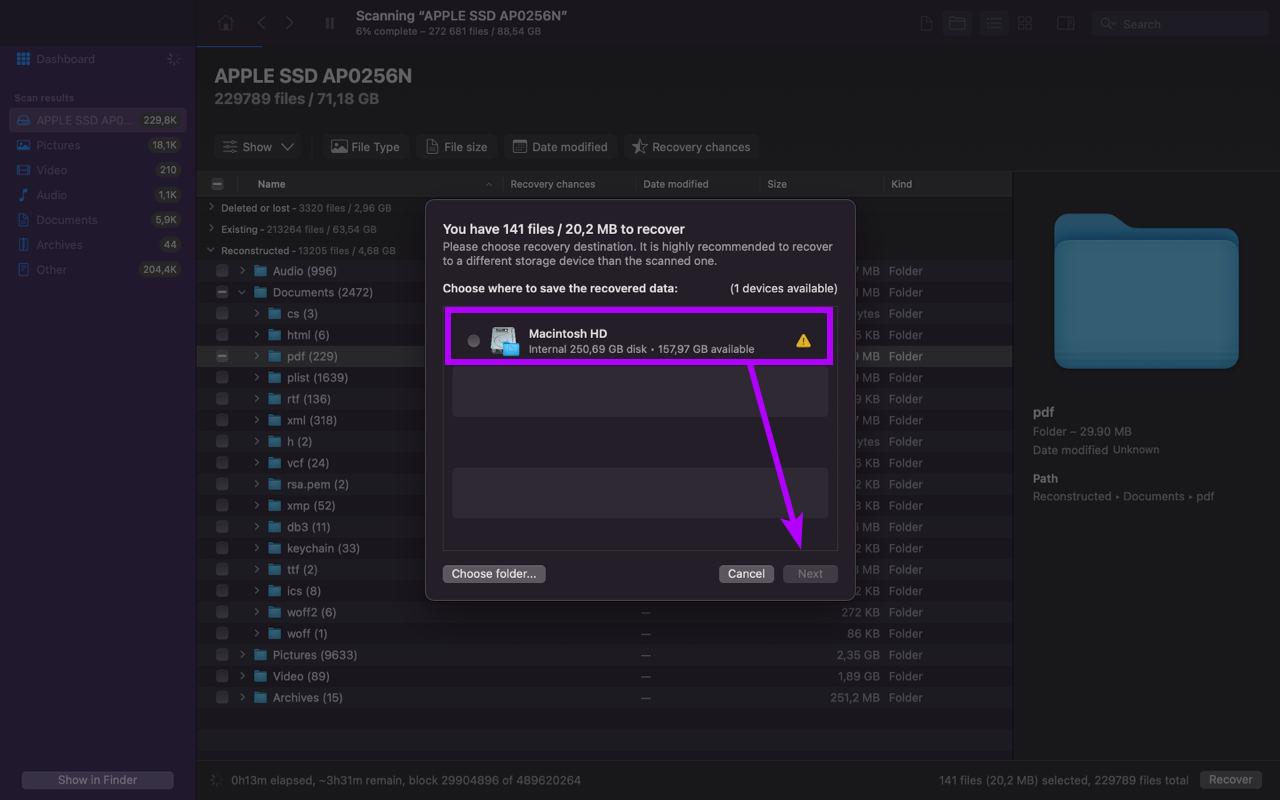
- Once the folder is recovered, you’ll see a screen saying Data recovery complete. You can either quit Disk Drill or click Show results in Finder to view the restored folder.
Method 3:Recover Your Folder from a Time Machine Backup
If you’re using Time Machine for backing up your Mac, you’ll be able to use this tool to recover the lost folder. This tool is capable of reverting deleted files and folders as long as you’ve performed a backup of your Mac before deleting the folder.
Here’s how to recover a deleted folder in MacBook via Time Machine:
- Connect the drive containing your backup to your Mac.
- Open the folder in which the deleted folder was previously located.
- From the menu on the top of your screen, click the Time Machine icon. Select Enter Time Machine.
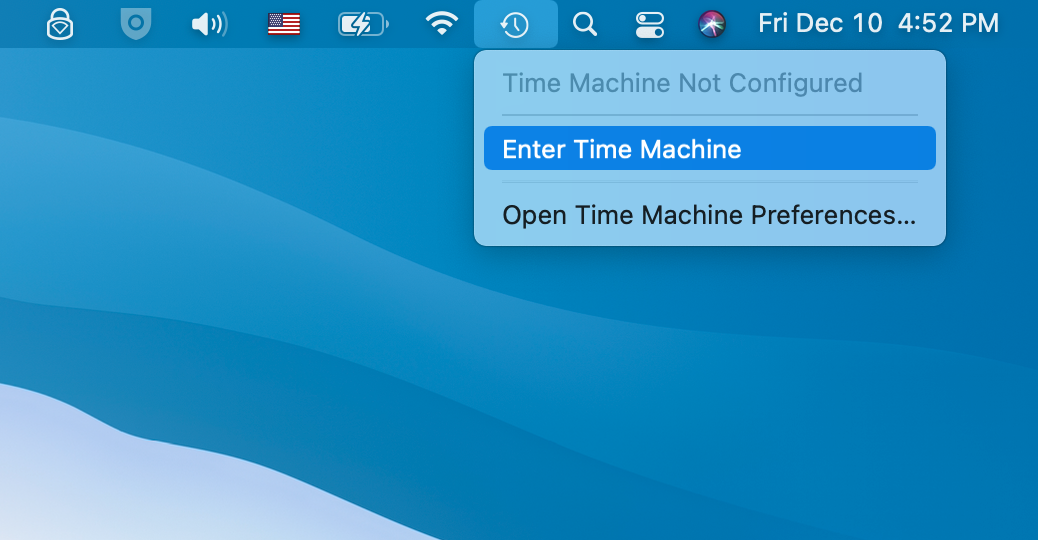
- On the right of the screen, use the timeline to choose the needed backup version. Then either use the search bar or manually search for the needed folder.
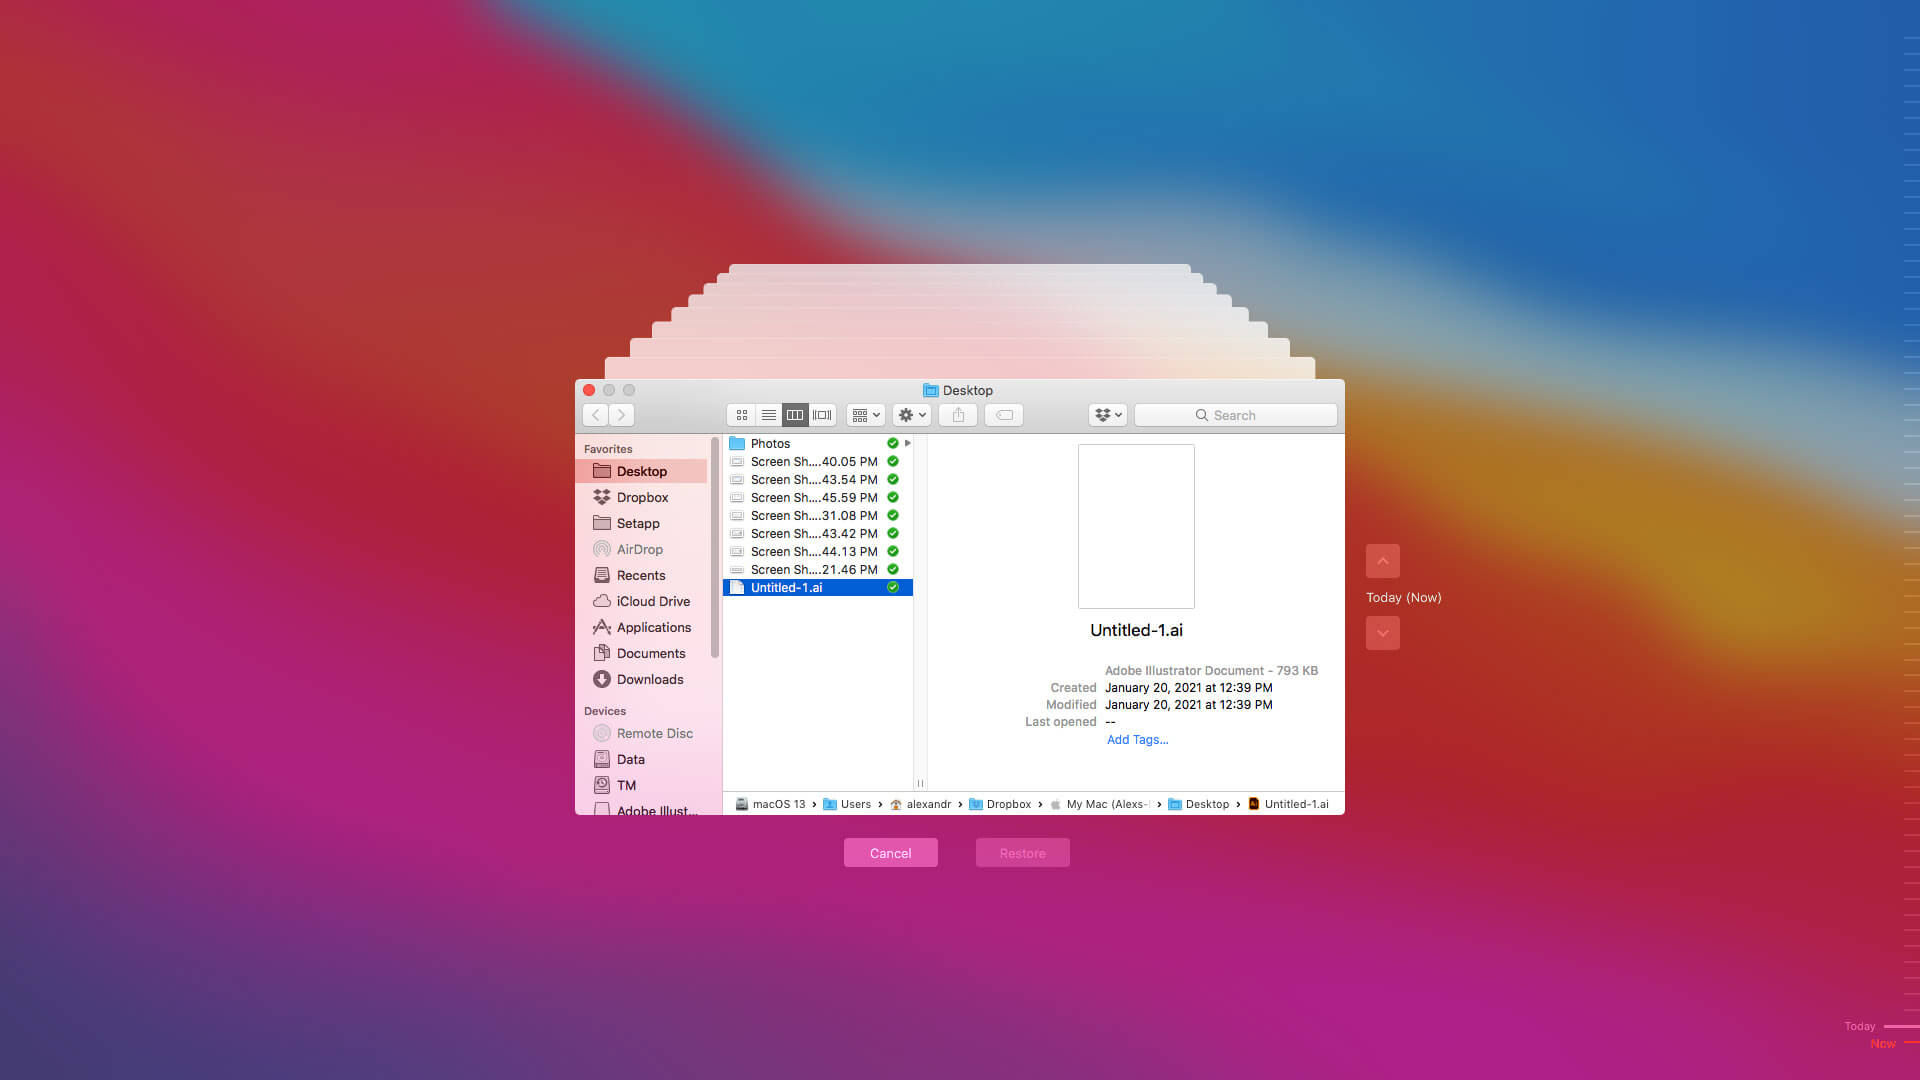
- Once you’ve found the deleted folder, select it, and click Restore.
Now you’ll be able to access the recovered folder from its original location.


